Thanks mate. More coming soon…
Thanks Jerry, I always appreciate appreciation from the figure whisperer!
1 Like
Thanks Erik. More to come…
Thanks G. Yep, I may not be doing another jungle for a while!
Thanks mate. I will try to keep it awesome…
1 Like
Thanks Dan. Yes, these excellent videos keep on coming…
OK, so I’m giving myself a challenge.
IPMS Scale Model World at Telford is ON!! As I type the calendar says 57 days to go. I can do it, right?
It was 2 years ago (the last SMW due to you know what) that I took along my Italy, Liberation 1944 dio (my first since I was 16) and managed to bag a Silver medal. I imagine that the competition will be very lively this year, given that everyone has been bottled up for so long, so I’m taking nothing for granted, but it’s worth a shot. Anyway, it will be great just to be there with everyone else.
So that’s a deadline and I intend to meet it…
First, let me give a quick recap on all that vegetation. This will mostly be pictures, but it will give an idea of the amount of work that was involved.
The big lesson that I learnt here is this: THERE IS NEVER ENOUGH OF THE STUFF!
I started with a selection of laser cut paper ferns, etc.

These are beautifully detailed, but also very time-consuming. Of course, if I had been building a small vignette for a figure they would have served me just fine, but even after I had cut out and assembled quite a few of them, it was clear that they just weren’t going to fill out the area I had to cover.
So I had to look for alternatives.
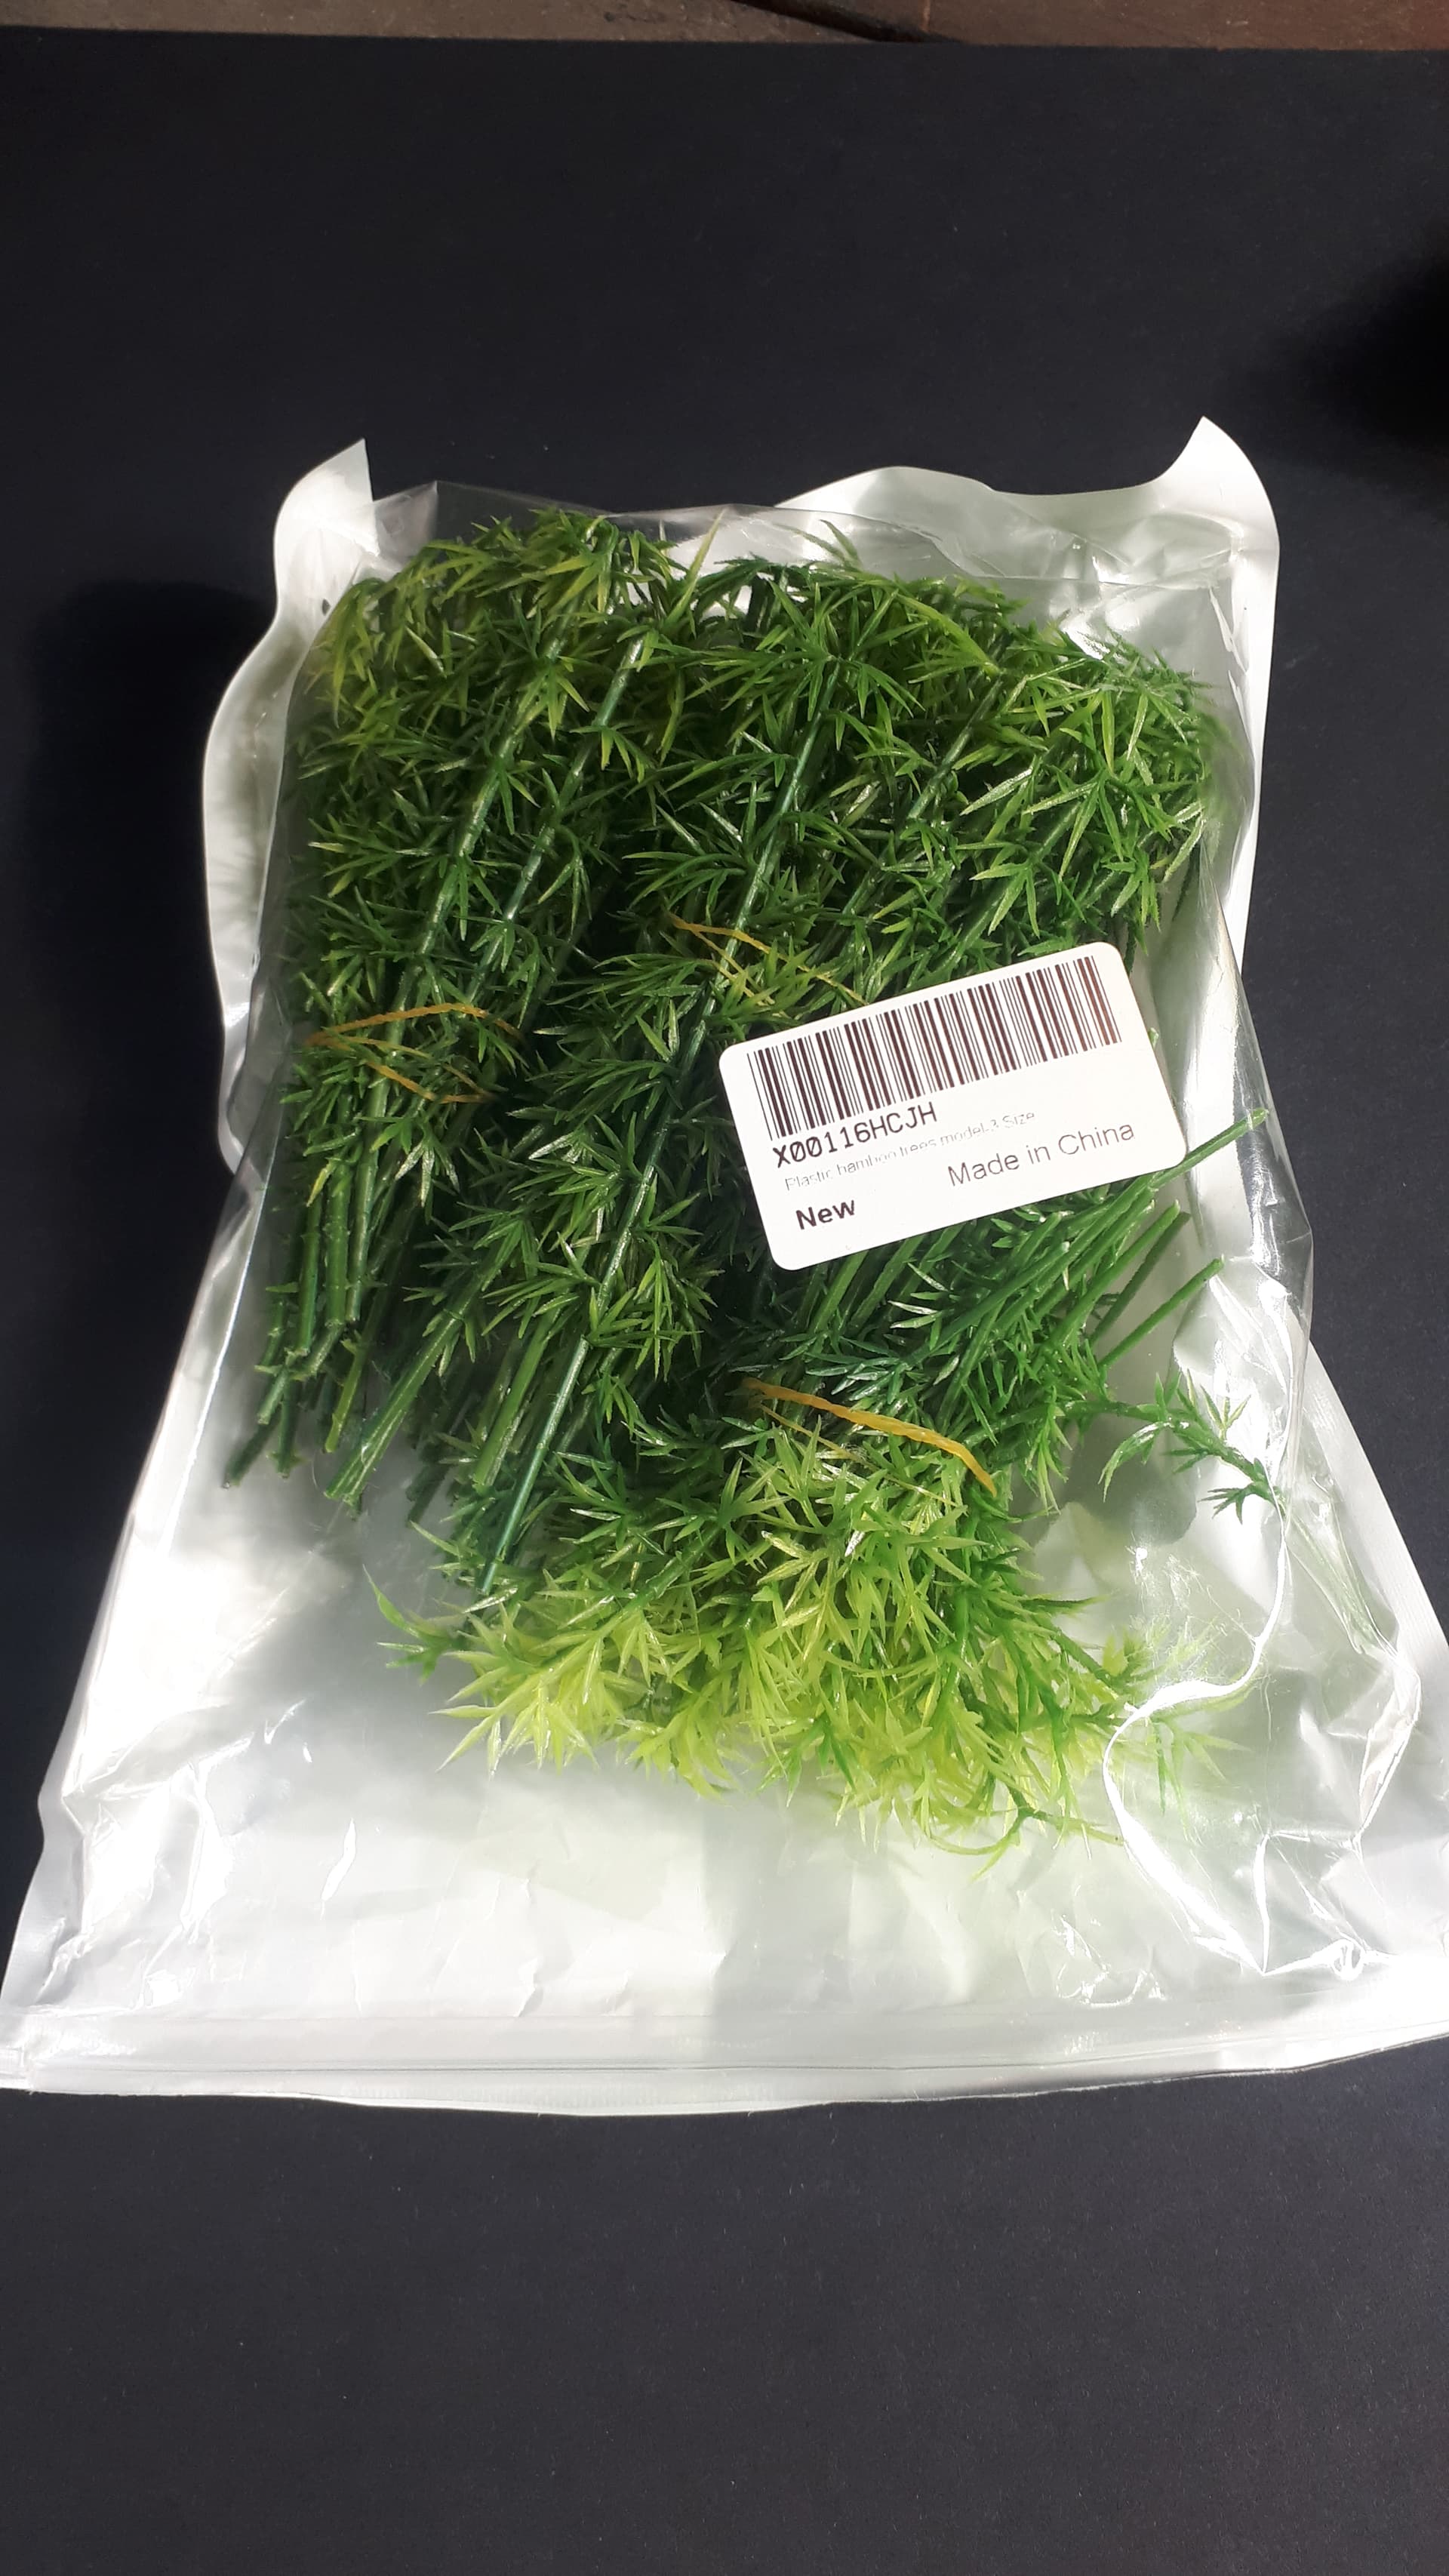
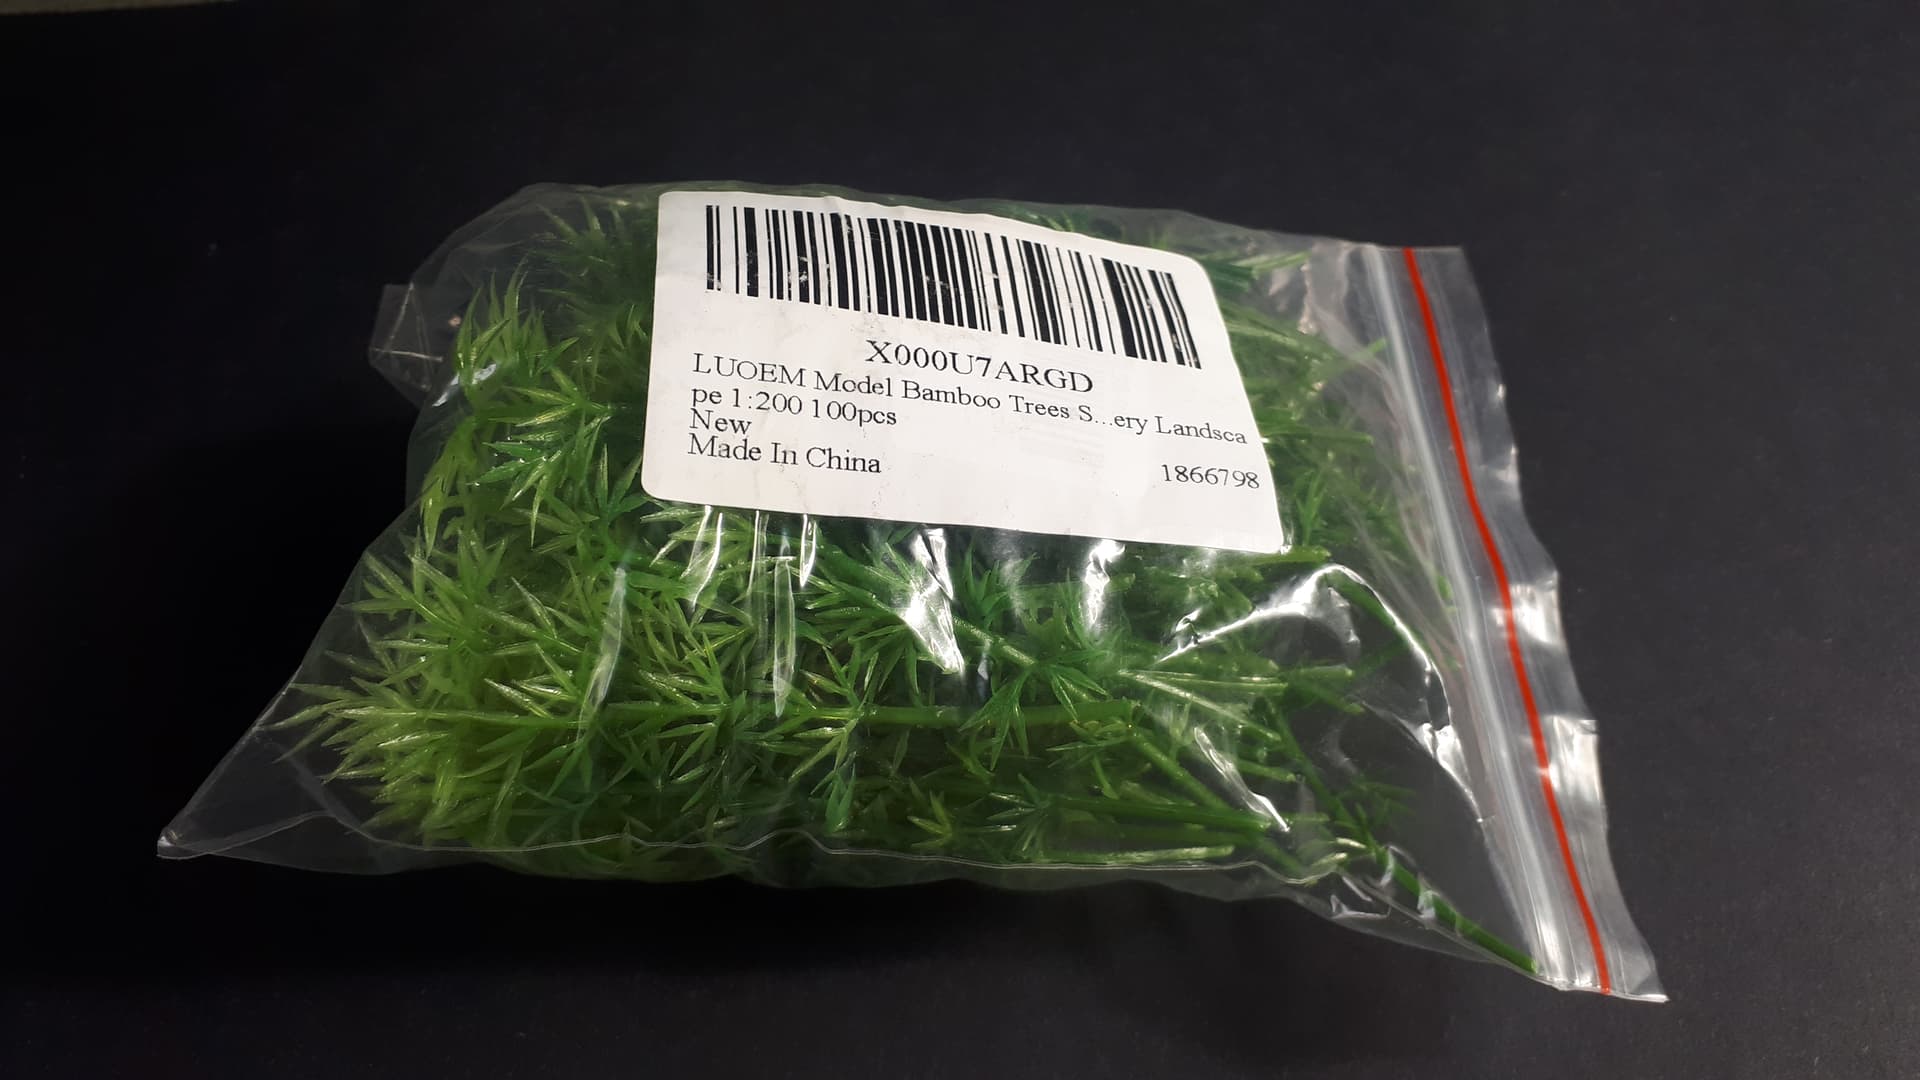
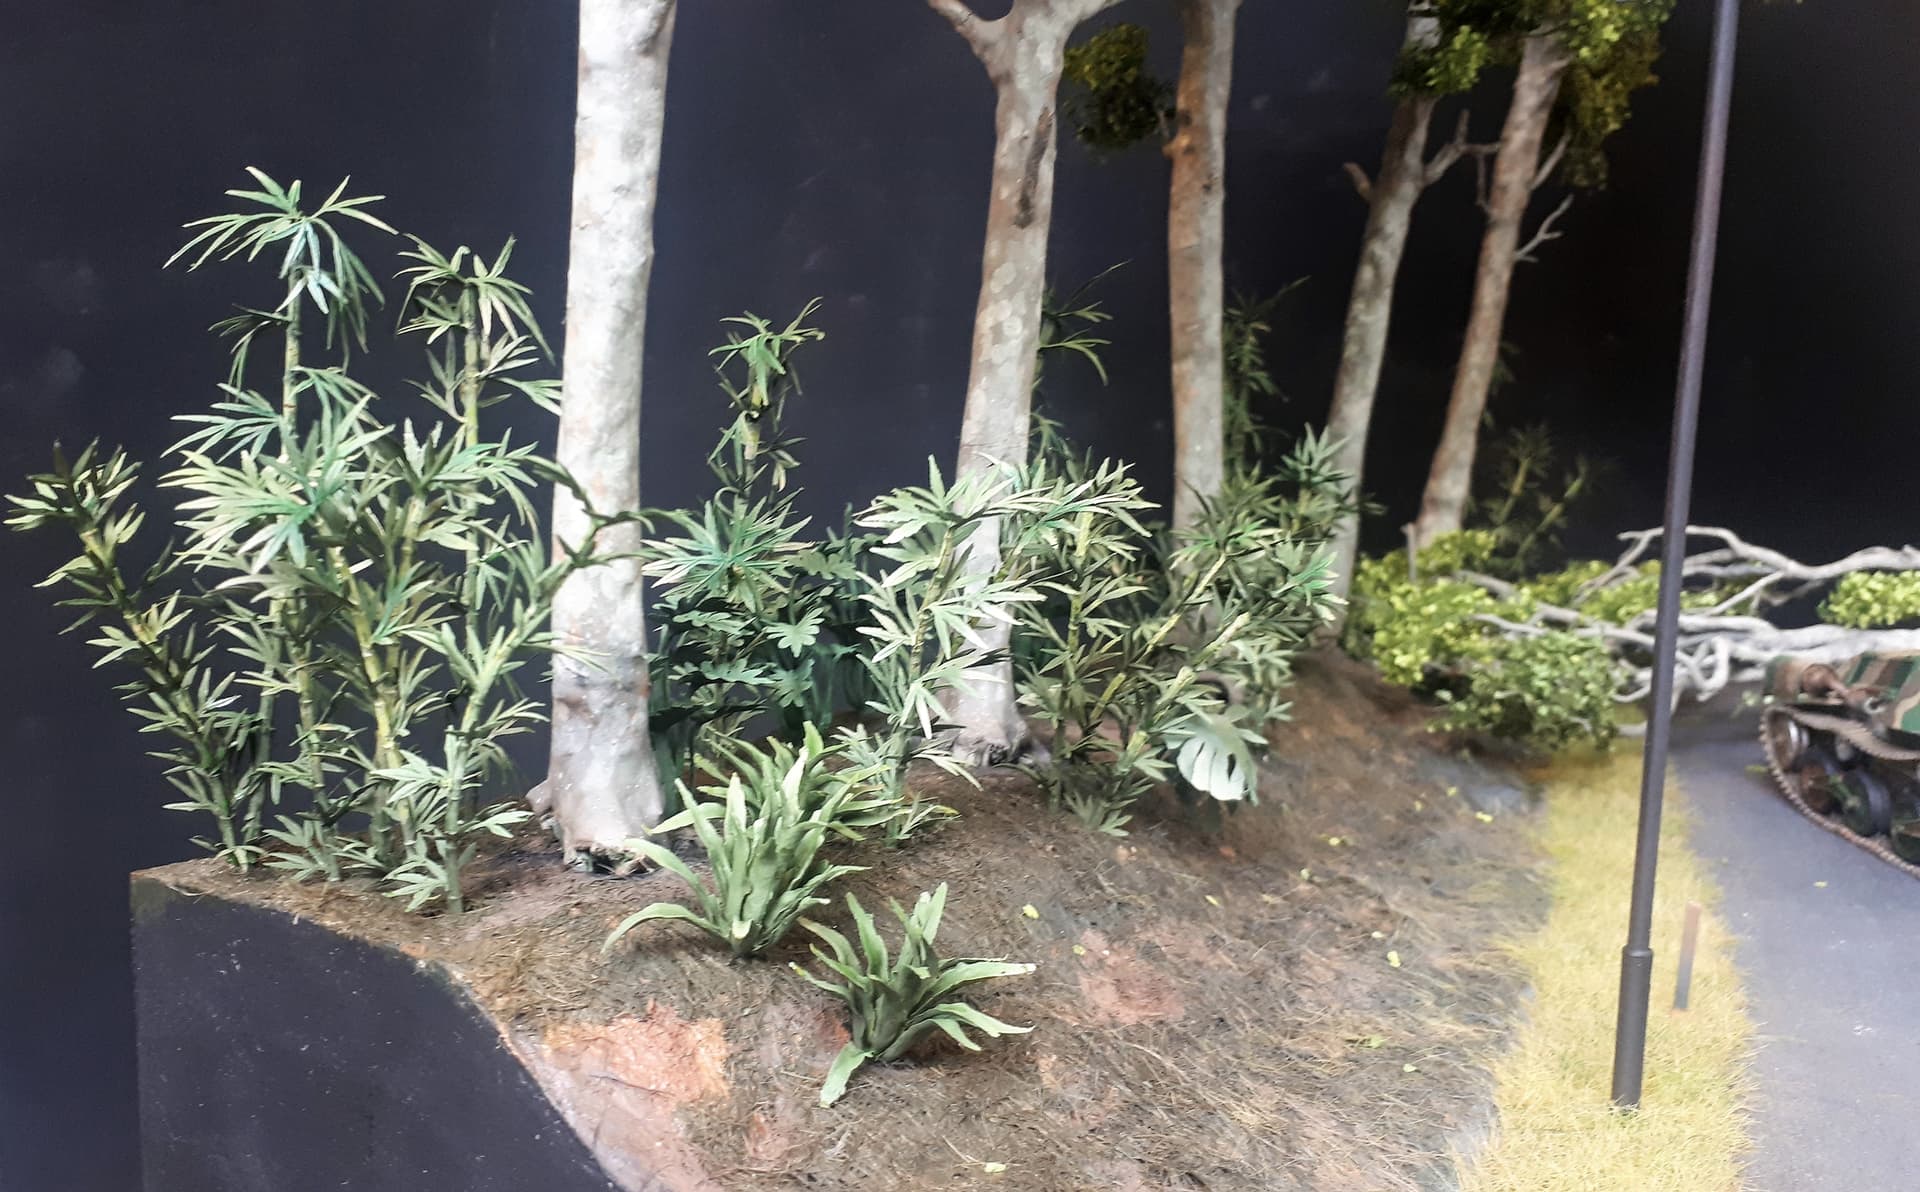
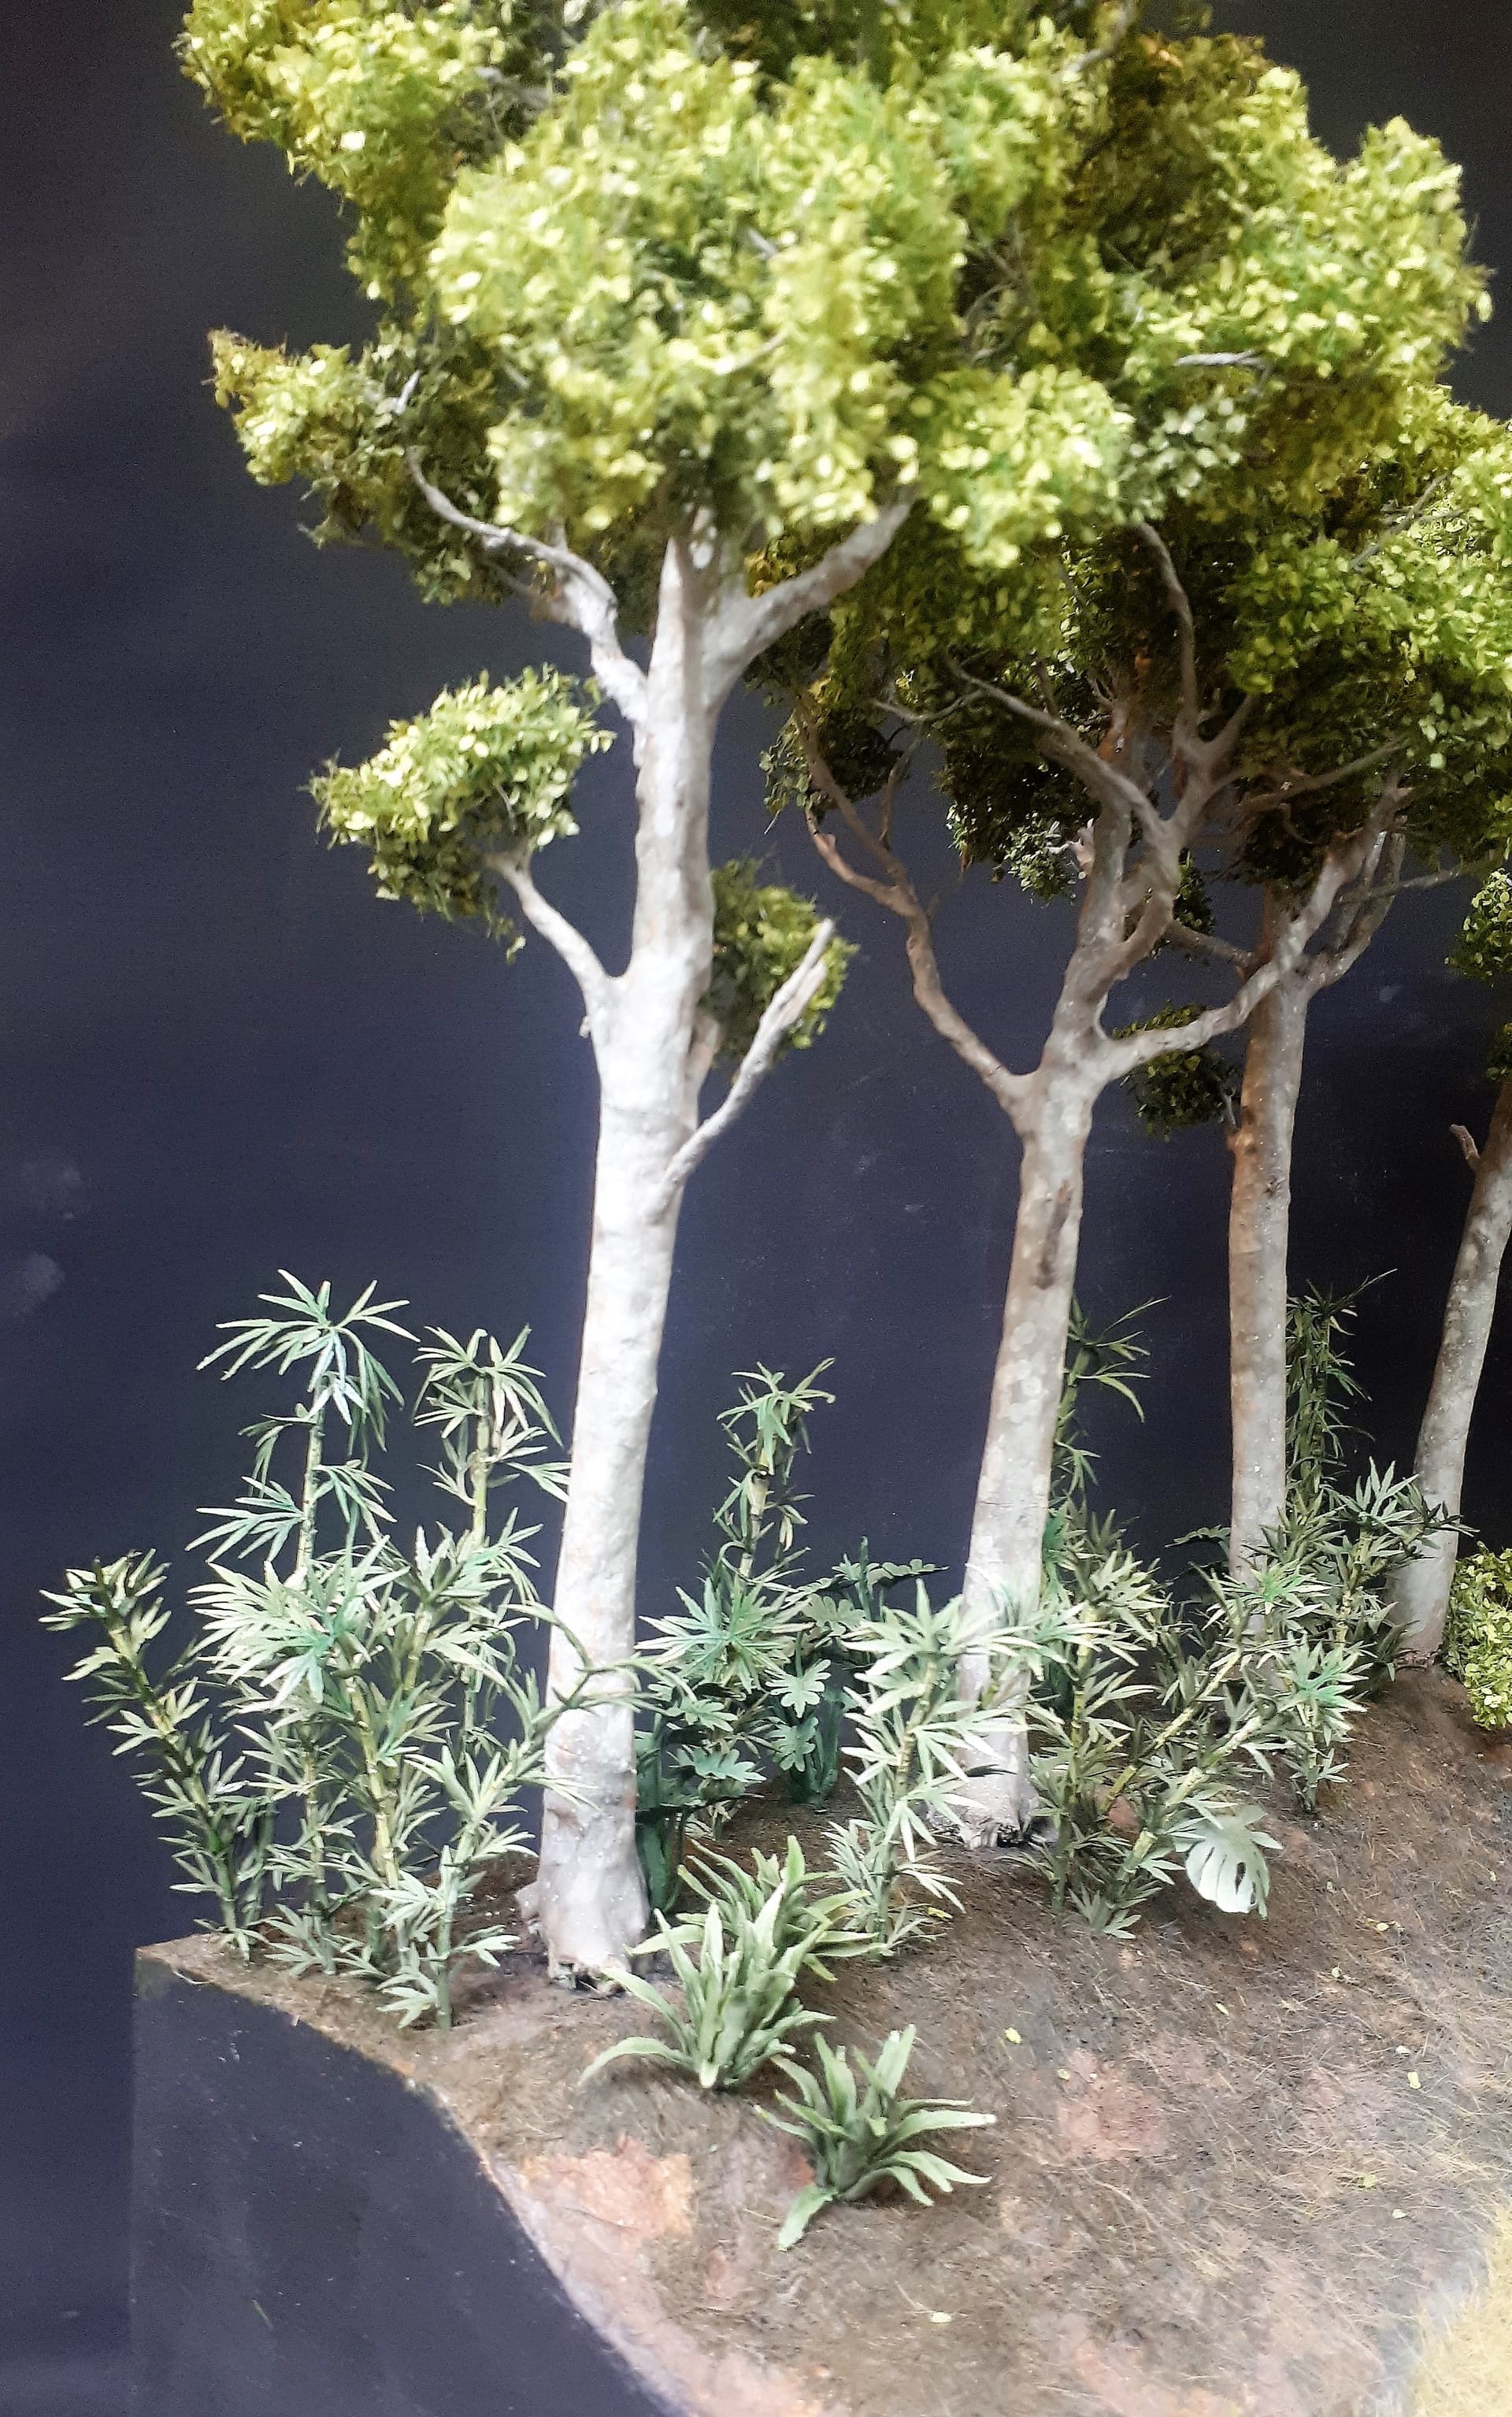
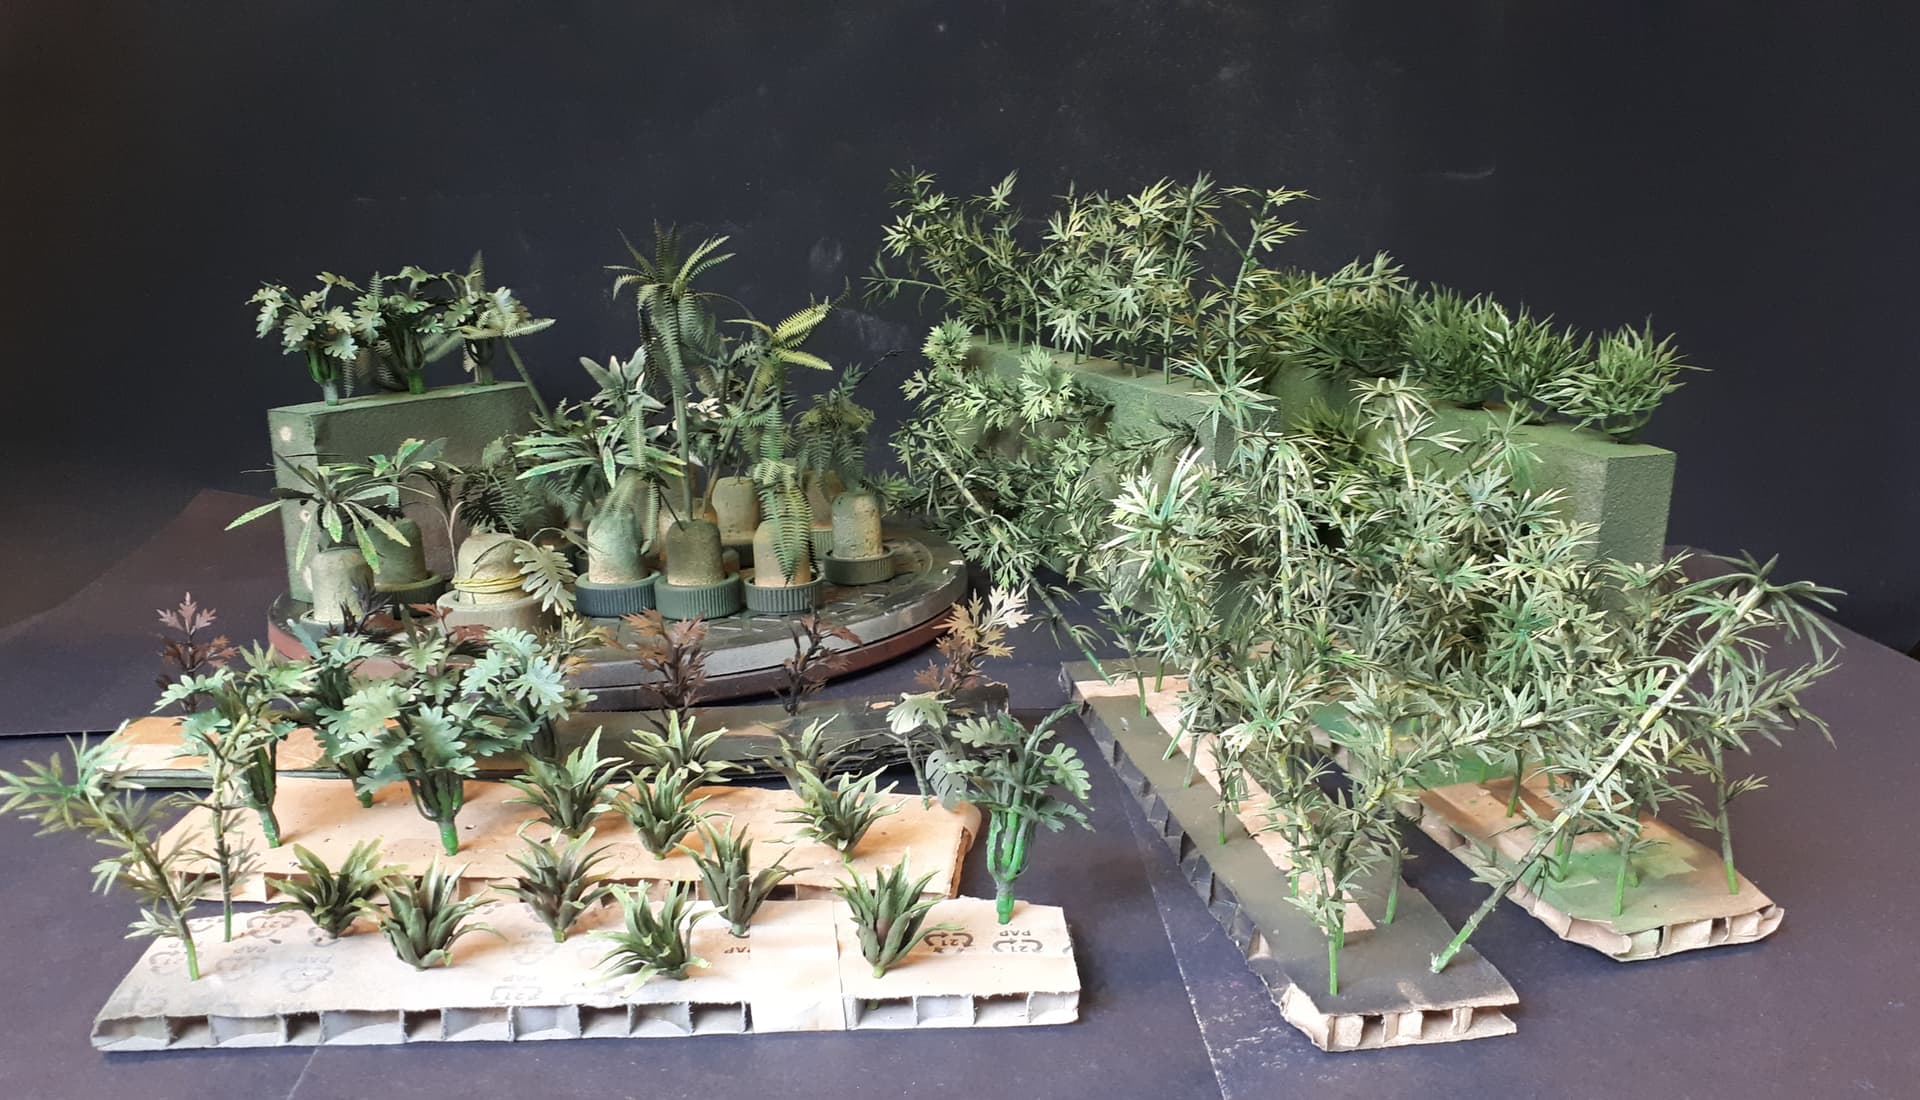
These are bamboo. They come from China and most of them can be ordered on Amazon for only a few pounds. They come in three sizes and you get 100 pieces in a bag. The tallest ones actually have a thin strand of wire moulded inside to keep them erect, but the smaller ones tend to be a bit floppy.
Although they look a bit artificial at first, the detail is actually pretty impressive and with a bit of paint they can be made to look fairly convincing.
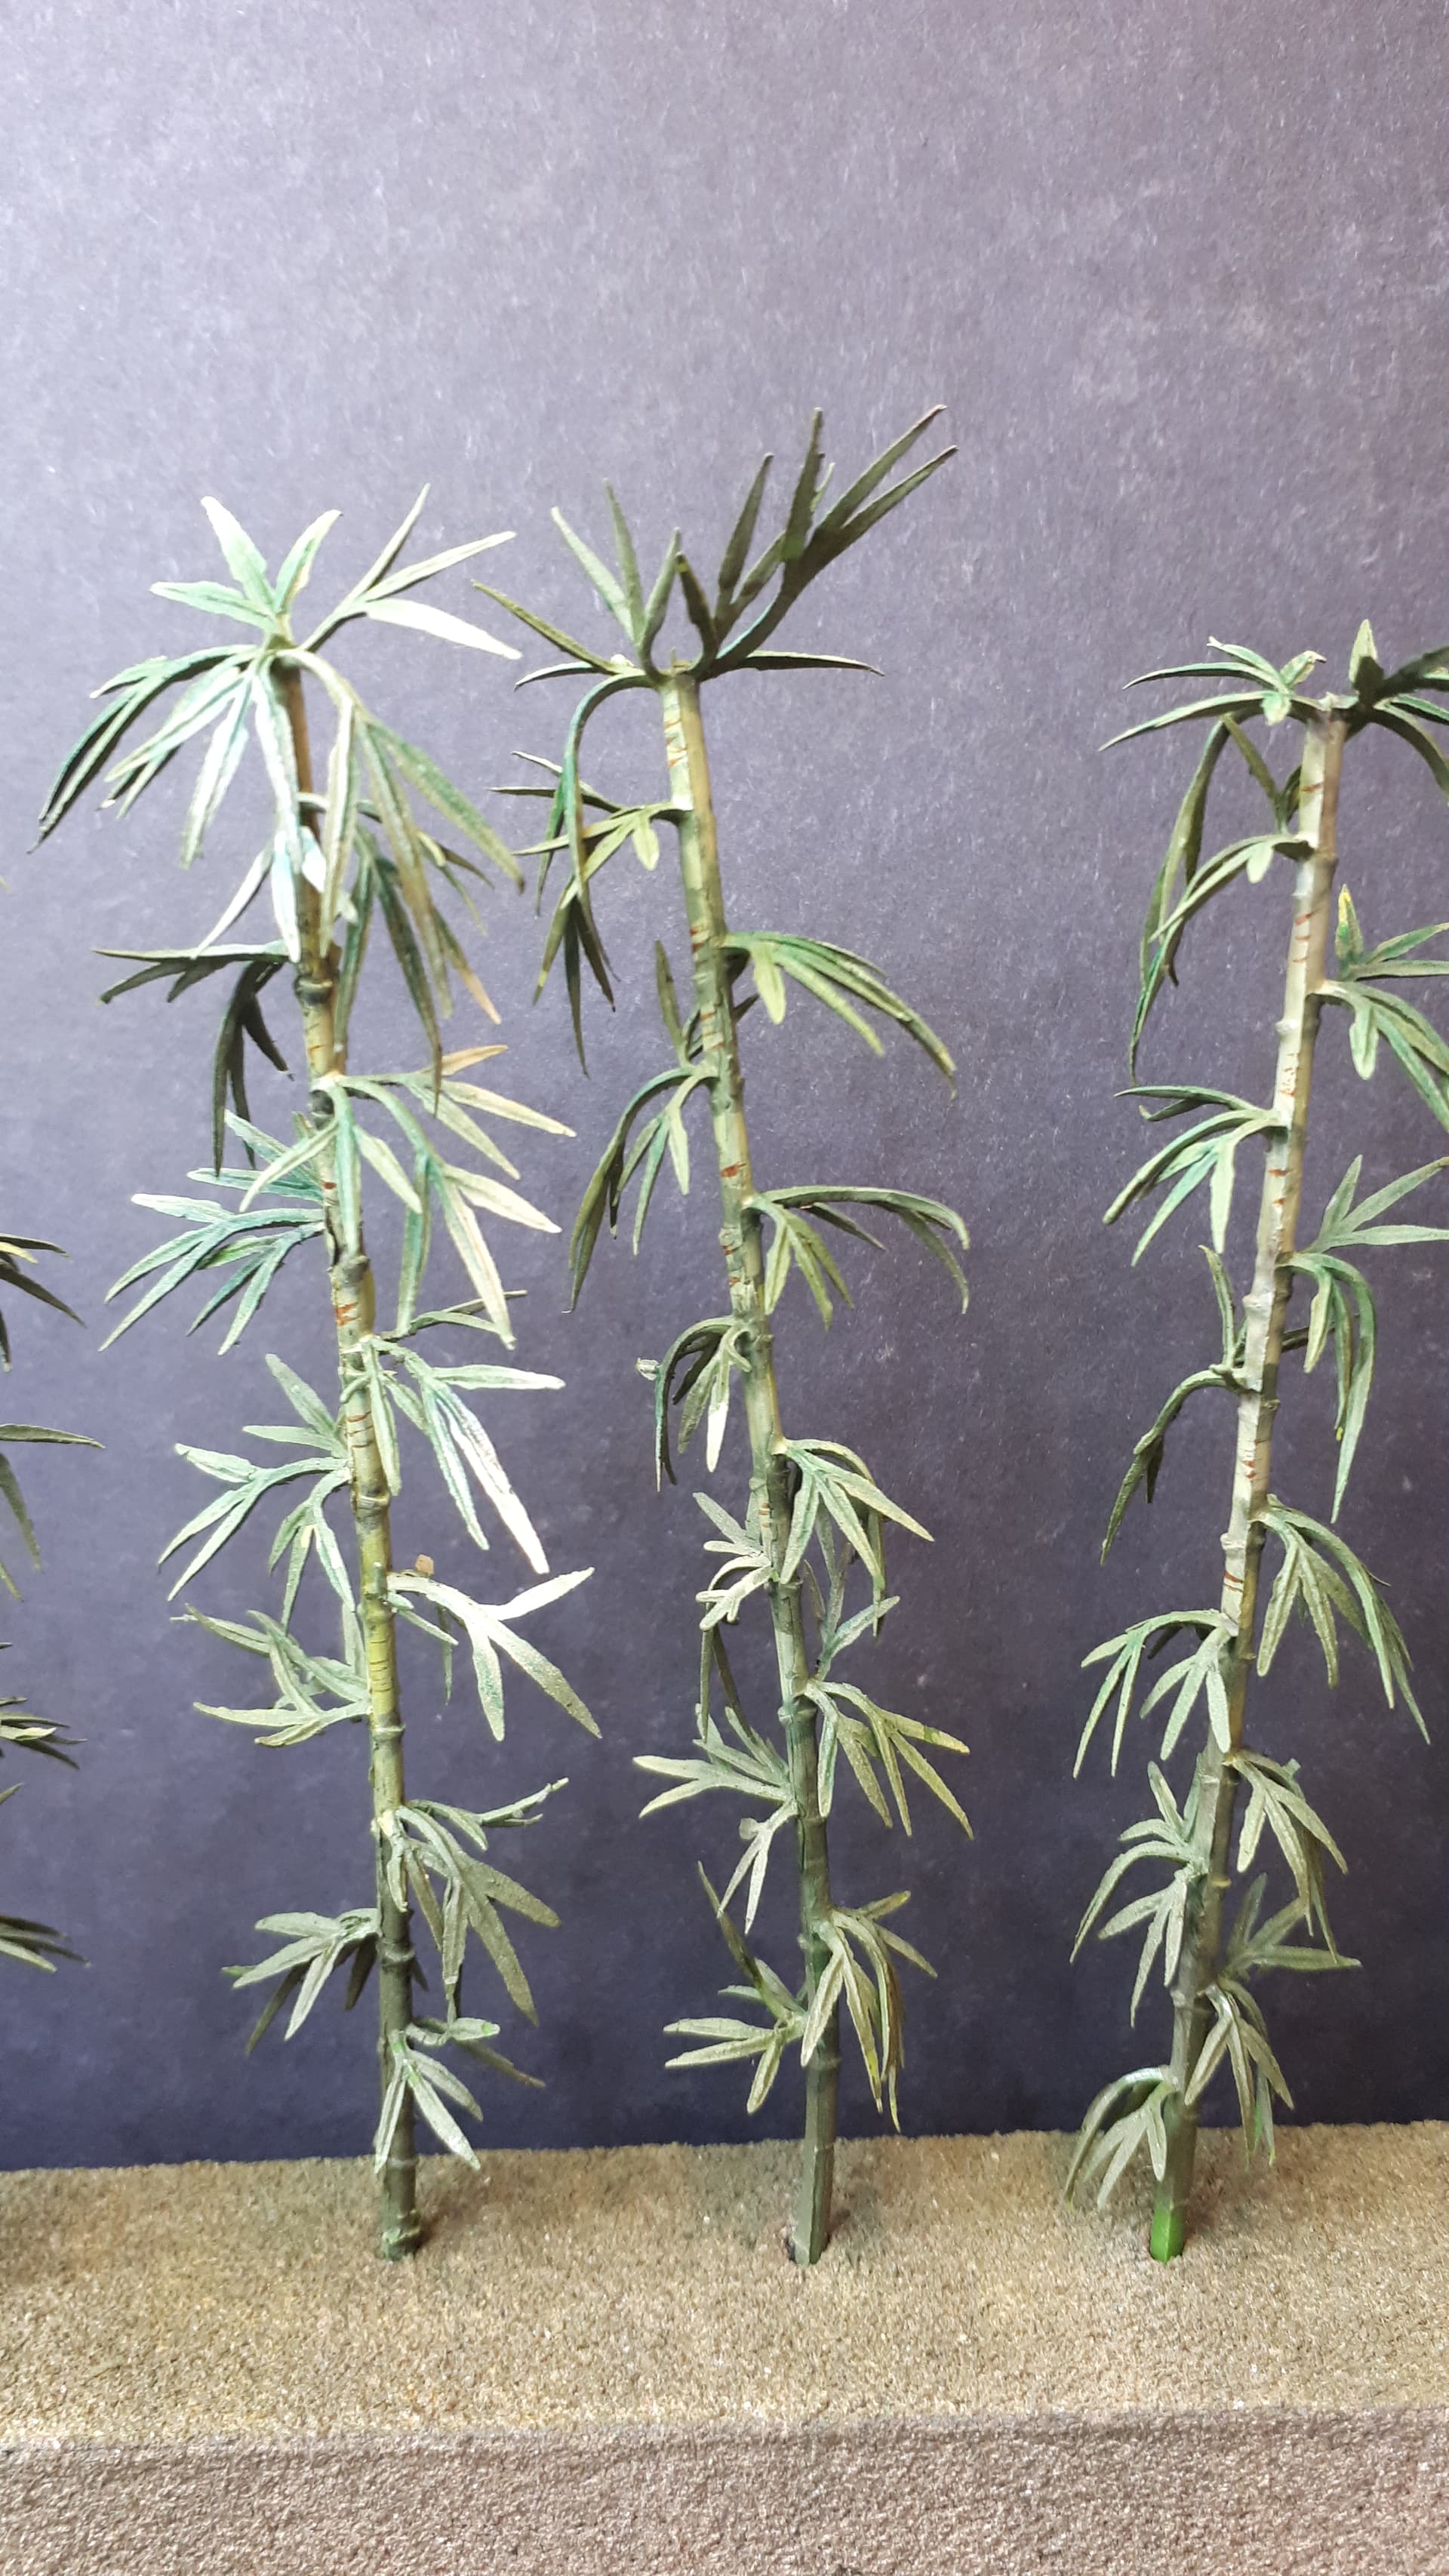
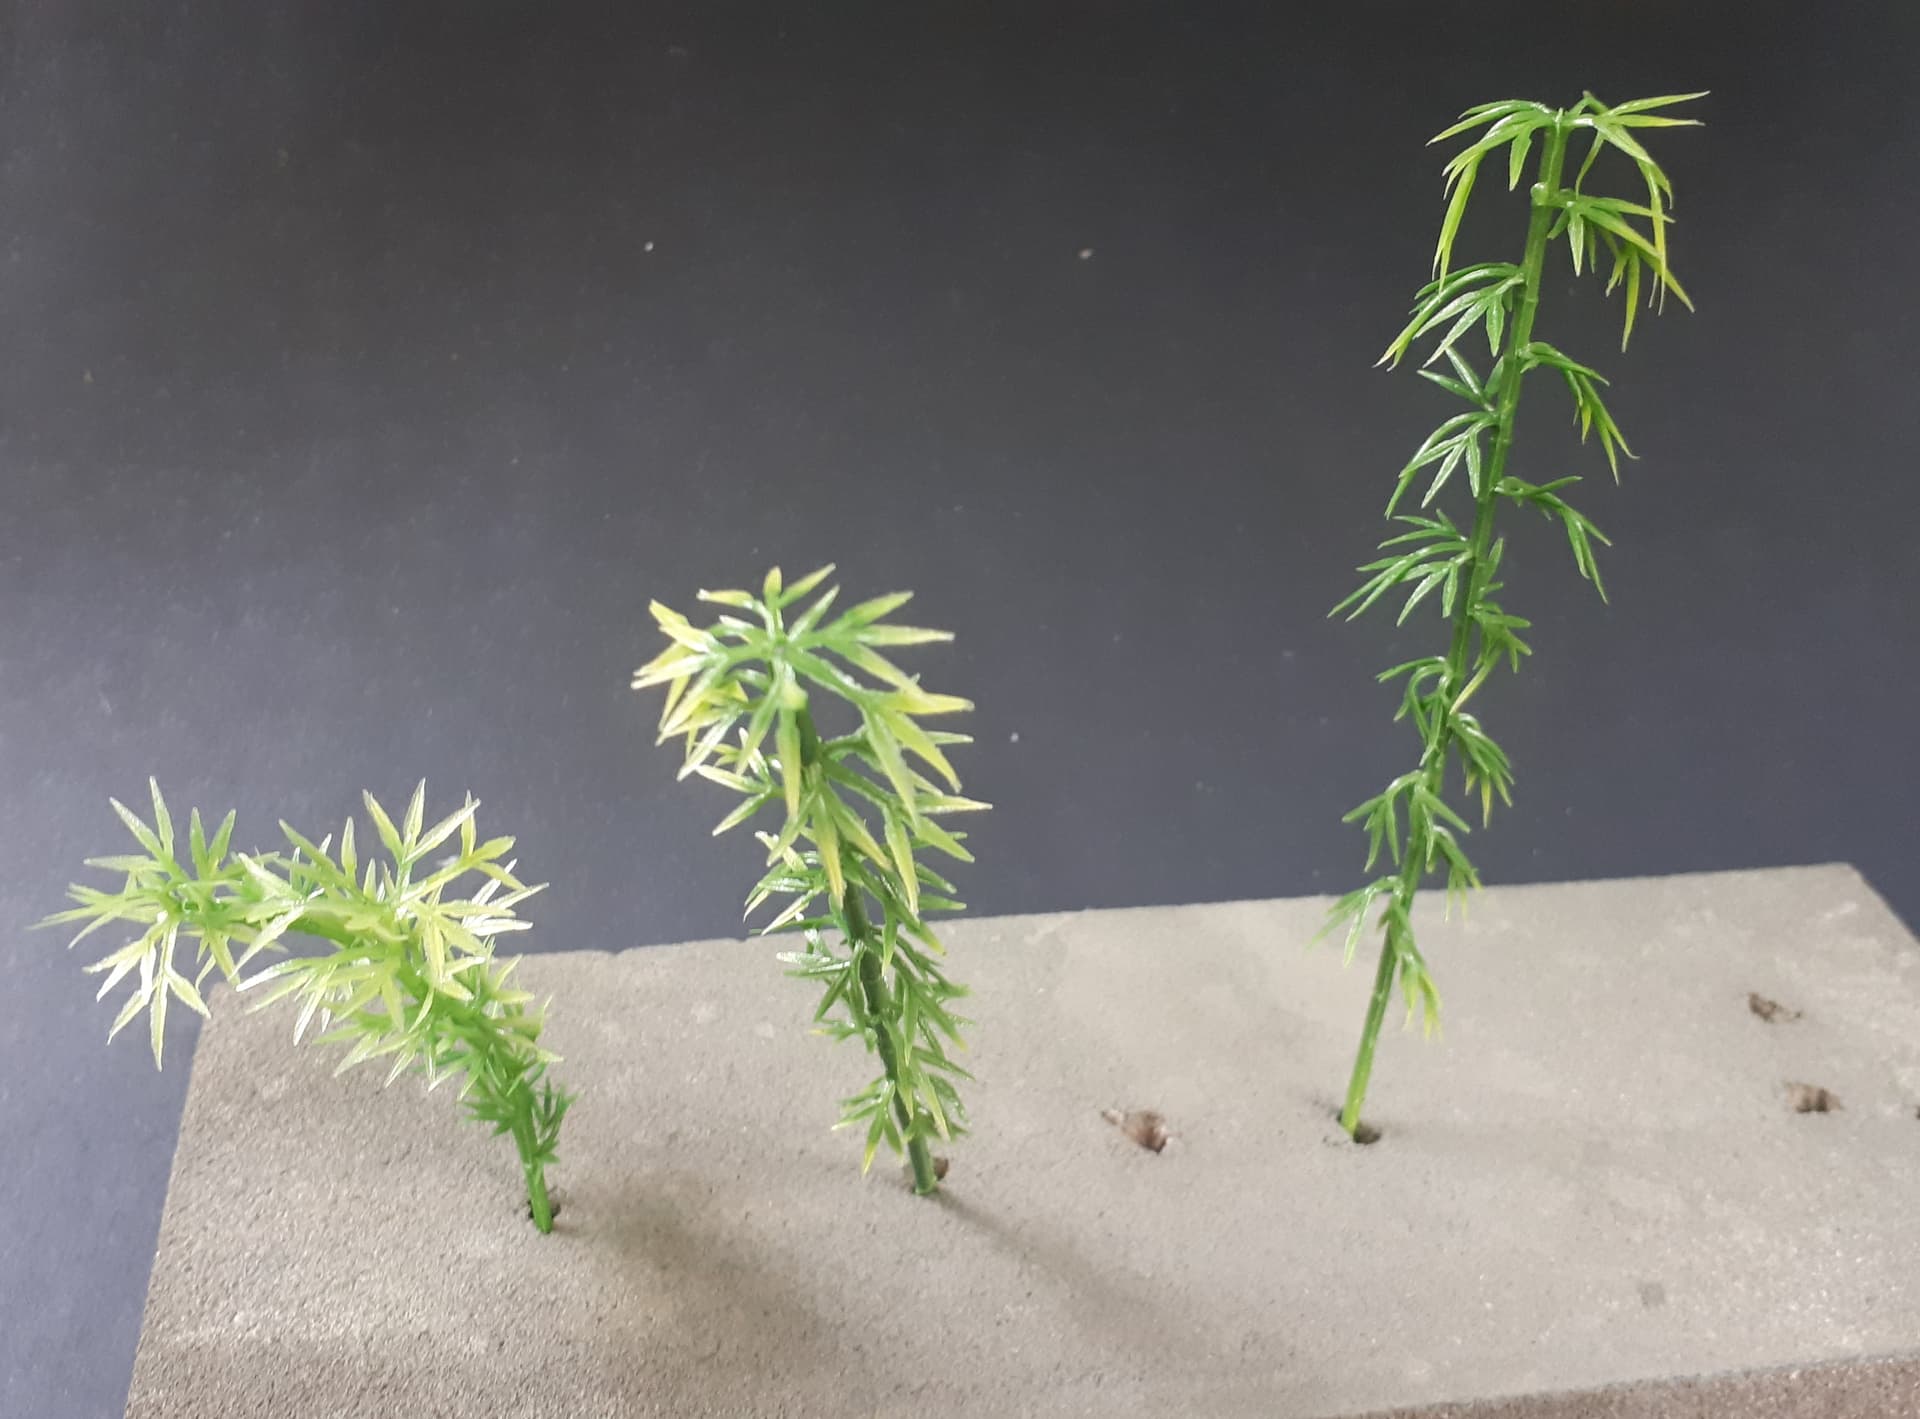
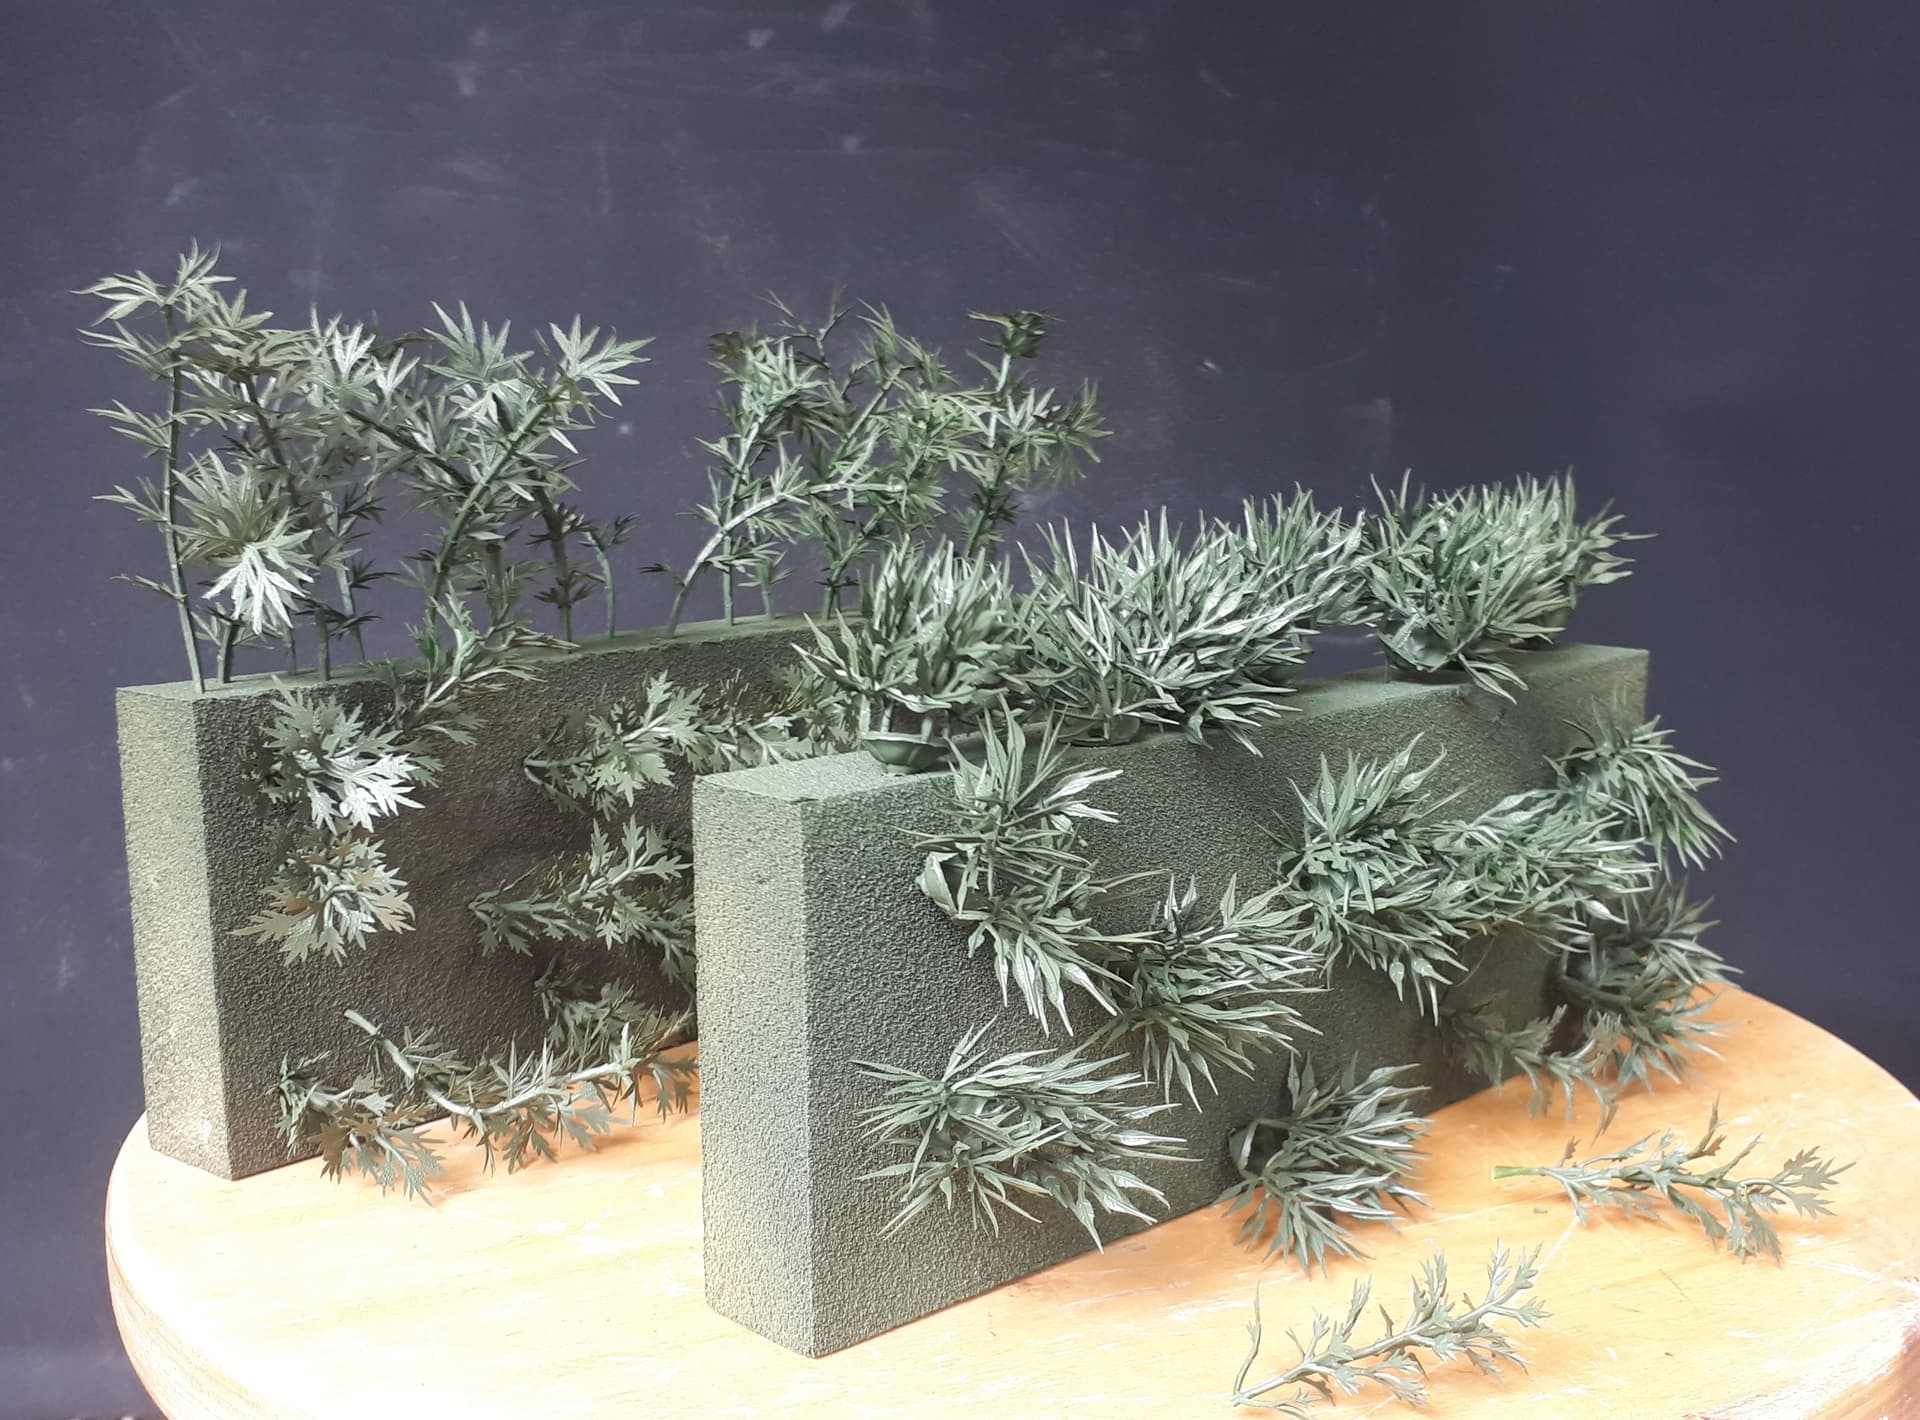
In order to help with painting I used cheap sanding blocks to keep them all in place, simply punching a hole and pushing in the plastic plant. I washed them first to get rid of any release agent. Everything was then given a generous spray of olive drab from a rattle can before they were sprayed and brush painted with various Vallejo acrylics.
And then there are others from the same source…
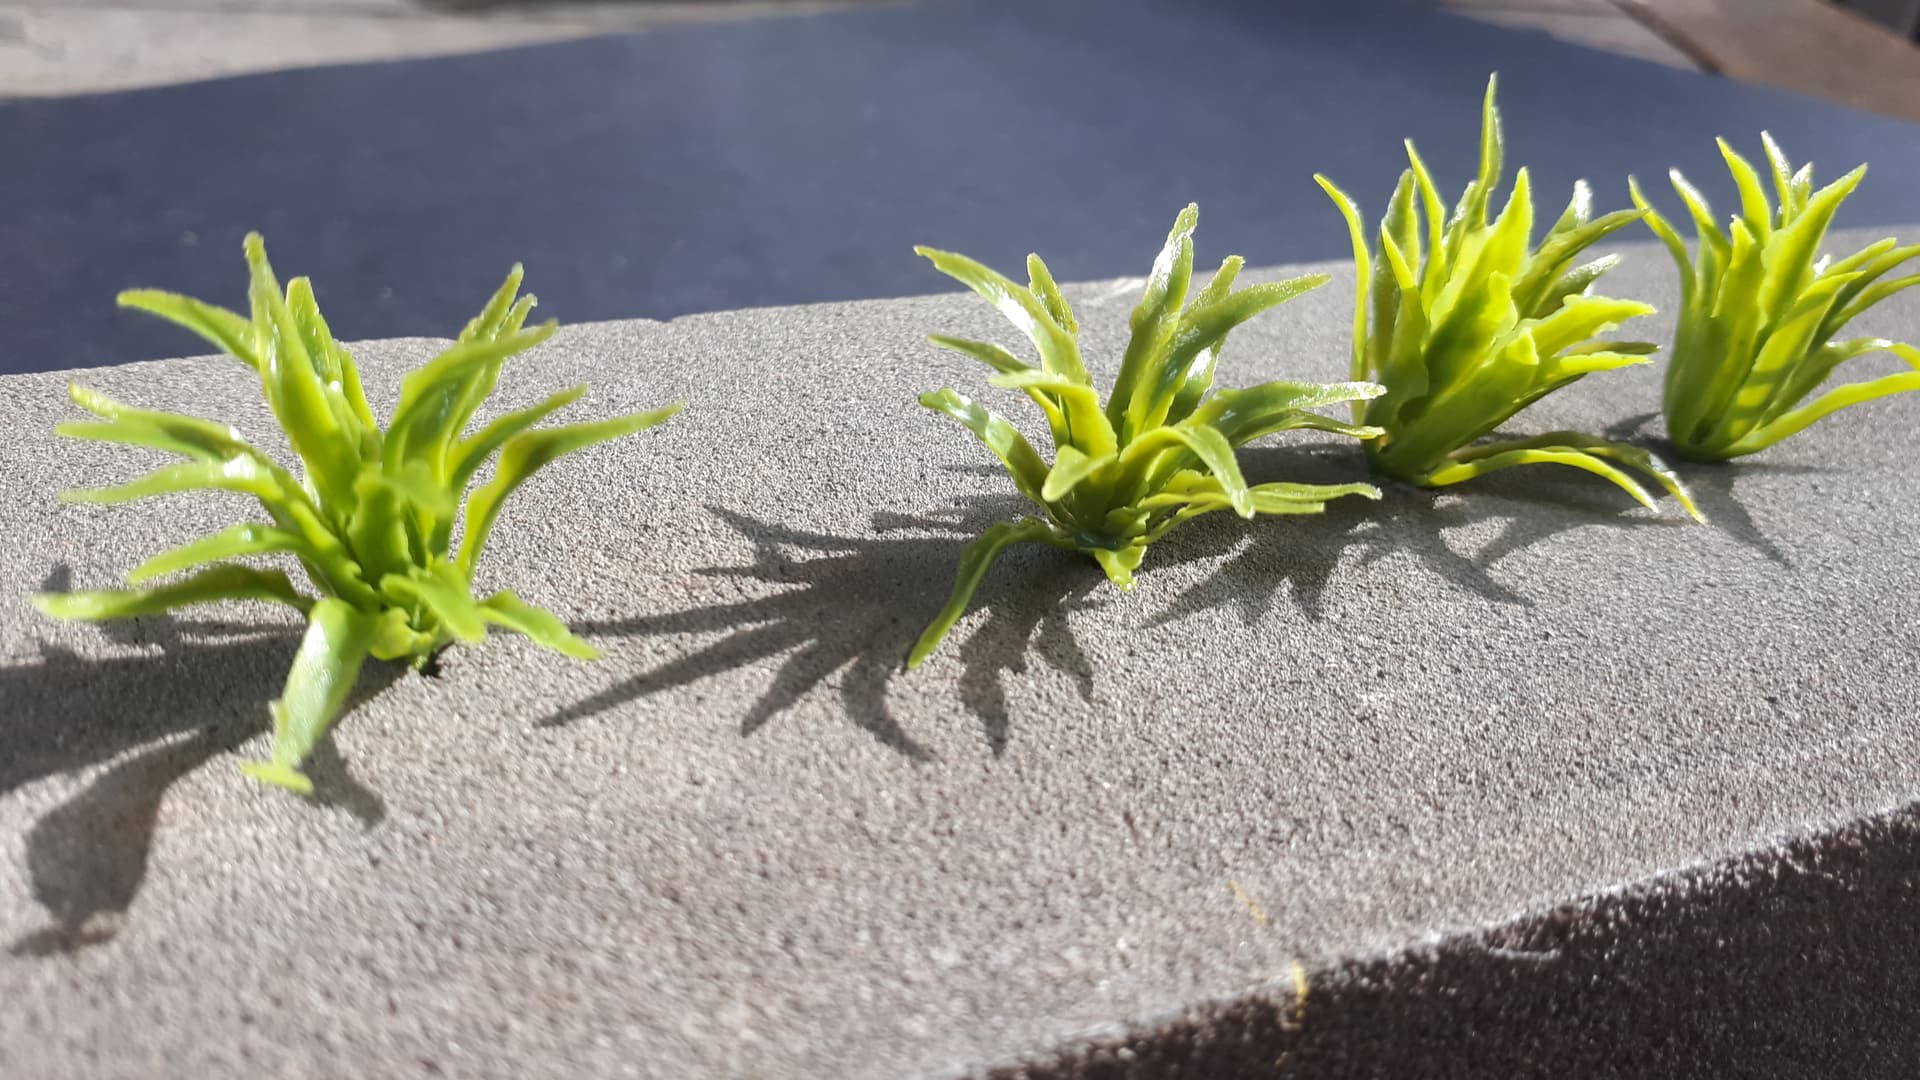
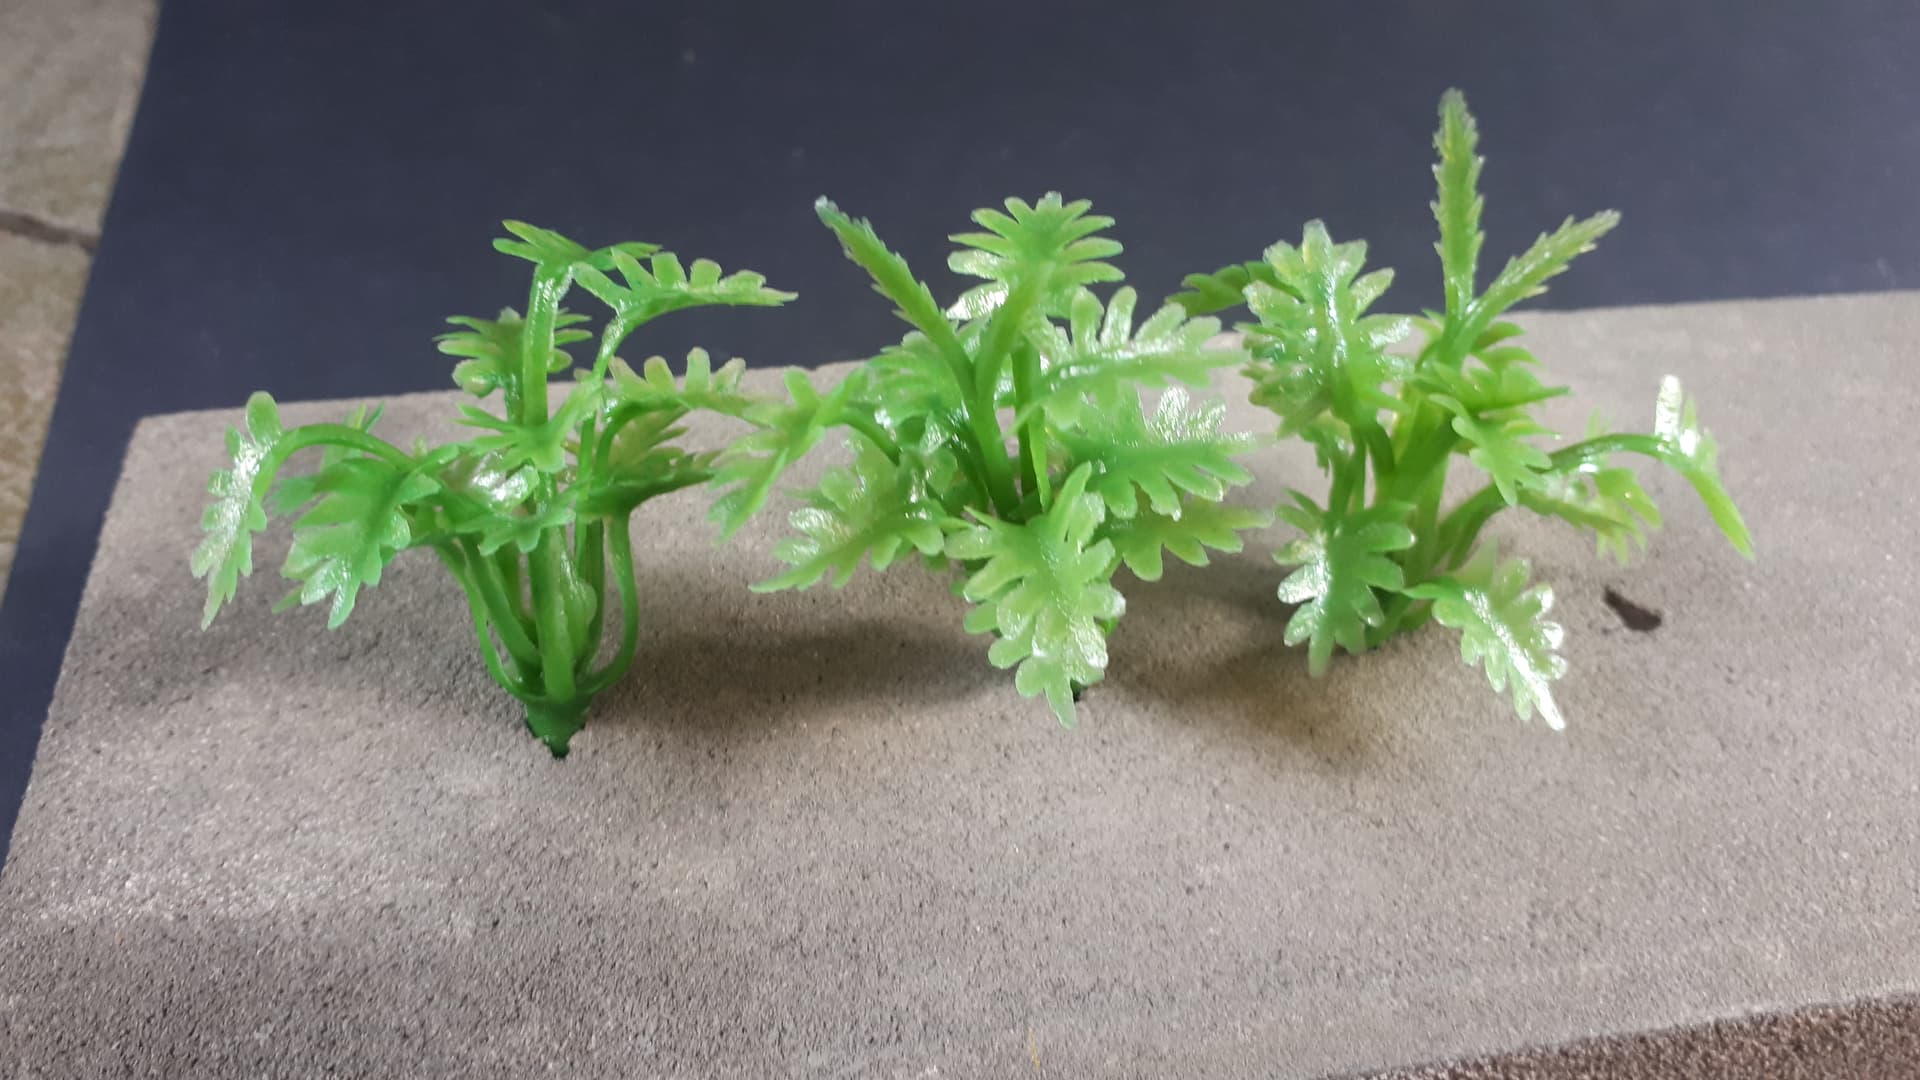
Now I am no botanist, so I have no idea if these are based on real plants and, even if they are, whether they are strictly appropriate for my Malayan jungle setting, but I always knew that they would end up surrounded by other foliage so, once they were painted, I hoped that they would look OK.
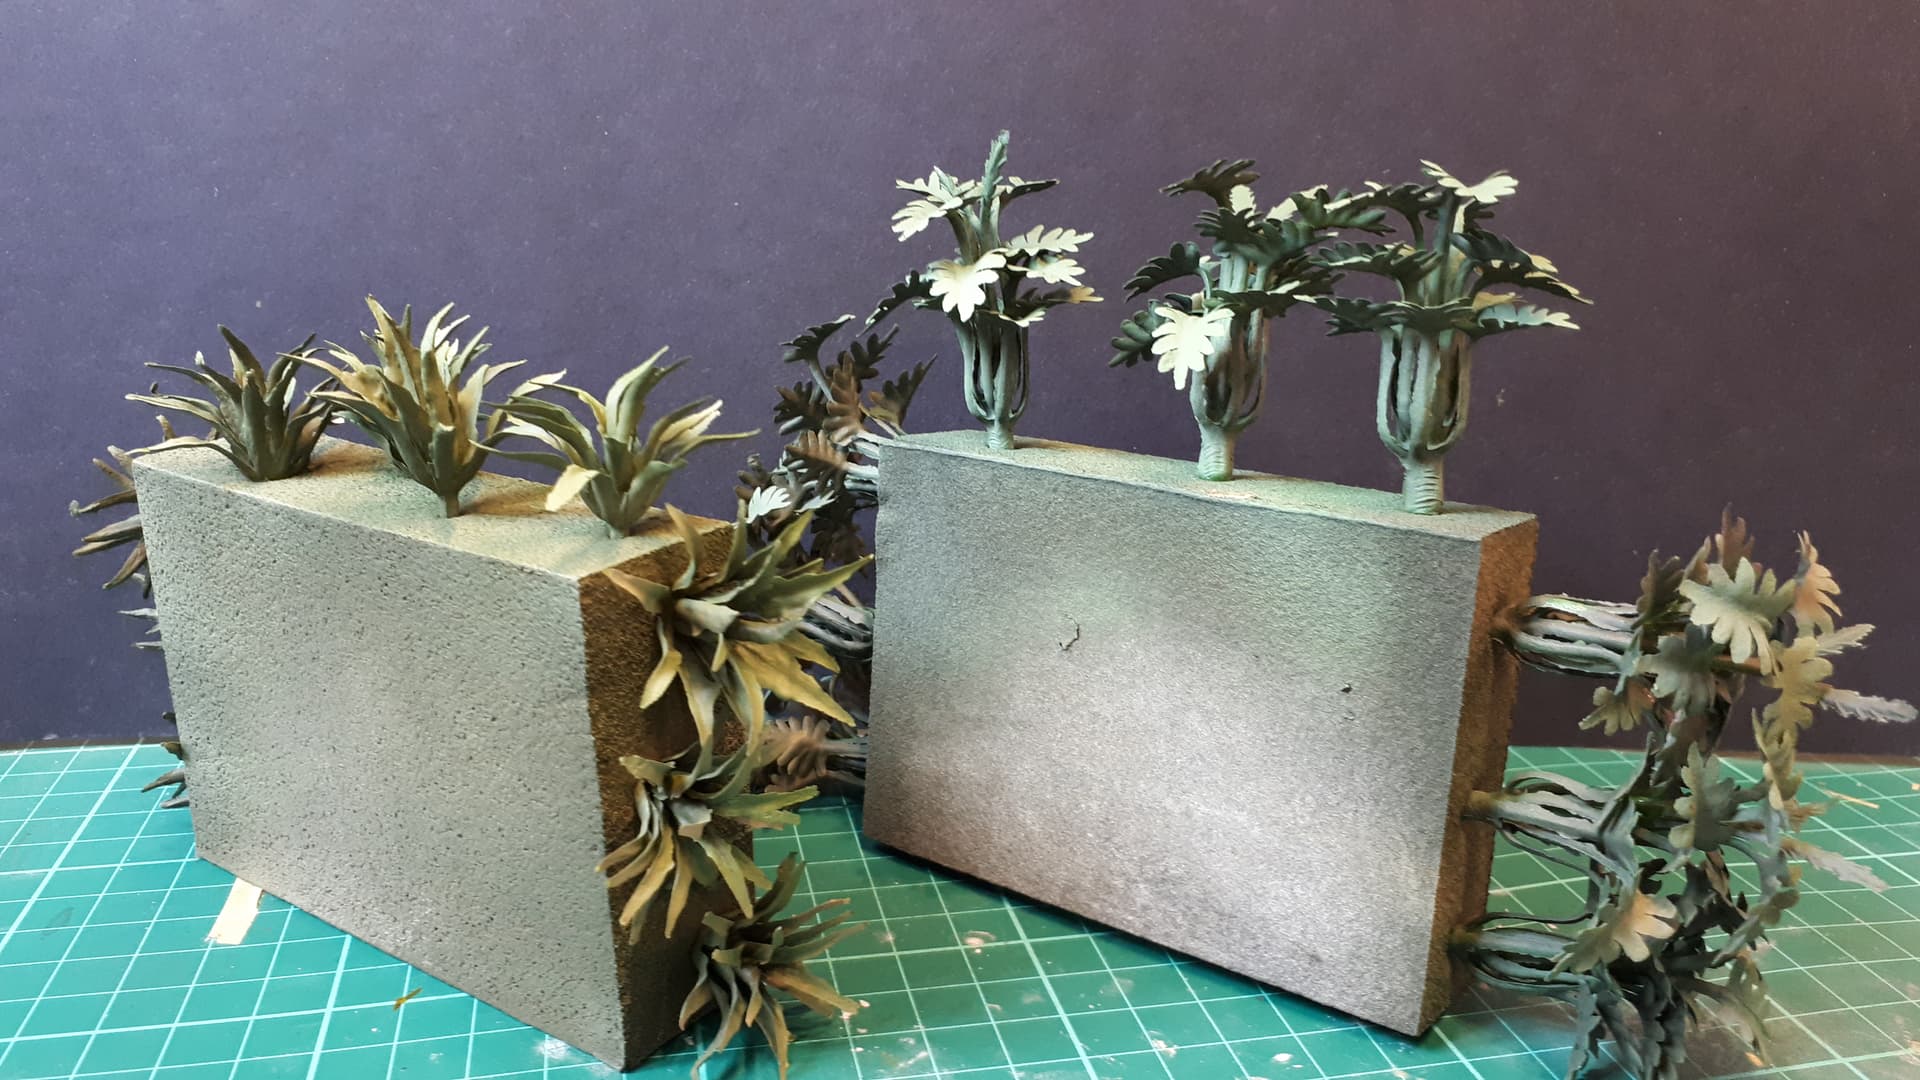
So once I had what I thought was a decent amount painted up I started to place them on the diorama. This was only a preliminary arrangement (they were just pushed into holes punched into the foamboard), but I soon realised that it wasn’t working. Everything just looked too sparse…
12 Likes
You’re not a botanist?
Haha
Keep on planting!
1 Like
Lovely greenery, but indeed, for a jungle not really enough…
Dan, I’m not even a gardener… but luckily I married one.
1 Like
Quite! So on with the greenery…
So, my first fix was to go back to the groundwork.
Right at the start I had used some plant lining material in an attempt to add some root texture to the base - simply gluing it in place and then ripping it off to leave a sort of ‘hairy’ surface. The problem was that, by the time it had been painted, it hardly showed at all.
So I decided to go for a material which I haven’t used in years and which, I suppose, is very old school: rubberised horsehair.
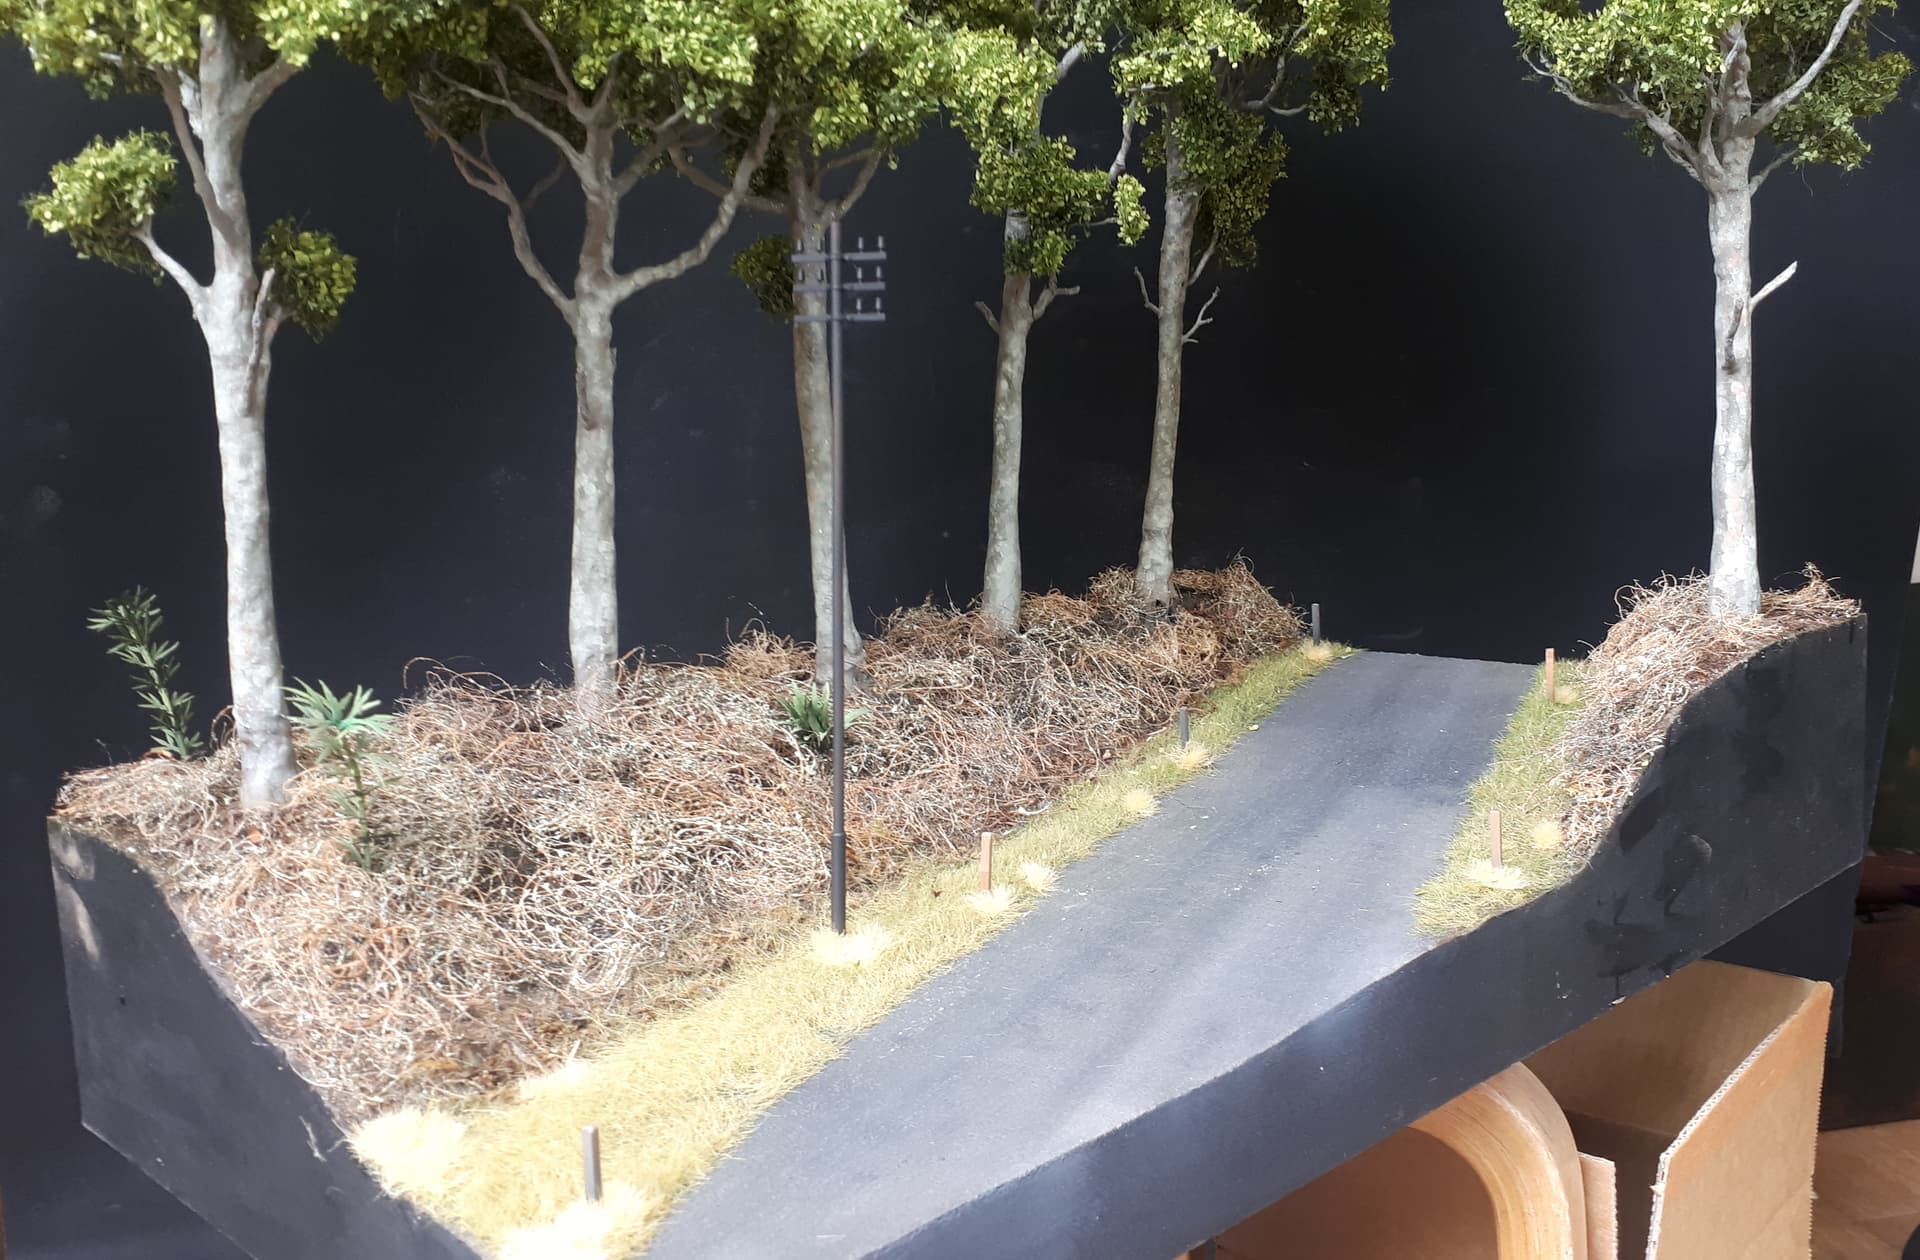
This was something of a game changer. It’s also very cheap and quick and easy to apply. Most importantly, it gave me some texture and volume beneath the actual foliage. I have no idea if this is really true to nature, but to me it did the trick.
You will also see how in these images I have already got the static grass in place along the side of the road.
Now, back to the other green stuff…
Realising that, even with the horsehair fix, I simply did not have enough plants, I ordered some more of the cheap Chinese ones. I also splashed out on a few slightly nicer ones (albeit still moulded in a rubber-like plastic). These came from Fields of Glory Models (fogmodels on ebay).
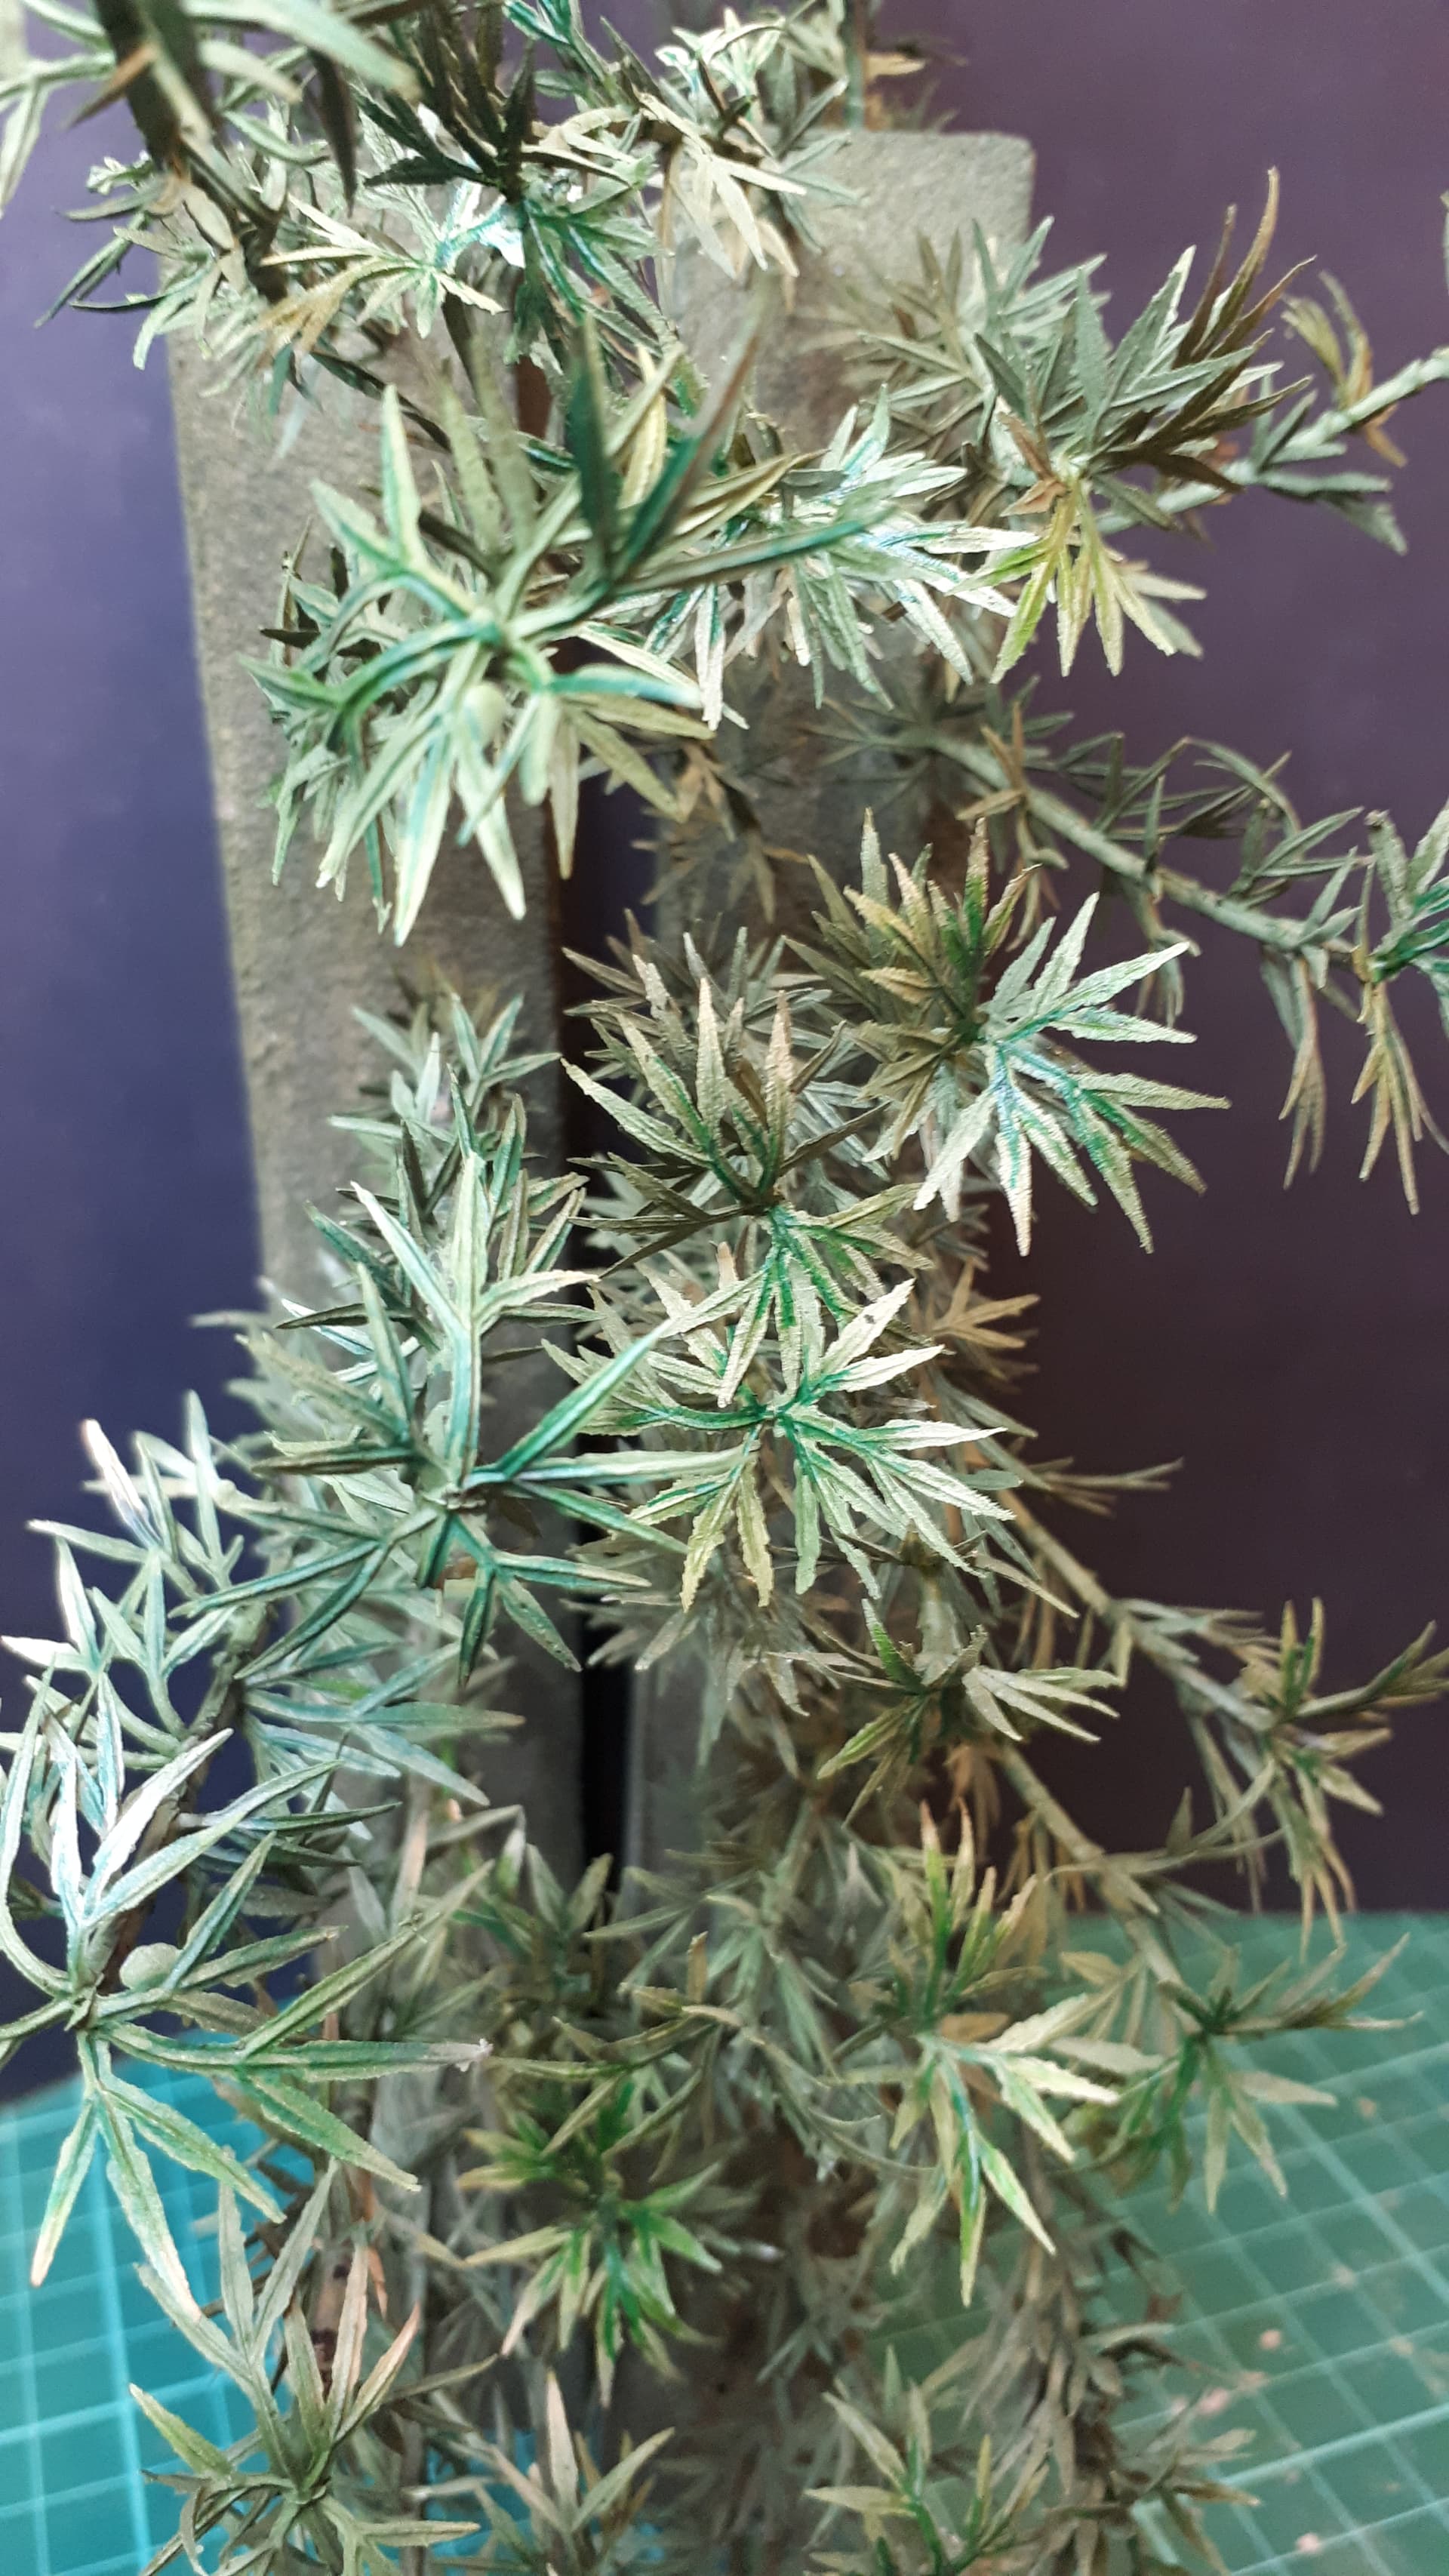
As before I gave them a blast of Olive Drab before adding some more colour variety with an airbrush.
I tried to vary the shades of green - some are definitely more blue than yellow - and I also reminded myself that some plants are not green at all … for example here are a couple I saw just wondering around my area of northwest London:
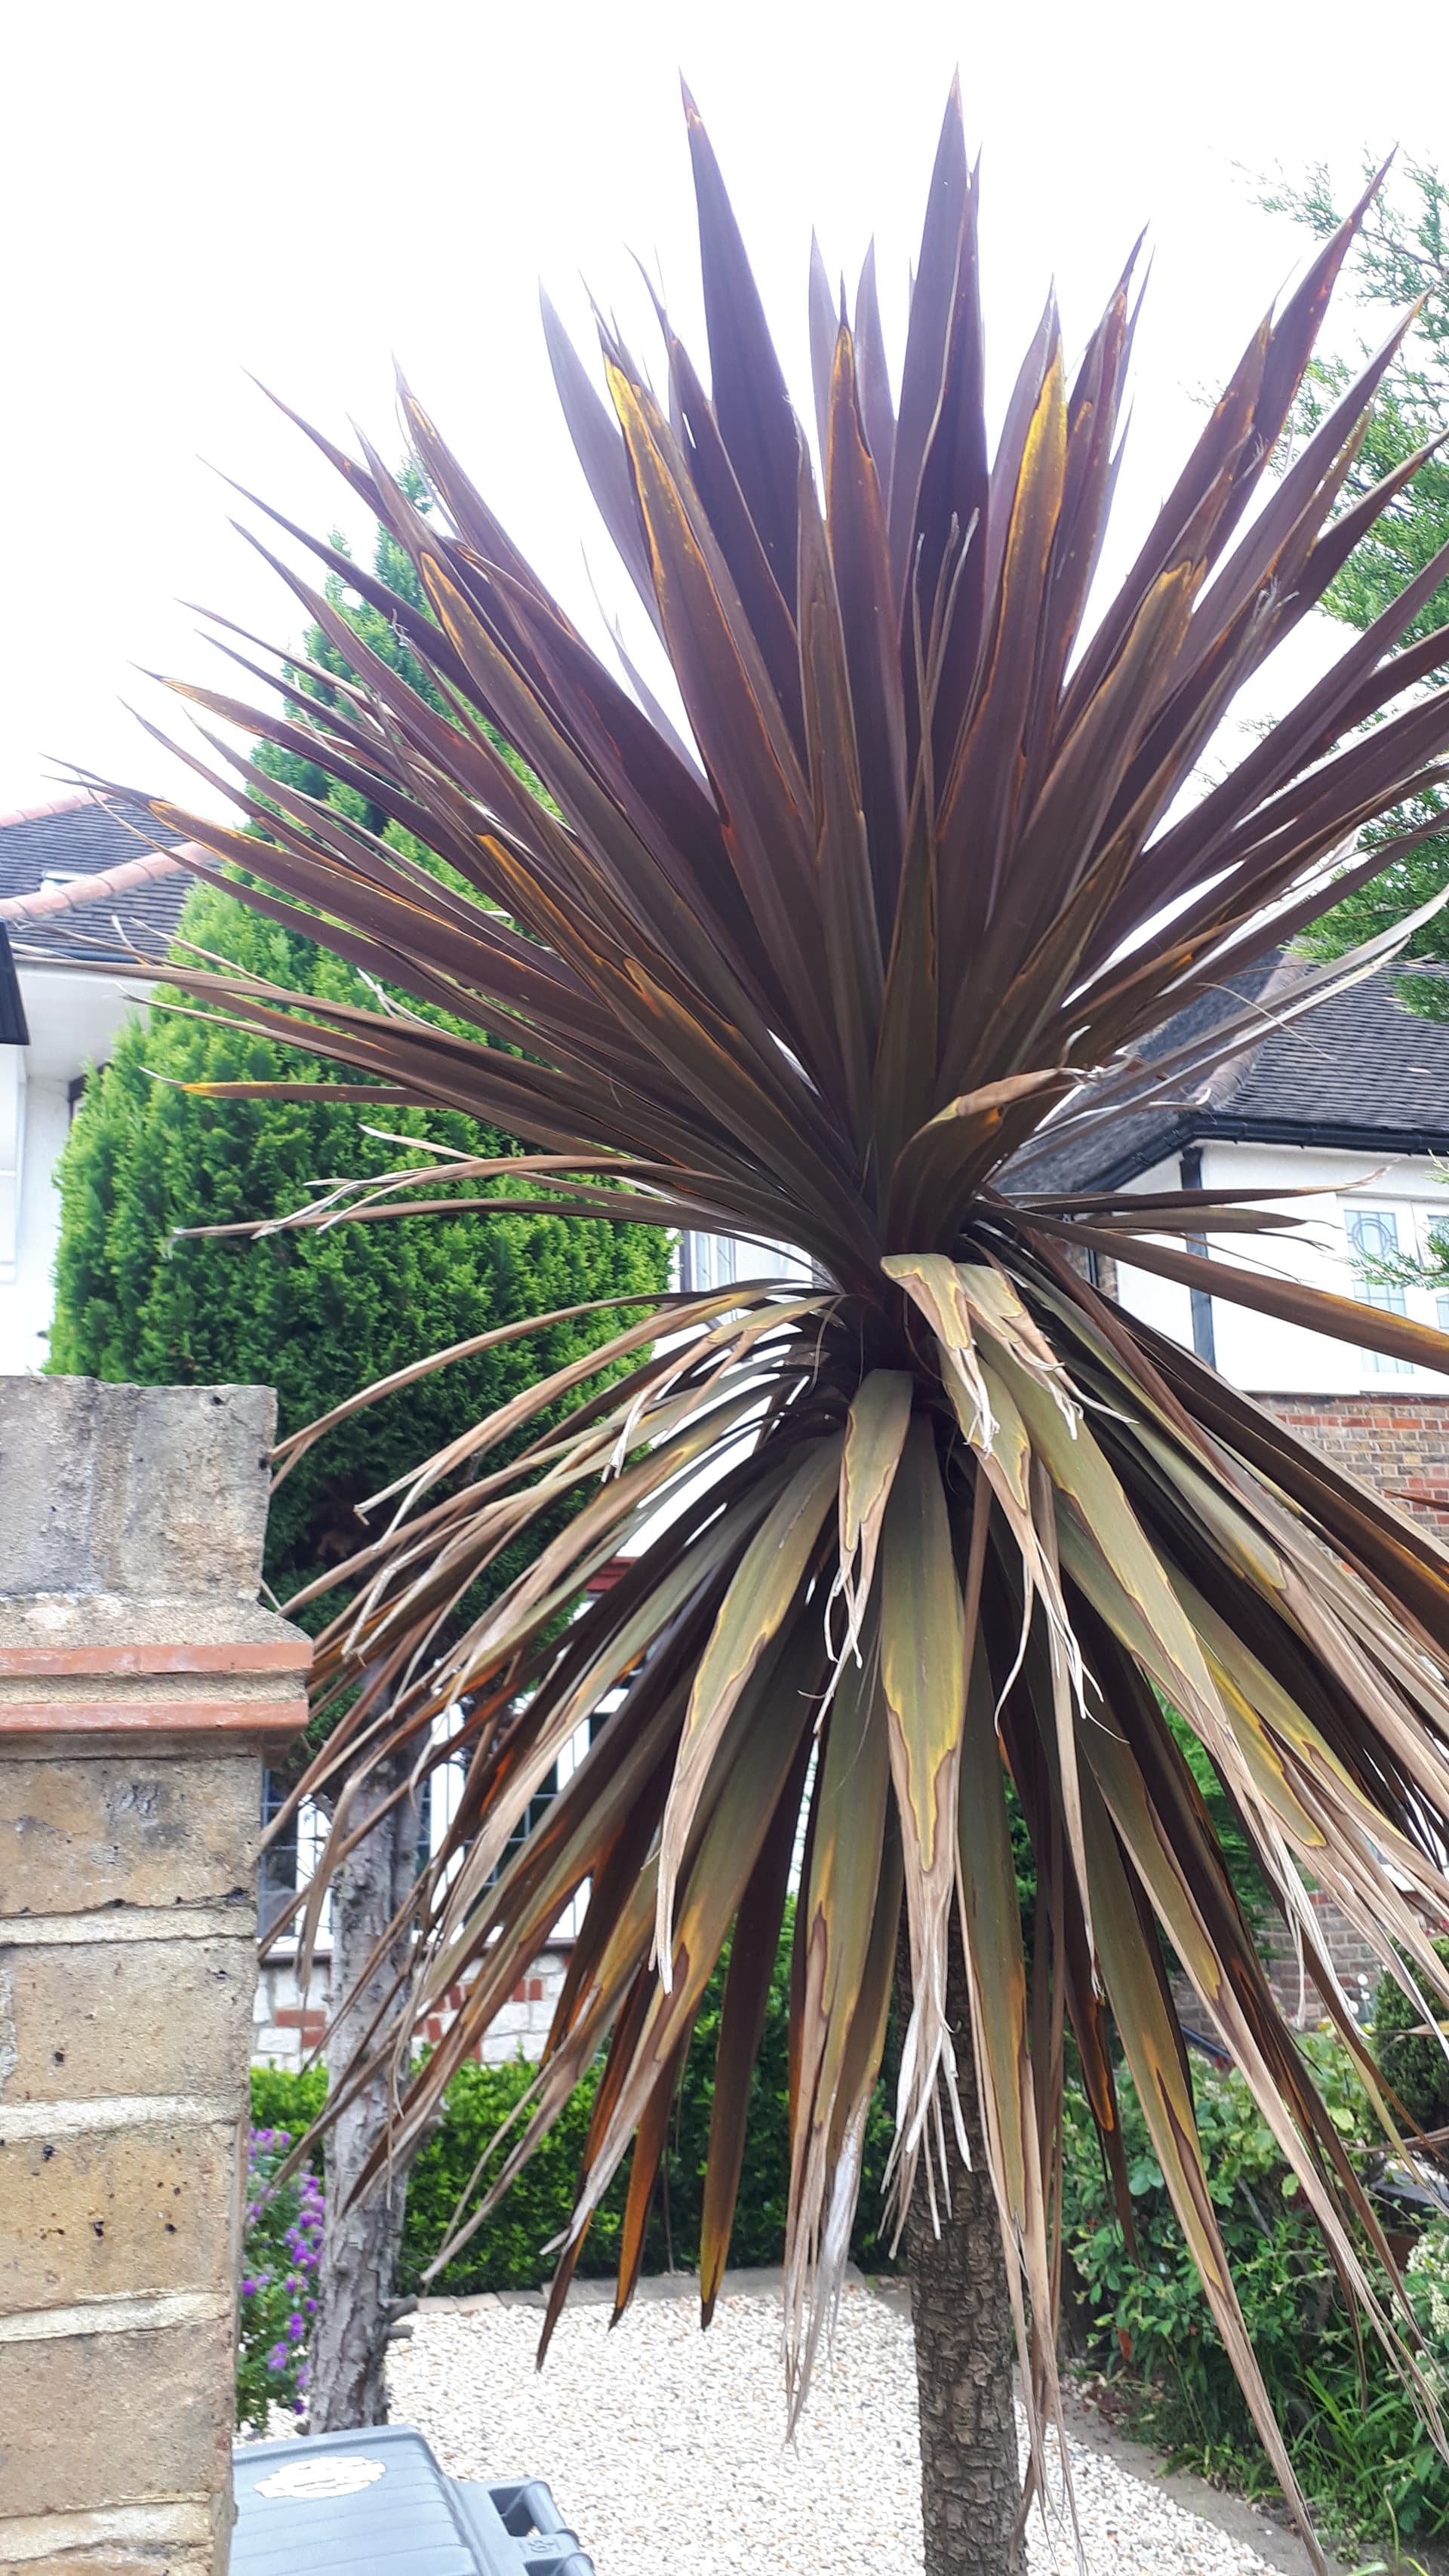
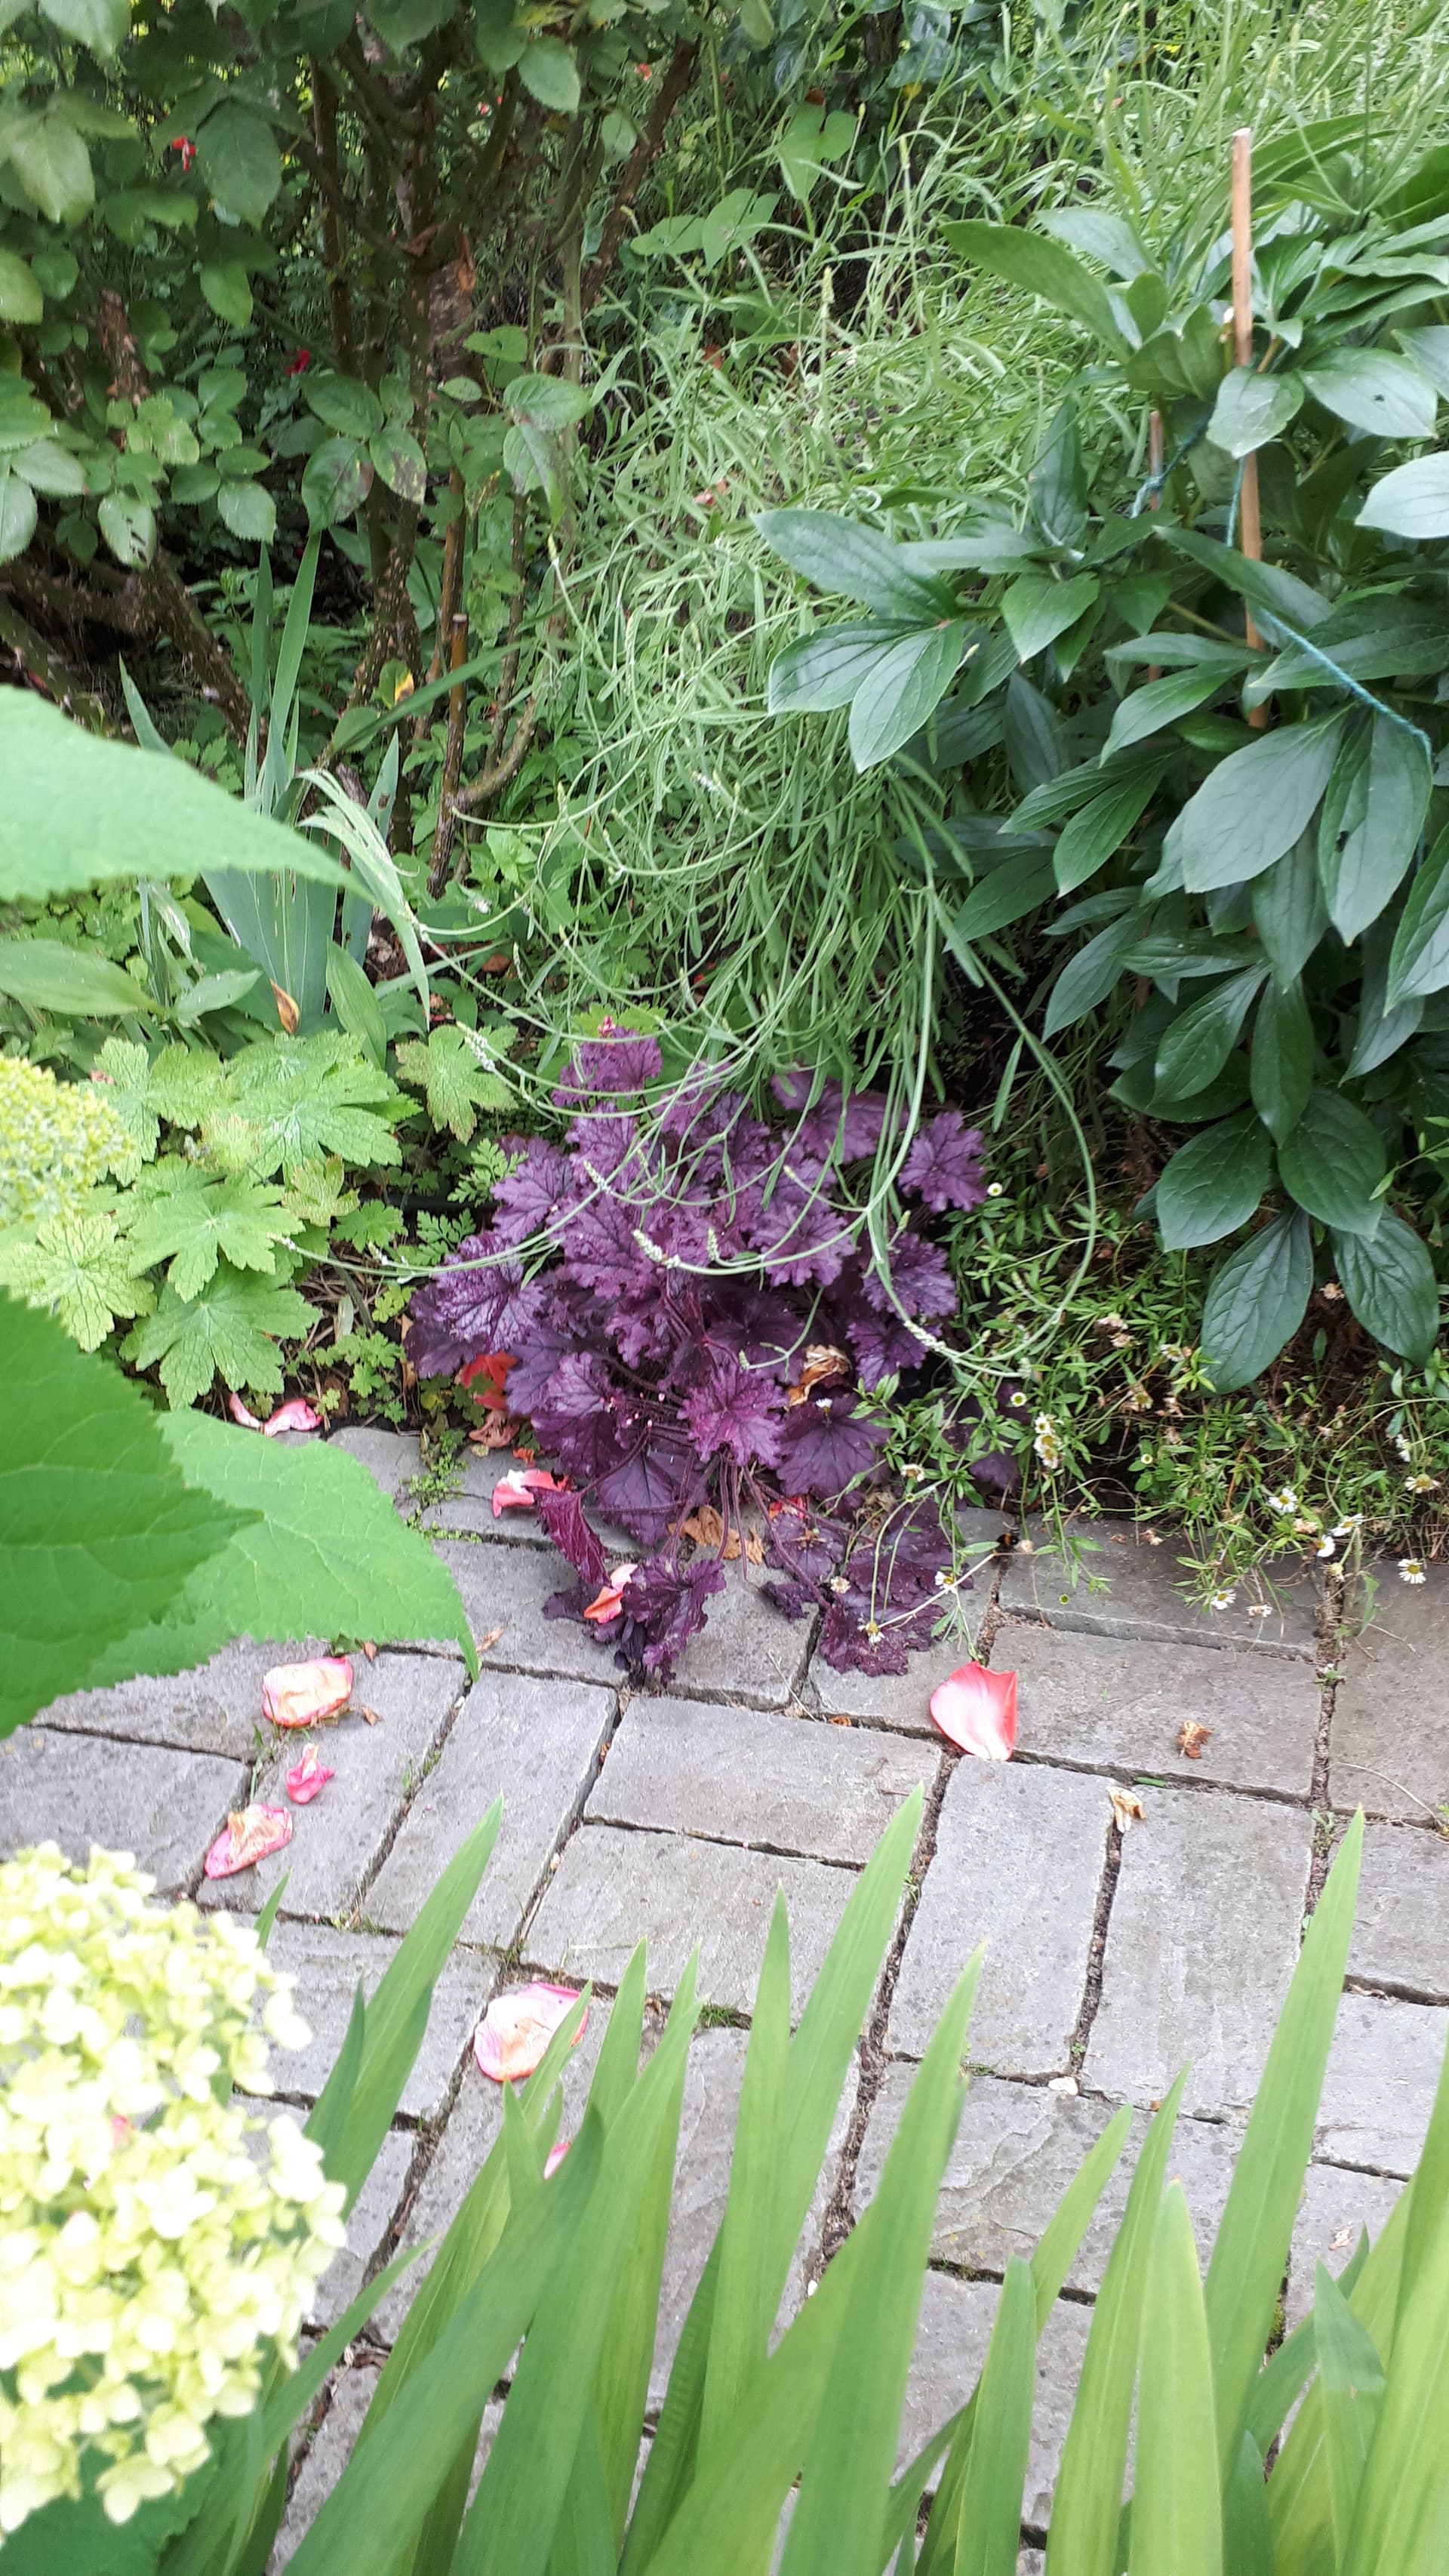
So a few of them have gone down the purple/rust-coloured root.
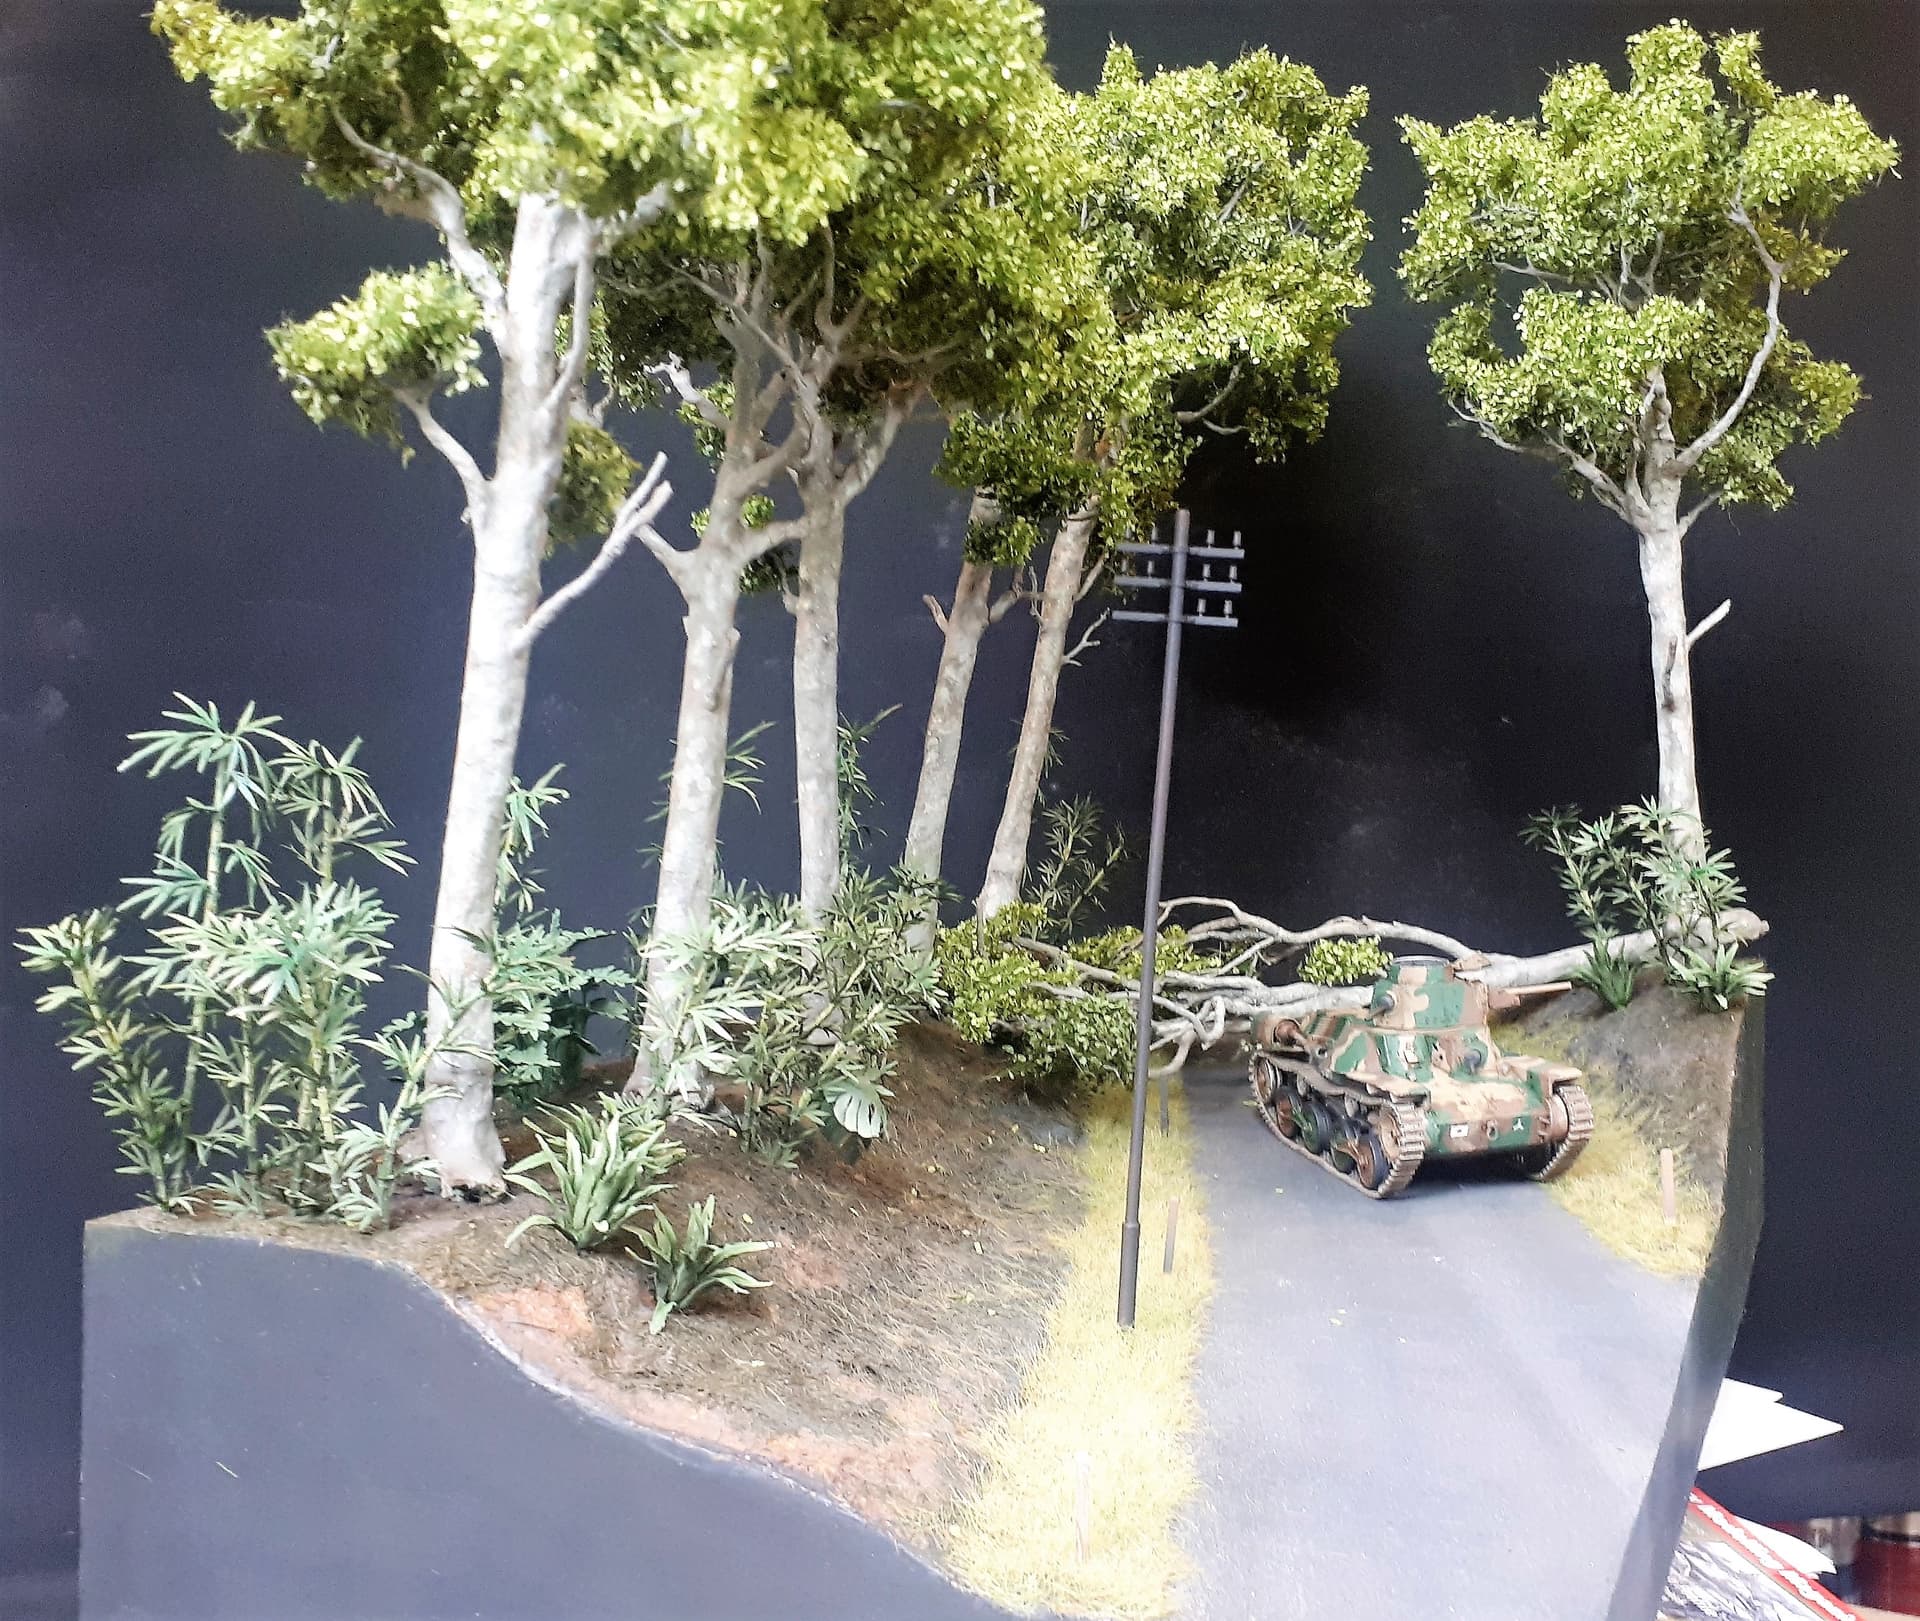
In the end when I assembled my cast of characters it was quite an impressive sight…
7 Likes
Beautiful work Tim .
Before your latest post I was gonna say it needs low ground cover , everywhere .
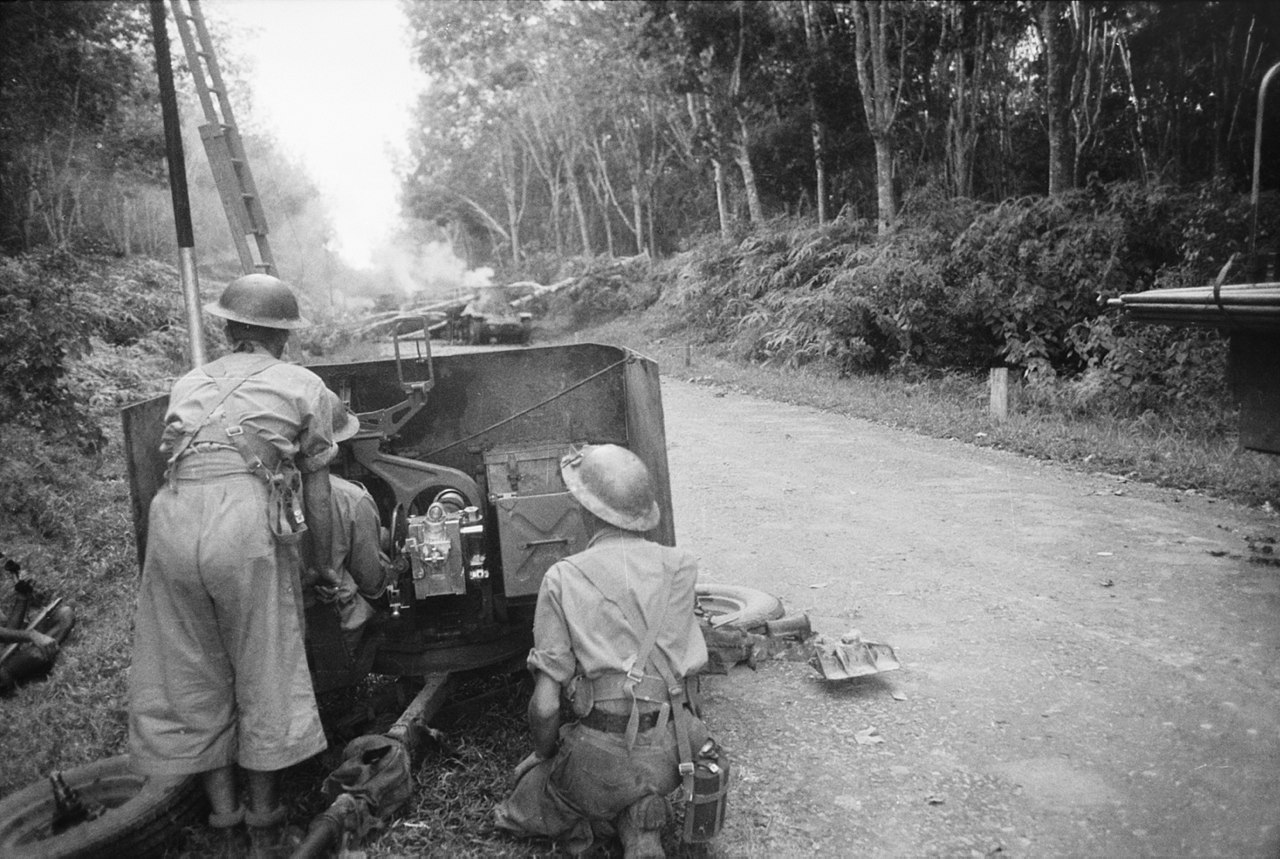
You’ve solved your own problem , junglewise you shouldn’t even see the ground .
As seen in your own ref pic.
1 Like
Having been born in Malaya (as it then was) not long after the end of the war, I find this story fascinating. I too was surprised to learn how effective the 2 pounder HE shells were against Japanese tanks. As an infantry tank, one of the Matilda II’s jobs would have been to knock out strongpoints but the 2 pounder HE shell was considered too feeble for this purpose. A well placed solid 2 pound AT shell however could severely damage any tank, vehicle or gun the Matilda was likely to encounter.
1 Like
Nice move, you’ve nailed the ground-cover issue with that stuff & the other foliage looks just right, tricky balance between not variegated enough & too variegated. Brilliant, Carry on Gardening 

Thanks Cheyenne.
I was partly inspired by your own adventures in the jungle… and after your French gatehouse project I am in no position to complain about having to make vegetation!
Hi Steve,
Always very happy to hear from anyone with actual knowledge of this part of the world. The nearest I have been to Malaysia is Japan two summers ago…
It’s funny how the 2-pounder gets such mixed reports - even though it the main armament for most British tanks for a good part of the war (and continued to be in the Matilda’s case).
Thanks Tim.
I like to think that it’s been worth the effort - and whenever I get impatient I just remind myself of your painstaking adventures in Prague. At least once I stick something down I know I can leave it!
1 Like
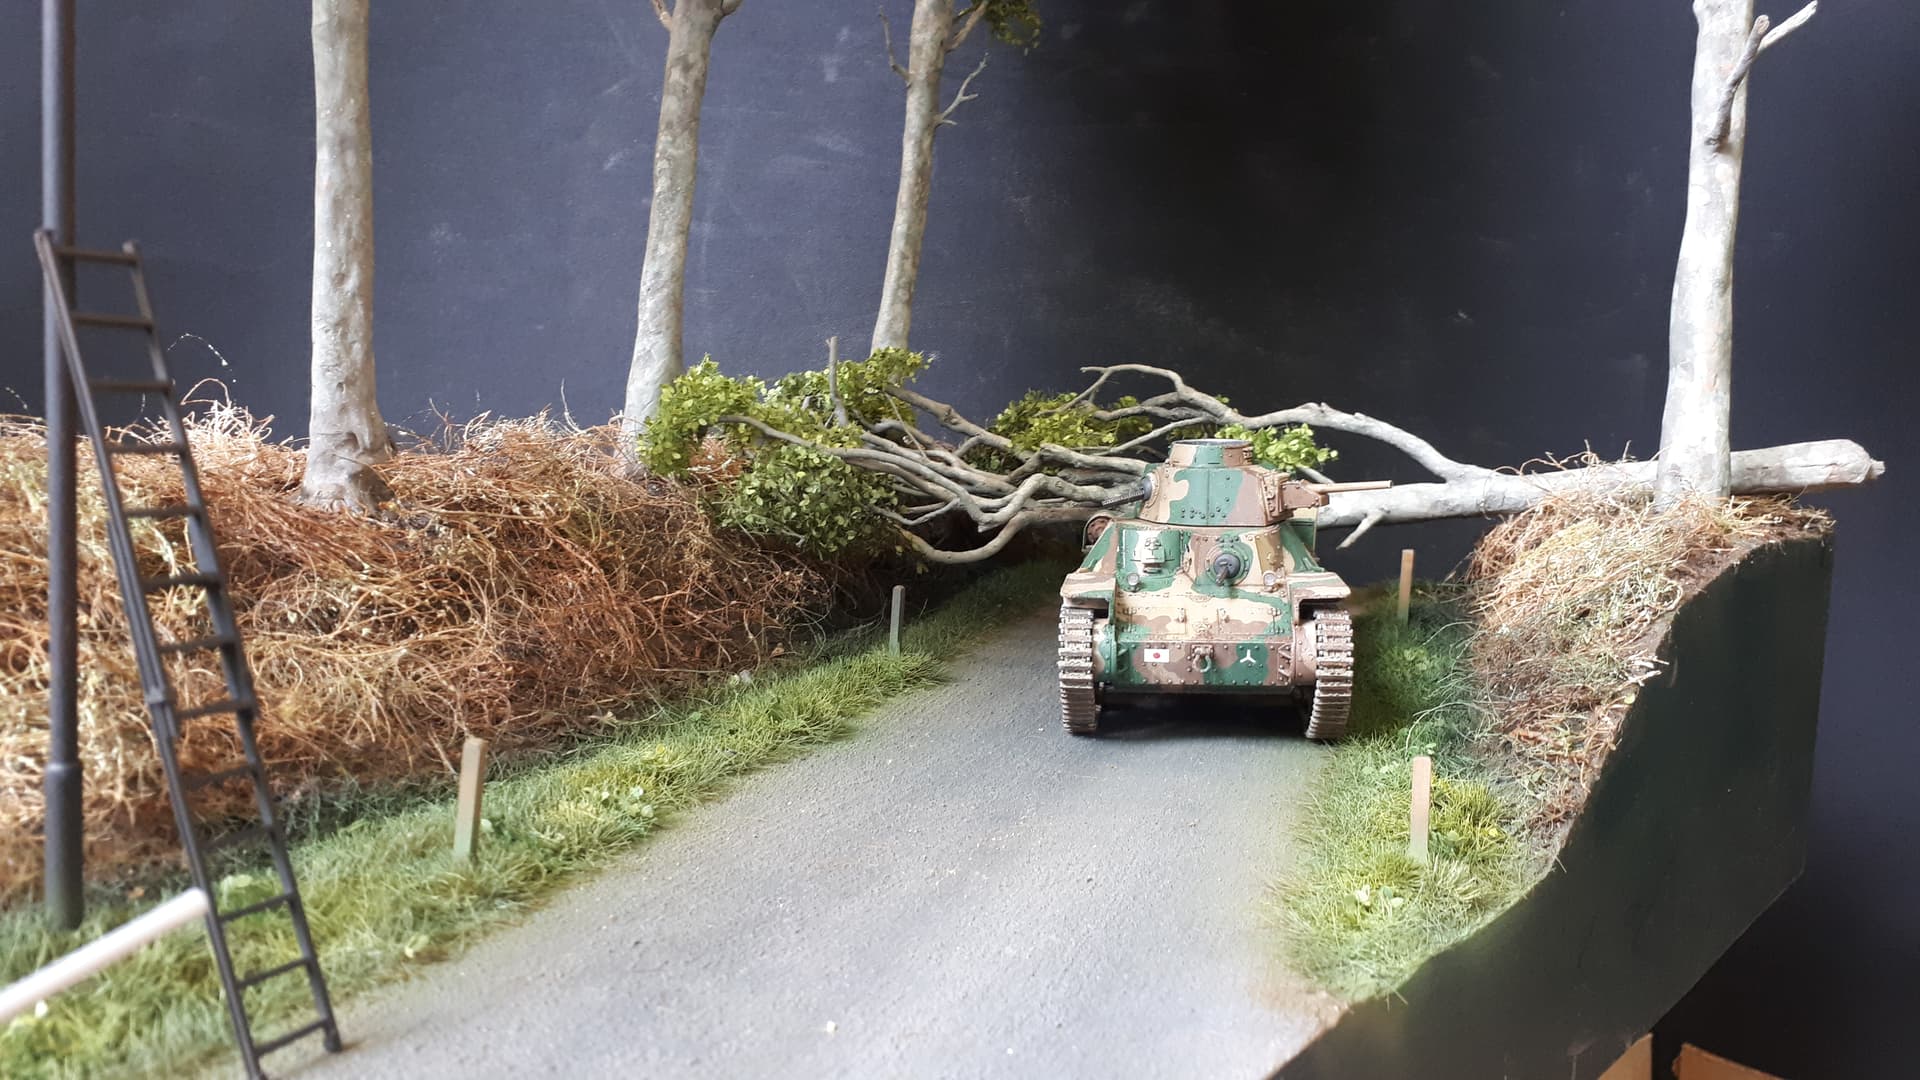
Well, you have all seen the ‘big reveal’ above, but here are a few more shots once I put everything in place…
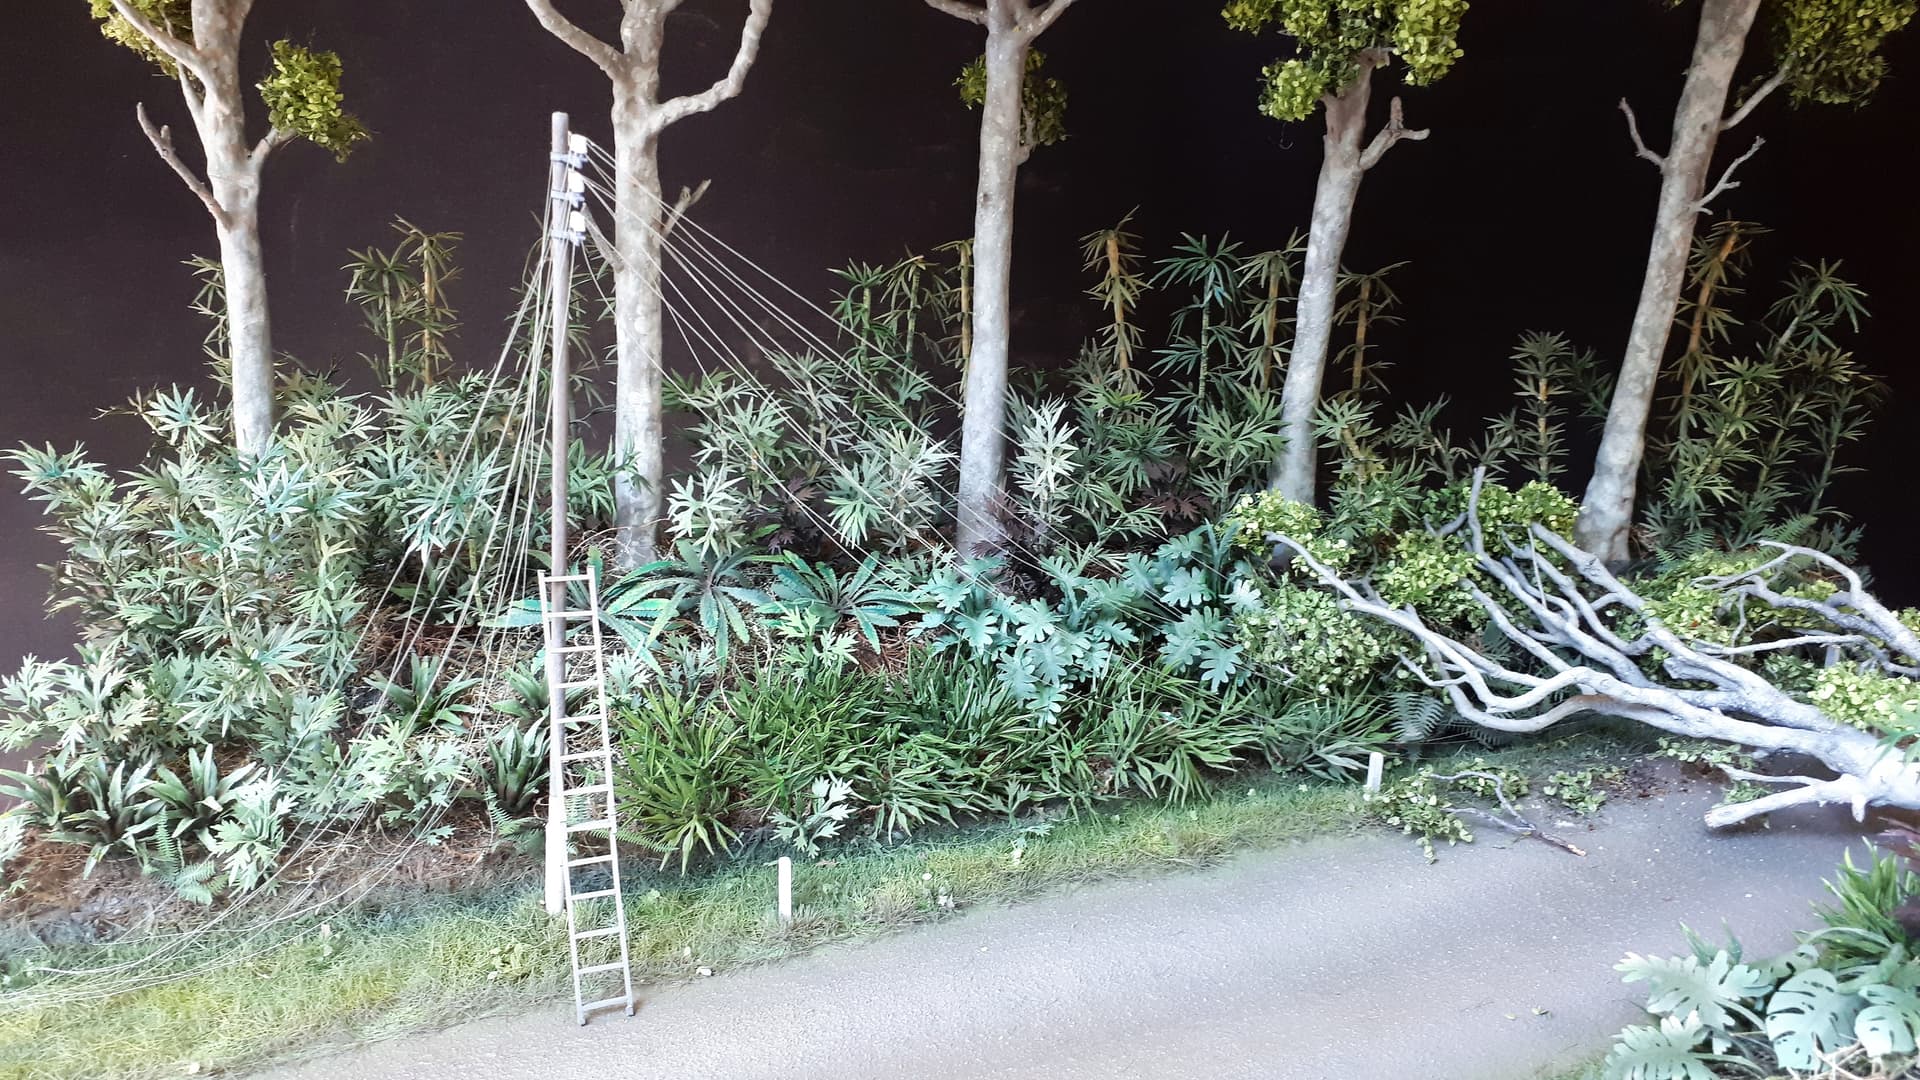

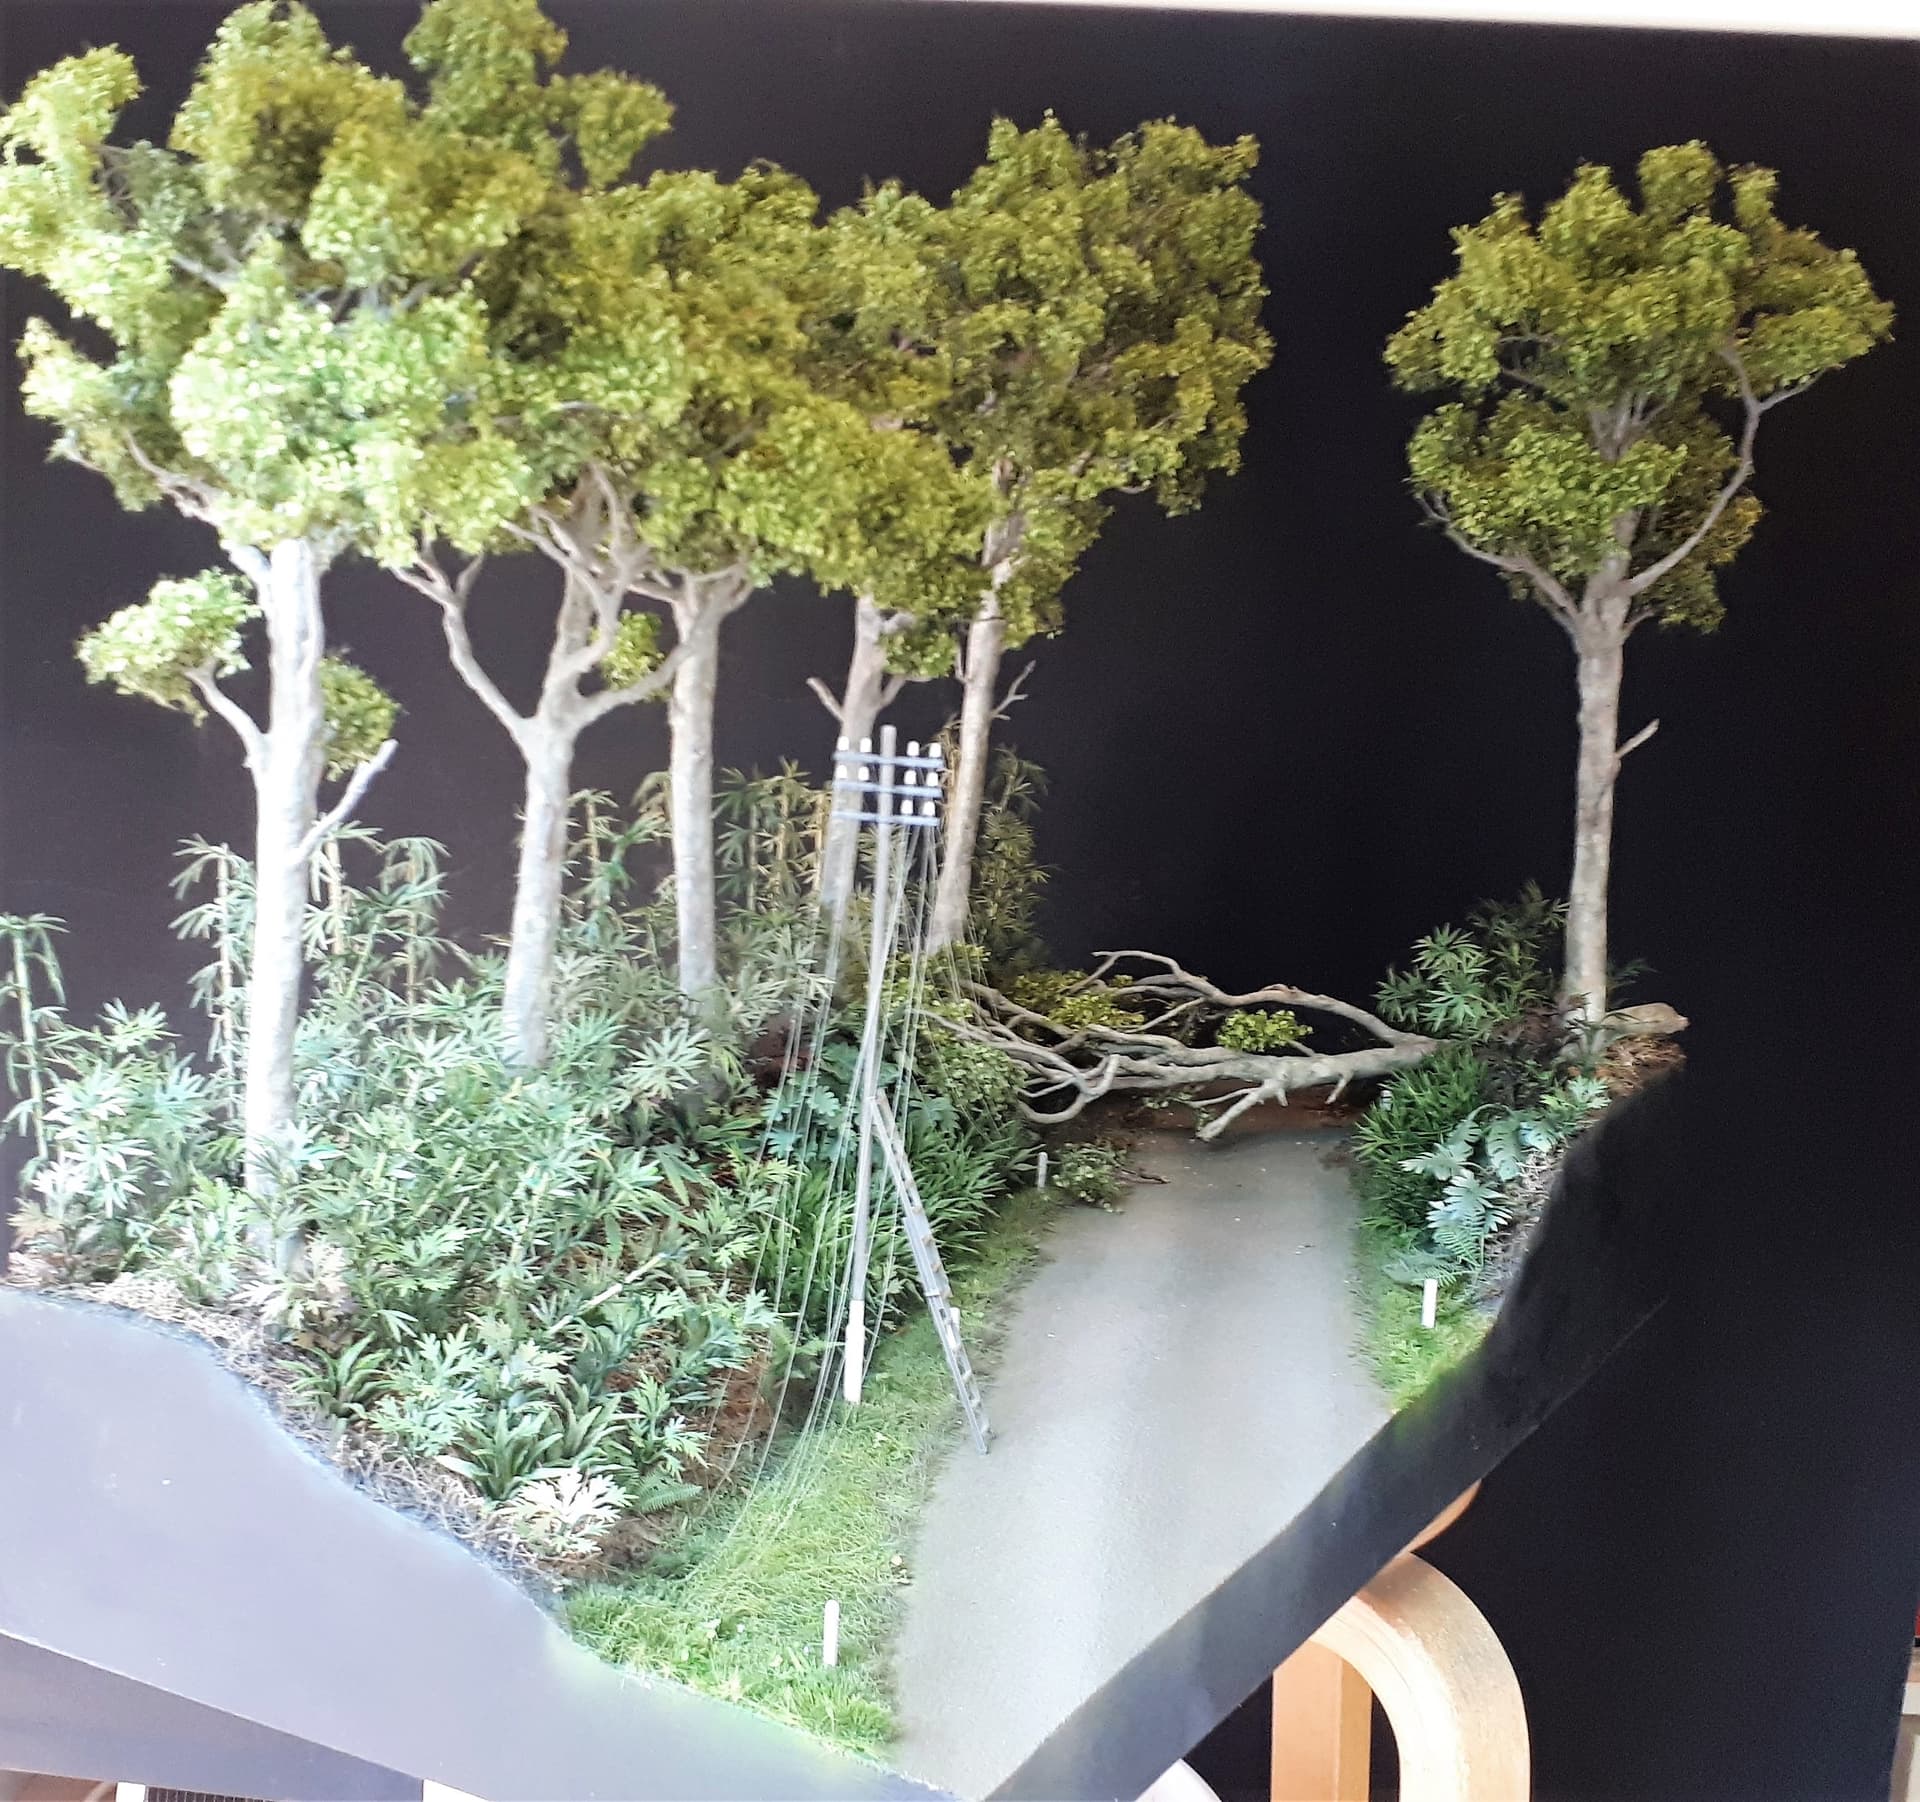
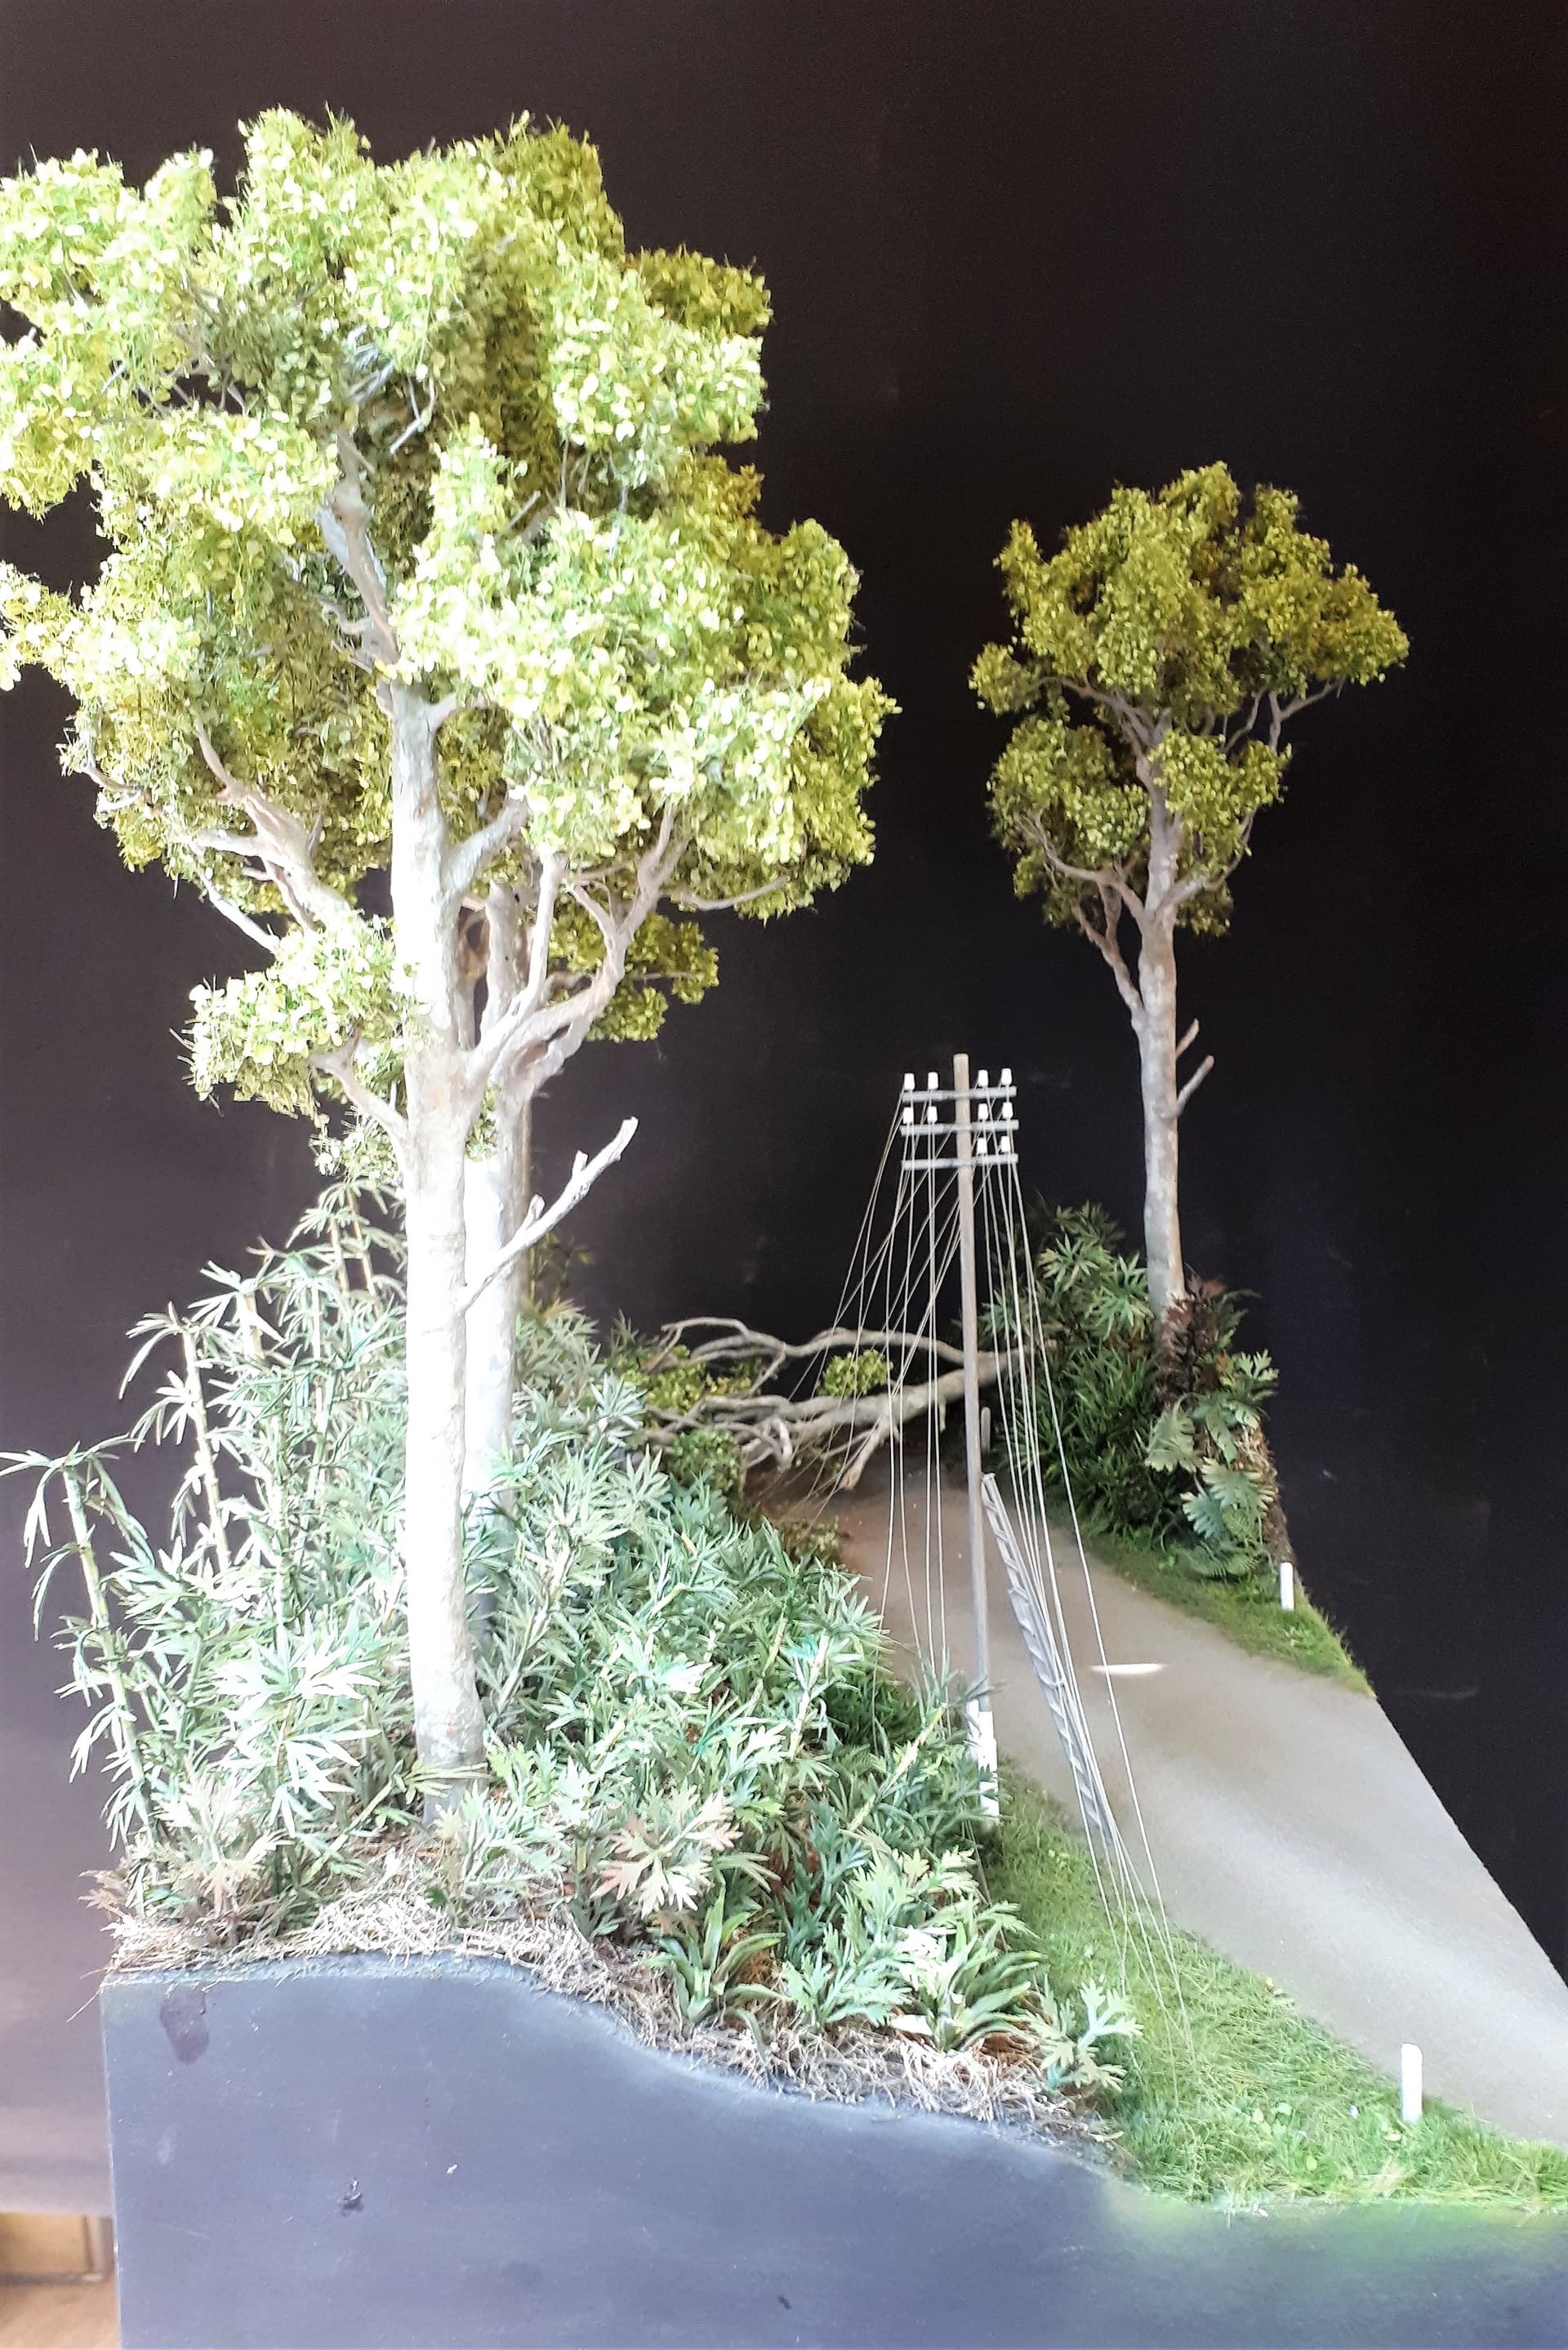

16 Likes
BRAVO! Can’t wait to see the completed dio!