Thank you Michael! Much to do but that is why these campaigns are so appreciated! Motivation to press on
3 Likes
doesn’t look like they have them anymore and what is MYN? did a search and came up empty.
thanks,- Joe
2 Likes
MYK sorry not MYN. They also go by Good Mark decals
1 Like
Started on the diorama. Small layer of resin with color at the bottom to illustrate ocean depth. Half a liter of resin on top of that. I am going to need more resin ![]()
More to follow ![]()
16 Likes
I didn’t forget about you guys!
Just been busy with multiple things at the same time..
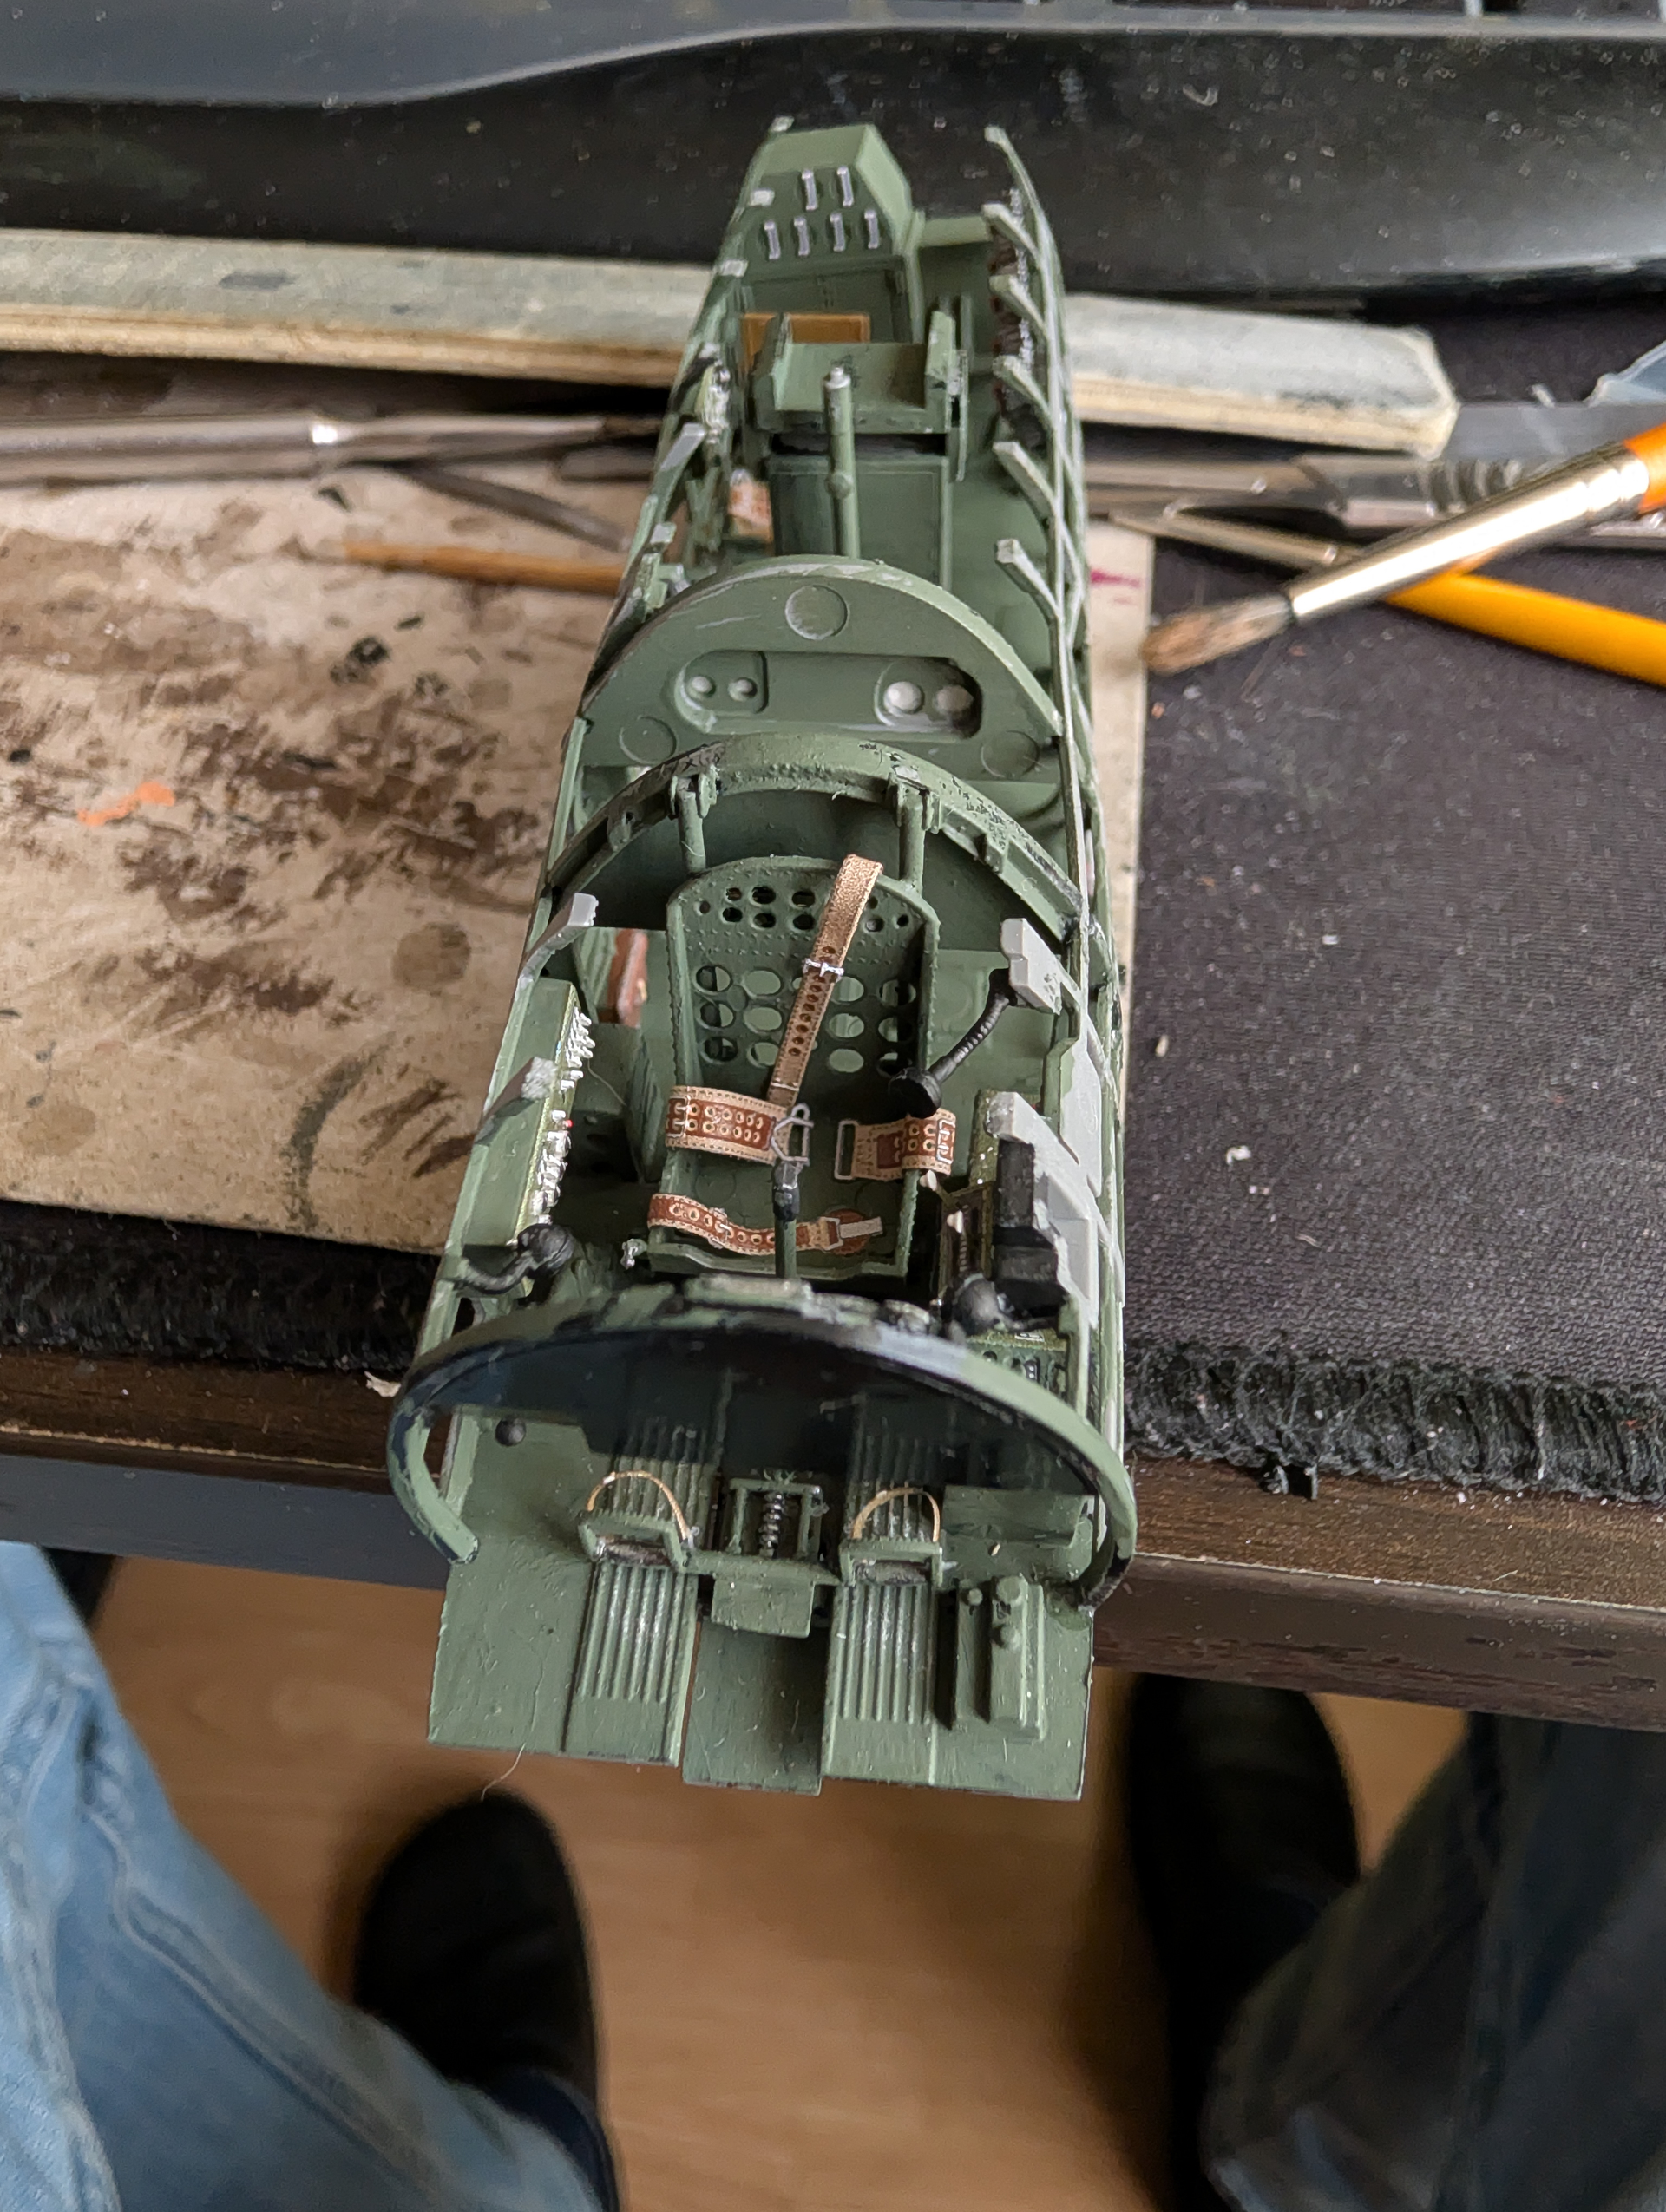
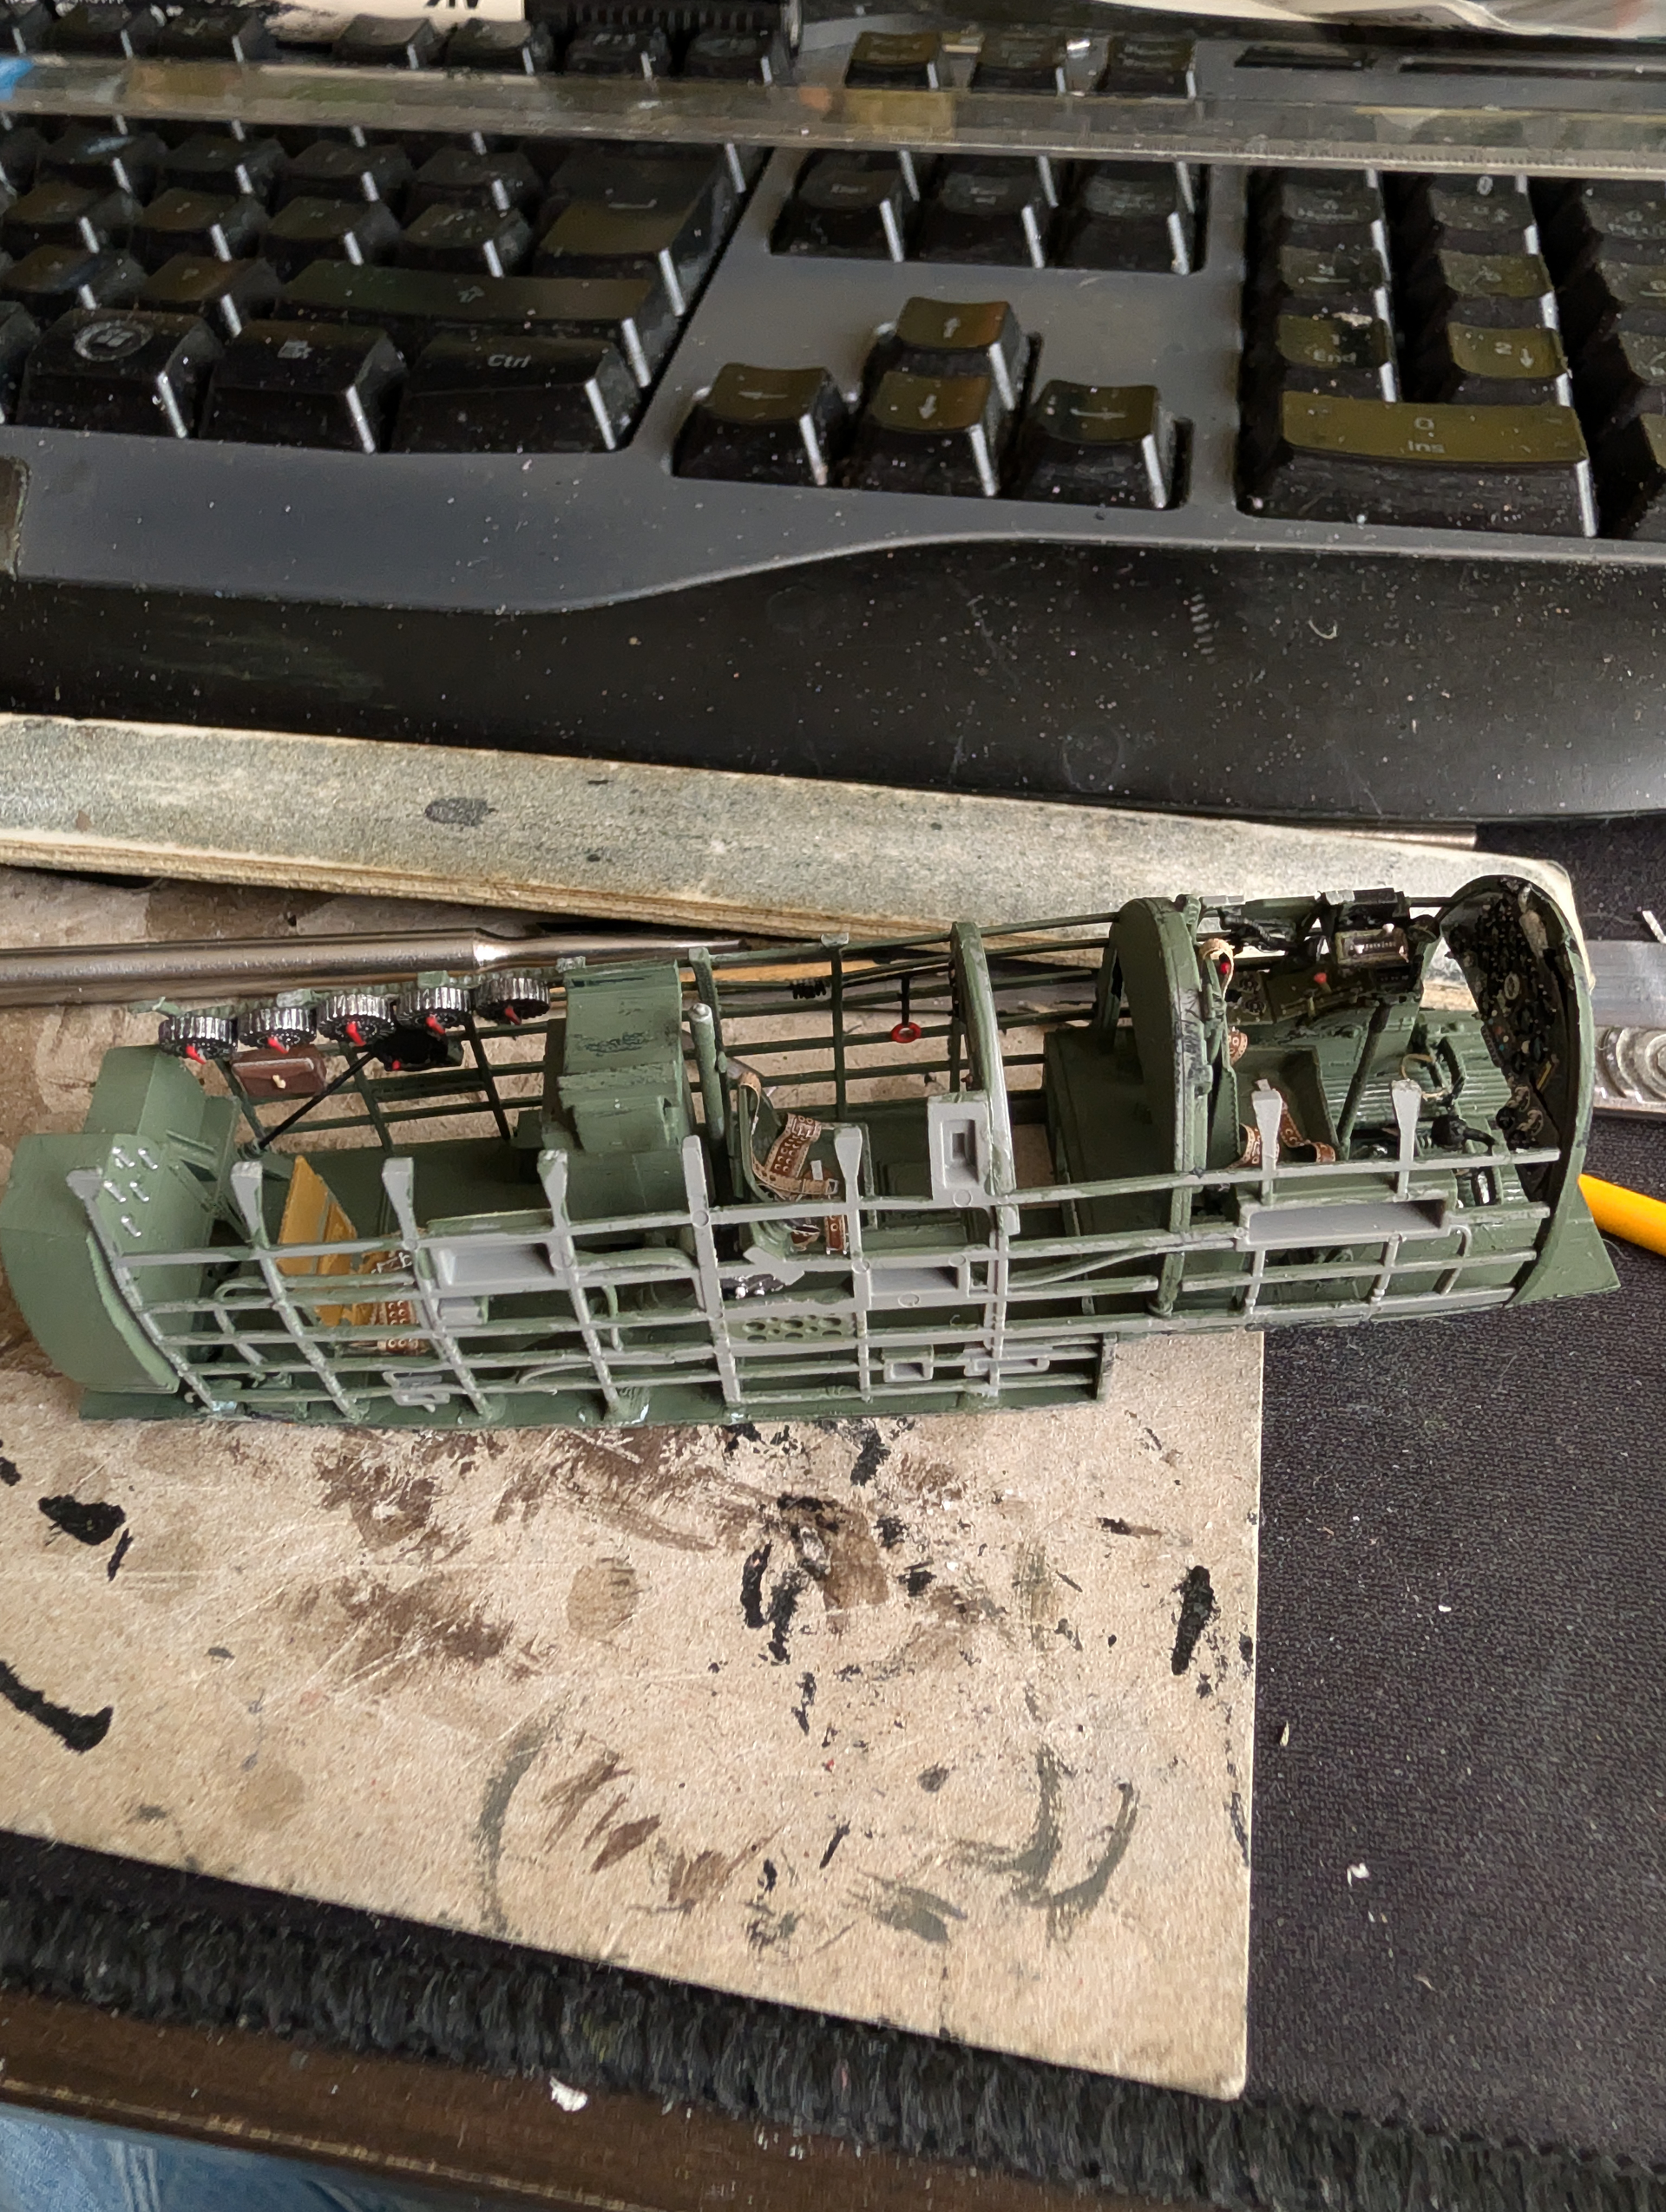
The cockpit is ready to be mounted in the fuselage halves…


10 Likes
That looks really nice.
I made a start today on getting the Lynx interior painted, just the base coat of blue-grey down and the instrument panels.

6 Likes
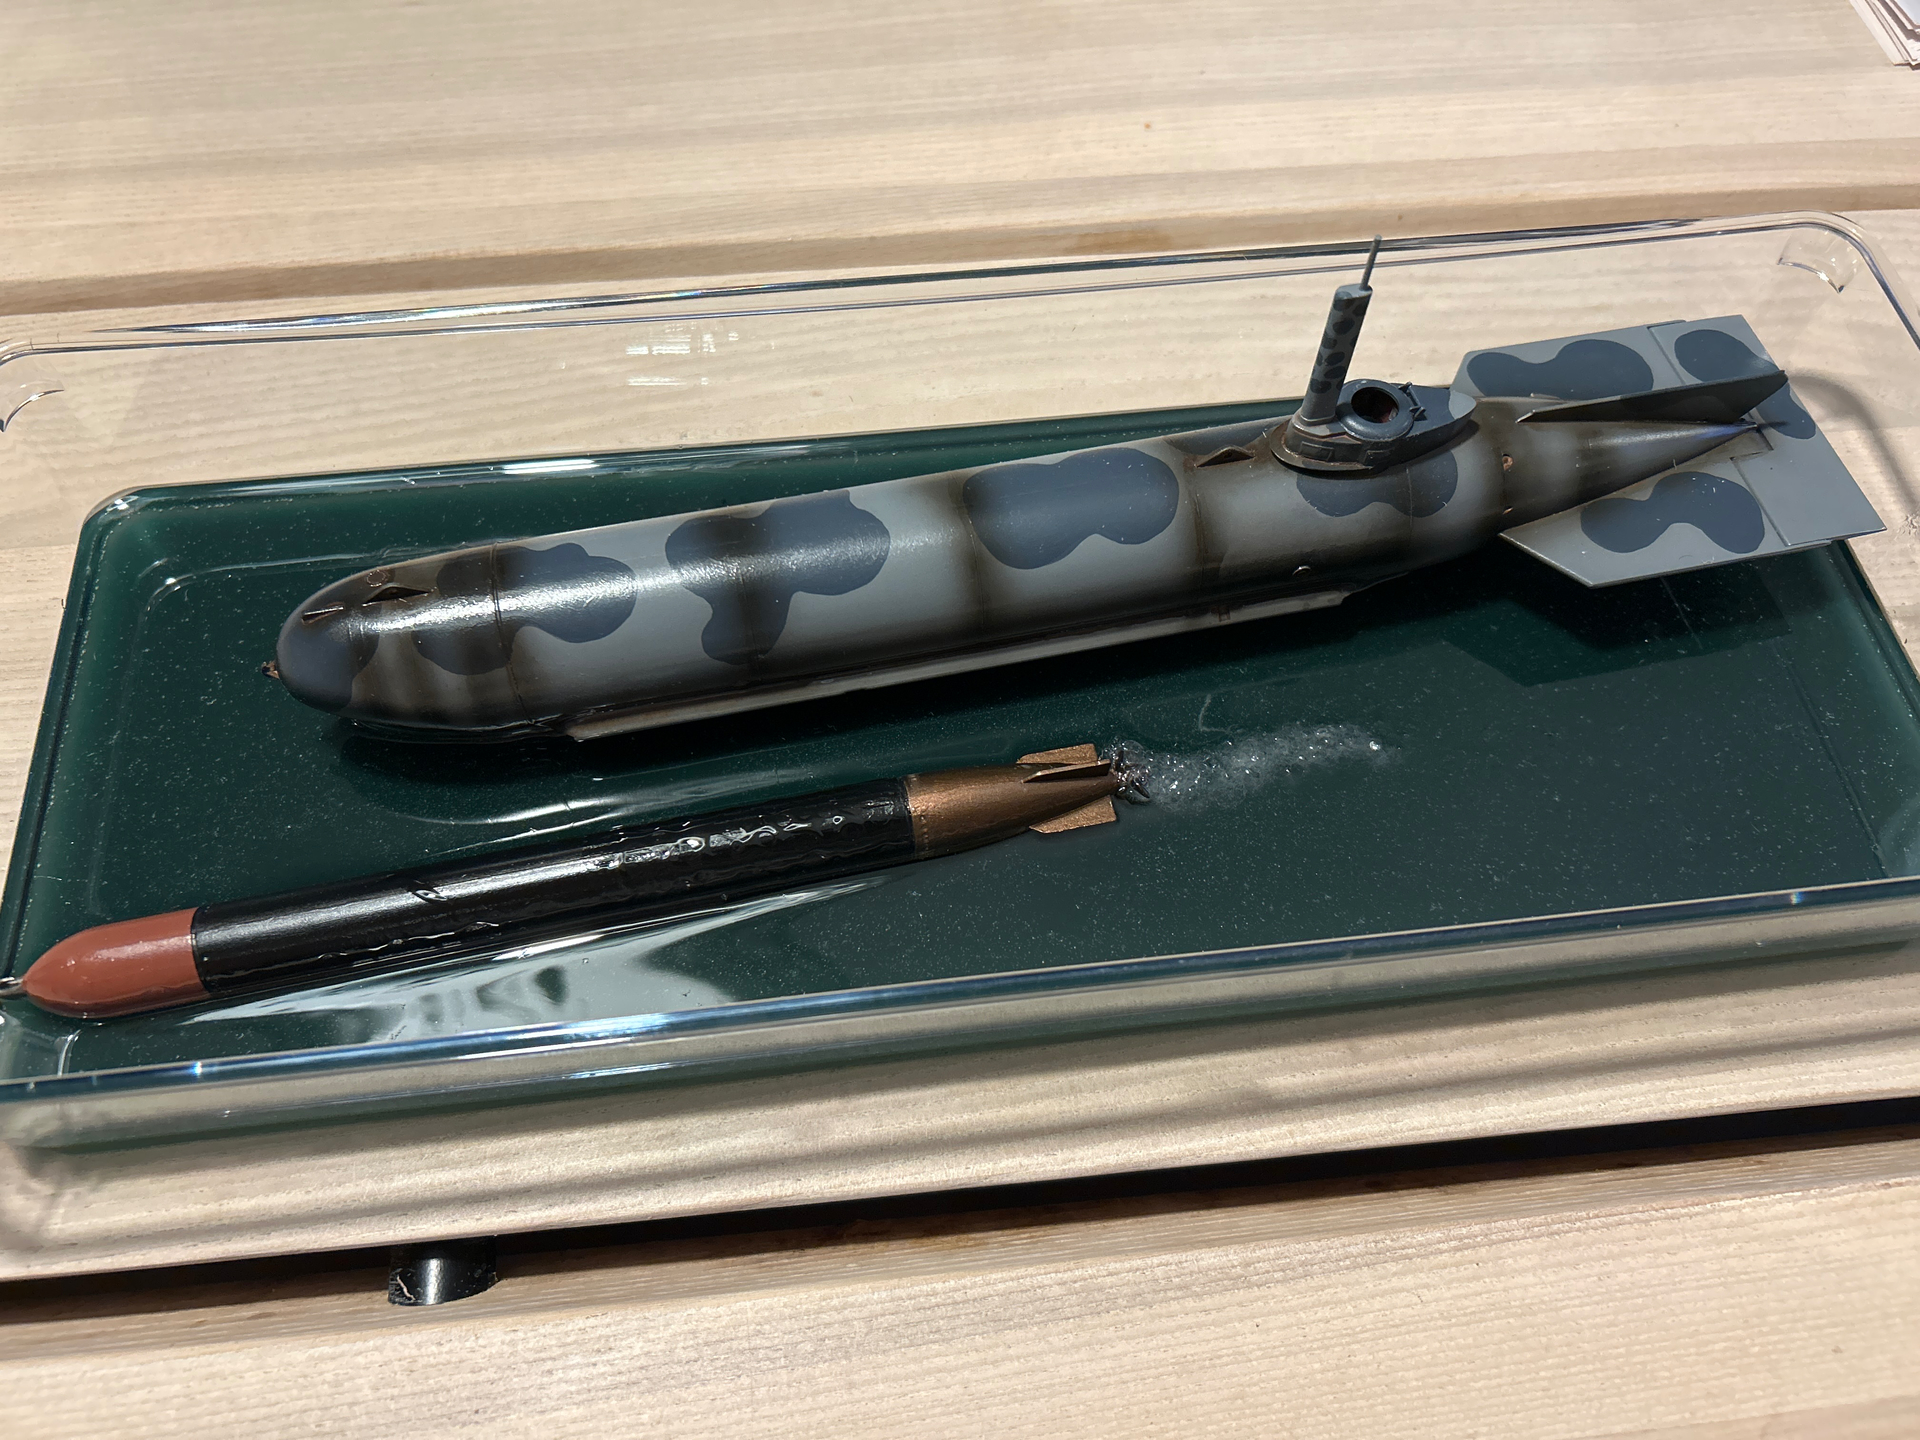
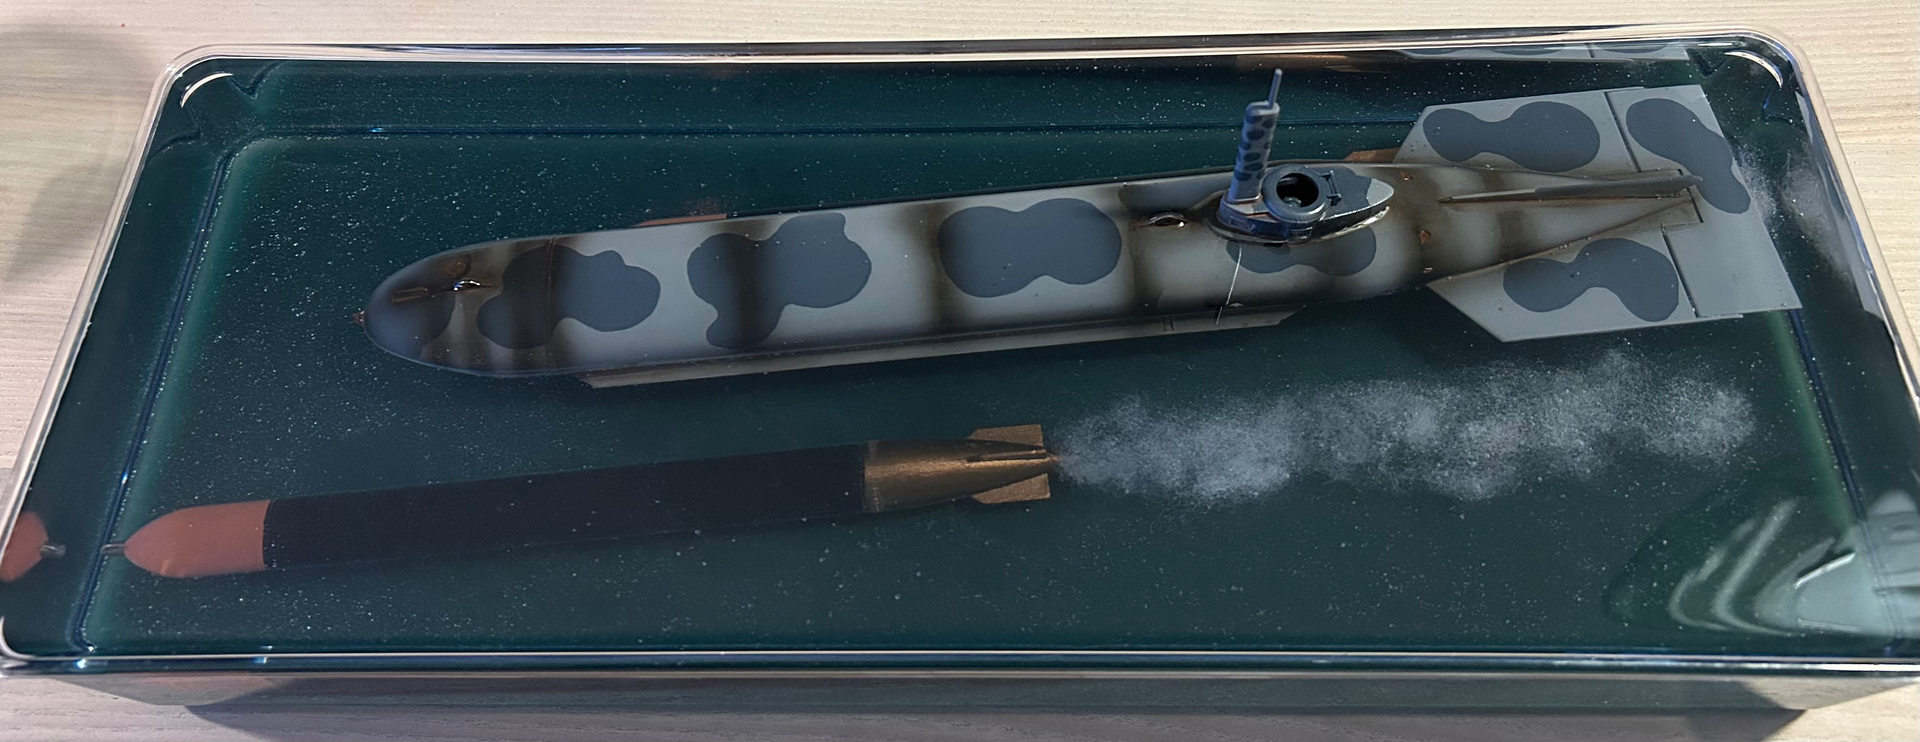
The hull is together. Next is the process of connecting the tower which will also be a bit slow due to minor warpage which prevents sealing both sides simultaneously. I did manage to break one of the torpedo bay doors (very tiny pins holding it in place) but I have a plan for repairing it and I still have the other for display purposes. This also means I can leave one torpedo out to display separate. So, a win?
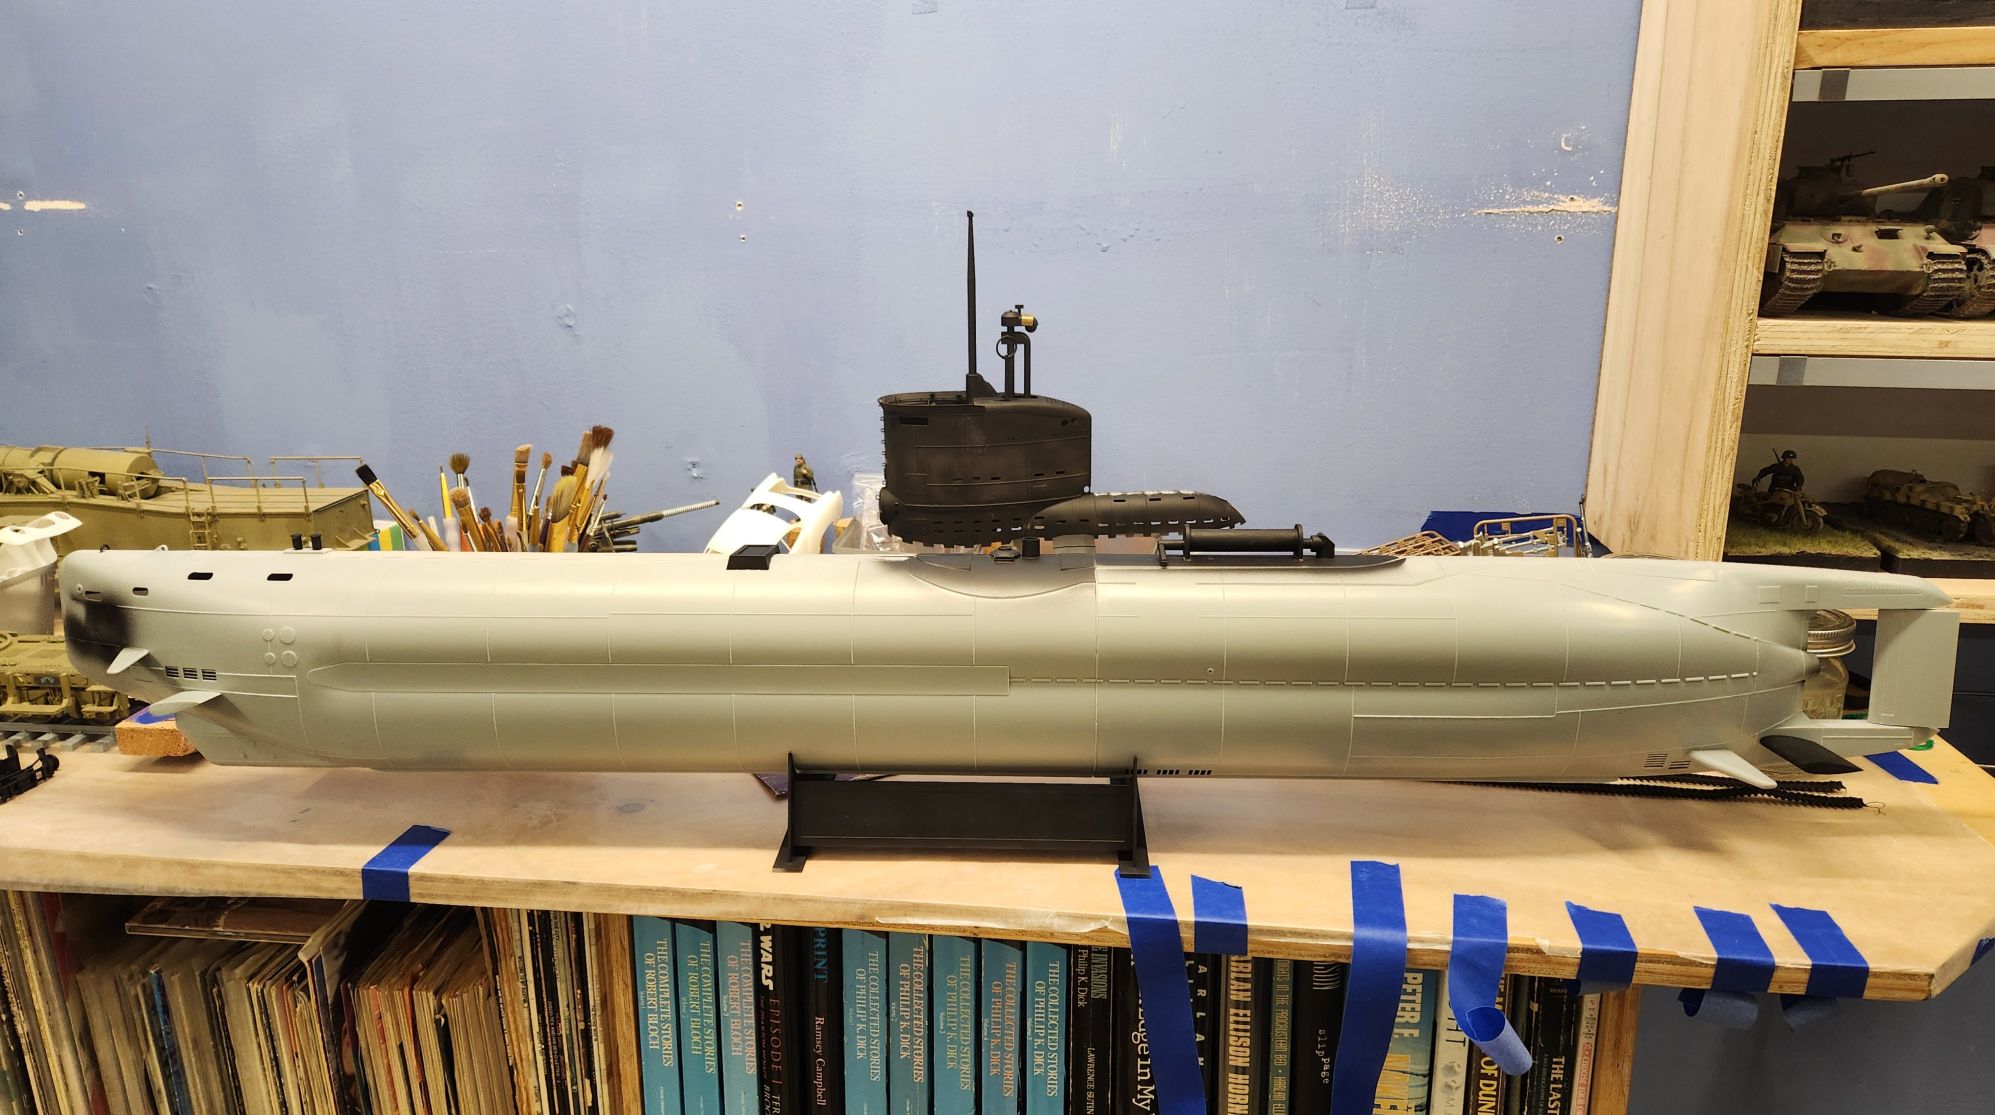
12 Likes
Looking great! Always good with a figure or torpedo to add scale to a model.
1 Like
Agree with Stephen. That looks really sharp. Are the instrument panels, seat belts, and other details done with resin decals or perhaps painted brass parts? They look much better than decals.
2 Likes
Those are 3D decals by Quinta ![]() Much better than the PE and regular decals included in the kit.
Much better than the PE and regular decals included in the kit.
3 Likes
Great. Thank you. I will buy some and give them a try.
1 Like
The only thing I didn’t use are the handles for the MG drums. I tried to remove the handle of one like they suggested, but it doesn’t work…
4 Likes
Looking good guys!
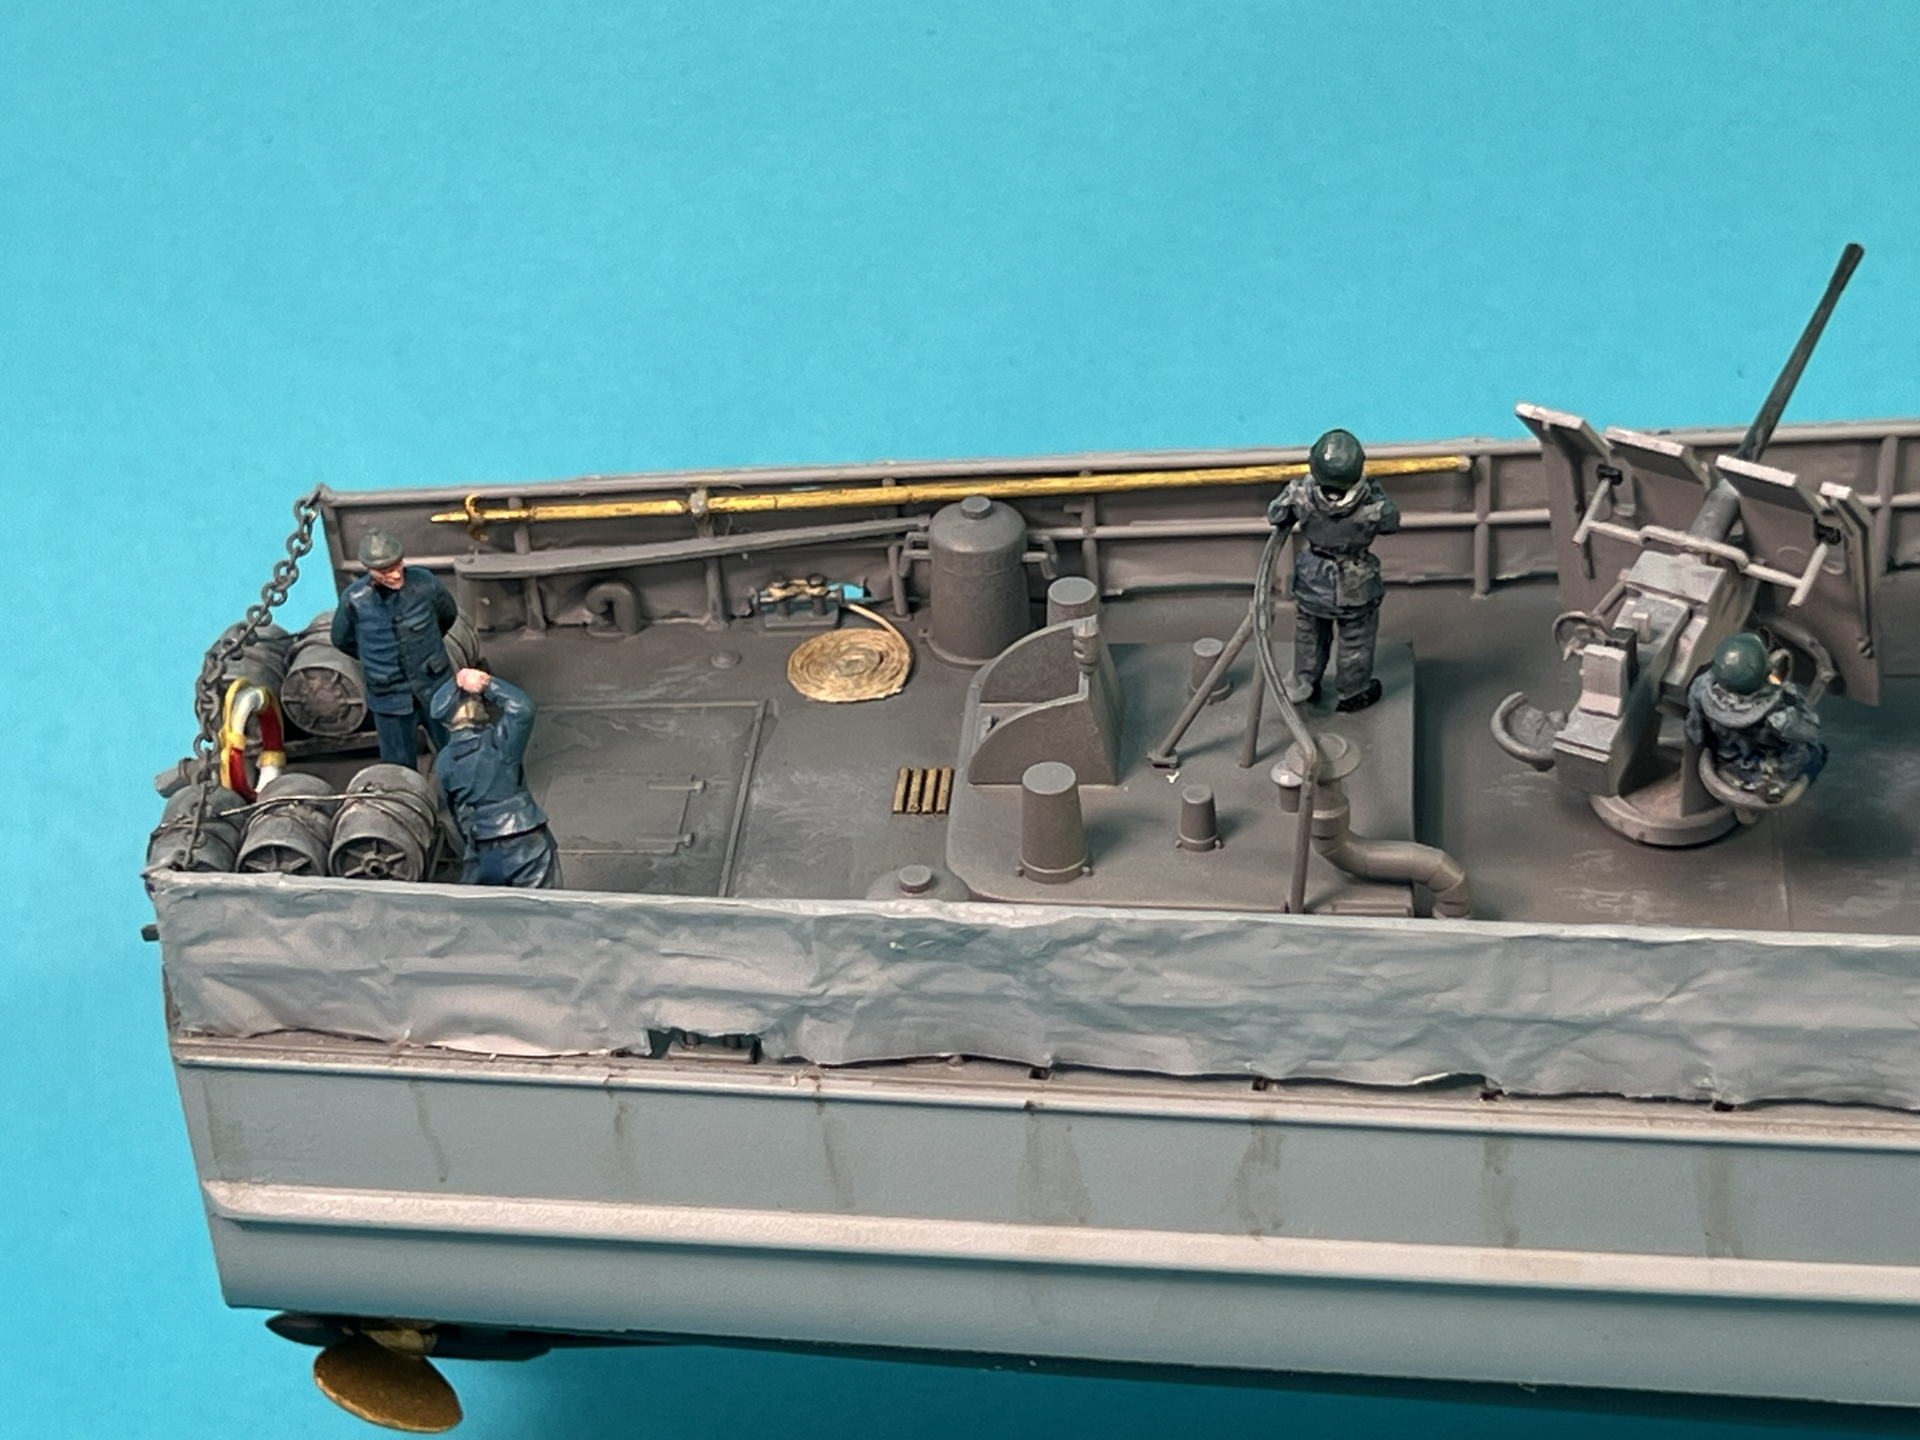
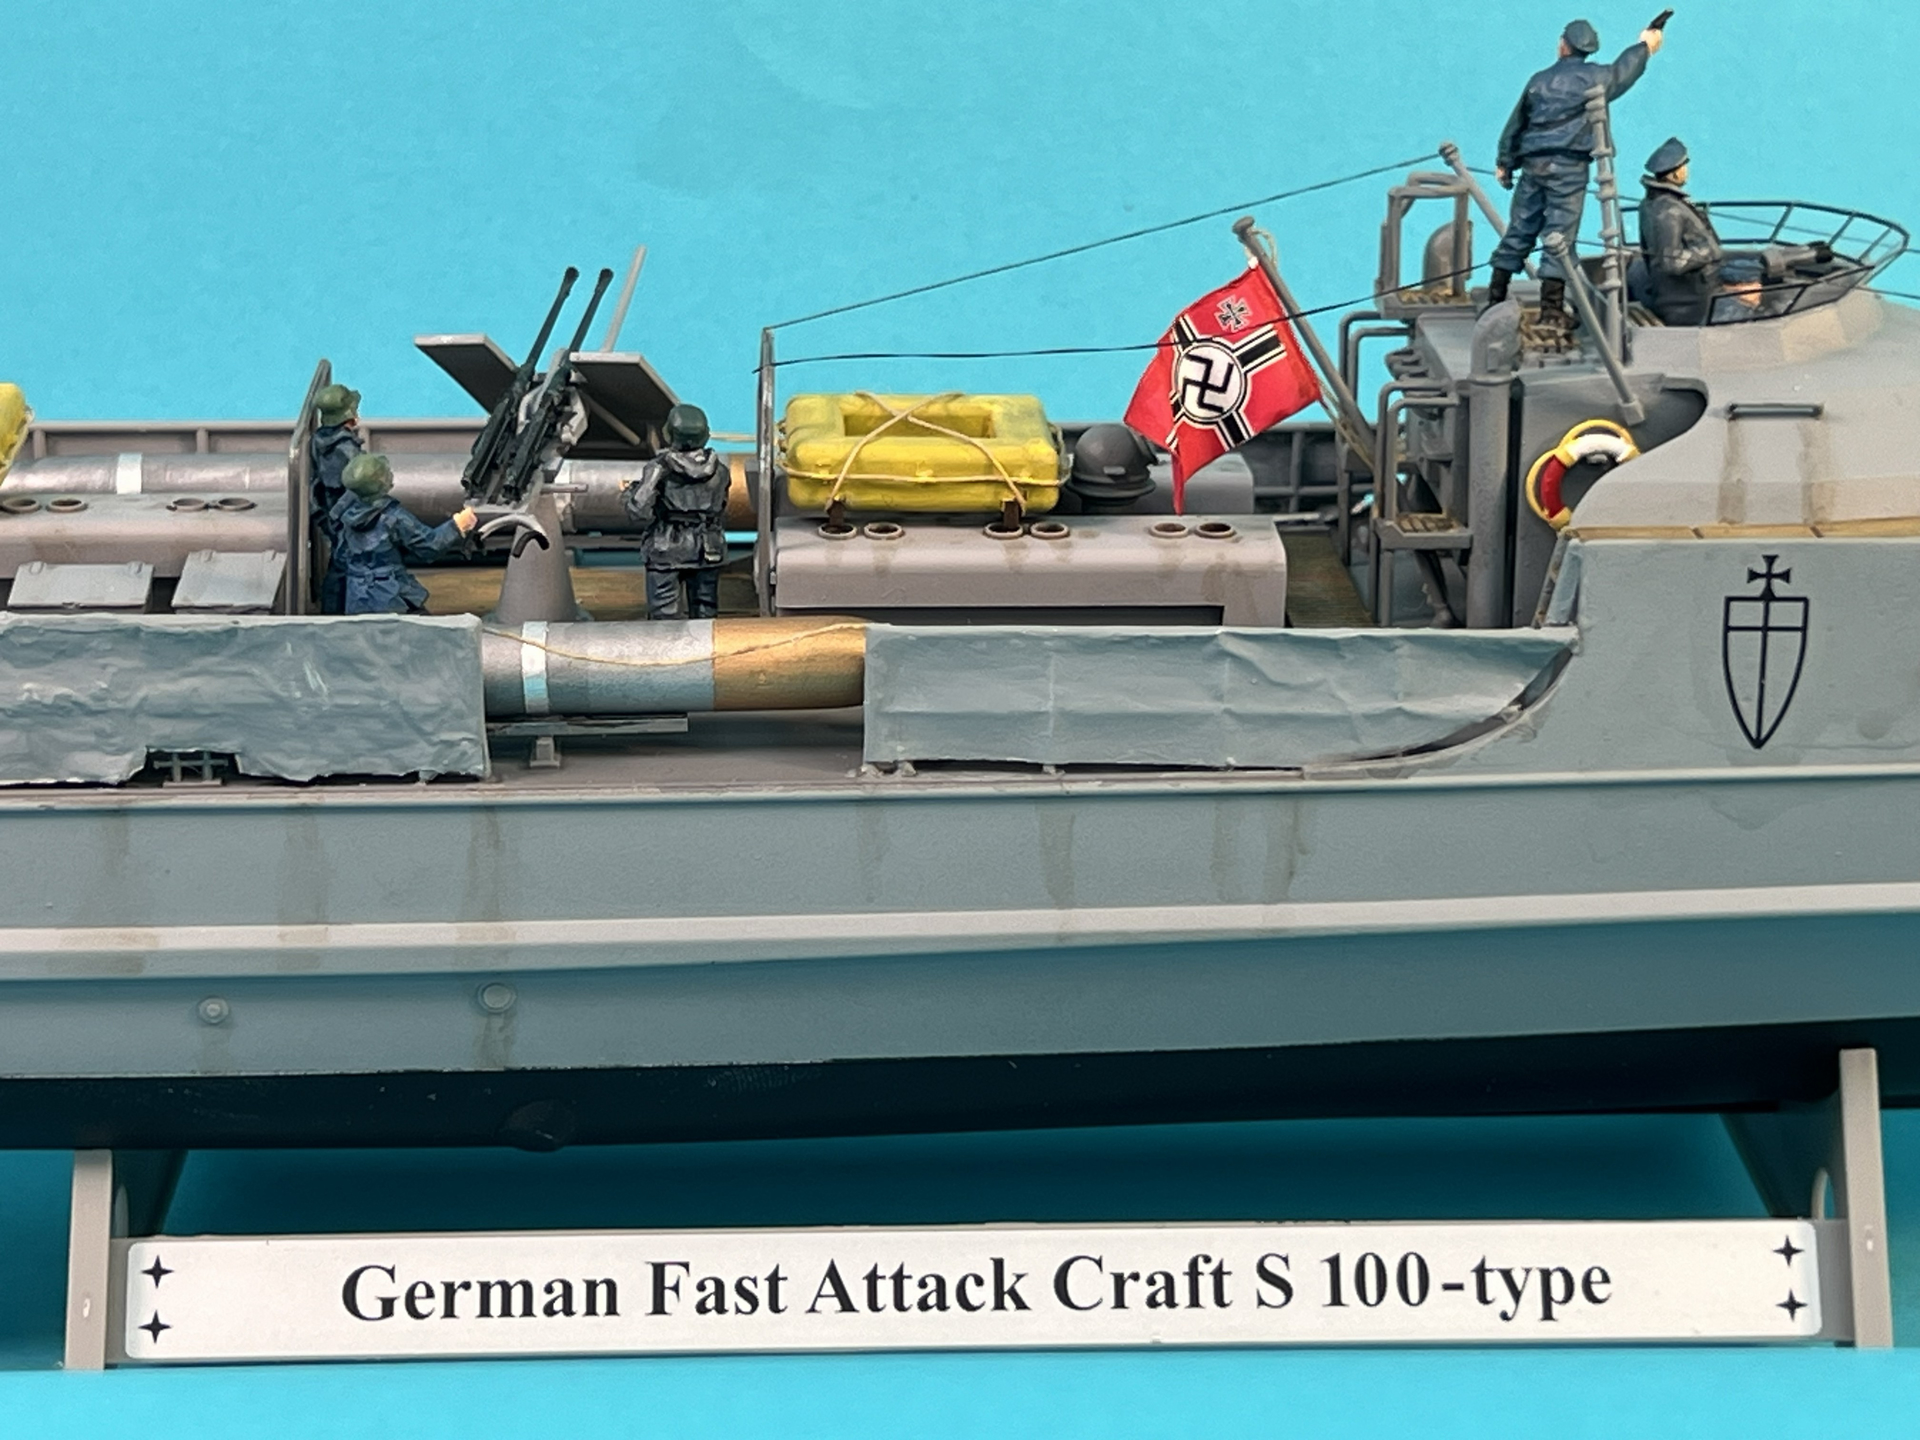
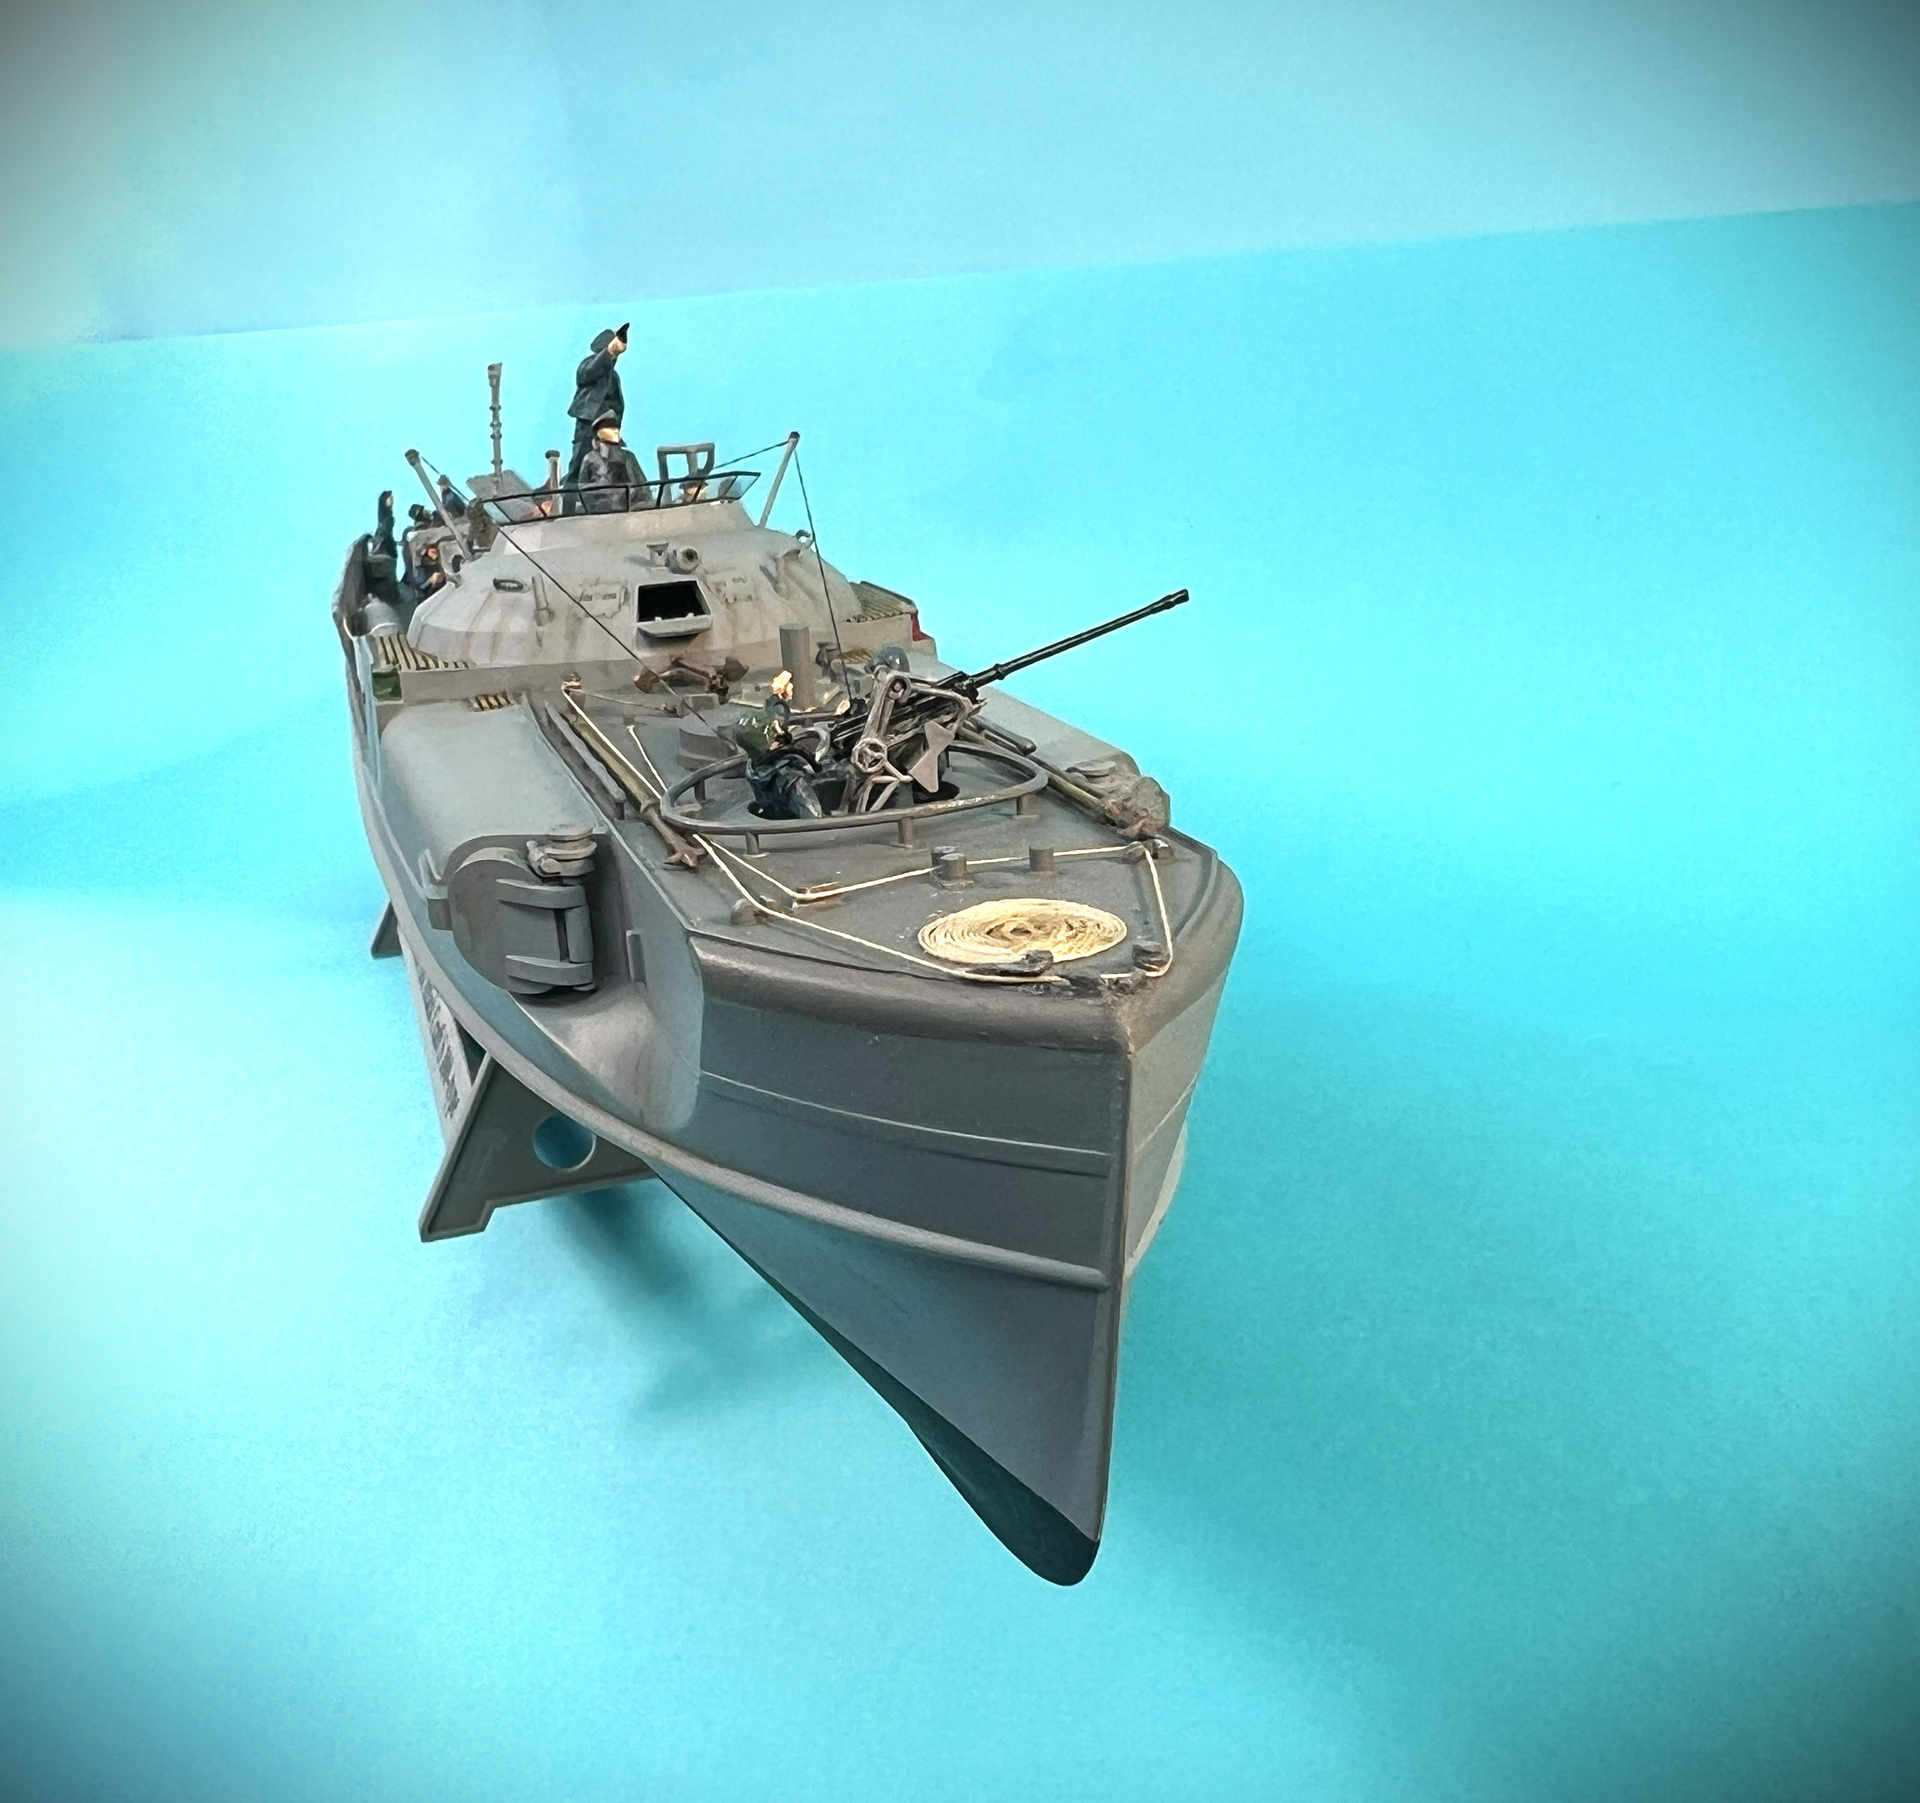
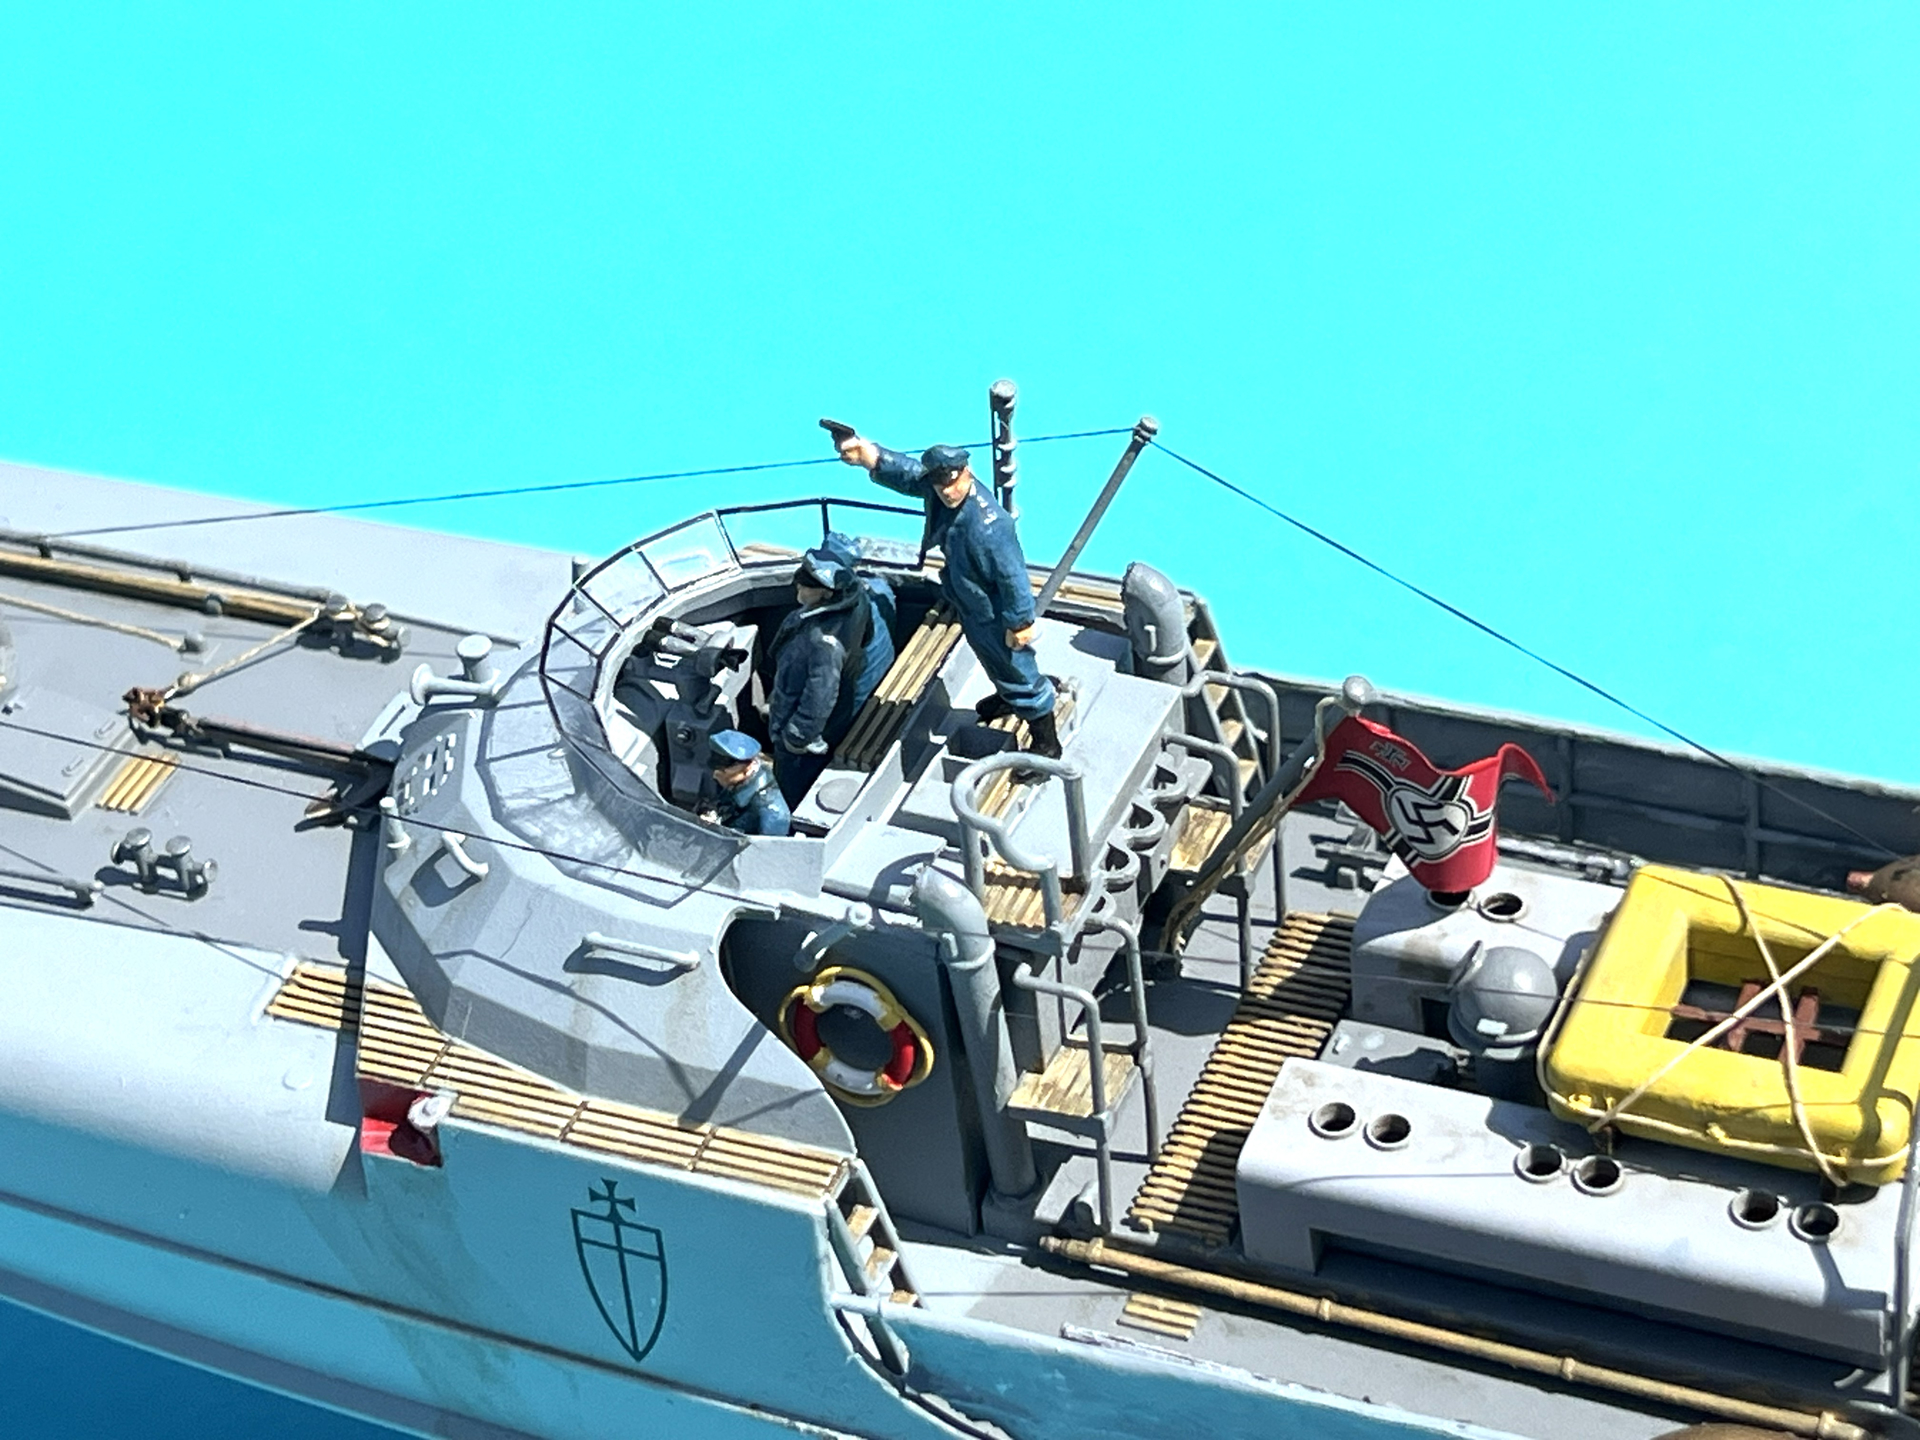
Okay. I am calling this one done. I submit for my entry in the Torpedo Away! campaign this Revell 1/72 scale S-100 fast boat. Much fun from January 2 to March 10, 2026. Pretty much out of the box build except for the added 13 crew members in the cockpit, at depth charges, and gun positions. Also added a canvas wind break at the mid gun guard. Many thanks for putting this group together as it motivated me to finish. Good luck to all!


22 Likes
That really is an awesome build Stu, looks fast even out of water.
Joe
4 Likes
Great build, Stuart! Awesome result and the figures really makes it come alive and show scale.
Congrats on finishing with a great build!
3 Likes
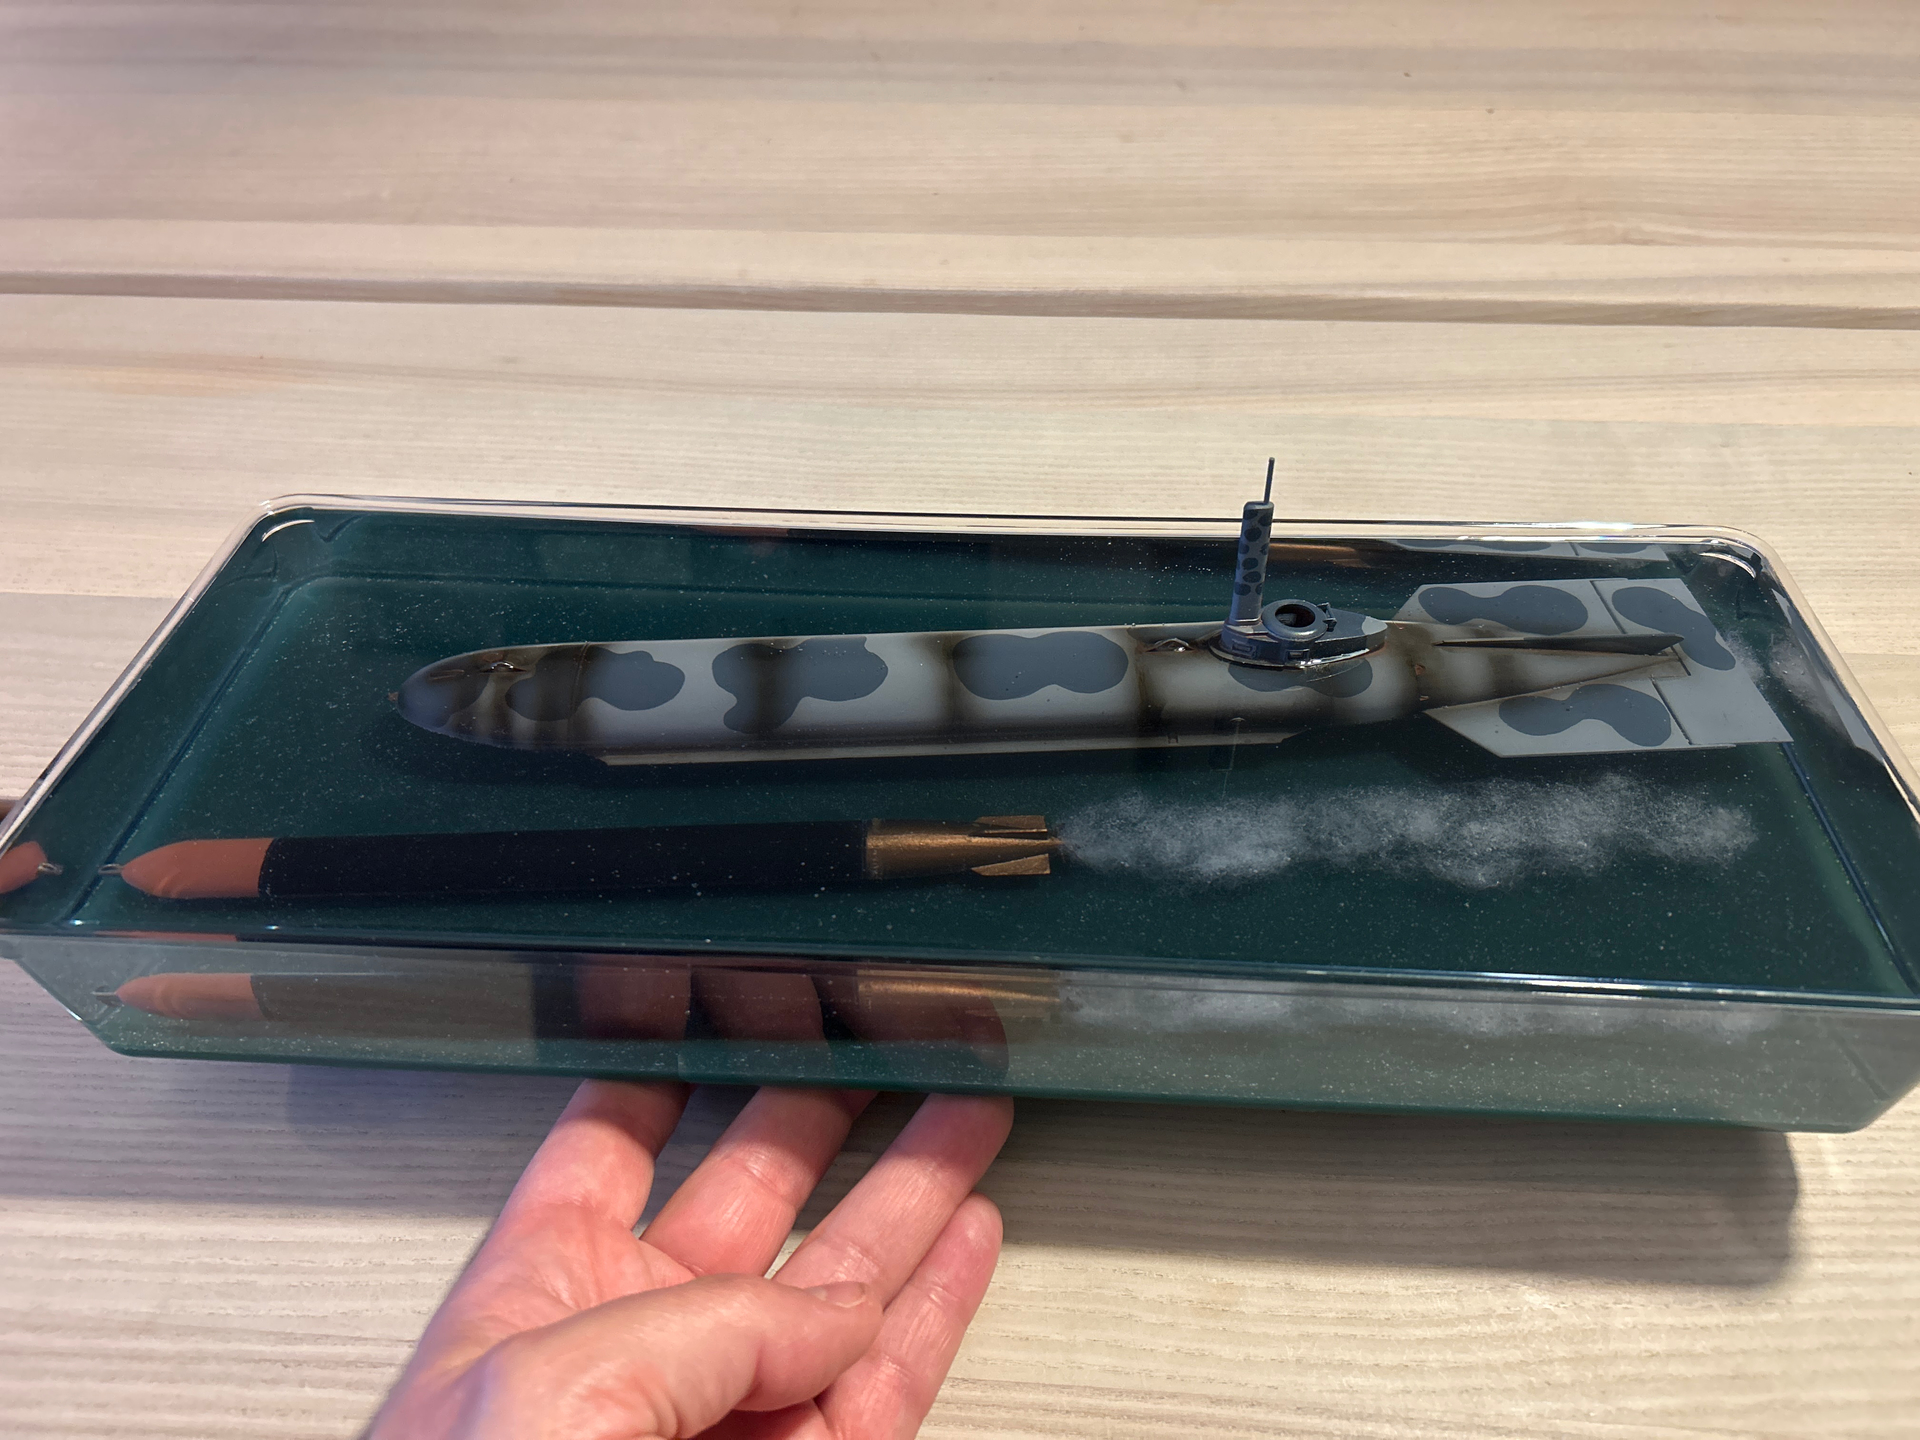
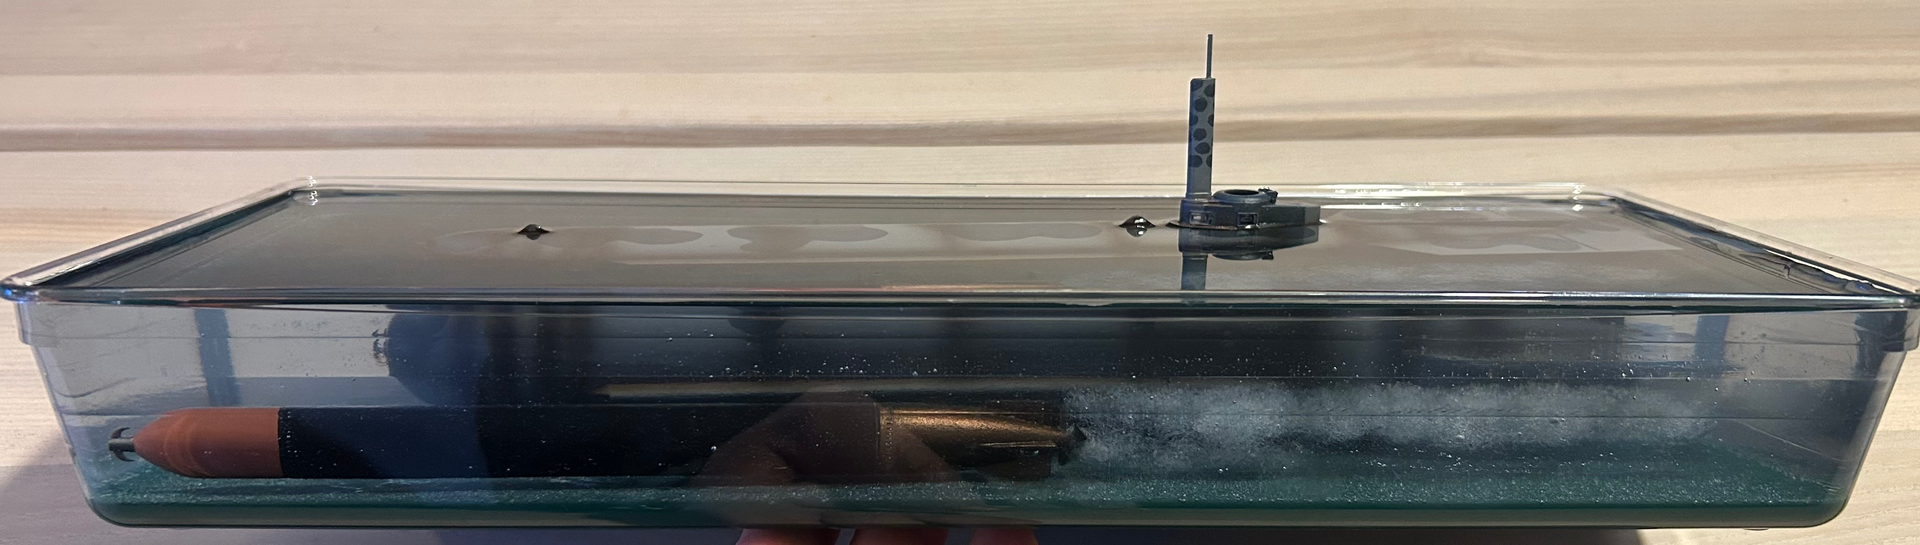
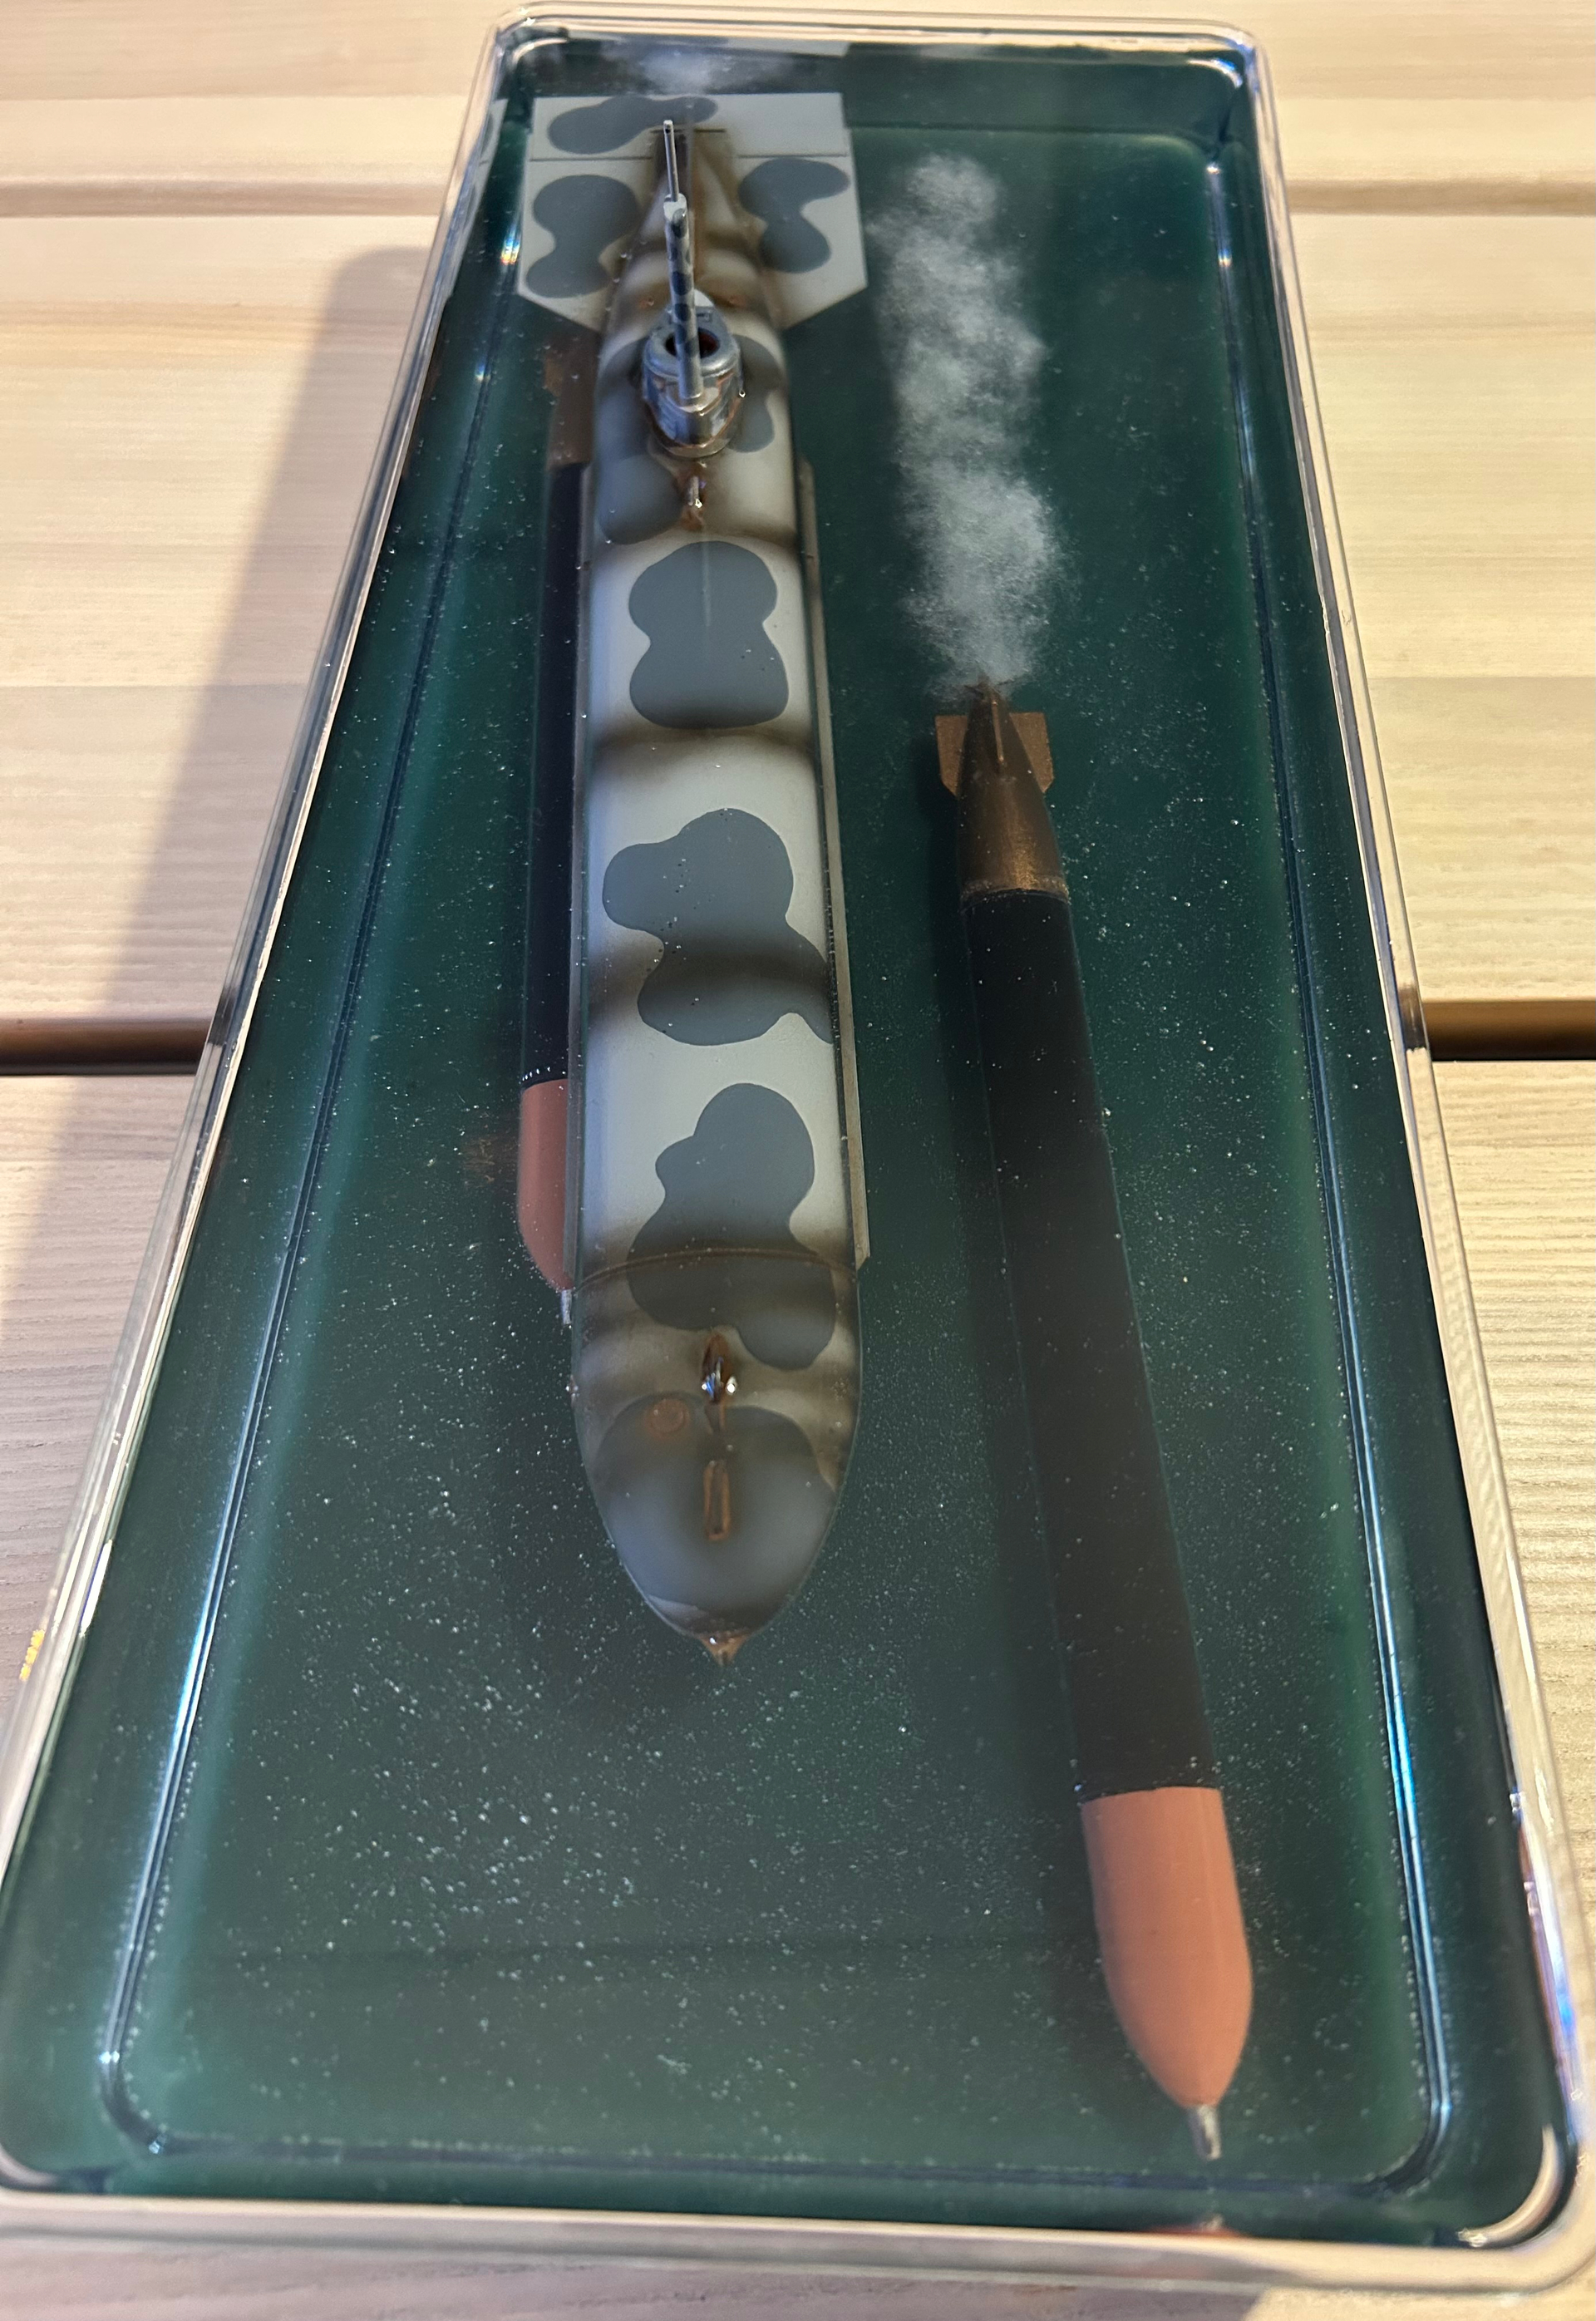
I am done with the resin. 6 layers - one pr. Day to get here. Next are the waves which I have tried once before in another build and did not really succeed with. Now for a second try ![]()
![]()
More to follow ![]()
19 Likes
This really looks great Jesper!!!
2 Likes
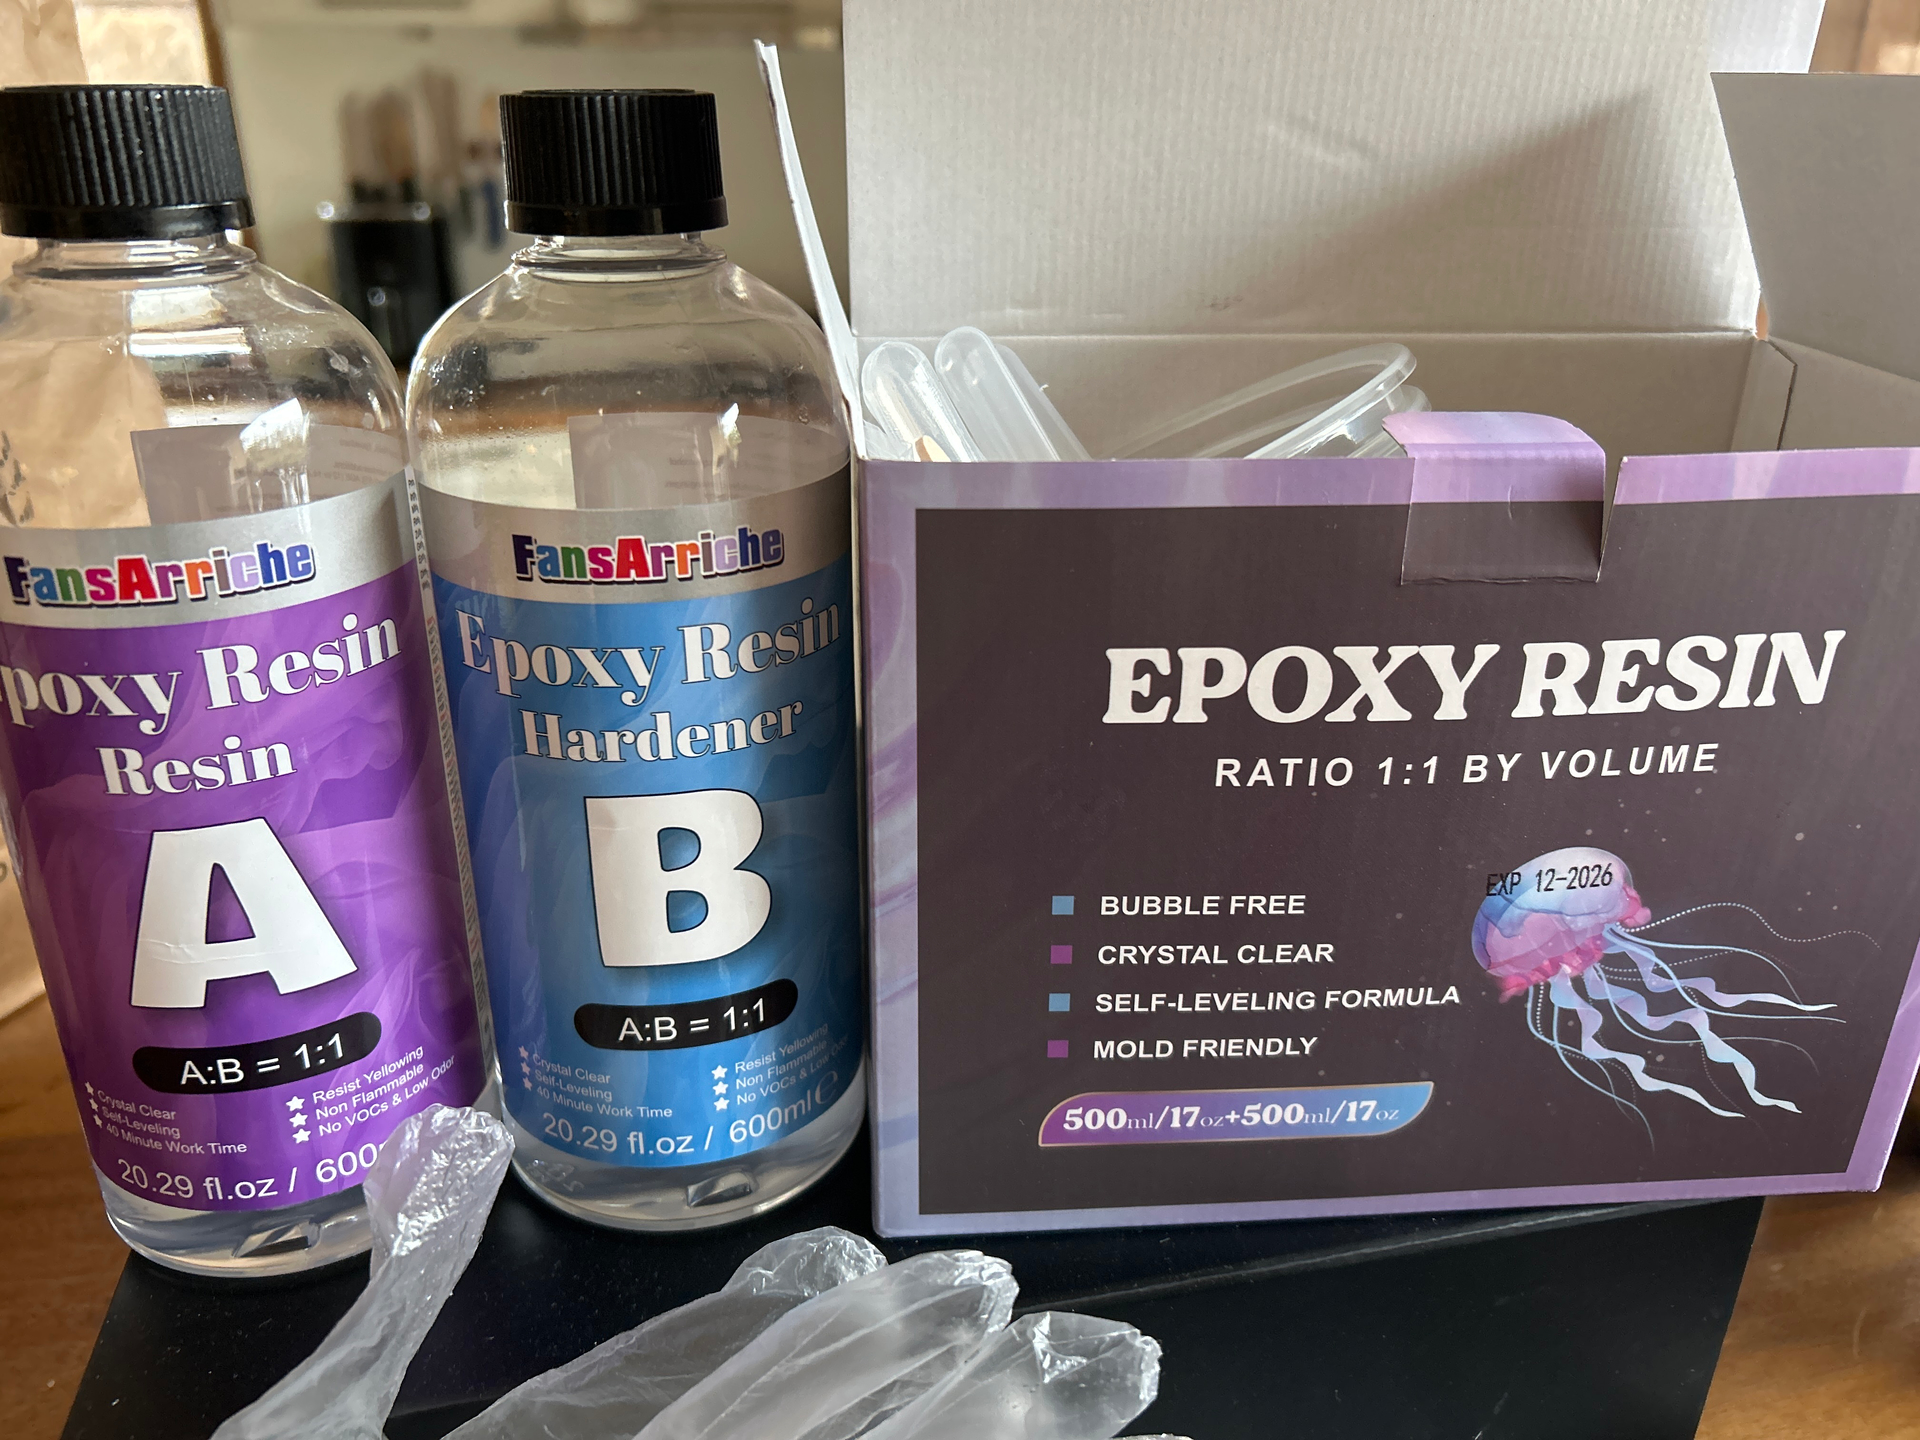
Thank you for looking in Joe and Jesper! This group has been fun to follow. Jesper, I have yet to attempt large water effects like your six layer clear cake there. How much heat does the resin cure generate around your vessel? This looks great with no hint of discoloration or heat distortion! Please share more details of your resin mix and pour methods?
2 Likes
Thanks for the comments, Stuart.
I use simple two part 1:1 ratio resin from Amazon. There are many brands - here the layers are actually from three different brands since I had different batches and had to buy more. So short answer, you can go with standard of the shelf crystal clear resin.
Use rubber gloves. Often included in the resin kits.
When you mix the resin make sure to use 1:1 ratio. If you do not mix 1:1 the mix can stay sticky and not cure completely or cure very fast and hot.
You stir the mix slowly in a plastic cup with a wooden stick ensuring to get into the corners of your cup. It is thick, so ensure everything is mixed. No need for mixing machinery, just normal slow muscle power will do.
Small bobles will form in the resin. Leave it for 15 mins to allow the bobles to slowly drift to the surface. During the process the resin will heat up. Do not do this in the hot sun on a hot day. The resin will turn solid very quickly and melt the plastic cup you are using. Been there - tried that. ![]()
Here I used layers of 1-2 cm. This ensures the resin will only get warm, not hot. No risk of melting plastic or cracking paint. In any case I needed layers to build up the torpedo launch and the underwater foam.
Gently pour the resin where you want it and wait for it to dry. Probably takes 12 hours to cure completely.
If you are pouring over something like a submarine and tank, make sure to fix it in place first. The resin is thick, so can push things around. I did not fix the Molch in this diorama, which was a major mistake as the side with the torpedo full of air tried to float up and turn the submarine sideways.
Once you have tried it a couple of times, it is very simple.
Hope this helps. ![]()
3 Likes