Torsten,
The cockpit really turned out quite well.
joel
Torsten,
The cockpit really turned out quite well.
joel
Thanks for your support, D! Much appreciated!
Peter, that are the photos I found on my first research of the C6N1-S as I have posted in post 505.
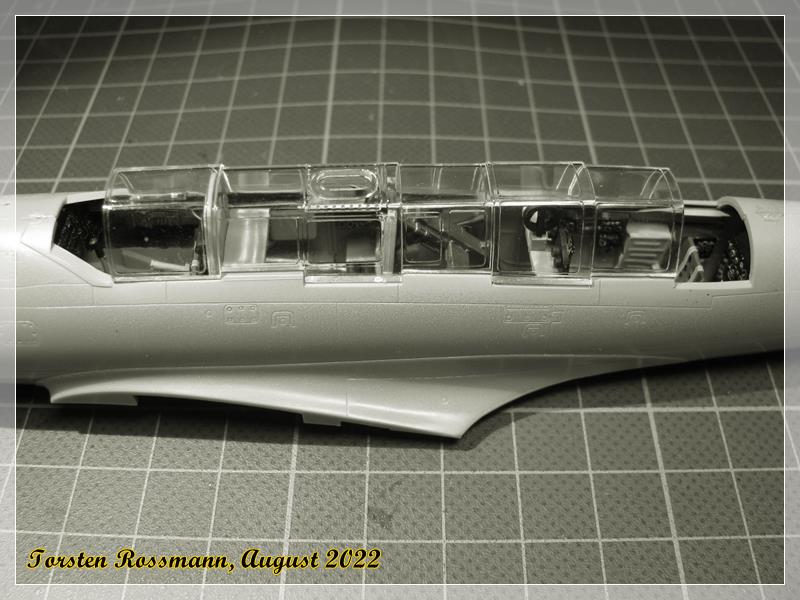
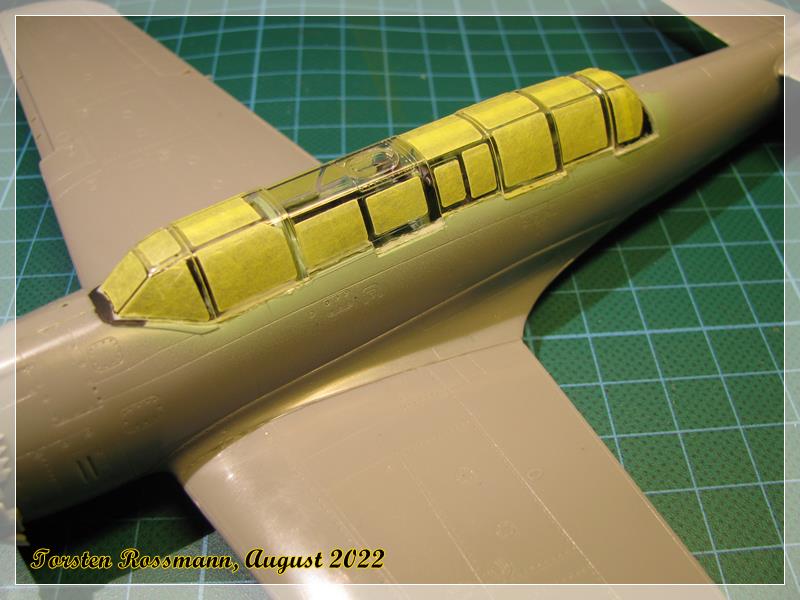
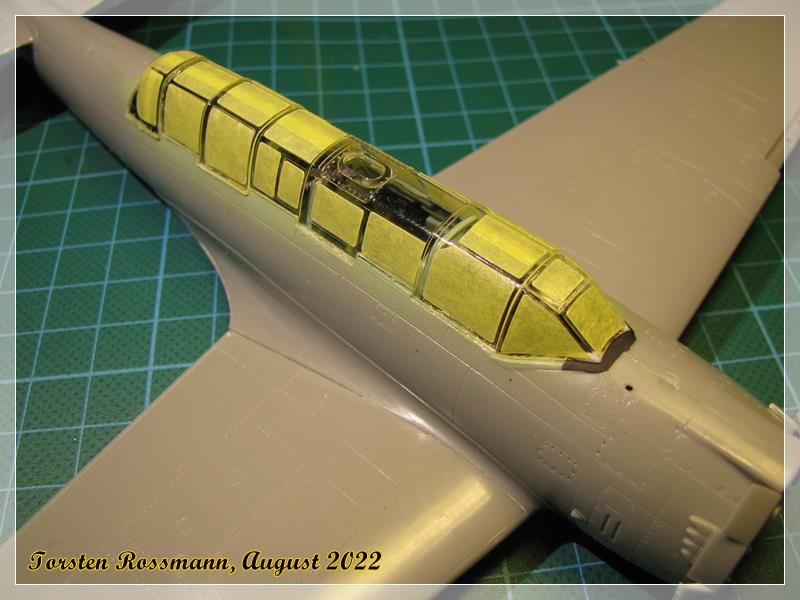
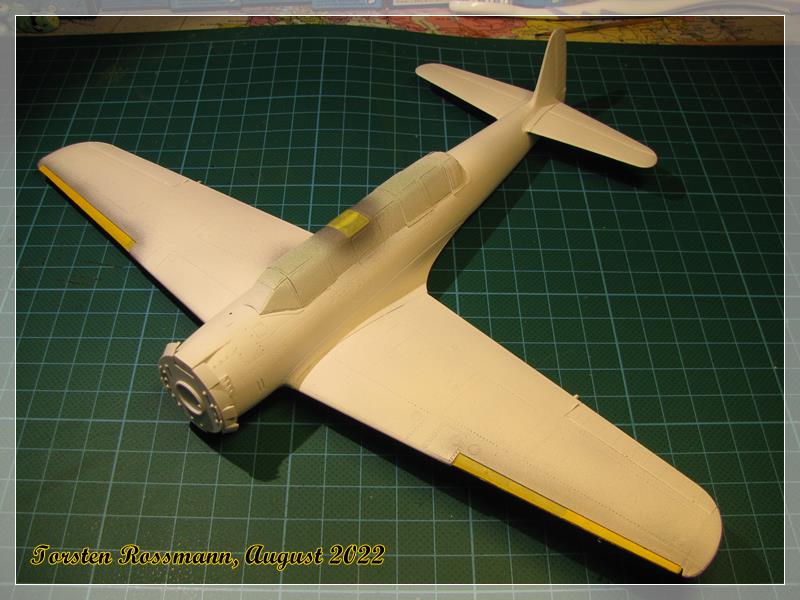
Joel, yes, I’m quite happy how the build proceeds so far. And the canopy just told me that I did everything right. This is just test fitting … ![]()
Torsten,
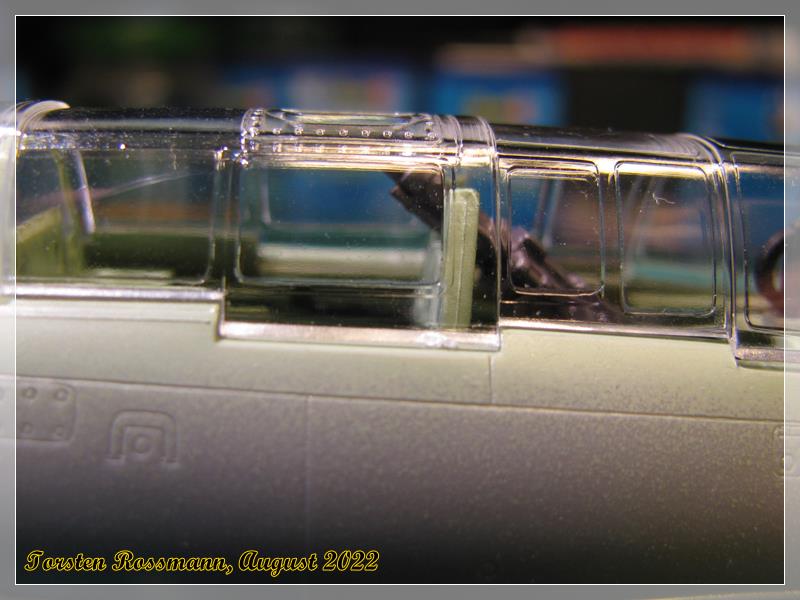
The canopy looks like an absolute perfect fit.
joel
Ya gotta love it when a decent model kit meets the hands of a true master. That interior looks great, like it came out of the factory. How are you going to do the window masks?
Wow, that canopy is really nicely fit! ![]()
Don’t praise the day before the evening, guys!
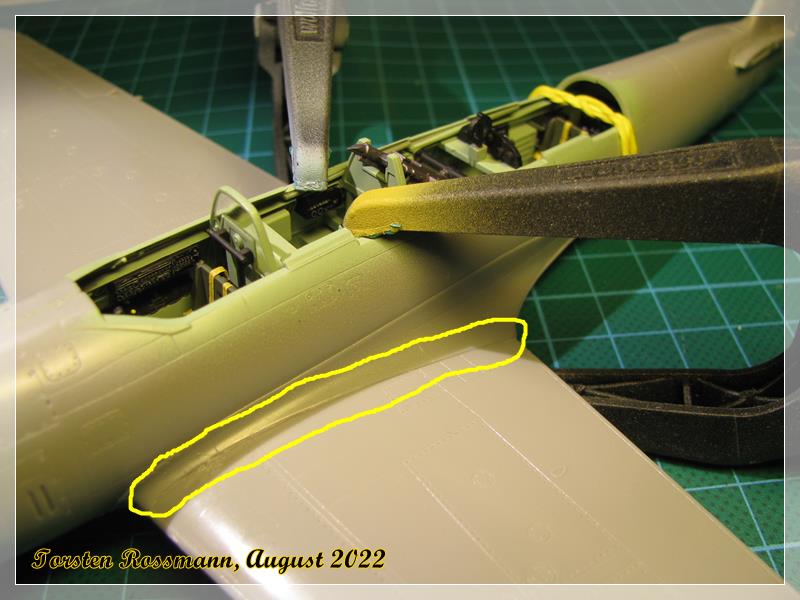
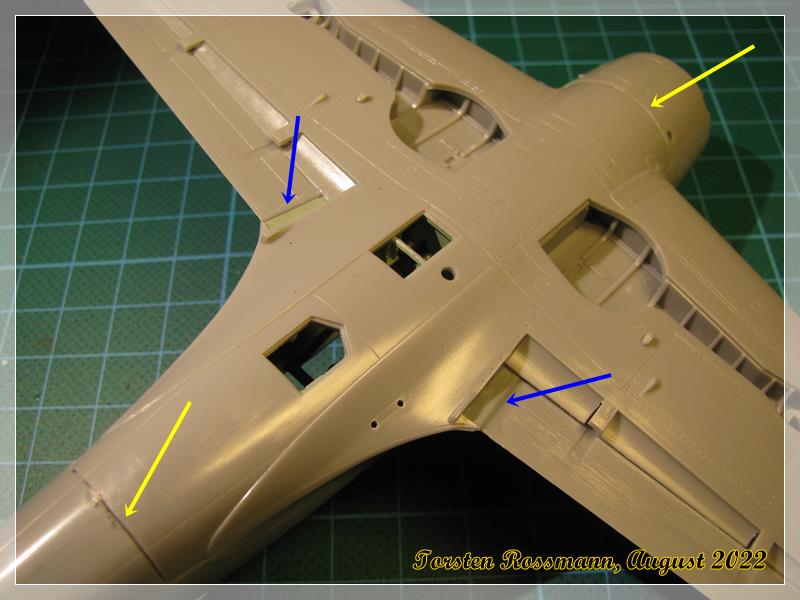
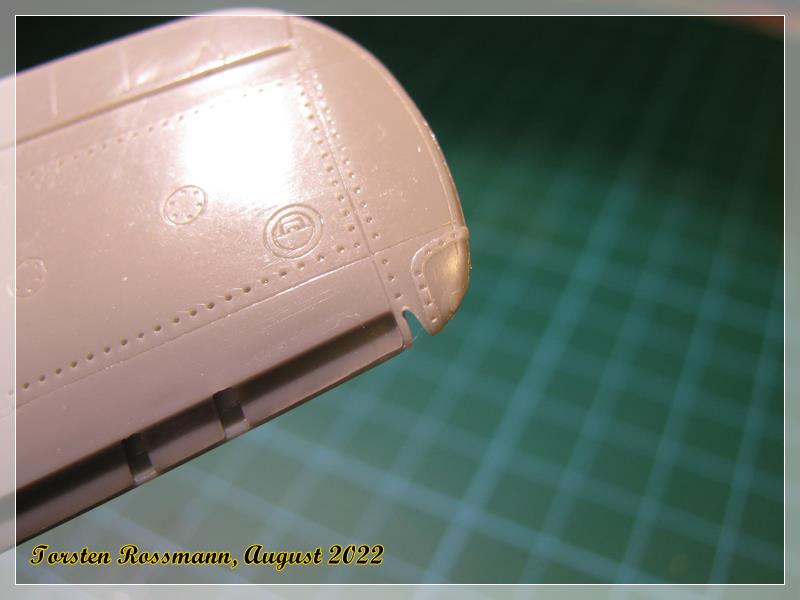
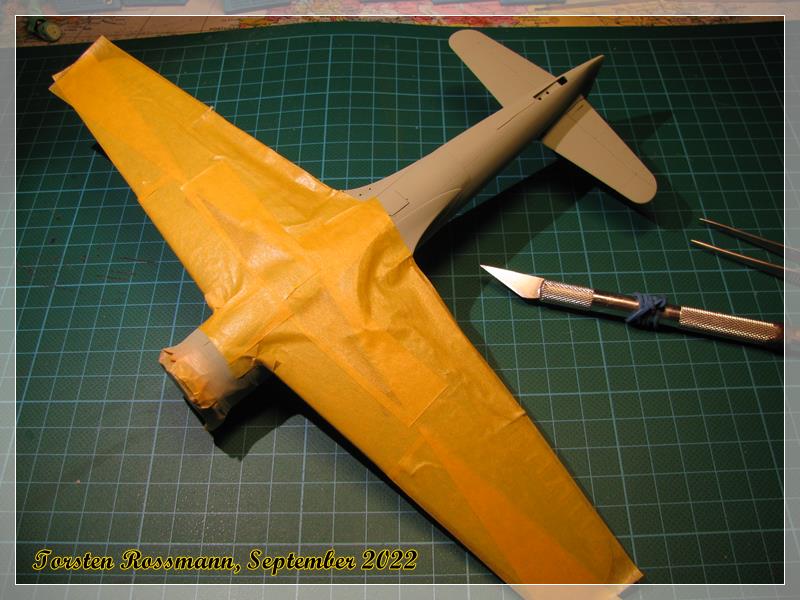
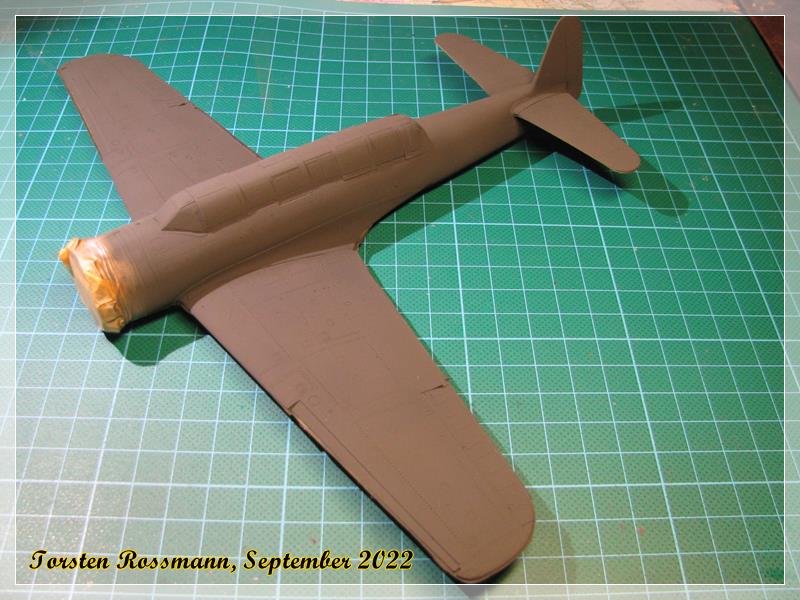
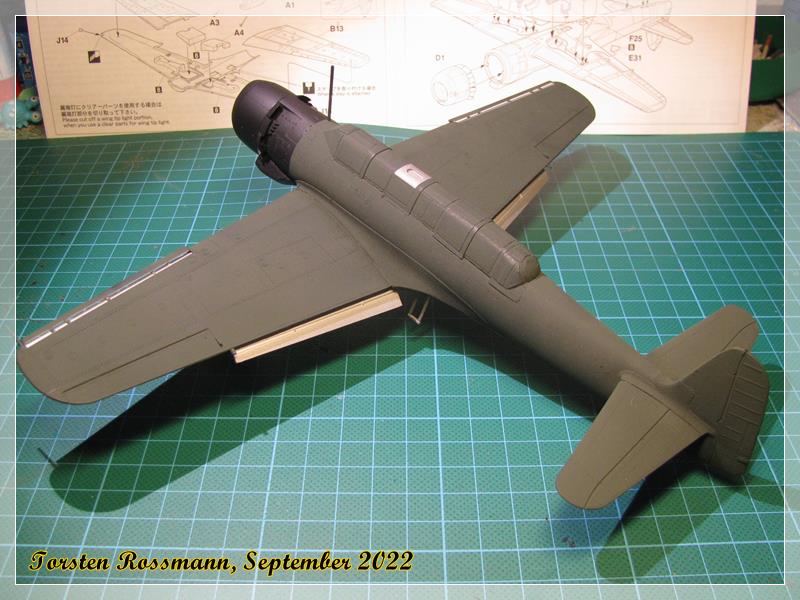
First massive fitting problems show up now. During test fitting the wings to the fuselage I noticed big gaps at the transition and the underside. While testing what to do against it I noticed that with the use of my 2 Wolfcraft clamps I could reduce that issue to a minimum. They are big and strong enough to keep the whole part under control. I should get a few more of these …
… I put glue from the underside into the gap (see blue arrows) and after 24 hours in the squeeze the result looks quite okay here but on the other side there’s still a small gap. Have to think about it. Maybe a little bit of glue already helps. But sanding is obligatory anyway …
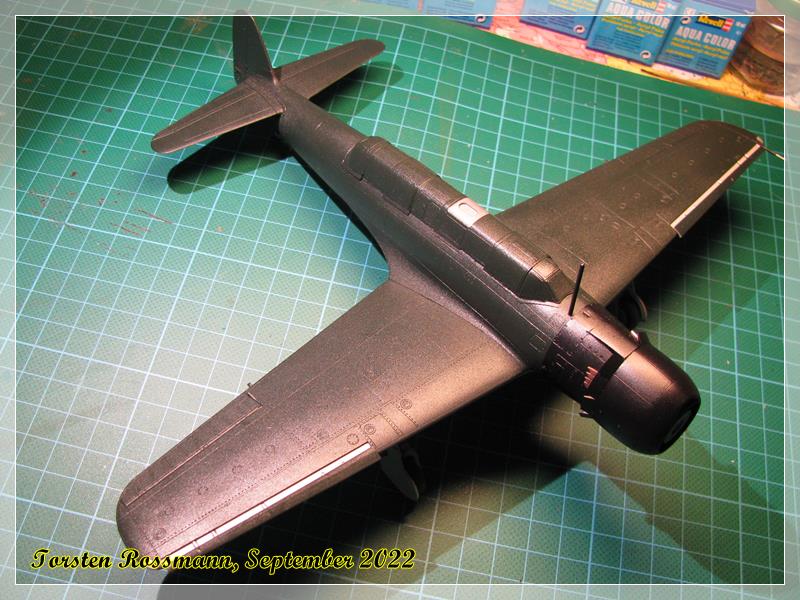
… sanding alone won’t help on the underside (see yellow arrows). So filling and sanding hopefully will do the job. But I’ve got the parts together finally. I’ll let you know soon …
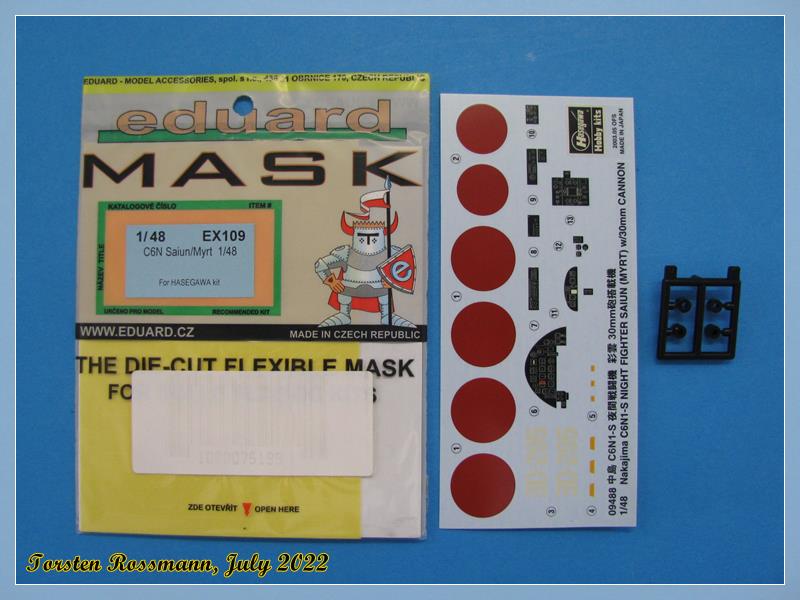
HG, for the canopy I will use the Eduard mask EX109 …
Torsten
![]()
The AH-1Z Viper evolved from the AH-1W Super Cobra. This helicopter is used by the US Marine Corps. It follows the line of the venerable AH-1 Cobra, which was the world’s first dedicated attack helicopter. A total of 189 Vipers will be built. Most of them will be upgraded from AH-1W airframes.
https://youtu.be/aGMxcBjNdvg
Others will be newly-built machines. The Viper was introduced in 2010 and full-rate production began in 2012. The AH-1Z Viper has new engines, a new rotor, uprated transmission upgraded avionics, and a new target sighting system. Upgraded helicopters have improved flight characteristics. This helicopter is fitted with an infrared suppression system, which covers exhausts.
Loath the person who made that sadly correct phase LOL. Nicely done and a treat to follow.
Thanks HG! Great to hear from an expert like you that my work is worth to follow.
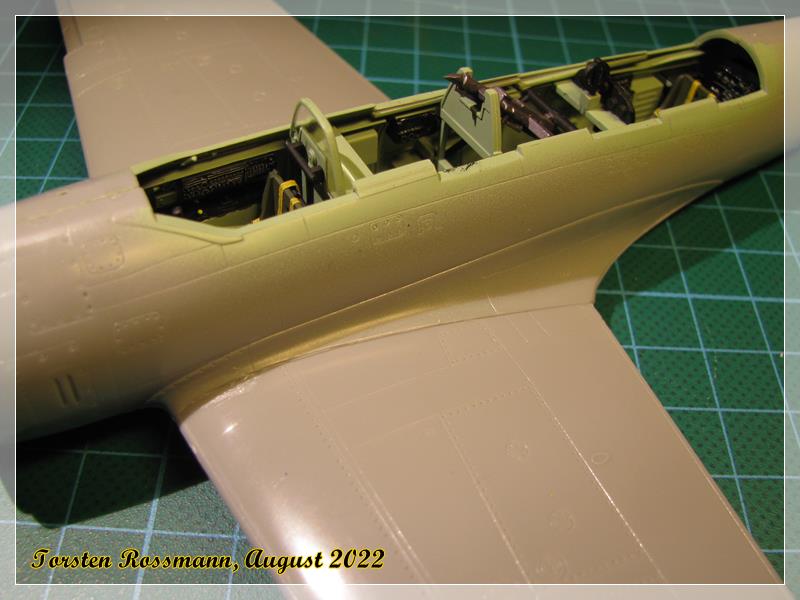
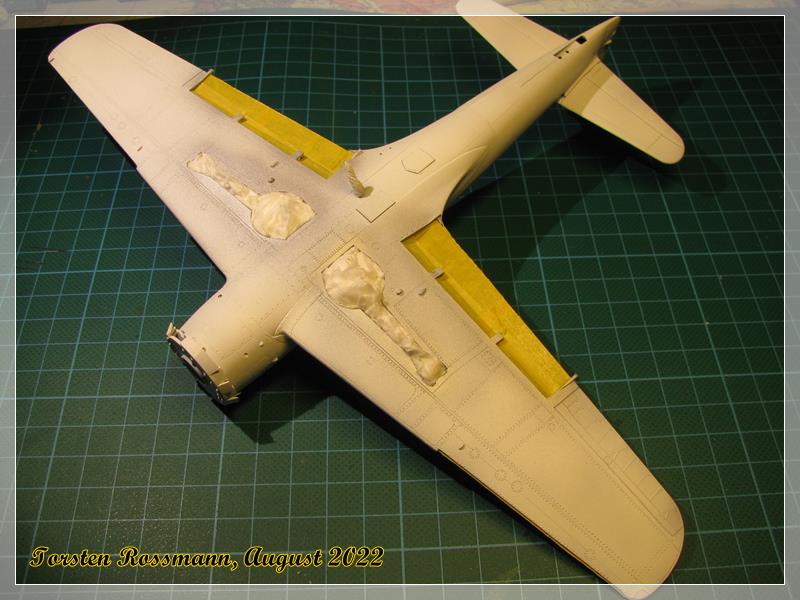
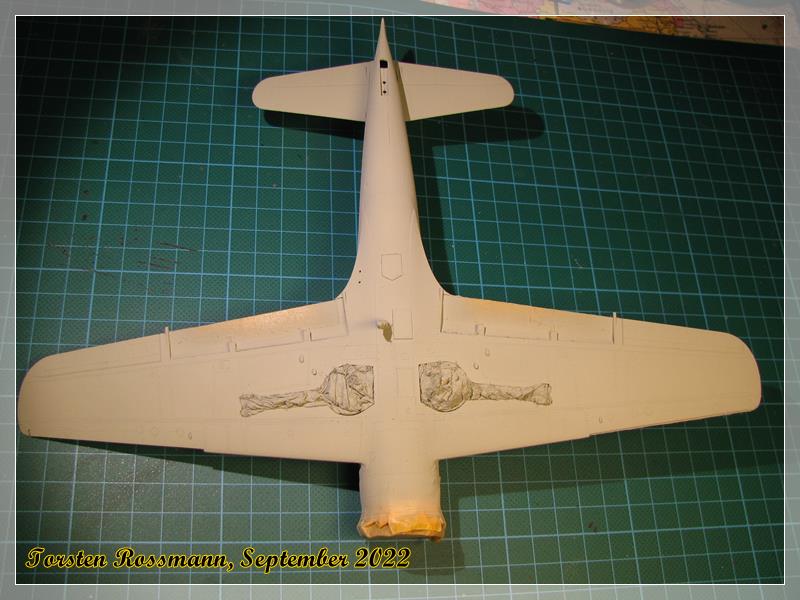
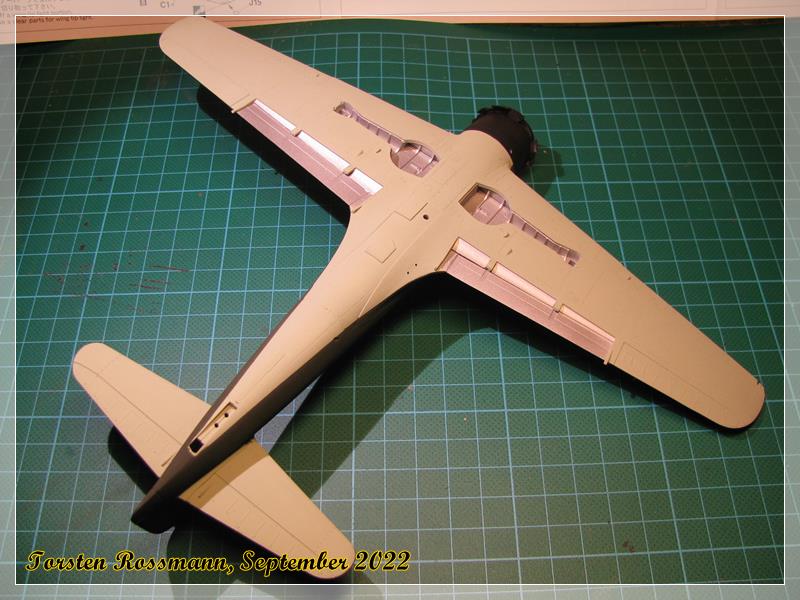
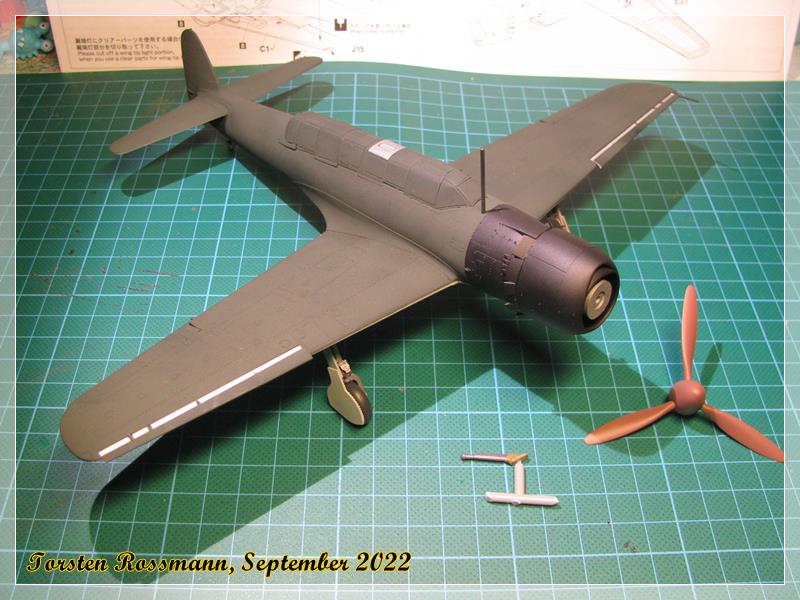
A small update from the C6N1 today. It was some filling and a lot more sanding to do over the past few days. This is the best result I can achieve on the underside …
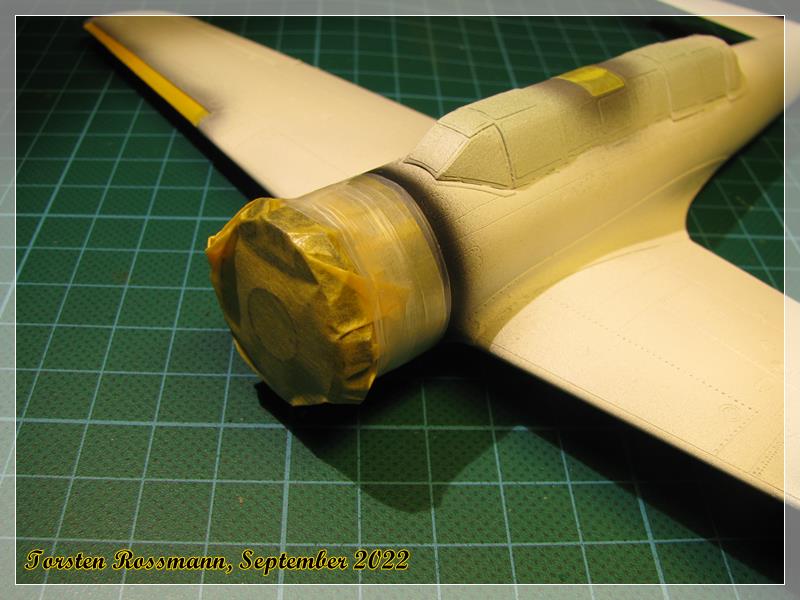
… the canopy is also masked by now. The mask EX109 is made for the recon plane and not for the night fighter, so some parts of it are not needed …
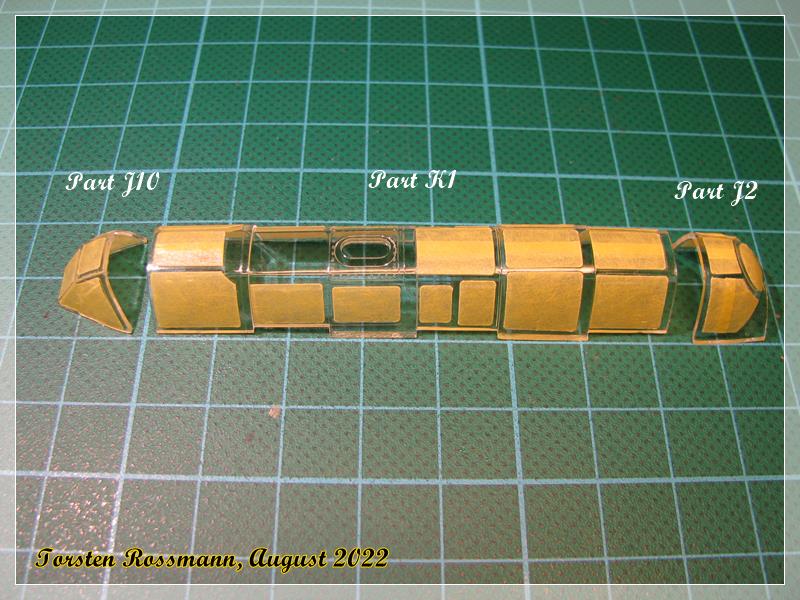
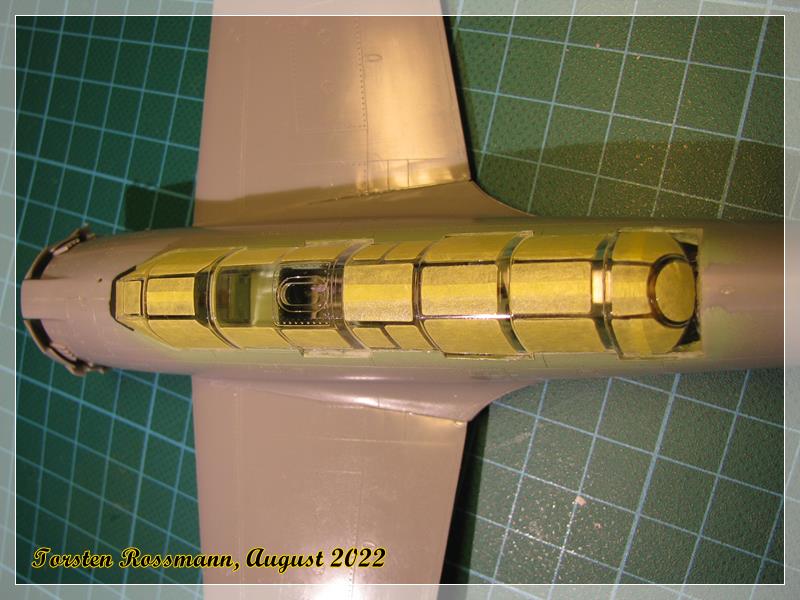
… and attached to the fuselage. I have used Micro Kristal Klear. There’s a little misfit of the rear canopy part J2 …
… for the small tail light there’s no mask so I have used a fluid mask (Revell Color Stop) …
… clear parts can be used as an option for the position lights and I wanted to use them but here you can see a hole for the pitot tube. If I would saw the plastic position light off, the small part in-between might come with it, so I’ll better stay with the plastic light here … ![]()
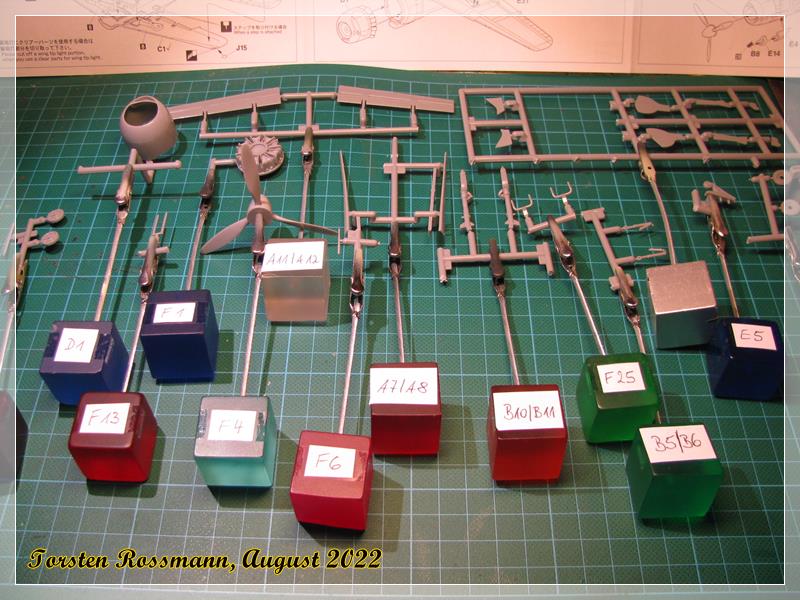
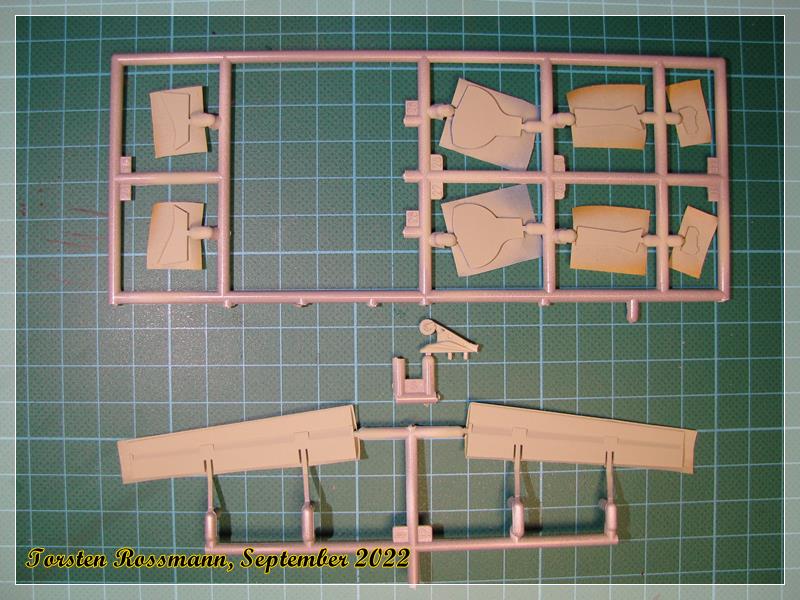
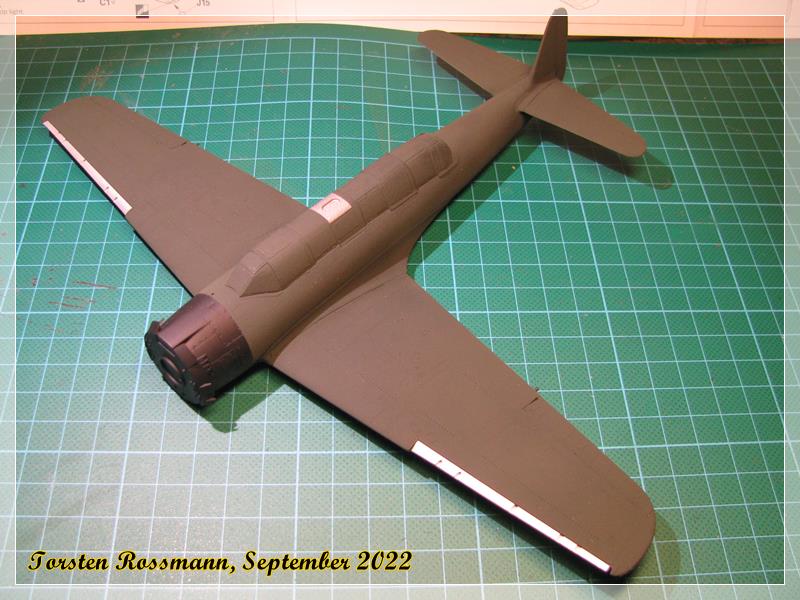
… finally many small parts made ready for painting … ![]()
… primer will come on Sunday, I hope I can start painting next week. Have a nice weekend!
Torsten ![]()
Coming along nicely Torsten.
Would it be possible to drill inside the curve inside the frame around the light, then saw through to that, then sand off the frame on the clear part?
Torsten,
fuselage putty and sanding looks perfect in the pics. Nice job on the canopy masking. As usual, your getting ready to paint pic with everything organized and labeled, puts my ad hoc get ready paint trays organization to shame.
joel
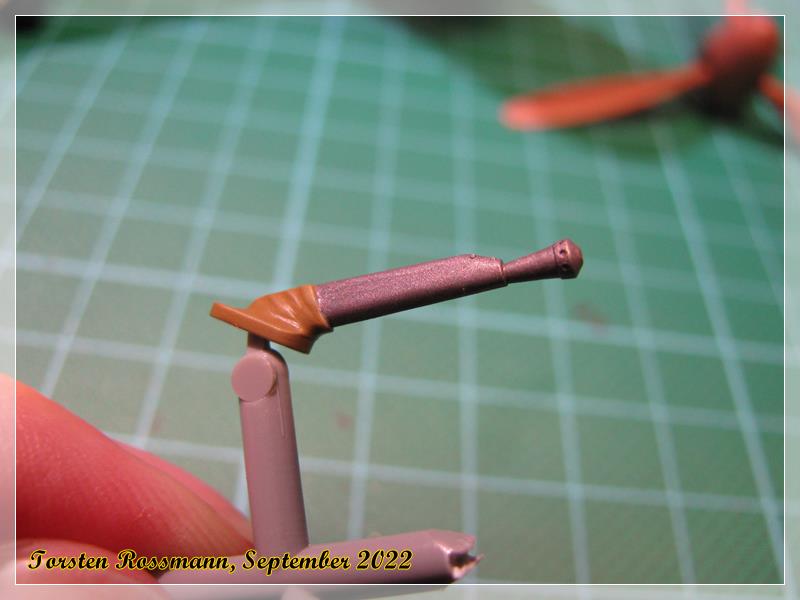
Thanks for the advice, Peter! I thought about it but it’s all too risky for me so I better stay with the lights how they are. The excellent Eduard Bf 109 also has no clear parts for the position lights and the C6N1 is a 20 years old kit …
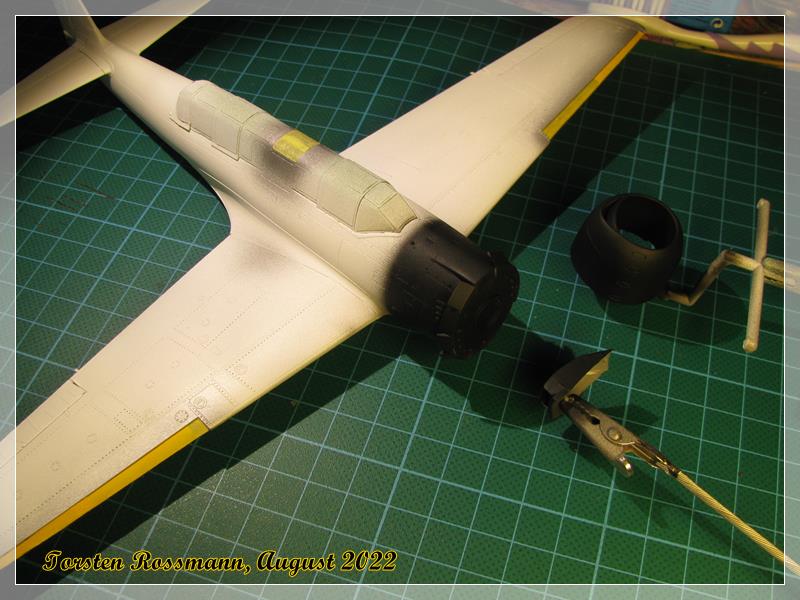
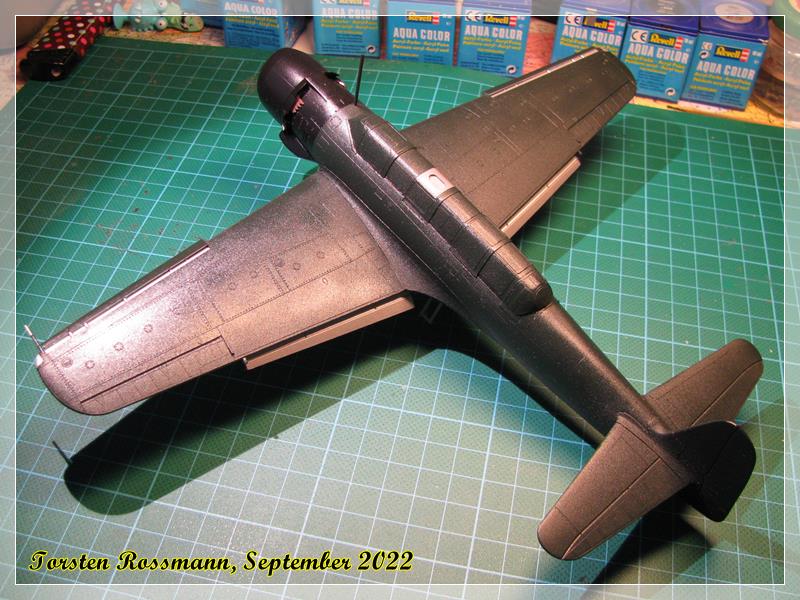
Just a small update from the Myrt today. After primer I painted some parts with Revell Aqua 99 Aluminium and started masking …
… for the wheel wells I use moist kitchen tissue. When it’s dry, it’s hard like paper maché …
… a bit more painting on the cowling parts with Vallejo 71057 Black …
… more masking will follow now before more painting but after the weekend break. I’ll be away to Switzerland ![]() for a few days and will “re-start” on Monday with the build.
for a few days and will “re-start” on Monday with the build.
Have a nice weekend, guys!
Torsten
![]()
Torsten,
Your Myrt is looking good, especially the bottom where you had fit issues. looking forward to seeing some final paint on her sooner then later.
I concur that taking the safe route especially on a 20+ year old kit is the smart move to make.
Have a great weekend on your mini vacation to Switzerland.
joel
Thanks Joel! ![]()
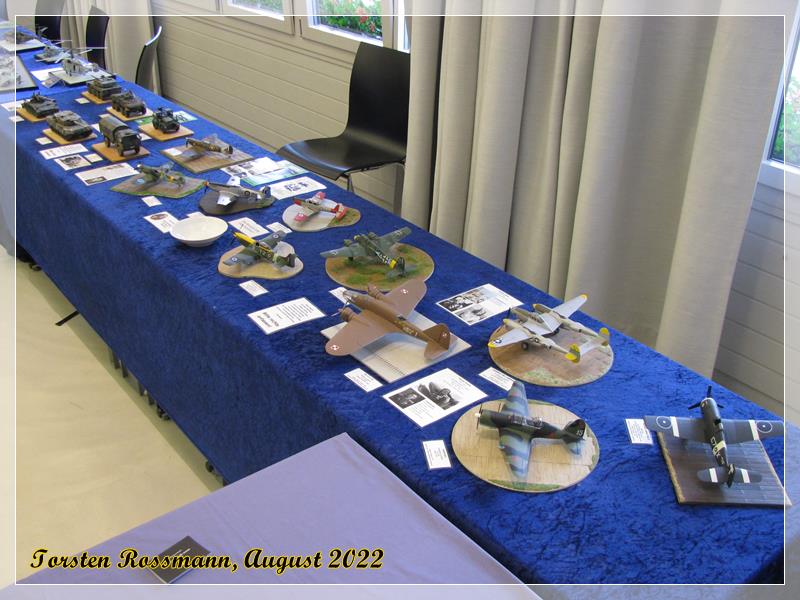
I really enjoyed my stay in Andelfingen, a small village between Schaffhausen and Winterthur, just a few kilometers behind the swiss border. It always feels like a mini vacation and it was - of course - a model show I attended there. We had a great time with a lot of chatting and laughing. It was my 3rd model show this year and I still have 2 more in September and October. That makes 5 in 2022 which isn’t bad for the restart after all the Covid 19 cancellations in the last 2 years. This was my table on Saturday morning before I filled the candy bowl for the “little fingers”. As you can see both Mustangs were there and it looks as if they wait for some candies, too … ![]()
Some progress on the Saiun is also done and as Joel wished, the C6N1 has also got some more paint. First I masked the cowling with Fine Line Tape and Parafilm M …
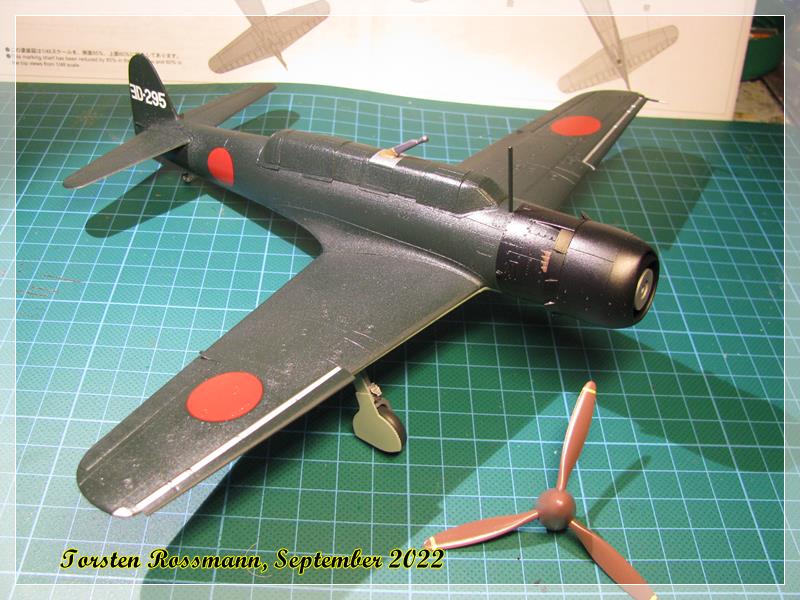
… Friday I painted the underside plus flaps and landing gear covers with Tamiya XF-12 IJN Grey, thinned with 40% IPA. The paint looks really dull now on the model …
… right now I’m masking again the underside for painting the upperside with Tamiya XF-11 IJN Green
… I hope to finish the main painting by the end of next week. Prop and wheels were painted this morning. Stay tuned for the next update.
Torsten
![]()
Torsten,
Sure sounds like you had a great time. I only wish that the conventions, and get togethers were more like what you have then so contest orientated here in the states. I long ago gave up competitions and just build for the enjoyment of it, and every once in a while gaze at my completed models in their display cases.
Nice to see some cameo paint going on. looking forward to seeing the topside done as well in your next update.
joel
Thanks Joel! Yes, we had all a good time there and the expo had indeed a little contest but of course I didn’t take part. Talking to friends I may meet only once a year is more important to me than seeing judges critizing models. So I sat in the cafeteria with others while prizes were given. The weekend was again too short …
Surprisingly two of my older models got the most attention. First the Hs 129 B-2, the old Hasegawa kit with AM decals, which I’ve built several years ago. The other one was the PZL 37 A from Mirage Hobby, a real putty and sanding monster ![]() I’ve seen this kit also only once built. Who ever saw a polish bomber?
I’ve seen this kit also only once built. Who ever saw a polish bomber?
Just a smal update from the Saiun, fresh from the paint bench this evening. Painted with Tamiya XF-11 IJN Green I’ll leave everything to dry thoroughly before I check if I have to go over some parts again and demask …
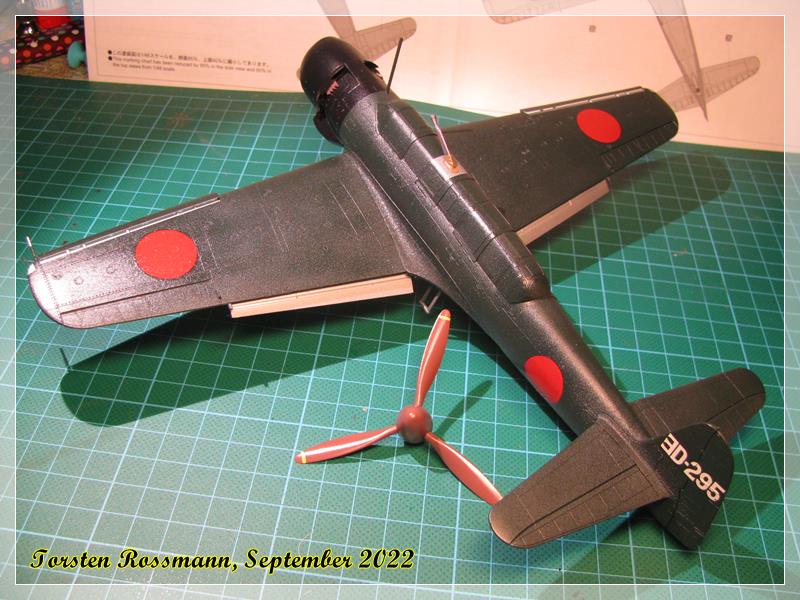
The C6N1 made a big step towards the finish line this week. After painting the uppside with Tamiya XF-11 IJN Green it was time to demask. While I needed 3 evenings to mask everything, it took only 30 minutes to take it off again …
… and this is the result. The green surface looks a bit rough now, as some paint was already dry before it “touched down” on the model. I see what I can do with Bodenglänzer later. Tamiya paint is reeeeally flat … ![]()
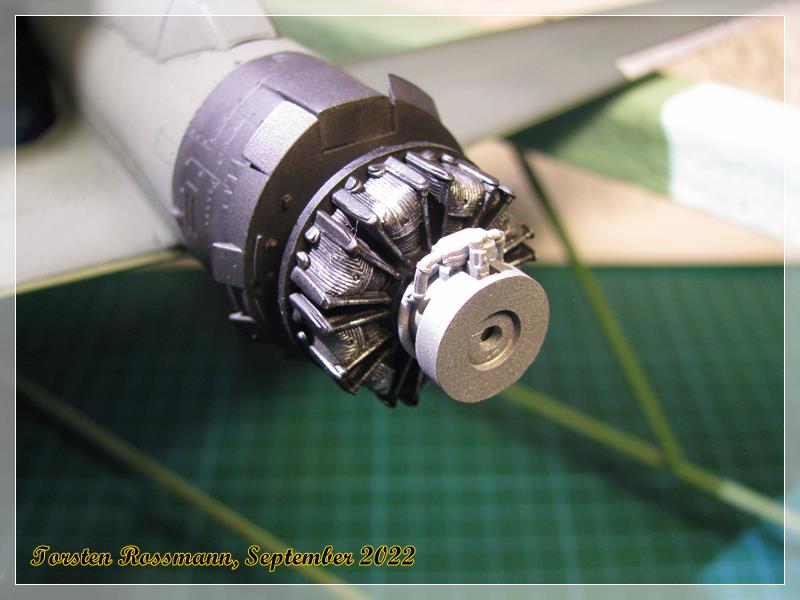
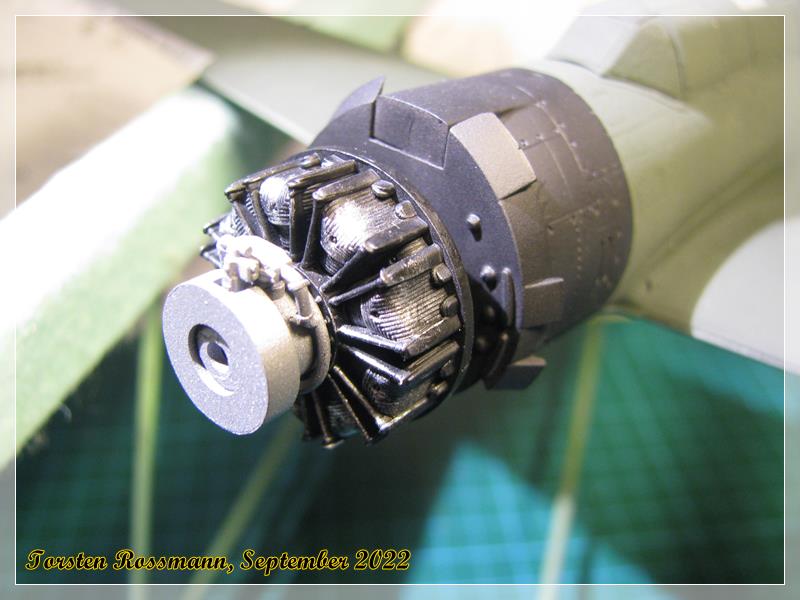
… the Homare 21 engine. Not much of it will be seen later because of the big cowling and propeller hub
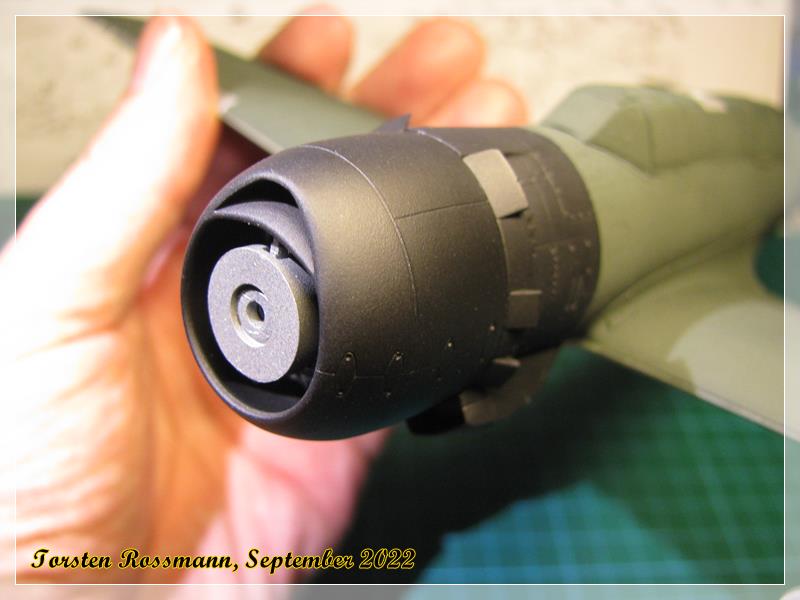
… what I just said … ![]()
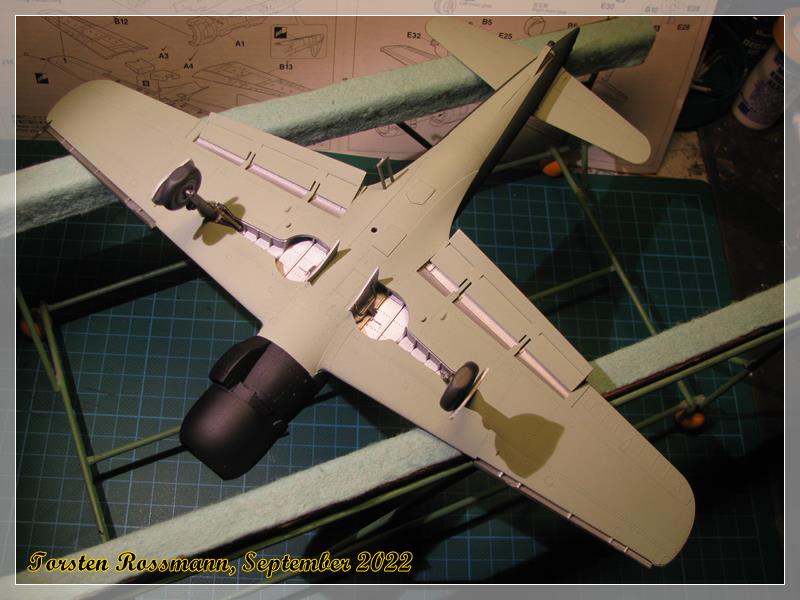
… finally the landing gear and covers, flaps, slats and antennas are attached. The Fowler Flaps look interesting and attaching the slats was a bit tricky …
… the upper part of the 30 mm cannon which will join the build later. A brass made part from Modellbau Schatton would look far better than this but there is none. The Saiun Nightfighter was a sole aircraft and I don’t think we’ll see many models of it built. It’s also not a very well known plane.
There are still some touch ups and detail painting to do. I see how far I get this weekend before I’m offline from my bench for a week of holidays.
Have a great weekend!
Torsten
![]()
Torsten,
The upper Tamiya Green looks darn good in the pictures. If a little rough to the touch, a light rub with a finishing grade of emery papers from 4,000 and up will do the trick. A good auto supply or even a repair shop has them.
I’m always amazed at just how little time it takes to remove hours or even days of masking, but the reverse would be worse having to wait to see what the final results look like.
Nice job on installing those slats as they look even across the wing and just as important to each other (an issue I always use to have). A shame that so much detail painting of the engine gets completely covered up. But with the addition on the landing gear, she now sits on her own legs and finally looks like a proper aircraft.
joel
How the “F” you centered that made me smile. I bow to the master.
Thanks for that advice, Joel! I’ll have a look for that tool at the auto supply shop in the neighbourhood soon. For this build it’s too late but I’ll also look what Vallejo offers for IJN Green and IJN Grey. They should have something in their programm.
Thanks for the compliment, HG! Too kind … ![]() If I look at your KNIL Mohawk and your work on Brian’s B-17, I know who the master is …
If I look at your KNIL Mohawk and your work on Brian’s B-17, I know who the master is … ![]()
After returning on Monday from a week of holidays in Northern France I returned to the bench again. Before my vacations I airbrushed Bodenglänzer all over the C6N1 and let it dry for that days. The rough surface is still visible but it looks far better than before …
Yesterday I applied the few decals (there are no stencils at all) and noticed that the 20 years in the box didn’t do them any good. They were a bit stubborn, especially the Hinomarus on the fuselage and the “3D-295” decals on both sides of the side rudder were brittle. I have used some slight softener (Revell Decal Soft) not to destroy them. Today I sealed them with Bodenglänzer and I hope, there will be not too much silvering seen later. As you can see, the 30 mm Schräge Musik has now joined the build …
I will give the whole thing again some time to dry before returning back to the bench on Monday because - yes, you guessed it - I have another model show this coming weekend … ![]()
Torsten
![]()