Looking good Torsten. That holiday in France has sure had a positive effect… ![]()
Enjoy the model show! ![]()
Looking good Torsten. That holiday in France has sure had a positive effect… ![]()
Enjoy the model show! ![]()
Torsten,
As usual, your decaling looks like it was stenciled on. Hard to believe that decals that old just didn’t fall apart in the warm water as they loosened from the backing paper.
joel
Thanks Russell! My holidays in Northern France were really memorable. Have seen so many monuments and museums and stood in front of too many graves. The Departements Picardie and Pas de Calais must have more soldier graves than inhabitants … ![]()
Joel, the decals were a bit stubborn but I had only a few problems with the decals on the fuselage and both on the rudder tore. But nothing I couldn’t fix. Though finally there’s a little silvering visible now …
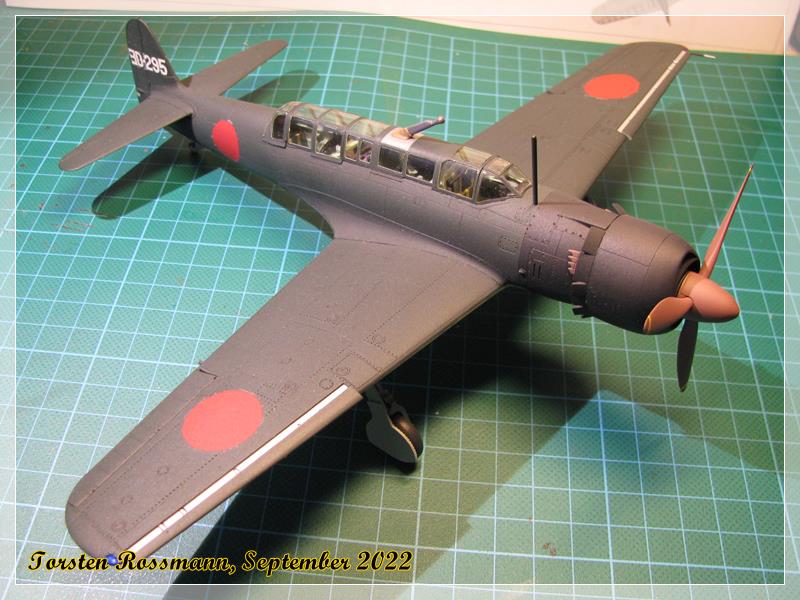
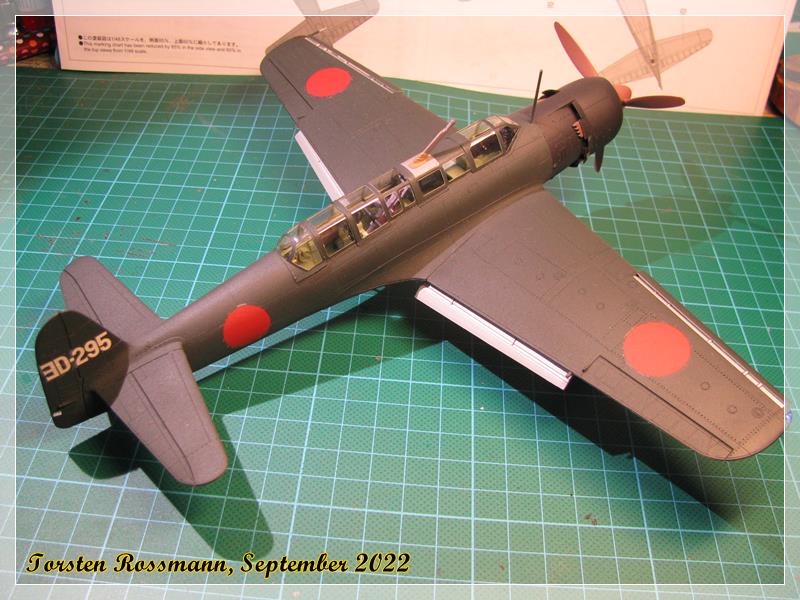
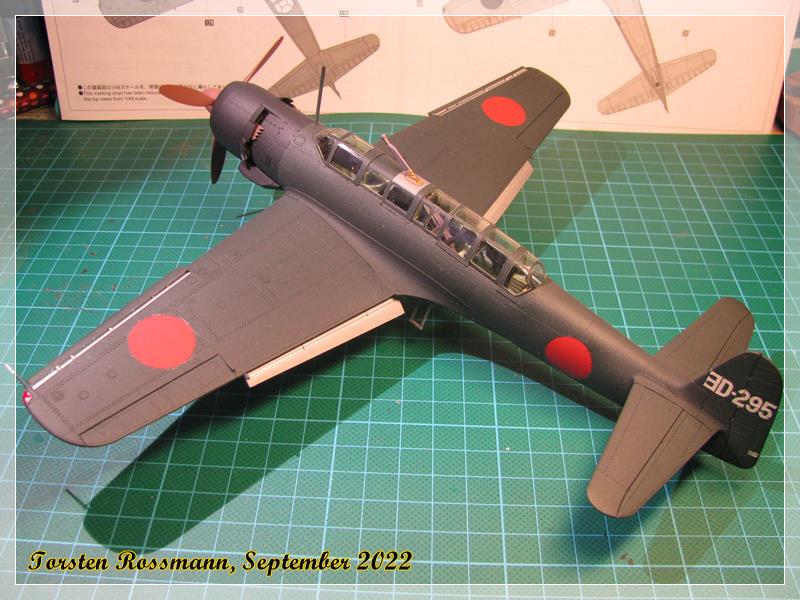
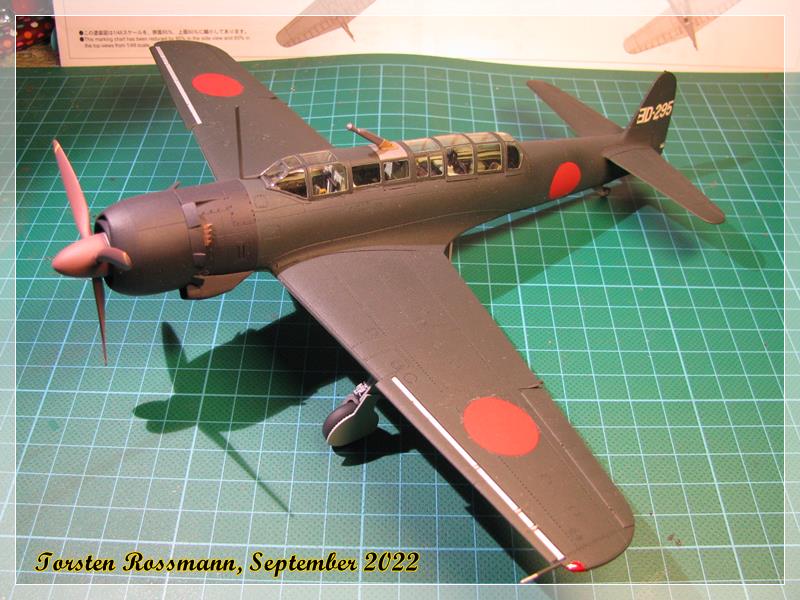
All needed parts are attached so I can call this build done ![]()
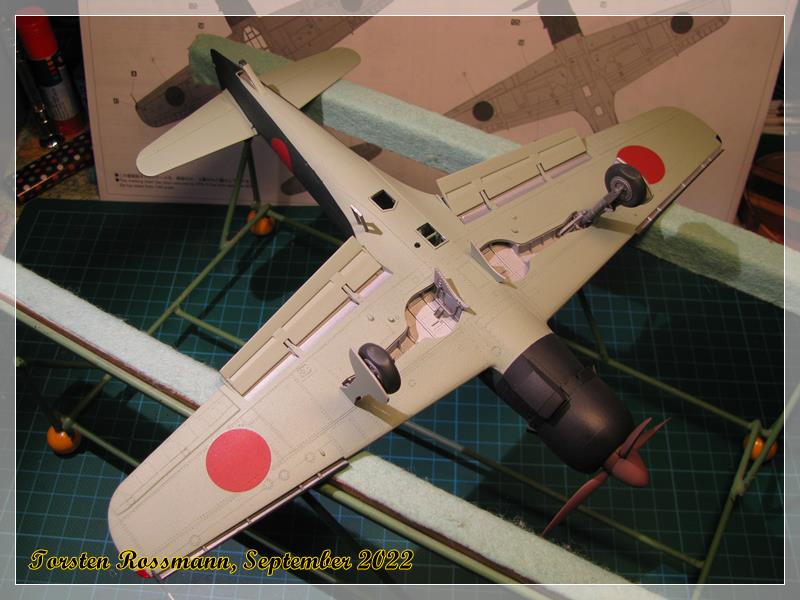
Nakajima C6N1-S Saiun Night Fighter
302. Kokutai, June 1945
Kit: Hasegawa 1/48
Paints used:
Tamiya XF-11 IJN Green
Tamiya XF-12 IJN Grey
Vallejo 71057 Black
Vallejo 71305 Interior Grey Green
Revell 83 Red Brown
Revell 99 Aluminium
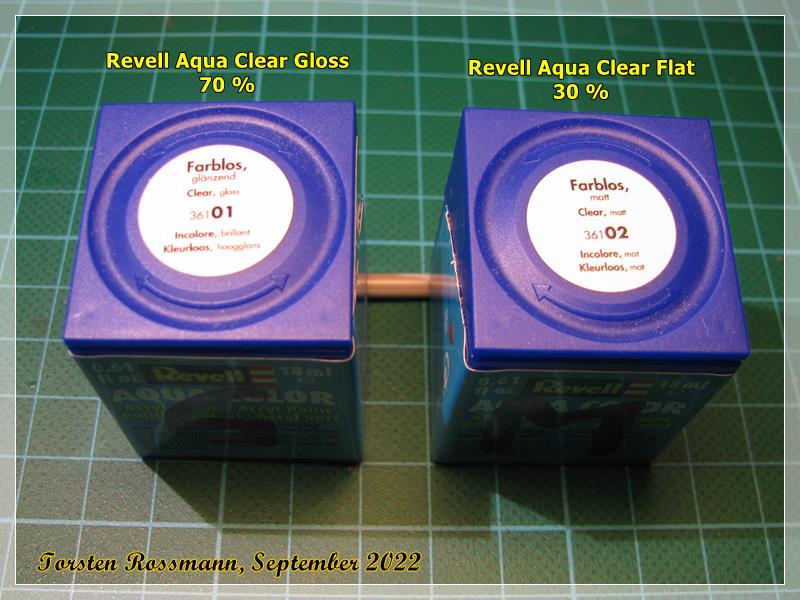
Though the kit is 20 years old the fitting was mostly fine. Fitting issues mainly showed up at the fuselage/wings transition and on the rear canopy part J2. Final coating was again made with a mix of Revell Clear Gloss and Clear Matt, this time with a ratio of 70/30 and I’m quite happy with the result. Of course this build is also not weathered at all.
Thanks again to everyone who followed this build. So 5 finished this year so far. Hope you’ve enjoyed it. Stay tuned for my next build. It’s already flying waiting loops over the work bench ![]()
Happy modelling!
Torsten
![]()
Hi Brother,
Did I miss the dull coat you used?
HG
I have started to use the Revell Germany Clear Coats because I wasn’t satisfied with the result of everything I have used before. Very often I have used Satin Clear Varnish from the german company Marabu but my airbrush often clogged in the end, so I had to try something else. Revell has no Satin Varnish so I have to mix and started with a 80/20 ratio of Matt and Gloss on my FUG Feldumschlaggerät last year. For military vehicles okay, but too dull for aircraft. So on the Chipmunk I had a 50/50 ratio which was still too dull. On the RCAF Mustang after that the ratio was 60/40 (gloss/matt) and now I am at 70/30 (gloss/matt) and this looks right to me. I might even try a 80/20 ratio on my next build. I’ll see …
This is the paint which I use …
Don’t know if you can get it in Canada, you might check it out. This is their german webside
Revell Model Building | Online Shop | Aqua Color, Clear, Gloss, 18ml, RAL
Revell Model Building | Online Shop | Aqua Color, Clear, Matt, 18ml
Hope this helps a bit
Torsten ![]()
Fantastic result, Torsten, on what can now be classified as a vintage release by Hasegawa! ![]()
![]()
![]()
![]()
And, build #5 already for this year… I’ll be lucky to clock up 3 for the whole year ![]()
Looking forward to seeing what’s been in a holding pattern ready to land on the bench next ![]()
Thanks Russ! Indeed, for its age, the kit didn’t come out so bad in the end. I’m really pleased with the result, even Tamiyas IJN Green doesn’t look so rough now. Don’t worry about how many kits to build in a year. A ship takes far longer than an aircraft or a tank. You’ll be fine with your output!
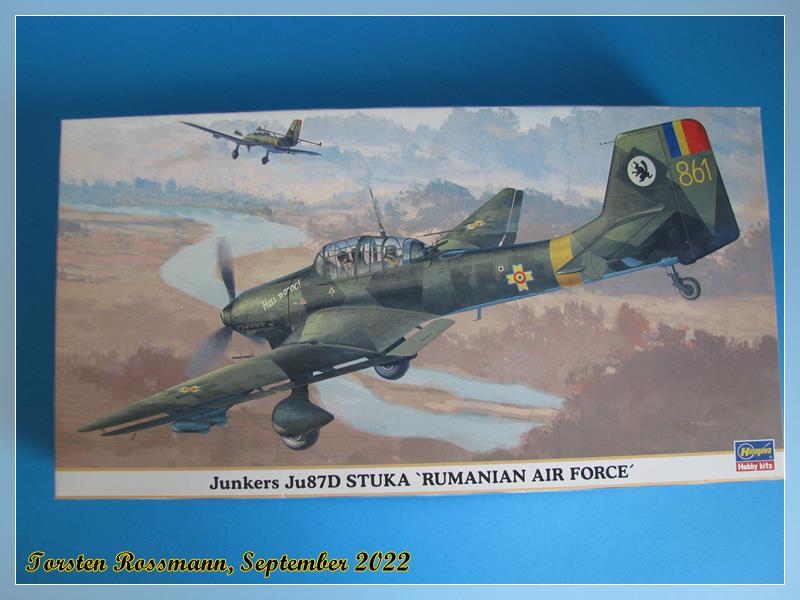
I can’t remember when I have built a Ju 87 for the last time. Must be decades ago … ![]() In my stash I found another oldie from Hasegawa and I think it’s time to get it on my work bench:
In my stash I found another oldie from Hasegawa and I think it’s time to get it on my work bench:
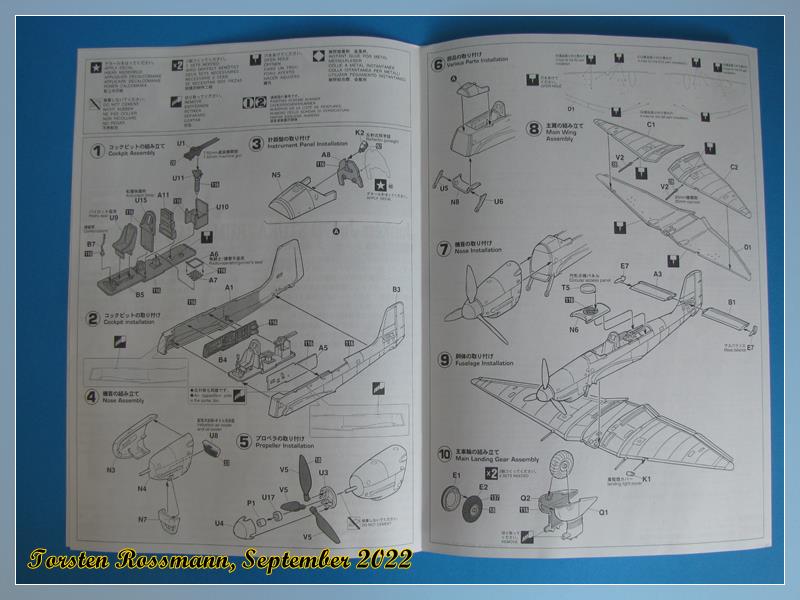
Junkers Ju 87 D with some unusual national markings. Hasegawa came out with this limited edition in 2006 …
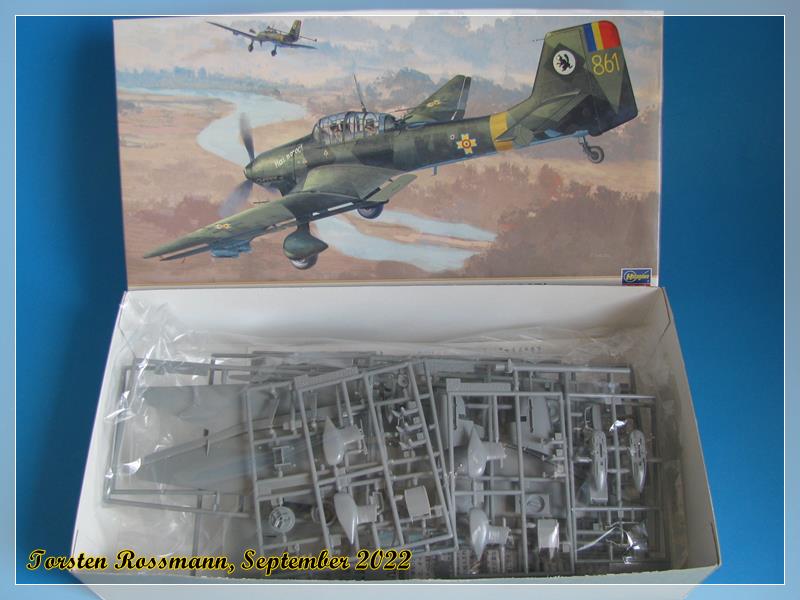
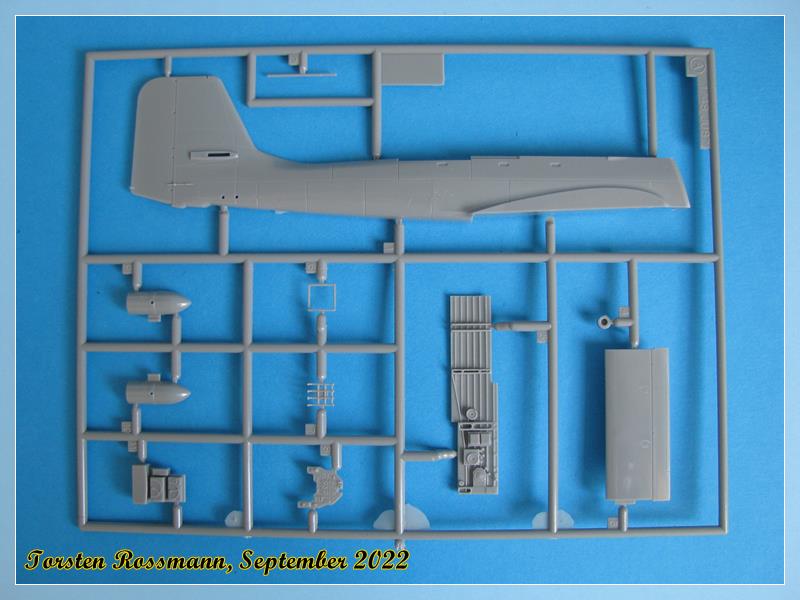
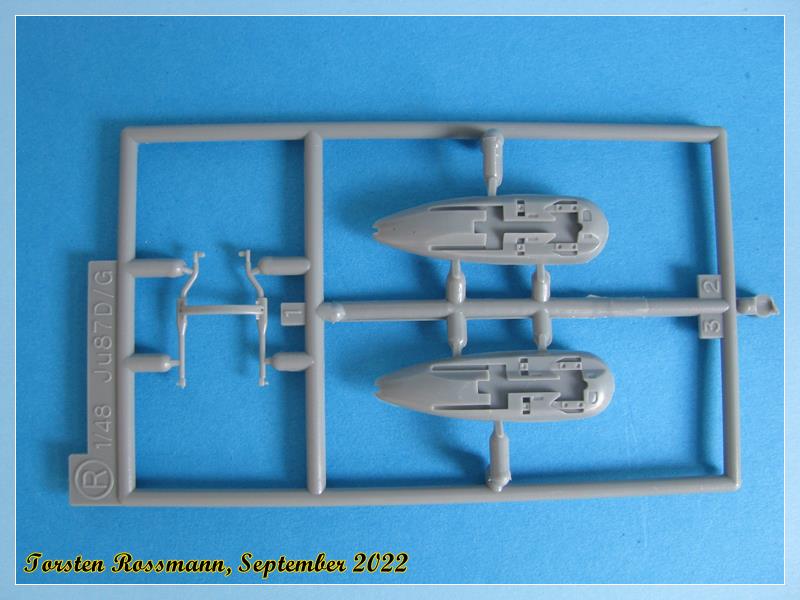
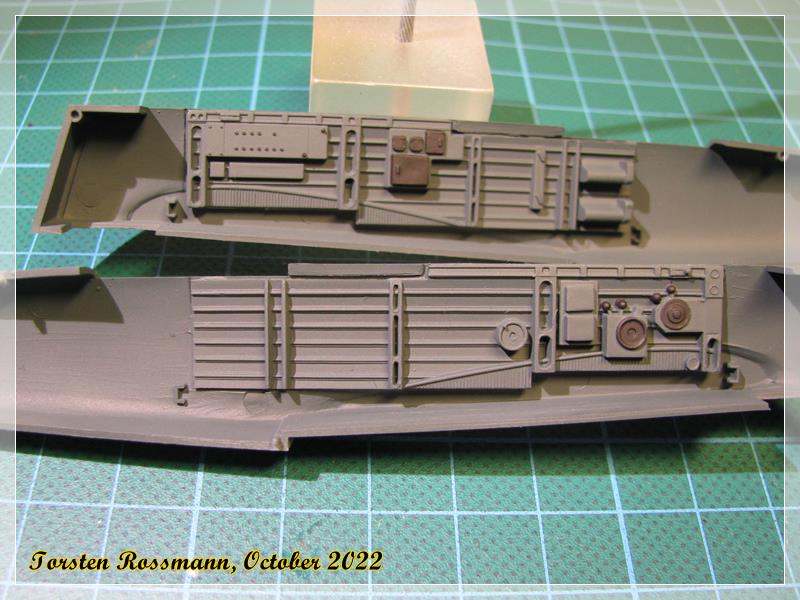
Let’s have a look what’s in the box. Sprues A and B come with the fuselage and some cockpit parts …
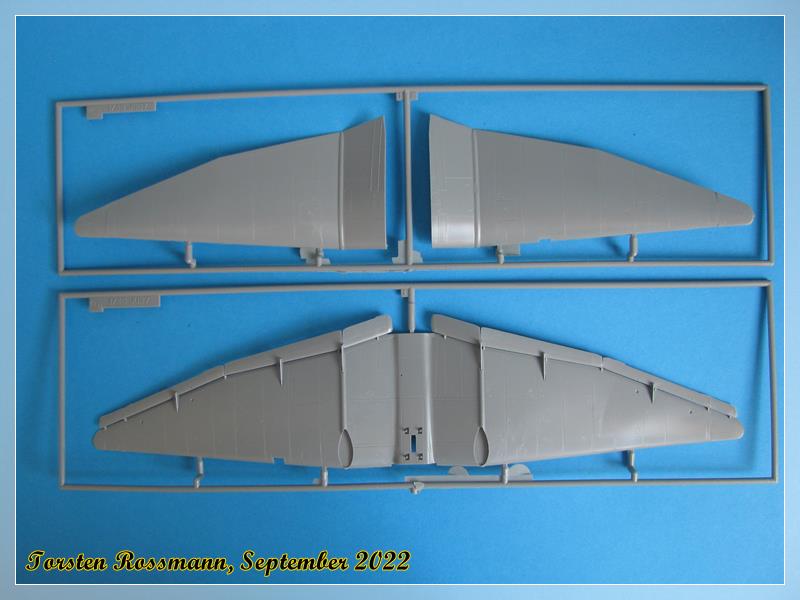
… the famous gull wings are on sprues C and D …
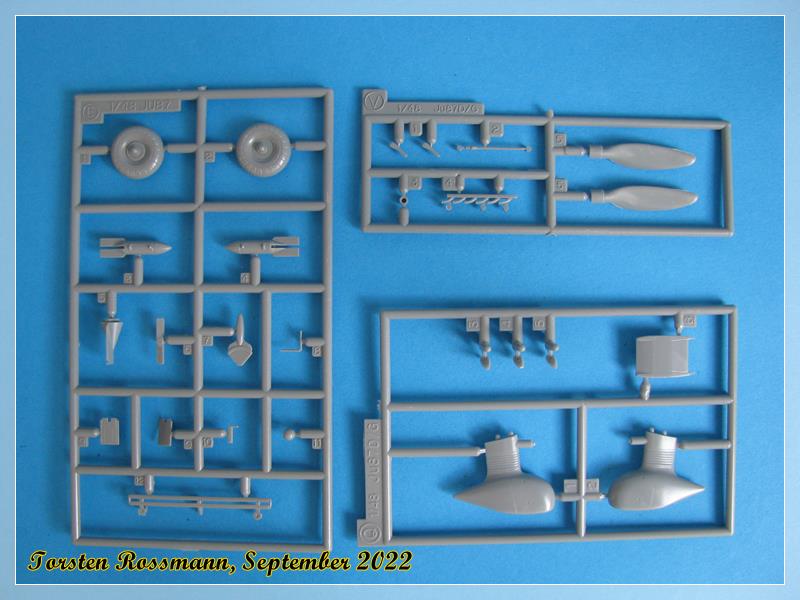
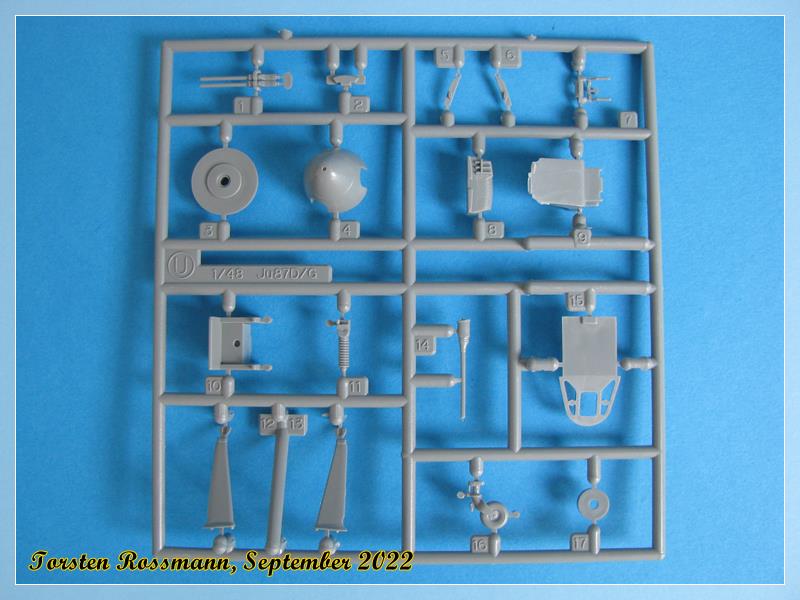
… Sprues E, Q and V are twice with wheels, bombs and prop blades …
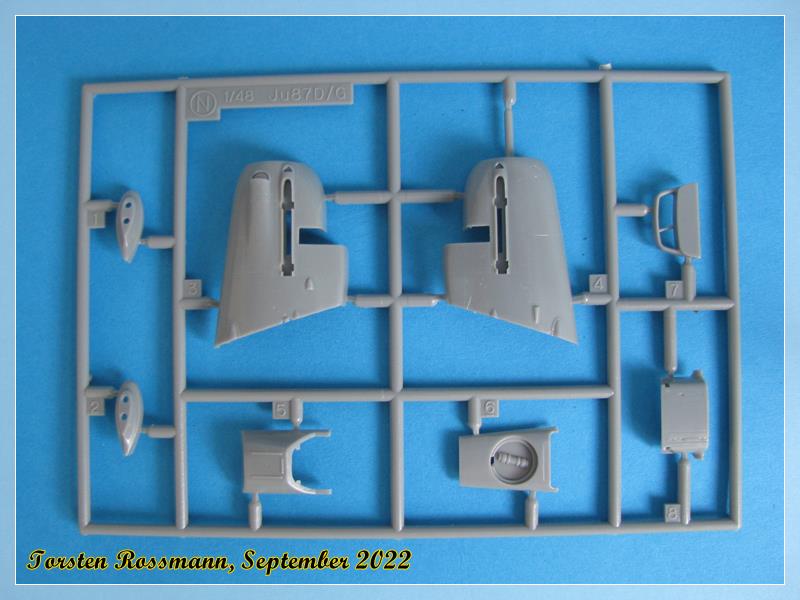
… Sprue N holds the cowling and other parts for the fuselage …
… Sprue R has the racks for the wing bombs and the deflector for the big fuselage bomb …
… Sprue U holds the propeller hub and various other parts …
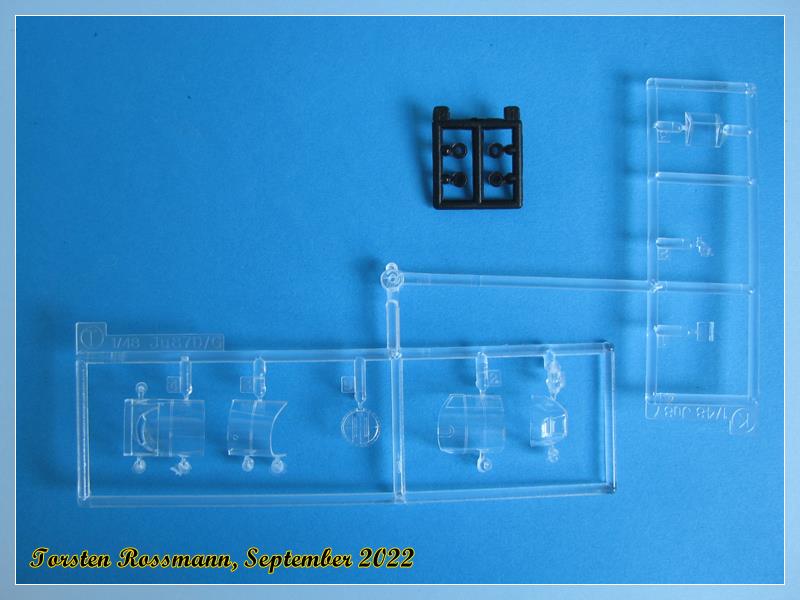
… the clear parts are on sprues K and T. As always some poly cabs are included in the kit …
… the decals on the small sheet look nice and well printed. As always, Hasegawa decals look a bit thick on the sheet but will be thin on the model. I hope to have more luck with them than with the ones on my Saiun. I also bought the Eduard mask EX089 for the canopy …
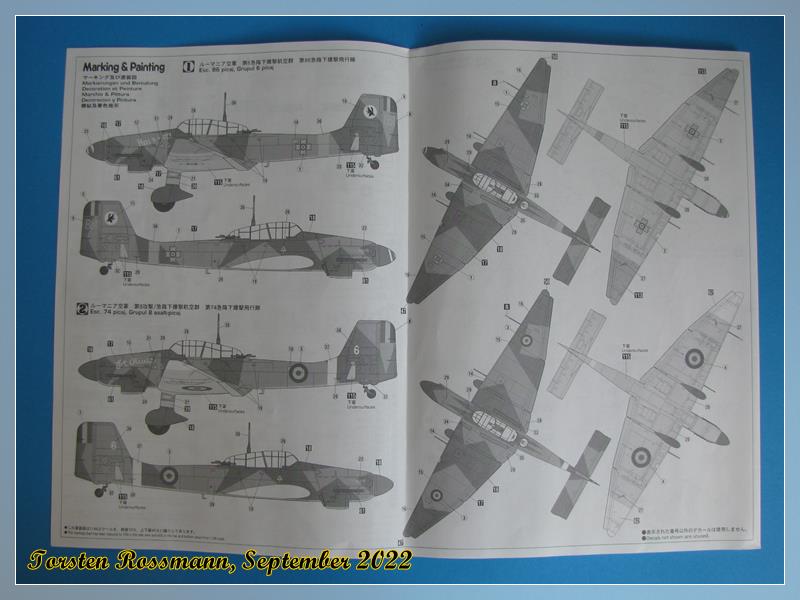
… finally a look at the painting instructions. Hasegawa offers 2 options, both planes are painted in RLM 70/71/65 …
I have decided to go with the first option, the plane with the Michael Cross and the yellow Eastern Front markings. Started already some research, though it’s not easy to find something about Stukas in service of the ARR, the Royal Romanian Air Force during WW2. As far as I found out Escadrilla 86, Grupul 6 was involved in the fightings in Southern Russia in 1943/44.
I’ll start with this kit in the next days and it would be great if some of you would again look over my shoulder to see what I produce here, good or bad … ![]() Paints will come from Revell as they have them all in their programm.
Paints will come from Revell as they have them all in their programm.
Happy modelling!
Torsten
![]()
Another fine build for the collection Torsten. Great to see something like this rare build fully completed.
Looking forward to the Stuka project now.
Torsten,
Looking forward to seeing you work your magic on the Stuka. Following your builds are always a joy for me.
joel
You plus this is going to be great!
Thanks for your feedback, guys! Glad to hear that you enjoy this permanent build blog as much as I do. I think I will start with the Ju 87 tomorrow evening, my first work day after holidays … ![]()
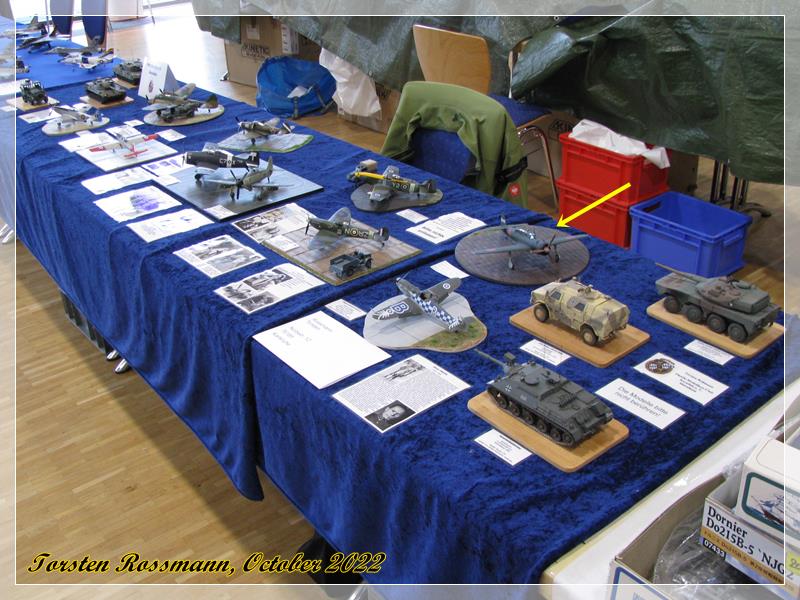
Came home yesterday after my last model show for this year. It was near Munich and the C6N1 was already on display (see arrow) ![]() But the most attention on my table got the Airfix Blenheim. Had 2 shows on the last 2 weekends, that’s all for this year now. Had 5 in total which is quite good. Next expo will be in March 2023 if everything goes well. I should get something new done by then …
But the most attention on my table got the Airfix Blenheim. Had 2 shows on the last 2 weekends, that’s all for this year now. Had 5 in total which is quite good. Next expo will be in March 2023 if everything goes well. I should get something new done by then … ![]()
Torsten,
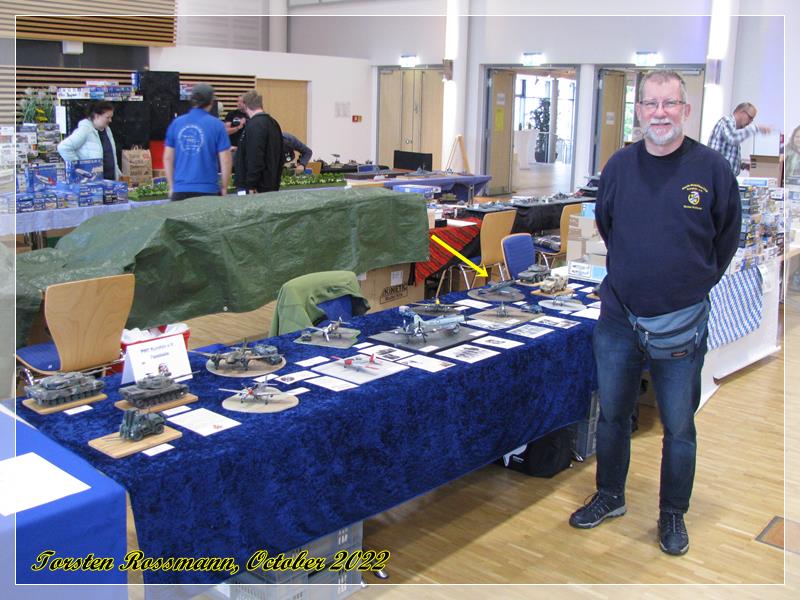
Is that you in the 2nd picture?
joel
Darn it… give us a close up, I mean of the table NOT of you hee hee. Regardless, wow, so happy for you Sir.
Live and in person … ![]()
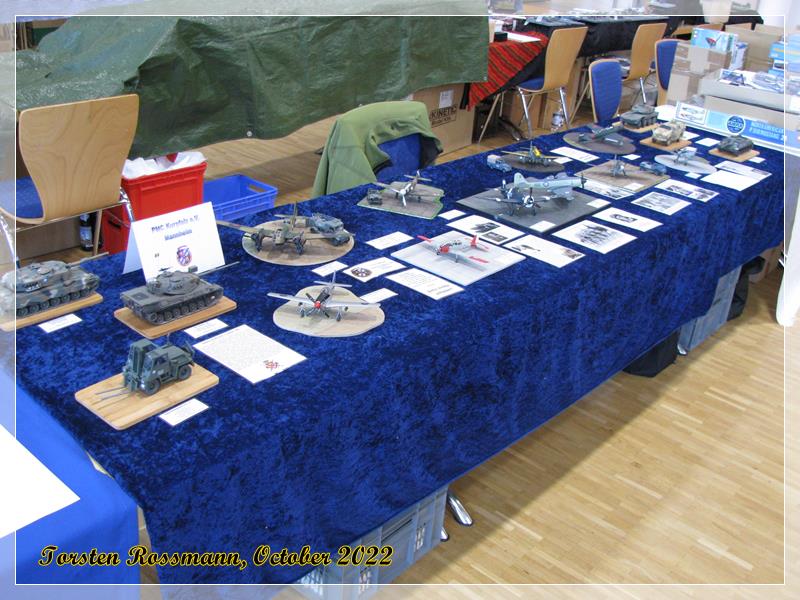
Sorry HG, I have only one more total view of my table from the other side. Usually I don’t take photos of my models on shows, only of the table …
Have started with the cockpit of the Stuka yesterday but nothing worth showing yet. I hope to present first pics at the weekend.
Torsten
![]()
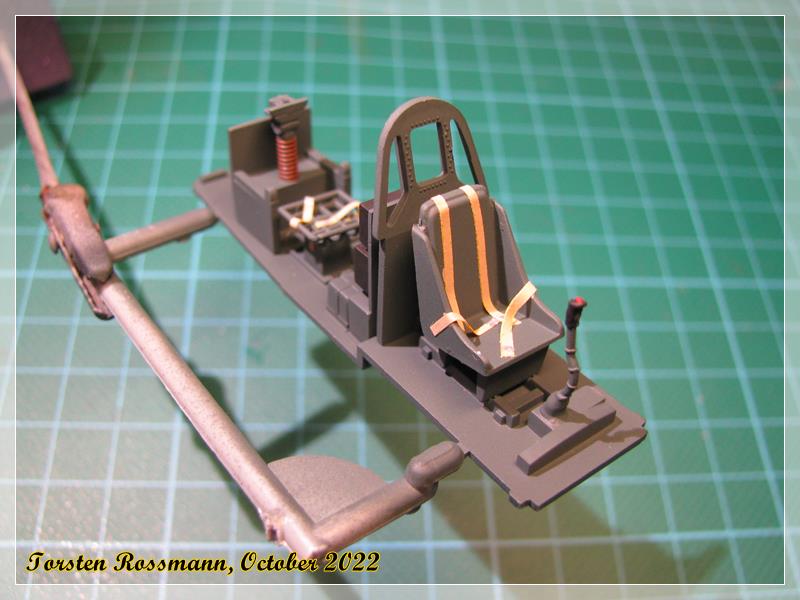
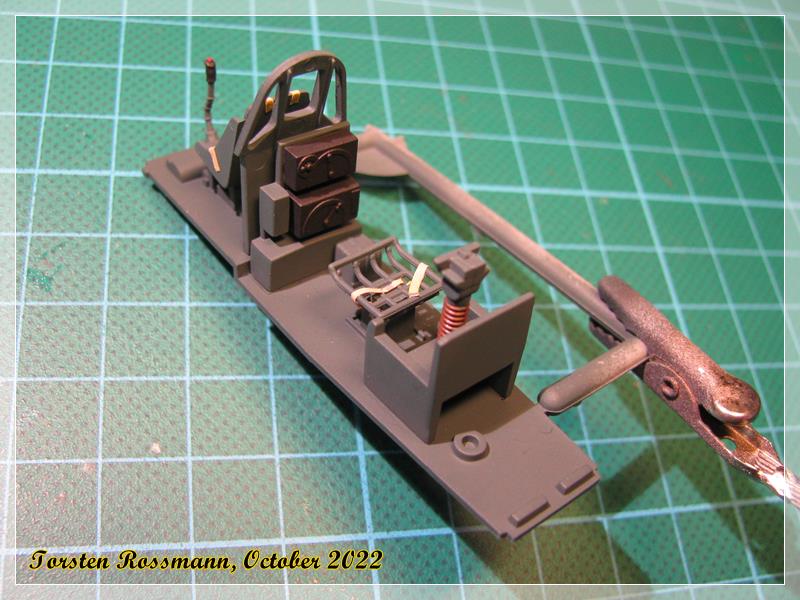
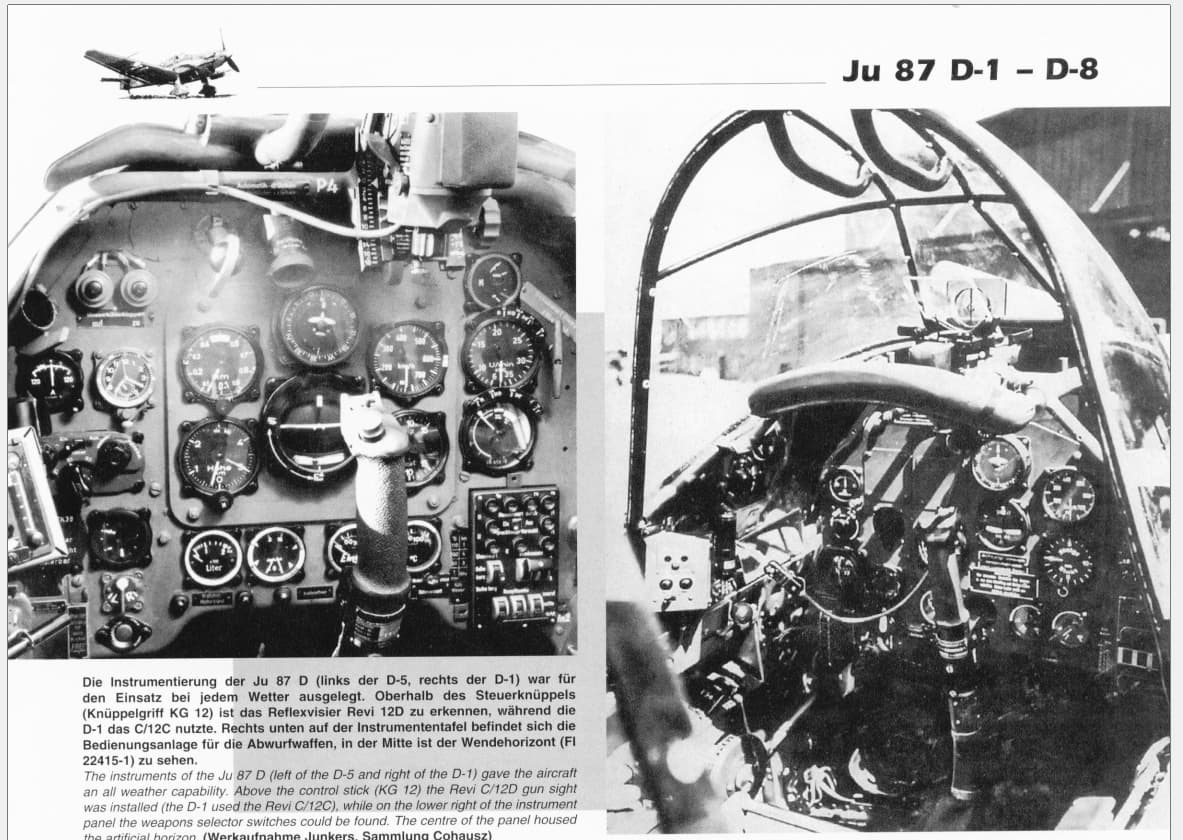
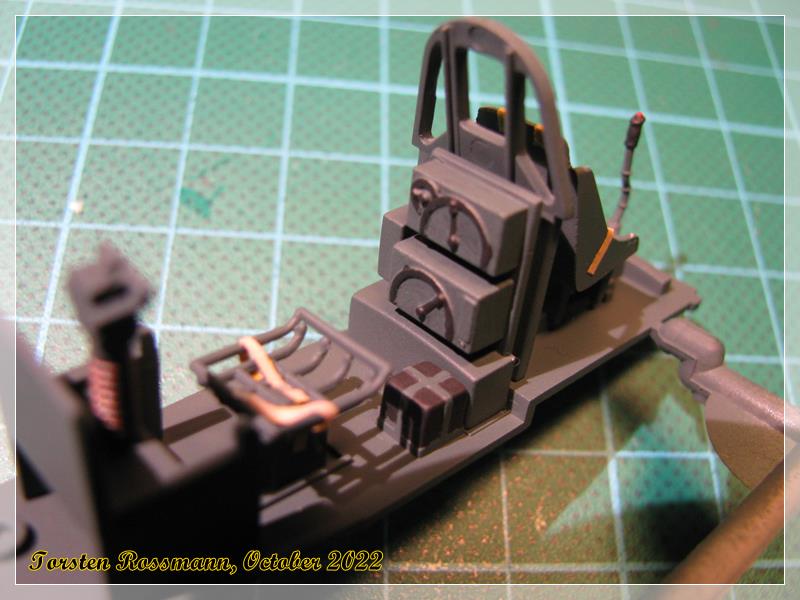
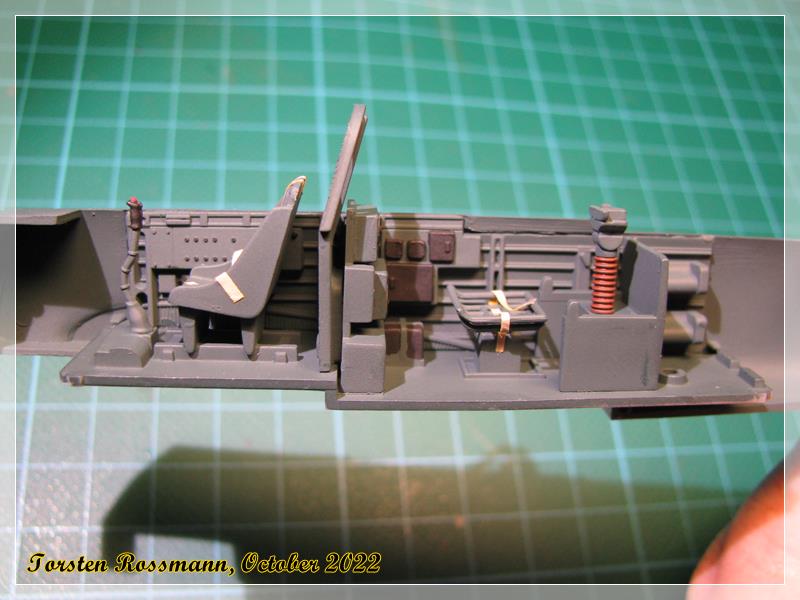
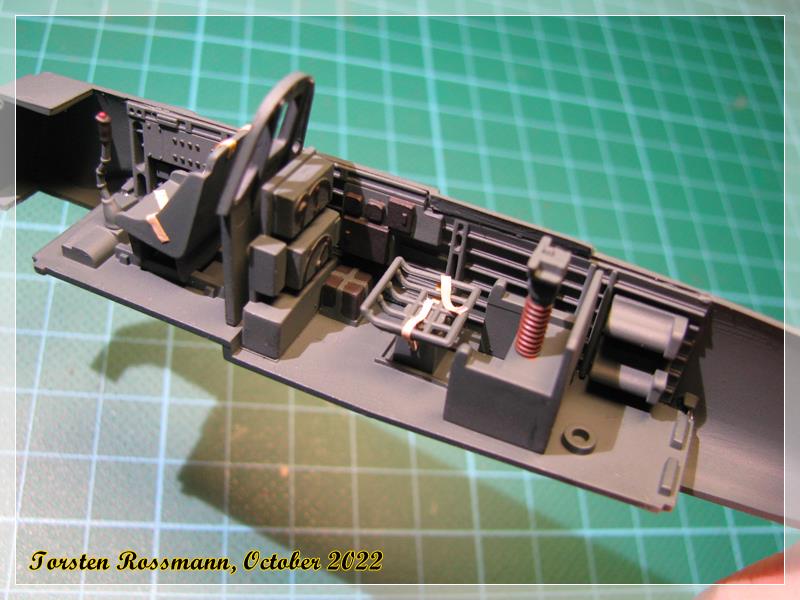
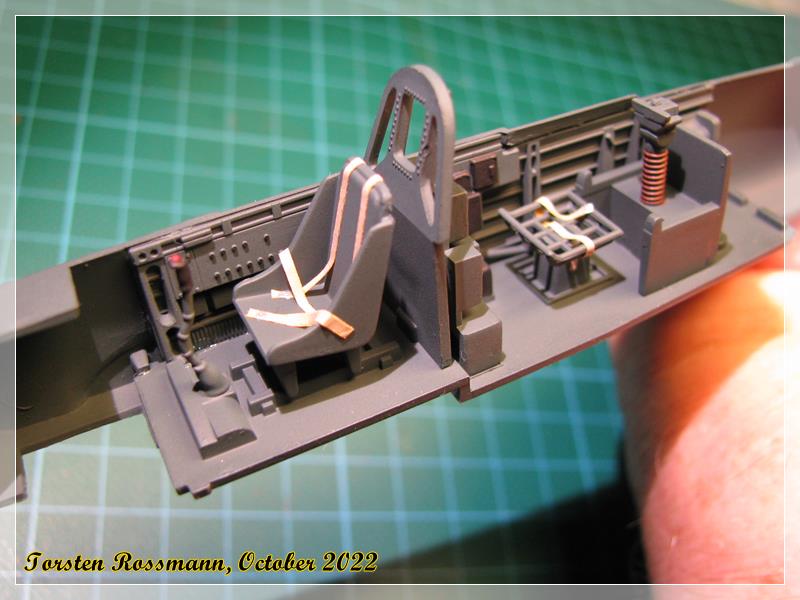
First small update on the Ju 87. Yesterday I finished the cockpit. Unfortunatly in my 2 books about the Stuka I didn’t find any cockpit photos and the internet was also not really helpfull. Only found out that surprisingly the pilots seatbelts are attached to the seat and not to the frame. I just think of the G-forces during the dive … ![]() Made the seatbelts with Tamiya Tape and painted them with Revell 89 Beige.
Made the seatbelts with Tamiya Tape and painted them with Revell 89 Beige.
the gunners seat has only 2 small belts but later when the fuselage halves are together I’ll add another bigger belt just behind the seat from one side to the other. The MG 81 Z is not yet attached …
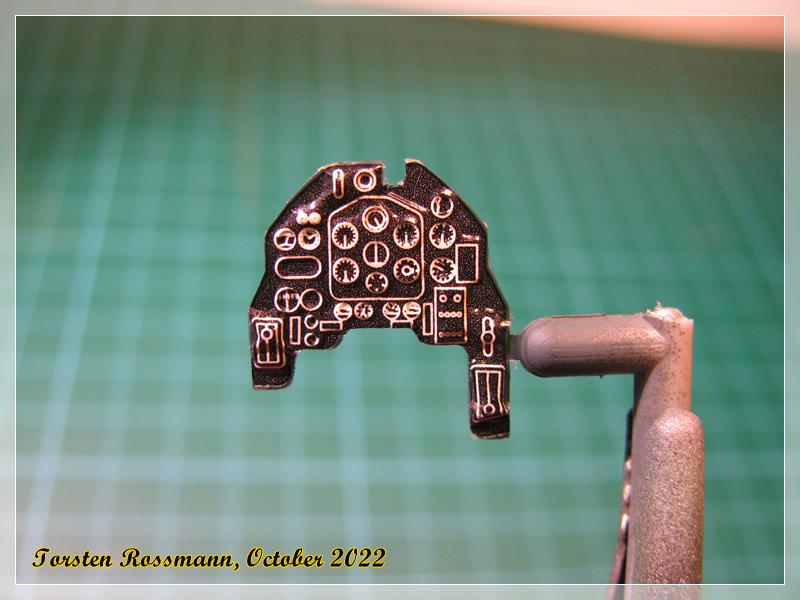
the IP has a decal which looks better than dry brushing …
haven’t done much to the cockpit walls, painted only a few knobs black …
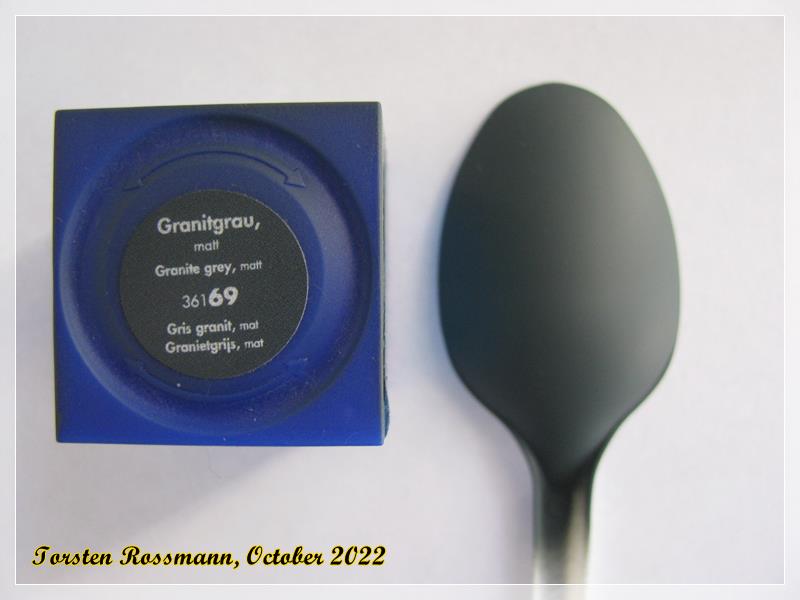
I thought I have RLM 66 in my Vallejo collection but I was wrong. So I took Revell 69 Granite Grey which comes close to RLM 66 …
That’s all for now. Next update will come soon. Have a nice Sunday!
Torsten
![]()
Torsten,
Nice start to the cockpit. With your detail painting skills, I’m sure that the lack of cockpit reference material won’t hold you back from producing one of your excellent cockpits.
joel
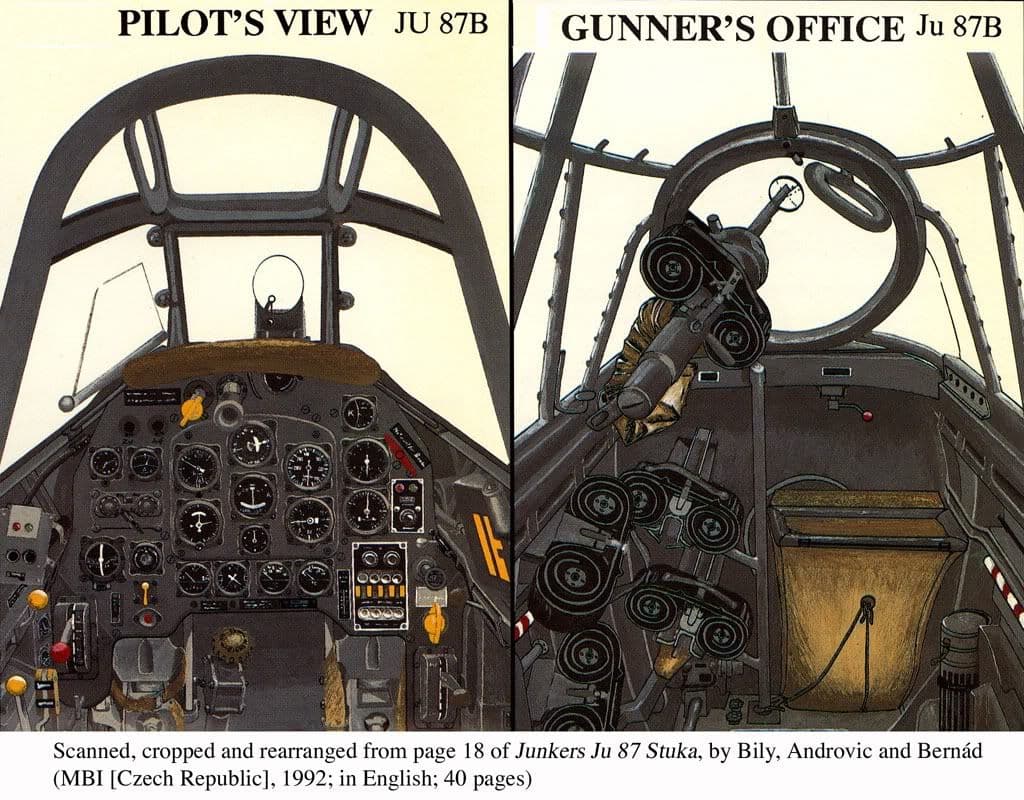
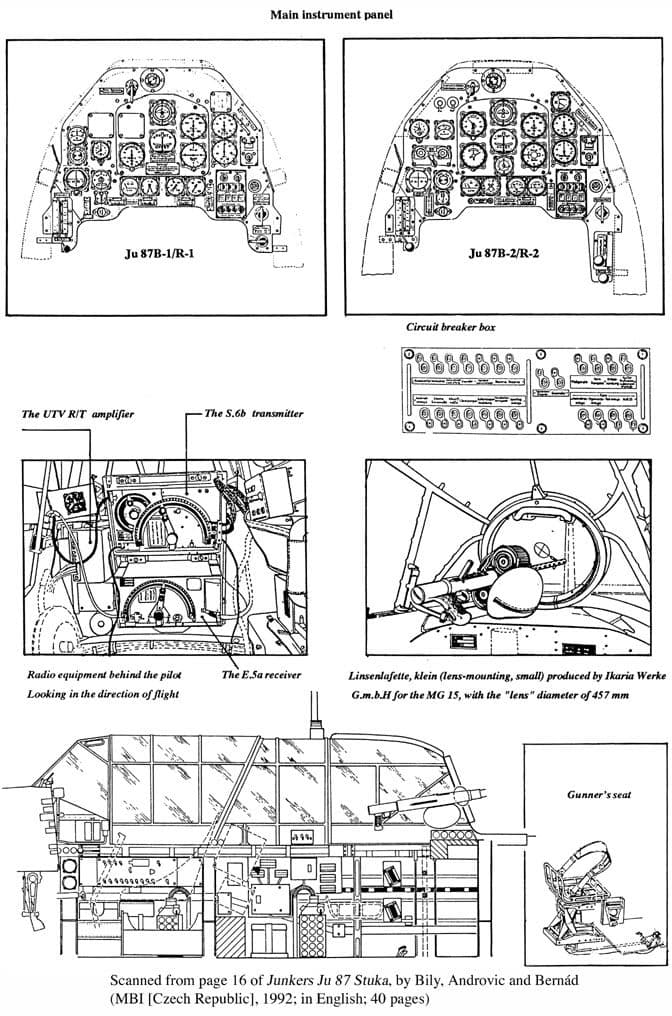
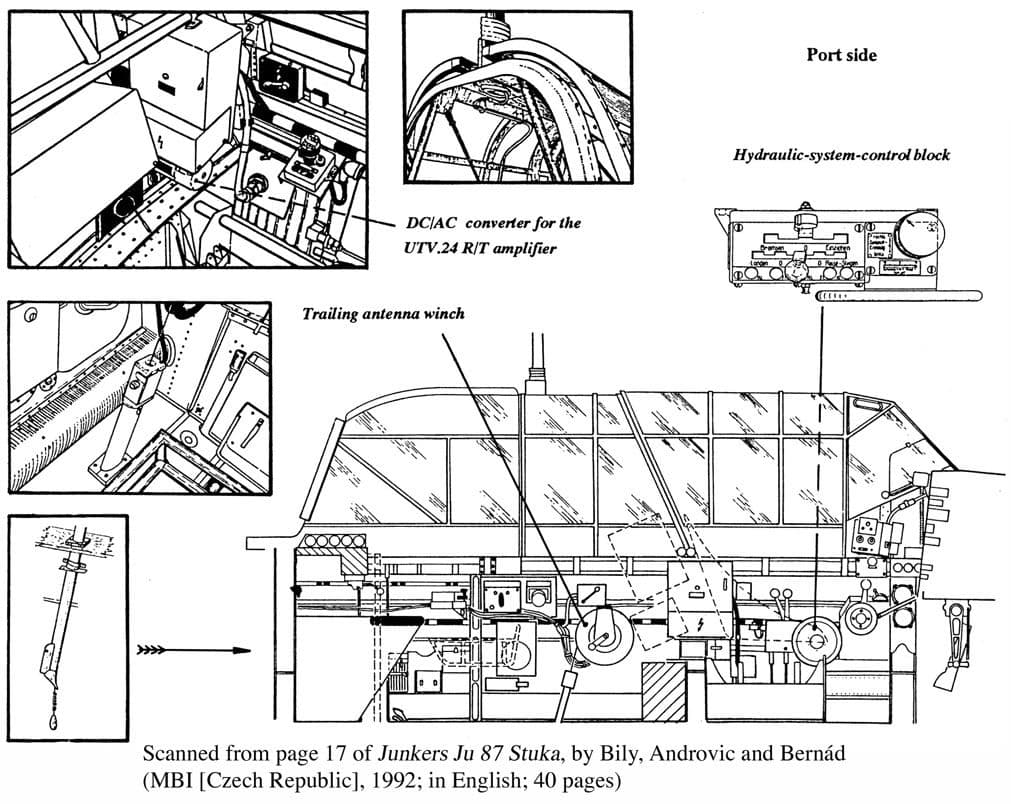
Hi Torsten. Look here:
https://ww2aircraft.net/forum/attachments/ju-87d-5-pdf.88169/
https://ww2aircraft.net/forum/attachments/ju-87-d5-bo-pdf.88170/
Some illustrations, they are the B version, but some aspects may be the same:
Thanks a lot for your help, guys! ![]() This is a great forum, I knew that and I tell everybody!
This is a great forum, I knew that and I tell everybody!
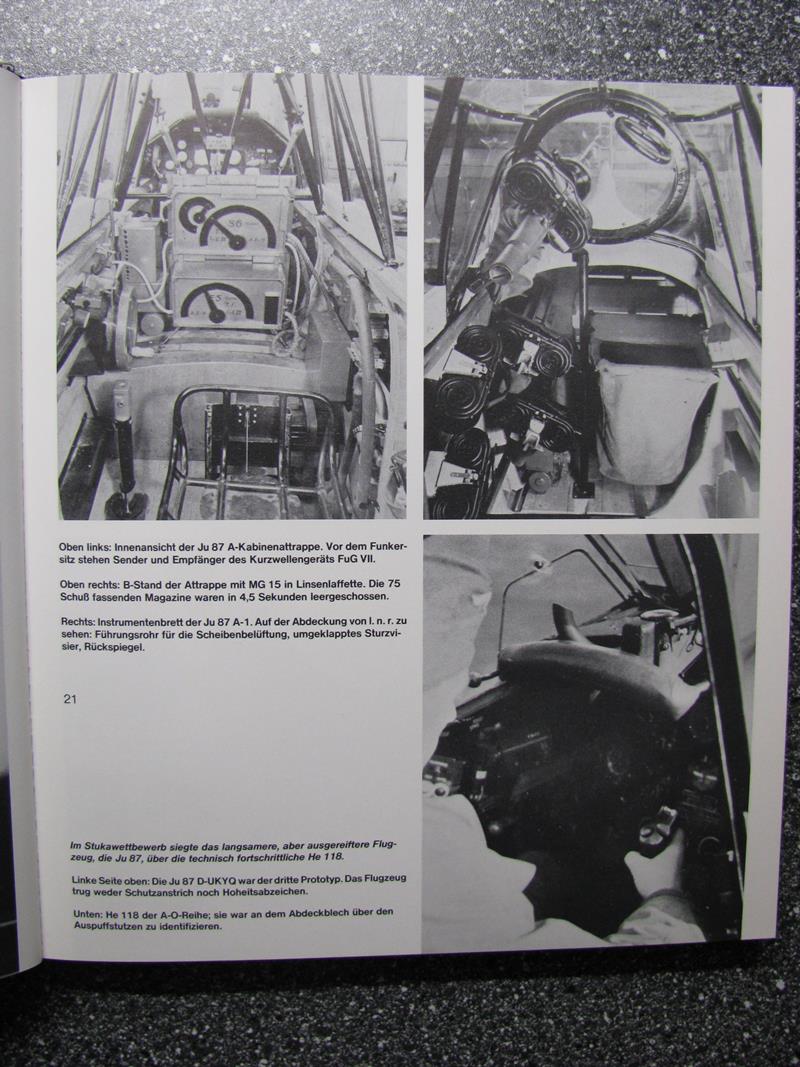
Thanks for that links, Peter! I’ll have a look at them, I’m sure they are a great help for me. Recently I got an old book at a modelling flea market. I had a closer look at it today and what should I say? Bingo! ![]() The book is from 1980! Imagine that …
The book is from 1980! Imagine that …
and I found this. It’s the cockpit of the A-Version (the Stuka with the “trousers”) but it’s okay for my D-Version and I already made some small corrections. The radios should be grey with black scales, mine are vice versa now. These in the photo are probably painted in RLM 02 Grey-Green as it’s an early Ju 87 …
Btw, I have also a B-Version in my stash, which should become the famous “Snake Stuka” of North Africa … one day … ![]()
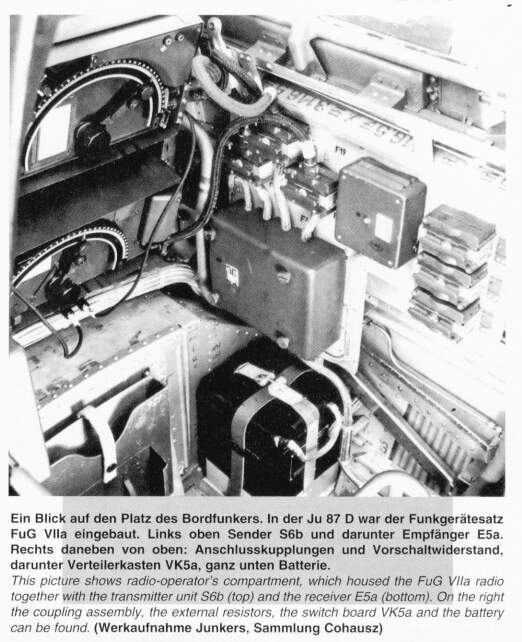
After Peter’s PDF I have done some paint corrections. Here you can see the sender and receiver of the FuG VII and the batterie box in correct colours …
… some further painting was made at the cockpit walls. That should do it …
… and the cockpit inside …
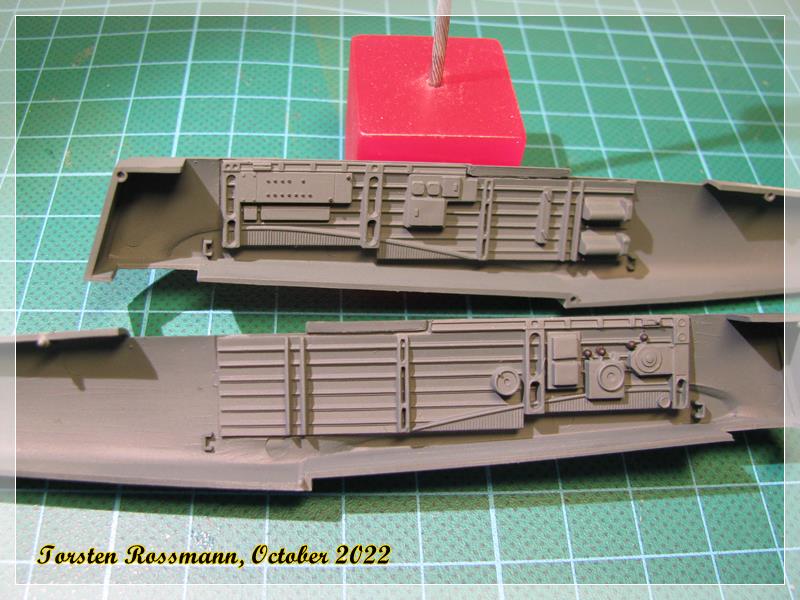
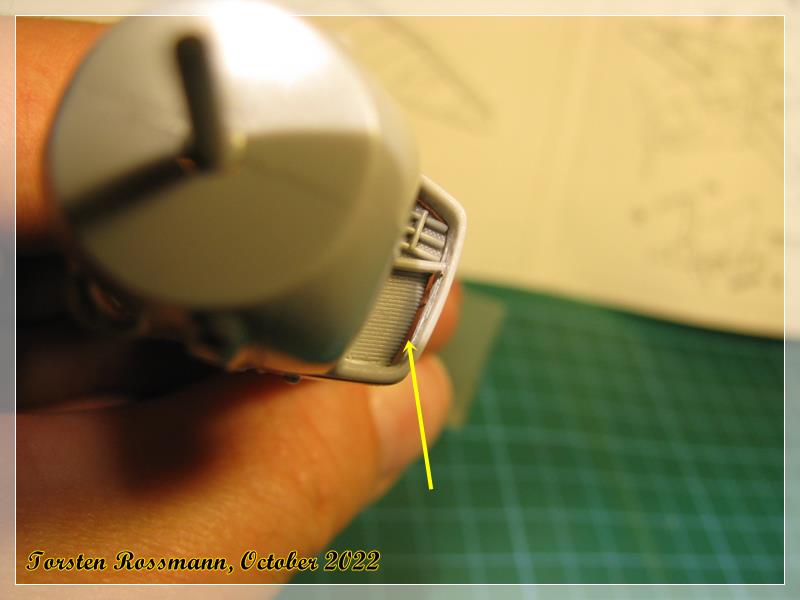
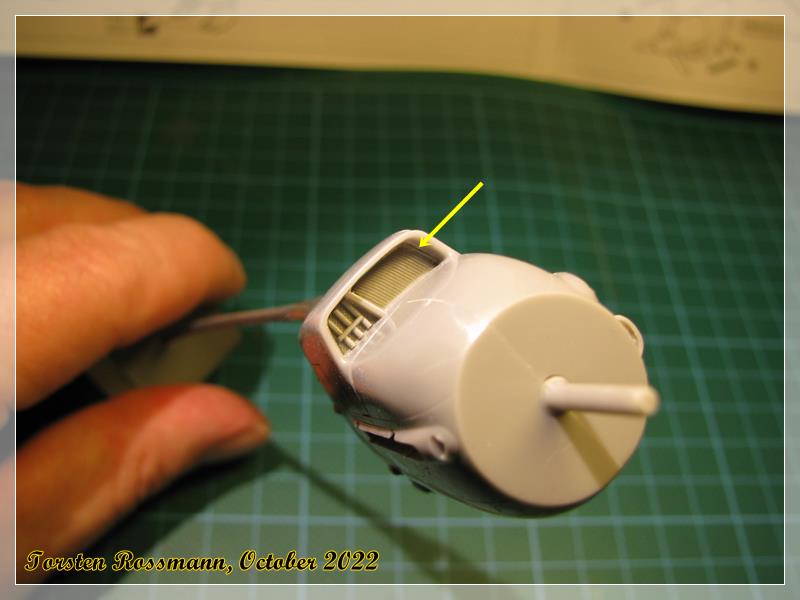
… during test fitting I noticed that the jalousie of the oil cooler is too small so I added a small Evergreen profile to the right side and did some “surgery” for better fitting …
… the result is not perfect but better than before. Not easy to take proper photos in focus with my bench lamps …
I will close the fuselage now and noticed already that it will be very tight job. So I have to press and squeeze again …
Torsten
![]()