Torsten's bench works

I’m back here after a long absence :grin: ! I’ve never built a Stuka but would like to do a D or G. Or a Battle of Britain B… Just about any Stuka would obviously do :grin: !

Noted earlier on your experiences with Tamiya colours: the few times I use them I am always taken by surprise how matte they are, a 50/50-mix with clear produces something that’s passable semi-gloss but not more than that!

:raising_hand_man:

Magnus

2 Likes

Great to see you back here, Magnus! :slightly_smiling_face:

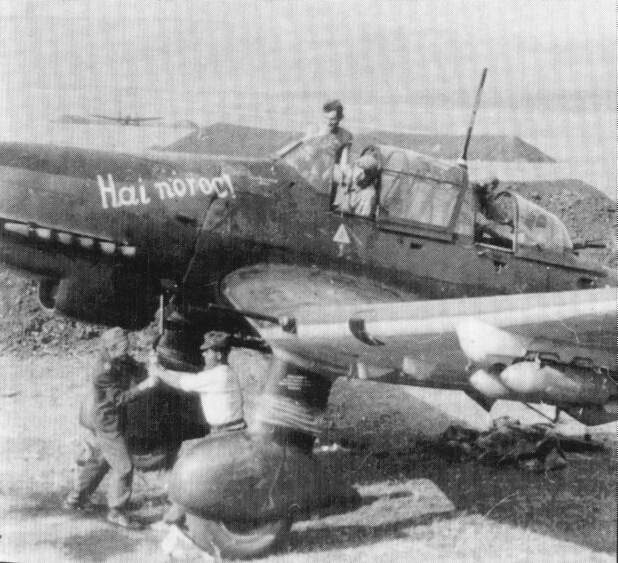
The Ju 87 is not often built as a model, I have noticed that, too. Even not often seen on models shows. That’s strange because it’s one of the most famous aircrafts of the first half of WW2. Maybe it’s because of its reputation, who knows … I haven’t built a Stuka in decades.

Don’t know who offers a Ju 87 in 1/72. Airfix and Revell Germany for sure but who else?

Concerning Tamiya paints, I have ordered a set of Vallejo IJN paints at my trusted airbrush shop in Leipzig which should be here next week. I also don’t often use Tamiya paints. I’ll see how the Vallejo will be …

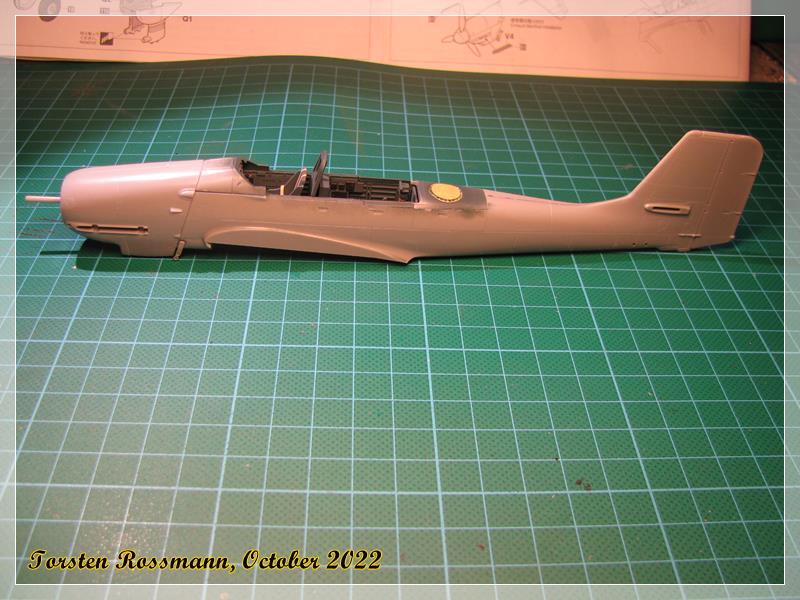
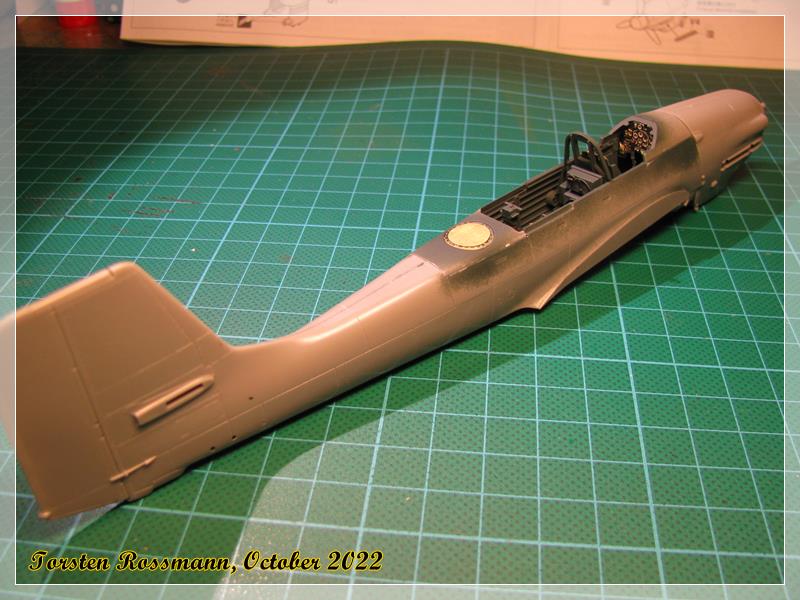
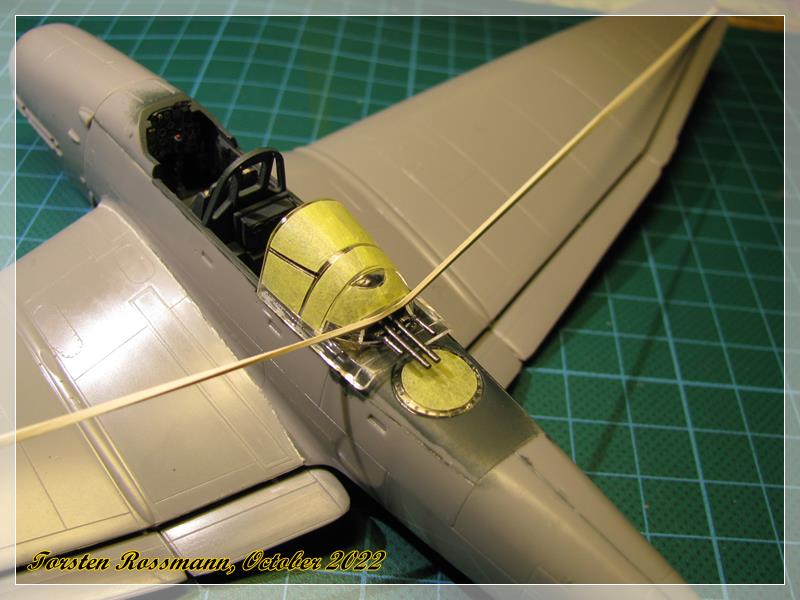
Some little progress on my Stuka. 13 clamps for a few hours helped to get the fuselage halves together …

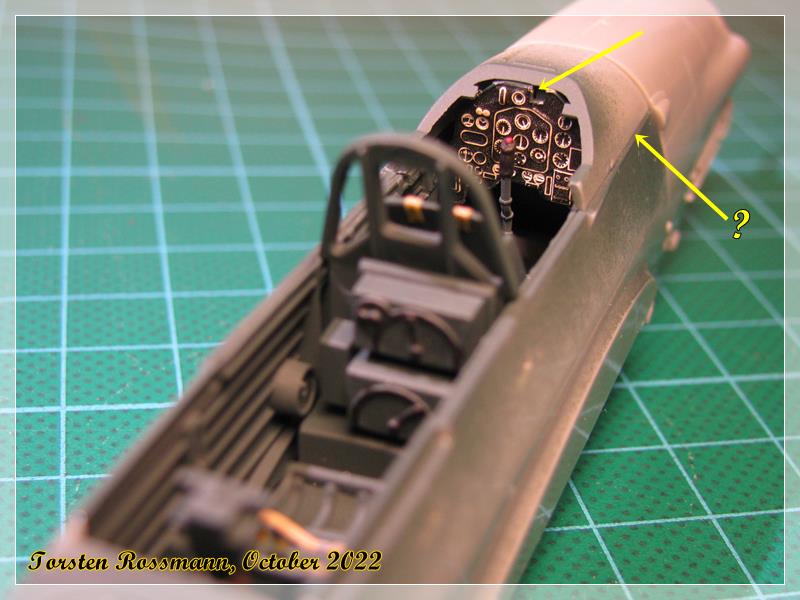
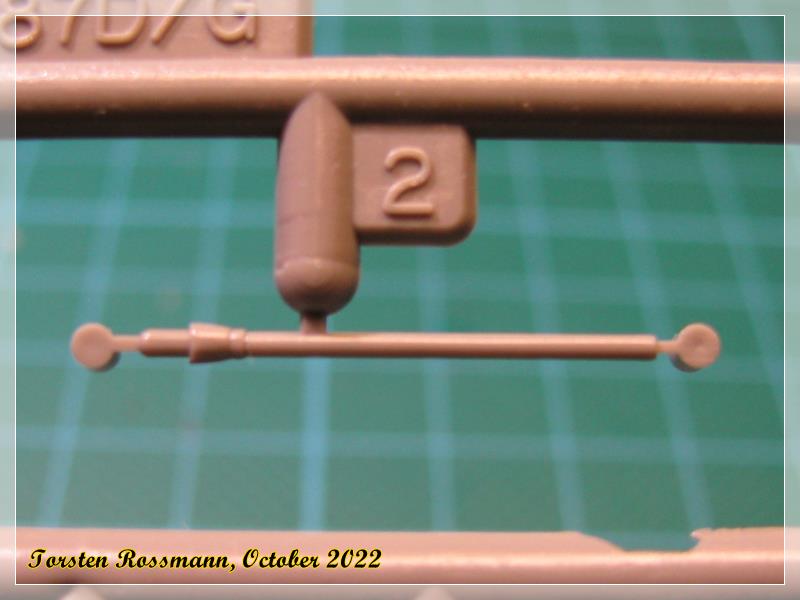
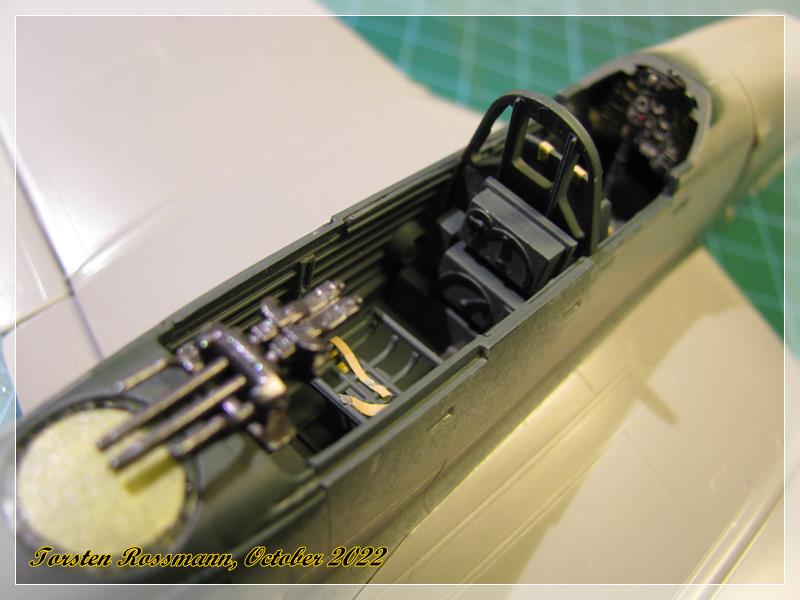
I shouldn’t forget the gun sight (Reflexvisier “Revi”) before I add the wind shield … :blush:
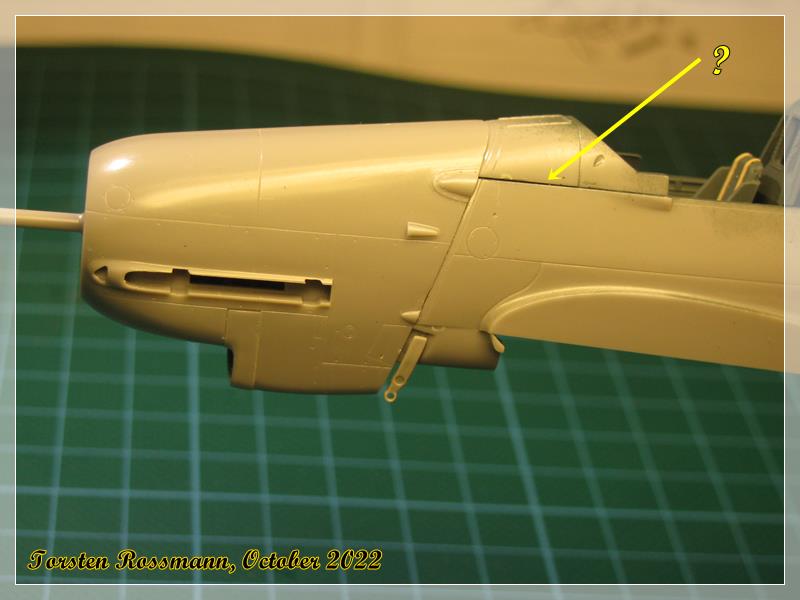
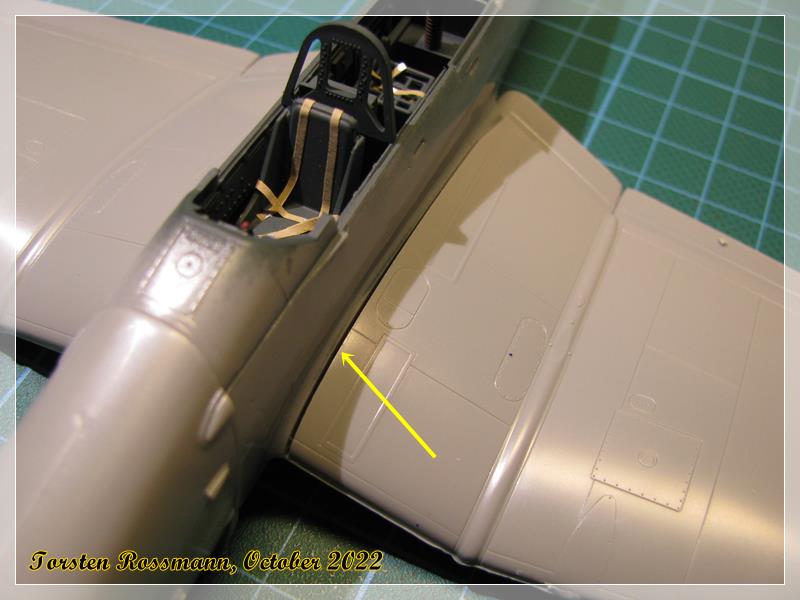
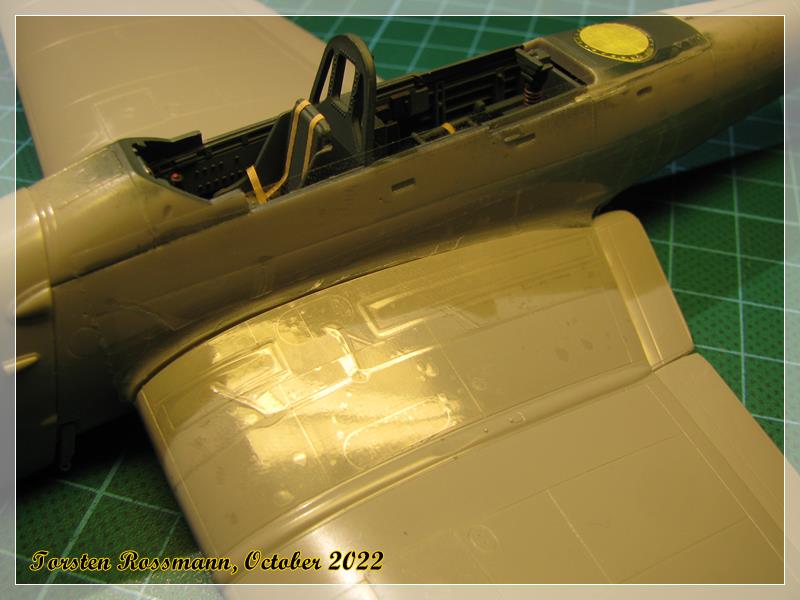
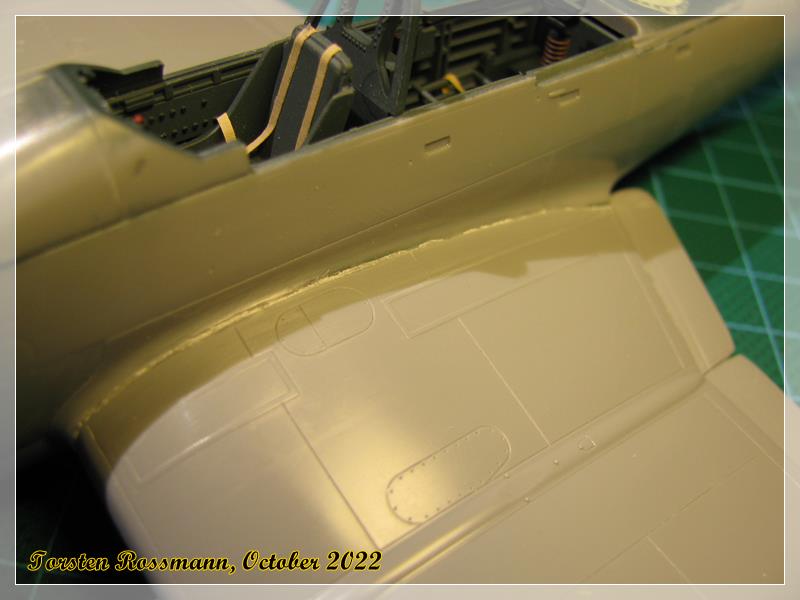
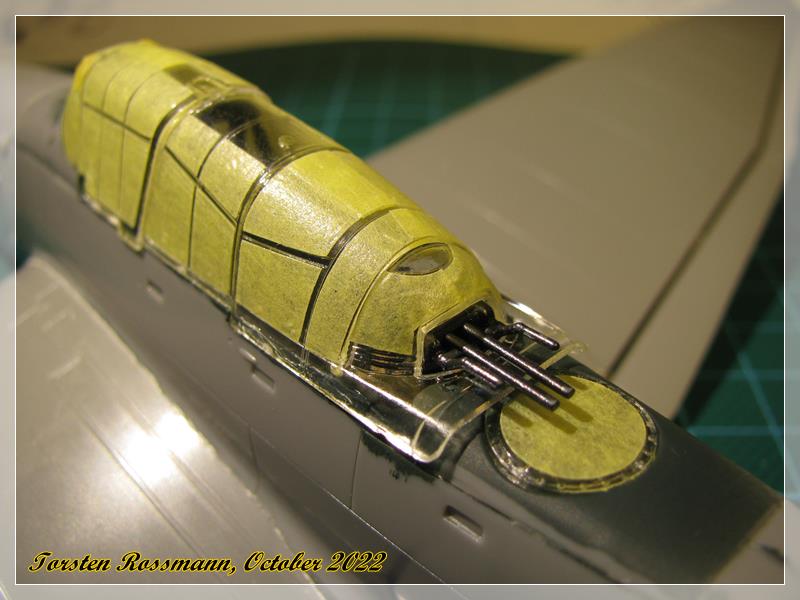
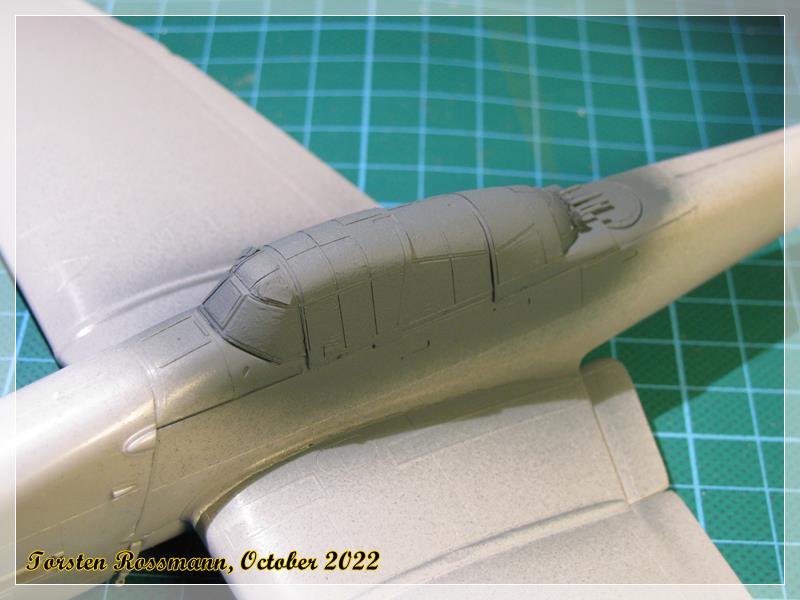
The fitting of the IP cover is strange because it leaves a tiny step on both sides of the fuselage. Have to check my references but I think I have to sand here … :face_with_raised_eyebrow: It looks worse in this macro shot than in real though.

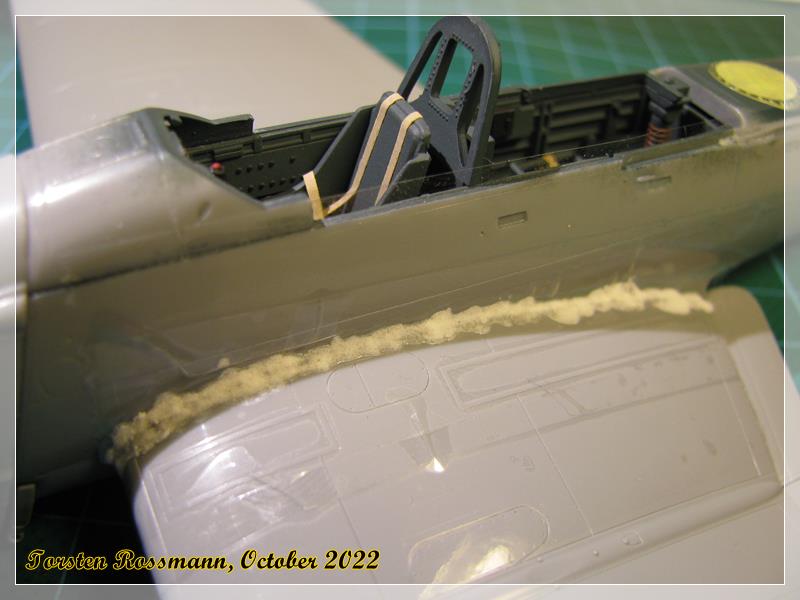
… same of the left side …

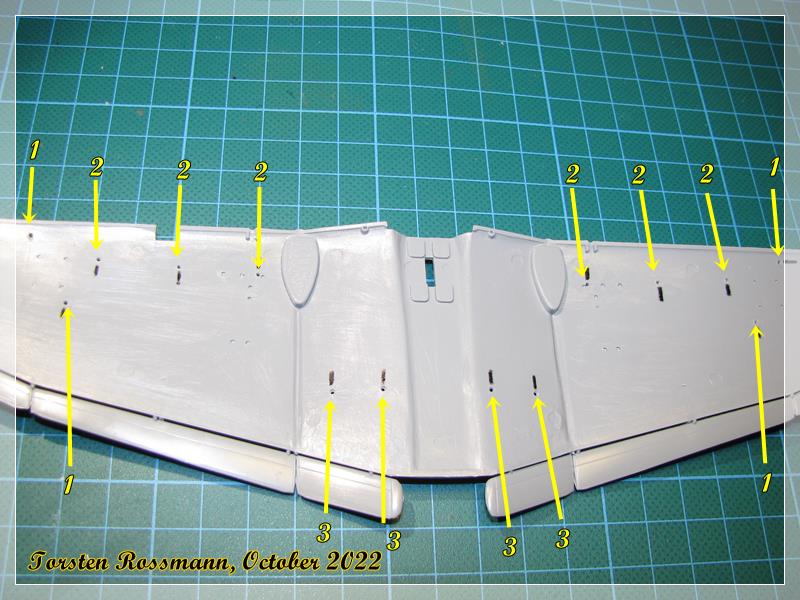
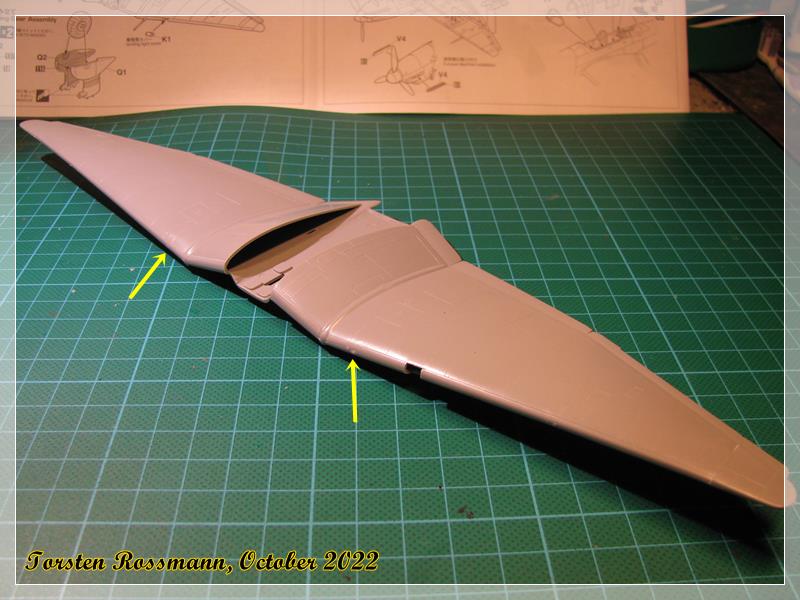
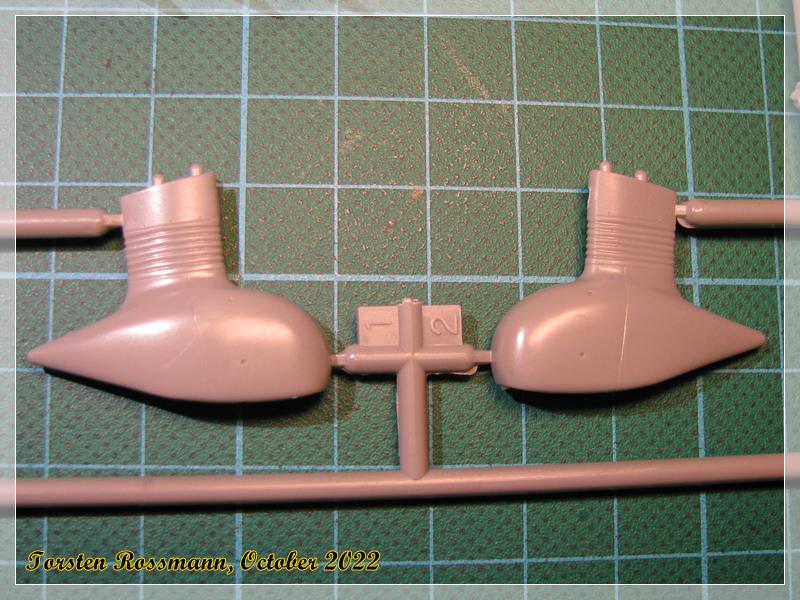
… on Friday I took care of the gull wings and on the inside of the underside are many pre-drilled holes for various Ju 87 versions. I marked the needed holes for my model with a black Edding before drilling them through the surface. The numbers have this meaning:
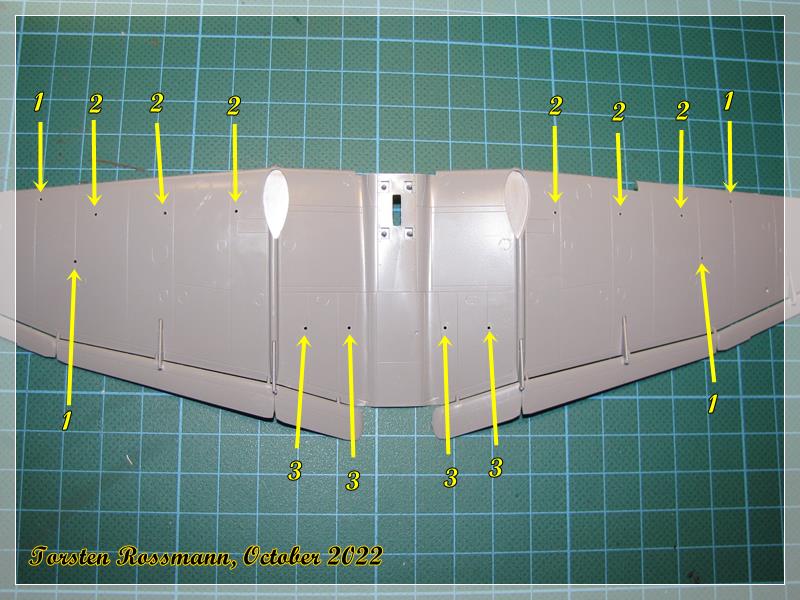
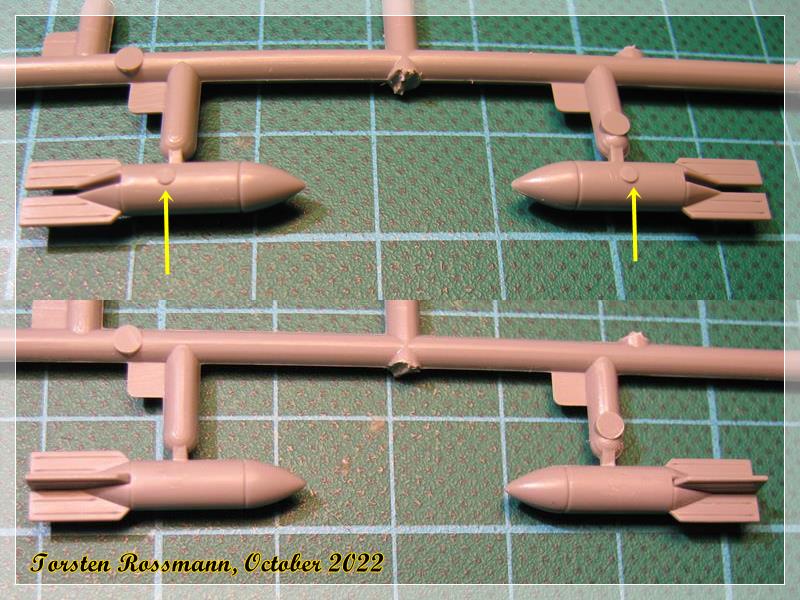
1 = bomb carrier for two 50 kg bombs (one carrier per side)
2 = dive breaks
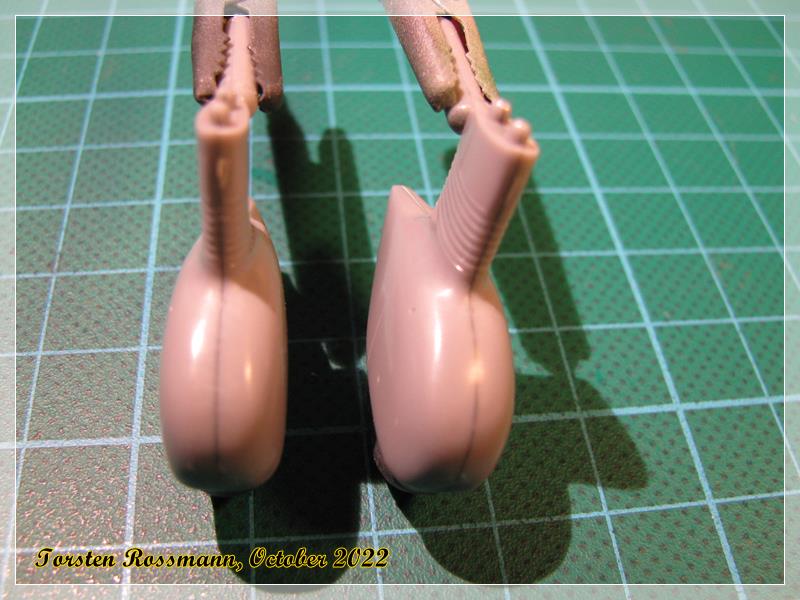
3 = water cooler (one per side)

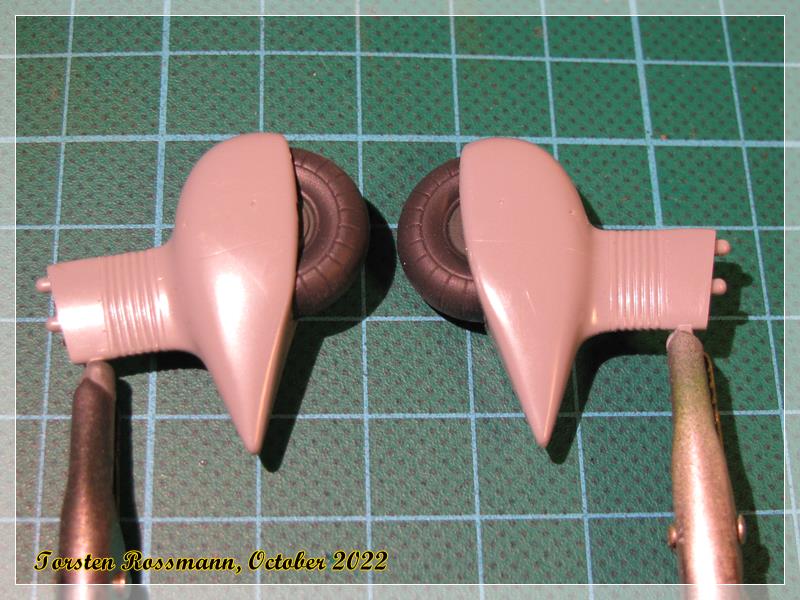
… same on the underside …

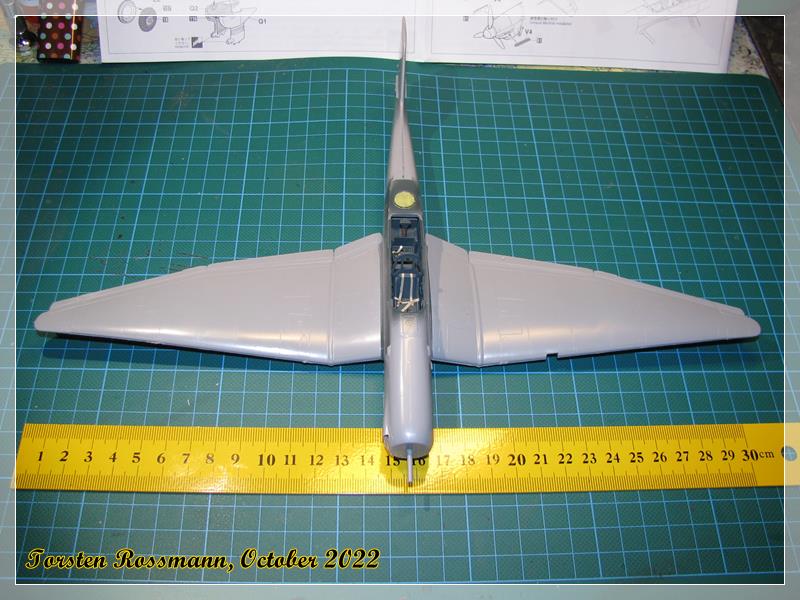
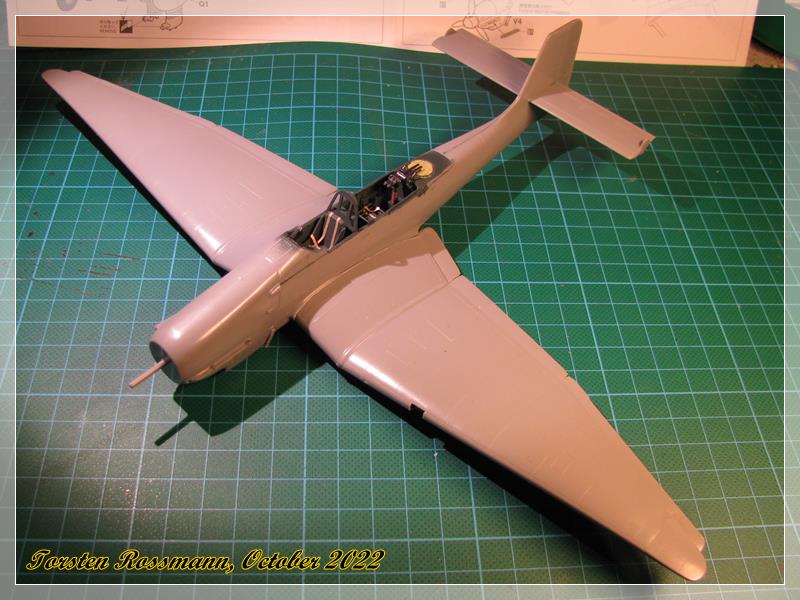
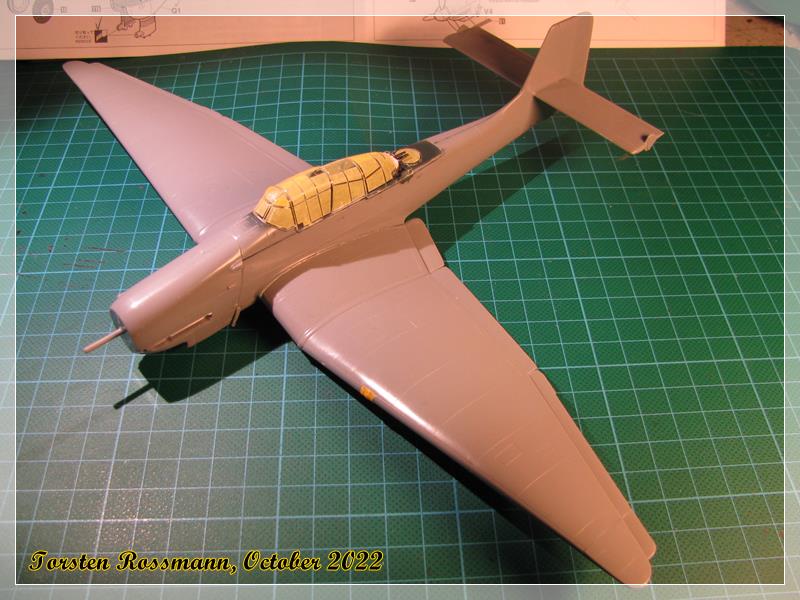
… the fitting of the wing parts is quite good for this at least 15 years old kit. I even didn’t need my rubber bands … :smile:
First test fitting with the fuselage shows a very tight fitting and a gap on the left side which putty and some sanding will take care of. And with a wing span of about 31 cm it’s no small bird …

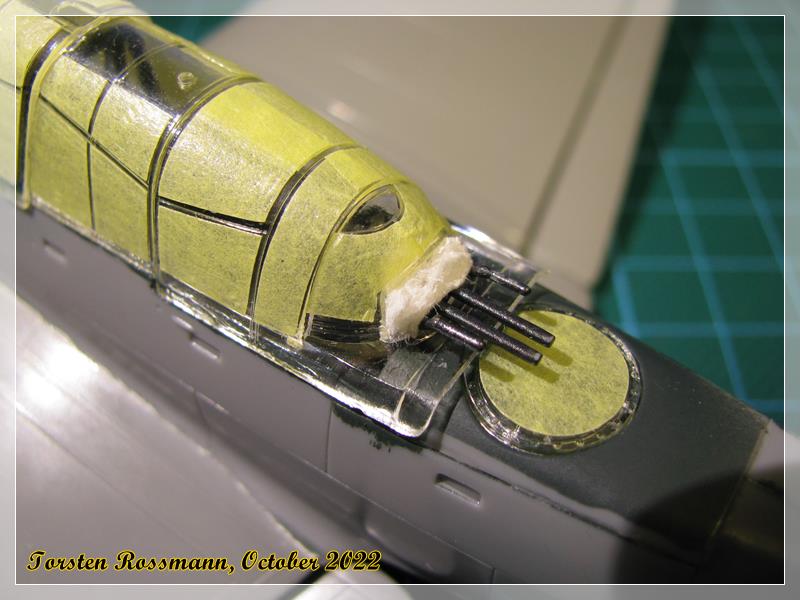
… I have closed the holes for the wing guns again because the kit has 20 mm guns in it, which would be most likely the MG 151/20. In my references I haven’t found that combination yet. As far as I know the Ju 87 D had the MG 17 with a caliber of 7,62 mm in the wings. Have to look further …

More work on this kit next week. It’s still a long and winding road before take off … :slightly_smiling_face:

Torsten
:beers:

11 Likes

@BlackWidow It’s iconic but really rather ugly (even if the D- and G-versions look far better than the B I think), can be one reason for seldom seeing it built :slight_smile: !

Airfix does a new-tool B/R-version (both BoB and North Africa boxings, one even with Italian decals), for the D- and G-versions I think it is still the Fujimi kit one should go for. I have never seen what’s in those boxes but the kits should at least be “semi-modern”, which in this case means the 1980s (oh my, I’m getting old :slight_smile: ). Re-released recently by Hobby 2000 by the way!

:raising_hand_man:

Magnus

3 Likes

Looking good Torsten :slightly_smiling_face:

The Stuka was a big a/c too, I’ve the 1/72 new tooling from Airfix in the stash and at a wingspan of 20cm will fill a fairly large chunk of the display shelf at that size :face_with_spiral_eyes:

2 Likes

I wouldn’t call the Ju 87 “ugly”, Magnus. Maybe interesting or special but not ugly. Well, it was a special aircraft anyway … :wink: I found out that Revell Germany also offers the Stuka D/G in 1/72 in their online shop under 04692, though I don’t know what ancient kit that may be …
Revell Model Building | Online Shop | Junkers Ju 87 G/D Tank Buster

Russ, I guess, the Airfix Ju 87 is a B, right? As it’s a new tooling you can’t go wrong with it. The new Airfix kits do have a good quality. I have built a few of their new 1/48 kits, like the Spitfire Mk. XII, Seafury, Defiant and lately the Chippy. The other Ju 87 I have in my stash is a B-2, originally from Hasegawa but reboxed by RoG several years ago. I also have to look where to put this bird later on my shelf of pride. I guess, the Mustangs have to make room … :wink:

A little update without photos. I have sanded a bit at the IP cover first and glued the wings to the fuselage. The gap on the left side looks smaller now. There’s no gap on the right side. I will add some putty now and leave it to dry over night. So it’s sanding time tomorrow … :woozy_face:

2 Likes

Sure is, Torsten. It’s the B variant and from their 2016 new tooling. She’s a big beasty coming in at 192mm wingspan. But interestingly about the same size as a Fairey Swordfish. :thinking:

2 Likes

Torsten,
Your car guy buddy has as usual be lurking in the shadows following your build each step of the way. And as usual your work it accurate in both modeling and accuracy to the real aircraft.

As usual I’m looking forward to your priming, painting, and decaling updates as that’s where my modeling parallels your modeling.

Magnus, great to see you back on the boards. Hope all is well with you and your family.

If you guys think that the JU 87 is a big aircraft, many years ago when I modeled 1/48 scale aircraft, I bought a PBY-5A by Revell. Now that’s one huge aircraft. Never built it, and I accidently found the box in my son’s old toy chest that I made cleaning the basement.
joel

2 Likes

Thanks Joel! As always I try my best but I know that I’m no first class modeller. There are some others around here who deserve that rating … :slightly_smiling_face:

You’re right, the PBY is a huge bird. I once also had that Revell/Monogram kit in my collection but it’s long gone. Meanwhile I got a newer edition of it but it still sleeps in my stash. But the PBY is a twin engine, so for a single engine the Stuka has quite a wing span. The Nakajima C6N1 Saiun is a bit smaller, while the He 219 from early last year is slightly larger. But the He 219 is also a twin engine.

Anyway, some proof of my work of the last 2 days. Before I glued the wings to the fuselage I added some clear tape to them …

after the glue had dried I mixed some putty and filled the gap. Looks ugly, doesn’t it? This all happened yesterday evening …

this is the result of todays sanding work. Looks okay to me and no panel lines were really hurt thanks to the clear tape … :slightly_smiling_face:

Don’t know when I can start painting. There’s still a lot of work ahead, at least another week. And it will become again a masking monster … :unamused:

Torsten
:beers:

9 Likes

Torsten,
the filled and sanded gap looks much better. I’m going to borrow your clear tap method to protect small molded in details when I sand and polish besides putty when needed.

joel

2 Likes

Perfect Plastic putty is a fairly good finishing putty for this type of work. Before it cures you can use water to clean it up. It does not bite into styrene so it does not damage details or melt the styrene if you go outside the gap. You just use a moist cotton tip run sideways along the join to smooth the putty and a moist paper towel to wipe away excess on the parts. It is perfect for fine and shallow gaps. For large gaps I use the tape method with a stronger putty, but try and keep that putty just below the main parts so I don’t need to sand that at all, and then put the Plastic putty over that.

2 Likes

Thanks for your feedback, guys! :slightly_smiling_face:

Of course you can use that clear tape method anytime you want, Joel. The idea is not of my origin but I find it very useful for works like these.

Thanks for the hint, Peter. I will have a look for that putty. At least Amazon should have it.

Some more progress is done on the Stuka in the last days …

… MG 81Z and Revi are added to the cockpit. Don’t know why the camera focused wrong here …

… Eduard masks in action … :grin:

… Part T4 needs a little help to stay in the correct position. Finally a rubber band! :smile:

… all canopy parts are attached now. There’s no option to leave the pilots sliding canopy open, so everything will stay closed in the end. There’s also a little misfit with part T2 (see arrow) on both sides which I have closed with Micro Kristal Klear …

… I have to close the small opening of the MG with a tiny bit of kitchen tissue or I’ll have spray fog inside … :face_with_raised_eyebrow:

… here’s a photo of the original rear canopy from the ealier mentioned book. Easy to see how thick the plastic part is …

My Ju 87 has already the look of that evil bird of prey the original aircraft was. More to follow soon …

Have a nice Sunday, folks!
Torsten
:slightly_smiling_face:

13 Likes

Torsten,
As usual, your masking with or without a masking set is dead on perfect. And noticing those little issues now, will save a ton of issues after the masking is removed.

joel

2 Likes

Setting a cracking pace here Torsten, and really coming along nicely. :slightly_smiling_face:

I am surprised by the fuselage to canopy mismatch-wouldn’t have expected that from a Hasegawa kit? :face_with_peeking_eye: Do you think you can muscle the canopy back to the correct fit? :thinking:

2 Likes

Great question Russ!

1 Like

Just a small update from my Ju 87 today.

The Romanians got about 90 Ju 87 D-3 and D-5, which had no “Jericho Trompeten” at the landing gear covers…

… so off they go … :-1:

… adding the wheels and sanding the seams was no problem. Still have to cover the wheels though …

… all four 50 kg bombs had some ugly pin marks which were a bit tricky to erase …

… some bit and pieces made ready for painting … :grin:

… the landing light compartment is just a hole in the wing so I made some to look a bit like a landing light from Evergreen I have here. Not near perfection but much better than the empty nothing …

… the opening of the MG 81 Z was closed with a bit of kitchen tissue and I hope that is sufficent …

… so I think I can start painting the Stuka this weekend … :slightly_smiling_face:

Next update soon. Have a great weekend, guys!
Torsten
:beers:

9 Likes

I always enjoy the bits on sticks - “Torsten’s Asparagus”. Looking great Torsten.

2 Likes

Torsten,
And I’ll 2nd it. Of course I kind of borrowed that technique as well.
joel

1 Like

:yum:
Yummy! Love asparagus! But mine looks less tasty …

Just came back from the paint shop and here’s the first result. Yesterday I degreased the model and first paint is RLM 66 “Interior Grey” on the canopy …

… followed by some winter camo. A bit unsuitable for summer 1943 in Ukraine, isn’t it? :wink:

First real paint will be RLM 04 Yellow, which should be done tomorrow.

9 Likes

Hi Torsten,
Nice to see a Romanian aircraft , not many around. I know you are almost done but here is a topic on a Romanian forum about this aircraft, interesting discussion (even if you have to use google translate) plus some photos. Good luck, looking forward to see it finished.
Dragos

1 Like

Hi Dragos!

Welcome to my thread! :slightly_smiling_face: Thanks for that link including those fantastic photos of the original! I haven’t found any of romanian Stukas, so these are very useful for me. This aircraft looks really used up and I bet it didn’t survive the war. My model will look a bit cleaner … :smile:

So I see that this aircraft really had the MG 151/20 in the wings and the Sturzflugbremsen (dive brakes) are missing! Can you tell us what the words on the cowling mean?

I knew this aircraft had overpainted german markings which give me some headaches :thinking: but I have an idea how to solve this problem, at least for the Balkenkreuze and the overpainted swastika. A bit of extra work but let’s hope it works. It looks as if there are no overpainted Balkenkreuze visible on the underside of the wings though.

Several years ago I built a USAAF Spitfire with overpainted RAF markings which I brush painted on the fuselage and used masks on the wings …

And finally a small proof of my work today. Yellow RLM 04 was applied on the underside of the wings and for the fuselage band. Have used Revell Aqua 310 Lufthansa Gelb for it as usual. Comes from the same tin as the Yellow on the RCAF Mustang a few builds earlier … :smile:

Have a great Sunday!
Torsten
:wave:

10 Likes