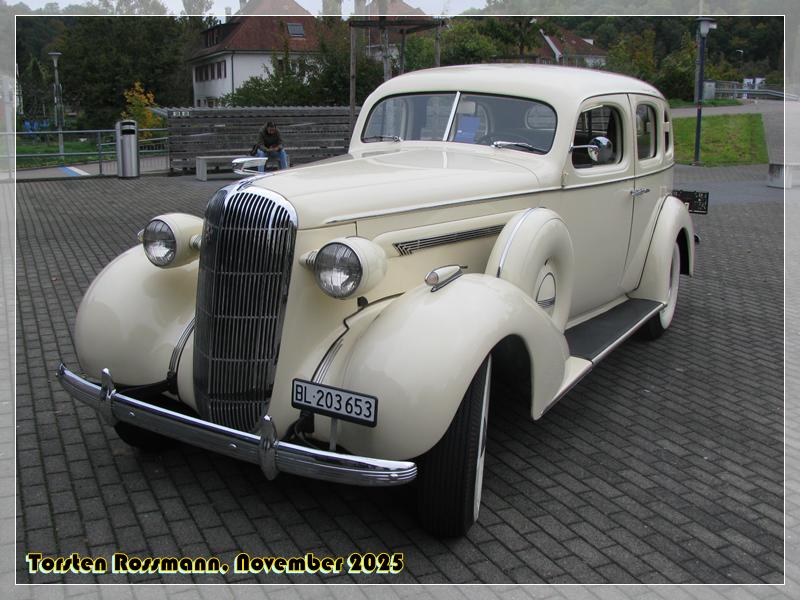
Same would happen to me, if you show me photos of Germany, Magnus. Have not travelled a lot in my country yet. That I can do when my health one day starts to become worse. I haven’t been to many places here. So far I feel healthy enough to do long distance trips and my car is a true road runner. But if you like to know what the photos show, here are the results from top to bottom:
Marina in Karlsborg at the Vättern Lake
Marina in Mariestad at the Vänern Lake. Lovely little town, I could live there for longer
Old Water Tower in Oskarshamn at night
Kalevistenen on Öland
My TT Line ferry in Trelleborg from where I was waiting in the queue to get aboard. The loading was a bit chaotic and we left 4 hours after the planned departure …
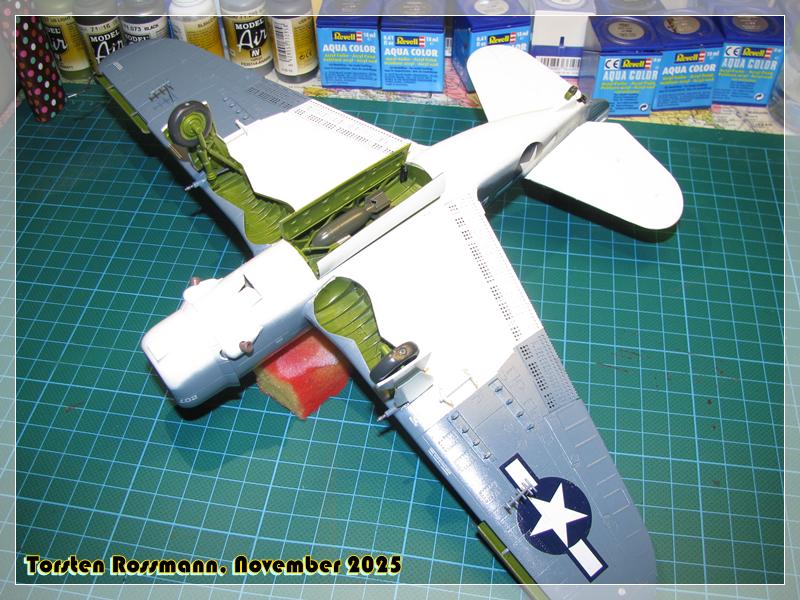
A short update of the Helldiver without photos. I redid the white underside because I was not happy with the result first. Looks much better now and I’m already detail painting. Hope to show something new soon. But now I prepare my stuff for the expo of IPMS Switzerland in Basel this weekend. So everything quiet on my work bench for the next days.
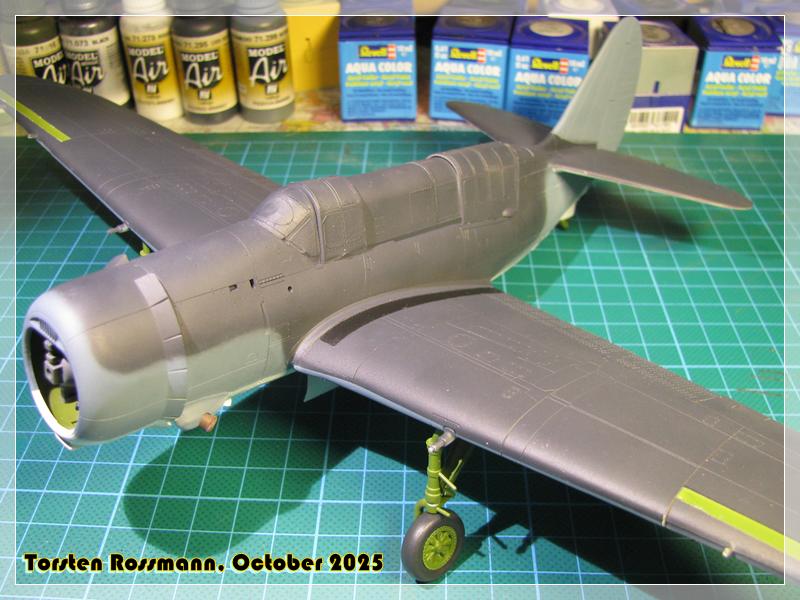
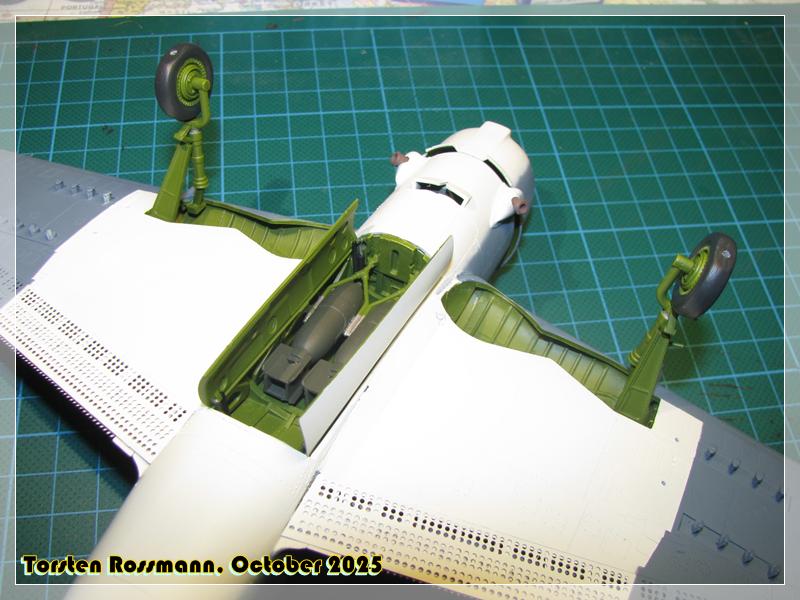
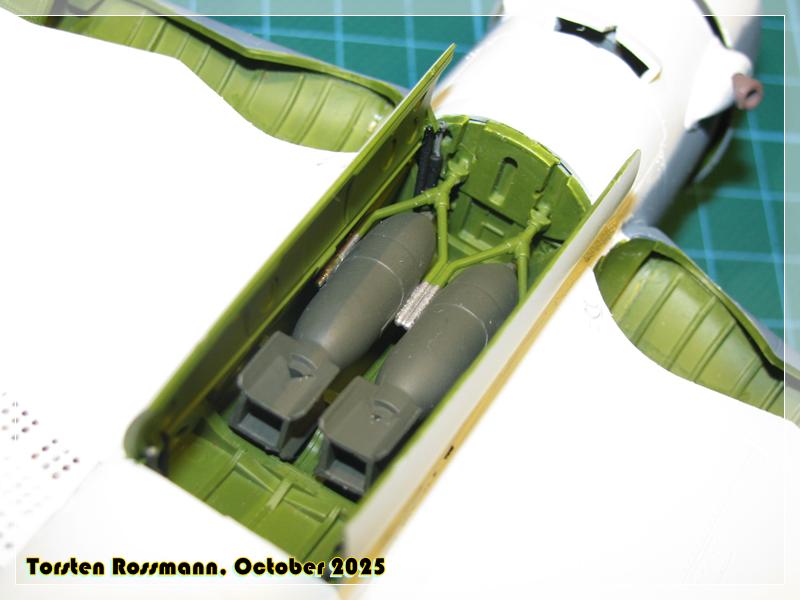
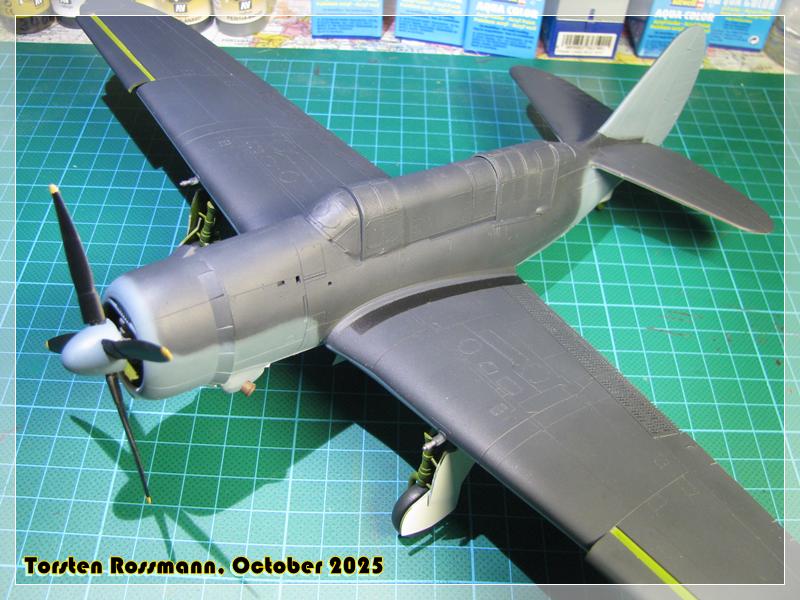
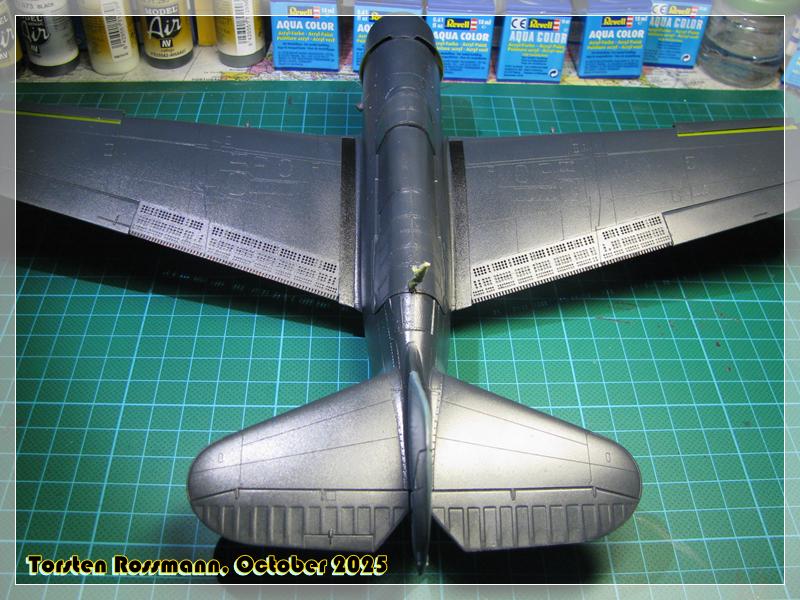
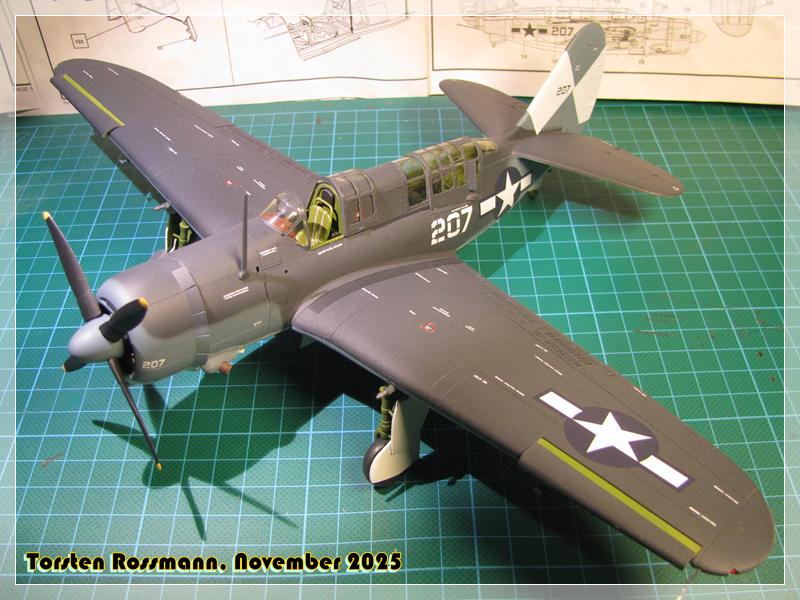
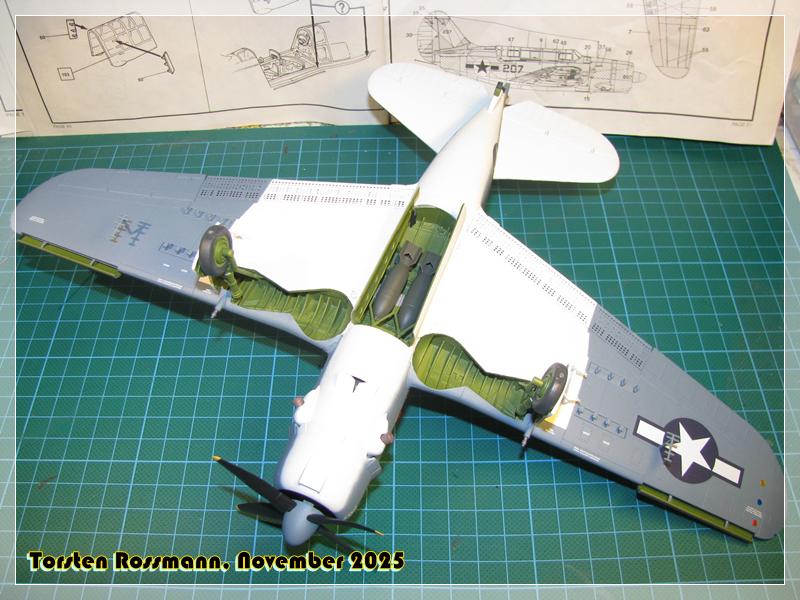
Finally a big step towards the finish line this week! Done most of the paint correctios and detail painting and the Helldiver stands on her wheels. A bit tricky though because the landing gear is slightly outward but not as much as on a Bf 109. On the original aircraft it isn’t. And at first I made the mistake to paint the struts and wheel hub White. But it’s also Interior Green. You can guess, I needed a few layers to get the Green opague …
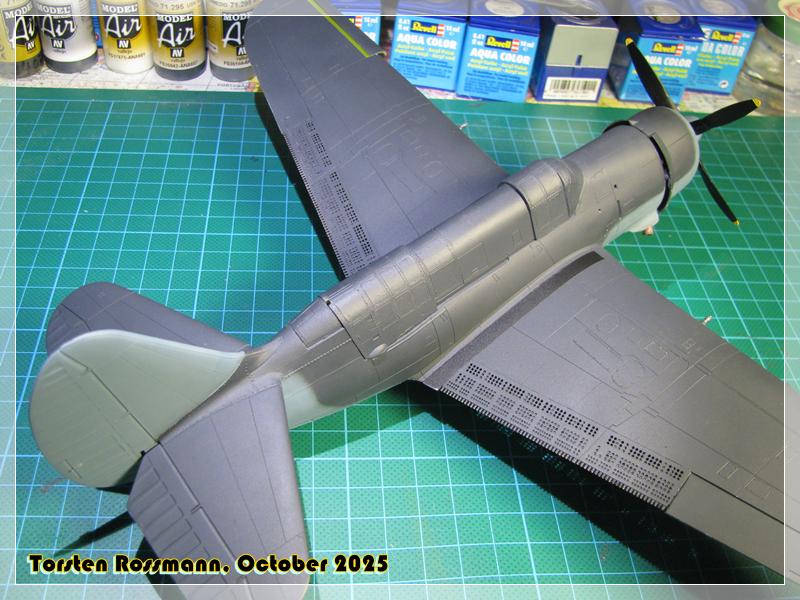
Still some minor touch ups with White and Green but the major work is done on the oldie now. I think I can spray Bodenglänzer all over in the next days. The last missing parts like radar and antenna will be added after I’ve done the decaling. Wish me luck that the decals behave well after nearly 30 years in the box …
I have my final model show for this year next weekend, but the Helldiver will not take part in it.
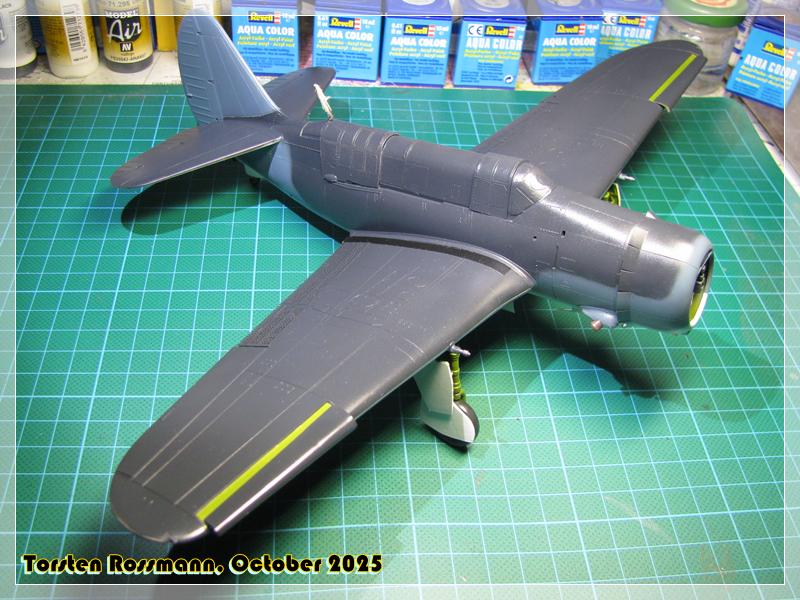
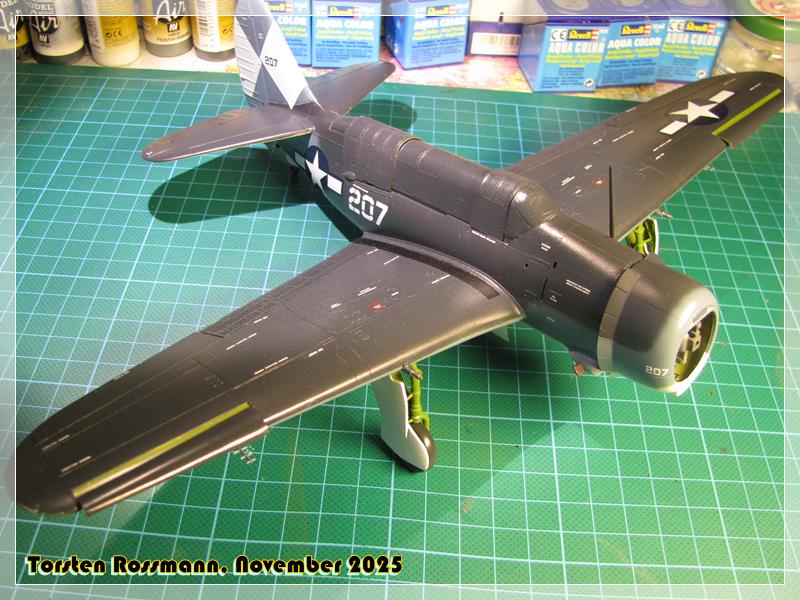
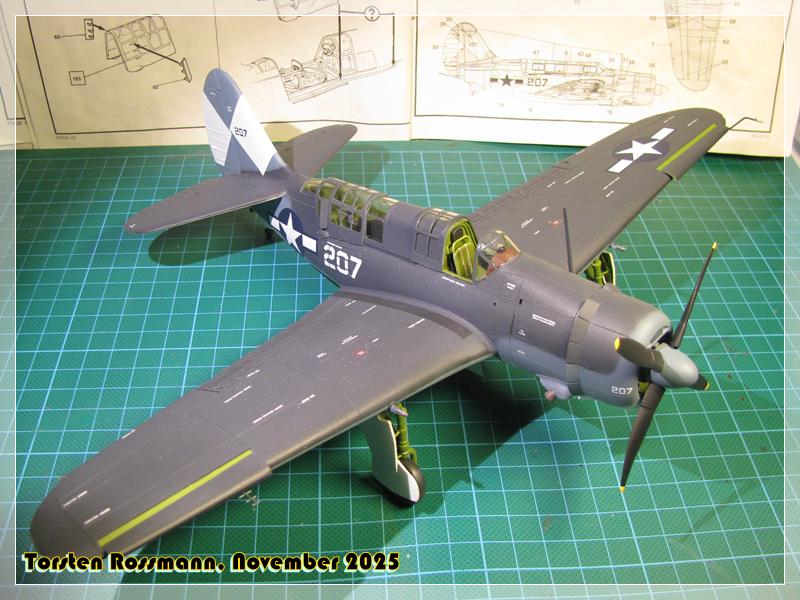
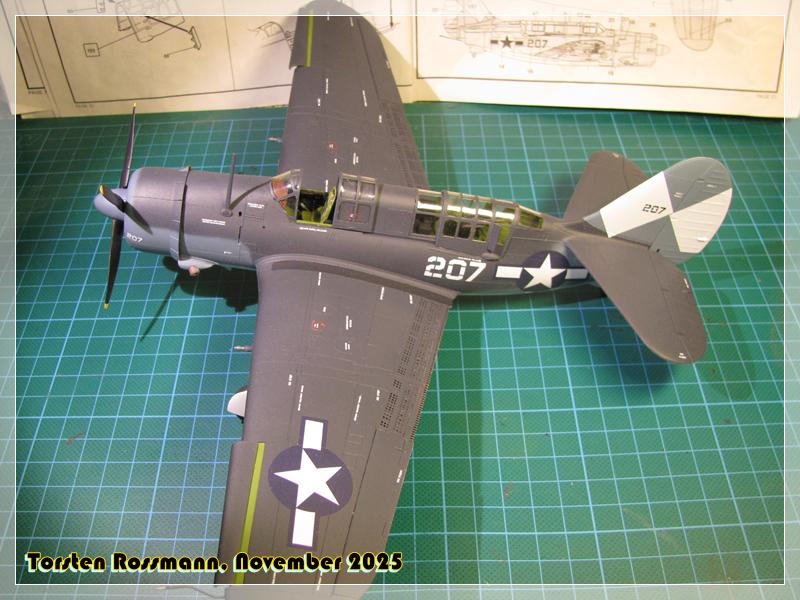
All decals on and sealed now! The quality of the decals is good and they behaved well in warm water after nearly 30 years in the box, made by Zanchetti. Though I’m not quite happy with the big decals on the side rudder. They are one piece each but I had the feeling that all decals are too big, so I cut them in half and I was right to do so. They won’t fit as planned, the tips should show to eachother. But this is the best way I could do. The painting intruction from Revell is not to scale and more fantasy than reality, so also the Star and Bar on the fuselage are too big. They have the same size as on the wings. But other than that I’m quite happy with the result, especially that the decals went on so well. I have already made other experiences with this kind decals. Remember my F4U-7?
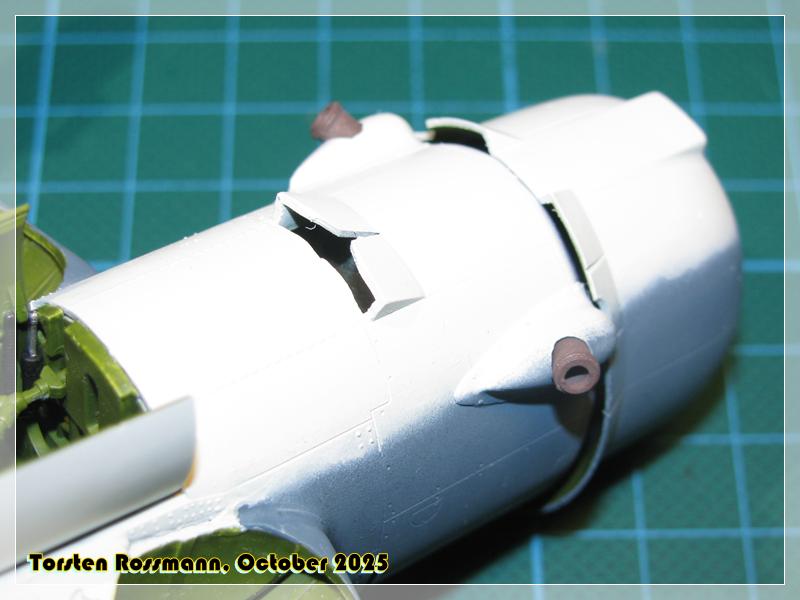
All last parts have joined the build now, like the antenna, pitot tube and underwing radar. I hope to finish the Helldiver within the next few days …
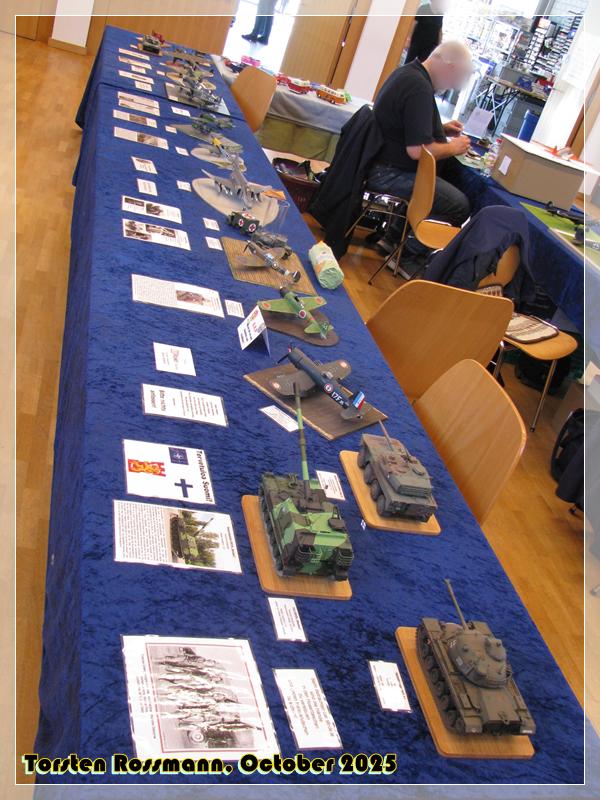
Sorry for the delay in posting progress lately, but as I have told you, I had two fantastic shows in October, first in Basel, where I suddenly had a lot more space than needed …
Saturday evening some of us went to the WTS, the Wehrtechnische Studiensammlung der Bundeswehr in Koblenz. The WTS was already closed but we had the permission to go in and stayed a few hours. 25 older men behaved like little children under the christmas tree …
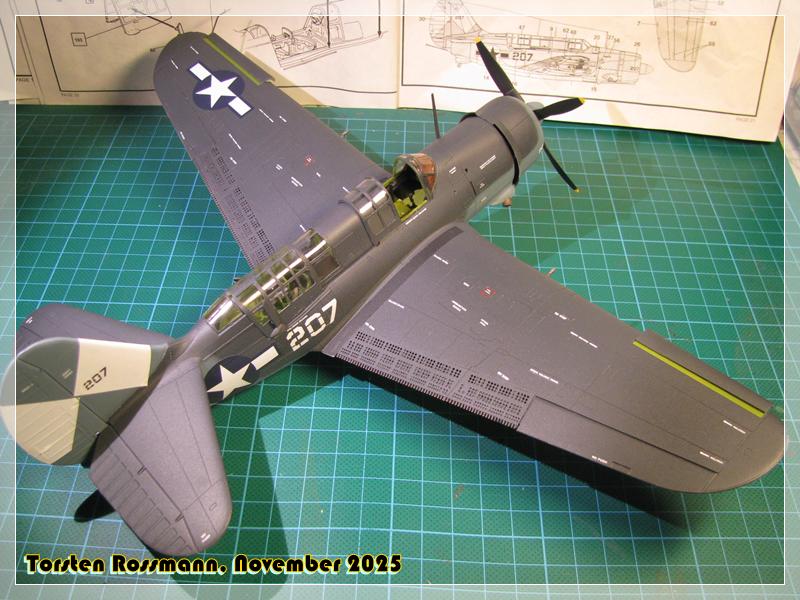
Finally I call this build finished. It has given me a lot of work but despite all the problems along the way I’m quite happy with the overall result.
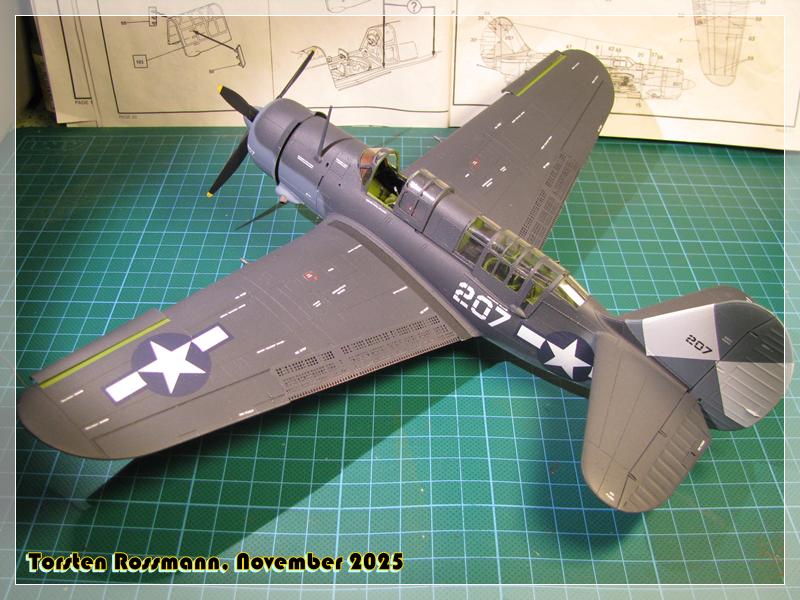
Curtiss SB2C-4 Helldiver VB 83 aboard the USS “Essex”, April 1945
Kit: Revell/Monogram 1:48 (1997)
I have mainly used Vallejo paints and avoided the horrible mixing orgies suggested by Revell
Vallejo 71073 Metallic Black
Vallejo 71137 US Light Green FS34151 (new Interior Green)
Vallejo 71279 Insignia White FS37875
Vallejo 71295 USN Sea Blue FS35042
Vallejo 71299 Intermediate Blue FS35164
Revell 09 Anthracite
Revell 42 Yellow Olive
Revell 90 Silver
Revell 302 Black
Tamiya X-23 Clear Blue
Tamiya X-24 Clear Yellow
Tamiya X-27 Clear Red
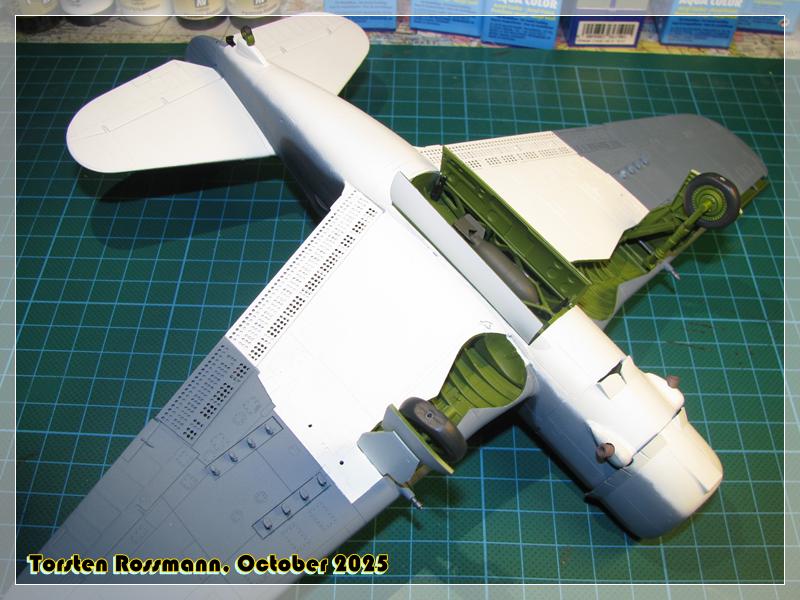
Final coating was again made with a 70/30 mix of Revell Aqua Clear Gloss and Clear Matt. I achieved good results with that paint with my last builds. The formation lights on the underside of the right wing are painted with Tamiya. Had to check my Marauder build to get them in the correct order. Demasking the canopies was easy, no problems here. Though I notice some overspray that came under the canopy. As mentioned earlier I opened the pilot’s canopy because of the bad fit as shown in Post 1047. The final parts added to the Helldiver were the air deflectors on the gunner’s compartement. I decided to keep that canopy close because the evil carpet monster had eaten the gun sight … The decals are both on the positive and negative side. Positive because they came off easily from the transfer paper after nearly 30 years in the box. Negative because they seem to be too large, at least some, especially on the side rudder and the Star and Bar on the fuselage.
So, after nearly 120 w.i.p. photos, including some from holiday this build comes to an end now. Thanks to everyone who joined me along the way and I hope you’ve enjoyed it. The quarterscale Helldiver is a rare seen built model as I have noticed. At least I have not seen many. And now find your place on the shelf of pride! First show for the SB2C will be in February 2026 in Thionville/France. No more shows for me this year.
Have a great weekend everyone and happy modelling!
Torsten
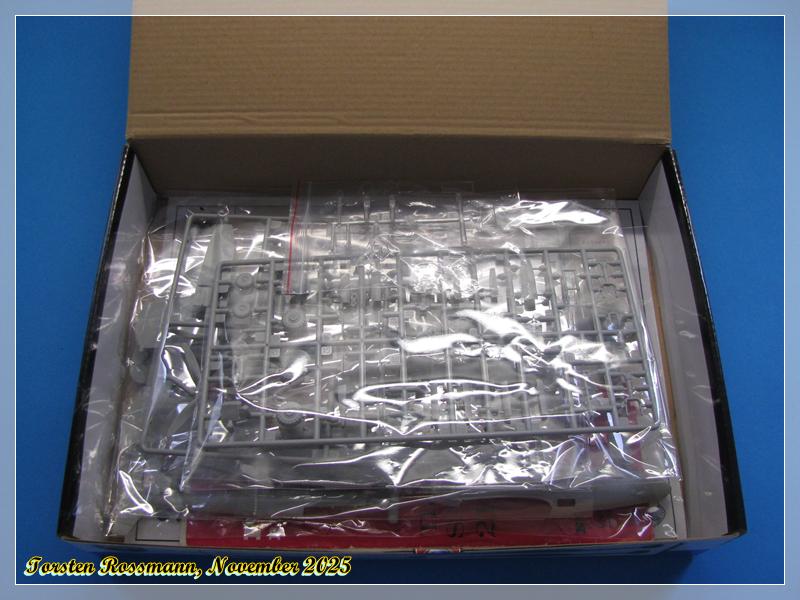
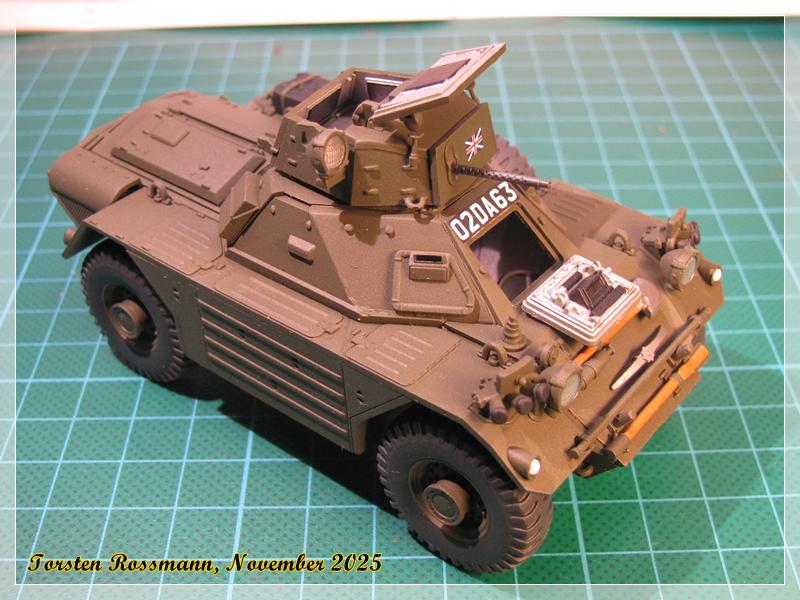
Now that my Ferret is nearly done I’m ready for the next build. Living for 9 years in my stash now, it was time to put this rare kit on the bench. It was starring at me all the time.
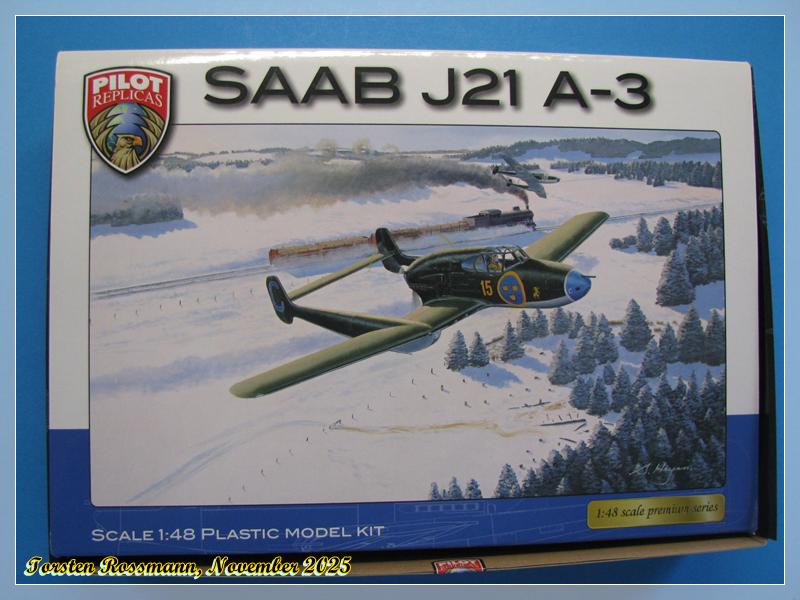
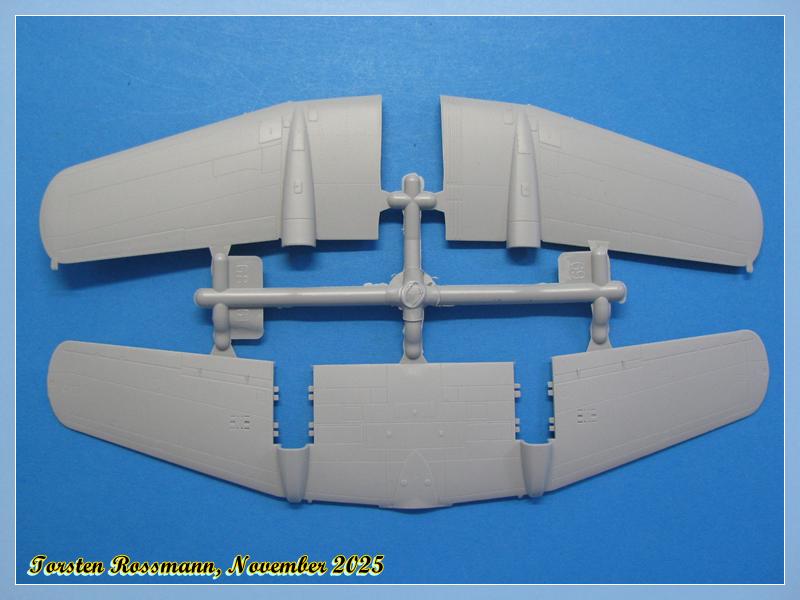
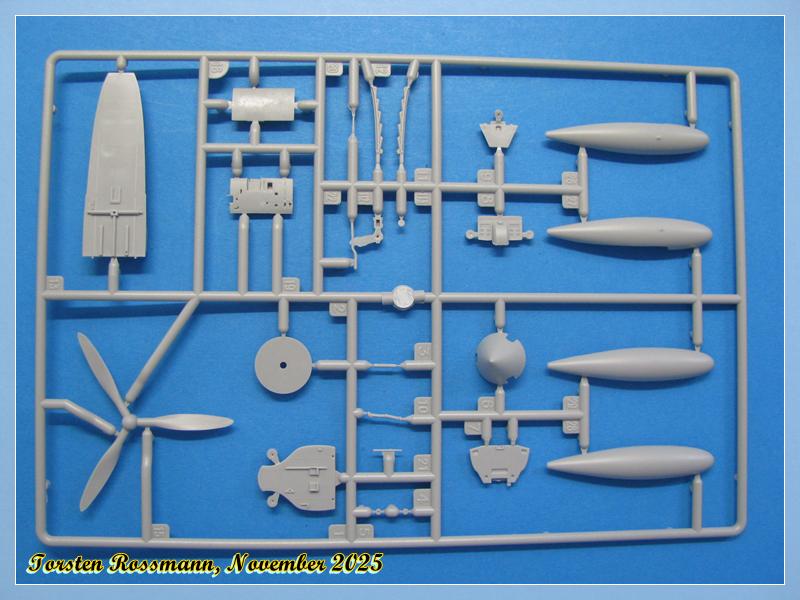
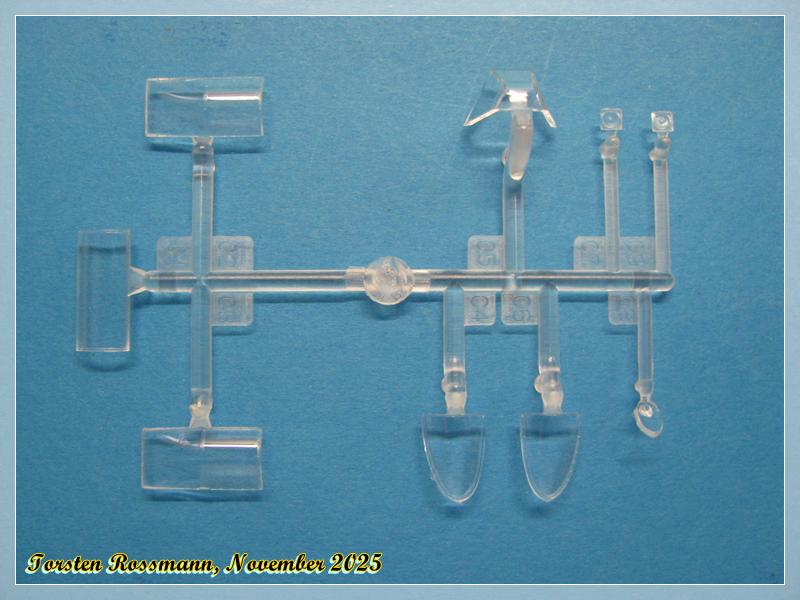
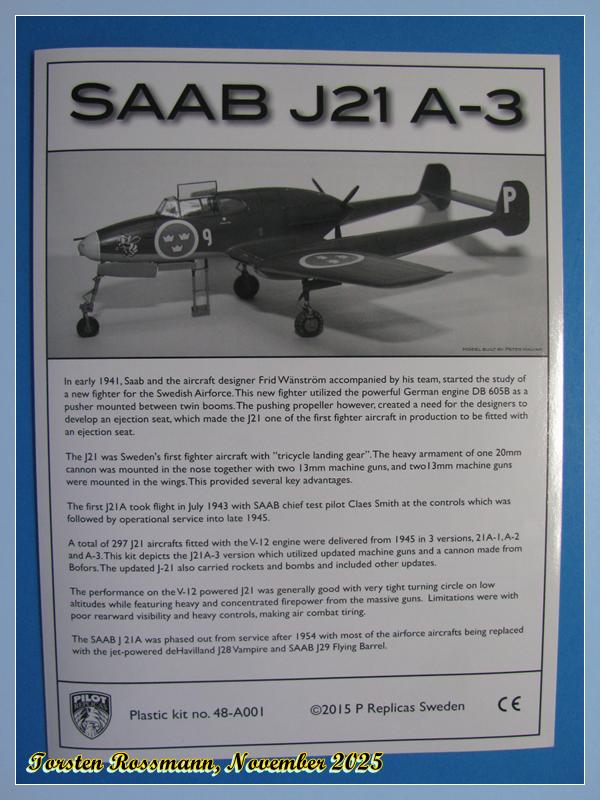
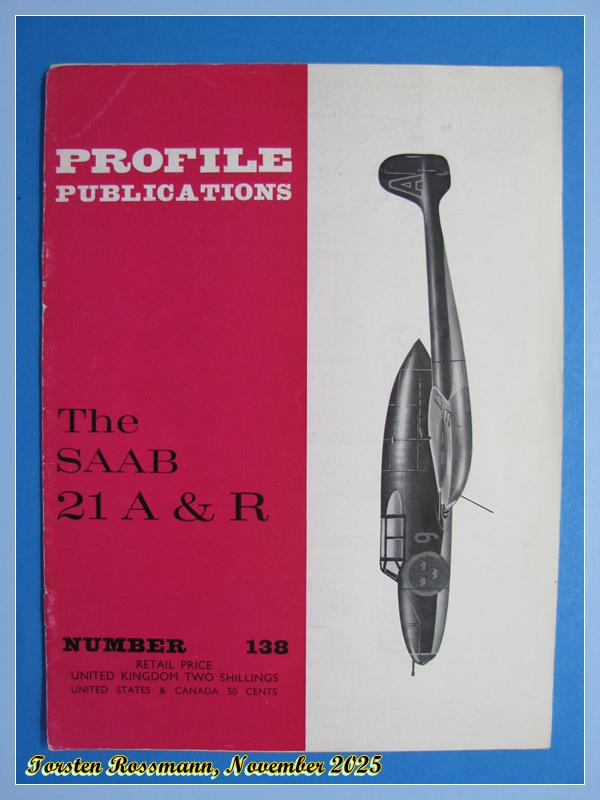
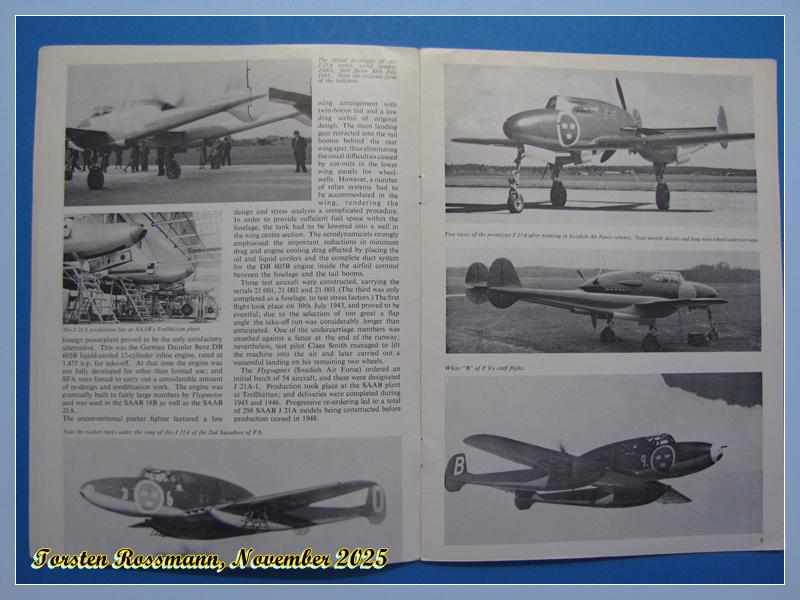
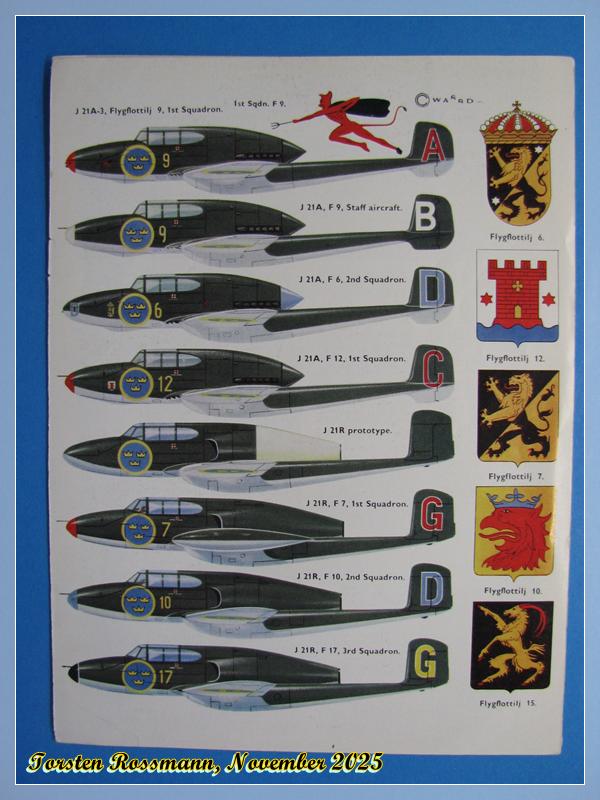
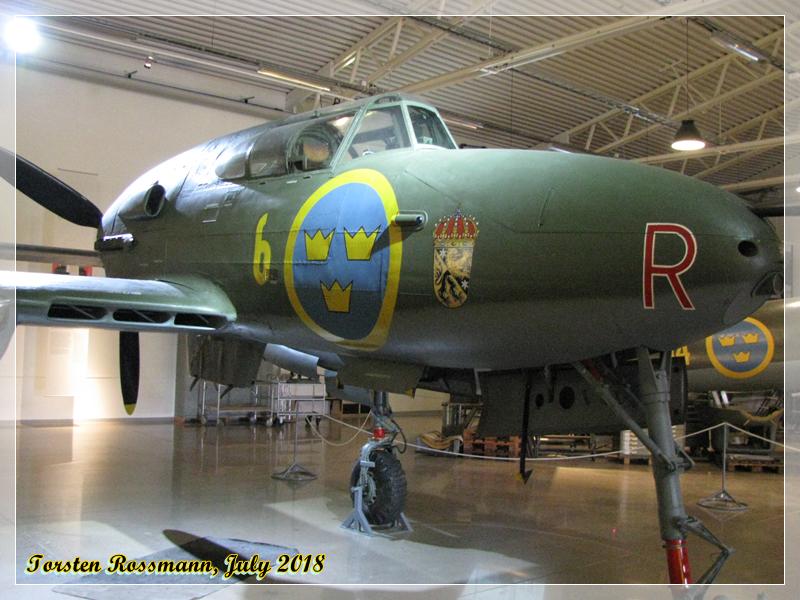
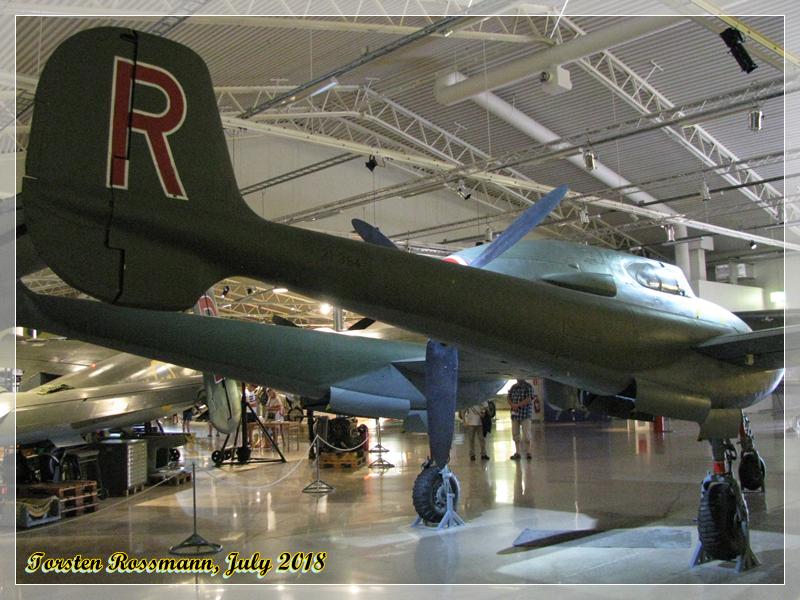
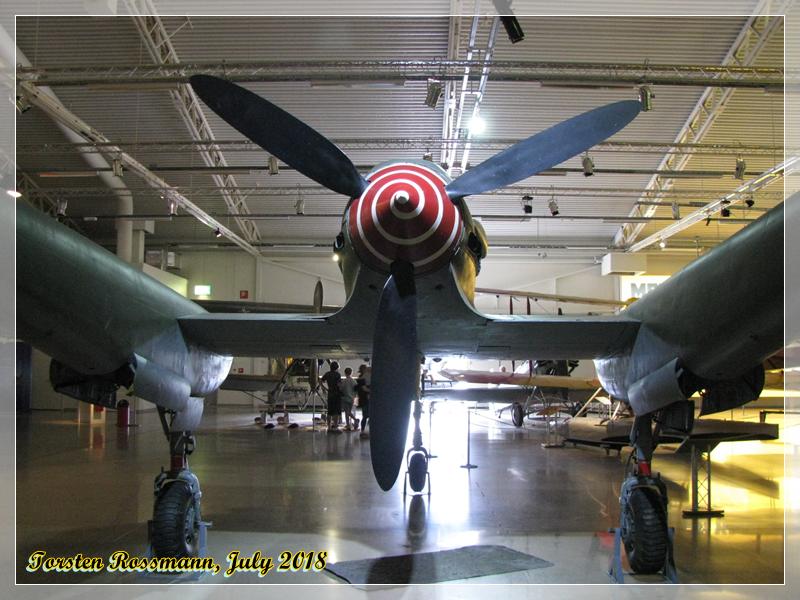
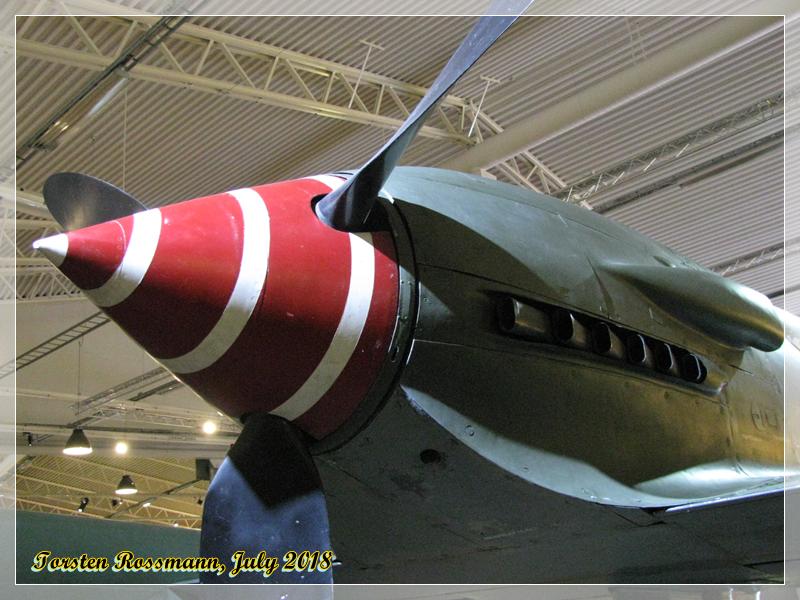
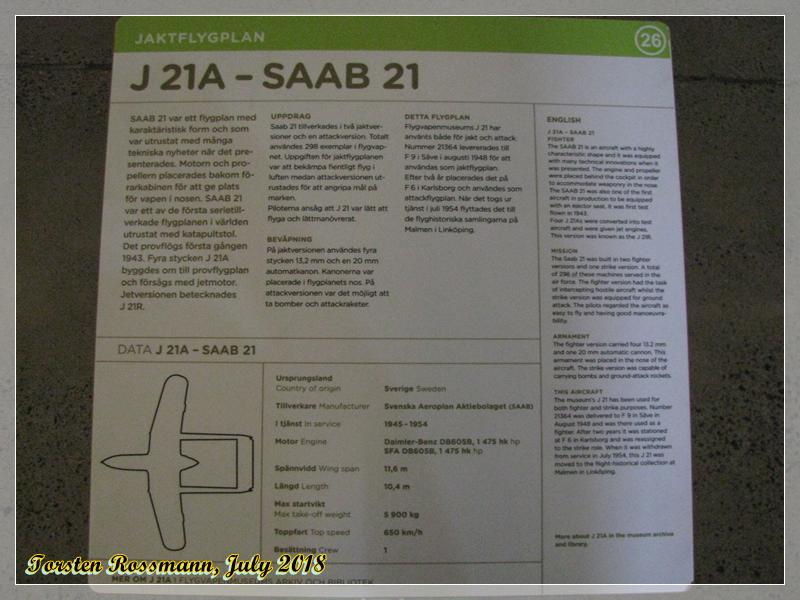
Some of you may know my soft spot for SAAB aircraft and I’ve built quite a few of them in the past, like the Tunnan, Lansen, Draken and Gripen. So it’s time for the SAAB J21 A-3 to join the Tre Kronor Team, don’t you think? The kit comes from Pilot Replicas and is as always in 1/48 …
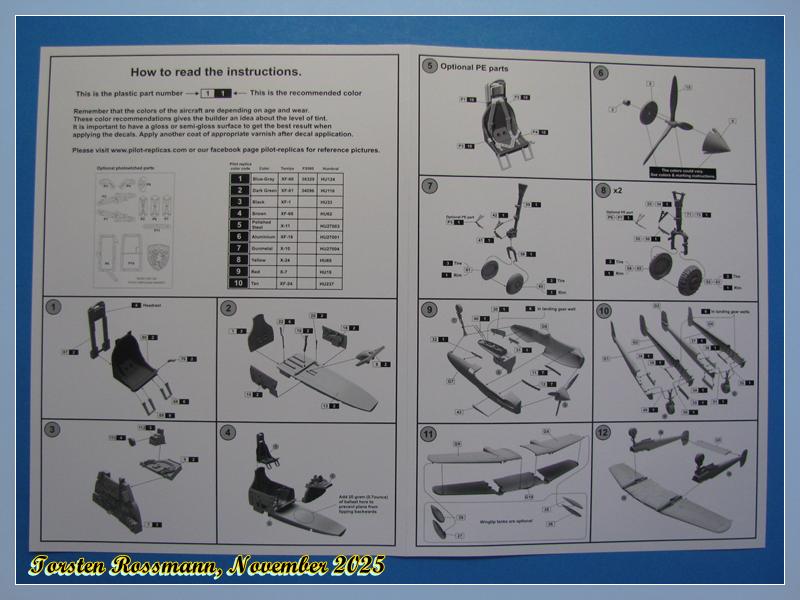
Unfortunatly I have no Eduard masks for this kit, so I will see what I can do. Have to check if I have all needed paints around but I think so. Maybe our Magnus @magnusf can confirm that the suggested paints are correct …
I will start with the build in the next few days and it would be great if some of you guys would join this ride again.
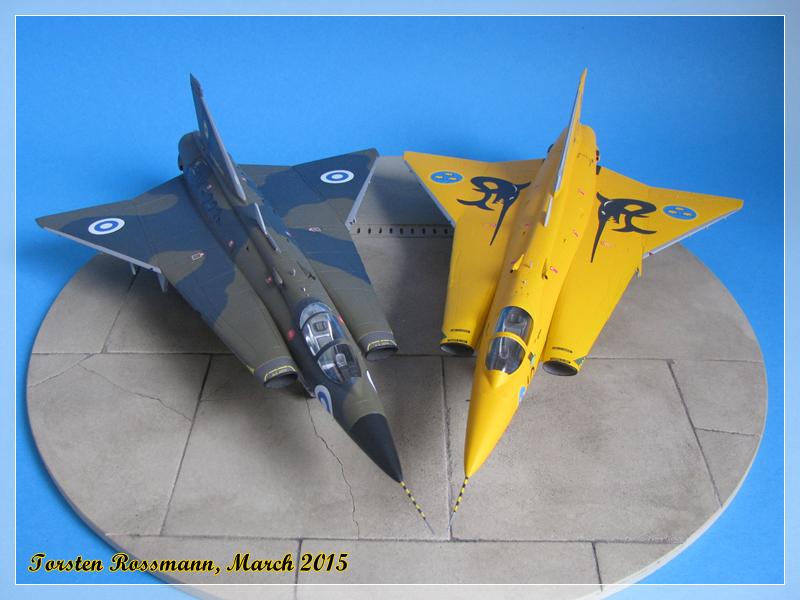
I’m also no SAAB expert (wouldn’t say I’m an expert in any aircraft at all ), I just like their aircraft and as mentioned have built a few of them up to date. Though I’m far more into props I have a favourite jet plane and that is the J35 Draken … Here are my Hasegawa Draken, which I built 2015 and I’ve seen these 2 birds in real already!
@BlackWidow are you into Tamiya? If so, I can help with the following:
For the green: XF-13 for a new aircraft, XF-61 if it has been in service for a while. Another friend of mine thinks XF-81 is the best match.
For the grey-blue: XF-66 with XF-53 a close second. Mr XF-81 (world famous from the sentence above) recommends a mix of these two .
Another favourite combo is H309 and Gunze H307 with a drop of blue added.
I can’t read what PR recommends in the table in the instructions but I think you can safely follow their recommendations, the person behind the company knows his stuff! (His dad was even one of Sweden’s pioneer aftermarket decal printers starting in the 1970s!)
Another piece of trivia: I had a teacher at university in the 1990s who had flown the J 21 in the late 1940s - he even crashed one!
Thanks for the time you put into your answer, Magnus! Much appreciated! You pointed me into the right direction.
Of course I don’t have FS34096 and 36329 in any paint as suggested by Pilot Replicas …
The Tamiya paints you mentioned are exactly what PR suggest. But I’m not into these paints, as they have only a small variety and mixing is often inevitable. So I don’t have these paints. But I checked my (few) Gunze paints and I even found a glass of H309. But it doesn’t sound healthy, means, it has dried out … So I checked the Gunze Colour Chart and noticed FS34079 and FS 36320 for H309 and H307. And I have these with Vallejo Model Air, though their names are completly different to Tamiya or Gunze. So I’ll use these for the J21 and hope to be close enough …
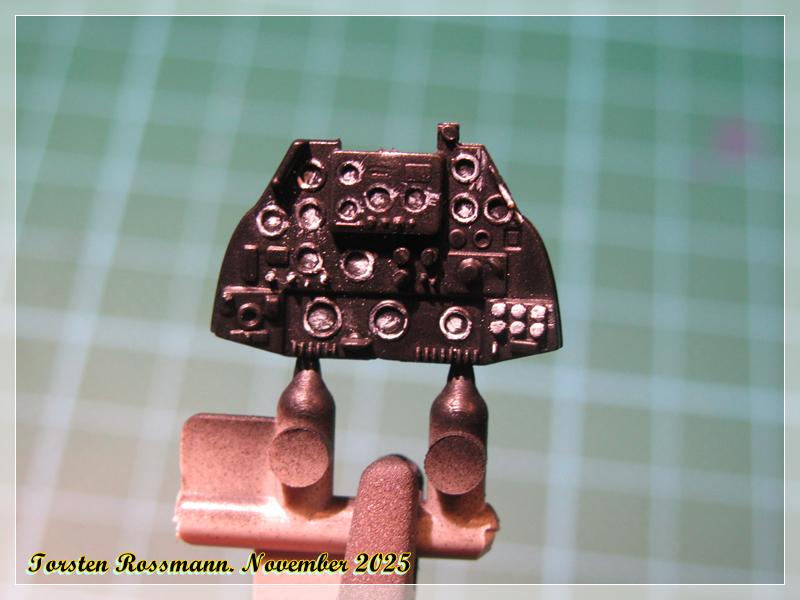
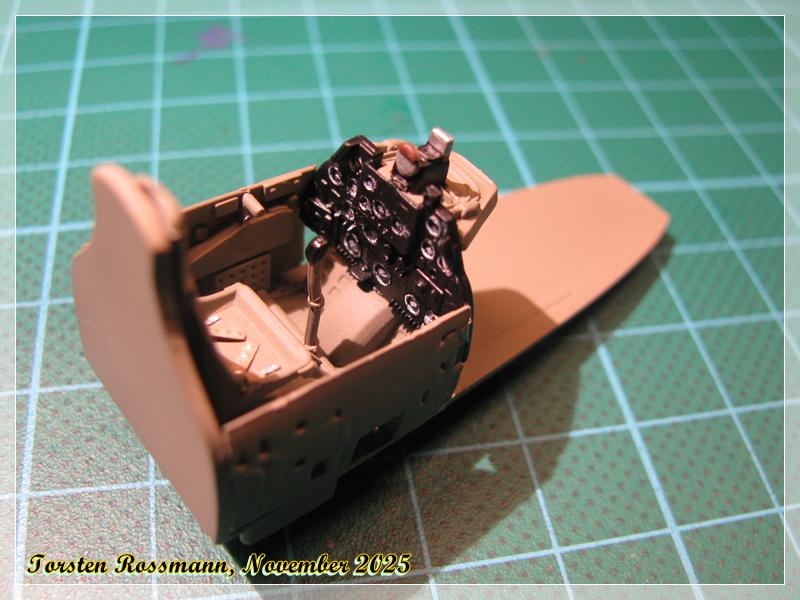
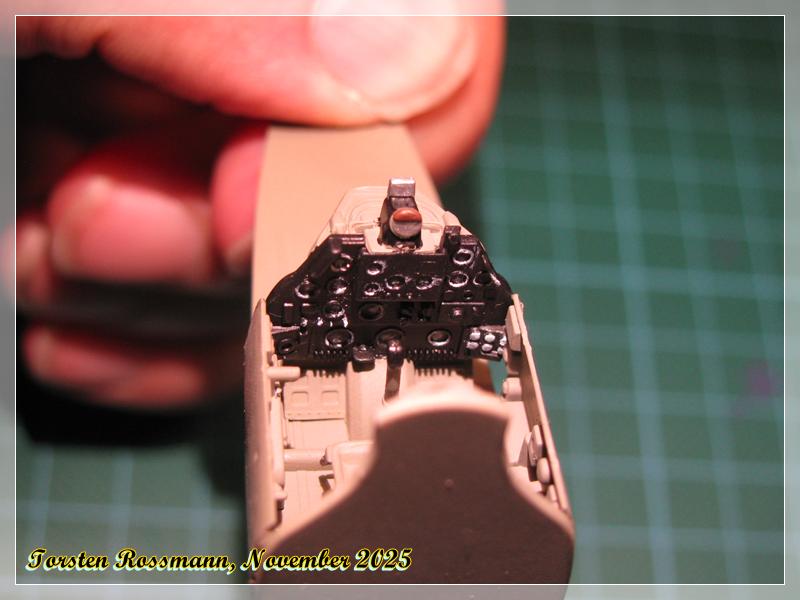
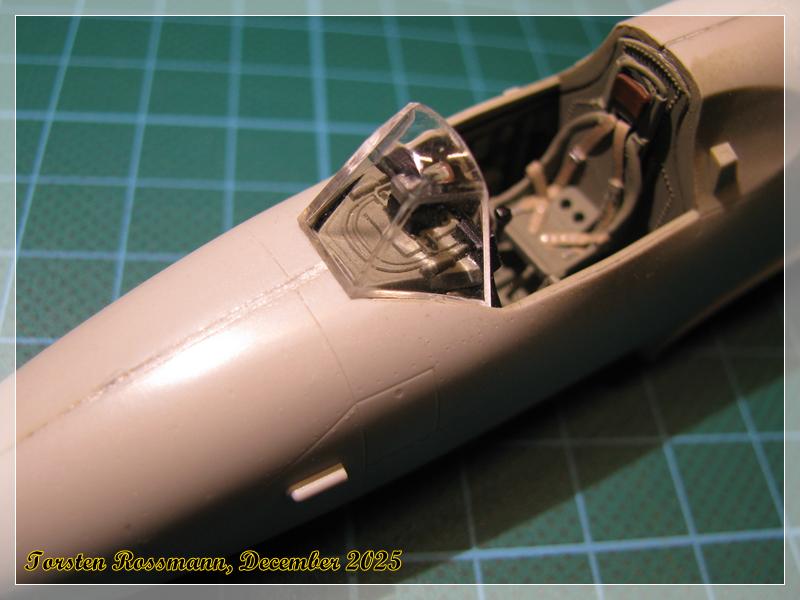
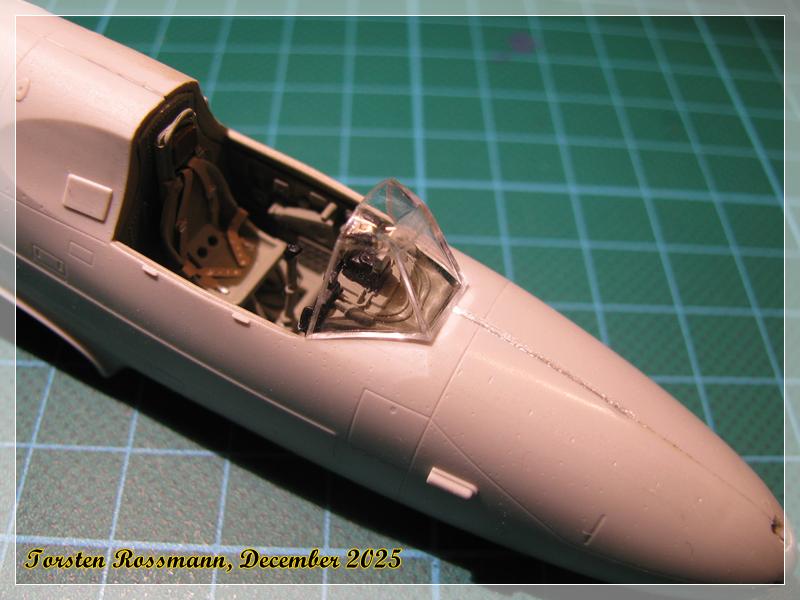
The instrument panel looks nice but it has neither PE parts nor decals for the gauges. So I dry brushed everything a bit. Not perfect but better than nothing …
Cockpit is completed. Detailing is a bit disappointing to me. For 50 Euros I can expect a bit more I guess. There are even no clear parts for the gun sight … I have decided to keep the cockpit closed in the end because of the poor details.
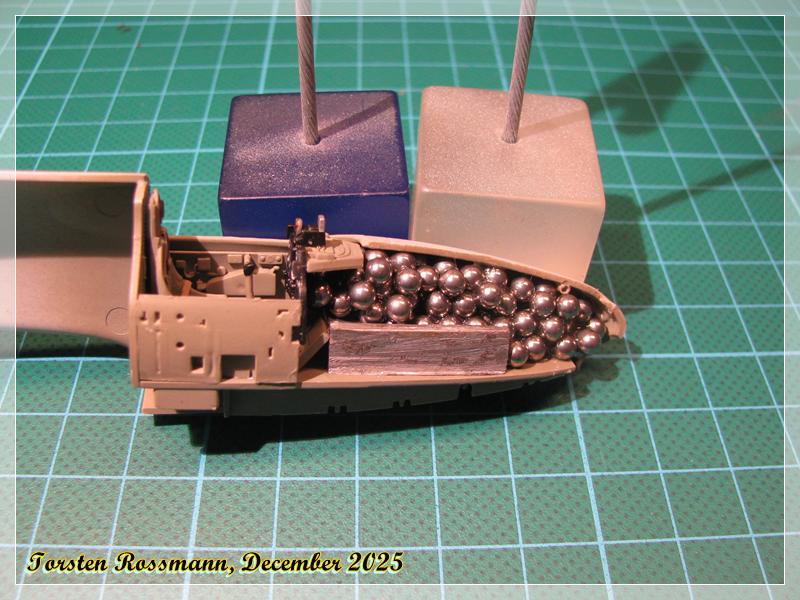
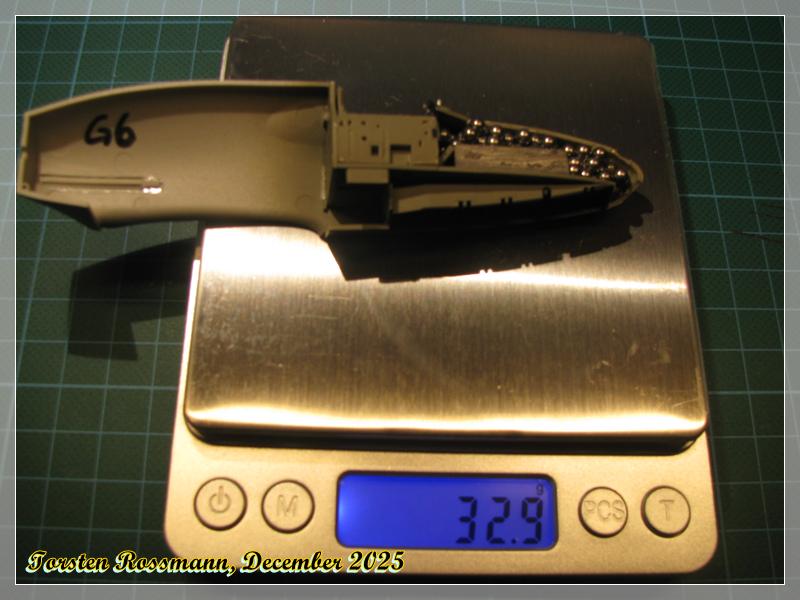
After the problems Jim had with transfering our photos to another drive in the last days (a huge thanks to him for his work ) I can finally show you my progress on the J21 of the last week or so. First I added some balance weight to the front of the fuselage …
… minus the plastic parts it’s about 24 gr. I hope that will do the job otherwise I have another tail sitter Ponal White Glue holds the bunch at its place …
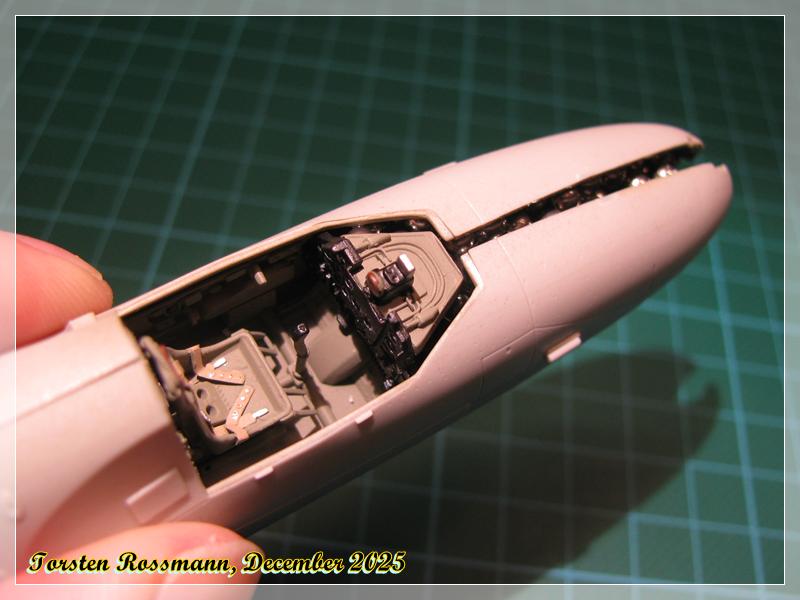
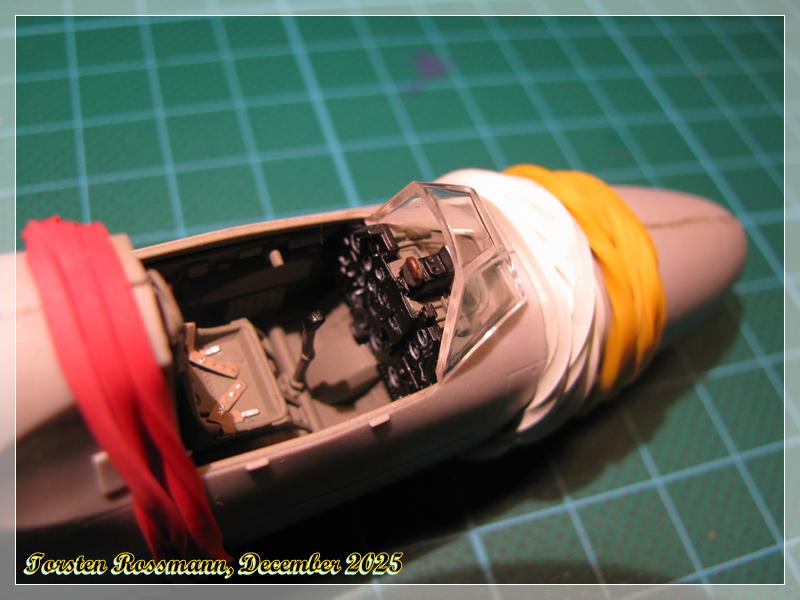
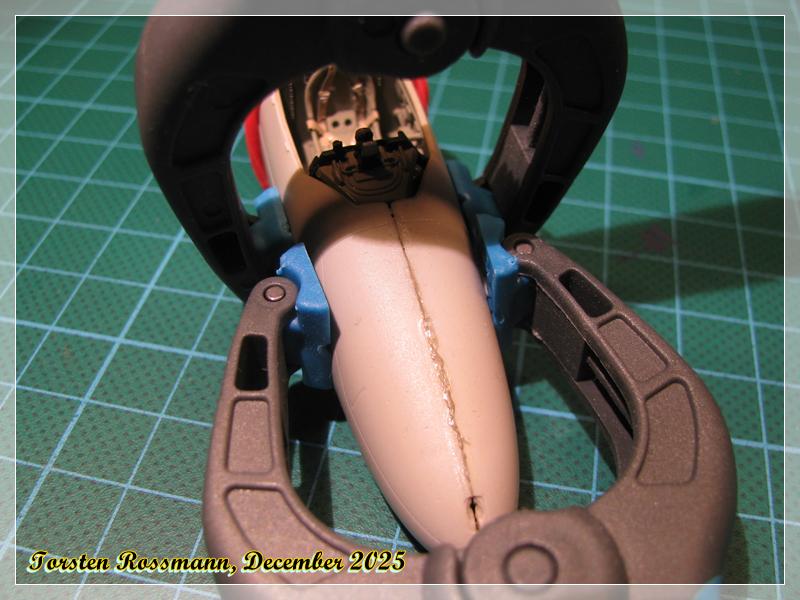
… later I noticed that the rubber bands are not sufficient enough to press the fuselage parts together. So I used 2 strong clamps and some Ethylacetate over night. I know, the seam looks ugly but I will sand it later. I even might still need some filler just in front of the cockpit. I’ll see …
As I assumed, I had to use some filler in front of the cockpit but test fitting of the windshield still looks good. Maybe it needs a rubber band to stay in place later. Not sure yet if if open the cockpit or not …
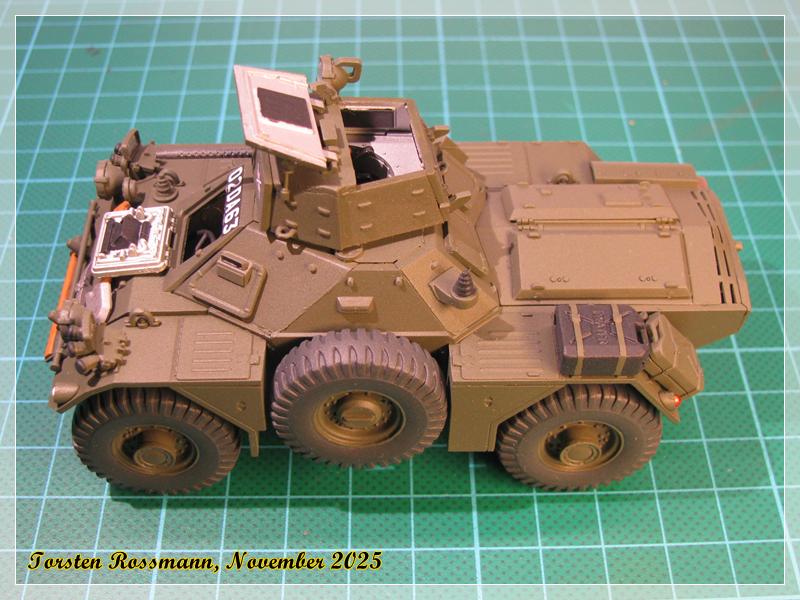
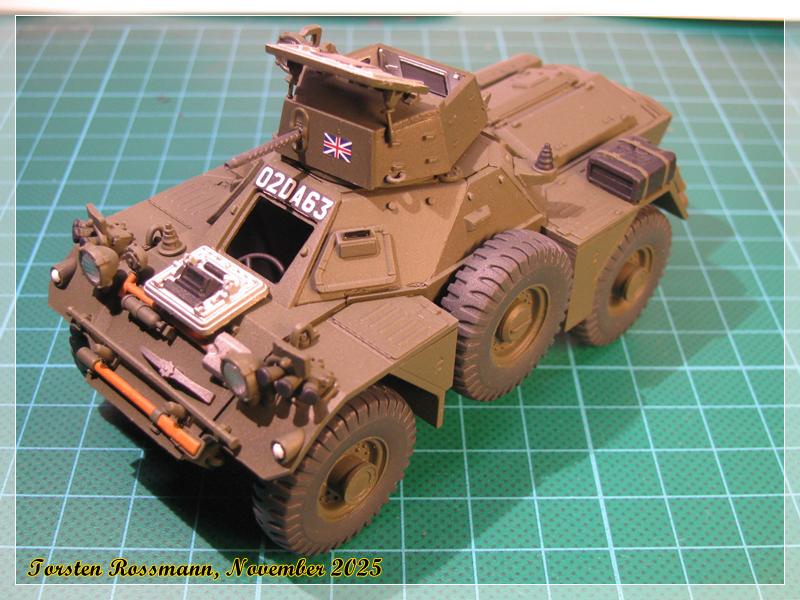
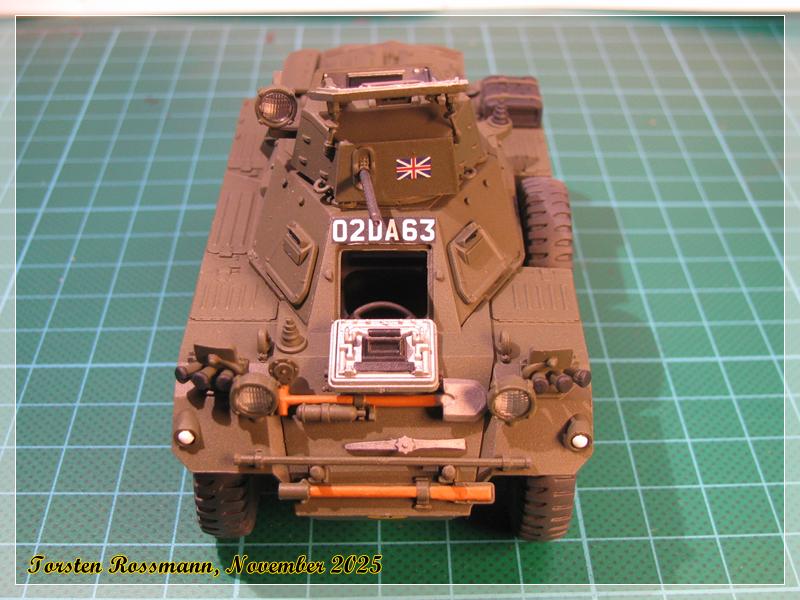
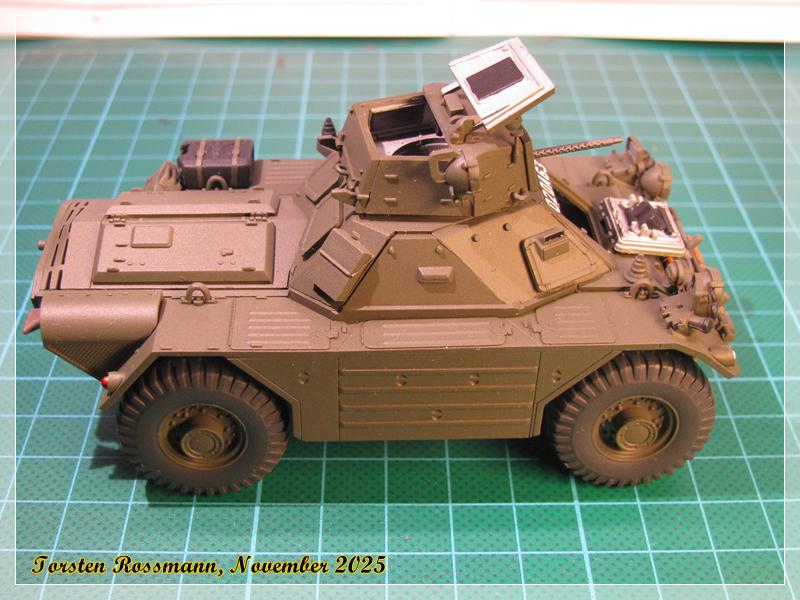
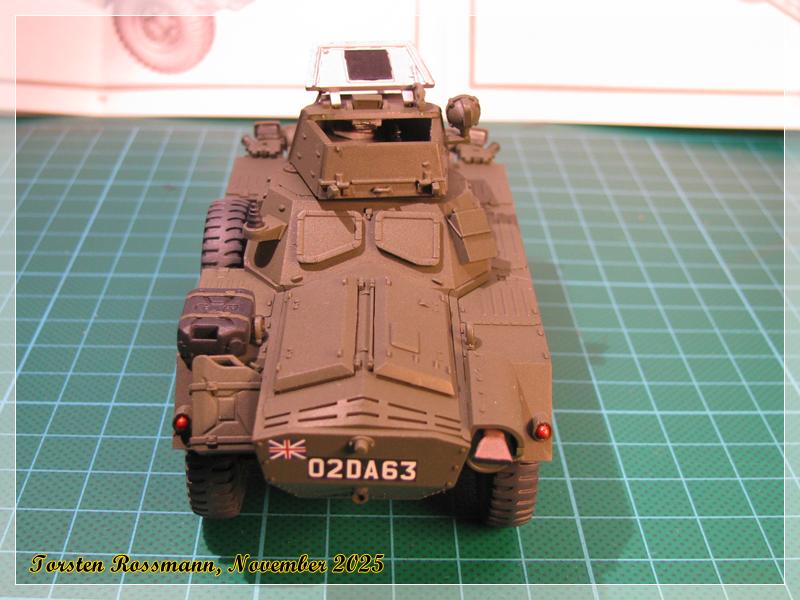
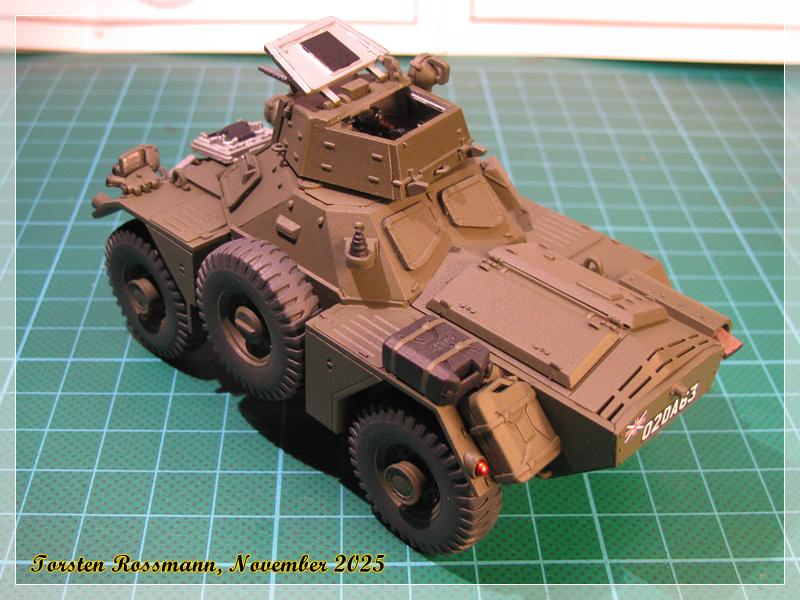
Before I forget I want to show you my latest model, finished earlier in November. I guess not many have seen it. It was a fun build, no real big problems. Painted with Vallejo and Revell. It’s only 11 cm long.
Ferret Scout Car Berlin Infantry Brigade, 1961
Kit: Airfix 1/35
@BlackWidow I know that you aren’t a paint-Muppet but I checked my FS595B fan deck (which makes ME a certified paint-Muppet ) and FS 34096 and FS 34079 are close to identical so you’ll be perfectly fine with your paint choice.
And thanks for showing the Ferret, I’m a huge fan of wheeled armour even if I never get around to building any.
Paint Muppet, hahaha! So funny!
Thanks for your feedback, Magnus. Thanks to confirm that I’m close enough with my chosen paints. You’re right, I hate mixing paints. If I don’t have the recommended paint or brand I try to find the nearest one. With over 100 bottles my box of Vallejo paints is quite large but there are still a few I don’t have or would rarely use.
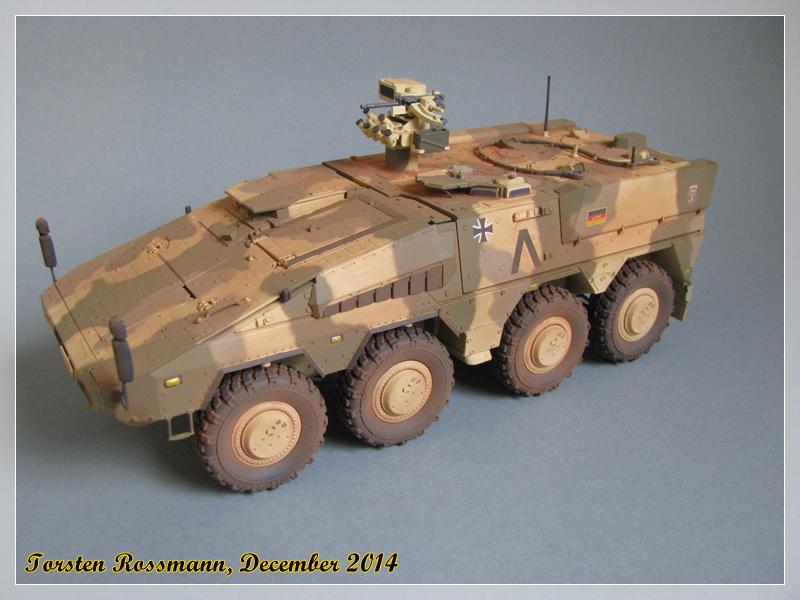
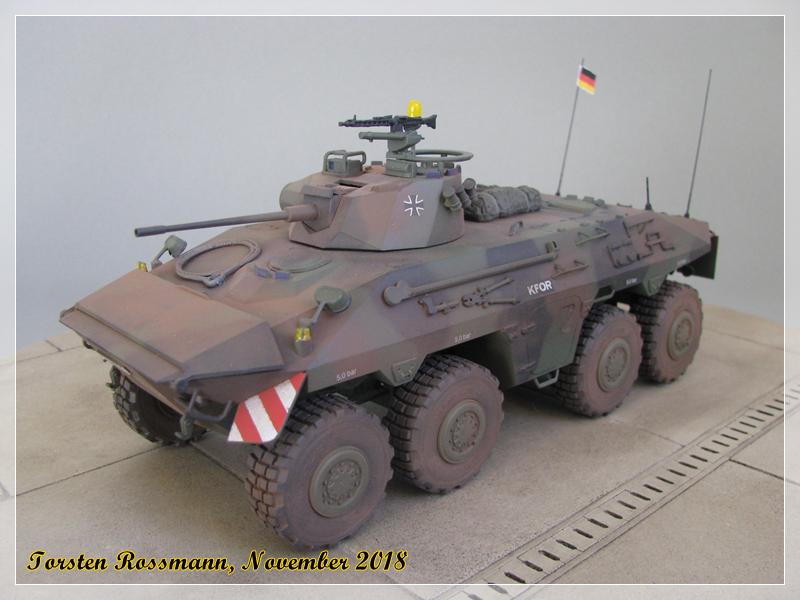
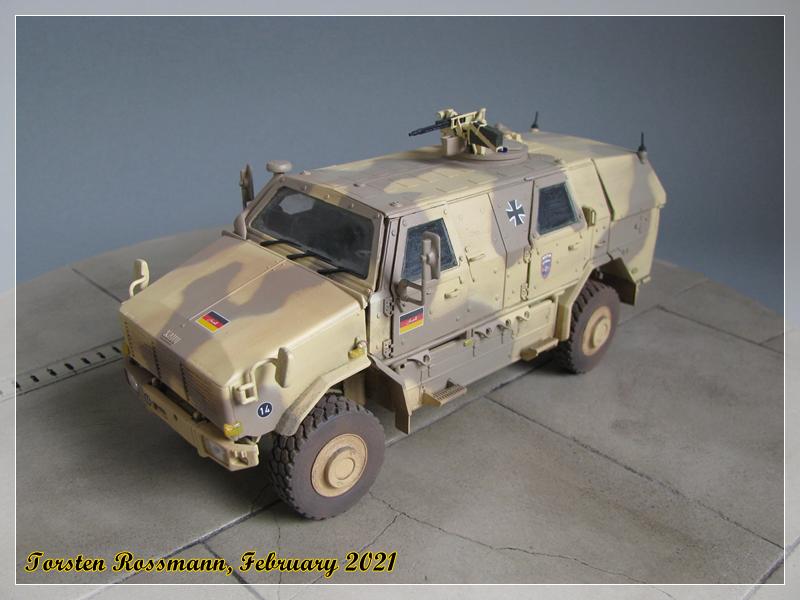
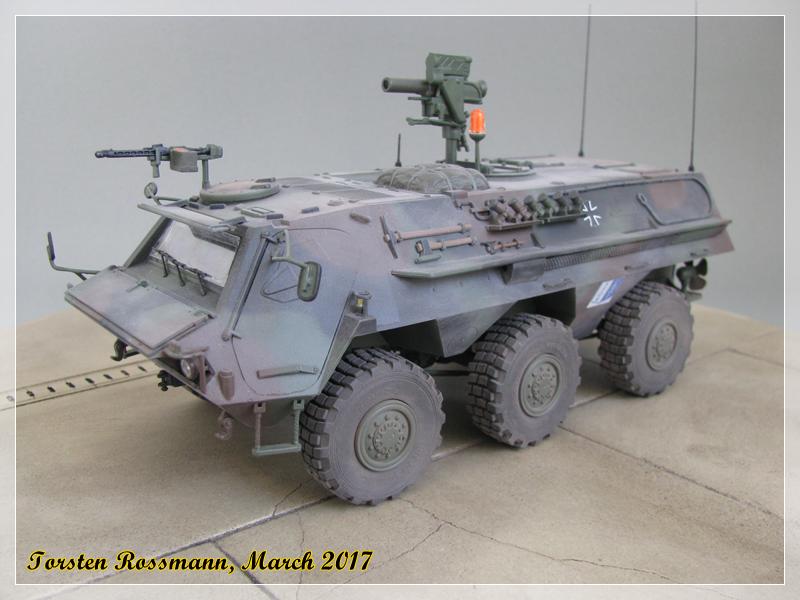
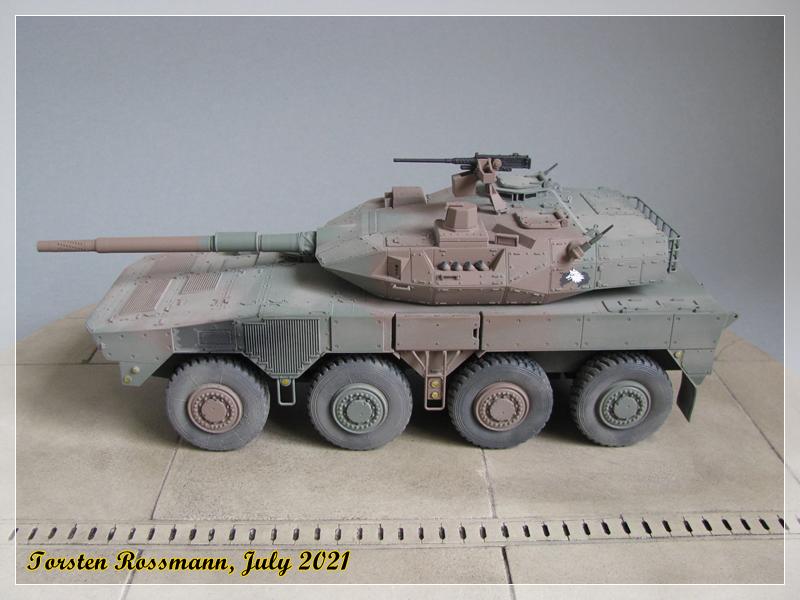
And we have something in common - I also like wheeled AFV (and military trucks). Can’t tell which one I like most, but the GTK Boxer is a beast. Large as a house and so versatile. So you probably like my little collection I have built over the years … All Bundeswehr, except the last one.
I’m sure not near as talented as some of the Amorama guys here, but I try the best I can. Recently I have started another AFV build, the Leopard C2 from Takom, though it will become a long term build, I guess … Leopard C2 Canada - Armor/AFV / Modern - KitMaker Network