They look great to me! The Marmon looks have always given me the impression of looking cartoonish but in a good way. Reminiscent of watching Bugs Bunny or something with wobbly wheeled farmers truck going down the road.
1 Like
Outstanding, Nick!
3 Likes
Stickframe, this is an amazing amount of scratch building here, pure creativity, Well Done.
1 Like
Paint really looks good. Transforms them pretty much. Lovely work.
1 Like
Seeing the brush guard you’ve made Nick, reminds me of a very similar rack I welded for my brother Chevy truck many years ago, made of 8’ channel iron and 2.5’ flat iron covered with 3/16ths wire mesh, it weighed a ton, I don’t know how many sets of tires he wore out with that monstrosity on his truck lol, it would push a tractor out of a ditch though, fond memories, I loved that low geared 4 speed manual tuck 
Cajun 
1 Like
Hello gents, time for an update, first though, @agincajun, Ha! that bumper sounds like a brute!
This is where I got the idea for this:
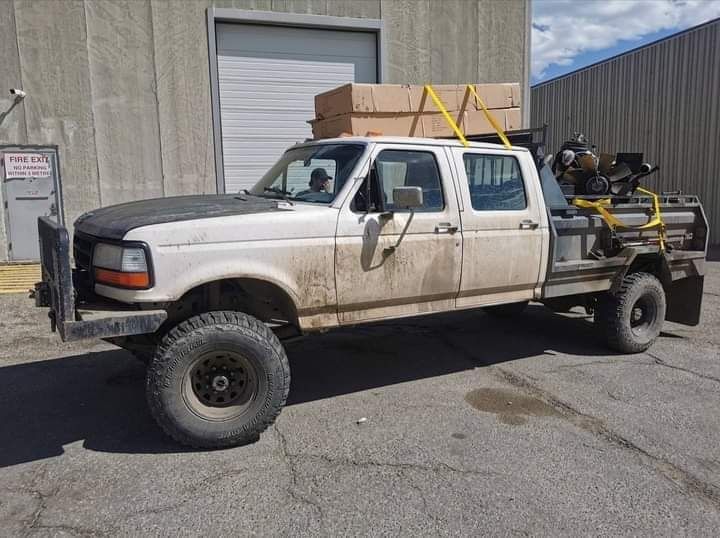
Notice any similarities?  This guy has a no nonsense bumper too!
Back to the Ford flatbed:
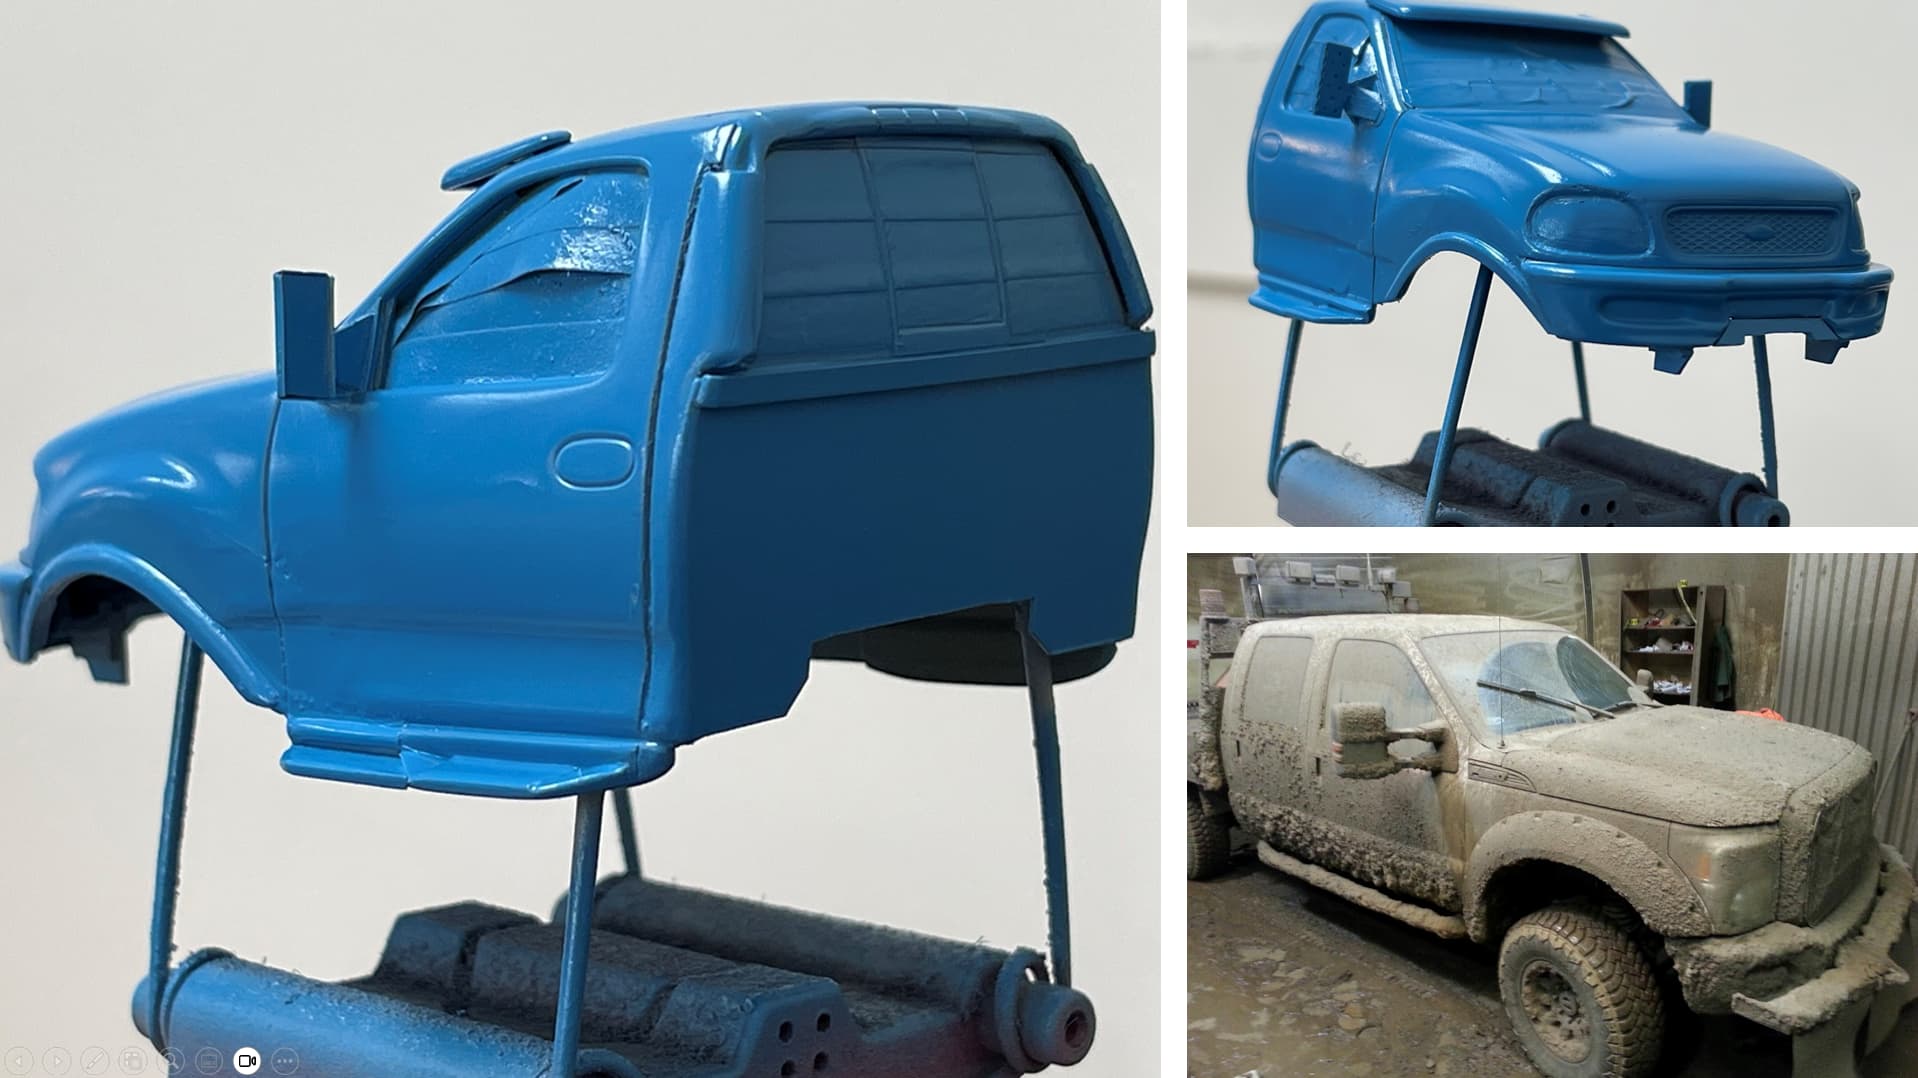
I thought a lot about @cosimodo Michael’s comments about the fender well openings, and tire size, in fact just looking at the white Ford above (different model/year etc but close enough) the shape I had before was not right. I struggled with the 1/32 scale body, which I imagine was exaggerated some to accommodate monster truck tires. The distance between the top of the hood, and bottom of the cab appears to be too tall, so not proportionally correct. So, I did what I could to make it seem more reasonable.
The Tamiya paint and primer went on perfectly - and when it was done the body work turned out a lot better than expected. The picture in the lower right is an indicator of things to come, but first:
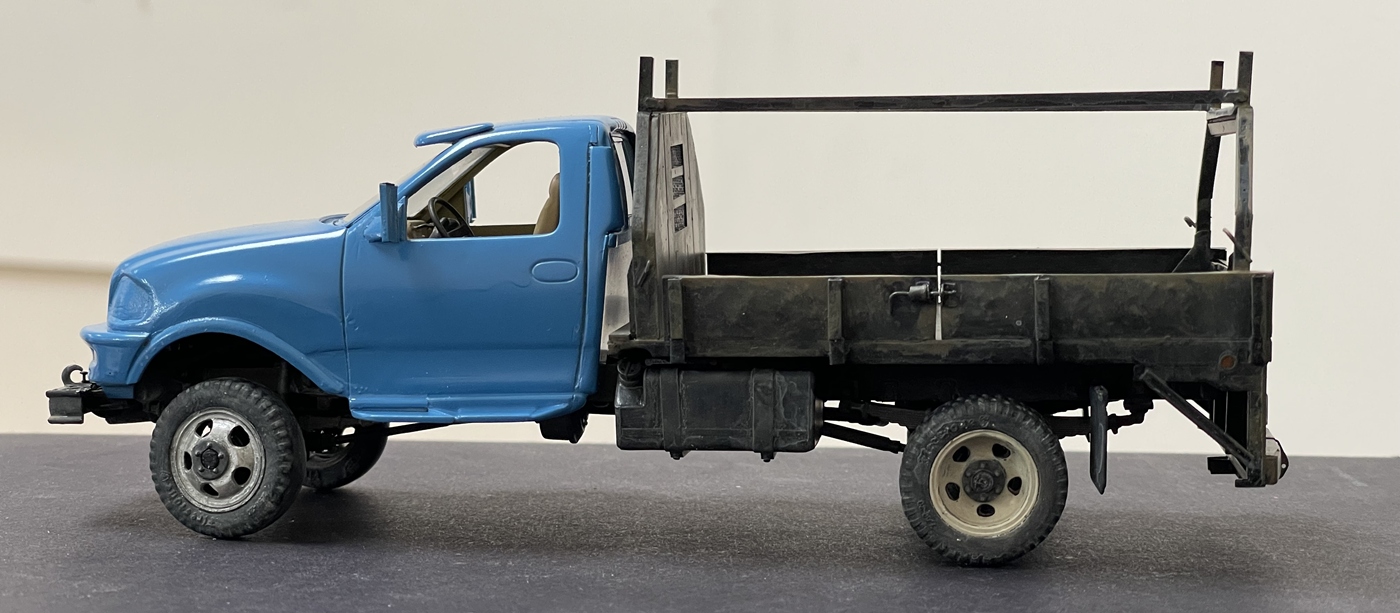
I almost left this as is, the paint turned out so much better than I expected! But, that thought was short lived:
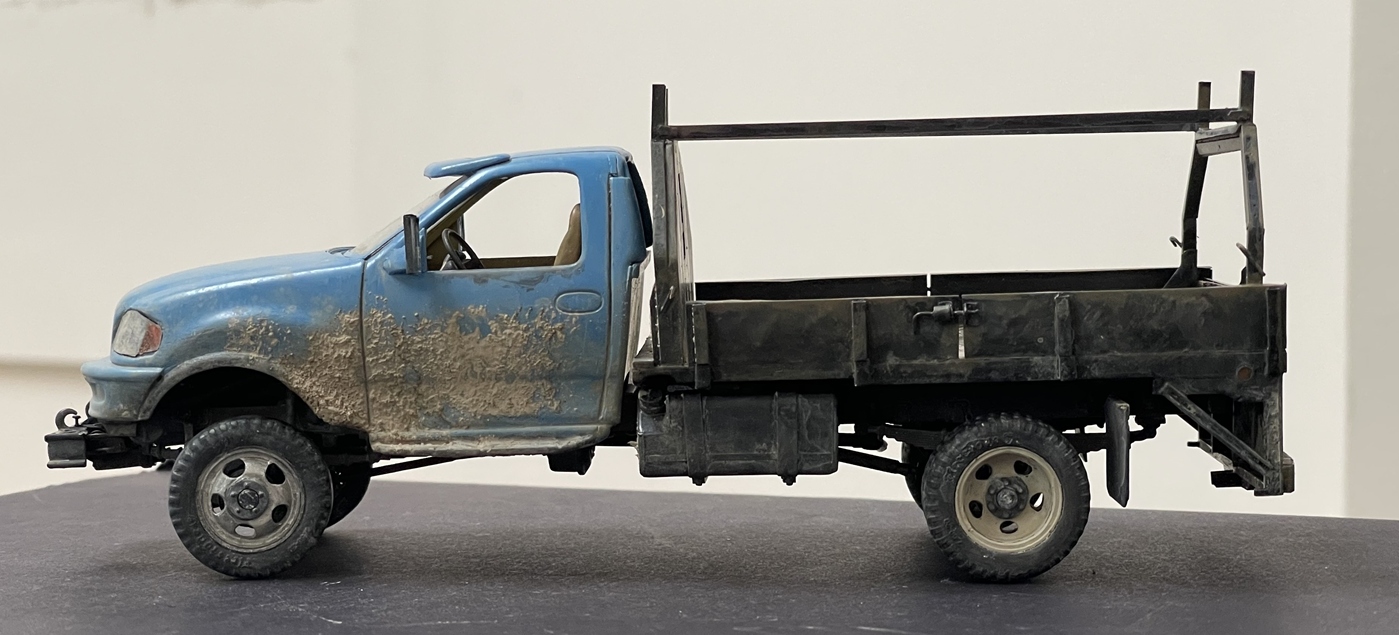
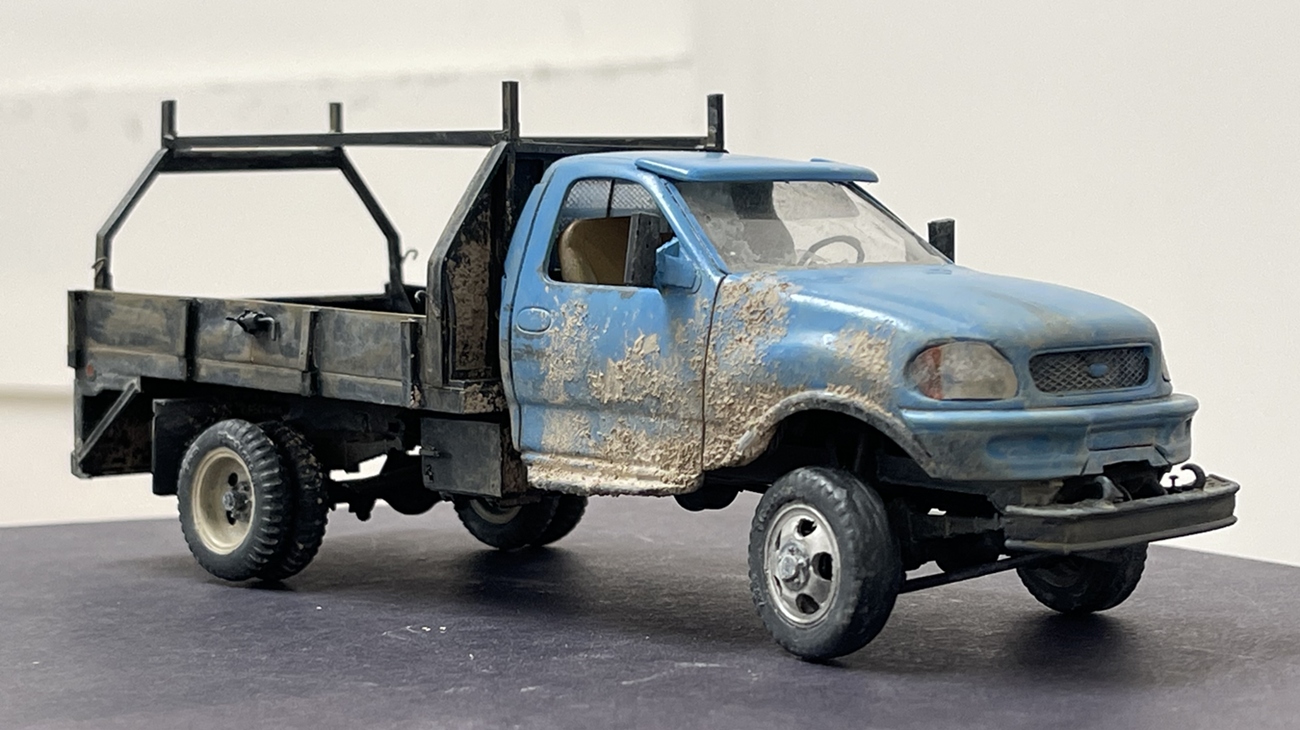

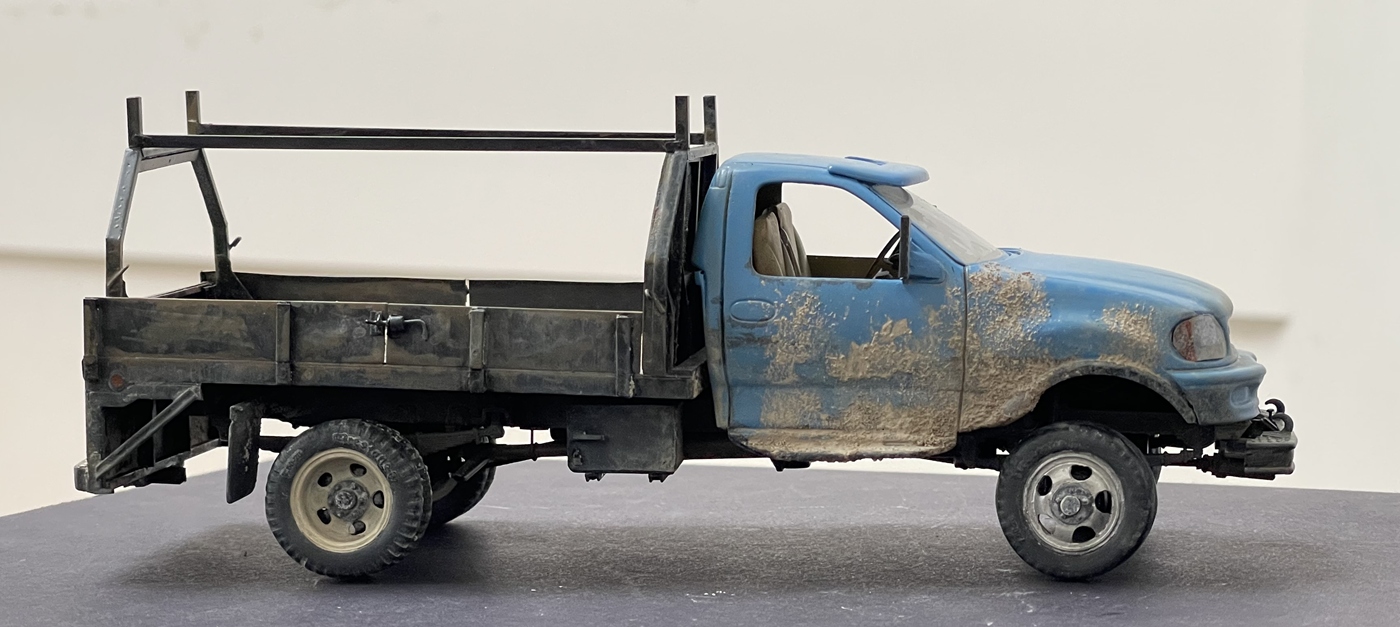
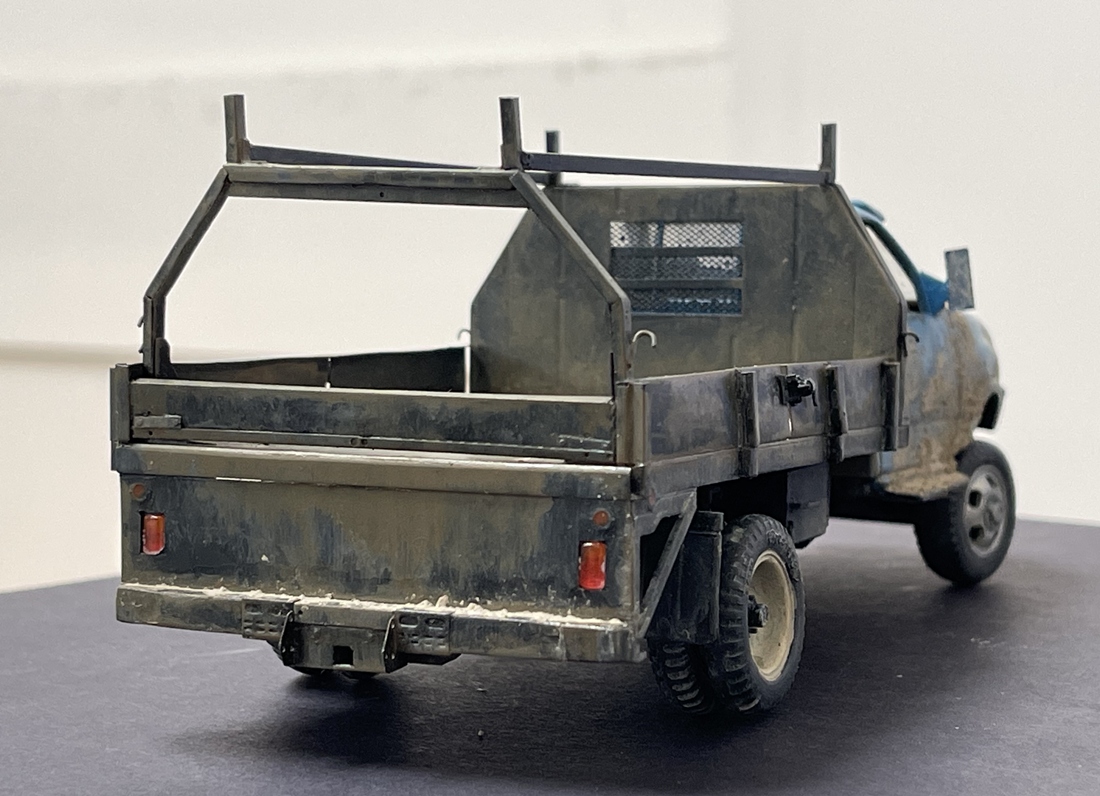
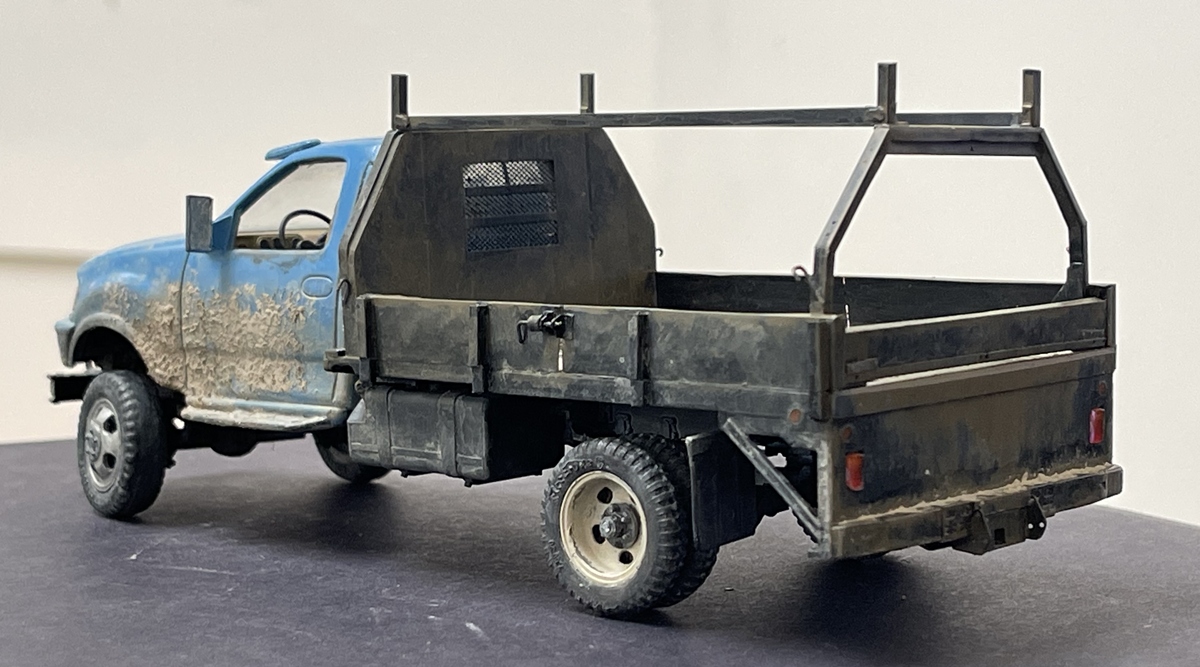

I took the advice a few of you offered and did dent up the bed rails, maybe it’s the lighting? or combination of weathering and base color, but you can barely discern any damage! It’s there
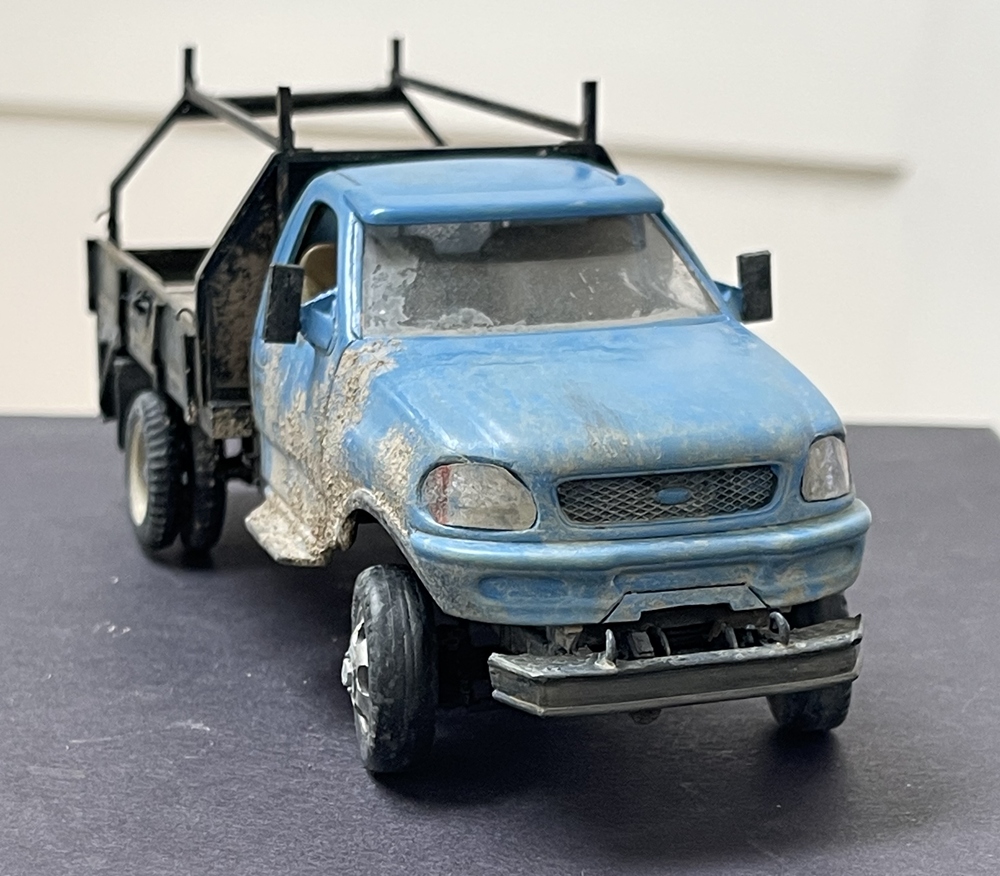
Ok, on we go! To my chagrin, specifically as a Chevrolet square body fan, this project now has three Fords!! I looked at the 3d kits @Tank_1812 Ryan suggested, which are really nice, but they are print files and not kits…and thought about finding another 1/32 scale kit to convert - no thanks! One every few years is fine with me! I do have another idea cooking to add some variety but not sure just yet about how to handle it -
OK, thanks for having a look -
Cheers
Nick
8 Likes
Looks like a well used truck - the work you’ve done has all blended seamlessly together!
cheers
Michael
1 Like
Maybe an old Dodge Power Wagon? Wayne
2 Likes
Hi Nick,
My “aesthetic” nerve is itching, severely …
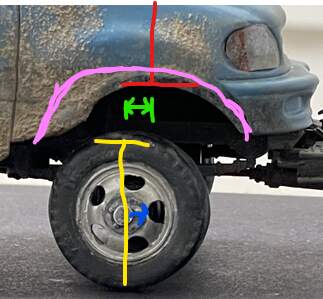
I’m way late to the party, sorry, but …
To my eyes the front axle is too far back which causes the fender to look as if it belongs on another vehicle. The axle position also messes with the approach angle but that is not an aesthetic issue.
If the axle can’t be moved forward then the opening could be adjusted backwards.
Moving the whole cab is not an option so “sheet metal” surgery would be the way out of the problem. Open up the rearward arch, possibly also “closing” the frontal arch.
Don’t change anything just because I have ideas …
The current fenders reminds me of severe overbite …
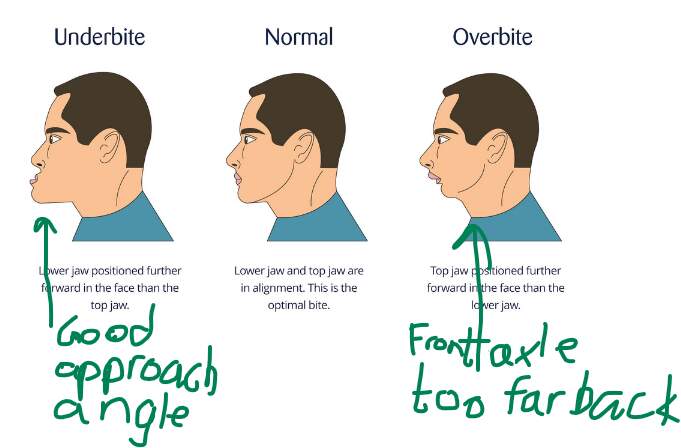
2 Likes
Hi Robin @Uncle-Heavy , yeah, and…yeah - as the great Willie Nelson sings, “Turn out the lights, the party’s over”, because at this point, well, this part of the party is indeed over - that said, as I’ve been fooling around with this geometry as much as any other part on the build, I took a stab at something easily fixable - scraping off some of the pigment “mud” the fender opening:
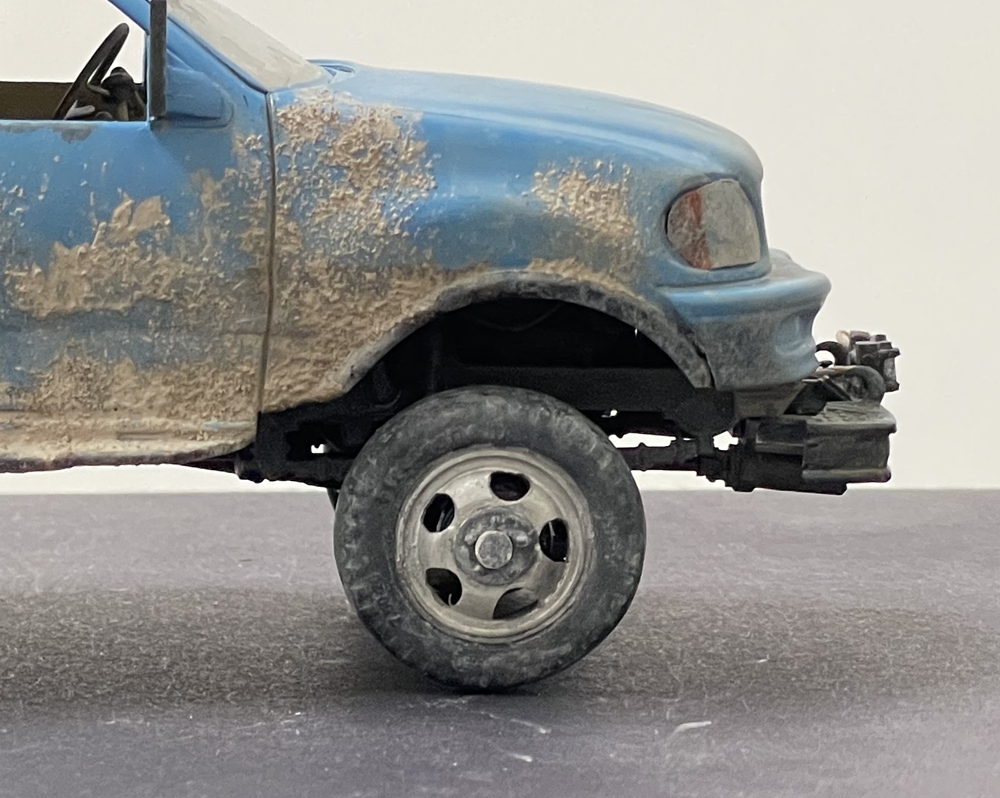
Better but not great. I think your fundamental point is correct though, that the cab is sitting too far forward. When I started on this I marked the centerline of the axle and fender well -
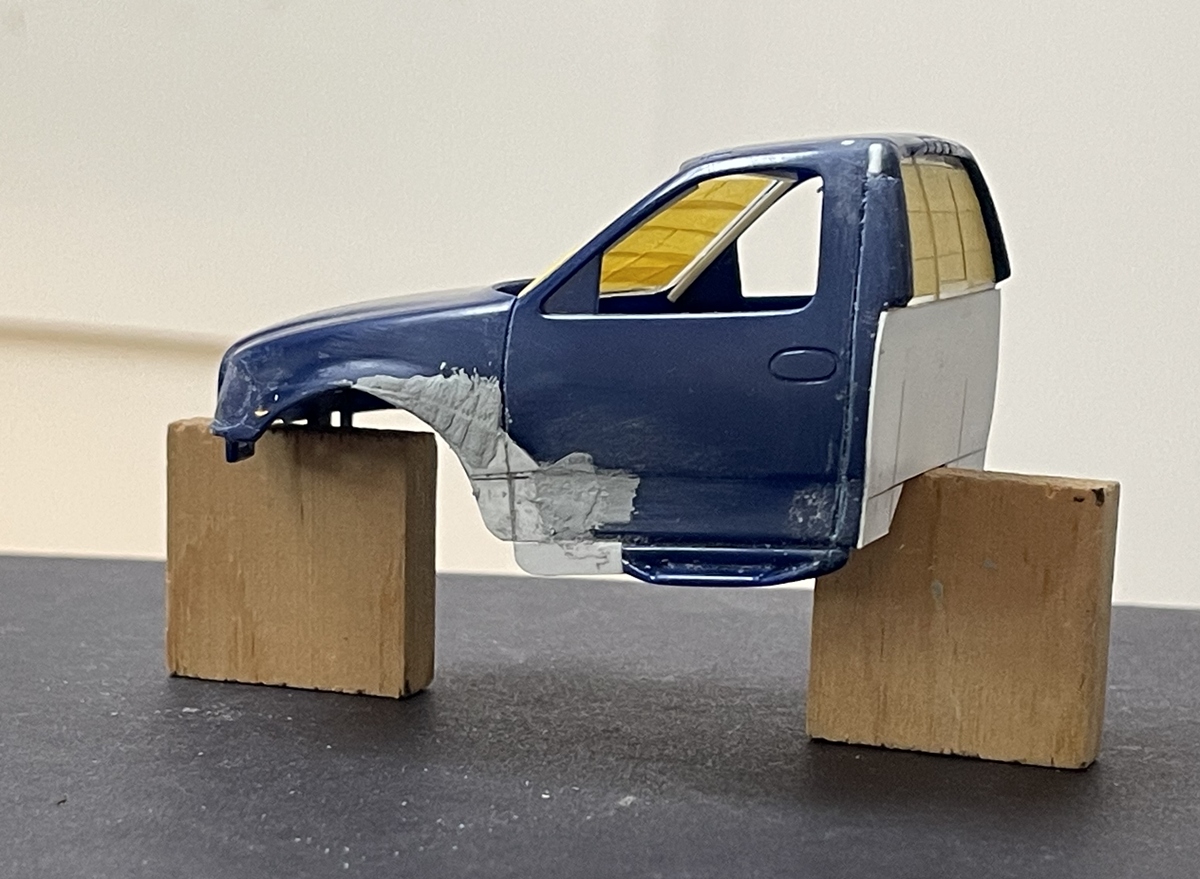
Bottom line - by the time the engine/transmission, transfer case and cab interior were installed were installed this is what we got  Just part of the fun of it all - speaking of fun, another truck is in the shop. I would like to be adding one of these two:
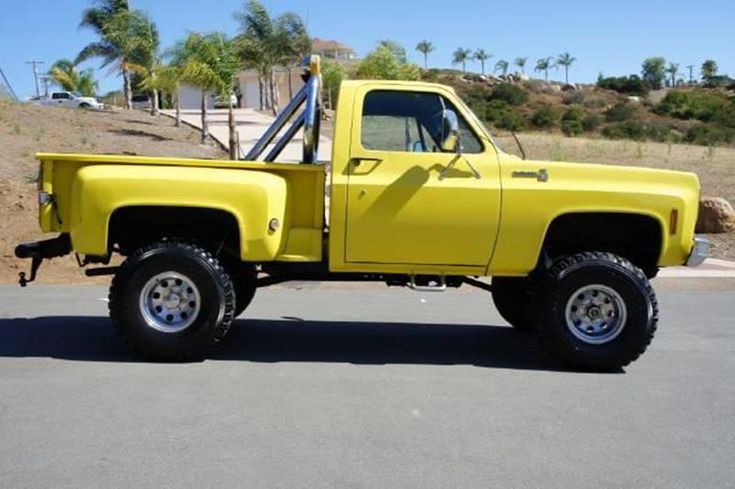
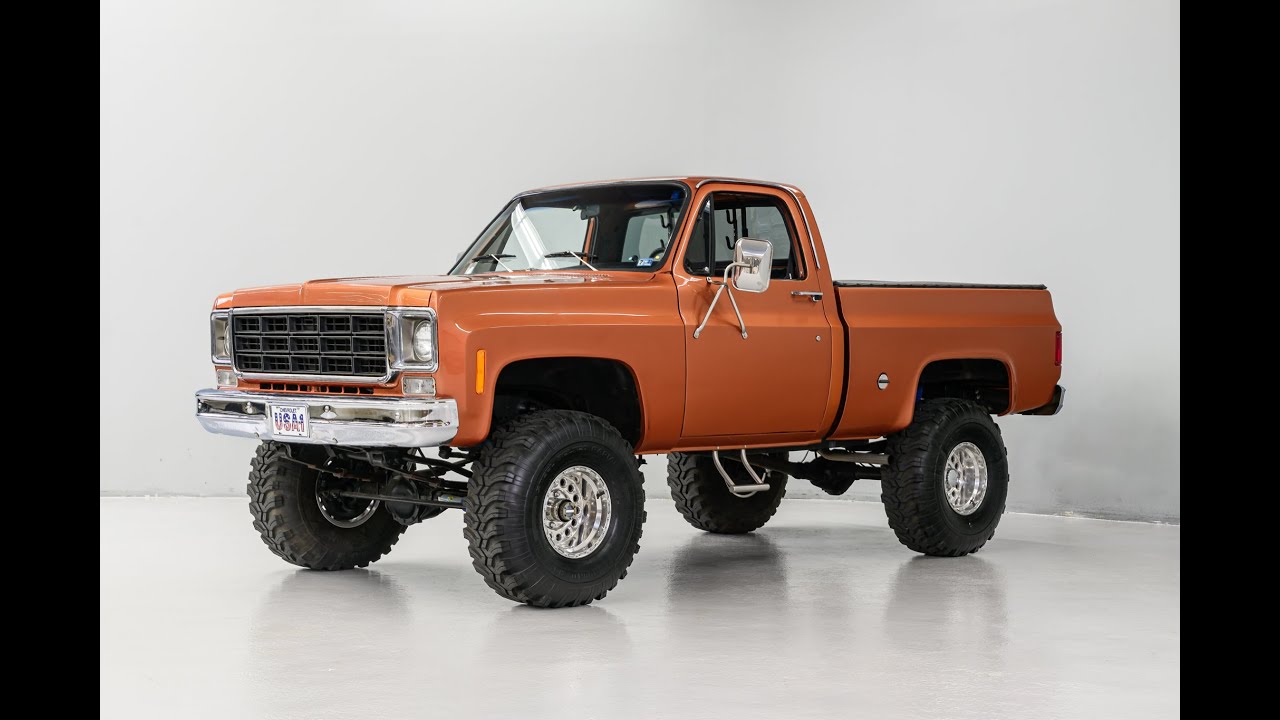
A 70’s era Chevy square body 4x4! But, nothing close is available in 1/35. Not willing to give up that easily, I am going way out on a limb and trying to build a Jeep J10:
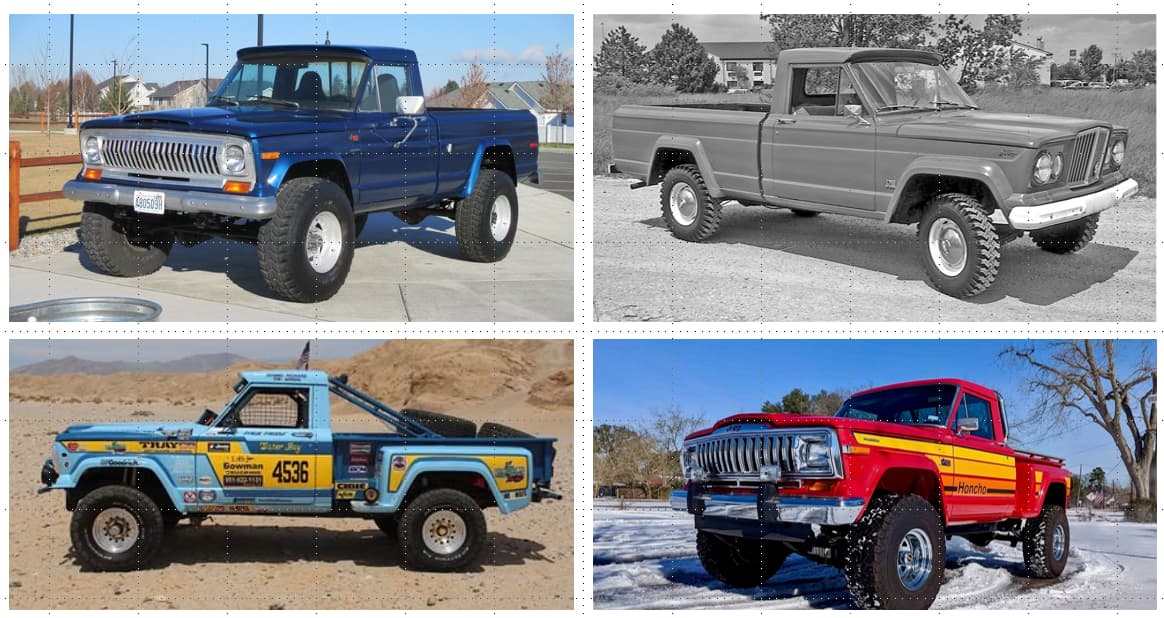
These are not that well known or particularly beloved by me, but, they bare a general similarity to the ROK K311A1 pickup, which appears to be based on the old Kaiser M715. I don’t know if this lineage is correct, but for what I’m doing, I’m not worried about. Instead, I’m focusing on how to do this:
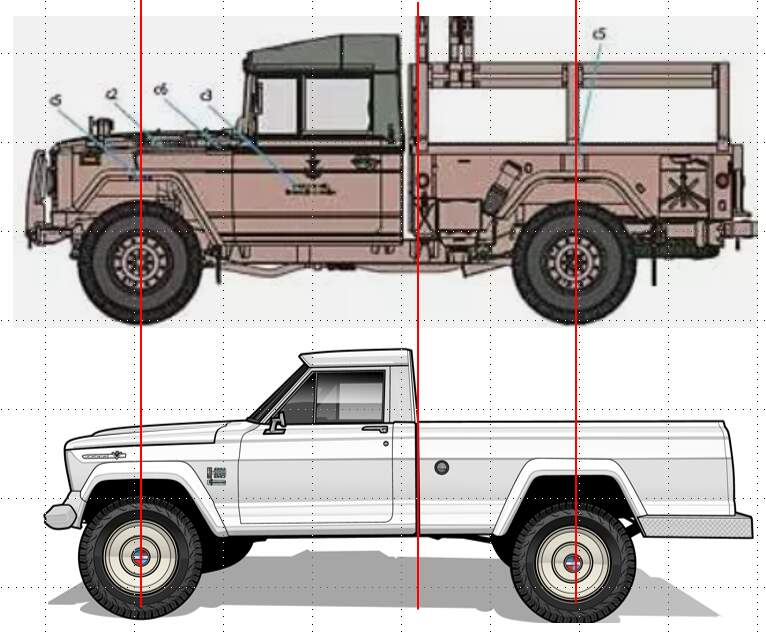
easy enough!
The base kit is made by Academy and is pretty nice as is - all goes together fine, and the plastic is good to work with. So far I assembled the chassis including a modest lift, and have gotten after the cab:
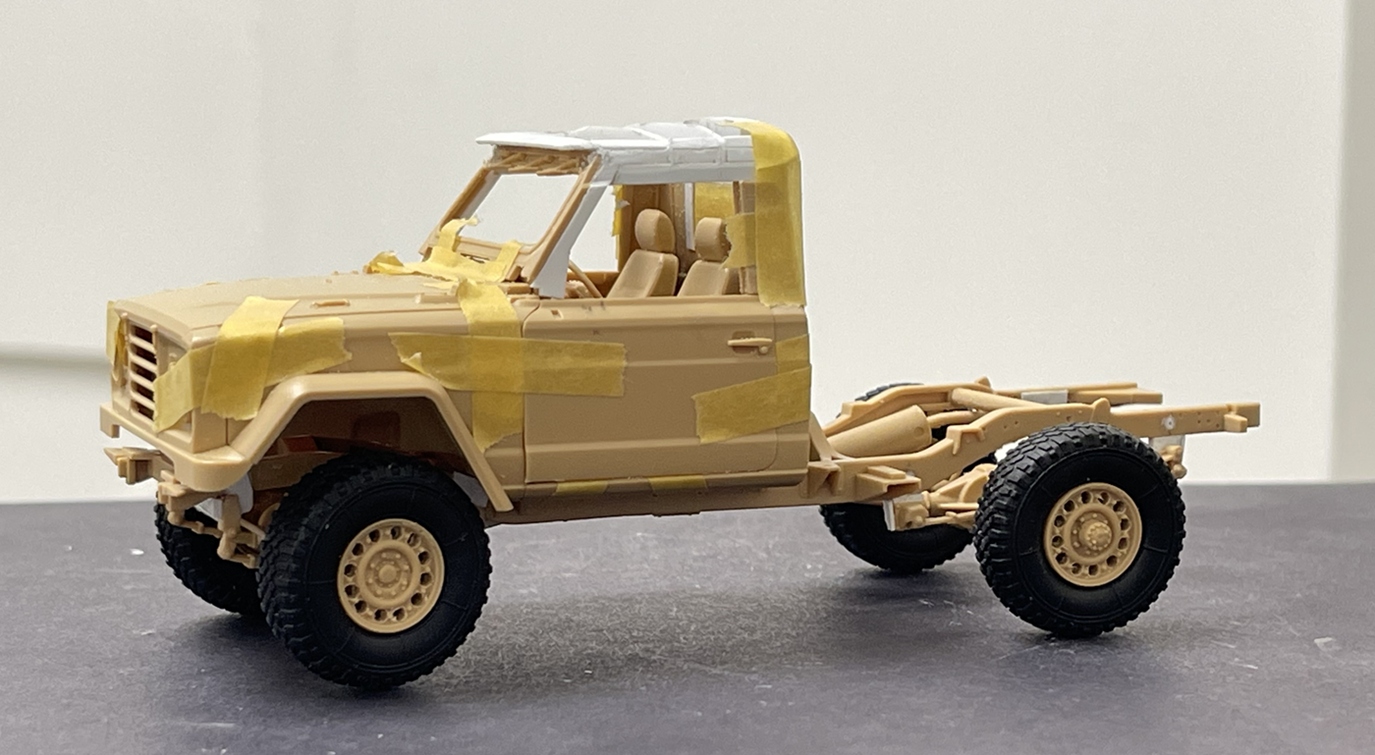
I drilled out the wheels to give them less utilitarian look. The lift took some head scratching and patience, but went pretty well, as all wheels are touching the ground
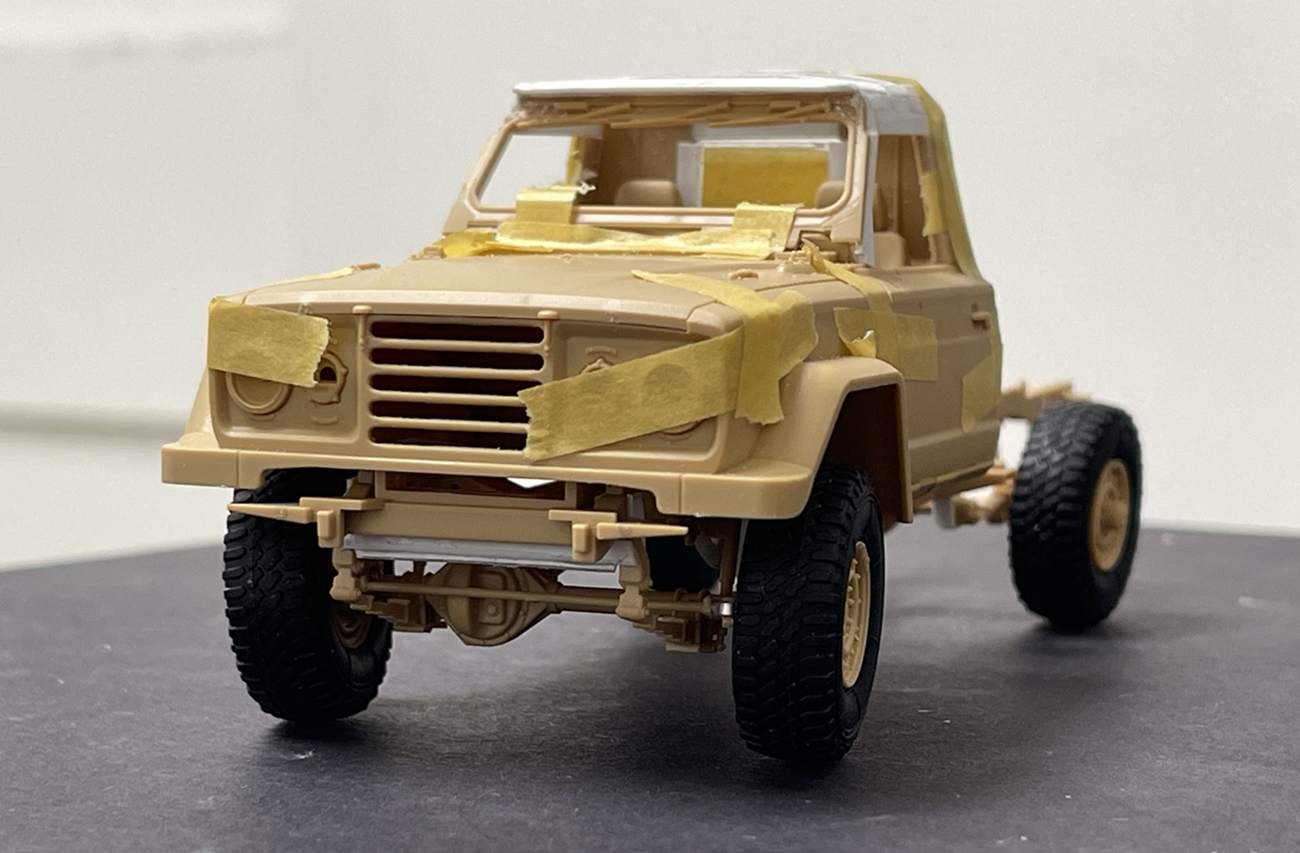
The cab has been complicated. The kit windshield is essentially mounted vertically from the hood/firewall, but the J-10 windshield is raked back. Making this more exciting is that the cab is not one piece, and instead is made of several parts, which mercifully can be taped together for this. But, this means the completed cab can’t be removed for painting - you get the point - a bit of a hassle.
To solve this, I am making the windshield and roof removable, like the other body parts:

A long way to go on this, but a good challenge -
Thanks for having a look
NIck
7 Likes
Oh what a treat - not being satisfied, I tried again, tore the cab off, and here you go!
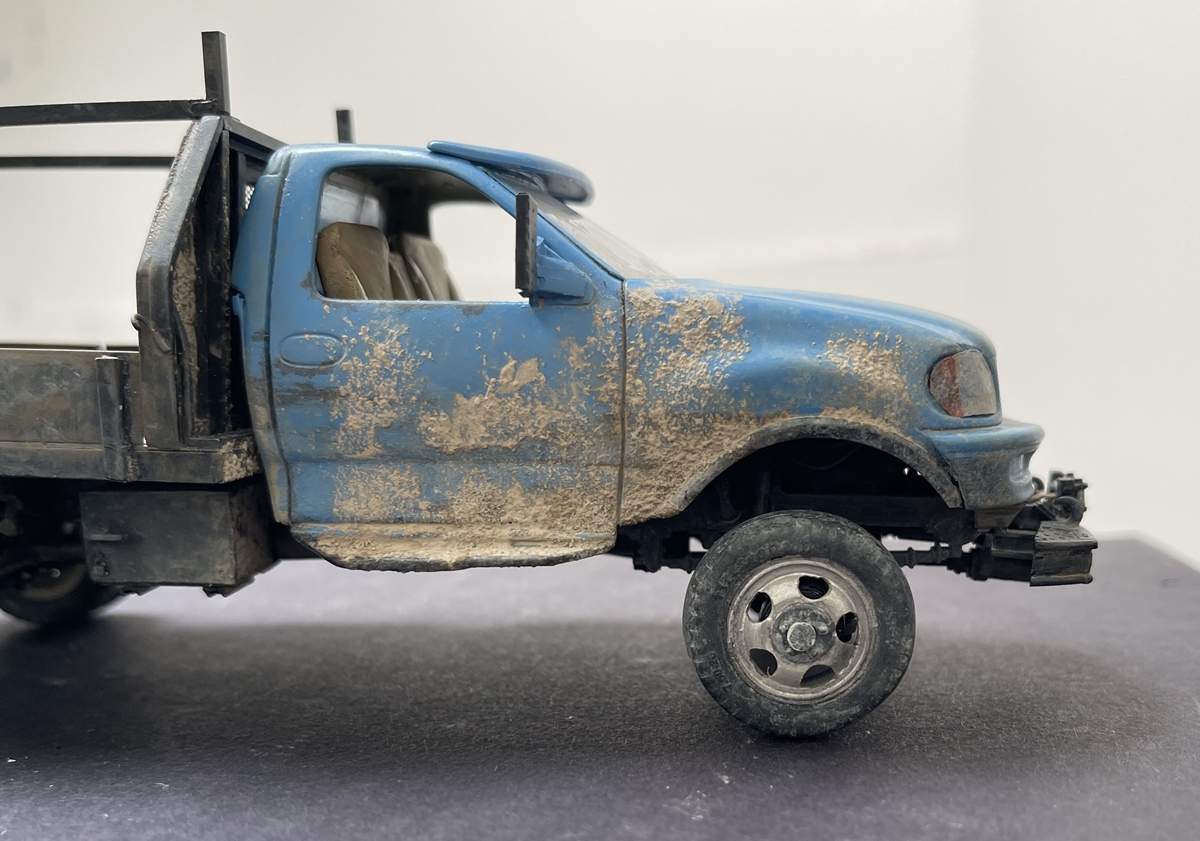
Better eh! well, that was short lived:
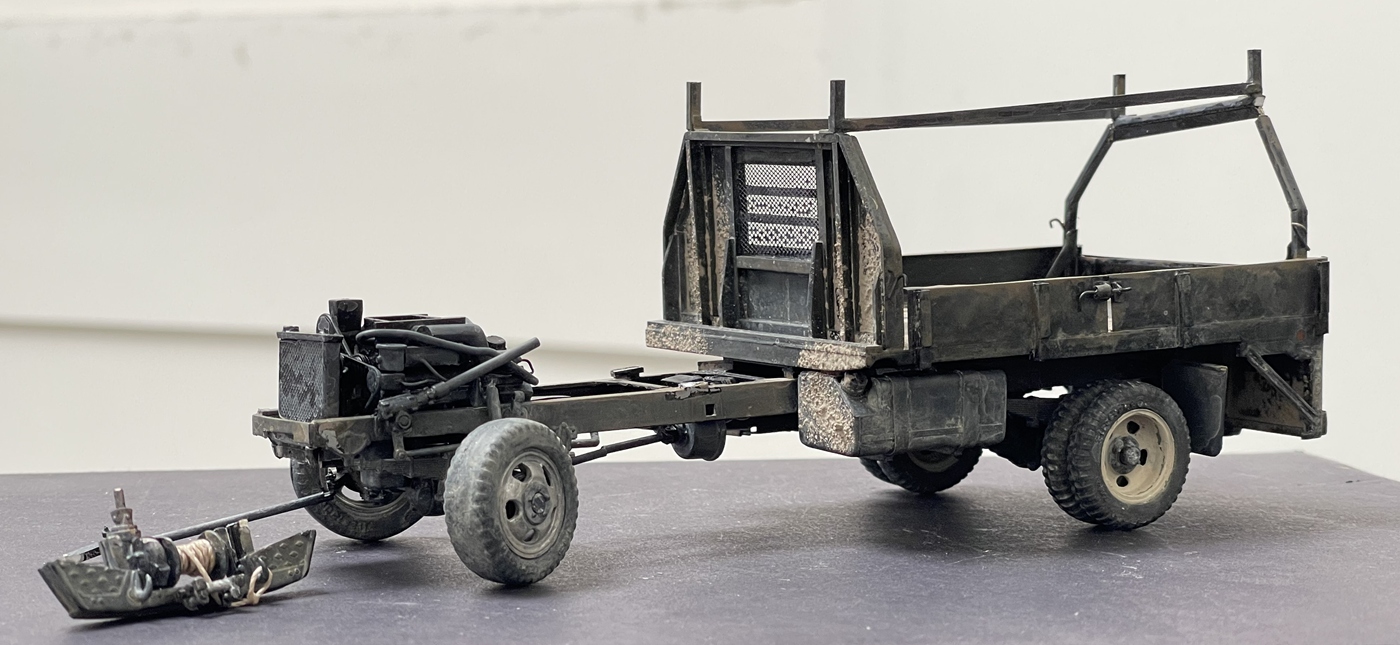
And in the blink of an eye - how much damage? All of it!
Broken:
Front bumper and winch;
Steering drag link;
PTO driveline;
Front drive shaft;
Rear post on rack; and,
Cab is no longer attached.
So, @Uncle-Heavy, I guess I’ll try again!
@HeavyArty, hi Gino, thanks - funnily enough, this Ford is also a 1/32 kit. I don’t mind adapting these to 1/35, but it can be a bit of a headache!
Cheers, and back at it I go - the Jeep will wait
Nick
4 Likes
Step 1. Make a prototype.
Step 2. Evaluate prototype
Step 3. Make a better prototype
Step 4. Rinse & Repeat until step 3 yields a satisfactory result.
Step 5. Finished
I am dreadfully sorry that I tricked you into ripping the build apart.

@Uncle-Heavy, hi Robin, no worries at all - I should clarify that the damage occurred after I removed and reinstalled the cab - I dropped it! and, well, the impact of hitting the floor facilitated parts scatter
The good news is that my process is essentially what you describe - build and rebuild until it looks about right! And, as part of that, a new version:


With all said and done, I like this more anyway! specifically where the winch is mounted. In the previous version it was mounted lower, an idea which came to me when I saw something similar on a local utility Ford F550. But, most of the winches I’ve seen electric or PTO are mounted higher - which: 1) looks a lot better; and, 2) addresses your comment about approach angle. I’m guessing utility trucks use their winches to get unstuck in the mud, or to help with lifting or dragging, whereas other off-road trucks use their winches to get out of more difficult situations where clearance is more relevant.
Oh, and yes, the front driveline has been adjusted so it is now a one piece unit without a mid-section step. The camber on the front is a bit but not a lot messed up, and I can live with that!
OK, now, back to the Jeep!
Cheers
Nick
9 Likes
Super update … I love how it continues to morph into new directions and rebuilds and remedies… Great stuff 
1 Like
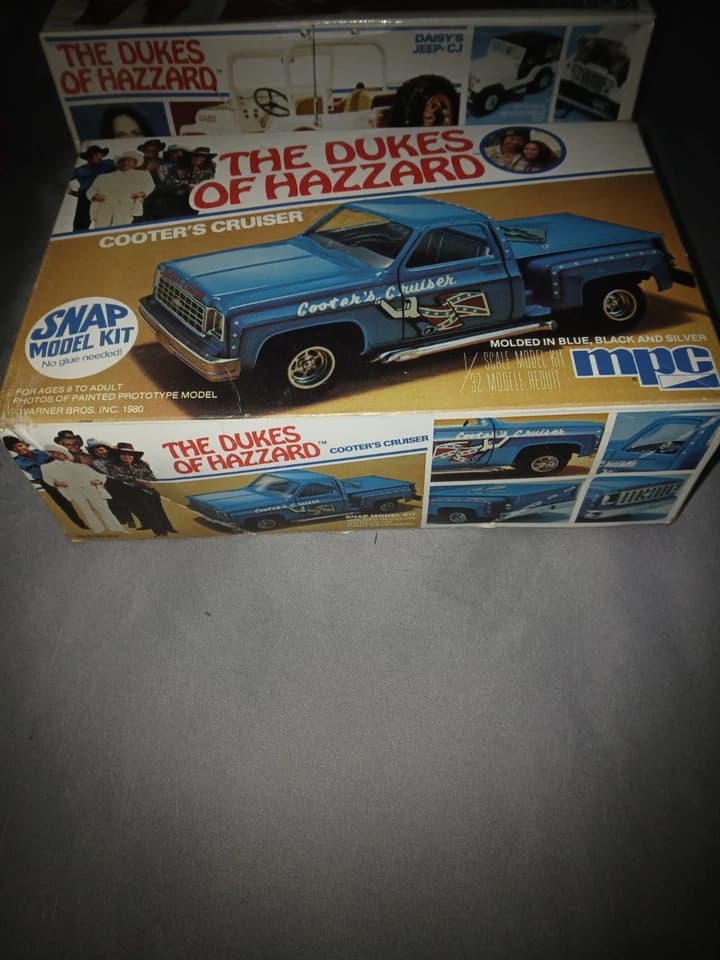
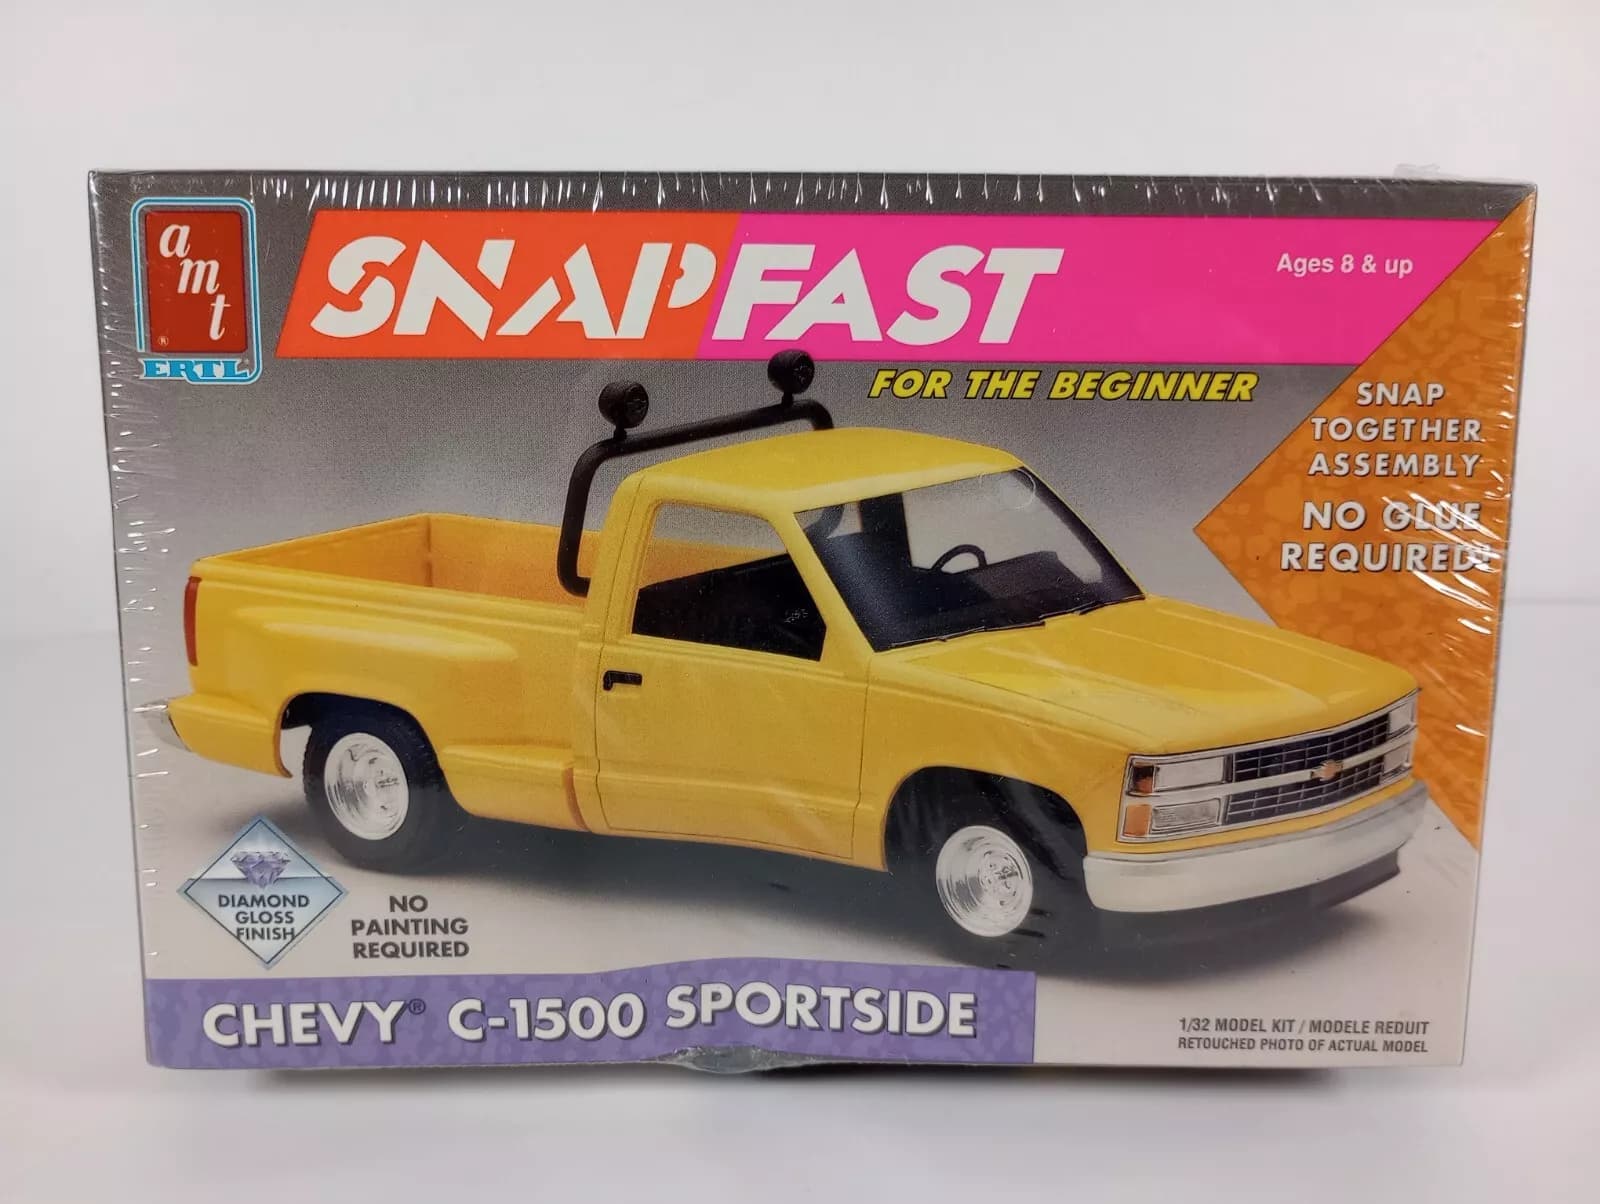
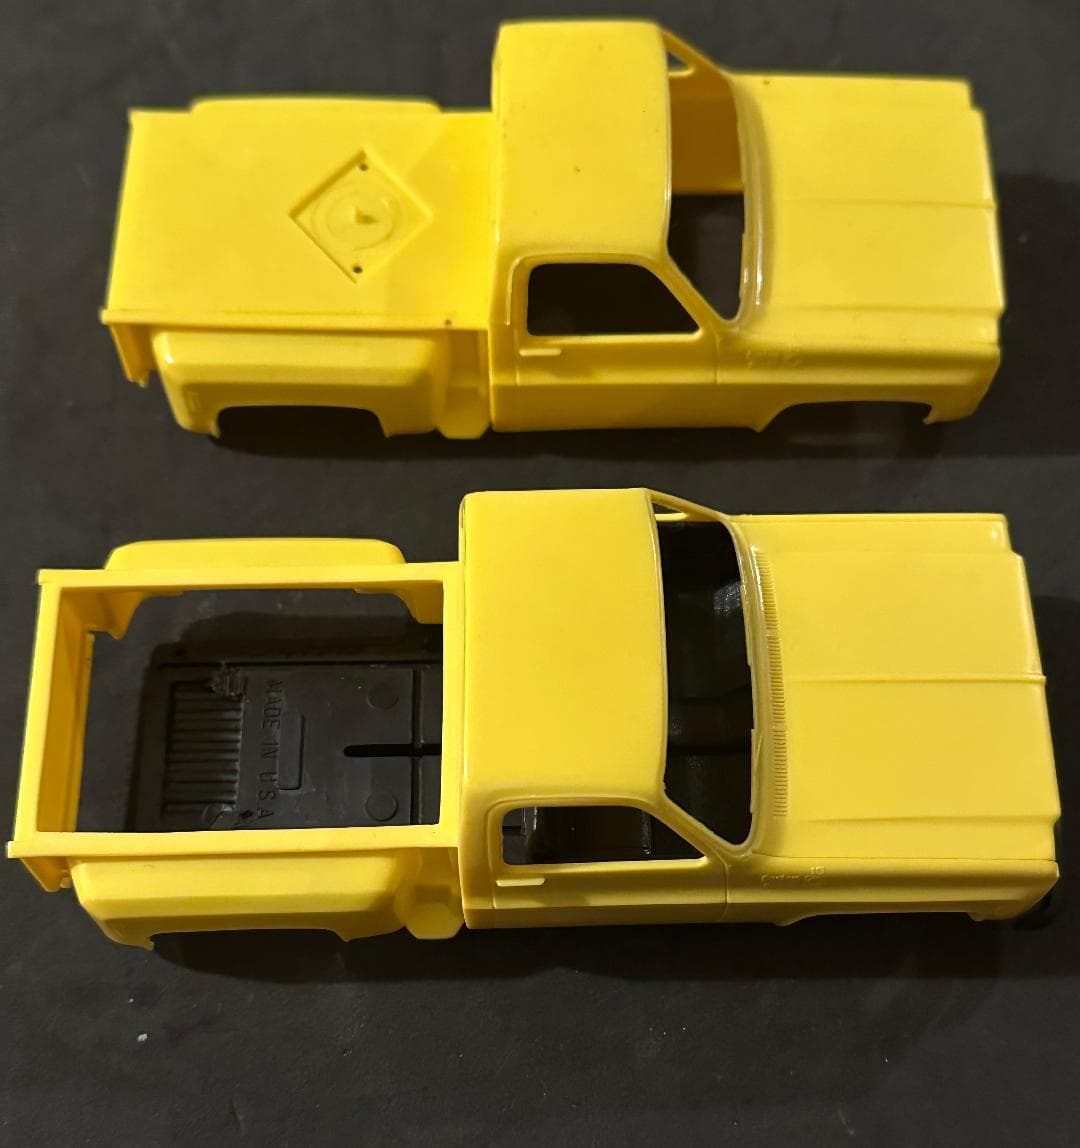
Nick, always a pleasure watching your builds. As for the "Square body 4x4, these will probably fit the bill perfectly - there were tons of stepsides in Iraq, which is why I have them:
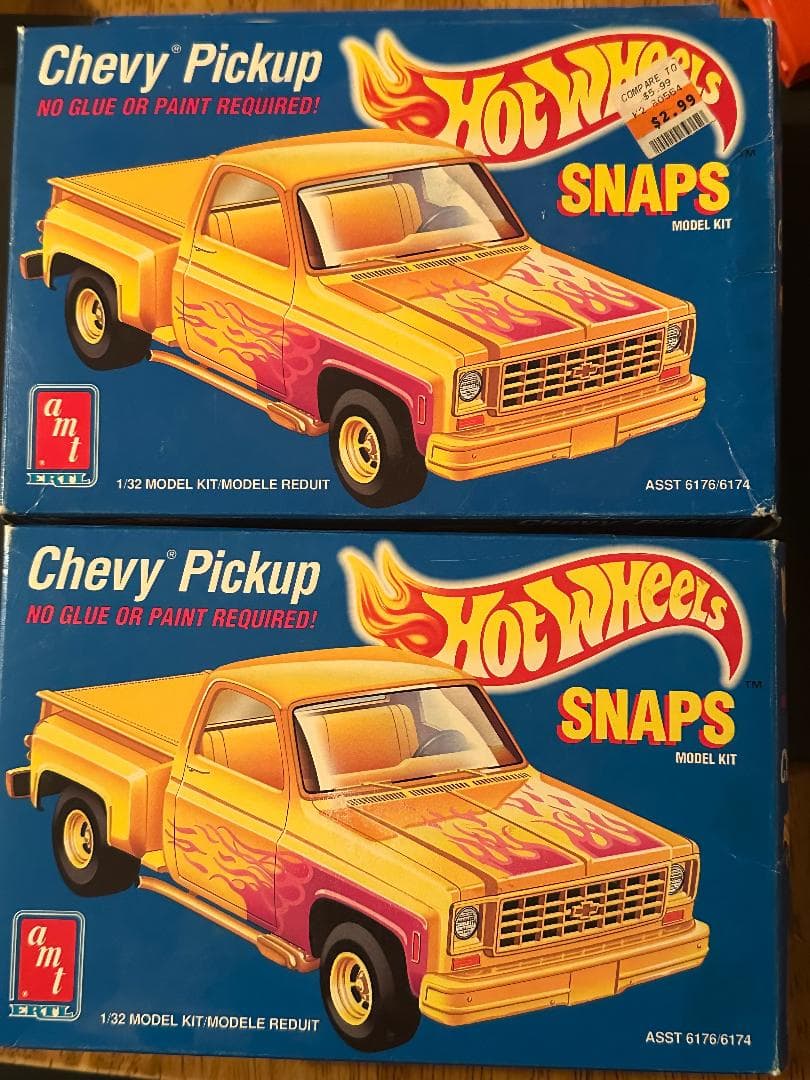
You have to remove the bed cover. No problem there:
There are several options, and even thought they’re all 1/32, the size difference is obvious:
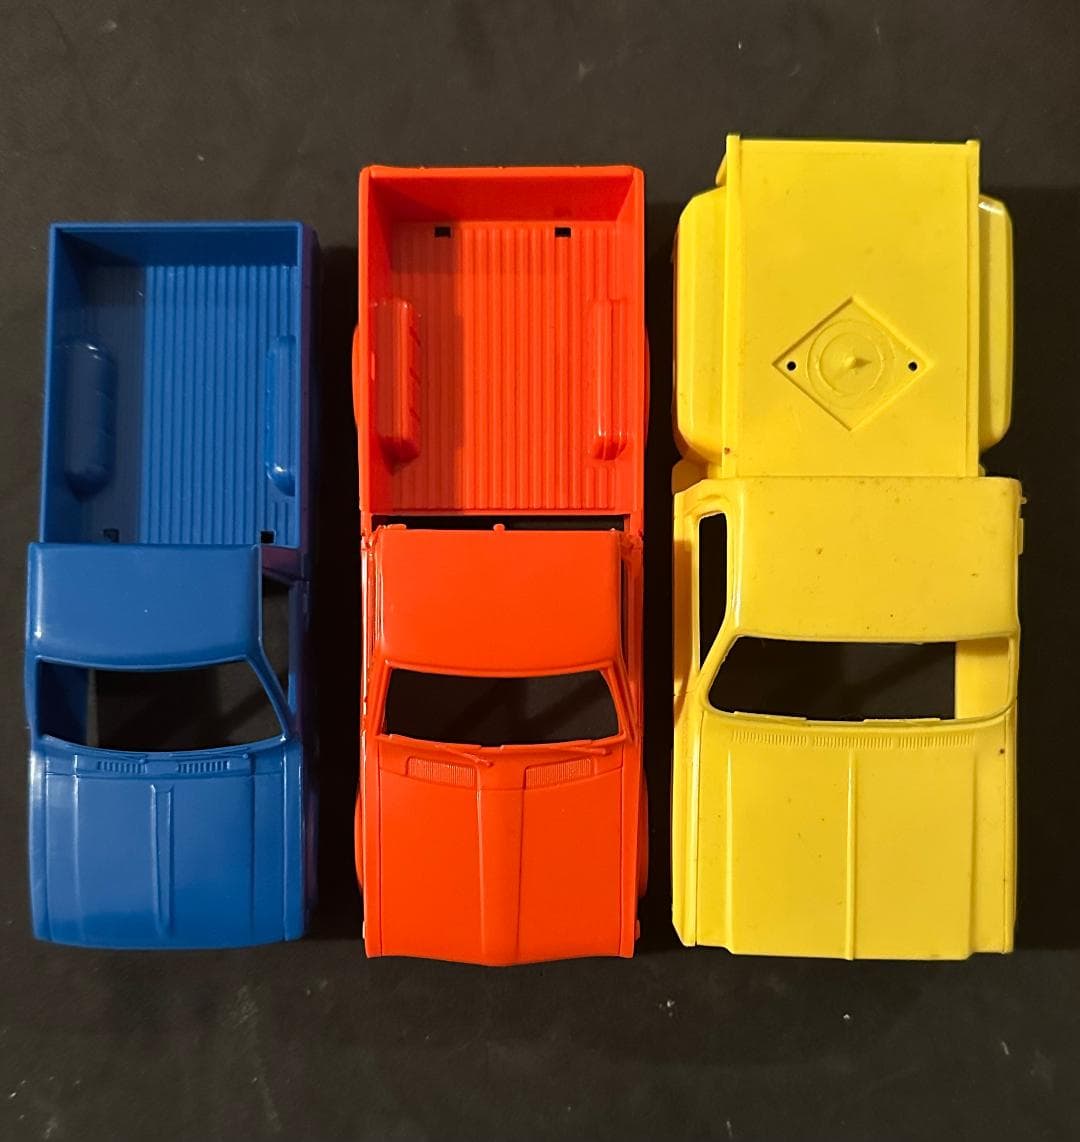
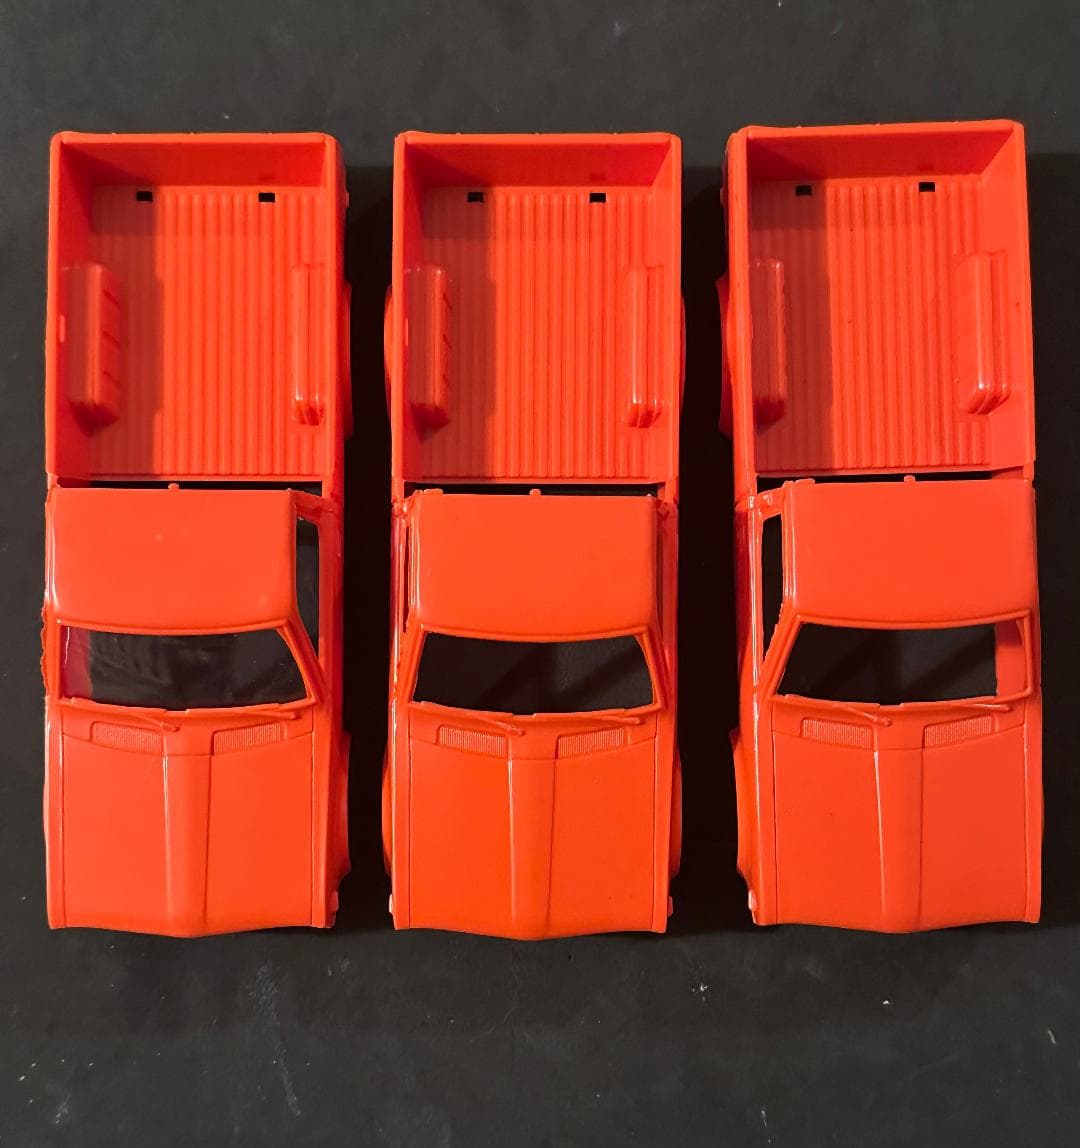
I’ve got a slew of the red ones, but need them for more crew cab conversions:
However, the blue one, being closest to true 1/35, is the only one I have left. I might be talked out of it from the right guy. It’s complete:
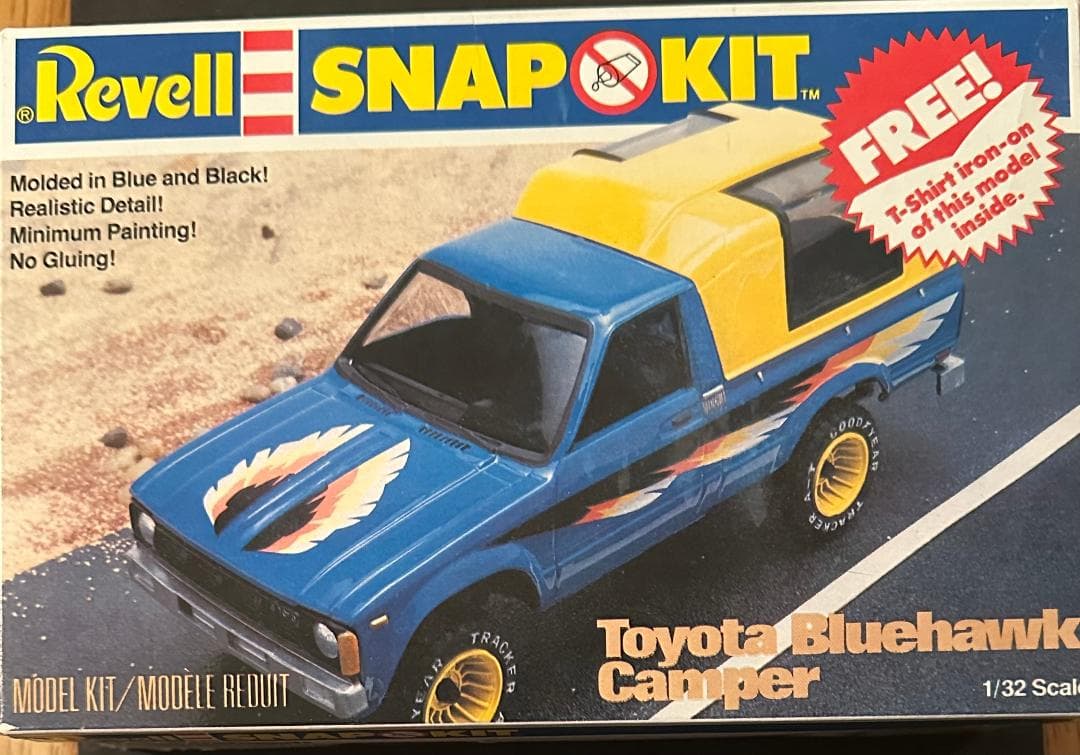
These are still pretty plentiful. As long as I don’t buy them up. The Iraqi Police used the under the old “Luv” moniker."
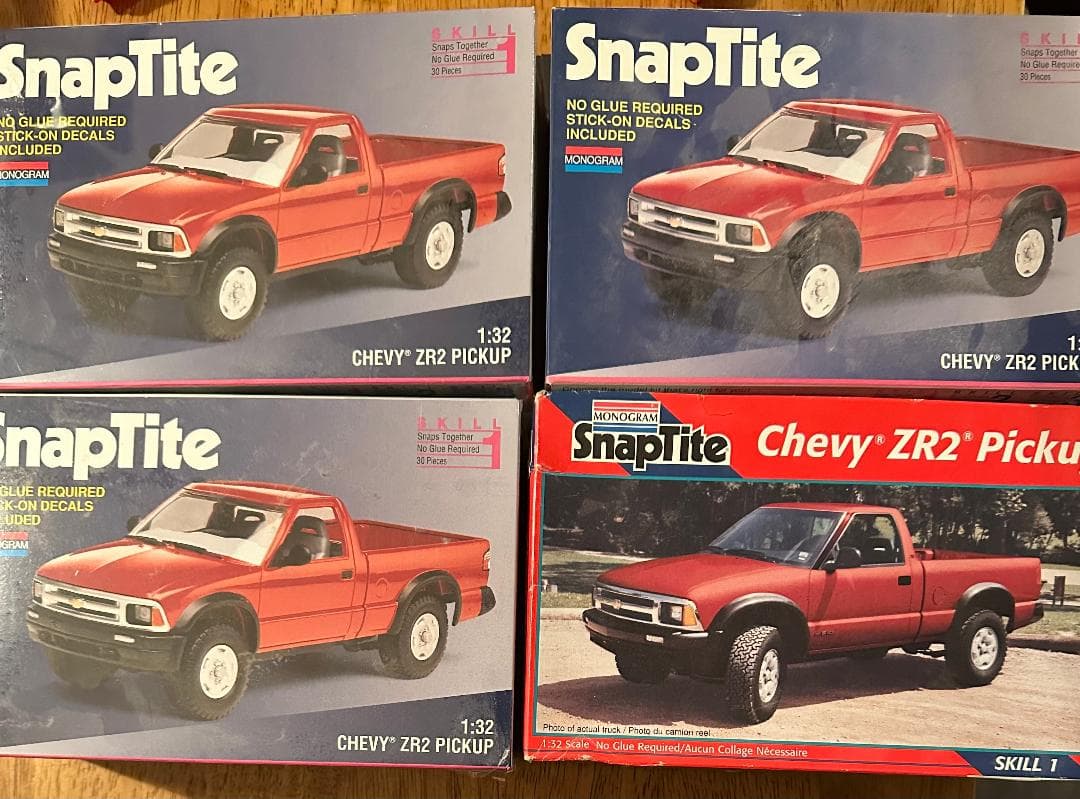
4 Likes
Hi @Johnnych01, thanks, John - very much appreciated! You know, I think that’s one of the things I like about scratch building, as using my highly unscientific approach, it’s never that clear how it will turn out!
@18bravo, Hi Rob - wow! that’s a great collection! Yes, a Chevy square body is one of my favorite pickups, and those models you have are hard to come by. It’s funny, I like Chevy trucks, but this build has 3 Fords and a Jeep!
Speaking of Jeeps, specifically the J10 variety, an update. While my donor truck shares some similarities with a J10, some elements don’t match, but in ways I don’t care to address, as the kit sure looks taller and narrower than a Jeep, but the body lines are relatively close. As the kit has elements of a few J10 variants, I’m mixing attributes of various model years. Below are some prototype images:
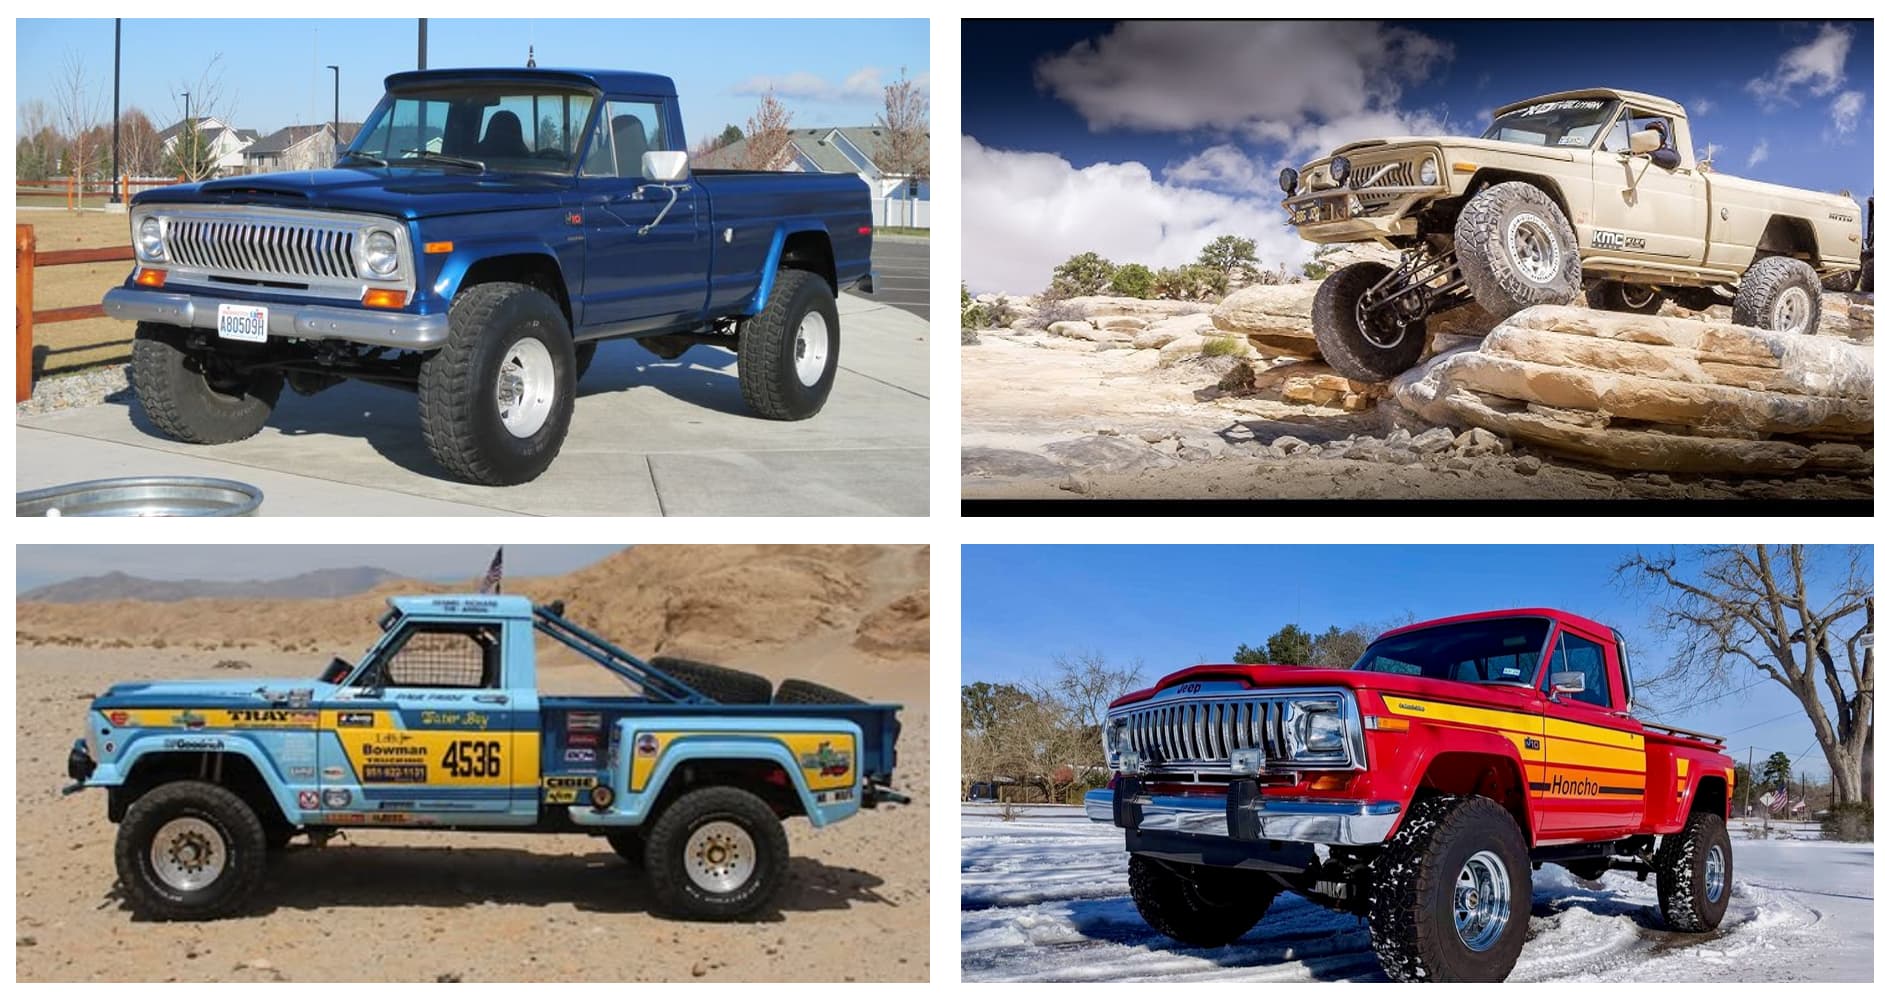
And from this, you can see the upper two models have round headlights and the vertically slatted grill, so I’m using those - and the bottom two have a stepside bed, so I’m using those. And where it sits right now:
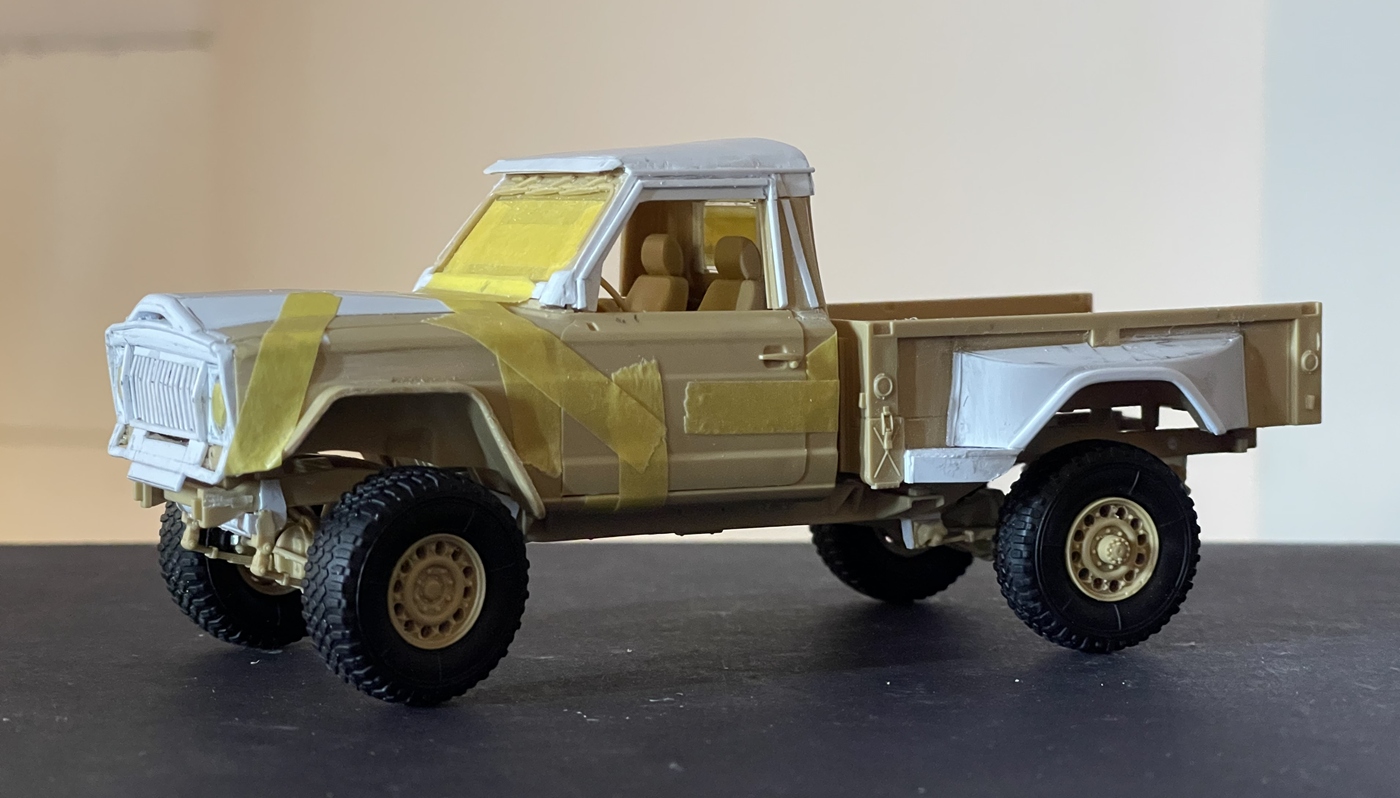
Characteristically similar? Yes. Exactly right, no! But with the lift and work so far, I like it -
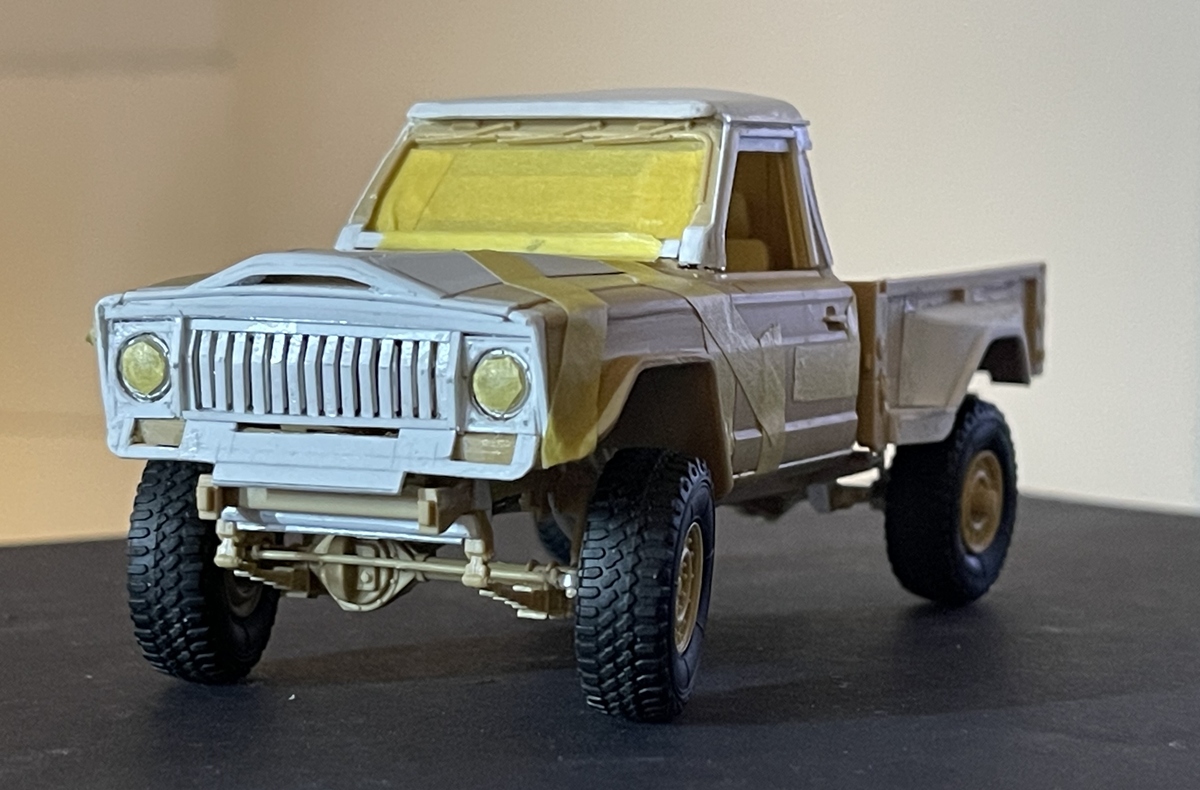
As you can see, relatively close on the grill and hood. It turns out the kit grill is oriented vertically, but the body lines are rounded and even slightly tilted backward, whereas the Jeep grill frame is also essentially flat, the fenders on either side project forward, and then angle downward, and obviously, the grill facade is completely different and headlight bezels are square, so lots of evergreen used here.

In this picture, you can see the cab windshield now tilts back, while in the kit it’s vertical. The J10 roof is interesting as it has built in visor over the windshield and an abrupt edge in the back. The kit came with a canvas/fabric cab top.

I took some license on the stepside fenders, which should be more square, but I like the sweeping lines more.
Back to 1/32 Chevy trucks - well, as some people build numerous Panzers, Shermans, HMMWVs, and M1A1s, and so on, I like trucks, and have built several Chevy trucks, many in 1/32, like the one below:

Ahhh, what a treat! an off road racer! This looks a lot like an older Trophy truck, which were still two wheel drive. Like the blue Ford, the only part of the kit used here is the body, then a scratch built chassis, suspension, adapted engine etc. Not to worry, the cab was cut at the back of the door line, in order to make it longer, and wheel openings enlarged to handle bigger tires/wheels and vertical wheel travel!
As it’s been so highly modified, I don’t think the scale looks completely wrong next to the Jeep, but in the upper left you can see what I mean about the Jeep looking a bit narrow and tall. You can also see where I got the design idea for the stepside fenders!
I’m thinking about using this truck in the dio - maybe the lumber company sponsors a race car?!
OK, thanks for having a look and on we go.
Cheers
Nick
10 Likes
Trucks around the yard, are also going to include a car. Specifically a VW baja bug. The initial plan was to use the RFM kit, and make a simple baja bug . But, I discovered the Type 87 was all wheel drive! A real opportunity to make something pretty cool! First, some prototype images:
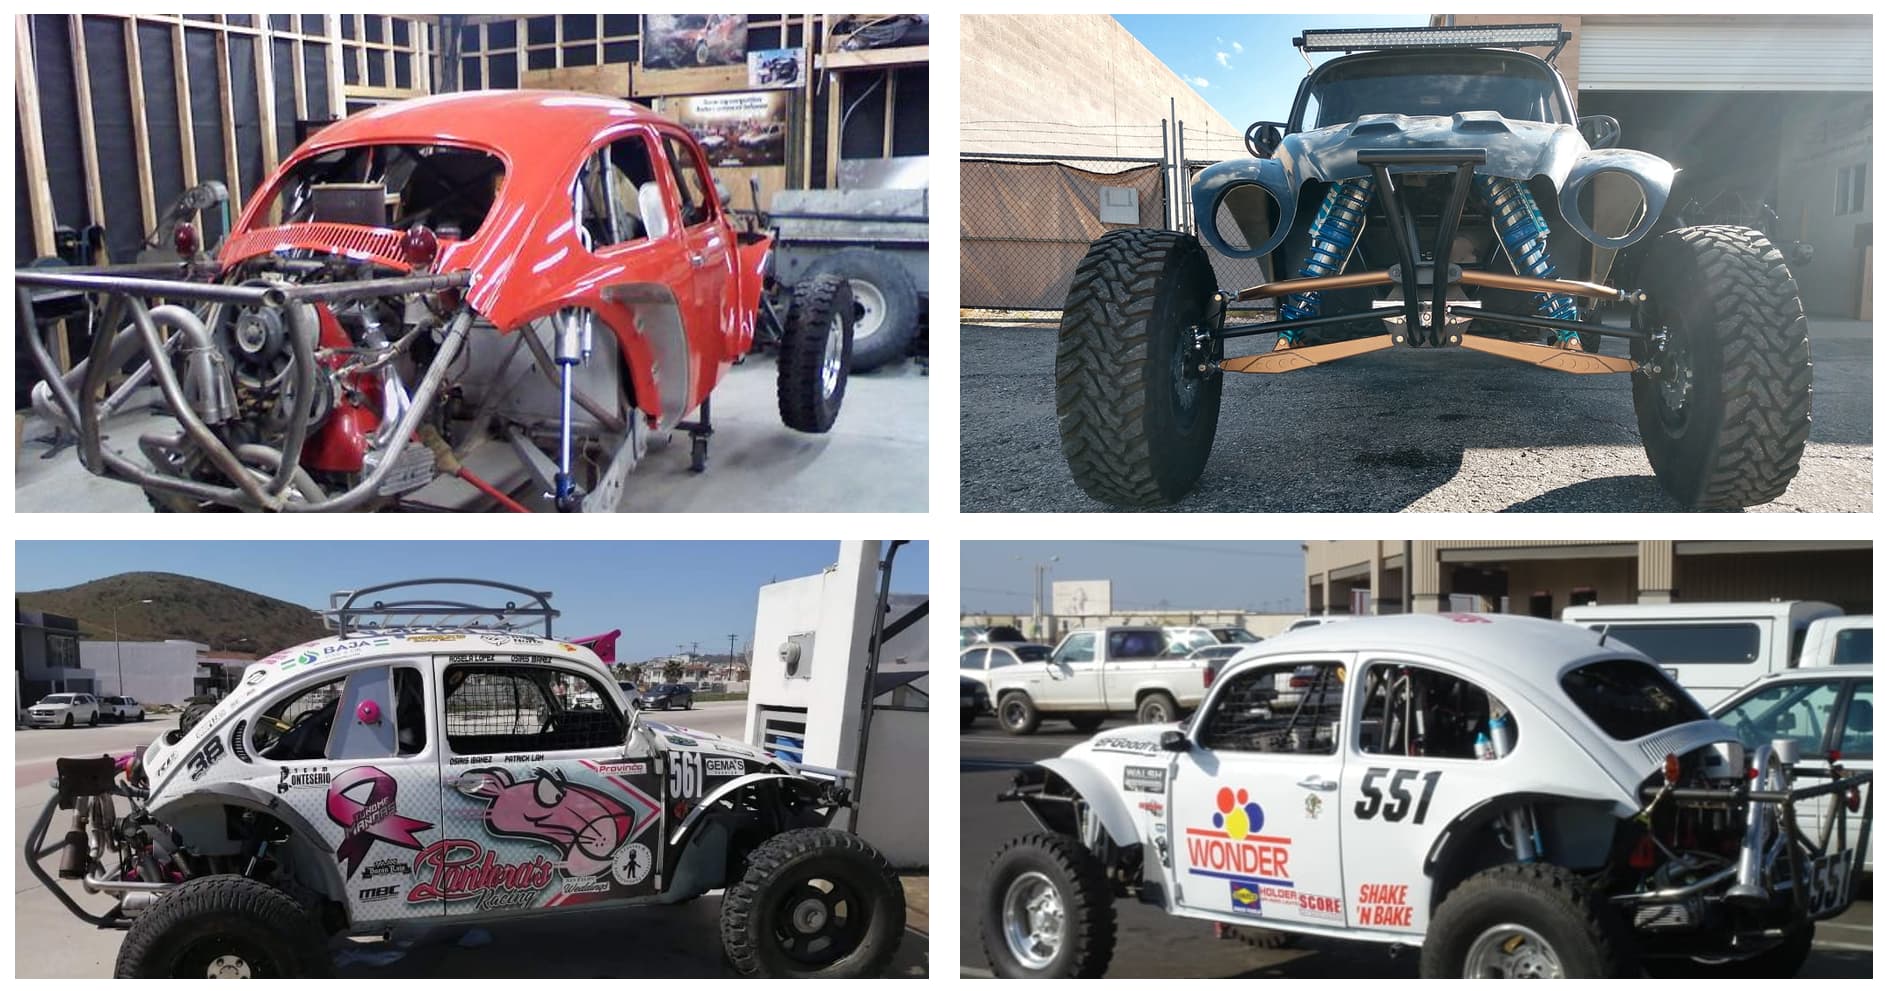
I really like the car in the upper right, and it became the basis for the front suspension. The car in the upper left shows longer racing trailing arms and shocks which I’ll make, and all share the distinctive look of a baja bug. None of these though are all wheel drive.
And some progress:
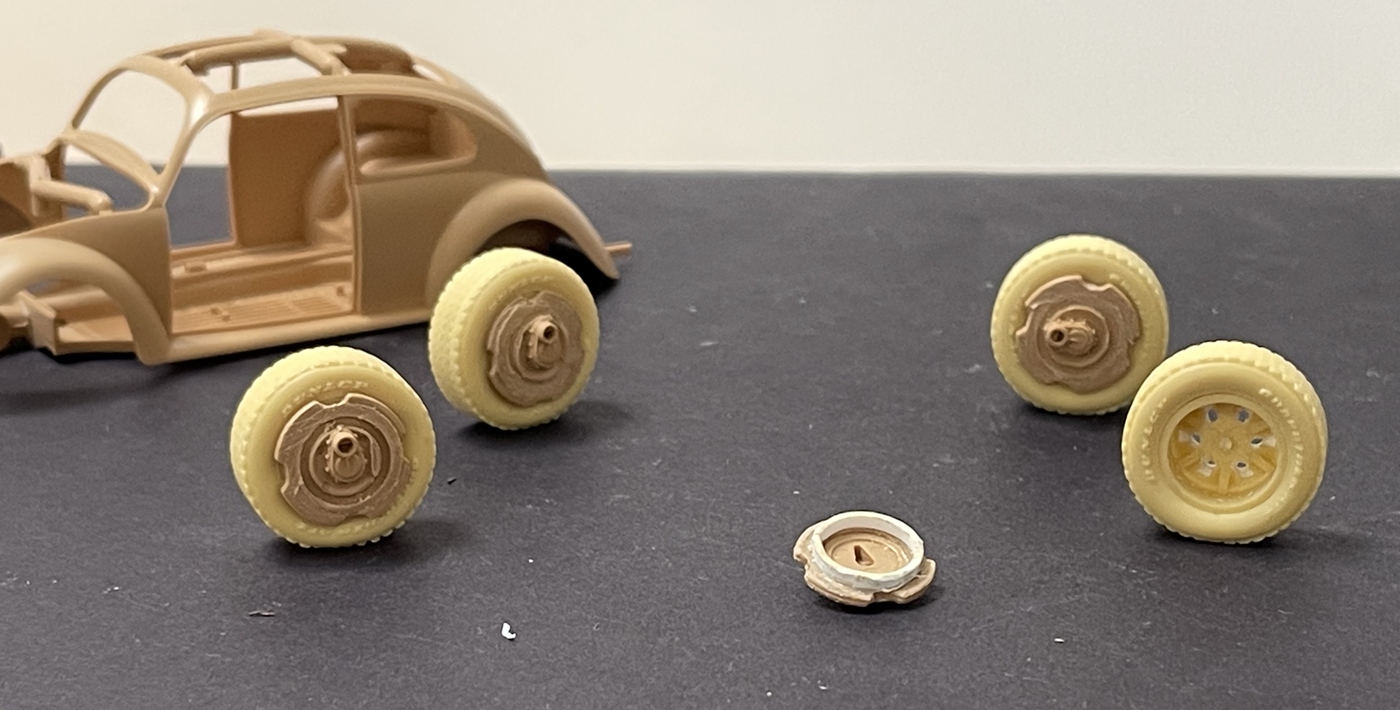
Wheels - how hard can they be to make? Well, not that hard per se, but it took time to figure out what alt tires/wheels to use, and I settled on a set for the Meng Hilux from the stash. Then how to adapt them to work with the kit hubs and portals. The evergreen ring serves as a fairly stable insert. Next came all sorts of cutting, filing and drilling to make them look lore convincing, which I did after this picture was taken. And, as I don’t like the Hilux wheel design, I made some inserts for the outward facing side.
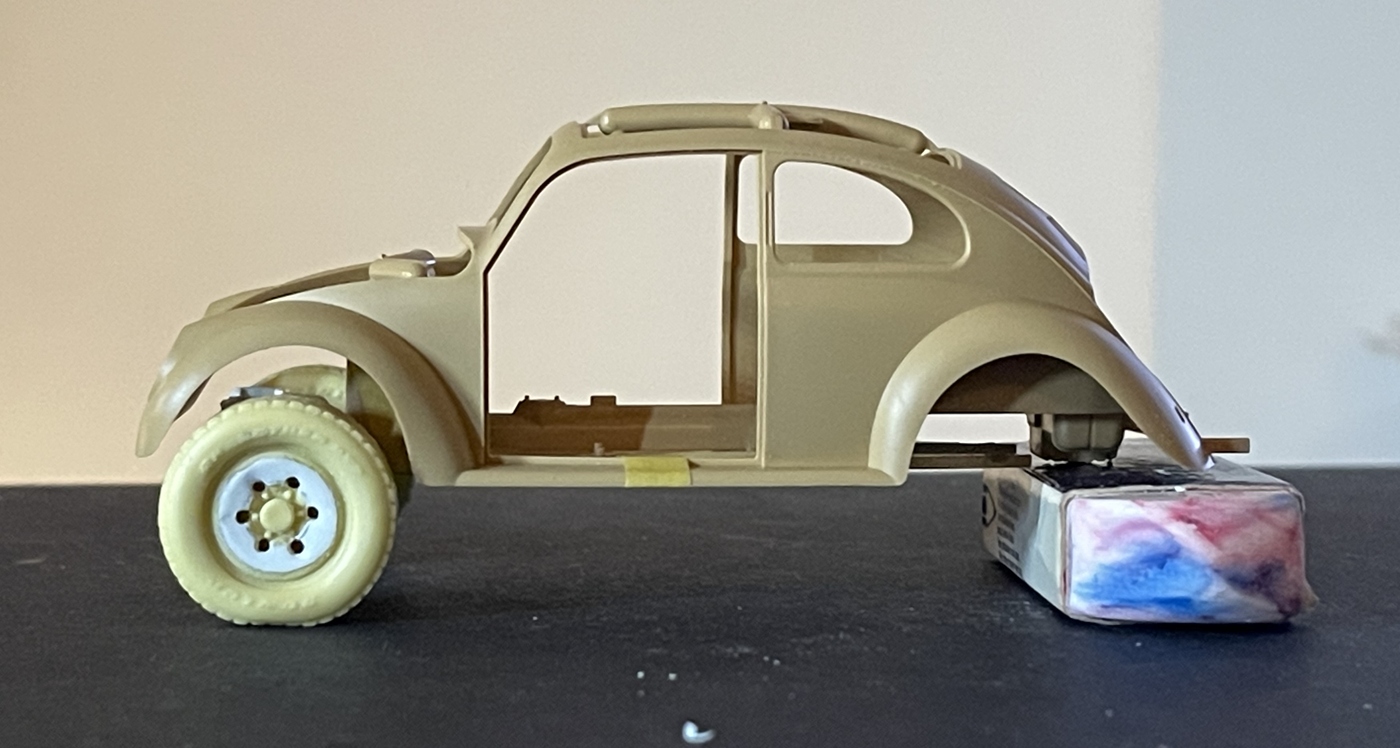
Granted, my wheels are not that much better, they are better. Next came reworking the front suspension:

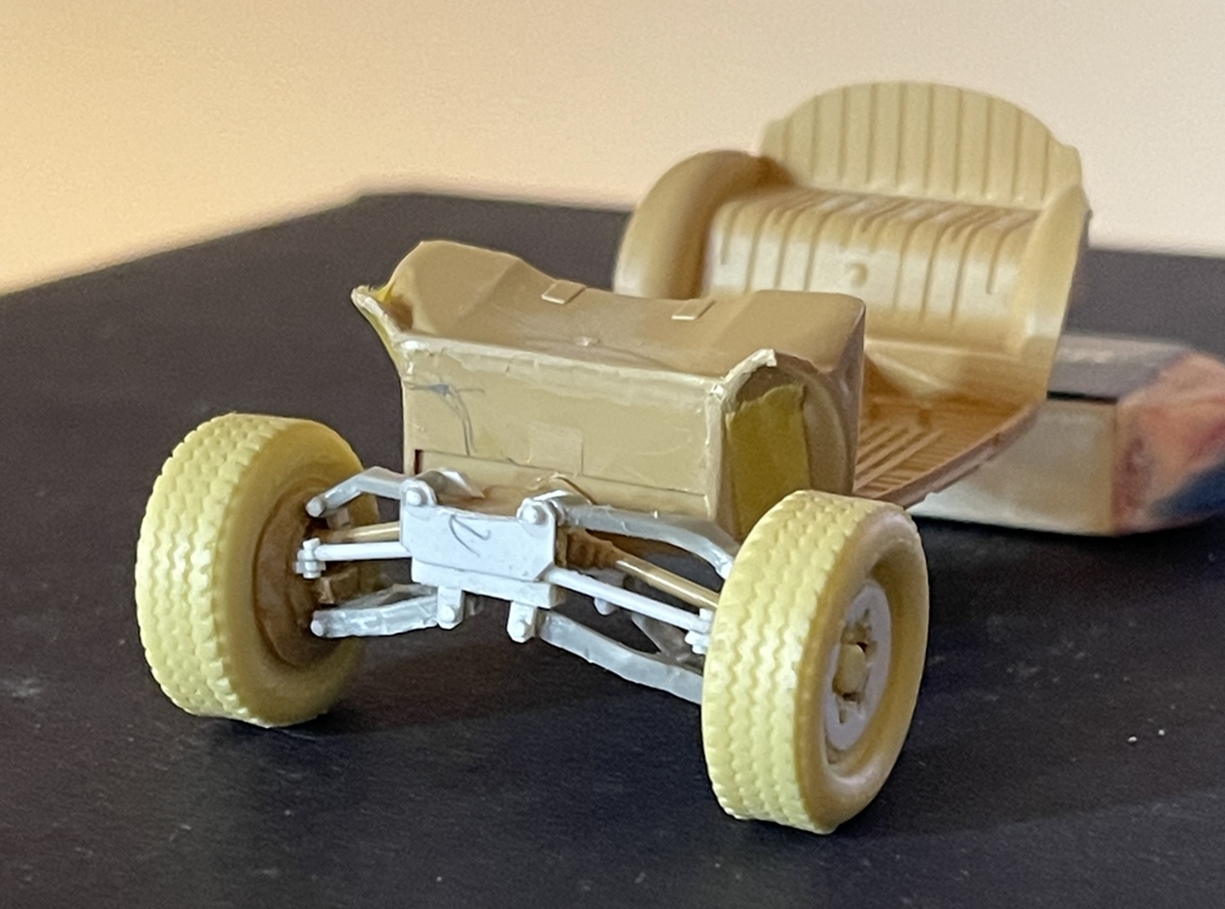
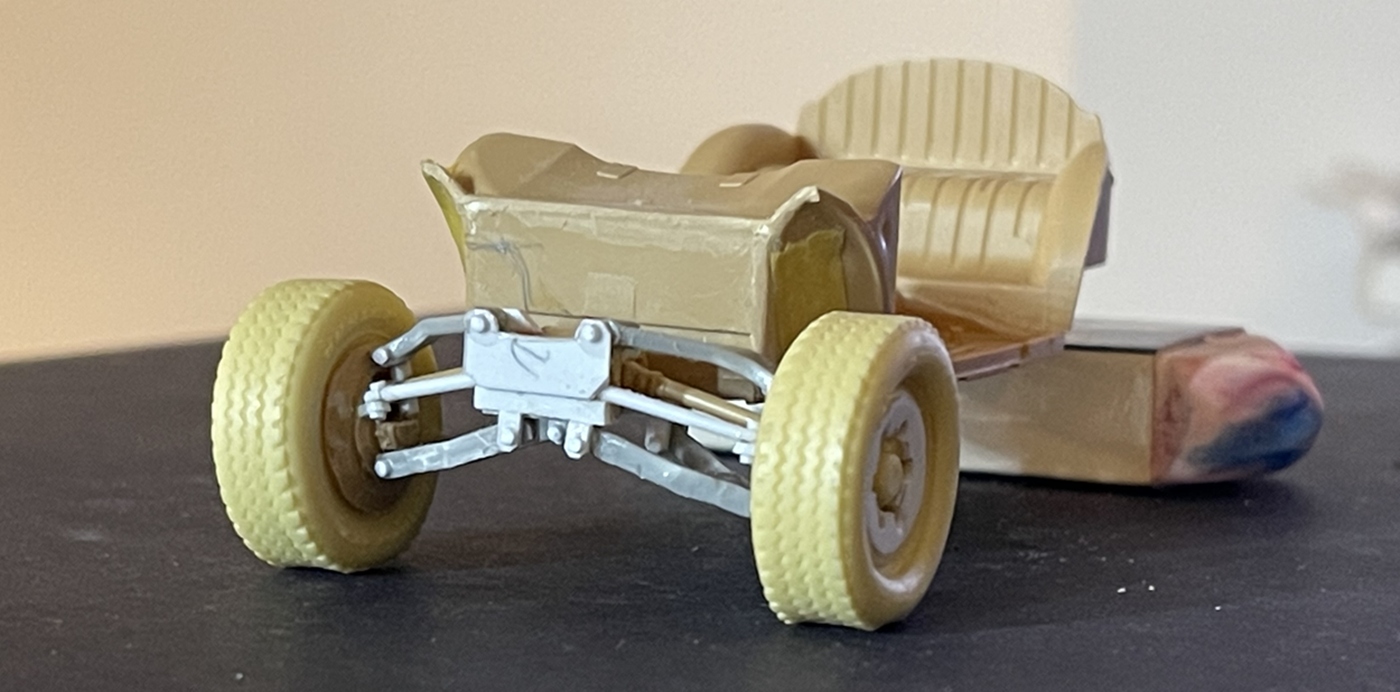
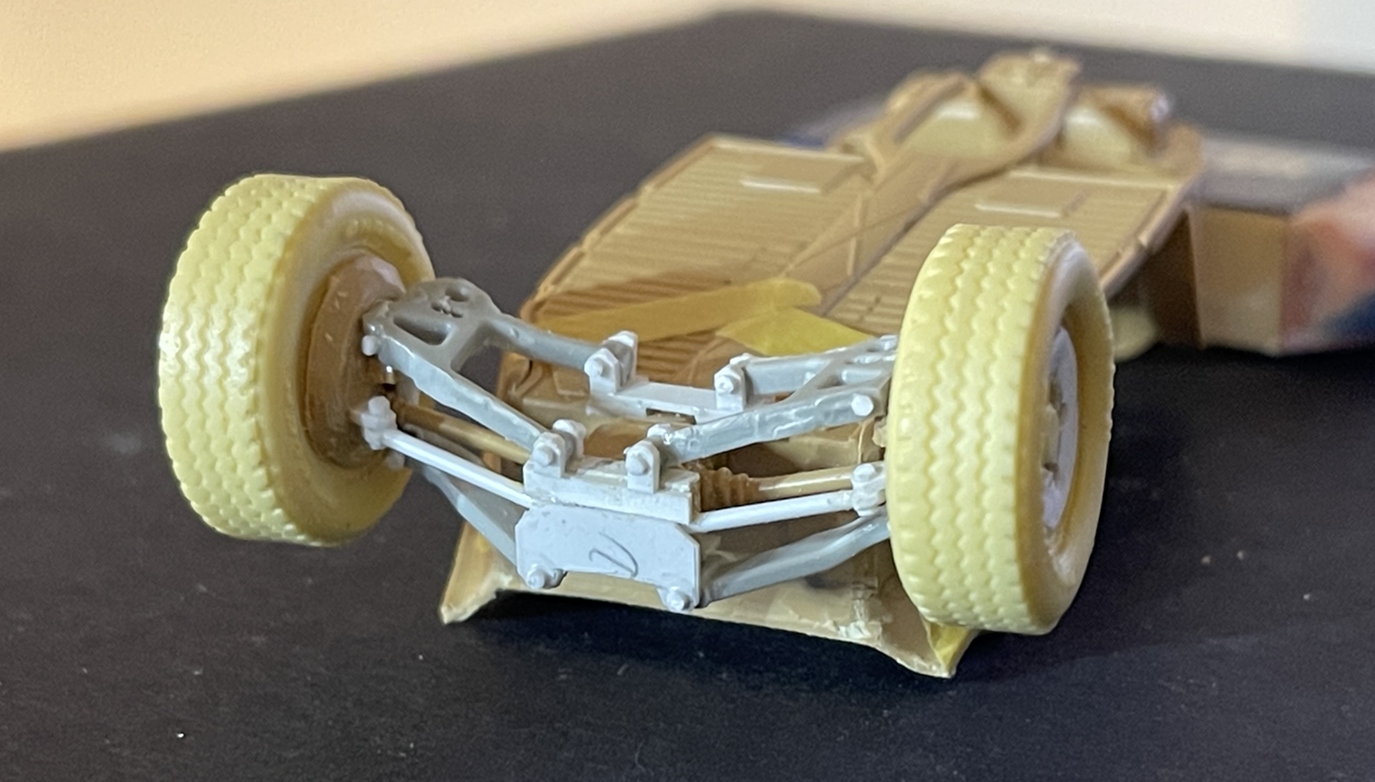
When doing research on the car I found some drawings showing how the car actually works. Then, looked up suspension sets for Class 5 baja race cars - and combined this is what we get.
So, this has been pretty interesting - and challenging - I even managed to get bike rides in this and yesterday morning, and got some real work done - so, all in all off to a good start.
Thanks for having a look -
Cheers
Nick
8 Likes
cool fun build … lots of great work fitting it all together though and good research
2 Likes
That looks great.
2 Likes