I can’t wait to see progress on this!
1 Like
Please modify the fenders, ![]()
May I suggest polished steel for the wheel hubs/rims?
1 Like
Hello gents,
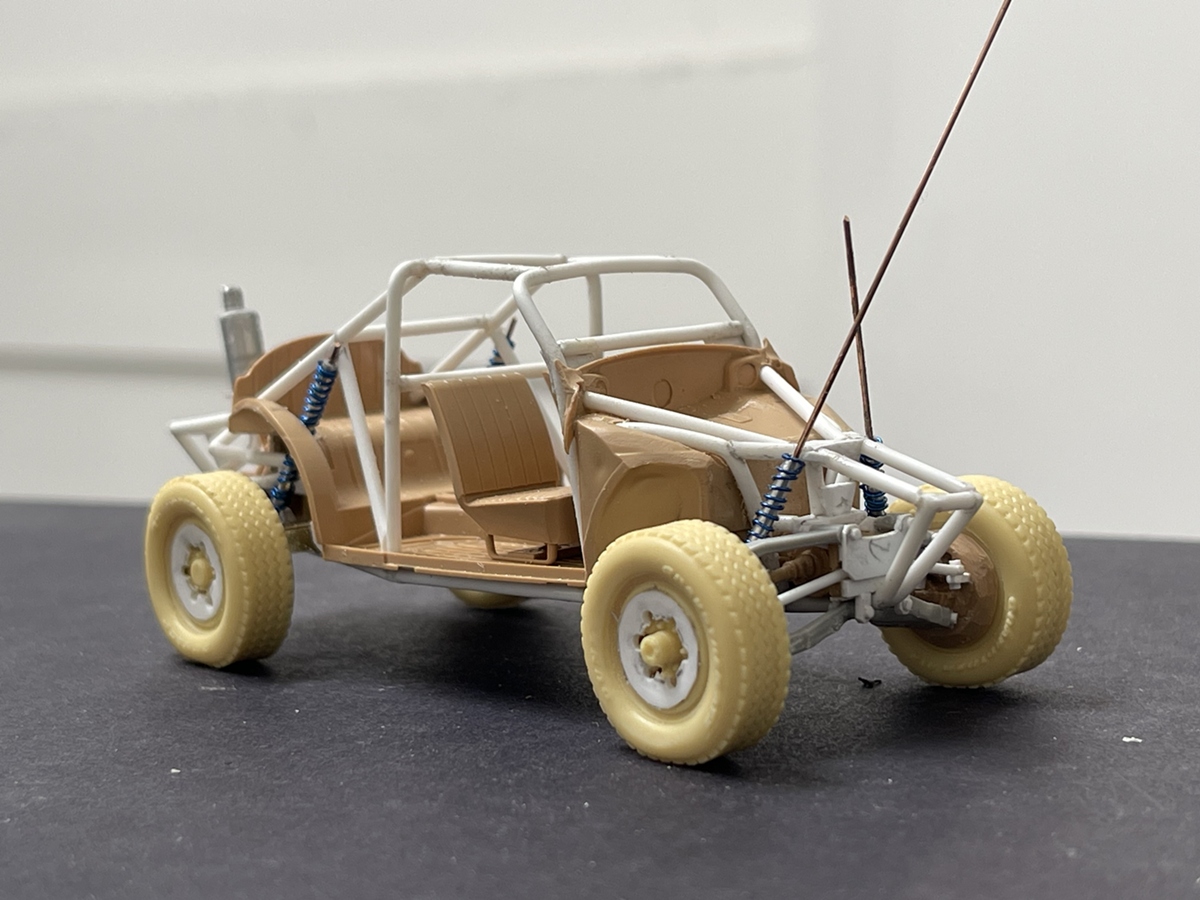
I’m making progress on the Type 87. I like the overall look but can say with clarity some of the steps were tedious - starting with the front chassis/tubing fitment:
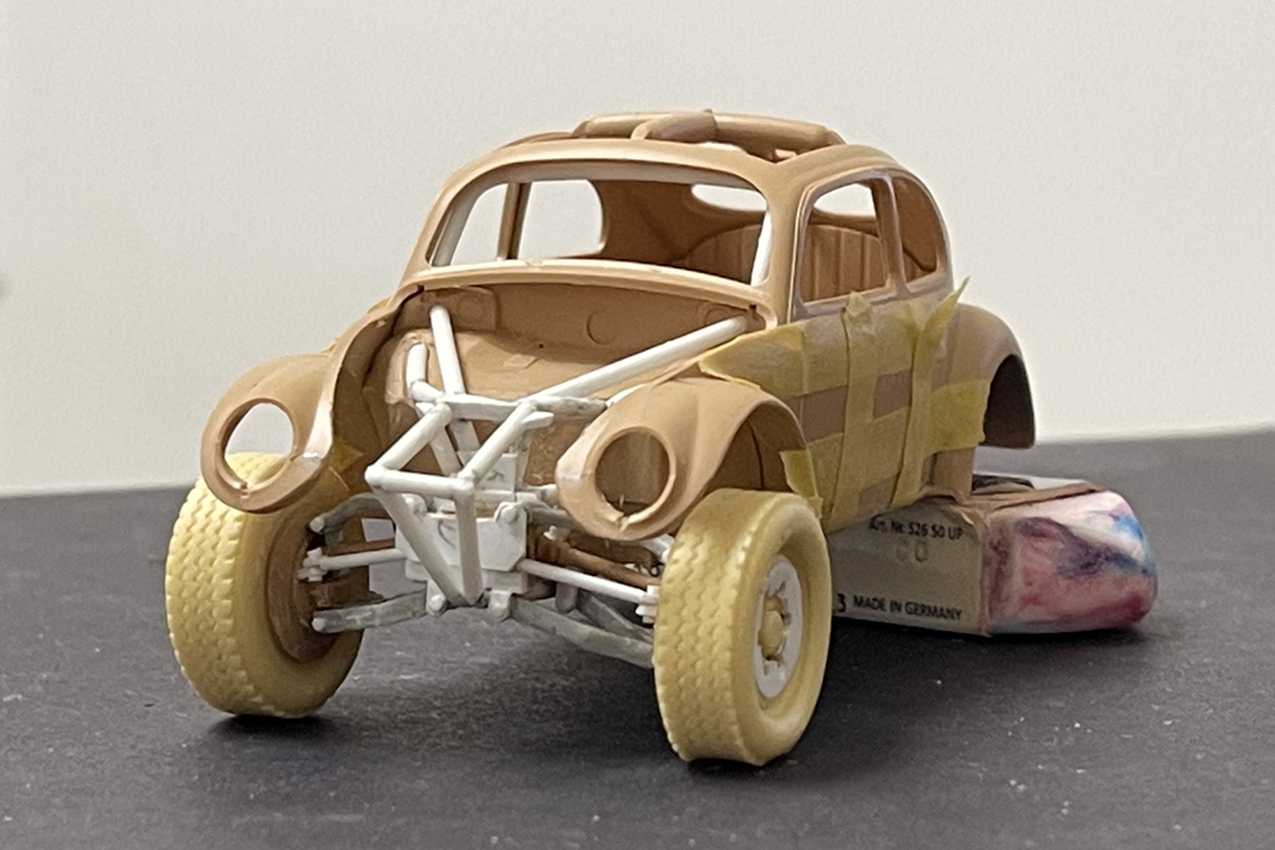
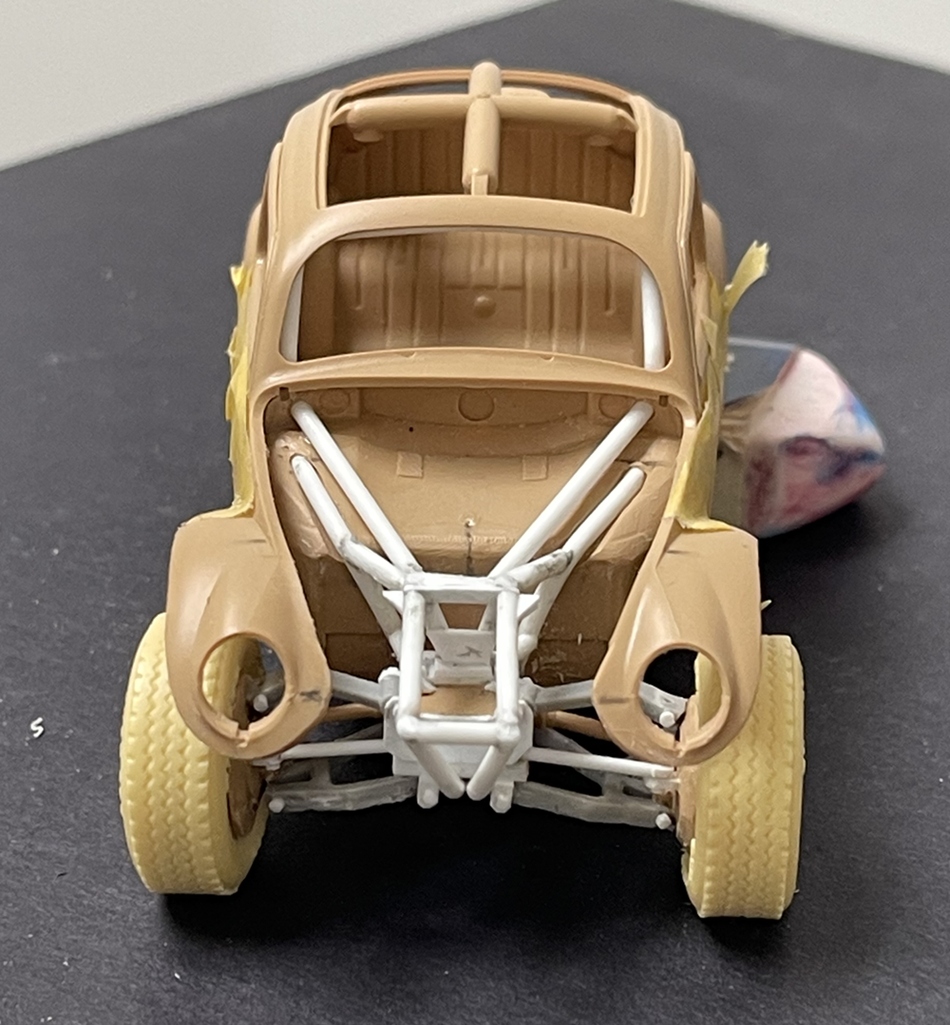
It’s obvious enough that this is a bit tricky, but less obvious how tight the tolerances are (as despite what the pictures suggest) the parts are small, and if you cut something a few degrees off, too long/short, well, it looks awful! But, so far so good
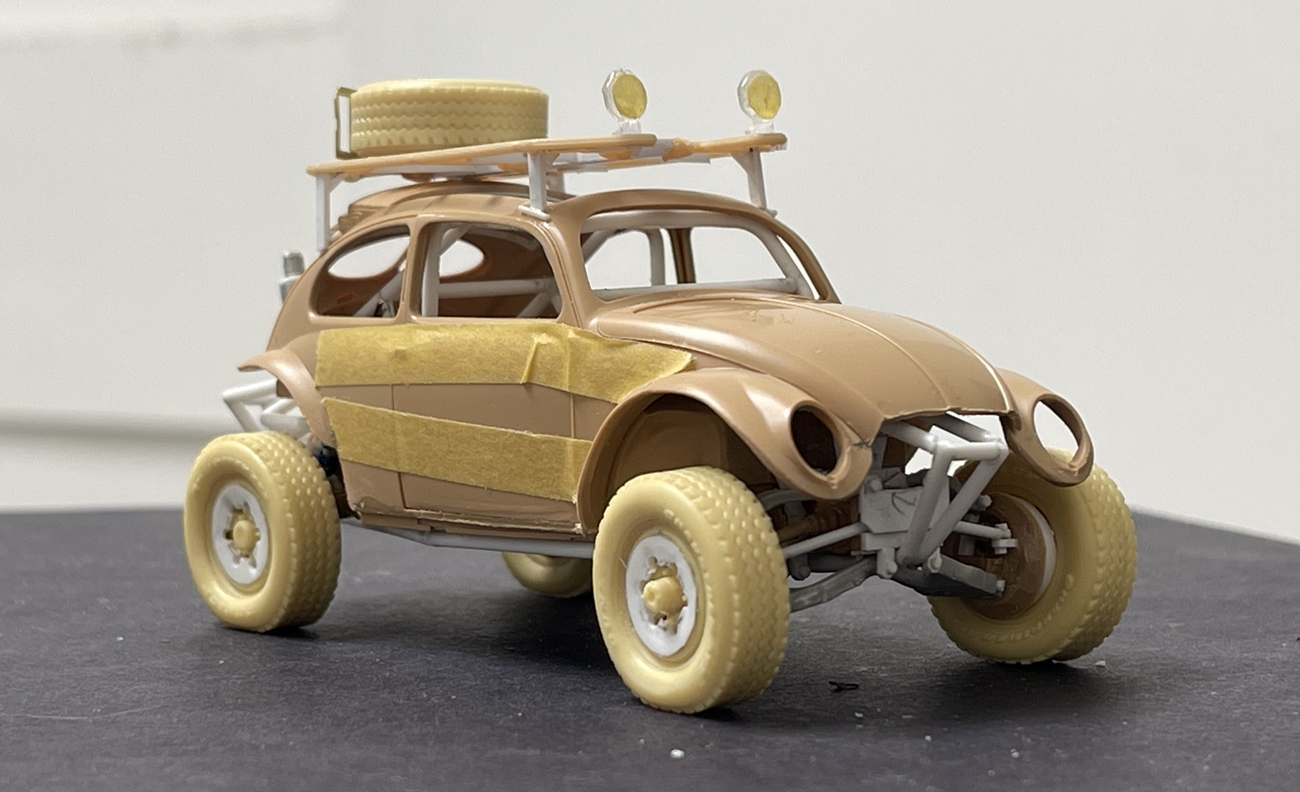
@Uncle-Heavy well Robin, body cutting comes to those that wait! ![]() I held off chopping this off too early because I wasn’t sure how the parts might fit in the bigger scheme of things - that is, if you cut off too much too soon, it’s a PITA to put it back together later!
I held off chopping this off too early because I wasn’t sure how the parts might fit in the bigger scheme of things - that is, if you cut off too much too soon, it’s a PITA to put it back together later! ![]()
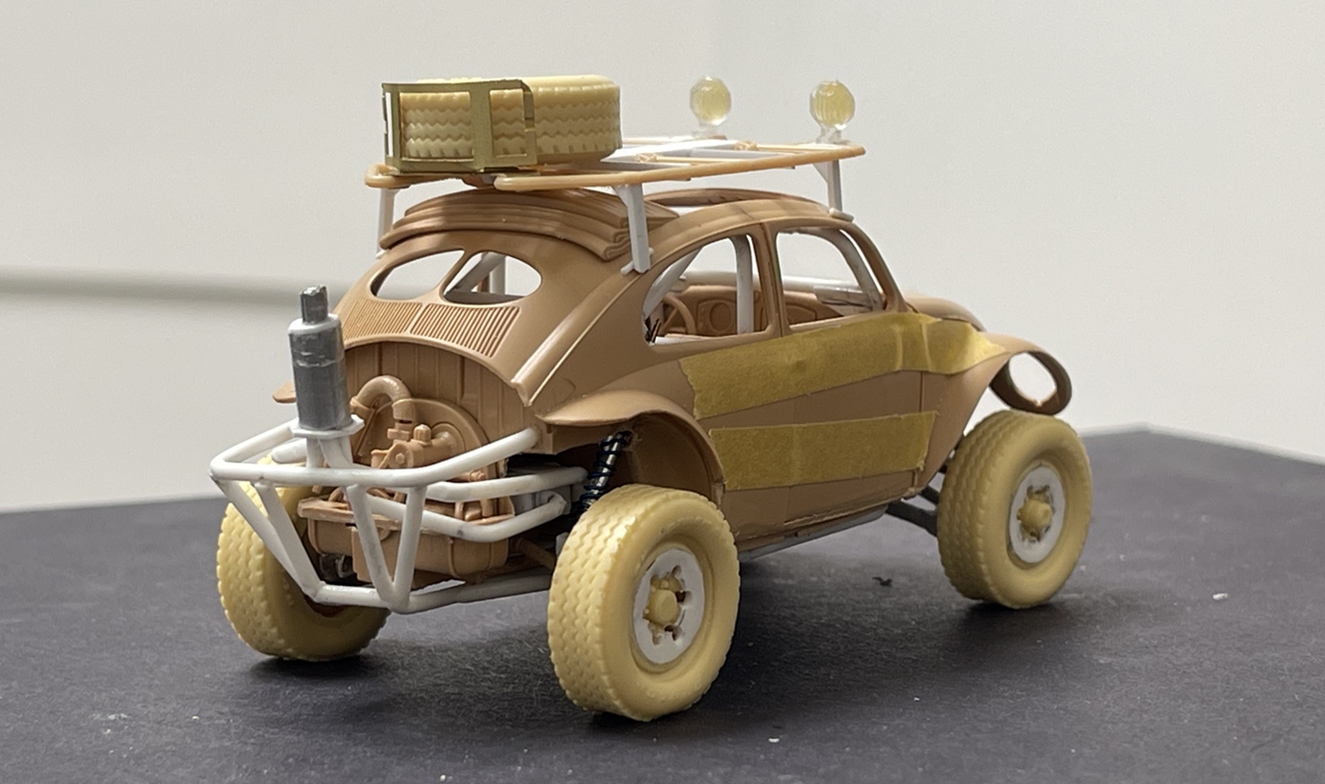
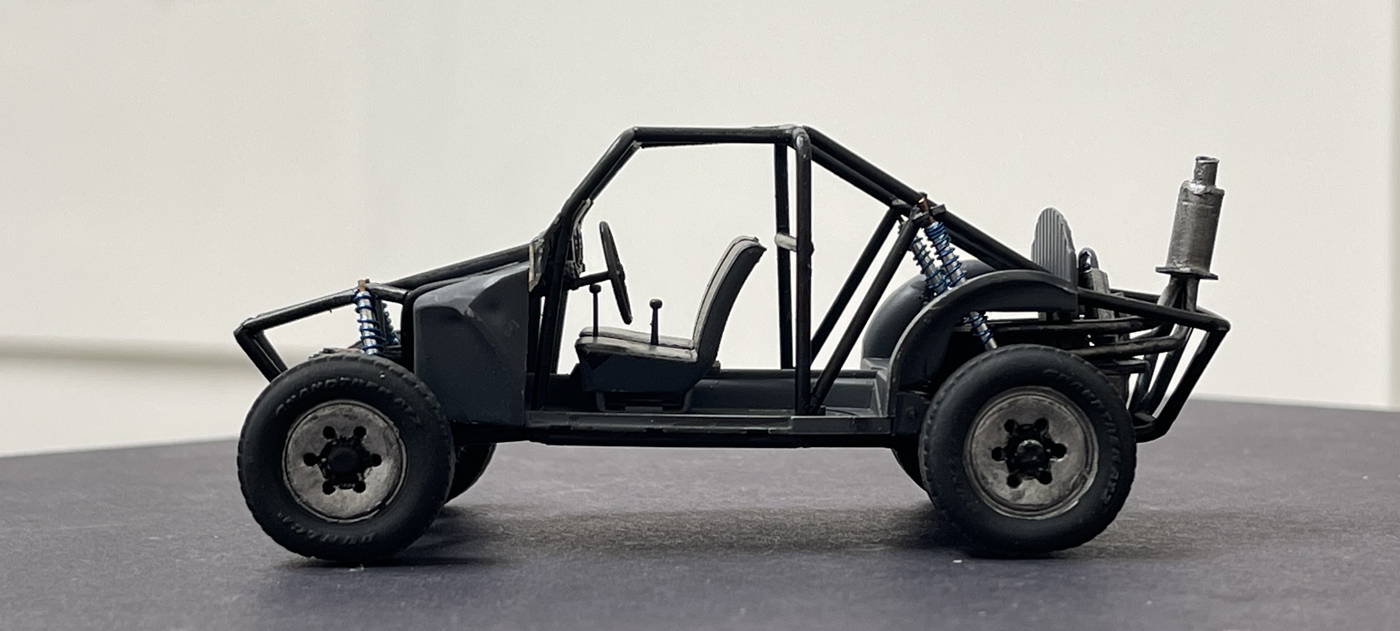
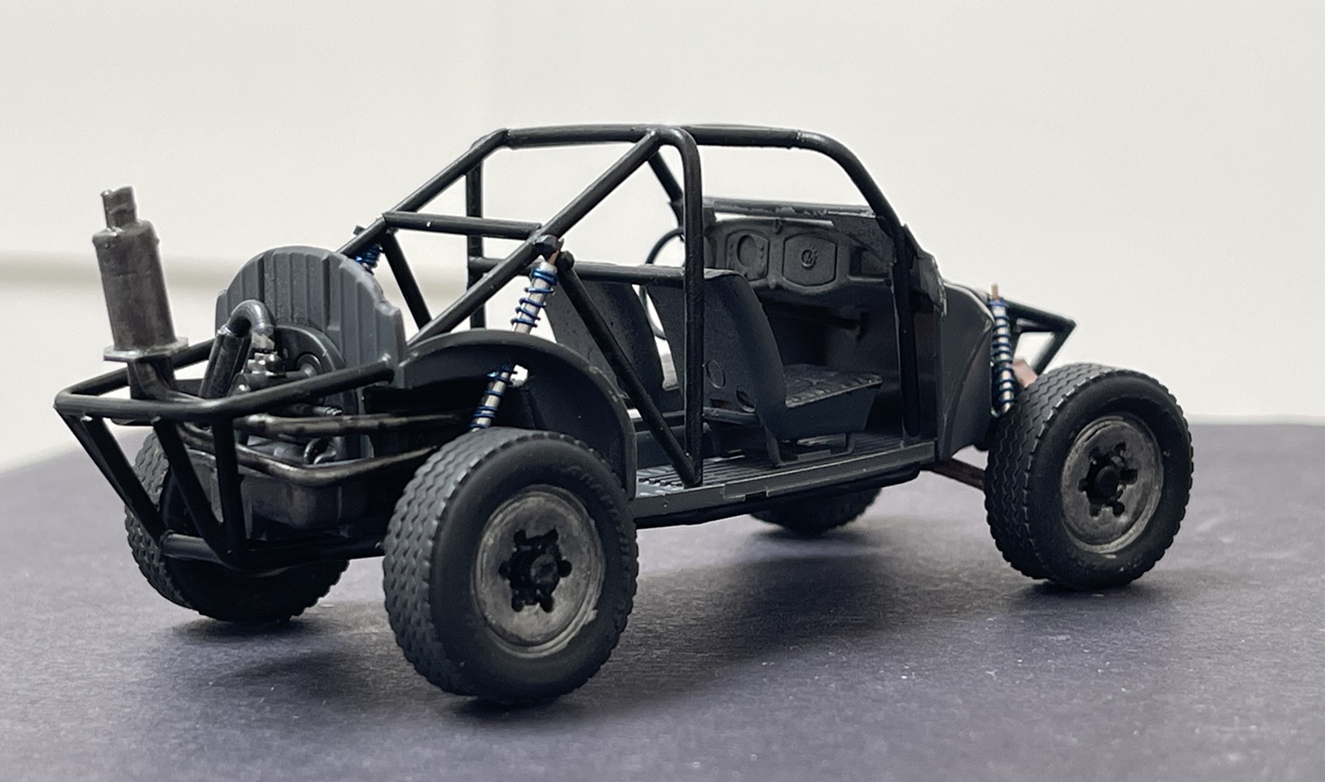
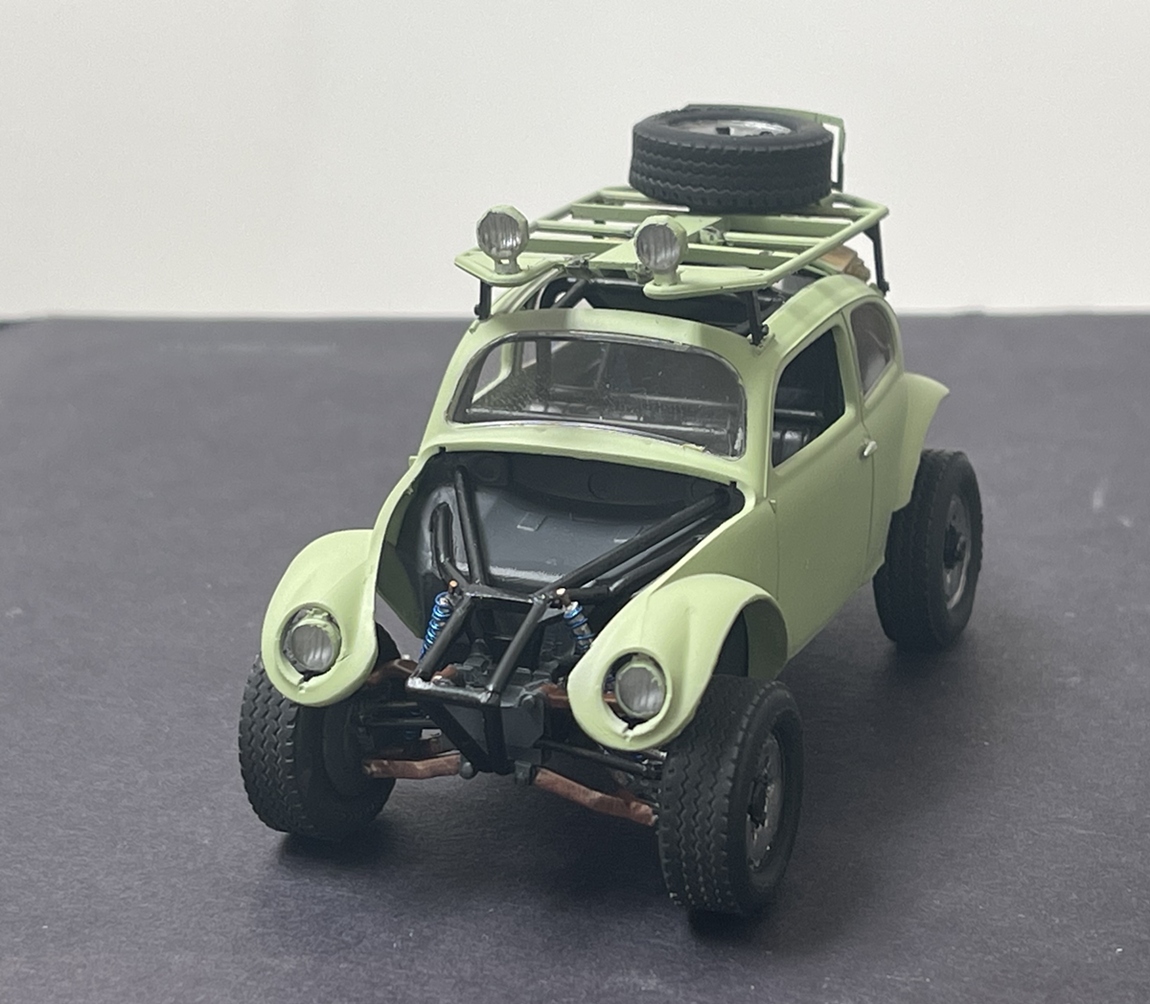
Speaking of a PITA…how’s about the sassy headers??? yep - all four tubes, happily bent around the modified engine to at least vaguely look like a 1600 cc model…yep… having struggled through various sets of headers on GT-40s and F-1 cars, I had some sense of what I was in for. So, holes were drilled into my custom built heads, allowing pre bent exhaust tubes tp be stuck into the block and glued in place. I then made a collector plate - just a sheet of plastic with four holes (you can see just below the muffler), which was slid over all four tubes in a way that looks convincing and flooded with glue. Finally, a short section of alu tube slid over the tubes. It received a cab, cut to match it’s diameter, and single pipe exhaust sticking out the top.
Then on to the chassis etc:


So making progress. I want to add a few odds and ends, then off to paint -
thanks for having a look -
Cheers
Nick
12 Likes
Yep. All stability gone to h-ll in a handbasket
1 Like
Looks fantastic Nick – those coil springs, are they DIY or did you decimate your stash of biros?
1 Like
I’m all caught up in the details.
Hello gents, on we go - some updates:
First, on the baja bug:


This worked out pretty well for the most part, and with the body:
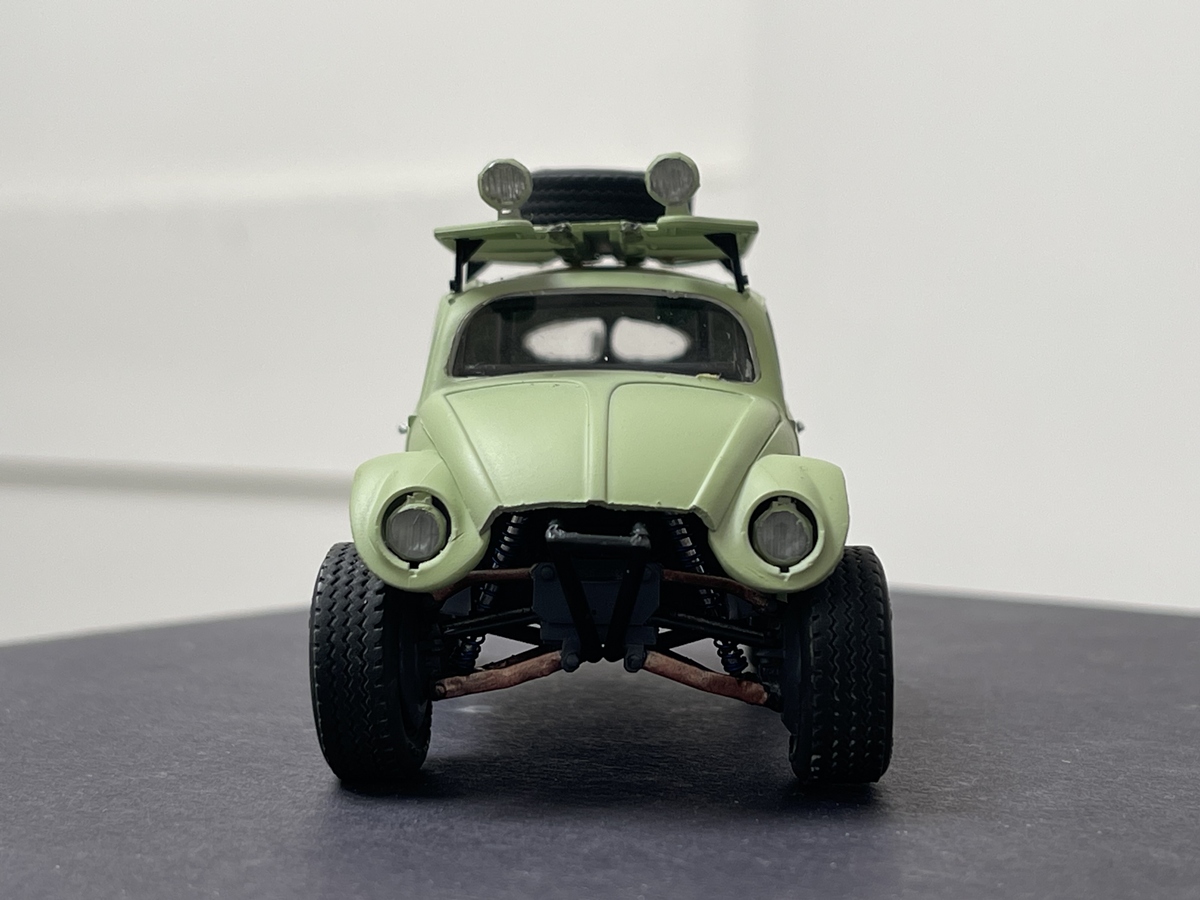
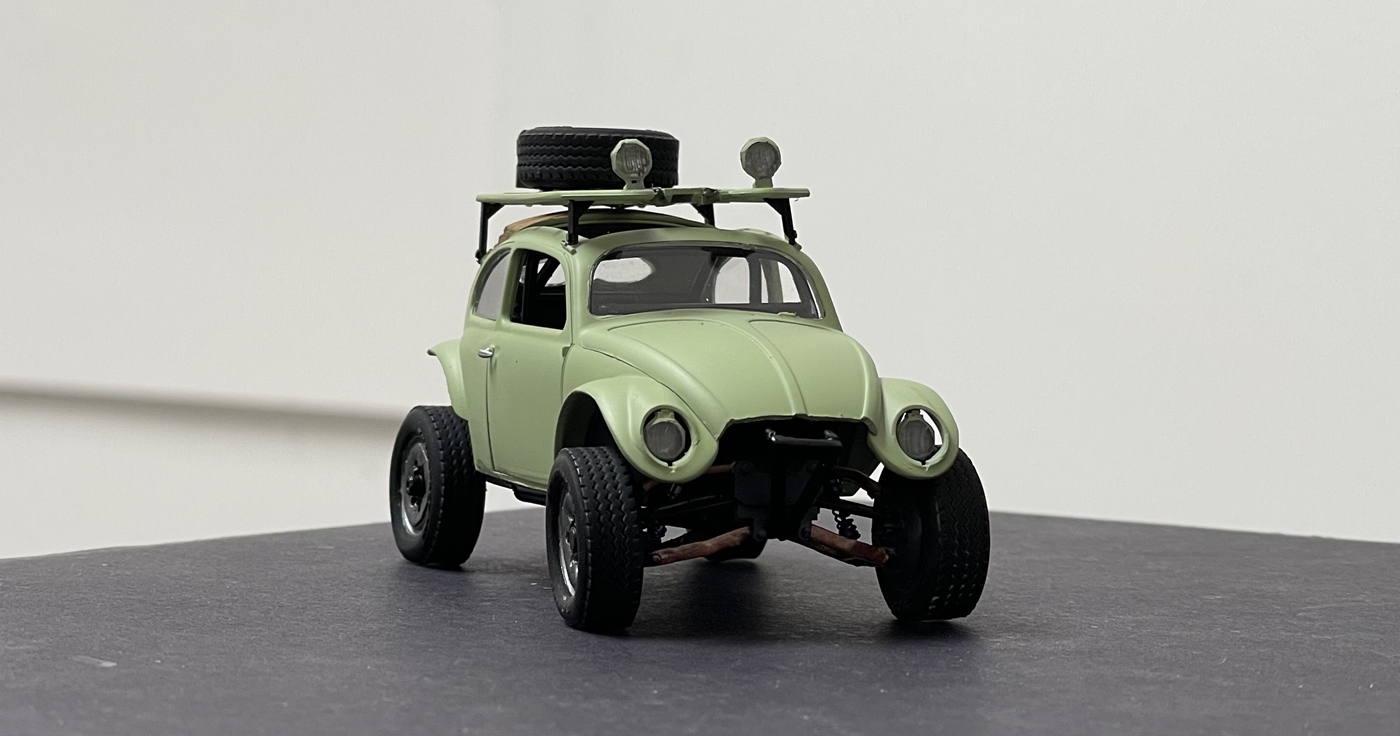
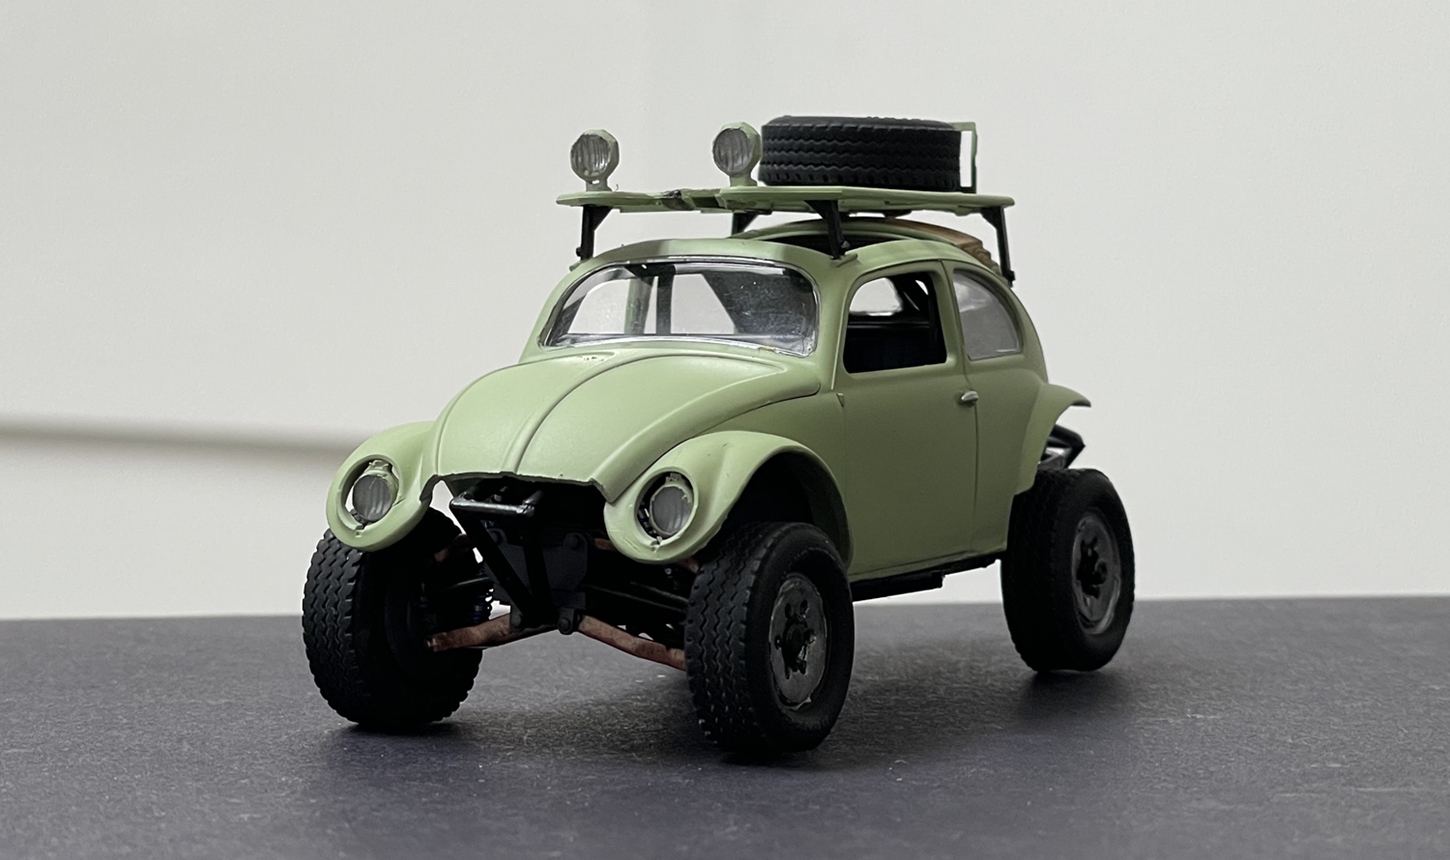

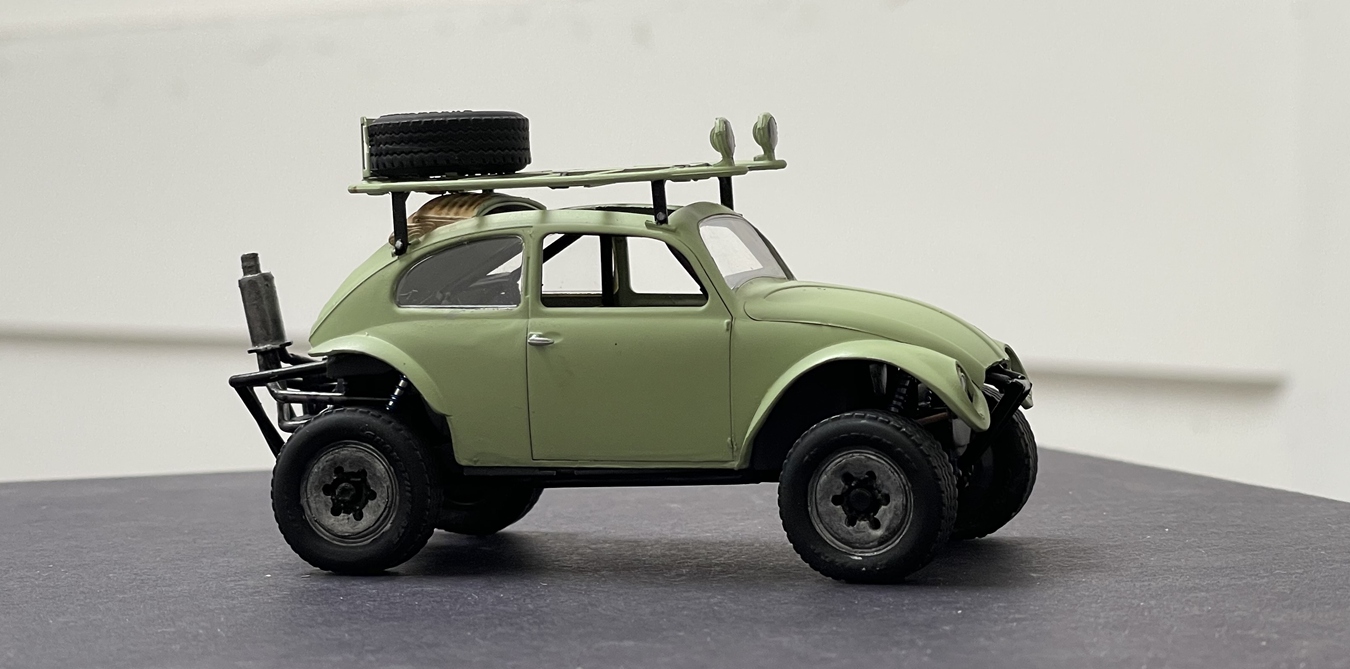
I need to touch up some things here and there, and the sagged tires don’t seem to be sagging in the same direction. Not sure how far I’ll go to resolve that, as experience tells me digging into small parts firmly attached with CA can = disaster ![]()
And, the J-10:
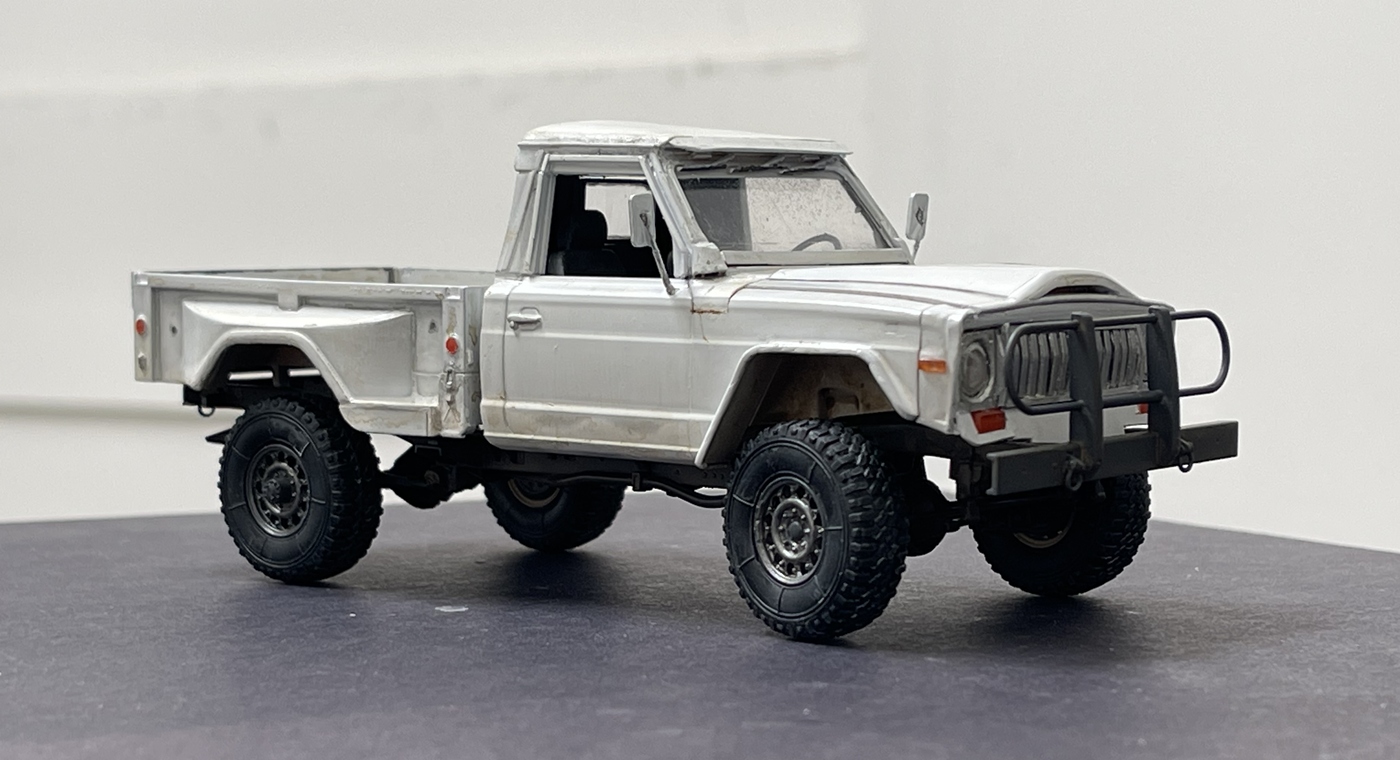

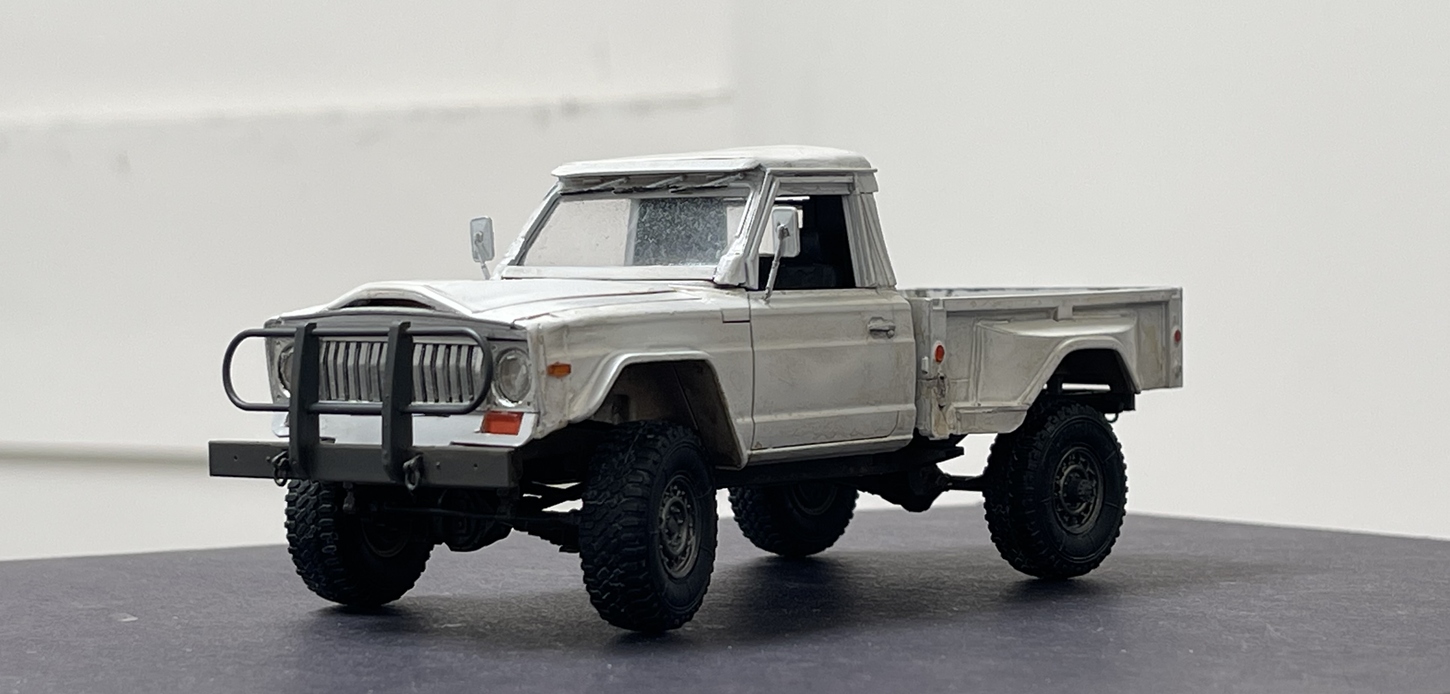

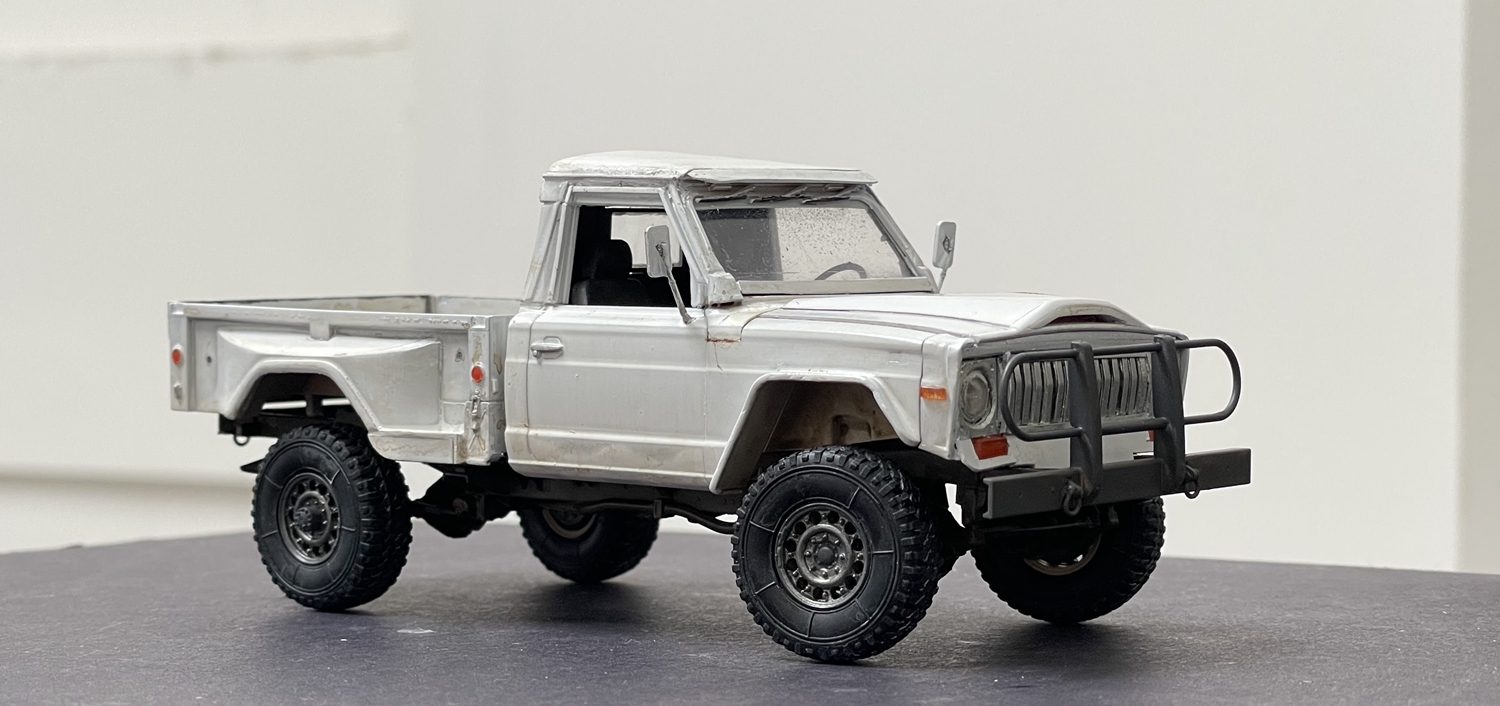

The J-10, I think the conversion went a lot better than expected, while the paint, a lot less good than I hoped. I used an old can of Tamiya white, in which the pigment seems to have separated from the bonding agent, making it watery. I shook the can vigorously and still no luck, so, weathering applied in really not good areas, and it’s ok.
I am pleased with the “lift kit”, body work and grill, which seem to do their parts in making this look convincing -
OK, on we go - seems I might need to start the dioramas now!
Cheers, and thanks for having a look -
Nick
16 Likes
Very nice. The “Jeep” came out looking great.
2 Likes
Really nice update. Love the bug, thats cool … I like the J10, it shouts out “old workhorse” and the paint and weathering equate to that look.
2 Likes
Always impressed by your amazing work.
1 Like
@HeavyArty, thanks Gino, all things considered, it turned out pretty close. The proportions of the base kit are not quite right, but the basic shape is close.
@Johnnych01, thanks, John - the bug was probably more fun that it should have been to build!
@tiking, hi Charles, thanks very much, really appreciate hearing from you!
And for today, on we go with the actual diorama - finally!
As a refresher, the following provide some inspirations and early concept studies for the project.
First up, images of old lumber yards - which I suppose we’ve all seen somewhere along the way. The basic concept for me comes from remembering the yards I visited with my dad and brother in the early 70s for around the house projects. At the time, “big box” stores weren’t around, so off to the local yard you went.
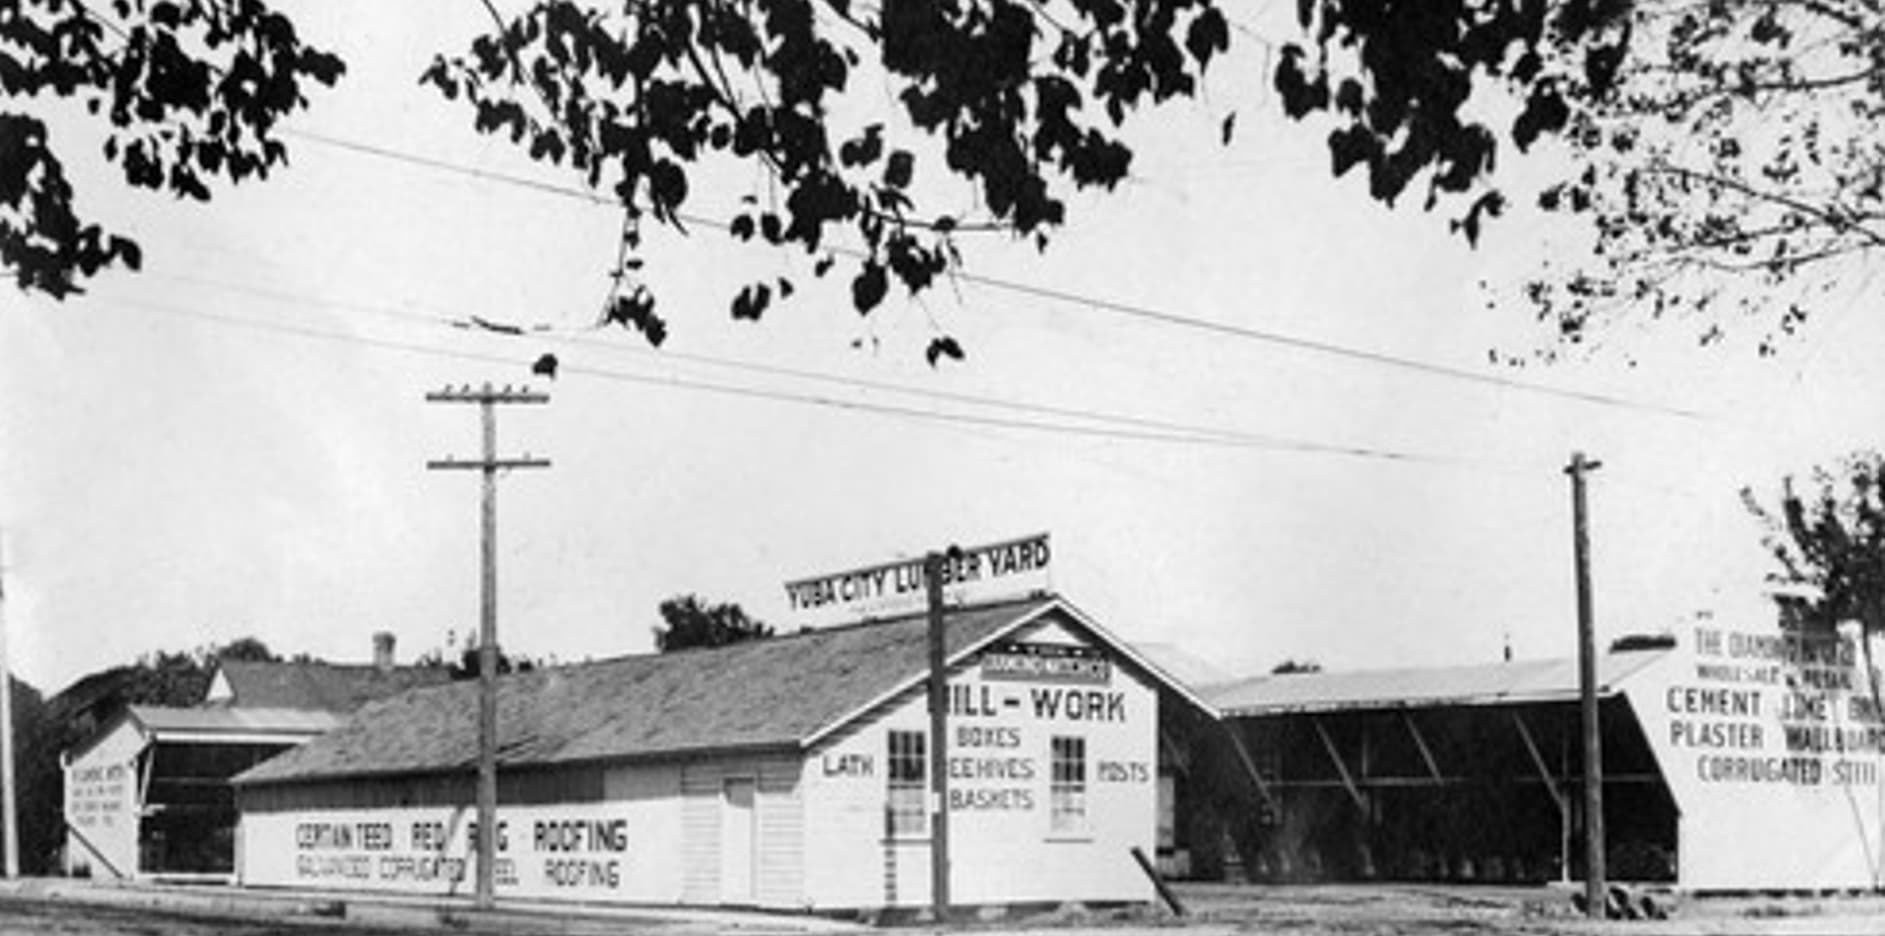
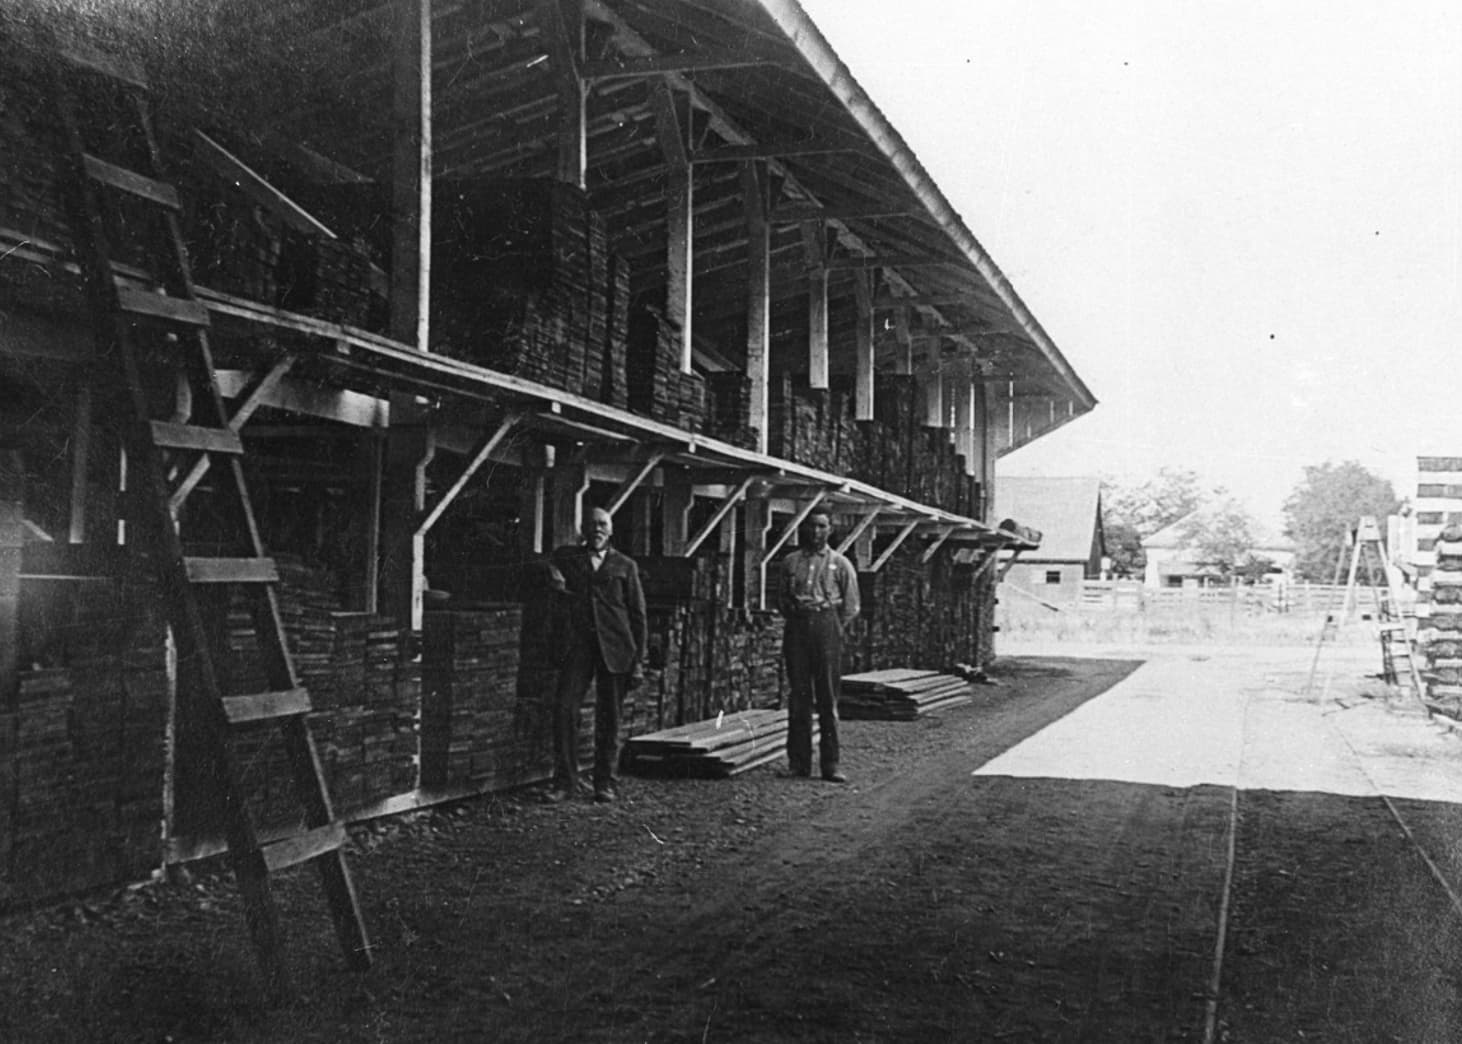
Happily for me, after doing enough looking around, I found that within the University of California photo archives, are examples of several - taken when they were relatively new:

Above, you can see the key elements - a big woodshed, and an office. The shed design was distinctive, so it is what I will try and represent.
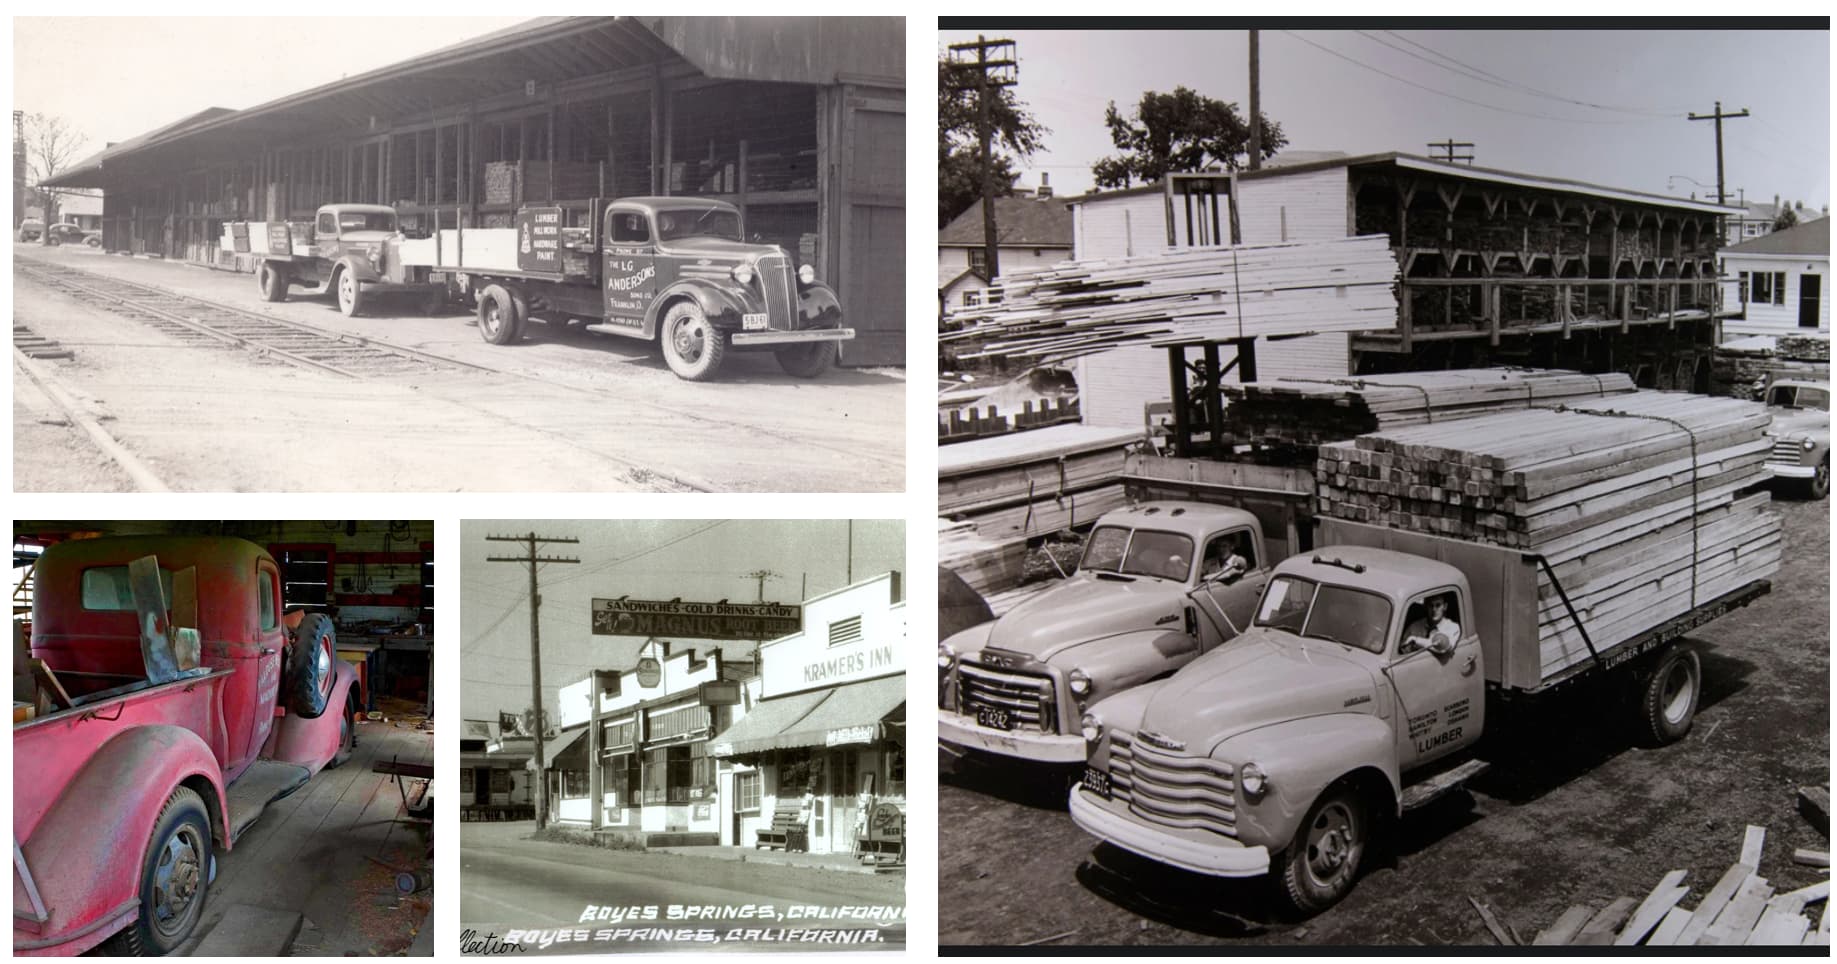
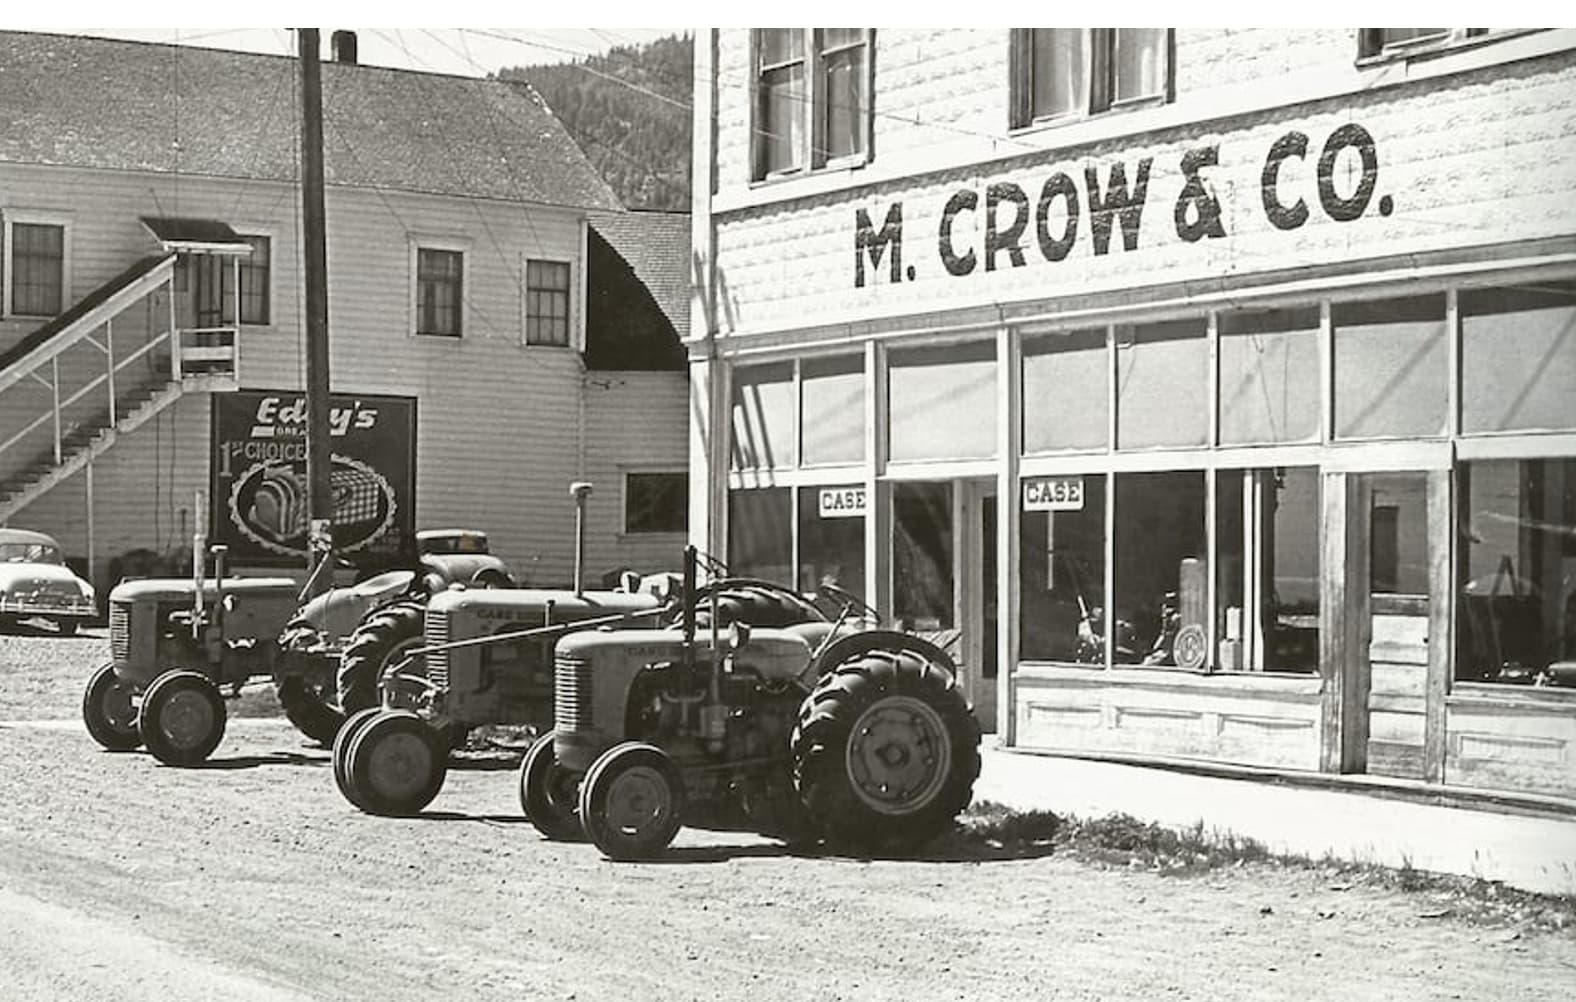
These also give the basic idea - a bit cluttered, street front shop, and old vehicles - but, as this is being built today, I’ll be using the vehicles built/shown above.
Along the way of vehicle construction, I made up these concept studies:


While these convey the basic idea pretty well, they don’t actually work as shown.
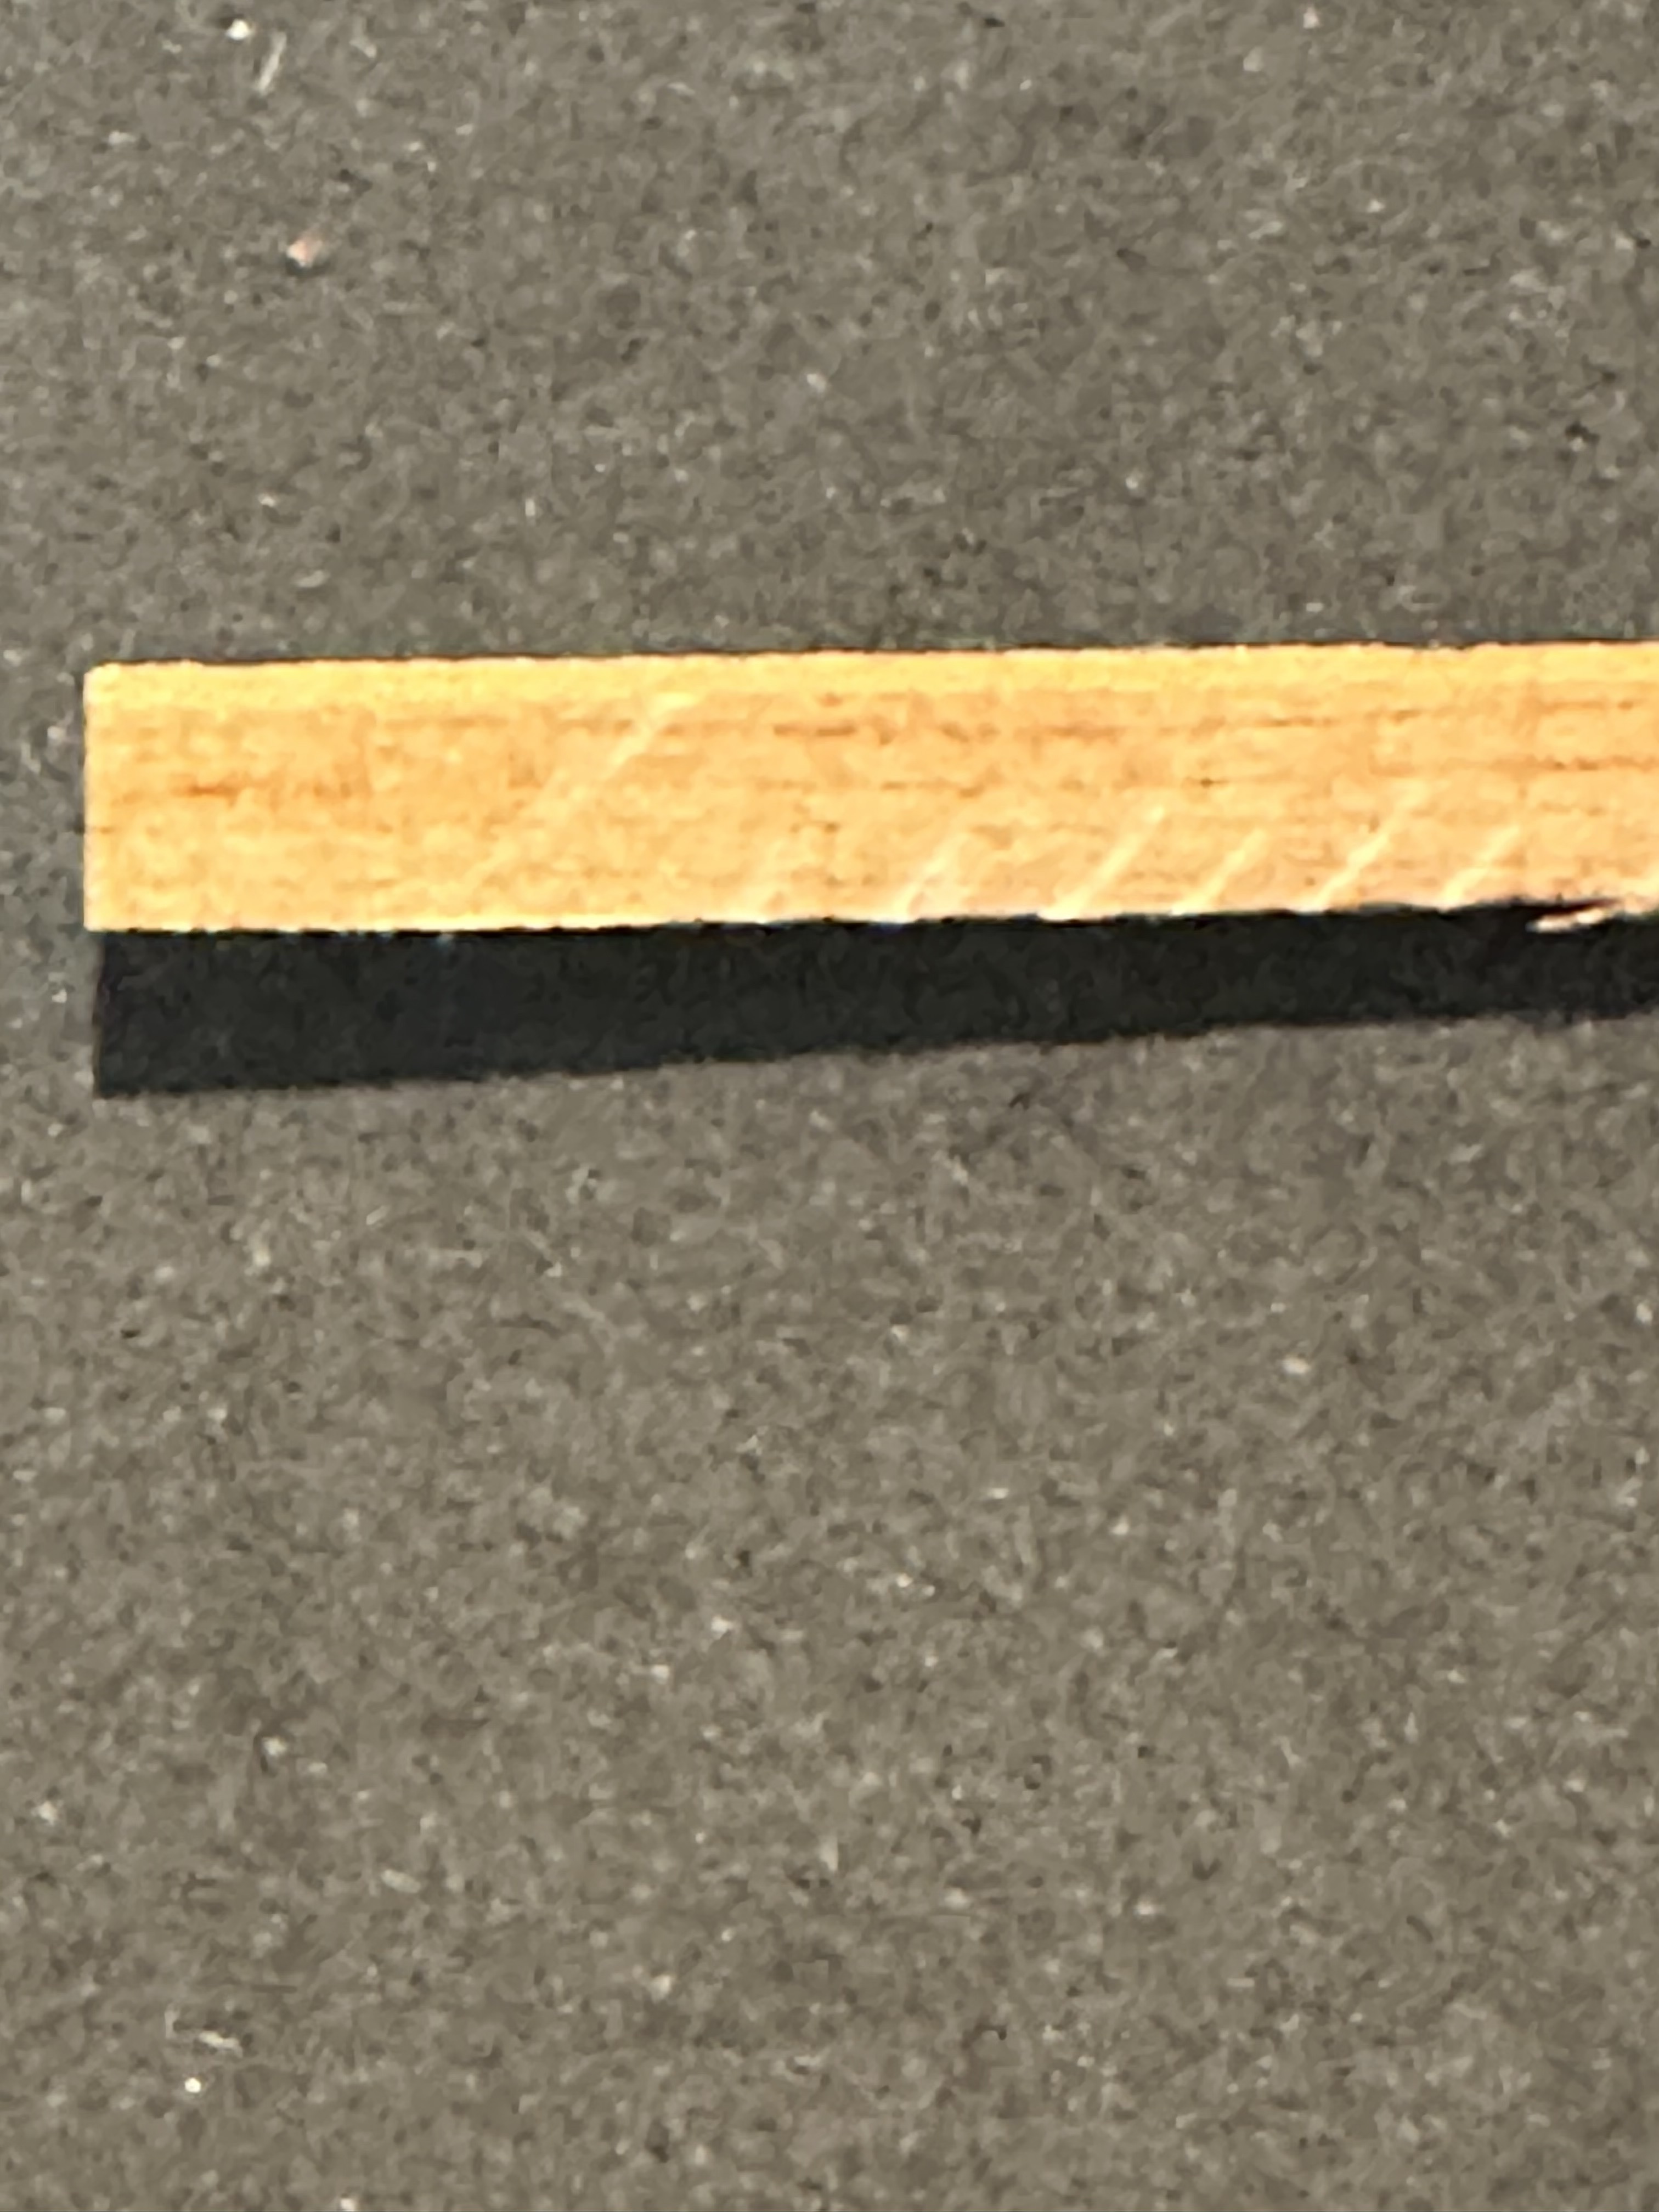
So, I began site planning today. First though, about scale. Over the years I have purchased a couple of 1/35 scale rulers - perfect right? well, no. The are not much thicker than PE and are hard to quickly read. So:

Yes, I went ahead and made one to use. I found another version, which looks to be nice quality, made of aluminum, and a lot like a typical architects/engineers scale - but, they’re $25. No thanks. A lot easier to mark a piece of strip wood and go with that - it will be fine for what I’m doing.
Now, on to some progress - first for visual scale:
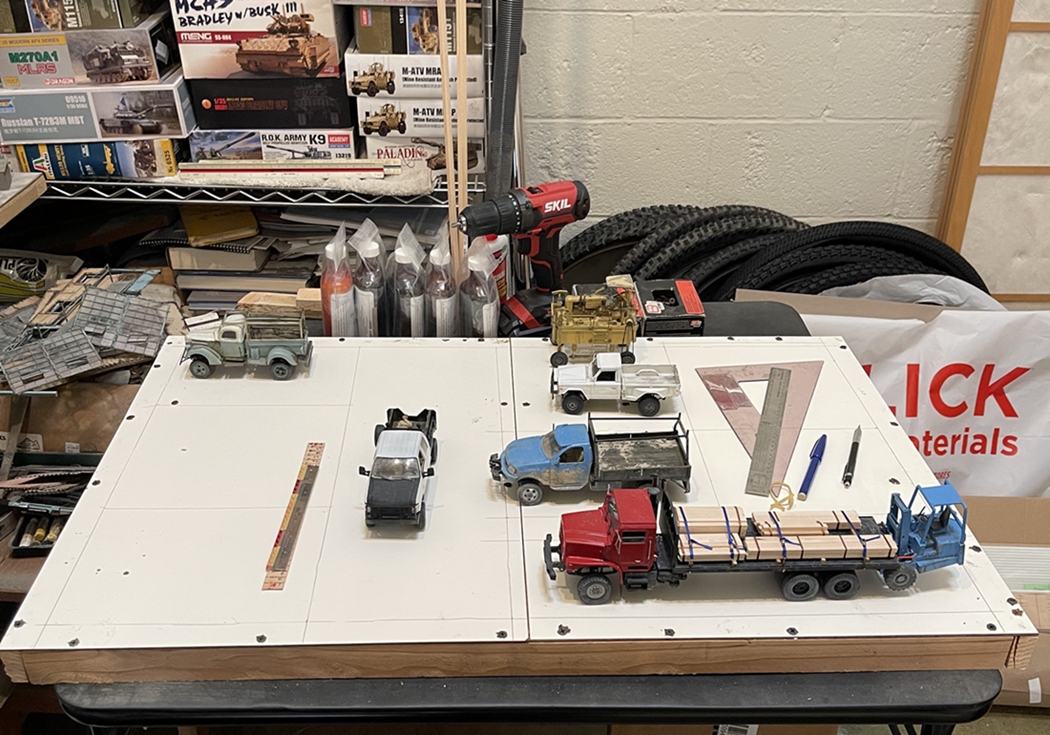

This will be big, but not huge - also, @18bravo, well Rob, ha ha - in the background, in the stash, not one, but two Panda MATVs!! What is wrong with me?!! ![]() Something about the Zen experience that comes with model building?
Something about the Zen experience that comes with model building? ![]()
![]() Back to the project - this is 24" x 36" and here is all we have as of today.
Back to the project - this is 24" x 36" and here is all we have as of today.
So just like a real site planning project, starting with the basics, just to see what we are working with, then get in to looking at some alternatives:
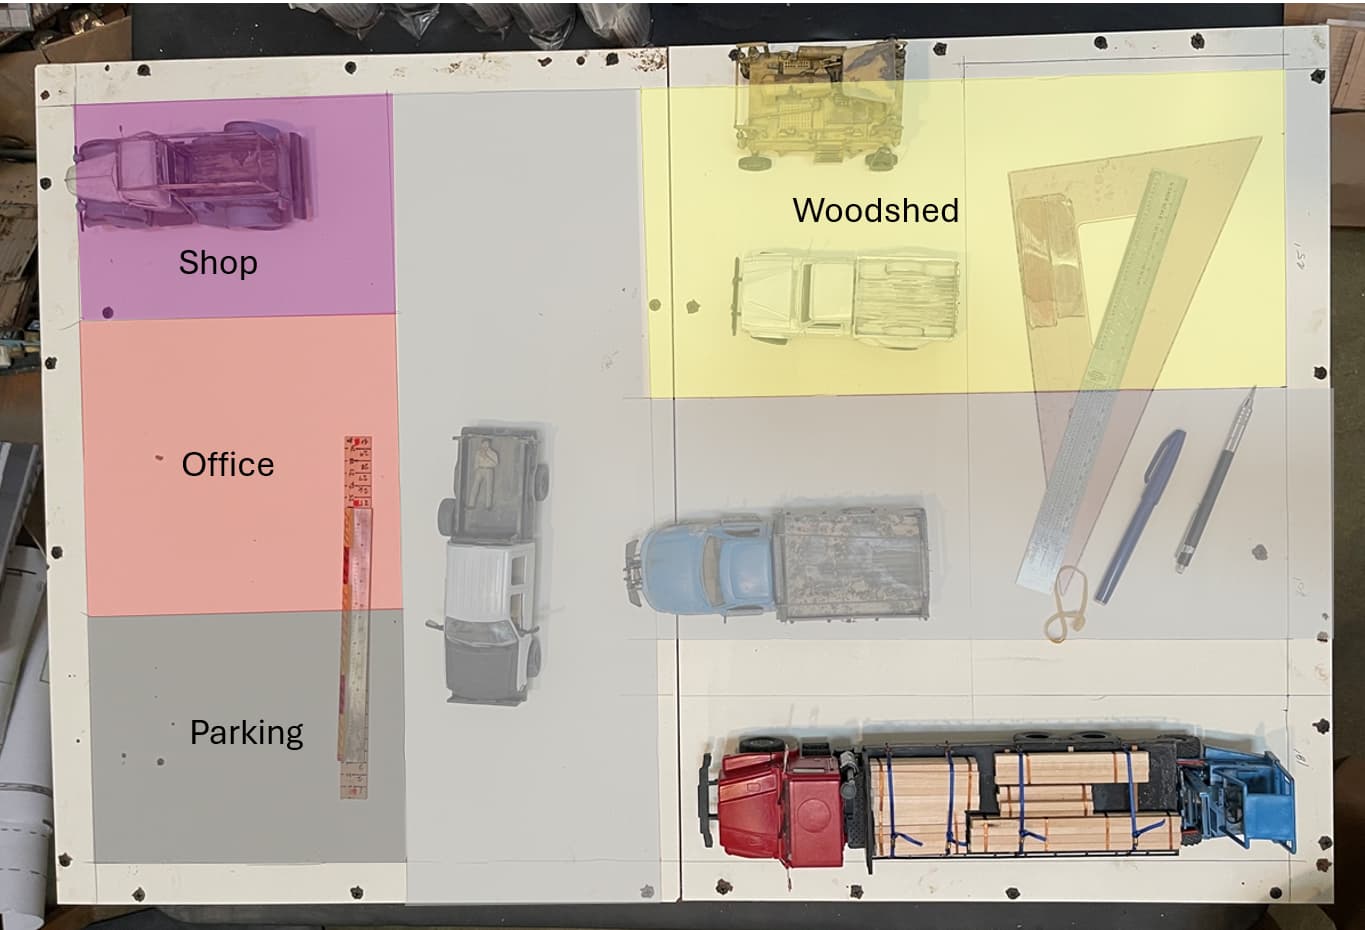
This layout is close to what is shown in the two renderings - except, it includes some parking in front of the office. I rejected this pretty quickly. The shop is too small, and the project looks like a parking lot, and there is not much room for a cutoff saw - maybe along the side of the woodshed across from the shop? Not ideal.
So, alternative 2:
This still has the parking in front and small shop, but also reorients the woodshed.
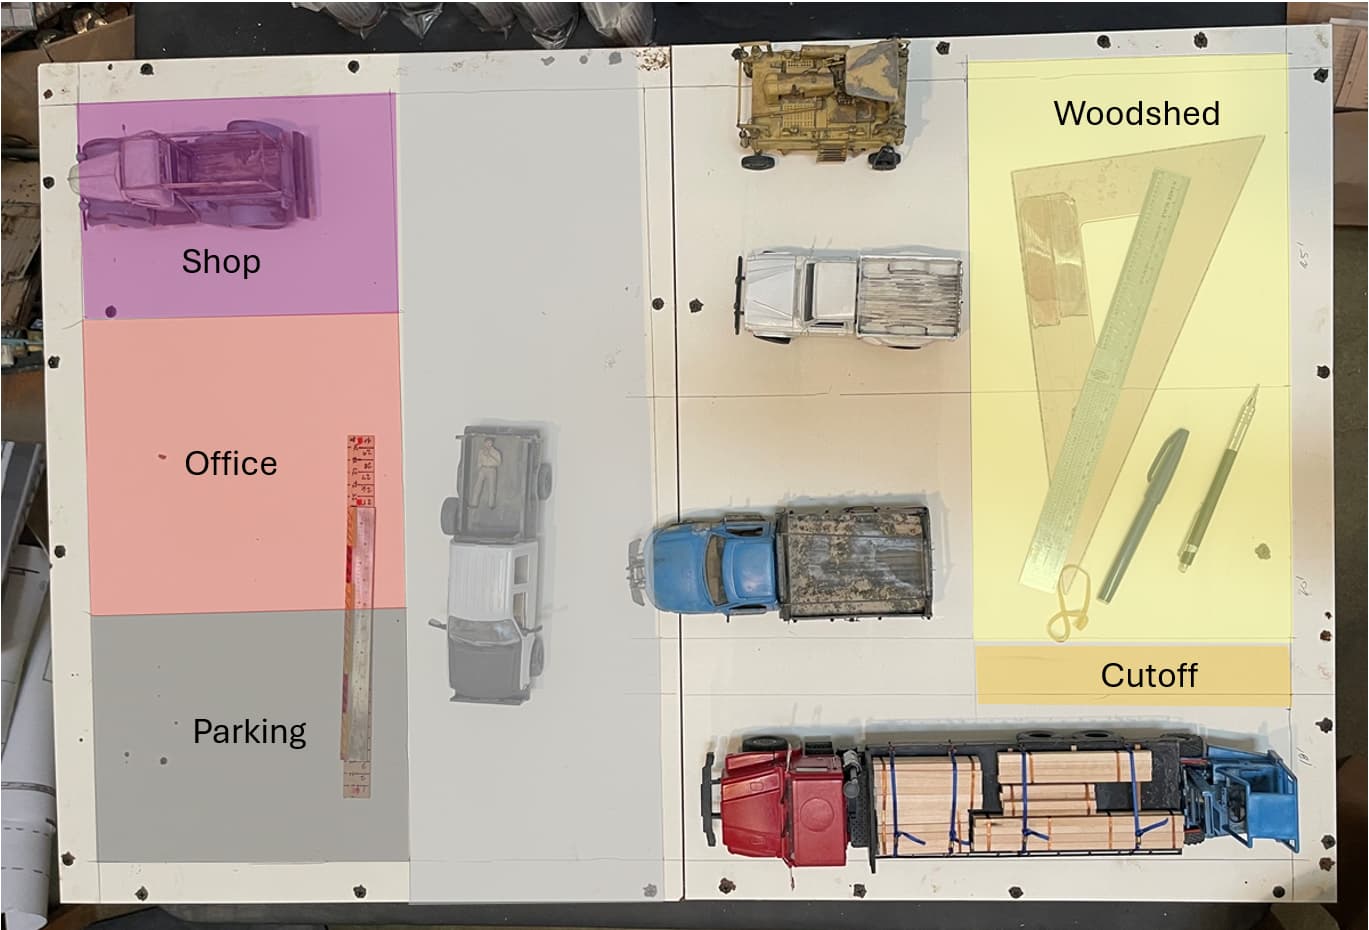
And alternative 3:
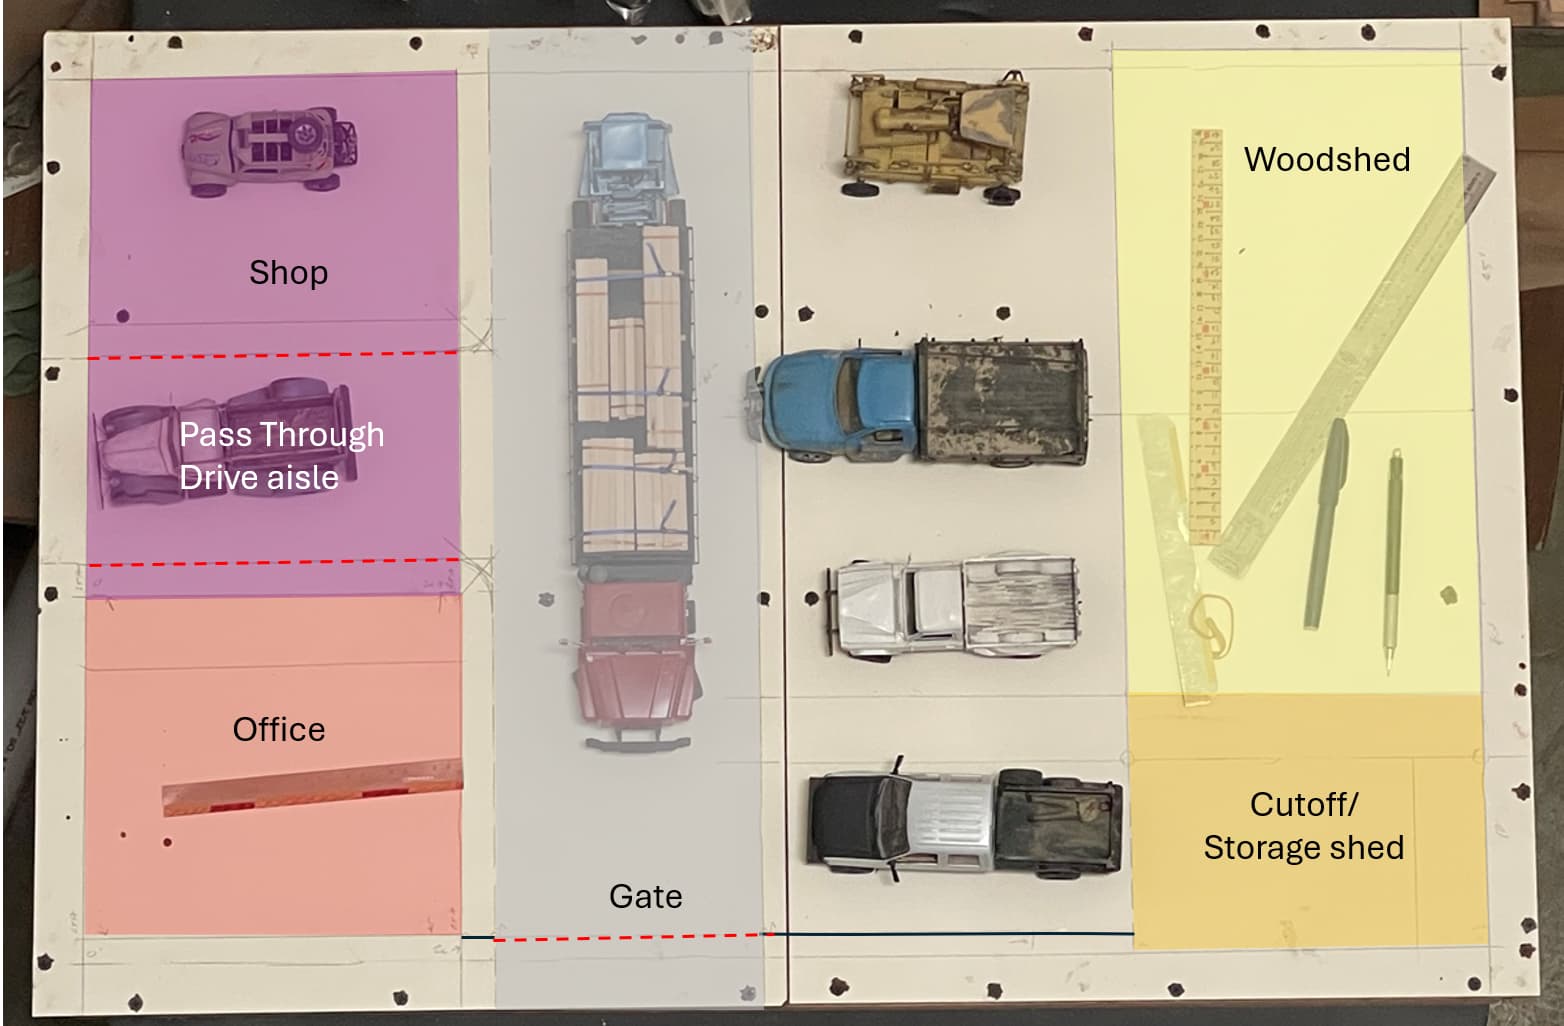
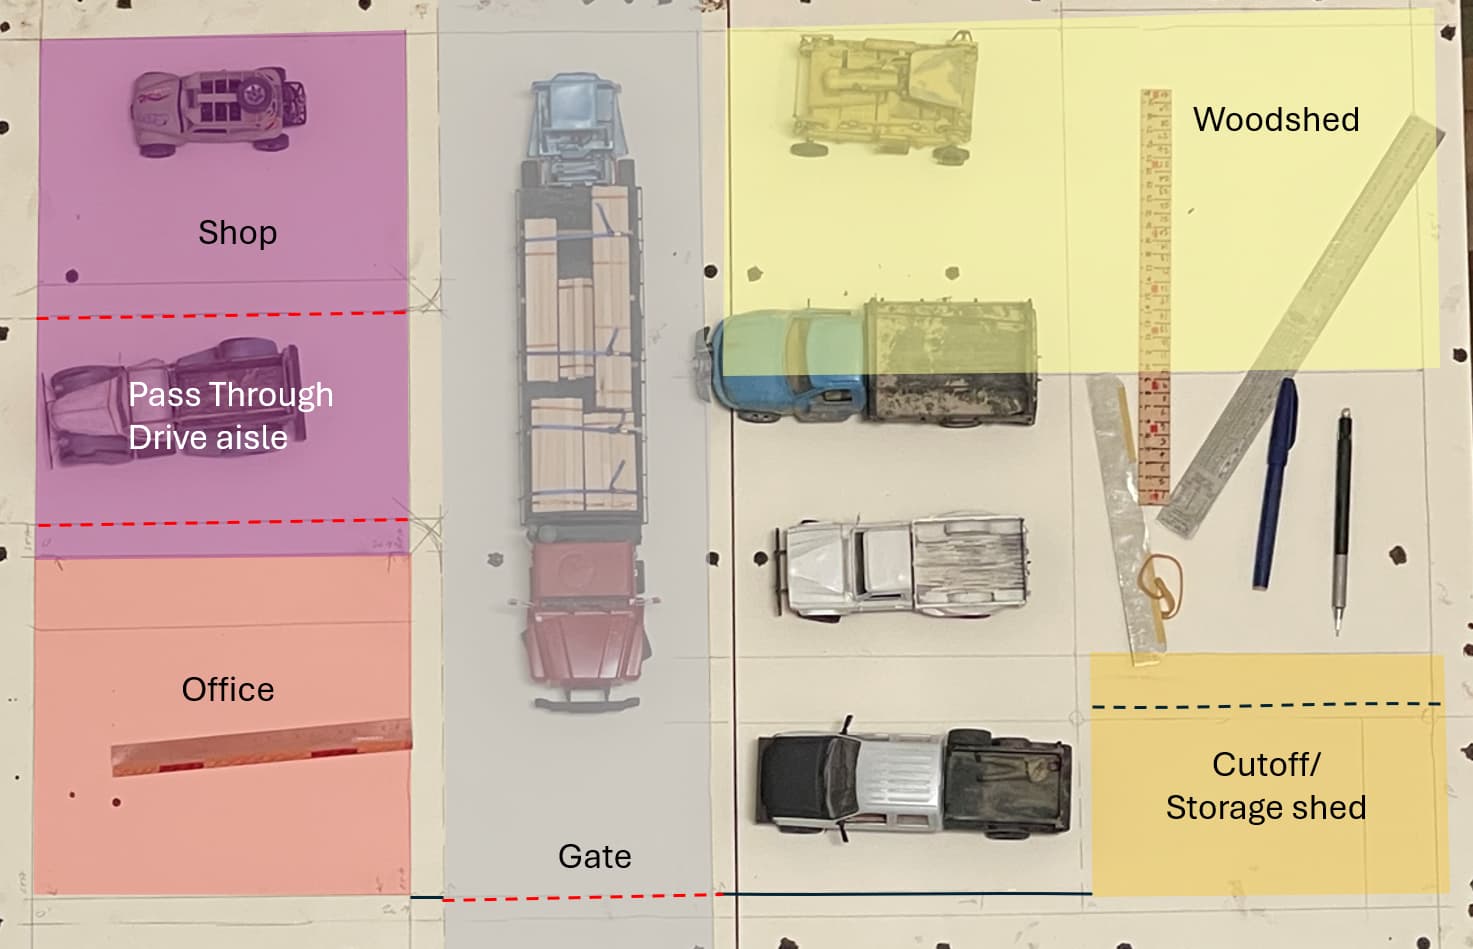
I eliminated the parking in front, which brings the office forward, opening more room for the shop, and, as shown here, I added a building pass through lane. I also extended the woodshed along the entire side, and made the cutoff area into a shed.
I thought about this considering a few things, including how the whole thing will look when it’s built. I have built a few unnecessarily complicated dios, and while they are clearly awesome ![]() , well they also have problems, specifically, how does the viewer get to see what’s going on? All sorts of detail effectively screened from view. So, I’m taking a more direct approach on this.
, well they also have problems, specifically, how does the viewer get to see what’s going on? All sorts of detail effectively screened from view. So, I’m taking a more direct approach on this.
The front part of the building (on the left) will be a solid structure (ie traditional street front store), while the other part (purple) will be more transparent, with large shop doors and windows on the outer edge, and the interior will be more open and shed like. The wood shed and cutoff/storage shed will be largely sold along the outer edge, and more open on the interior, like in the prototype examples.
My next task will be tedious, roughing up and weathering the lumber. The shed will be stick frame, board on board construction, so all of the framing will be visible. The office and shop will be a blend of board on board, and board over cardstock - the bottom line though, is that this will take some time to make!
Thanks for having a look -
Cheers
Nick
10 Likes
I just returned from Oklahoma logging country a few days ago. Saw some pretty cool logging trucks along the way, but was too obsessed with trying to stay in electric drive to stop and take photos. Besides, you’ve got quite a fine collection already.
There’s a cool trick for simulating rough cut lumber - use a Dremel and a circular saw to very faintly add some arcs along the lumber. It looks fantastic when not overdone, as with most things I guess.
1 Like
“Solid” progress on the base Nick, random thoughts about the overall;
-
Final weight – any guesstimates? Seeing this brought back some nightmares about Anthropoid, I made two halves each 26 x 52 ins. The bases were just plywood (but had to be fairly thick to avoid flexing), roadway support structure all balsa, road surface a thin layer of filler. I was surprised at the weight and unwieldy-ness of the halves, especially (like I know you will) when transporting outdoors for daylight photography. Just wondering if there’s a case for dividing your 24 x 36 ins. base, I guess it all depends on your building materials.
-
You could CAD it all & spin it around to work out photography perspectives, or go old school & make a quarter-scale cardboard mock-up like I did. Certainly worthwhile, I recall discovering some unexpected problems to resolve about viewpoints (eg will the camera/phone fit in the desired spaces for close-ups, what’ll be seen in the background of all the subject areas & how much photoshopping may be necessary, will X always block Y and/or Z in shots, etc.
But hey I’m not telling you anything you didn’t already know – I only have to recall Not Bladerunner to remind myself of that! Just curious about your masterplan this time, it’s always been a benchmark in the past.
1 Like
Hi Nick, I wonder which is more important - the trucks in the yard or the woodshed? Maybe that could help. The woodshed in the B&W pics seem to be dominant in the yard, which is how I see timber yards even today. Carrying variety of timber requires a lot of space so maybe a woodshed that runs the length of the dio. I would have thought in a “small” business office and shop would be one building. Even with that I don’t know how you will fit all the vehicles you have assembled in your space. I will be interested to see how it plays out.
cheers
Michael
My first thought when you showed the alternative layouts was to dump the parking.
After reading Tims post I thought about cutting off the front wall (the left edge in your layouts) of the office and store. This provides more space in the center to make it less cramped.
If the sign on the office (left side of gate) doesn’t reach from corner to corner you could cut the front by the left edge of the sign and leave empty wall on the right (gate side)
General idea:

This allows full viewing access to the interior, a small footprint on the diorama while pretending to be bigger than it is.
The pickup truck in the drive-through would be squeezed in if a third of the aisle length is cut, assuming you keep that drive through.
Without the drive through:

More yard, pickup moved to parallell with rear end of big truck,
teller/cashier window in the wall beside the pickup. The teller/cashier
could also have a window in the office wall by the gate.
The visible shop floor is reduced by cutting half the building, compensate
by removing the drive through.
If the roof of the office/shop combo overhangs further to the right there could be
space for outdoors display of smaller building supplies that do not require being
inside.
1 Like
Well gents, as long as you’re interested, this build will be going on for a while, and I look forward to hearing from you all along the way - for better or worse! ![]()
@18bravo well Rob, that’s a pretty interesting trick - maybe, I don’t know just yet, as I will require weathering a lot of basswood!
@Dioramartin, ahh, Tim…making my life more difficult! ![]() Unhappily for me, I can’t use CAD! For work, I sub that and graphics (photoshop) to someone else! That said, I might be able to ask Sarah, who is my senior designer, to make up a cad base and put it into sketchup - which we can fly around and look at from several angles
Unhappily for me, I can’t use CAD! For work, I sub that and graphics (photoshop) to someone else! That said, I might be able to ask Sarah, who is my senior designer, to make up a cad base and put it into sketchup - which we can fly around and look at from several angles ![]() hmm - not sure though - that can be time consumptive- but, who knows? And, you are not allowed to mention Not Bladerunner!
hmm - not sure though - that can be time consumptive- but, who knows? And, you are not allowed to mention Not Bladerunner! ![]() it could be called “not finished”
it could be called “not finished” ![]() I am optimistic that this will remain relatively heavy, but not unwieldy. I’ve had mixed results with modular builds, so would rather keep it one piece.
I am optimistic that this will remain relatively heavy, but not unwieldy. I’ve had mixed results with modular builds, so would rather keep it one piece.
Alas - I usually rely on this (below) highly technical method for concept development. The crazy thing is I can send awful drawings like this to Sarah, via Iphone pics, and she can convert them to highly precise CAD files - ![]() obvviously, she is smarter than me!
obvviously, she is smarter than me!
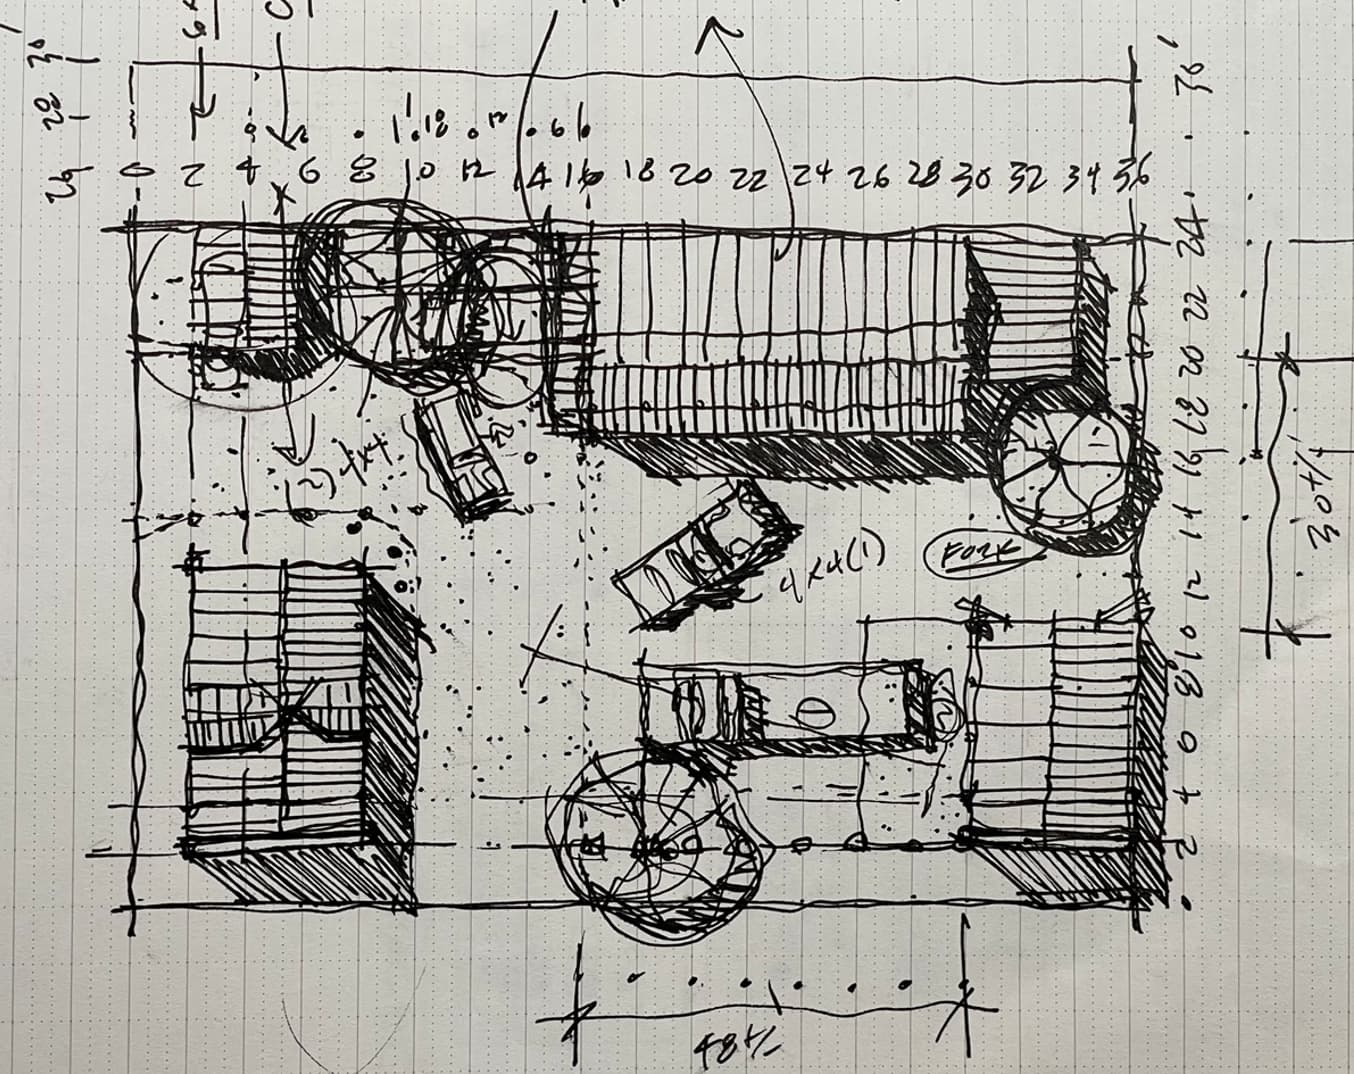
This was an early concept sketch - and, @cosimodo, Michael, yes, you have also raised several good points - one, close to Tim’s question about weight, and by definition scale. A real lumber yard would be huge, especially in 1/35 scale - so, I’m planning to represent the idea of this yard (and to clarify, a lumber yard, not a lumber mill) - rather than all of it. But, you made me think about the original concept again, so I made another alt:
In this version, the shed is where it was to begin with - toward the back - it would be about 50 scale feet long, and 25’ deep - I think - don’t exactly remember! but, despite it looking small on the figure, it’s about 18" long and 9" deep - so it will not go unnoticed. Doing this, I brought the cutoff and storage shed forward - hmmm, something to consider as it is similar to the original idea, and might result in a more interesting space between buildings.
Speaking of the original idea, and as long as you guys are interested - some more background images:

These images include the office to the front across from the shed, and the distance between is relatively narrow. As to my wild and crazy adaptation, and to clarify the idea of the “pass through drive aisle” (shown in last 2 alts), please see below:
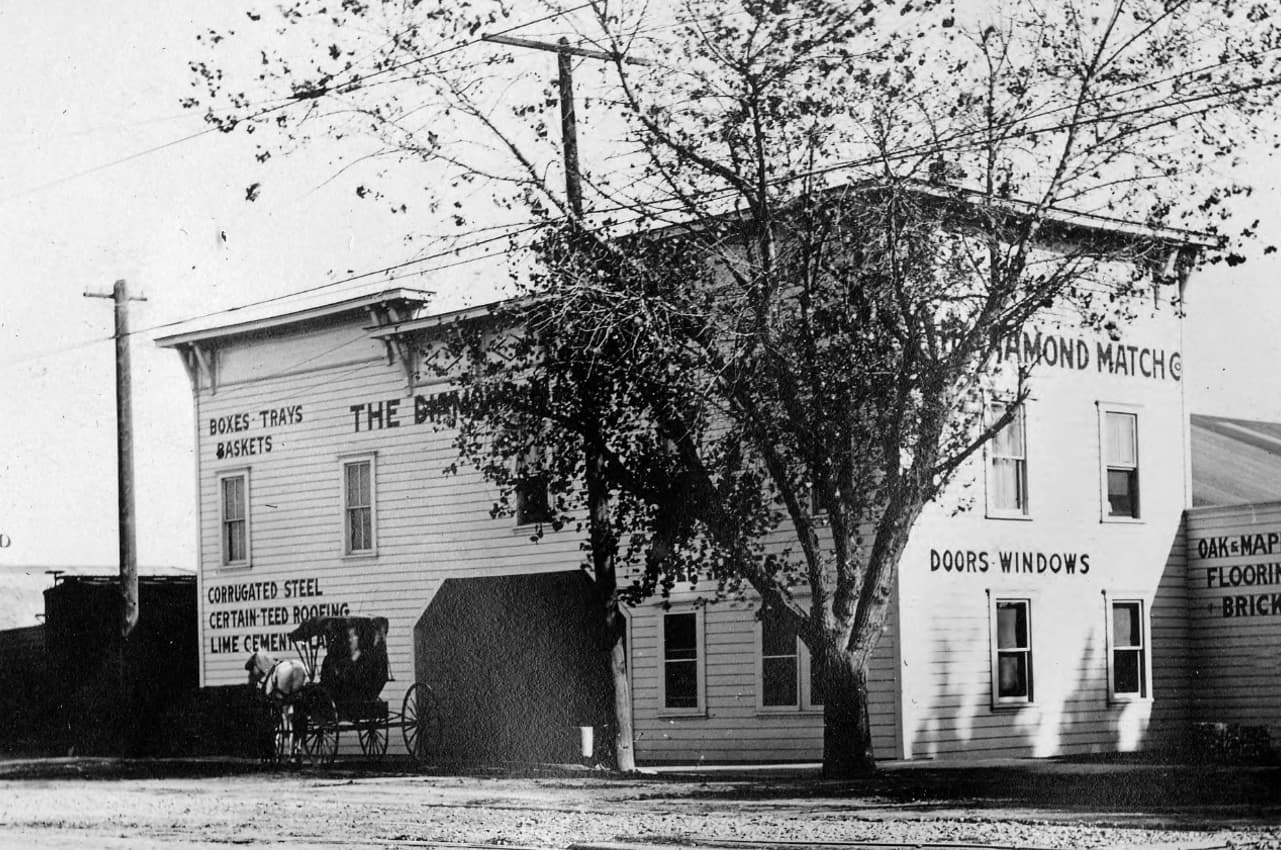
I really like this building and portal, so using this photo, imagine the office/retail area in the front, then the portal then the (machine) shop behind - something like this, but probably not just like this - but who knows? this looks pretty cool.
As for the storefront - I’d like to make a traditional street front like this:
Big windows - looking out to the street.
On to the woodshed - I have a particular style in mind:


This is the building I described as being all board on board - which will be fun to make.
Oh! and I just noticed @Uncle-Heavy, Robin is joining the fun! welcome aboard - and well, please see above -
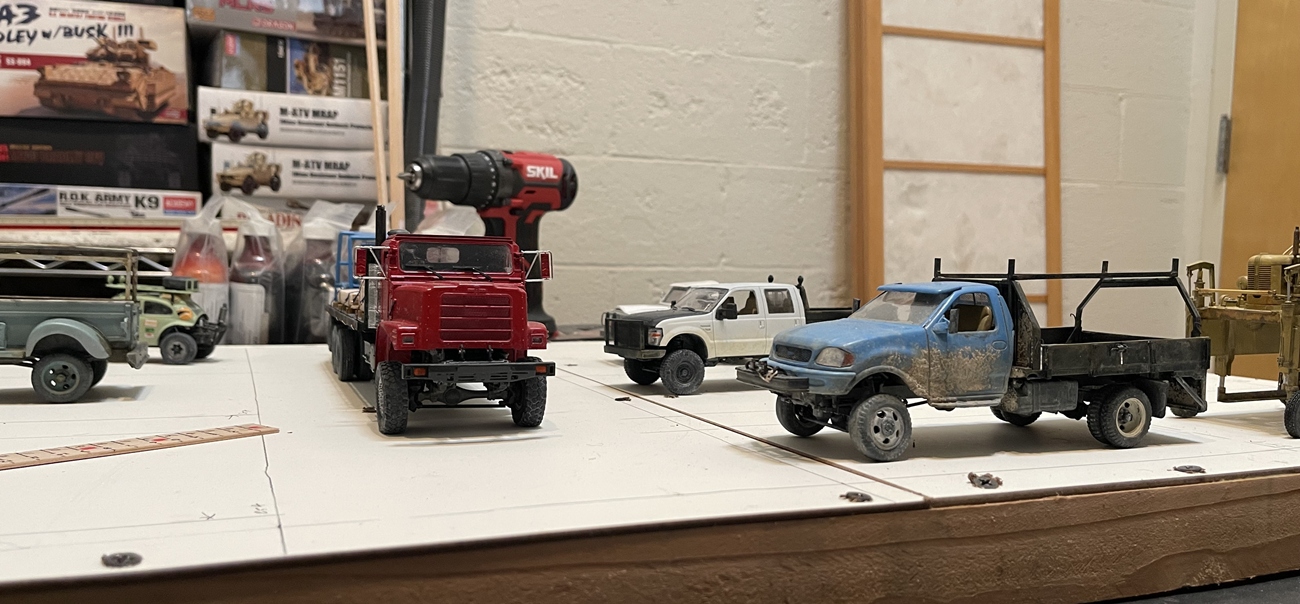
And an important note here, is that the vehicle placement is not set - just there now for basic scale - drawings are helpful but these being there are more helpful, as you can pretty easily see what fits and what doesn’t Like in the new alt, where does the straddle carrier go?? ![]()
OK, on we go!
Cheers
Nick
4 Likes
Yeah sorry Nick, that was a low blow ![]()
![]() I’ll go sit in the naughty corner & write out a 100 times “I must not mention that brilliant, spectacular, mind-bogglingly awesome and er ‘not finished’ diorama which must never be named and…”…OK I’ll need more paper.
I’ll go sit in the naughty corner & write out a 100 times “I must not mention that brilliant, spectacular, mind-bogglingly awesome and er ‘not finished’ diorama which must never be named and…”…OK I’ll need more paper.
Well, who needs Sarah/CAD when you can do pen sketches like that early one. Whatever layout you decide on is guaranteed to pop our corks…now there’s another lightweight material ![]()
1 Like
While all of the photos you reference appear to show all timber under cover, in the mill and lumber yard I worked at in the 70’s a fair bit of material was stored outside. Think pressure treated and larger timbers. The straddle carrier could be moving a load to outside storage which is off-diorama.
1 Like
Hello model builders,
The diorama part of the project is now underway.
I decided this morning was as good a time as any to start the weathering process of the basswood which will be used to make buildings/sheds and fences.
I’ve used the method shown before, but am embarrassed to say, it took me some time to figure out how! ![]() Happily the old remote hard drive(s) house all - just spend the time to go through old, poorly organized files
Happily the old remote hard drive(s) house all - just spend the time to go through old, poorly organized files ![]()
First though, I thought this picture might interest some of you regarding the planning and design part of this or other dio projects:
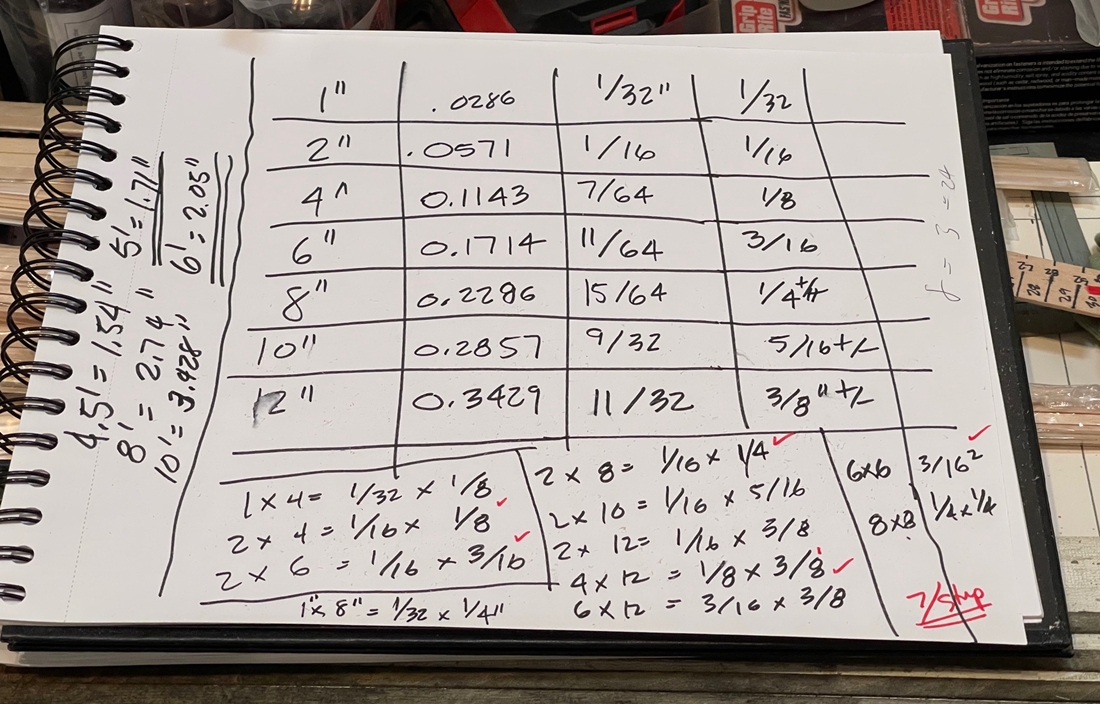
As is evident in the concept/study photos posted above, I’ve been pondering this project for a while, so have also thought about building materials, sizes, and quantities. Rather than constantly going back and forth with either a scale- or normal calculator to convert 1/1 to 1/35 scale nominal dimensions for lumber sizes, I made up this little table.
The top part of the table shows various desired dimensions in 1/35 scale, first as the desired scale dimension, then as a decimal in inches, then fractional dimension, and in the final column, my adopted dimension.
The reason for the “adopted dimension” is that while there are many sizes of scale lumber available, all sizes aren’t - which is fine - pedantic is ok when trying to replicate/scratch a key element of a turret, but I don’t think that’s the case now - that is, I don’t think 1/64" one way or other will make or break the project, and I have no interest in trying to source custom basswood for a diorama ![]()
The lower part of the table shows commonly used dimensional lumber (ie 2" x 6" as 1/16" x 3/16") which is pretty handy. I’m not quite willing to commit all of this to memory…yet
Step one, scrape the scale lumber with a razon saw to rough it up:
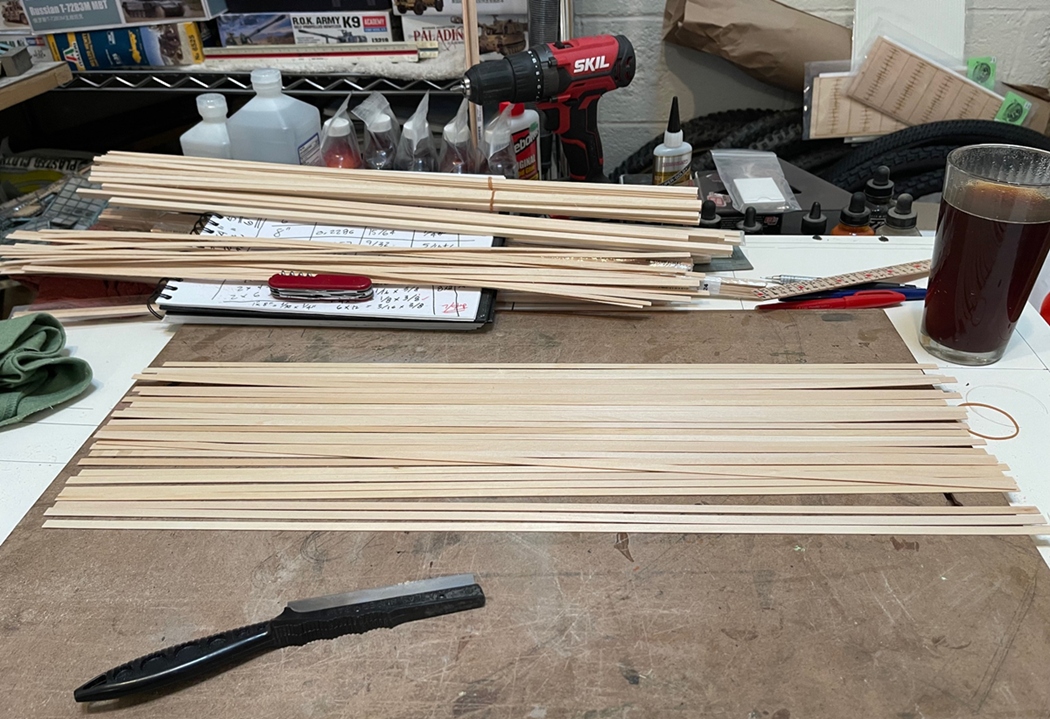
This task isn’t all that hard to do, but it moves along a bit slowly, as the front and back side of each “flat/really thin” piece (ie 2 x 6, 1 x 8) is roughed up, and all four sides of square pieces (6 x 6 etc).
The only part of this that’s a bit important, is that you not get sloppy or lazy. If you don’t give similar attention to or skip a side of the material, it will look different than the other side when stained. And if you don’t keep uniform pressure when scaping etc it can be easy to break the material you are trying to rough up.
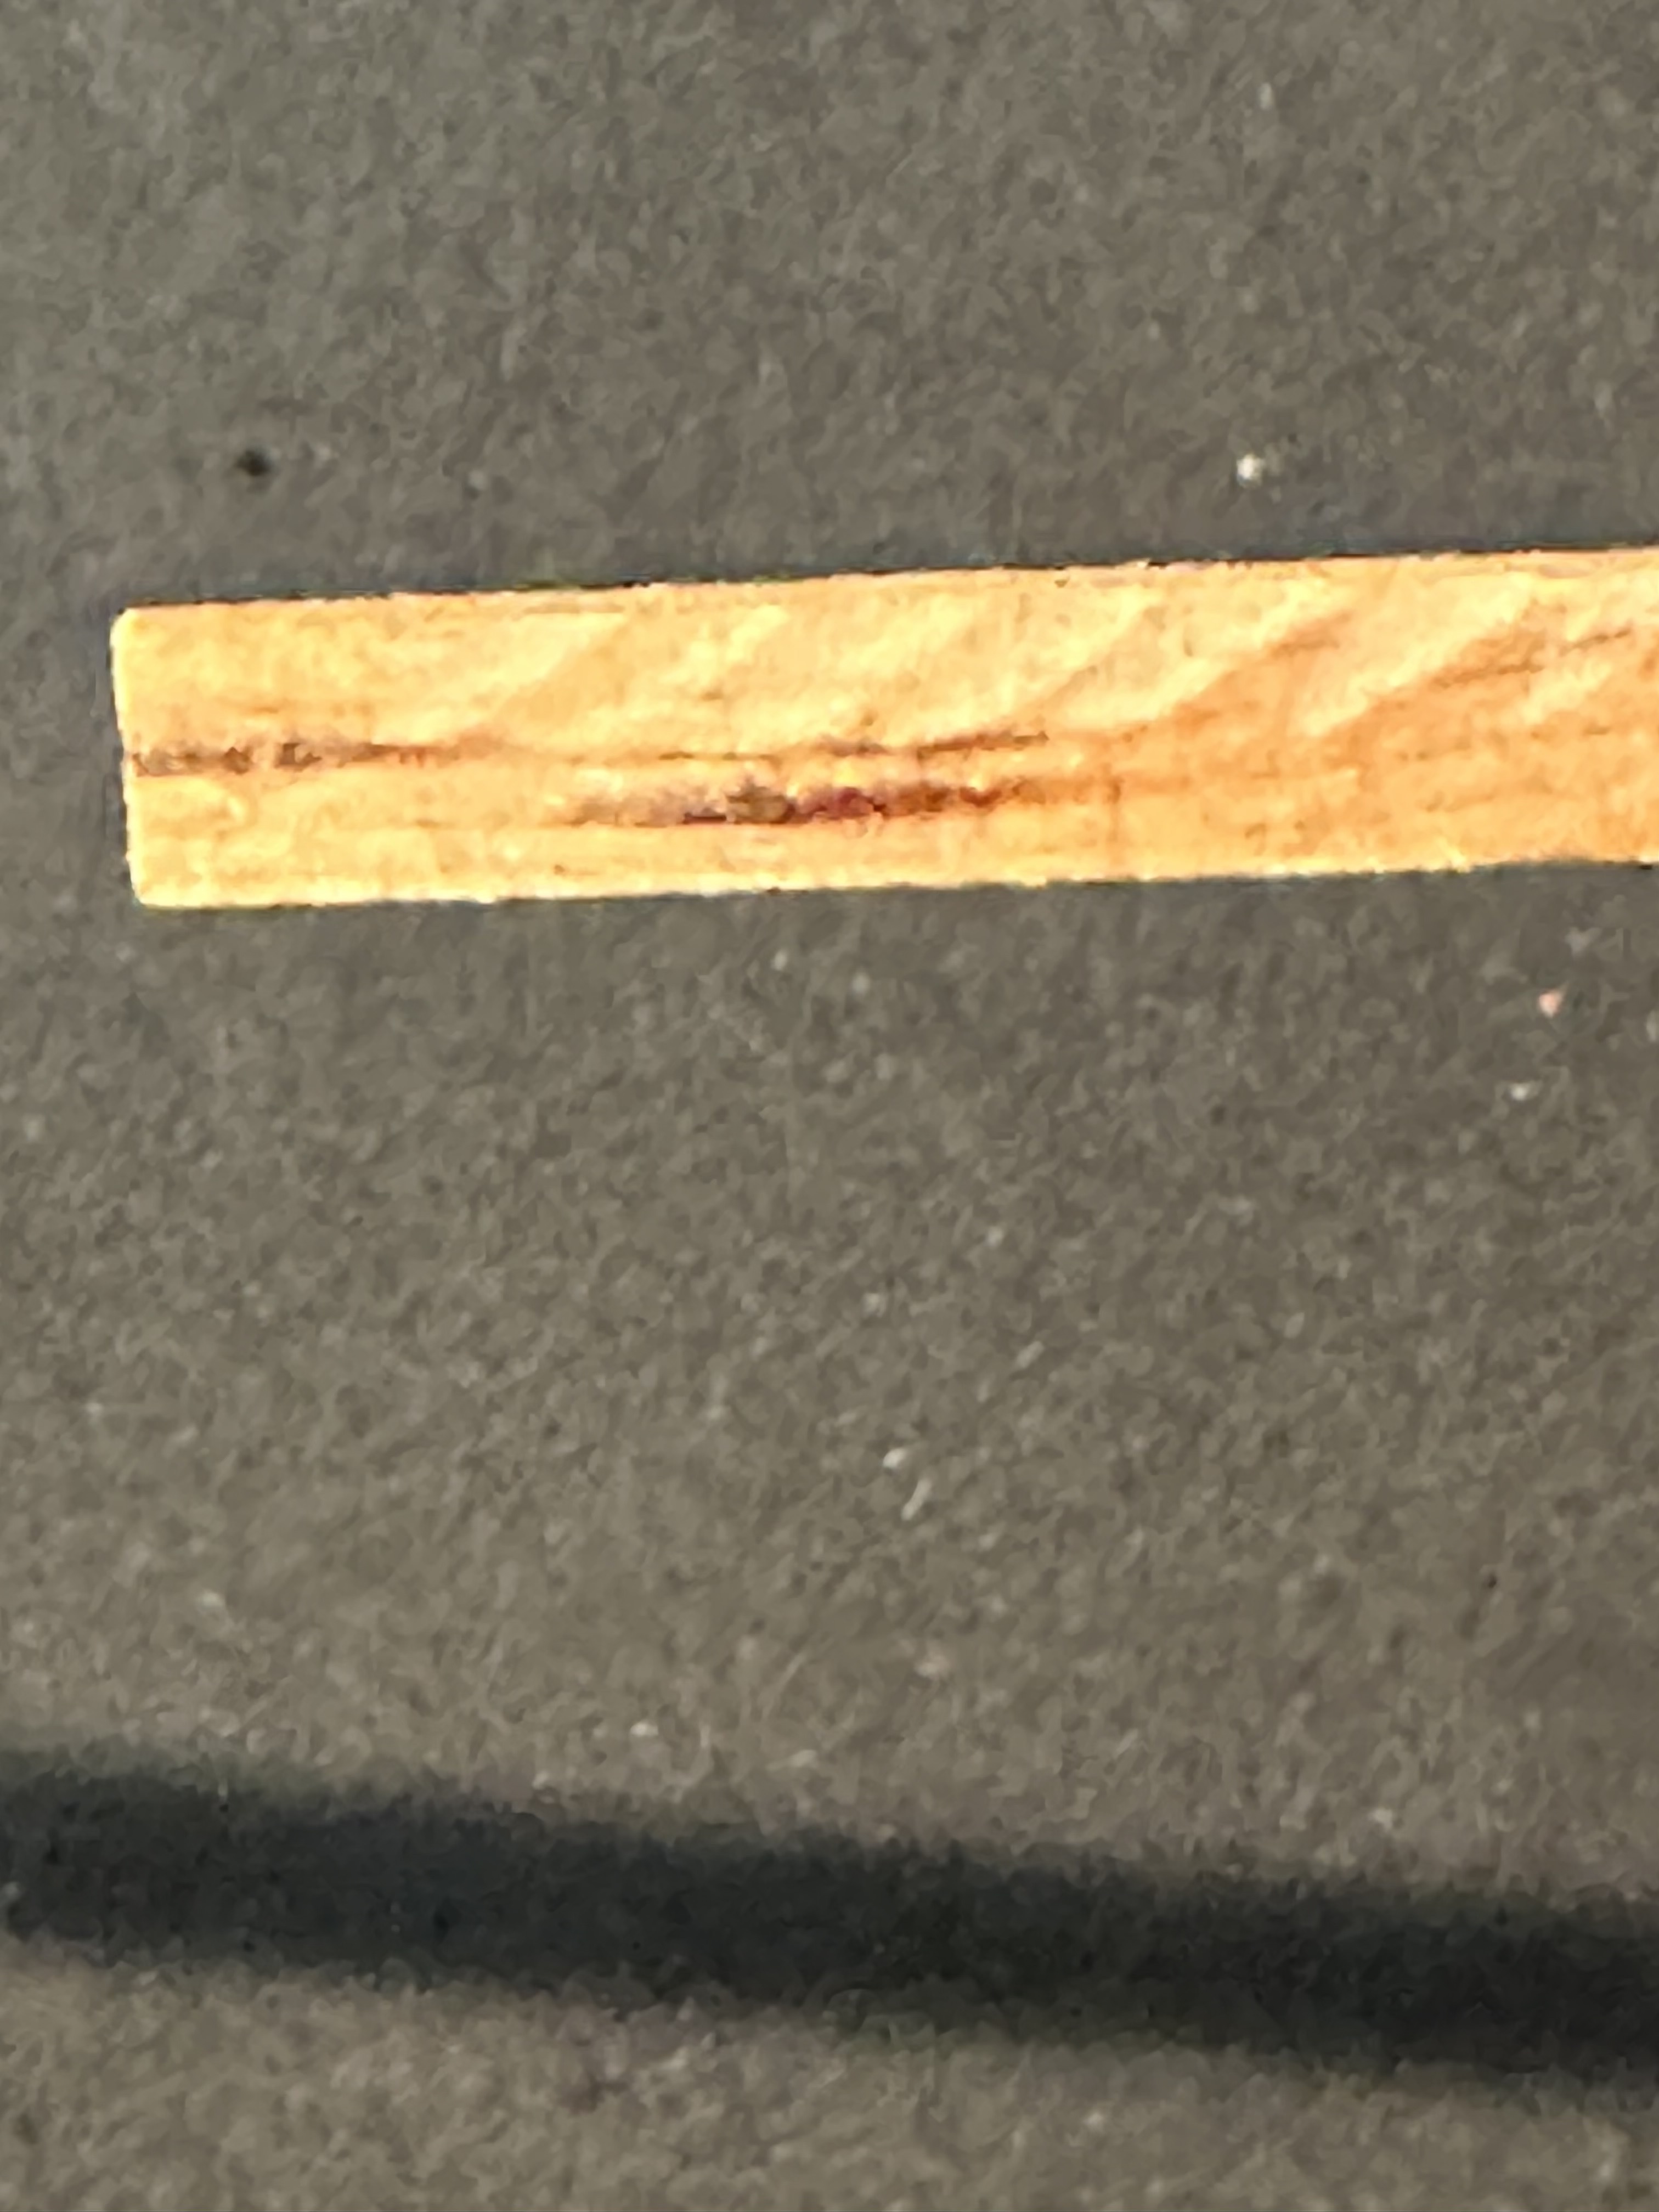
Then on to staining:
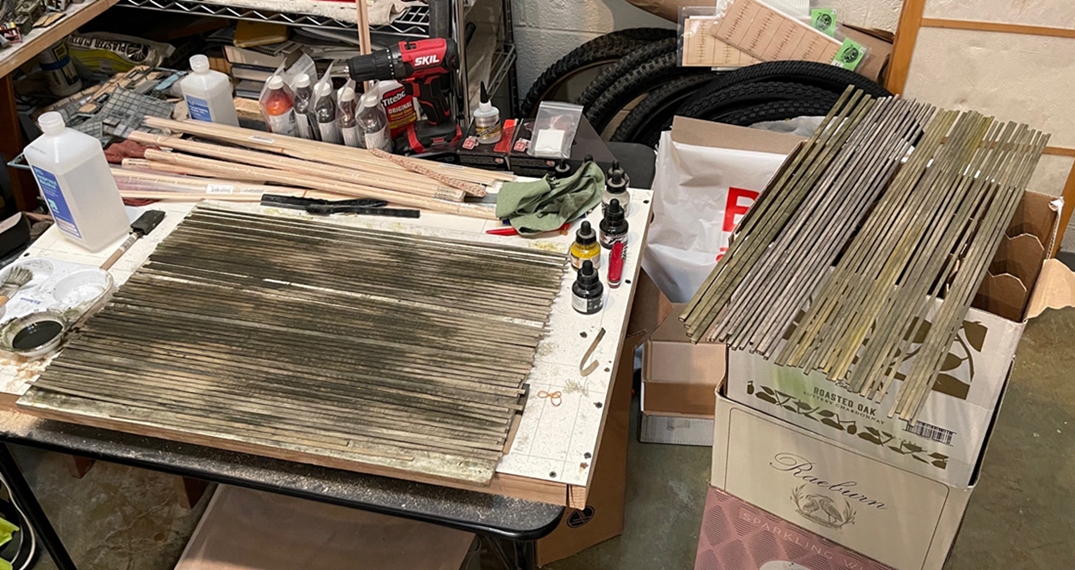
For this I use a cup of isopropyl 91% alcohol with a few drops of black, sepia, white, and yellow India Ink, which is water and alcohol soluble. I don’t use a precise mix of colors and amounts of each as I like some variety in weathered colors.
The stained and unstained material shown above represents about one third of the material I’ll use for the entire project, meaning various buildings will be built, and each will get it’s own batch of stain.
And a couple of progress pics while drying out:
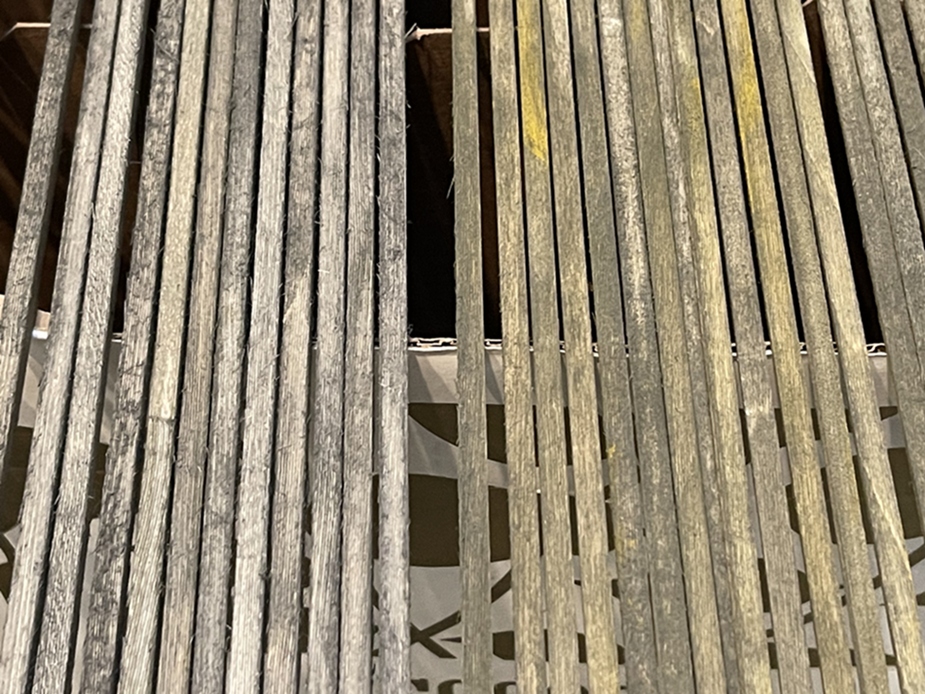
You can see how the weathering is working out above, as some, but not grossly exaggerated, wood grain is evident, and where the stain picks up irregularities in the wood and roughing up process.
The more grey tinted material on the left are scale 6 x 6 used for posts, while the warmer/yellowish brown on the right are 2 x 6s used for rafters and wall infill as needed. I don’t think either of these will get more color (additional stain or new paint color).
The 1 x 8 s will be treated to look like they are painted white. This will be done by scraping pastel colors off the stick onto the stained wood, and blended in with a firm brush and alcohol. This BTW is a very slow process, but can look pretty good
And another:
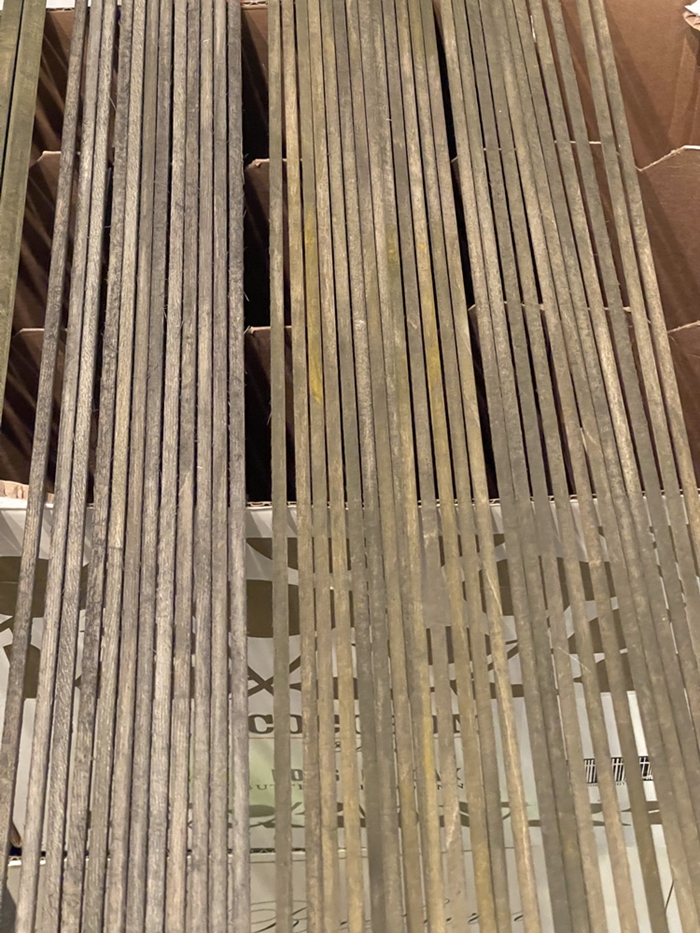
So far so good. I might start framing tomorrow.
Cheers
Nick
7 Likes
That lumber looks great but I thought you weren’t going to post anymore of your ‘wood’ pics on the internet anymore ![]()
A building like this in a diorama will look very interesting.
2 Likes