Well done with all the extra work you’re putting in on this one to make it look good. … Lots of effort but you’re certainly getting there and showing it whose boss ![]()
![]()
1 Like
Isn’t there a hole in the bottom that the ram fits into? There was on mine. Good work as well ![]()
Hi!
Under this link, there are a couple of detail pictures of a later version of that blade. Not exactly the same, but might give an idea where to fix. Scroll pictures to the end.
On the early one for Challenger 1 & 2, I think I can rember that there was a third connection between the mounting plate and the dozer, which also can be seen in your picture. The ram goes into that connection and is bolted there at the same point I guess which is shown on the recent one.
Andreas
1 Like
Still plugging away. I’m back to work too, not much time for the fun stuff.
Everything about this kit is a struggle, but I’m still having fun. Does that say something about me?
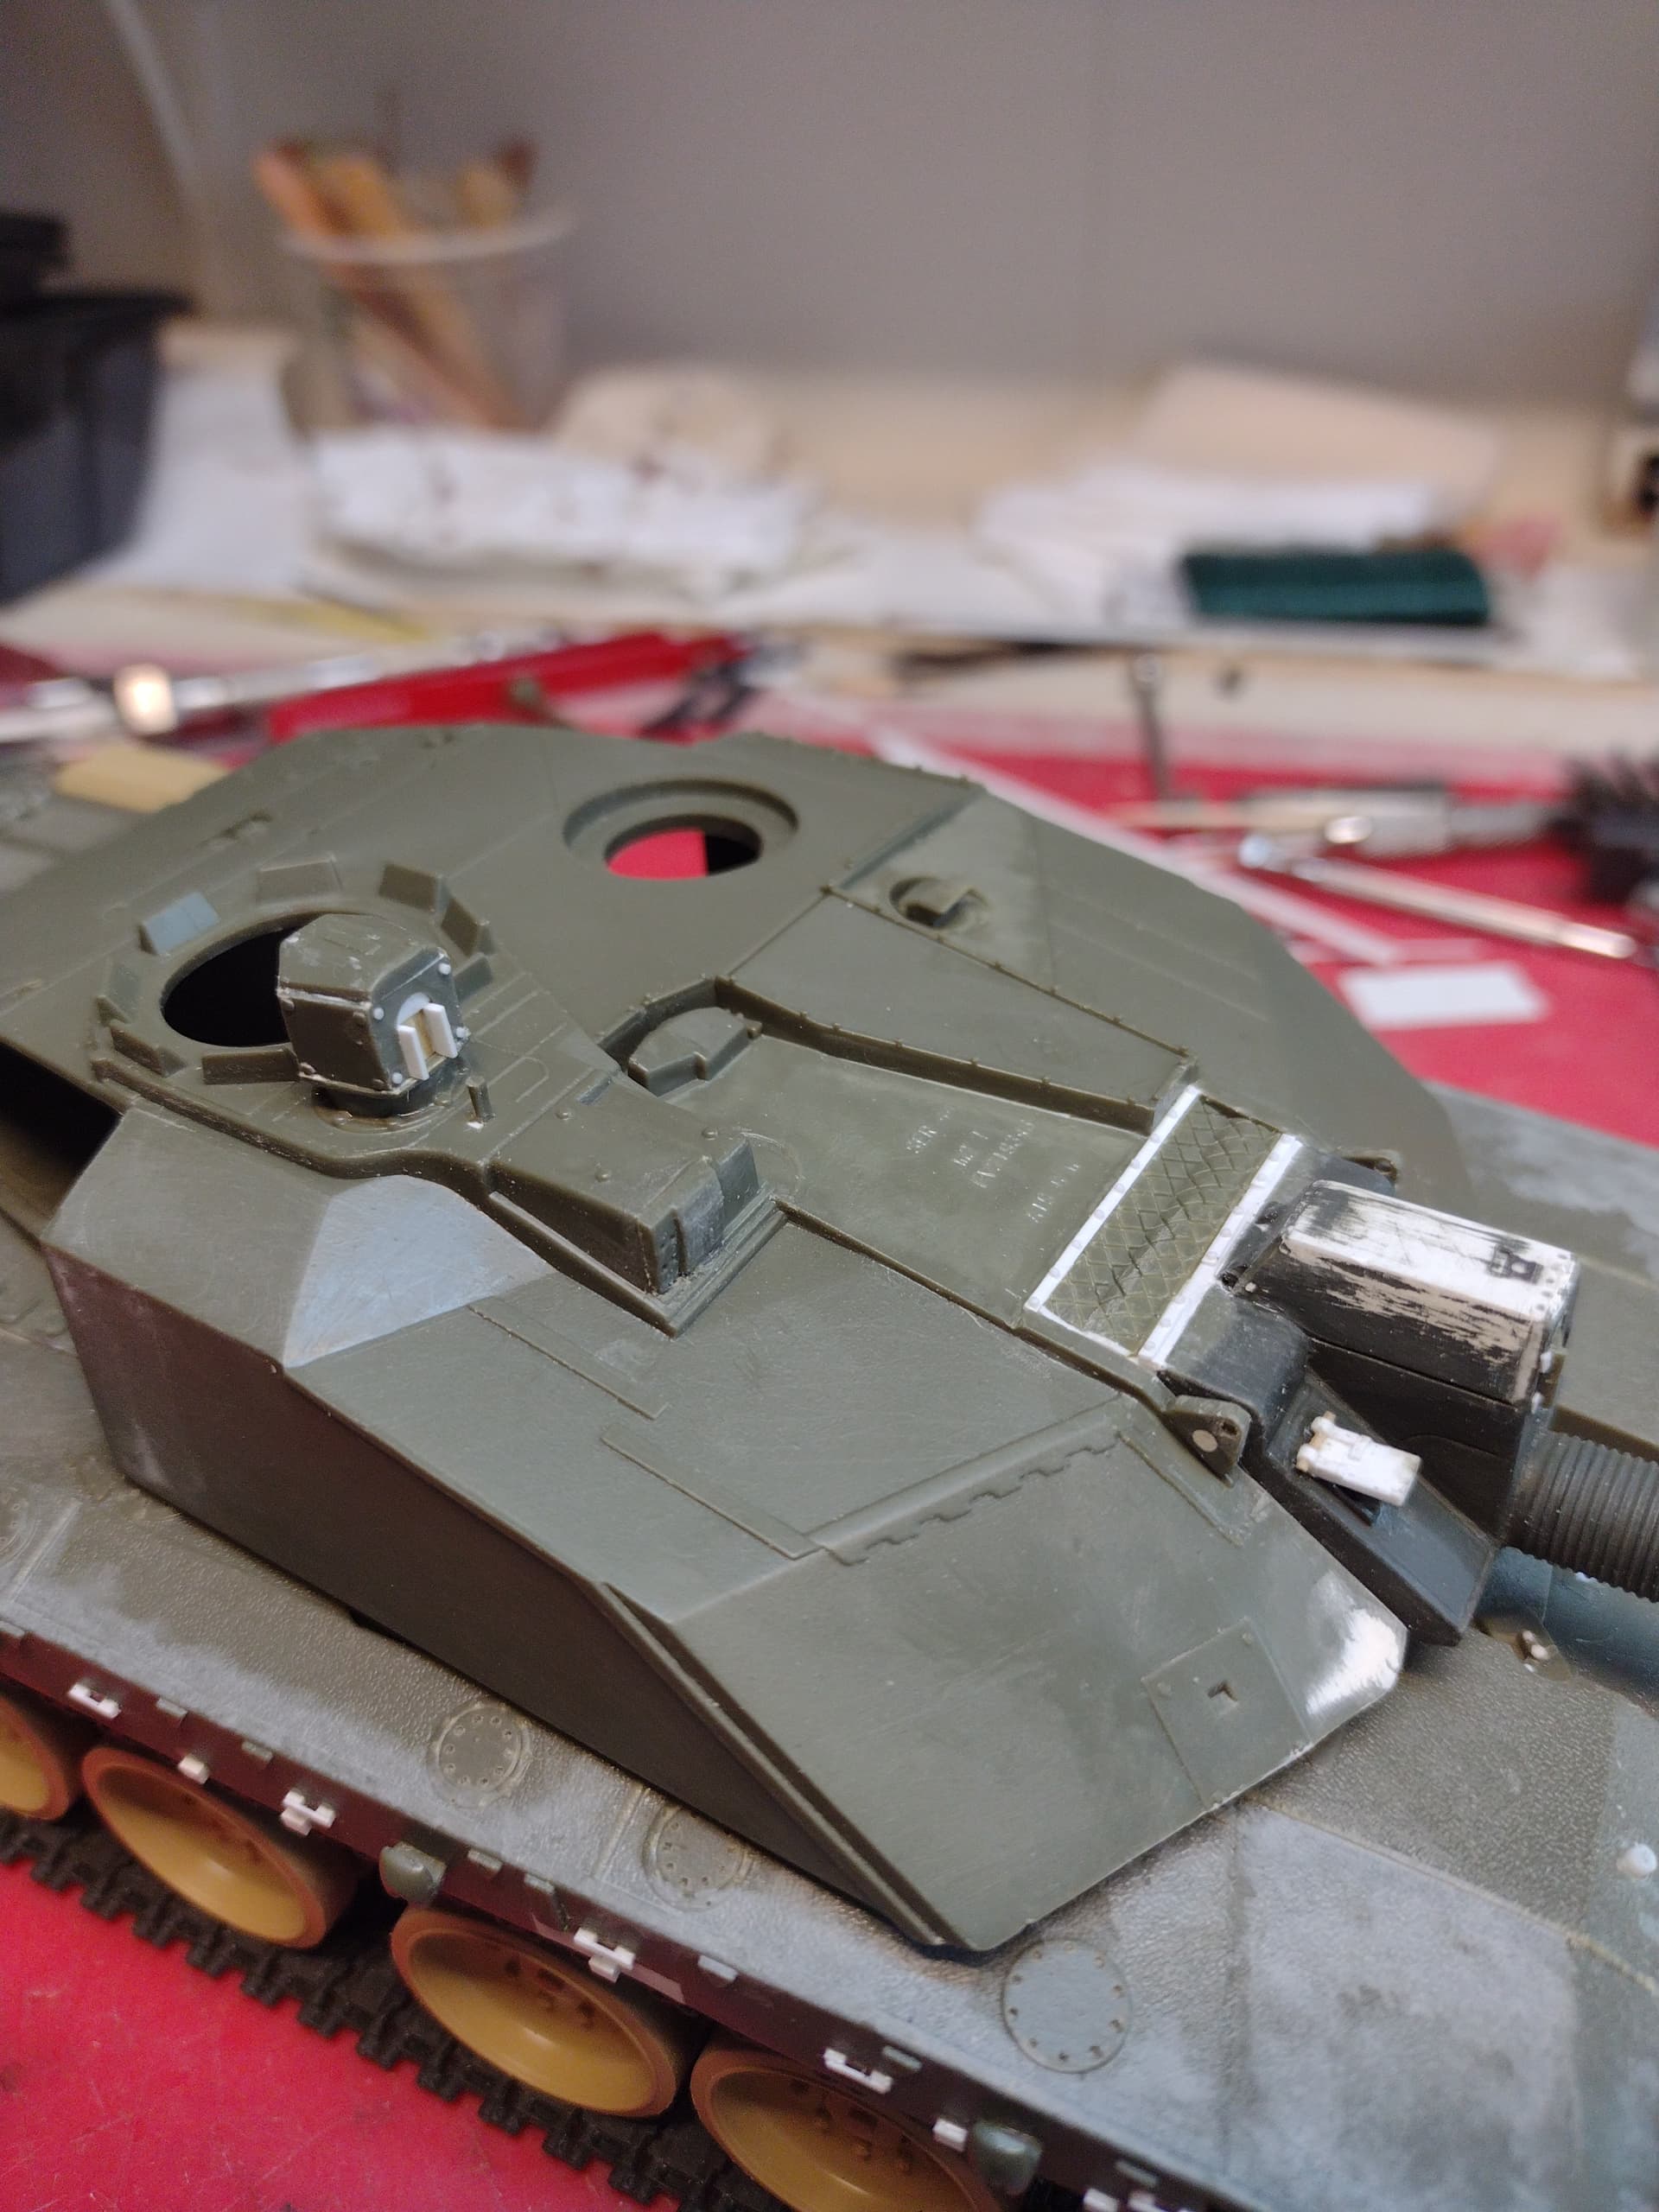
As designed by Lumpeter, there would have been a good 3\16" gap at the top of the mantlet and the dust cover, mostly due to the rearmost fastener strip being in the wrong place, not a hard fix. Also, more cavernous ejector pin marks in silly places.
Yay…
2 Likes


Great continued work and corrections on this build Russ. It just shows how bad the kit really is in its out the box basic look .
2 Likes
If I were to review it, I’d call it a rat. I will confess though, I’m having fun. My problem is resisting the urge to just use the Tamiya turret, but I want to keep it intact for a “what-if” I have in mind.
1 Like
Turret bins were crude, but separate, with release handles “suggested” by Lumpeter, a step better than Tamiya. Yes, I actually complimented something about this kit. On the negative side, I was “forced” to model them as beat up, due to atrocious fit.


Hatches are done, both operable so I can add figs later, or not.

On to little bits on the turret now.
3 Likes
Good effort Russ … It is certainly making you work … It will be a great job and really satisfying once you’ve completed it all…![]()
1 Like
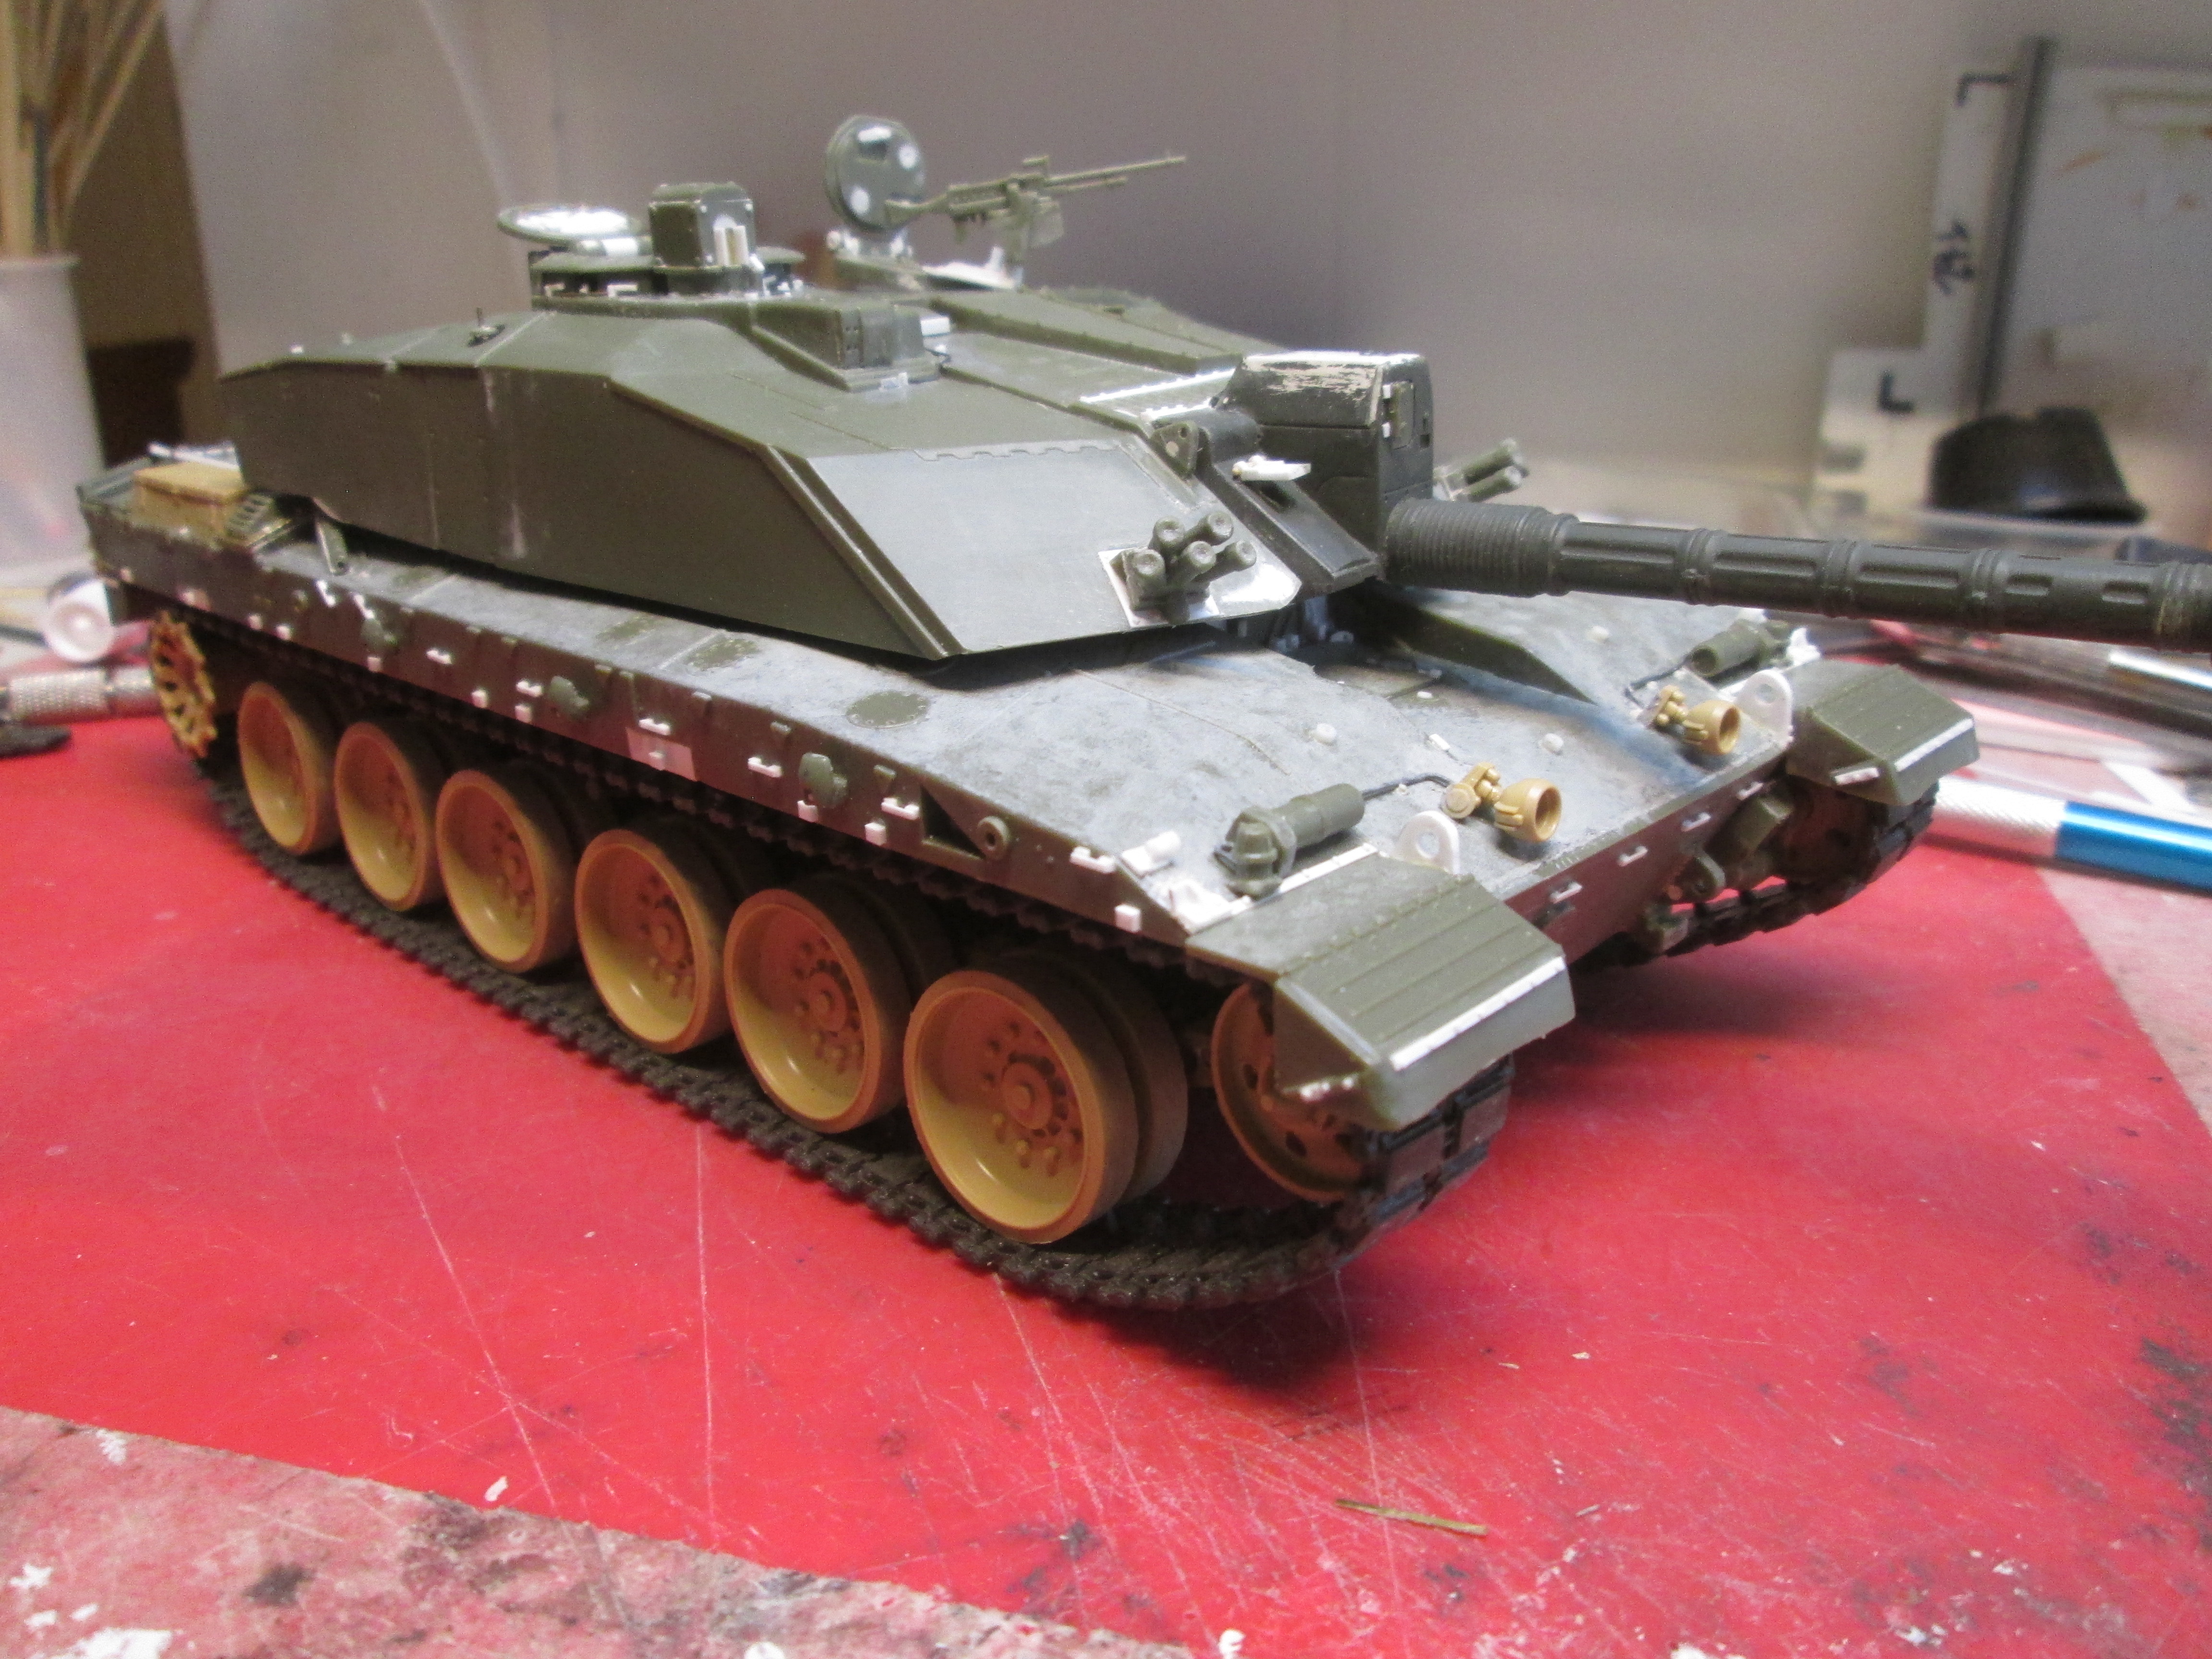
Still need to add the anti slip to appropriate areas of the turret, but I did change up the hull texturing a bit from Trump’s “pebbles” texture and removed from the engine cover, trying to make it look more like what’s in the pics I have, and a bit worn in places. More turret stuff done too. I added some better bolt heads to the dozer and made up pins to make it removable in case I decide not to use it. I’d like to do the blade’s hydraulic lines but haven’t looked real hard for pics of them… yet. Otherwise, it’s close to primer.
 IMG_3709 by Russel Baer, on Flickr
 IMG_3702 by Russel Baer, on Flickr
 IMG_3707 by Russel Baer, on Flickr
 IMG_3705 by Russel Baer, on Flickr
I’m congratulating myself for not giving in and just using the Tamiya turret. It would have been easier and quicker, but where’s the fun in that? ![]()
4 Likes
You’re certainly making a showpiece out of this dog Russ. Congratulations on sticking with it and doing the hard work.
2 Likes
Thanks, but I have to say, I LIKE this kind of modeling, as much as or more than building a “perfect” kit OOB.
1 Like
Russ I had a look through a lot of references and didn’t have any real joy with any of the cables for the dozer. Even when it’s fully down being used you can’t see much of anything and the same for when it’s raised…
2 Likes
Thanks. Since it’s removeable, I can hold off on finishing it until I either find something that gives me an idea of how the hoses run or just decide to use it as-is.
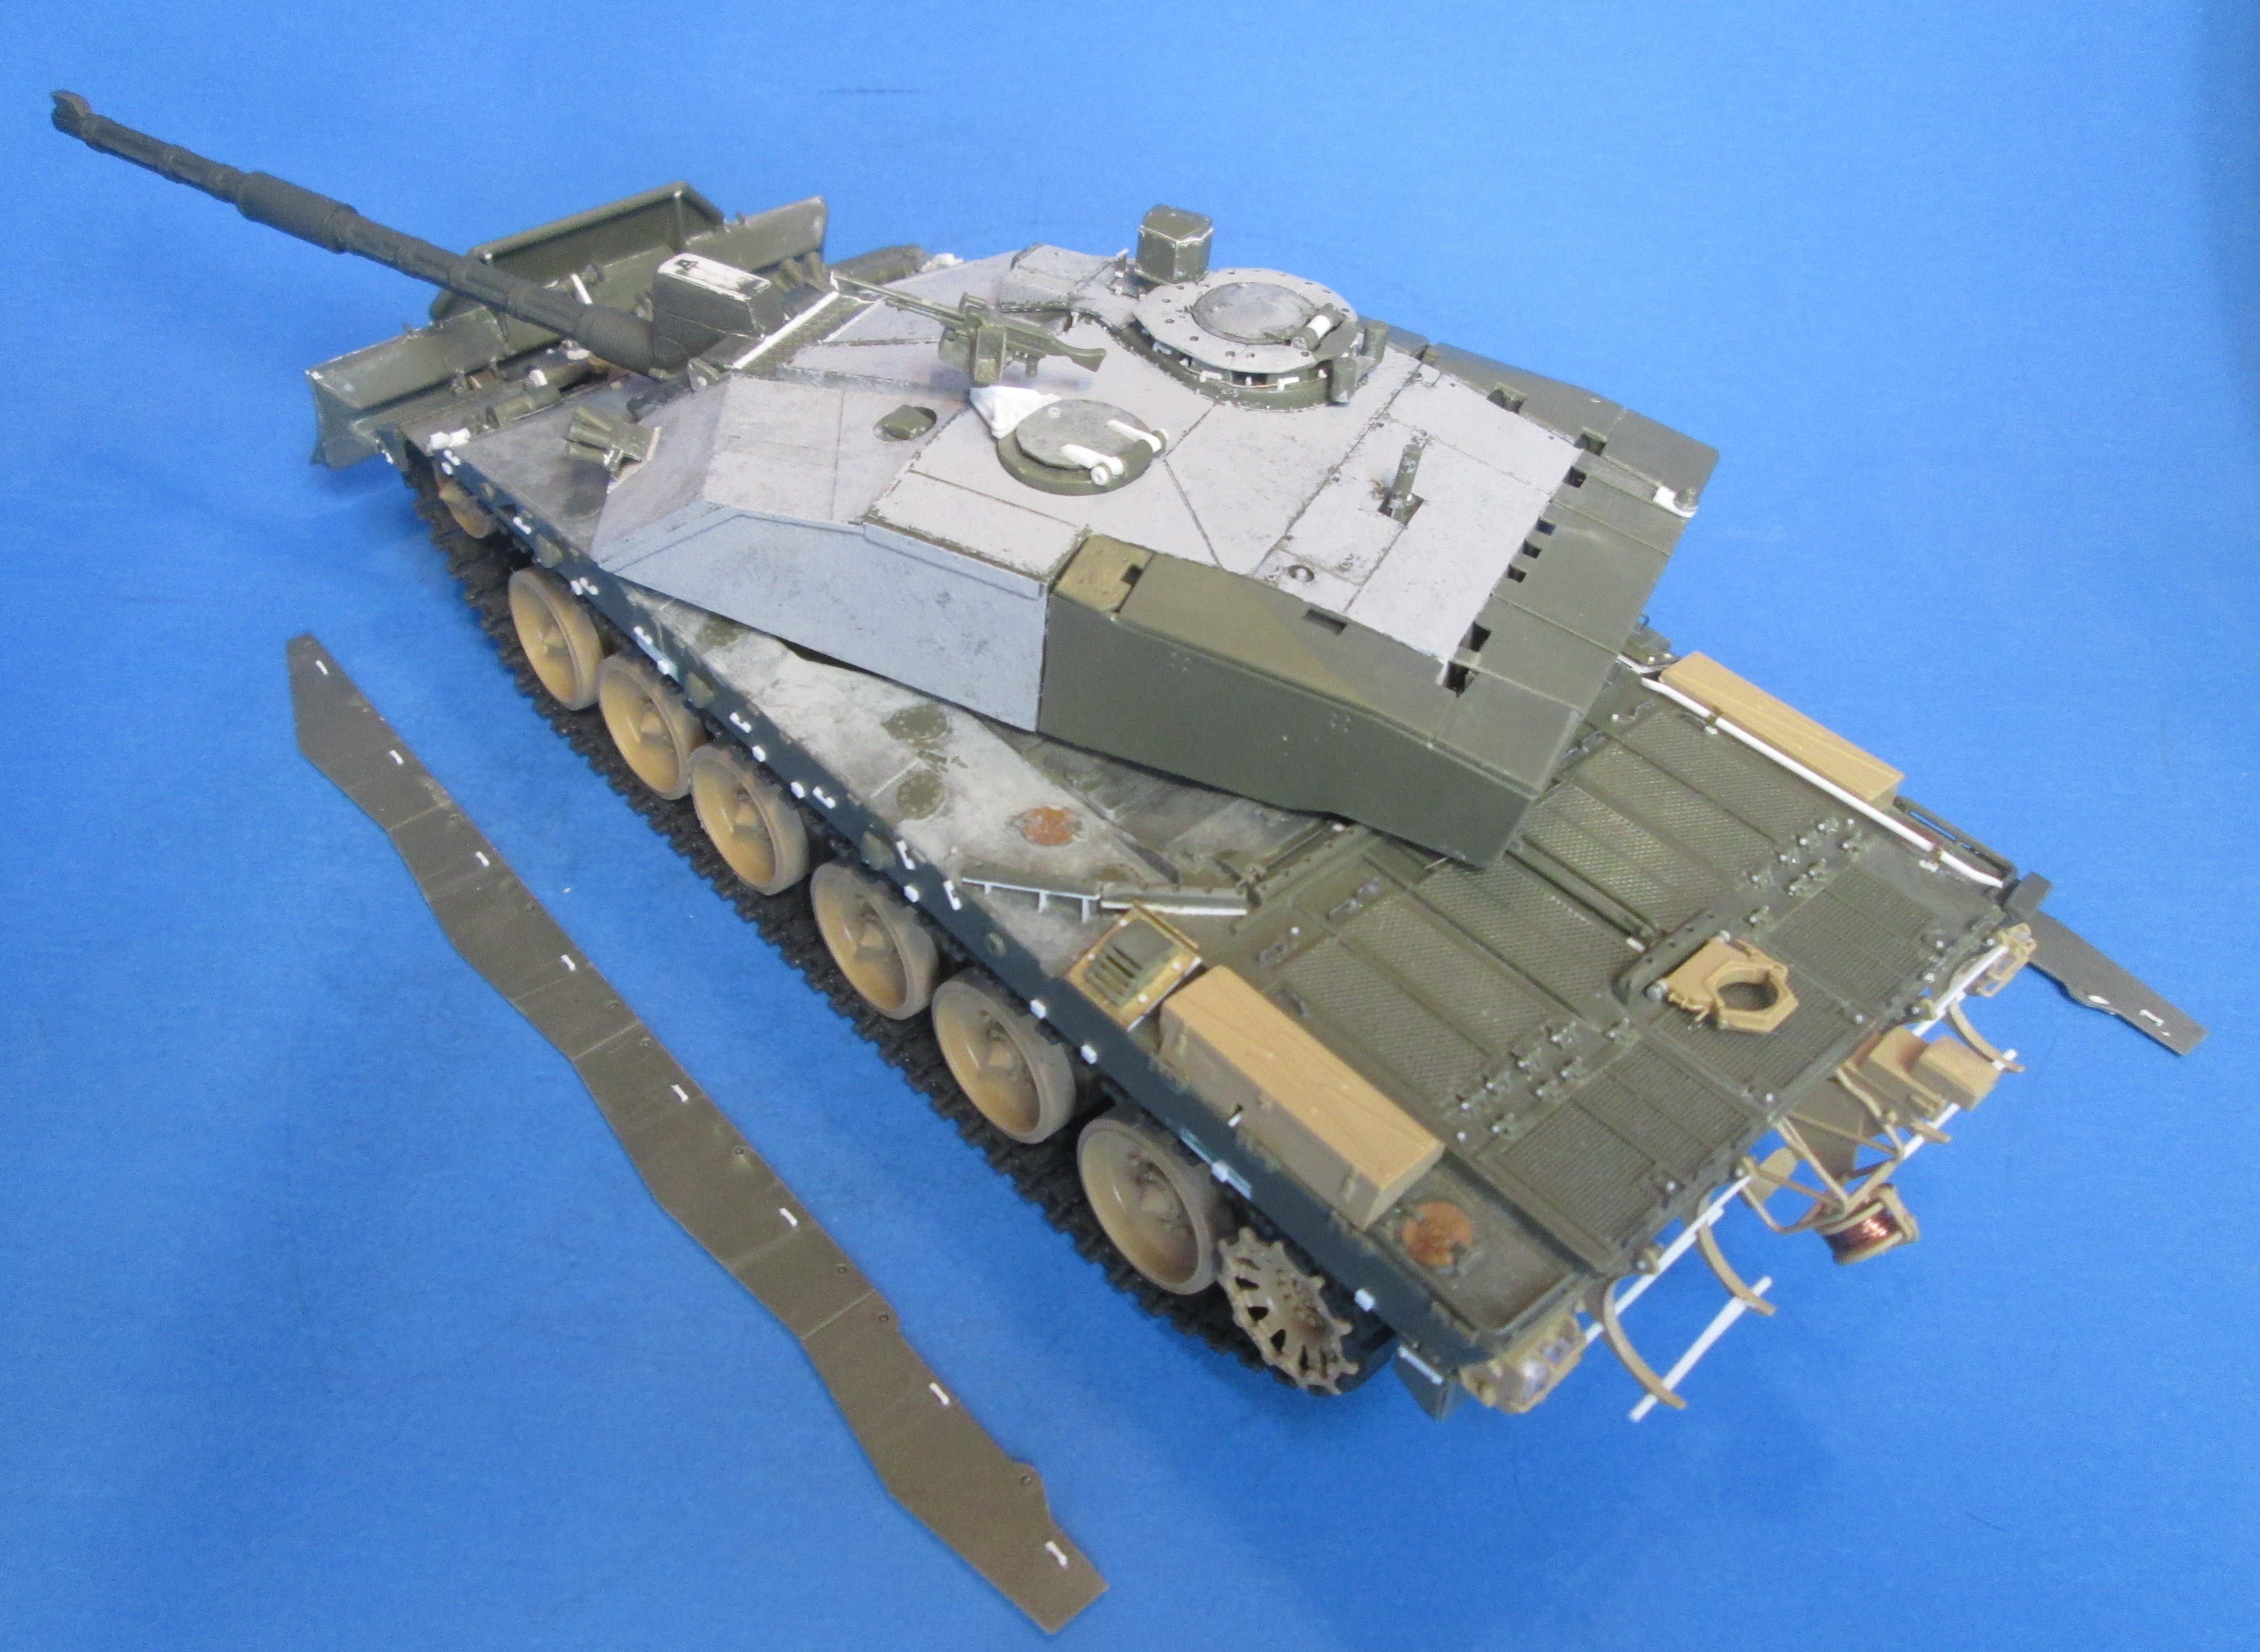
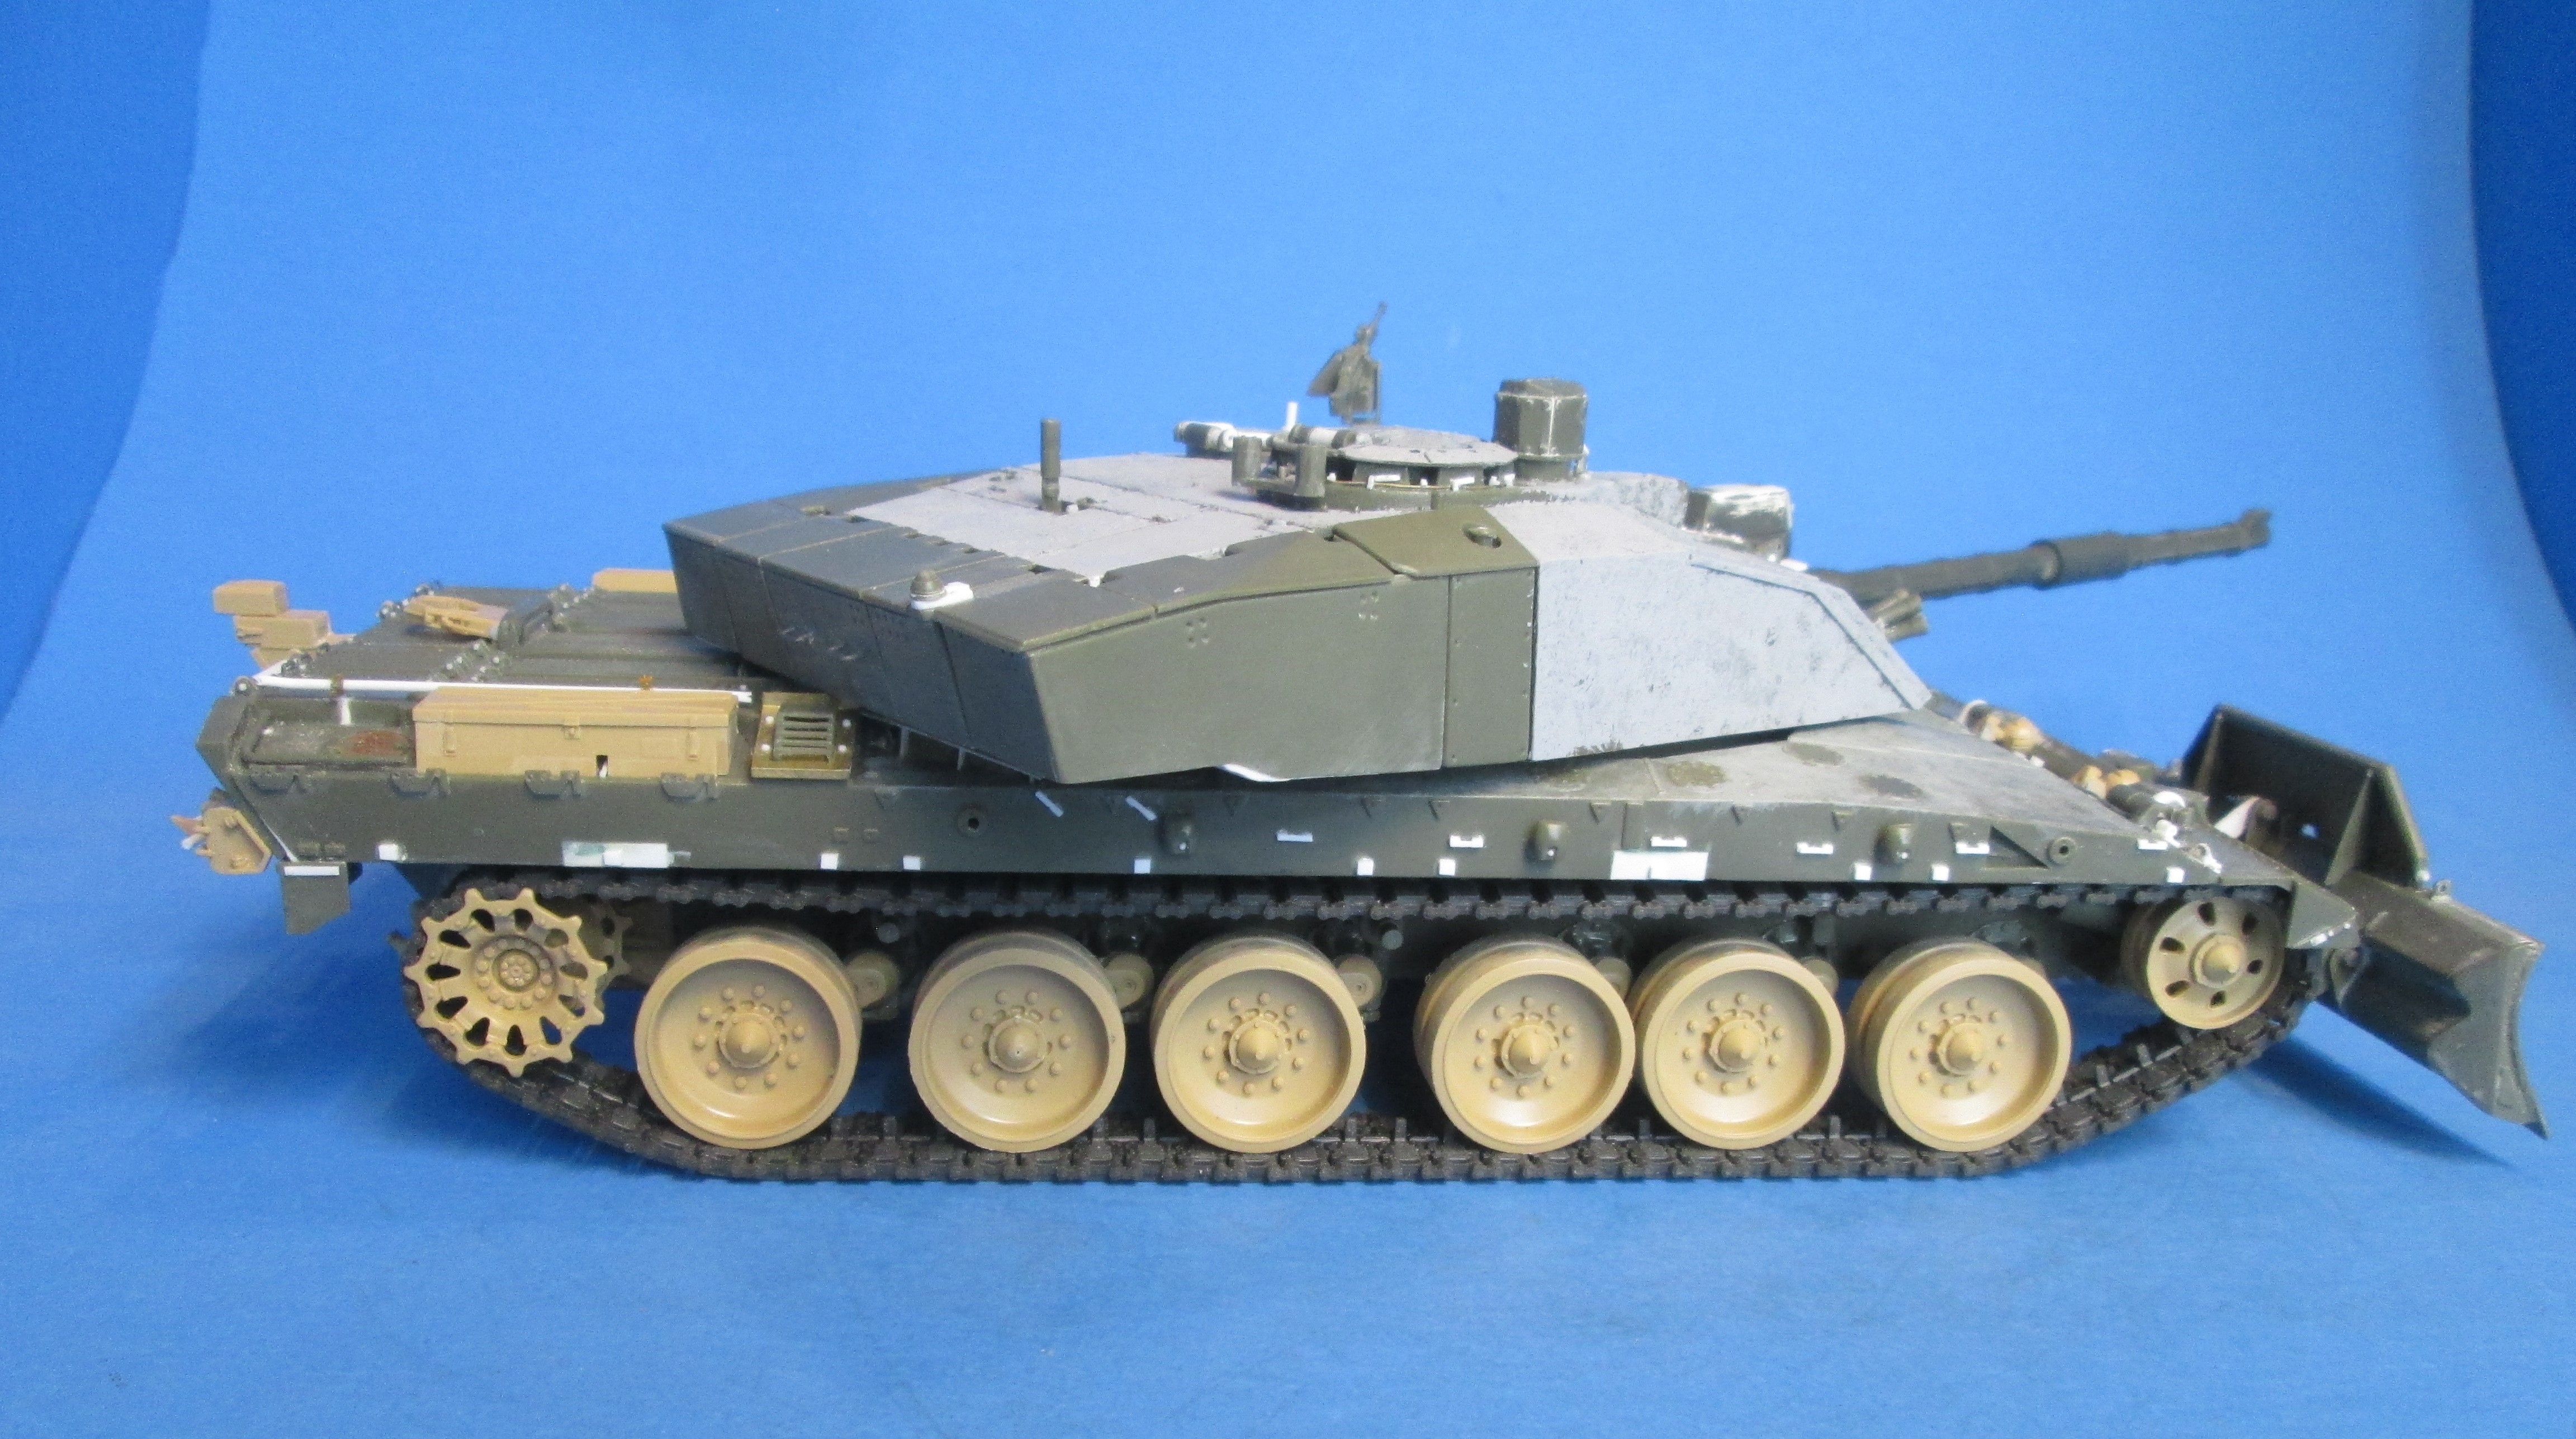
Well, I’m calling it ready for paint. I’ll probably carve the ratchet handles off the Tamiya fuel drums off and make up straps for the mounts, unless I get a wild hair and decide to do something else there. I’ve seen “soft” stowage in the mounts, strapped up and it’s visually interesting.
 IMG_3712 by Russel Baer, on Flickr
 IMG_3715 by Russel Baer, on Flickr
 IMG_3714 by Russel Baer, on Flickr
 IMG_3711 by Russel Baer, on Flickr
7 Likes
Good work on that kit .
You have done a cracking job Russ. Really lifted it up to a whole new level… Bring on the paint ![]()
Hi!
If you are still looking for the UDK Dozers wiring/hydraulic lines, and you can wait until next weekend, I will look into my archive, since I may have pictured it lowered. I had a special appointment for a Chally 1 with that dozer, and that will be pretty much the same. I just hope I do have the picture you require. The vehicle in question was this one, with and without side armour fitted.

And when you ask yourself why it is so low on the ground, it was a cold December day around 0 degrees C, and it came straight from a hangar without moving more than a couple of meters. Effects of hydrogas suspension.
Andreas
2 Likes
Amazing work on the build Russel. Looking forward to seeing it under a lock of paint.
P.s. I notice you post your photos via Flickr, just wondering if you knew you can post them directly here without using a host?
Thanks all!
Andreas, I’m in no particular hurry on the blade, and since it’s easily attached, I can wait to see if you have anything on the hydraulic hoses, even something rough. I think the main cylinder would have to have at least two, but as to where the pump and controls are I’m clueless.
Jim: I use Flickr for other websites so they’re already there. I’ve looked at Kitmaker’s hosting before (admittedly years ago) and found it cumbersome. I even had to wrinkle my forehead when I posted a short article on the Merkava SPAAG “what-if” a while ago.
1 Like