Most strong (Heavy Duty) oven cleaners will remove enamel paints. They are caustic so you need gloves and do not breathe the fumes.
Or for a non-toxic option Dettol?

Most strong (Heavy Duty) oven cleaners will remove enamel paints. They are caustic so you need gloves and do not breathe the fumes.
Or for a non-toxic option Dettol?
Thank you. I’ll look into that!
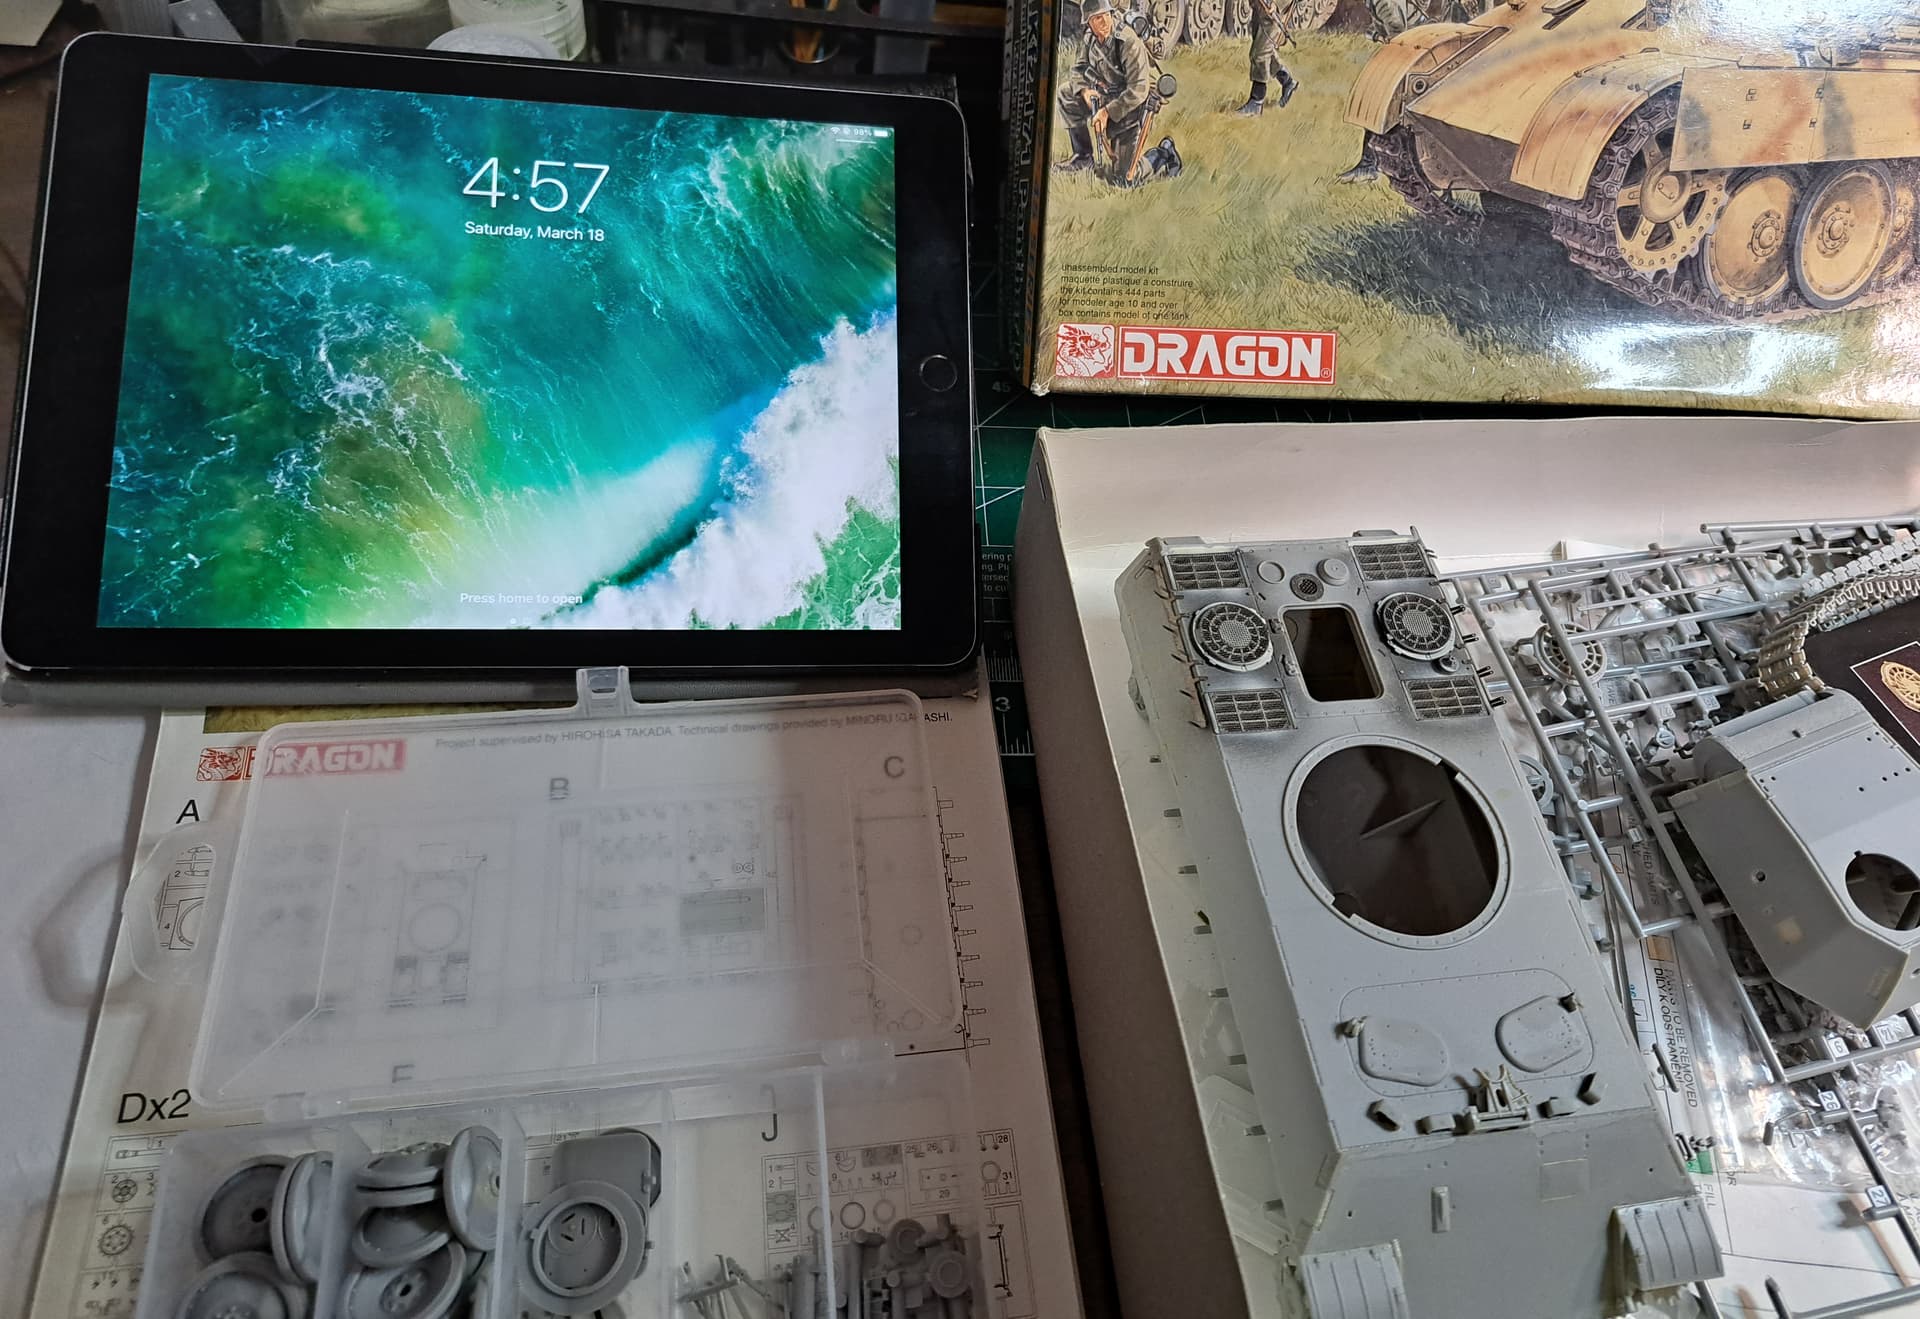
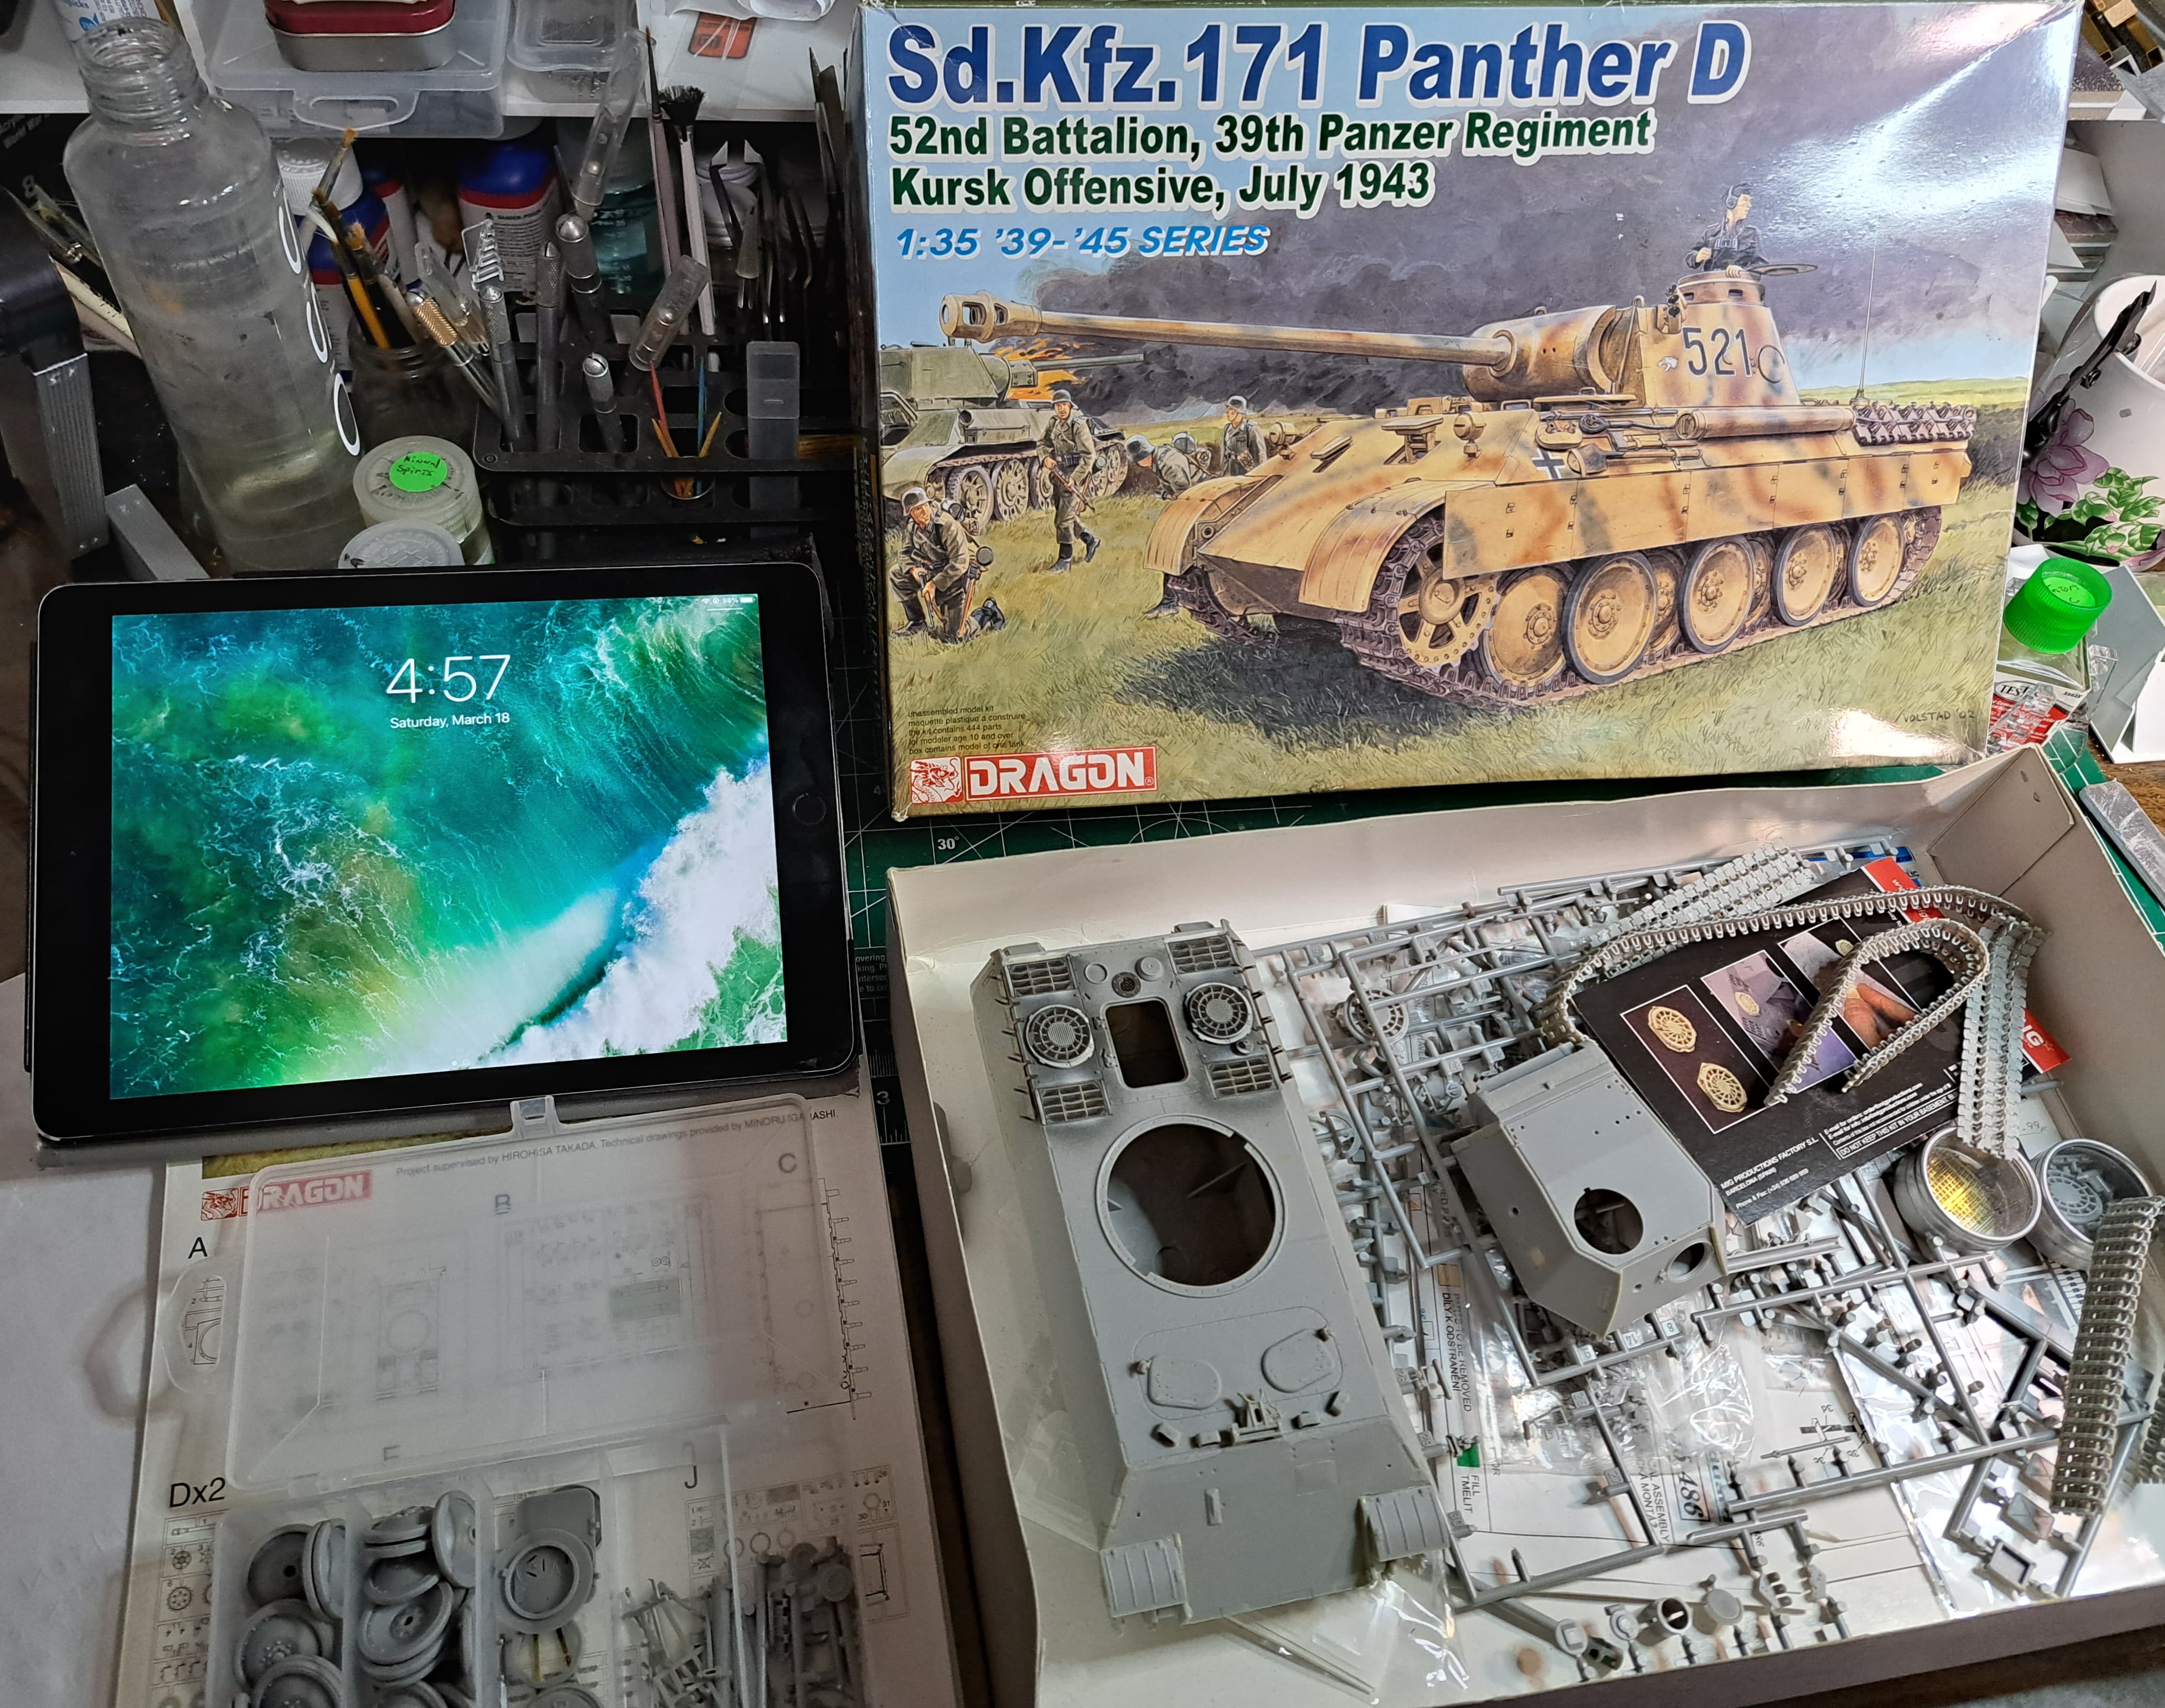
I’d like to join the group build with this long stalled shelf queen #6164 Dragon Kursk Panther D.
Started in ~2002, as a new release, stalled since 2003. Current status and today’s time and date stamp.
Welcome aboard Wade. I built that one way back when. If you want to know some tweaks, let me know.
Yes, please I’m all rust & seized bolts on what’s what with this old dog. Thank you.
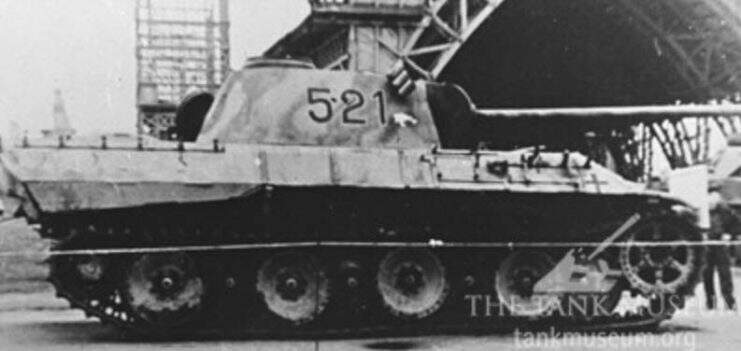
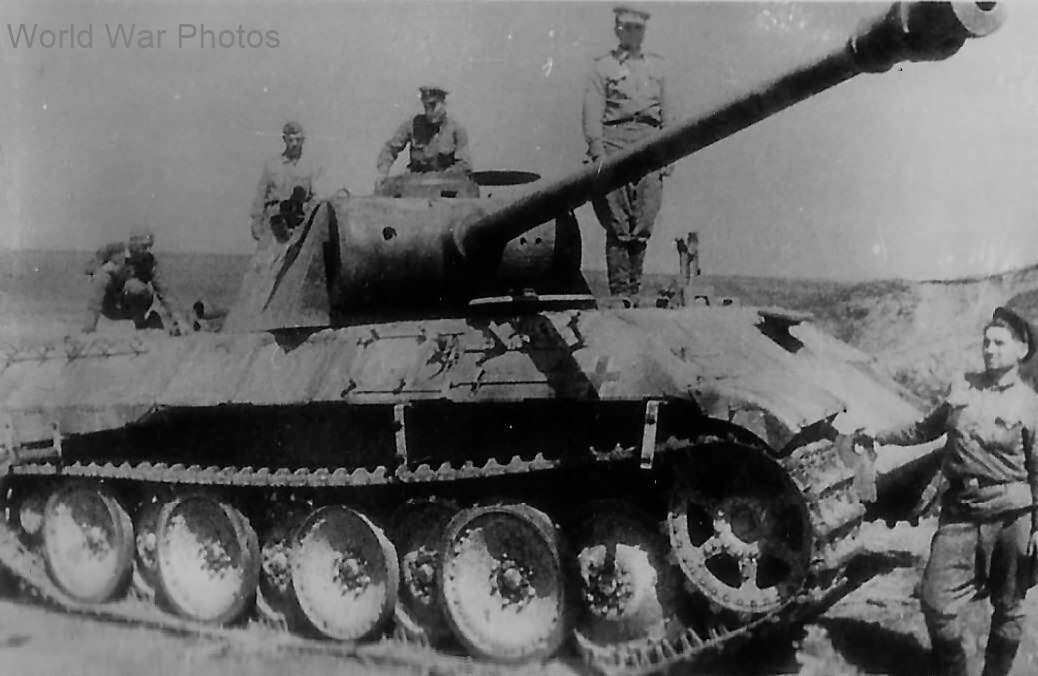
It depends if you want to do the kit’s Kursk Panther or not and how far along the build series. The ones at Kursk were the first ones produced. M.A.N Produced most of the first ones and they had differences in even those first batches. If you want to do ‘521’ from the kit decals:
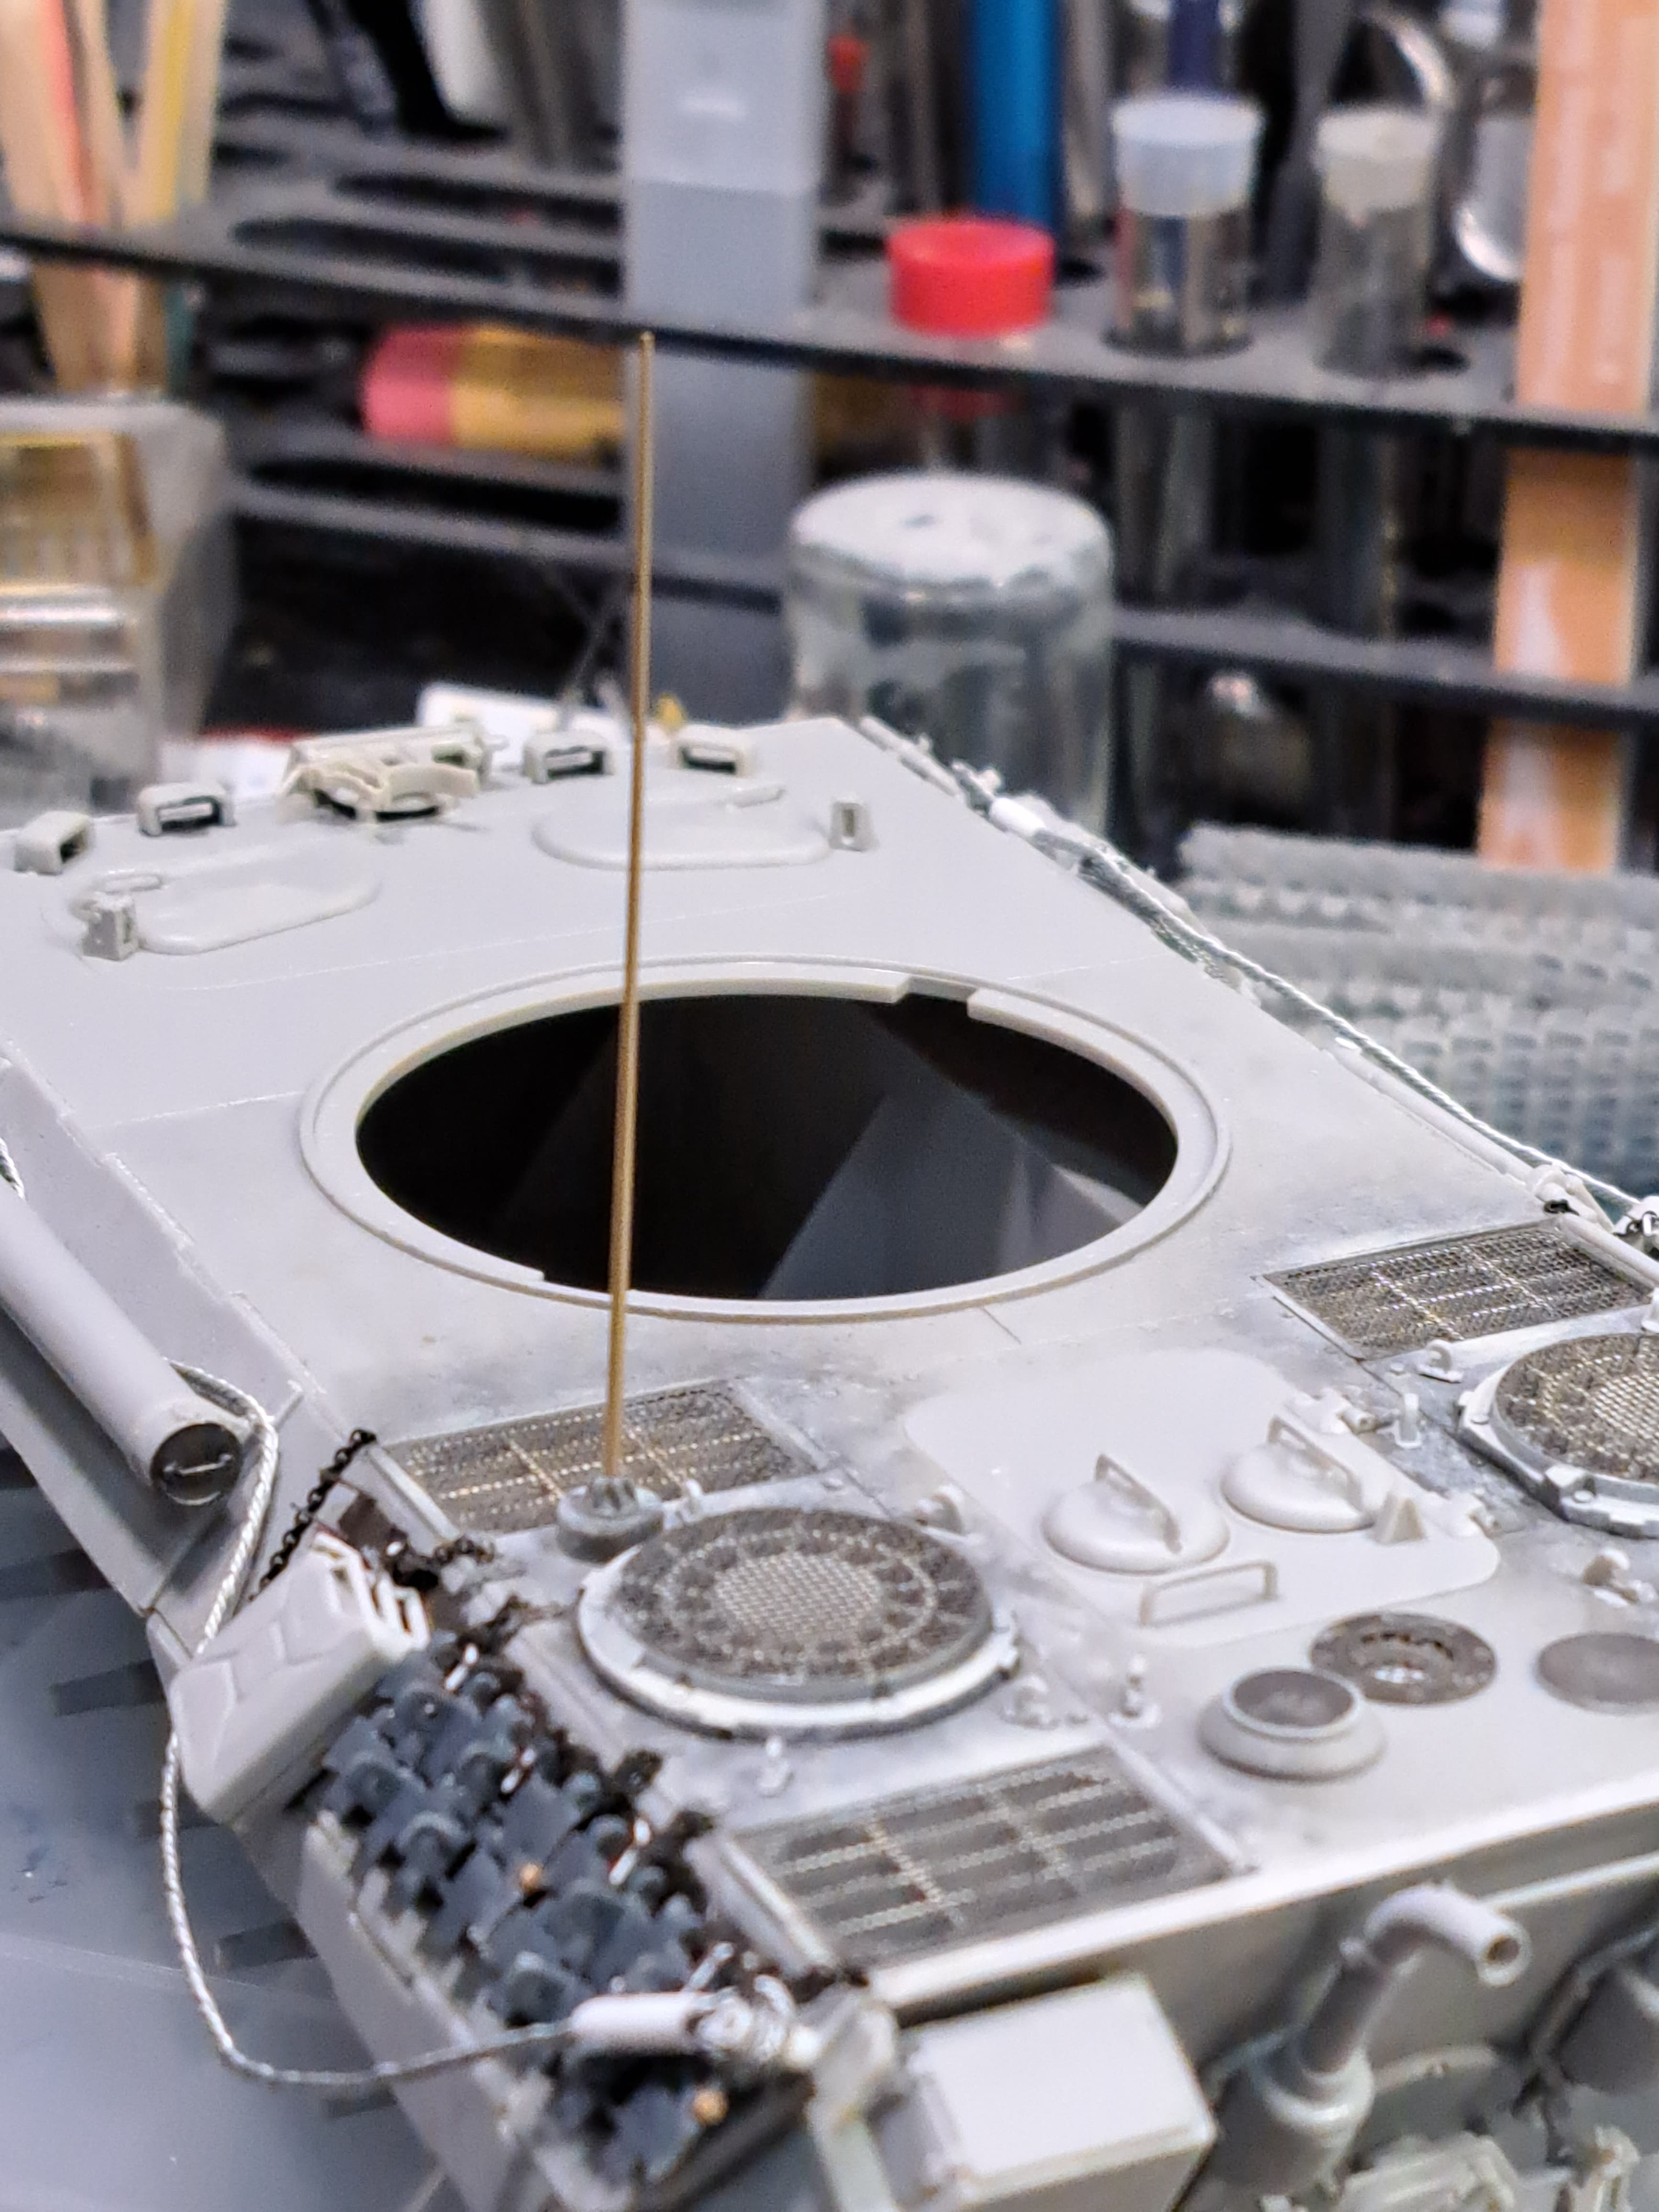
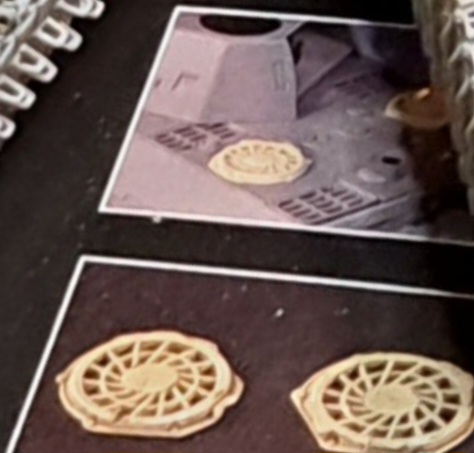
There should be no rain guards over the pistol ports in the turret sides for the M.A.N. version. Most also had the large tool box where the kit gives you mounts for tools. These pics show the tool box and lack of rain guards:
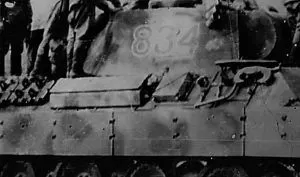
Here is some pics of ‘521’ after the Russians recovered it.

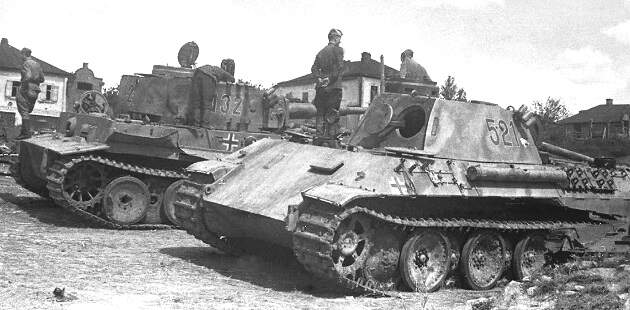
Note the mounts for the large tool box, lack of rain guards, etc.
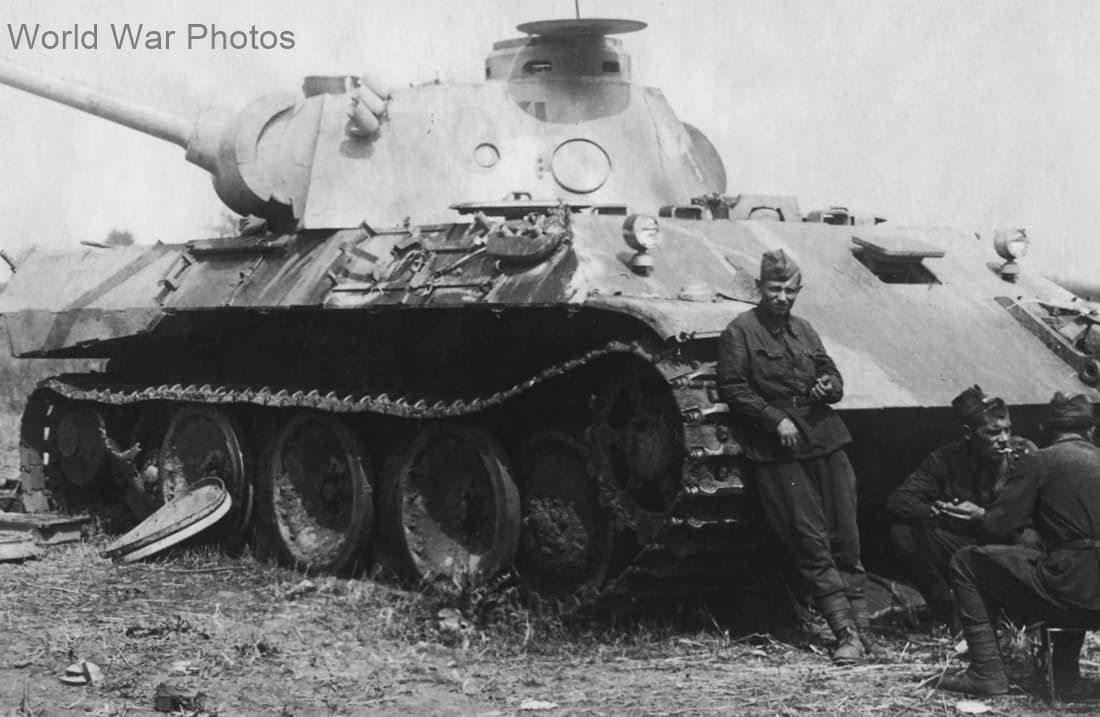
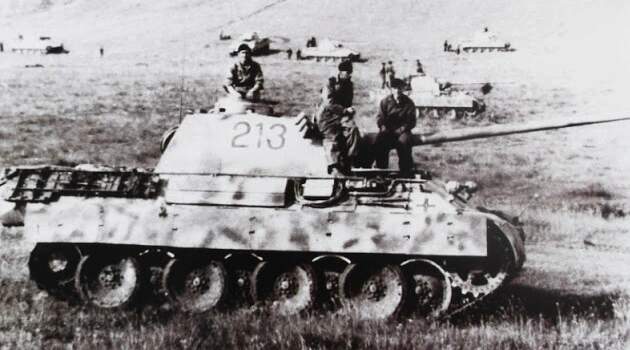
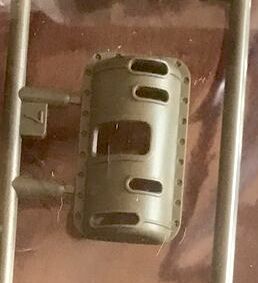
Most early Panthers had asymmetrical fan covers on the engine deck, not the circular ones in the kit.
The heat exchange plates on the insides of the rear stowage boxes should be the early inverted pattern not the type in the kit.
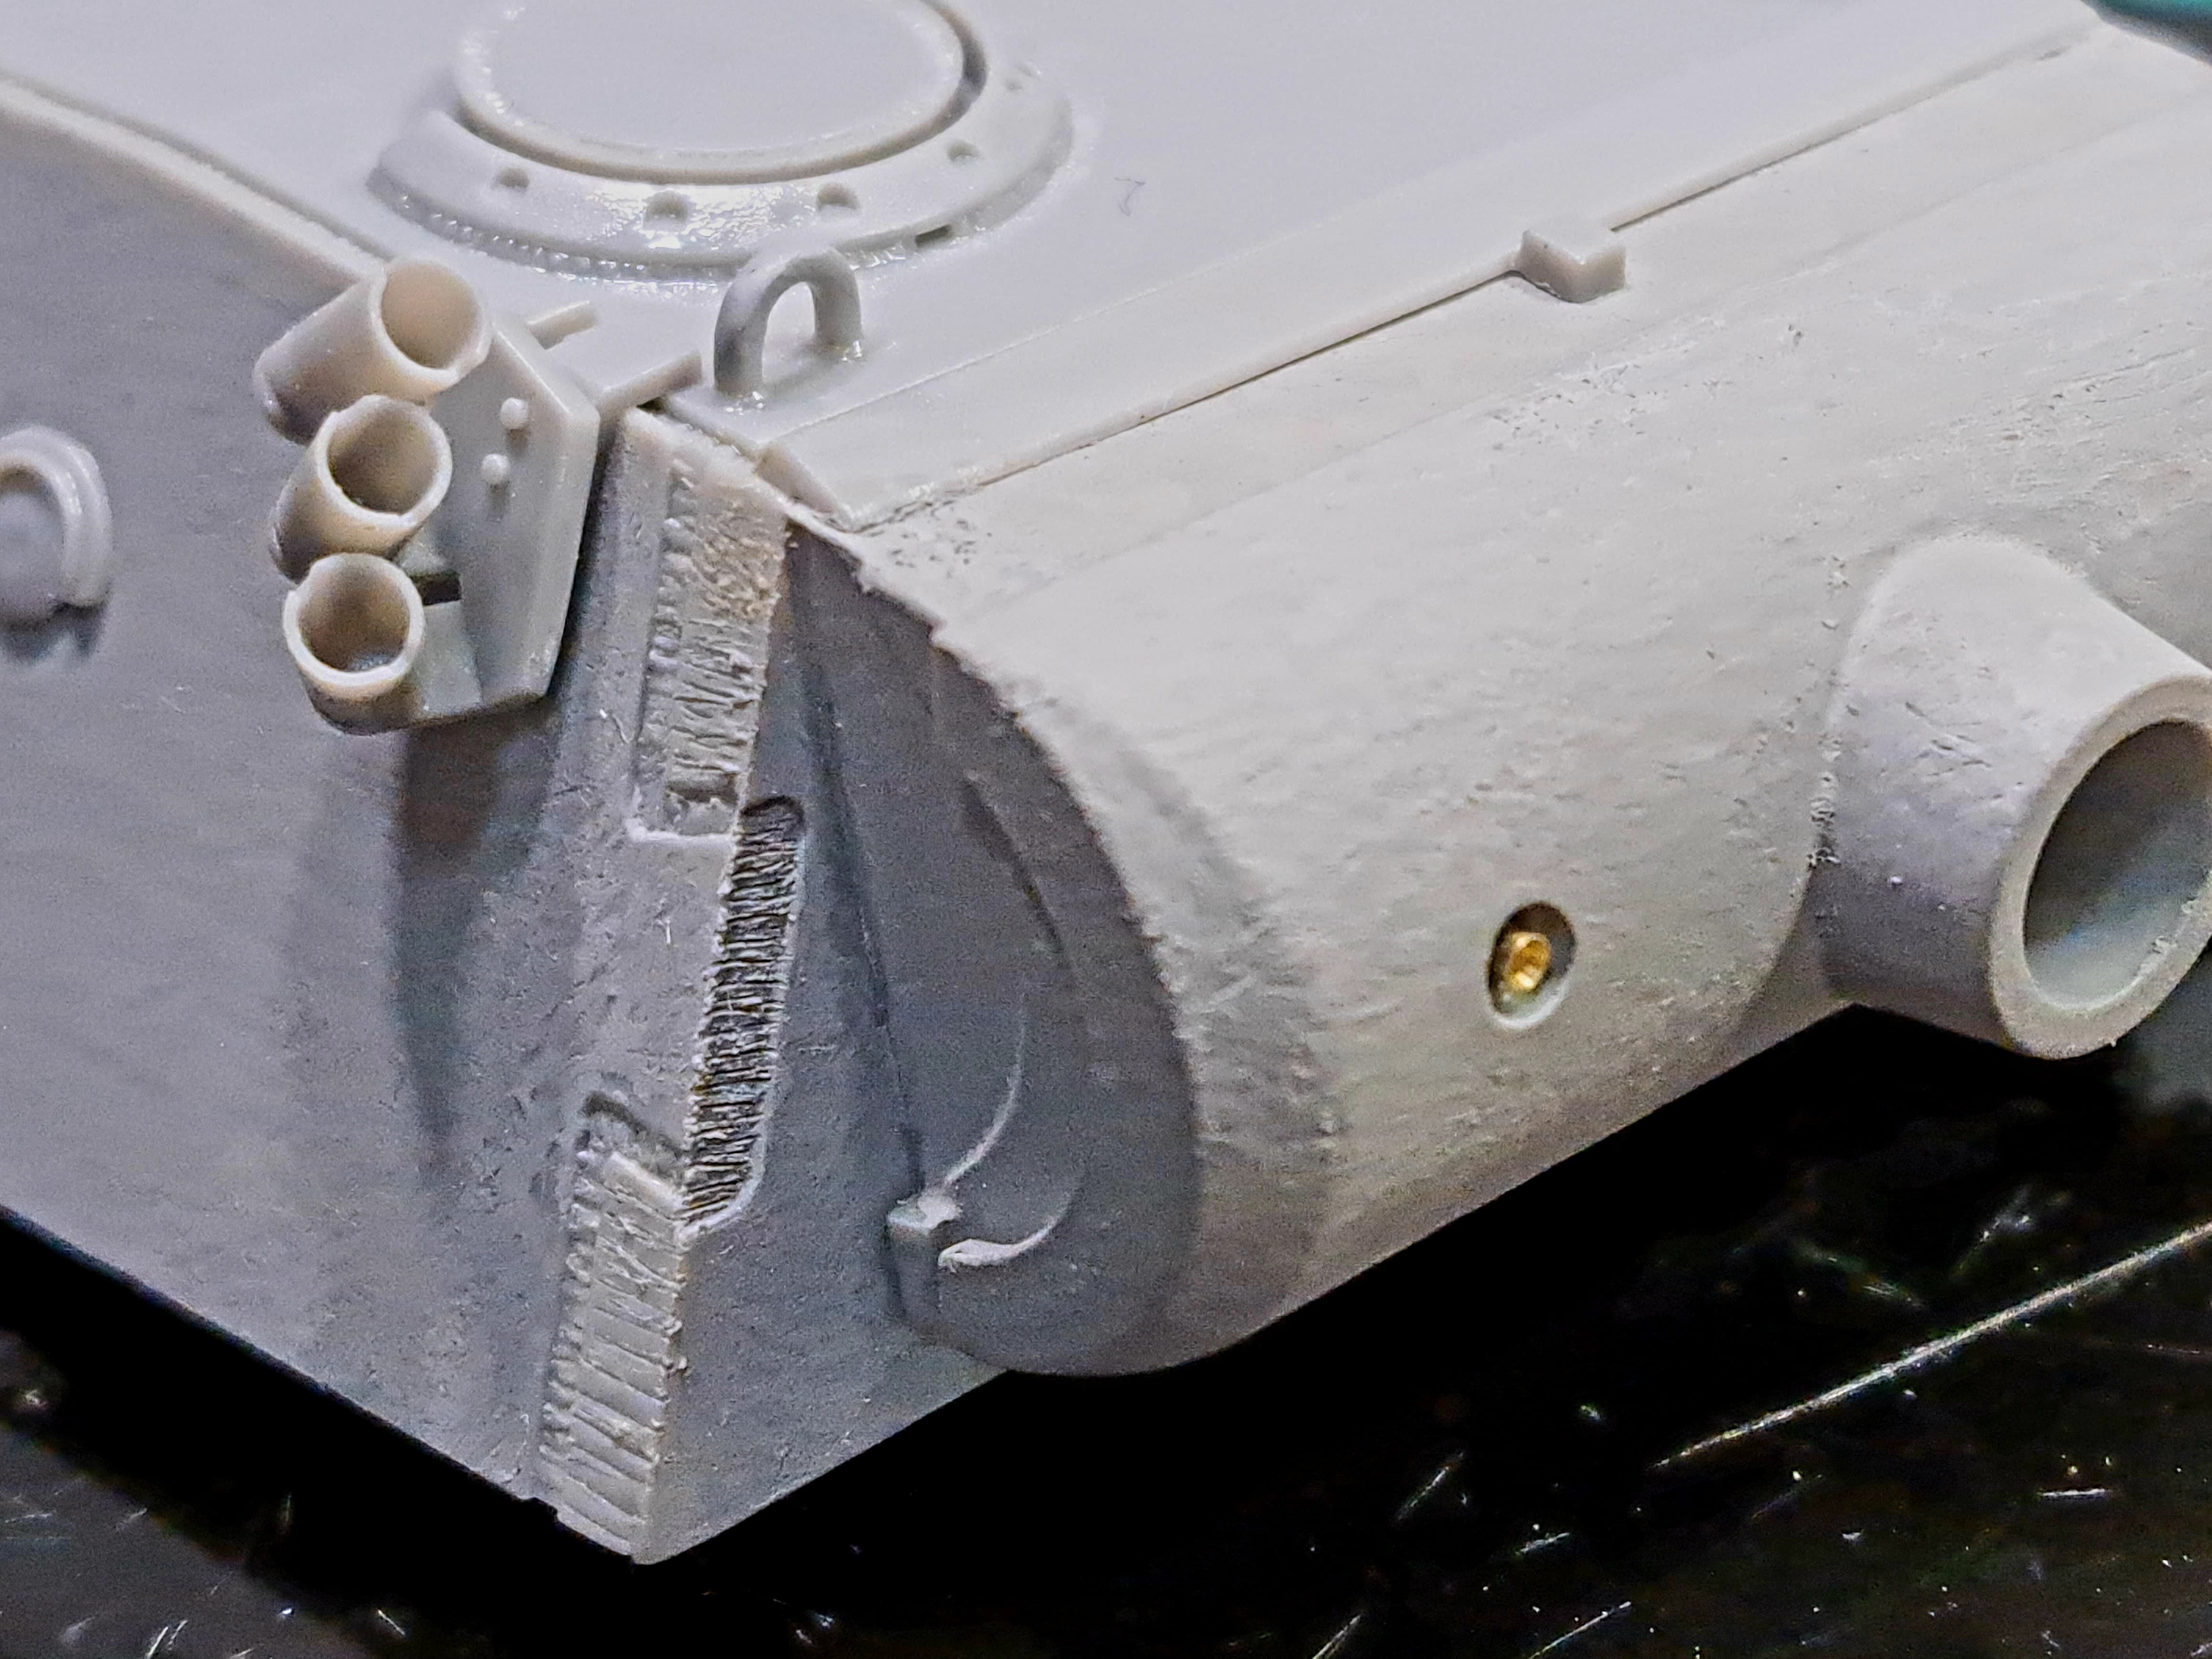
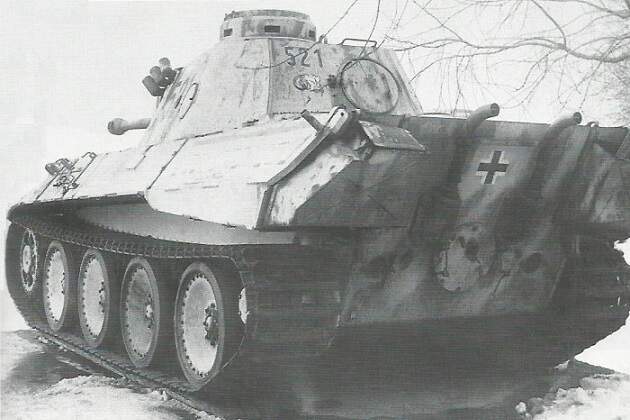
The Gun travel lock is missing from the vehicle in the pics, but it probably should be symmetrical. The extended rod in the kit was a later modification. Panthers at Kursk showing the symmetrical type :
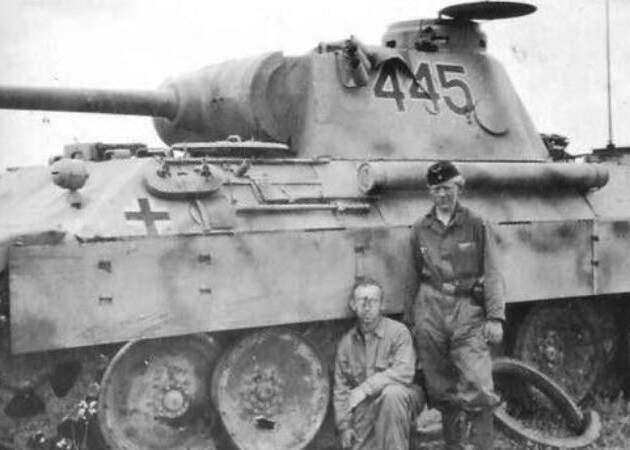
(NOTE: the pic of ‘445’ of Grossdeutschland div, is not the other kit decal option; That pic is ‘445’ of a vehicle with Panzer Abteilung 51. This is a pic of the GD one:
 )
)
Most early tool racks had the jack block secured by crossed braces, the latter had the single horizontal metal strap.
Thank you!
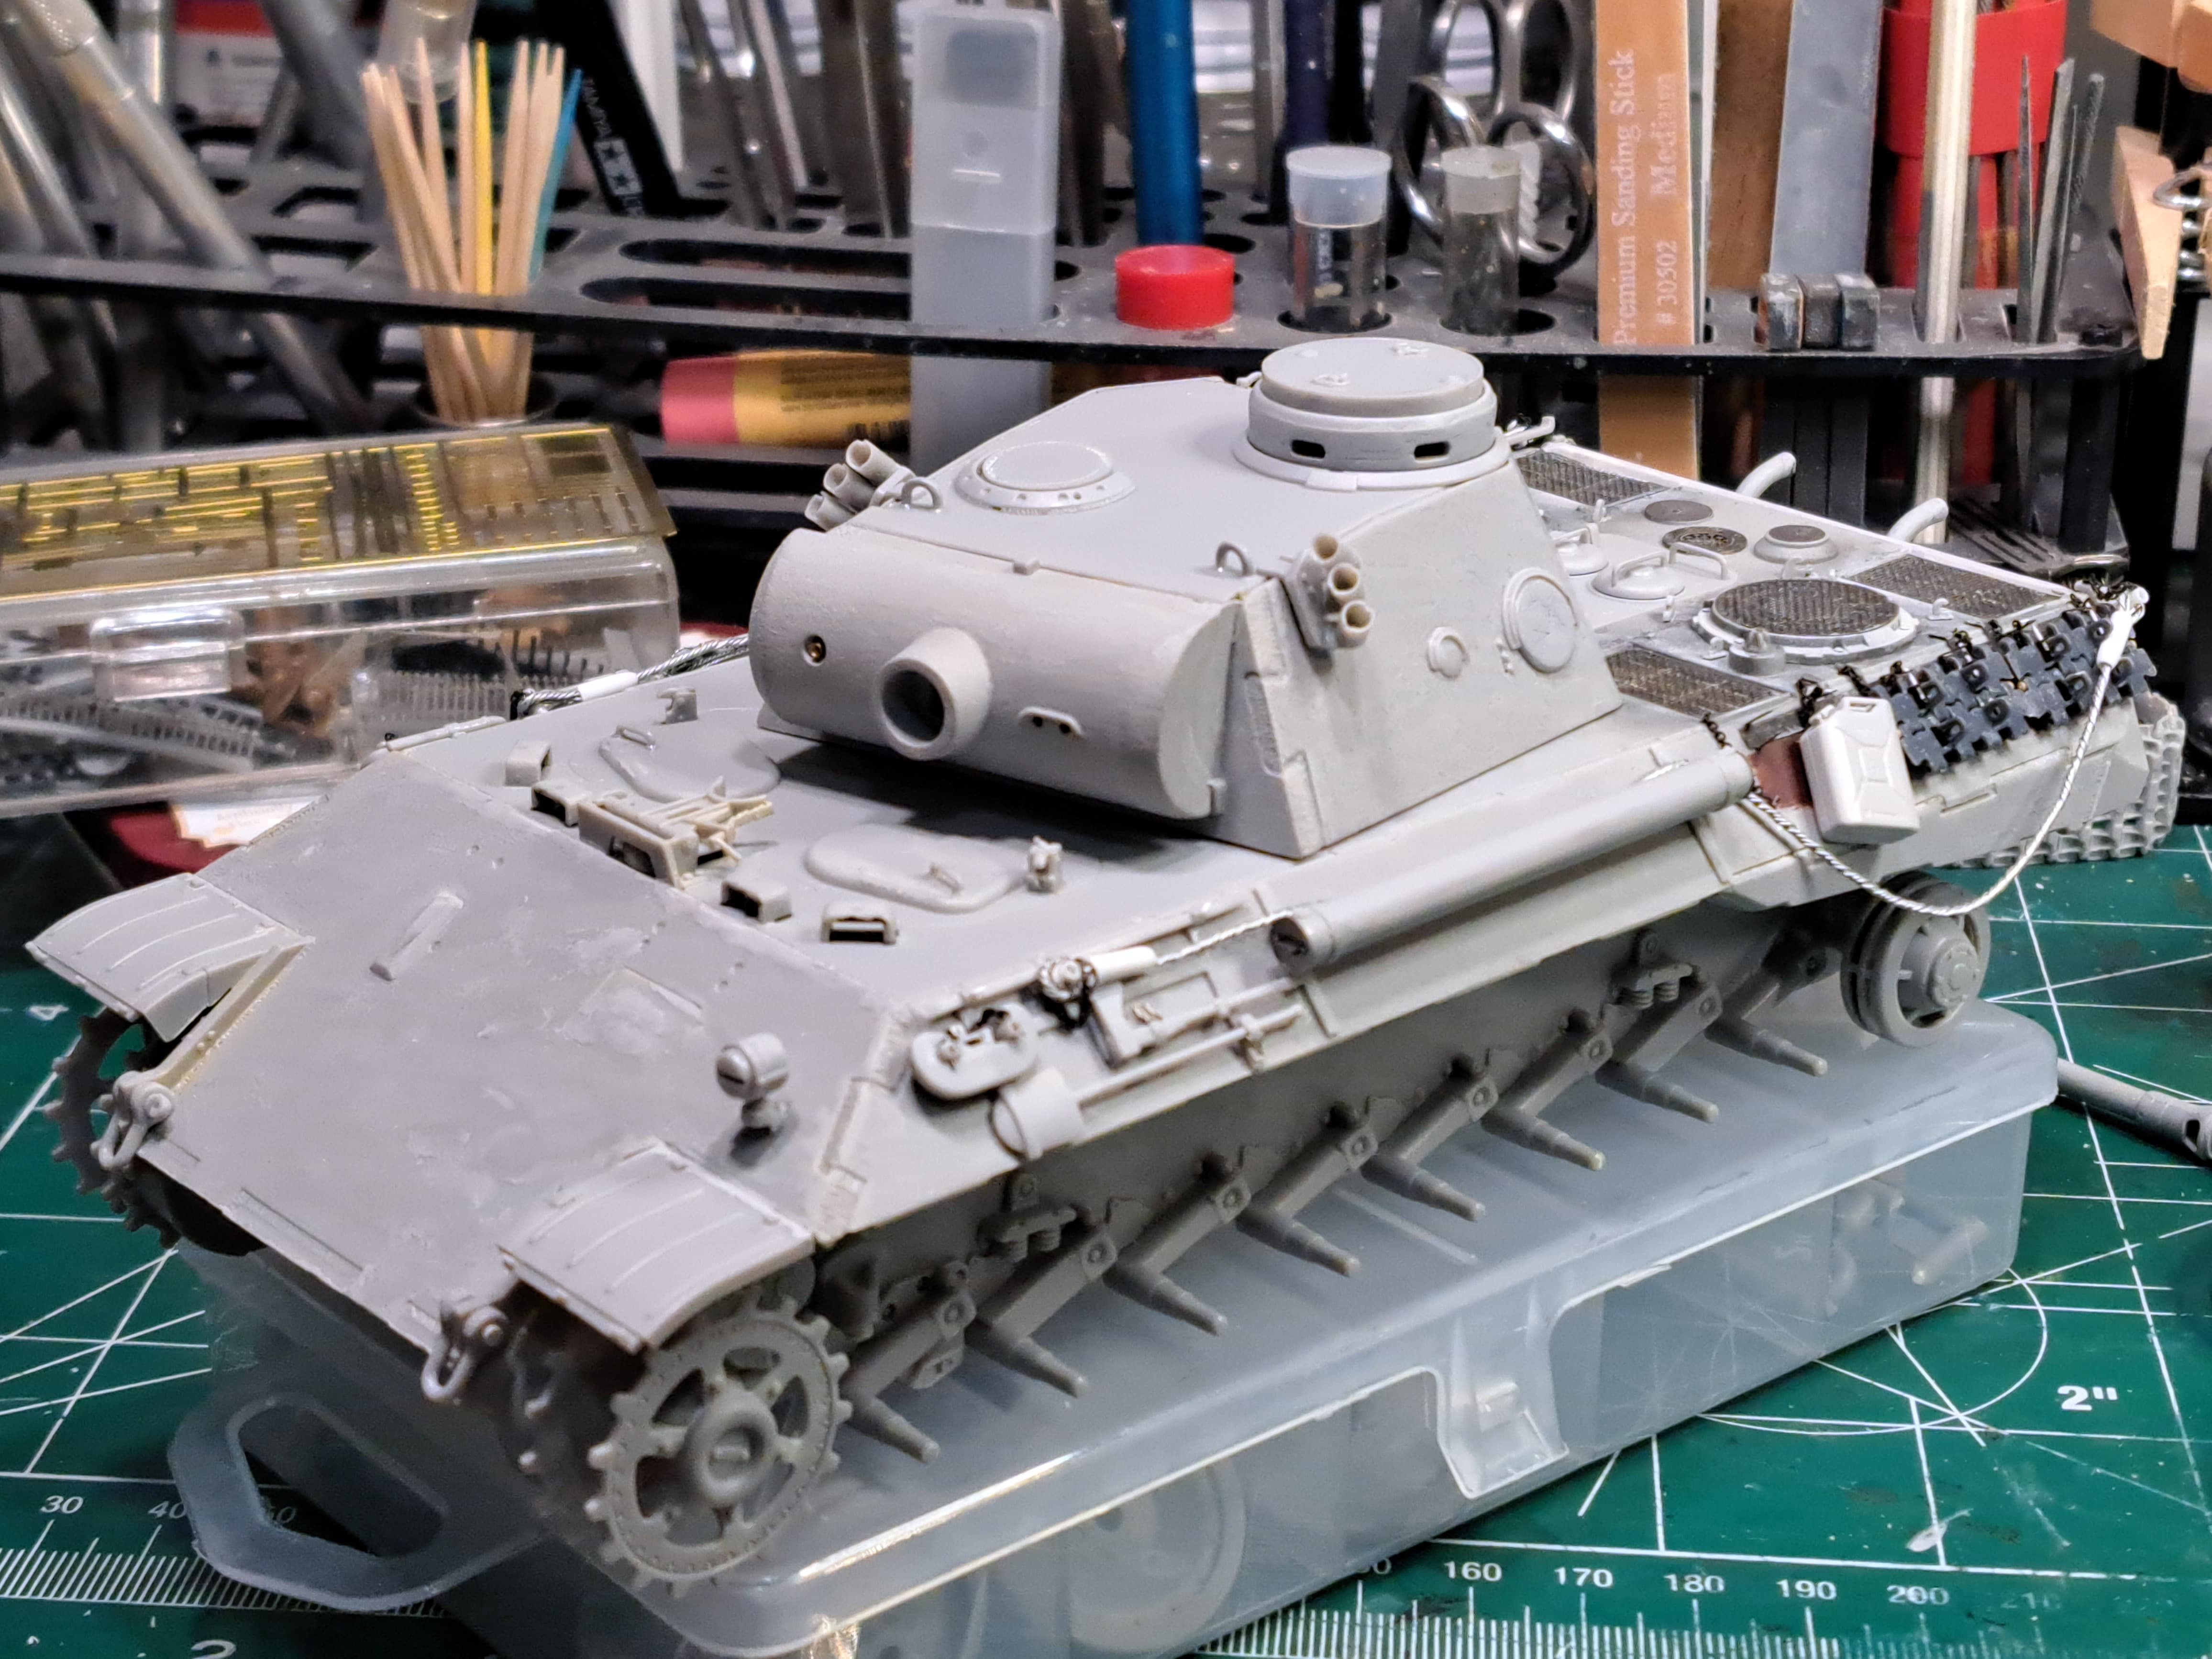
I’ll probably go with a Grossdeutschland Panther with “standard” tool arrangement instead of the the big box. I have a pair of the original style fan covers but build progressed too far to use them.
Think these fan coverare OK for a Grossdeutschland “stalking” Panther D?
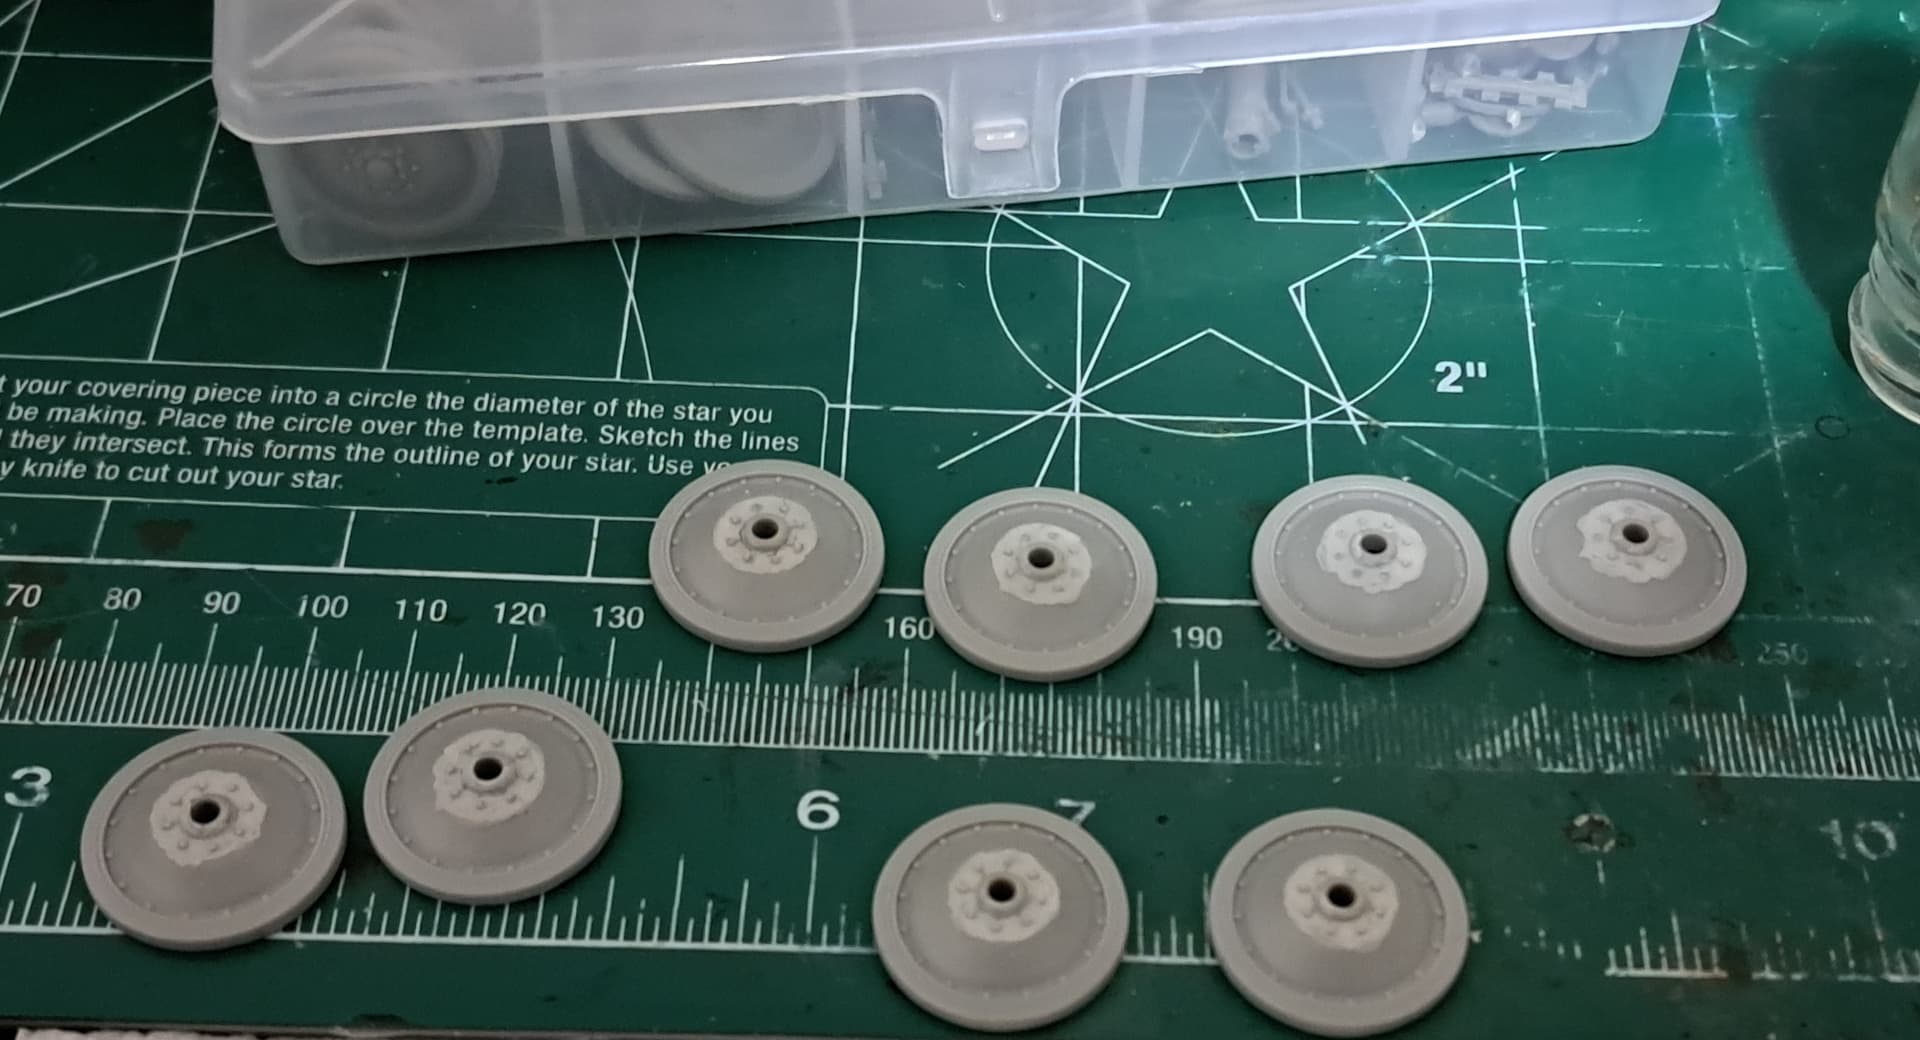
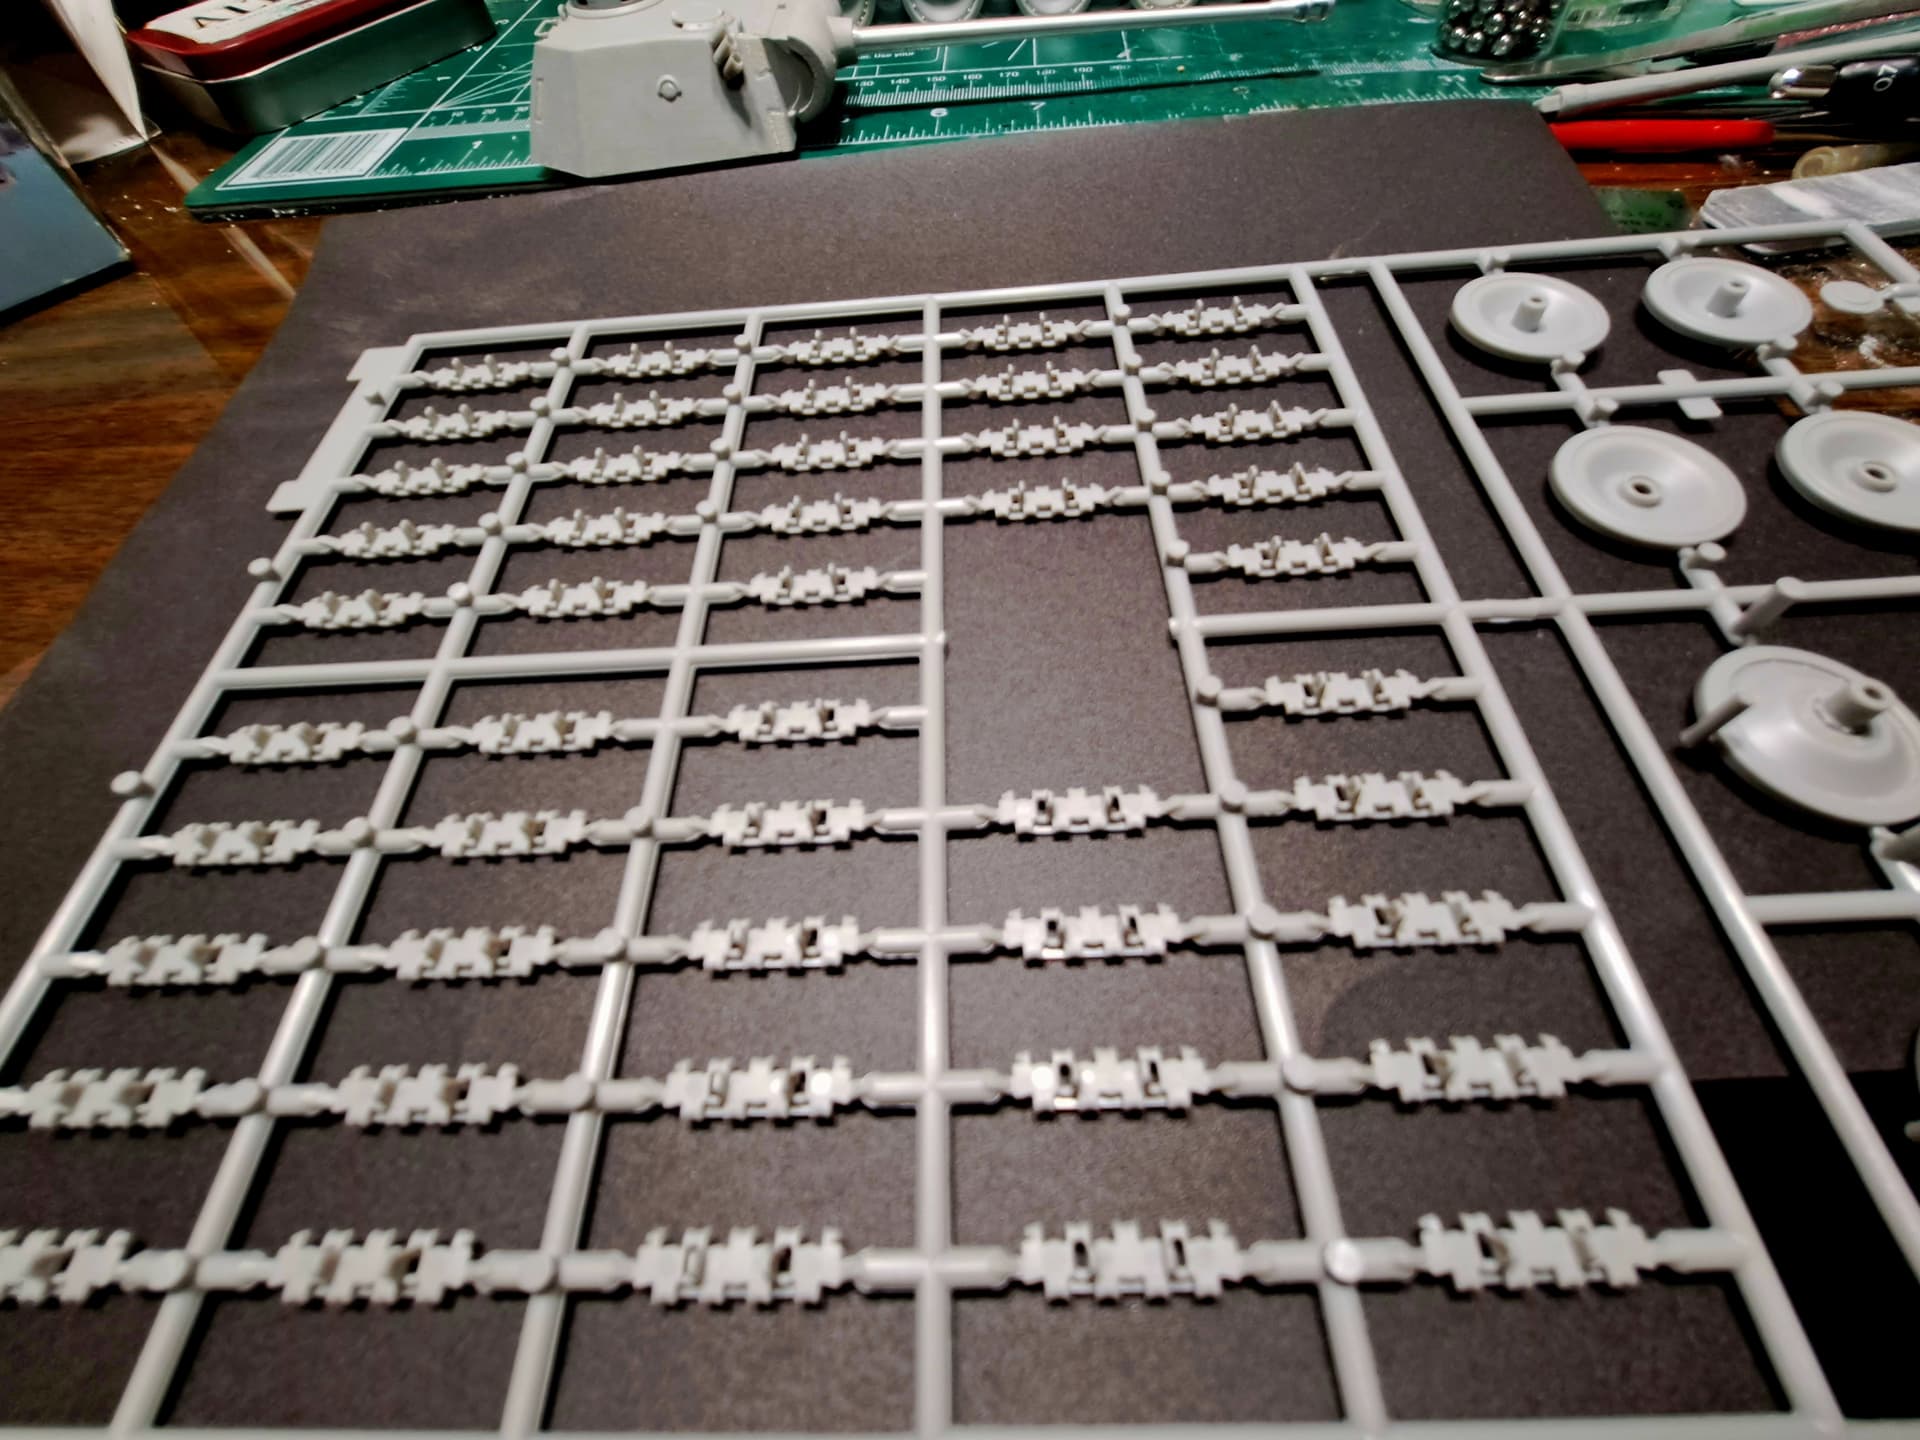
Decided to start by finishing fixing the 32 punch marks on the outside faces of the inner set of road wheels.
Someone liked this and it reminded me I posted here.
Finished this tank but neglected to grab a time-stamped picture so it won’t qualify for the campaign. But here are a few iPotato pics just for fun.
Fairly happy with it given it’s my second attempt at oil filter weathering.
That info on the Panthers of Kurst was certainly useful. I have some of those Panther kits someplace and will pay more attention when building them.
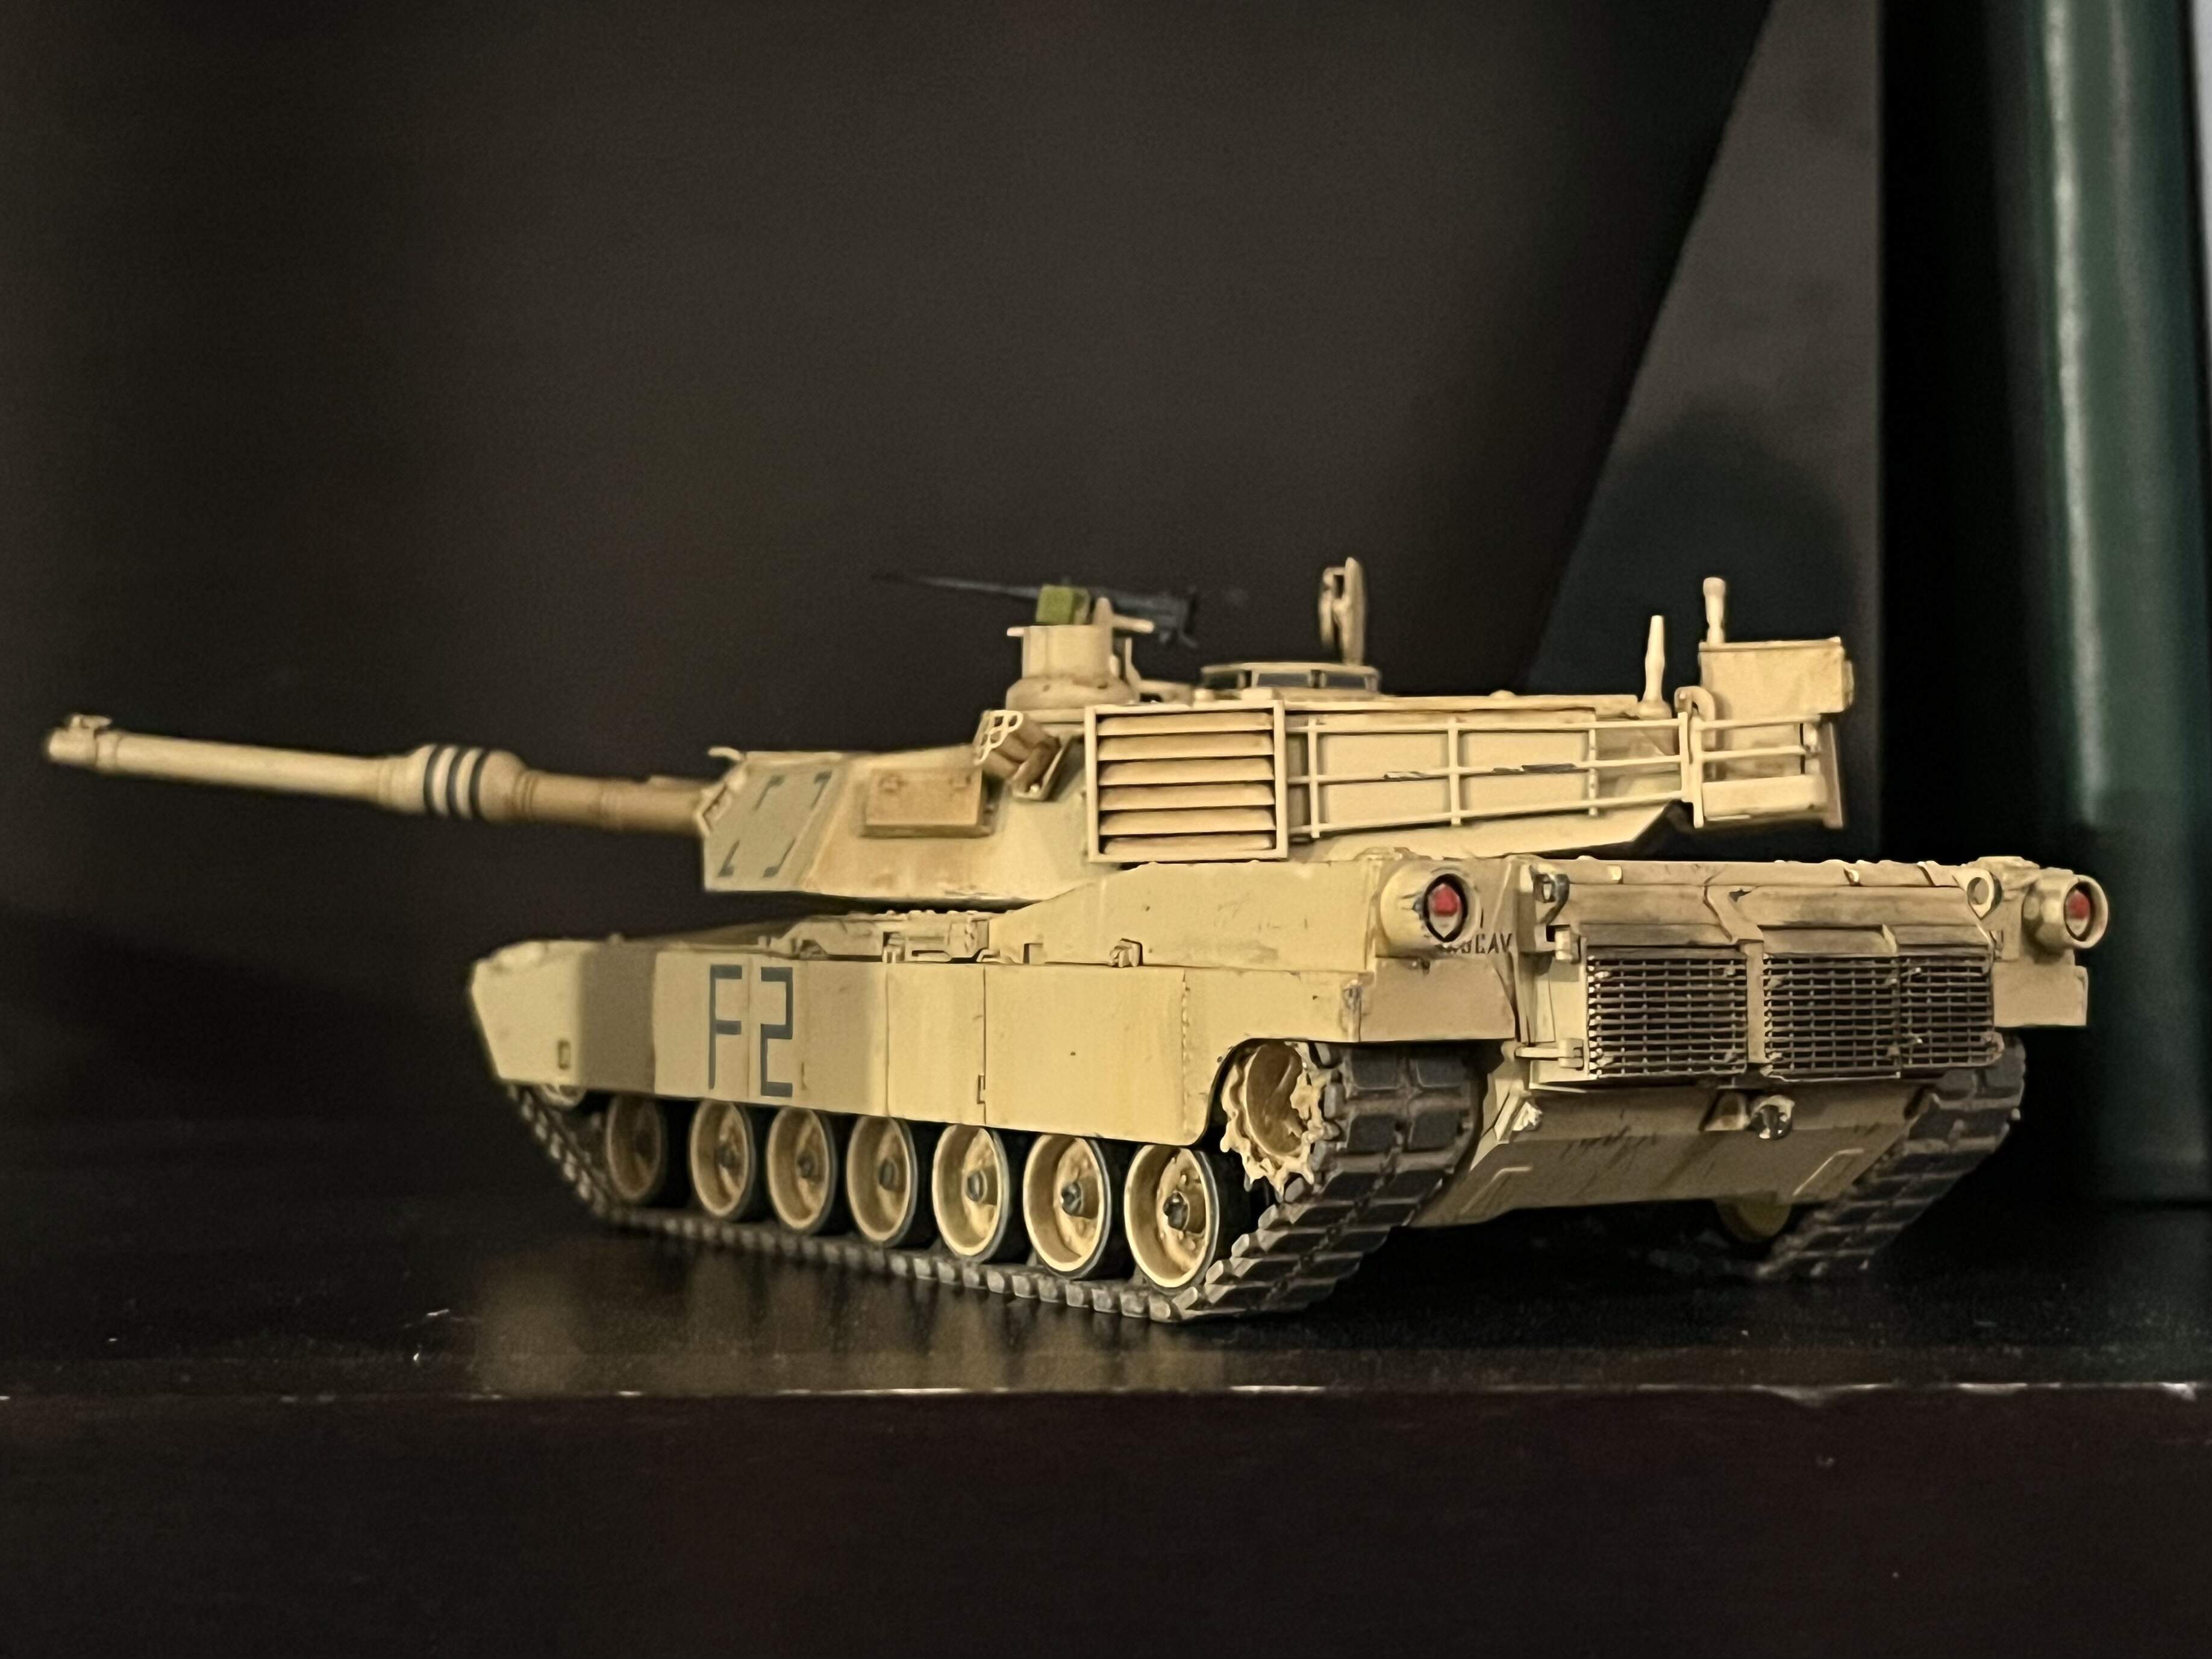
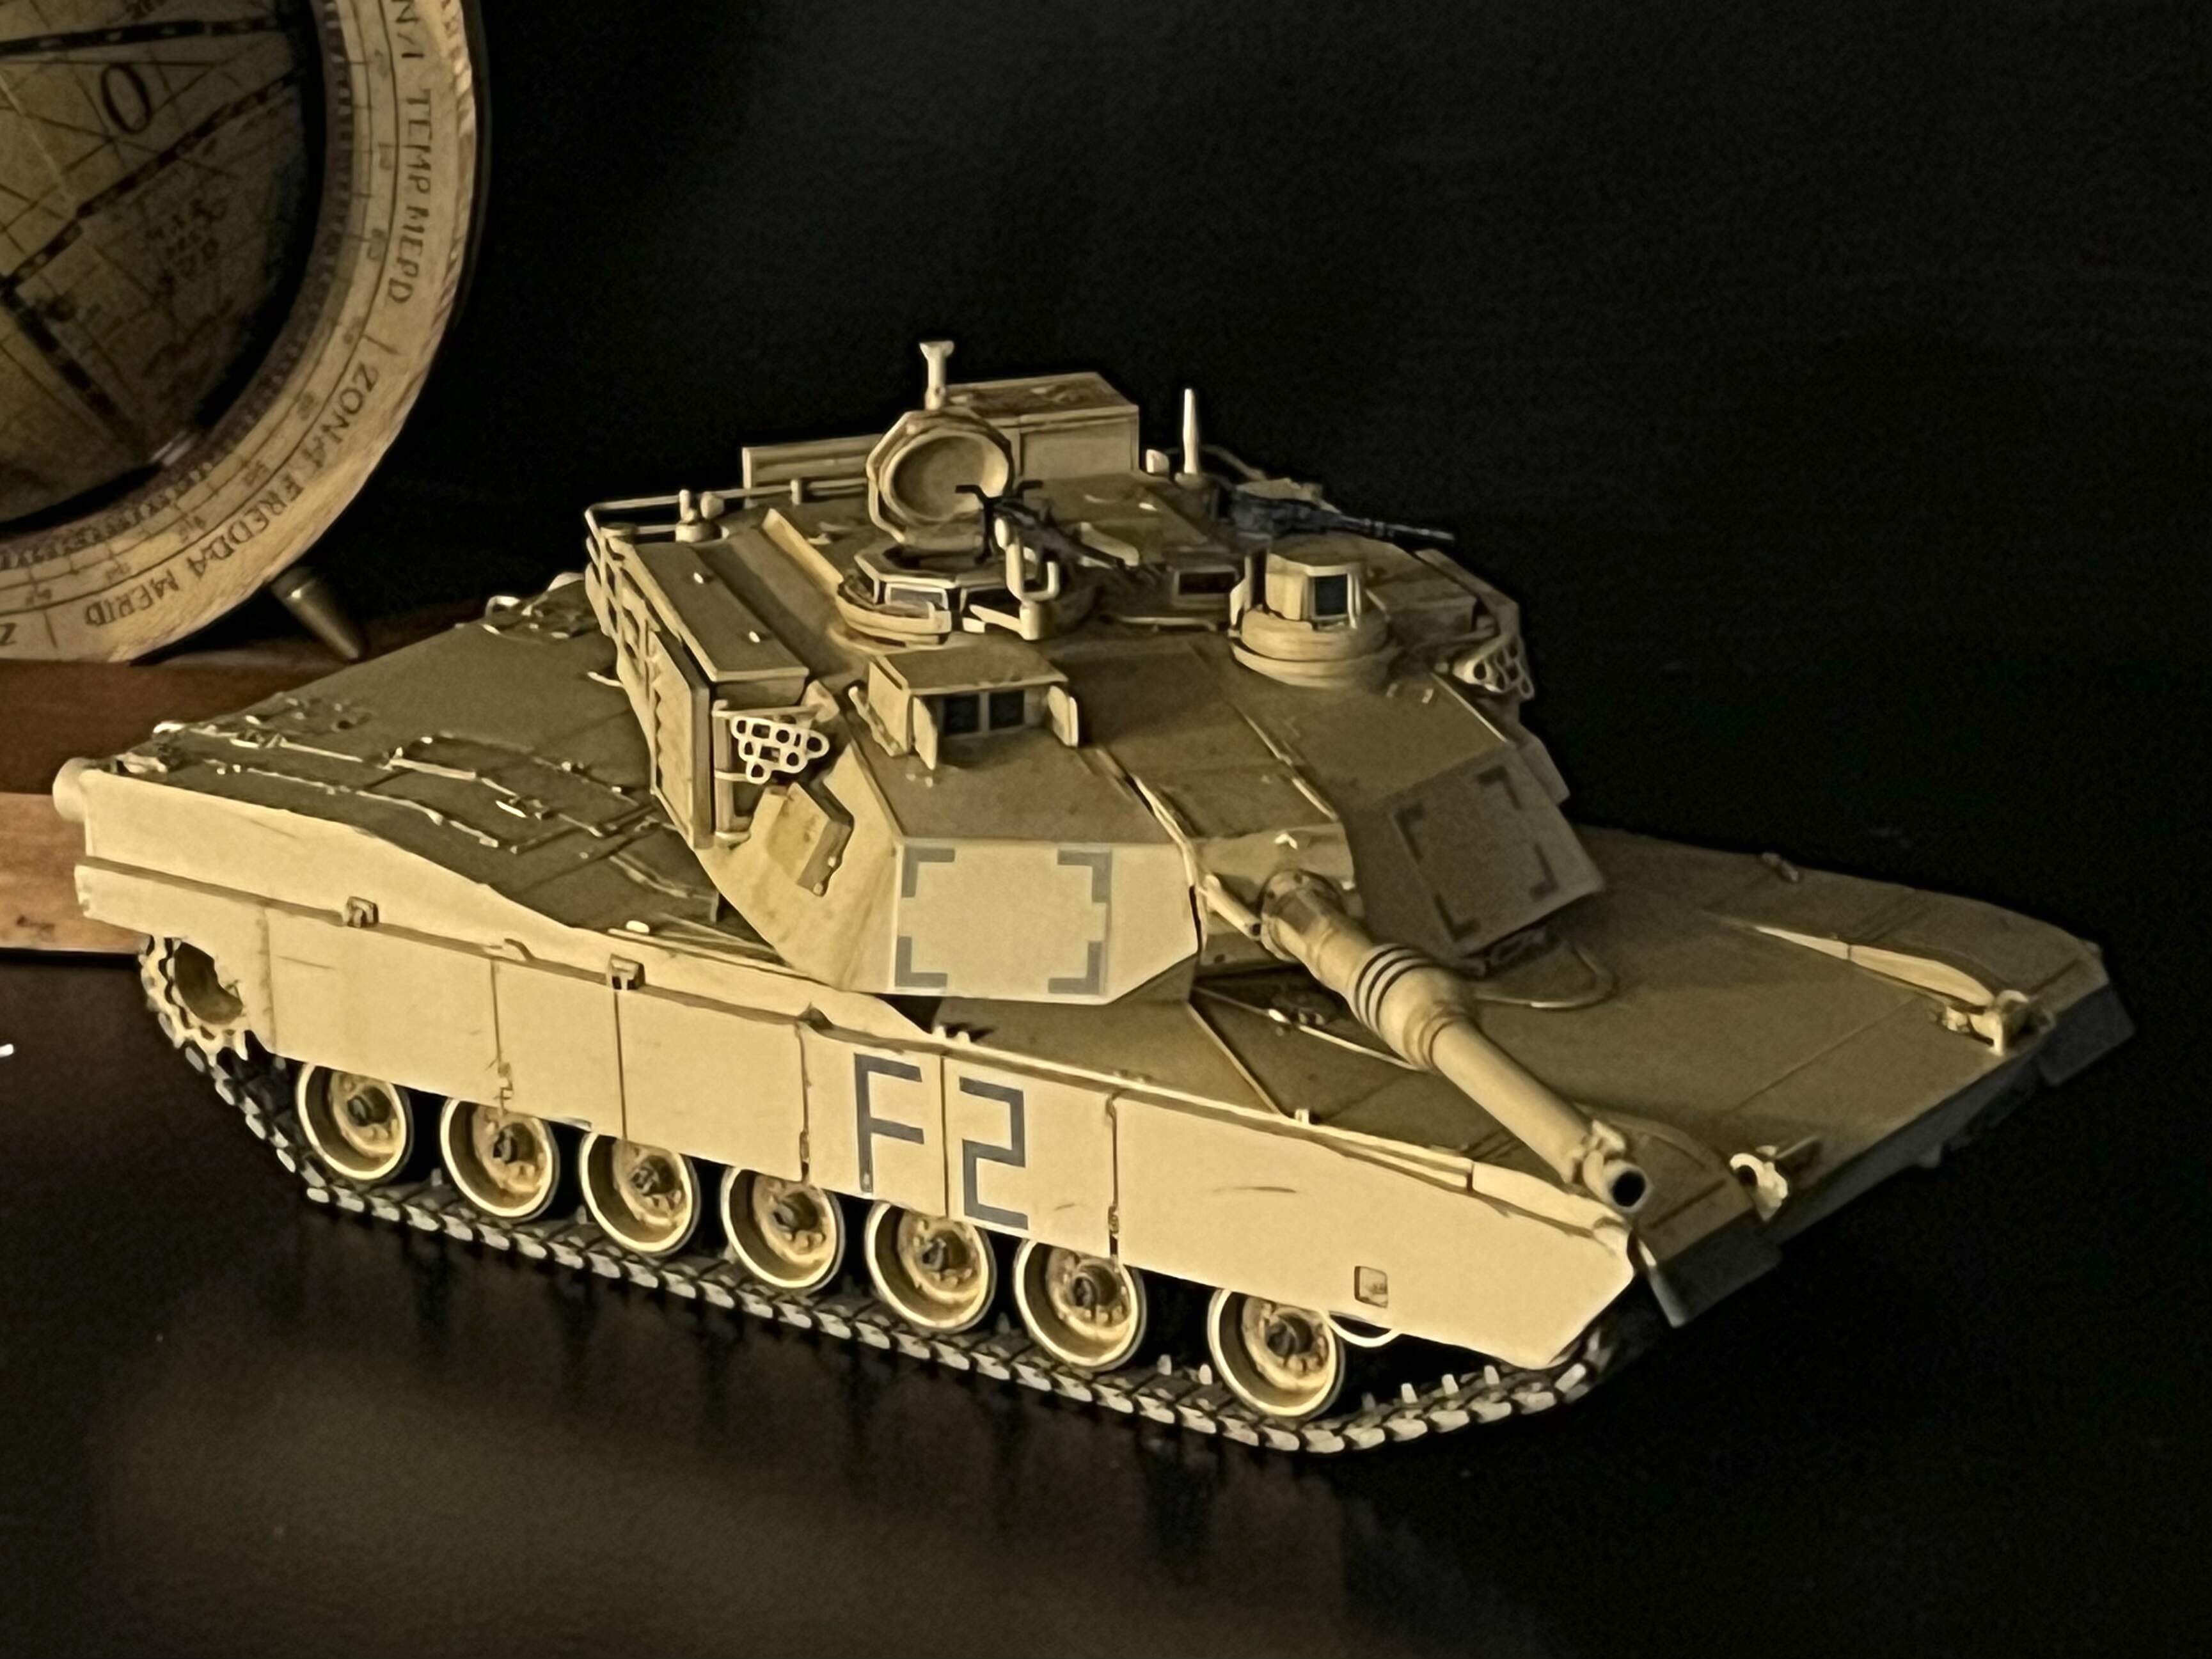
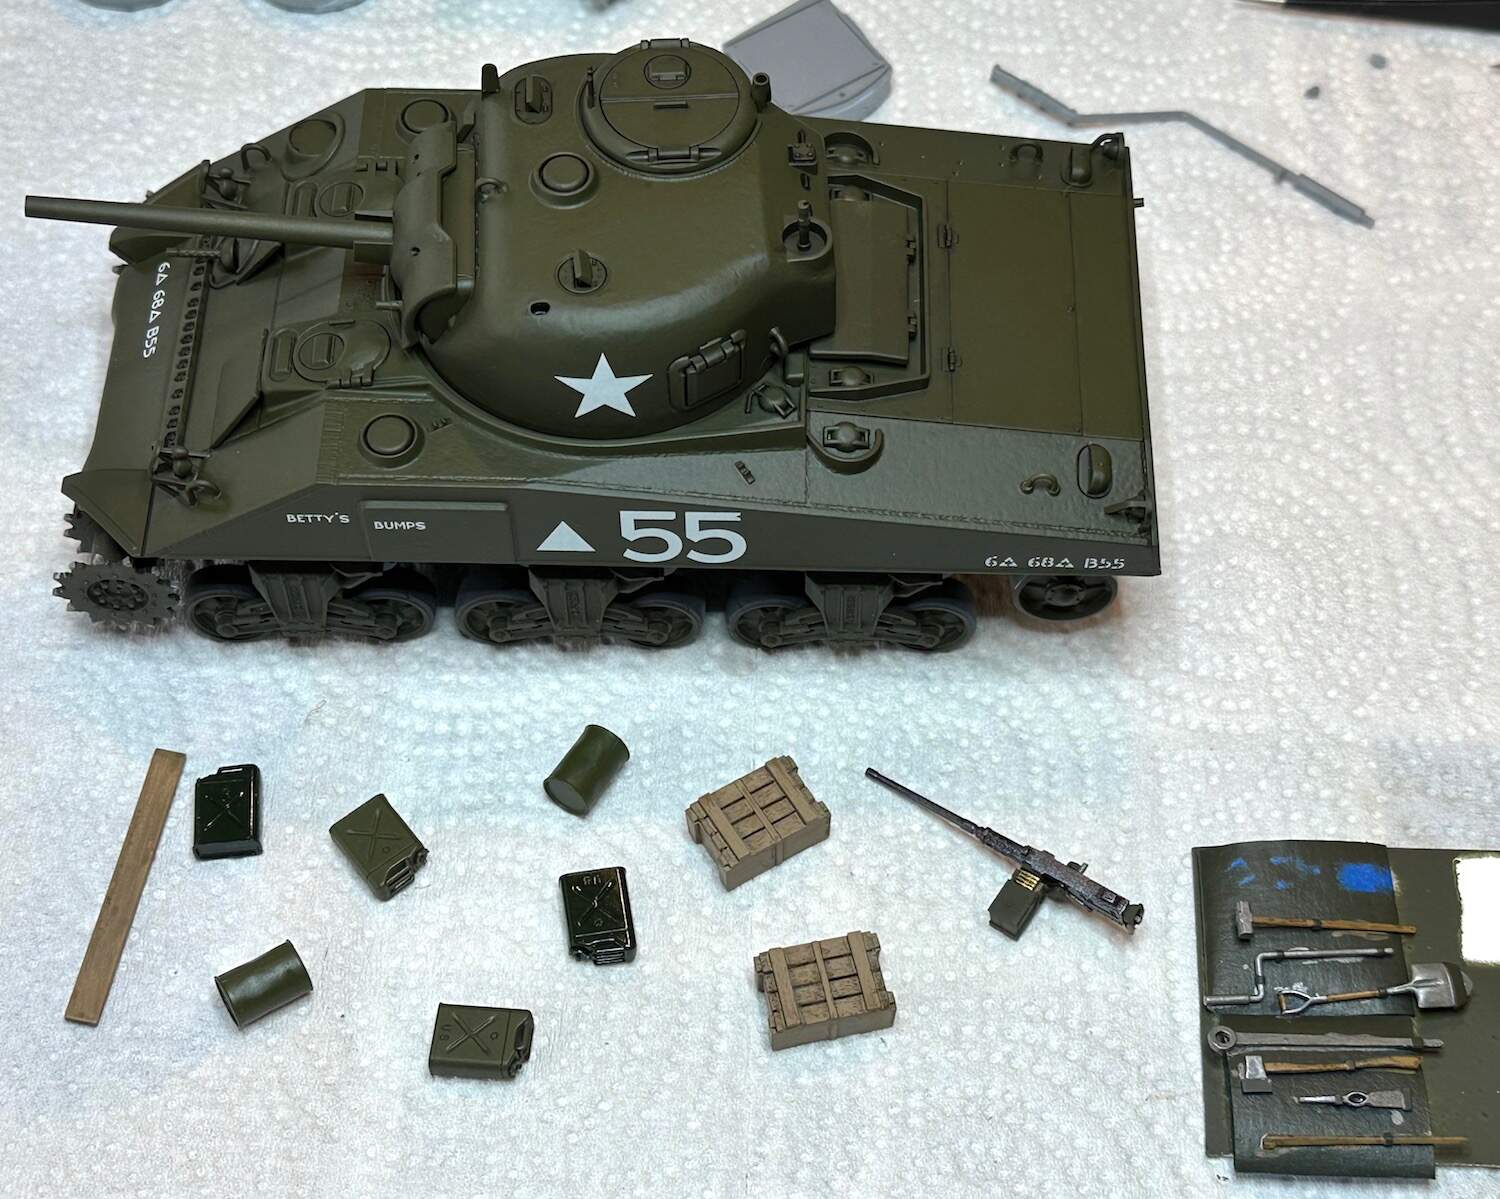
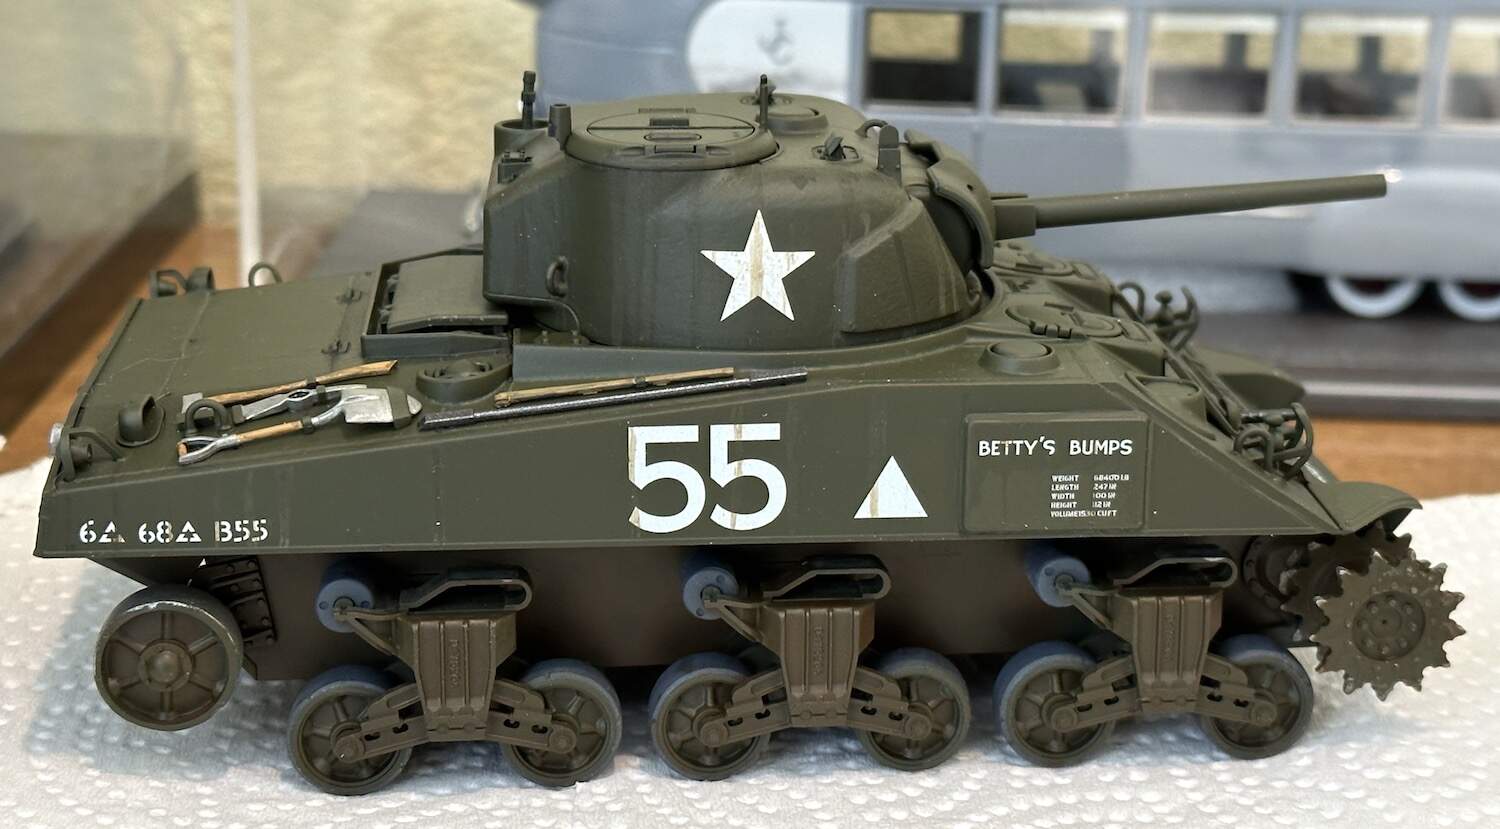
I got more work done on the Tamiya M4. I glossed the parts and gave them a pin wash then flatted it again. Also, all of the tools, cans and other bits got some attention. Speaking of tools, I wonder if these shouldn’t be painted OD like the rest of the tank? When I was a kid in the 1960s we got many of our camping supplies from ARMY/NAVY stores which were still selling WW2 & Korean war surplus gear. Real GI stuff, not the cheap repops sold now. I remember the folding shovels were painted OD, not the way the kit instructions say to paint the tools now. A bit of research on this might be worthwhile for the next build.
I have decided NOT to box in the hollow sponsons on this model. The project is too far along to want to mess up what is done now. This kit came with another “complete” M4 kit. I found out later that whoever consolidated his collection ditched all the parts he did not think he needed. This is most unfortunate as I needed some of those parts and worse, one essential part for any build was missing. It is the gun mount for the front of the turret, the fixed one that is under the moving shield. If I can find one of those I can build another M4. if not, I’ll just move on to another project and surplus the second kit to someone else. Does anybody have a spare?
Paul
Paul have you thought about scratch building the part? Use the one you have as a template for the outer frame size. Cutting a couple of thin pieces of styrene to shape and drilling the holes to accept the bolt heads on one, and gluing that over the second piece will give you backing for the bolt to stick to.
Another piece of styrene curved with some 'half circle" pieces to help keep the shape and fill out the ends would be strong enough. Making some smaller half circles to step down the sides and a little putty along the edges of those to smooth the graduation.
The holes in the original are to allow for movement in the kit outer mantlet parts. You just need holes where the gun barrel, etc are.
Thanks for the thought. it certainly could be done if there were some good reason to go to the bother. I do not consider this second kit as a terrific priority as there are already better Sherman kits in stock and ready to build once they are located in storage.
The method of construction you detailed seems practical enough. It would involve some real model building, not just assembling bits.
Unless someone comes up with the part I’ll just save the kit for some special build in the future or pass it on to someone else.
Paul
Current Status
Touch ups tomorrow, if passes inspection, wash, dry over weekend start painting on Monday.
Progess Report Last Ten Days
Looks fantastic Wade. Starting to look the business.
The details on your Panther are just wonderful. I would be very proud if I had built it.
Paul
@hudson29 Paul, thank you very much!
That’s very kind and means a great deal to me, especially with this ones ~20 years on the shelf of shame.
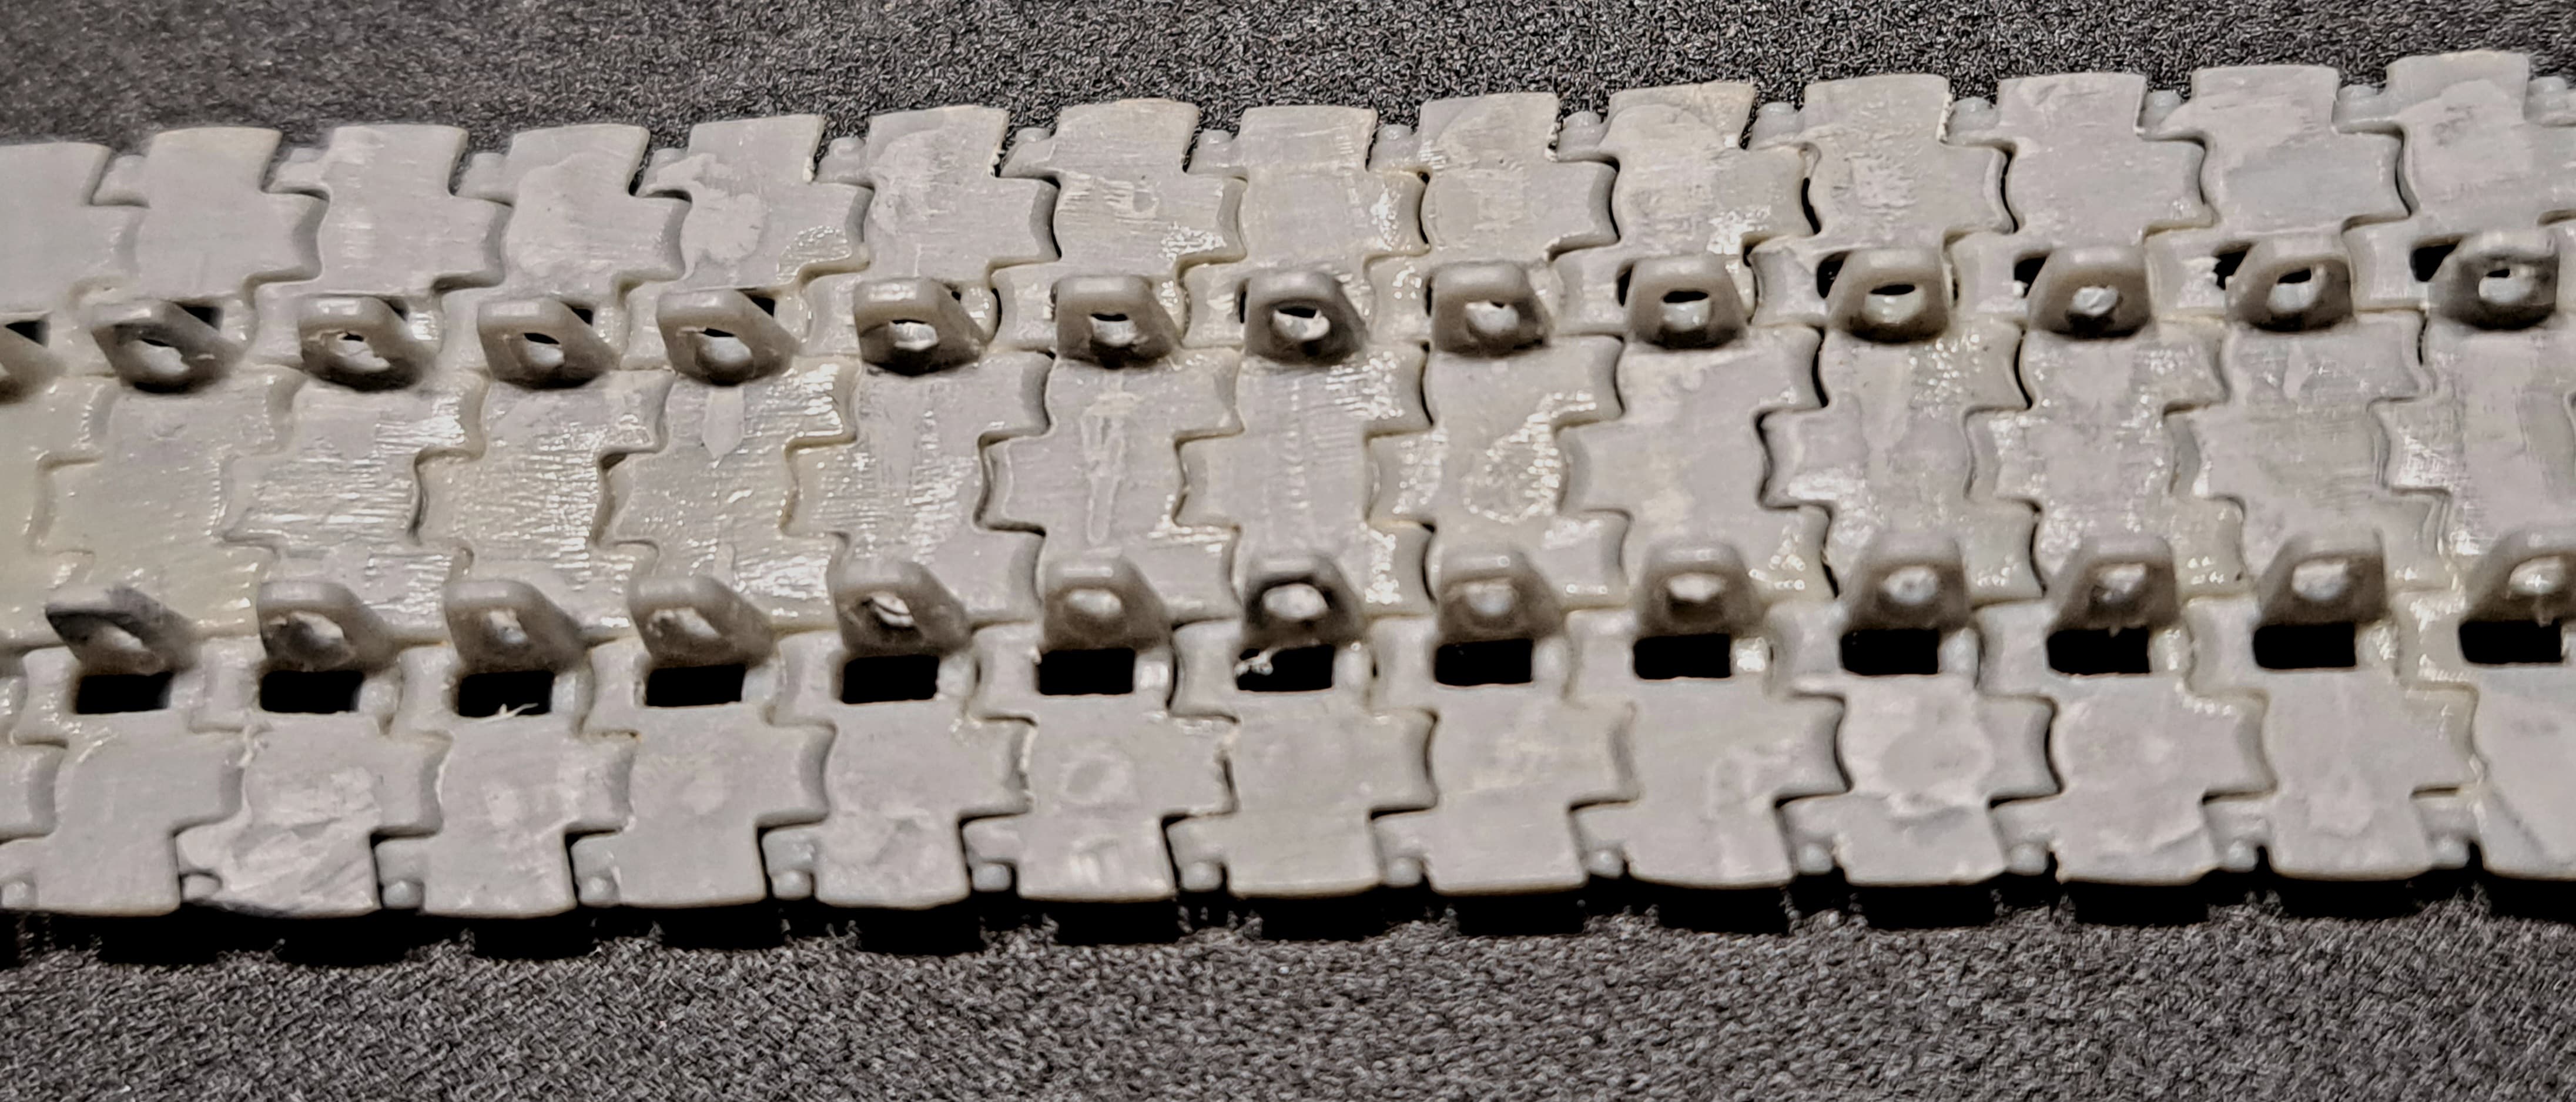
I’m hoping the 650+ fixed punch marks on the track inside faces won’t show when painted. Hand drilled and filed out guide teeth to make them hollow as these are not “magic tracks” lol. Still have some touch up and repairs to make on the tracks.
Oy Vey, that’s a lot of ejector pins to fill. THe should disappear under a coat of paint and mud. ![]()
I did a Panther a few years ago and built a set of Fruil metal tracks for it. They are a lot of work also but really look the part. Let’s hope yours look as nice as the rest of the tank.
Paul
Yep. Did the same on my tracks all those years ago. My club mates still question my sanity!
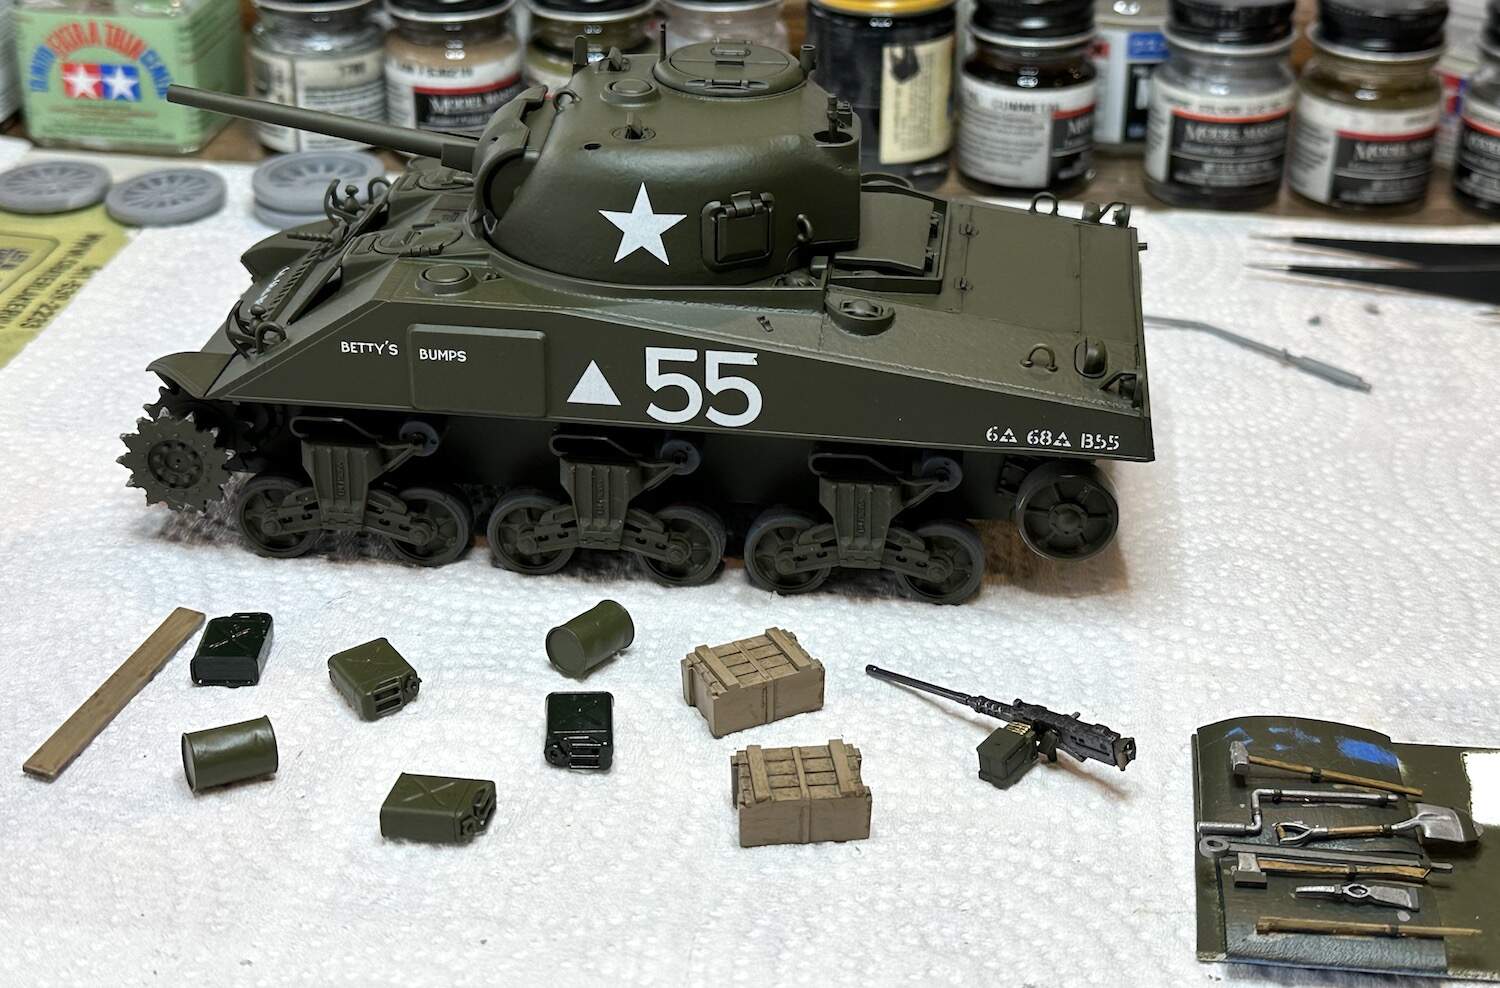
The old Tamiya Sherman got its tools mounted and a start on dirtying it up. After sitting uncompleted for a decade or so its at least making progress.
Paul
I have a soft spot for those old Tamiya Shermans. Looking good.