Time for a revisit to this methinks:
6 Likes
I think that horse bolted many many moons ago for most of us lol …
5 Likes
I know, I know! So many models, so little time…
(and such pi** poor self discipline!)
3 Likes
Buying isn’t the issue because they can become like hen’s teeth later it’s starting a new one that is the issue. YMMV.
2 Likes
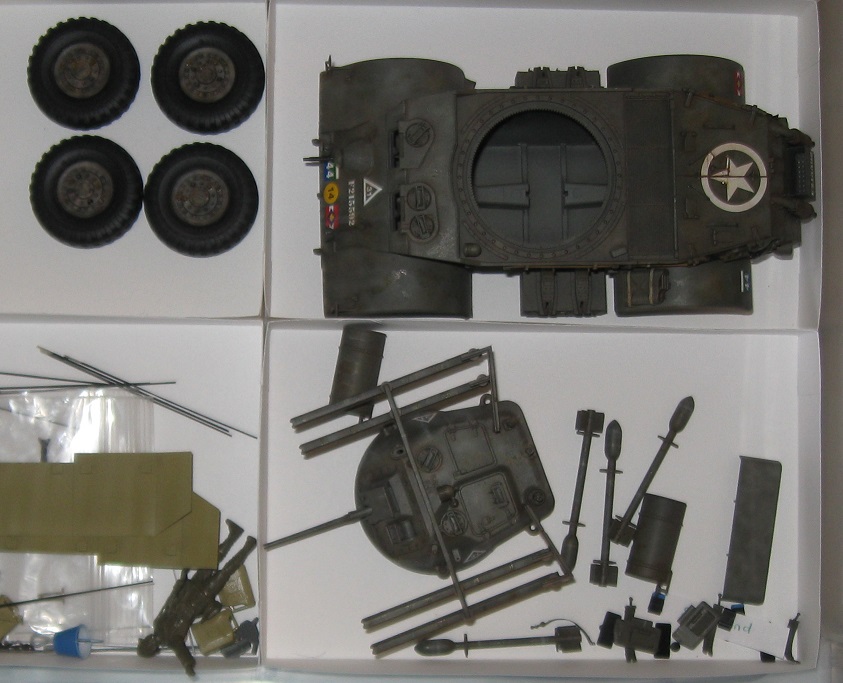
With 12 in process of painting & 1 building, its the last steps with decals that always slow the process for me.
2 Likes
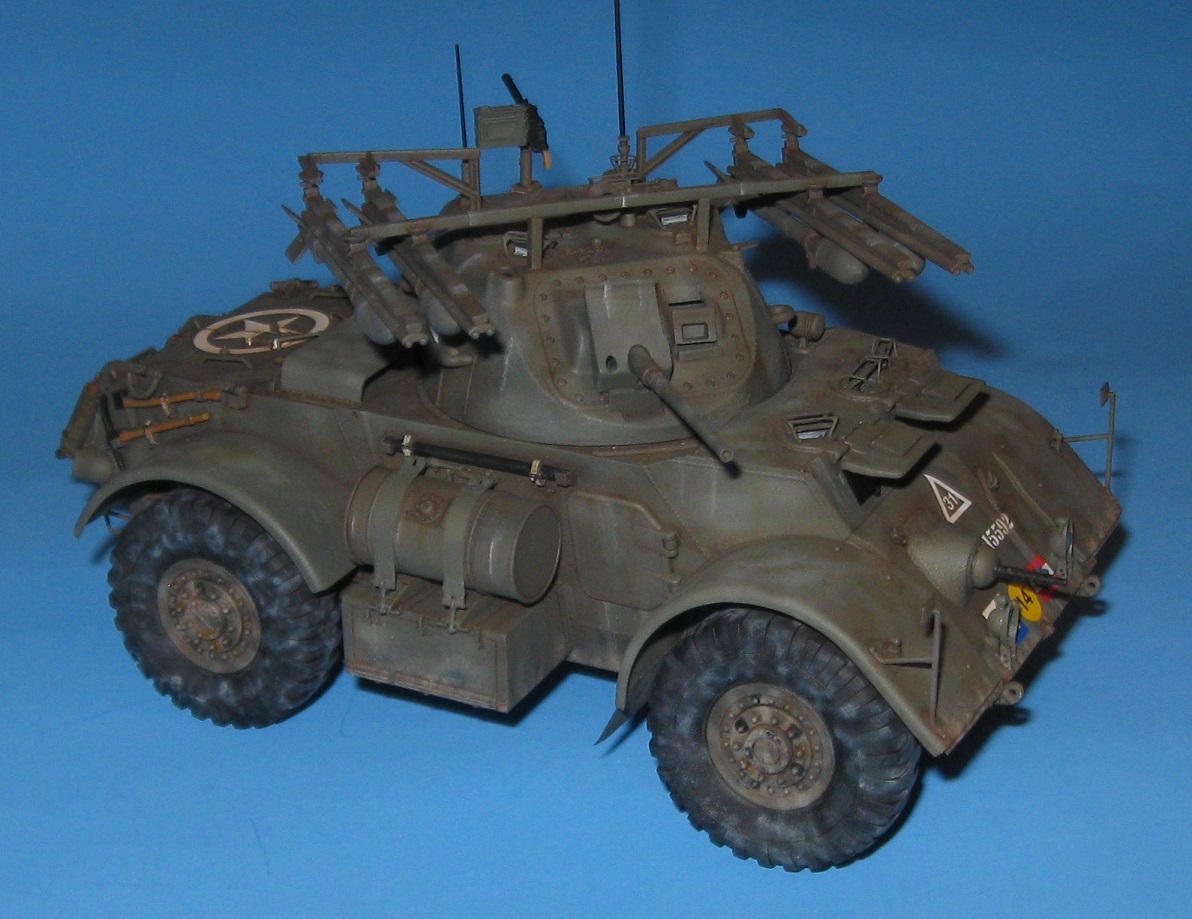
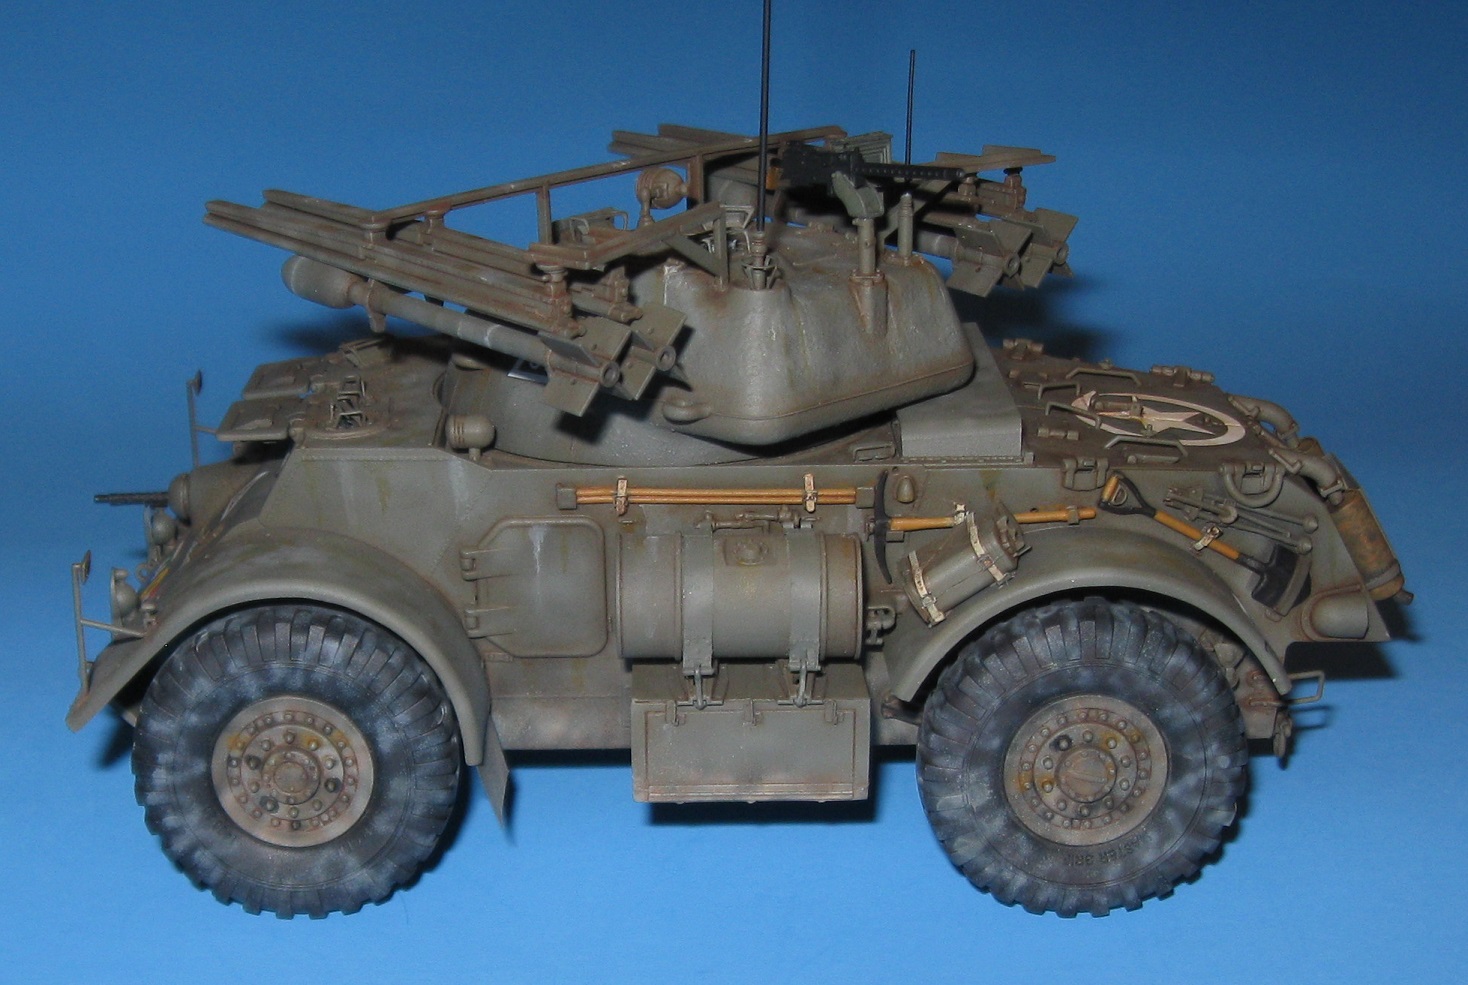
The Canadian staghound is now very close to the finish line. With the exception of the star on the engine deck, the decals were easy to apply. I do not have any recent experience with oil paints so used them carefully and with great restraint over a series of days. After the oil paints dry I will give the model another clear coat, put it together, and resolve any remaining issues.
I really like this vehicle so kept the weathering very restrained, spending a fair number of hours pushing around tiny amounts of paint. For better or worse, the tires remain perfectly black.
6 Likes
You have done a great job Doug. Tamiya does a ‘Rubber Black’ paint that is a great tyre colour. A grey brown tinge that works well. Have you thought of a very thin earthy colour wash to tone down the black? Just enough to add a film of colour on the outside face and a build up in the treads?
4 Likes
Thank you! I am feeling more positive about this model than the previous three.
Now that you mention it, many years ago, I recall using an enamel color called rubber black or something very similar. I know it is considered best practice to use a dark gray or dark brown gray for tires but, given my limited selection of acrylic paints, I went with pure black. You are right. I should have added some gray or brown to the black. On my Pak 40, I over sprayed black with bone white and tusk cream to break things up, which produced an interesting result. I’ll try the same thing with the staghound tires, but use a brown black or very dark gray. That should break things up a bit.
2 Likes
Well…I have inflicted enough mischief on this poor model and cal it done. ![]() golf clap
golf clap
The paint job turned out rather wonky. The tires are particularly crazy but…now I know not to do that again.
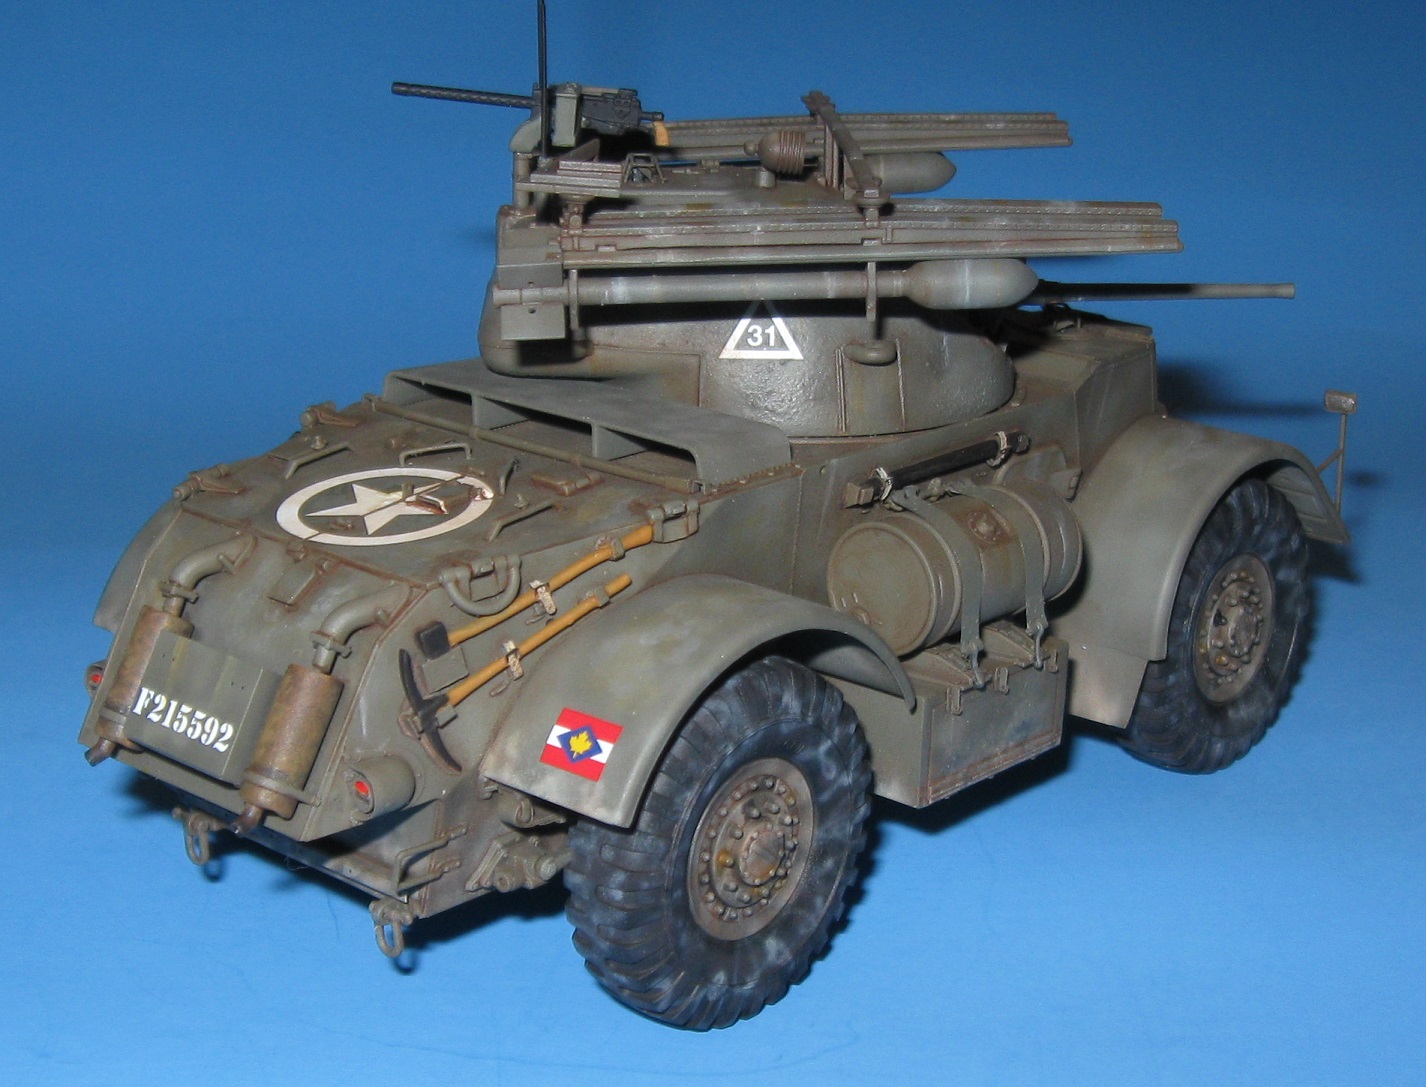
Vallejo primer caused many problems, right to the very end, because it comes away in ragged chips and sheets when sanded or scraped. This made final assembly extremely difficult. In contrast, Vallejo acrylic paints are very forgiving.
Inexperience led to some problems during final assembly, especially with regards the fuel tanks and periscopes. In hindsight, I made things much more difficult than they needed to be.
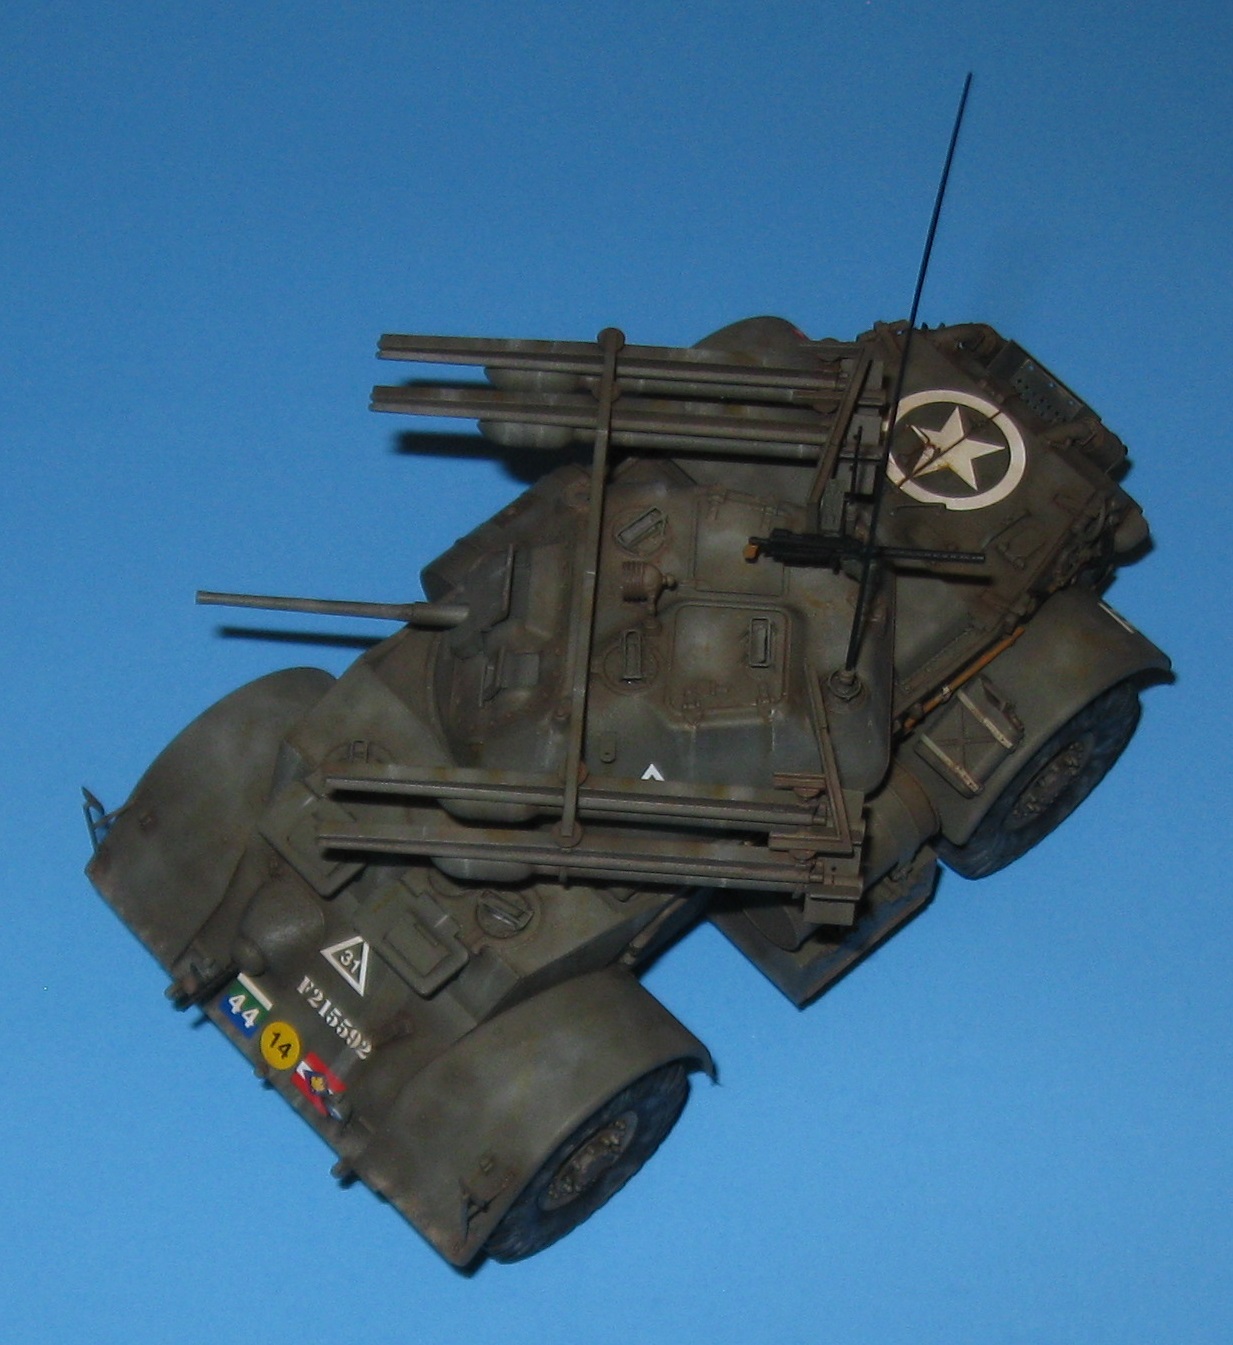
Oil paints did not go to plan. They look very different under a matte clear coat.
Thank you for allowing me to participate in this campaign! ![]() It served as strong motivation to finish a very old project. I learned many valuable lessons along the way and that is worth a measure of sorrow.
It served as strong motivation to finish a very old project. I learned many valuable lessons along the way and that is worth a measure of sorrow.
Right. So… Can I go for two?

10 Likes
Great to see this one finally done Doug. You have done a great job on it. I’m glad you enjoyed the group build. The motivation, support and learnings along the way are some of the main reasons group builds exist and I an very pleased you benefited from them.
You only get one badge, but you always get more support when you participate with more than one build.
2 Likes
Thank you. It is fun chasing the many skilled model builders who frequent these forums, including yourself.
Hahaha! I added a ‘2’ to the badge in my previous post. My thought was to increase visibility of this campaign and perhaps encourage more people to join in.
…
So…I originally intended to enter a Brummbar in this campaign but could not find the apron plates.
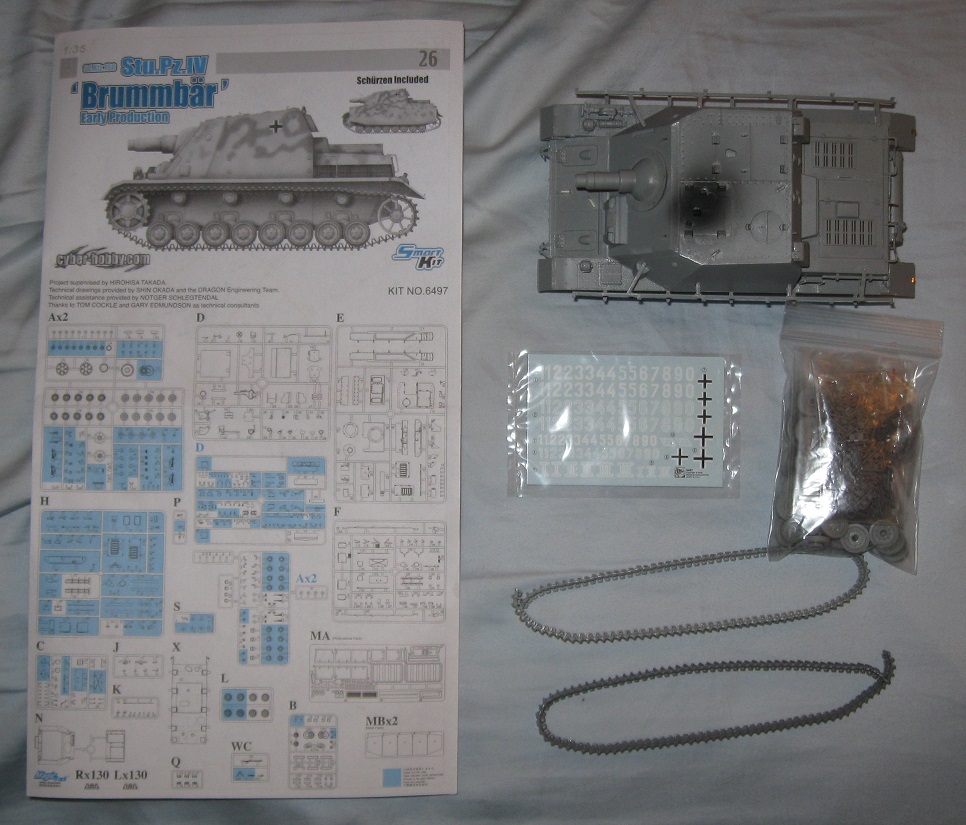
The decal options include one vehicle without apron plates so…let’s do that!
My goals for this model are to complete it in two weeks, spray good looking squiggle camouflage, and use a different algorithm for weathering. My air brush tends to misbehave so spraying squiggle camouflage will be a real challenge.
Synchronize watches…
3 Likes
The schurtzen are not hard to make from 0.20 thou evergreen card stock and some bent wire. The dragon ones were aluminium I think. They were a pain to build on my panzer IV so I just scratch built replacements.
2 Likes
Yeah. I did that not long ago for a Dragon Sturmgeschutz IV. When placed on the model, the apron plates did not line up in a realistic manner and looked pretty bad.
In my opinion, apron plates look much better when molded as a single piece per side. When I tried to make some that way and scribe panel lines into very thin card stock, the lines ruined the structural integrity of the long panel. Also, when trying to place the long apron plate run on the model, lining up all the hooks proved impossible.
I also left the apron plates off a recently completed Jagdpanzer IV. There must be a way but I have yet to find it.
An old trick: Place the armour plate face down on the desk. Place the model sideways on it so the mounting rail is in the right place, then push Blu-Tac on the ends of the rail and onto the plate to hold it in place. You may need to support the model along the wheels to keep it at the right angle to the plate. Then get your hangers and place a bit of glue on the ends and place them over the points on the rails into position and let it all dry. Take off the blu-tac and slide the plates up and off for painting. Perfect fit when you put them back.
Started working on my Char B1 bis after I finished my “Hot out of the Molds” entry. after a 12 year rest in the box started working on the fenders.
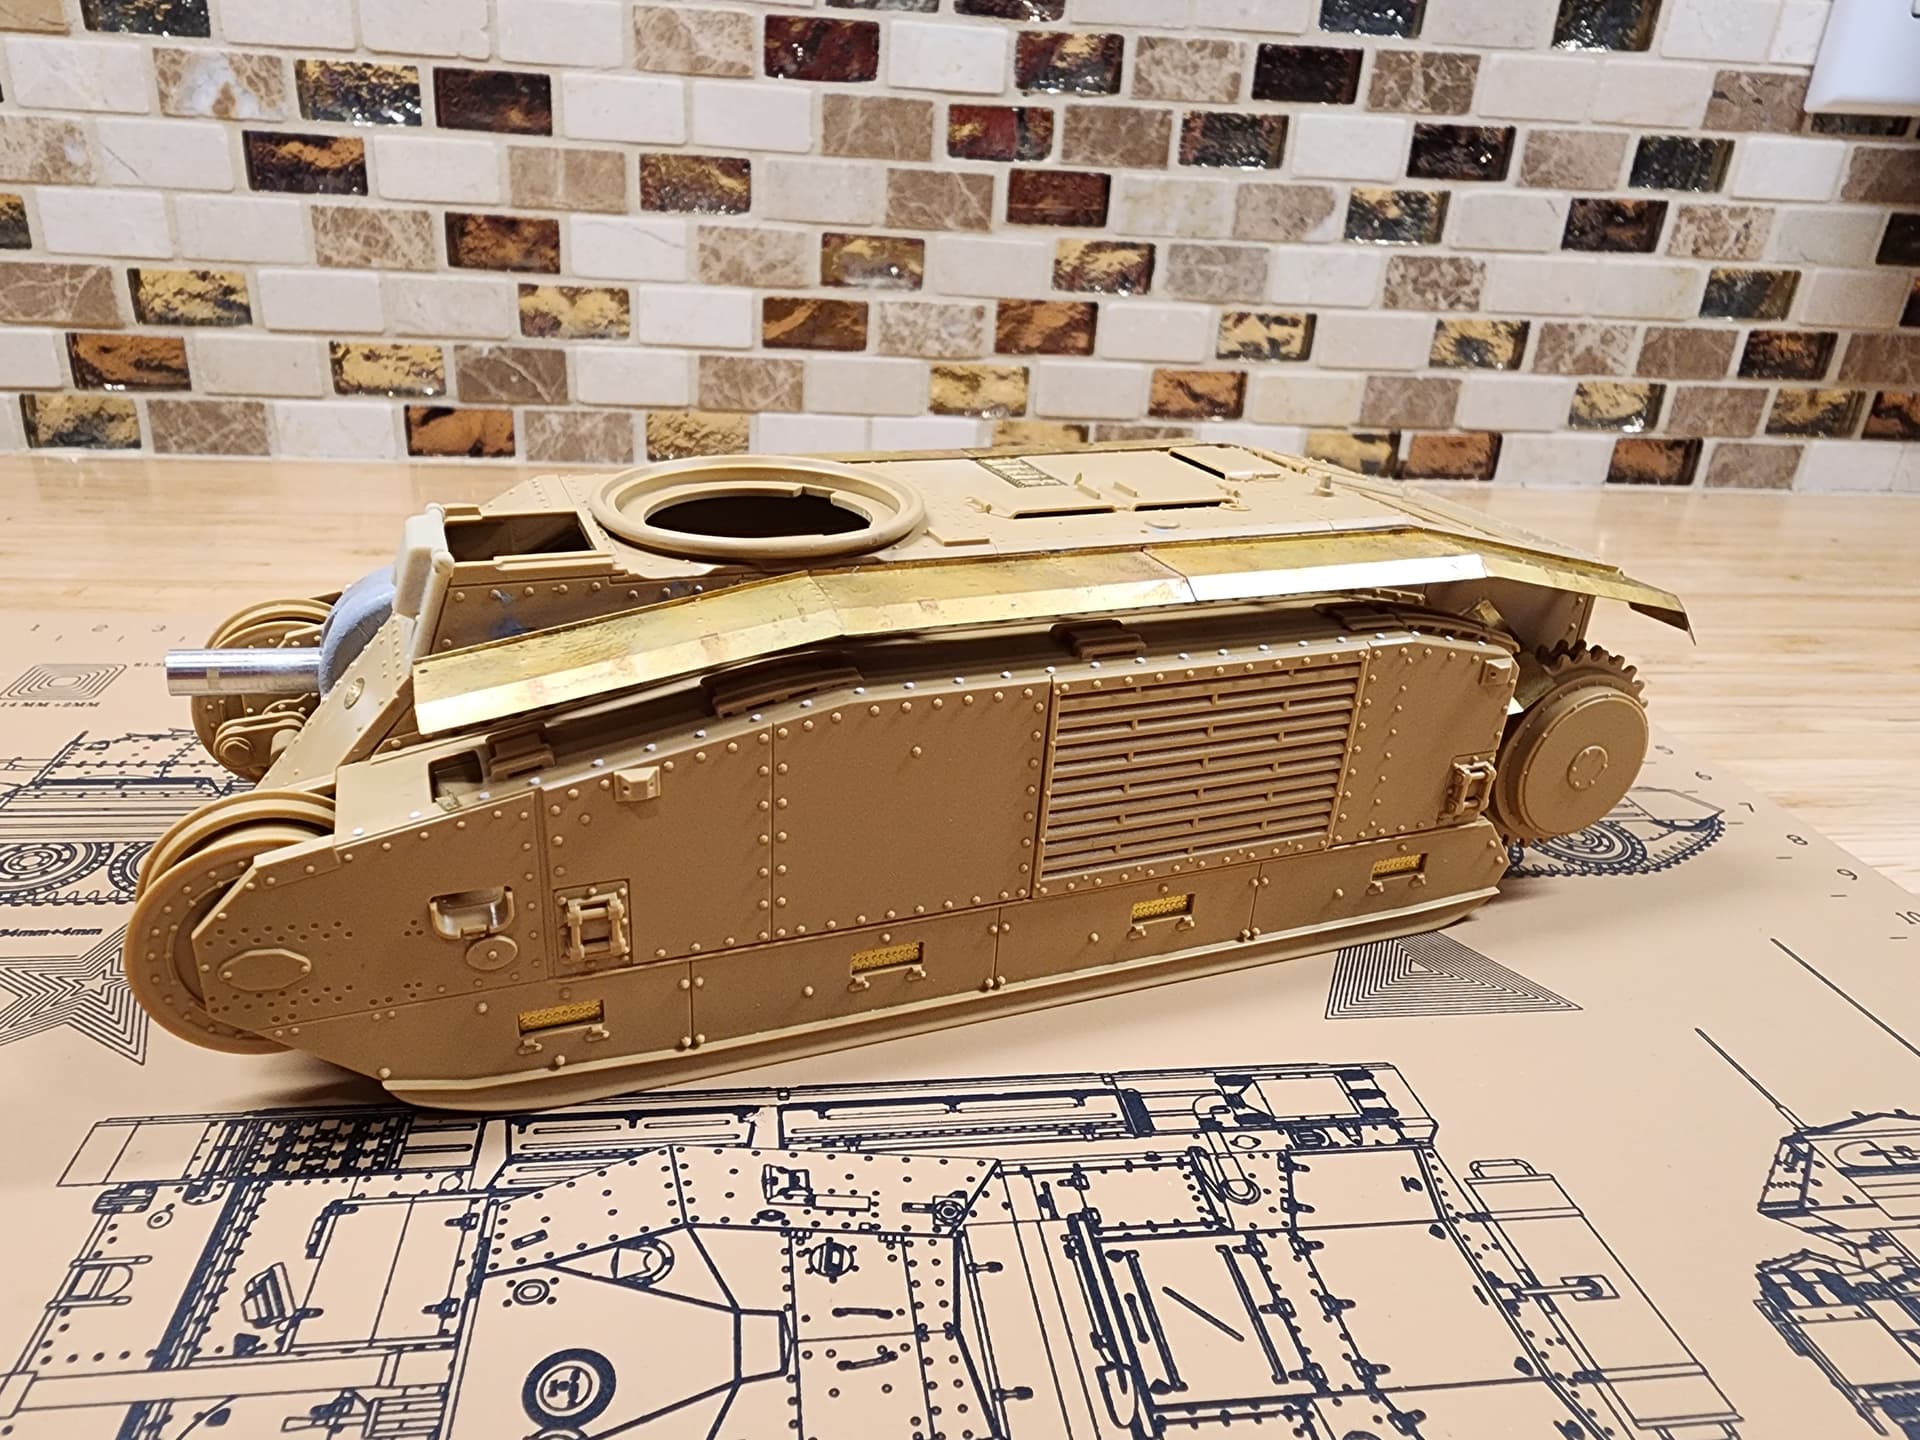
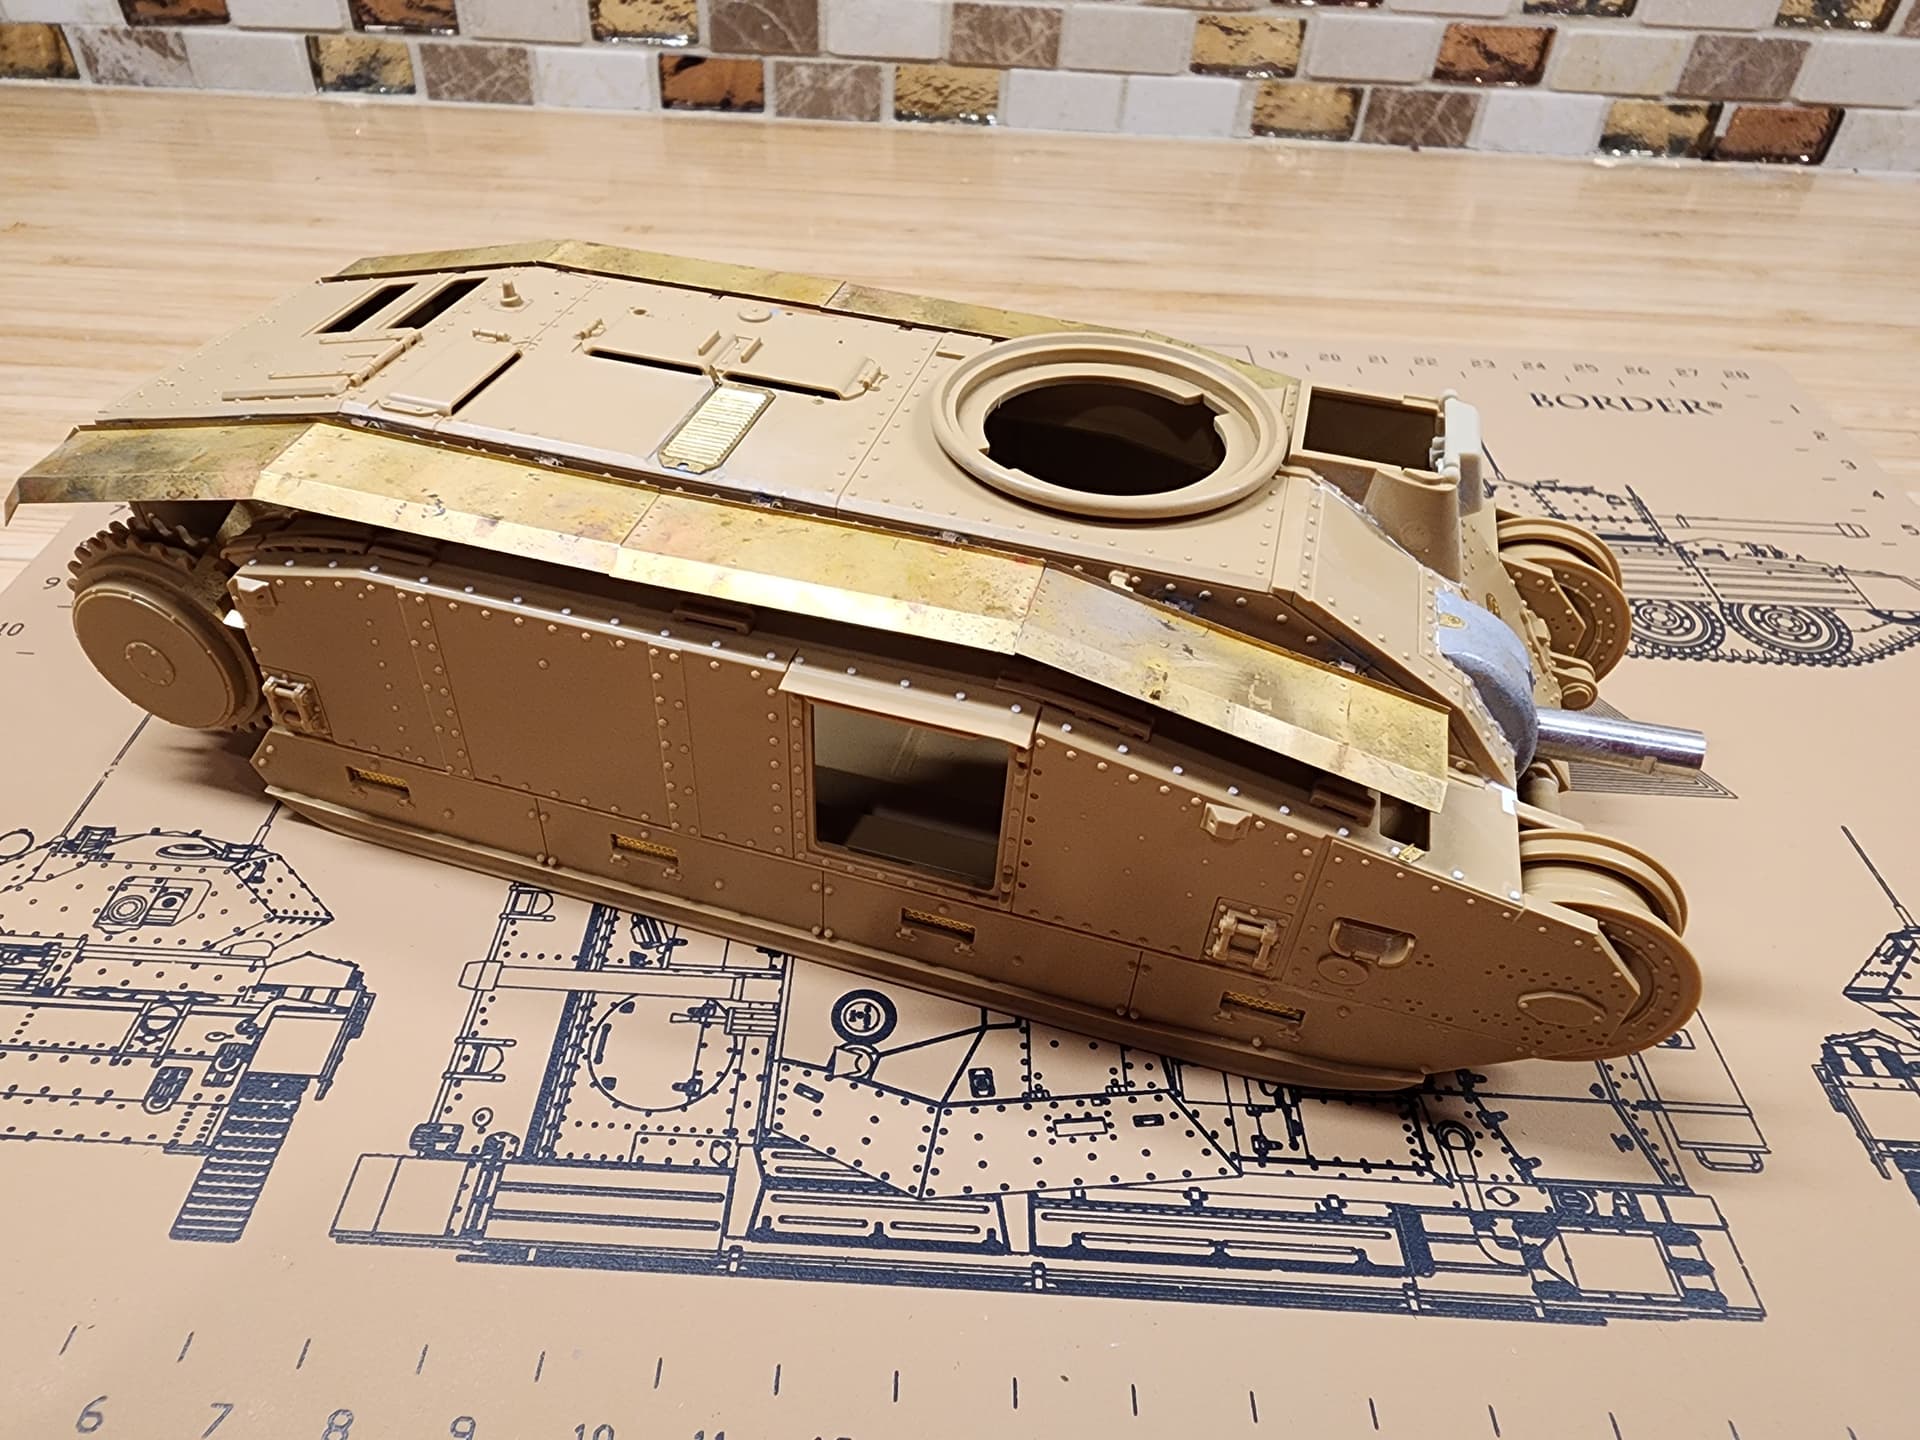
It took most of the day to solder and install the fenders. I wish that there were three sets to make because the second one was way easier to do!
6 Likes
I have one of those in the stockpile, along with the corresponding Voyager set. It is a beautiful model.
1 Like
I love the smell of primer in the morning. It smells like…two campaign models getting done. Well, actually, it smells a lot like Everclear but we do not share those stories with the children.
This time around, Badger Stylenze primer was used for everything. To save a bunch of time during assembly, all the glue points on road wheels, sprockets, idlers, and hull axles were masked off. Before applying a base coat, I will apply black paint by hand down into the engine grills to cover the brass. A scratch built return roller replaced one that went missing. Unfortunately, I still cannot track down the apron plates for the Brummbar.
The only worrisome hurdle remaining for the Brummbar will come tomorrow, when I attempt to paint very fine squiggle camouflage. My airbrush continues to have good days and bad days so things could get ugly. It may come down to the humidity.
2 Likes
Yesterday, in preparation for spraying squiggles on the Brummbar, I watched a number of videos on fine line airbrush work. According to the experts, any obstruction in the air brush will impede fine line work so I gave my air brush a more thorough cleaning than usual. Late at night, after the temperature dropped and the humidity rose, I practiced mixing thin paint and spraying fine lines on white card stock. After doing that for most of an hour I decided to go for it.
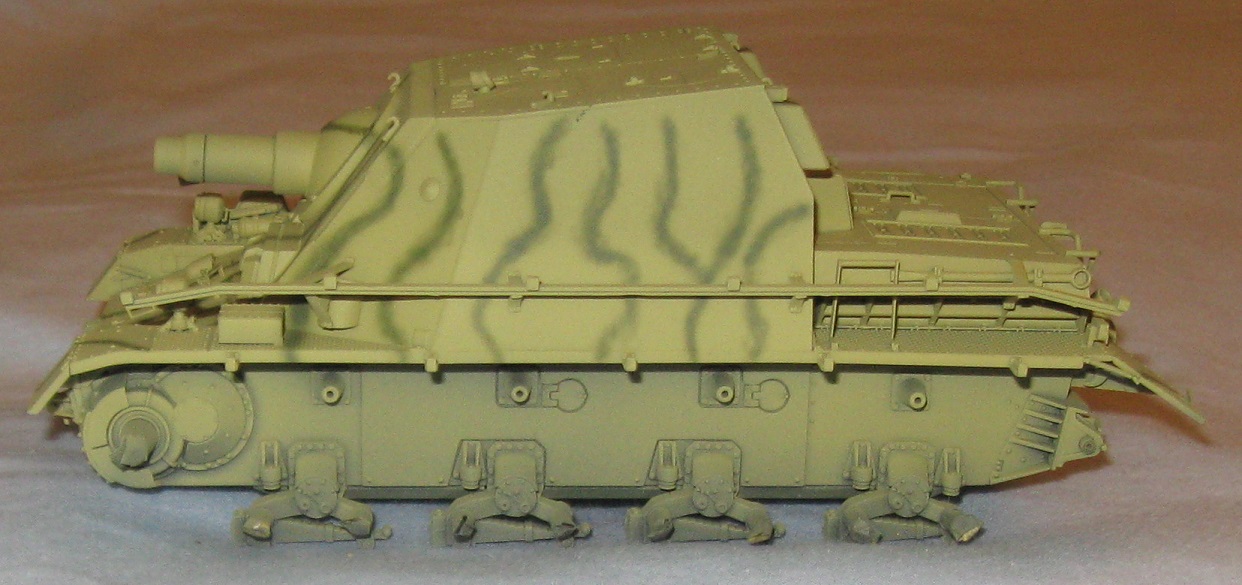
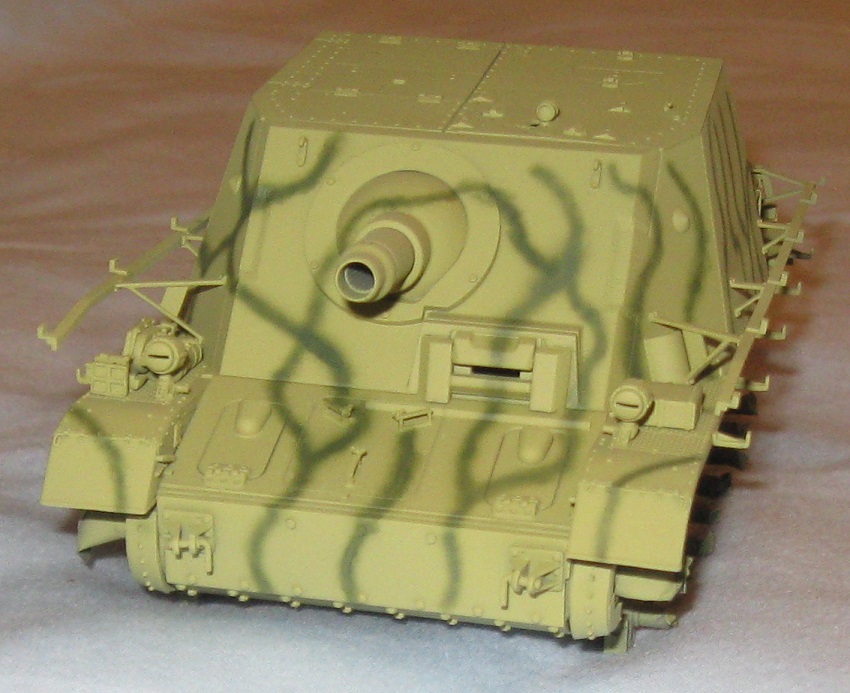
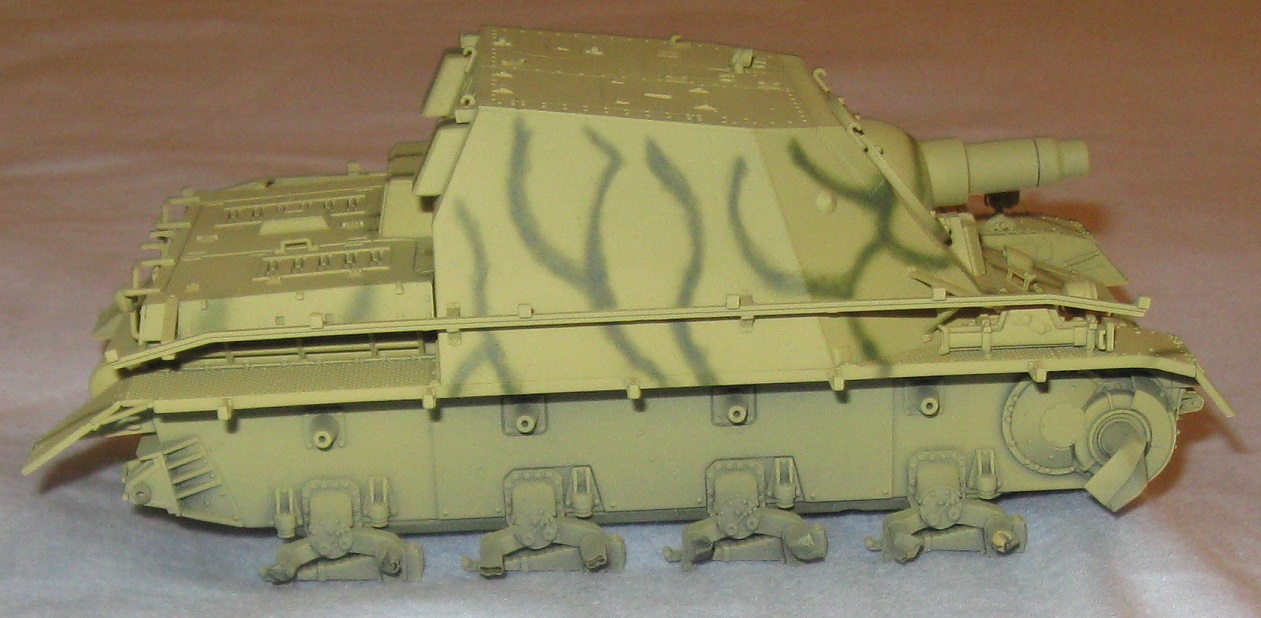
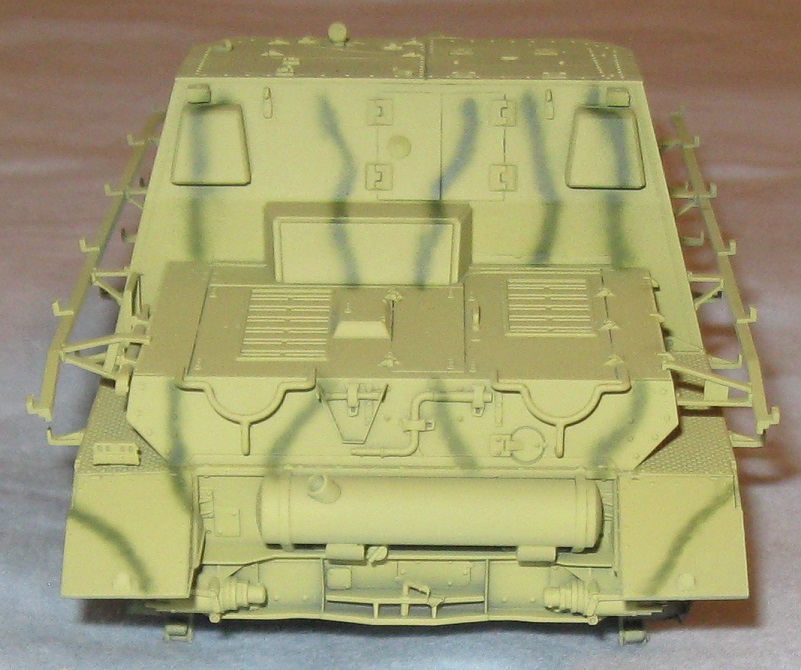
I would really like some feedback on this. The camouflage scheme calls for brown over green squiggles. I stopped after spraying the green because I was really tired and my back was on fire. Does this look right? Should the squiggles also cover the top of the fighting compartment and engine deck? For some reason, I got it into my head that the squiggles should not be on the upper surfaces.
Negative feedback is fine. I can always put on another coat of yellow ocher and start over.
Please ignore everything below the fenders. I am trying a different painting algorithm and could not get to those areas in one paint session. Painting the squiggles was very time consuming and intense.
4 Likes
Remember that most of the camouflage painting was done by fieldcrews with rudimentary equipment and even less knowledge of camouflage. So your squiggles look good, as if field applied. I would suggest extending them over the top, barrel and enginebay though.
Then do the same with the brown.
2 Likes