First steps toward completion have been made by means of a statusanalysis.
There are several issues I have to tackle.
issue 1; the tracks do not fit the AM metal idlers at all. I have no alternatives for either in my possession, so will have to make them fit. Also parts of the tracks are missing.
Issue nr.2; I had to literally dust the vehicle off and had to remove the by the previous tennant (spider) left behind “furniture”. That was easily tackled without adding more damages.
Issue nr.3; badly misaligned wheels. No idea whether that was caused by sloppiness during construction or decade long storage in a closed, plastic container.
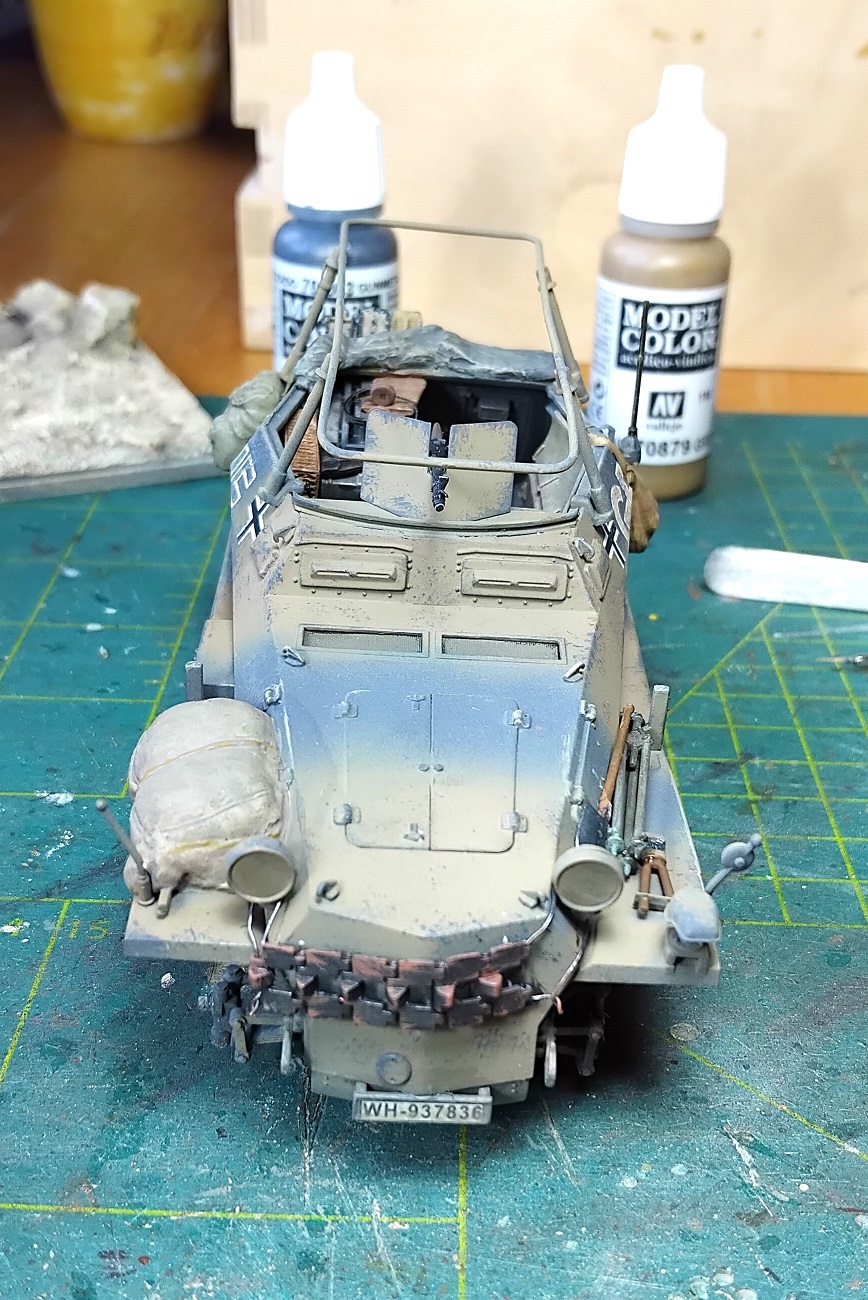
Issue nr.5: istalled, but unpainted wiring on the radioset. In order to increase accessibility I removed the rear tarp (old Tamiya), which, as it turned out, was made to fit by adding putty to the underside.
Quite a few things have been fixed by now; the tracks, which had to made to fit around the sprocket by removing teeth on the inside, the front wheels, a number of damages and missing parts were taken care of and I even ripped off the roof to slip in one of those old Vinyl Dragon 251-drivers from the sparesbox.
I also added gear and straps and complemented the figures.
Oh my… I forgot to do updates!
I gave the vehicle a new coat of paint and I have been thinking about that alot.
I think the pictures of the real thing show 4 layers; a dark one (probably/possibly bleached or dusty panzergrau), a camouflage layer (some form of sand/earth from either german, Italian or British stock), a layer with applied mud/sand/water mixture, topped off with the accumulated dust.
That all also shows a lot of wear. So…
Then there were the decals; old, thick and brittle. They have these small black markings, which I assumed are meant to be cut, so that the decals will follow the contours and angles of the body. Said and done… but where to apply the crosses???
The decals sit way too far to the front! So I had to remove them. Luckily I found a spare set in the sparesbox and I used those. My enthusiasm in adding the bags meant that I had to apply the decals around said obstacles.
And the next round!
I am using a foe me new technique for chipping and wear; a sponge. Dipped in a bit of base paint, whiped off on a piece of paper and dabbing in irregular patterns.
I also did something about those red letters. They did not sit right with me. marking a high profile target in red, in a sunscorched desert with supply issues all around… No. I went for some sand/earth tone instead, of German, Italian of even British origin.
I also did the rims and wheels, tarp and bags.
I added a bunch of gear to the interior and had some headaches because of the jerrycans. They were too big to fit the rack! So another dive into the sparesbox.
The frontwheels caused trouble too; one was loose and the other (left) broke off??
I had some fun with pastels; first a wet layer to simulate the plastered on dirt/sand and then a layer of dry, lighter coloured powde to simulate dust.
Advantage of pastels is that you can remove it later, which I did by scrubbing off the pastels on the areas where the dirt would have worn off. It will leave a dusty look, though. Unless removed with water.
Link and length tracks are bit loose on one side, but are way too loose on the other with the extra link, and too short without it. Hence the gap, which is not quite as big as it looks in the pic. Luckily the tank has side skirts that will hide a rudimentary track join solution of two strips of styrene stuck to both sides of the inner faces!
Next time I touch it, it will be to do the scratch built engine bay gizmology.
It looks great Ron. Gives a nice feel to the dusty Western Desert environment. The broken Lee-Enfield is an interesting addition, as is the goggles in the pointing figures hand.
Hello everyone,
I had a pause in modelling for almost 8 years but now back on track (hopefully). In the meantime my previous account and badges disappeared but no problem, new campaigns are always available To get back to business, I’ve chosen Dragon’s Kettenkrad, which I had started ~10 years ago…
cheers,
Zsolt