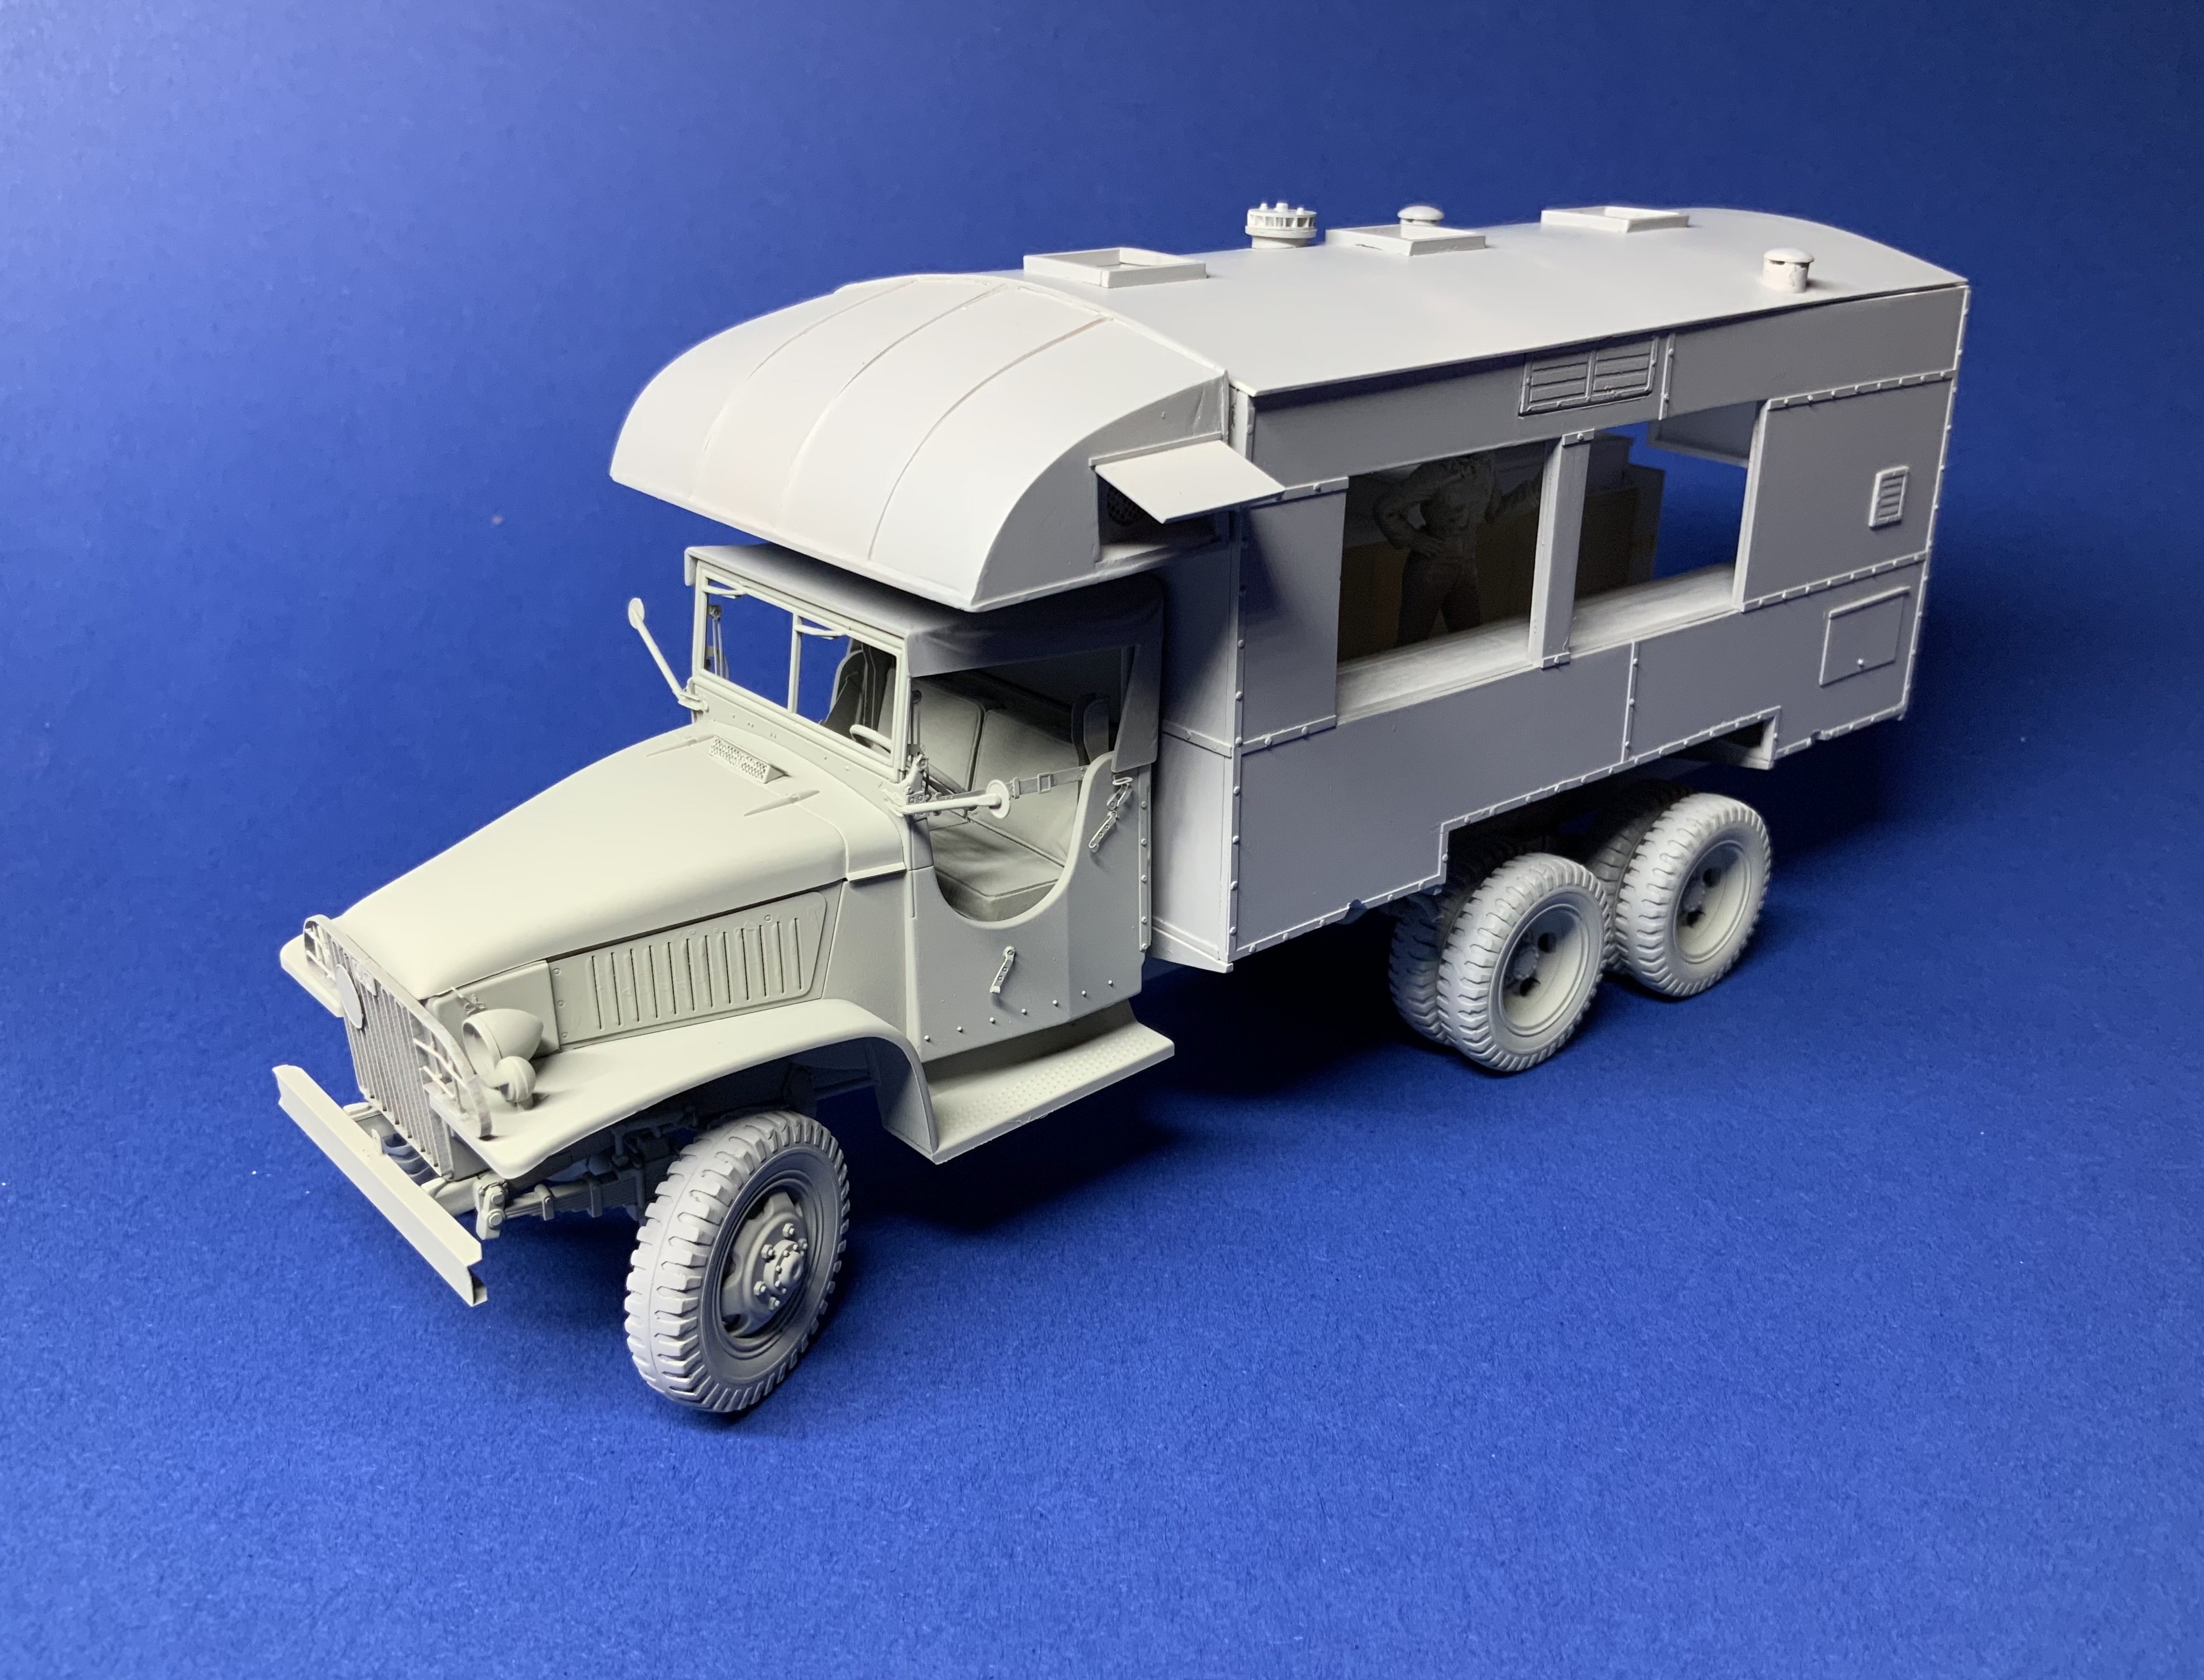
So, a productive day. The GMC primered and the basecoat of Tamiya XF-80 (Royal Light Grey).
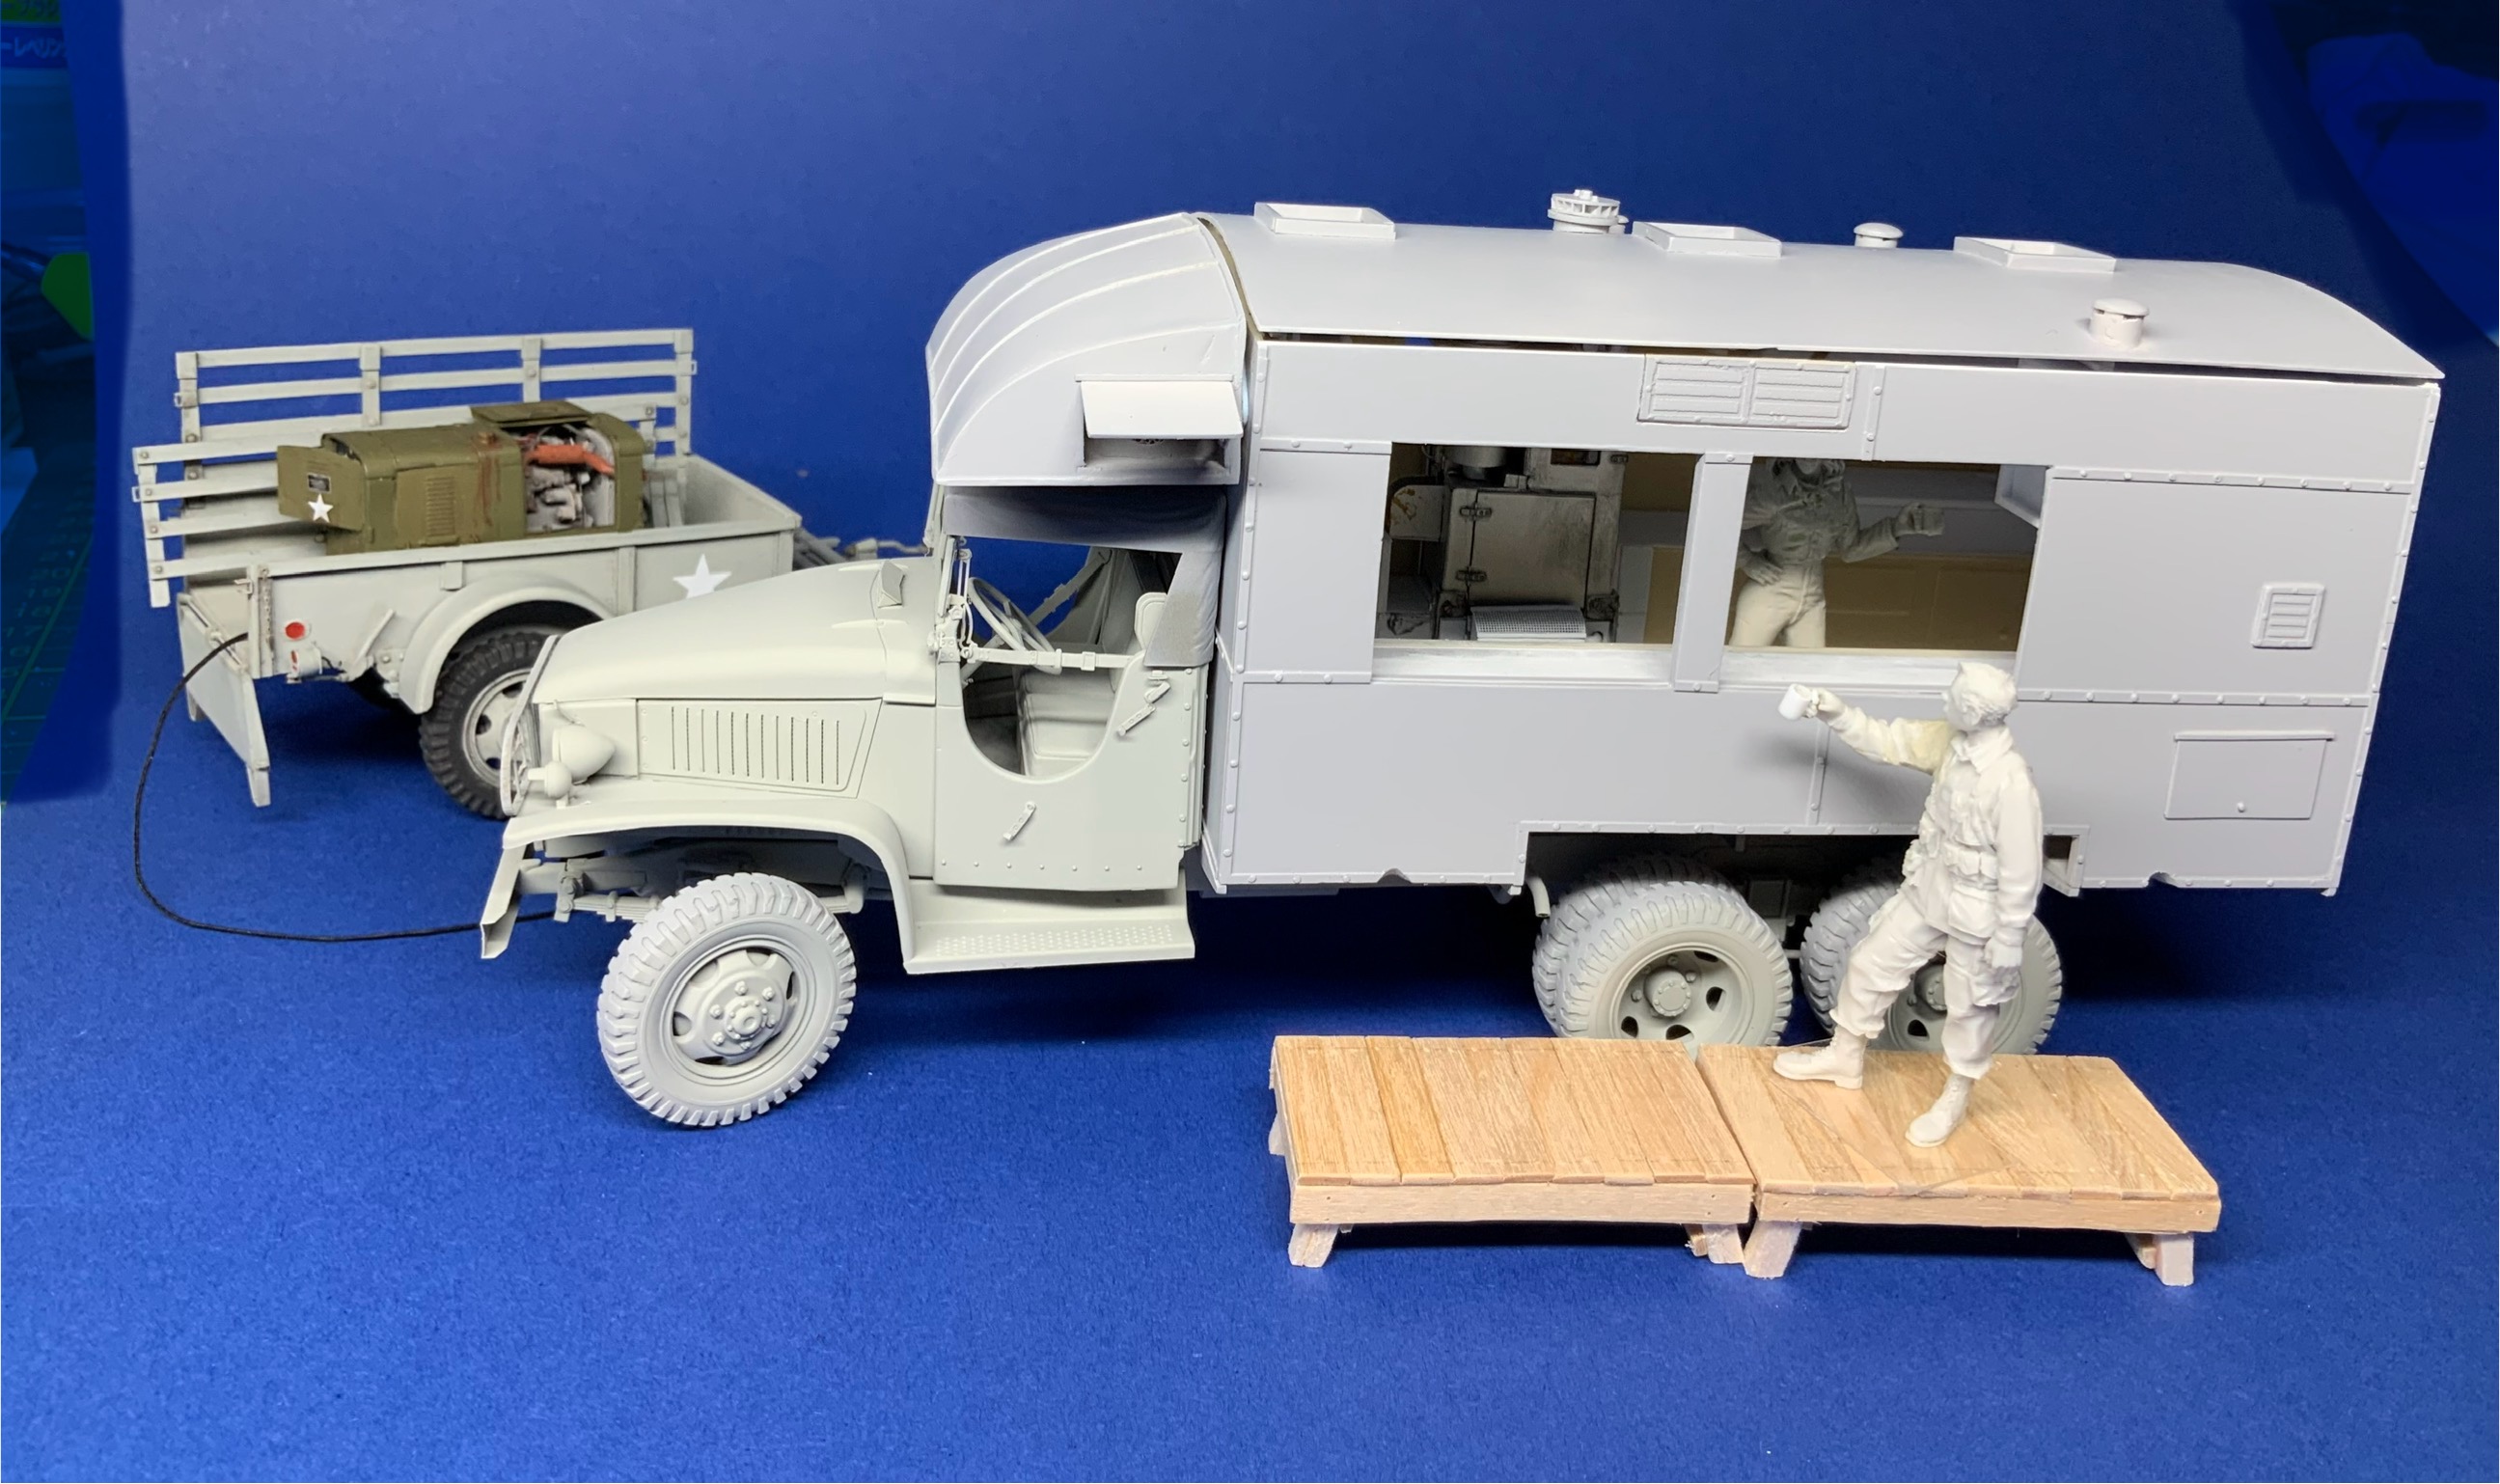
The Clubmobile structure is only primered ((Mr. Surfacer)
A moment of joy
15 Likes
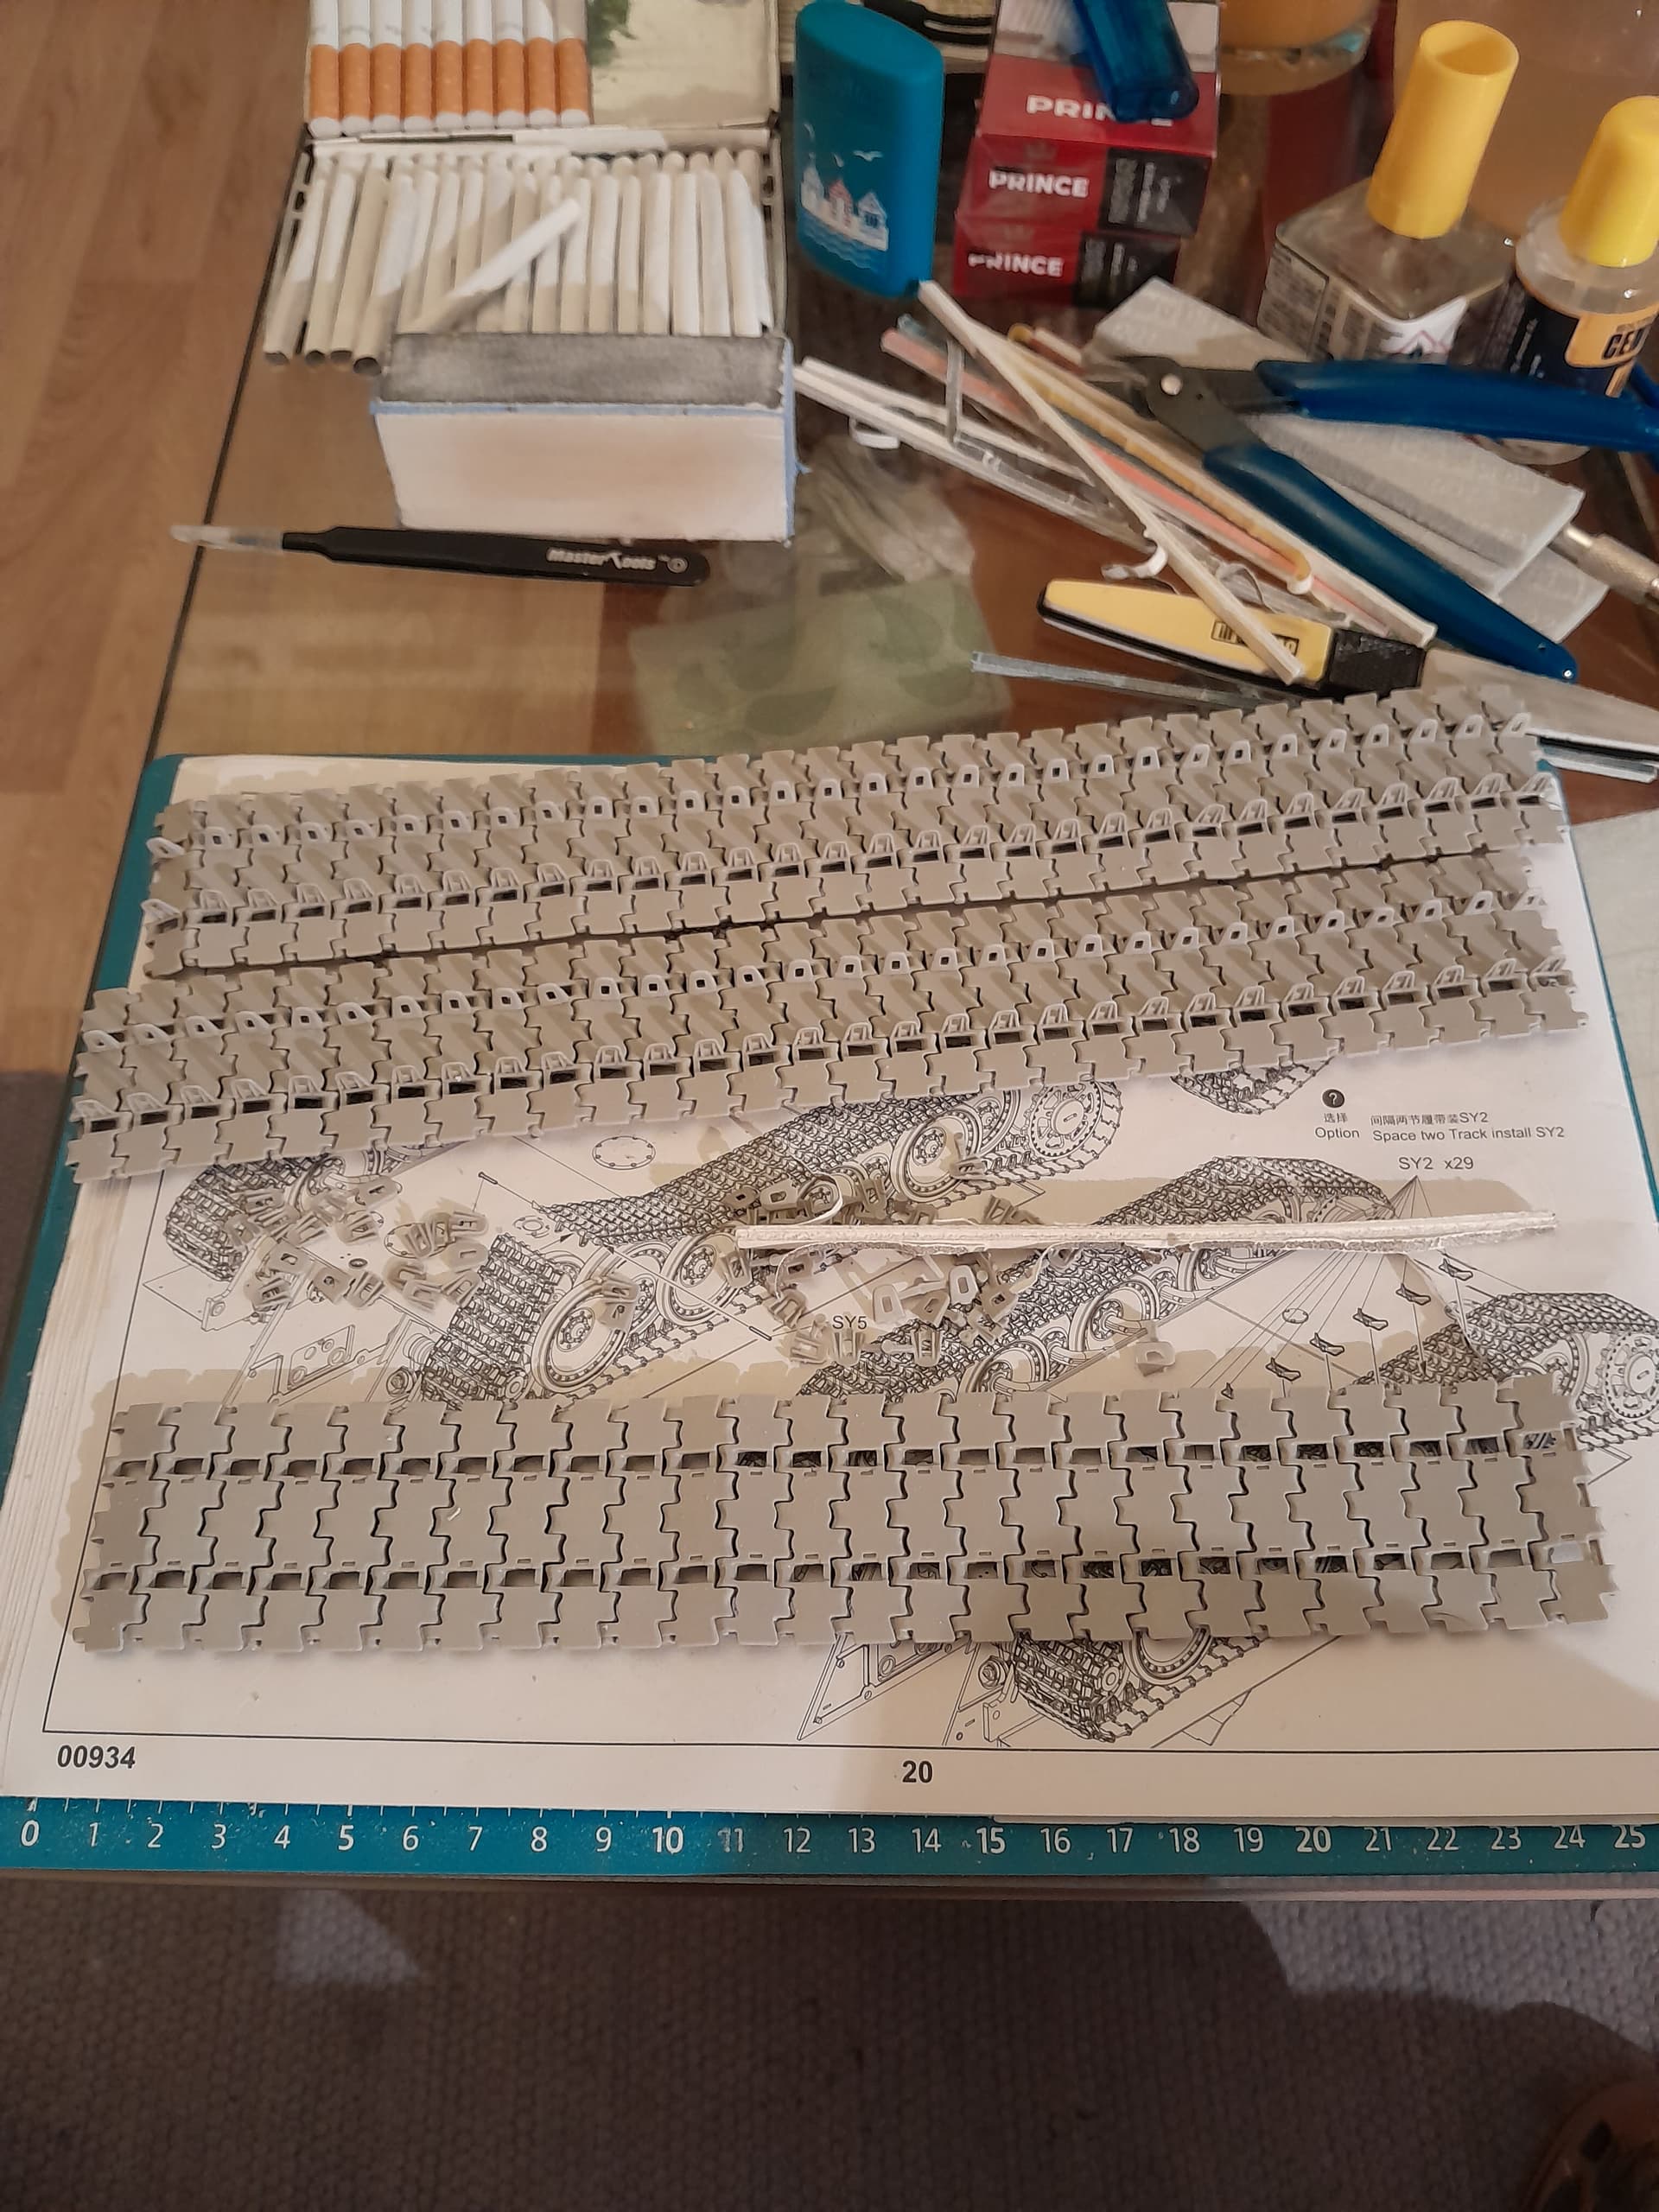
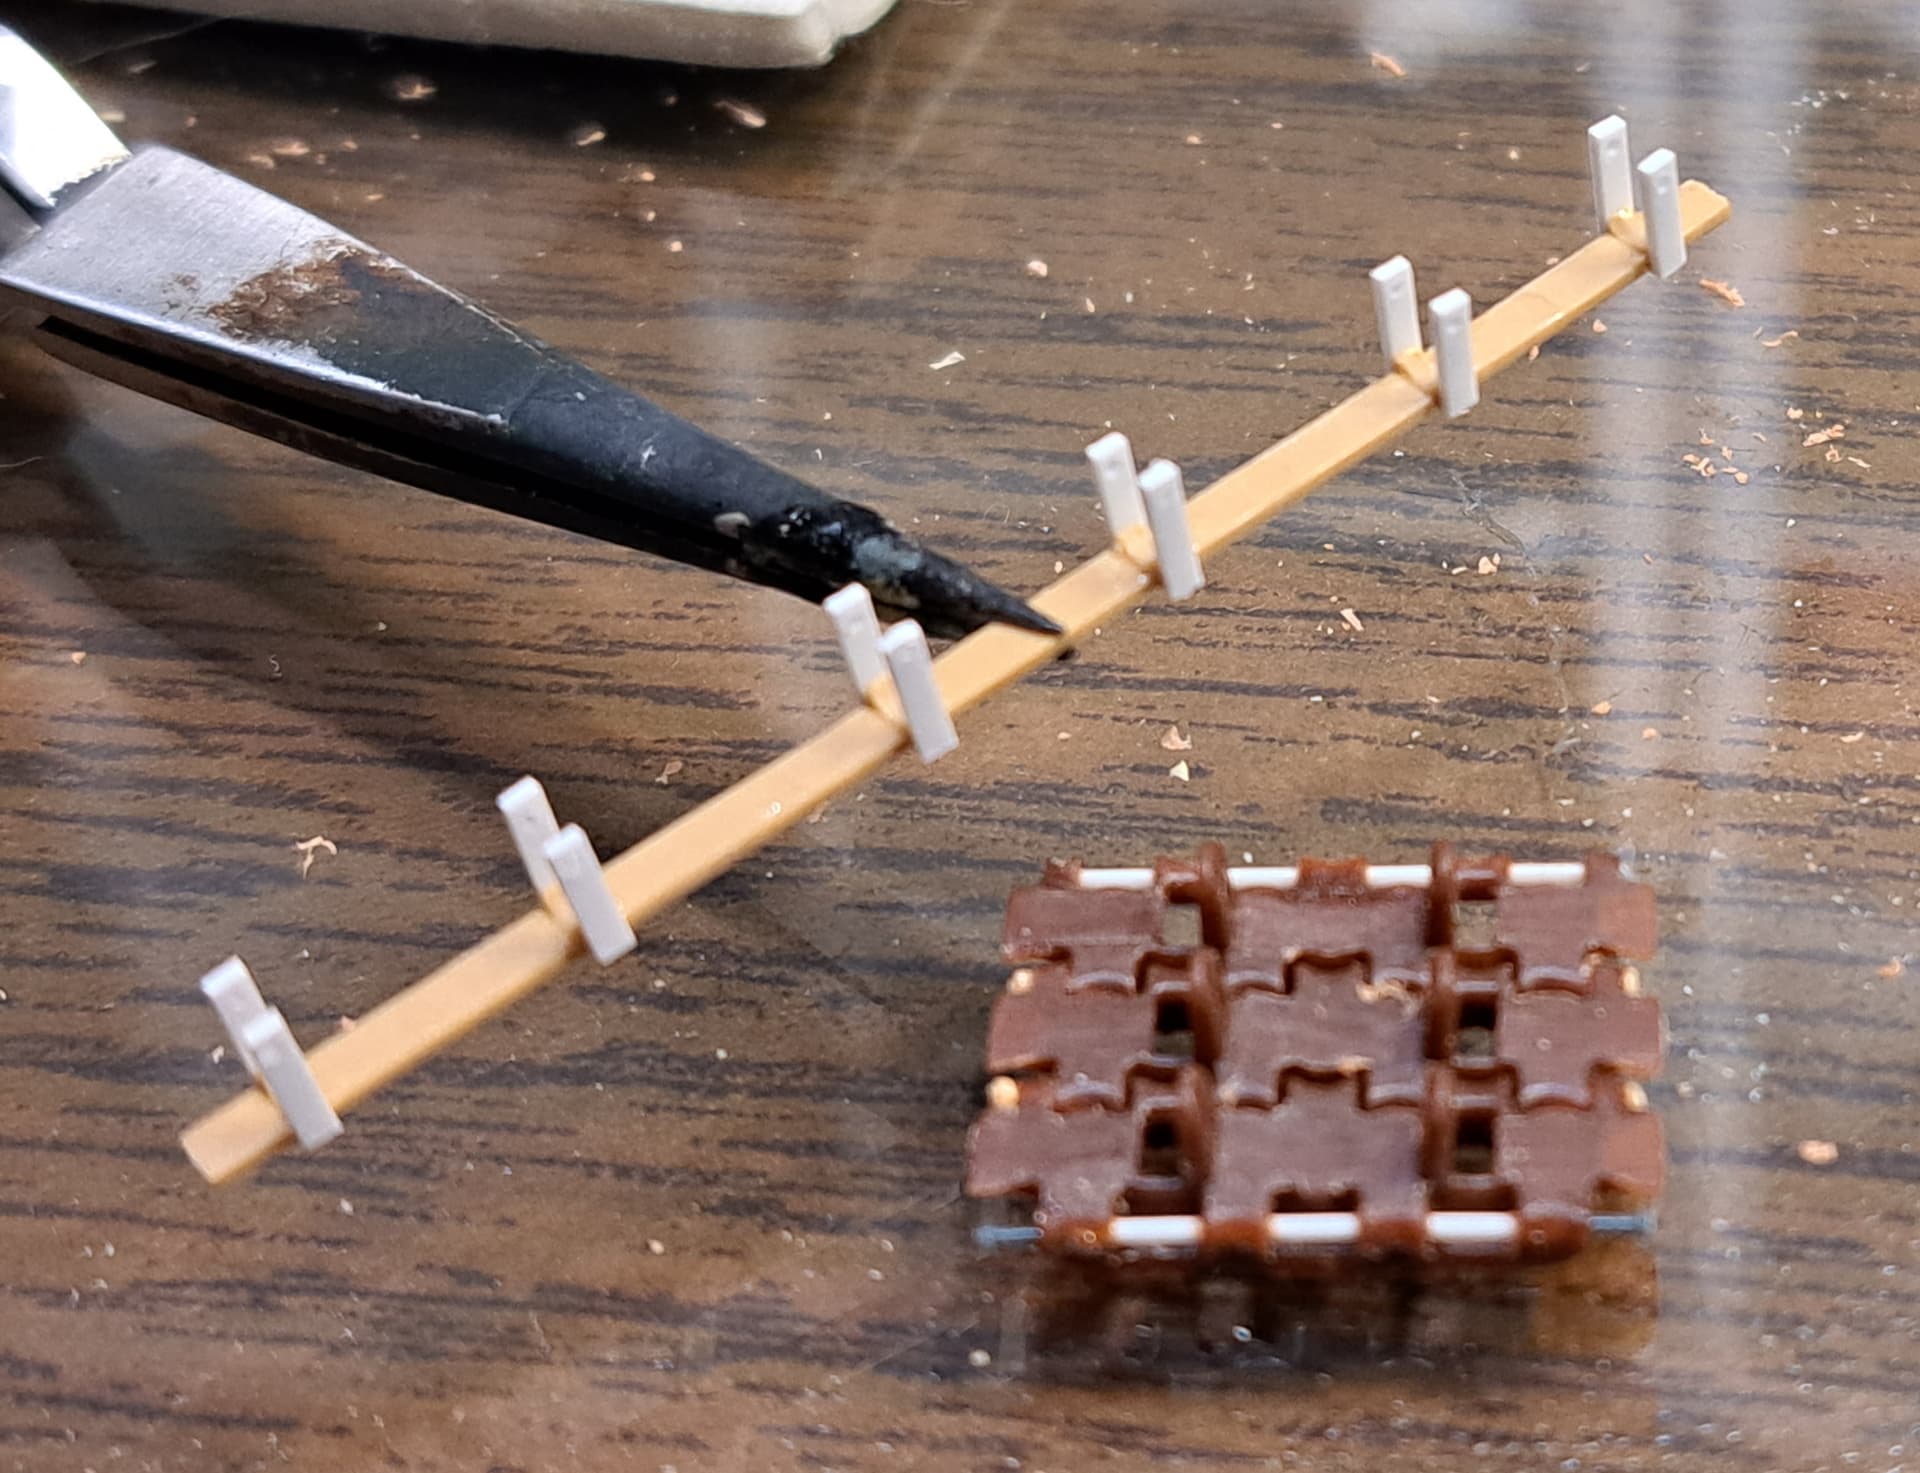
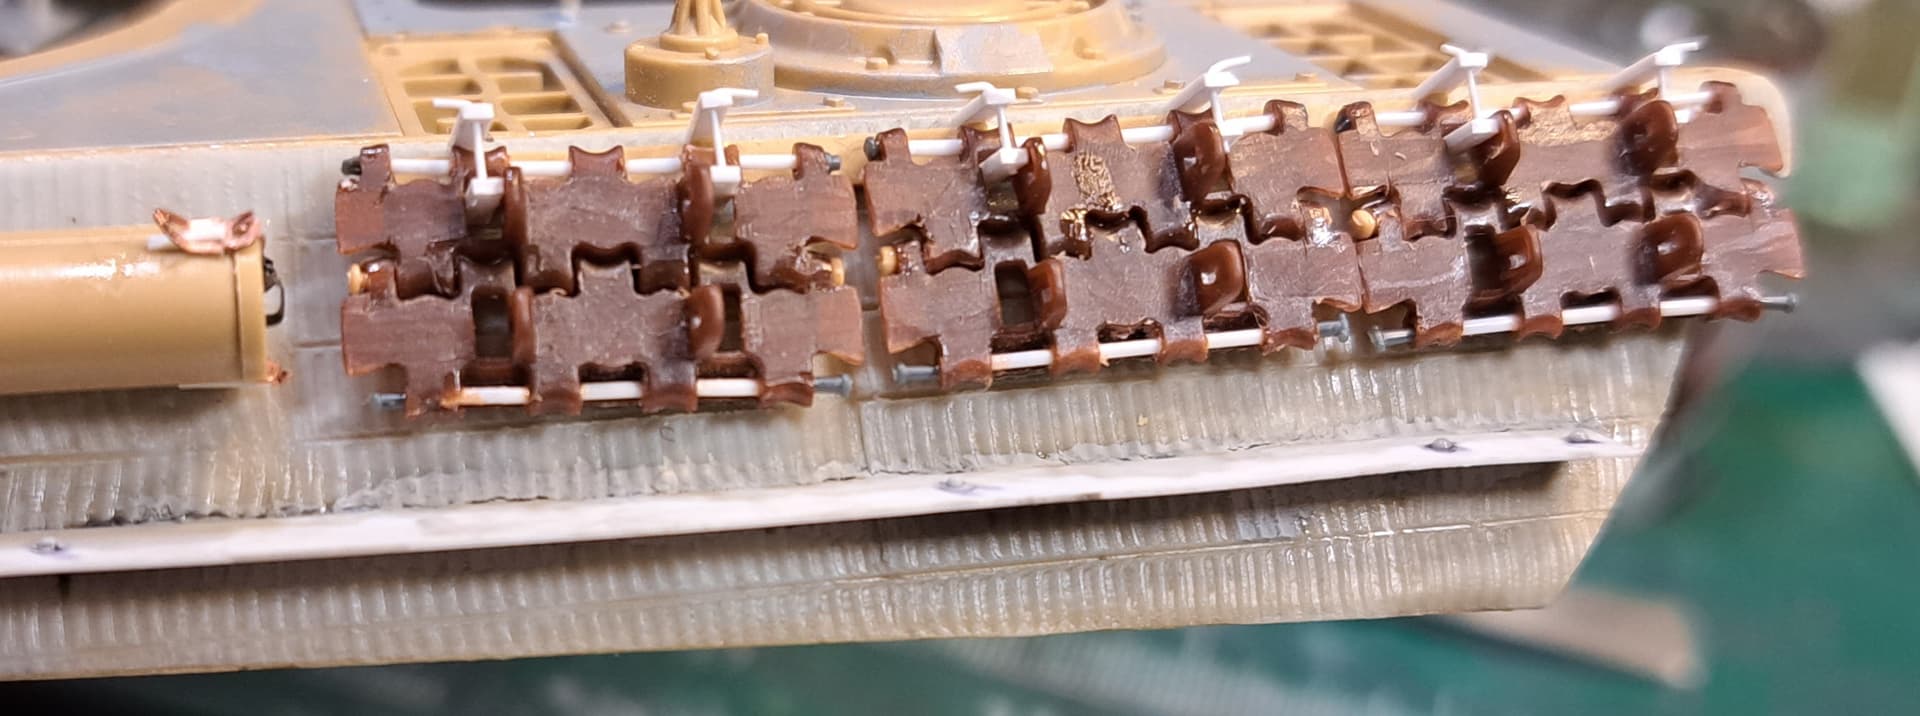
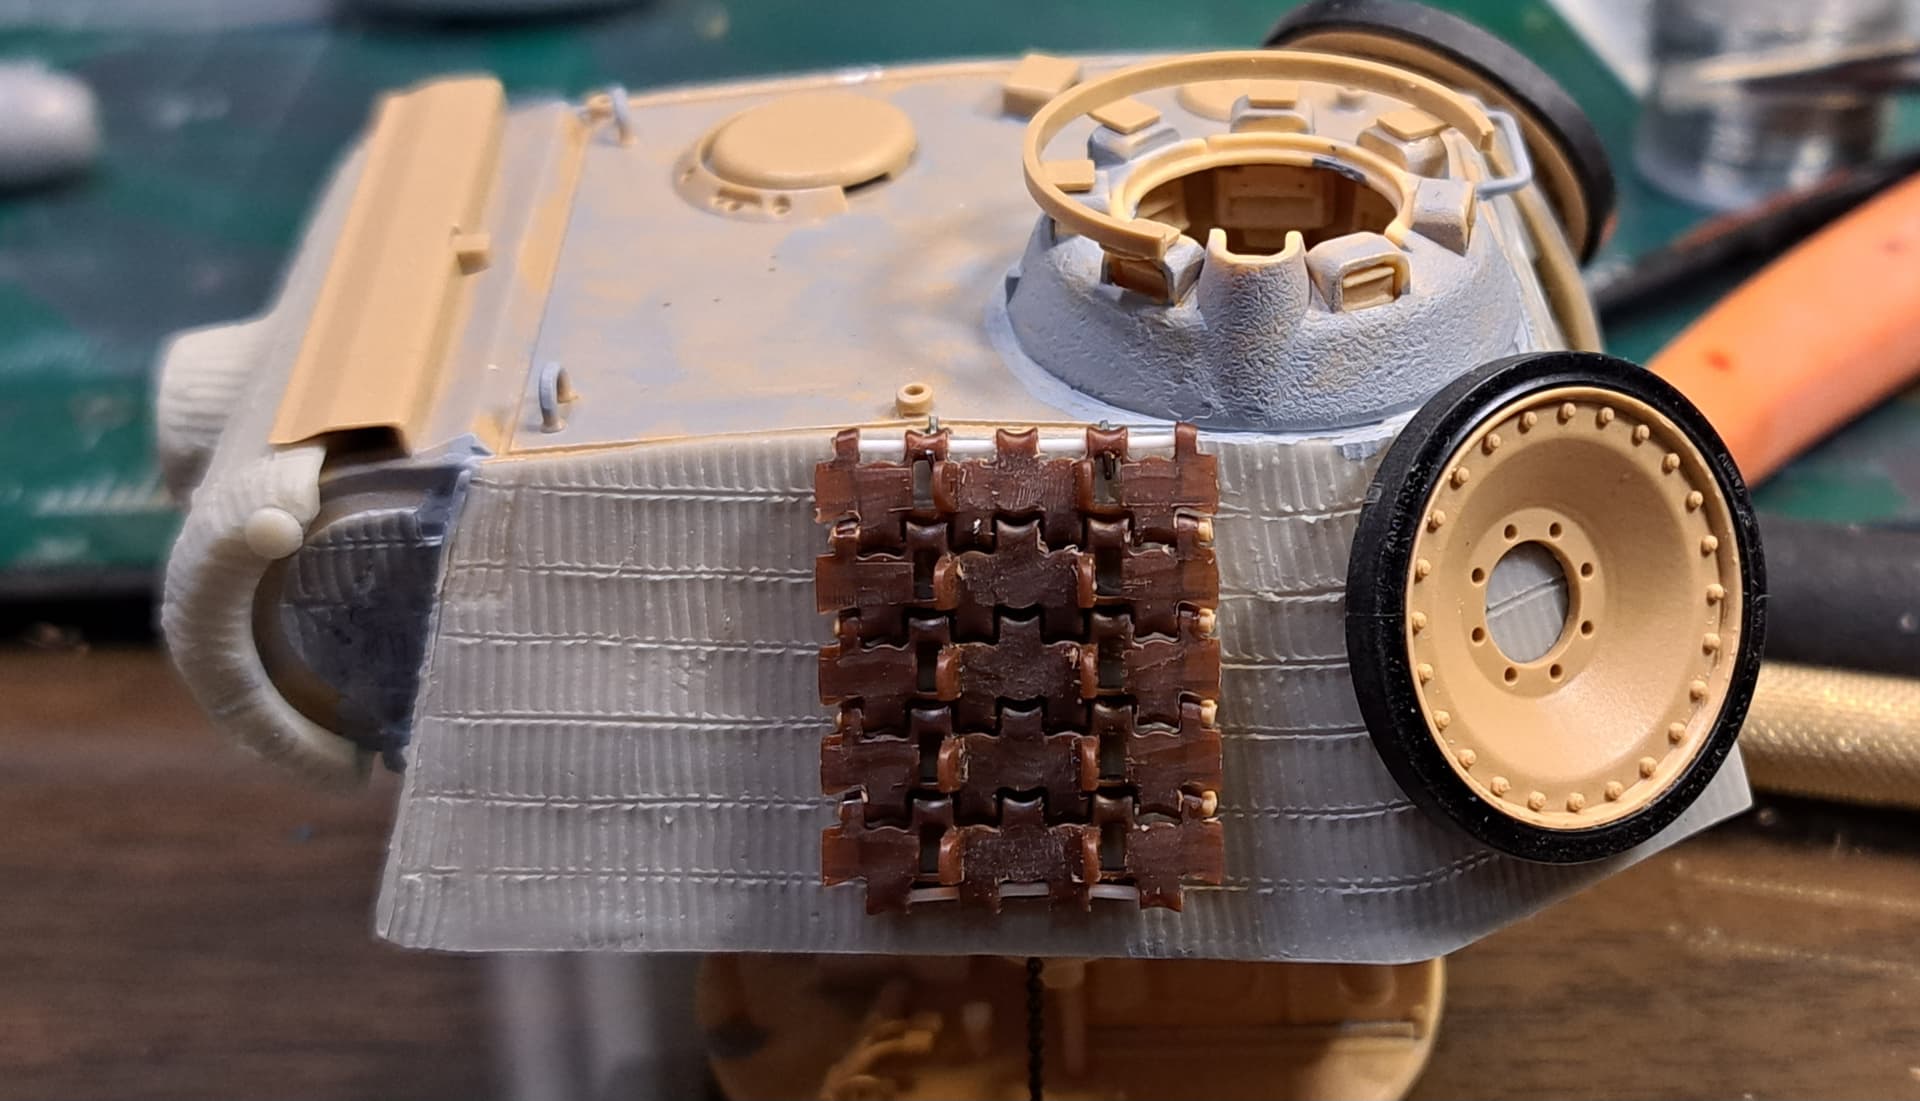
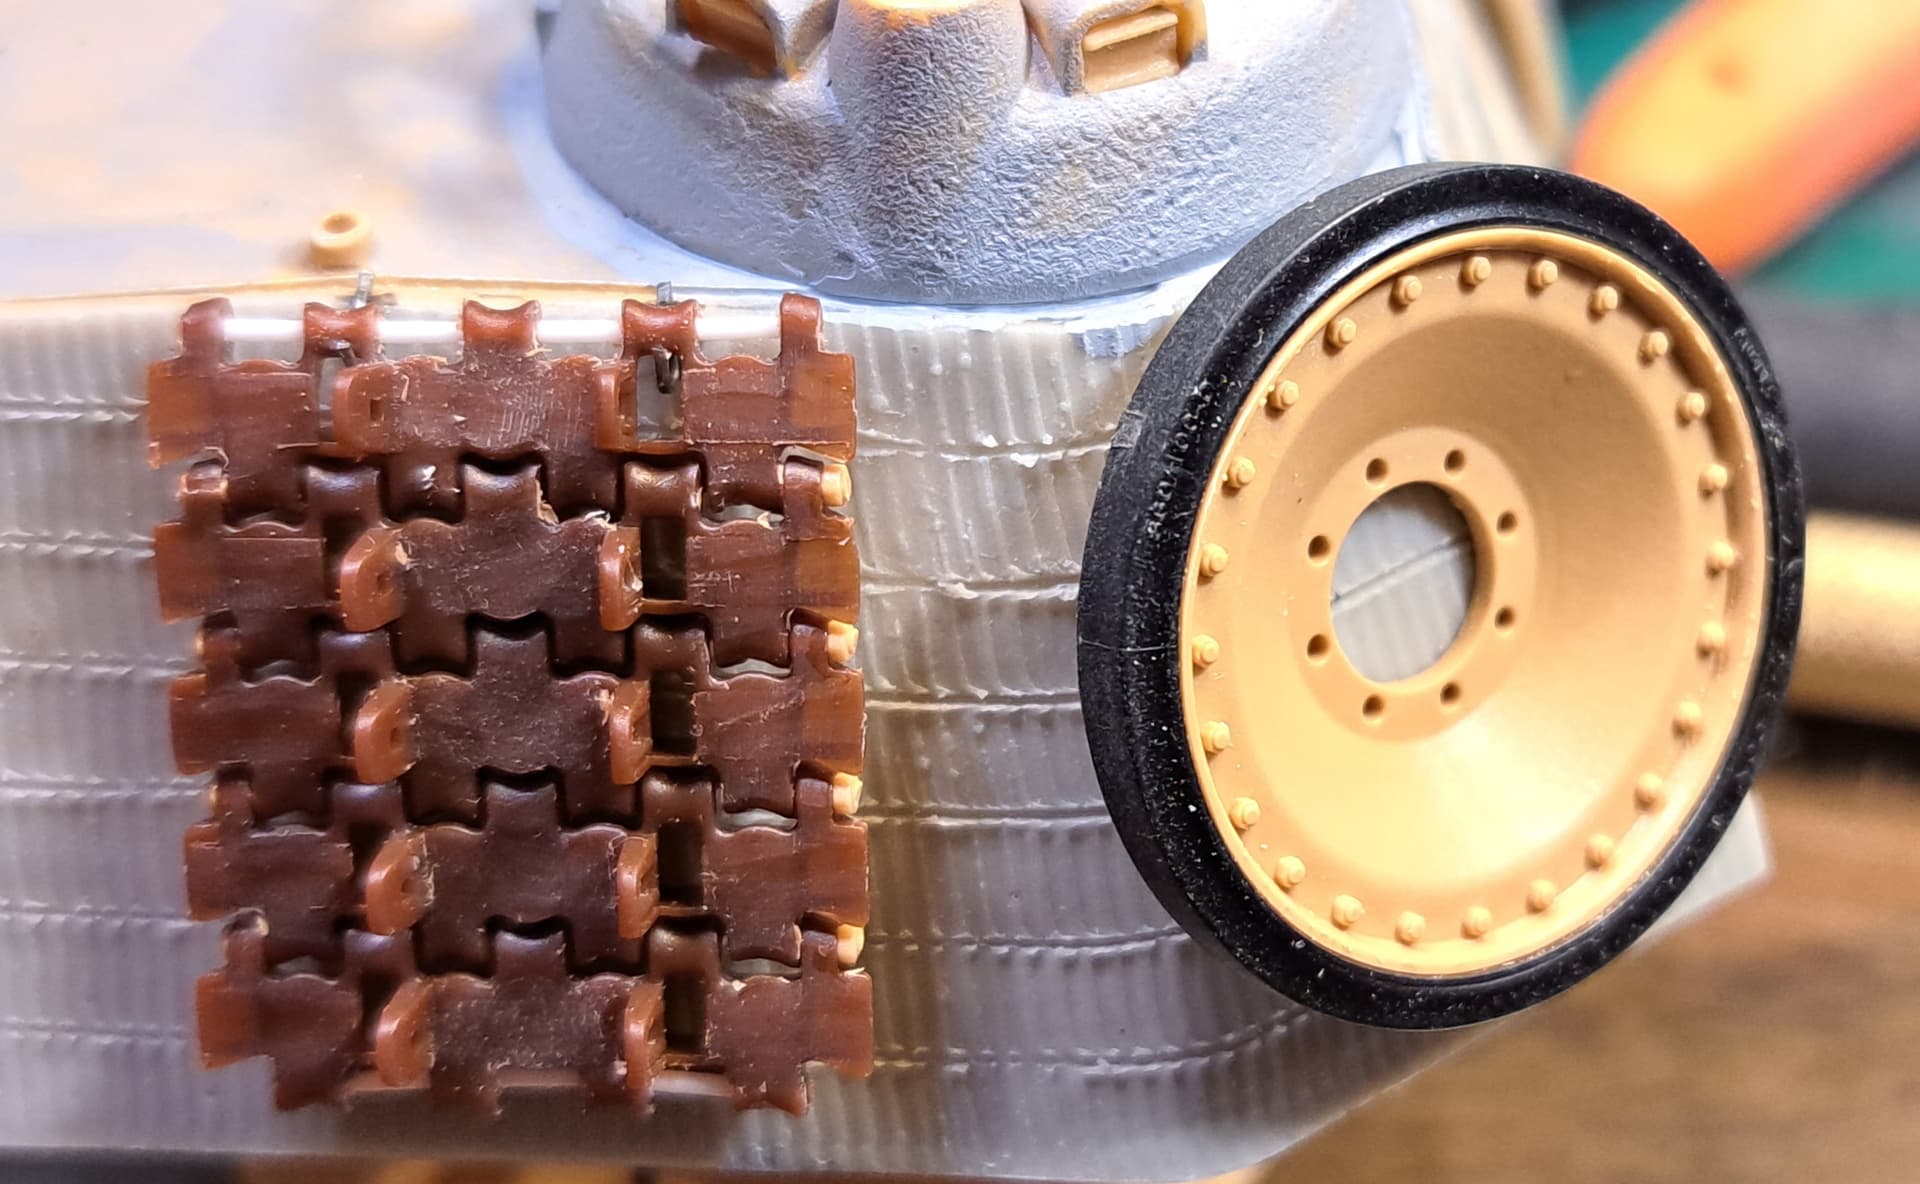
The last steps to finish the jagdpanther tracks and the model at all. Next week I want to start painting. Painting was always difficult to me, now I think I work better with my airbrush. My problem is that I don’t have much space, for building it’s okay, for painting it’s a little small. Next week I start with the tracks.
Have a good week✌️
7 Likes
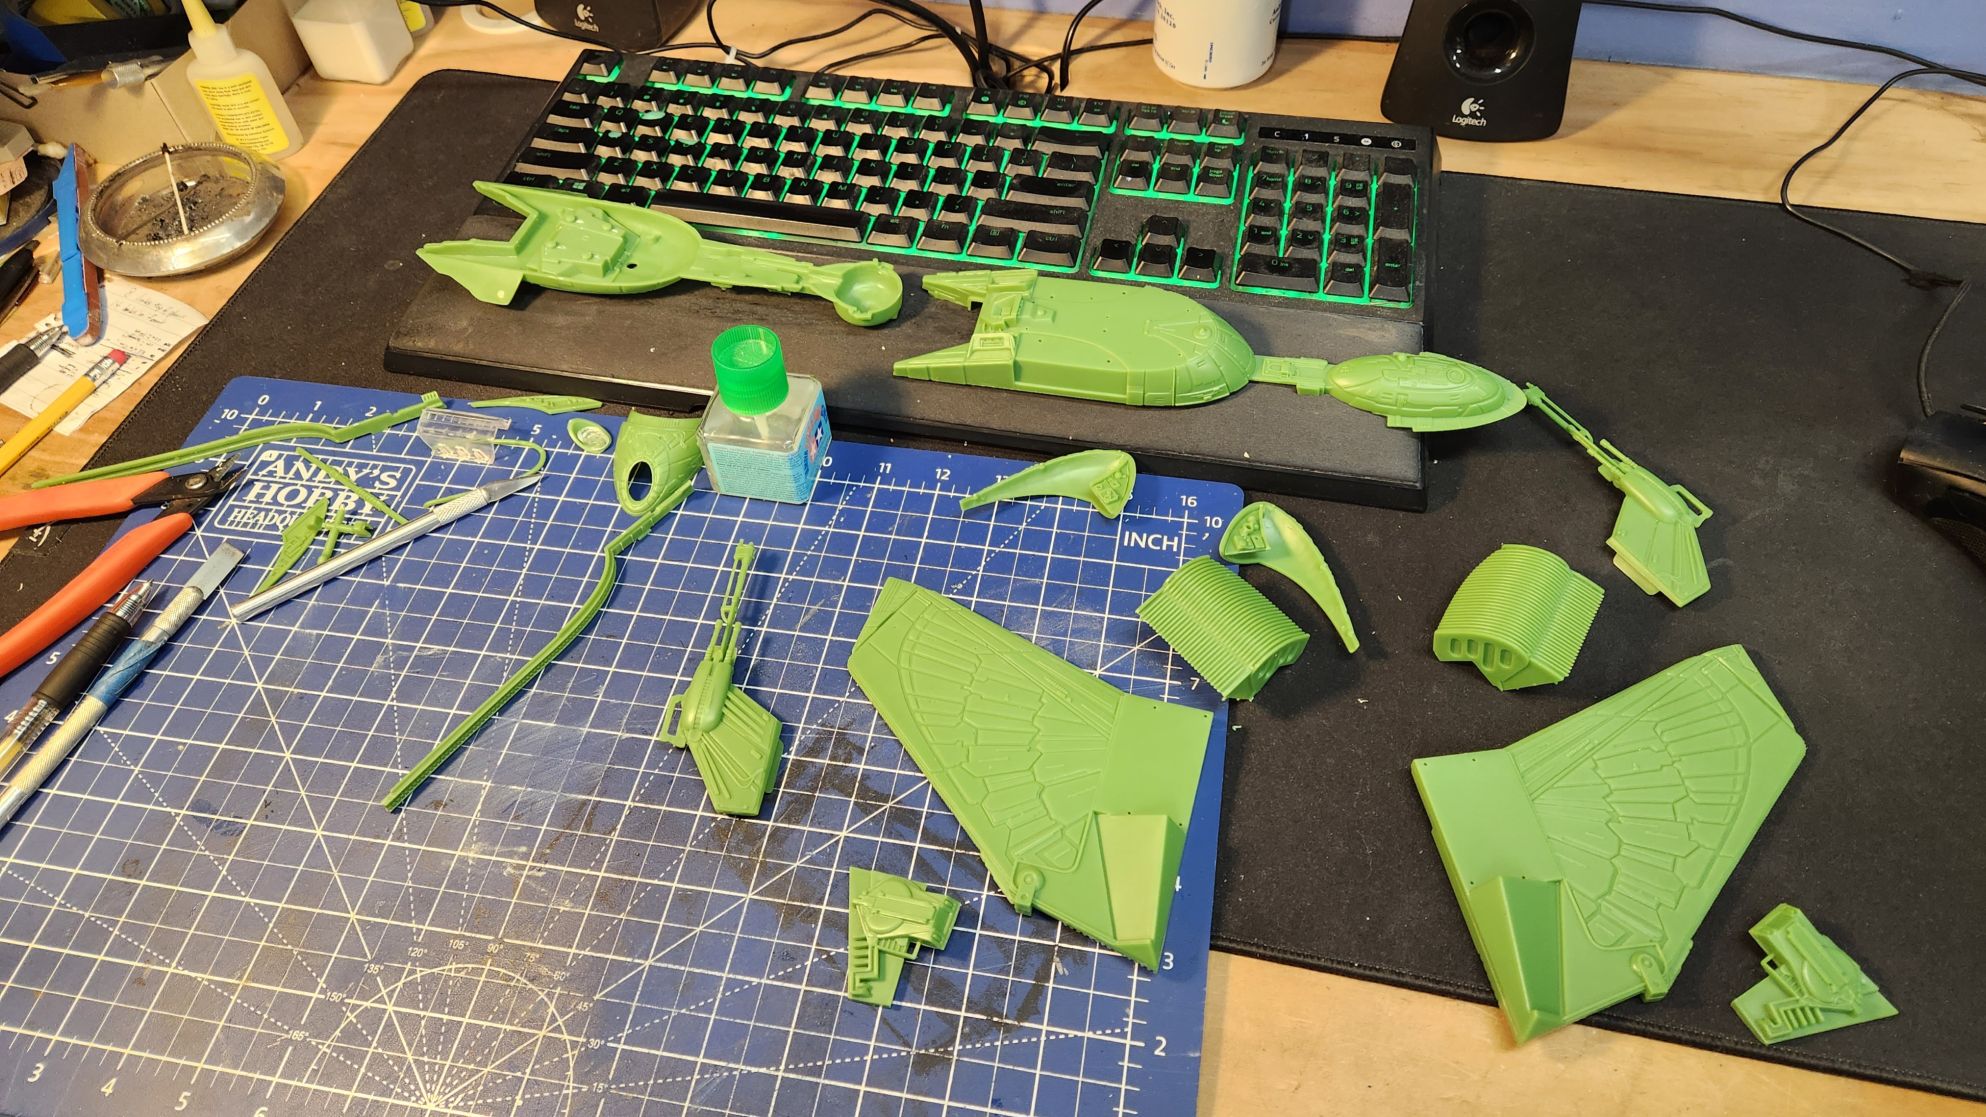
Well, um, in the middle of a few other things I got an urge to build more starships so I did this earlier today:
9 Likes
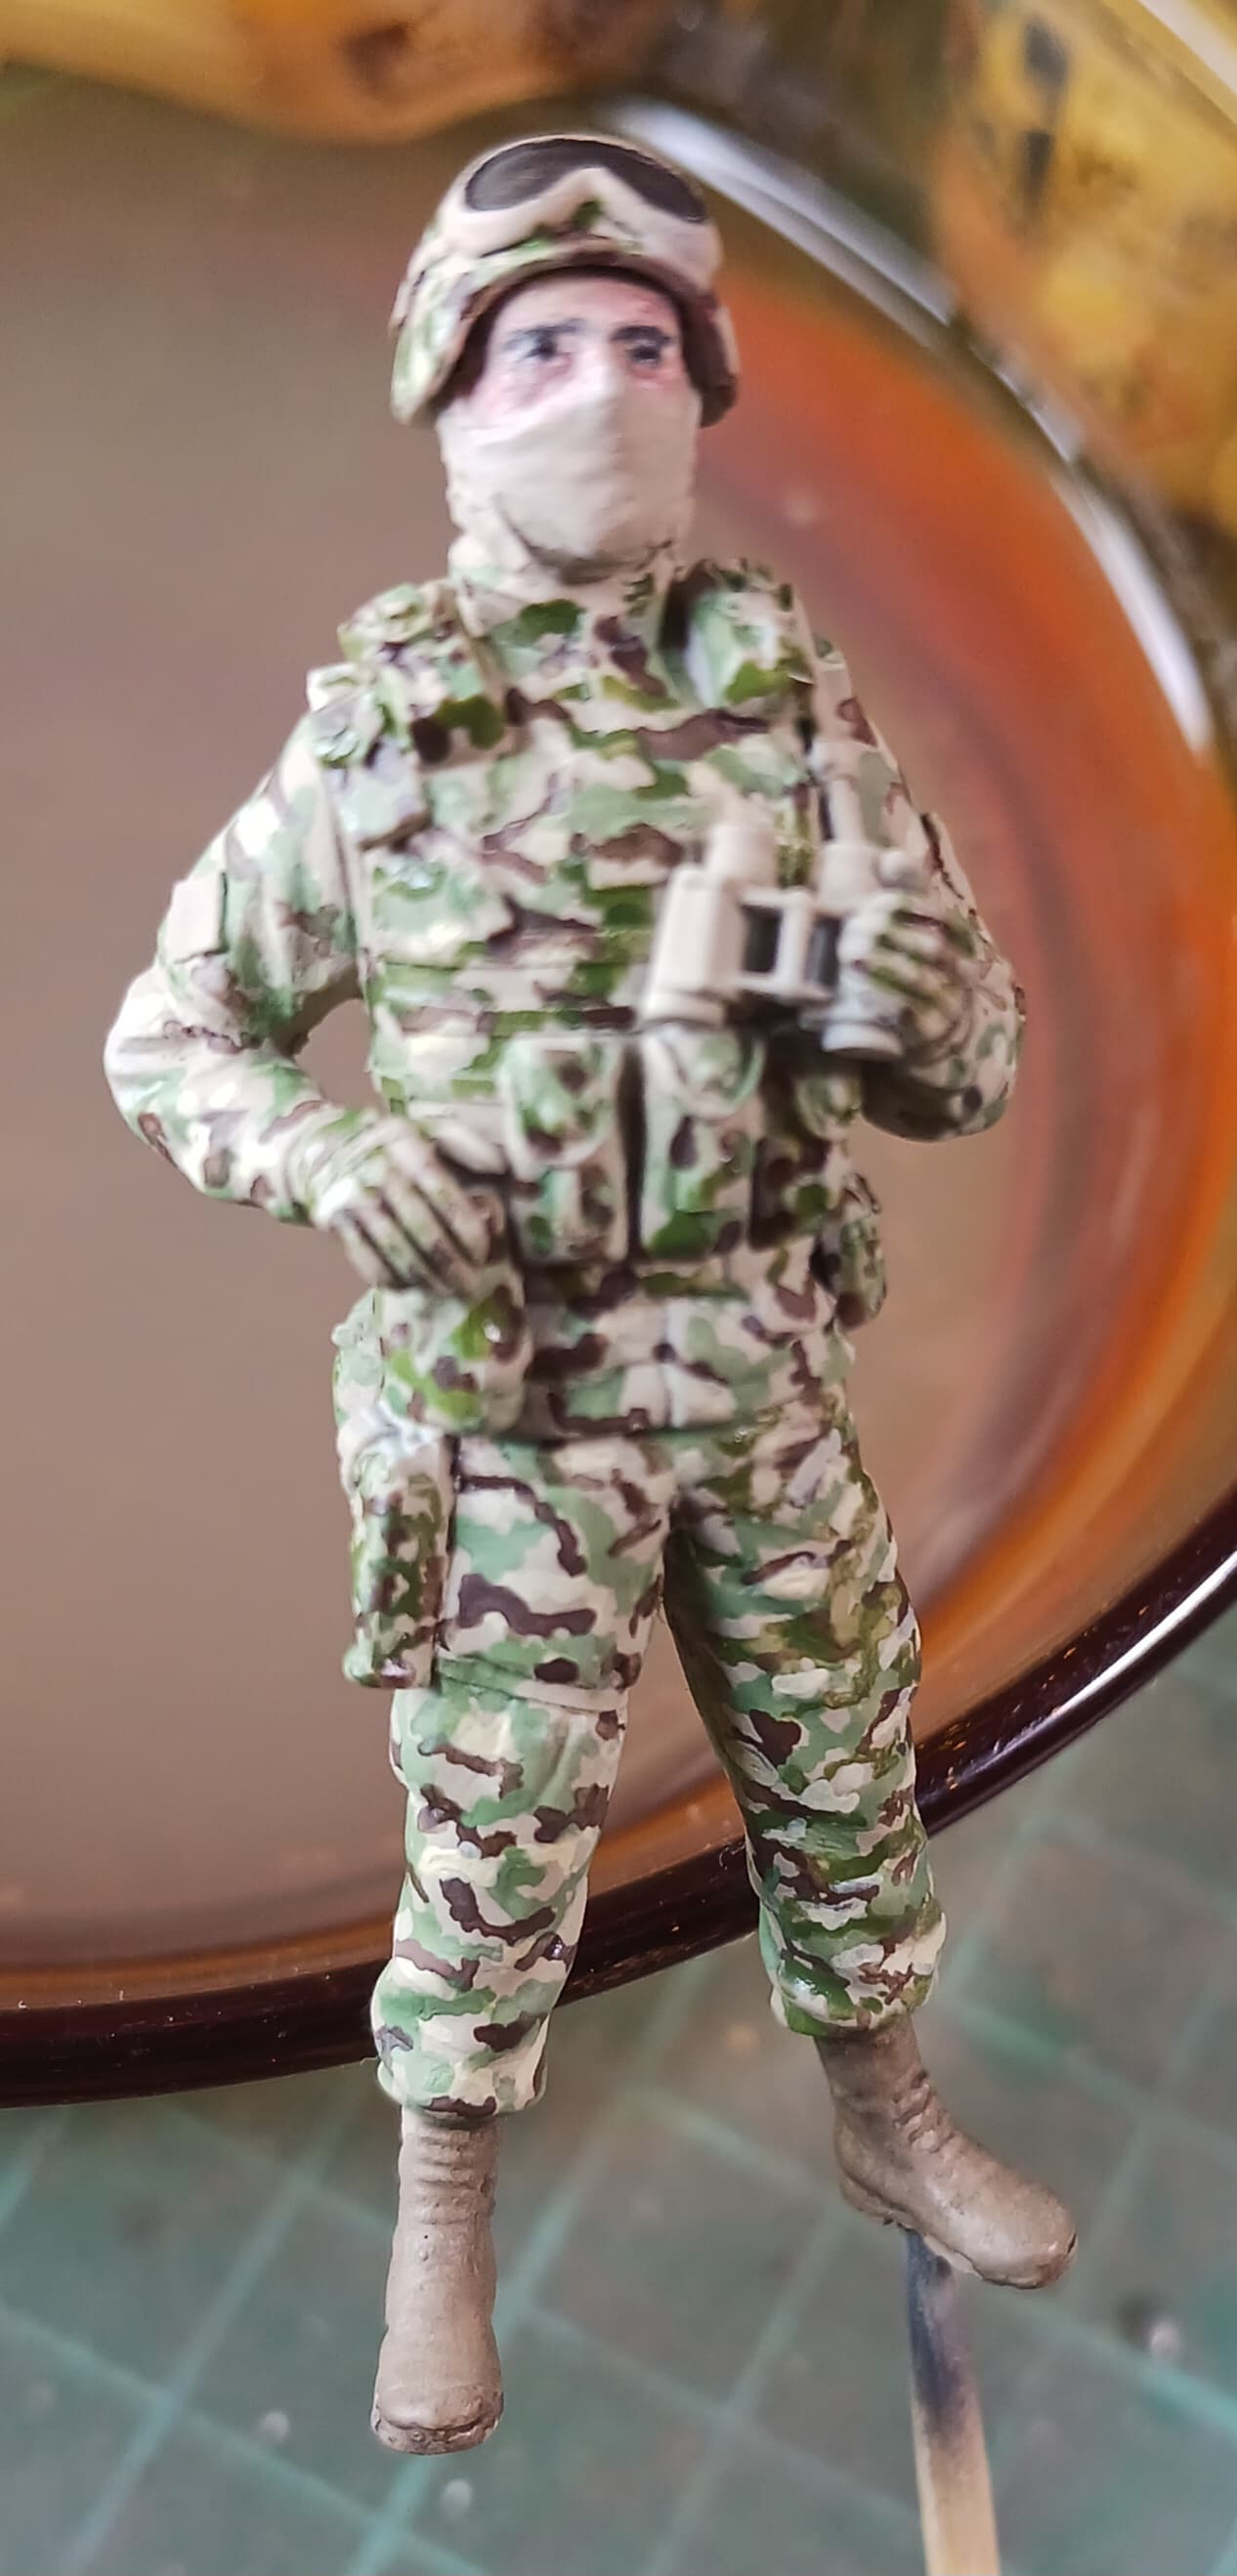
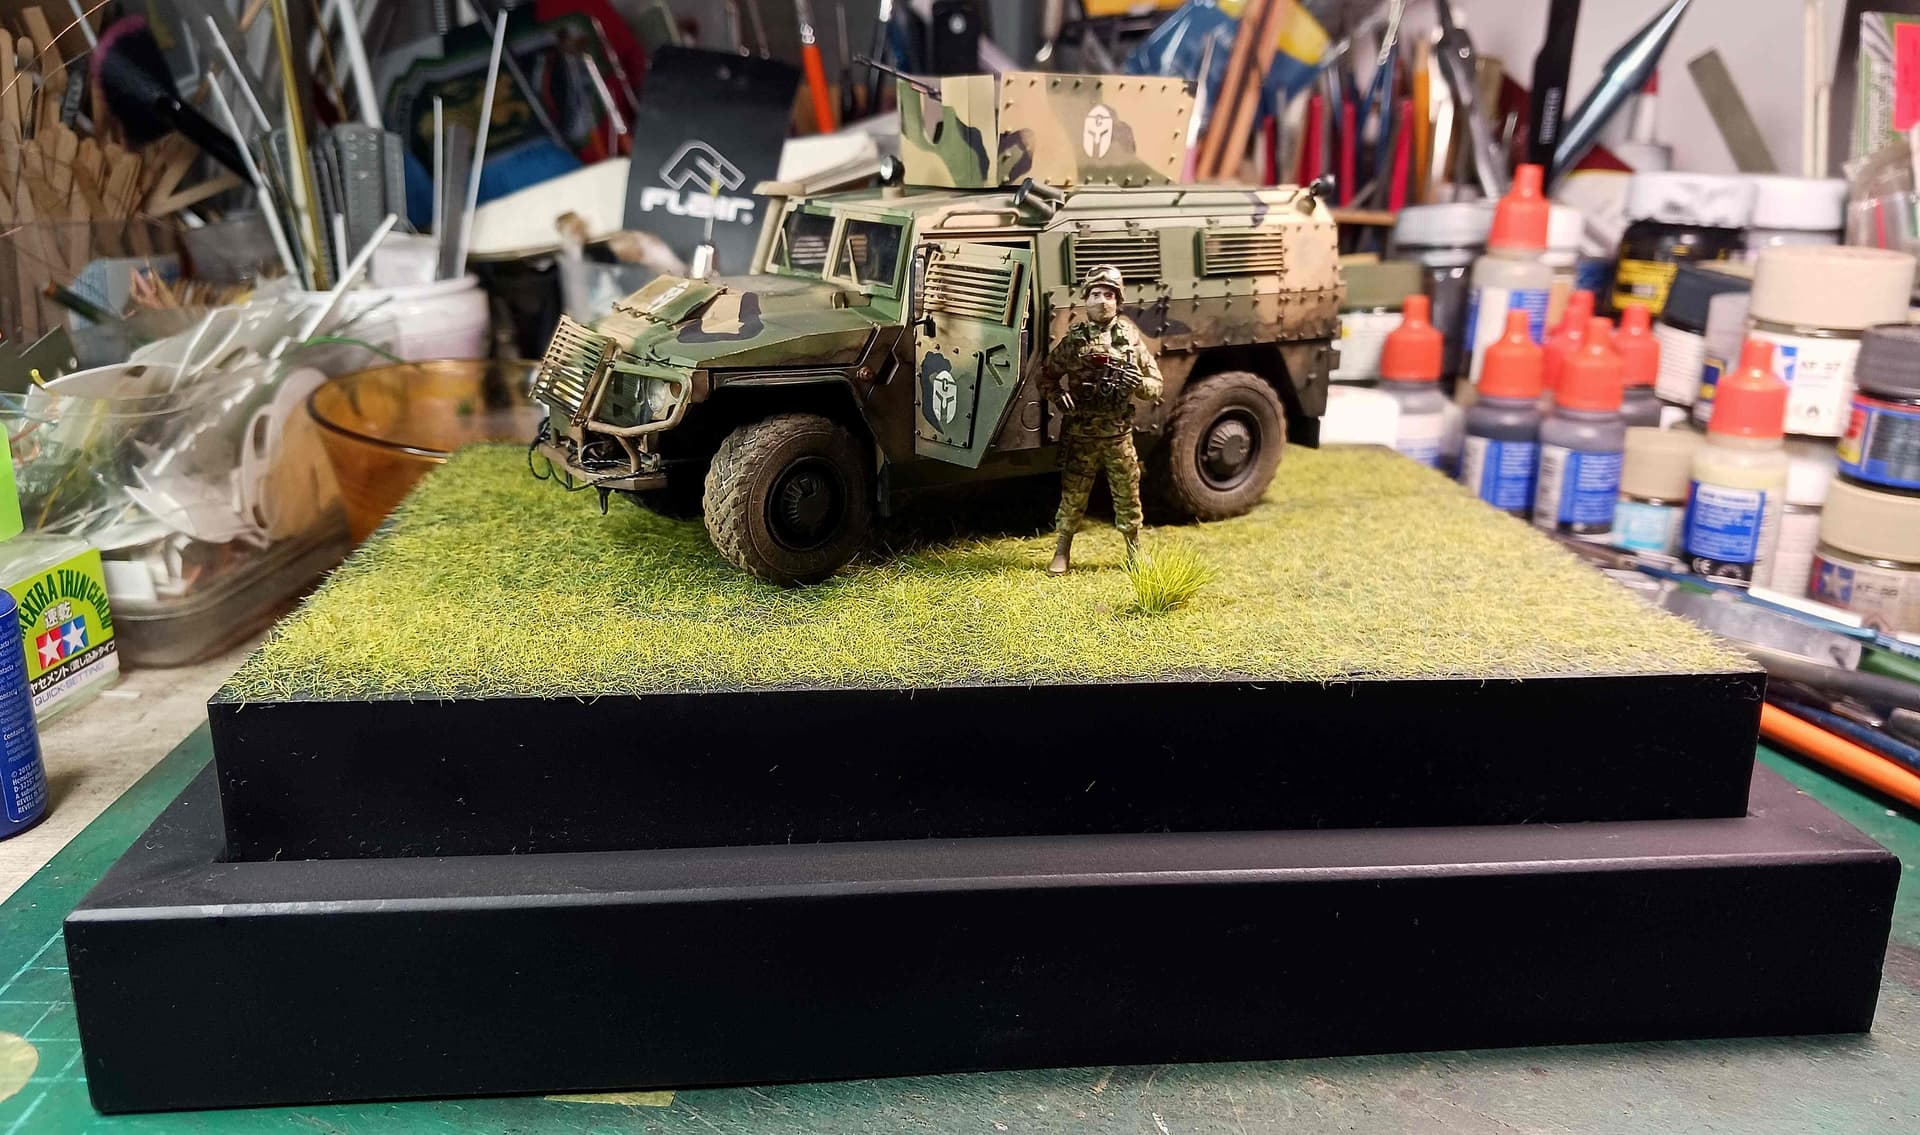
Besides wrapping up the towing cables for the 2 Maybachs I’m finishing, I had the pleasure to paint the camo on a figure for the GAZ 23115 Tigr-M, I need to finish this week.
Sofia Scale Model Show takes place this weekend…
Cheers,
Angel
10 Likes
Im cleaning uo another 18 scifi 6mm tanks and painting anothet 18 along with 30 pieces of 6mm cold war soviet armor. Getting aomething going while waiting for my 1/35 mojo to come back.
4 Likes
Finished a Shelf Queen: Tamiya 1/35 Leopard 1A4 for the “Unfinished Business 2023” campaign.
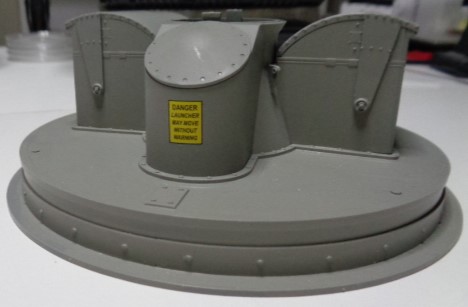
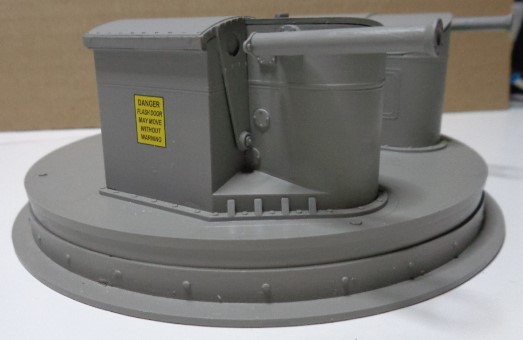
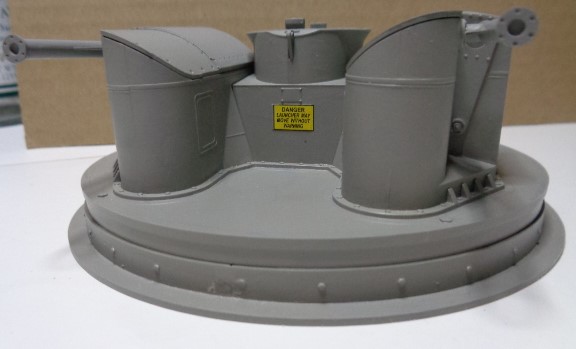
Almost finished the launcher for the Takom 1/35 Sea Dart. The rest is waiting for the missiles (need to fill seams, put fins on, and paint). I’ve also been working on a Tamiya 1/35 SU-76M, but work has stalled. I’ve also been working on Italeri’s 1/72 AH-6 Night Fox for the “Helicopters 3” campaign.
6 Likes
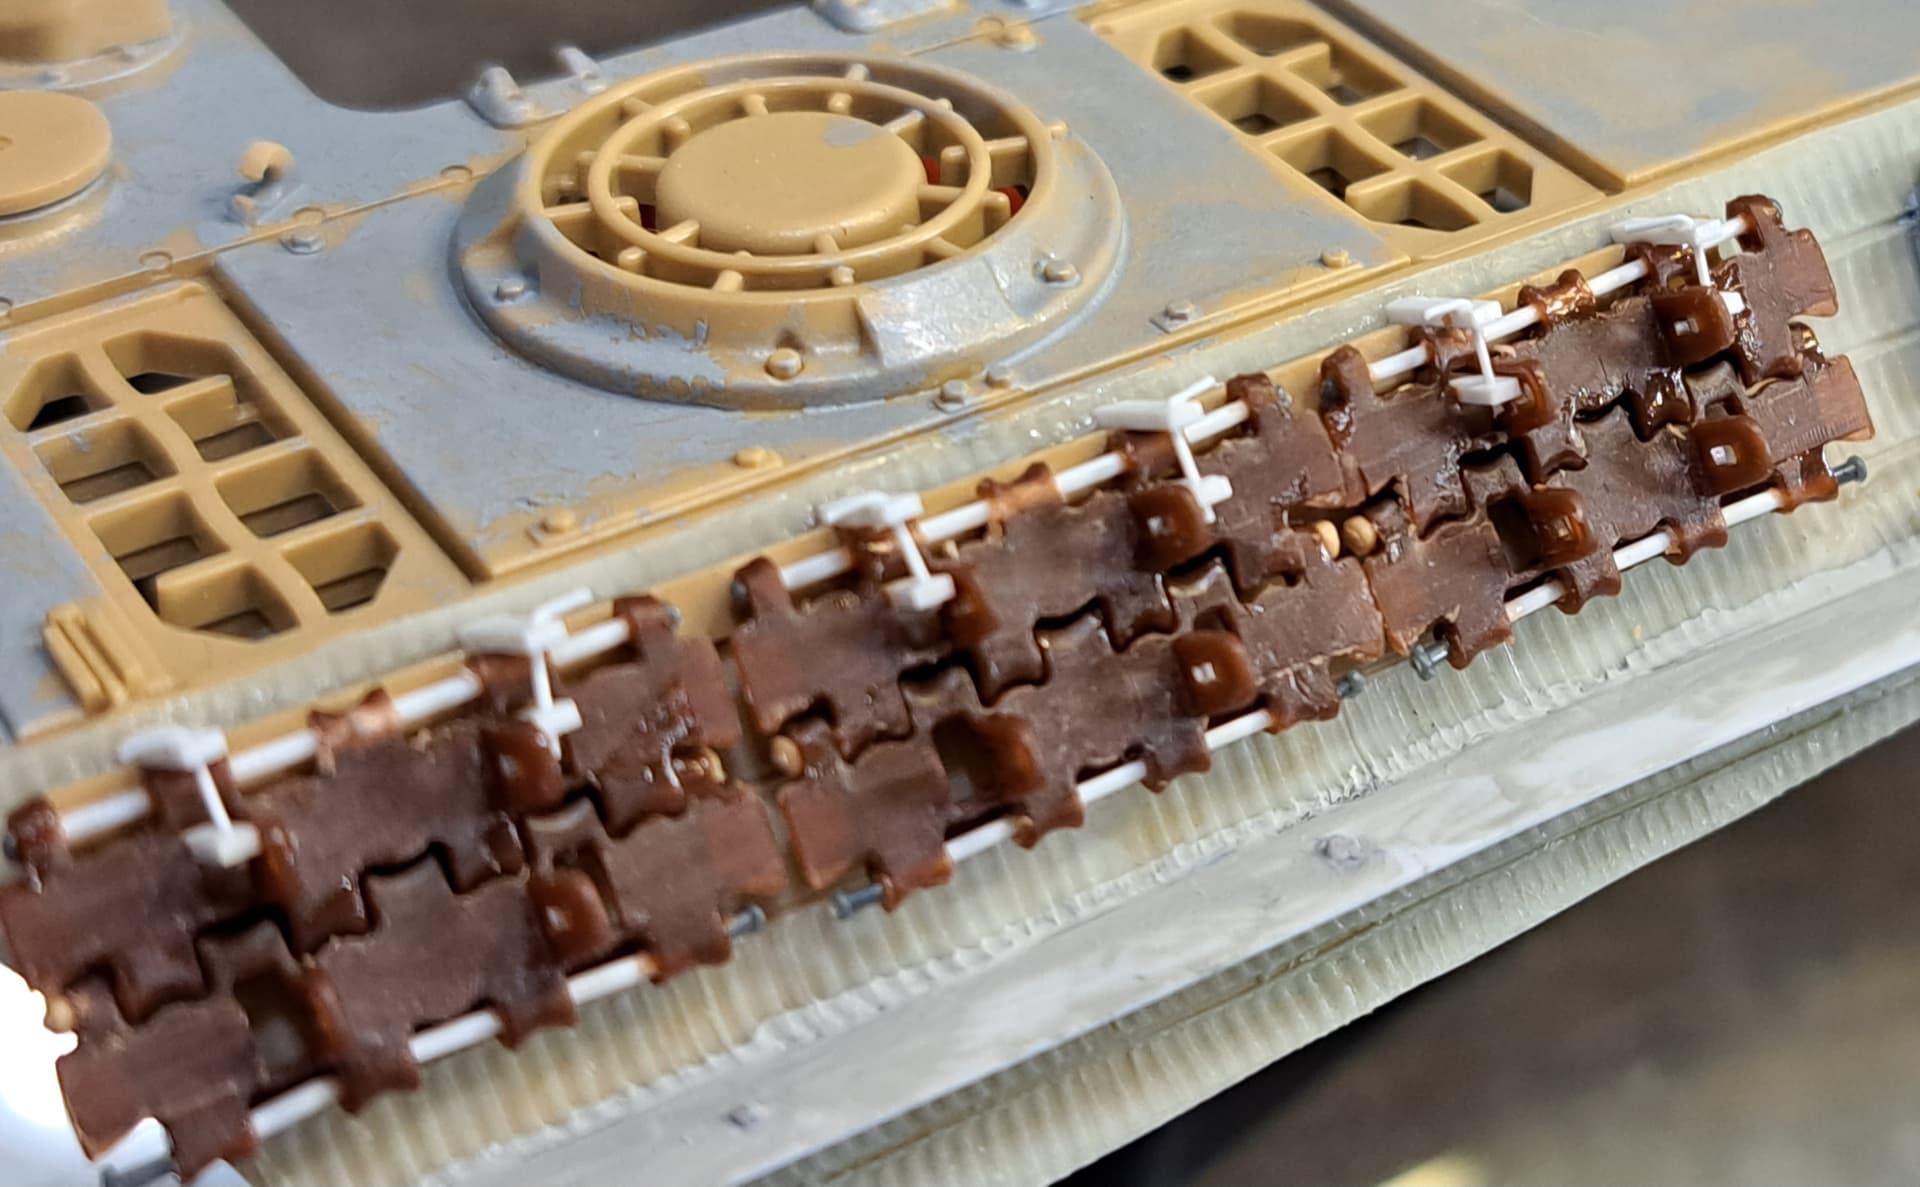
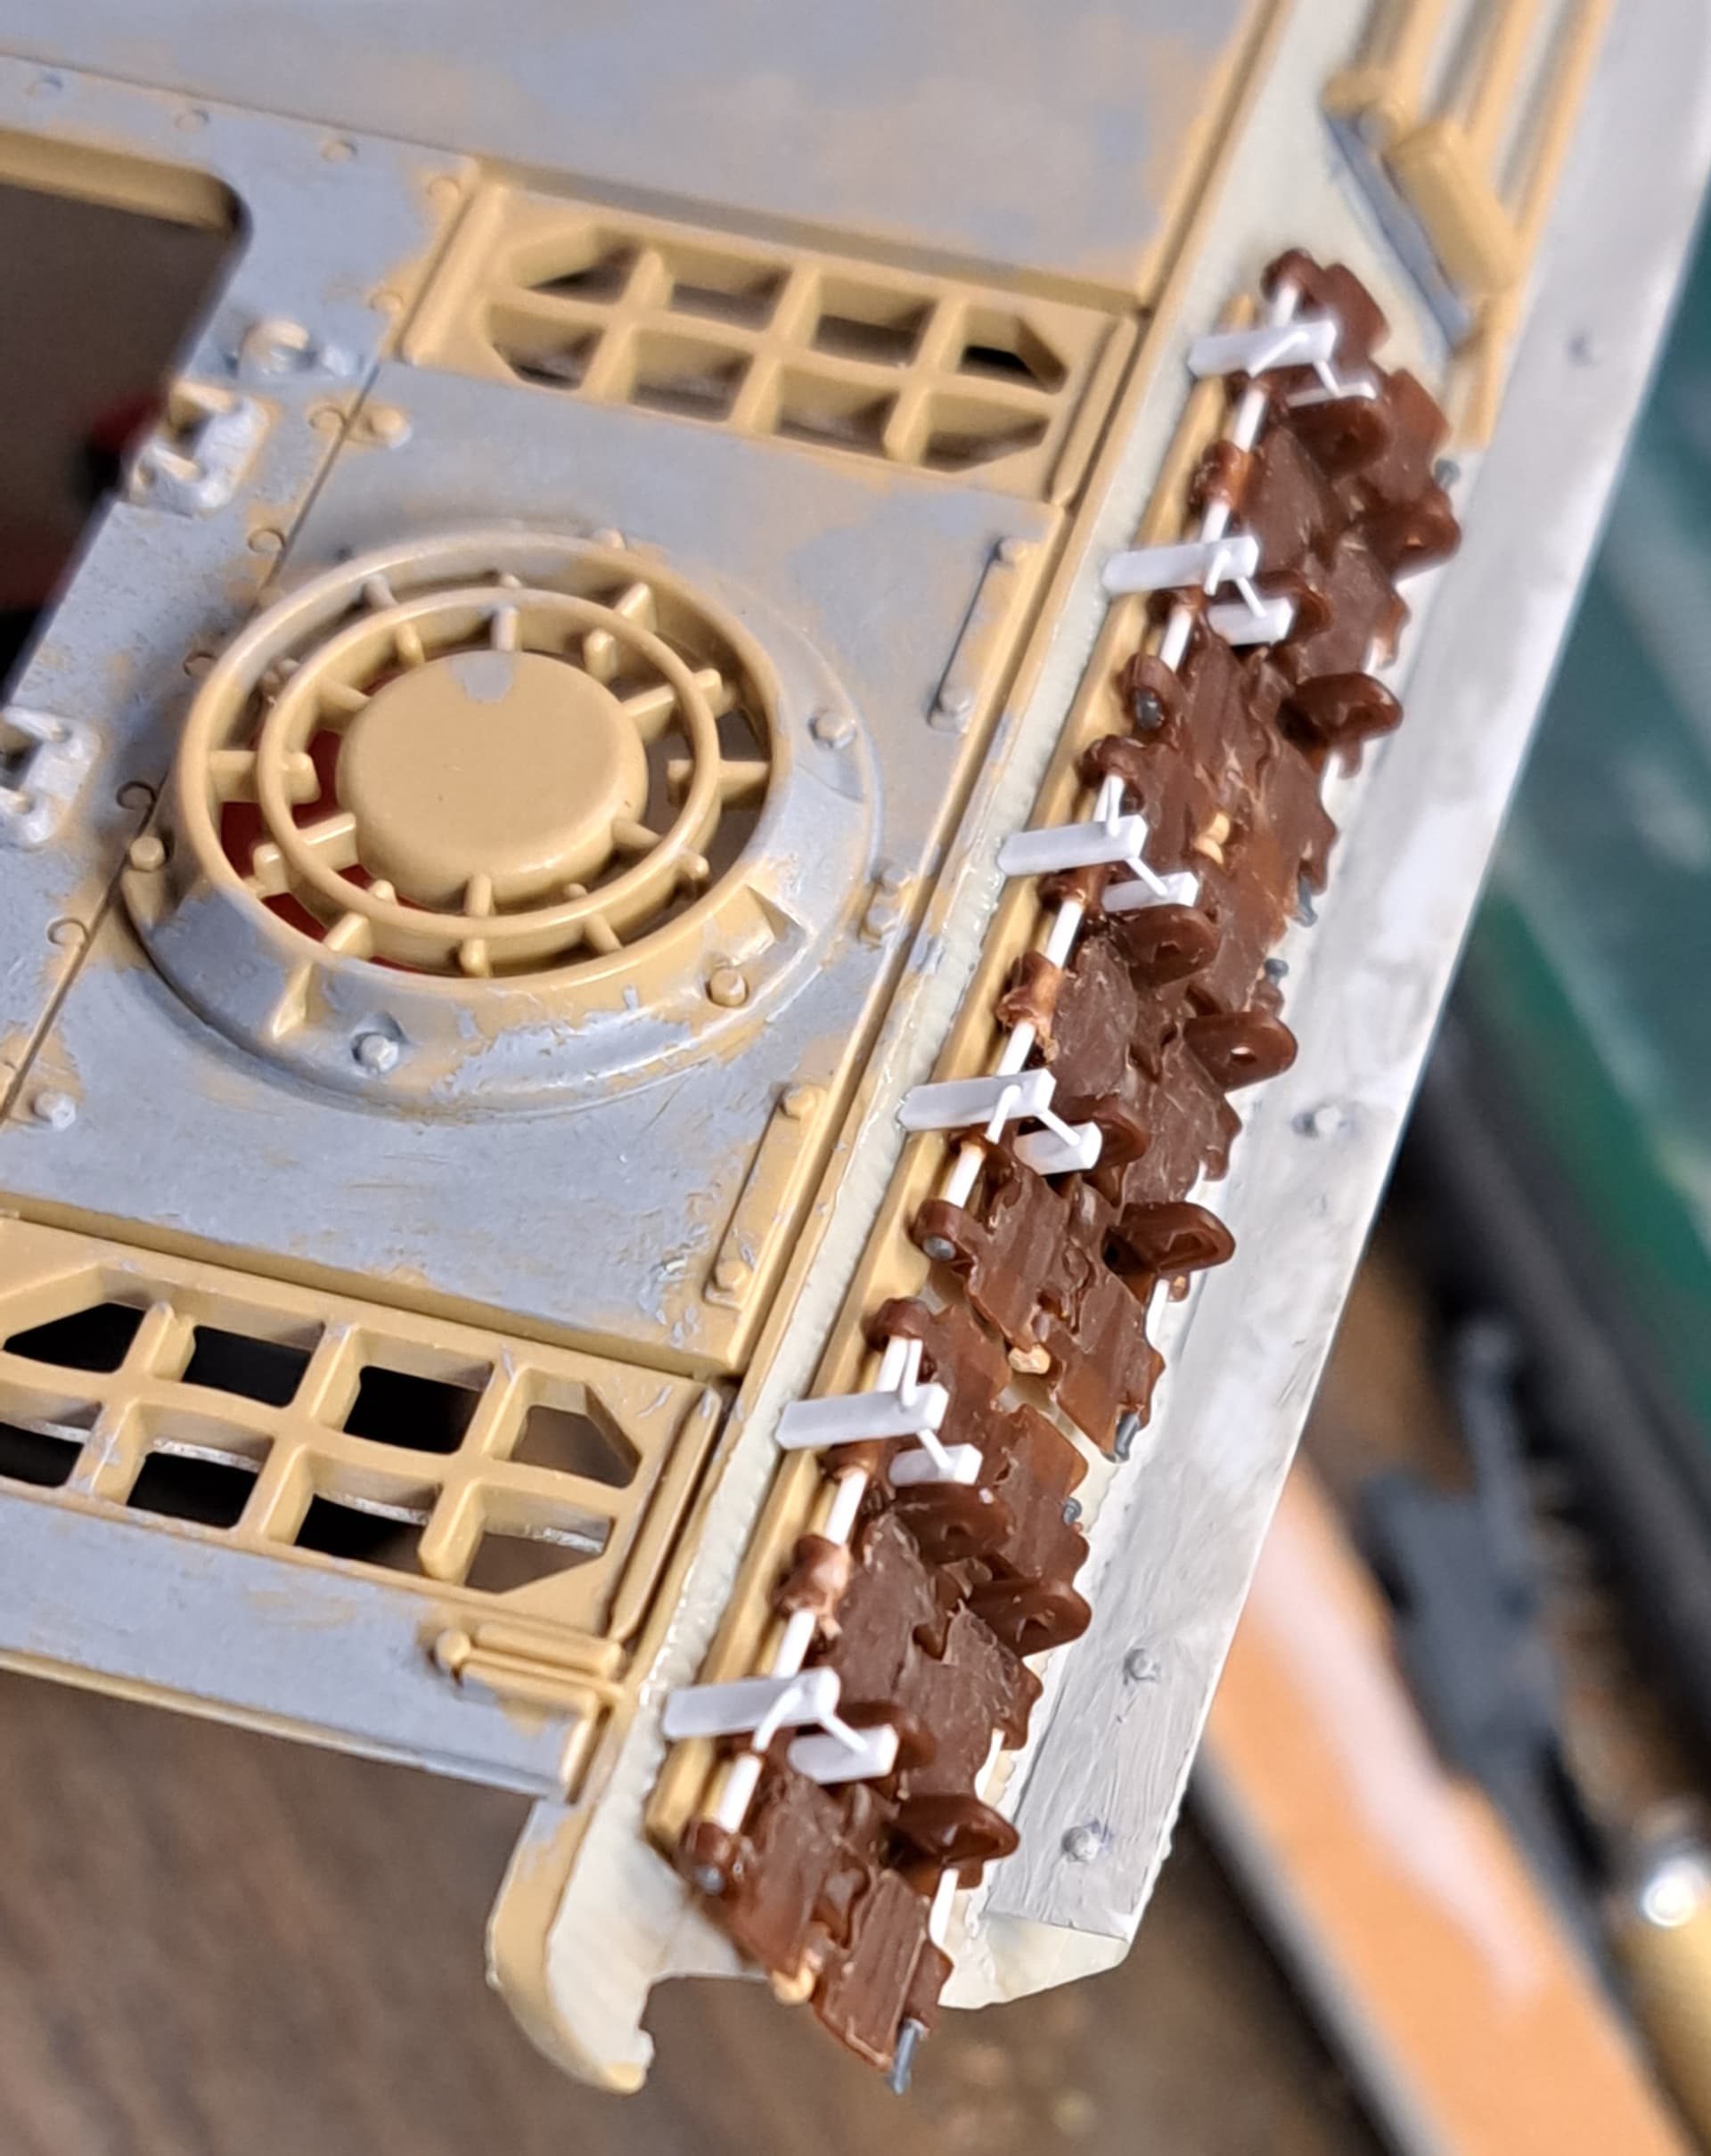
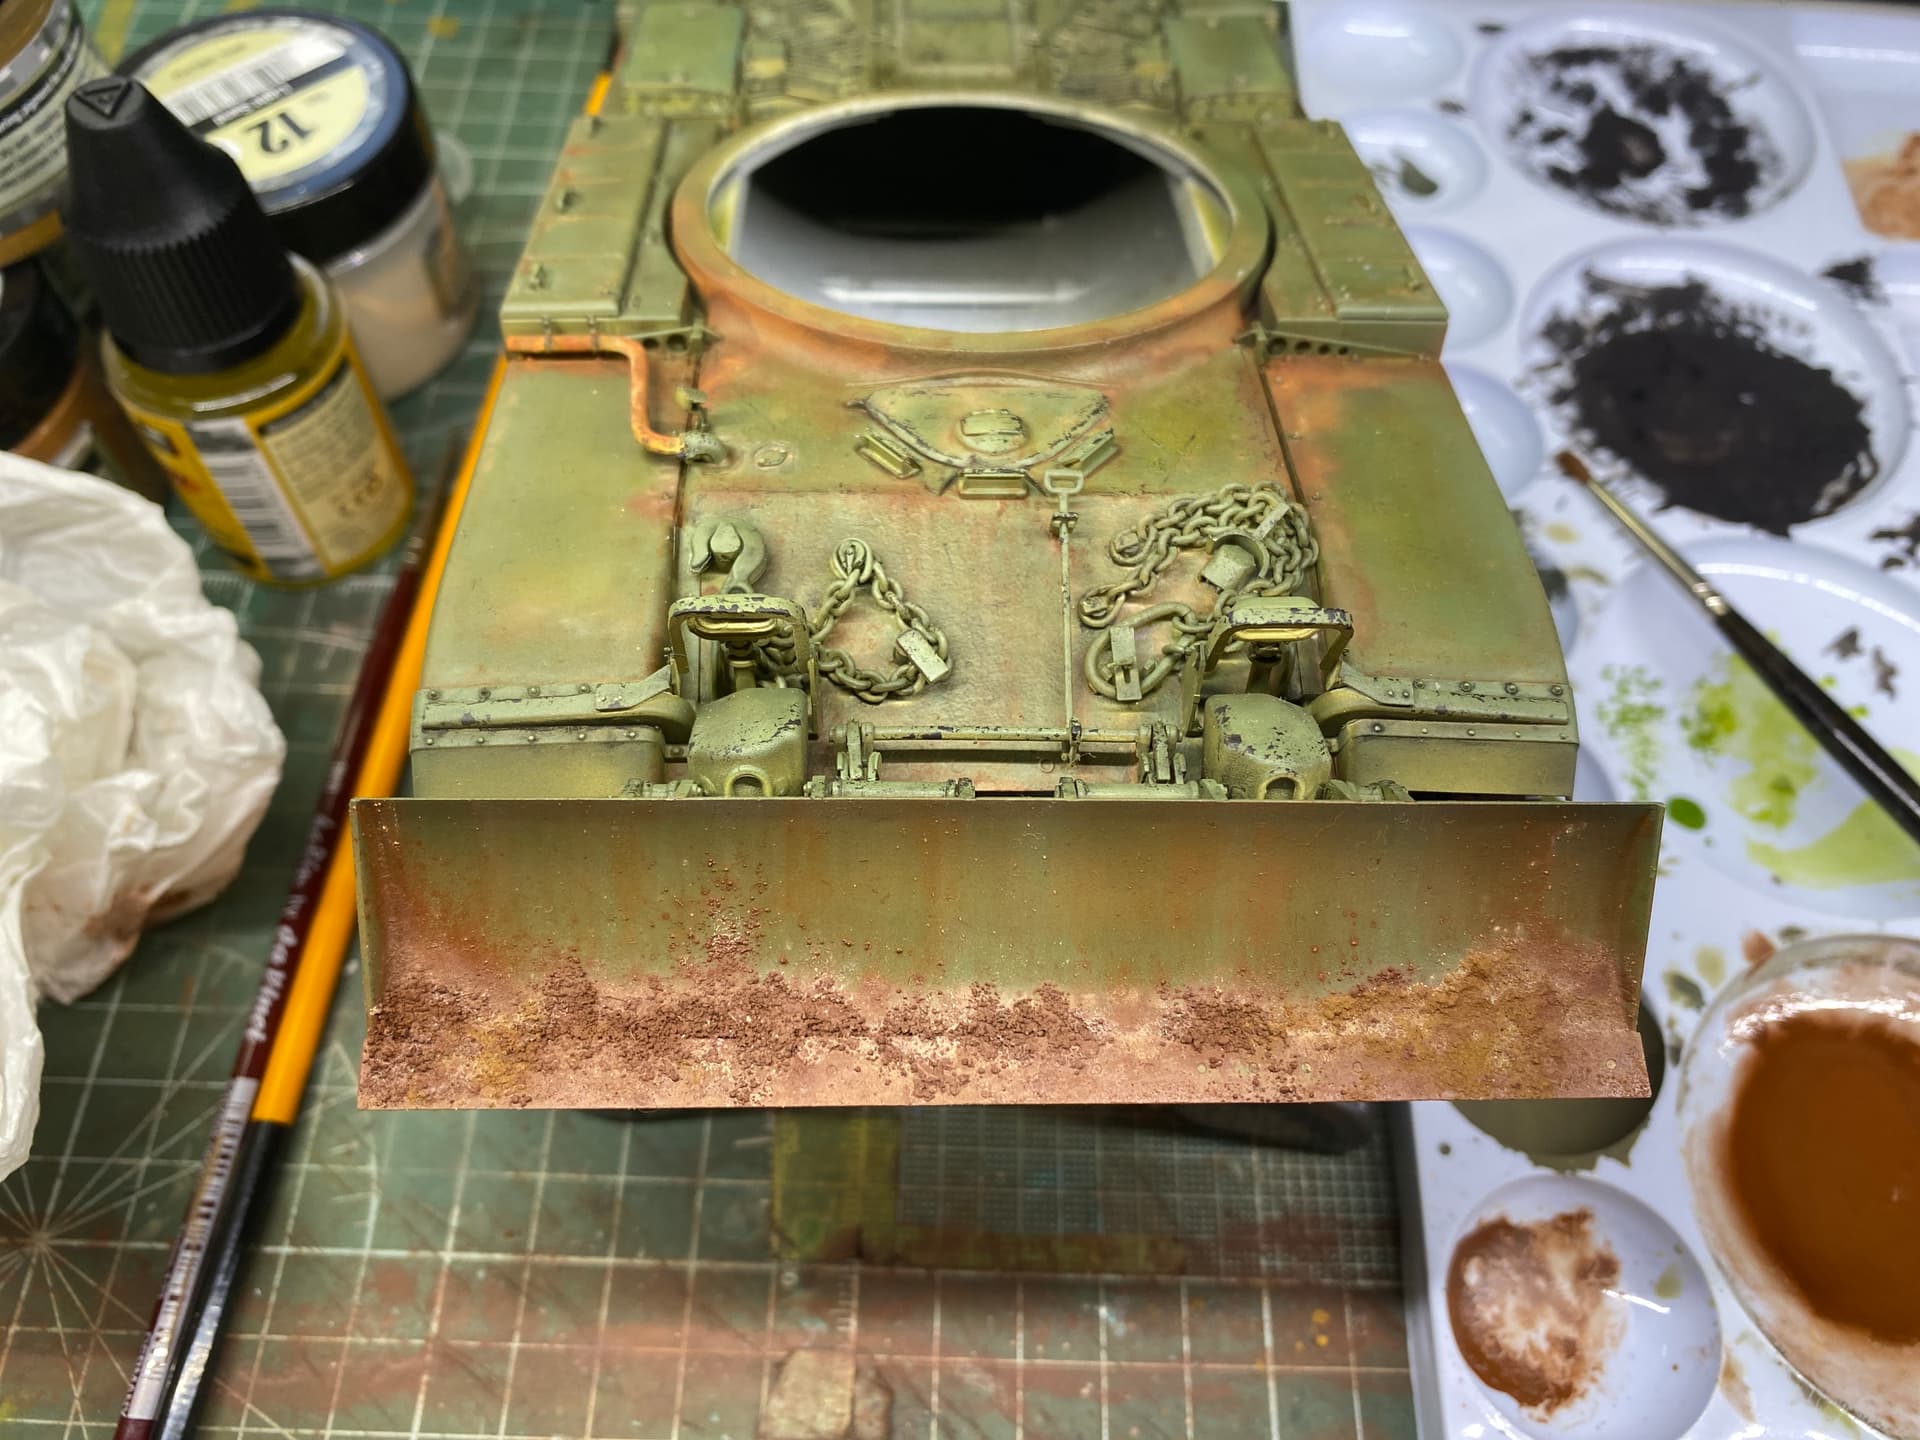
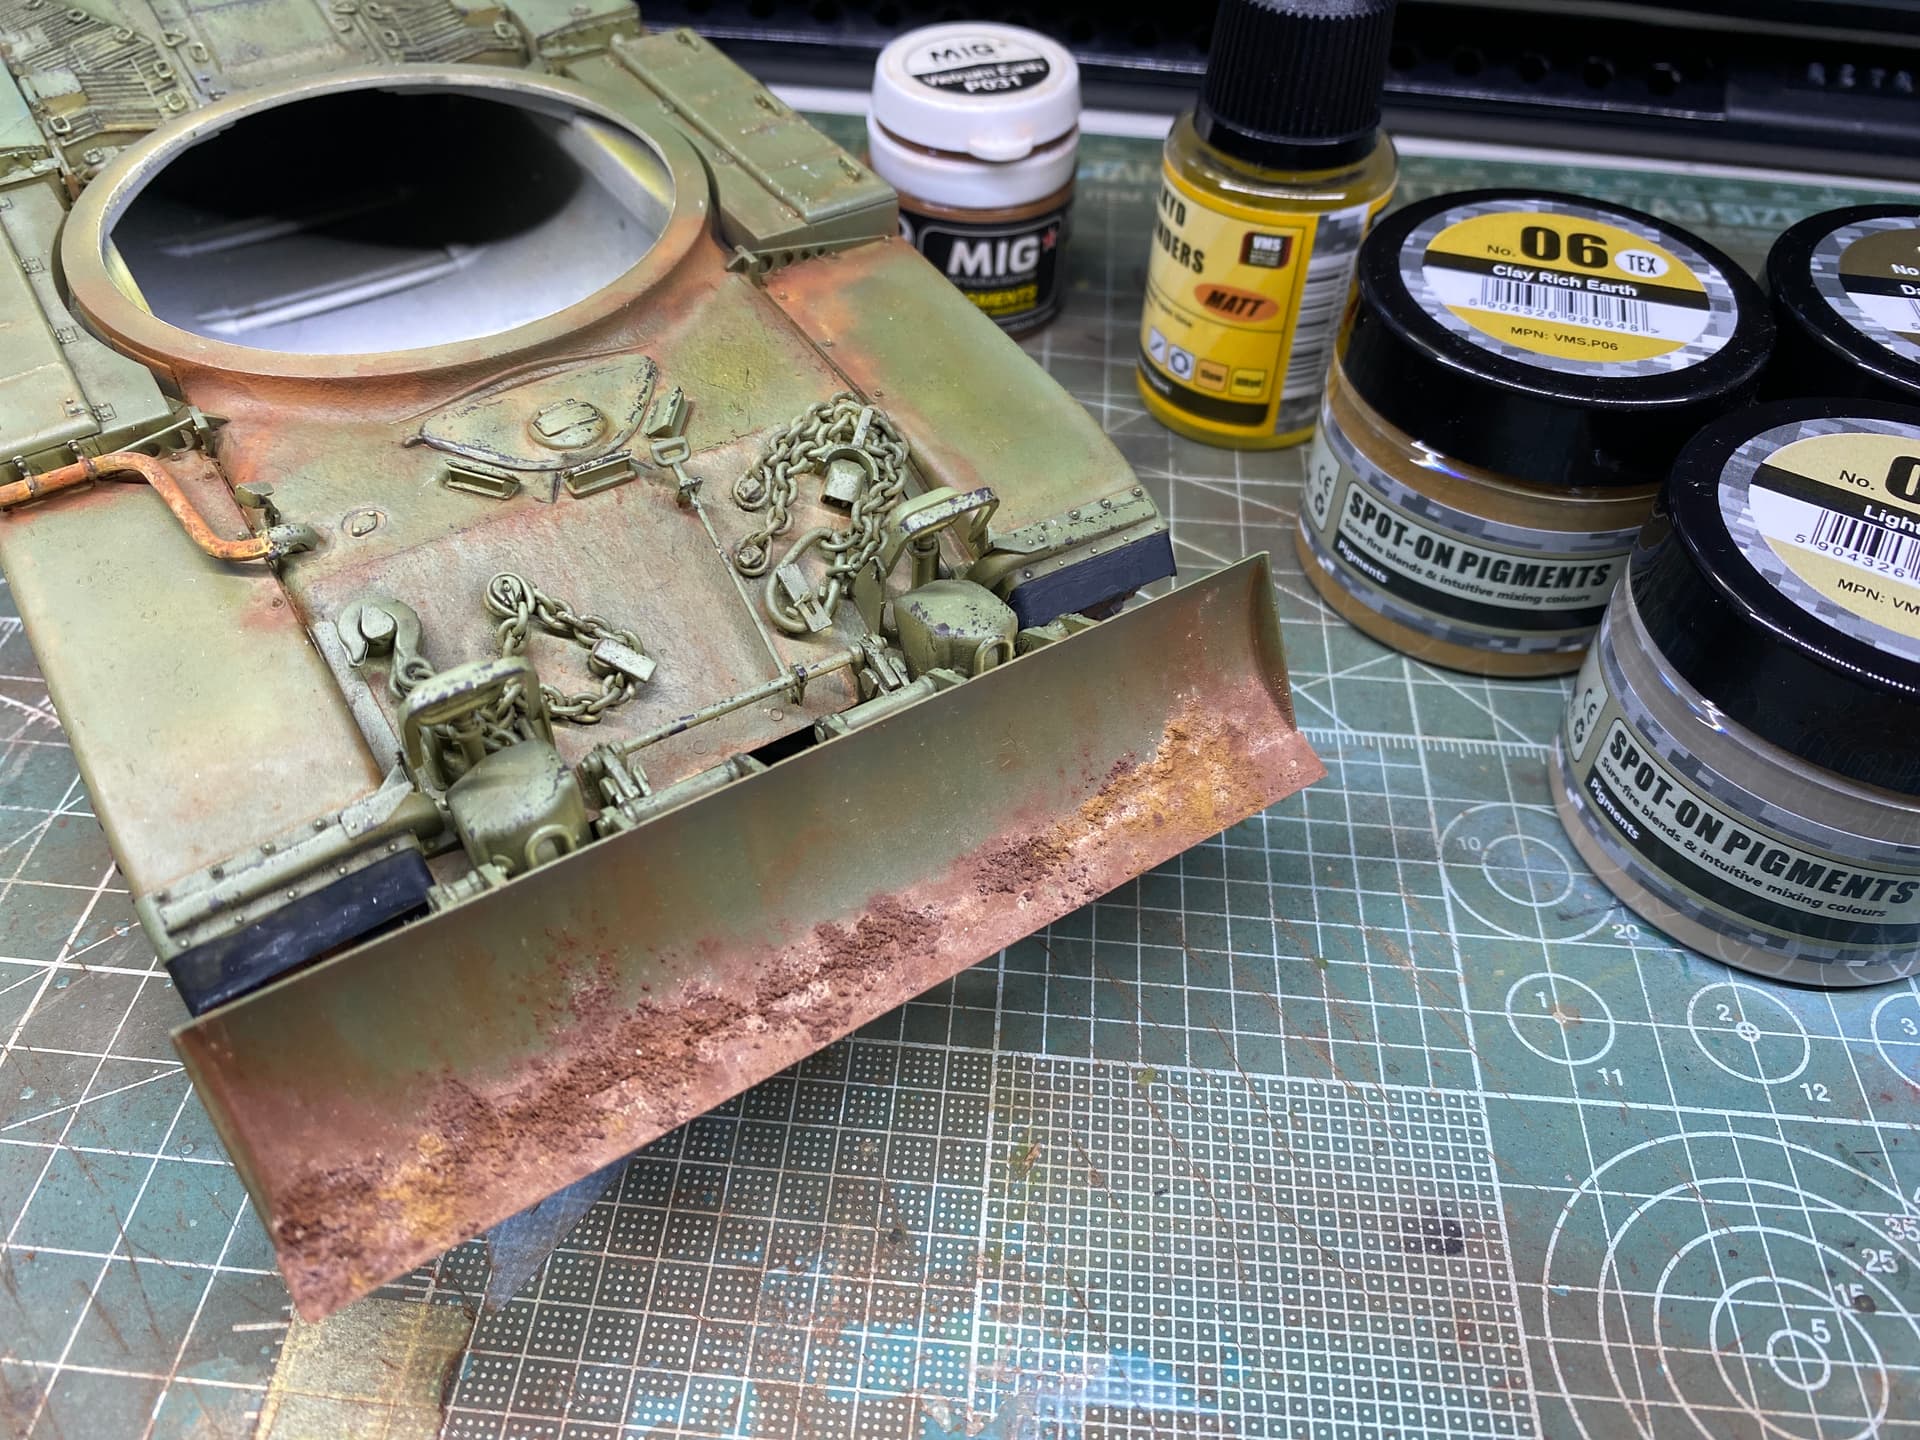
Bad weather in Germany, I hope it’s still raining on Friday so I can have a long weekend. I really want to have the finished-painted Tracks on my table Sunday evening, nothings gonna stop me
![]()
Have a nice week✌️
5 Likes
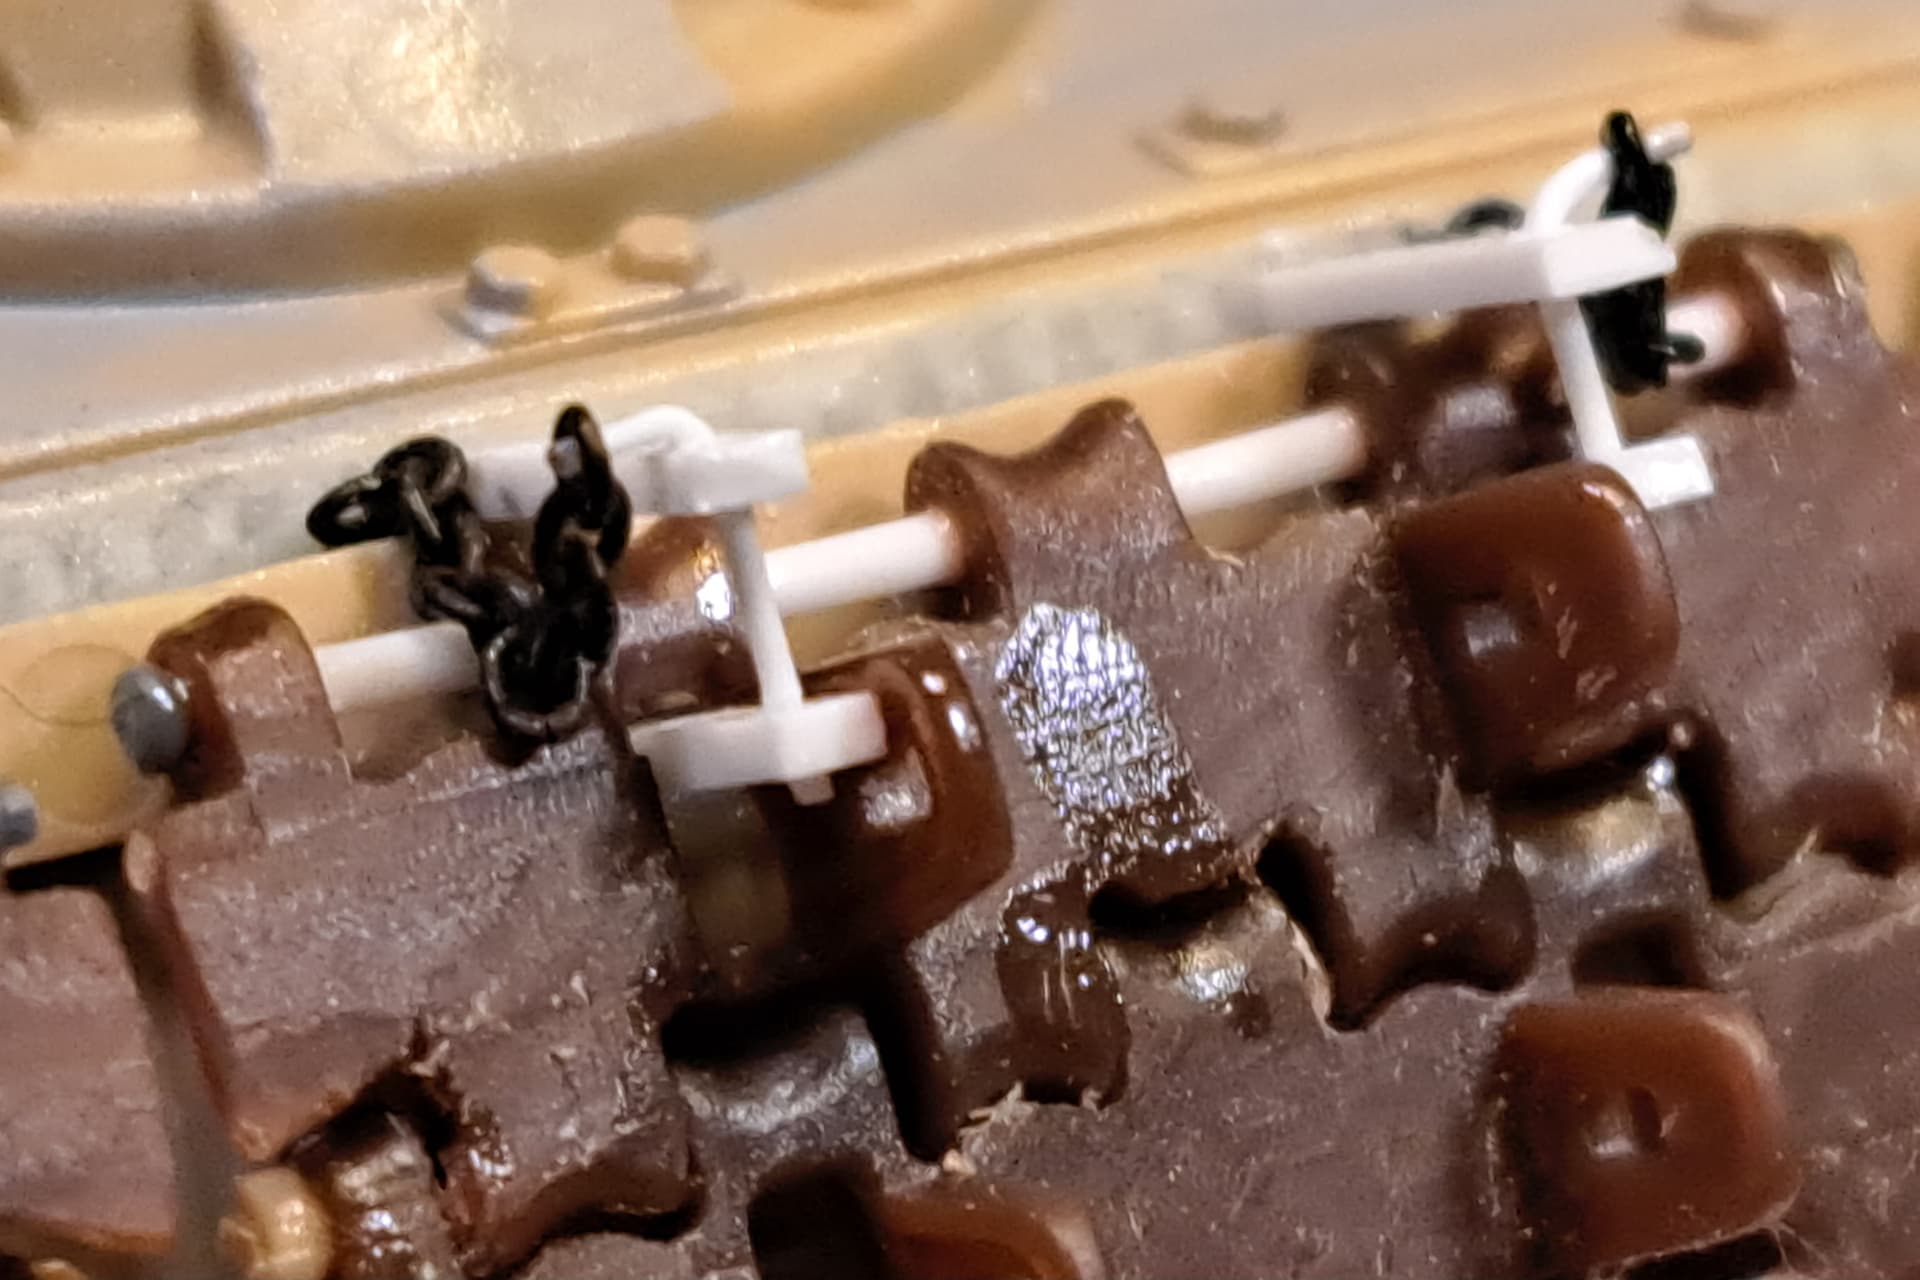
Working on spare track holders…will do chain after the other side is done.
One of the stock kit spare track holders.

Also replaced the kit top cover for rhe side skirts. It’s way too thick.
15 Likes
I recognize a Klingon Bird of Prey anywhere. My late cousin loved Star Trek and his hobby room was chock full of AMT/Revell ships. Literally every variant of the Enterprise was represented, along with Klingon Bird of Prey as well as Romulan ships and smaller shuttles.
3 Likes
Added missing pieces and some lazy weathering on a shelf queen of mine(the GAZ 23115 Tigr-M), the set up will probably look like this:
Cheers,
Angel
12 Likes
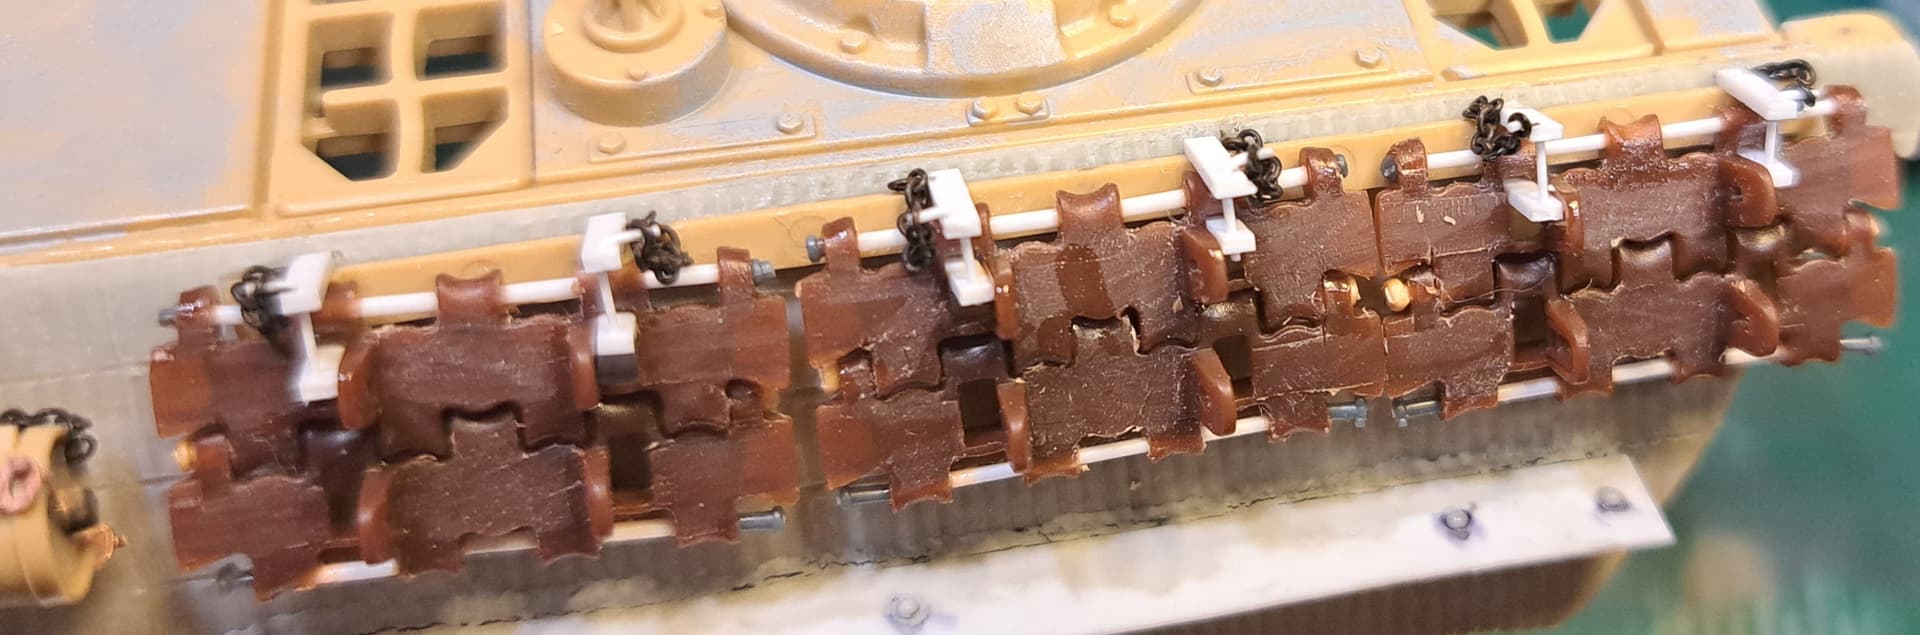
Other side…
With chains…
Added spare wheels from RFM to turret rear and spare track to turret side.
Looks familiar with those wheels…
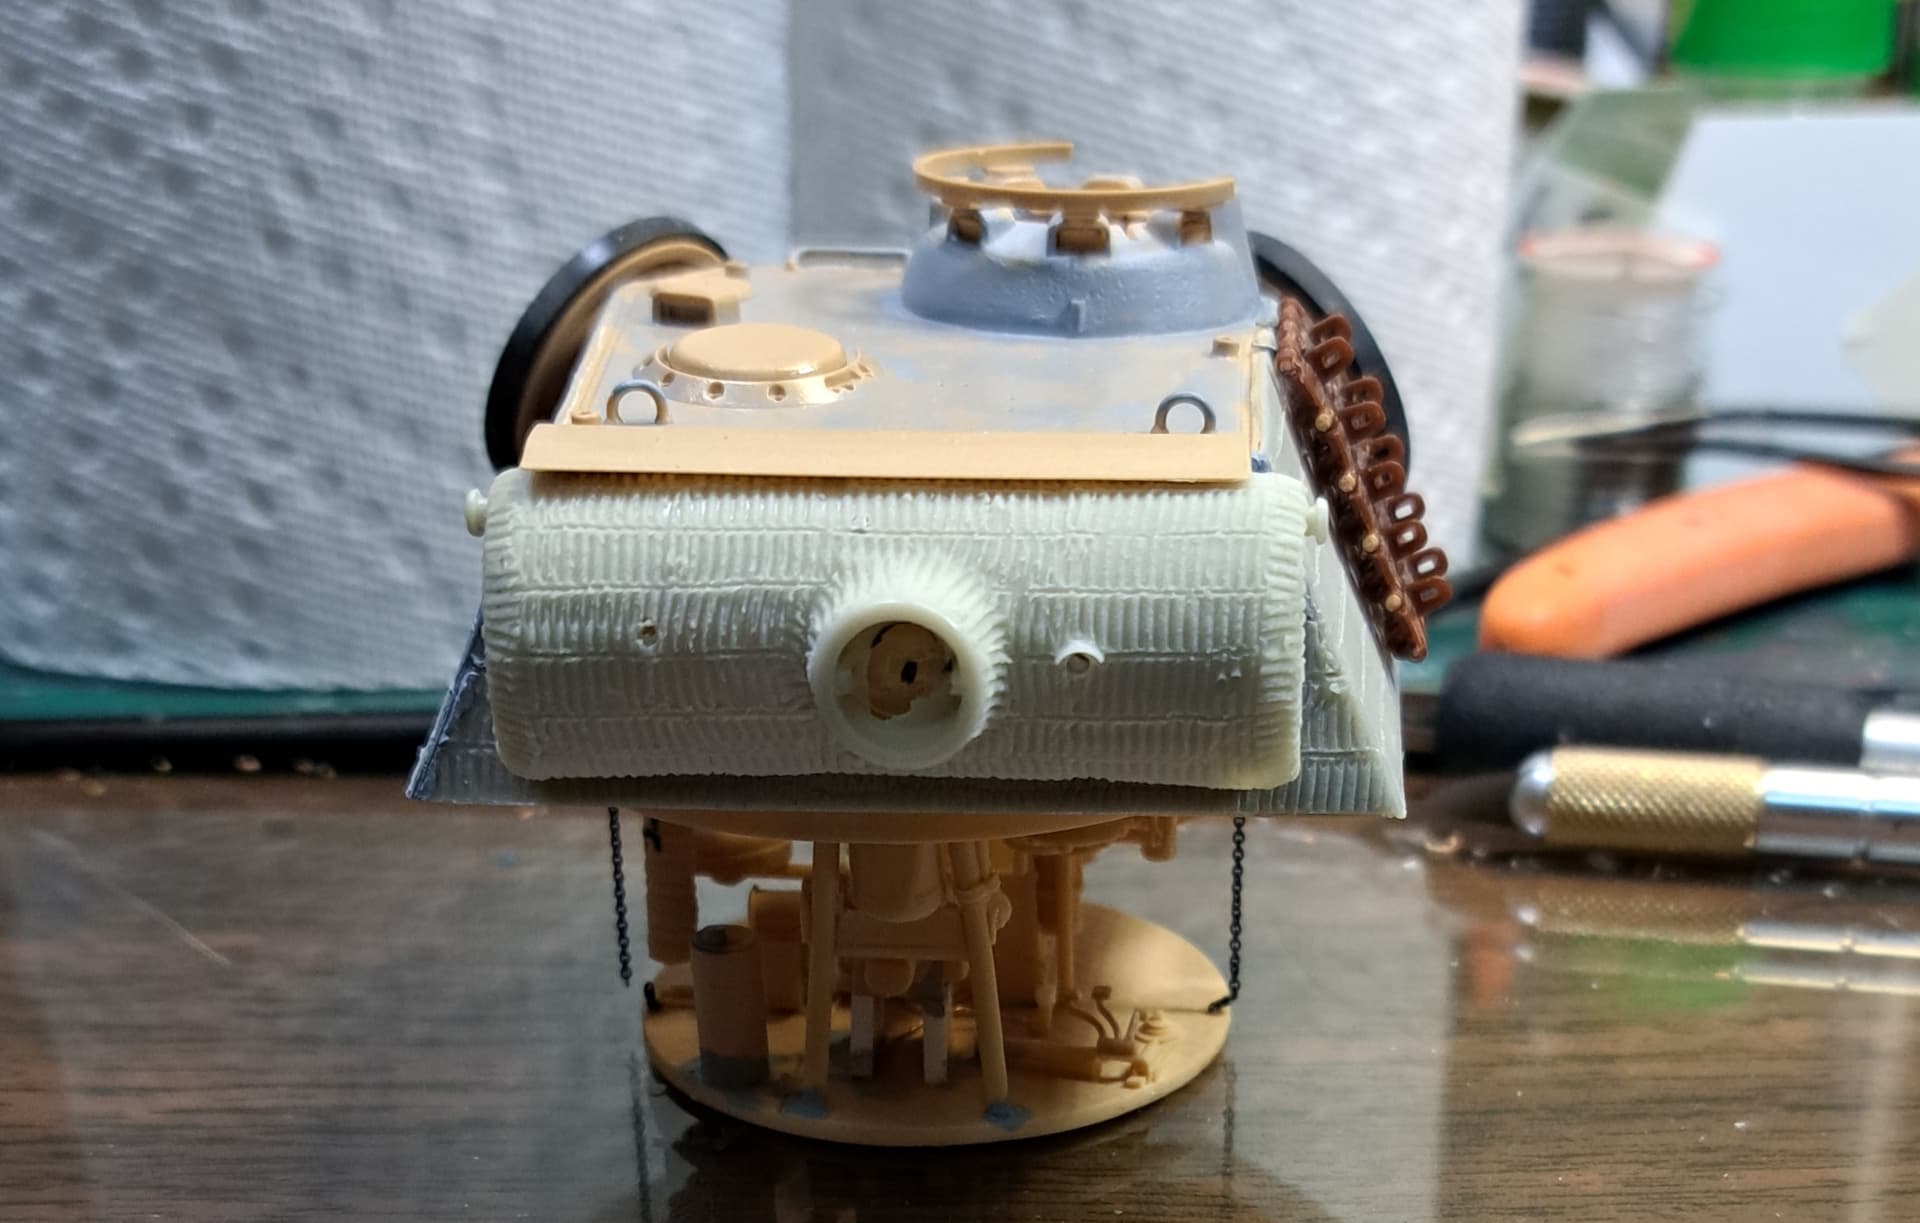
Rats! I know why…
12 Likes
Not today, but last night I attempted to hang the Discovery from 2001 from my ceiling. Was trying to adjust it and apparently the rear section had not quite adhered to the inside of the connector and it slid out of the antenna section and the entire rear went to the floor.
Miraculously, not a single cargo pod nor the engine exhausts came off so all I have to do is get some new epoxy and re-attach.
So…effing…lucky.
5 Likes
Today, be careful when working at heights, lifting heavy loads, handling sharp objects and communicating with your wife - Friday the 13th!
7 Likes

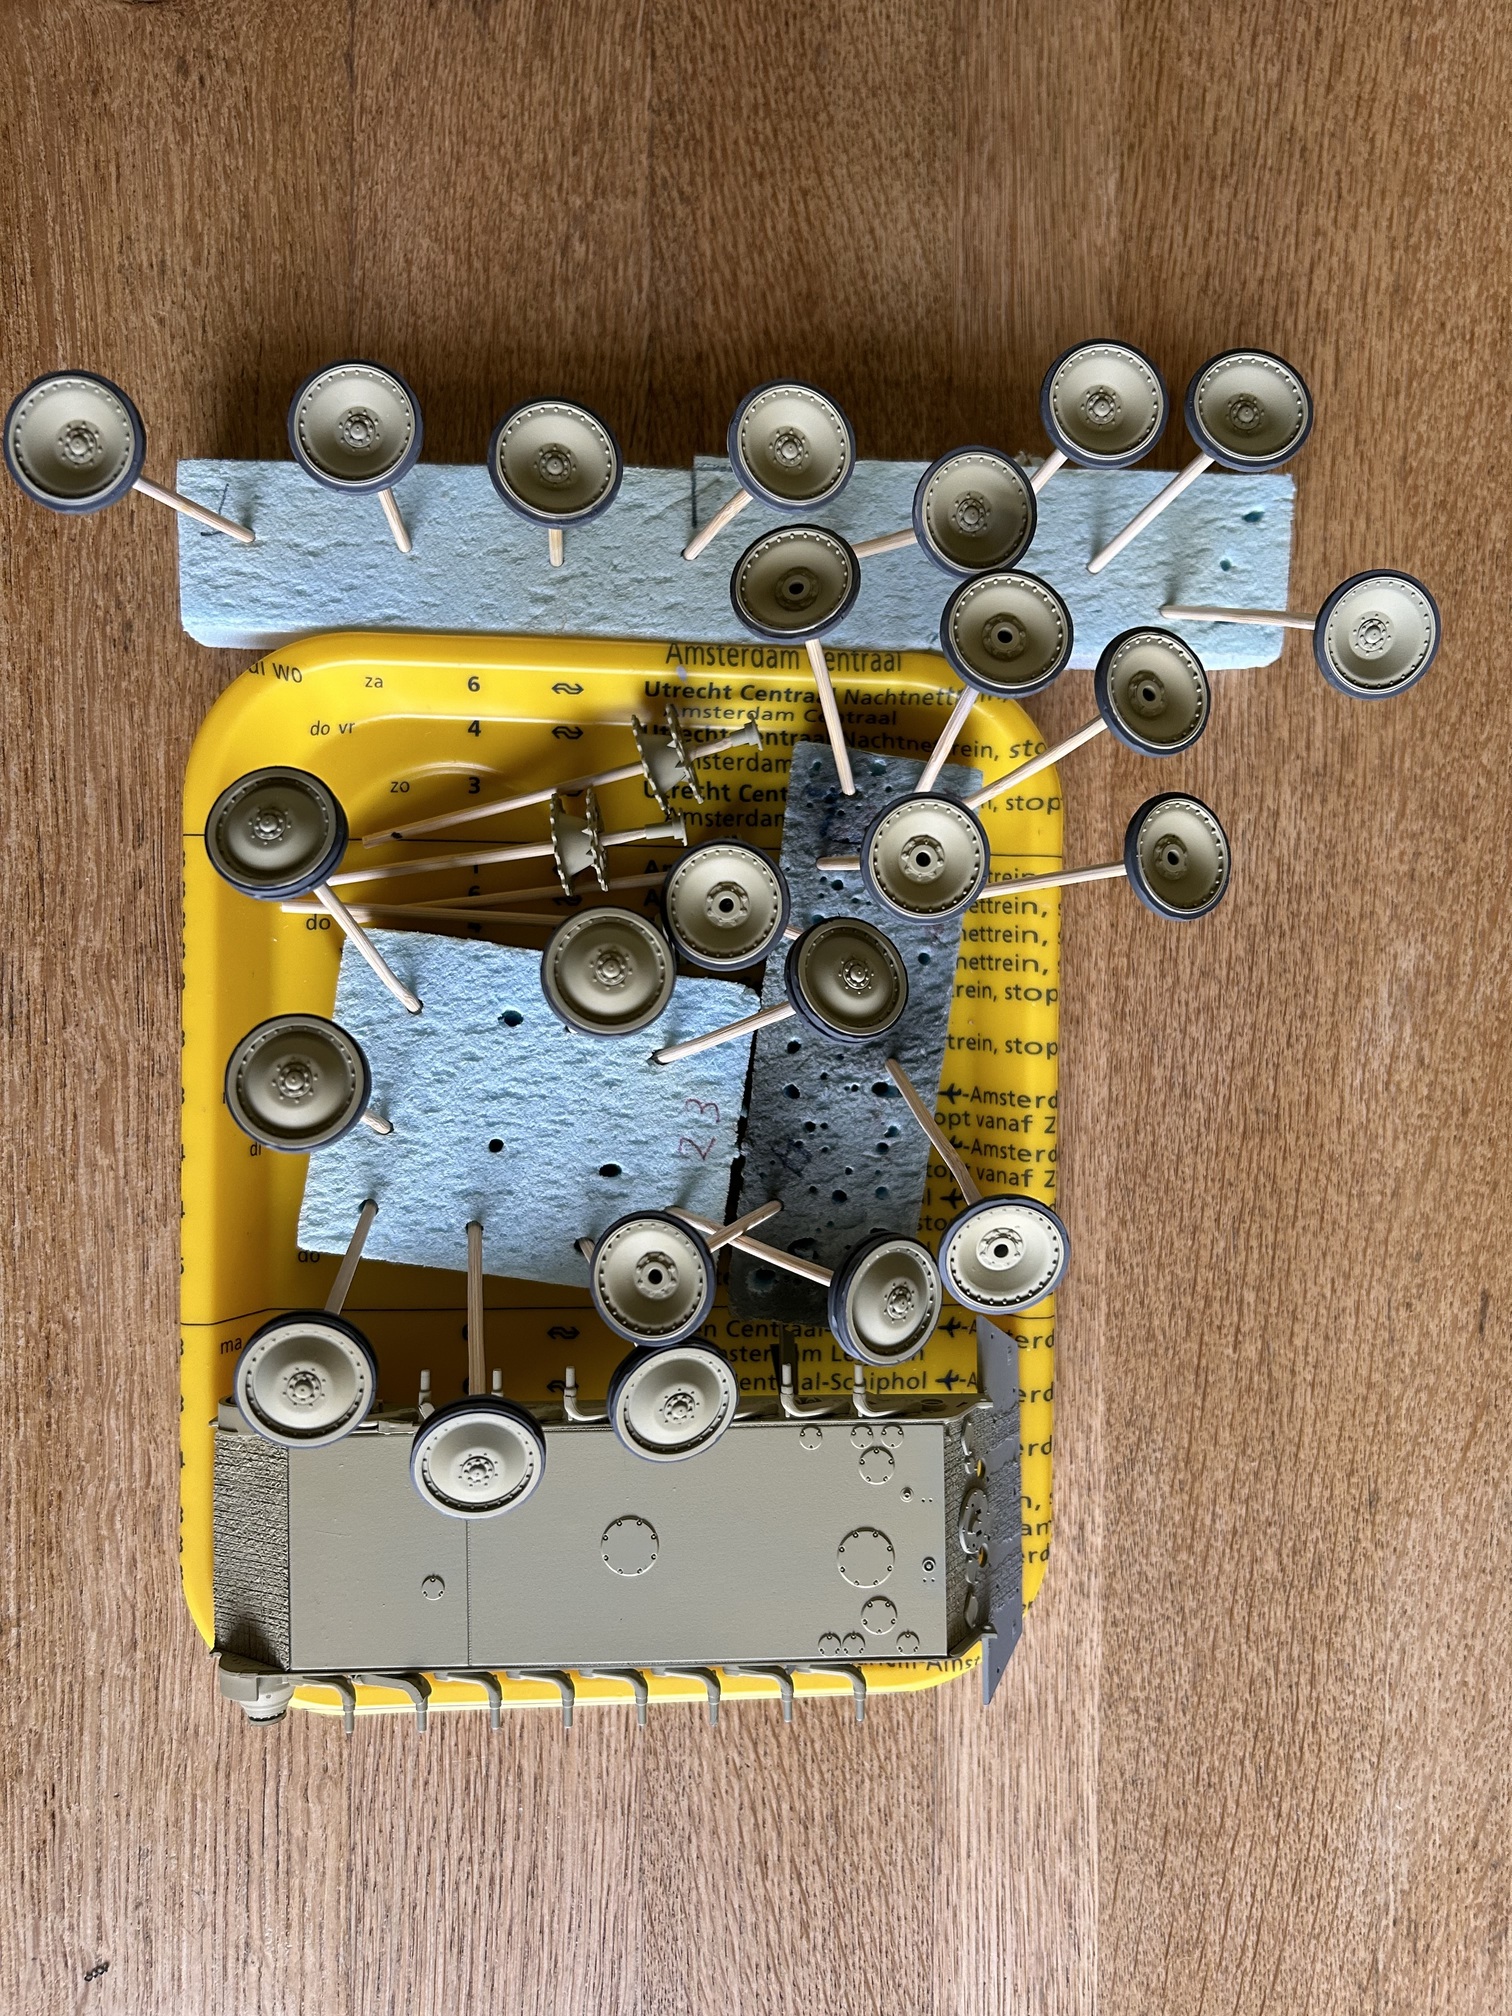
I have heard about “magic tools” and seen them on models (my own and others).
Is this the same method applied to spare wheels (magic wheels)?
![]()
![]()

5 Likes
![]()
![]()
Robin, found my hidden pun on Mickey Mouse and Disney’s Magic Kingdom, you did!
AAA+
On a serious note, I have to dig in reference to see if the wheel retaining plate was bolted in place or secured with wing nuts. If wings full or half.
Any pictures of such appreciated greatly appreciated.
3 Likes
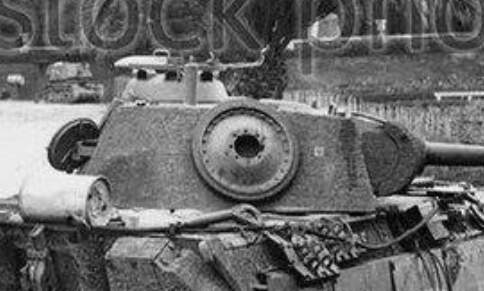
This photo is said to be from comparative trials in Germany between a Panther and an M3 tank.
I presume it was done by the Germans before 1945 since there would be very little purpose in doing it when the M3 was no longer in service (captured lend-lease tank? I don’t think they brought one home from North Africa)
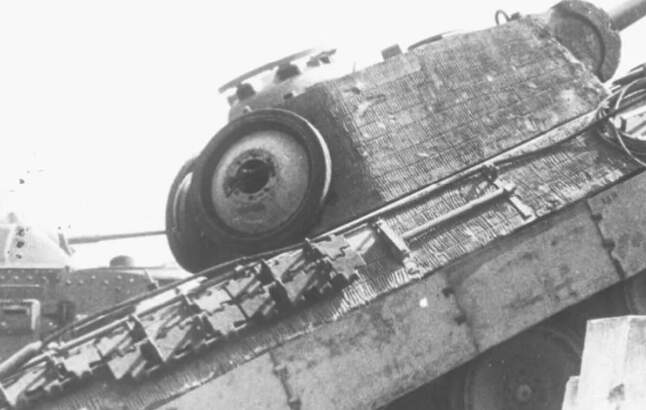
Looks like a pin in the center with some kind of arm with pegs to catch one or two bolt holes on each side. I see no reason for having a central pin sticking out like this unless it is threaded for a nut holding an arm in place. The other option, without the pin, is a bar with studs inside the wheel and and wheel nuts from the outside. Note that the convex side of the wheel disc faces outward
Paris 1944:
Different position. Doesn’t look like a central pin, more like studs sticking out from the turret side. Two, maybe three studs.
annnddd the money shot:
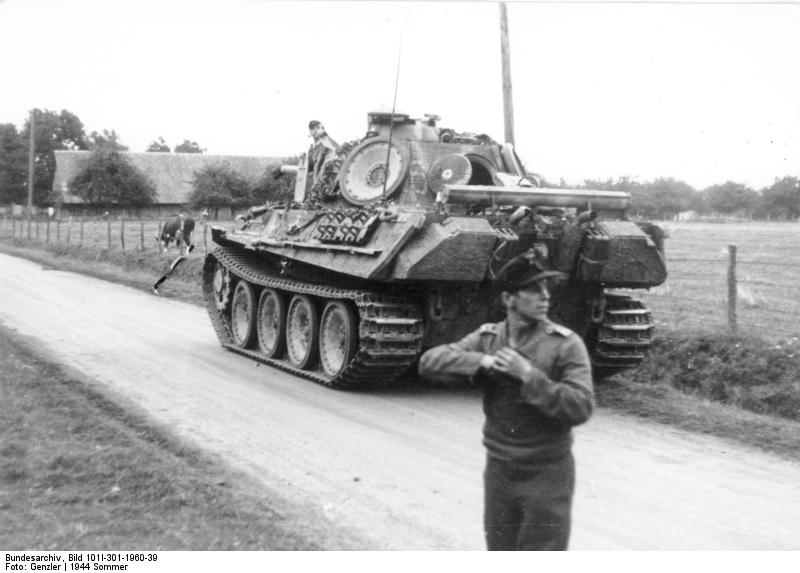
Convex side in, three nuts on studs welded to turret side
Very few images of Panthers with spare wheels so I guess that it was “local initiatives” → make do with what’s available. The easiest solution would be two or three studs and use the regular wheel nuts.
10 Likes
The money shot is GOLD.
Thank you, probably saved me a day of page flipping with a dozen or so dusty old books ![]()
FWIW - that’s possibly a 116th Panzer Division Panther with the white dot on the escape hatch. I’m modeling a 116th PD G.
Sadly my Panther doesn’t have the gun cleaning kit on the rear engine deck. That’s due to the Cavalier Zimmerit being molded for standard left side mount. Just didn’t want to bog down revising that.
Rear mounted gun cleaning kit was very common for known 116th PD Panther G’s from what I’ve seen. Sometimes the 116th PD A’s didn’t have the gun cleaning kit across the rear.
So my 116th PD G will be a replacement vehicle shipped in that hasn’t had the gun cleaning kit moved yet by the field work shop.
Edit - the OCD is bad today, confirmed 116th Panzer Division used 3 nuts to attach spare wheels.
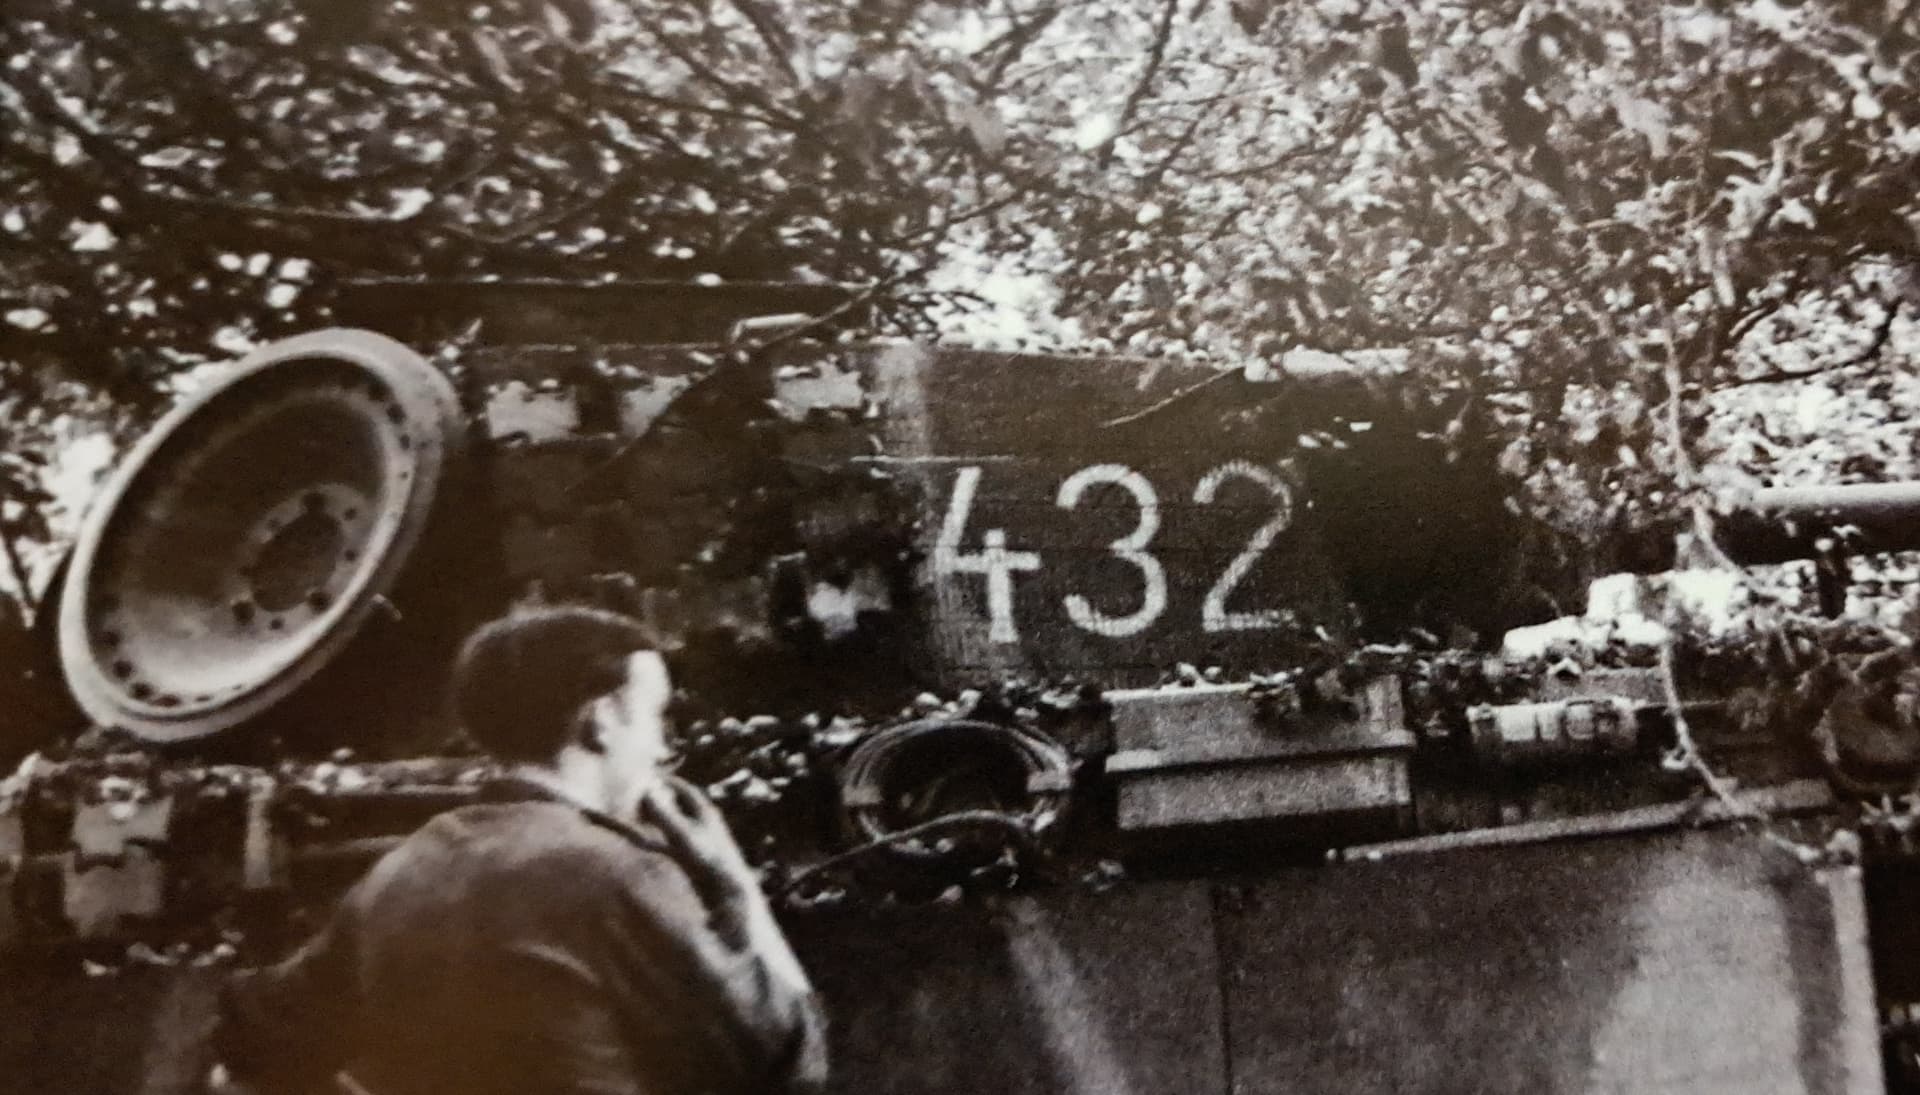
Photo from Didier Lodieu’s, “The 116 Panzer Division’s Panther Battalion in Normandy, July-August, 1944”.
9 Likes