Waited for some thread to arrive. The stuff I had was .55mm. Should be .45mm for the crane, so it’s “hurry up and wait” until Amazin gets here. The .55 will be good for the rear winch, so it’s not wasted.
I got the white panels for the bumper codes done though, so………
2 Likes
Hello model builders,
With another few layers of details, this is looking a bit more respectable:
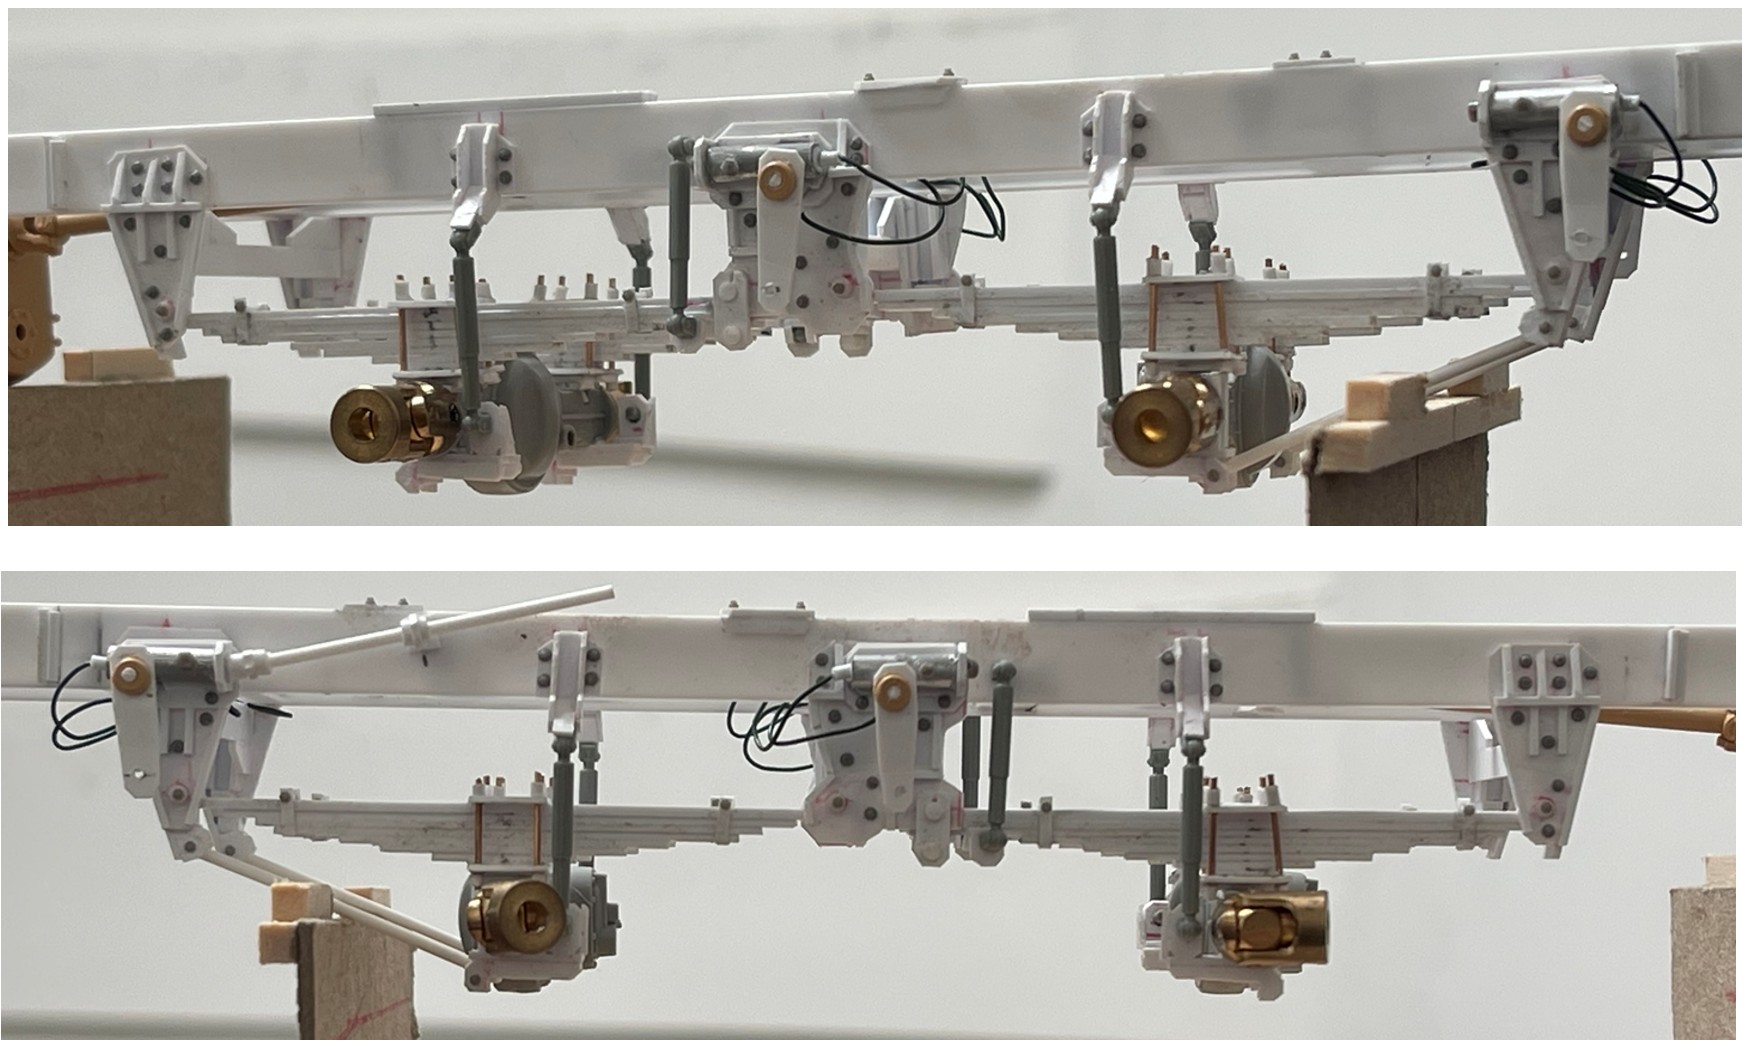


Looking closer to a viable chassis and suspension. I cut some styrene out, and added some in other places, plus more shock absorbers and bolts. And, we now have four sets of steering gears, pitman arms and hydraulics installed!
Next up, more bolts, wires, and hydraulics. Getting the steering installed and to work will be a bit of a PITA, so I’ll pretend this project wont need it for a while ![]()
Cheers
Nick ![]()
26 Likes
A work of beauty. Keep it up. ![]()
2 Likes
@Tank_1812, thanks Ryan. Yes - to keep moving, lol, I’ll try ![]() So far this project has required several little steps at a time, just one more layer each day.
So far this project has required several little steps at a time, just one more layer each day.
And for today, getting the cab in place:
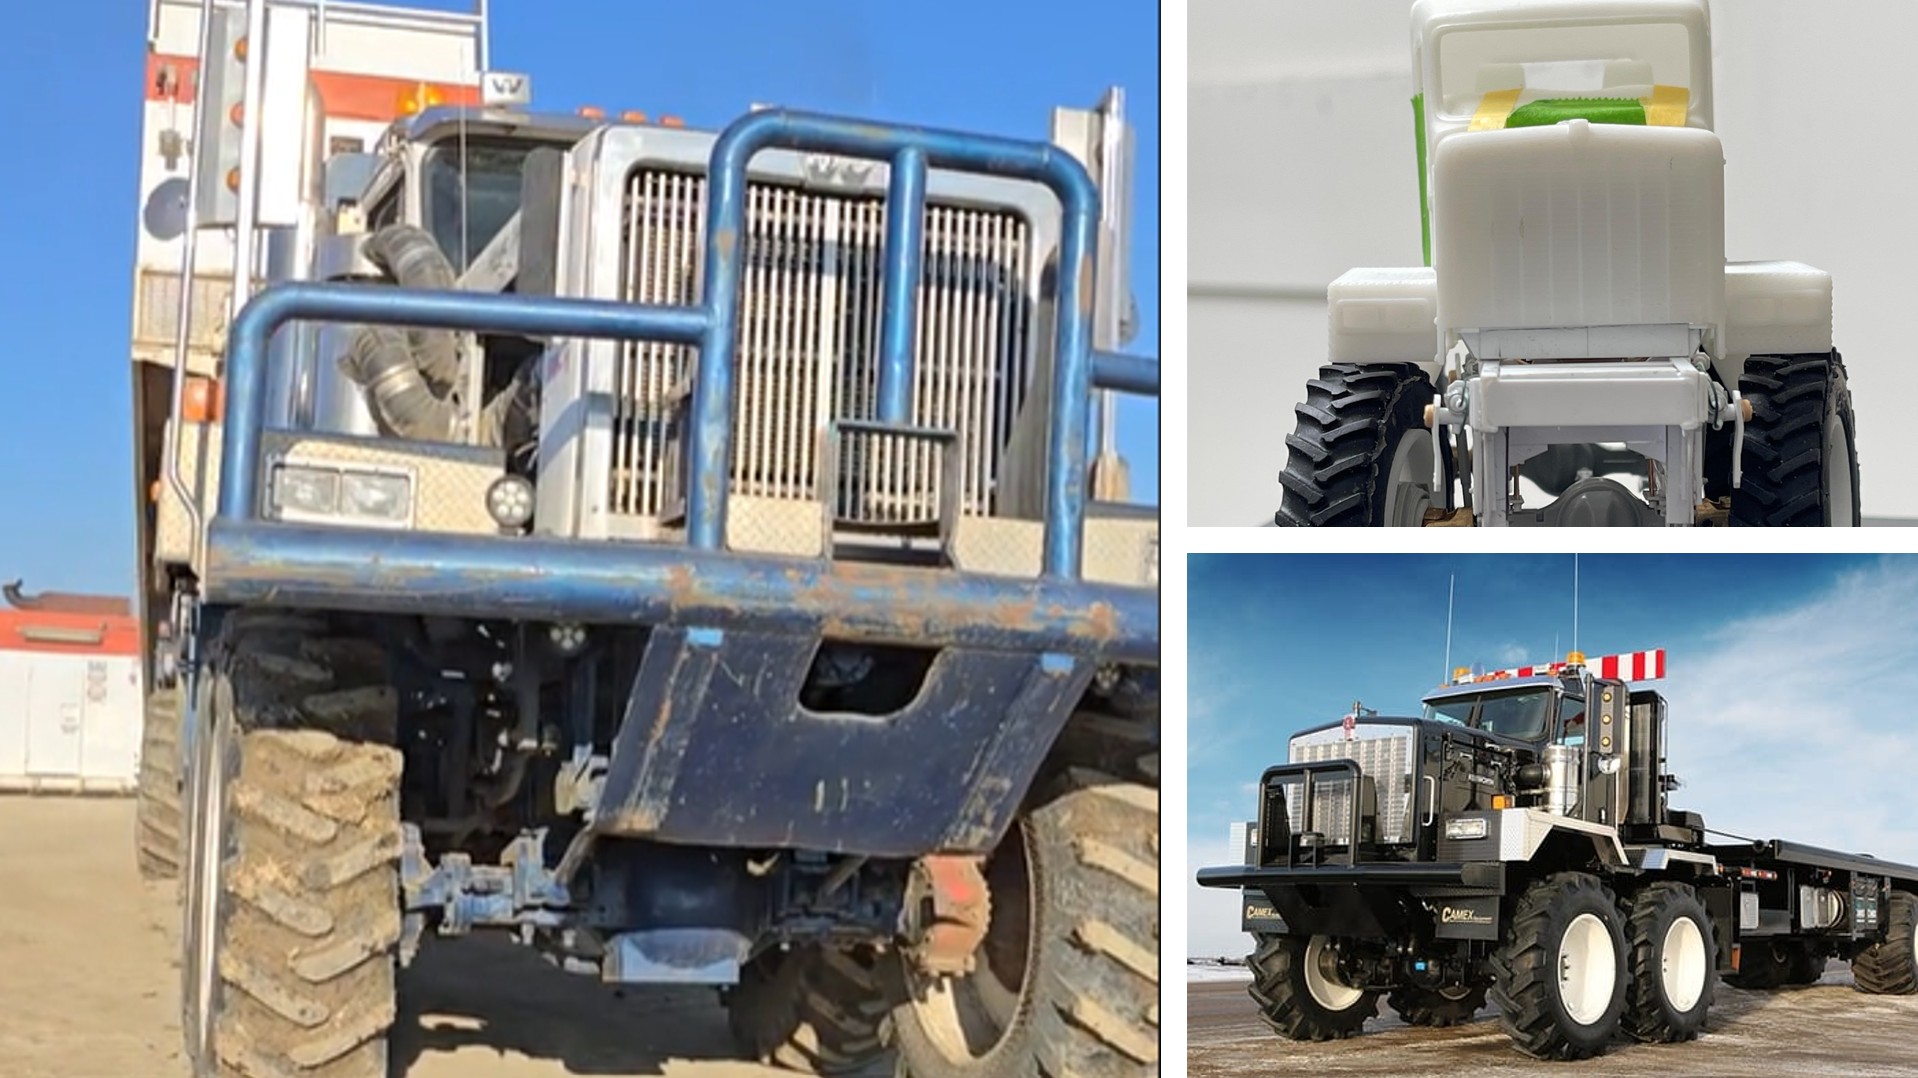
So you don’t all think I’m losing it on this build, here are a couple of examples of what I’m working toward - the truck on the left is a Western Star, while the black truck on the lower right is the Kenworth C500 which I have a cab for. Brands aside, the suspension and running gear of both is fairly similar, and as I am not working from any plans per-se, I’m pleased to refer to what I can find!

Getting the cab set correctly, even if only dry fit, basically took two steps. First, and now done while ago, was getting the cab/fender openings centered over the axle centerlines. With that location more or less fixed, I could set up the axles and now, go on to getting the cab to sit level. This required making up fore and aft body mounts. In the front, basically brackets, while under the cab, some cylinders that generally look like air ride bags. There’s a beam that crosses the two, which isn’t correct, but, the floor of the cab doesn’t have any mounting points, so we now have this. And, it’s set just high enough for an exhaust pipe to pass below.
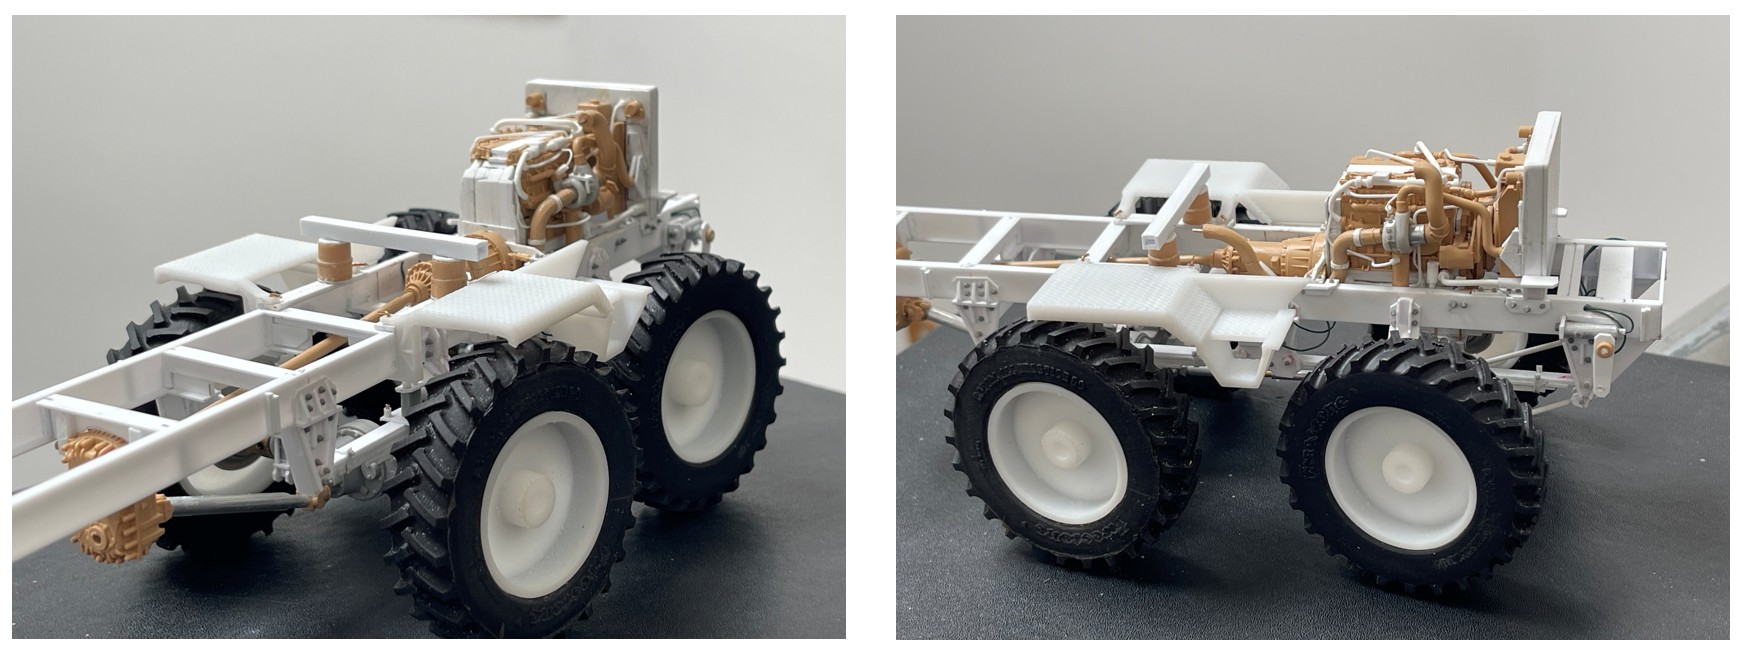
The rear fenders are temporarily held in place with metal pins. As you can see, these have a step, which is fine, as happily it is offset from the chassis just enough to allow my second axle steering gear and pitman arm to fit.
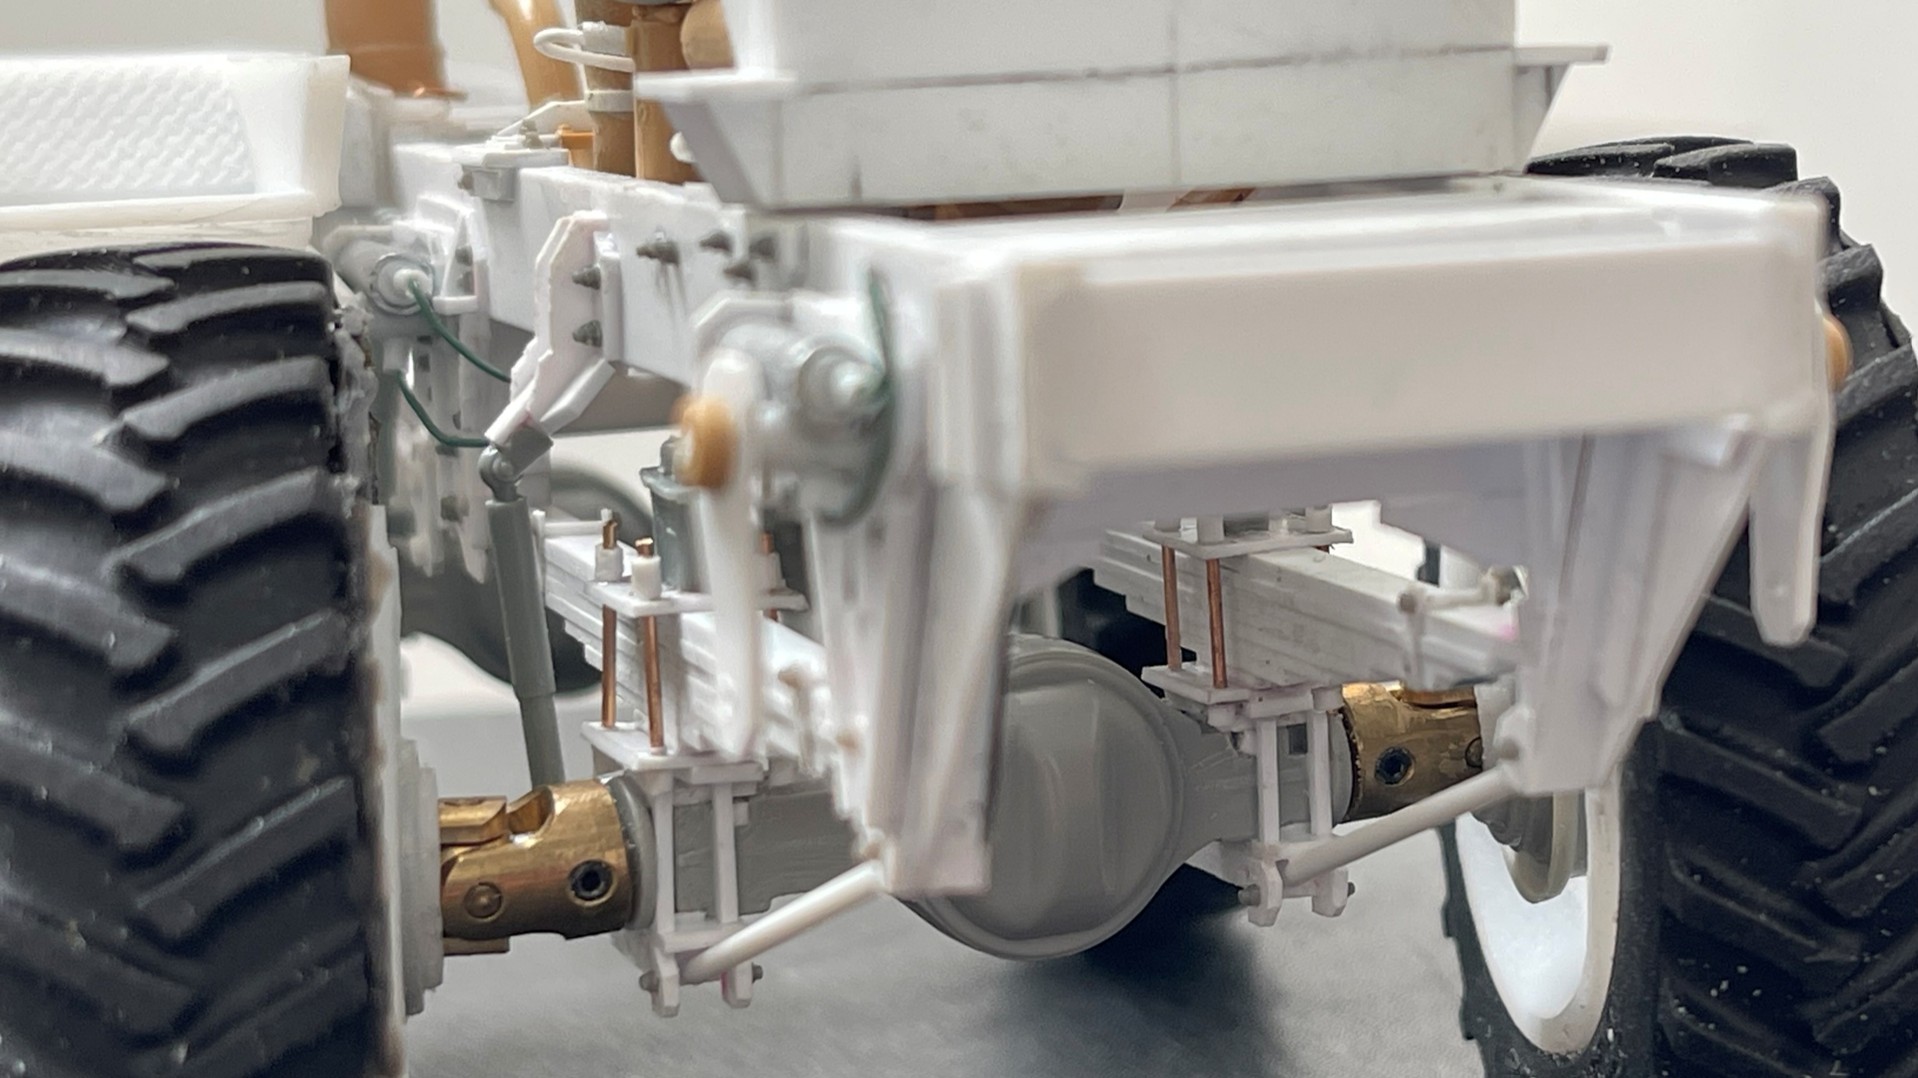
There are still plenty of bits to add to the chassis, but the real task at hand will be getting the steering together. This means linkages/drag links for each axle, and a separate drag link connecting/coordinating steering between two axles, which will be a bit tricky to pull off.
Cheers
Nick ![]()
19 Likes

12 Likes


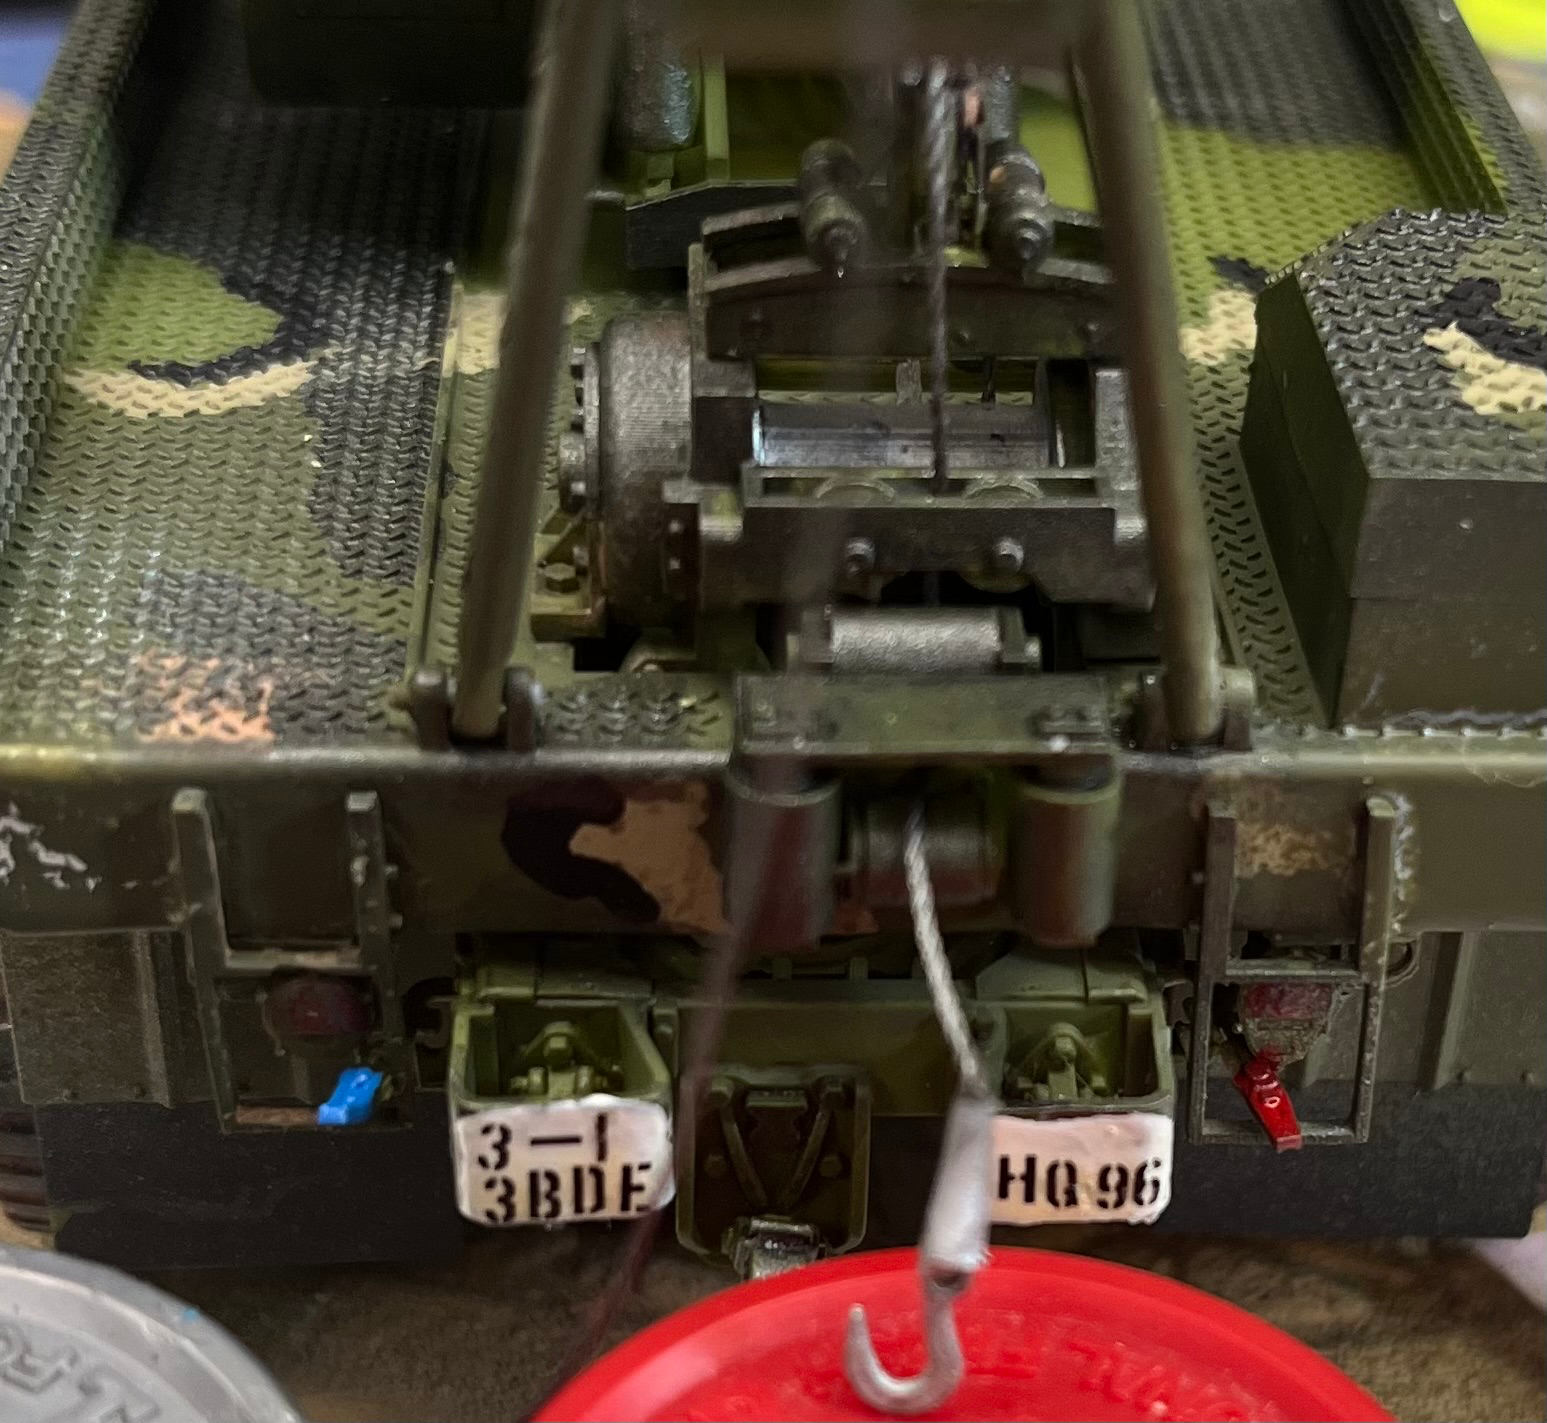
Re-rigged the crane and rear winch with the correct cable. Scratched a clevis for the winch. Finished the bumper codes using individual letters (horrible job!). Surgery tomorrow morning but hope to finish rigging the crane on the weekend.
16 Likes
It’s not that bad. At least you recognize that they’re crooked - that seems to be half the battle for some, I don’t see any film to speak of, and they’re not upside down, which we’ve seen on truck builds here. If you haven’t sealed them yet you can reactivate them. I would only recommend MicroSol as a last resort. Only half of them need to be moved, and not by much. If they’re dry transfers they come off easily with tape.
3 Likes
TBH I’m wondering if I shouldn’t start over on these. I’ve seen another truck with the codes on the back of the crane deck. I could print new codes, a splash of white and done.
But I’ll try and correct these first.
Cheers.
1 Like
Good on you for not saying. “It looks good to me. I’m calling it done.”
2 Likes


Looking good. What scale? Did you use the kit decals?
1 Like
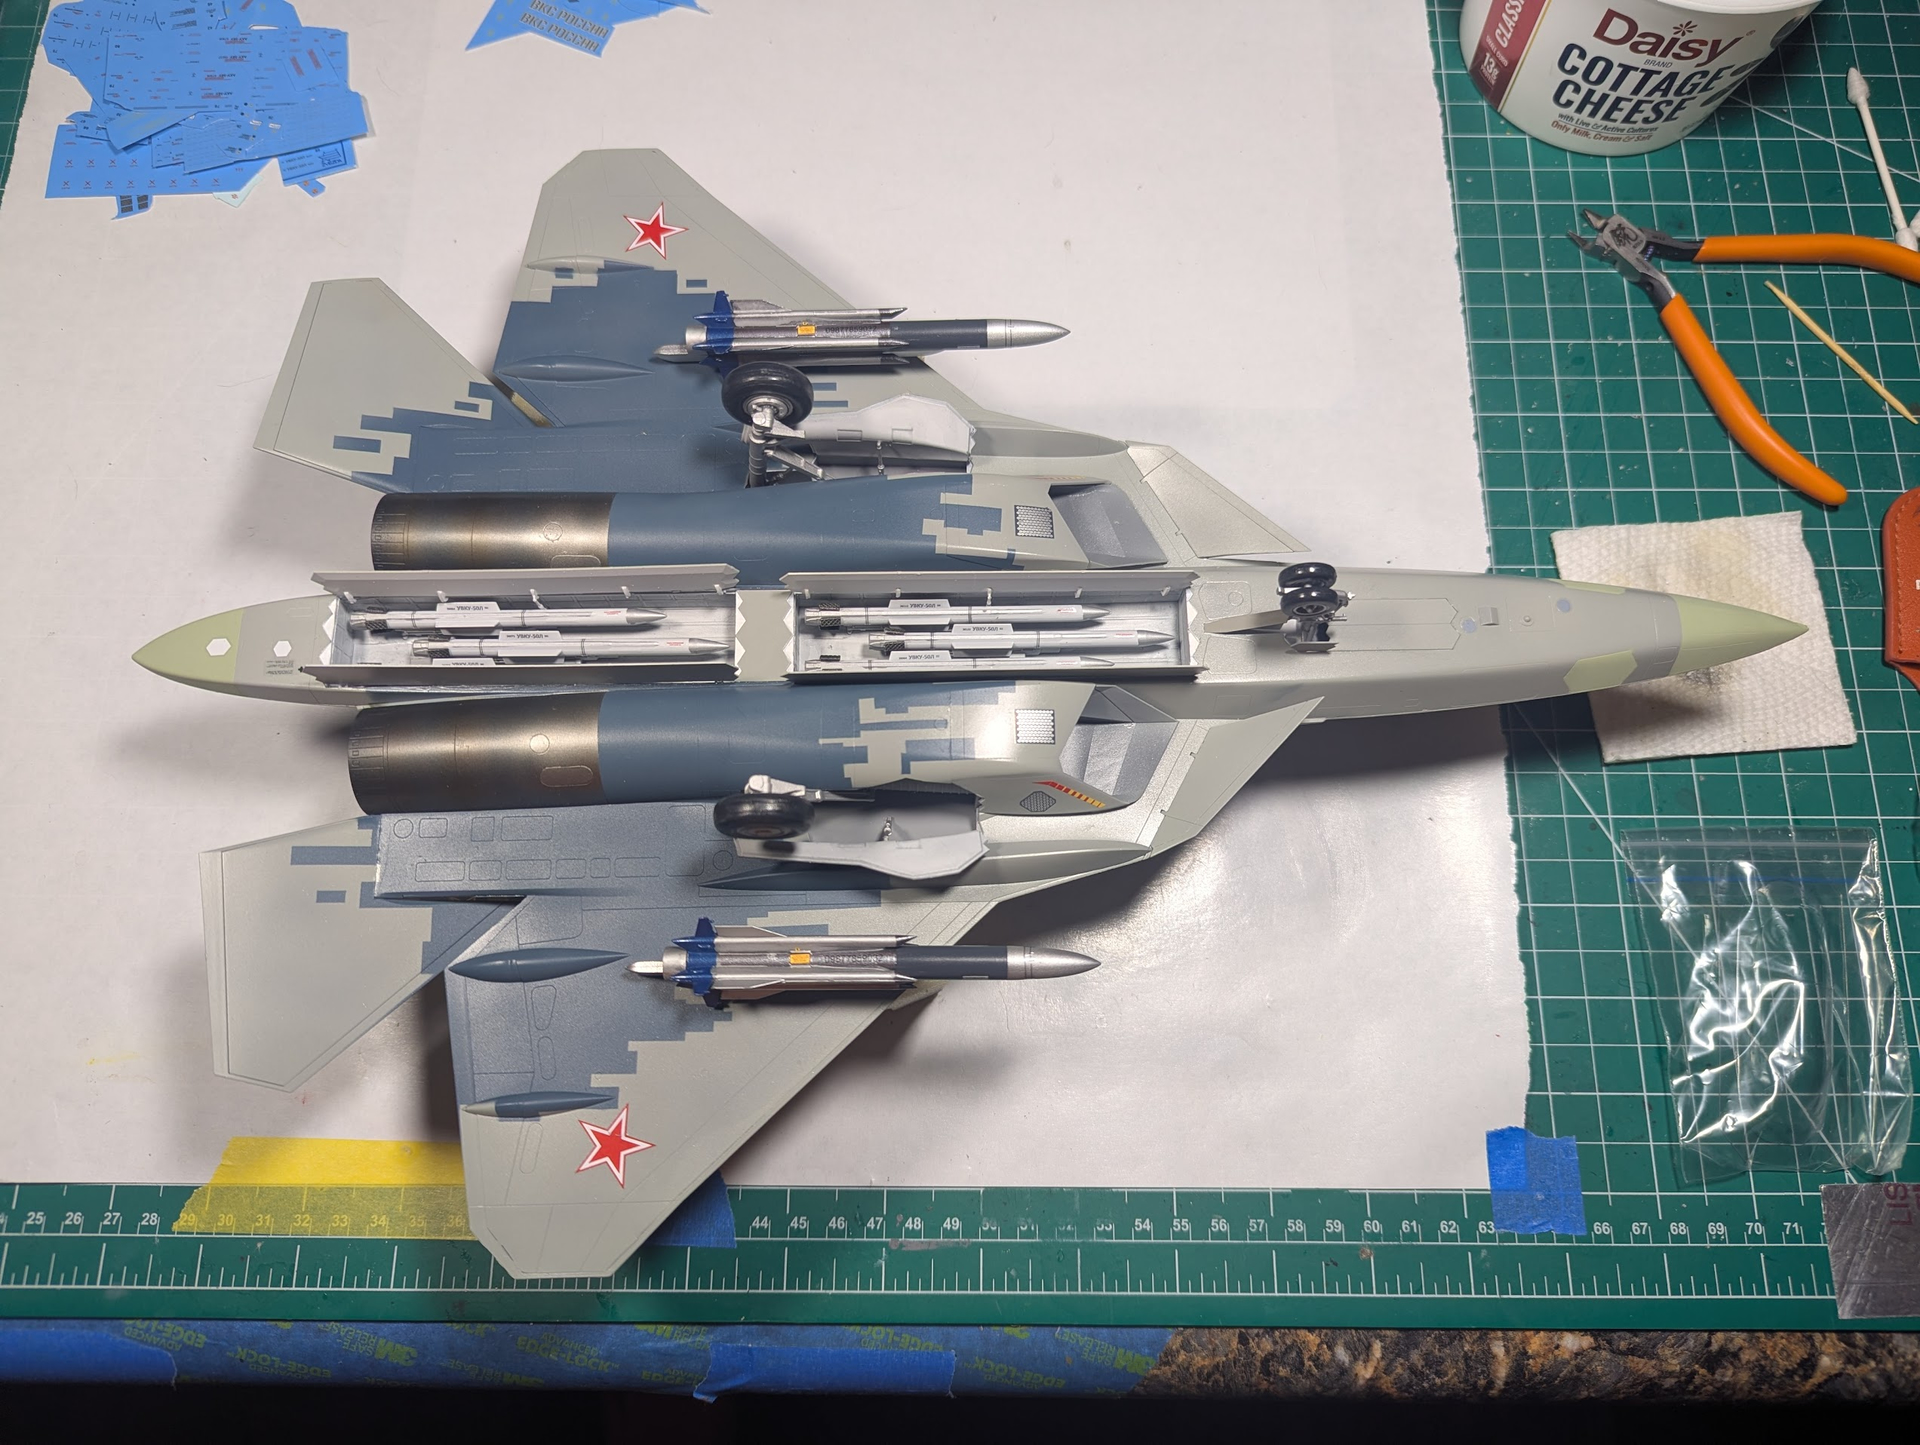
1/48, from Zvezda. These were the kit decals, and most went down just fine, but there were a lot of HUGE ones with the red-dashed lines, the “walk here” stuff that had large clear areas. I used micro-sol and micro-set, poked hundreds of little holes and improved it a lot. But in the end I just accepted what I had and kept going. I’m not looking for trophies, I want a set of Gen-5 aircraft. My Raptor and J-20 are waiting ![]()
3 Likes
Good to know. Thanks.
Sounds like we’re doing the same thing, except in different scales. I’ve got a 1/72 Raptor and J-20 waiting as well…
1 Like
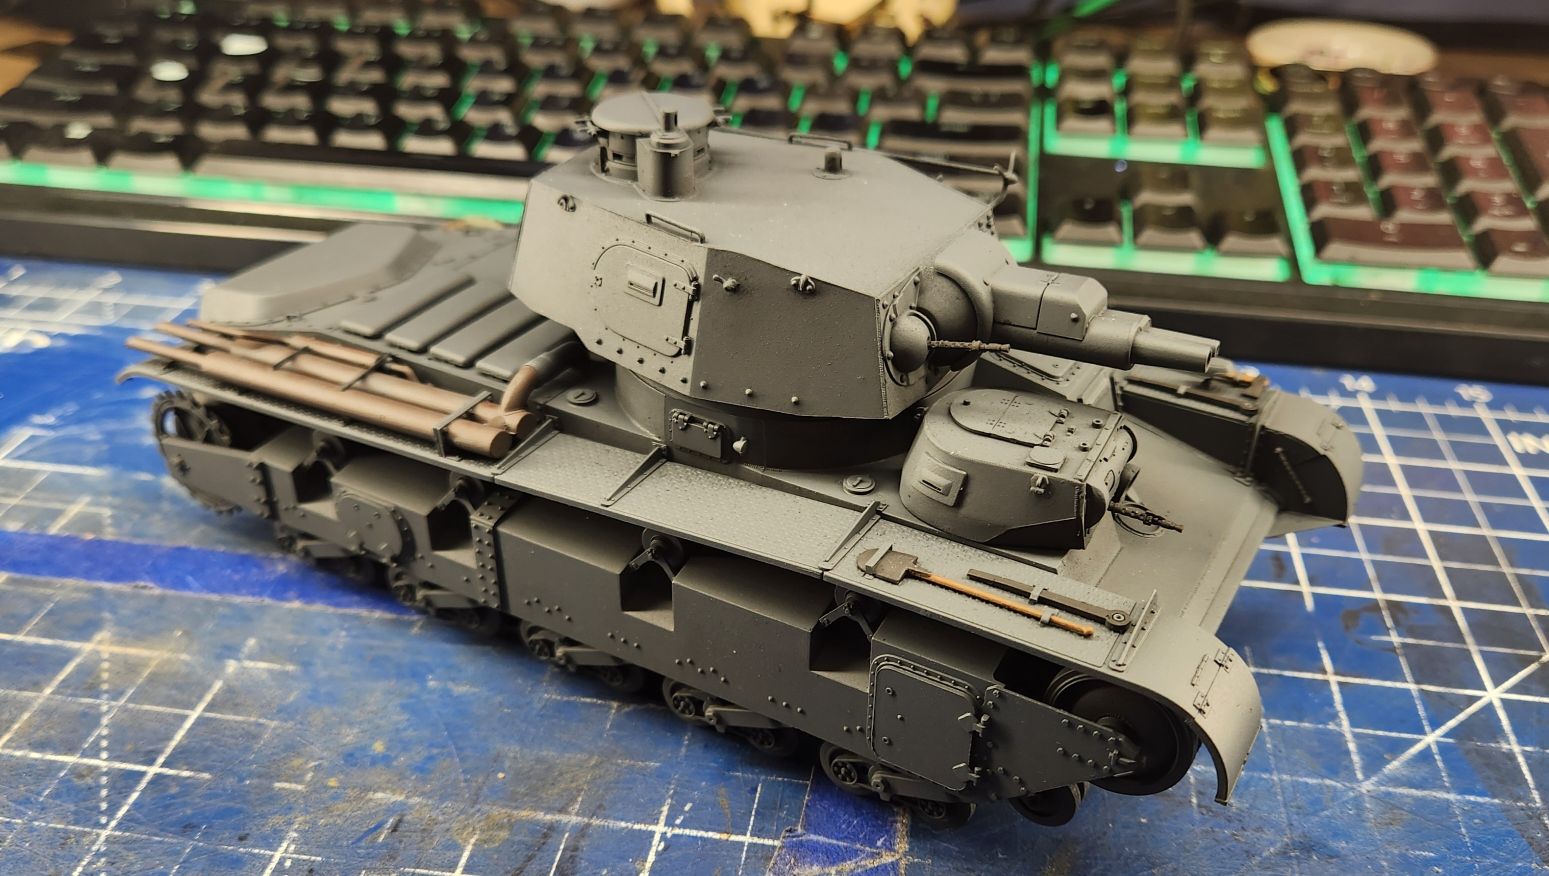
Scratch built T62 shell ejection port frame and door next to the kit parts.
Cross sectional drawing.

17 Likes


Back to work on the Revell Cutlass. Laid down the darker gold base coat, painted the frame rails Kandy Apple Red & started to modify the interior for the new console and dashboard. The real Cutlass will be getting a custom interior too.

I think this is the first time I’ve applied lacquer, enamel & acrylic all on the same part.
18 Likes
Calling the forward gun crew done! These two 1/72 scale Krieg mariners are now glued into hole in the Revell S-100 Schnell boat. Now who does not love yet another “pointing German”?
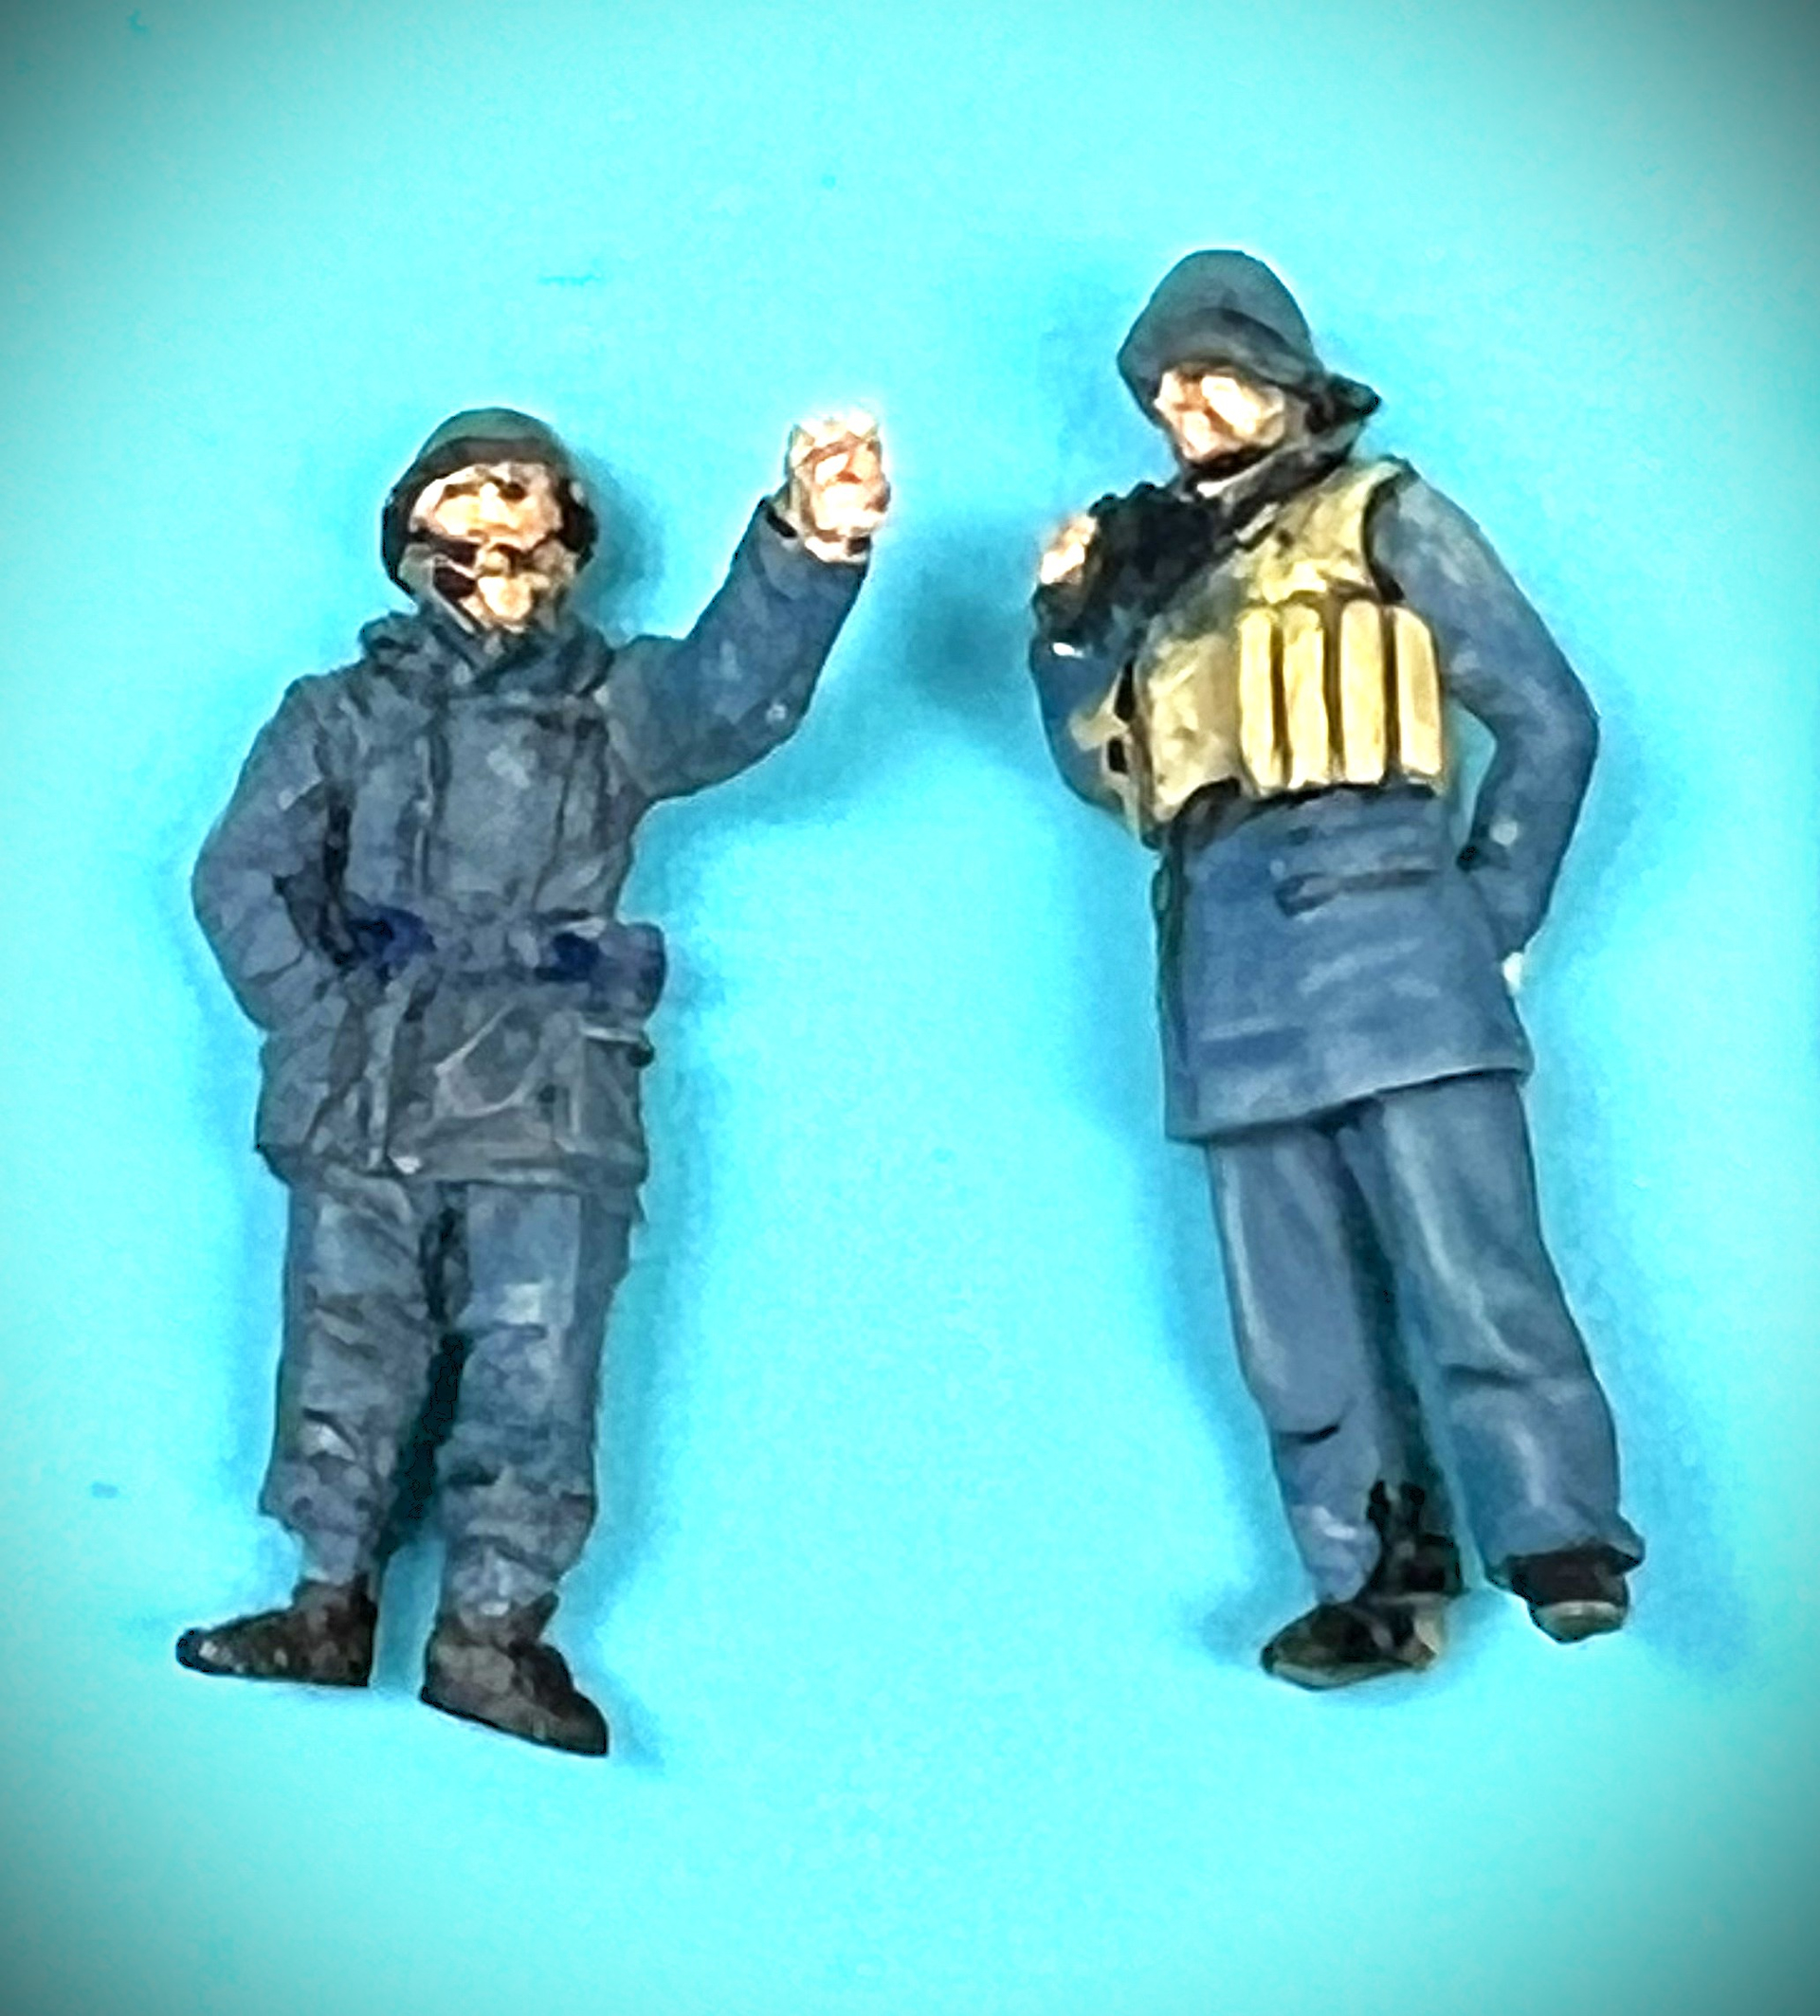
I’ve decided that 12 crew figures will show enough to represent the thirty some odd sailors that could be aboard. 7 completed so far and 5 to go to head towards the finished 1/72 boat model.

18 Likes


That man is seriously tripping into the pocket dimension. ![]()
7 Likes