Found shackles in my spares stash. Got the rear ones in place but had to halt progress as it’s irrigation season here in BC. My controller works from my iPhone but after testing the 8 zones, a few blown drippers need replacing so I’ll be on that for the next morning or so.
2 Likes
Full blown two day irrigation where I am. More to come.
1 Like
Two day set up? You must be on a farm, or maybe a (big) smallholding? Mine’s just a half-acre residential lot as you tell from the 7-8 zones of emitters.
Good luck with that bud.
1 Like
Nope. Mother nature. And she ain’t letting up any time soon,
1 Like
What is Ma Nature doing to your irrigation plans? Temperature or rain maybe.
1 Like
Back to the big truck - painting and weathering the chassis:
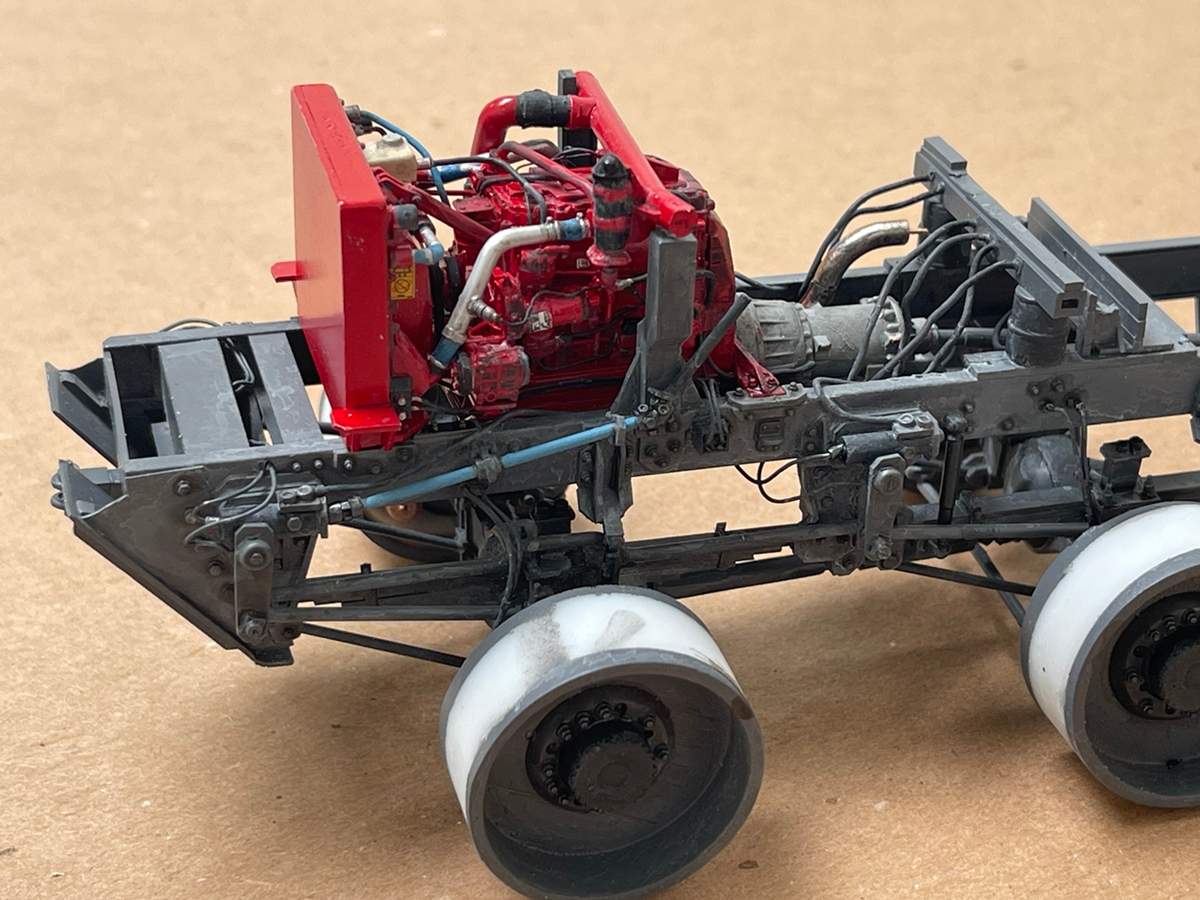

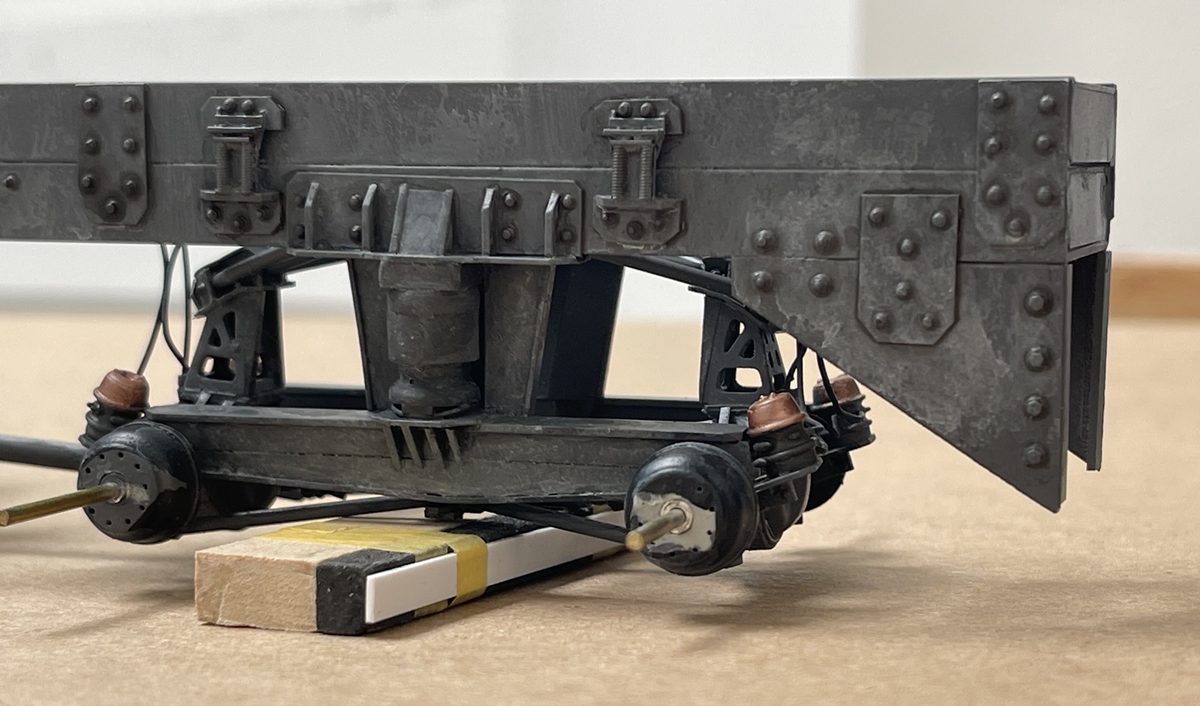
I decided I needed to show the rear end. It turned out pretty well - but, once the tires and bed is on, most of this will never be seen again 
After painting up the chassis, I went ahead and glued in the engine - and for fun, some dry-fit testing:
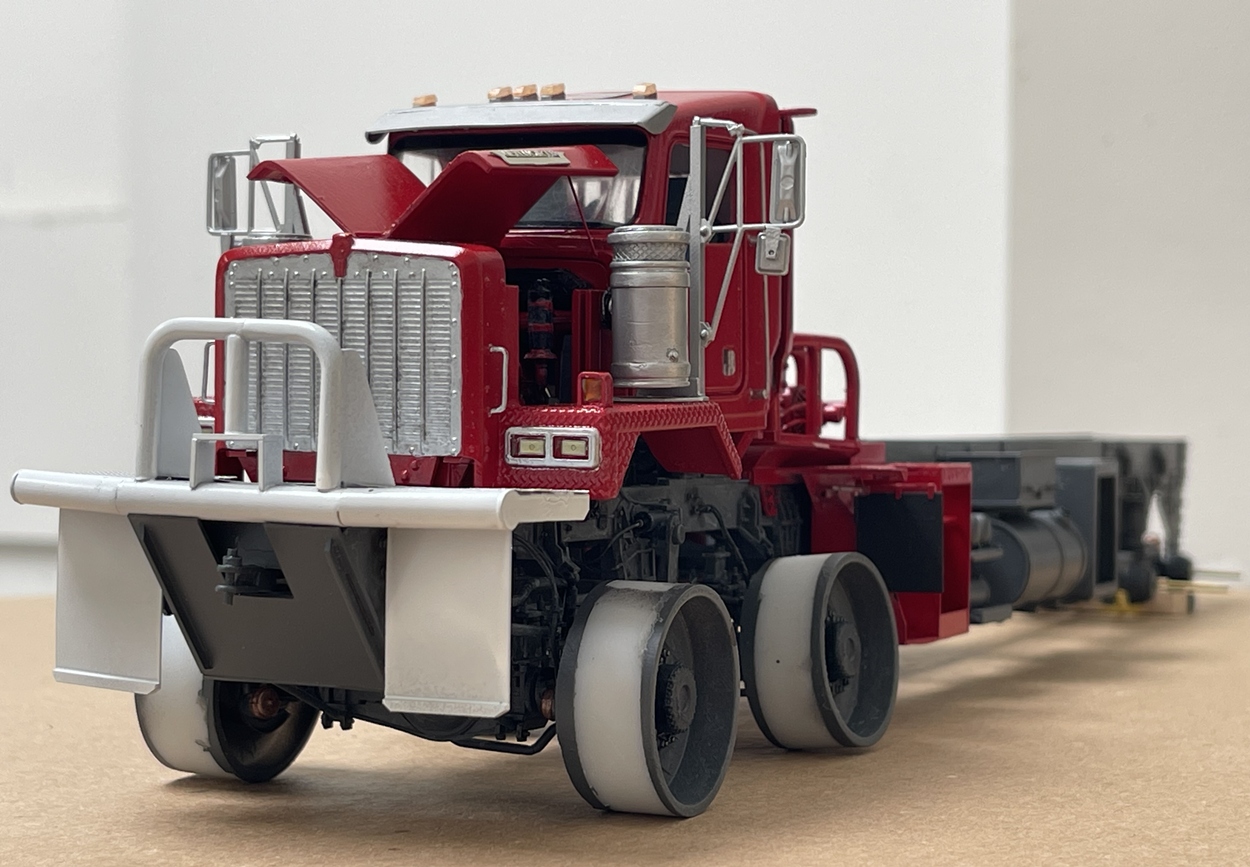
So far so good - the bed is half painted, the underside is red, and will add some white to the top
Cheers
Nick
16 Likes
That really BIG truck is looking great Nick! 
––––––––––––––––––––––––––––––––––––––––––––––––––––––––––
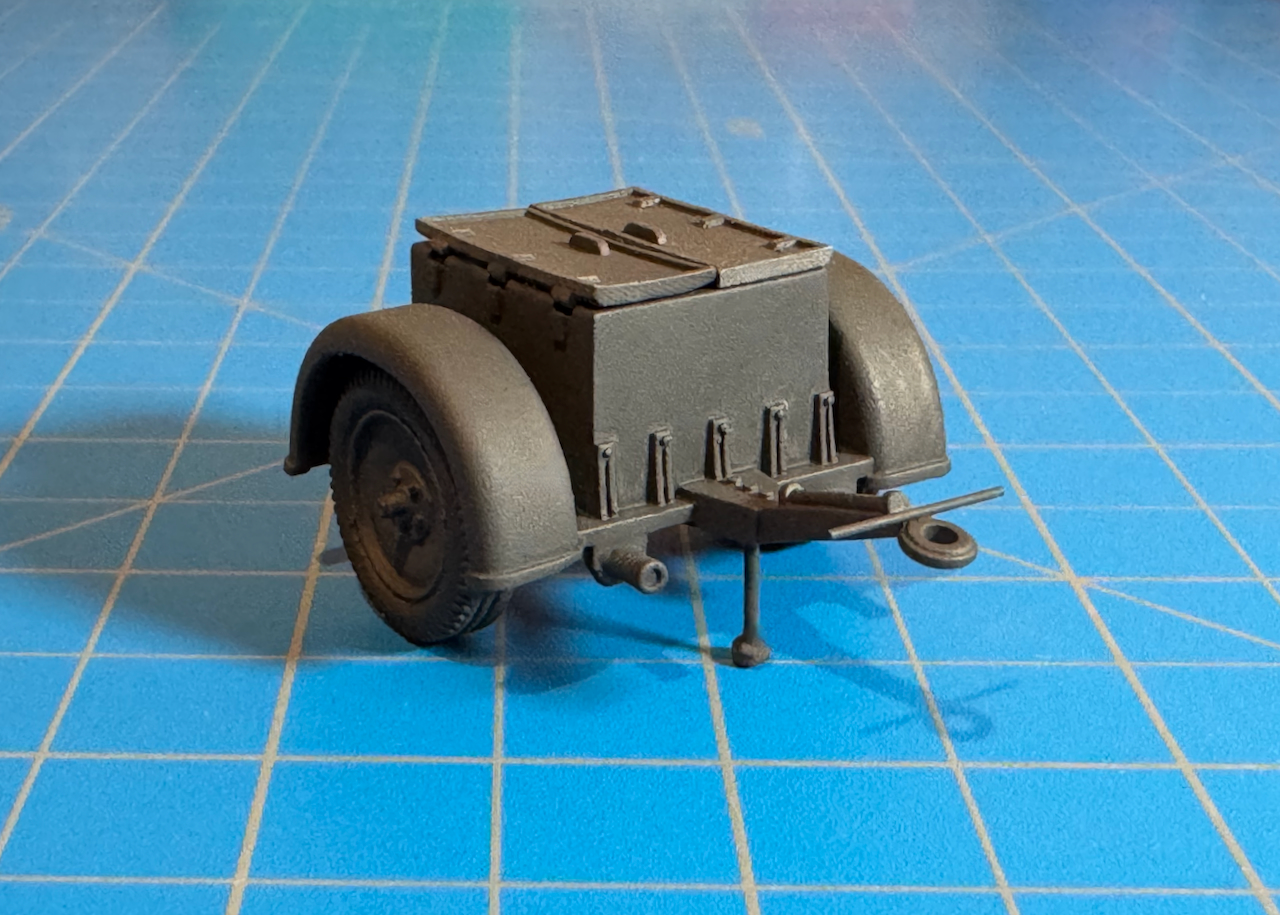
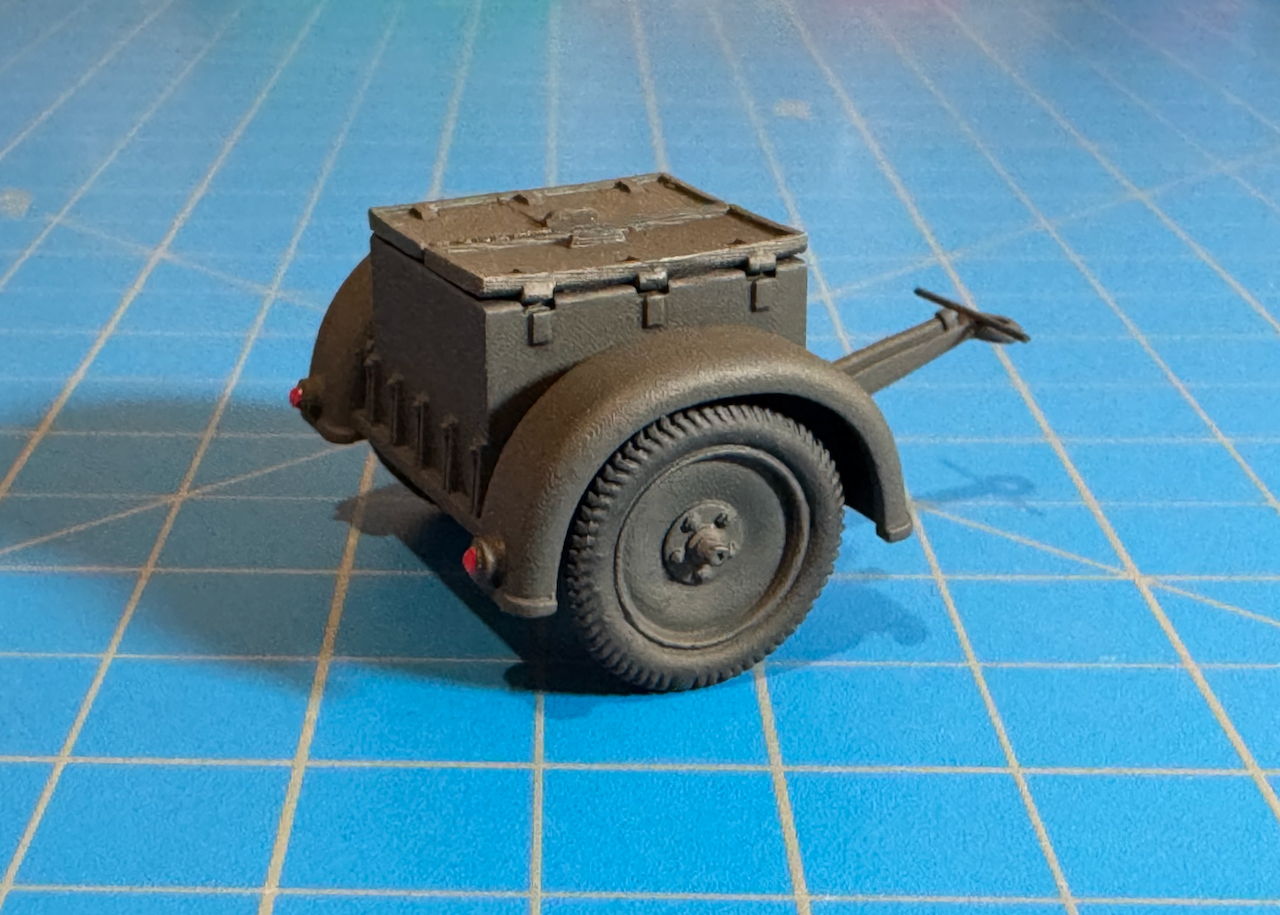
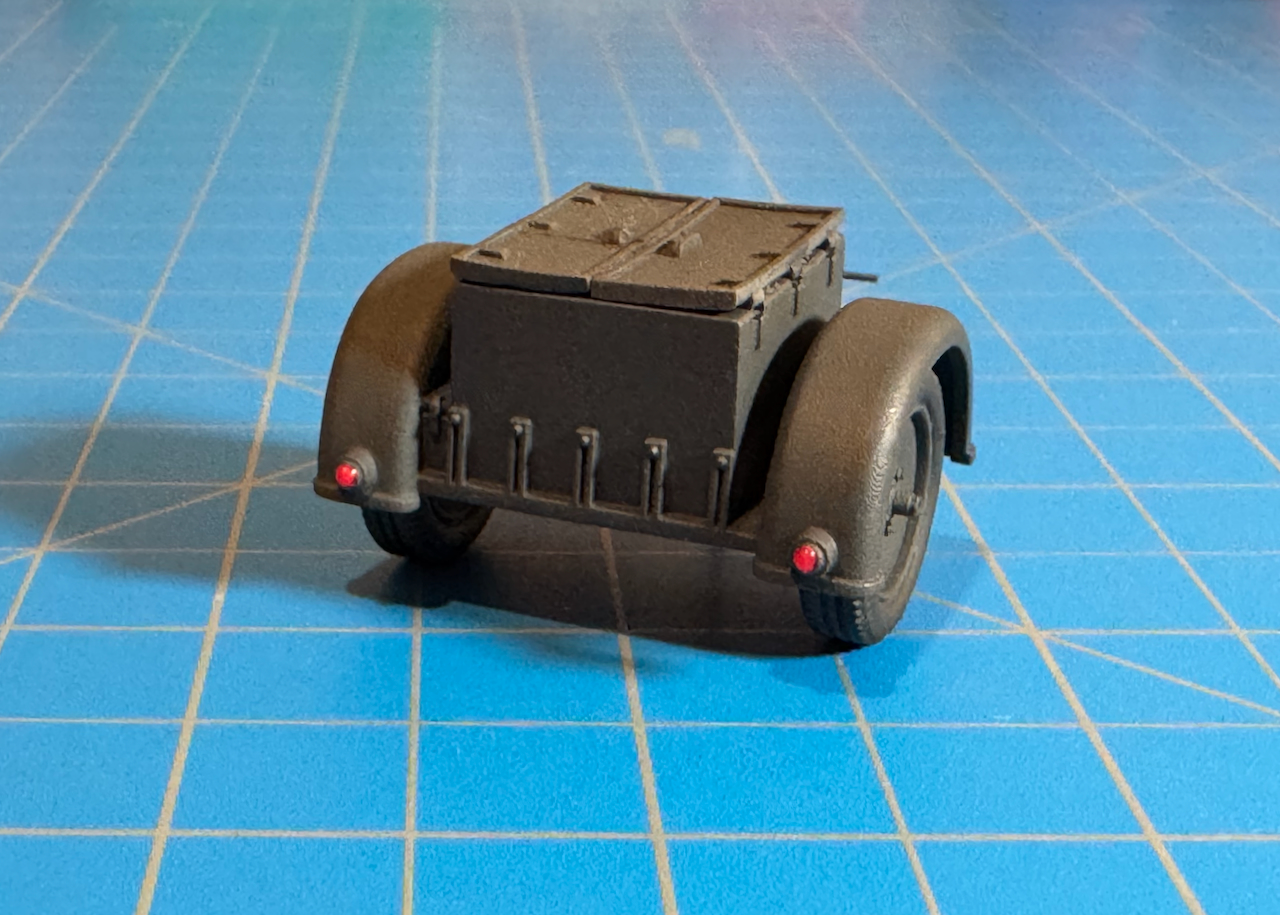
As for me. … I finished this small resin kit in 1/48 from Etsy…
‘Sd.Anh.32 Ammunition Trailer’
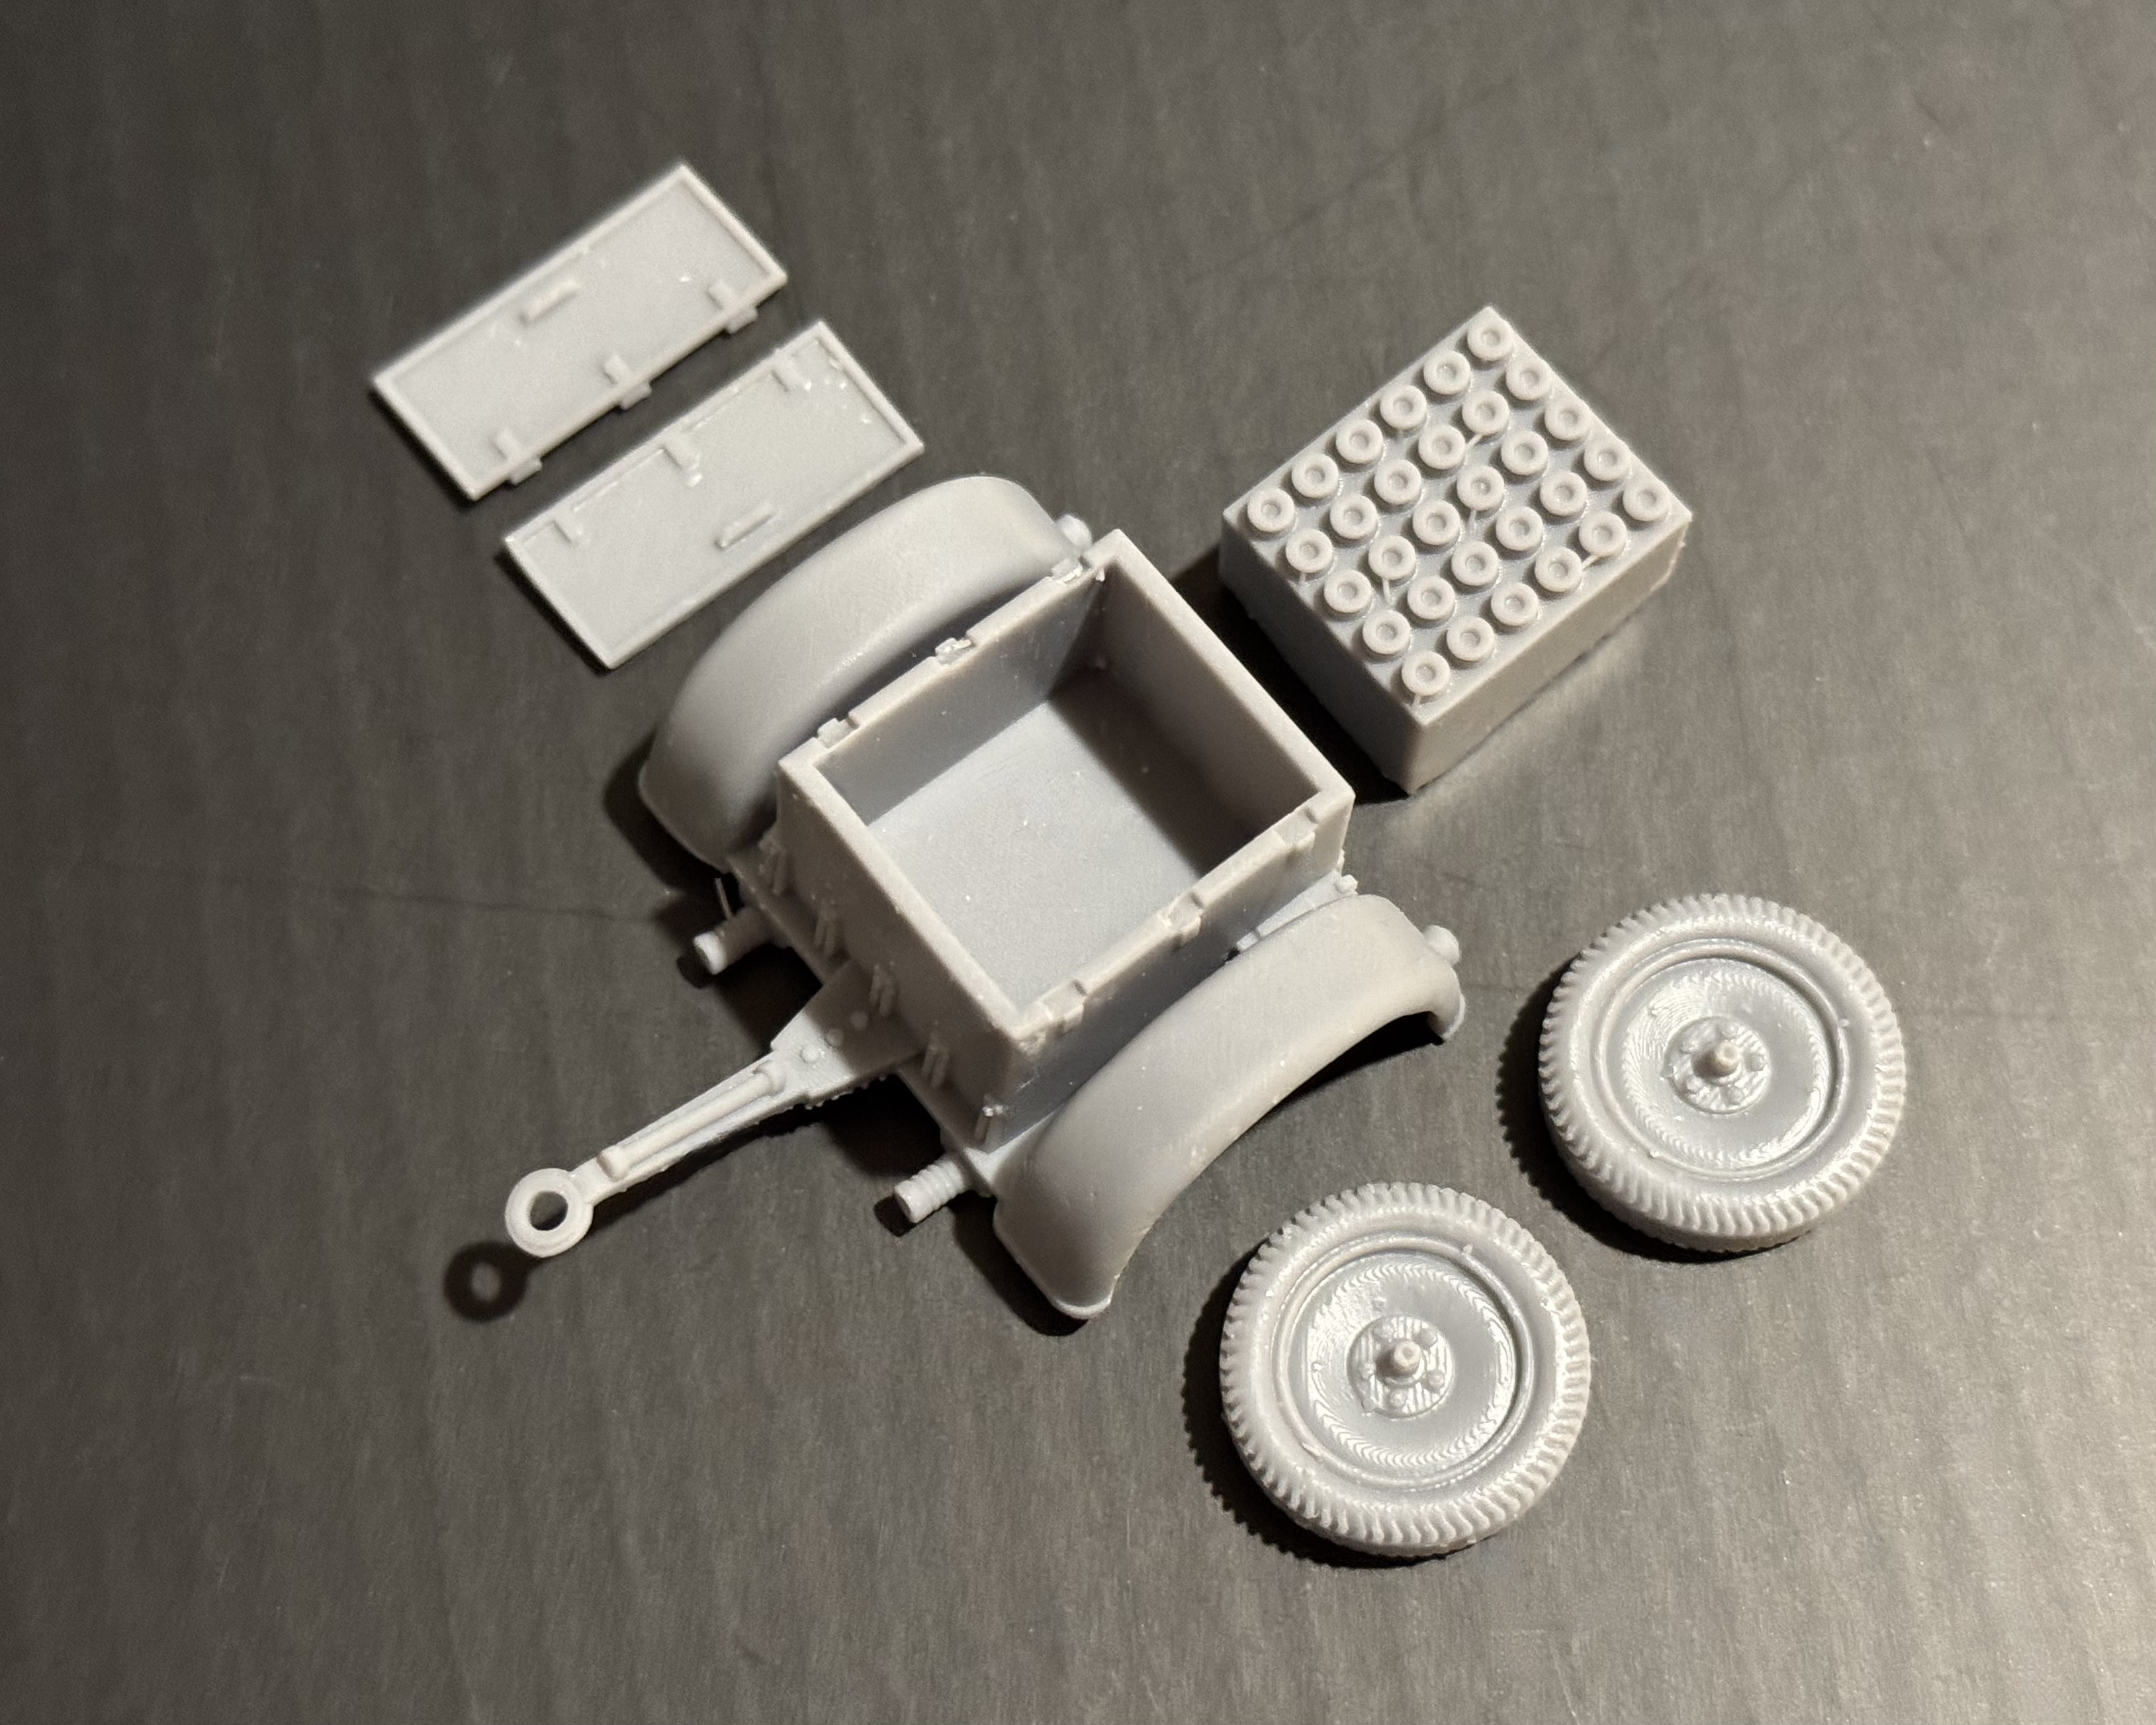
Extras:
Transport Handle
Front Leveling Support
Anti tail-sitter lead weight inside box
Paint Specs:
Base Color
• Tamiya (87064) Fine Grey Surface Primer (L)
• Vallejo Black Grey RLM66 (71.055)
Tires (tyres)
• Vallejo Dark Rubber (70.306)
• Tamiya TS-80 Flat Clear
Tail Lights
• Vallejo Flat Red (70.957)
• Microscale Micro Krystal Klear (MI-9)
Note: It’s hard for me to recommend this kit, as the lids were warped, there were many 3D support points, and layer lines that were very difficult to remove and/or fill with primer and paint. … But, hey-ho, the kit was only $14.26 USD after tax & shipping. … And it provided a momentary diversion from a more complex build.
—mike 
13 Likes
You know Mike, I’ve had my share of struggles with 1/48 builds! so I am sure you had your hands full pulling this little beauty together 
Cheers
Nick 
2 Likes
It turns out, the big truck gets a big booty too!
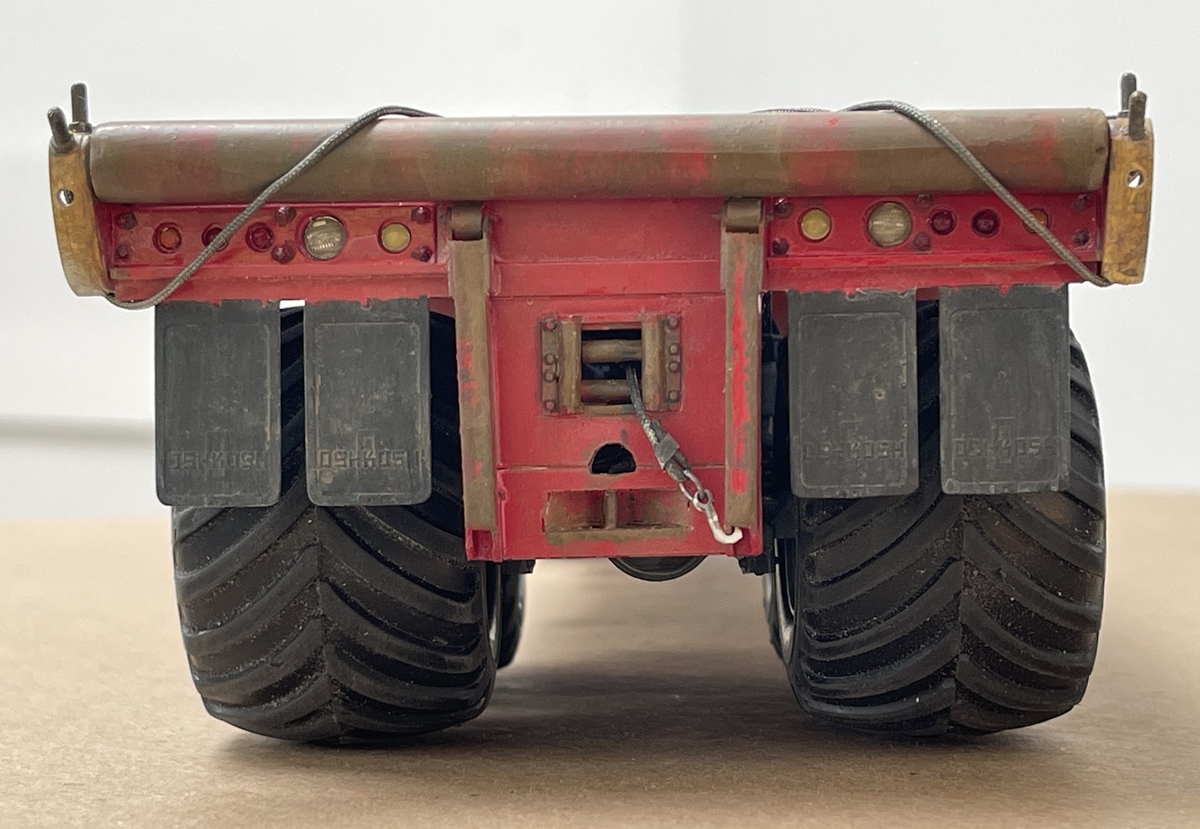
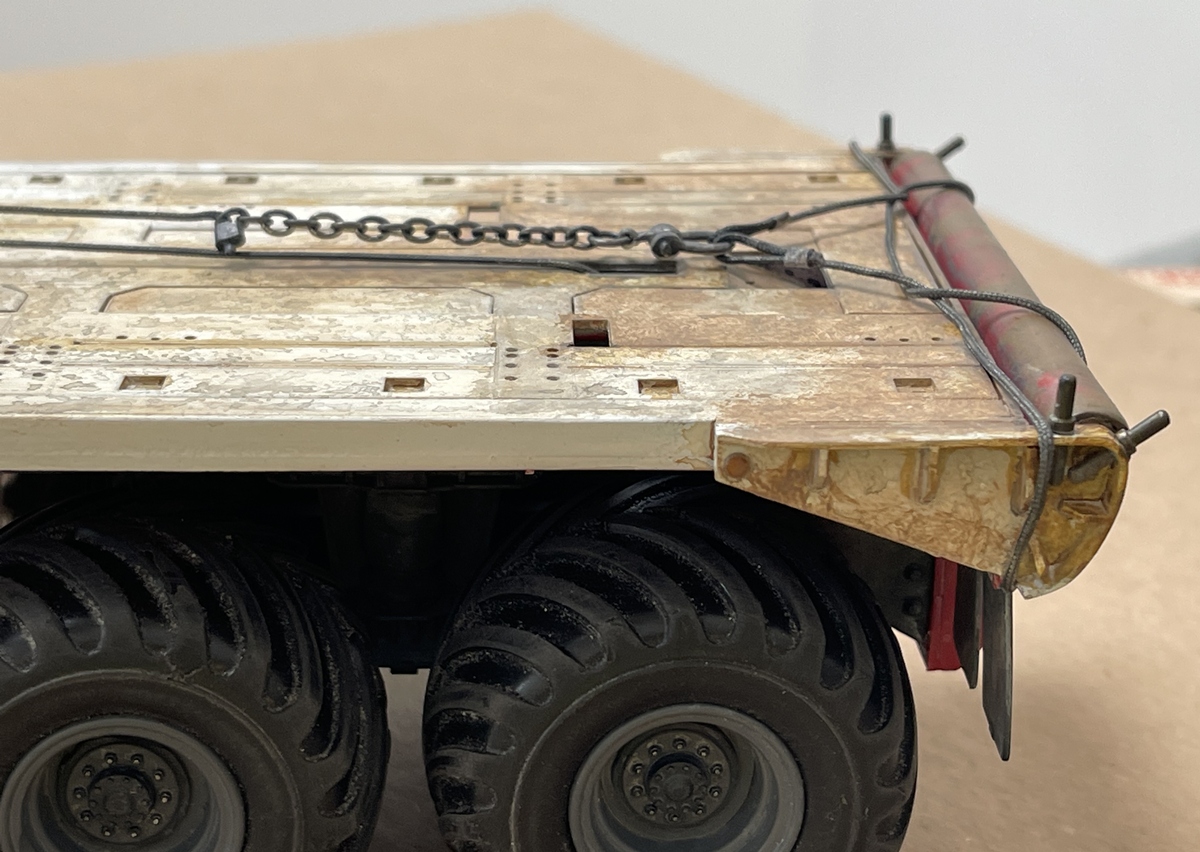
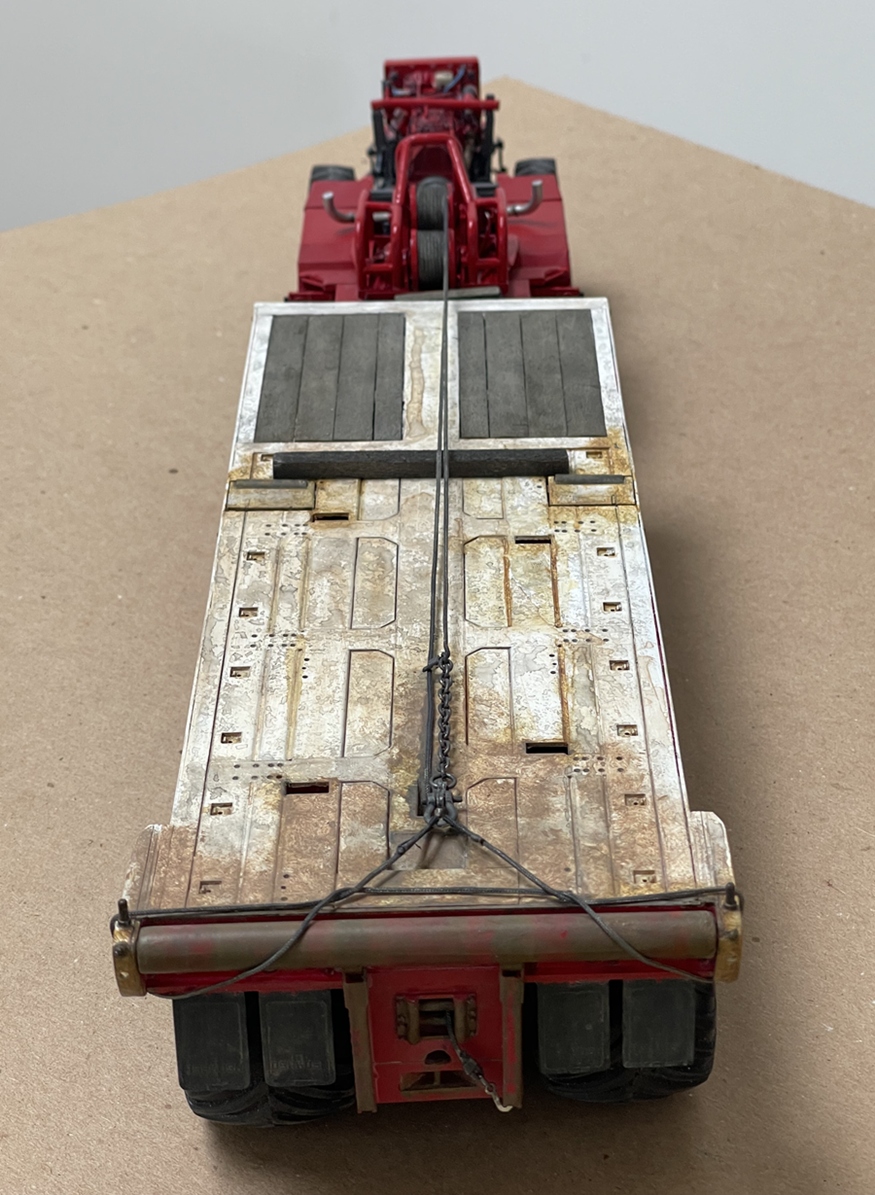
In case you were curious, this rig is about 20” long, though it’s only 1/32 scale, so getting the rigging on, which as it turns out had to happen once the bed was attached to the chassis was a PITA! It turns out there are two winch cables. The lower winch cable running across then into an opening in the rear of the bed and out the back roller fairleads, and then tied off on the frame with a ring and hook. Whereas the upper winch cable runs out, then gets tied off on the lift cable loop - also not fun! There are small hooks, rings, cable crimps, chain, and a D ring! The bed is mostly styrene, plus some basswood inserts closer to the front.
So, next will be adding another wash to the bed boxes and tanks, and then, on to the front end/cab etc.
Cheers
Nick
17 Likes
Are you sure that trailer isn’t real? 
4 Likes
Wow Nick I did not realise you were a railhead as well. Good go’n!
1 Like
working on my meng T72B3, I think I’ll this one faster than the T90A, I’ve already done the track in 3 days
1 Like
I tried to imitate the part, but it didn’t really come out right.
nah, what the hell.
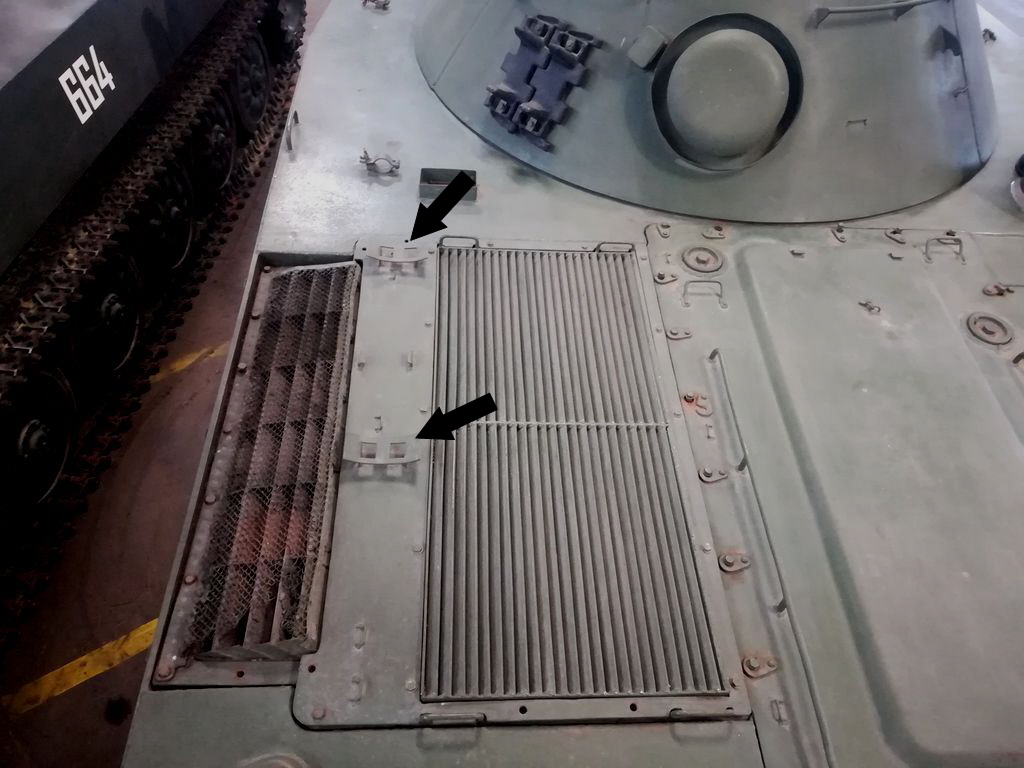
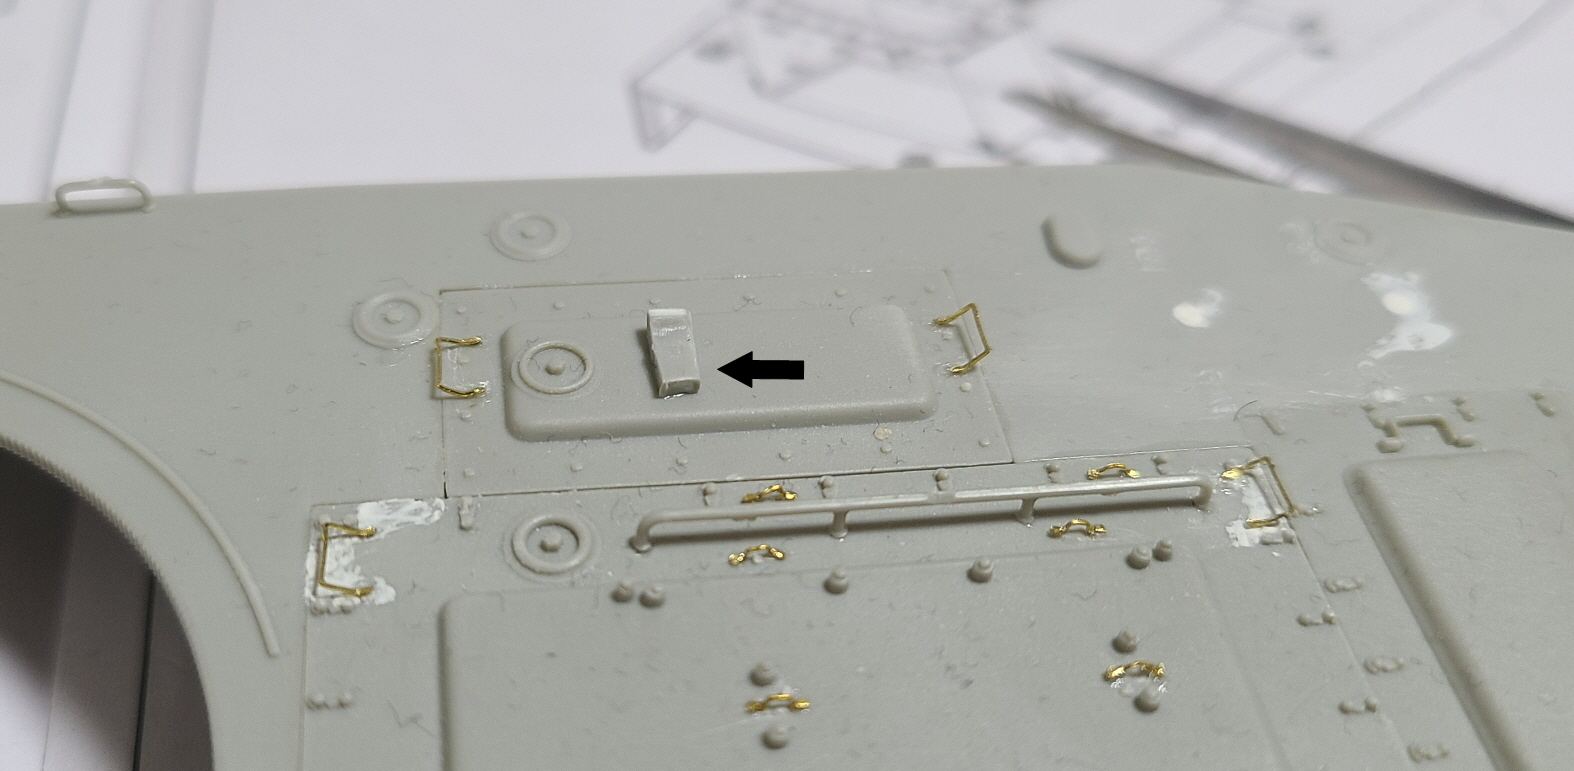
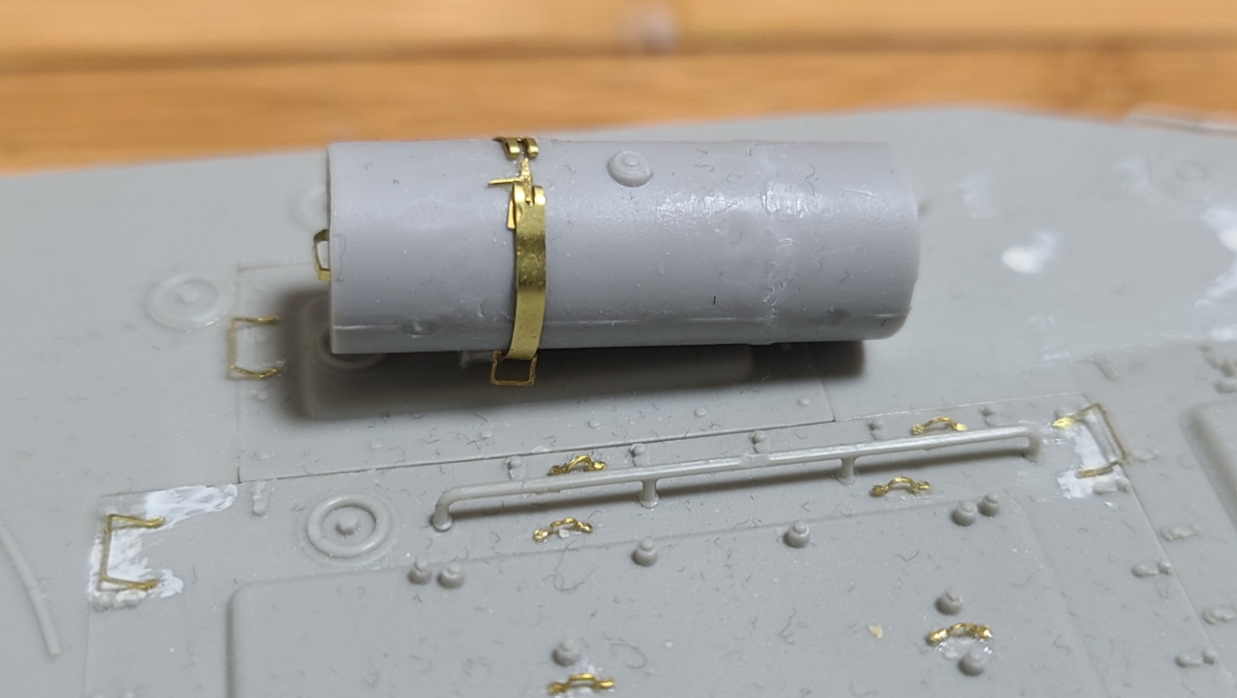
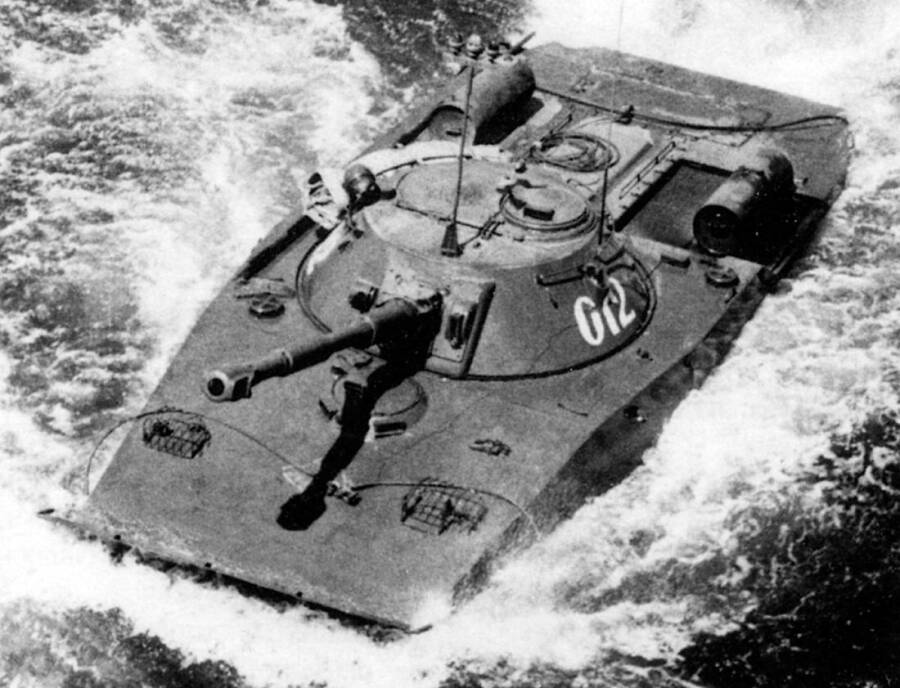
This is the part used to fasten the T-34 fuel tanks.
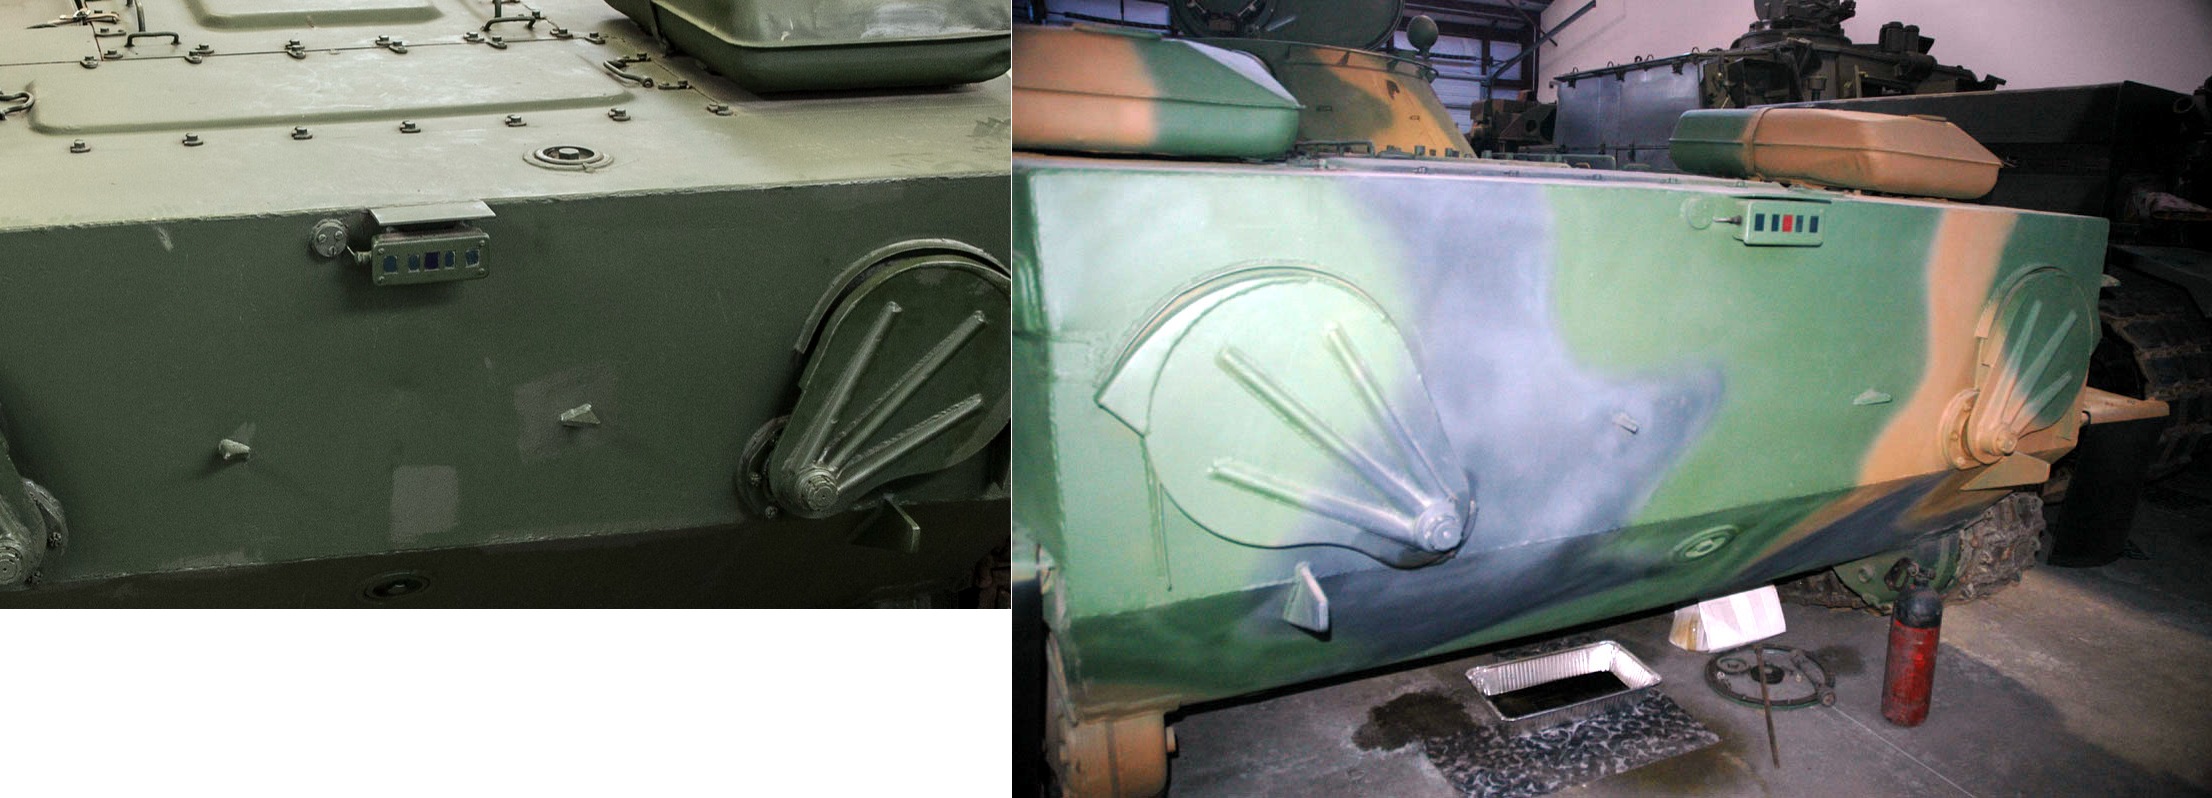
most east german tanks had rear blackout light. I tried to imitate that part, but,…. There is no way I couldn’t make it from the scratch build. Do you have any tips?
10 Likes
That rectangular panel? Yes - first a rectangular styrene block covered with a brass panel on the front.
For the lights - colored decal pieces cut into squares.
3 Likes
I made some progress on my twin turret T-26 mod.1931:
-built both turrets and detailed them with rivets, flush rivets and nut heads,
-built all wheel bogies,
-modified the late type wheels(with removable rubber rims) Zvezda gives to the early type,
-built the Bosch horn the early T-26 used:
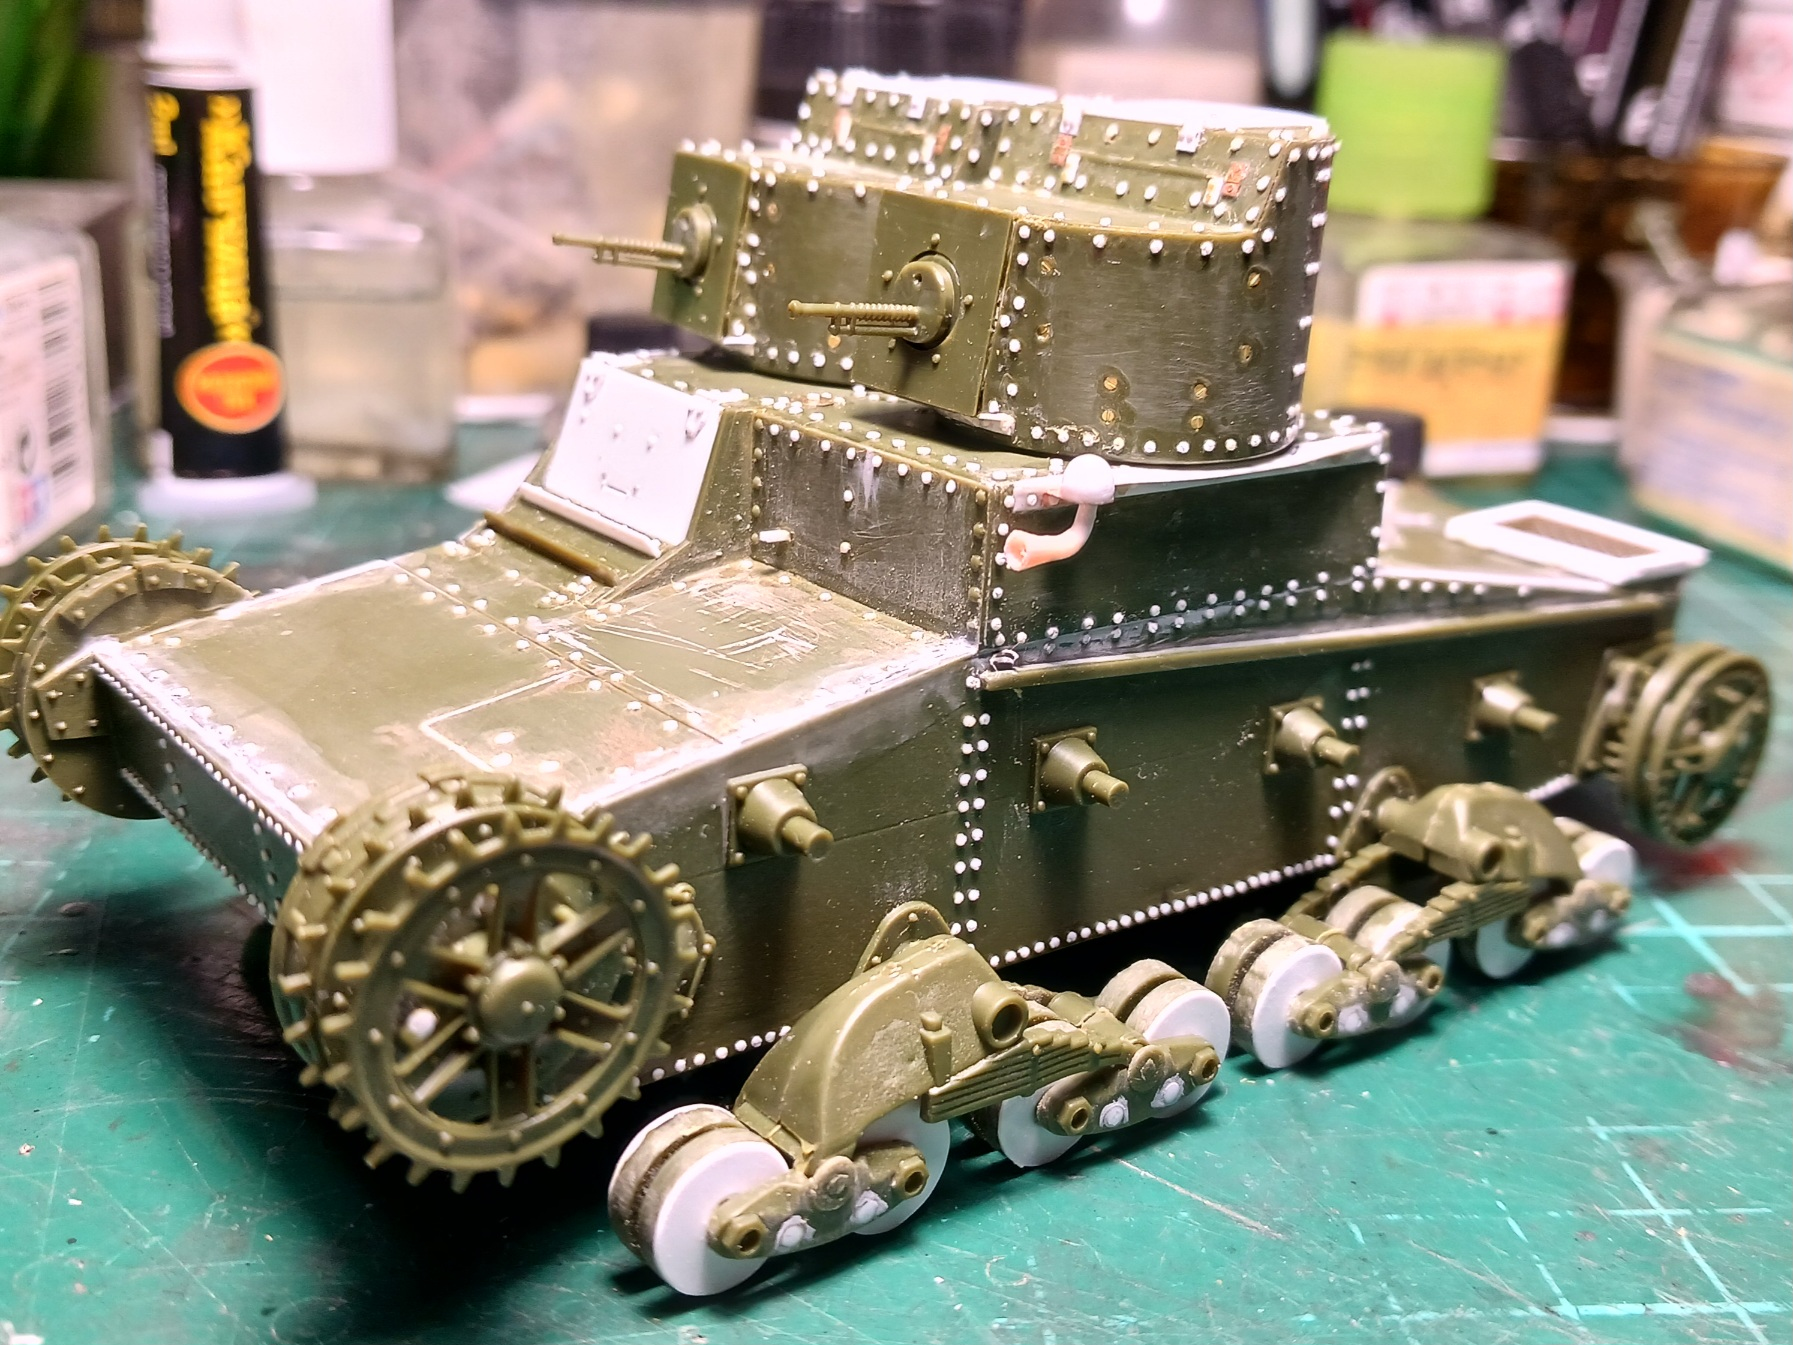
I’m away from my modelling room for a week, enough time to decide whether I order replacements for the idler wheels(another late type feature Zvezda mixed into its early T-26), or modify them myself-a tricky job as one needs to shave off 60+ reinforcing ribs between inner and outer idler wheel rims…
Cheers,
Angel
19 Likes
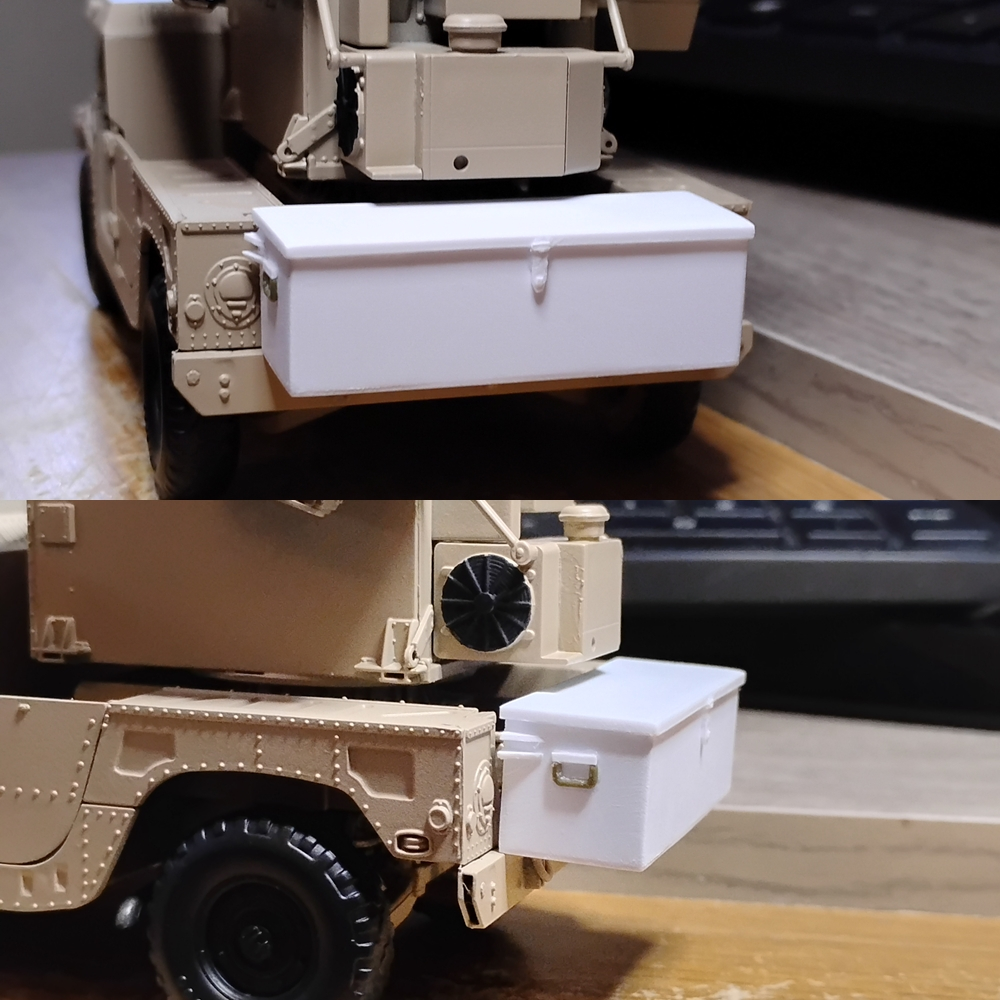
Not much today I just scratch built a storage box for the back of my old hmmwv avenger kit to try and match up with the real one. It’s good enough for me and government work.

25 Likes
Good to know The Dude is inspecting your work!
4 Likes
I built this kit recently, don’t remember if I had any difficulty with the nose but I agree with you about the engine being a waste. Probably why they retooled the kit. I can say the fit of the wing halves was poor and the wing root. I don’t like the way the landing gear attach either. If you’re closing the cannon bay doors you will need a lot of work getting them to fit
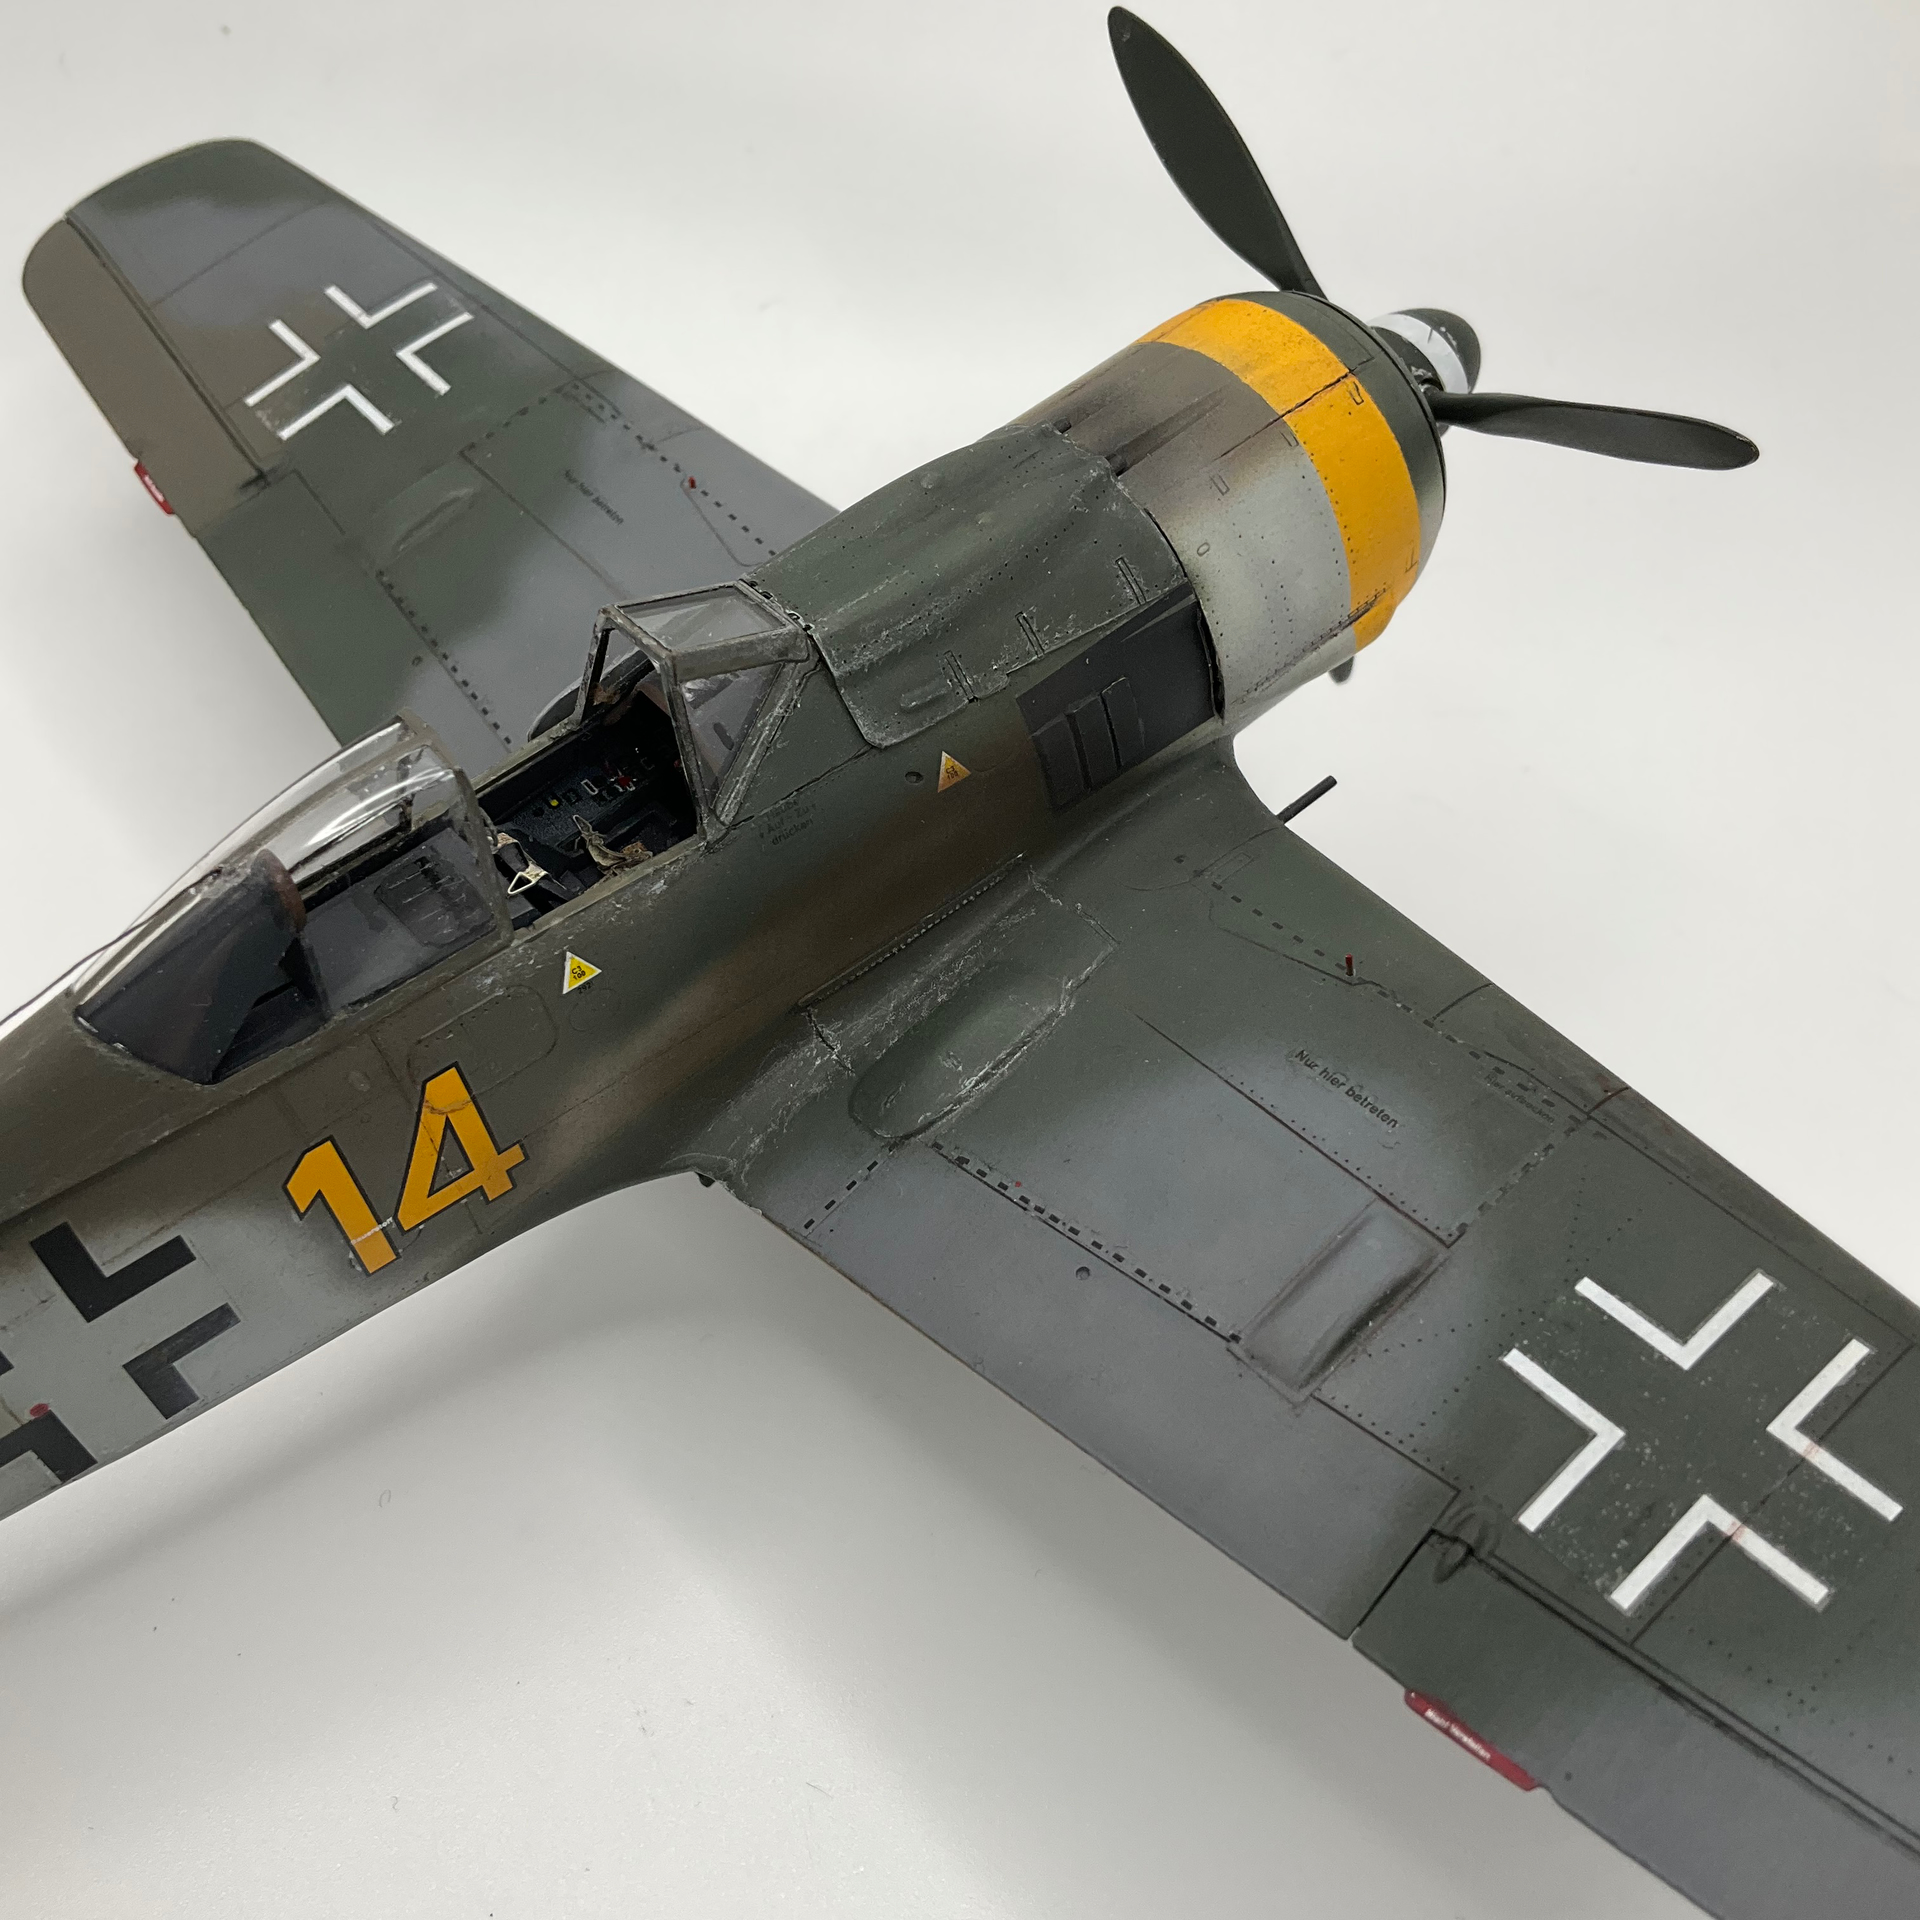
Also the gun cowl does not fit closed unless you delete the guns
Joe
14 Likes

Looks great. Can you share the box dimensions?
1 Like