Nicely done.
Still need to do some detailing on mine, yours looks really nice.
Thanks Reynier. I built that one about 30 years ago before I knew about pin washes and other such weathering techniques. I just wish that I could find a few more bottles of the Floquil paint that I used on this one and my other US Desert Storm builds. Yours will look much nicer I’m sure. It’s looking pretty damn good so far!
Thanks, still need the interior to be painted in the correct medium green. This one is being built as a USMC M1043 Armament carrier assigned to 3/4 Marines in 2003.
Similar to this M1046 (which I have the kit as well).

Working on completing my Dragon Bf109E-4 now that I finished the Bergepanzer. This kit was started on 11/1/2019 and made it as far as exterior primer before I put it aside.
Sprayed using AK Real paints and with my new Nedeco airbrush I got for $40 off Amazon. I got the red one (NCT-SJ83R) and I think I may order the black as a spare brush. I think I like it more than my Iwata.
Mottling is only an approximation of the illustration provided by Dragon – which is not that great of a guide (Quelle surprise!). I actually haven’t done a lot of mottling so far; this is like my fourth attempt.
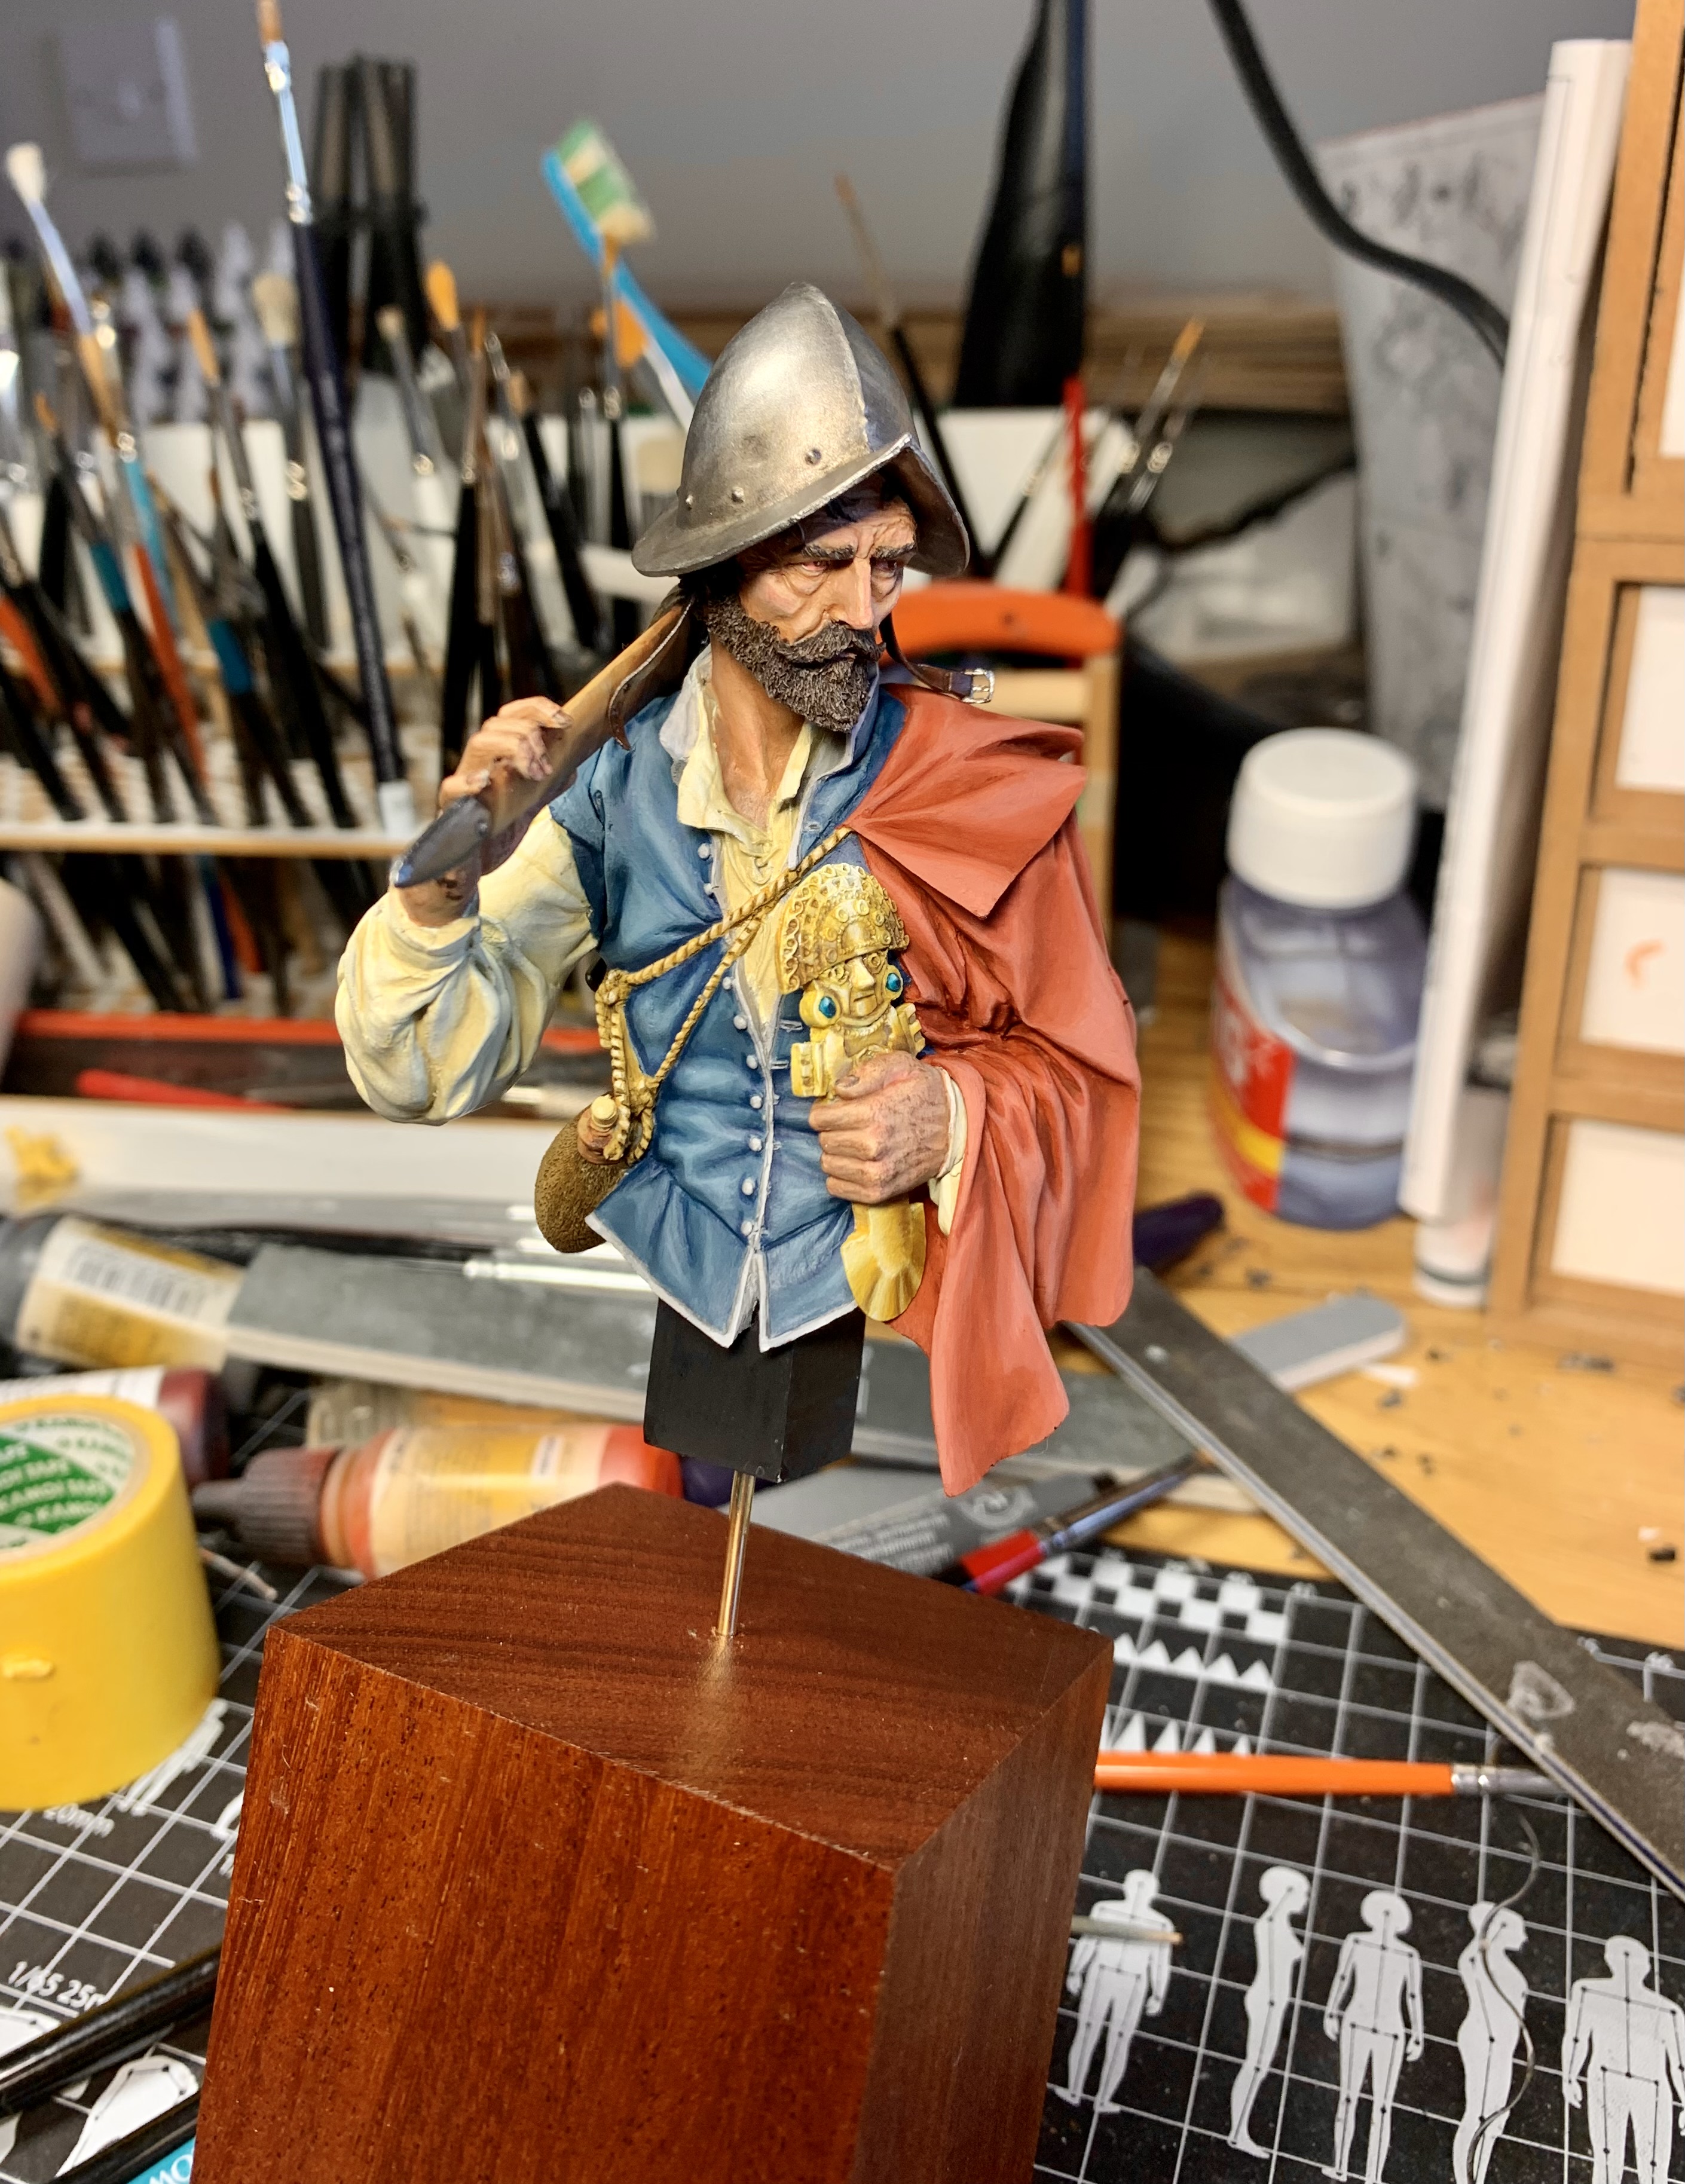
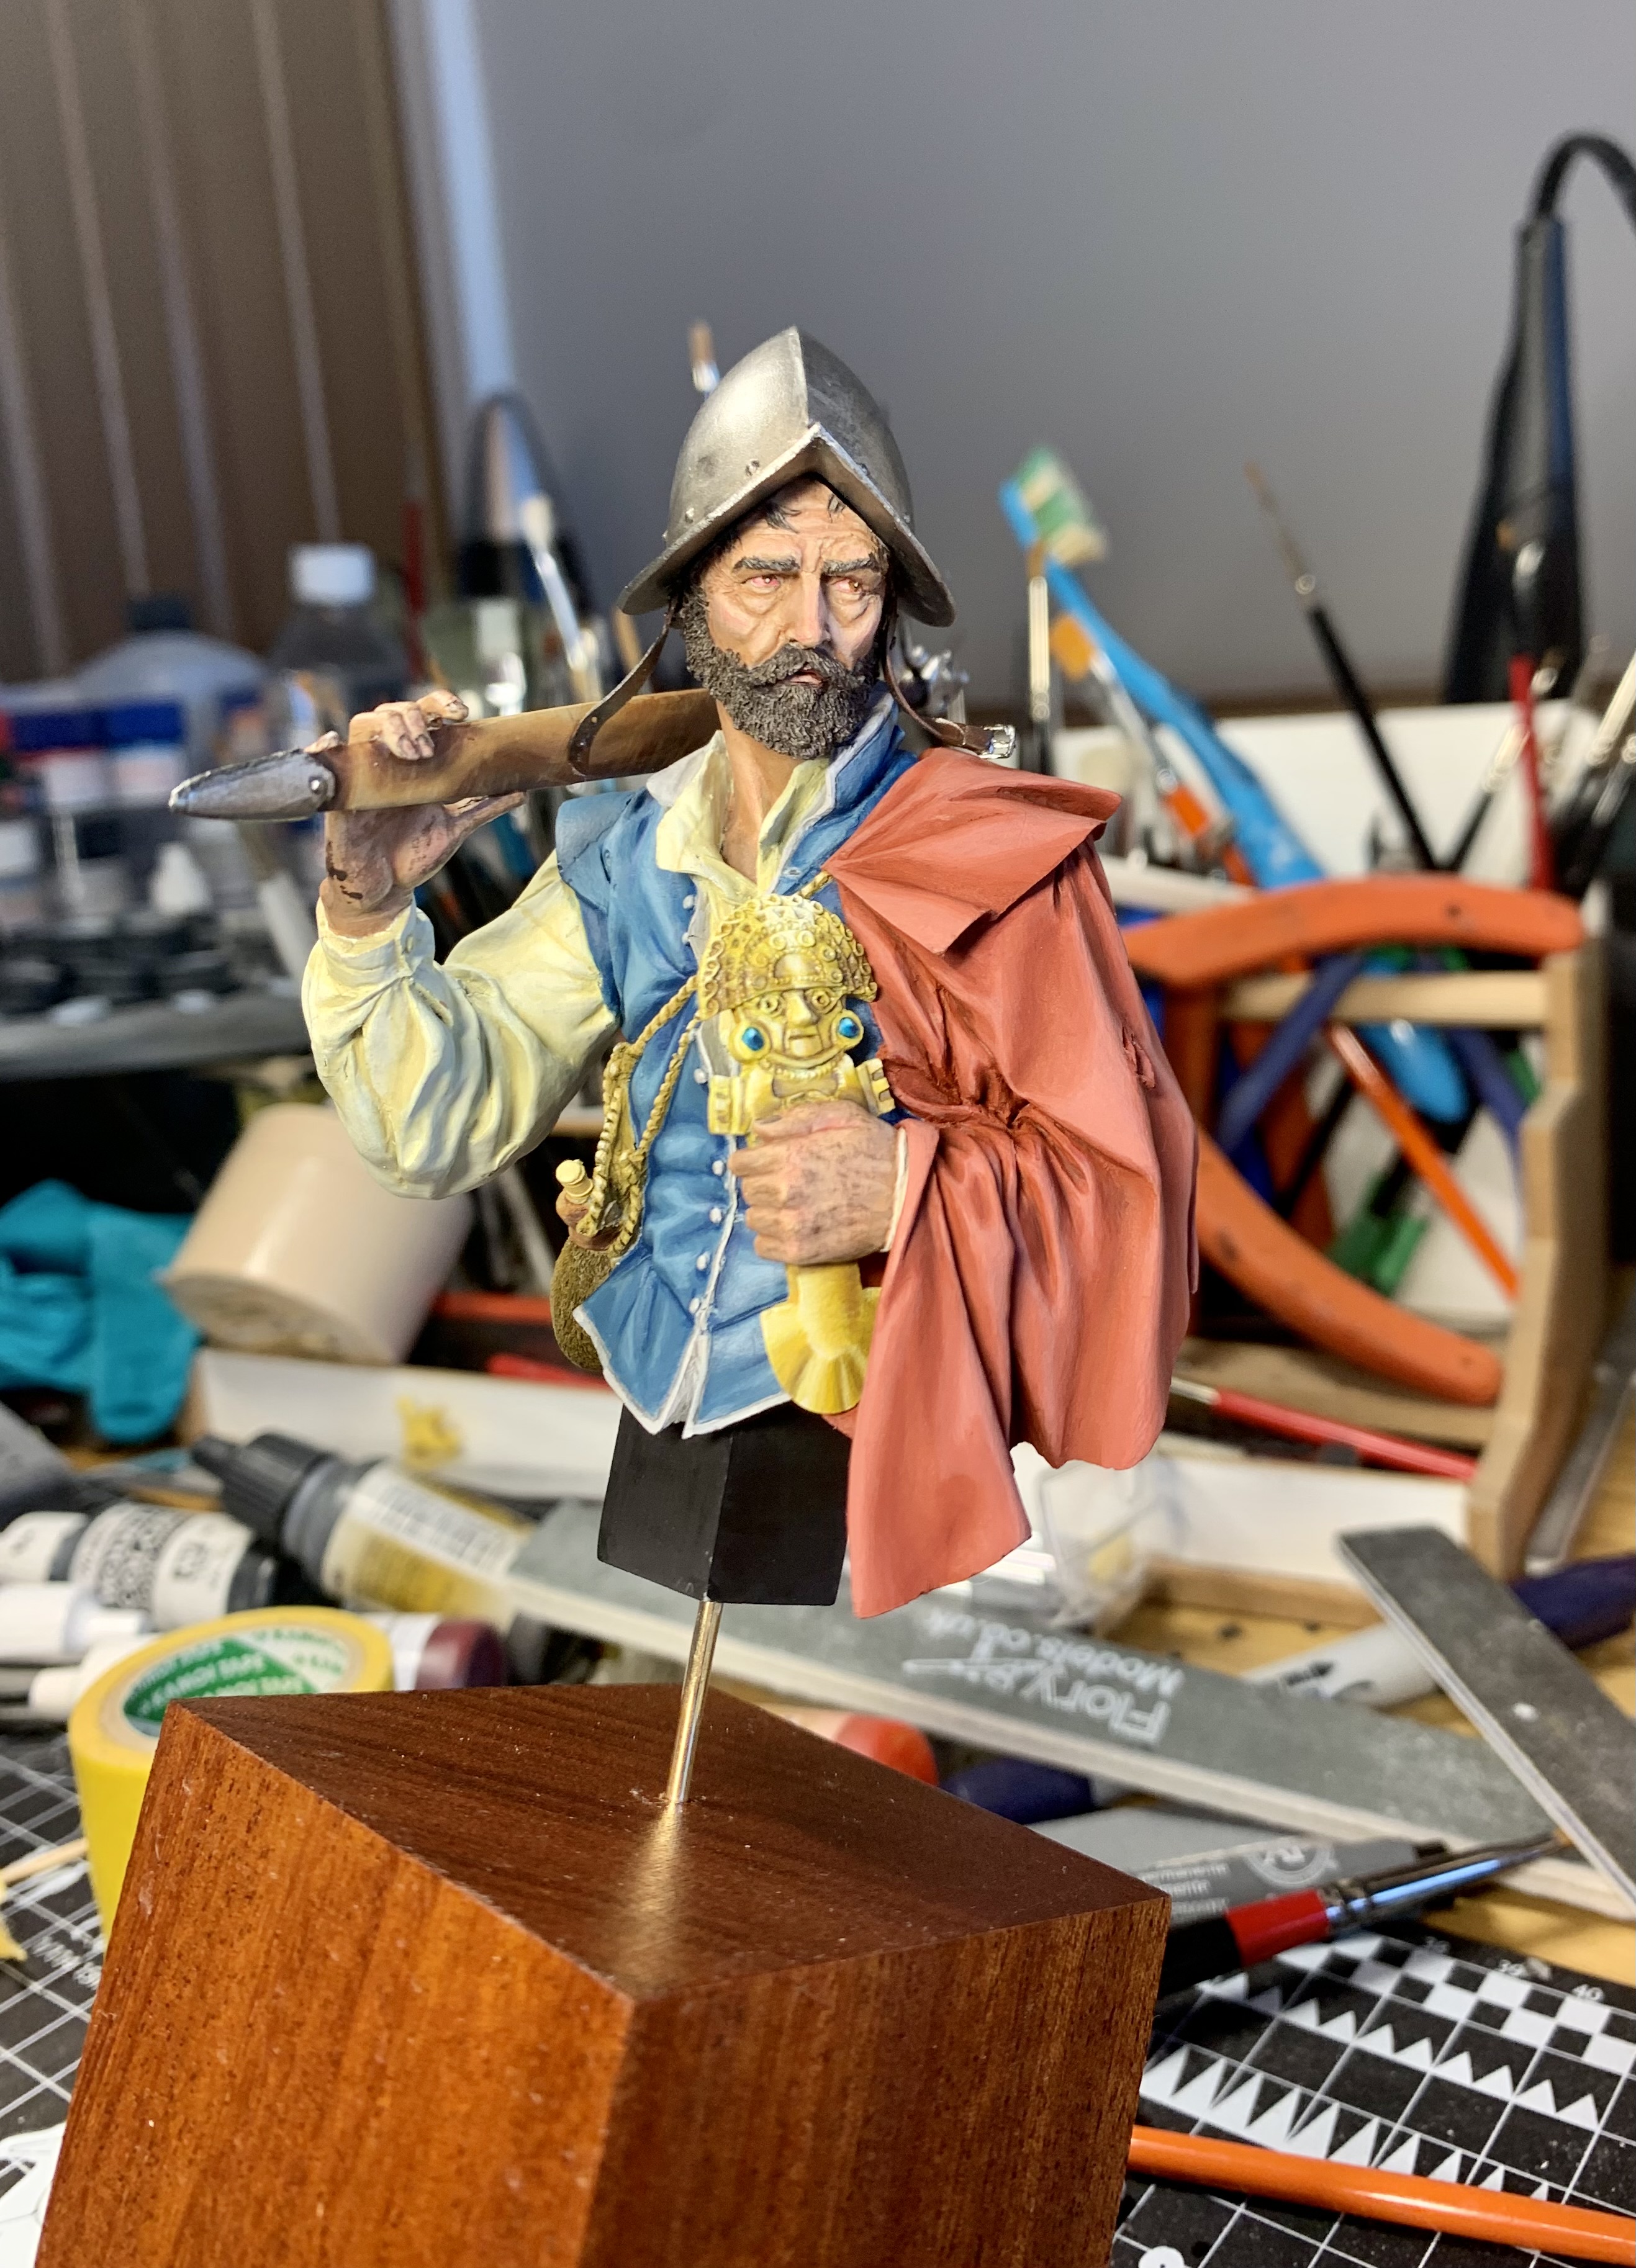
Just finished this bust from FER Miniatures depicting a Conquistador from Pizarro’s expedition to Peru in 1532.
As you can see it’s a beautiful sculpt with lots of character and a real joy to paint. I tried to do the Non-Metallic Metal paint technique for the first time too. The little Chimu Tumi ceremonial dagger was done utilising a Reaper Minis paint trio. It’s far from perfect- I don’t think it’s immediately identifiable as gold which is the aim of the NMM technique. But I learned a lot from doing it and will be trying it again, aiming to do better.
I tried NMM to do silver on the helmet too but couldn’t get the initial tones to blend convincingly enough and ended up stripping it and going the traditional metallic paint route.
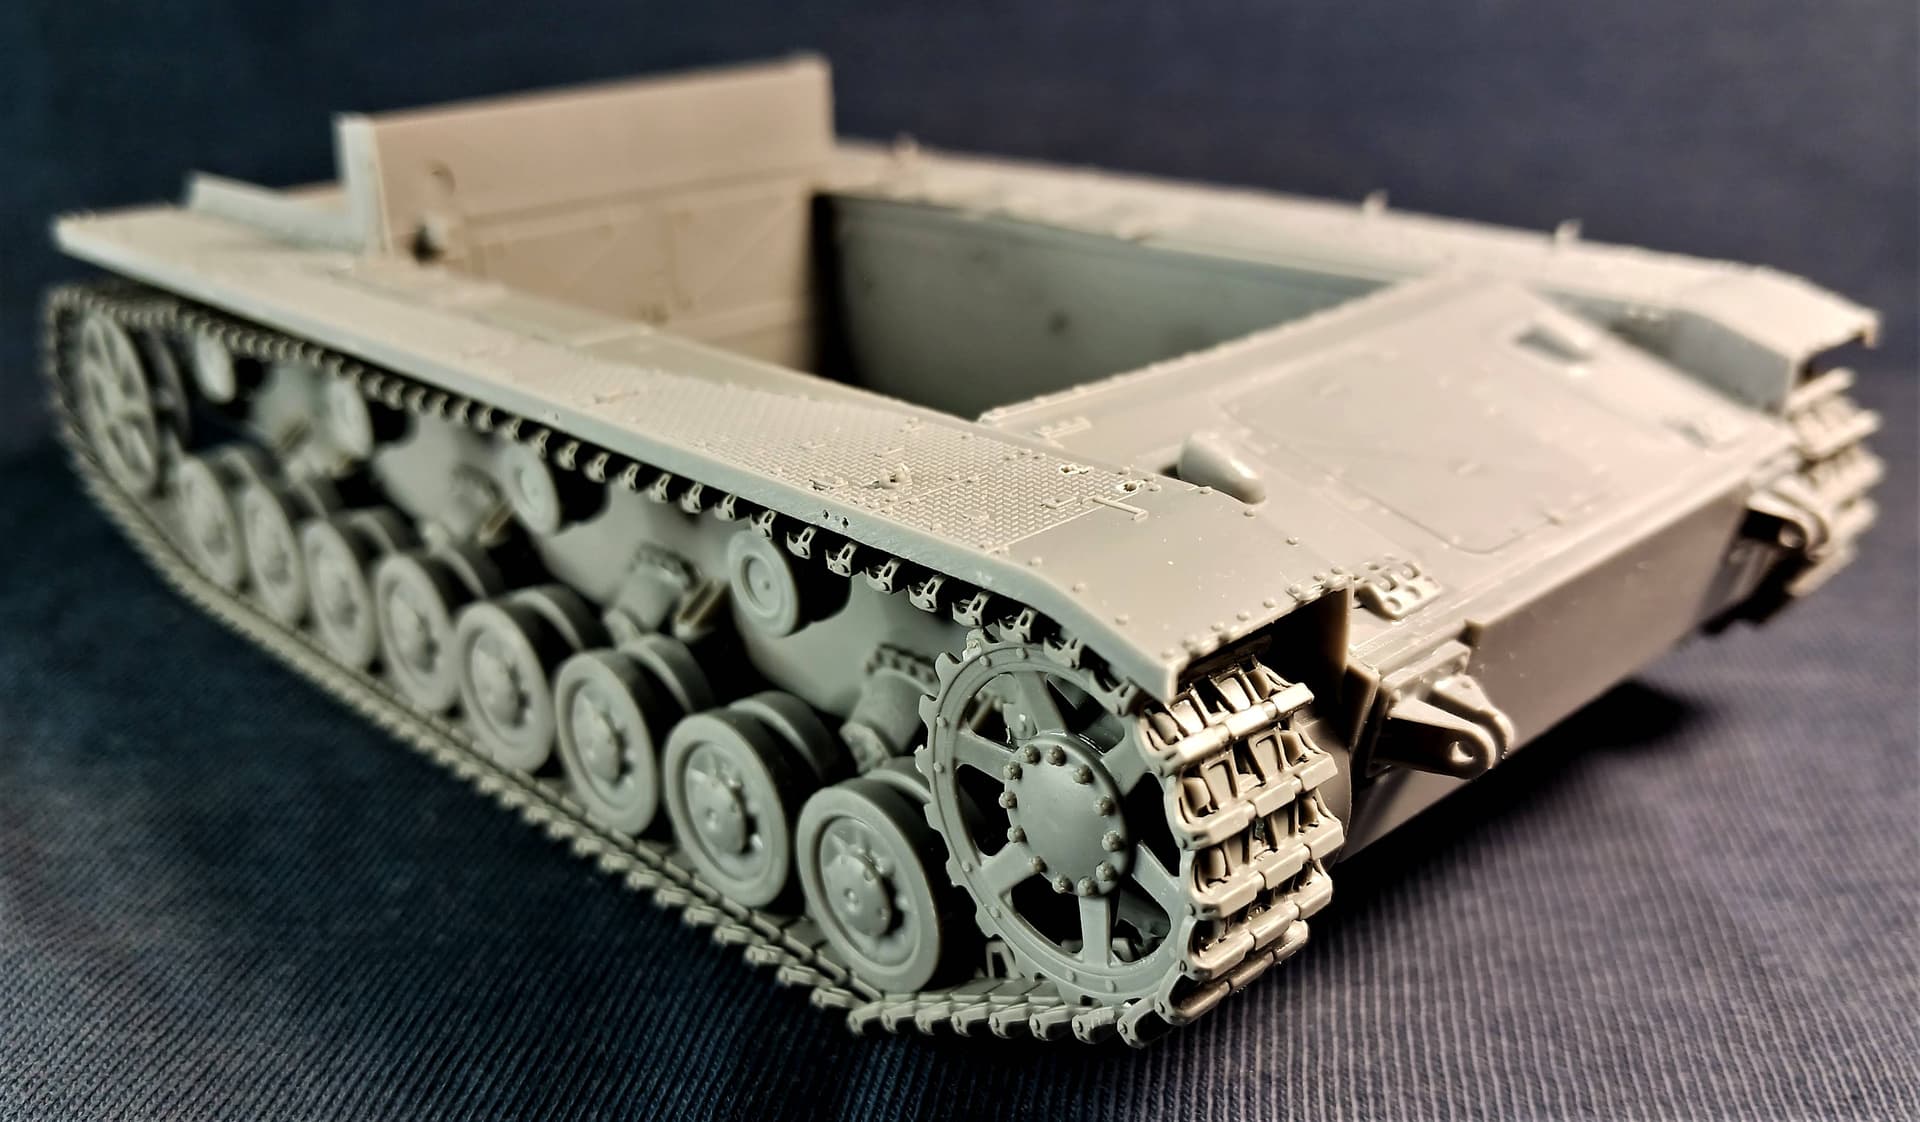
I’ve build the hull, suspension and tracks of my Vomag’s May 1943 production Bulgarian Pz.Kpfw.IV Ausf.H:
I am using MiniArt’s #35298 kit, less the interior (it will go to Kalin for use in one of the many Pz.IV he has) and Border Models open guide horn tracks- these are leftover from my previous Vomag July 1943 build and I chose to use them because their assembly is not so time consuming and their detail is crisper.
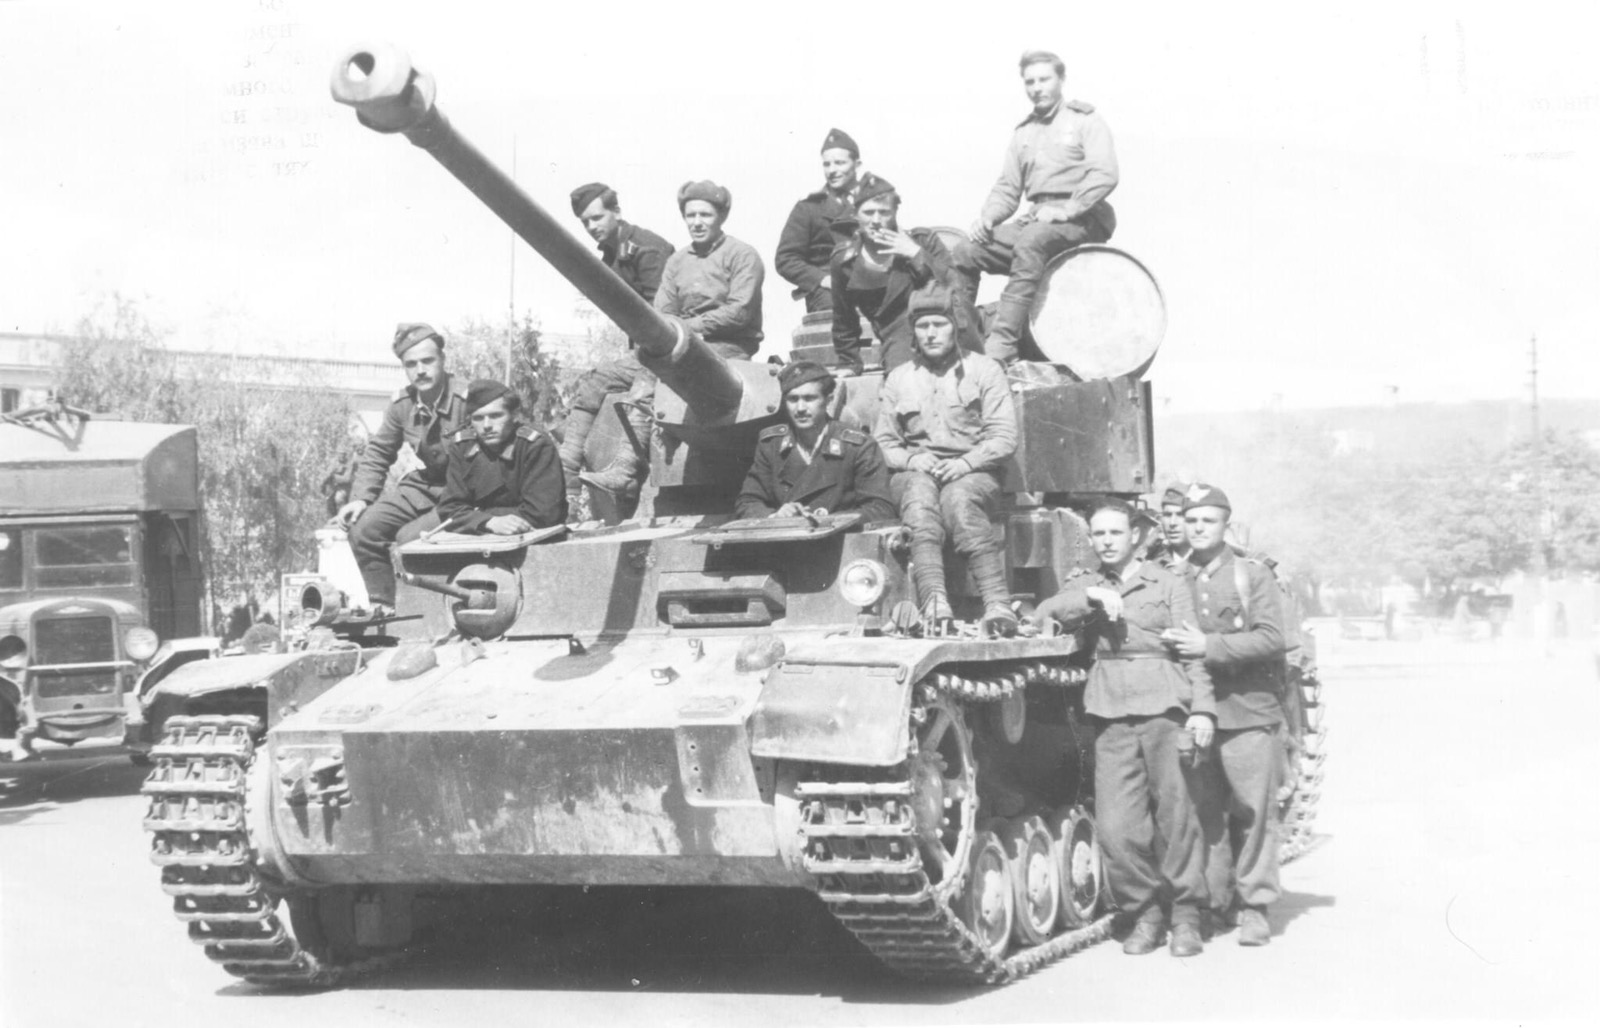
I will be building Fgst. 84907, Bulgarian registration number B 60250, a tank from the 1st Arm.Coy/ the Armored Brigade:
As usual, “Panzerkampfwagen IV at the Front- Update No 4” by Craig Ellis is used as a supplement to the pictures I’ve collected over the years.
Cheers,
Angel
Wow, Karl! That looks amazing! ![]() I always envy the figurine painters for their skills. I couldn’t do that.
I always envy the figurine painters for their skills. I couldn’t do that.
Very kind of you Torsten, thanks! I hear that same thing from other modellers too and I believed it myself at one point. But my advice, if you want to try your hand at figures or simply improve, is to get your hands on one and dive right in- always have one on the go too so you can have something to do while the glue sets on a plane or a tank!
Hi model builders,
I’m starting a new project that will get a different engine than what came with the vehicle. So I did the right thing and went ahead with converting the replacement engine before starting the kit.
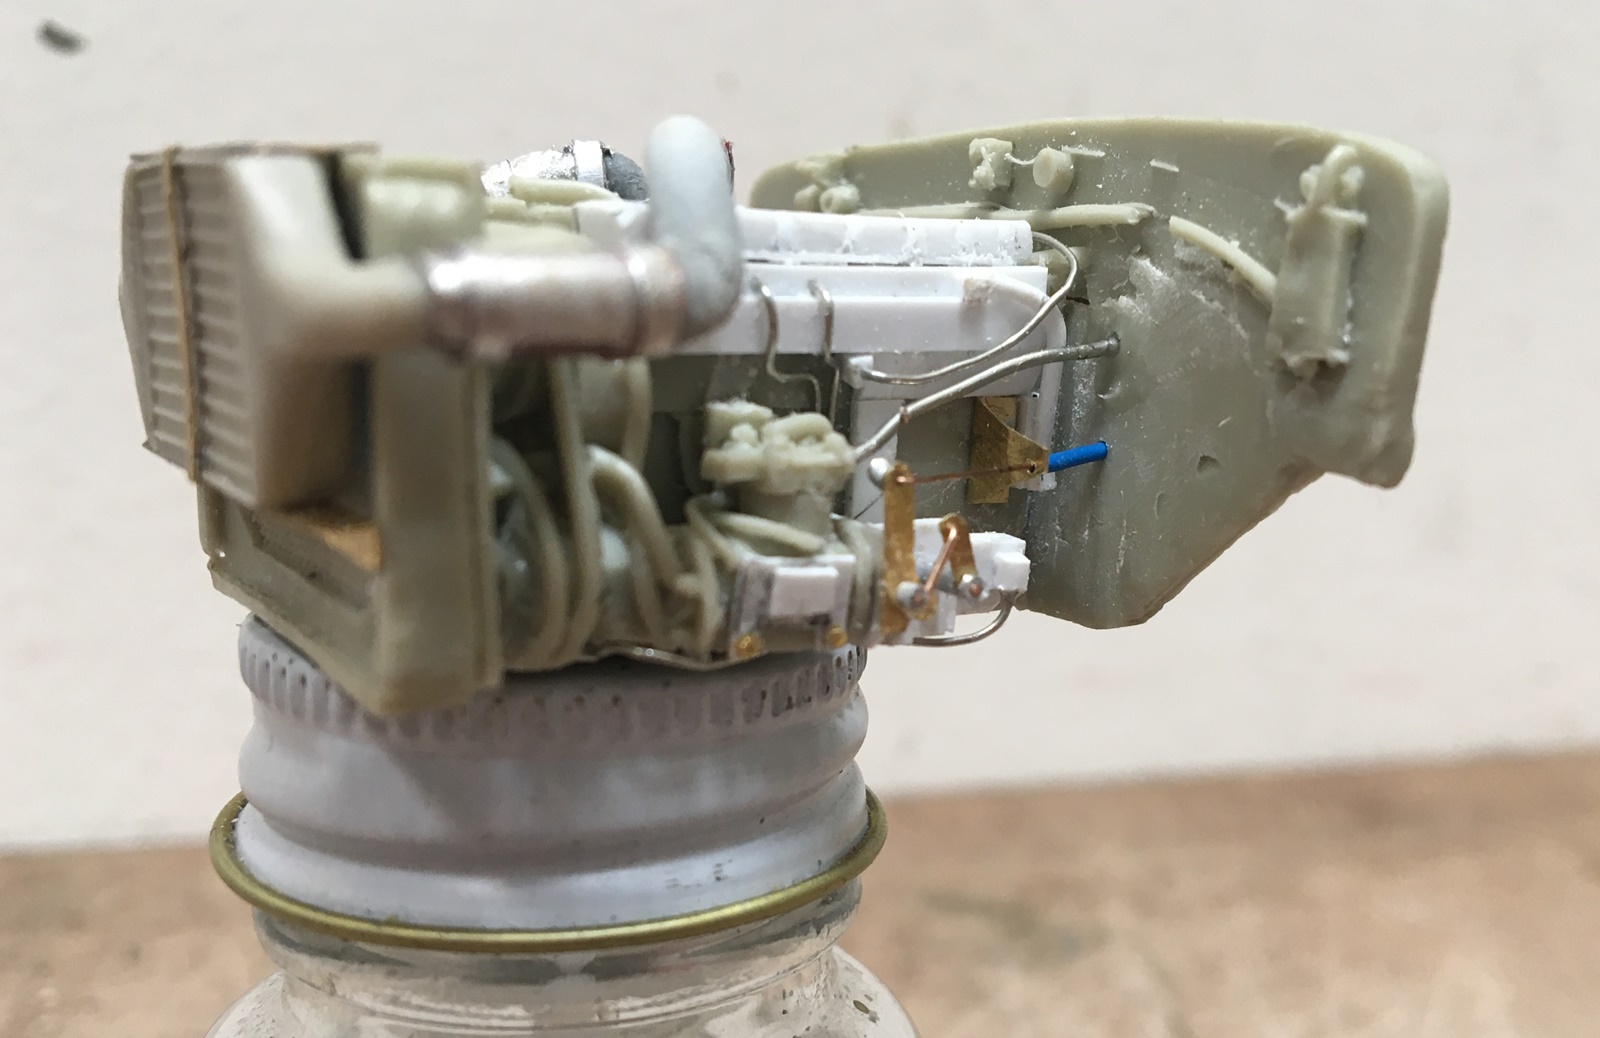
To do this I’m using a CMK donor kit for a M939 engine (which has been sitting ignored in my stash for years), which, while a Cummins, does not look much like what I want, which is a turbo charged and intercooled Cummins L10. Please have a look:
This is requiring a lot of cutting of the kit, which is fine, as it doesn’t look right anyway. First up, fix the valve cover and top of the engine - then get after an intercooler, which comes from a 1/24 scale Nissan. Getting the crossovers to work, well, required a turbo charger:
This is also a cut up and reworked 1/24 part. The intercooler tubing is from old sprues, bent and cut to work. You can also see the exhaust dropping out - I guessed the width of the yet-to-be built chassis and cut out a space to let the line drop, as it does on the L10, inside the frame rail. The air intake will sit on top of the turbo - haven’t figure it out just yet, but I have a basic idea in mind.
Then on to the fuel system - Unhappily nothing from the kit looks like this version, so out came the knife again, and I did some heavy cutting:
Above, you can see a reworked fuel pump, and fuel line and throttle linkage running through the firewall. And, various fuel lines and throttle linkage.
So, this will get some more attention and clean up but so far so good. I’m doing all of this because this engine will be clearly visible in the build.
I am making this leap because: A) I want to use this engine in my project; and, B) either it will work or it wont - so why not get after it? This block will wind up sitting on the kit frame rails, rather than having engine mounts, more or less as it sits on this small bottle - so, I wont be cutting up the frame anyway. Though I have a variety of changes planned for the chassis, I will worry about them later, as they wont have much to do with the engine.
After adding more to the block, I’ll make up the oil pan, the top part of the starter motor (the bulk of the motor will be out of view, behind the frame rail), a flywheel and gear box, then on to a transfer case. OK, on we go.
Happy model building,
Nick
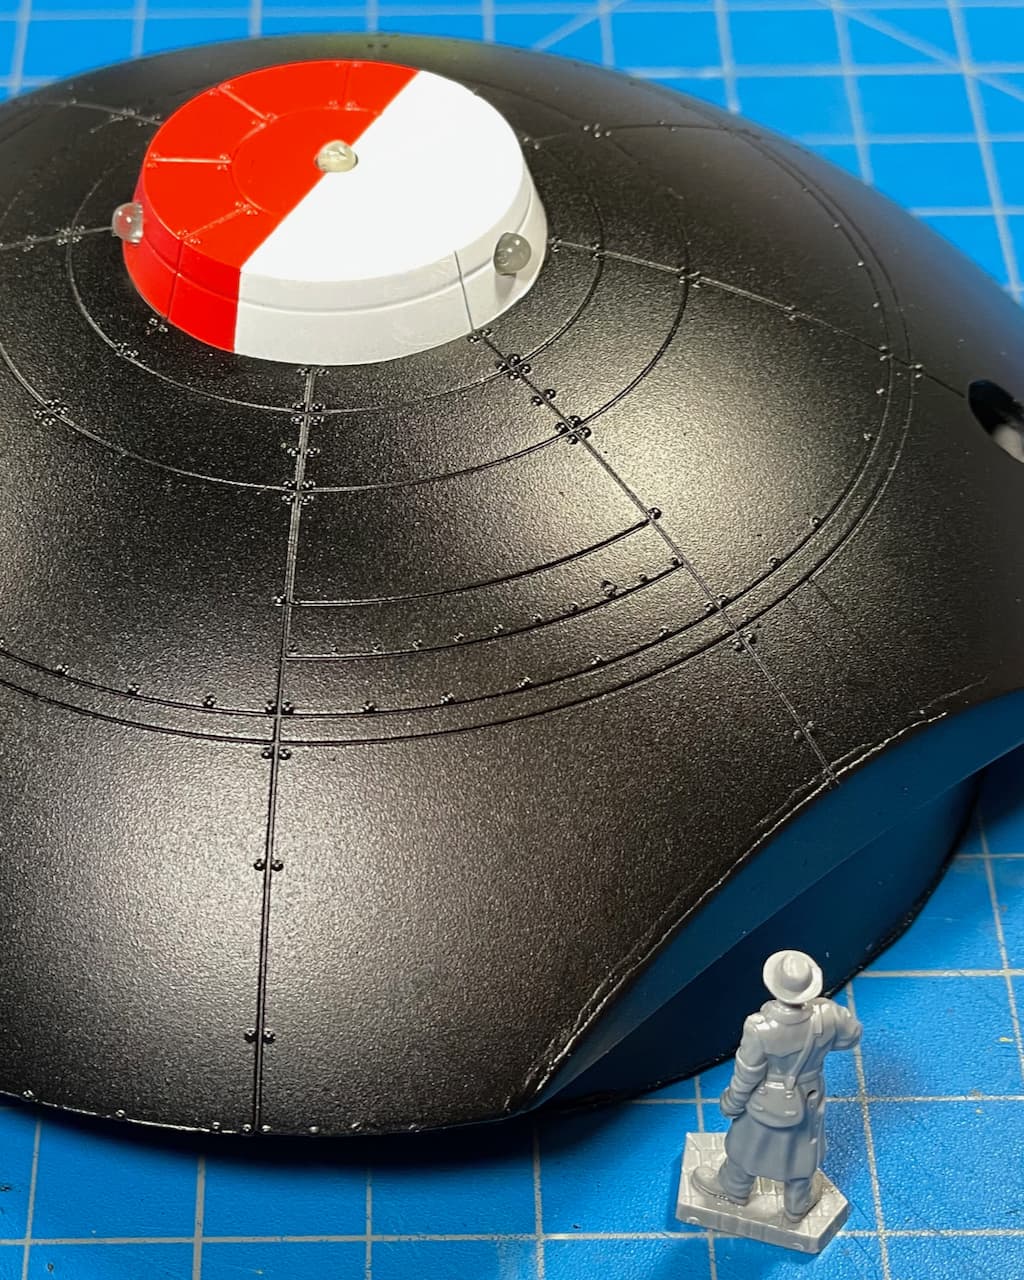
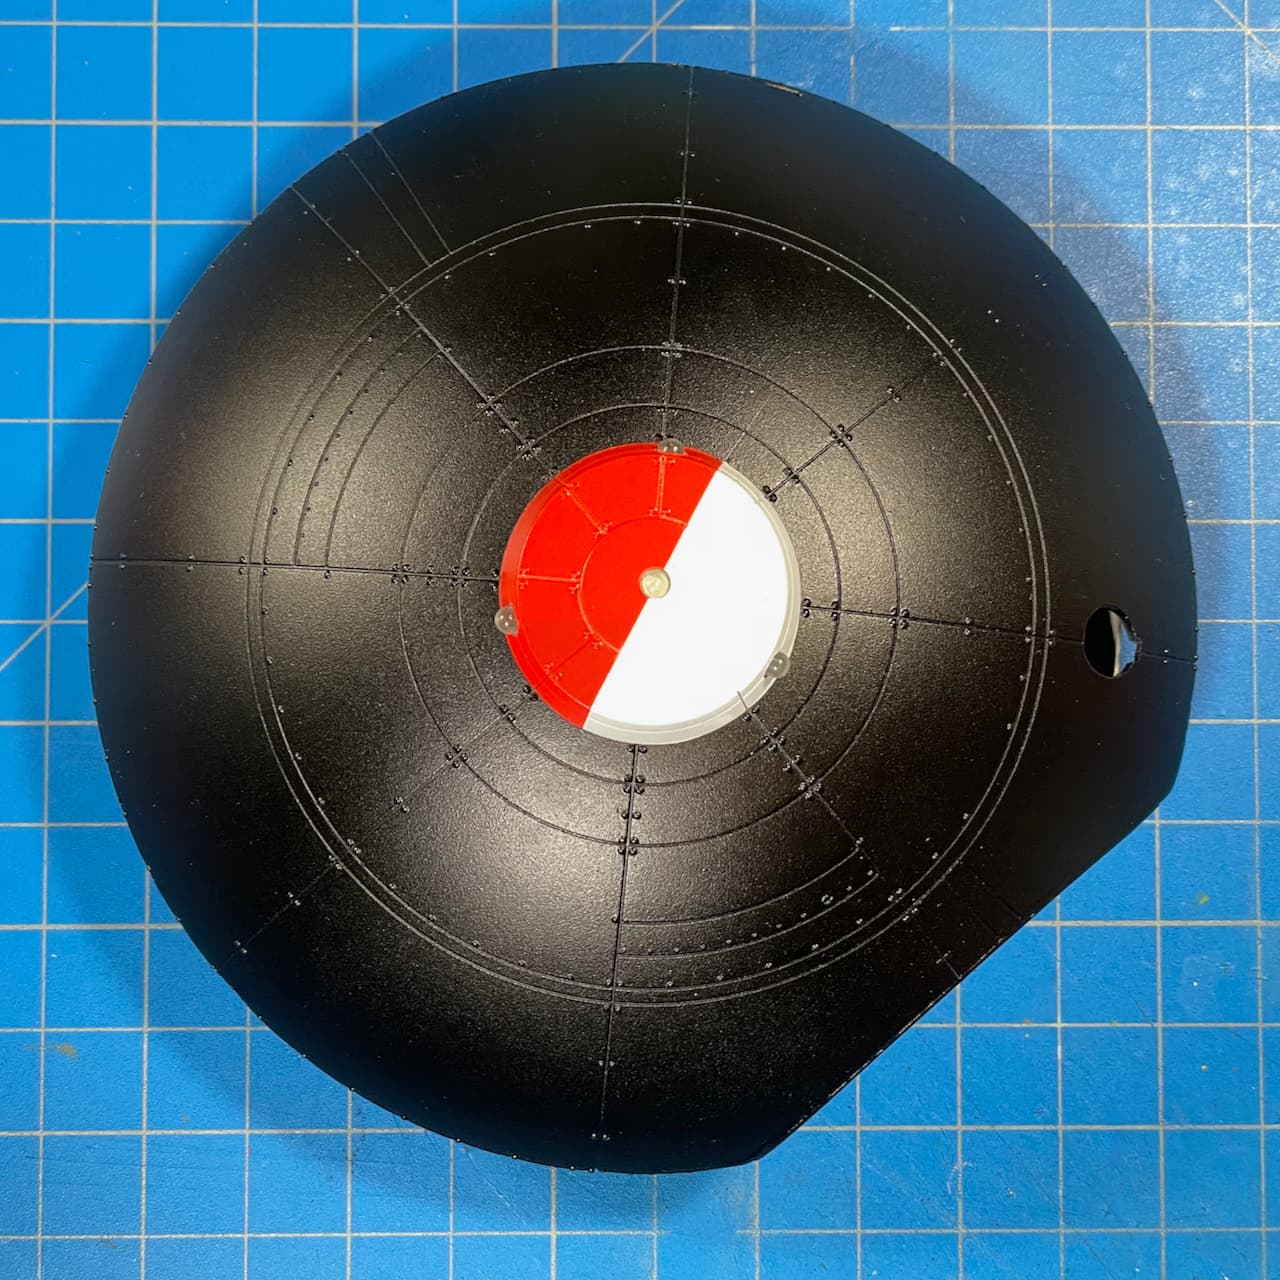
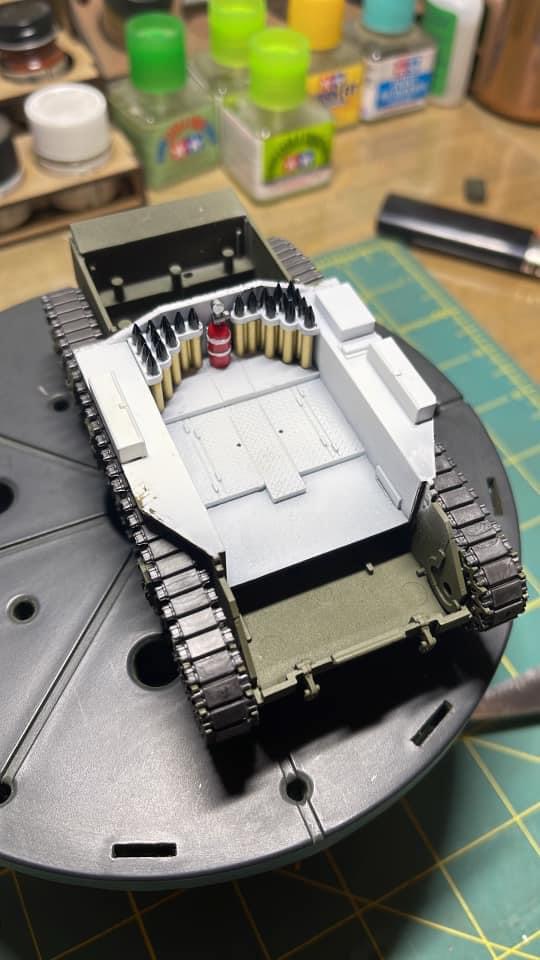
Further progress on the M8 Scott HMC.
Dry brushed some wear and dirt on the floor panels prior to washing.
Ammo stores added. And just because I need practice, decided to paint one if the kit’s figures.
Looks amazing! After the You’ve got a nice figure campaign, I kinda want to try out a 1/16 figure.
We have a new figure campaign, just saying. ![]()
Please do link, good sir. I may have to join a bit late, but I’ll definitely take a look.
Here you go.