Actually, you only need to order from SMM if you want the shackles. If you just want the tow ropes you can order direct from Thachweave.
1 Like
Nice gun, Gary! I have this kit waiting near my work bench, but strait oob, no extras. But I have no clue why Tamiya calls the Type 16 “Maneuver” Combat Vehicle. Everywhere else I read “Mobile”. In fact it’s called “Hitorokushiki Kidou Sentousya” in japanese. Not easy to pronounce for our tongues though … 
Normally I don’t go for after-market detail items, but after reading about the holes being represented by decals I figured I’d get the metal one.
1 Like
@Gary_Kato , Thank you for mentioning that Gary, I will order one too now that I know that
Tamiya does provide a decal for the muzzle brake holes, but they also provide a paper “mask” template if you want to drill the holes open. The bigger problem though is that the muzzle brake is molded solid (only the short end cap is hollow) so even if you drill the holes it won’t look right.
Personally though, I think the Tamiya turned metal barrel is a waste of money. I normally like Tamiya’s upgrade sets, but in this case they neglected to include the barrel rifling that is highly visible in the end of the barrel. Yes, you now get a hollow perforated muzzle brake, but why go through the effort of producing an inaccurate replacement part? And since the kit barrel is in one piece (except for the fume extractor and recoil cover) you don’t have any major seam to clean up to do, which negates most of the value of having a one piece turned metal barrel.
You are far better off to purchase either the Passion Models turned brass muzzle brake (which is about $5 less then the Tamiya barrel) or the DEF Models tire/wheel set which includes a resin muzzle brake. Both include rifling and of course are perforated. You could also get the Voyager complete metal barrel if you must have the entire barrel, but the rifling for that is a piece of PE which must be rolled, which I always find to be a pain.
2 Likes
Just got the Trumpy 1/35 M1126 Syrker ICV to add to my slowly growing stash.

May build it up for the Stryker campaign when I finish my T-34/85.
5 Likes
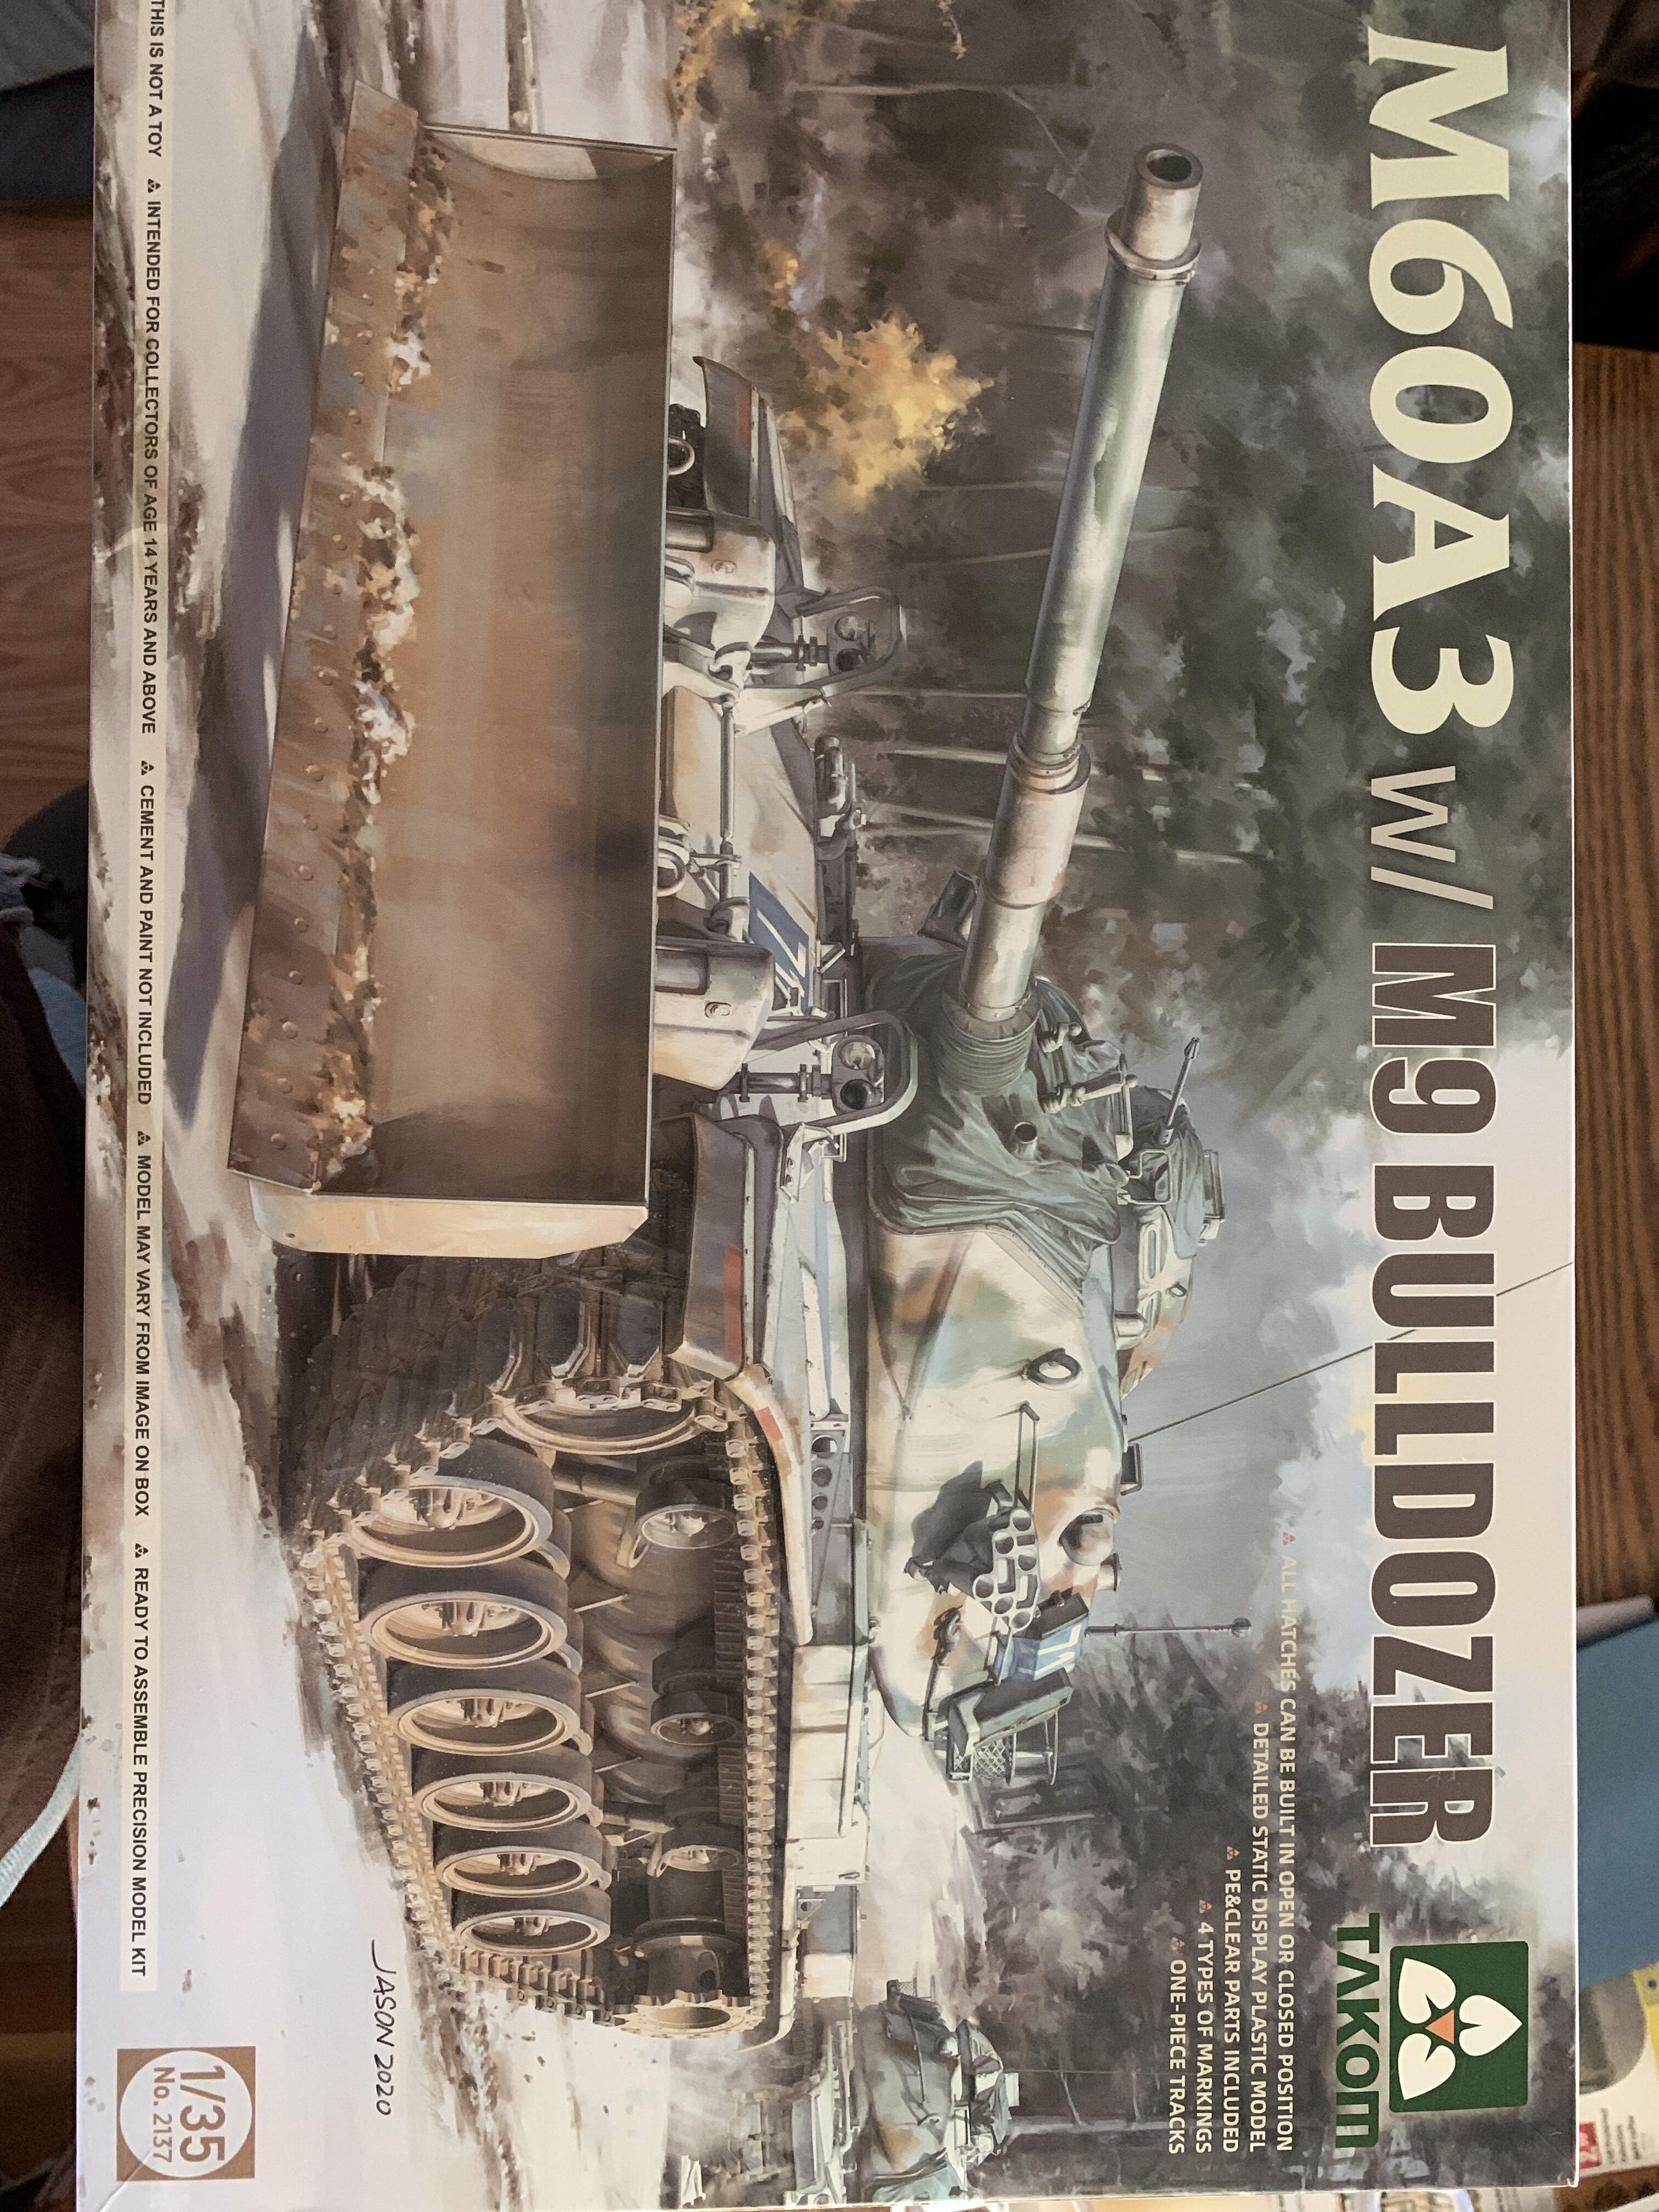


@Tank_1812 Ryan what’s your first impressions of the M60A3 kit?
No expert but looks like another winner. In the announcement thread for the US, I noted there is some issues if doing the AF version, decals and road wheels need attention from what I saw.
Yes, I also noticed that funny decal, Gary. Make me wonder why such a high class company like Tamiya does that. But they also include a mask to drill the holes in the gun. I’ll give that a try on my build. By the way, is that metal gun also made by Tamiya?
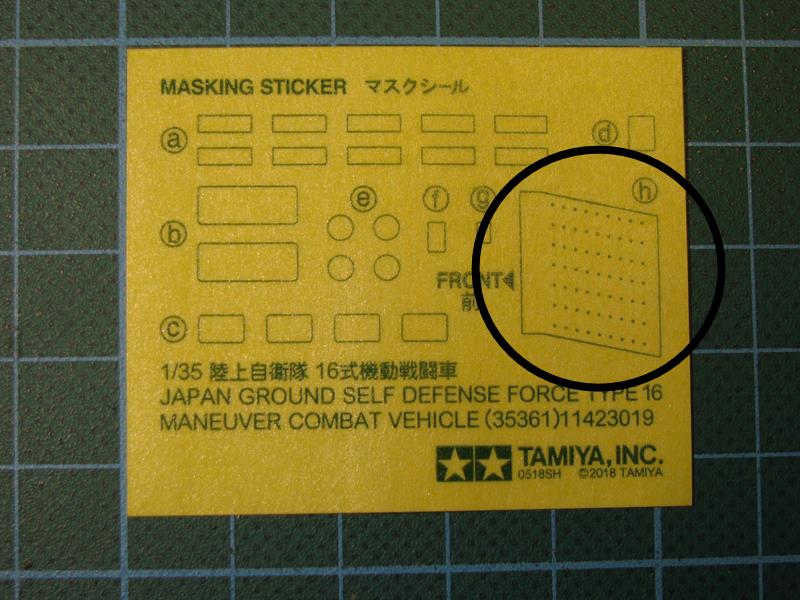
Yes it is.
While I still wish I could post a picture of Gecko’s Bedford MWD here(awaiting arrival for more than 4 months now)… I just received a new set of decals for the Eastern European Axis StuG III:
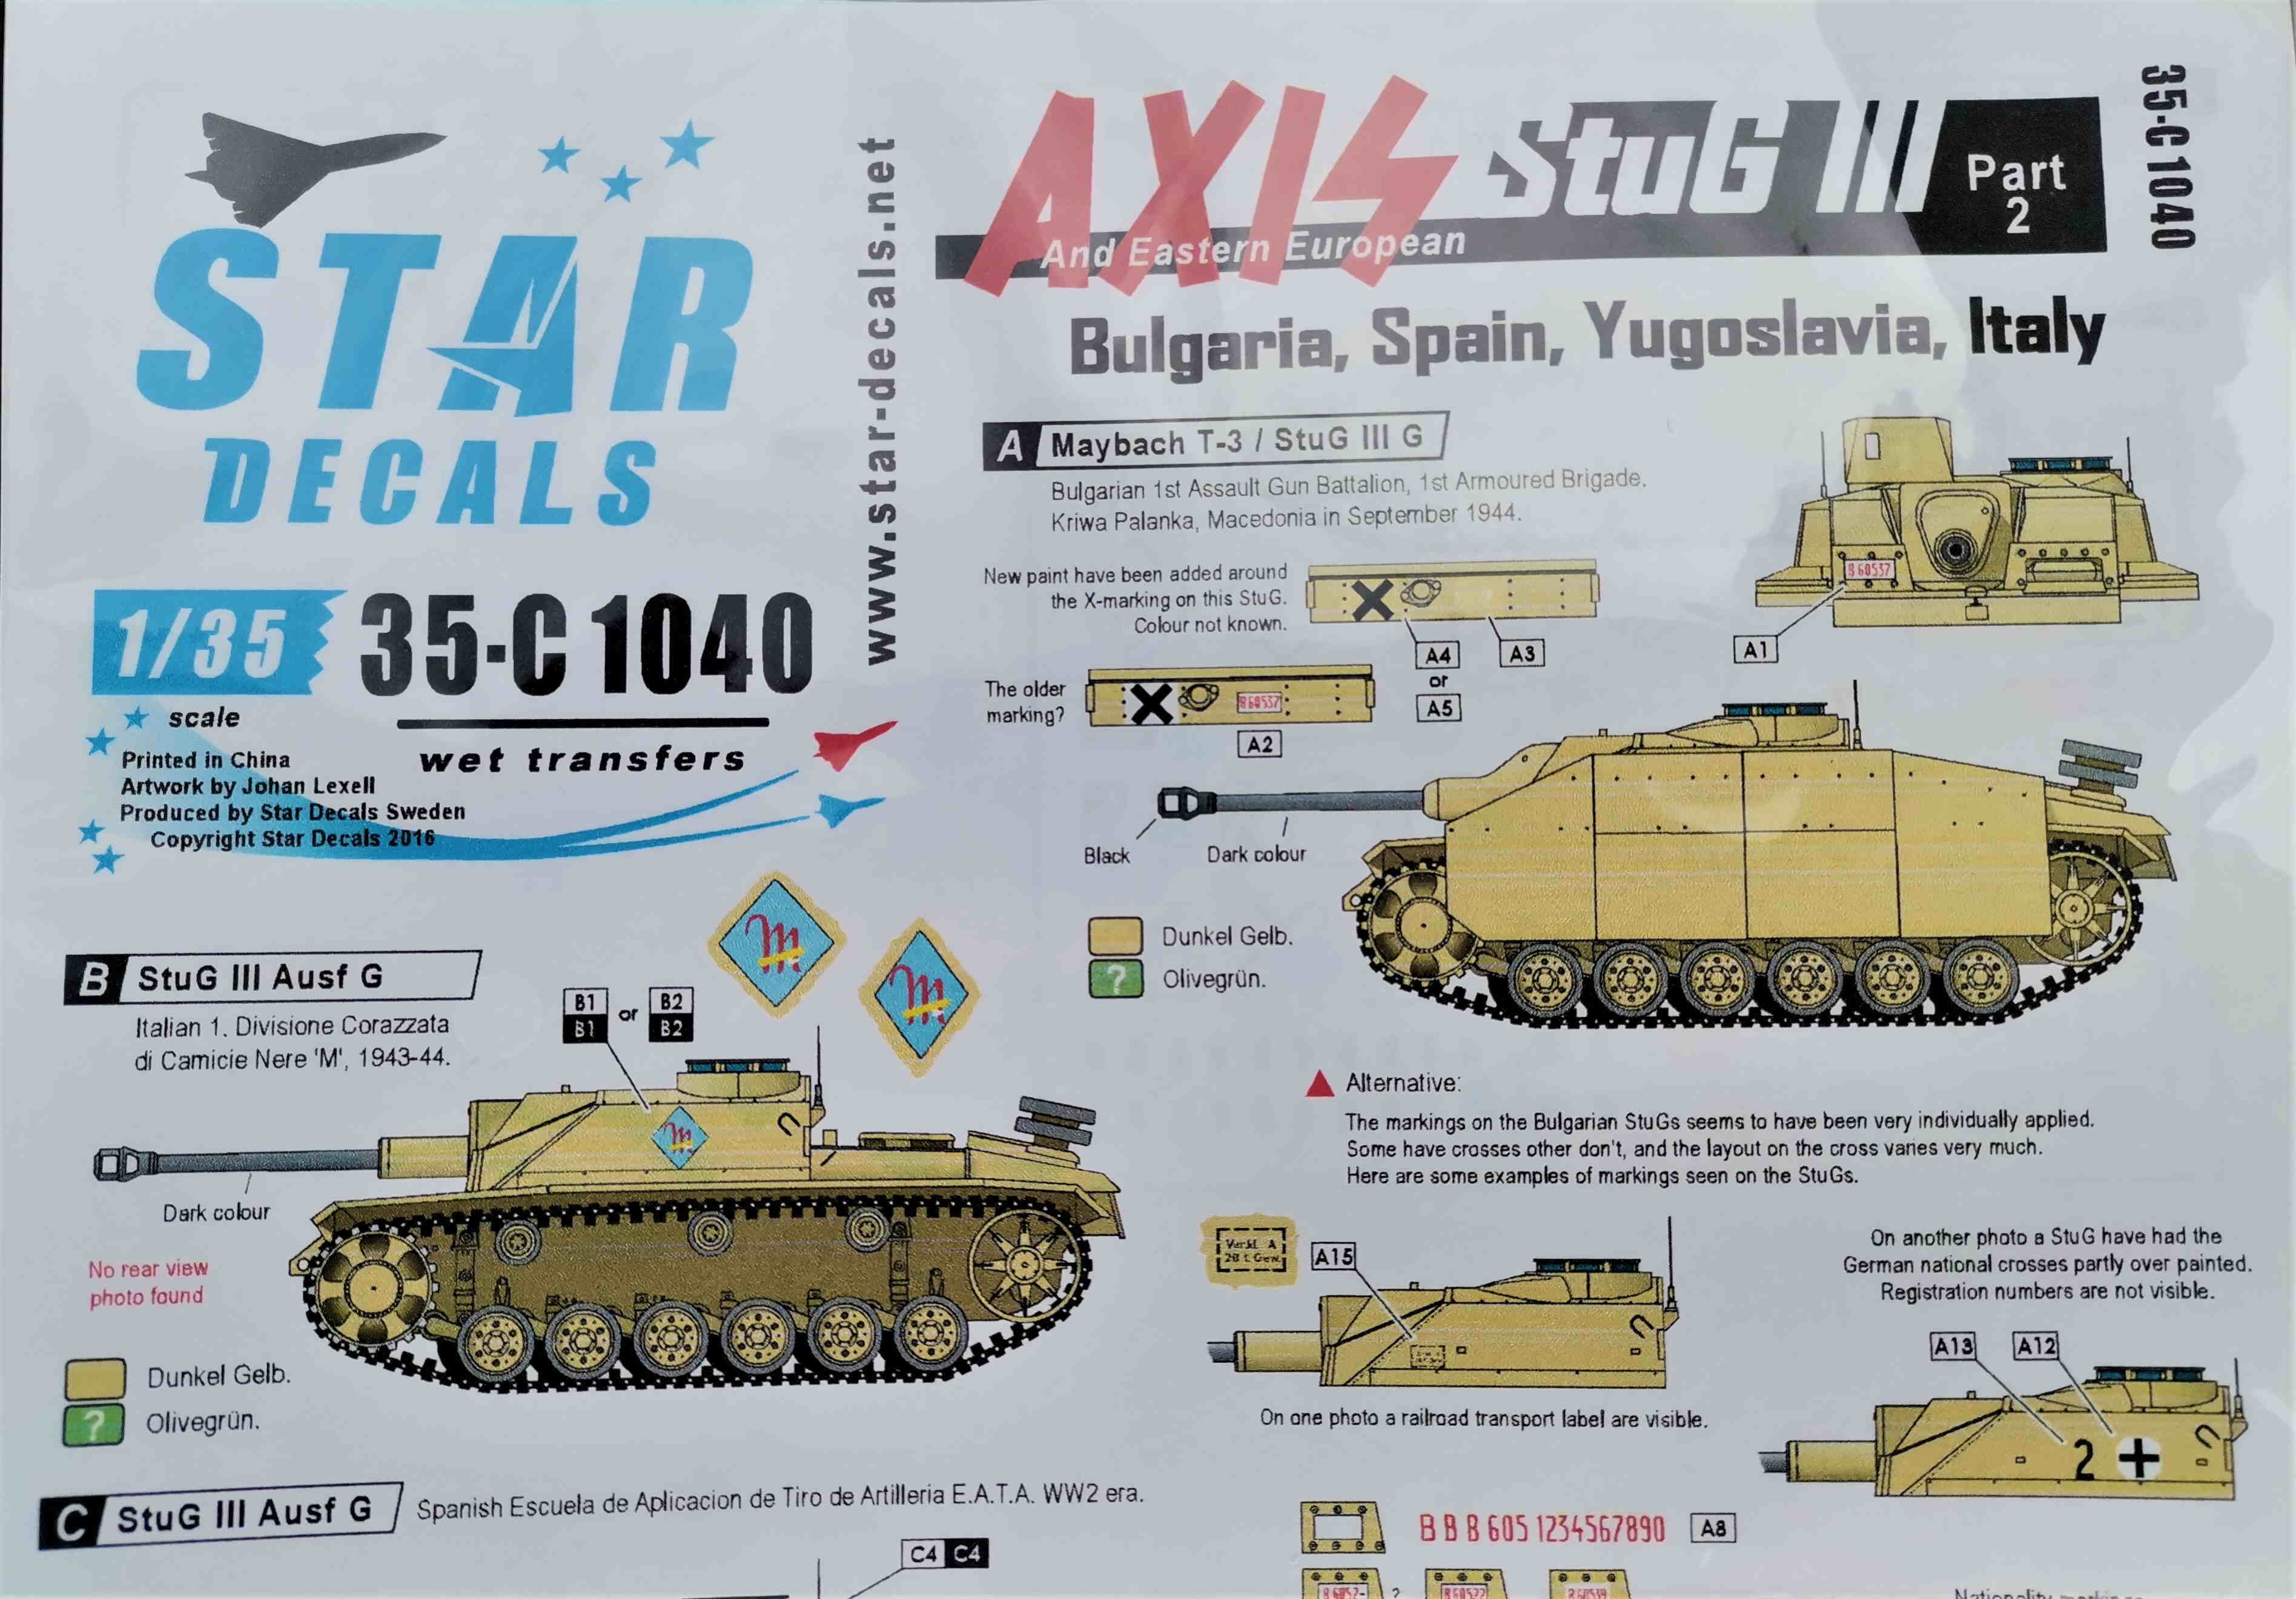
The set, I have in stock, looks like a Swiss cheese, so I needed a new one that can provide markings for the future build/s.
I’ll only use the Bulgarian markings, so should anybody need some of the other national markings(Spain, Yugoslavia and Italy), feel free to PM me and I will send them.
Oh, and I also received a new nozzle and needle(0.3 mm) for the cheap Chinese airbrush I use most commonly.
Both were direly needed ever since SWMBO let the Roomba clean the modelling room(in my absence) with following outcome:
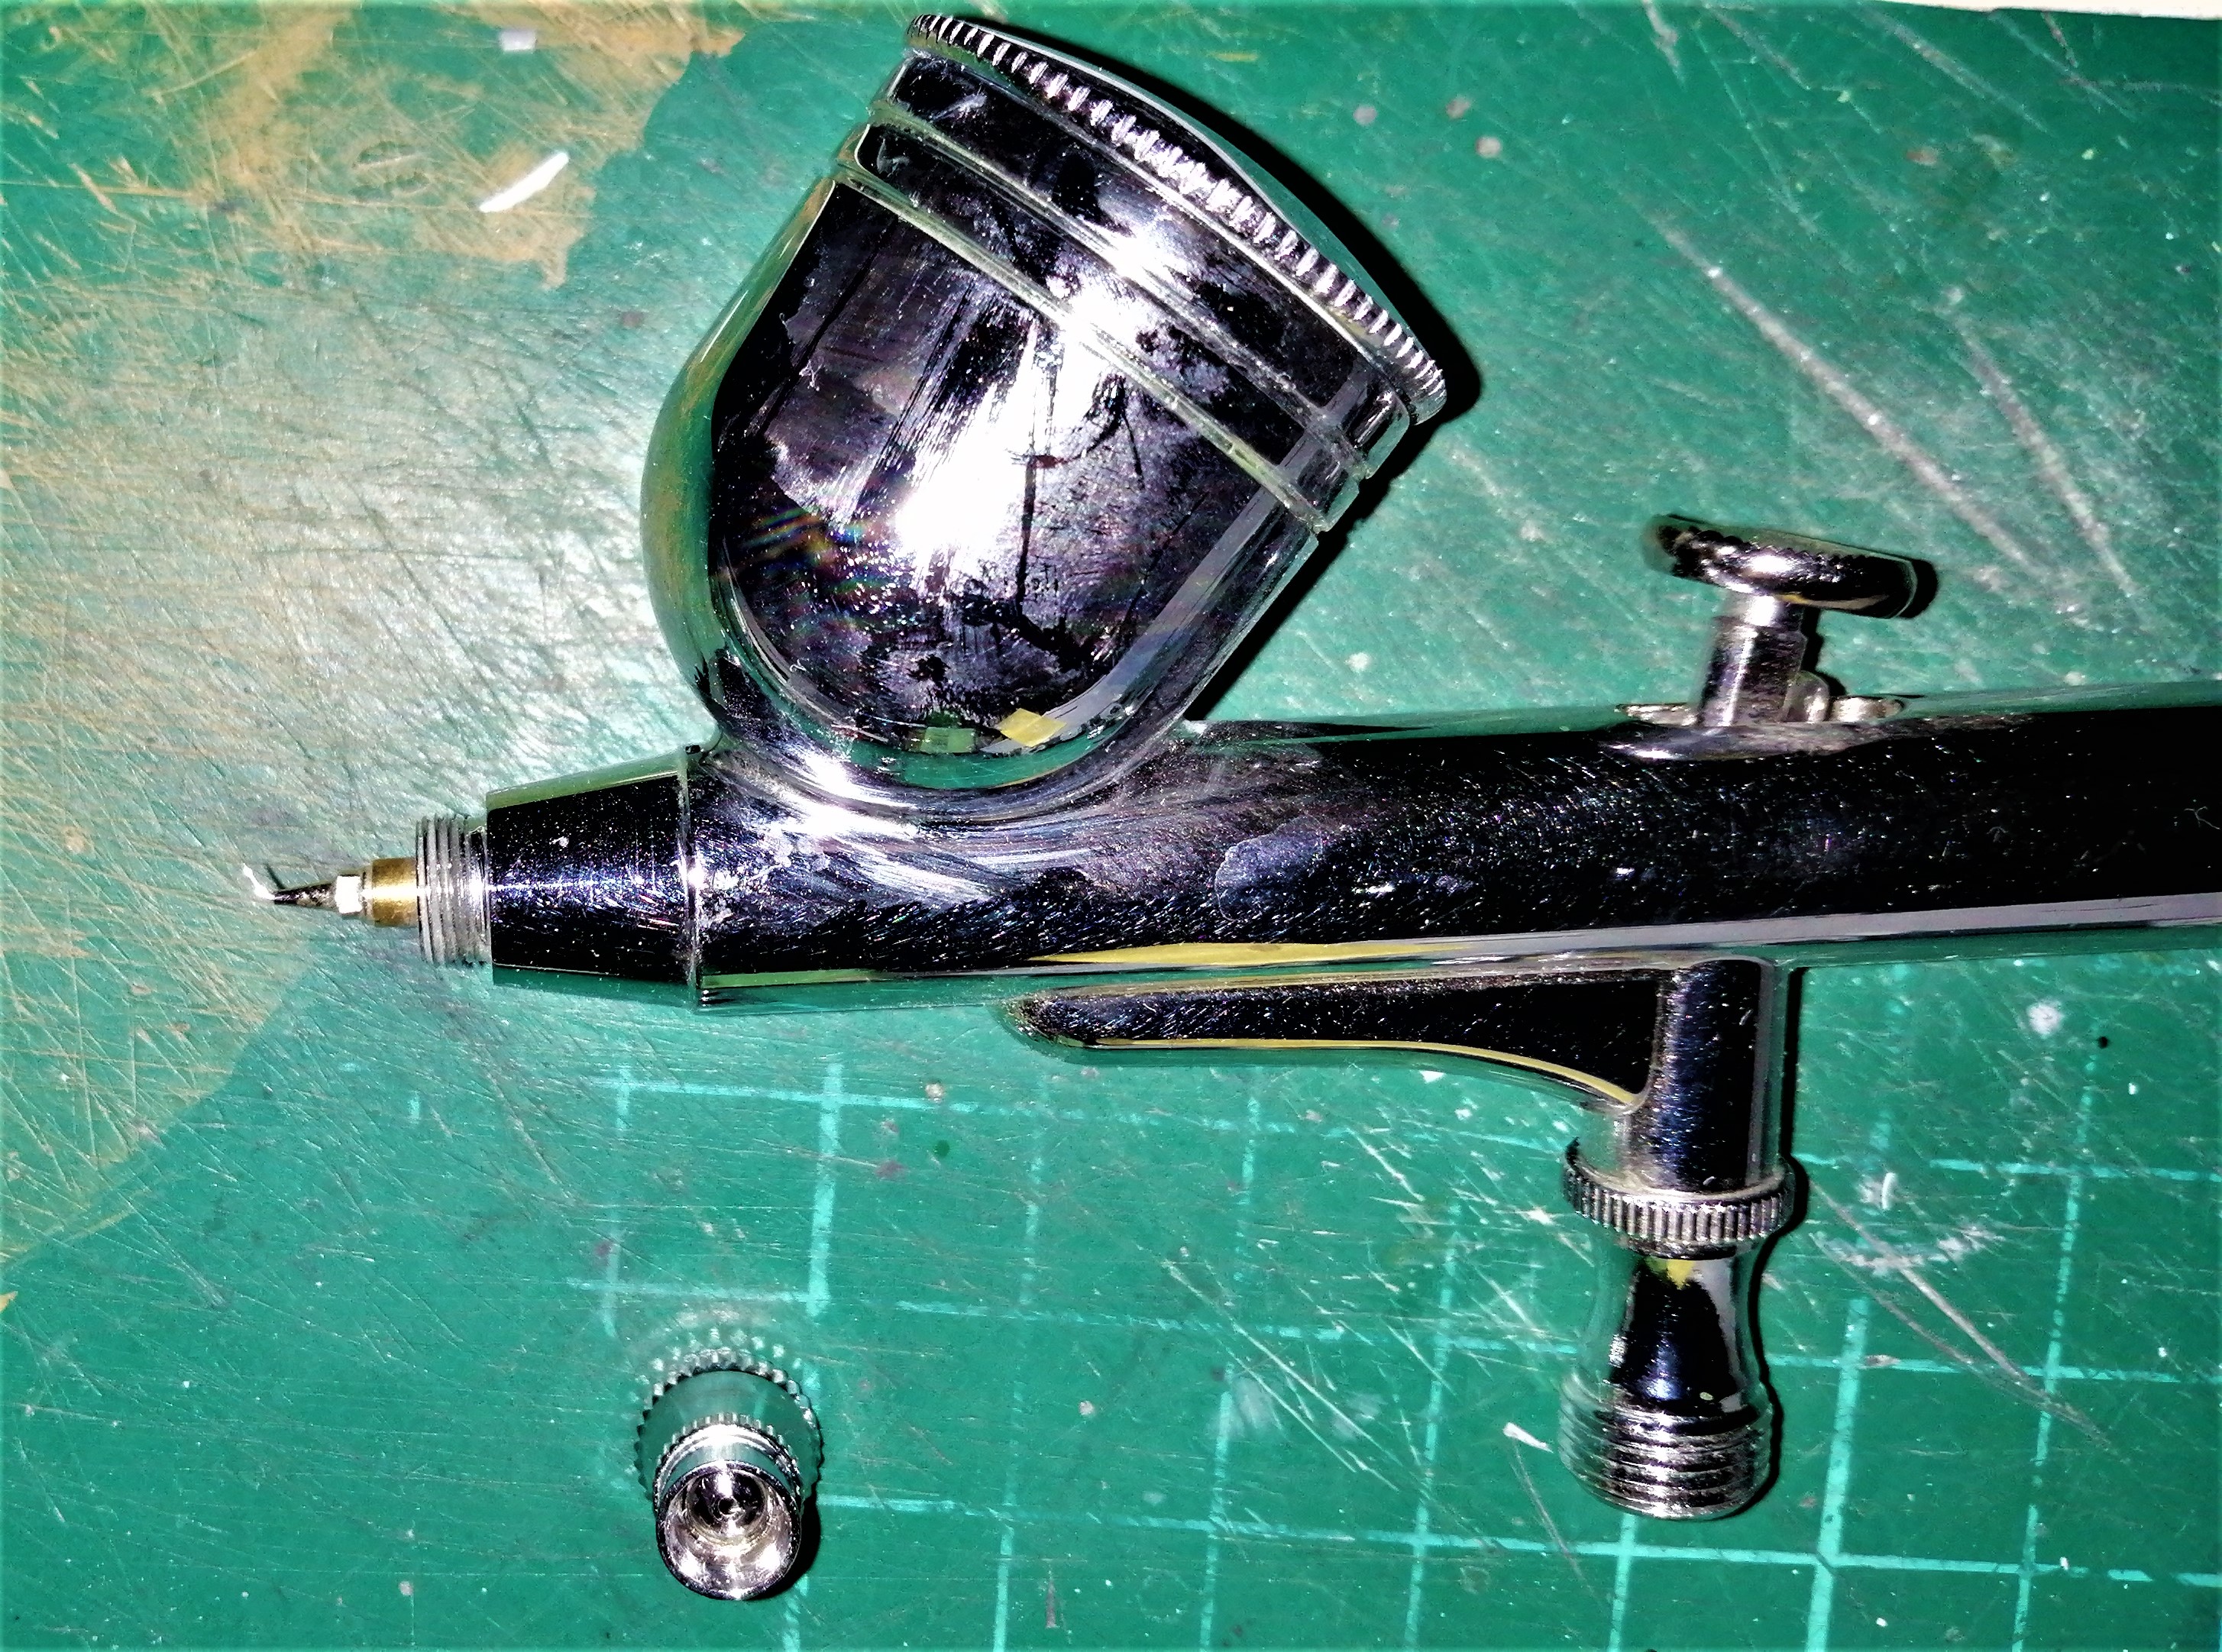
We are still arguing who must cover the cost incurred 

Cheers,
Angel
7 Likes
Interesting that the decal sheet tells you to leave the barrel in primer (assumed) in every decal option.
My LHS has the Bedford MWD in stock, but only the original soft top version. I’m hanging out for the hard top one. Hopefully yours will turn up soon Angel.
1 Like
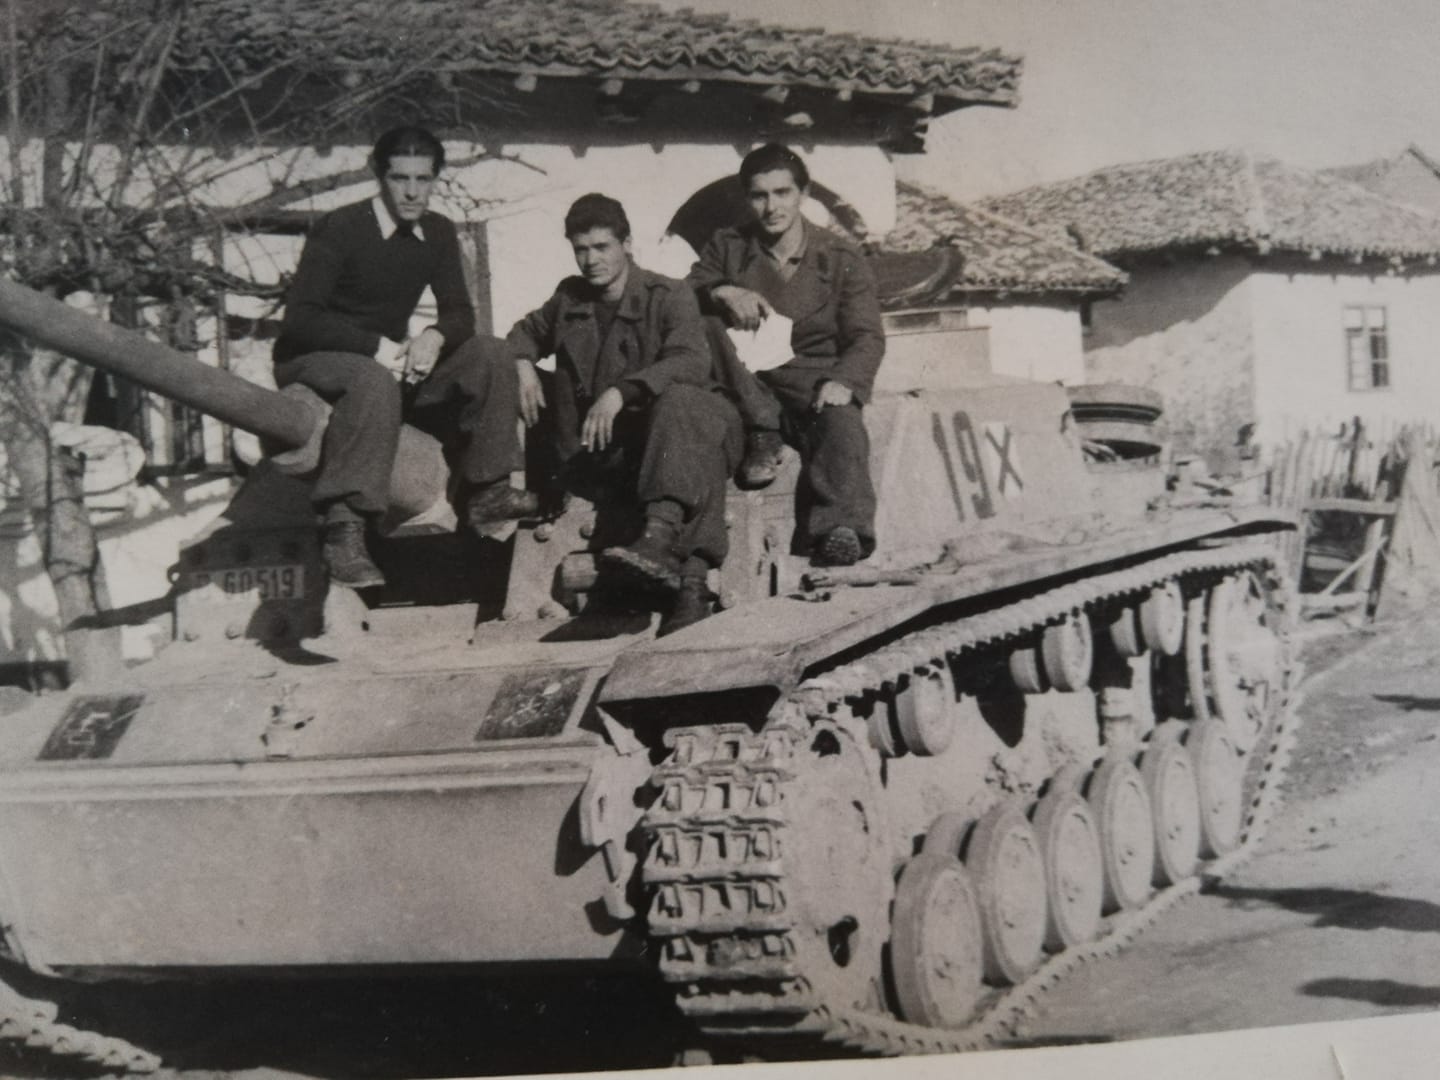
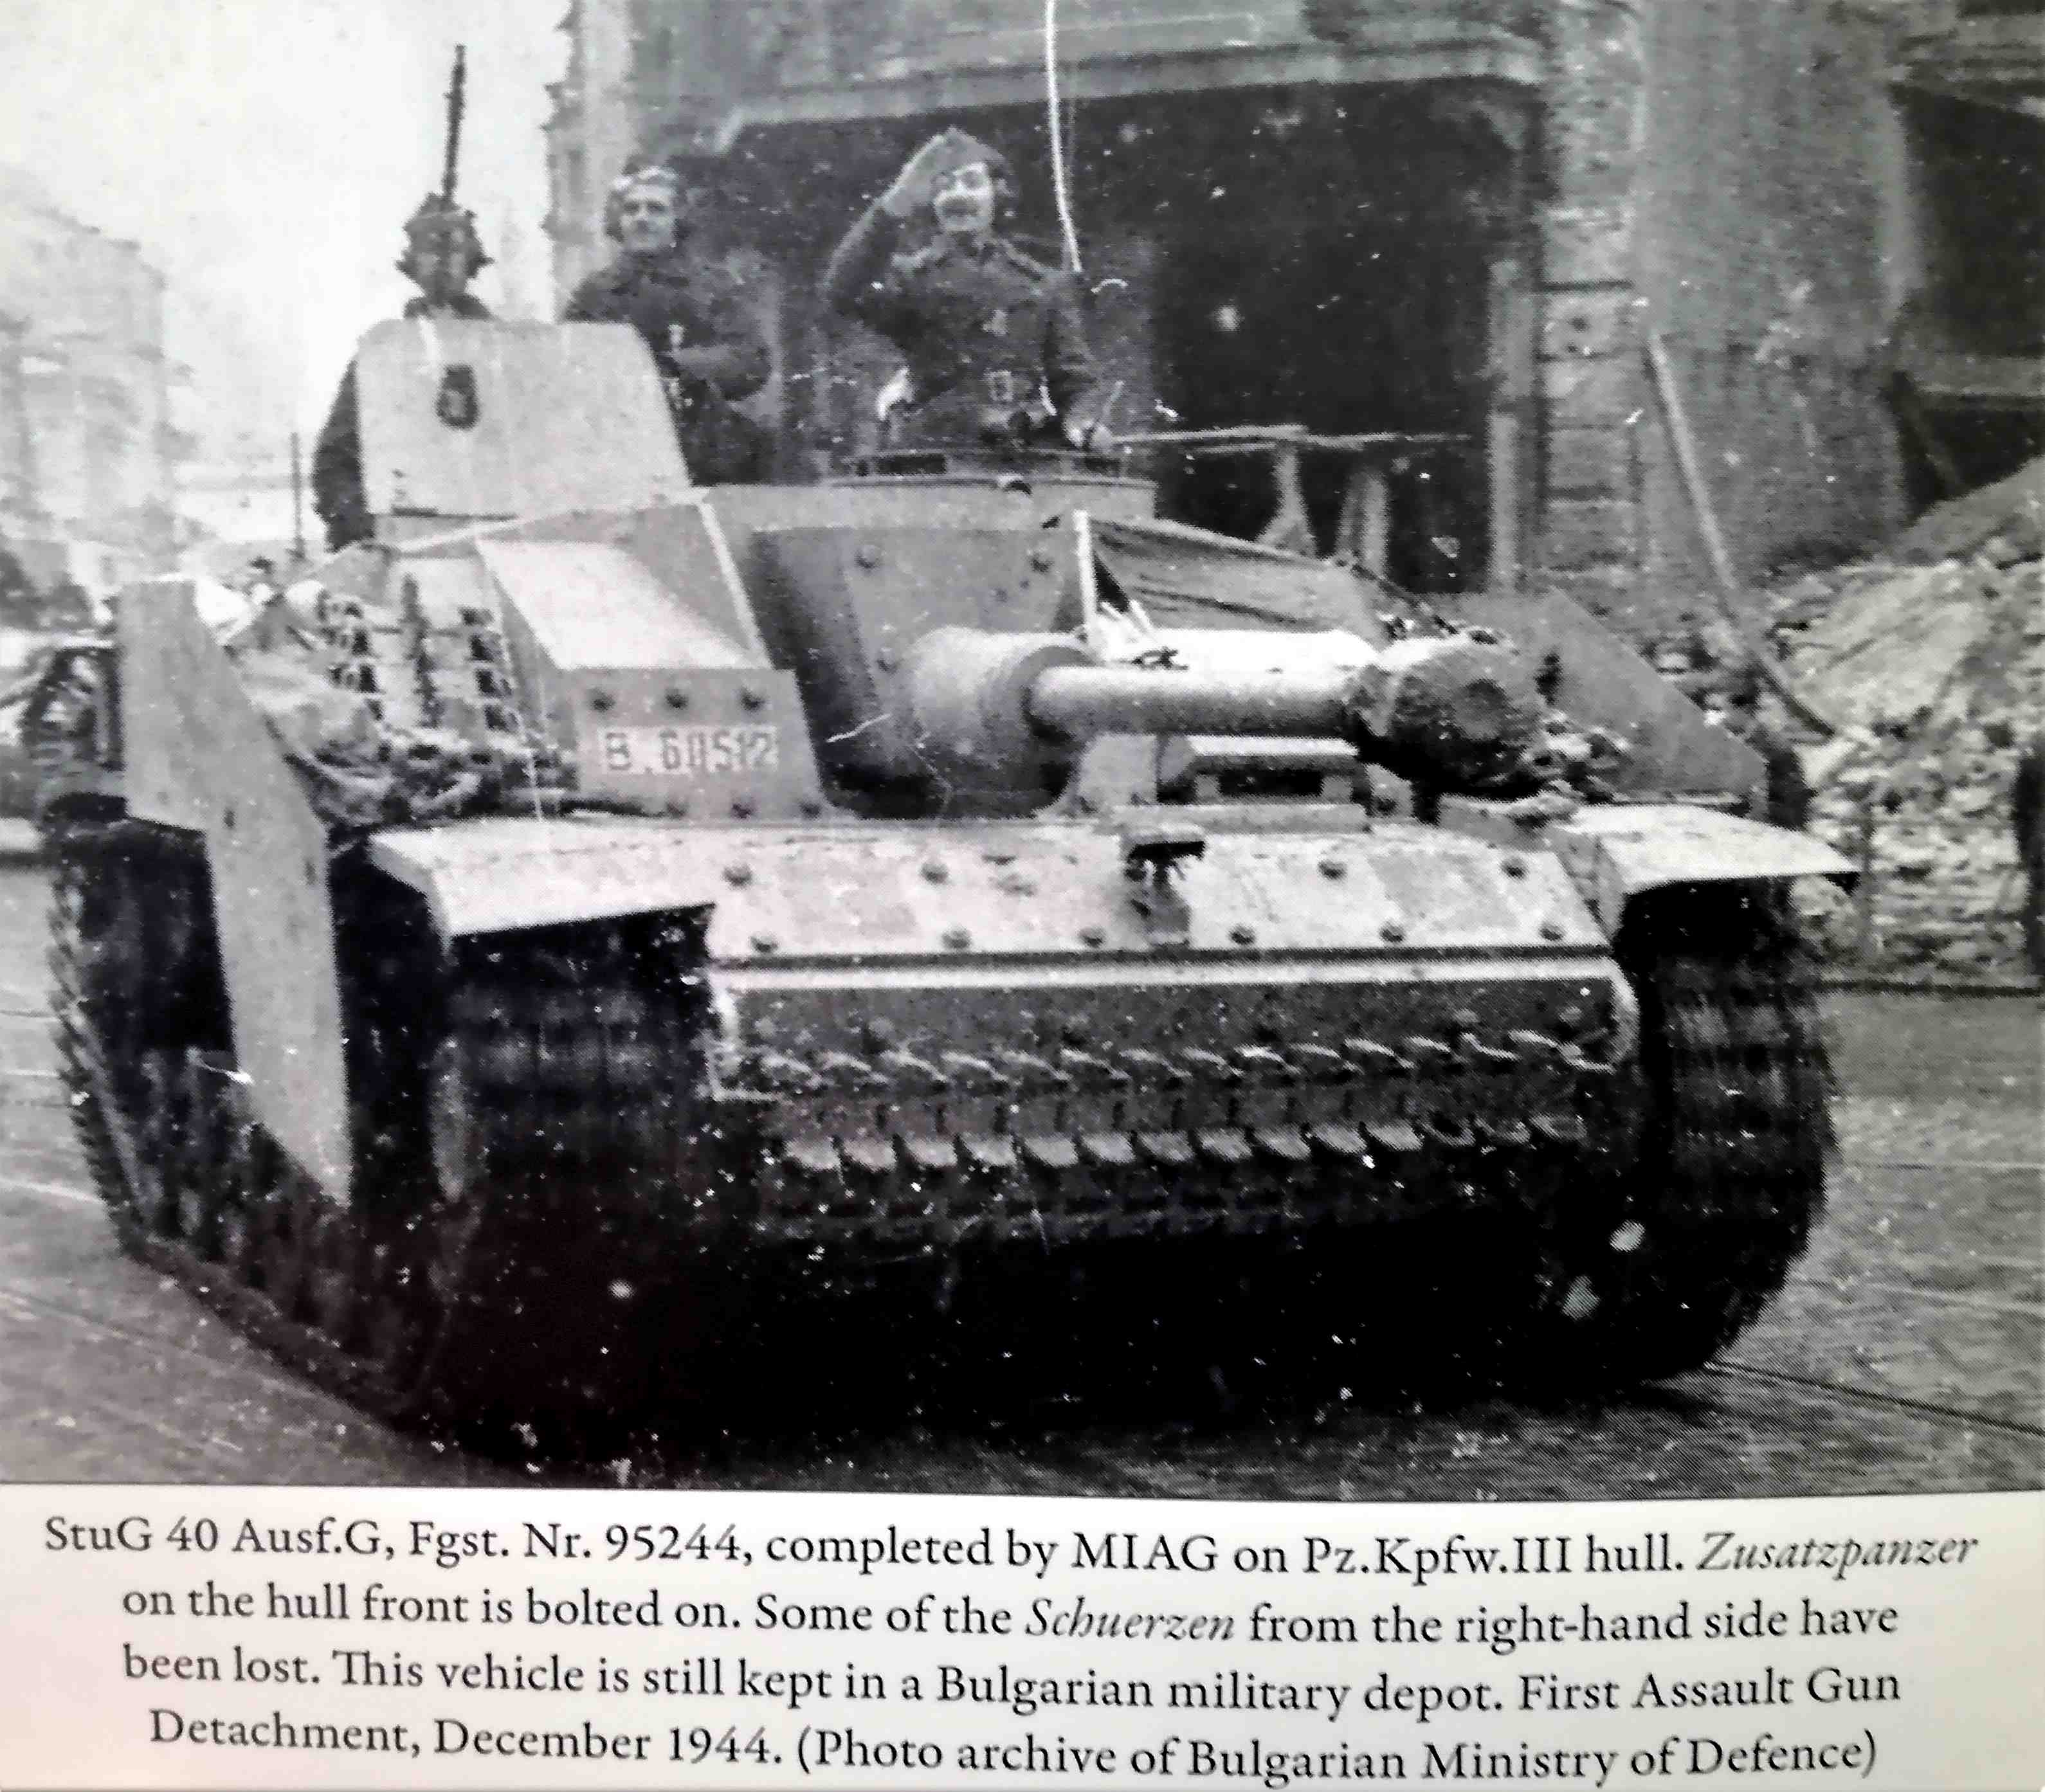
Among the 50 Bulgarian StuG III’s, there were
-
some with barrels only in primer:
-
some with barrels painted Dunkelgelb:


-many, where it is hard to tell primer or paint:
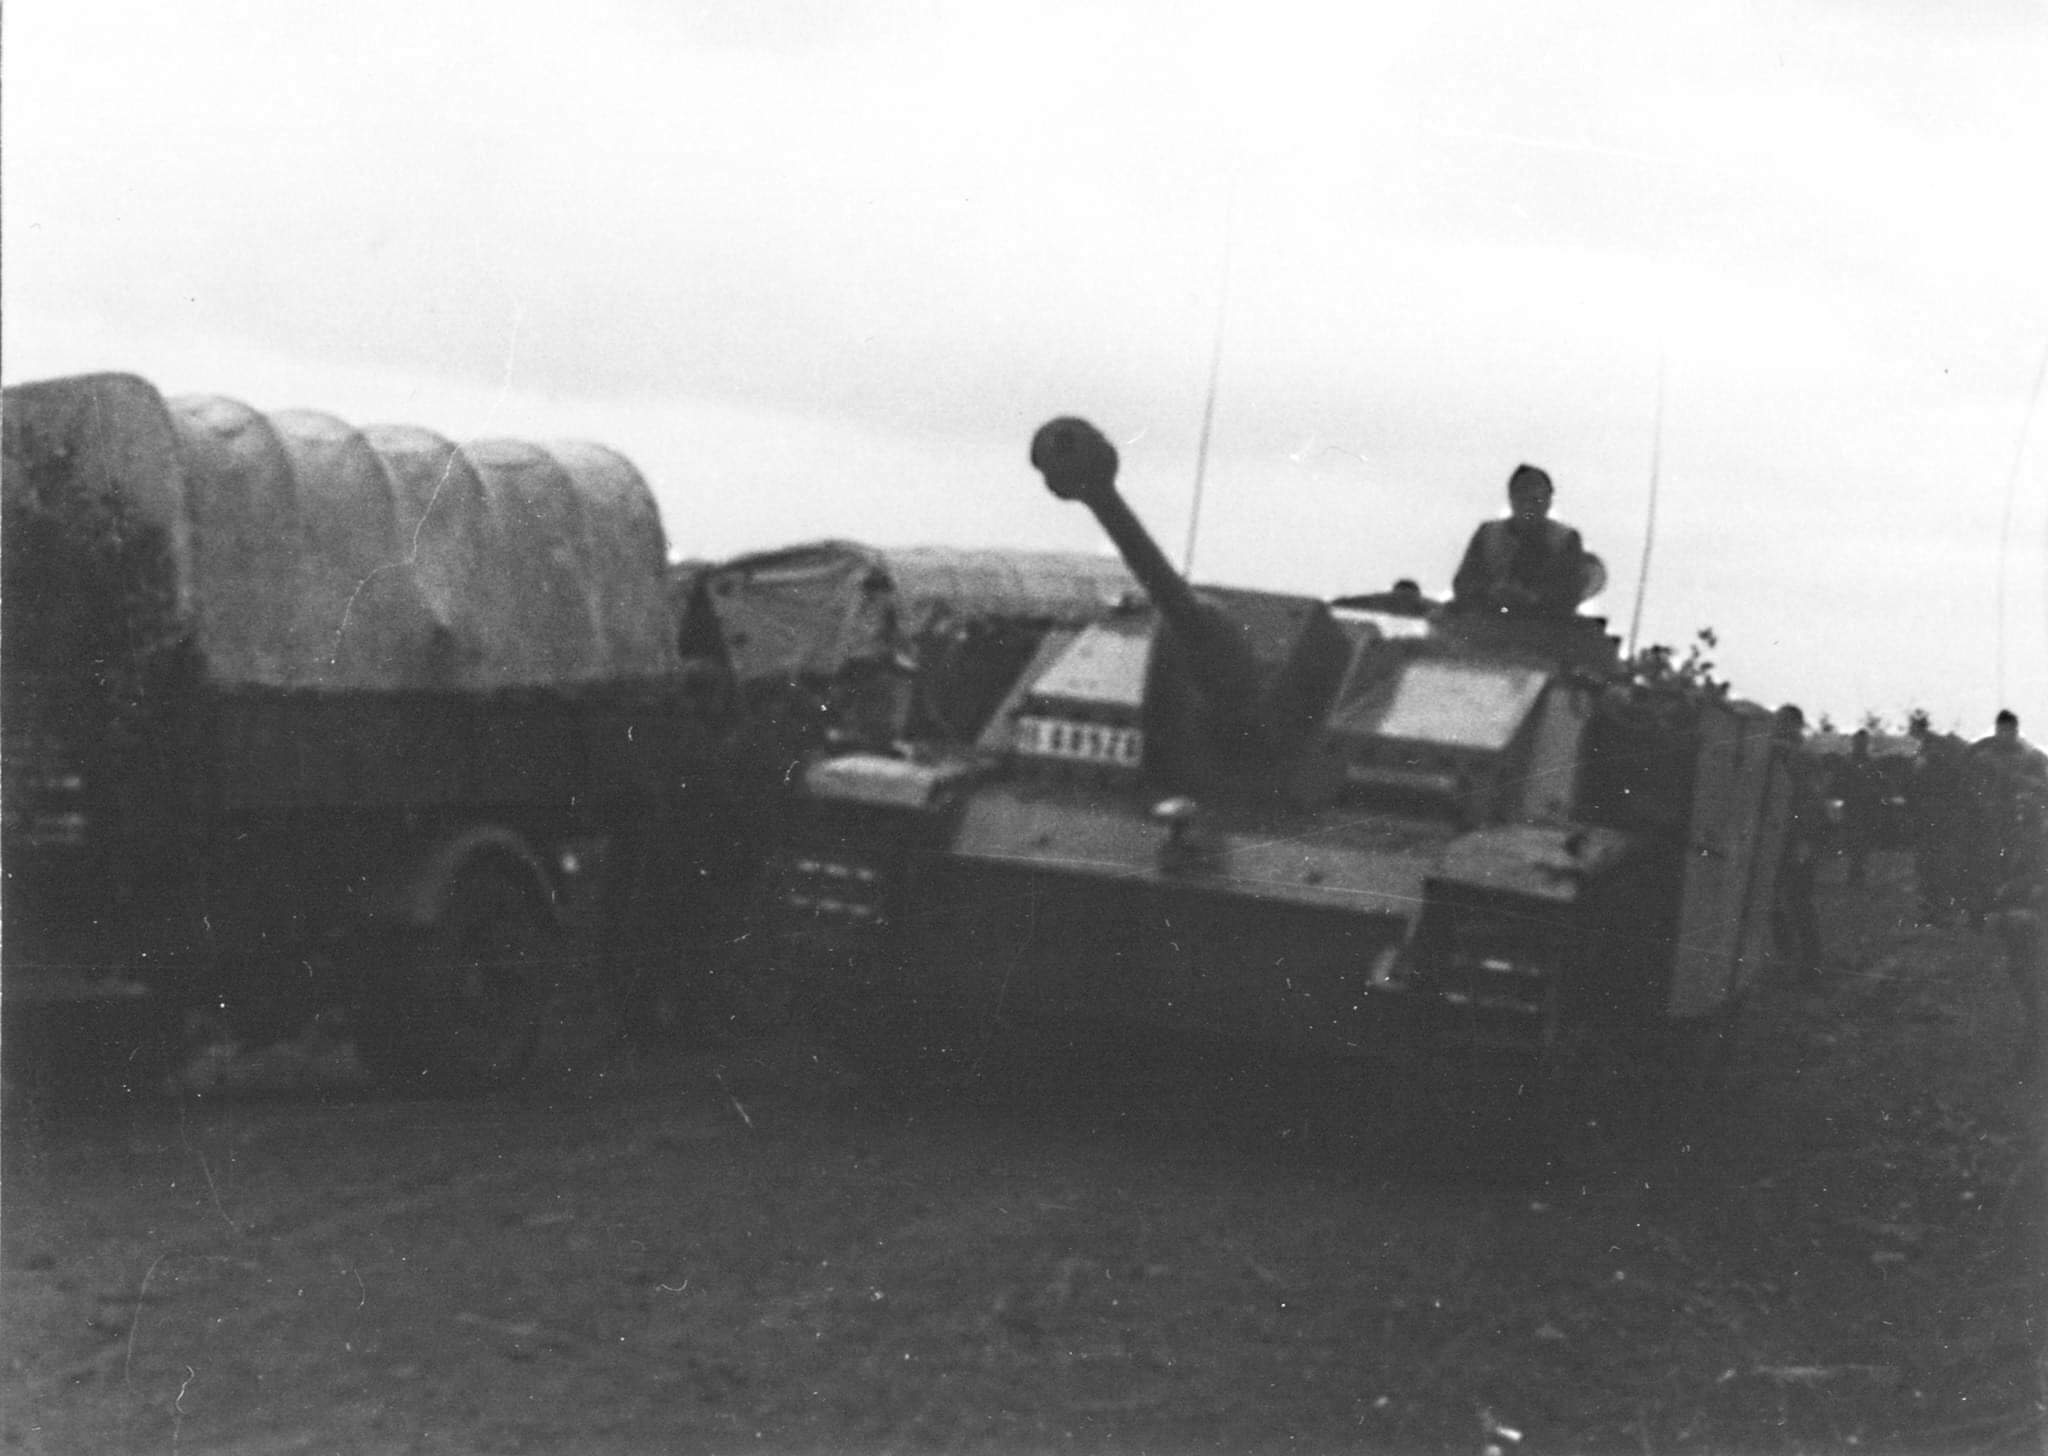
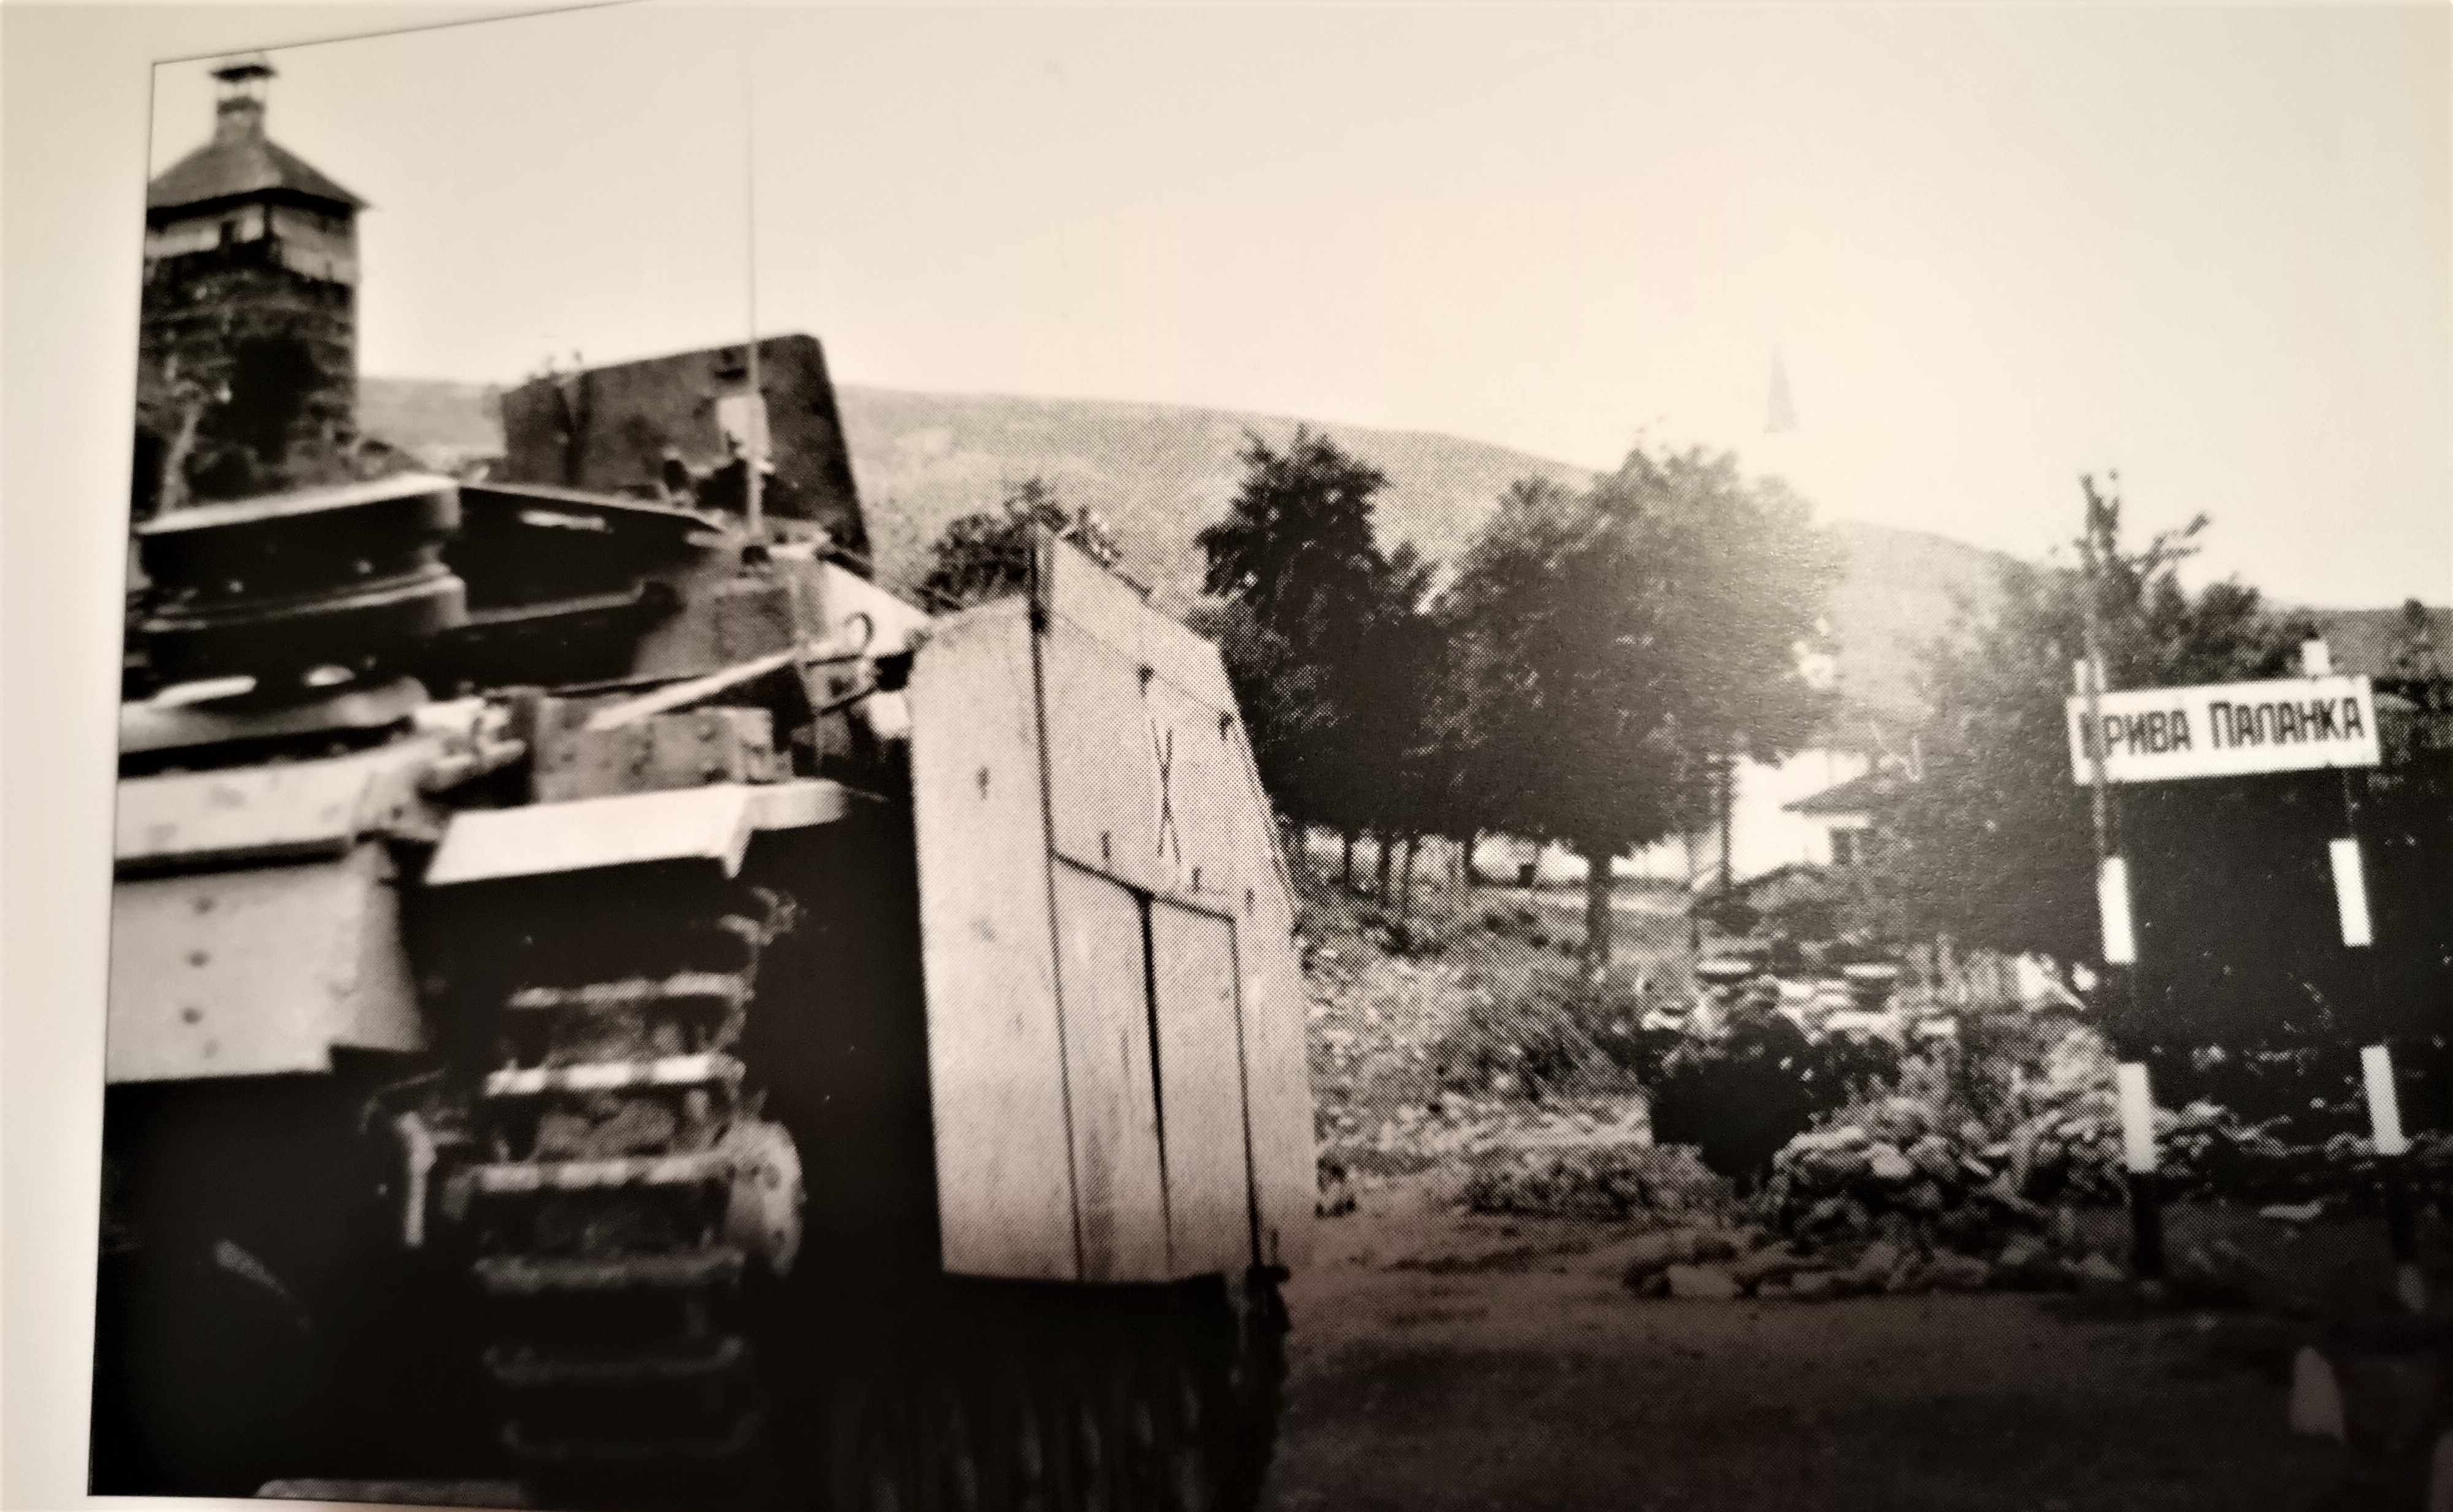

Covering Bulgarian StuG III’s means at least 5 builds- these were delivered between May 1943 and January 1944 in 5 batches of 10 vehicles each.
Among them were Alkett ones and MIAG ones, Saukopfblende ones and boxy Blende ones, zimmerited ones and bare ones.
Some were even built on Pz.III M hulls and had the funky exhaust with the valve on top.
So I wouldn’t advice following blindly the decal options.
But rather- pick a particular vehicle, study when and where it was built, what features were standard for this period/manufacturer and can you see them on the picture/s. Then build your model.
Yeah, these MWD’s seem to be in high demand, Peter!
I’ve ordered the pneumonia wagon version from the pre-order offer of one of my LHS on the first week of December last year. Last month the owner told me his (already paid) order at his vendor is still in the queue.
I’m sure it’ll show up and I will proudly inform you.
Cheers,
Angel
2 Likes
Great pics and info Angel. I think I just found out what scheme my Dragon Stug 3 Ausf G will be depicted as when I build it…
I just wonder about the other 3 nations also having only primer on the barrels.
1 Like
Not the entire kit, but half of it:
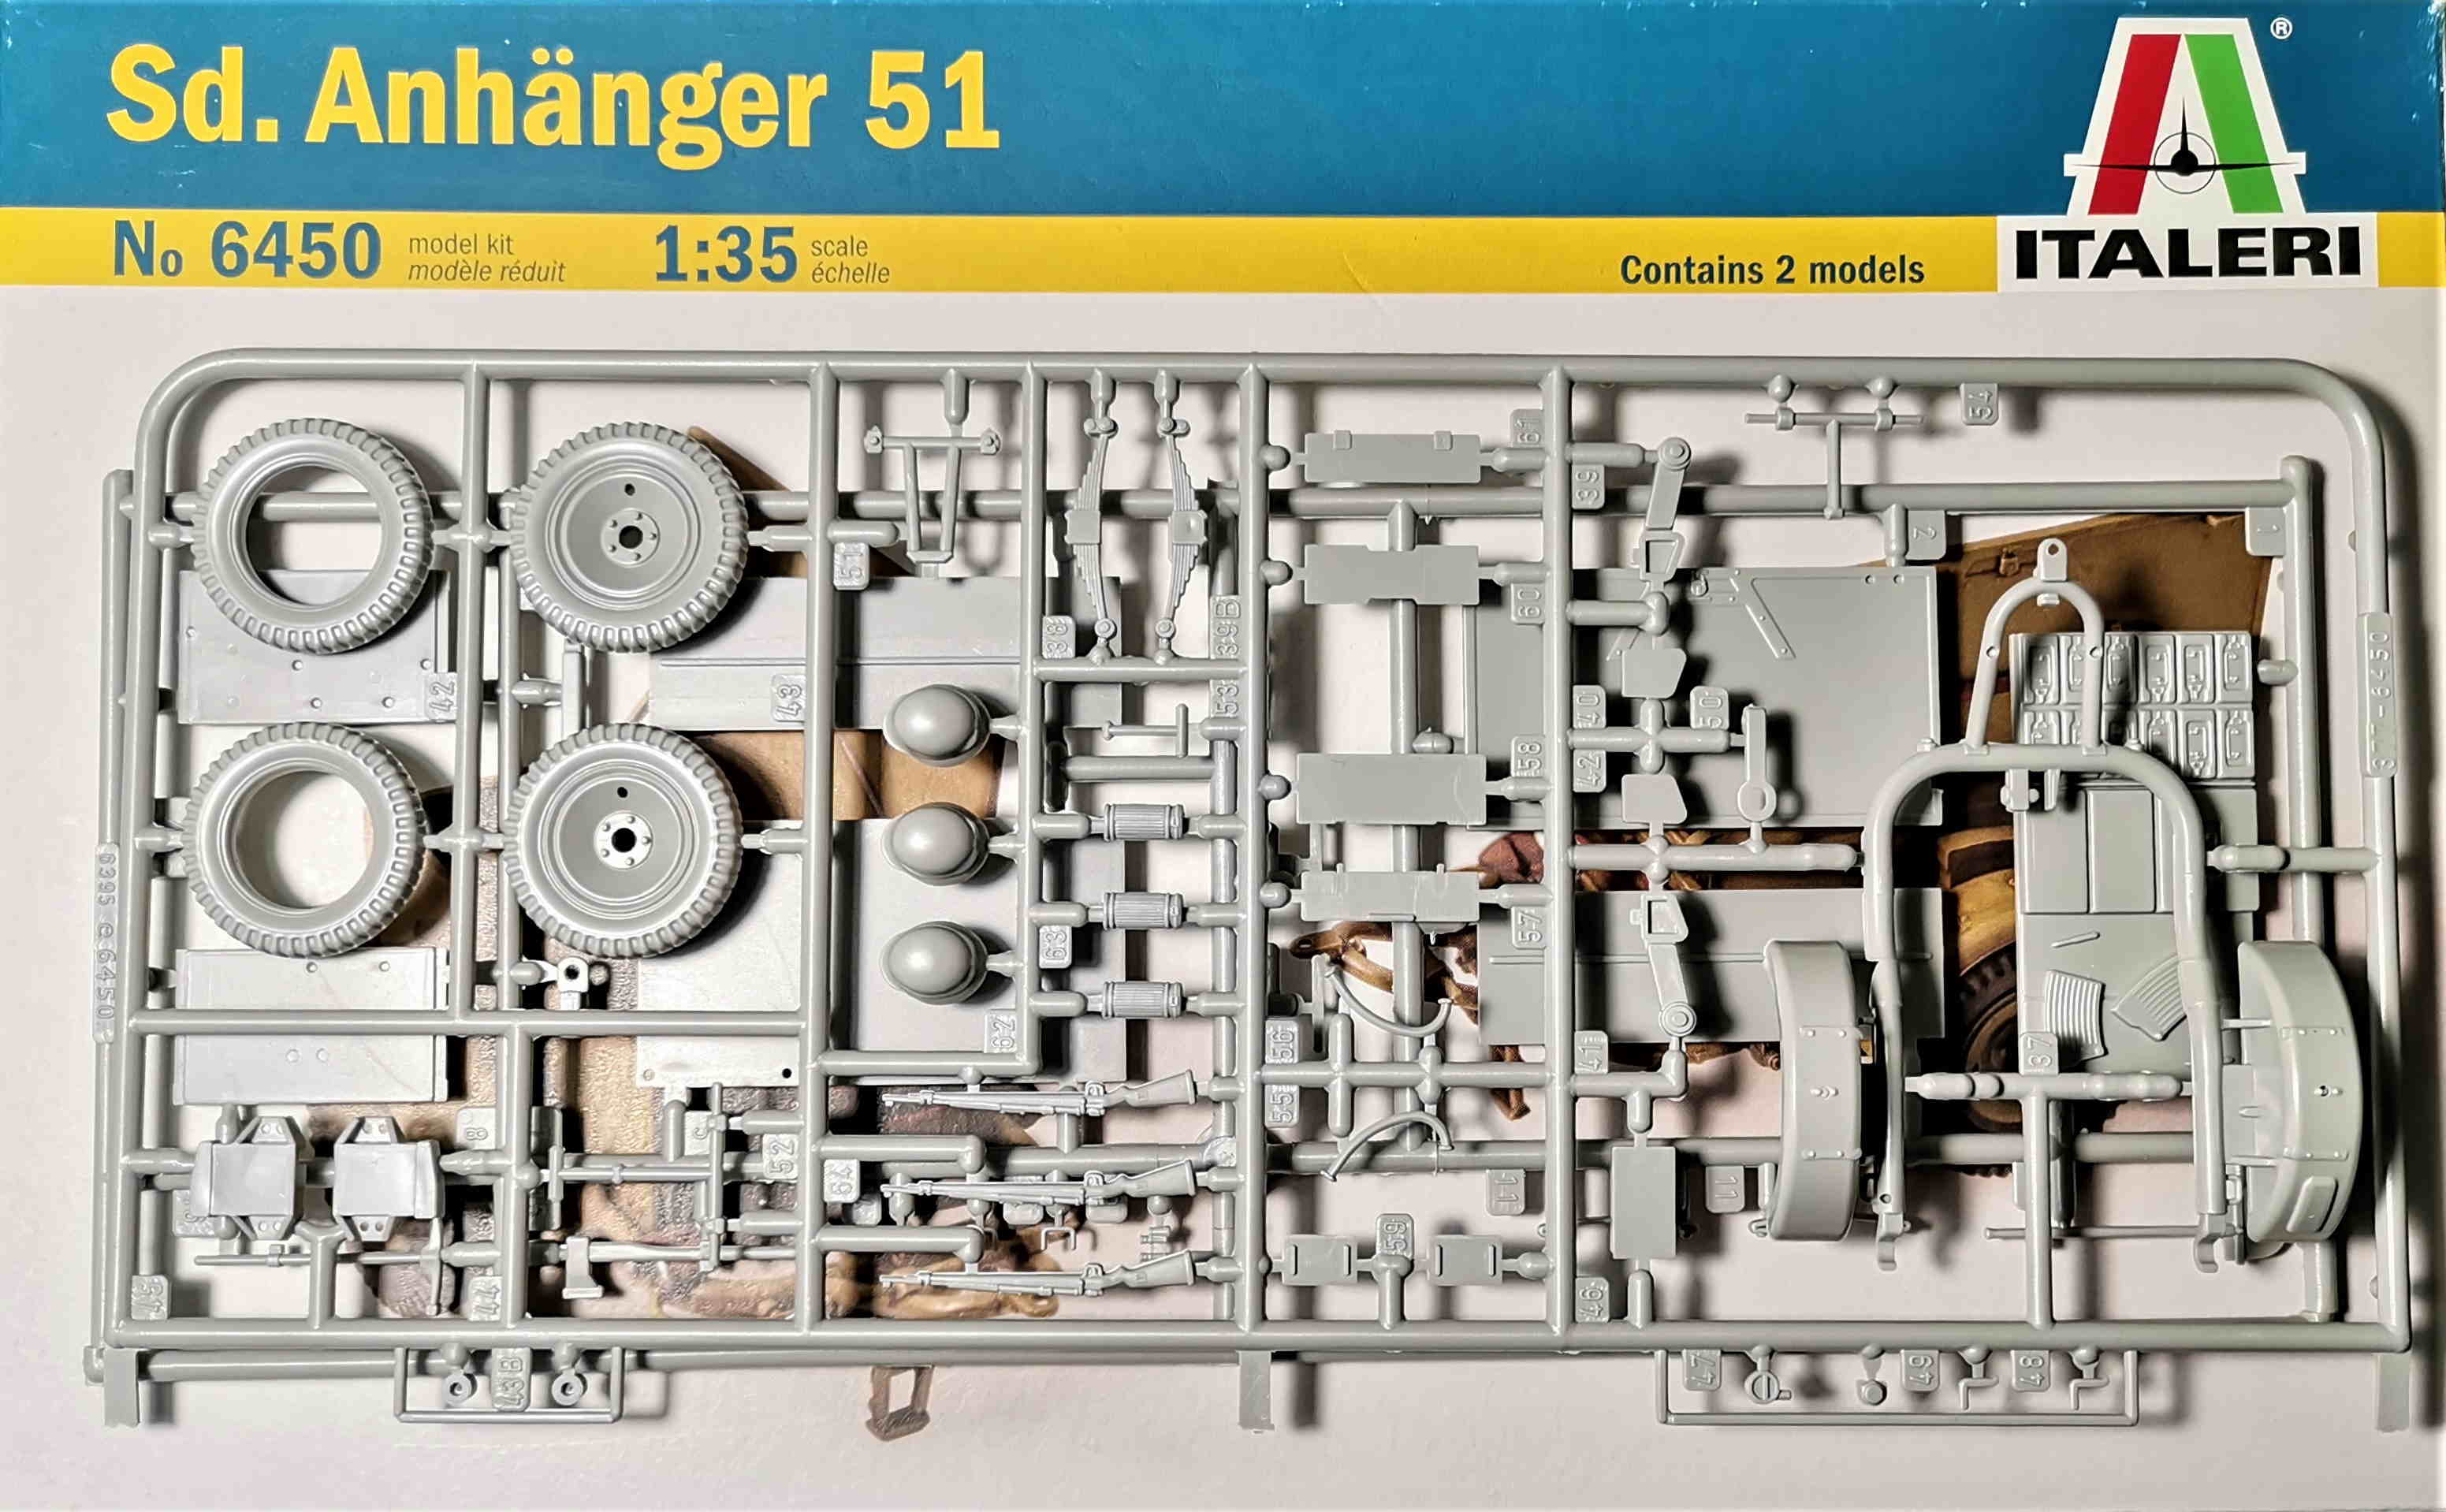
It contains 2 Sd.Anh.51 and because I need only one, we shared it with @k_mero4.
My plan is to convert it into the special Sd.Anh.51, that carried the Maschinensatz 8 kW für Flakscheinwerfer 60 cm:

Cheers,
Angel
6 Likes
A scratch build project or are you getting a resin one to put on the trailer?
I found 1/35th scale drawings on the web and have collected enough pictures, Peter, so definitely a scratchbuild project.
Cheers,
Angel
4 Likes
To be honest, it was a rhetorical question Angel. I would not have expected anything else… 
3 Likes
So I shouldn’t have answered your question, right?

1 Like