My jealousey meter is pegged. The photography is perfect, the work is masterful, and the thread enjoyable.
3 Likes
Thanks for the kind words, guys!
It’s been an enjoyable build so far.
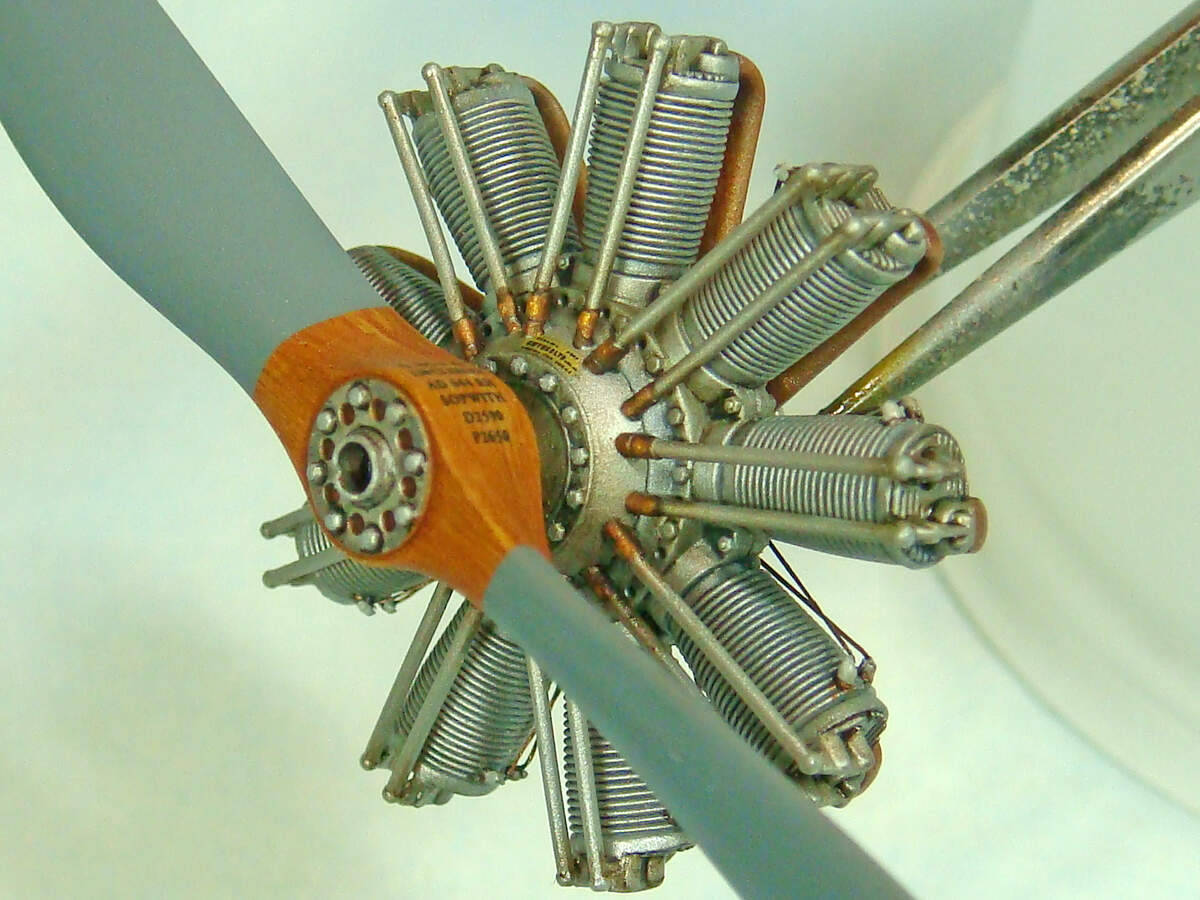
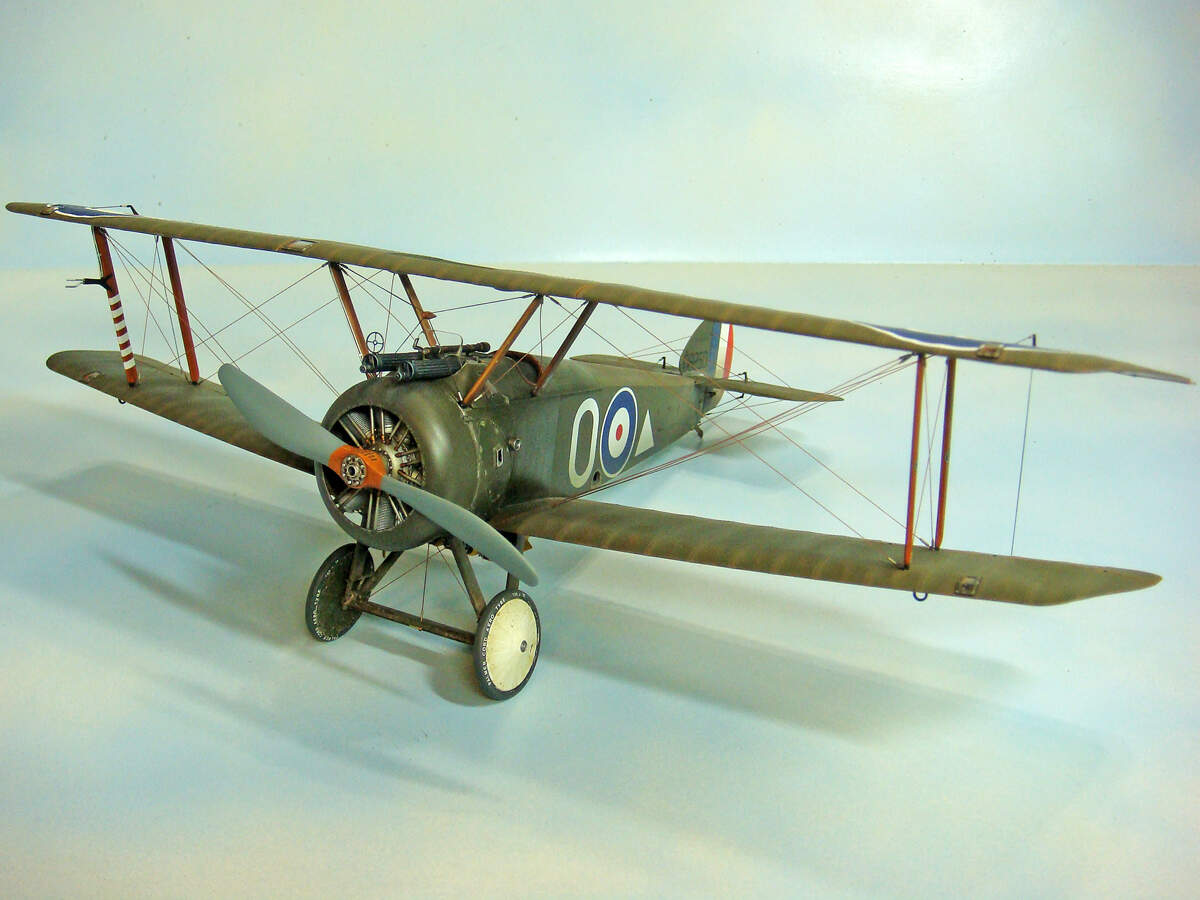
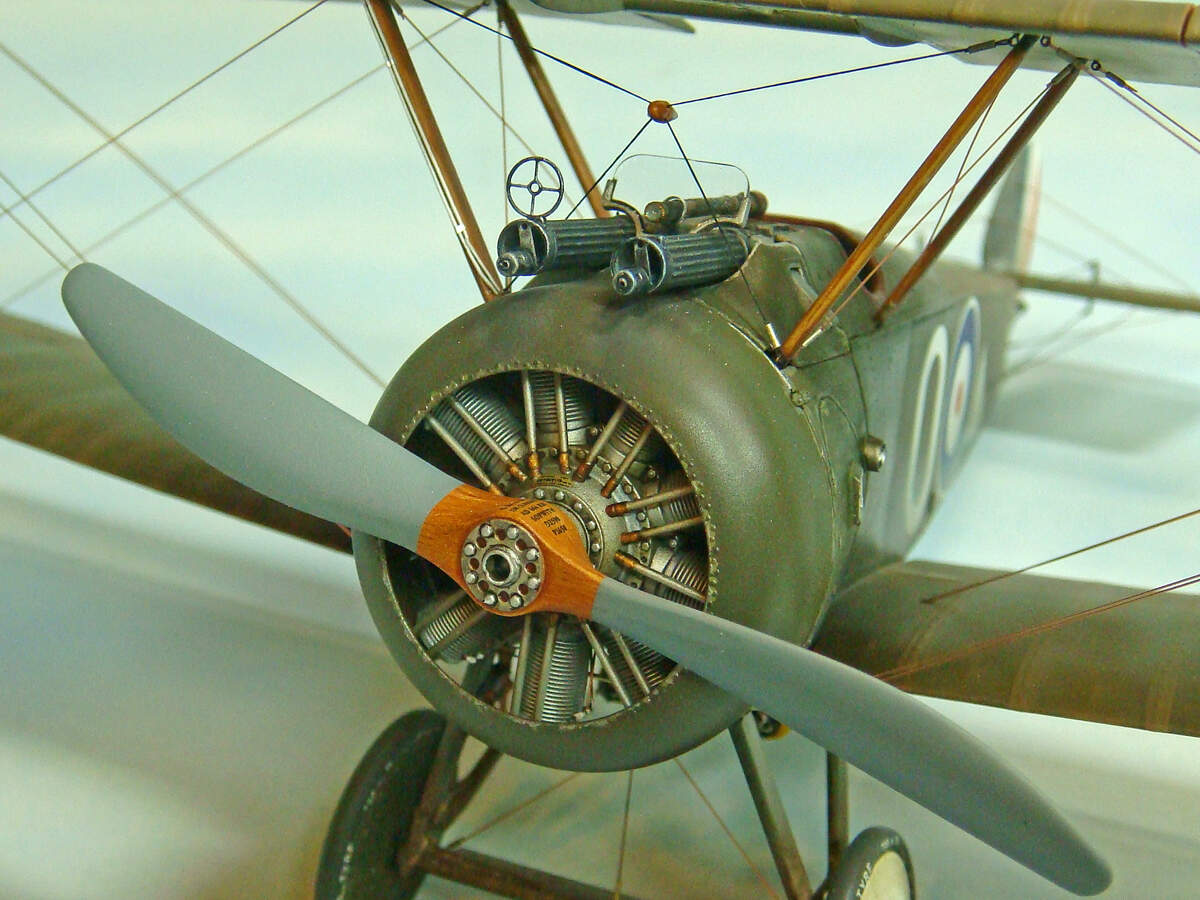
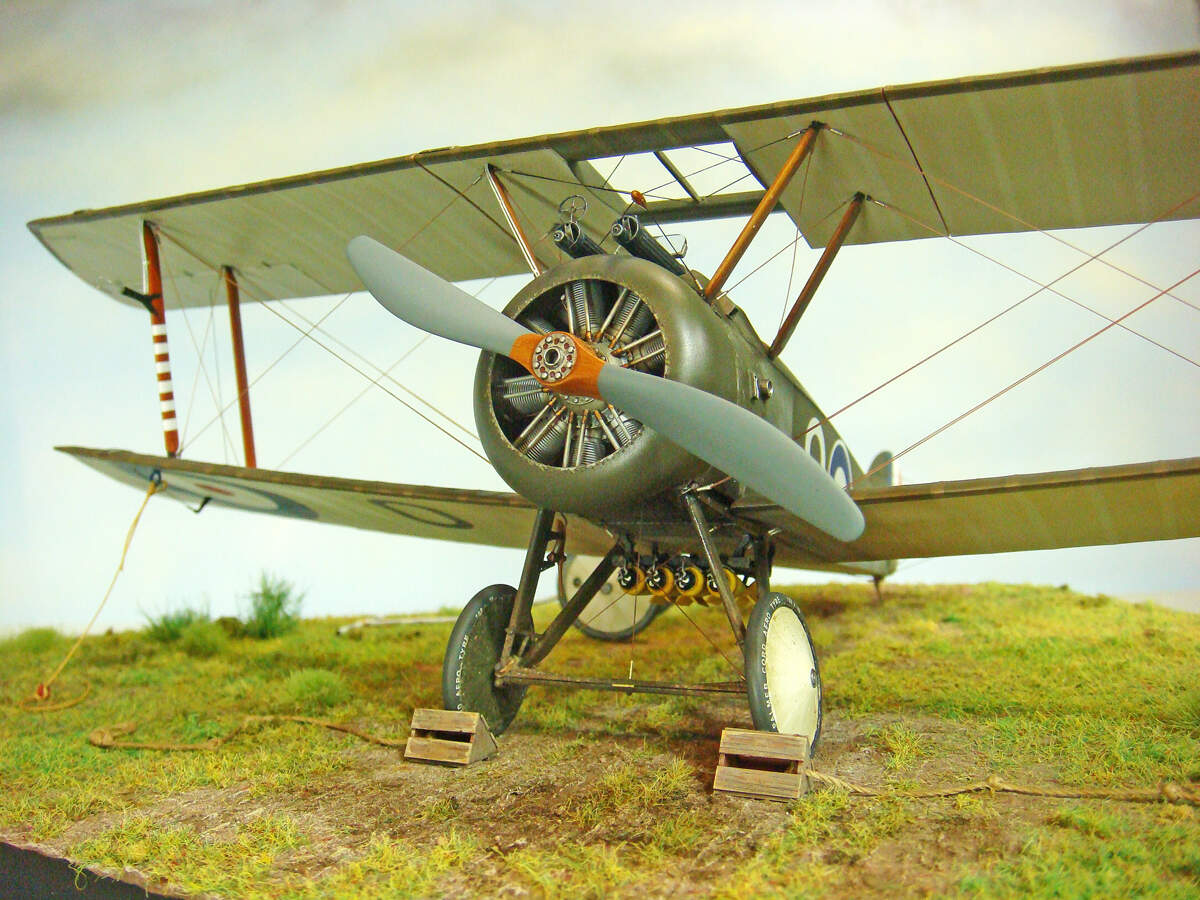
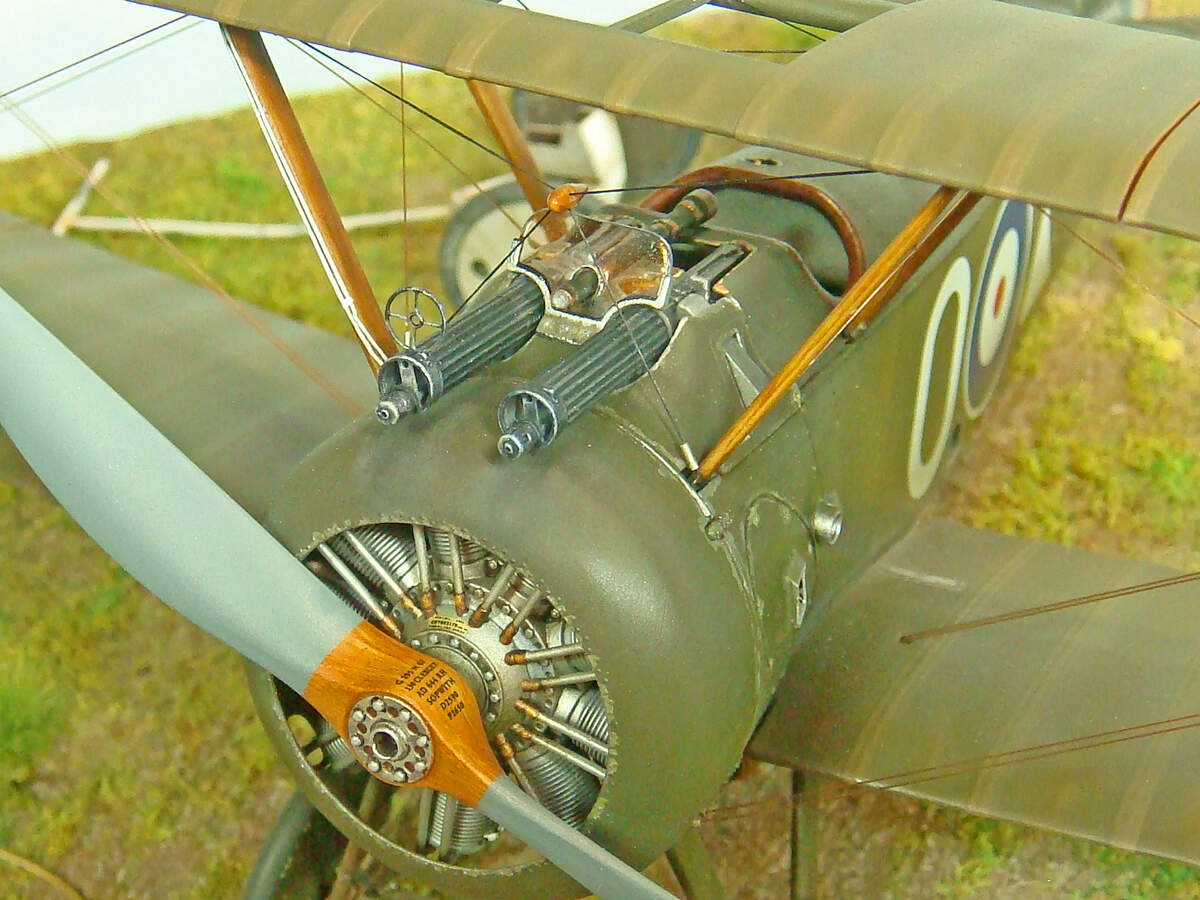
A quick little update. I’ve finished the Clerget 9B rotary engine and the prop and have added them to the Camel.
Not too much to say about these, really. The prop looks pretty nice, I think, especially with the kit prop data decal. (WNW actually provides a couple of optional decals for the props depending on the choice of engines used.)
The engine is OOTB with only the ignition wires added (per the instructions). I added these using fine EZ Line. Again, the WNW brass engine data plate decal was a nice little touch!
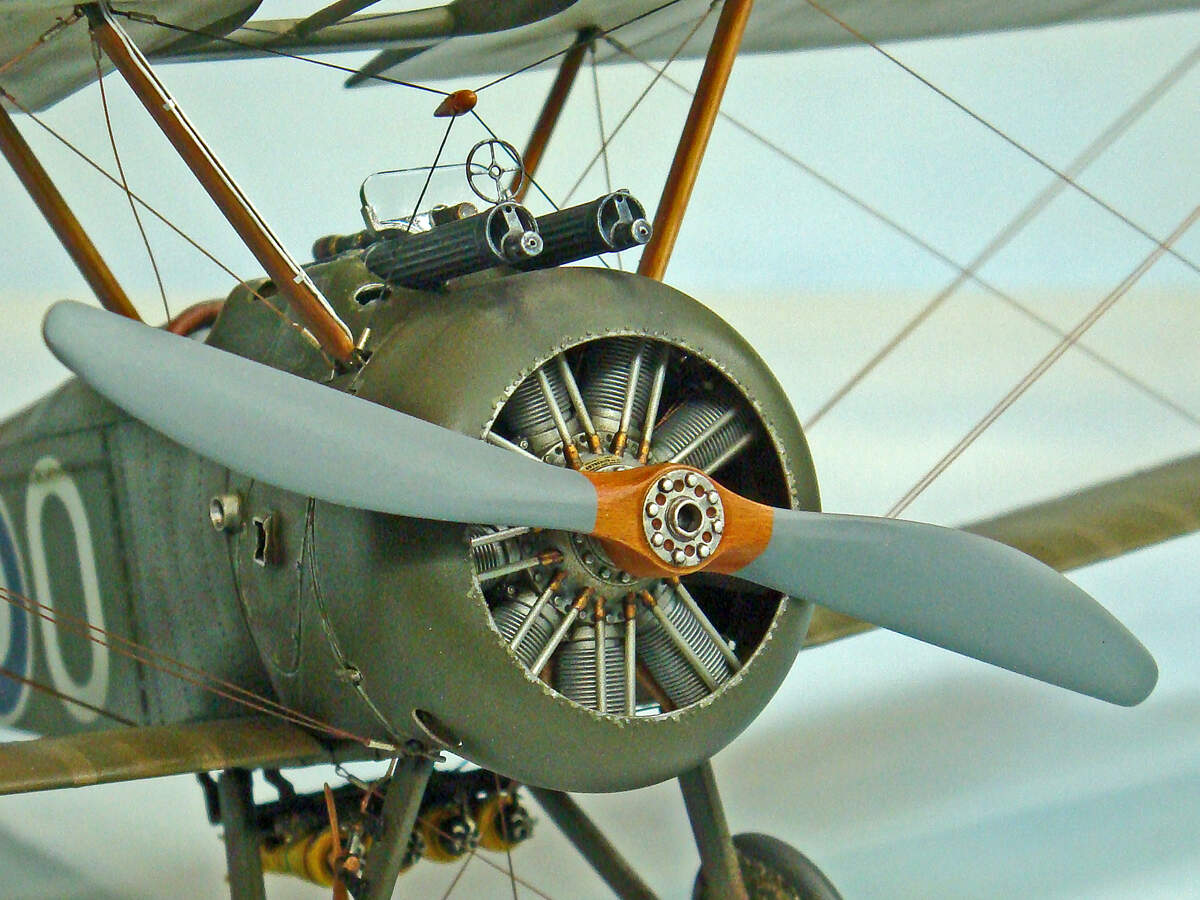
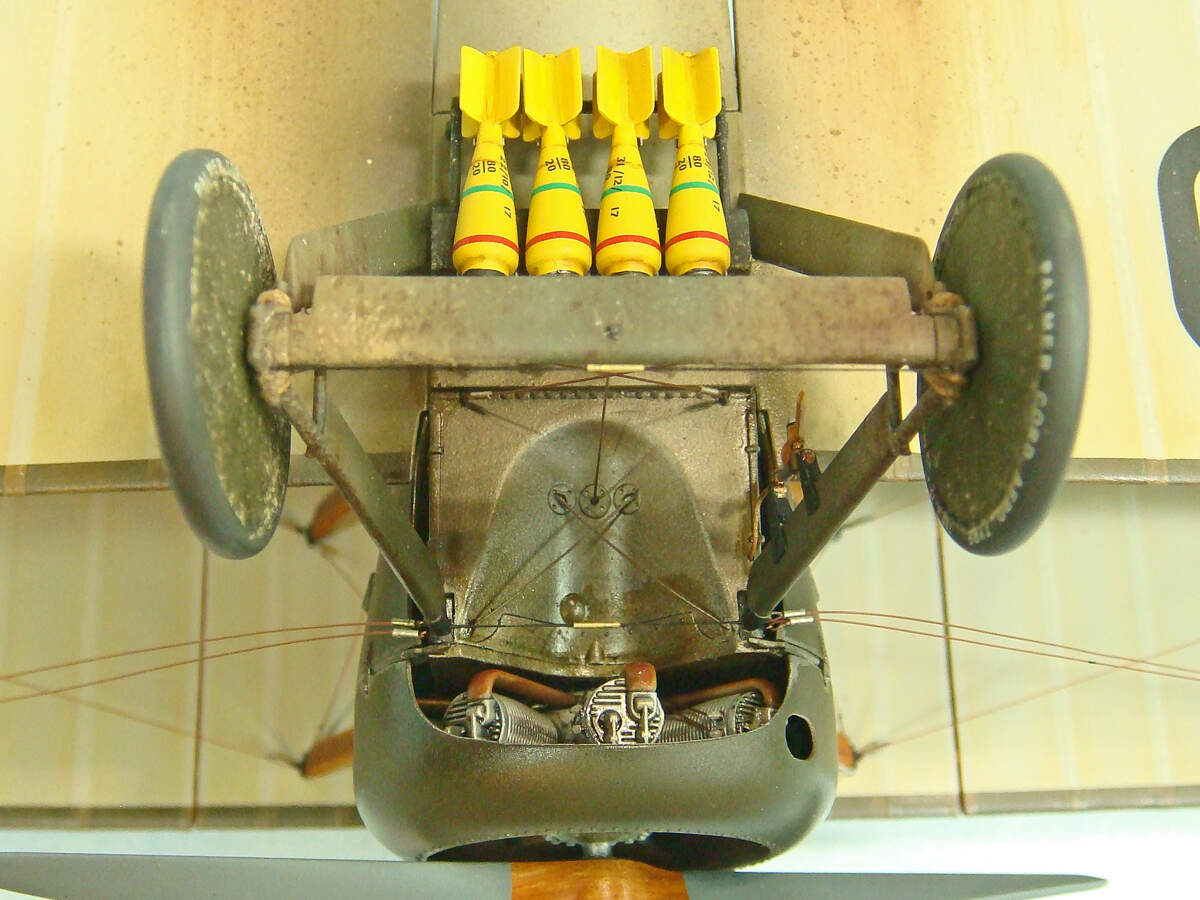
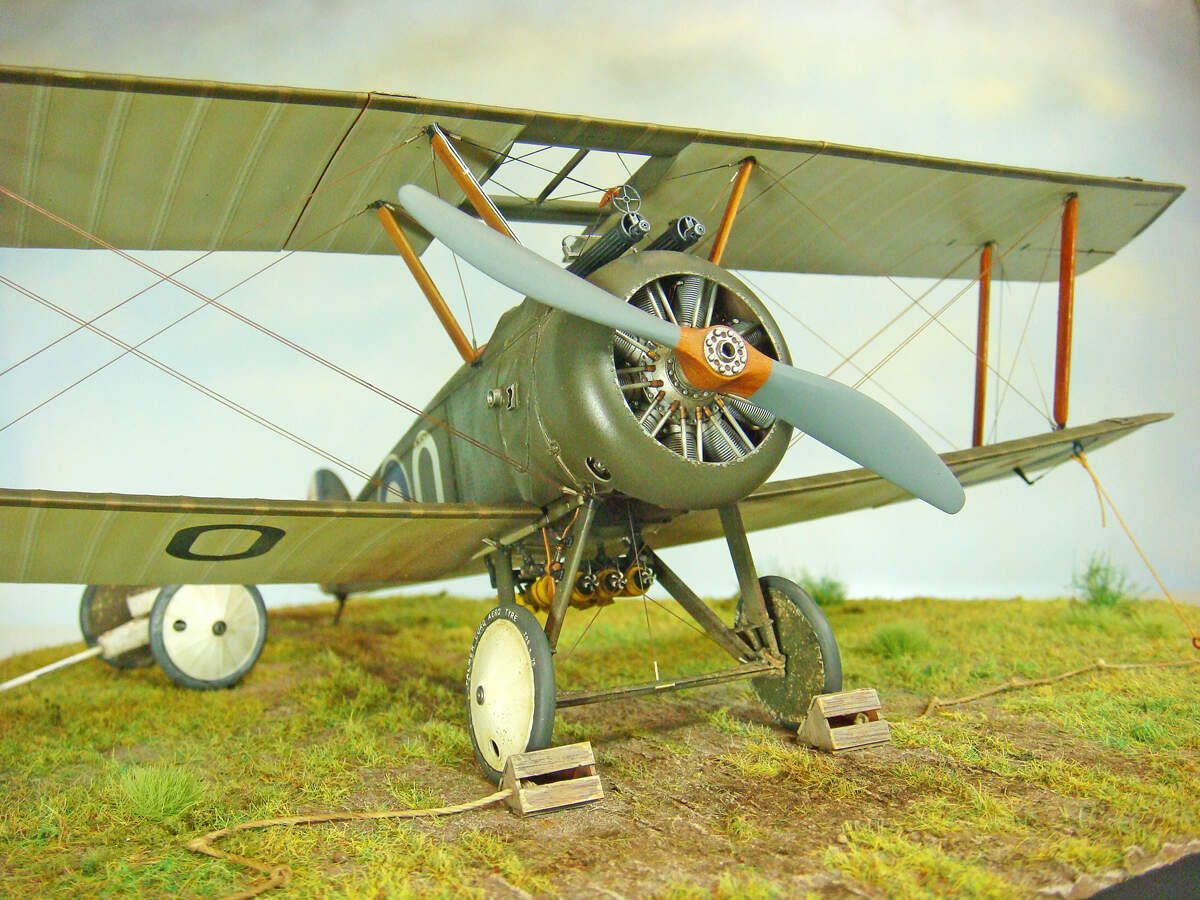
I did run into some issues with the engine cowling and engine clearance. Simply put the kit cowling is too small in its inner diameter to accommodate the engine which is, itself, very correct and accurate in its outer diameter.
I’ll show some more pics later of the engine, cowling and prop added to the Camel, but to avoid any suspense, I ground the inside of the cowling down until it would fit over the engine. It’s still a non-clearance fit (i.e. the engine still rubs on the inside of the cowling), but it all does go together. Unfortunately, the engine won’t rotate freely like I wanted, but I can live with that.
A braver modeler than I could probably grind down the inside of the cowling more than I did. In the end, I just took the more cautious route and gave up on making the engine and prop spin… LOL!


Happy modeling!
10 Likes
Just gets and better every time I stop by!
3 Likes
So, all good things must come to a close… and so it is with this build (and what a good thing it was, indeed!). Time to wrap up the WNW Sopwith Camel F.1 USAS.
I still have the display base and figure to do, so I suppose sometime in the not too distant future, I will post up a “final-final” update, but in so far as the basic build goes, the Camel is finished.
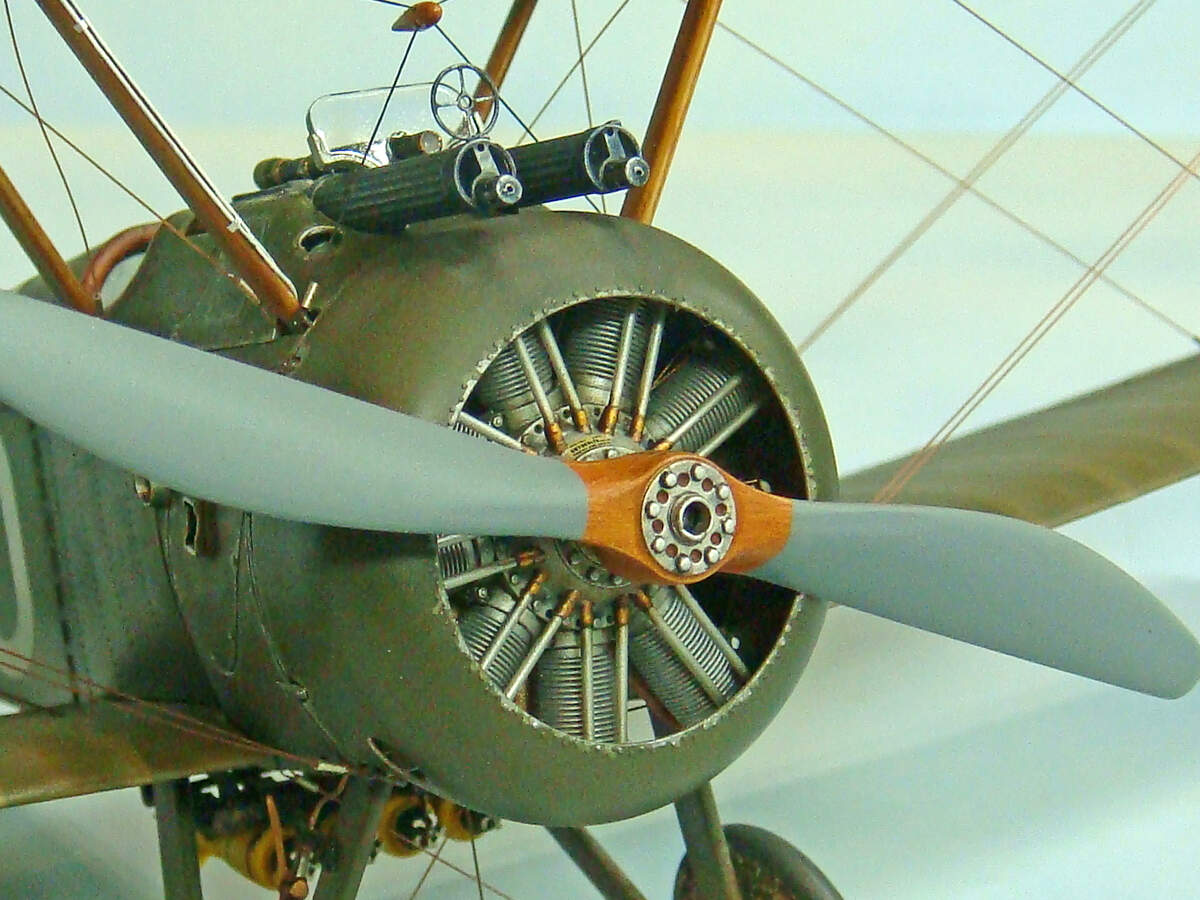
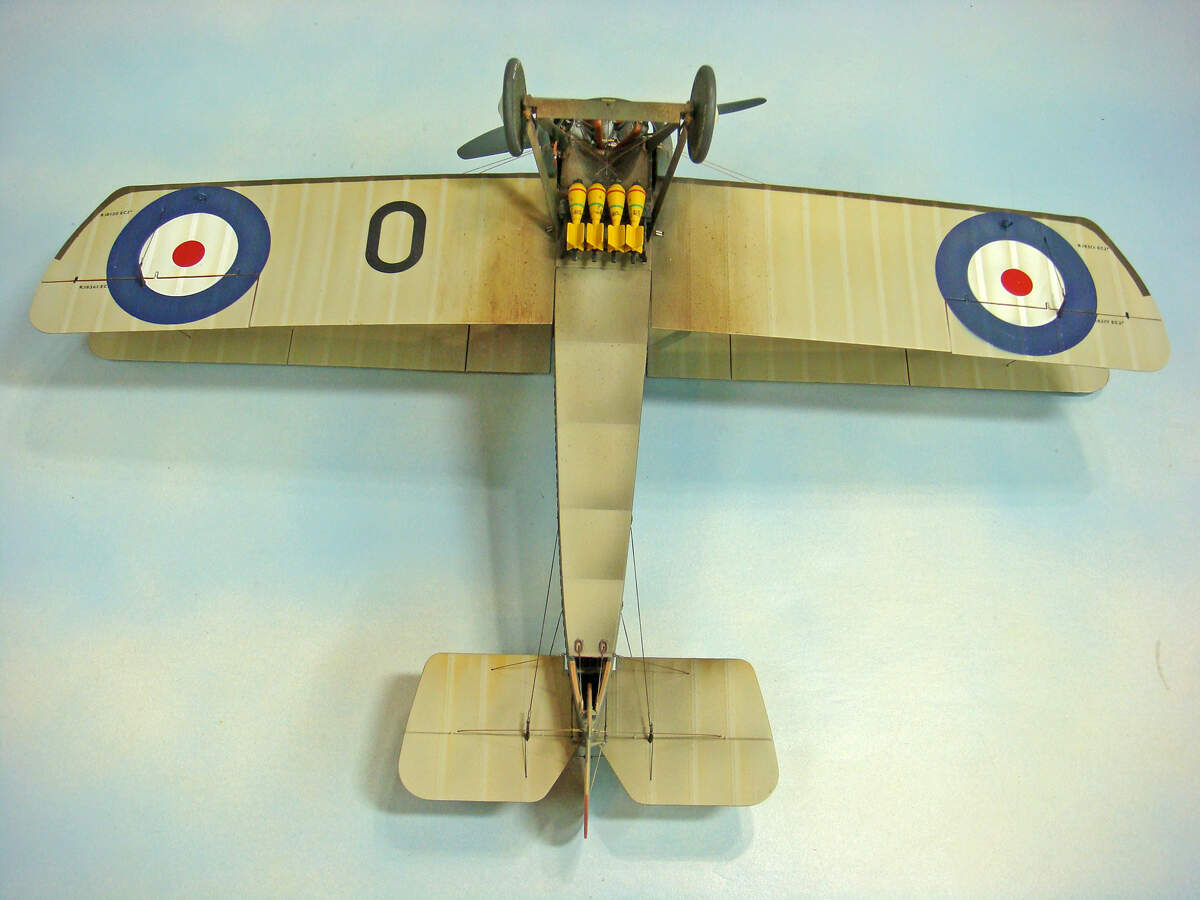
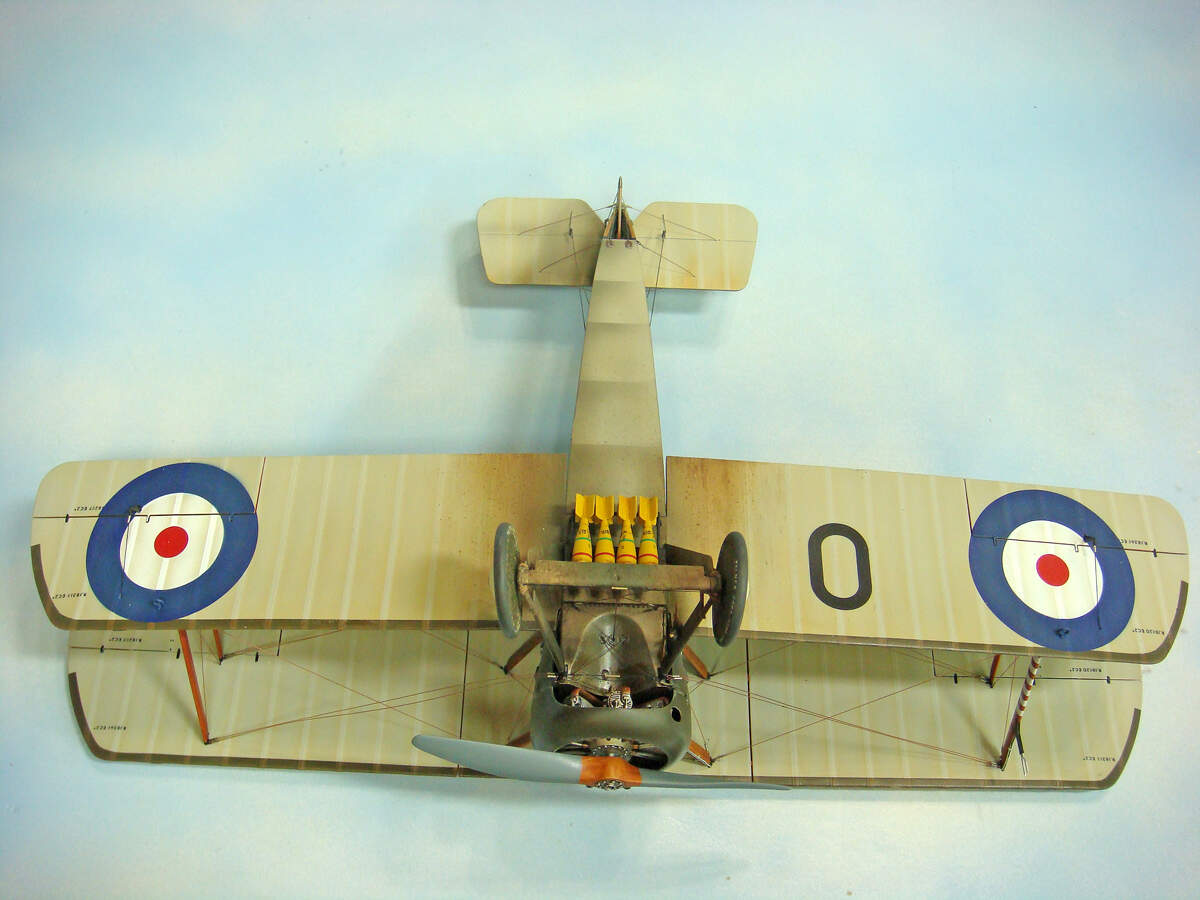
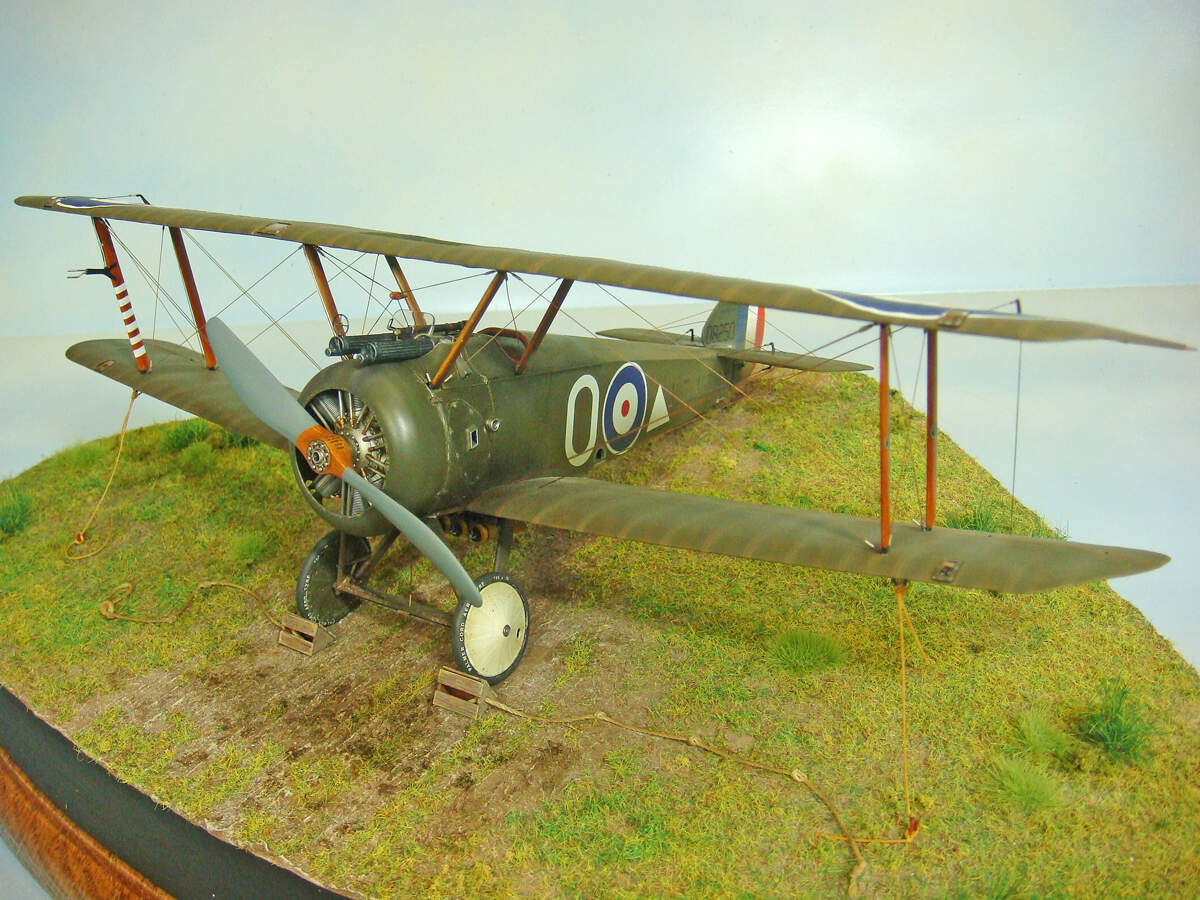
First up are a couple of “glamor shots” of the engine, prop and cowl installed. Not much to add here beyond what I posted above. Very pleasing results.
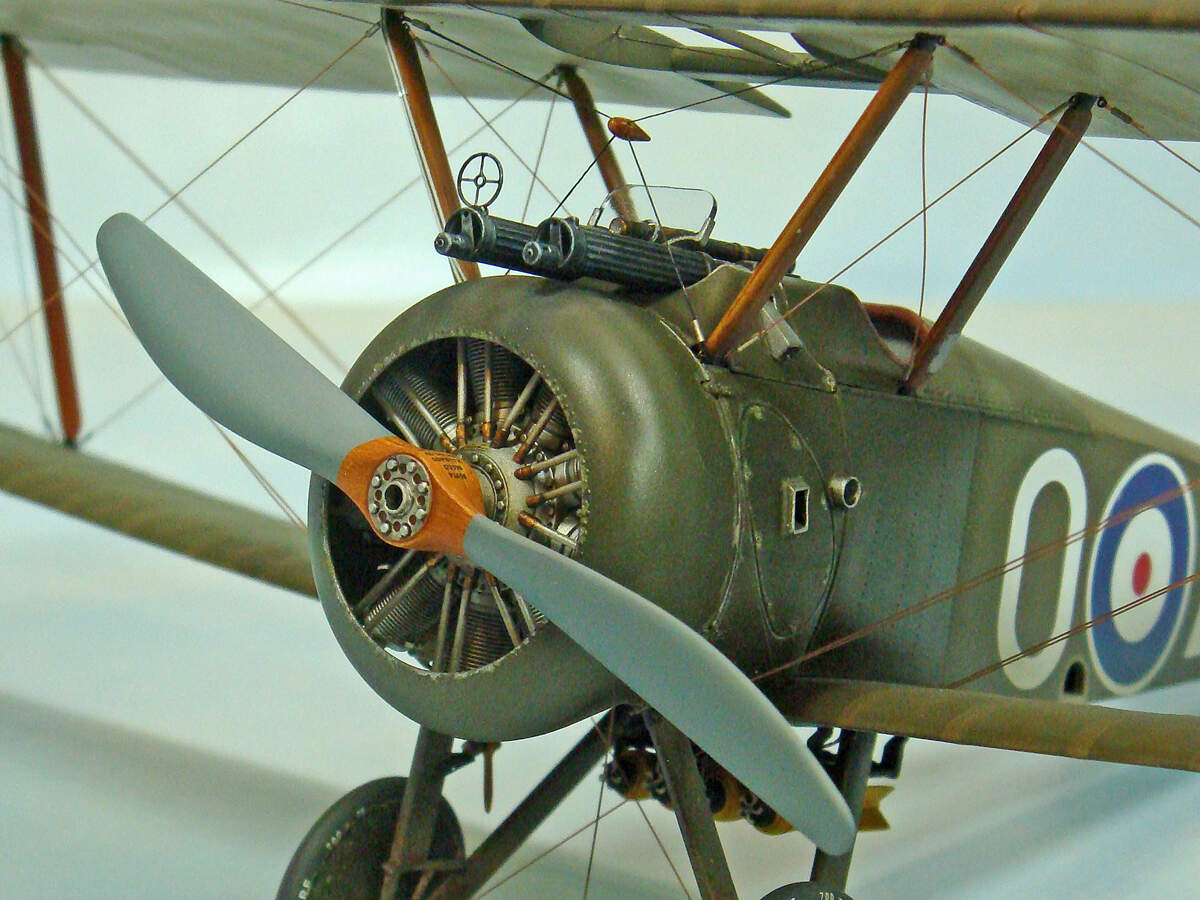

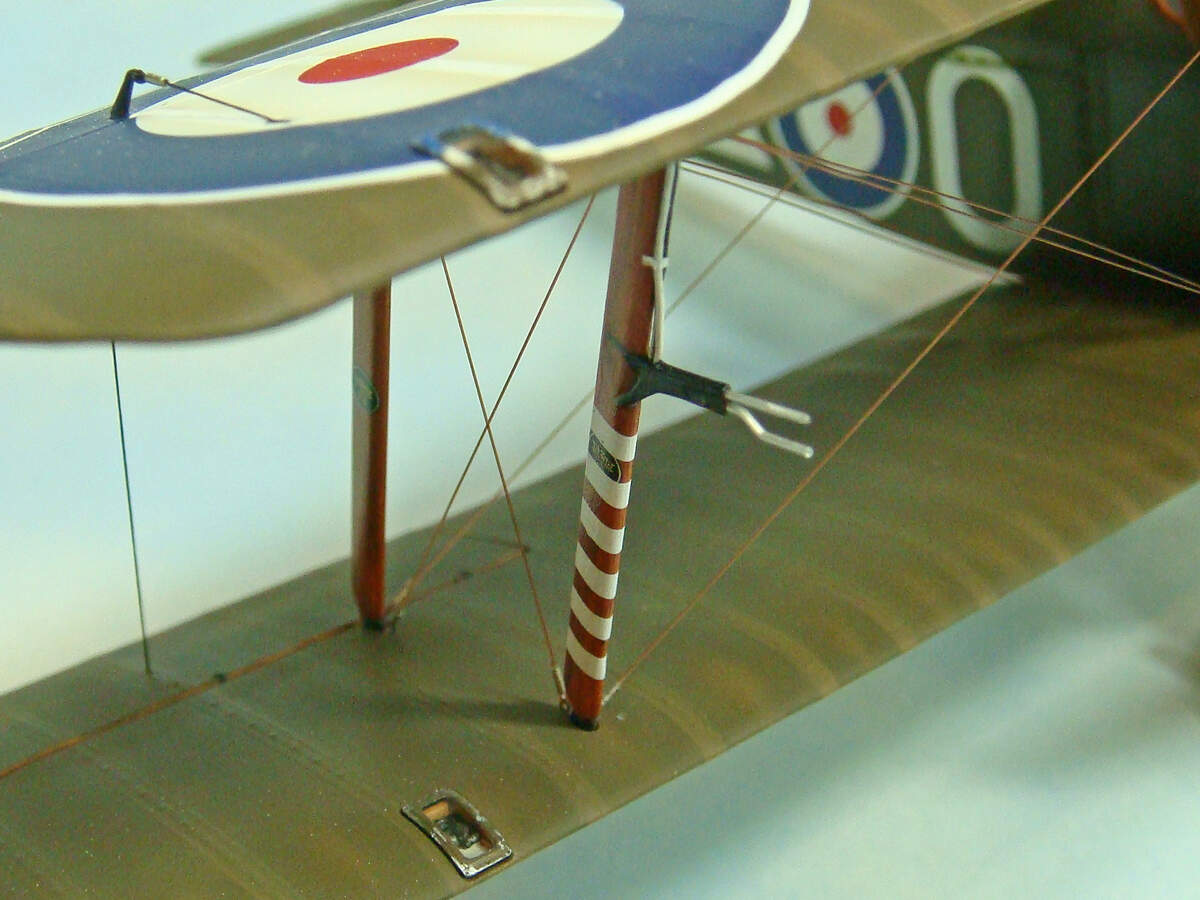
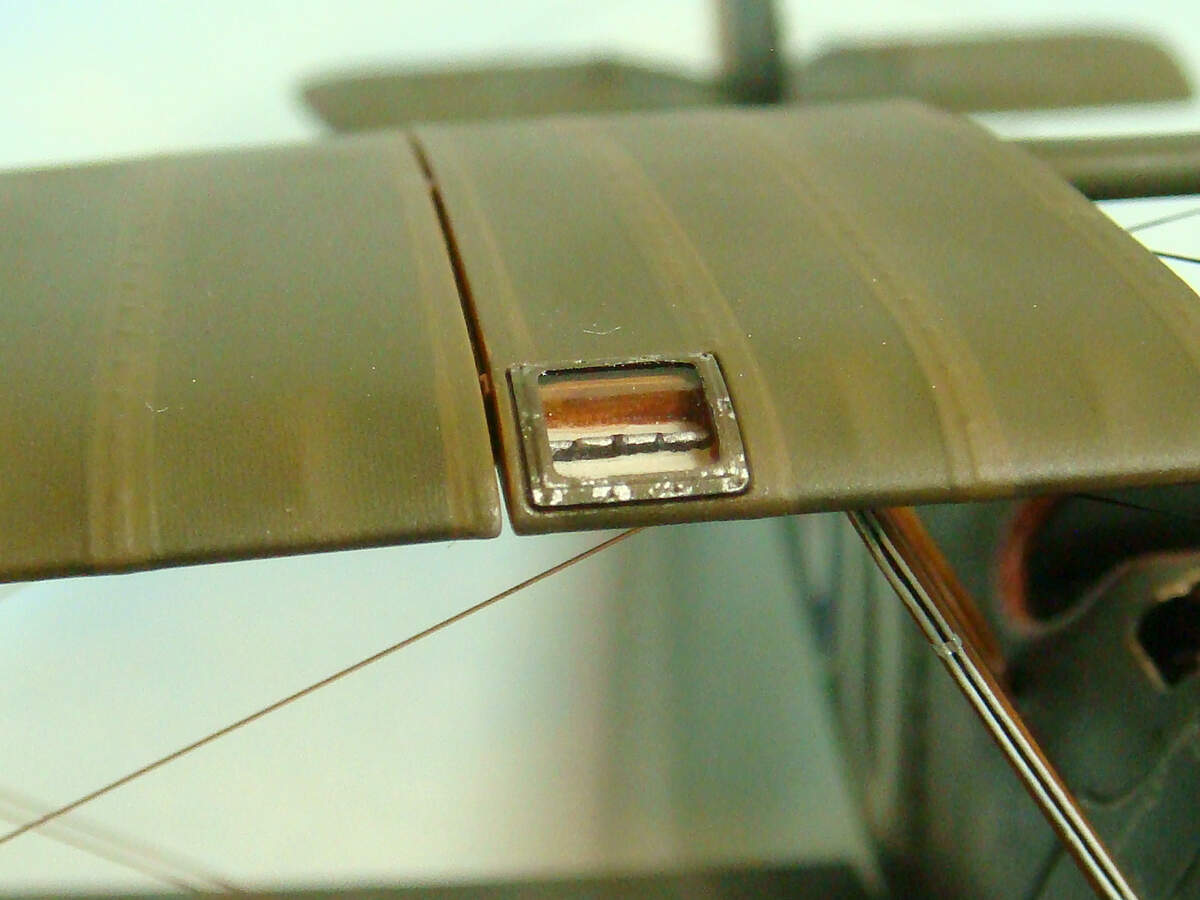
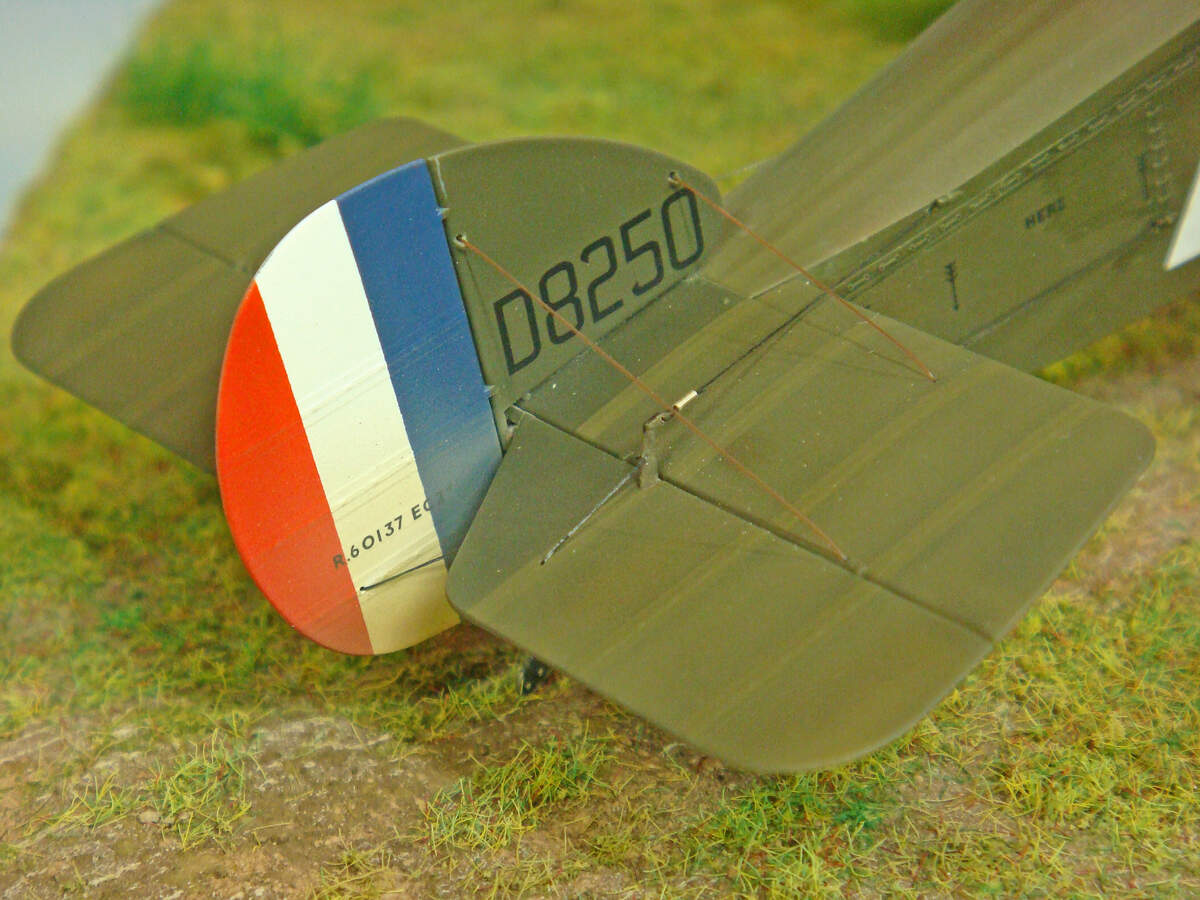
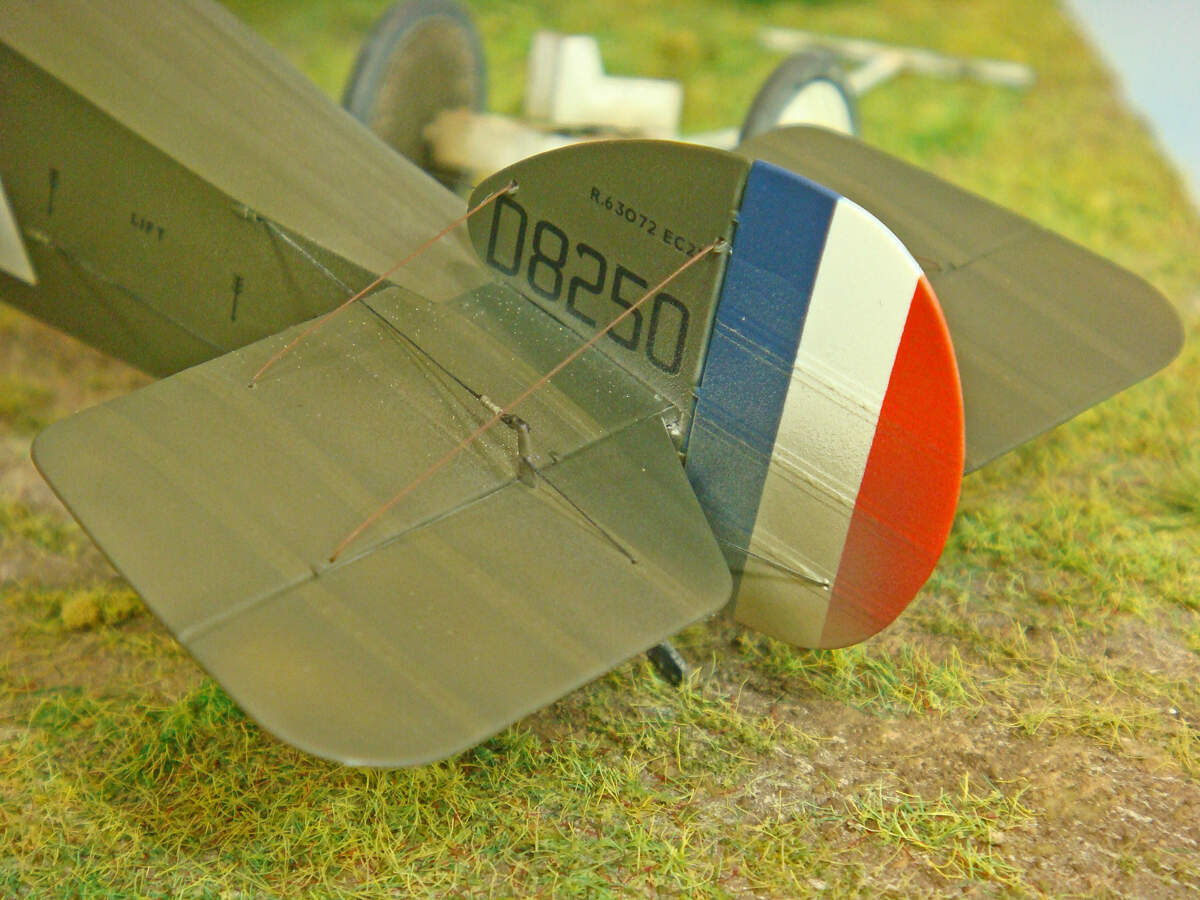
And here’s the rest. The final bits added were the clear covers for the five aileron control cable inspection-maintenance ports and the pitot tubes. I also touched up a couple of scratches and glue marks.
I did think the clear cable inspection covers were a bit too thick, but once finished and installed they look pretty good and, most important, they still give a good view of the internal details.
The pitot tubes were made from sections of Albion Metals .04 mm OD aluminum tubing.
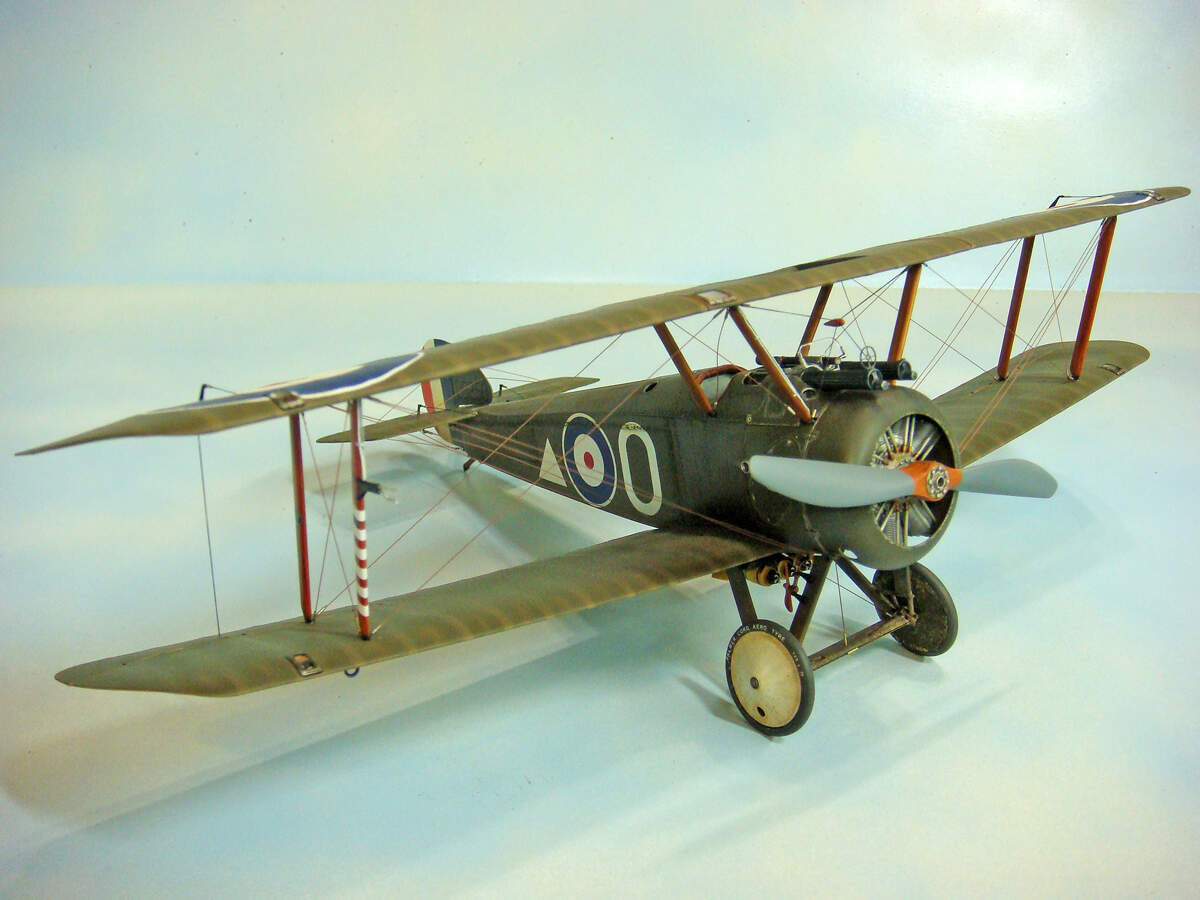
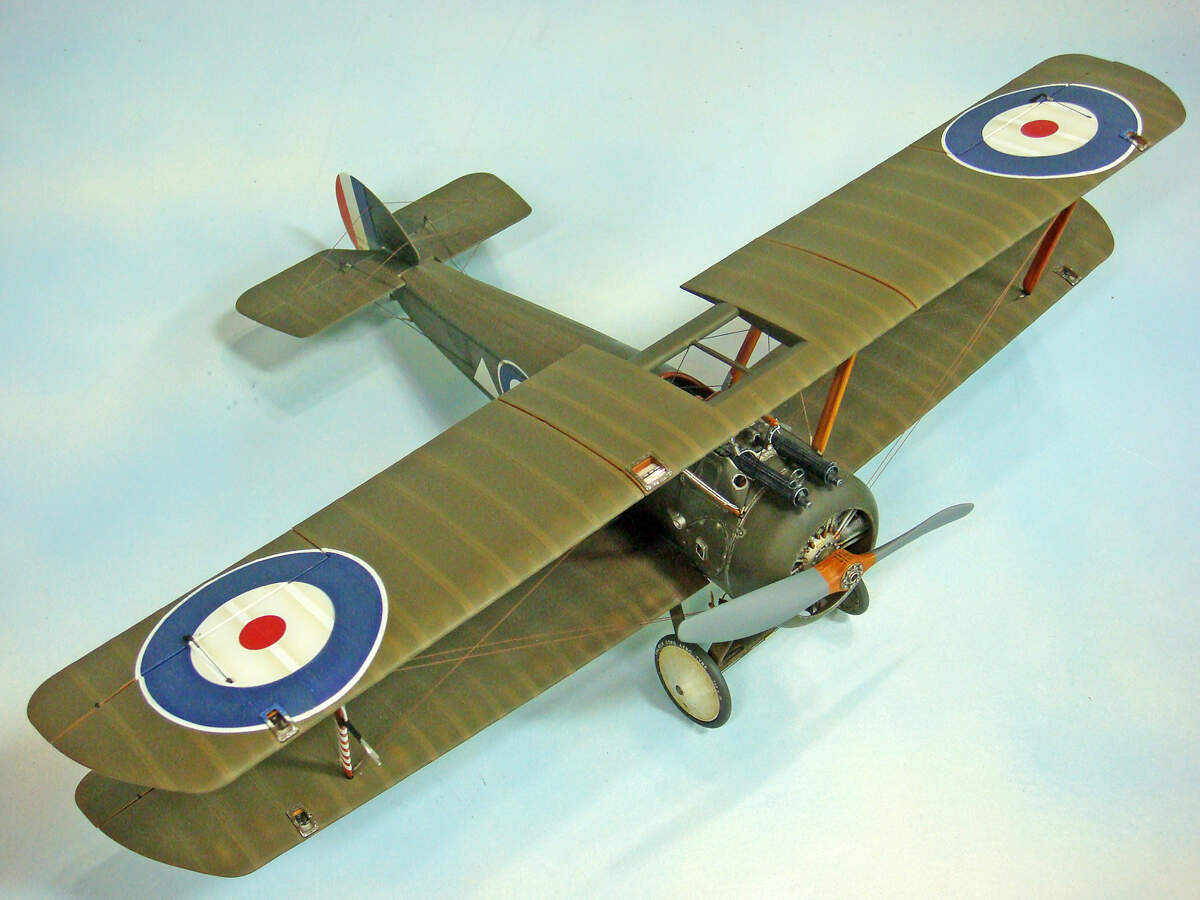
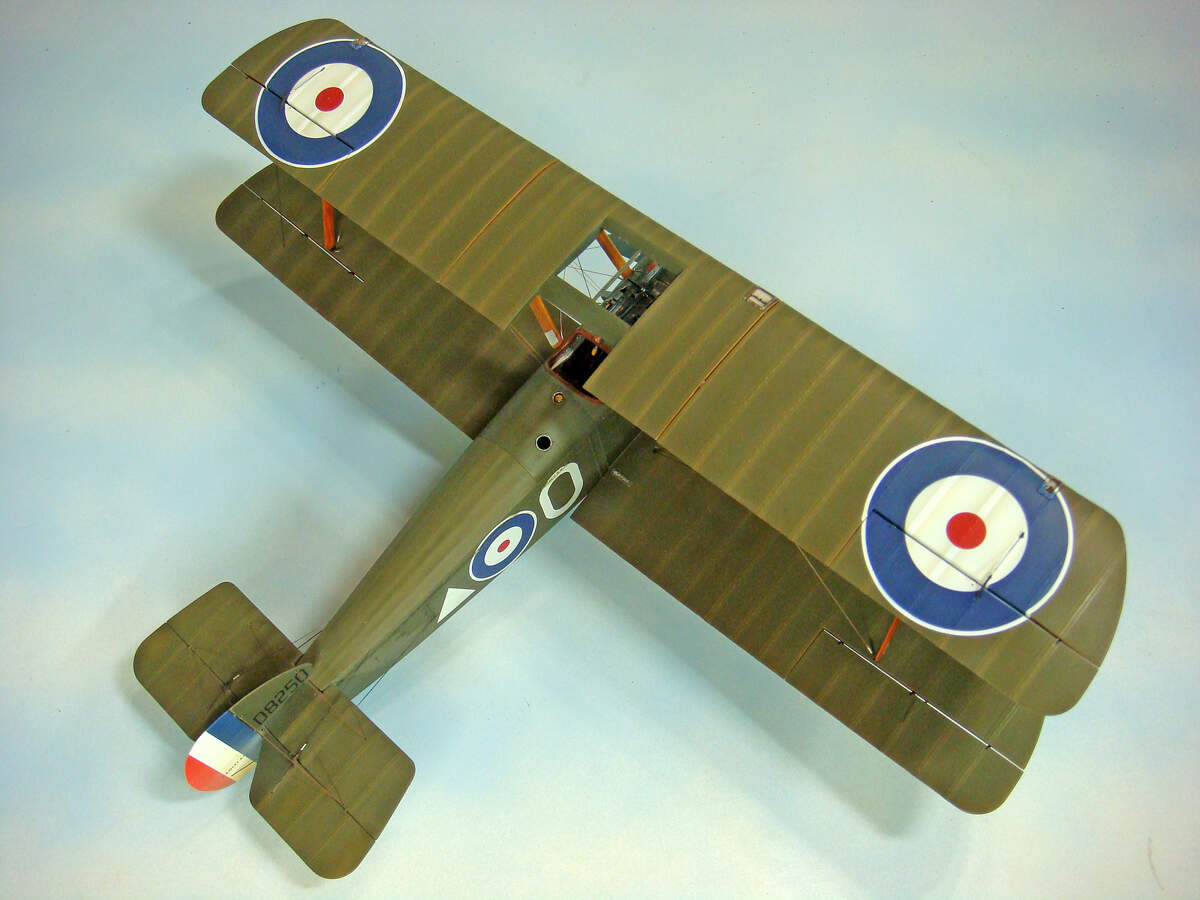
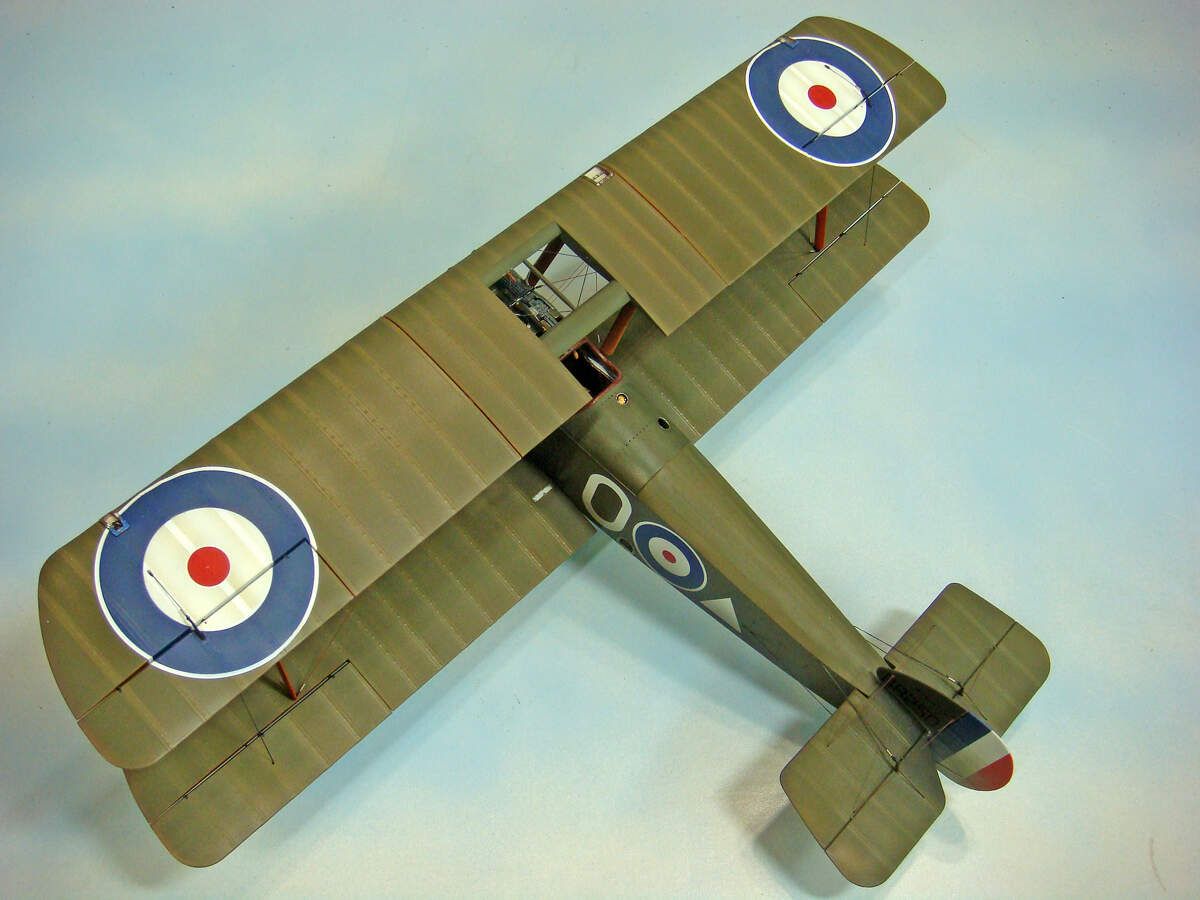


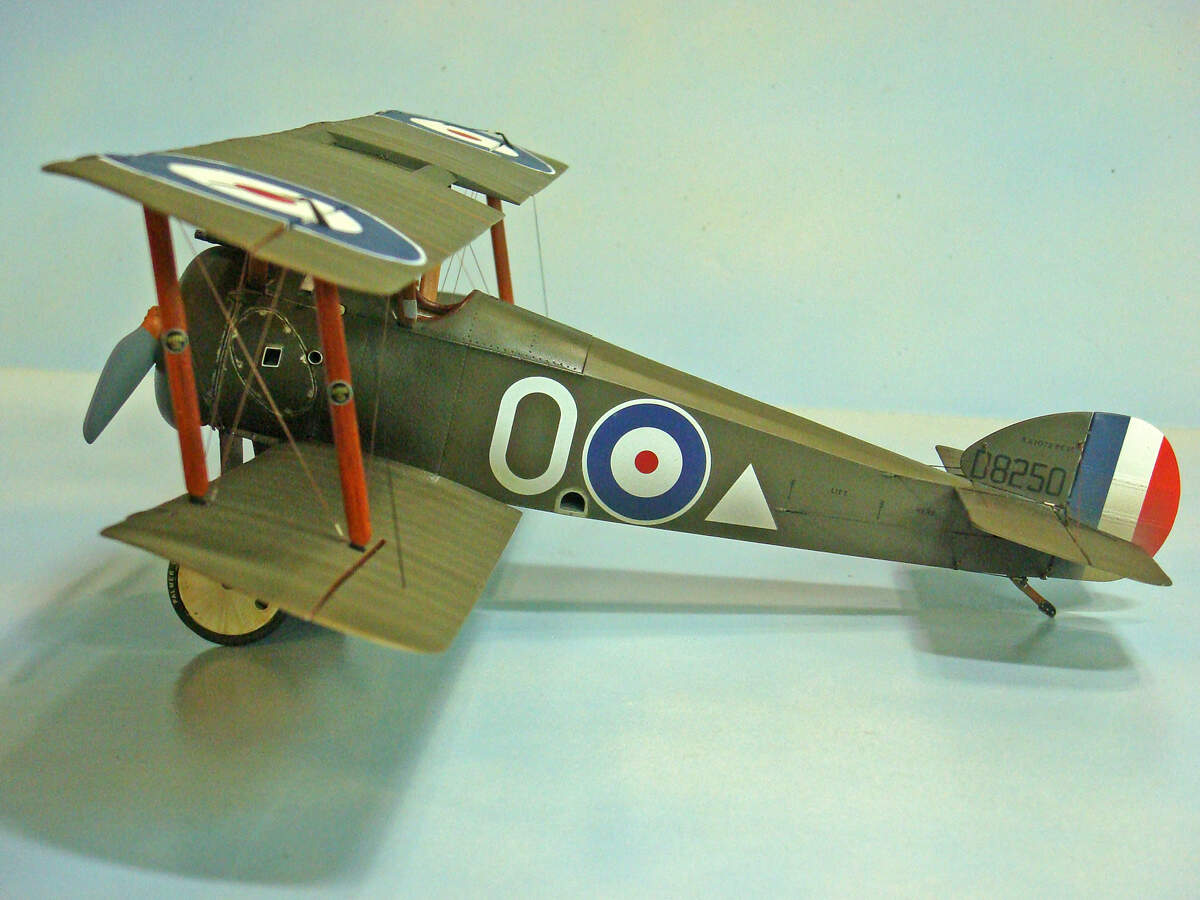
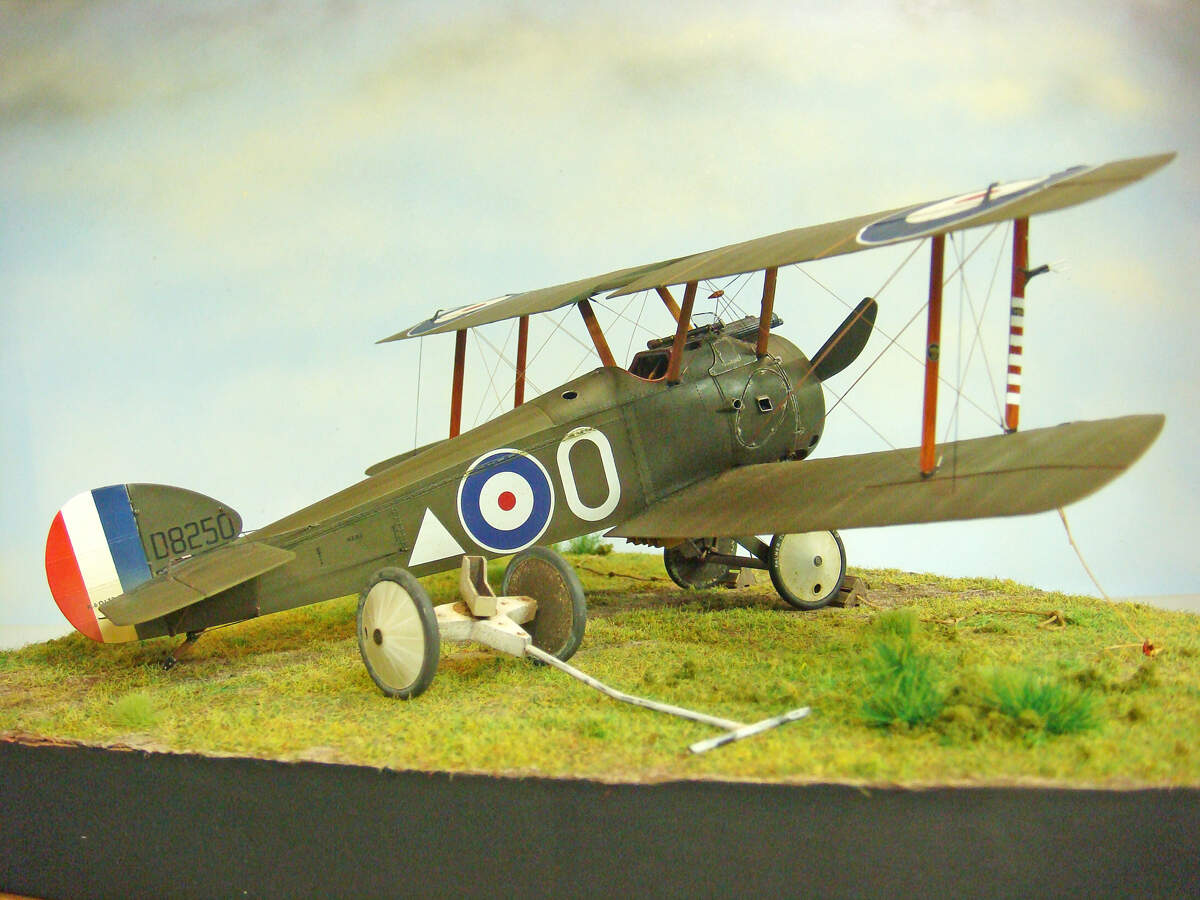
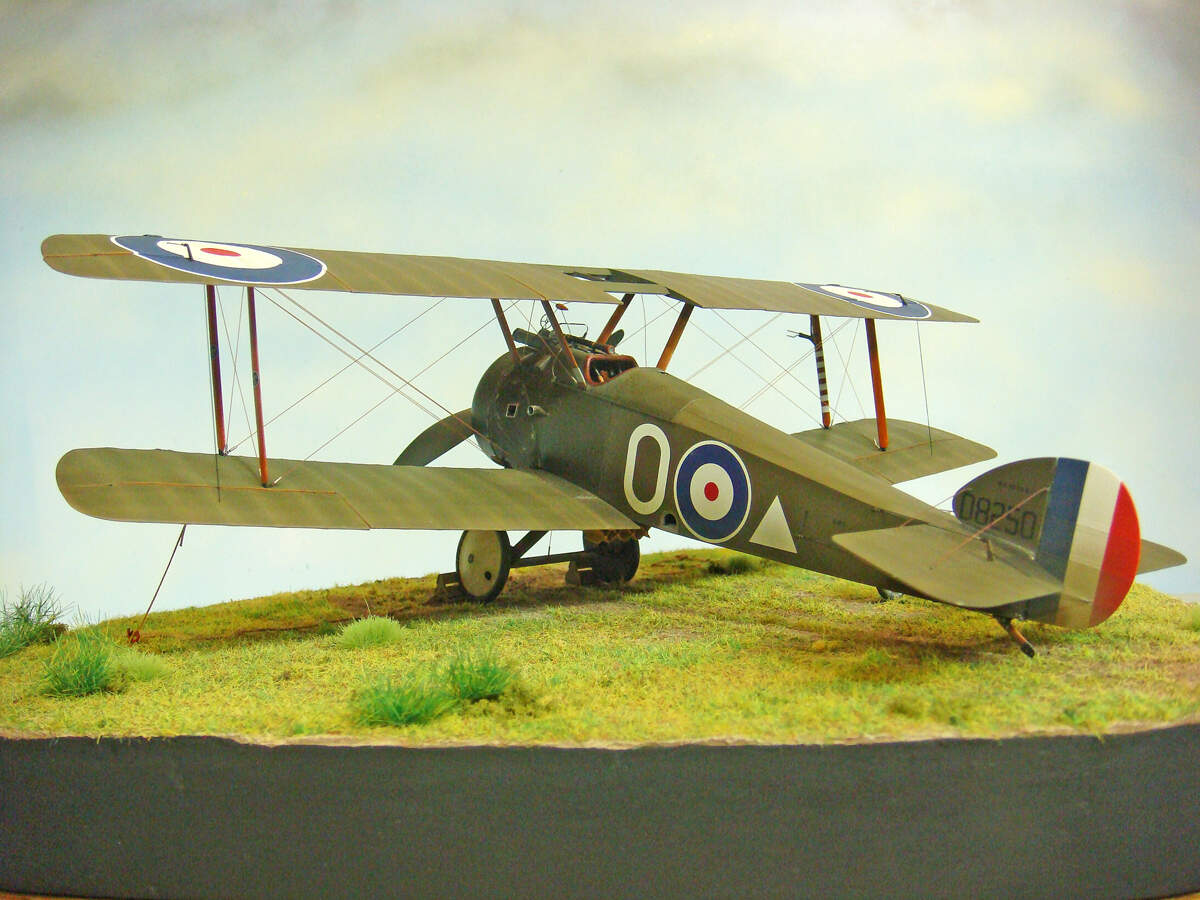
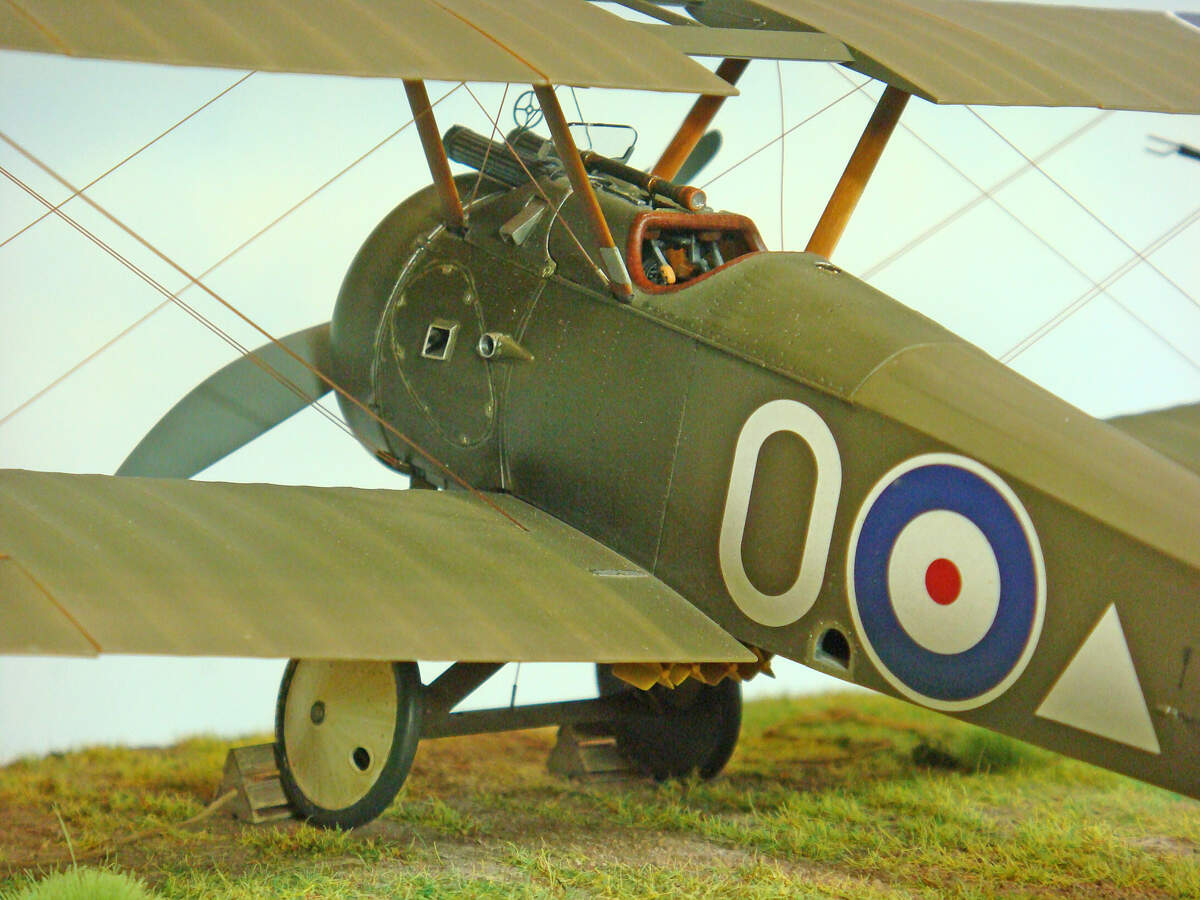
So, here we have CPT E.W. Springs mount from Summer and Autumn of 1918. He scored 8 of his 16 total victories flying 08250 as the “B” flight leader, 148th Aero Squadron, USAS.
My appraisal, FWIW as a novice WNW builder, is that this is a great kit, and I’ve had a ton of fun building it. It’s not a perfect kit, by any means. It does have a few small warts (probably most of which were of my own doing), but it’s about as close to perfect as any kit I’ve ever built in nearly 60 years of scale modeling.
I can only highly recommend it. Take your time, be patient, and believe and respect the WNW’s reputation for close fit tolerances, and this kit will reward you.
12 Likes
Stunning attention to detail! Great to see it completed 
Marty
2 Likes
Hi Michael- I have lurking in the shadows peering out at your every post on this build. It is outstanding and so my compliments to you . I have a few WnW kits in the stash, the Camel amongst them but I have yet to build one but you have certainly whetted my appetite.
Cheers - Richard
2 Likes
Incredible. Just incredible Mike
2 Likes
As I have already said but must say it again, ABSOLUTELY STUNNING!
The details and paint job and weathering makes this a real WINNER!
Cheers,
2 Likes
Yes - amazing skills being displayed here
2 Likes
@MINUX ; @RDT1953 ; @metalhead85 ; @Grauwolf : Thanks, guys! I appreciate all of the kind words!
1 Like
Simply incredible Michael!
You’ve built a great model, which you should be rightly proud of!
Thankyou for sharing and I look forward to seeing the final final update soon 
2 Likes
Well, it’s been a bit a slow period for modeling over the last few weeks. Lots of outdoor chores to get done now that spring is here. Still, I’ve been puttering along with a little here and a little there.
I’ve been working on the base for the Camel. I wanted to do something that wasn’t the usual oval or rectangle or decorative hex. I 've had in the back of my mind for some time, now, that perhaps a more triangular or teardrop shape might be lend itself to the natural outlines of a plane model, so I did some layout and composition tests and settled on a sort of rounded triangle.
Unfortunately, I didn’t take any in progress shots of the woodworking side. It was pretty simple, though. I made a cardboard pattern of my last composition test and used that to cut out a pattern in 1/4" (5 mm) plywood. The plywood pattern was screwed down to a nice piece of oak, and I used a router with a pattern cutting bit to copy the shape in the oak. After removing the plywood pattern, I then switched router bits to a quarter-round and cut the decorative edge. The oak was sanded, stained and given a few coats of gloss lacquer from a rattle can.
For the terrain, I traced the top edge of the oak base onto a piece of paper. I cut that out and pinned it to a piece of 1" thick Styrofoam. I then used a hot wire cutter to follow the paper pattern to make a “terrain” blank that would fit the oak base. I hot glued an irregular shaped piece of thick styrene onto the Styrofoam blank to make a perfectly level spot for the landing gear wheels to sit.
The blank was covered with ordinary plaster of Paris carefully smoothed on the sides and a little rough on the top (but not too rough since this is a grass landing field). I added a very thin layer of Celluclay to the top to give it some earth textures. This was all undercoated with cheap acrylic craft paints.
The vegetation textures are mixed static grass, ground foam and some long grass clumps. This was held in place with Woodland Scenics “Scenic Cement” and a few dabs of straight PVA (aka “white glue” or “Elmer’s glue”).
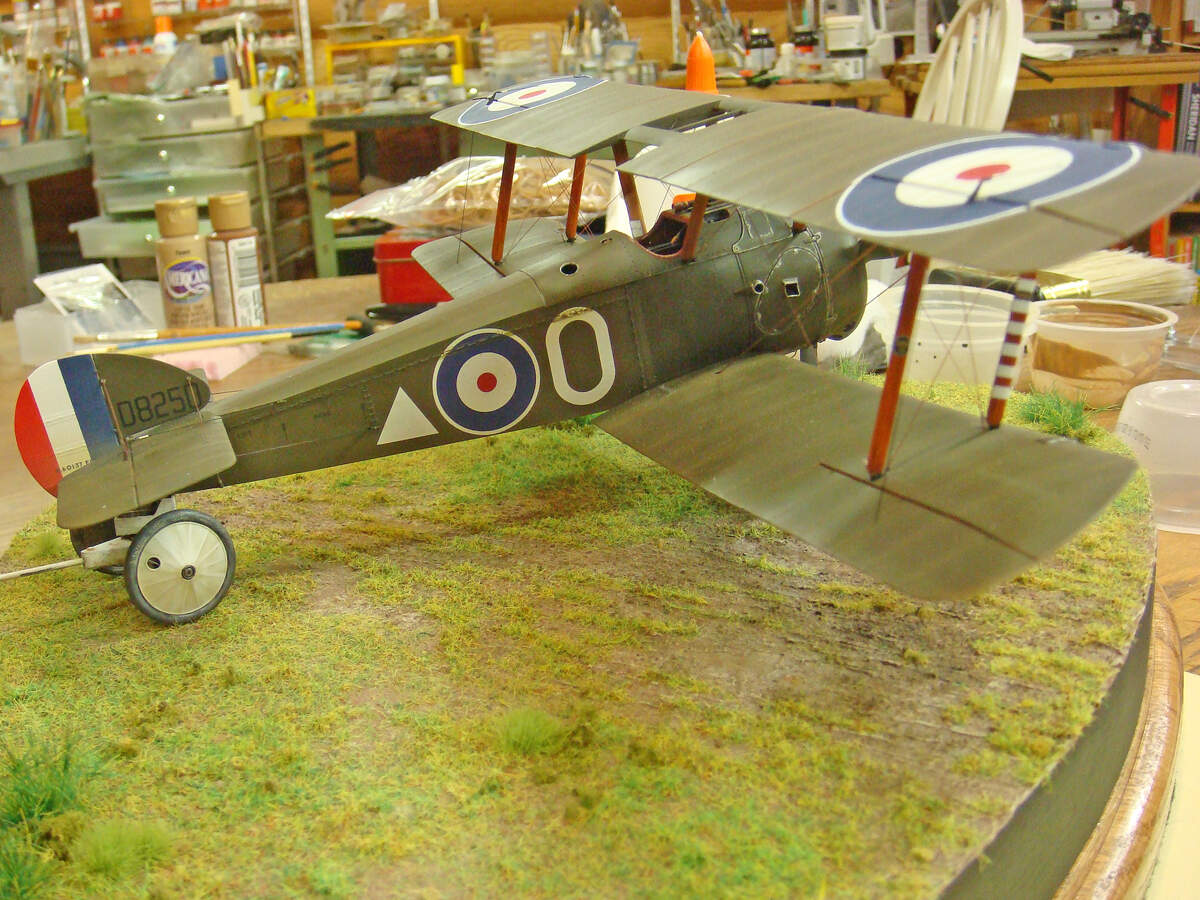
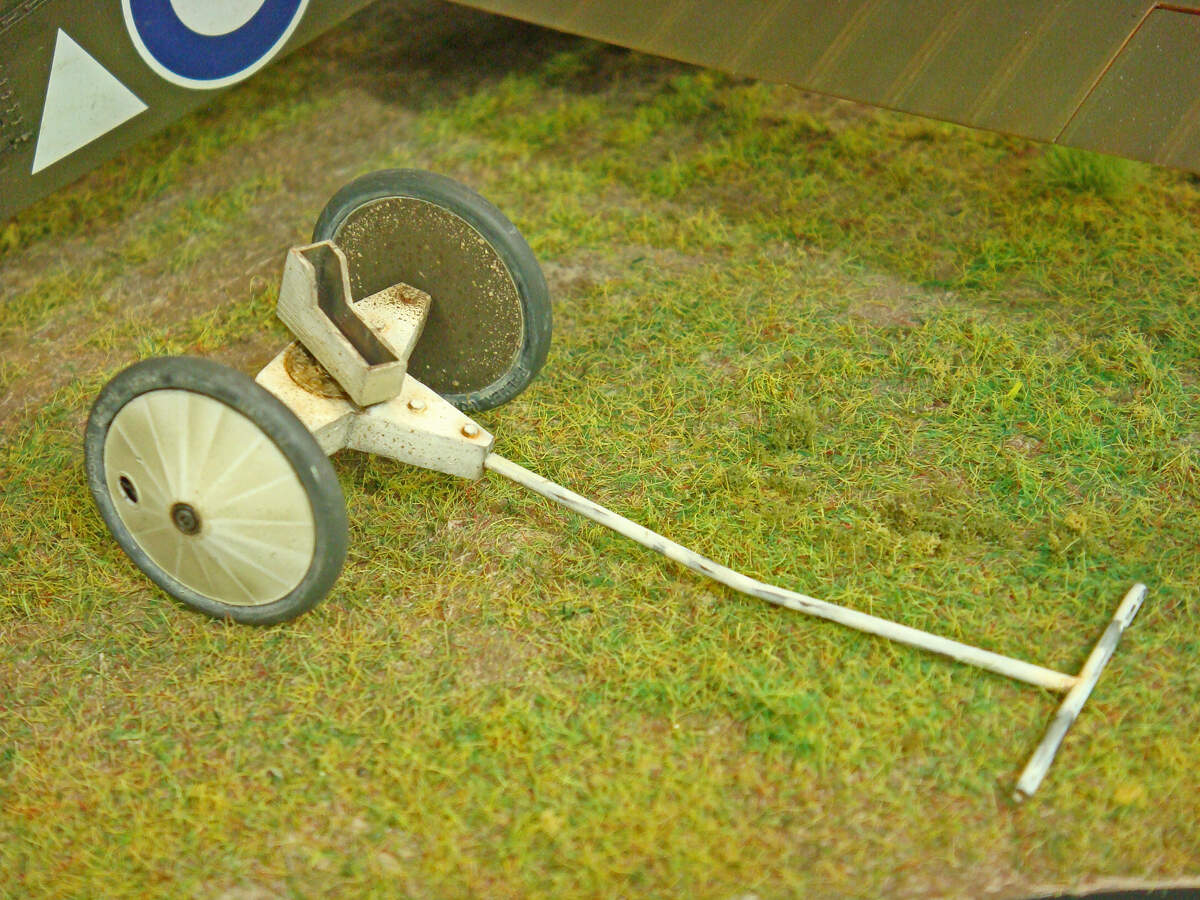
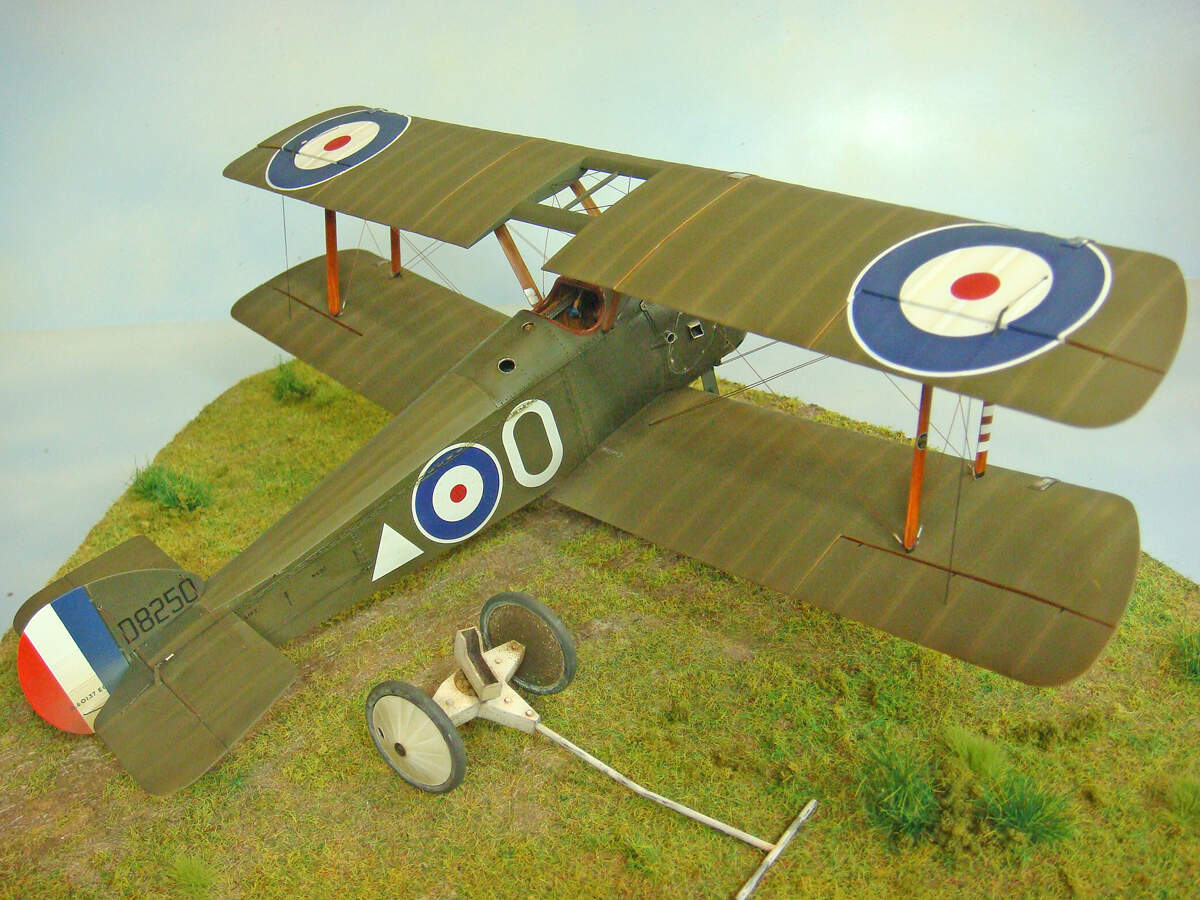
The first photo shows the terrain module (plaster covered Styrofoam with the Celluclay earth texture) test fitted on the finished oak base. Also visible are the scratch built wheel chocks, the tailskid dolly, and (if you look closely) the unpainted tie down pins.
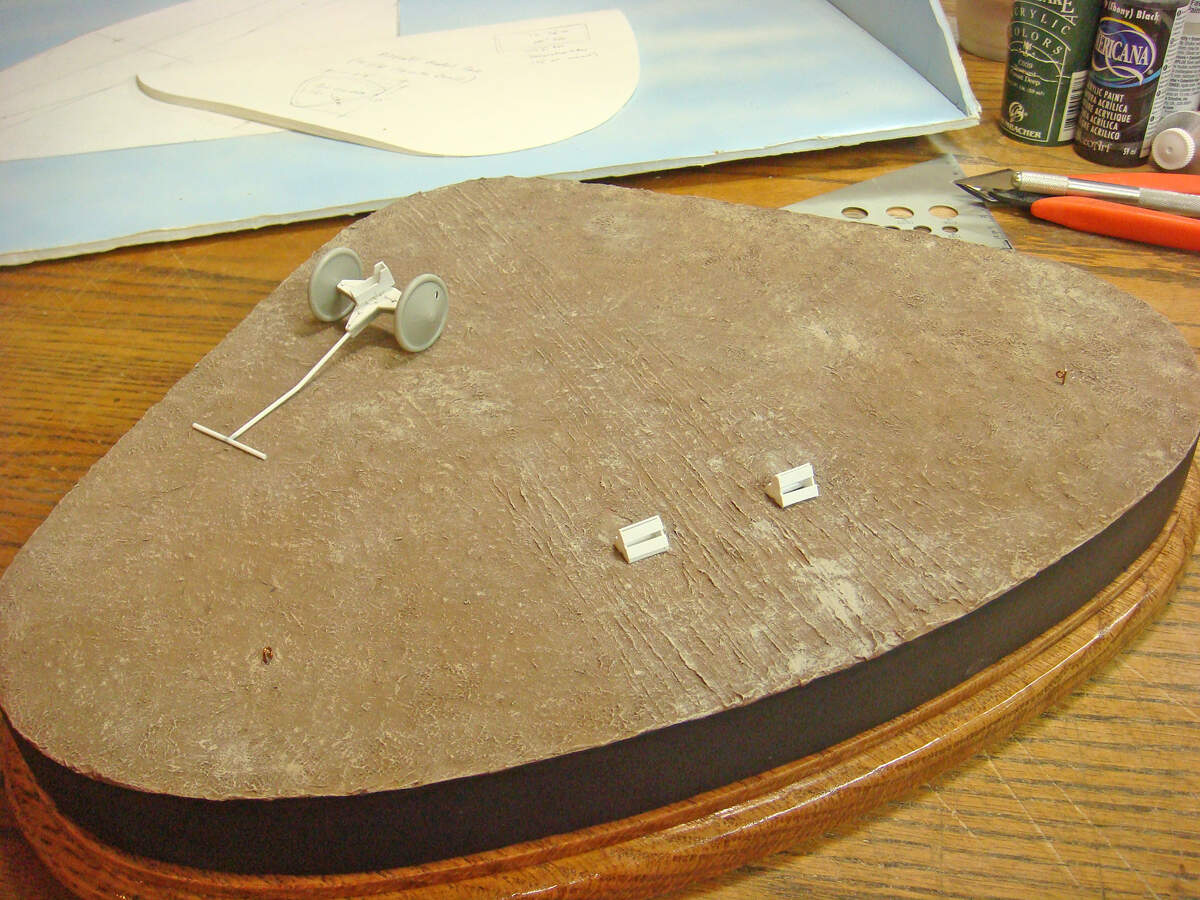
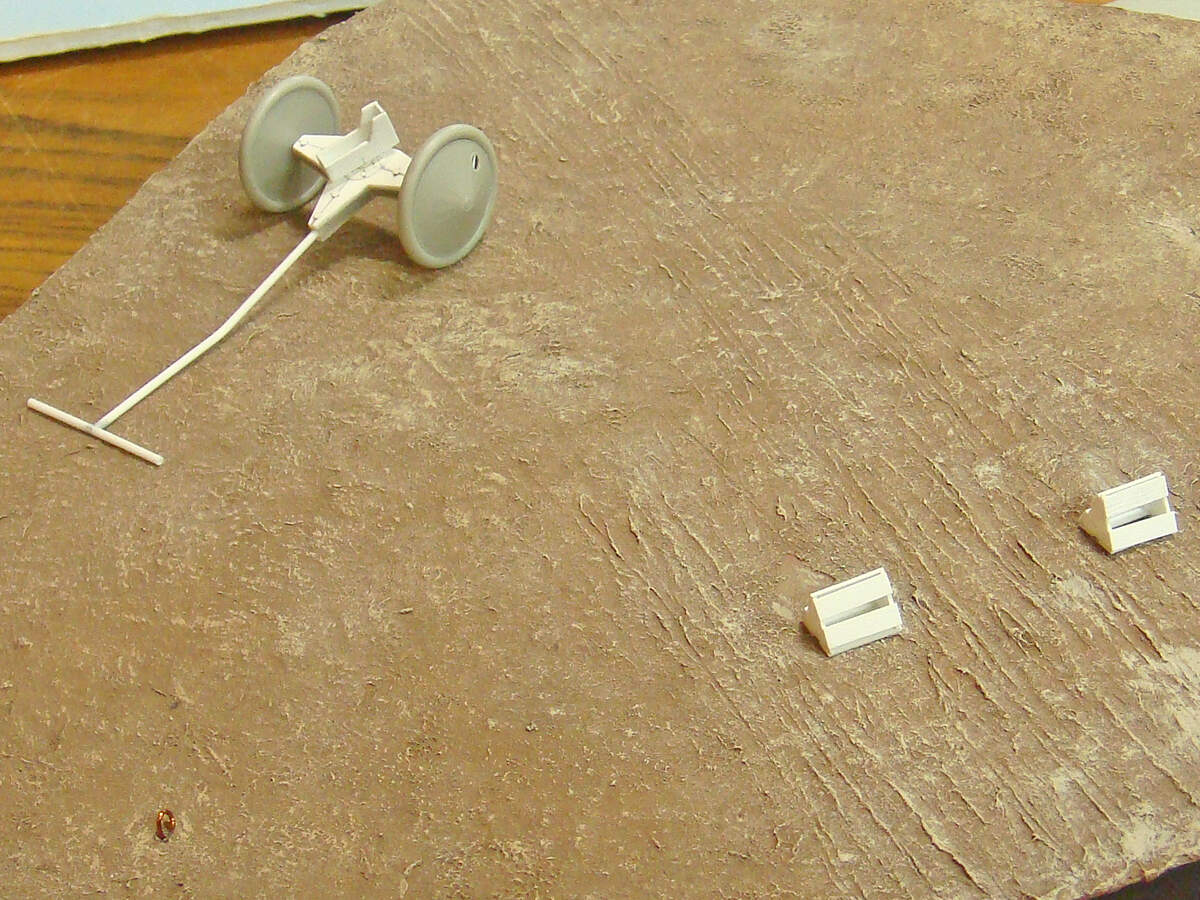
A close up the dolly, one of the wheel chocks and one of the tie down pins. The dolly was made from styrene stock with punched hex nut and screws. The wheels are the unused Camel landing gear wheels from the WNW kit. (They have a slightly different lacing pattern on the covers.) I’ll post some more information on the tailskid dolly in another post.
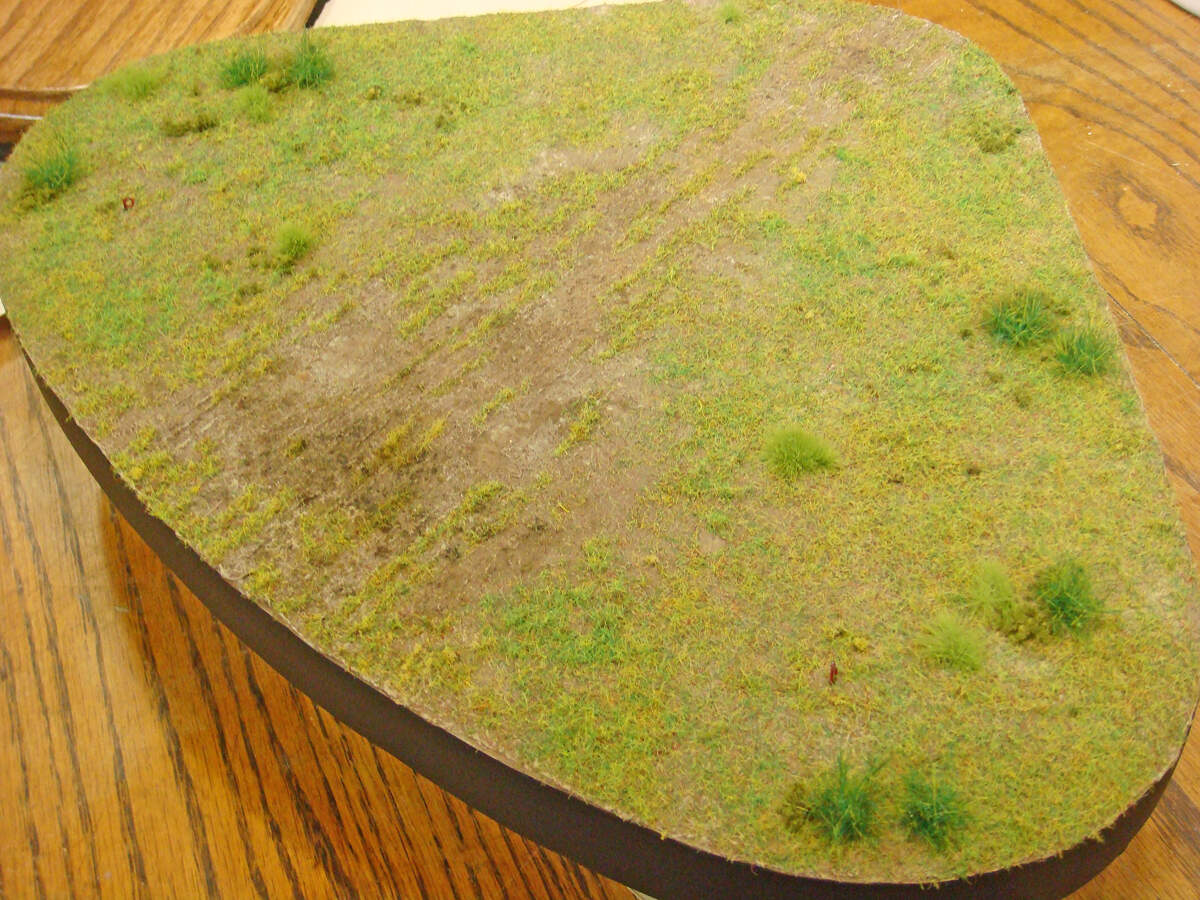
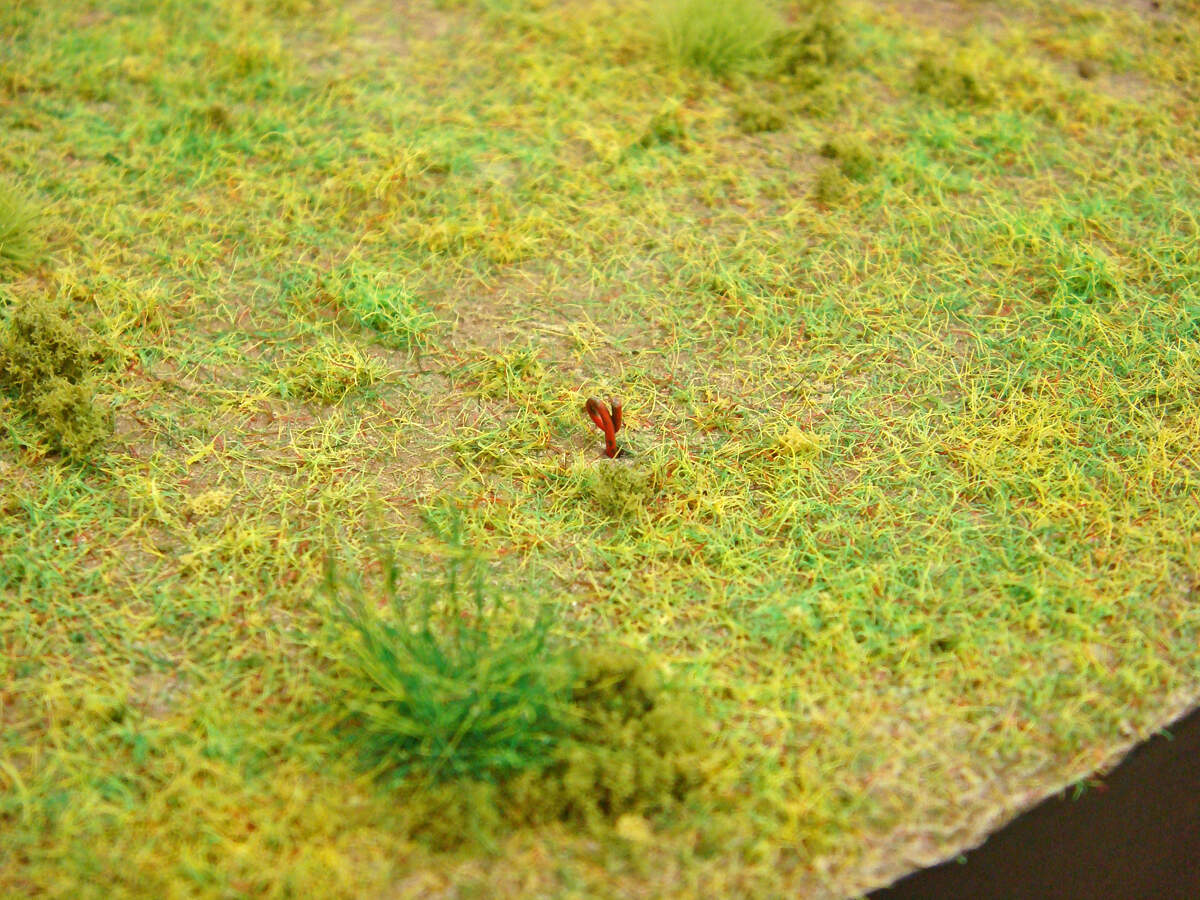
Here you can see the Celluclay earth textures and the vegetation added. The tie down pins have been painted (red for safety!) and glued in place. Some greasy black and brown oil stains on the ground where the engine might be serviced.
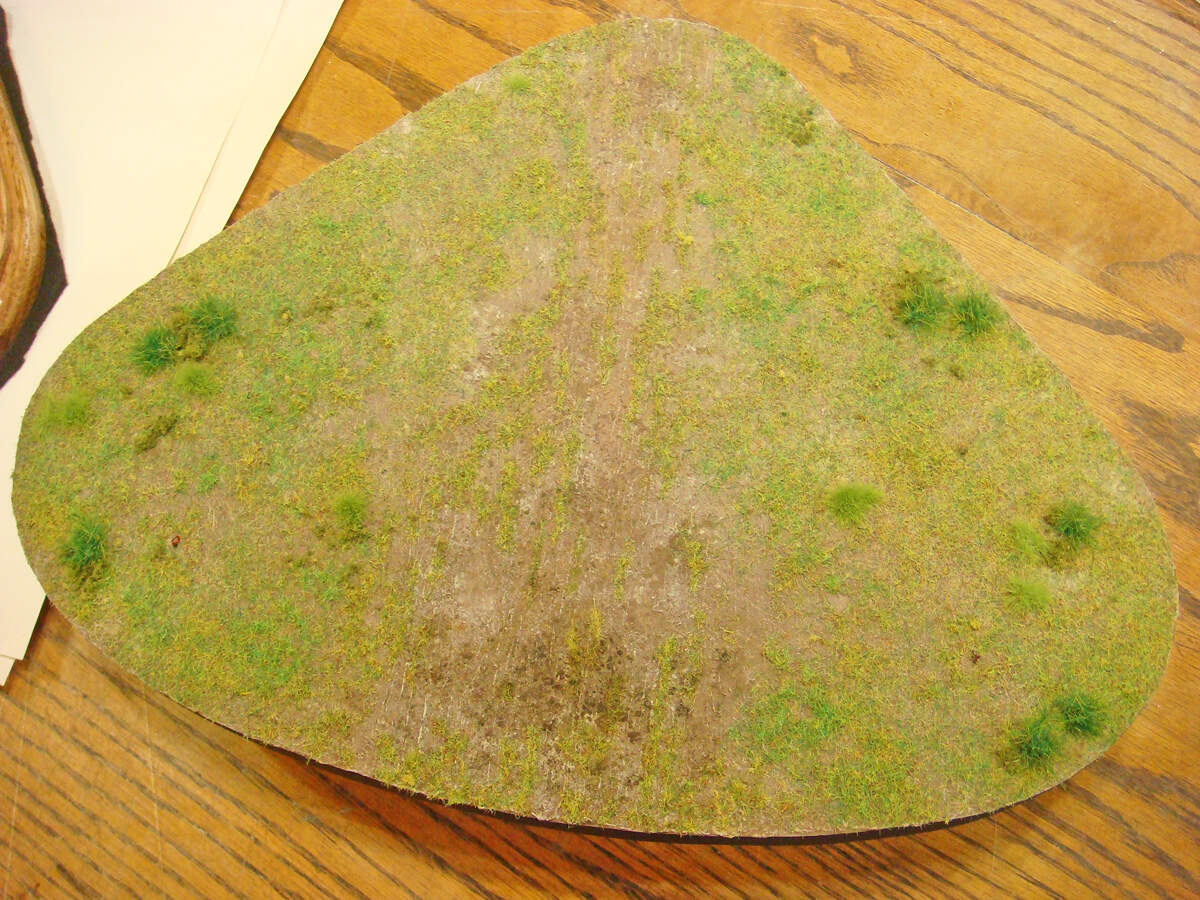
A slightly different angle of the ground work.
A closeup of one of the tie down pins. My plan is to have the aircraft tied down with the wheels chocked as if it’s parked to be serviced and prepared for another mission. These WWI airfields were quite literally just fields, with the aircraft taking off and landing according to whatever direction the wind was blowing. Once landed, they were wheeled by the ground crews back to the hangers for servicing and maintenance. When ready, the crews then wheeled them back onto the landing field and point them into the wind for take off. All of this ground movement was done by the ground crews simply muscling the plans around (engine controls were coarse so taxiing around was risky and there were no brakes, so landing rollouts just ended where ever).
This is the finished oak base getting a piece of black felt glued onto its bottom. The excess around the edges will be simply trimmed away with sharp scissors.

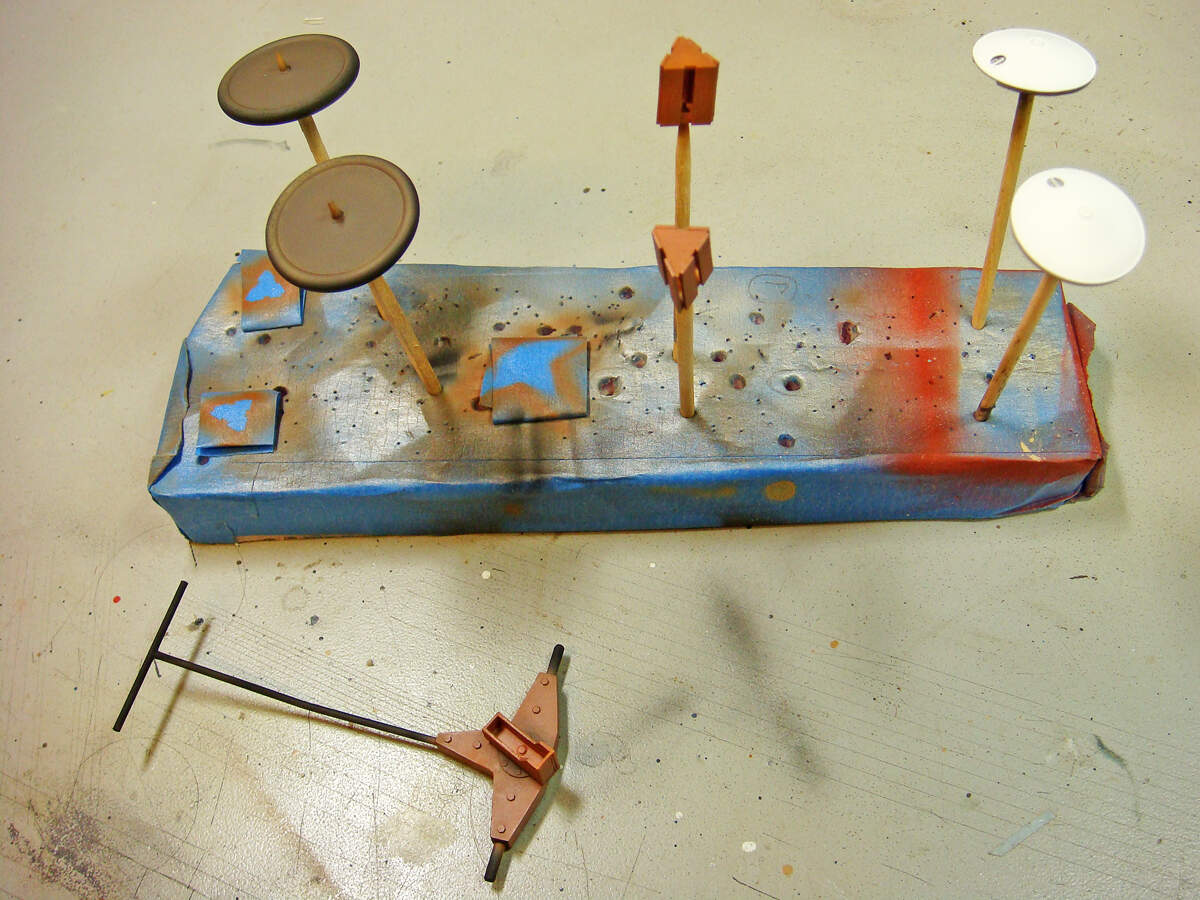
Finally, for this post, here are the other details in their airbrushed base coats. Much more detail painting to be down, but this is the start.
4 Likes
So, some information on the tailskid dolly. As far as I can tell, there was no such thing as a “standard” design for these things. It would appear that the mechanics and ground crew pretty much just fabricated the dollies from whatever materials were handy and available.
Many of them appear to use spare (perhaps slightly damaged) landing gear wheels, with or without covers. Most (but not all) appear to have buckets for the tailskids that pivoted independently of the dolly. This makes sense for maneuverability because the tailskids generally did not have much range of movement (and none on some aircraft).
The dollies used by the 148th Aero Squadron (the unit of the subject Camel model) appeared to have painted their dollies in the colors used by each of the three different flights (A = red; B = white; C = blue), so I’ll paint mine in white for Lt. E.W. Springs’ B Flight.
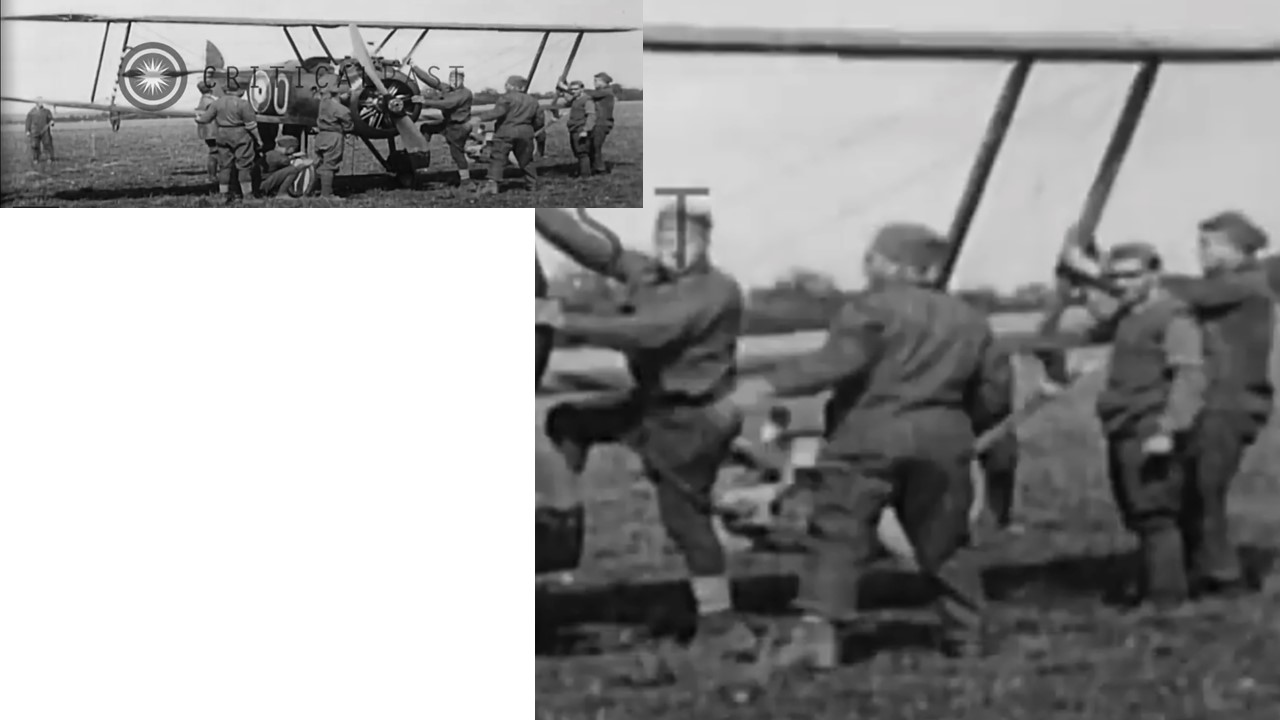
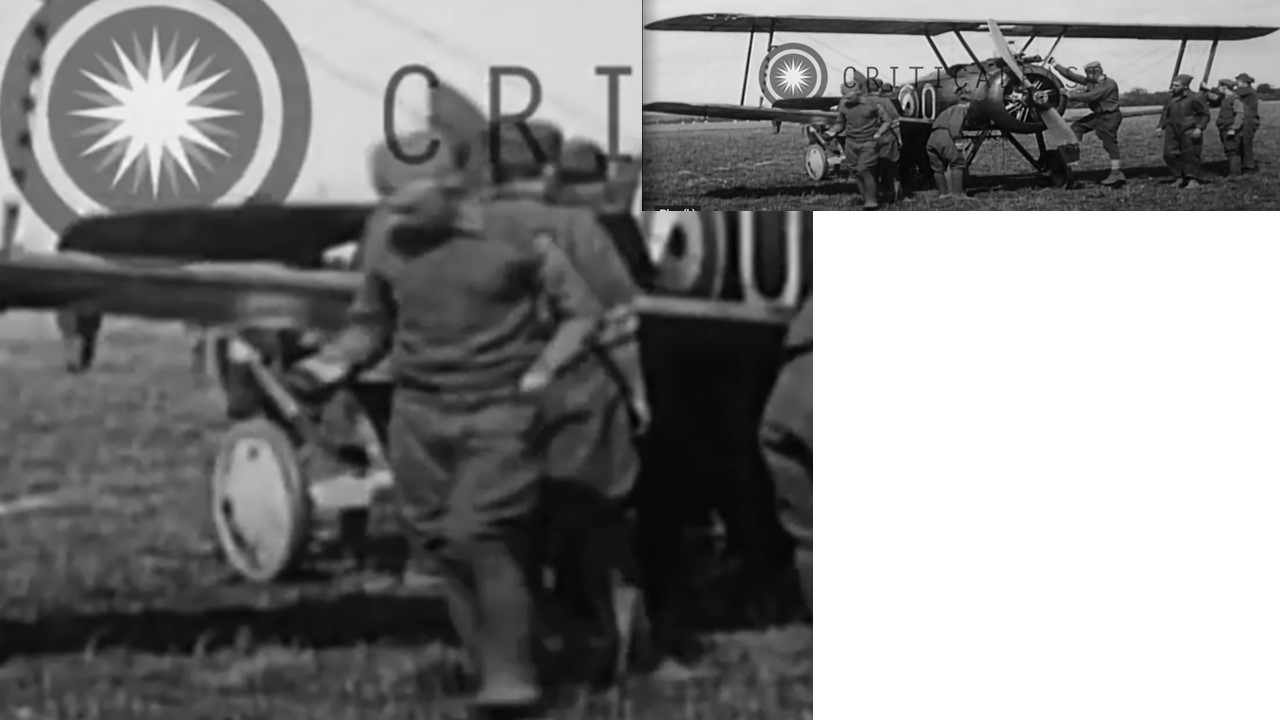
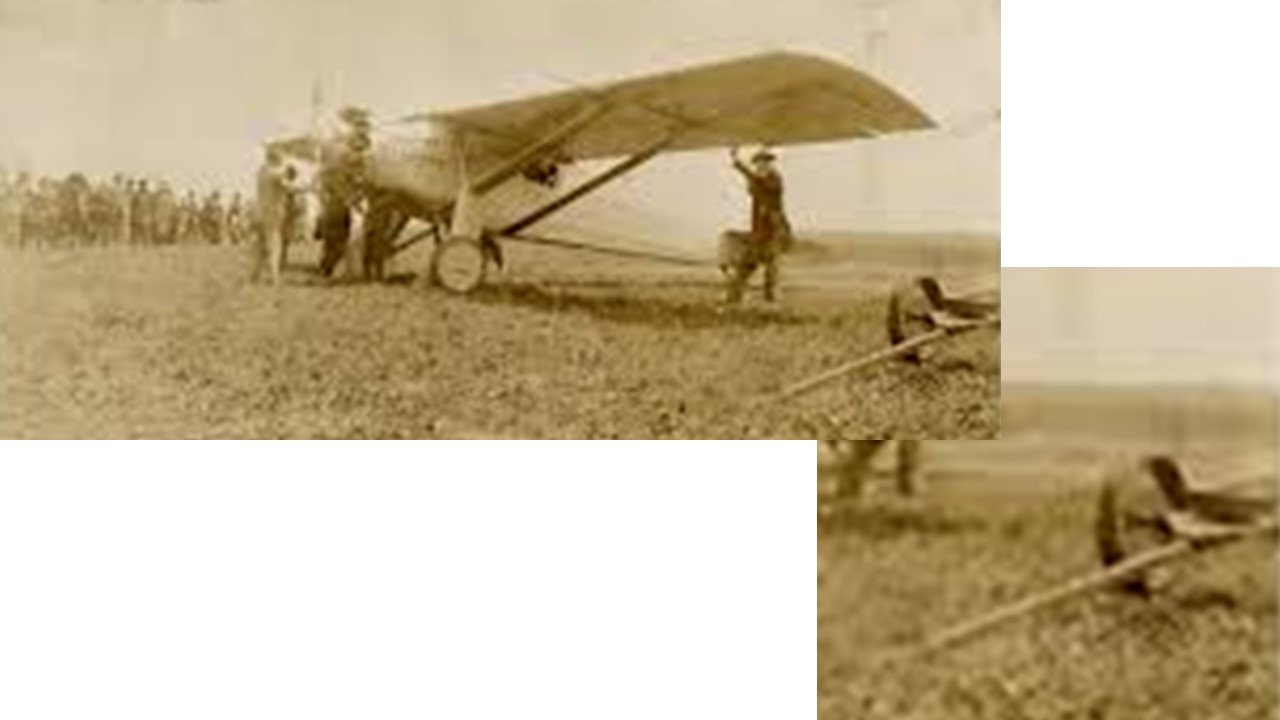
The first four photos here are screen grabs take from some film shot by US Army Signal Corps photographers of the 148th Aero Squadron pilots and plans. These grabs actually show Springs’ Camel “O” after he tipped it over on its nose during a landing.


The rest of these stills show some of the variety in dolly designs and materials. It’s not really clear if this first one has a pivoting tailskid bucket. Note the the bucket seems to be in line with the handle and the tailskid and rudder are slightly turned to follow.

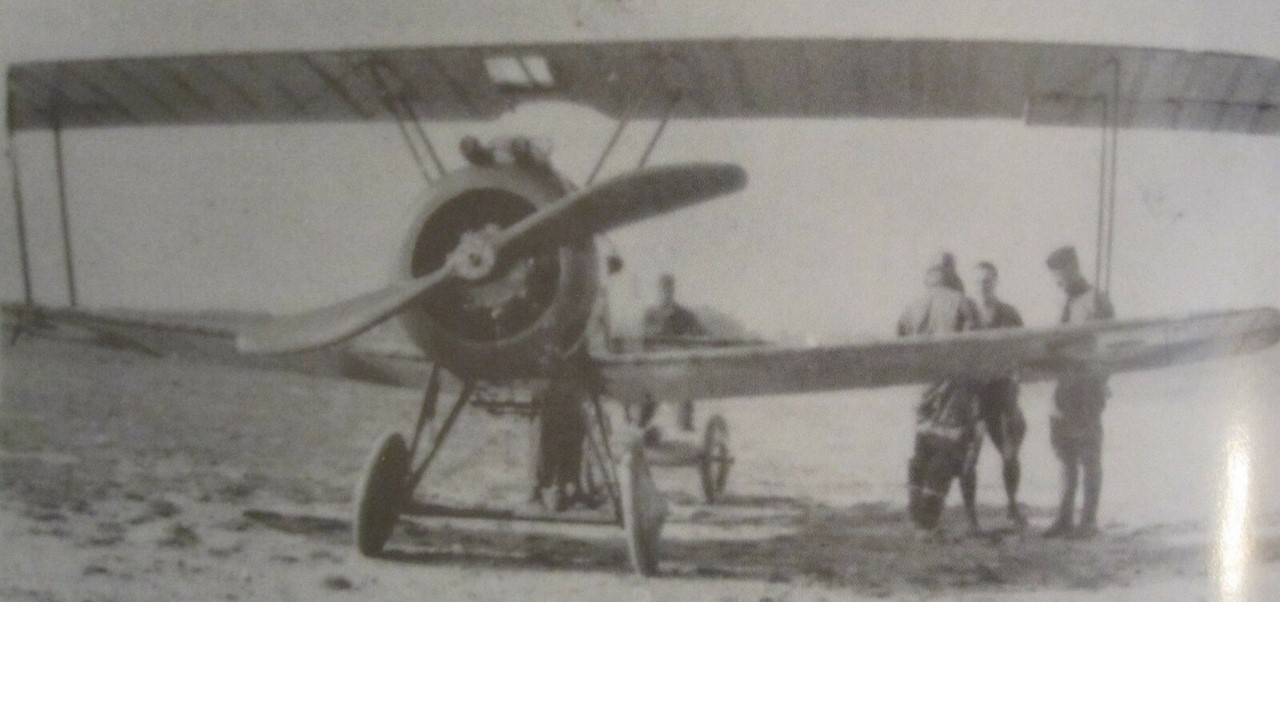
This one is interesting. The wheels used on the dolly look like metal farm wagon or tractor wheels.

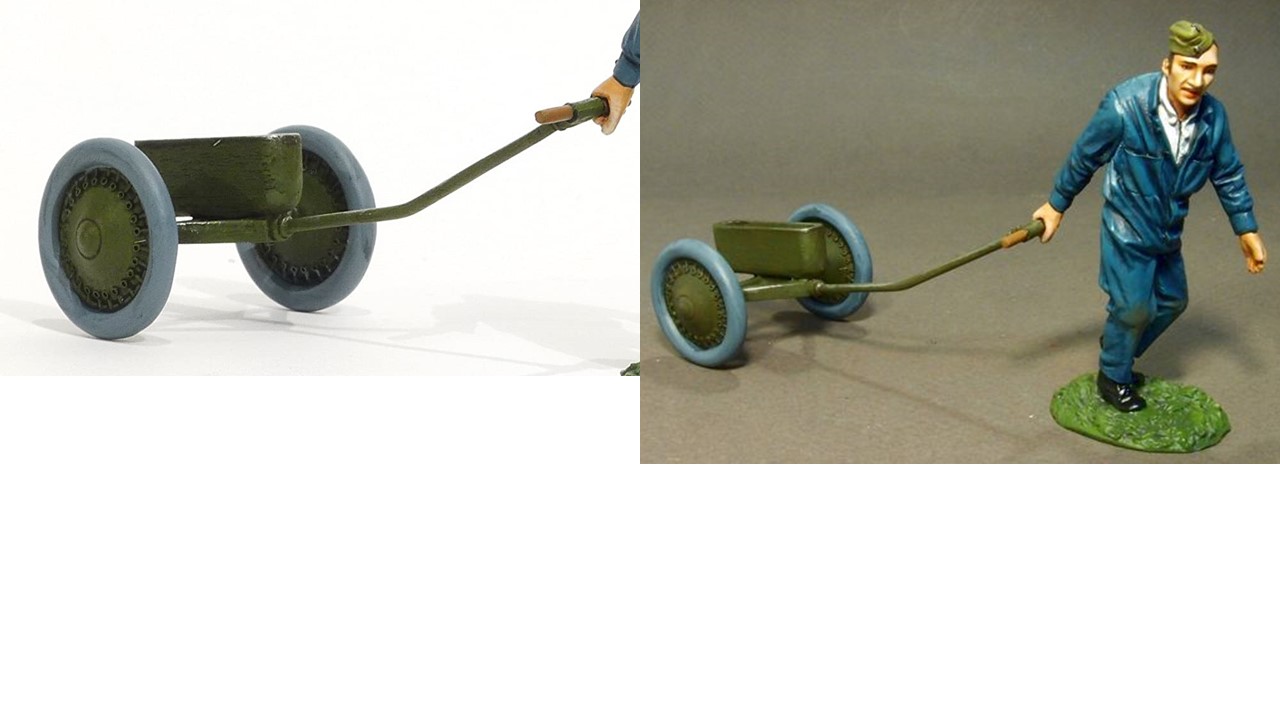
This last collage shows the only 1/32 scale tailskid dolly that I could find as a separately sold accessory. It comes with the figure, and both are pre-painted. There are a few tailskid dollies included as accessories in kits, but none of these are 1/32. However, building one is a simple project, and the designs are so varied that there’s really no right or wrong.
6 Likes
I am a huge fan of the USAS Camel (have 2 of these by WnW in my stash…) and yours is the best build by far of it which I’ve seen so far: Simply beautiful! Thanks for sharing, „SdAufKla“!
2 Likes
Amazing work here, Michael!
This is gonna look great as a diorama!
2 Likes
Looks terrific so far Sir, love watching your work. Mind if I borrow the dolly idea shown in the photo with aircraft 16 as it closely resembles a Salmson?
1 Like
Thanks!
I claim no ownership or originality what-so-ever with the dolly! Glad you find as interesting as I do.
Heck, I was doing a little research for a different project and came across a modern photo of a tailskid dolly being used to move an SE5a around. You can find other examples with a quick Google images search.
1 Like
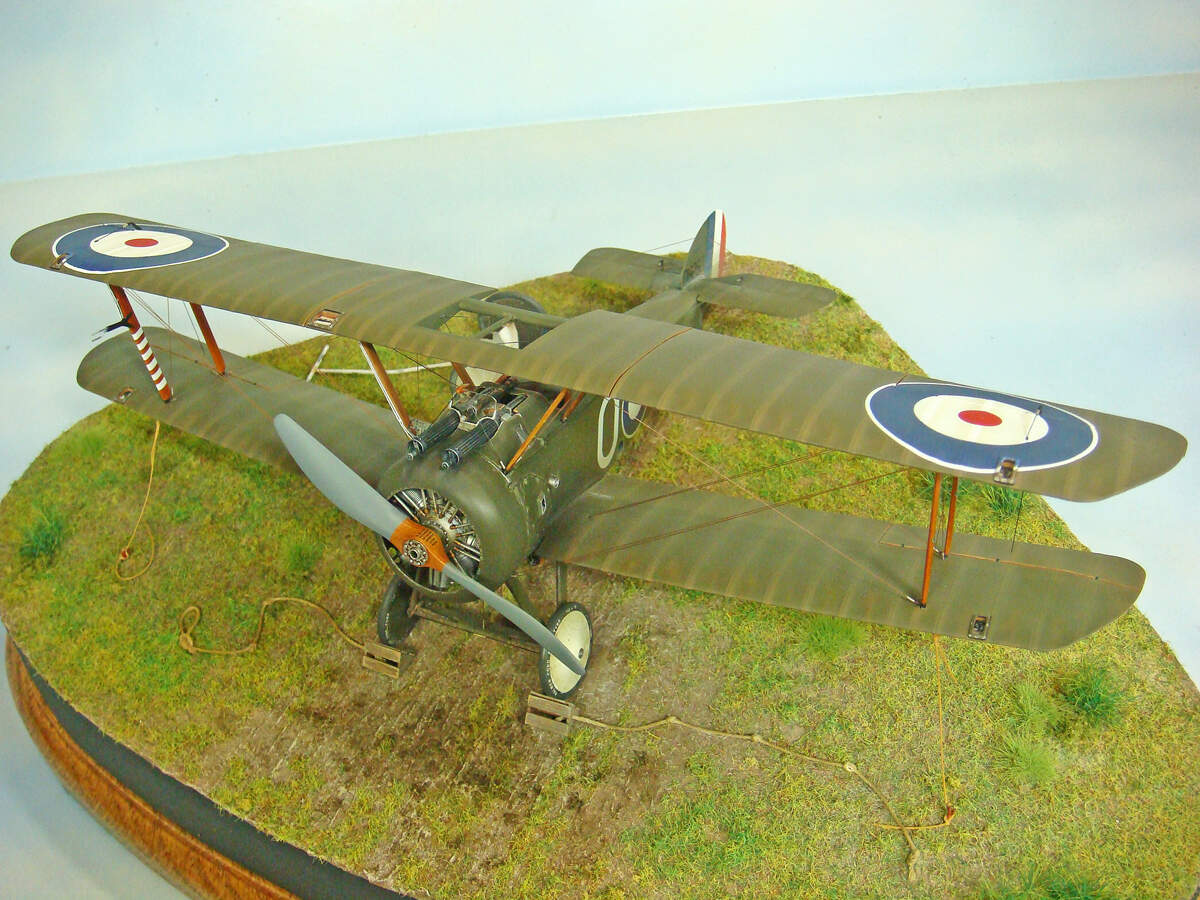
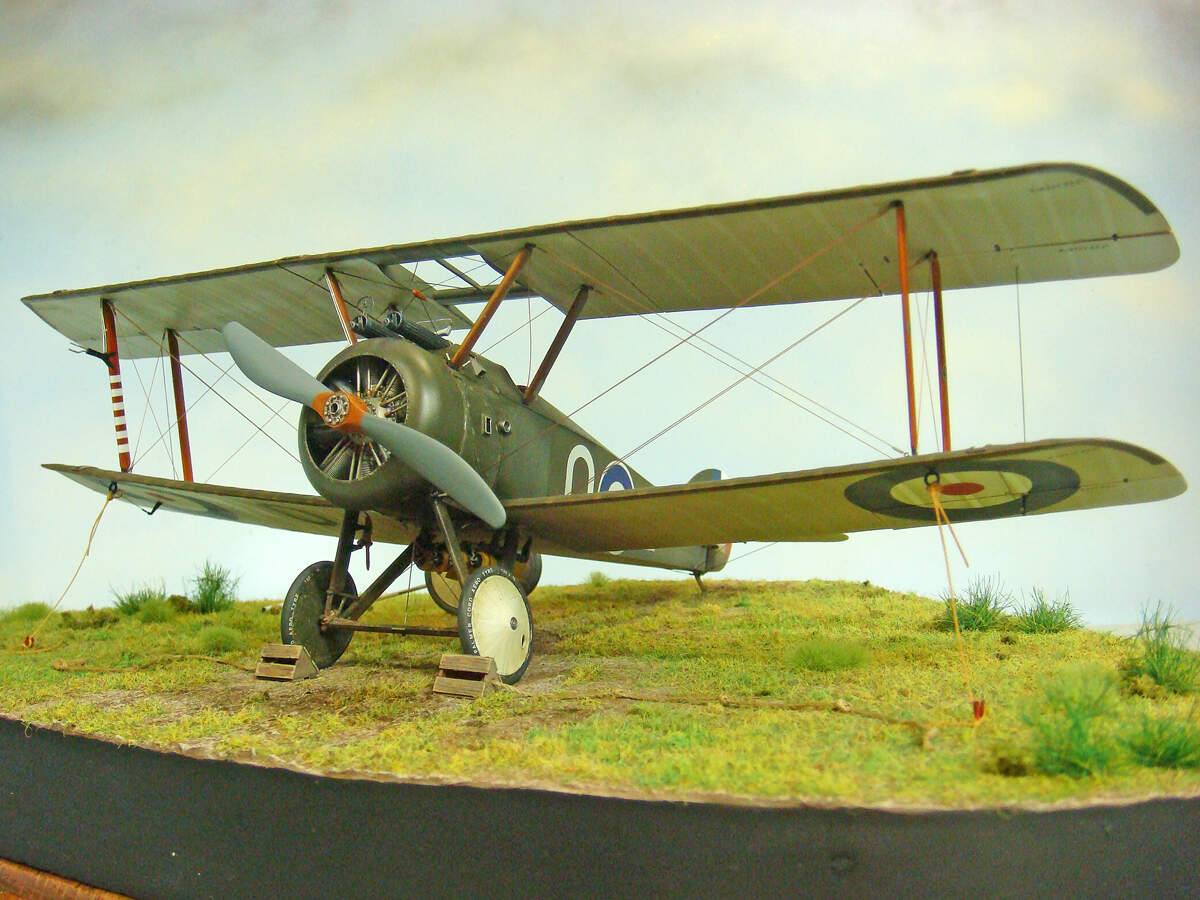
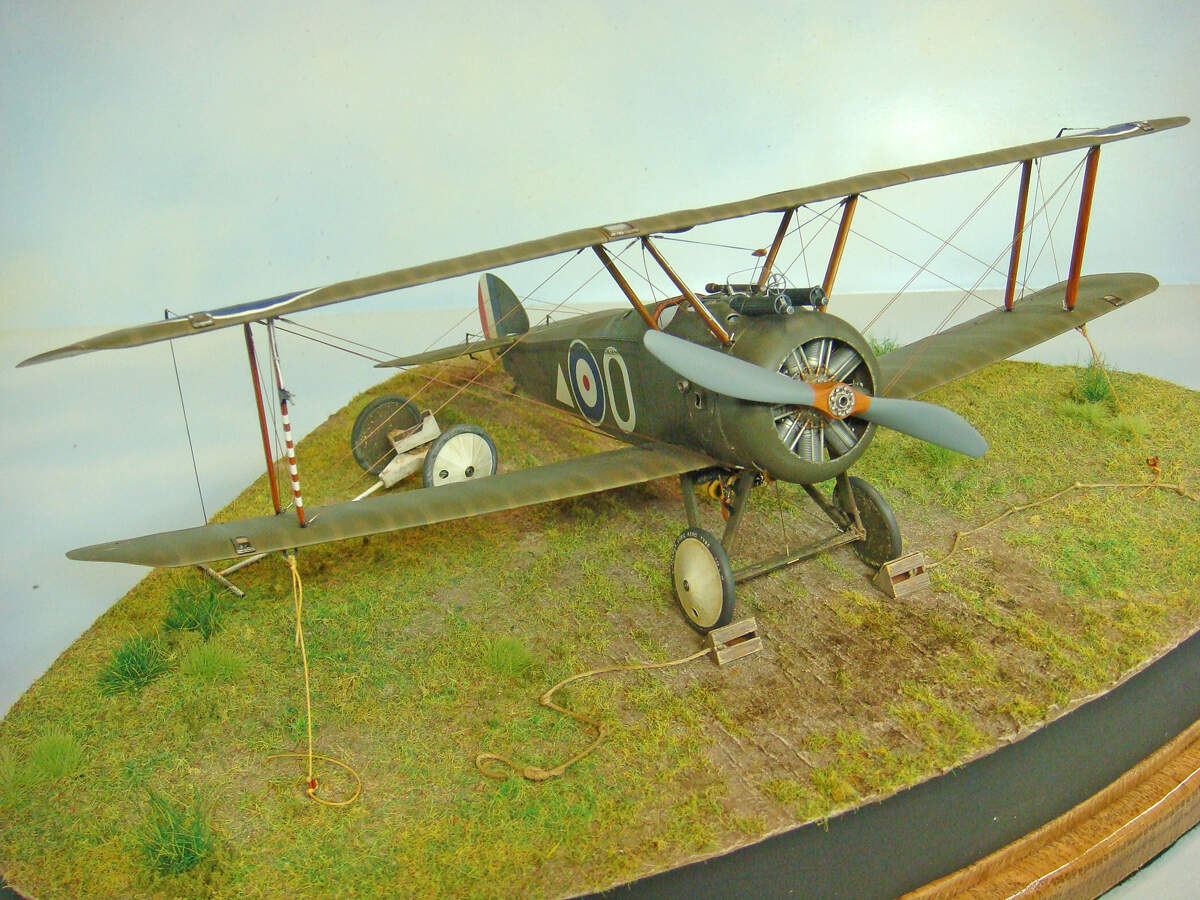
Ok, so it’s about time to wrap this one up… The camel is done and mounted to the base. Eventually I’ll add a brass title plate and a figure. (I’m working on the figure now, but will post up that project in a separate thread somewhere here on the KM Forums.)
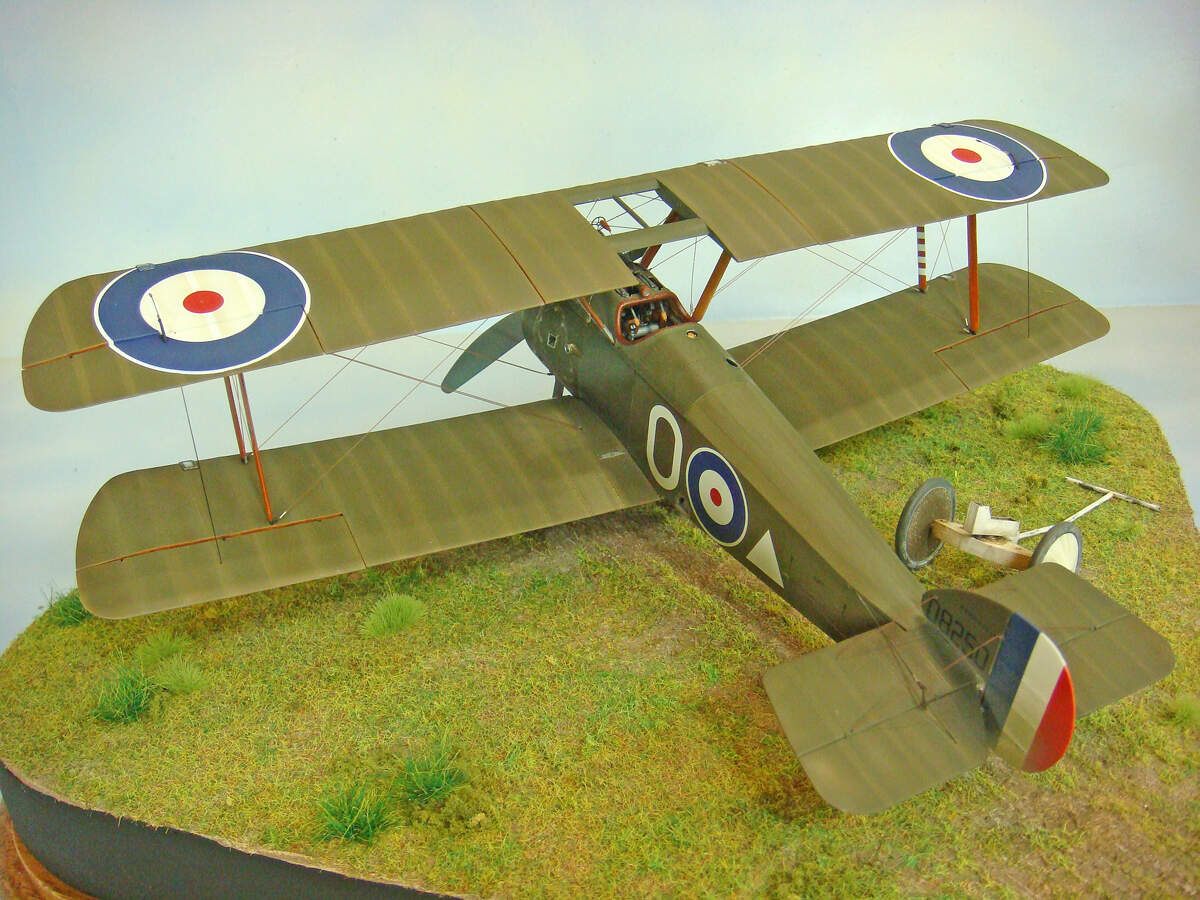
Here’re a few final “glamor shots.” I really can’t think of much to add. Perhaps a comment or two here or there, but most of these are self-explanatory or show details that have already been covered earlier in the thread.
I will note in these first two that I really just wanted to see the plane up on the tailskid dolly before I permanently attached it to the base. Sorry about the cluttered background (but maybe better than no photo at all of this feature… LOL!) The dolly itself came out pretty well. I’m pleased with it.
The rest of these are in a bit of a random order. Hope you enjoy them just the same.


Everyone I talk to about building this always asks or makes a comment about all the cockpit detail and they wonder if it can be seen after the model has been finished. So, I’ll let you decide for yourself.
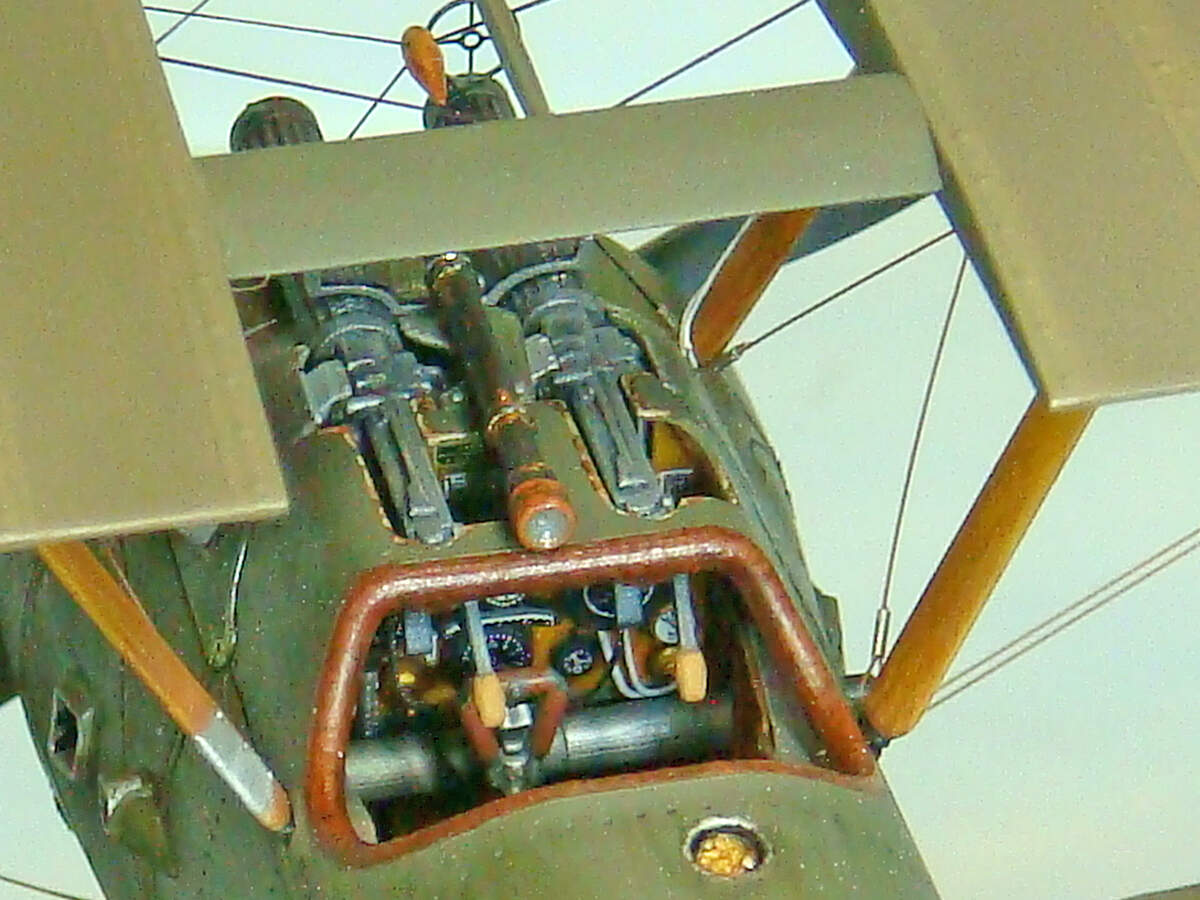
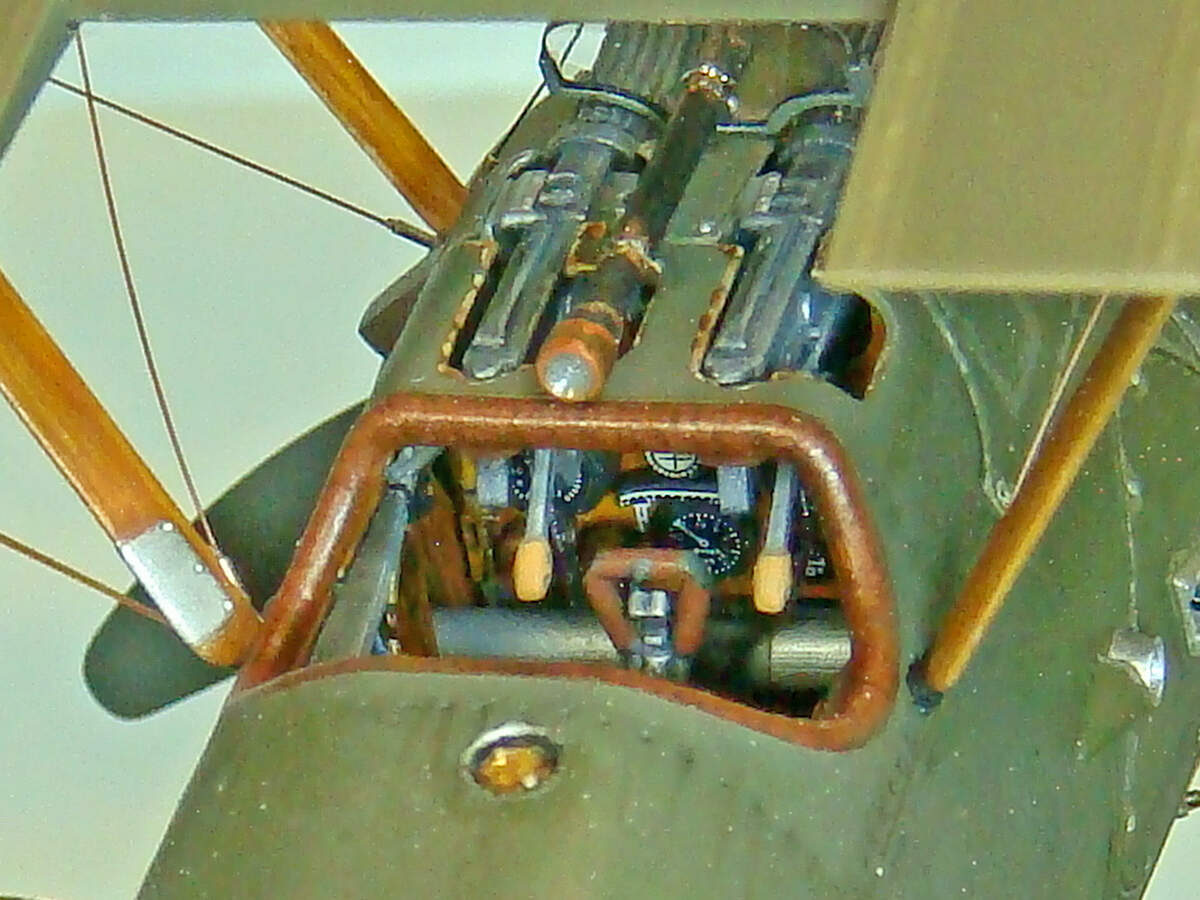
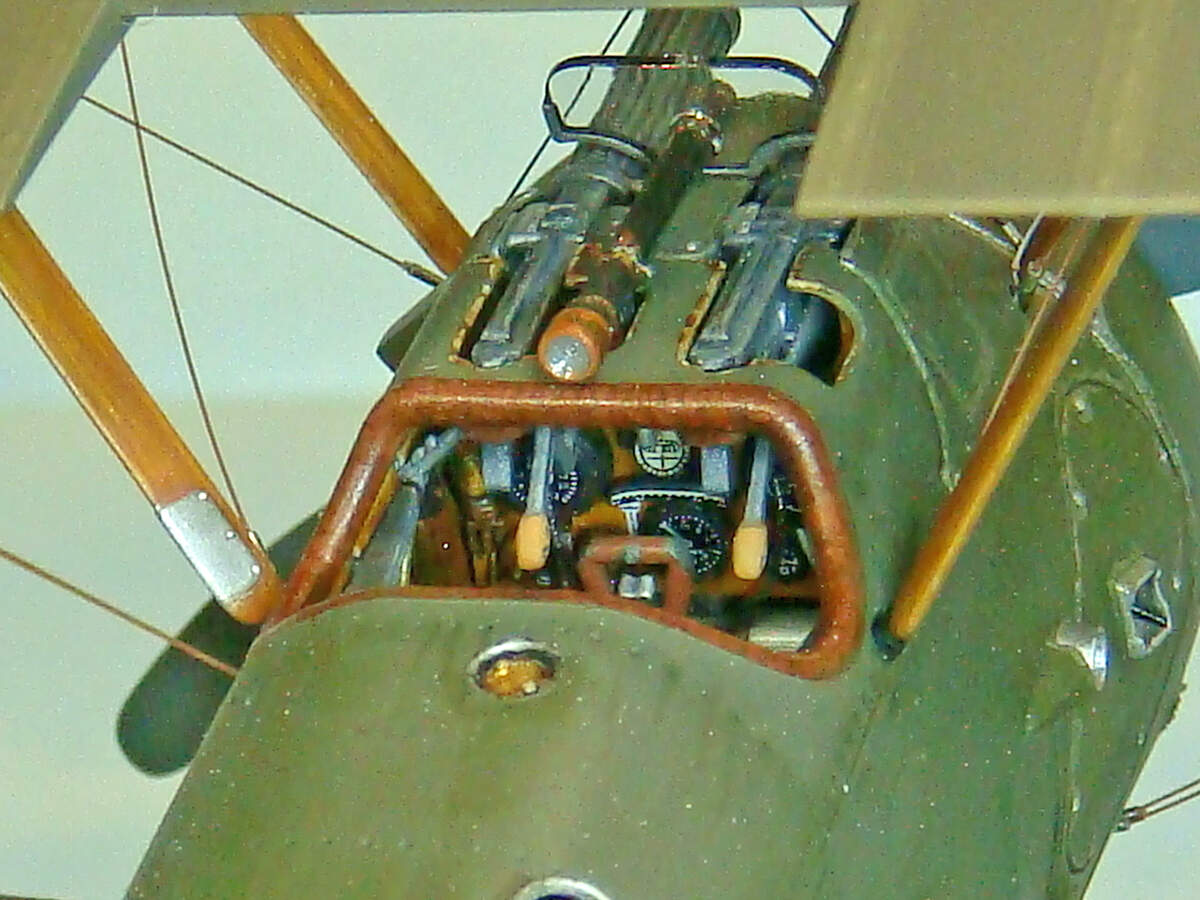
Of course, the seat detail is easy to see just by looking straight down into the cockpit. Plenty of photos of that already.


My final thoughts? What’s left to say about the WNW Sopwith F.1 Camel that hasn’t already been said by many other builders and reviews before me? Not much, I can tell you.
The kit lives up to its well earned, well deserved reputation for detail and fit. It’s actually a lot easier to build than I expected. In particular, WNW’s efforts and attention to those things that really help the modeler, like molding in small “divots” to locate all of the rigging wires, were really (REALLY!) appreciated!
I don’t have much other aircraft modeling experience to compare this build with, and I’m really not qualified to opine on how this kit measures up to some other Camel kits in 1/32. Suffice it to say, though, that I wouldn’t hesitate to build another if my modeling muse motivated me to tackle another Camel.
10 Likes