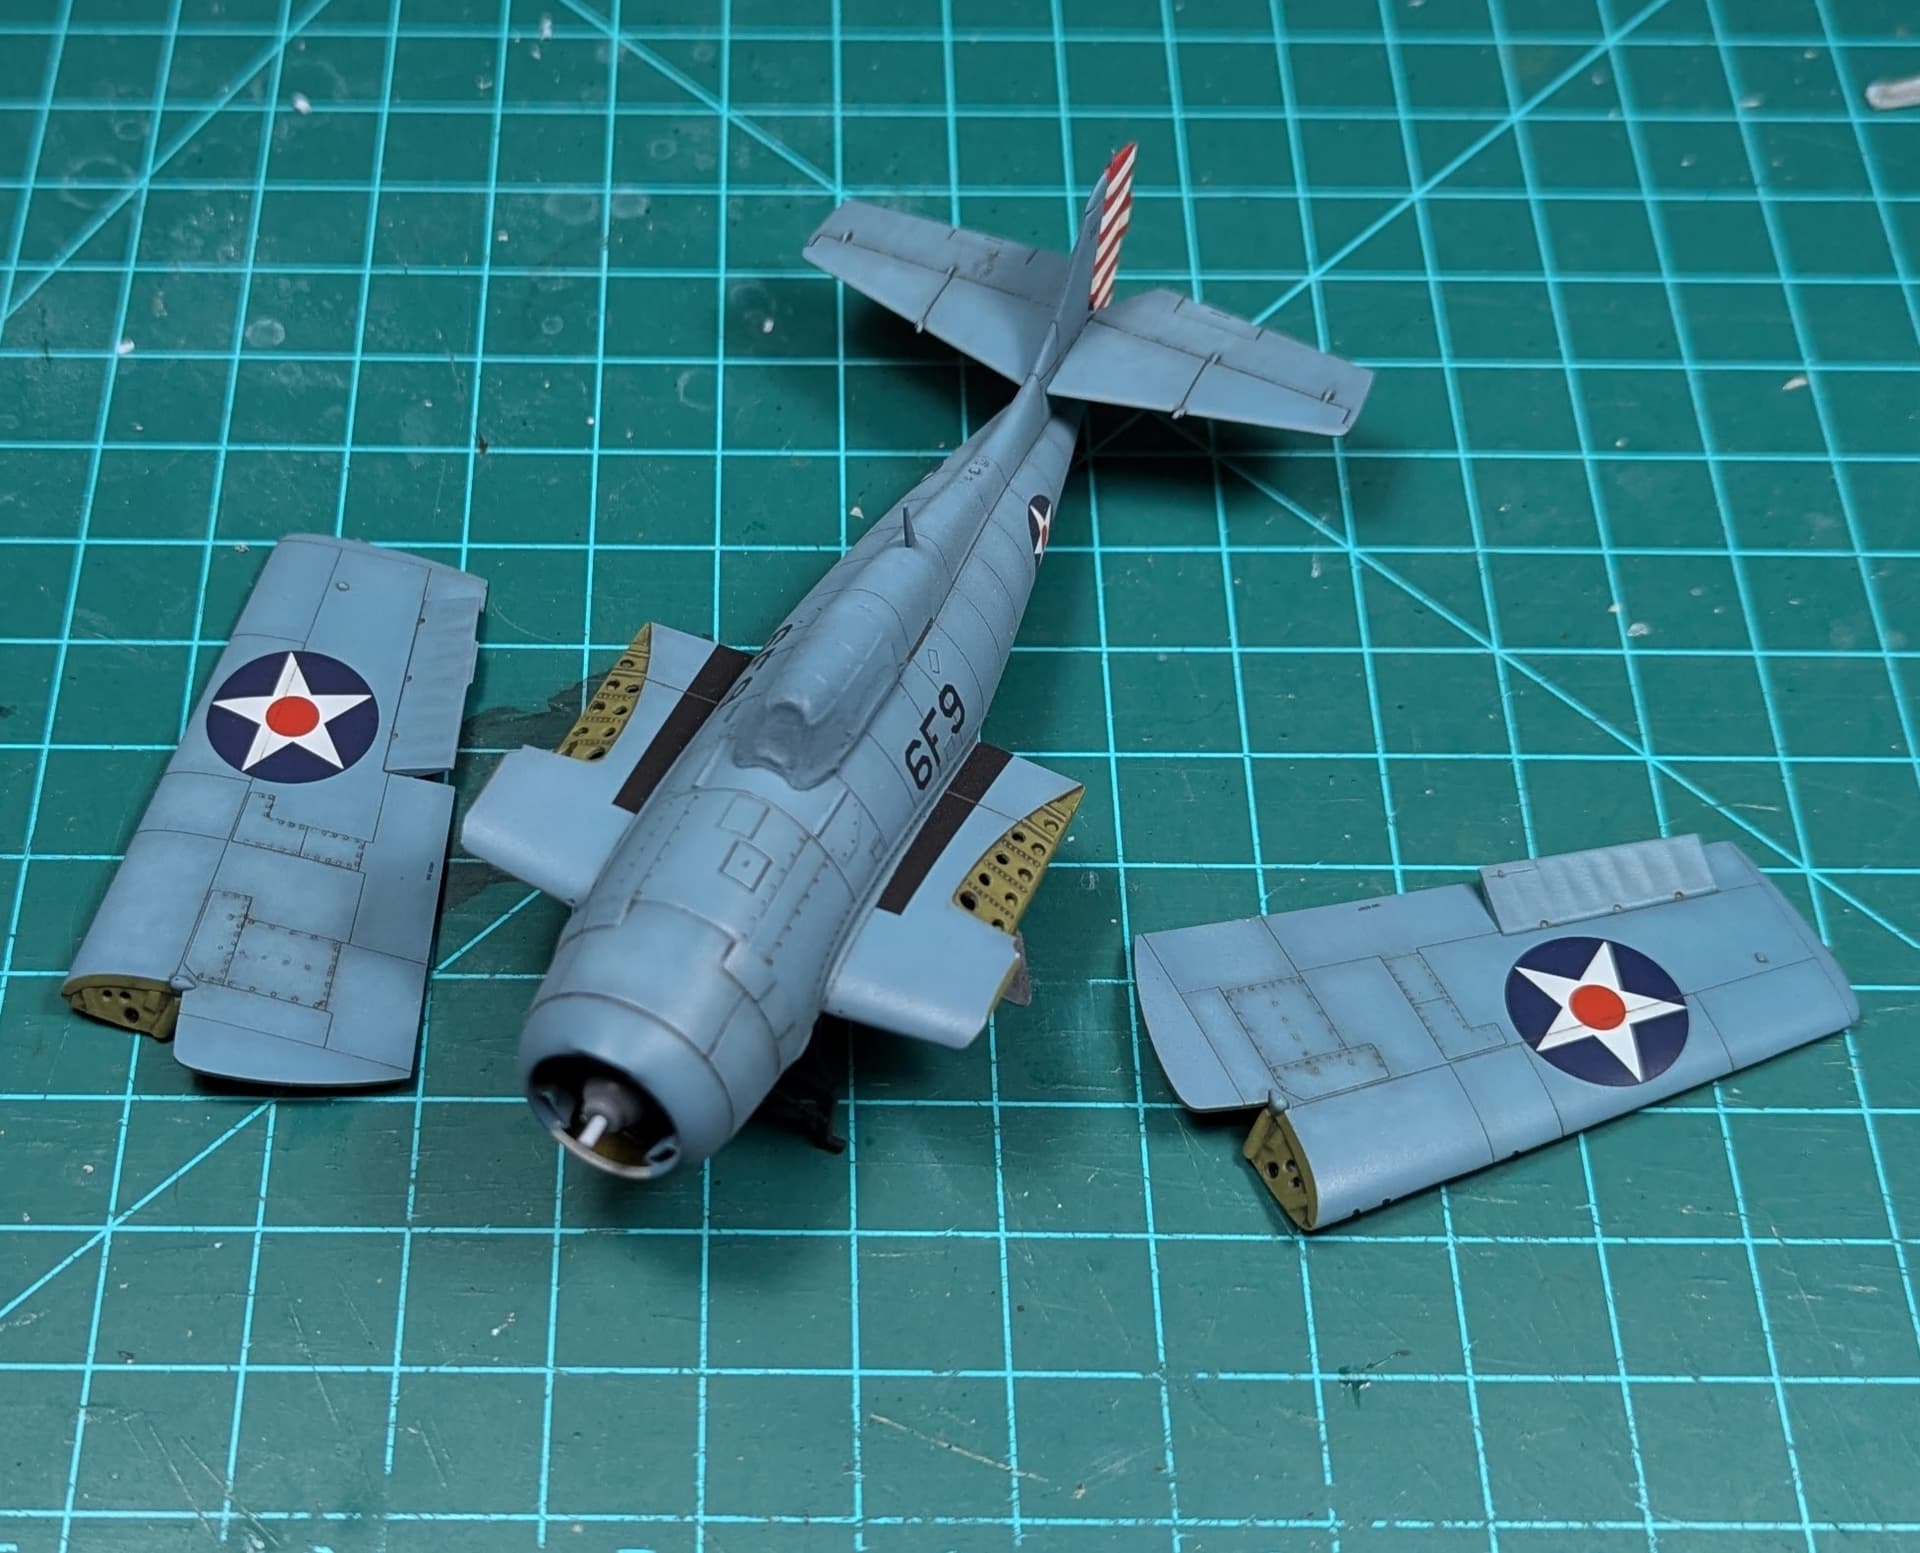
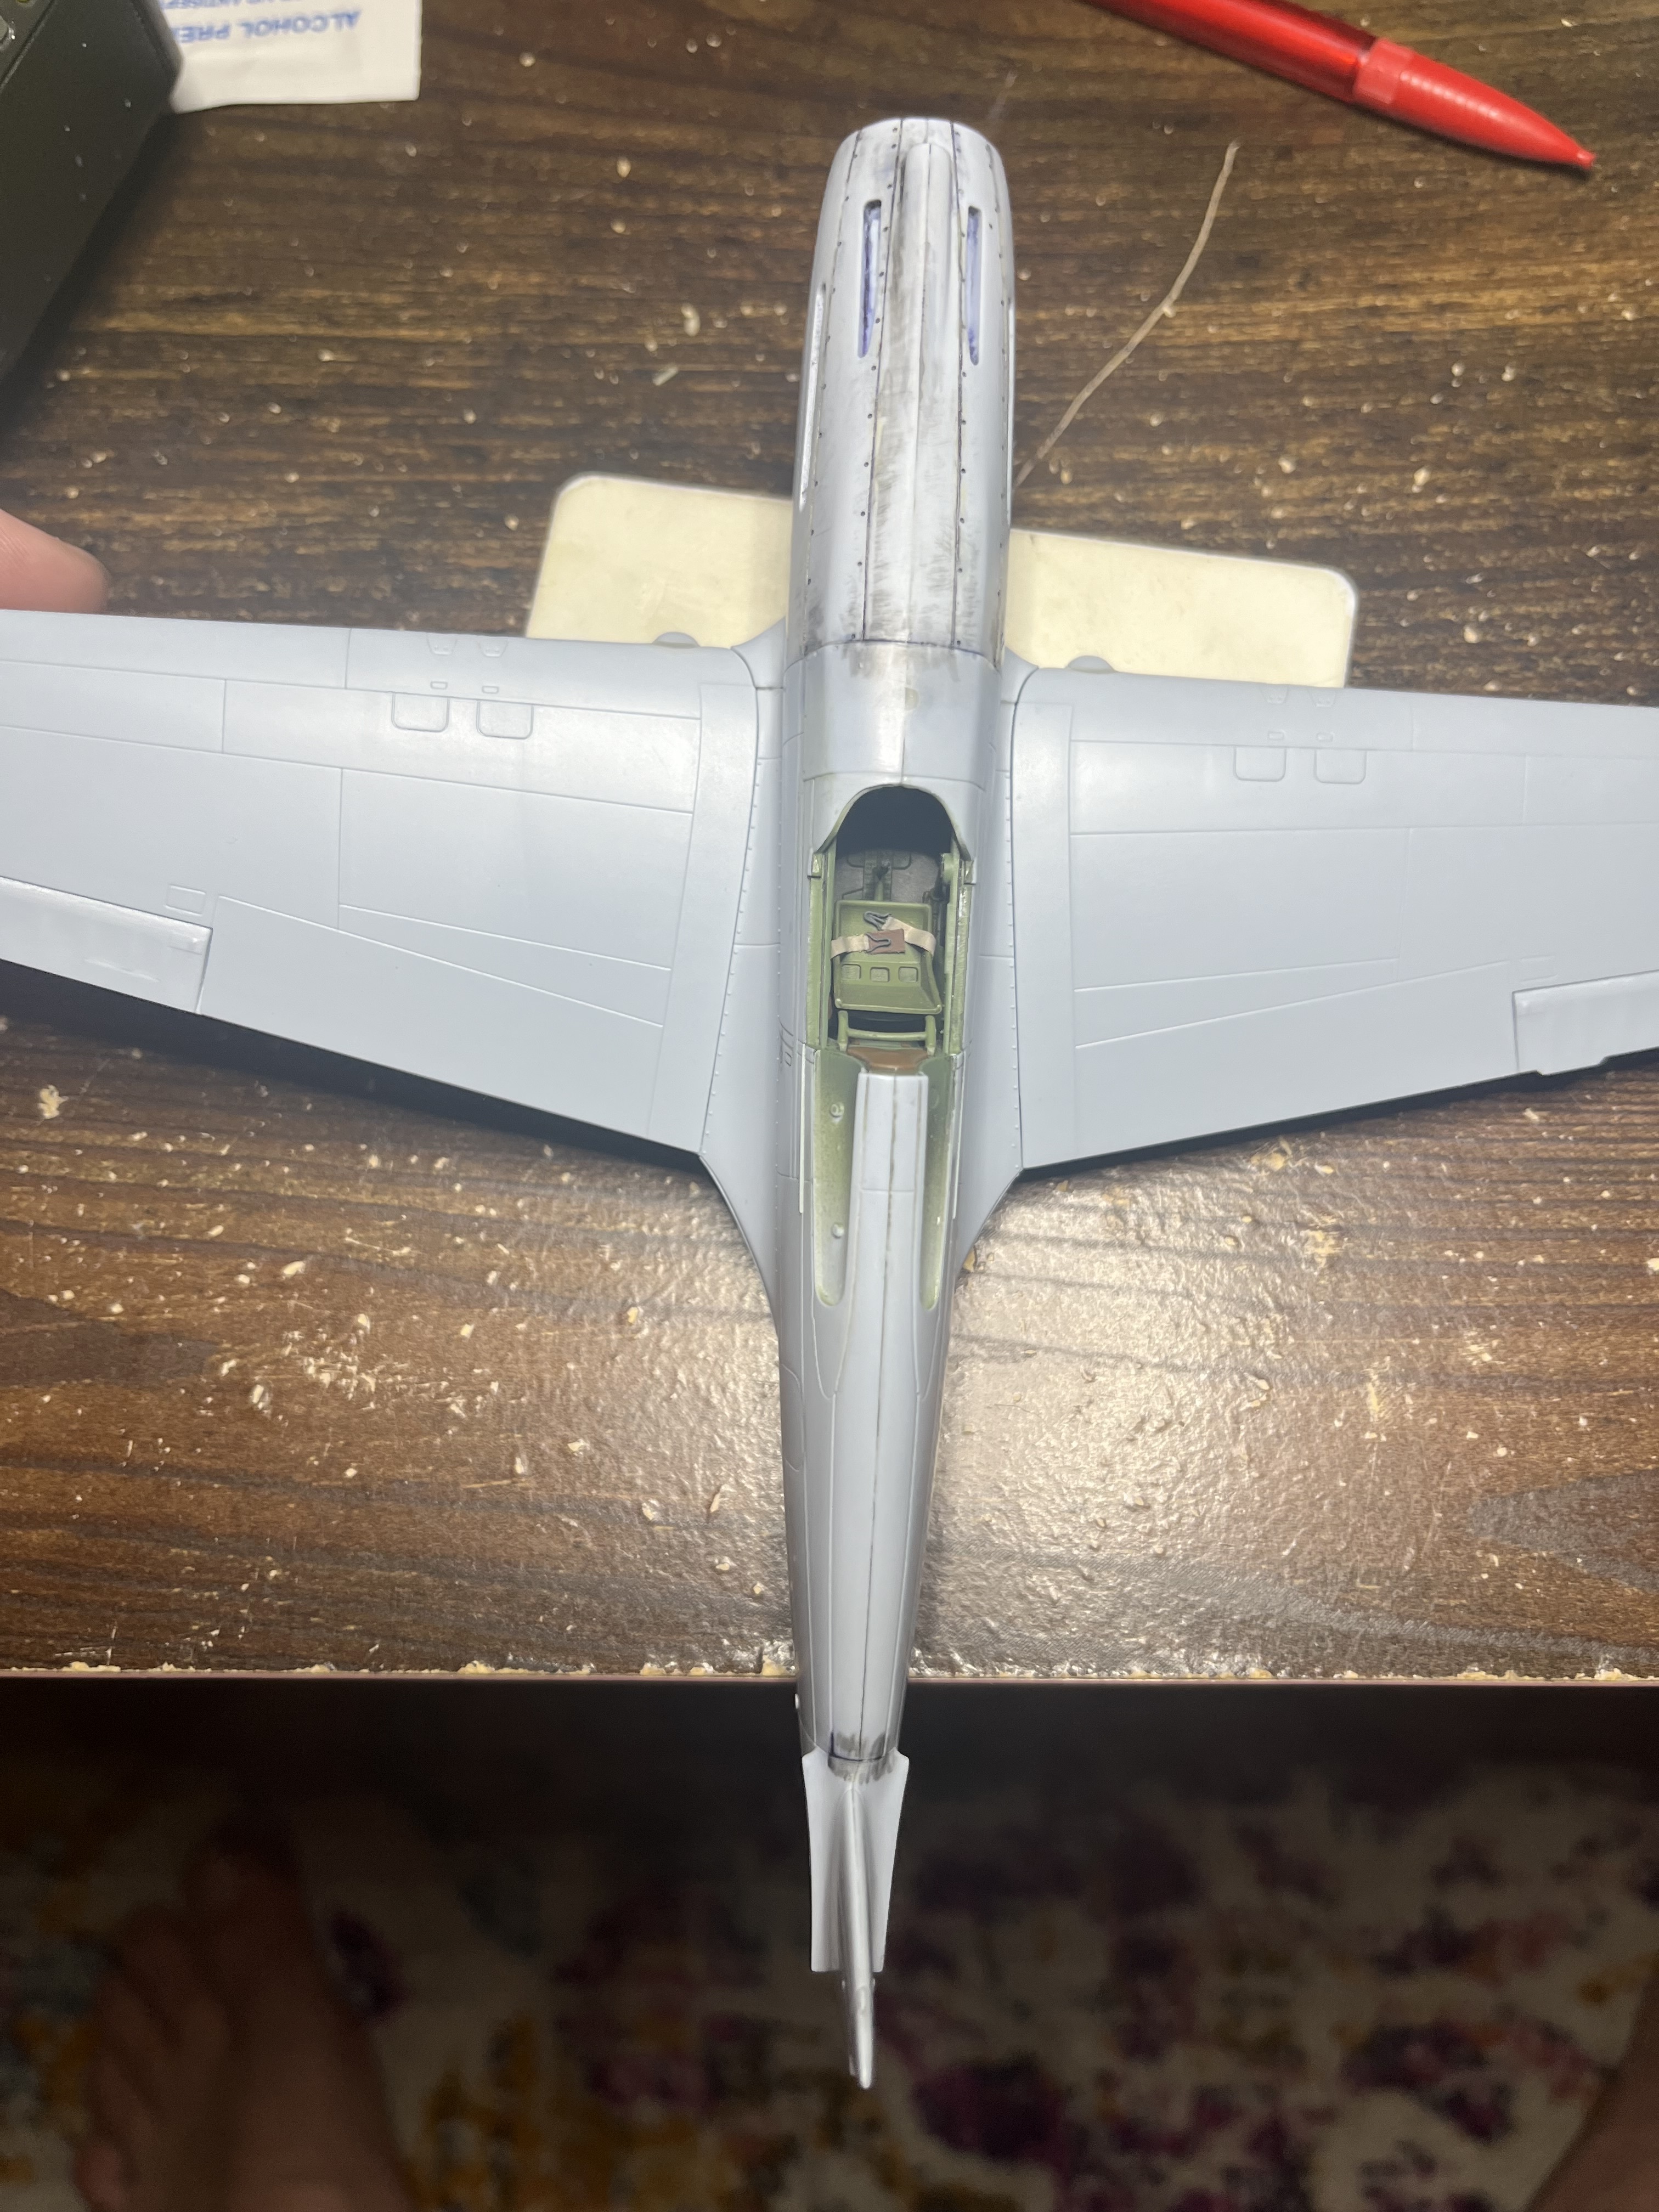
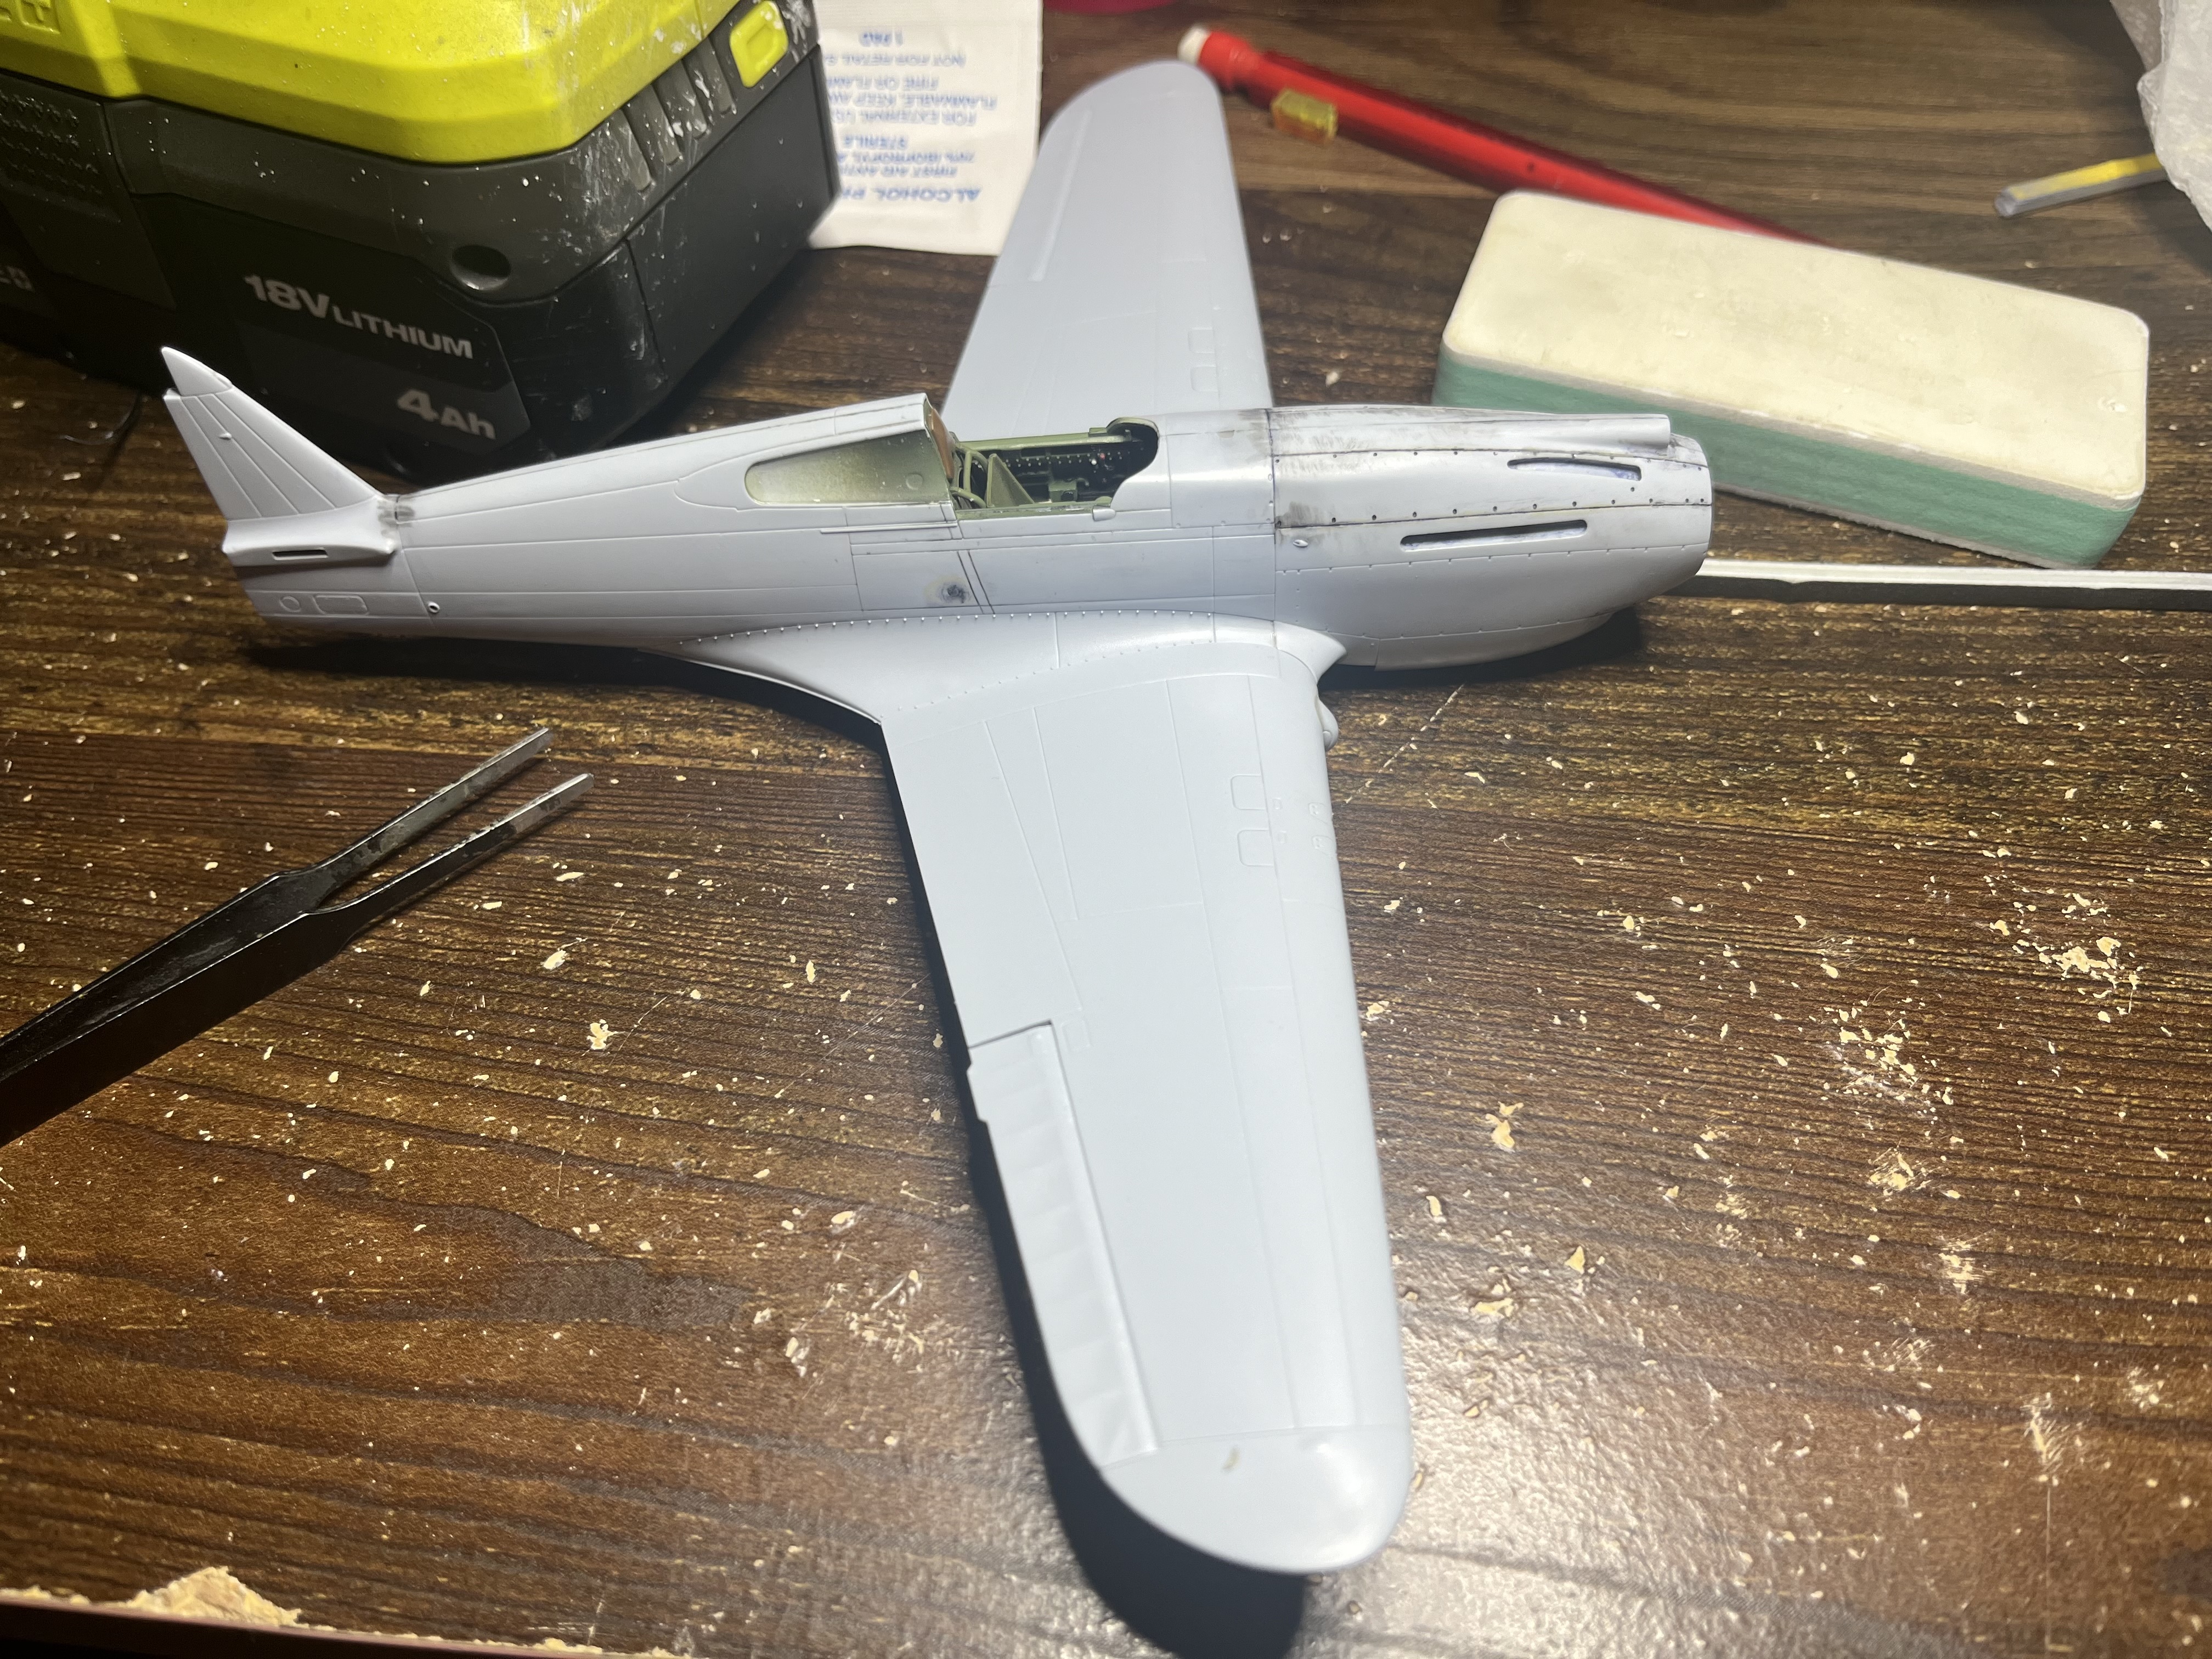
Here’s where my Wildcat stands. I’ve only got some weathering to do and it should be ready for final assembly. I drilled out all the lightening holes on the wing fold area and painted the rudder instead of using the decals provided in the kit.
10 Likes
A bit fiddly and the resin i used can be a bit brittle for such small parts, bit getting along slowly.
I replace the resin pins with 28g wire which holds them better
Only another 188 to go

6 Likes
Did you need to clear-drill them, or did the holes print OK?
1 Like
The holes printed ok. I think the brittlness was because i overcured them. Will try less next time
1 Like
Excellent build and finish Jesper.
1 Like
Looks great Lucas. I like the wing detailing for the folds and the colouring is faded well.
2 Likes
Update on my Trumpeter KV-1 Build
Sorry for the very long delay, but sometimes life gets in the way of building.
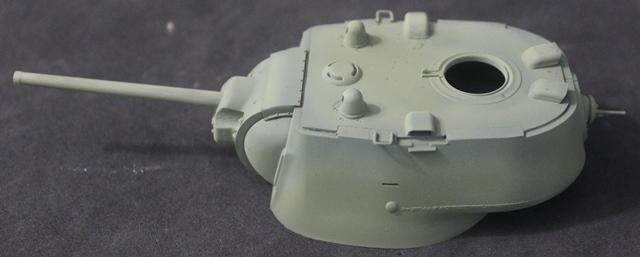
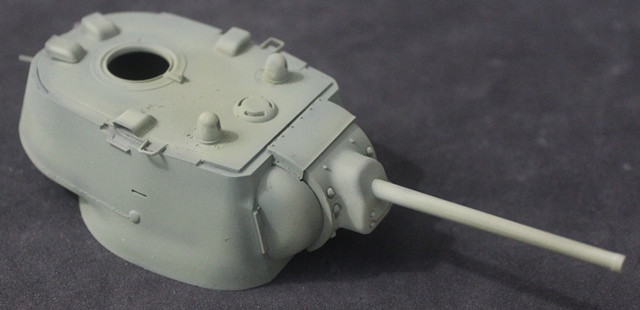
The turret came together with no issues and the weld marks Trumpeter added to the turret surface looks great with a thin coat of paint. I’ve pre-shaded the turret and hull for this build and, while I still need a bit more practice to master this, it turned out okay for this build.

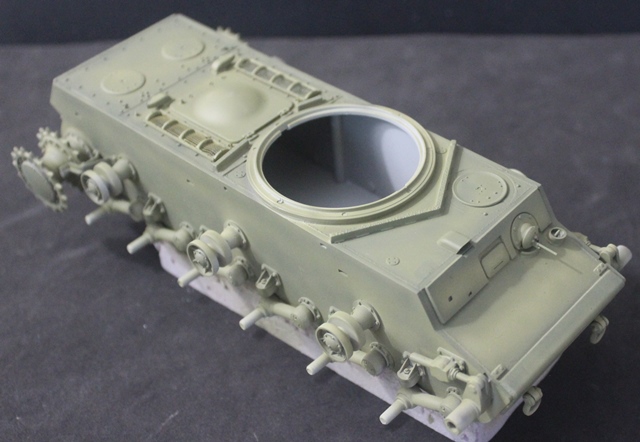
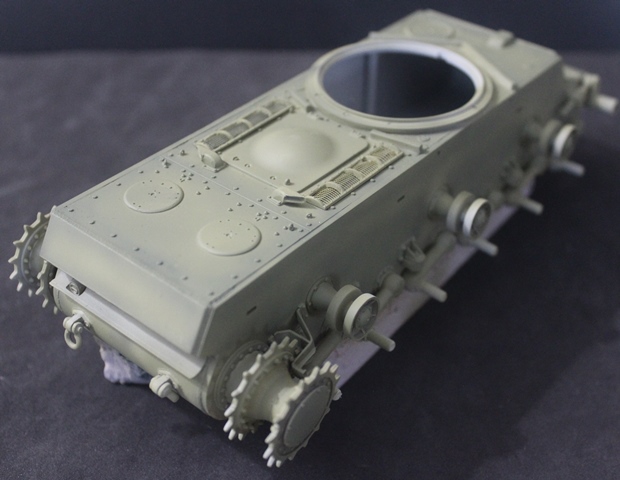
Trumpeter provides a nice hull with some very nice, delicate detail, though modelers who study photos for their builds will want to add some small touches to the upper hull to make this a bit more accurate. Trumpeter provides solid air vents for both the left and right side with a decent looking molded in screent, but I wanted to try and give it a better appearance. So, I carefully removed the molded in air vents while leaving the thin cross braces in place and added photo-etched screen. Looks a little rough, but perhaps later in the finishing process, I can help them along to look a bit more convincing.
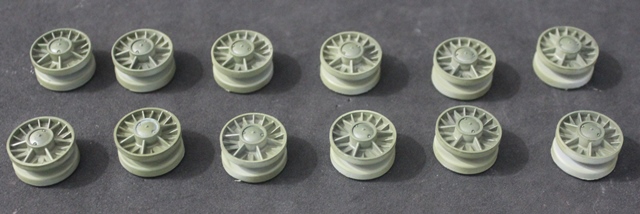
Road wheels have very nice detail and are ready for some pin washes now that it’s got a coat of semi-gloss clear coat.
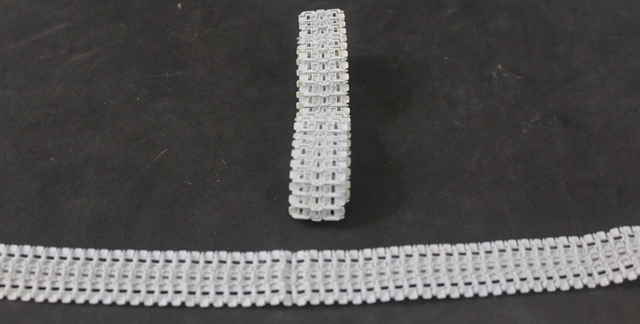
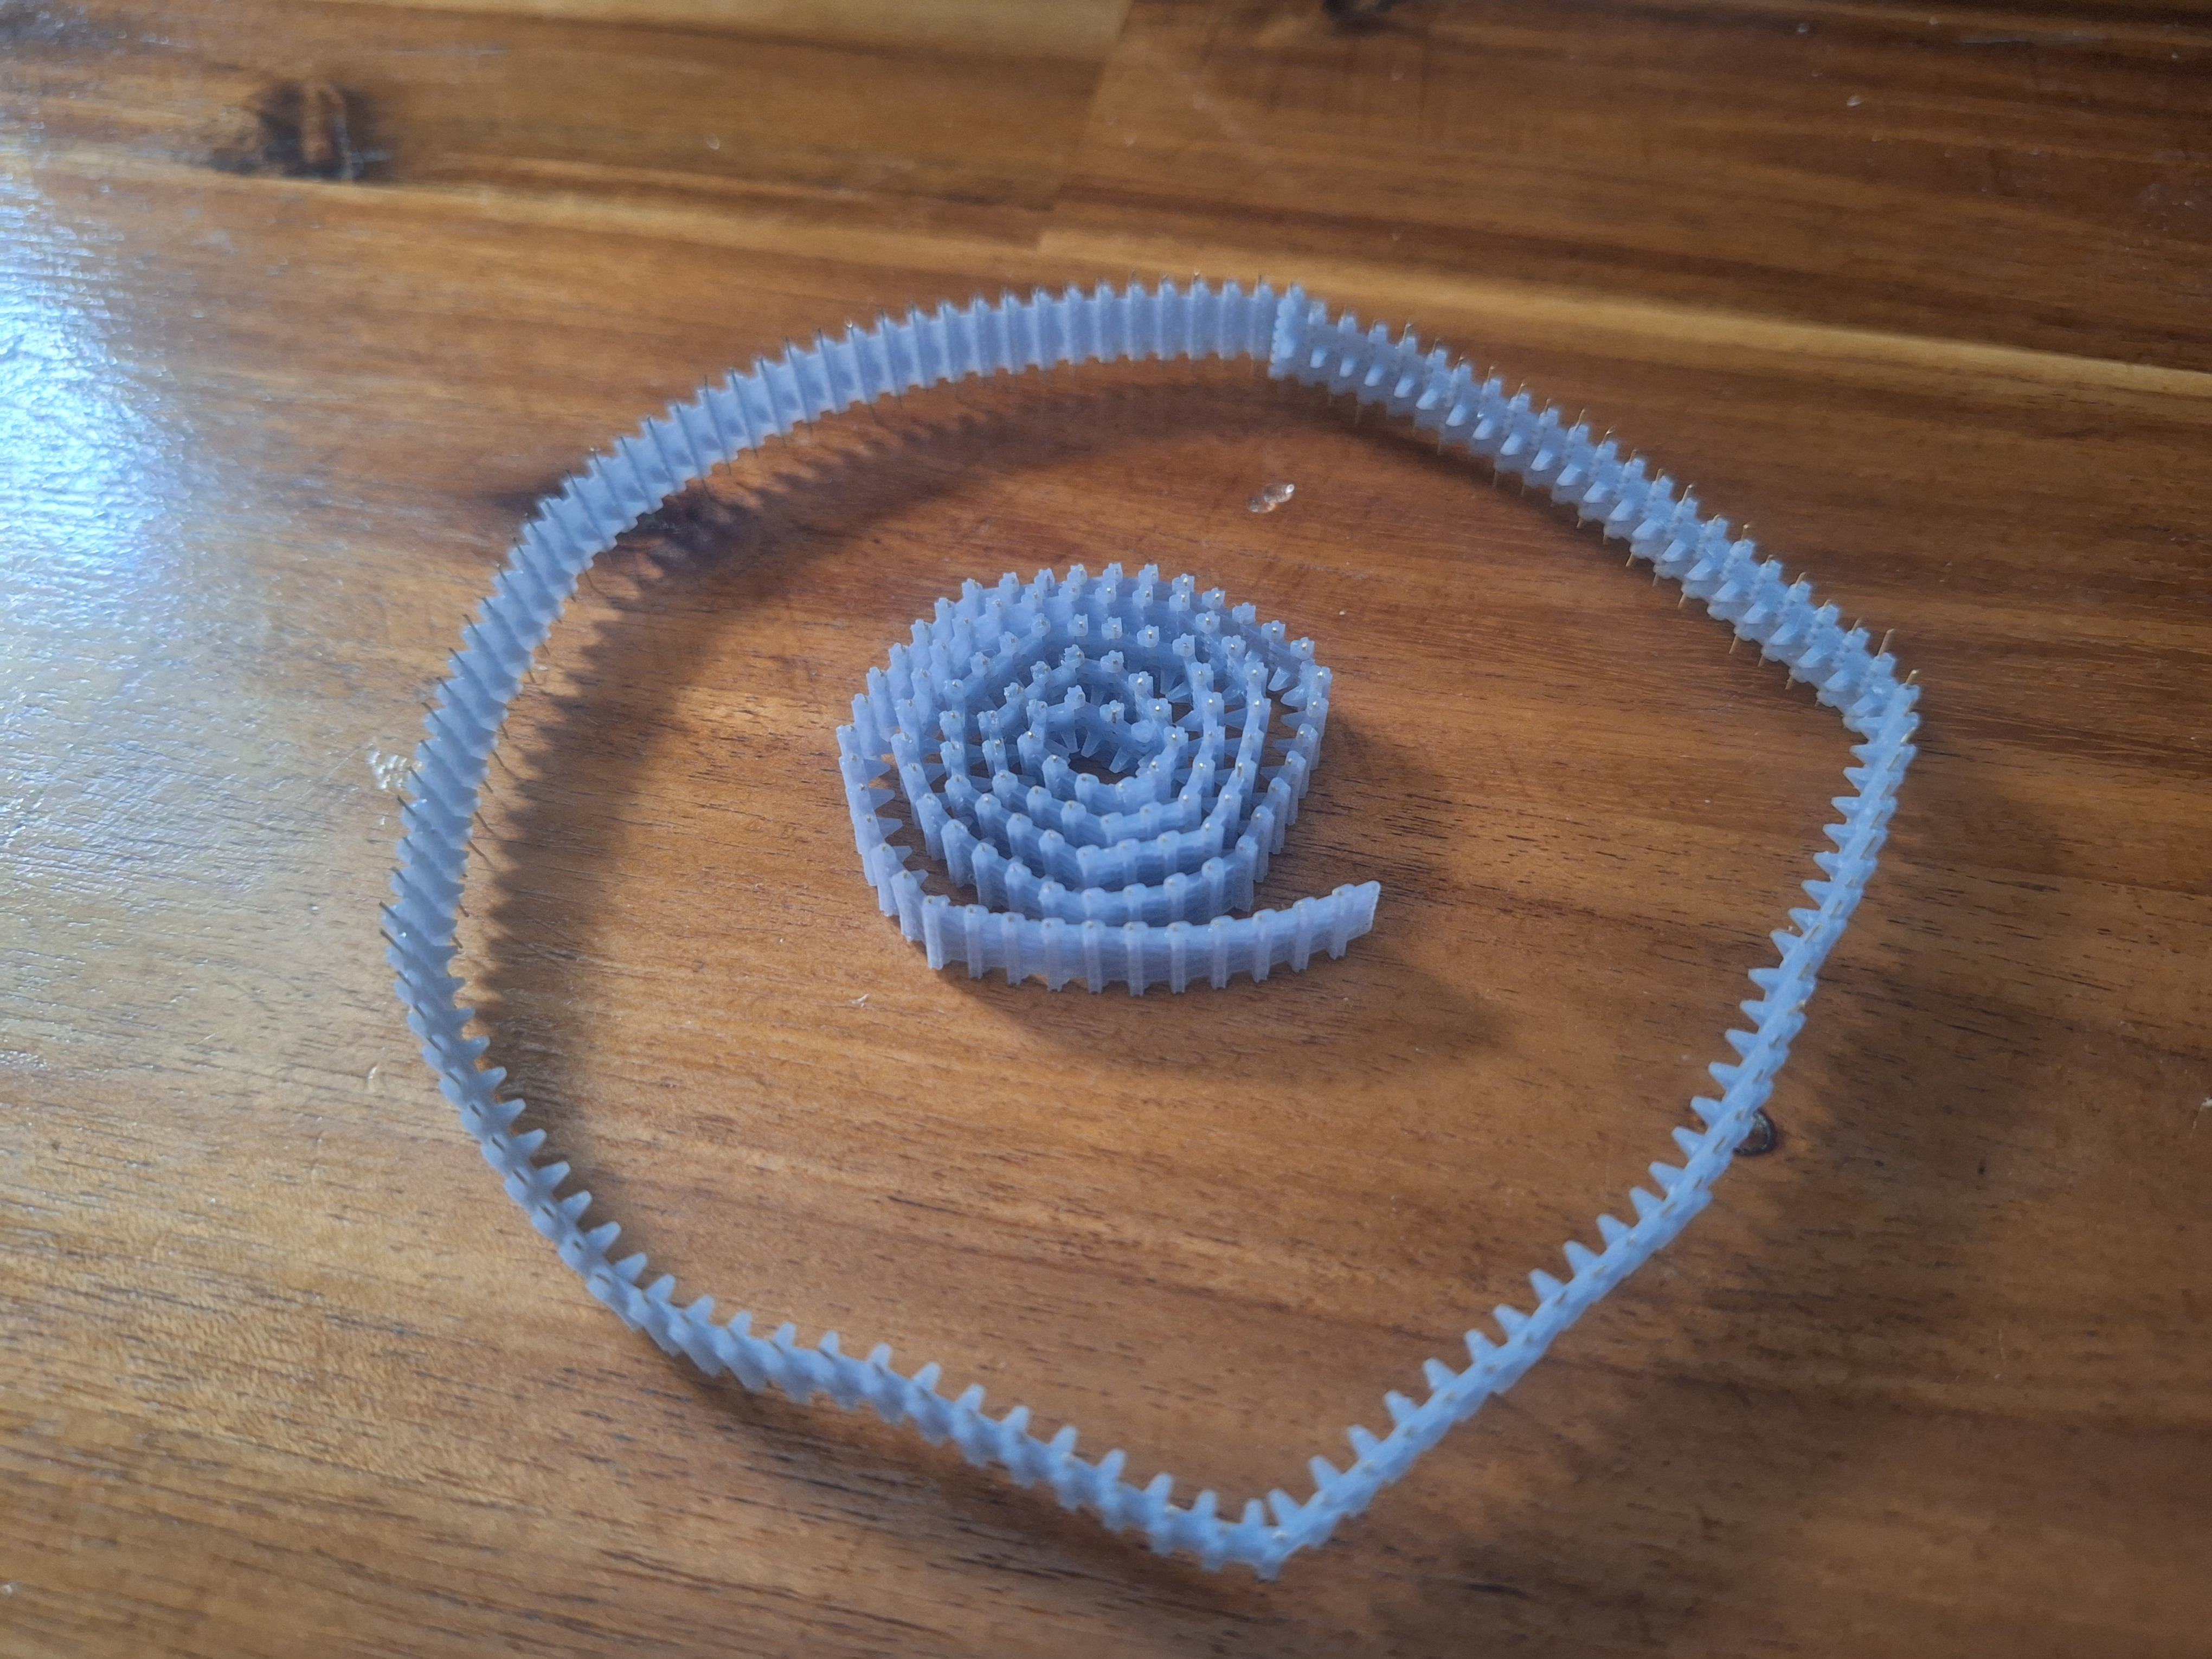
Finally the tracks. I wanted to up the game here on this one and added resin cast KV tracks from MasterClub. They look quite good and, while it takes tiny pins on each side to join the links together, it wasn’t as bad as I thought. Now it’s on to the weathering, then mounting the tracks.
The various builds throughout this campaign have been outstanding. While being exclusively an armor builder, I’m probably going to be buy some aircraft when this campaign is over. Any suggestions for a aircraft newbie? Probably looking at something WW2.
Cheers everyone.
chuck
P.S. Not sure if my Miniart M3 Lee will be completed for this campaign, but I’ll certainly try.
6 Likes
Now that nice progress. I see the rubber band. Was it not staying together?
chuck
2 Likes
It needed a bit of persuading around the front. There’s a lot of big chunky parts that fit into the fuselage and the tolerances are tight. Some trimming was on the back side of the instrument panel too. Good kit, but like a lot of Airfixs new kits, you do need to test fit every internal part and trim if needed.
1 Like
That is turning out really nice. Next Airfix Wildcat I do, I’ll do wings folded!
2 Likes
Great work on the Crusader. I admire your dedication in creating and printing your own tracks!
1 Like
Ok, I’m calling my Wildcat done. Putting the wings on was not easy because the parts did not have positive locators to aid in placement. It took me about 30 minutes to get them properly aligned and positioned. I kept the weathering light since these birds were relatively new in early 1942 and this particular one was on a carrier.
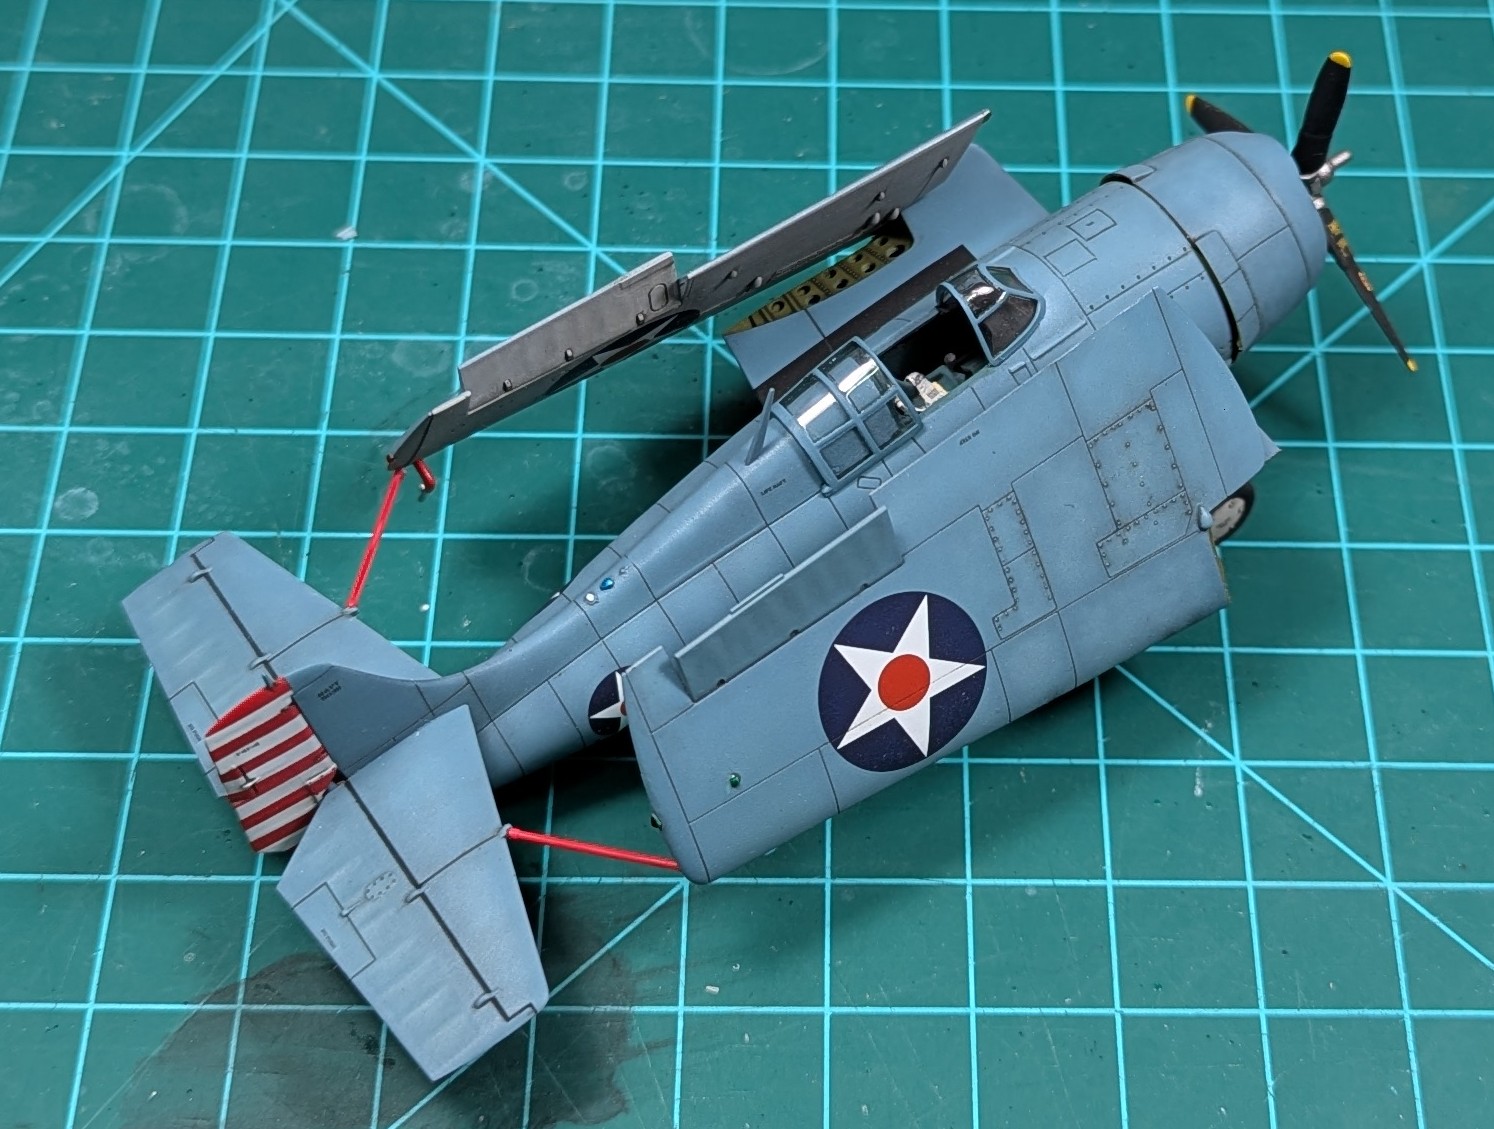


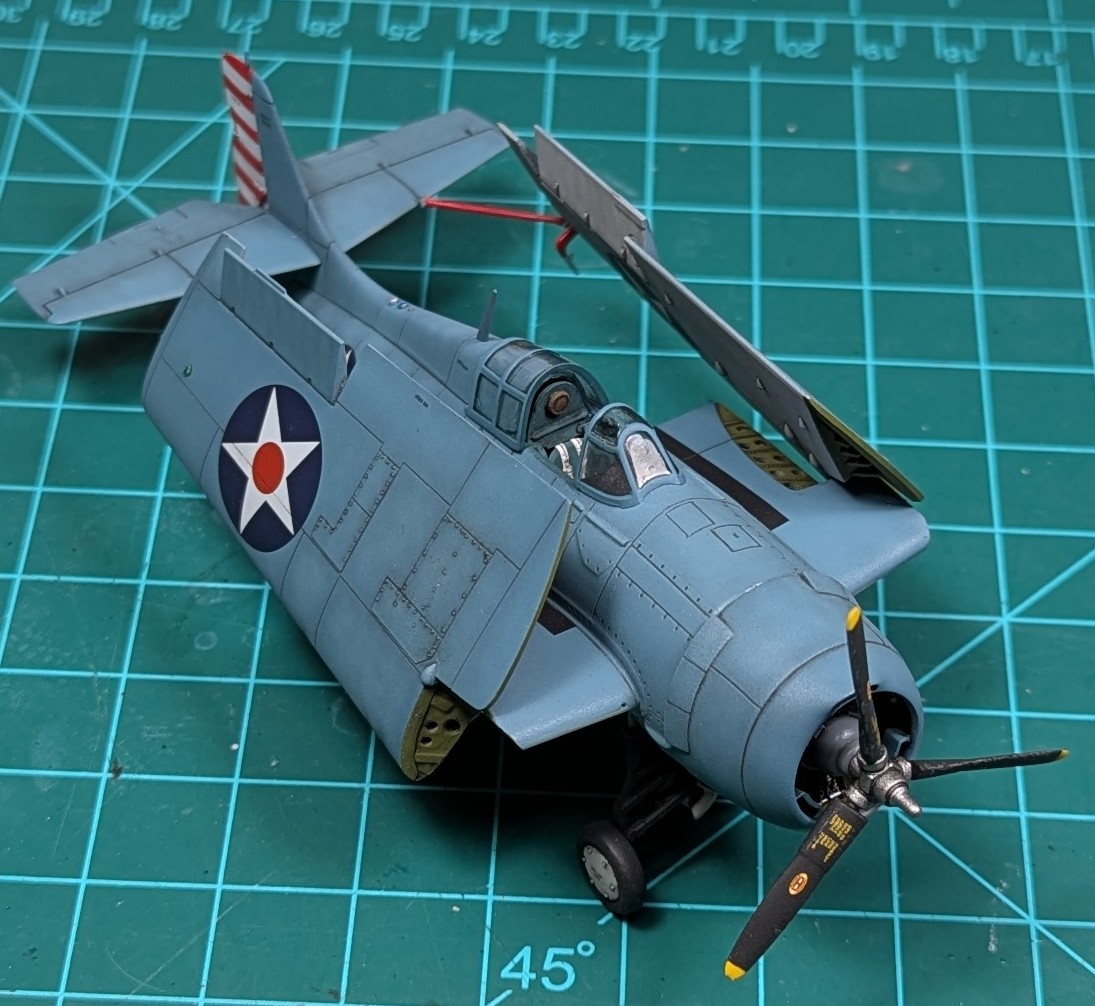
I accidentally stressed the sliding canopy and left a small stress mark (not quite a crack) near the rear center area, but it’s hard to see, thankfully. Overall, I liked the kit. The only trouble I had was fitting the wings, and I guess the undercarriage parts needed a lot of test fitting and sanding to fit nicely. Otherwise, it was a fun build, particularly for someone like me who mainly builds modern jets and armor.
12 Likes
After several days of choice swear words, several changes of specs and a minor breakdown, the tracks for the cruiser are done
Got the basecoat on the vehicle as well. Bit of detail painting and it should be done
5 Likes
Looks great Lucas. Congratulations on finishing.
I had a similar problem with the canopy on mine. It doesn’t quite sit right. I think it’s a little bit too thick so won’t settle on top of the fuselage properly.
2 Likes
Thanks! I agree, I think the thickness is an issue.
2 Likes
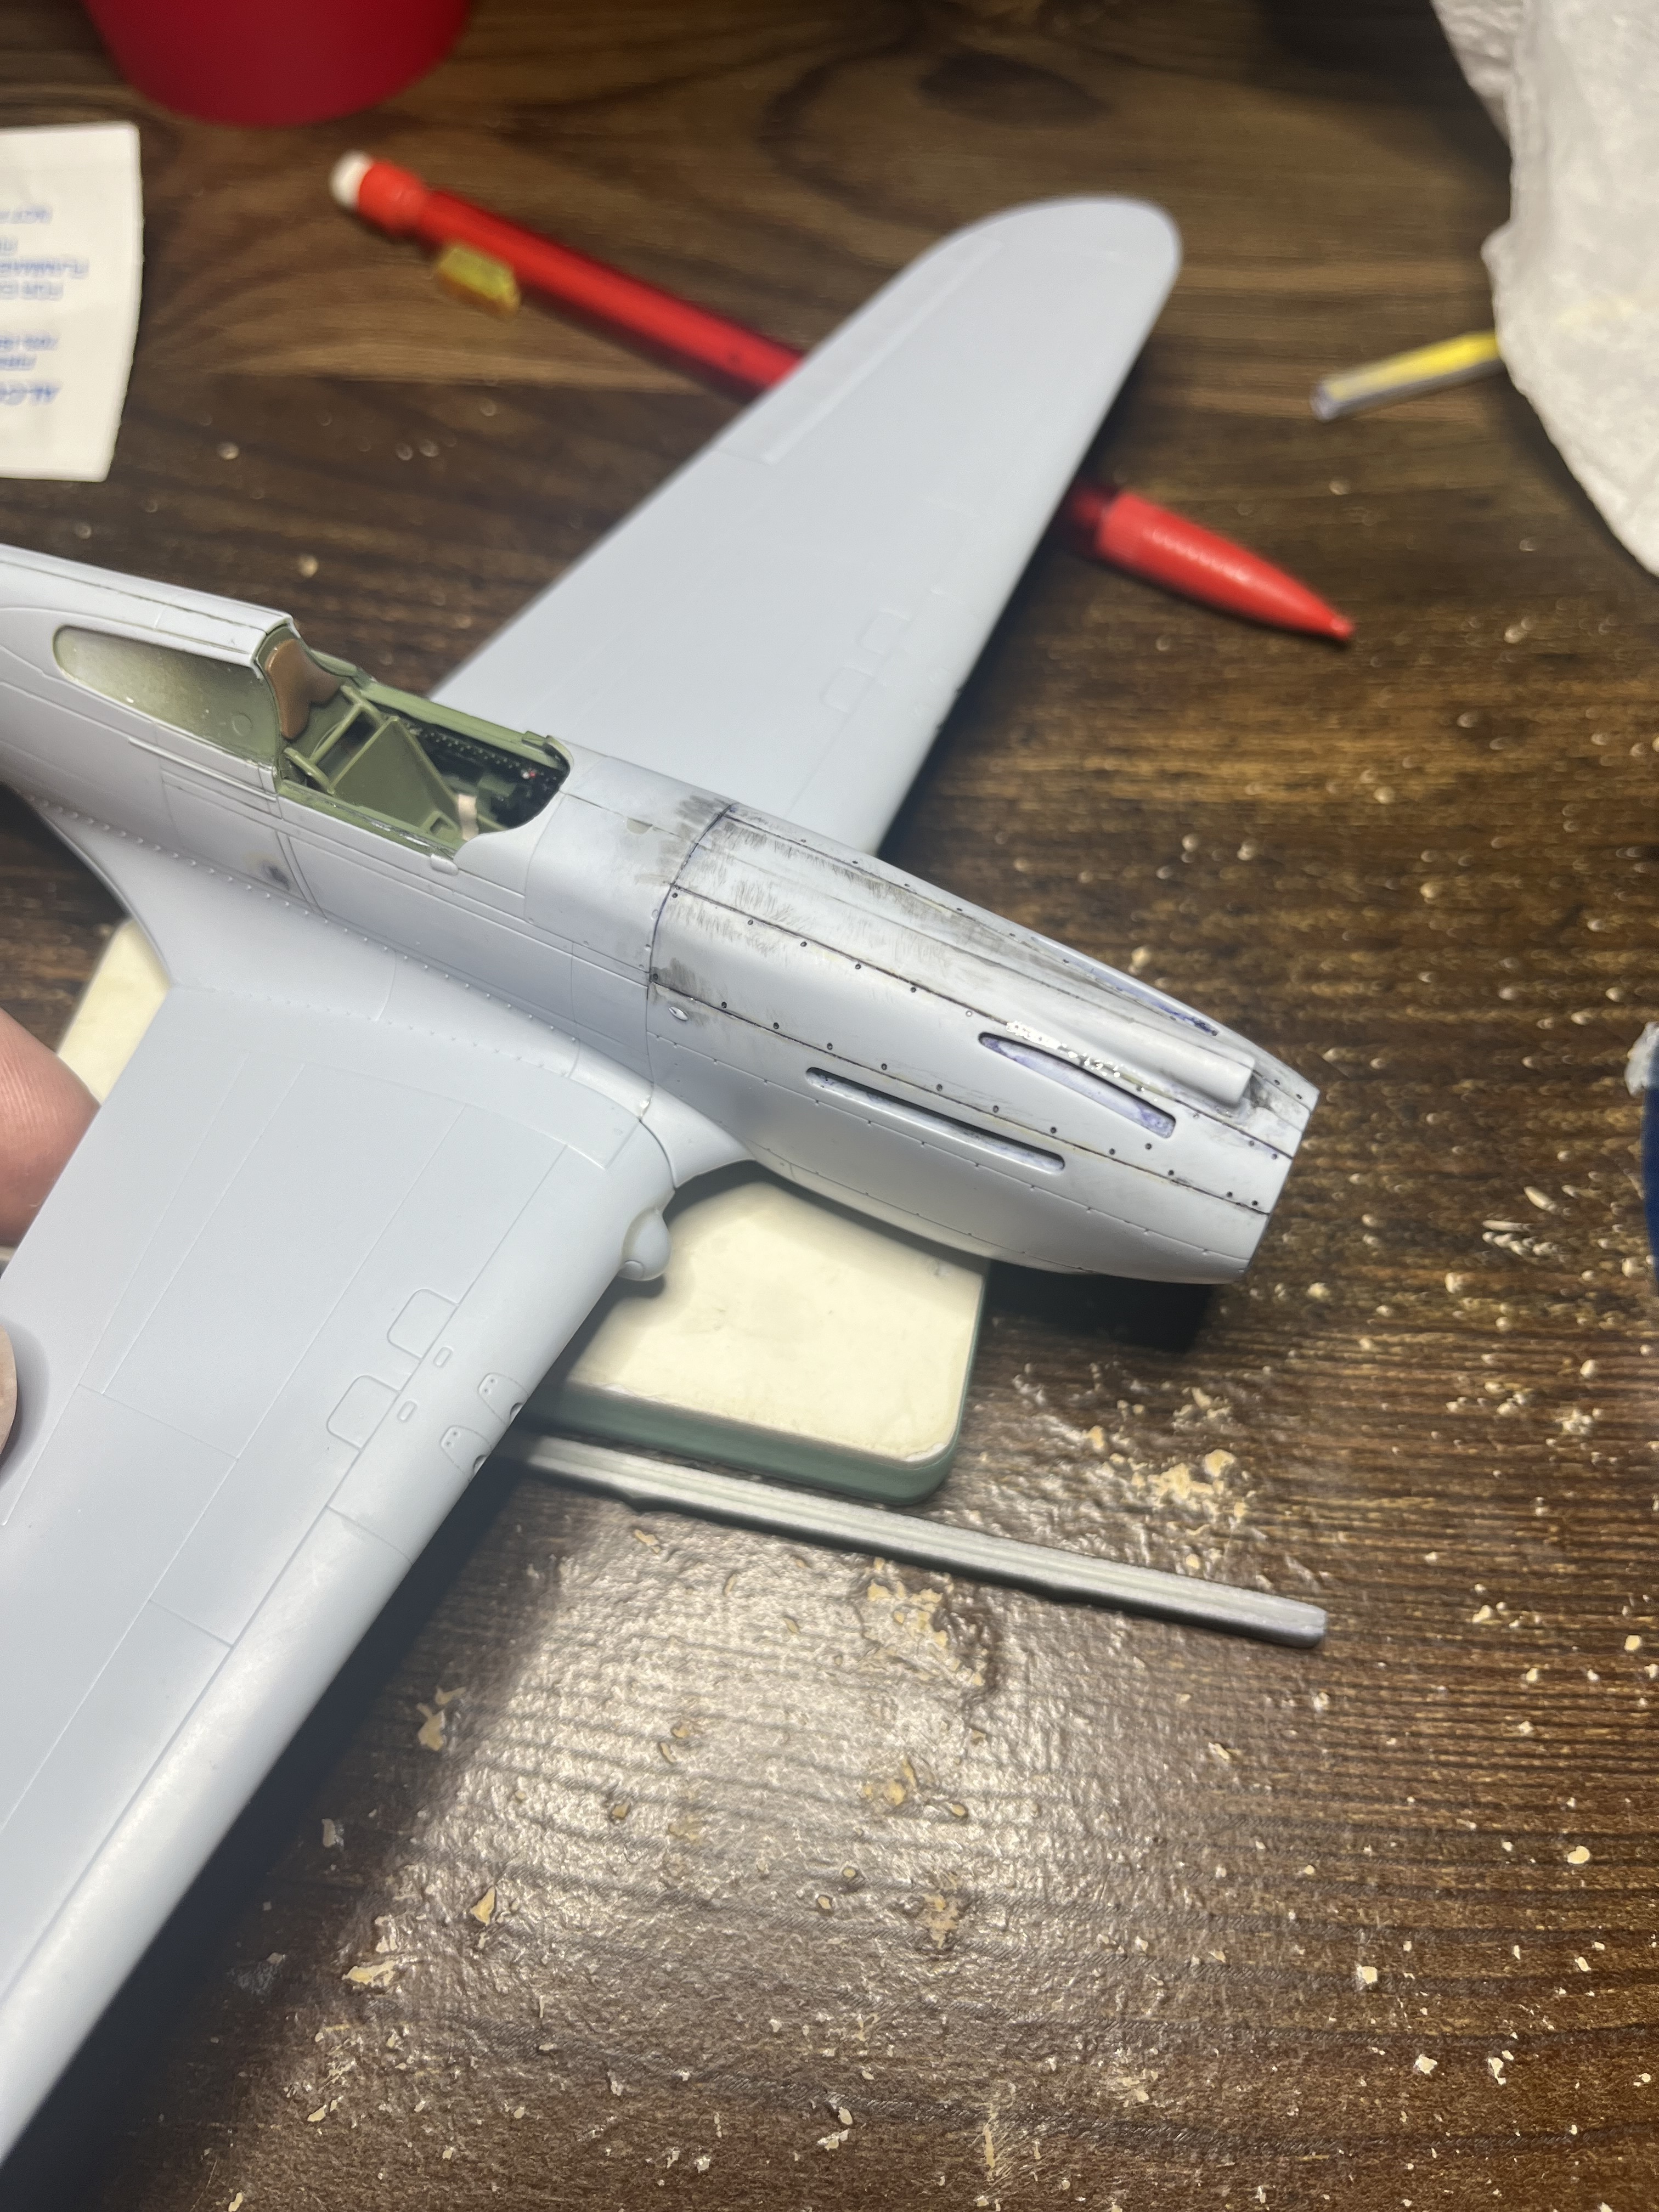
Been a while since I’ve updated. Overall the airfix P-40 is quite nice. Just a couple annoying fits, the knuckles on the wings being the worst offender. These took some careful filling with sprue goo and then shaping with sandpaper
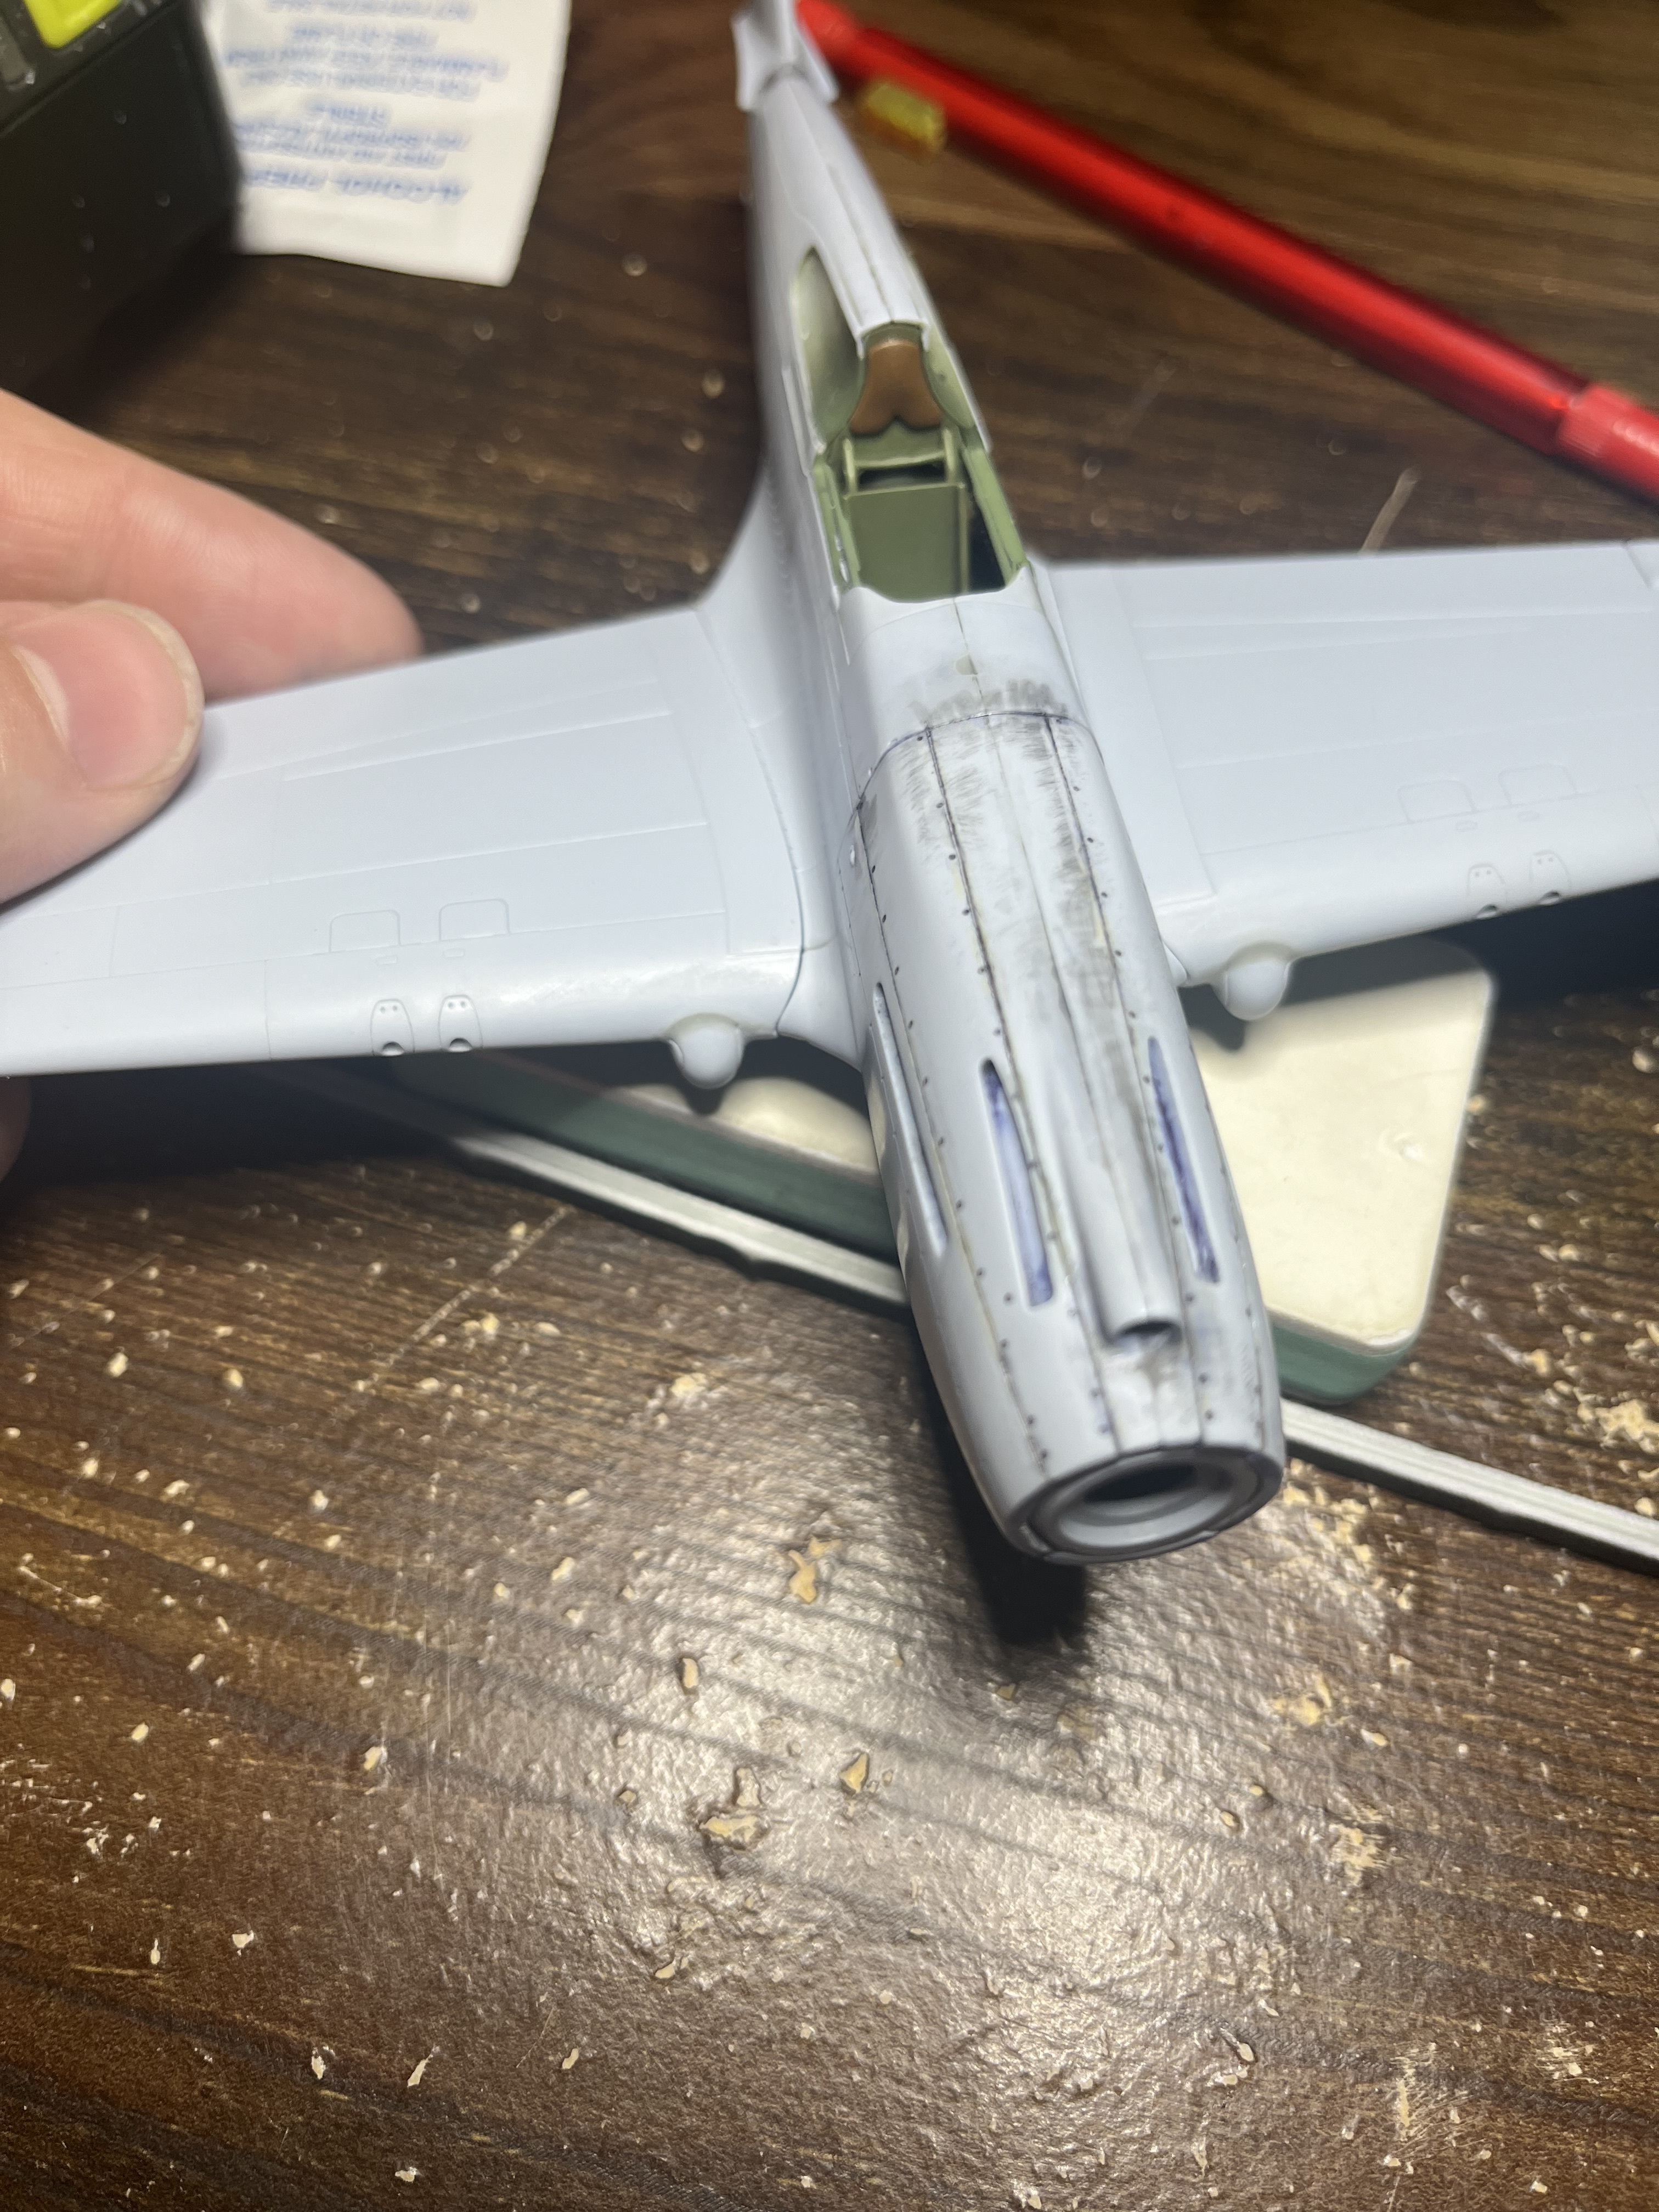
I also got the nose panels on, these fit decent but I ended up filling and scribing the panel lines as they were a bit wide with just the glue joint.
I still have to rescribe a small portion.
I have also dry fit the lower wing. The fit here is excellent. The way airfix did the wing root engineering is brilliant. Even dry fit there is almost no seam. With a little tamiya extra thing the fit should be marvelous
I think that is it for filling and poor fit. Should cruise through the rest of the build and be ready for paint soon
7 Likes
nice work mead. kit looks good. the only thing i see with the finished kits i seen is that the canopy doesn’t look right. it looks too big, toy like. i have one in my stash, thanks for the heads up on the knuckles and panels.
Joe
1 Like
hey guys when does this campaign end? seems like it’s been saying in 2 months for the last 3 months.
Joe
1 Like
1 January 2025 01:59
1 Like