I like it.
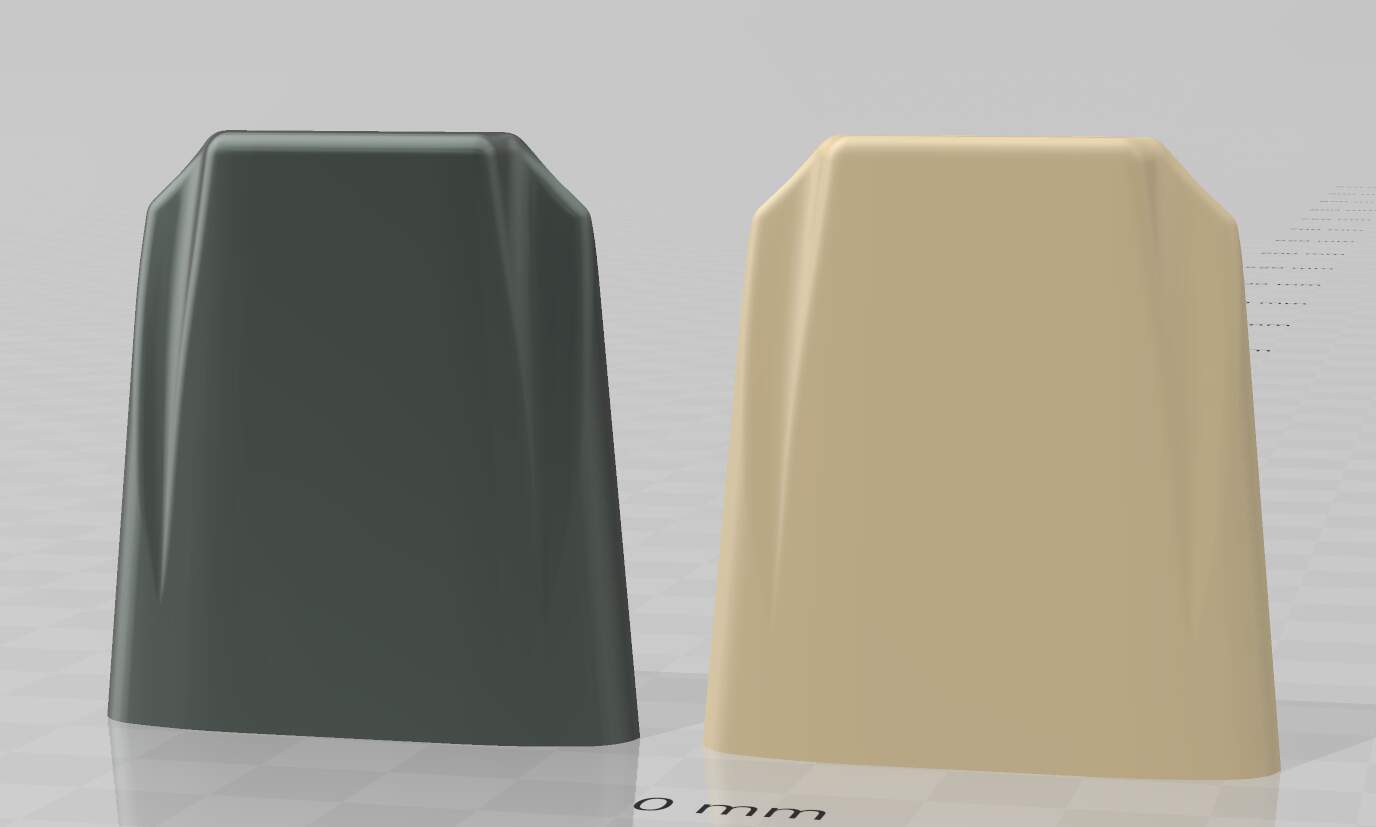
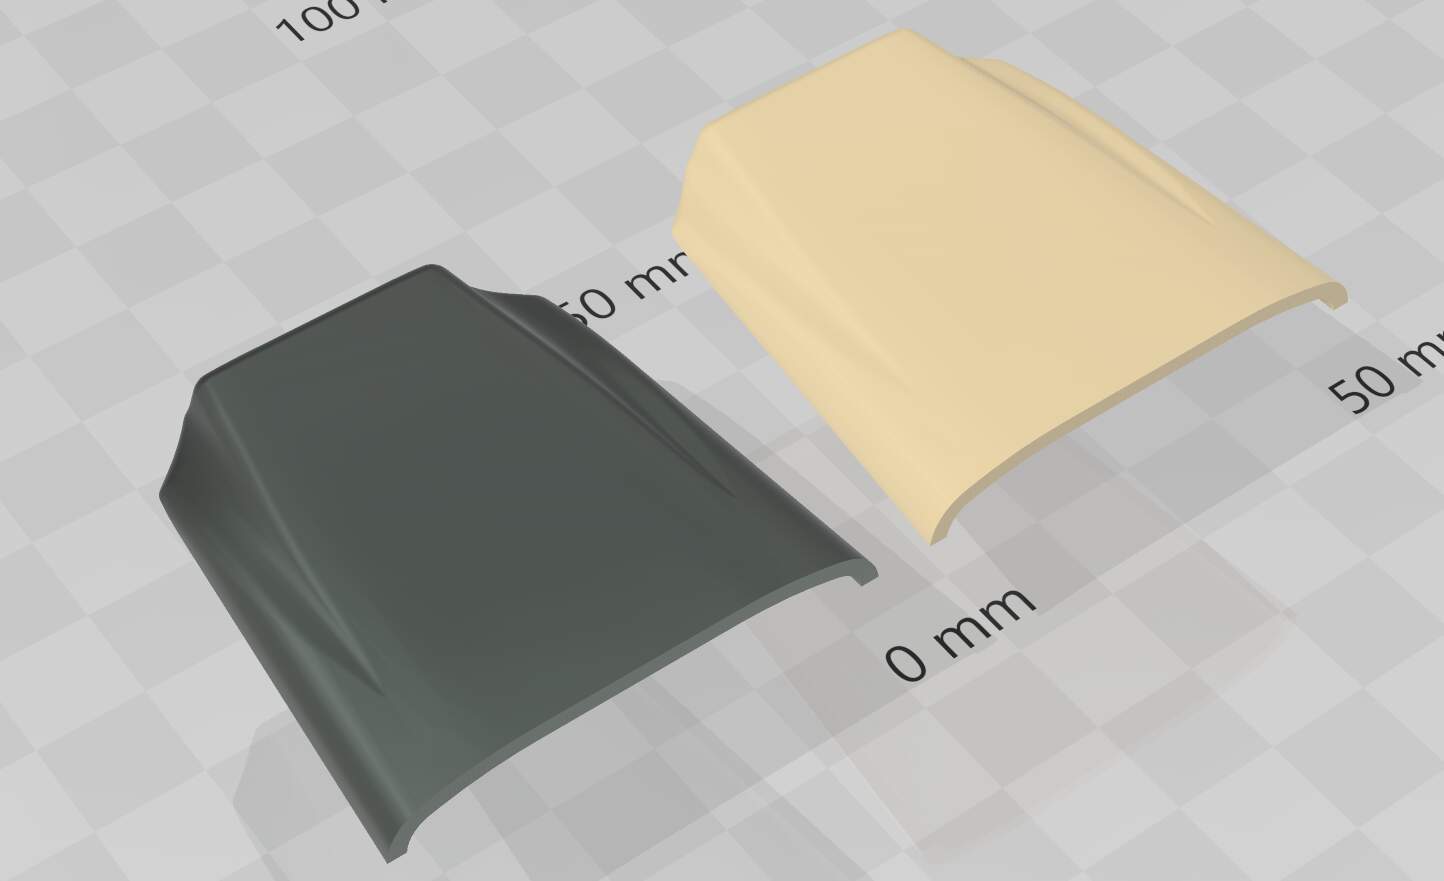
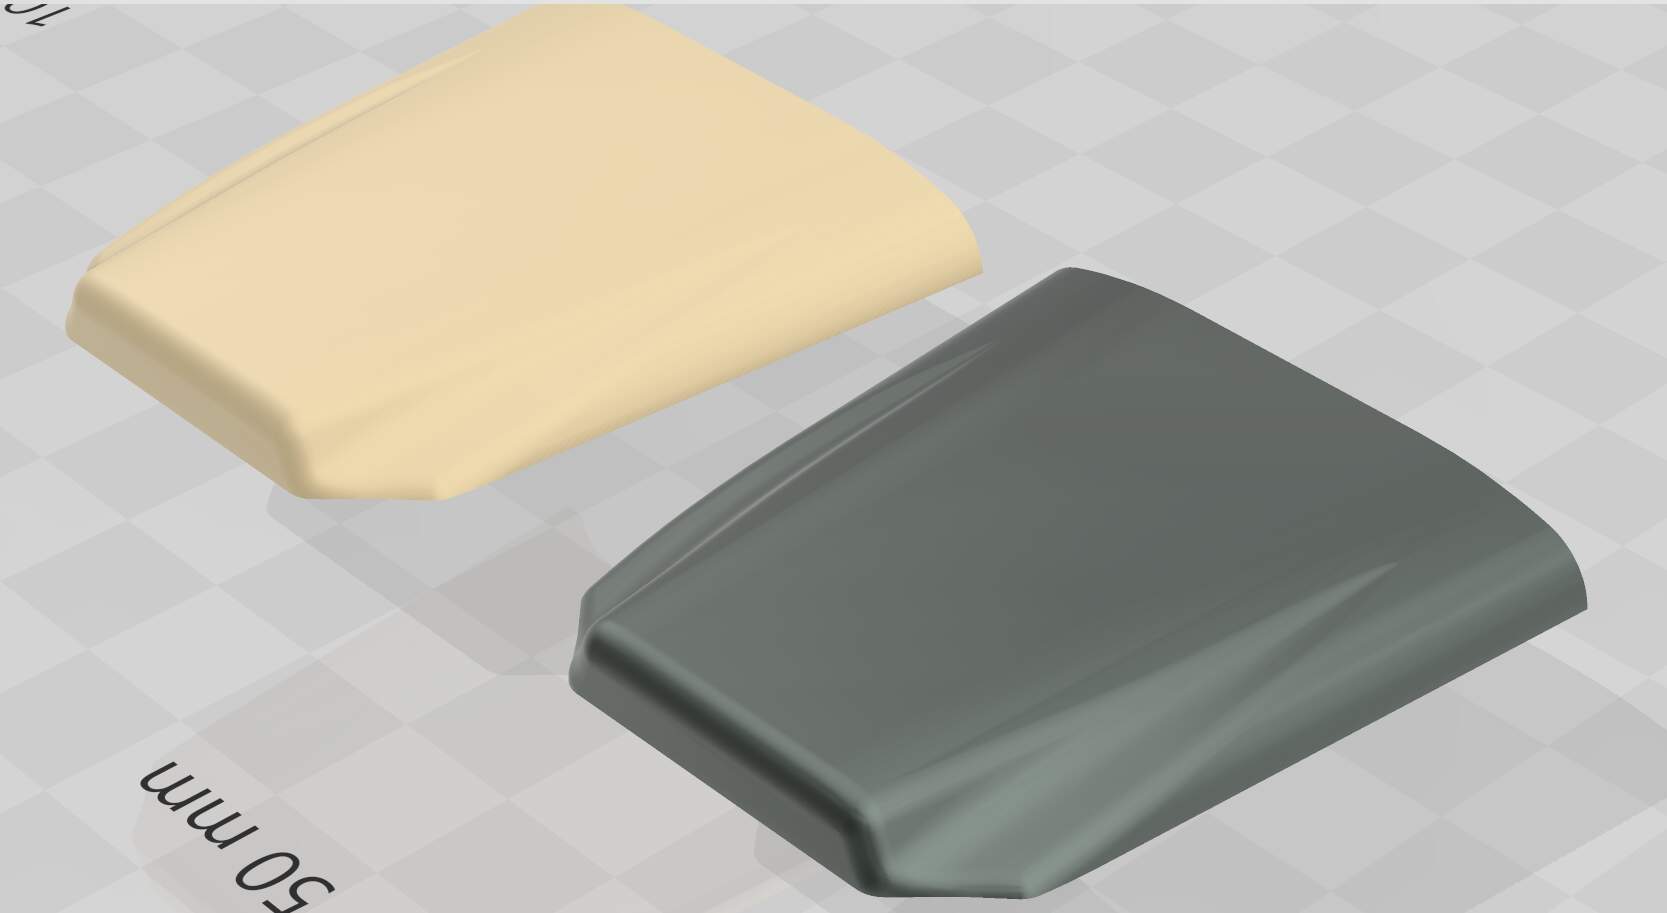
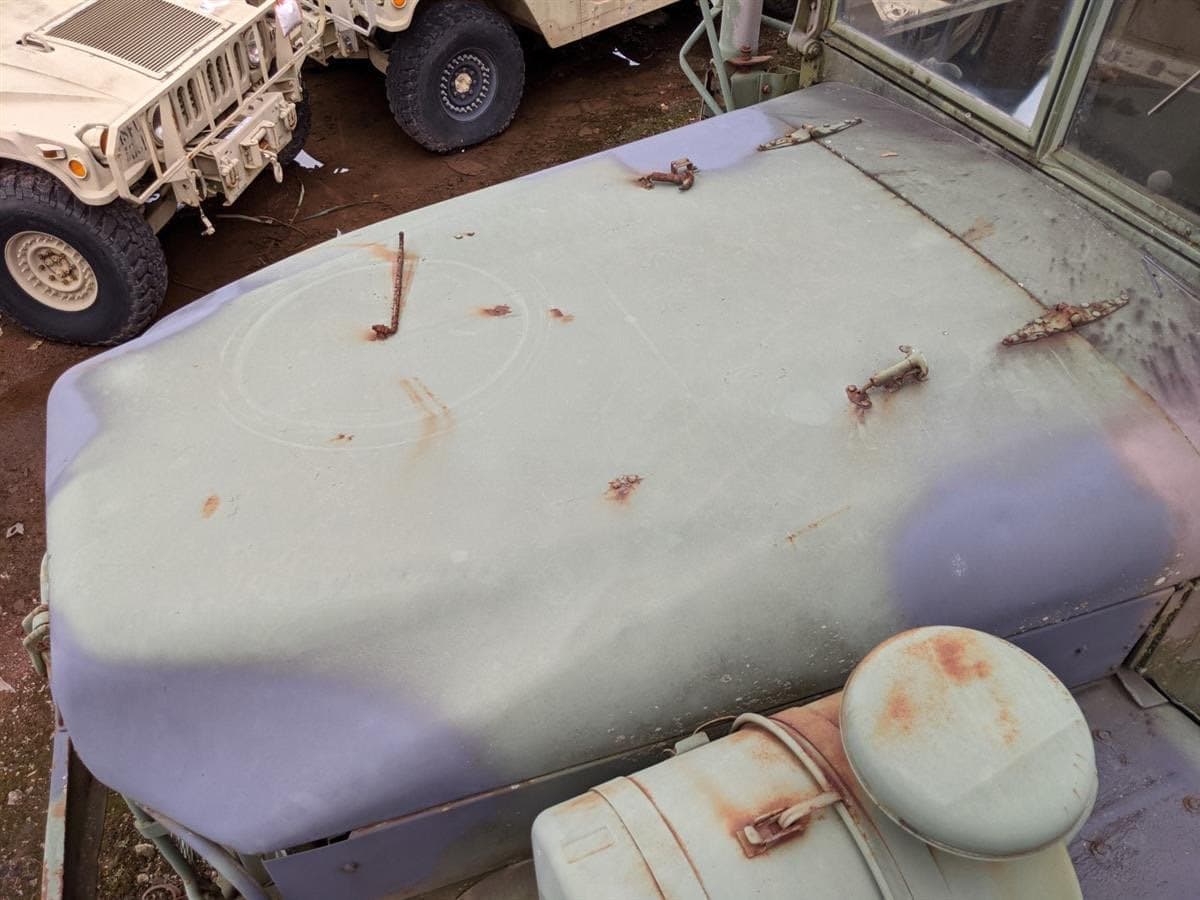
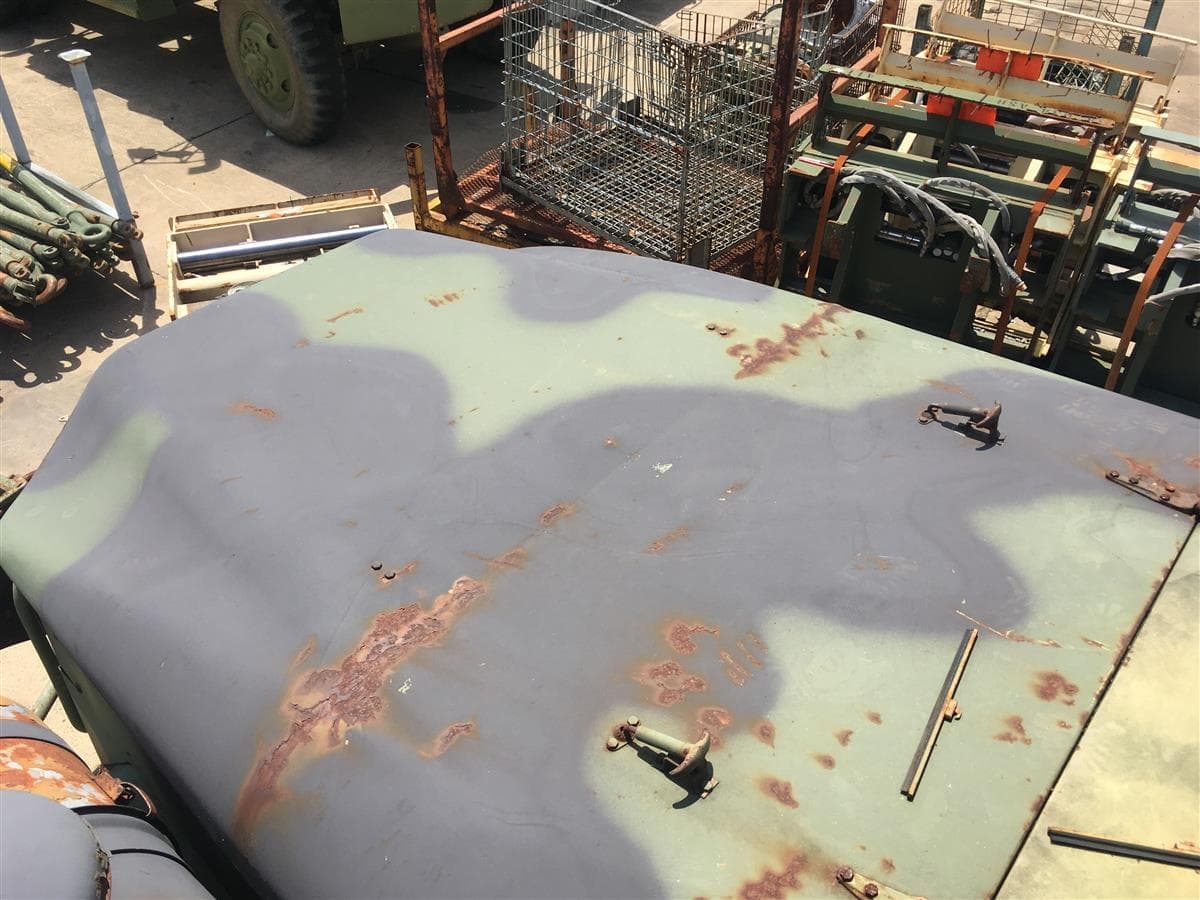
Again, busy this past weekend. Finished a CAD for the M809 truck hood conversion (for AFV C. M54 kit)! If this is not called perfection then it should be fairly close to it.
I hope y’all buy a lot of this to be worth my time and sanity. ![]()
Those curves were a PAIN to replicate!
I am thinking $25 for the hood, side panels, grills, air cleaner, and fuel tank. That is going to be a great deal if compared to RM’s offering.
Will move onto the grill and side parts this weekend then air cleaner, and fuel tank after.
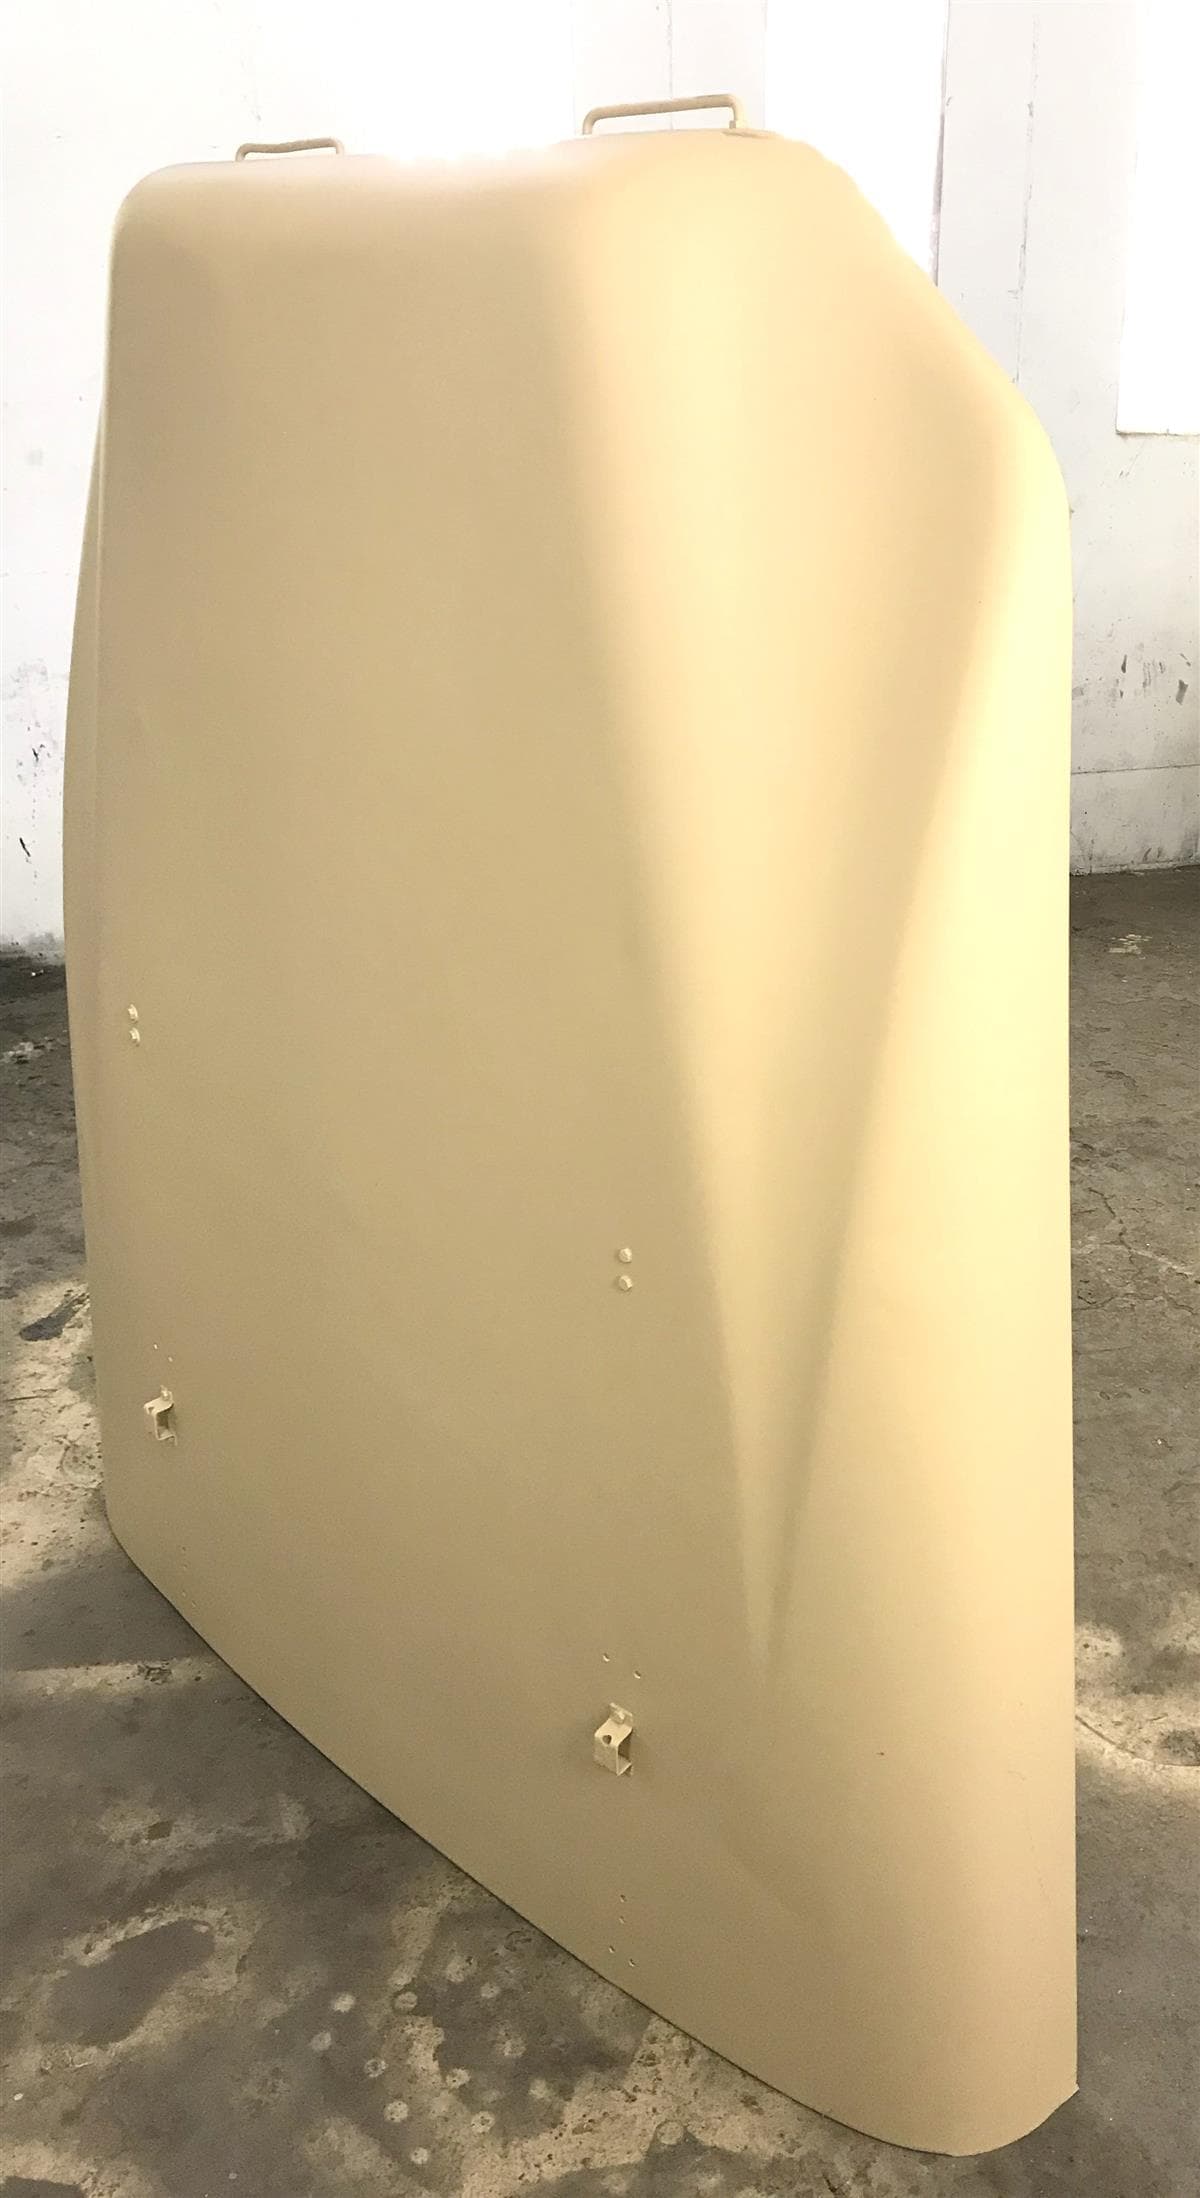
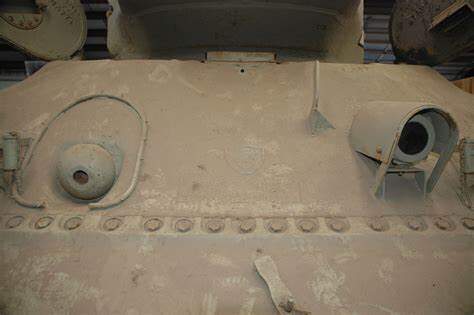
CAD based on this real photo:


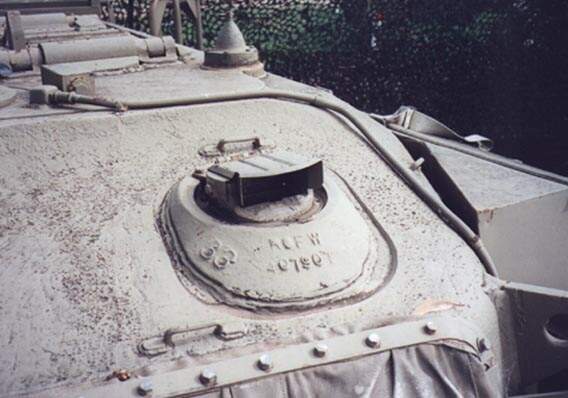
Reference photo used for a sketch:
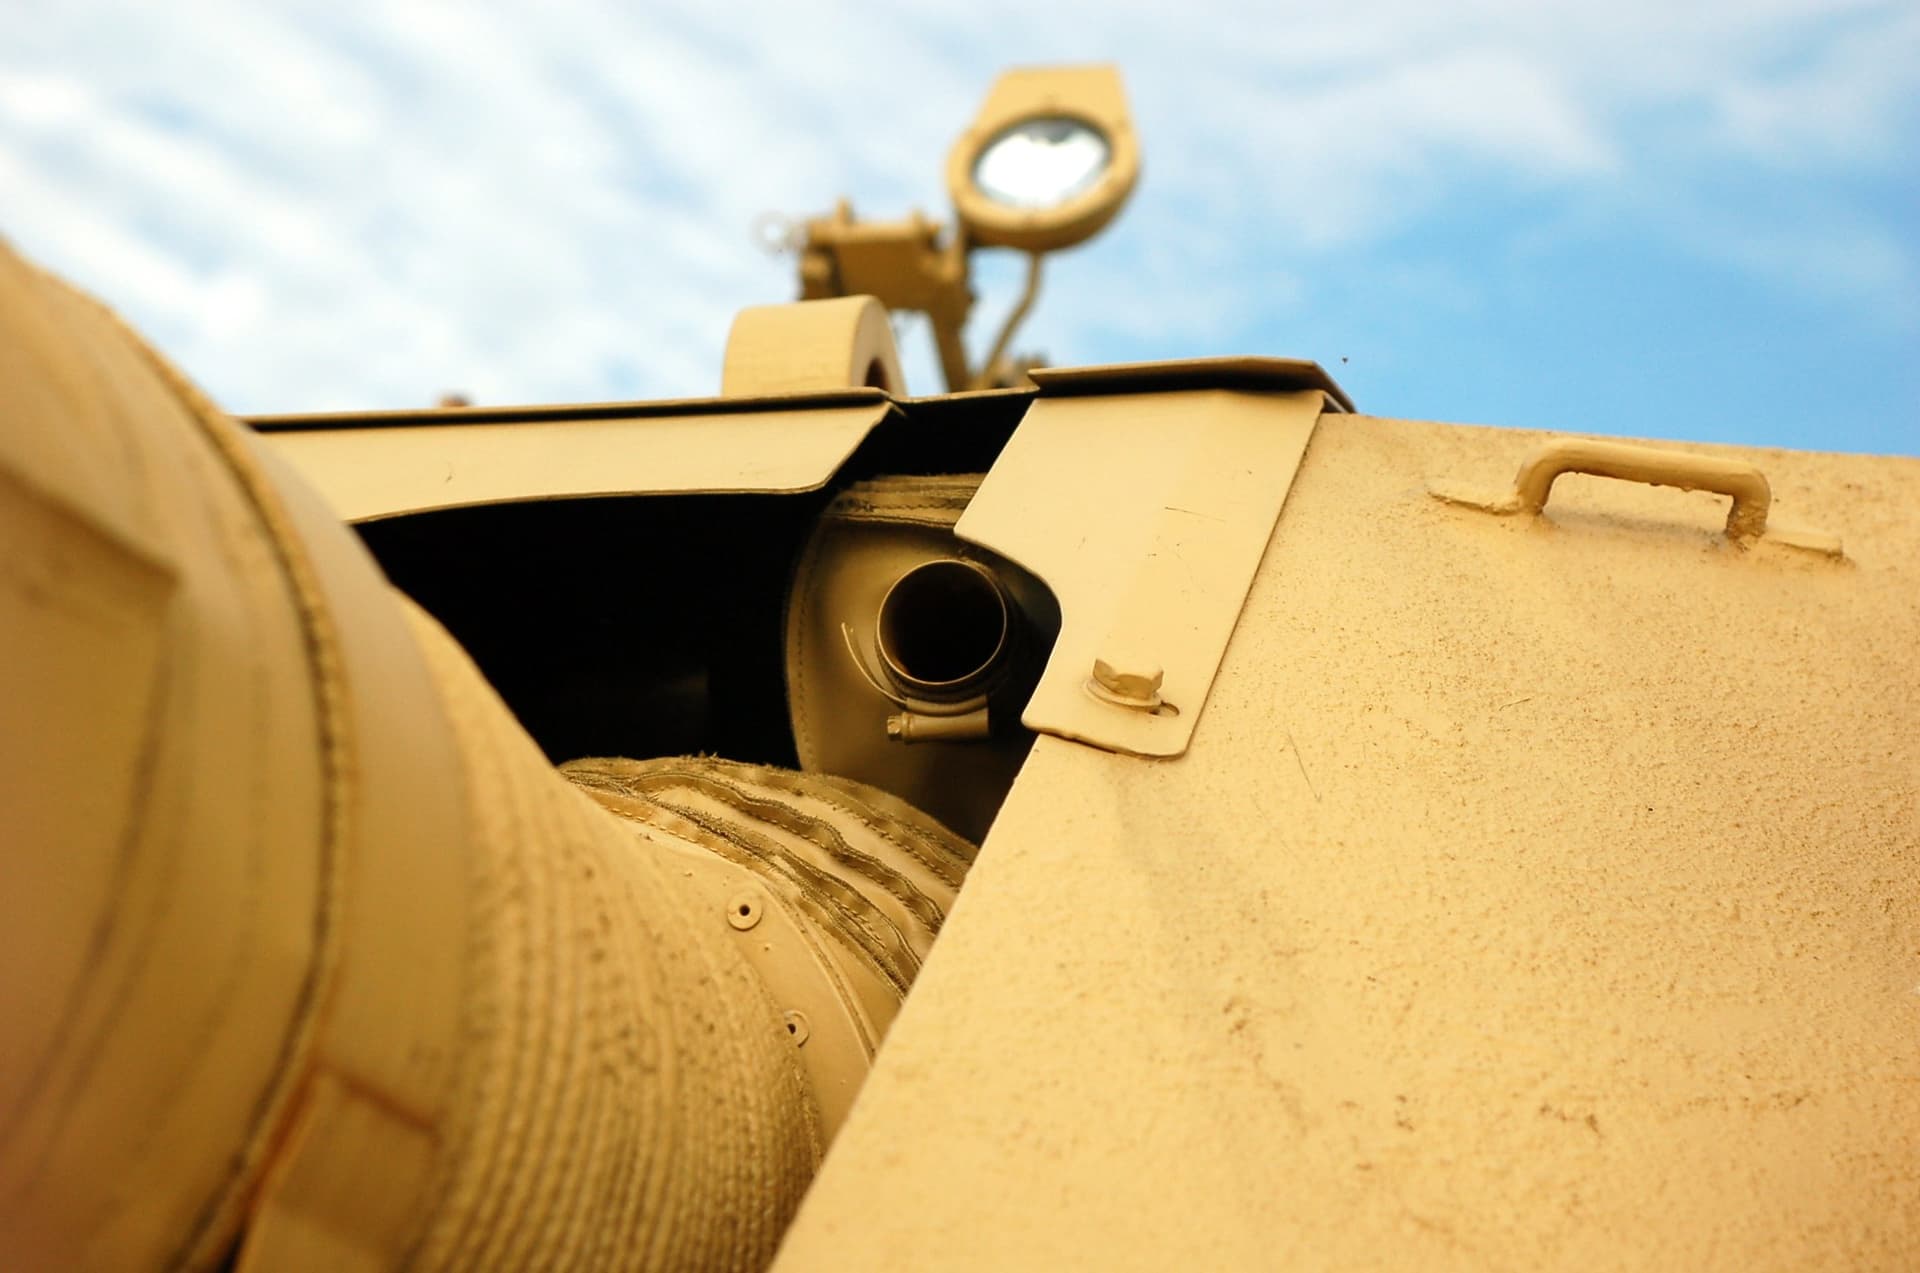
Reference photos used:
6 Likes
James have you thought of Tie downs that are printed on legs for easy removal? Having just added some to my AFV Club Centurion I thought to myself I need a 3d printer for this…
AFV Club’s are squat rectangle on rectangle, but the rear deal are these:
Aber etch are a bear…
1 Like
Hi Peter,
It doesn’t look too hard to CAD but I need to see how it looks on AFV Club’s Centurion, as well as more reference photos. Do you have more? At the same time, I won’t be able to get to it until mid-Dec. with the order backlog…
Kind regards,
James
1 Like
Thanks James, it was more of an idea for you, of something other guys may be keen on too.
1 Like
TMD has/had a resin set for US and Germans not sure about British. Don’t know if there is difference if that matters to you. 1019 -- US Tie-Down Cleats Type 2 (Handle with Feet)
They are shutting down Jan 1 as I recall.
The idea is smashing valid one, 3d printing can get the consistent shape that other mediums like pe cannot capture. Every Army has them on their vehicles, the detail issue seems they are all different. Maybe a generic set for those that want to replace say the Tamiya plastic one for instance but won’t care about type a vs type b (example don’t know if that is real types nomenclature or not).
1 Like
Thanks Ryan. The US ones are round rod, including the feet, where the British style like on the Centurion, Conqueror and Challenger has the rod for the feet flattened. The Conqueror and Challenger:

With so many Centurion kits out there, and so many guys doing Israeli ones too, plus the other British tanks, I thought there may be an appropriate market. Especially so, as cutting the flat feet off a resin block is nigh impossible, but would be so much easier if printed on a strut. Also as resin needs cyano and you don’t have time to correct position, where the 3D ones can be glued.
Maybe one of the guys currently serving, like John @Johnnych01 , has or could get some measurements.
4 Likes
Thanks to @SdAufKla, I use acrylic gel medium for the gluing pe….maybe too much working time but it can be thinned to use faster.
1 Like
I will see if I can get something sorted out. It won’t be straight away though ![]()
1 Like
The 3d printed resin is actually very similar to the regular resin we all know. It has to be glued with CA or super glue.
2 Likes
Not necessarily for all things, Mike. The small ones like these tie-down cleats would be fine with the plastic cement.
These tiny casting numbers are glued to the plastic sheet with the regular Testor’s plastic cement.
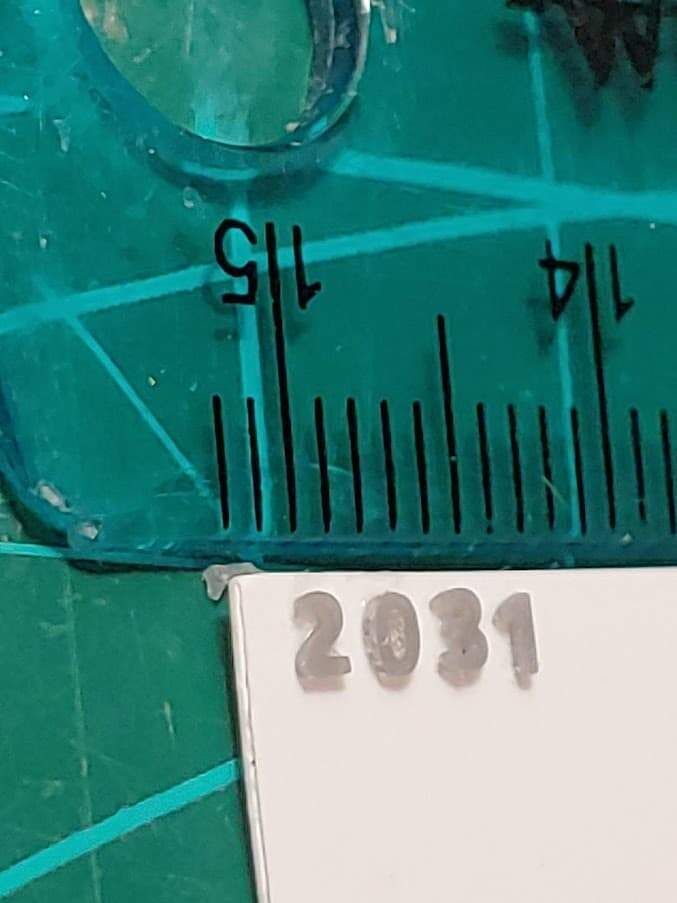
All I had to was some tiny dabs of liquid plastic cement, wait a bit for the plastic to soften, and then attach. Those tiny parts are not going anywhere.
Big parts - sure, you need superglue.
Kind regards,
James
1 Like
Djiti did them in resin several years ago. I still prefer homemade ones as they are positioned exactly where I want them to be, and I don’t have to worry about knocking them off. In fact, you can tie stowage to them as tightly as you want. I know these are a tad thick, but this is from the nineties. I use thinner wire now. Add “feet” at each end from .010x. 020 Evergreen strip. Adding liquid cement several times blends them into the wire and gives them that welded on look.
2 Likes
O, yeah, the old school scratch-building still works! ![]()
I figured you have enough on your plate already. ![]()
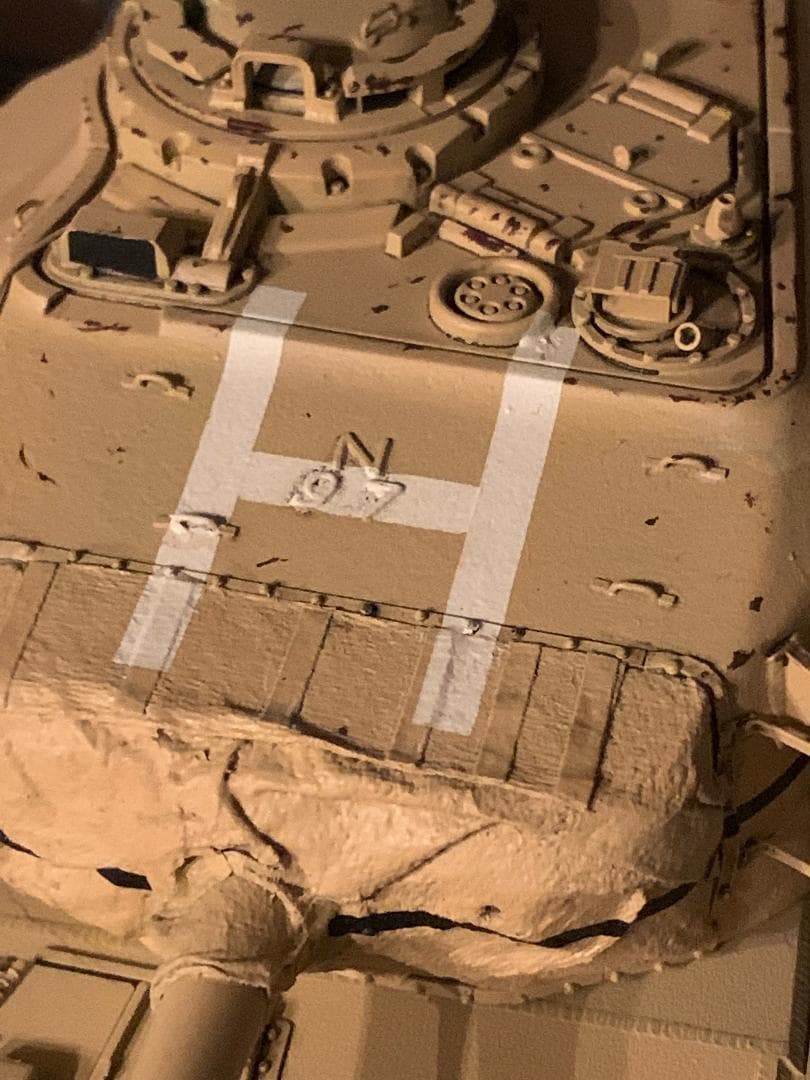
Any chance to have this one made?
This is for General Steel Castings Corp., Eddystone, Pa. and Granite City, Ill.
This is the casting marking that’s missing from the Tamiya M51 Sherman.
Hi Reynier,
Yeah, I can definitely make this one. In fact, I was going to try that exact marking next with other casting marks! I am getting a Sherman kit from @Tank_1812 to try casting marking on it. Please stay tuned.
Kind regards,
James
1 Like
Wow. Talk about scratch building - years ago I used to cut those markings off of Esci M60A1 turrets - a whole square piece of plastic, and splice them into other kits.
There is probably lots missing from any Tamiya Sherman when it comes to foundry marks.
1 Like
Predator looks badass.
2 Likes