The front has a raised lip to stop people shooting at the crack between hull and turret.
Here’s the internal frame that holds both the grille and the engine hatch. It has a water channel.
And here’s some detail of the intake duct.
David
The front has a raised lip to stop people shooting at the crack between hull and turret.
Here’s the internal frame that holds both the grille and the engine hatch. It has a water channel.
And here’s some detail of the intake duct.
David
I’ve got another query. “What another one?”.
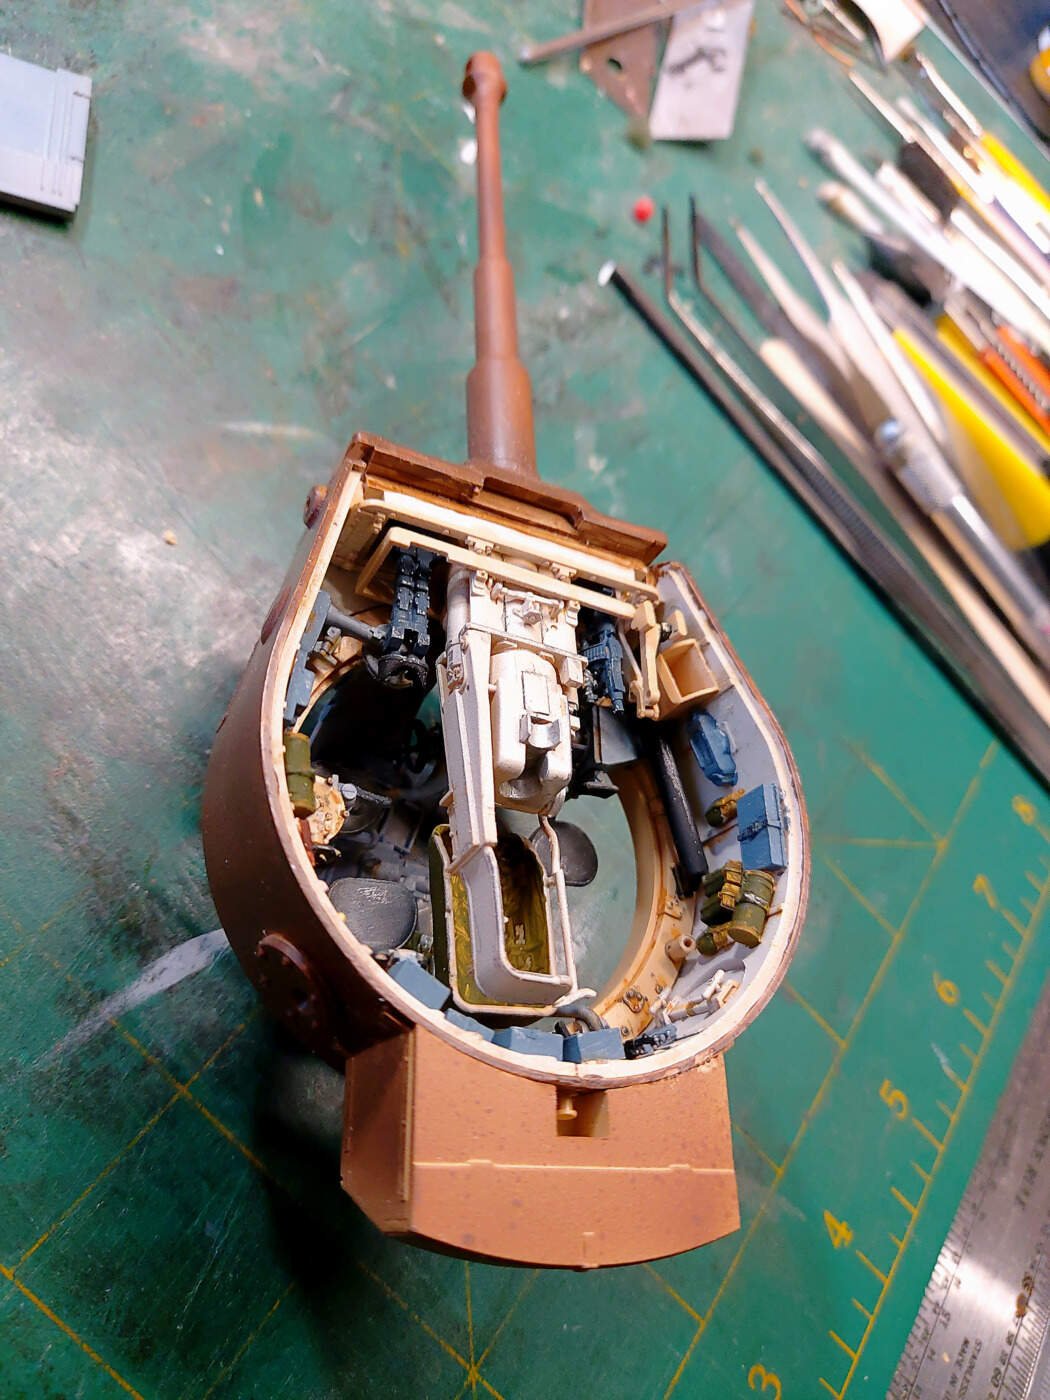
In the RFM Tiger 1 early, there appears to be only two radio boxes. The two on the top. No third one. Has RFM got this wrong or did some Tigers only have the two sets?
Again. The RFM kit has no driver gauges. Can’t be right. There’s nothing in the instructions for that position. Yet photographs and RFMs own colour guide show vision blocks there and the gauges.
I guess I’ll have to cobble something together.
thanks
bruce
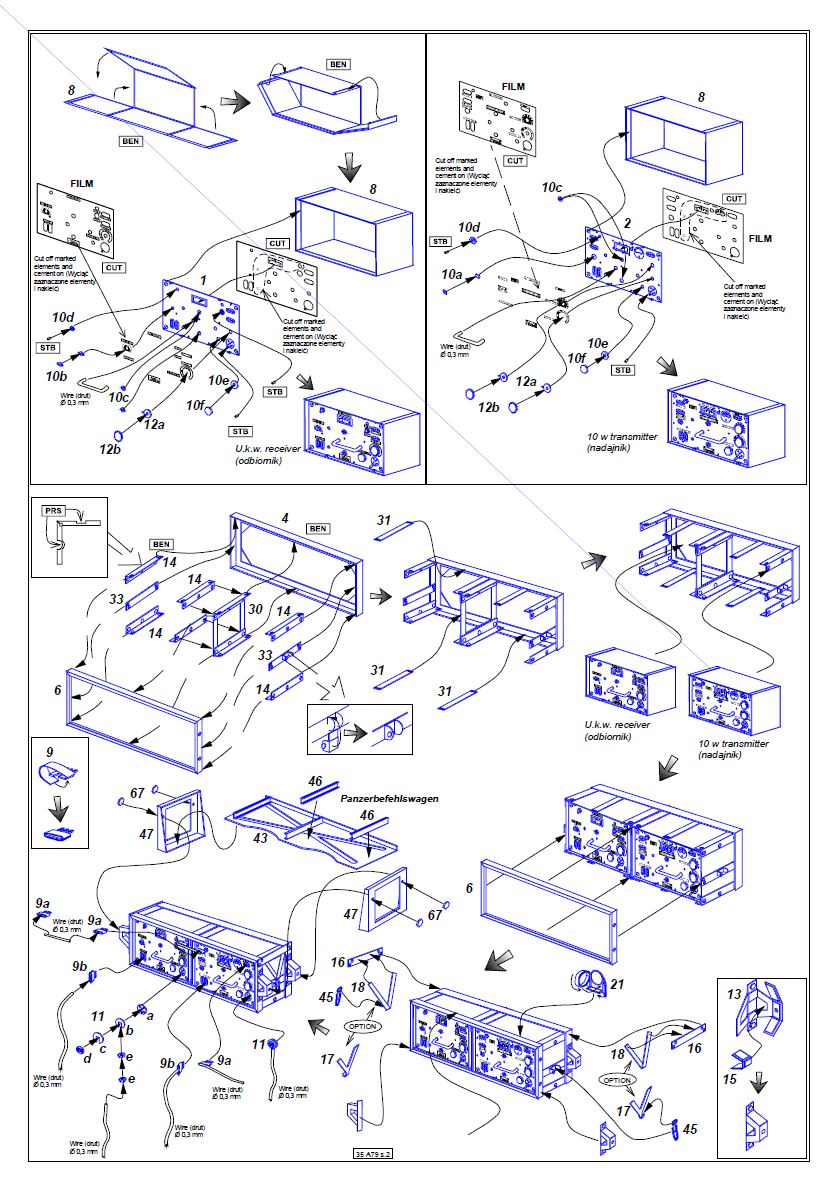
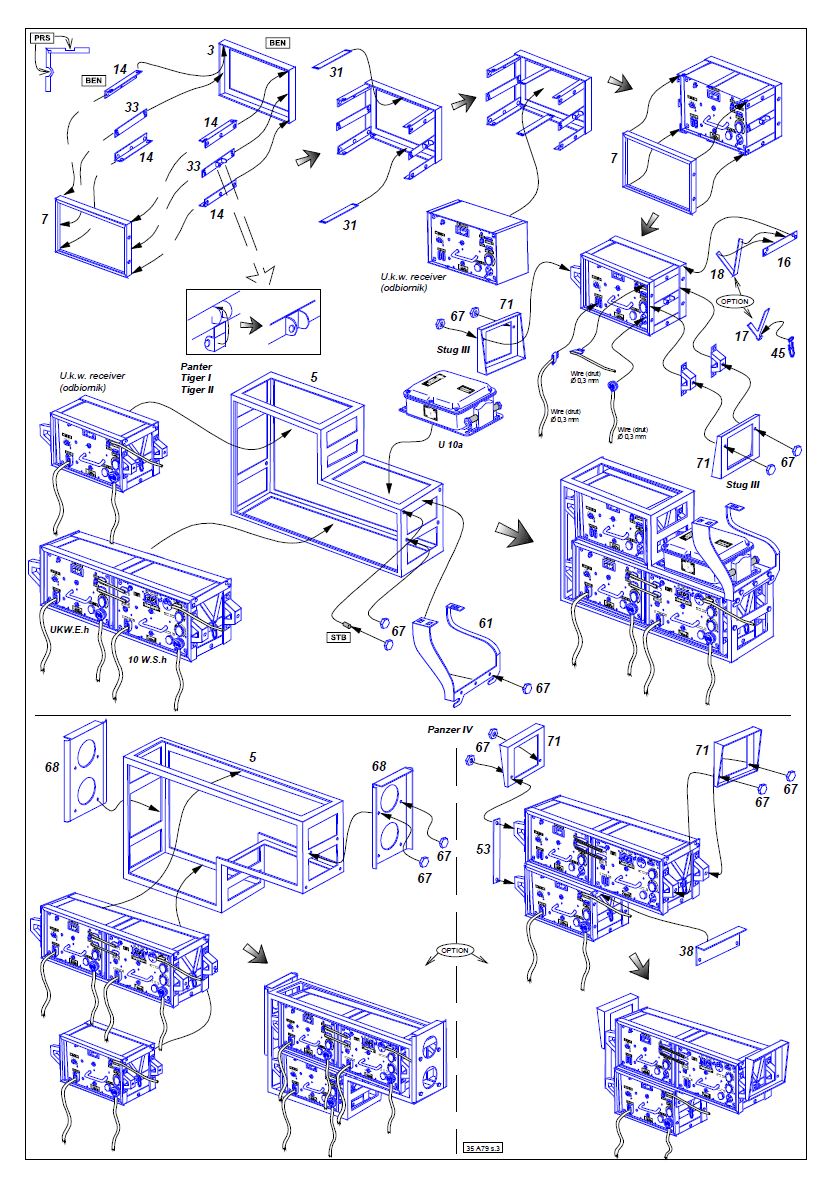
There were options here. The typical panzer had a radio rack with three positions. They normally carried a transmitter set and a receiver set. But they could operate with a receiver only.
Also, if they were leading a platoon, it was a good idea to have a transmitter and two receivers.
David
Thanks. It worries me that a kit like this is missing a driver display. Doesn’t anyone every check these kits for ‘oops’ stuff? Like the drivers information is shown in their colour page. But nothing in the instructions and not even an overlook because there is no parts in the kit that look remotely like it. And no spare vision blocks.
When you get nobs like me trying to build a kit then one has to wonder!!
bruce
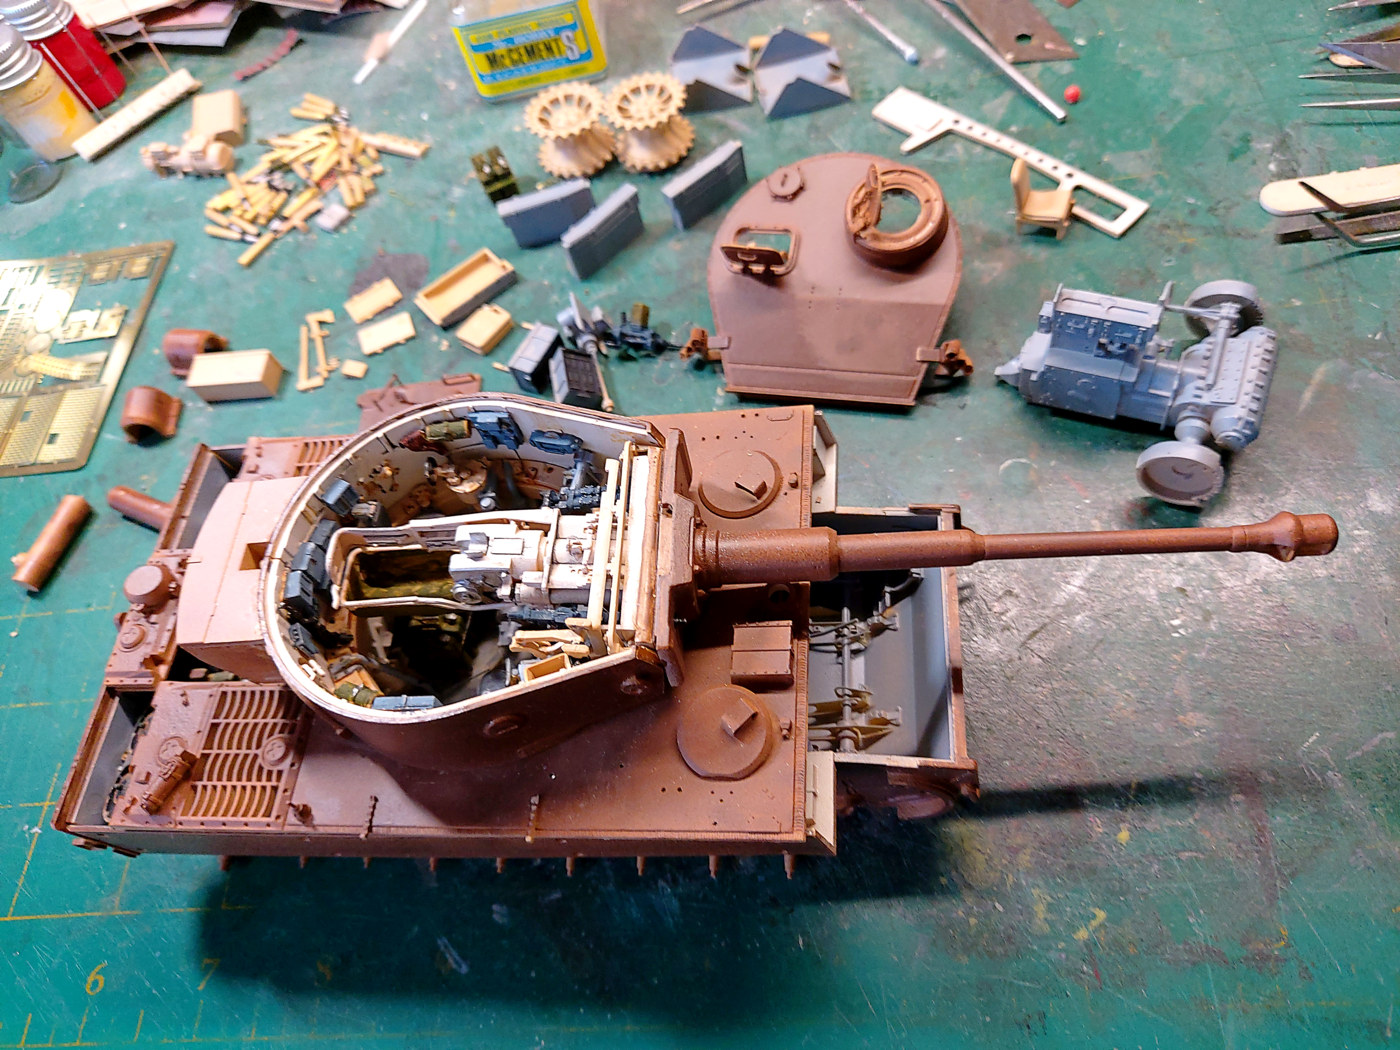
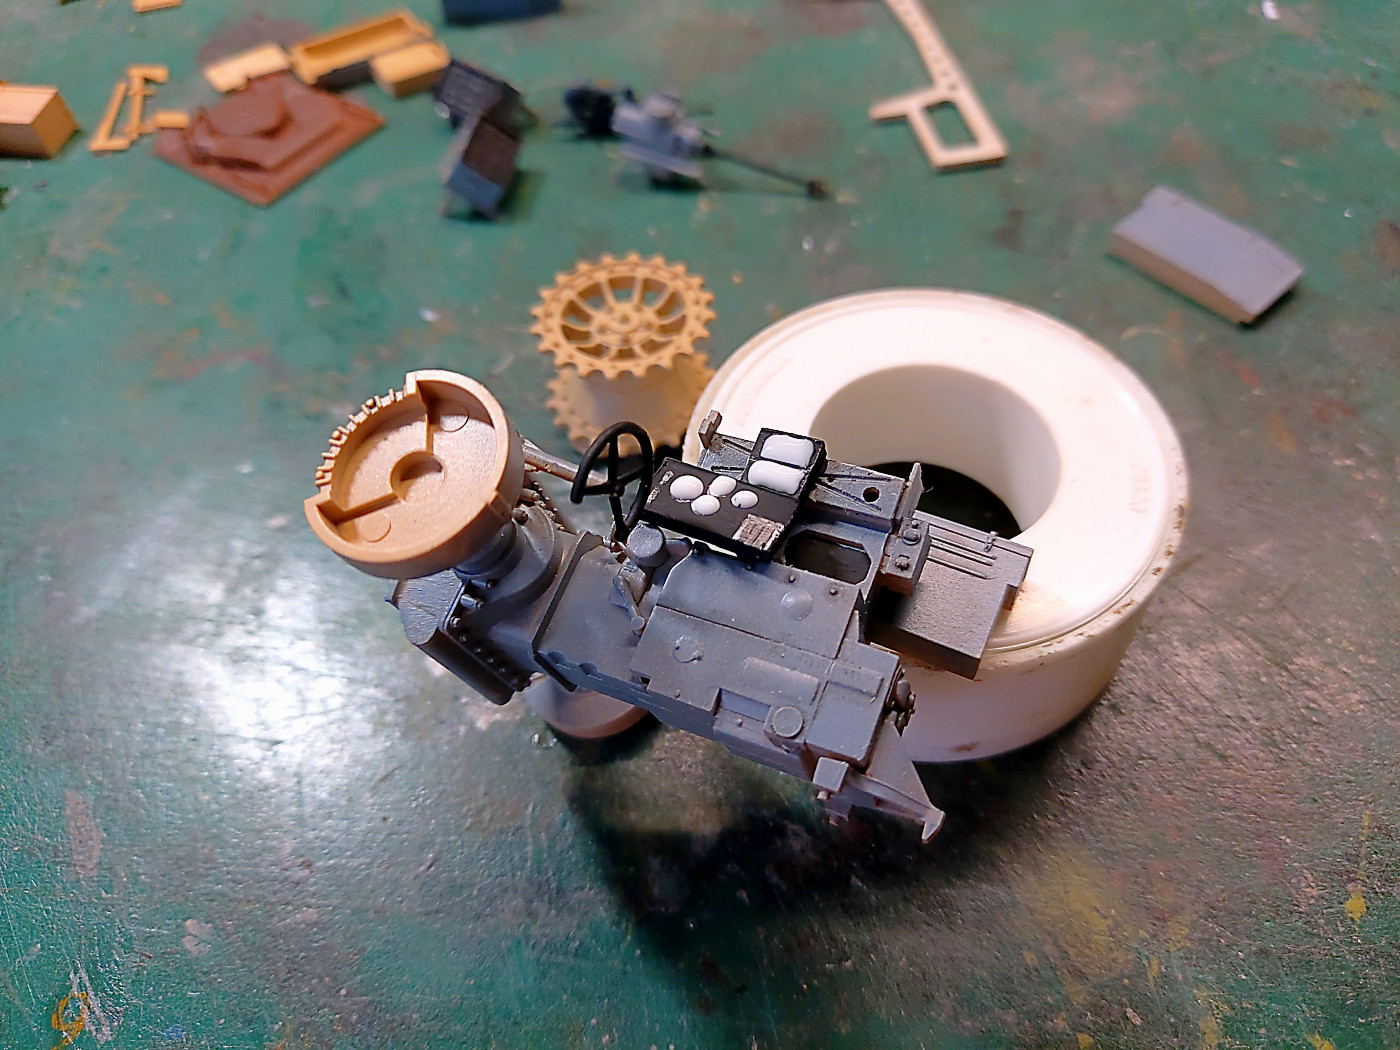
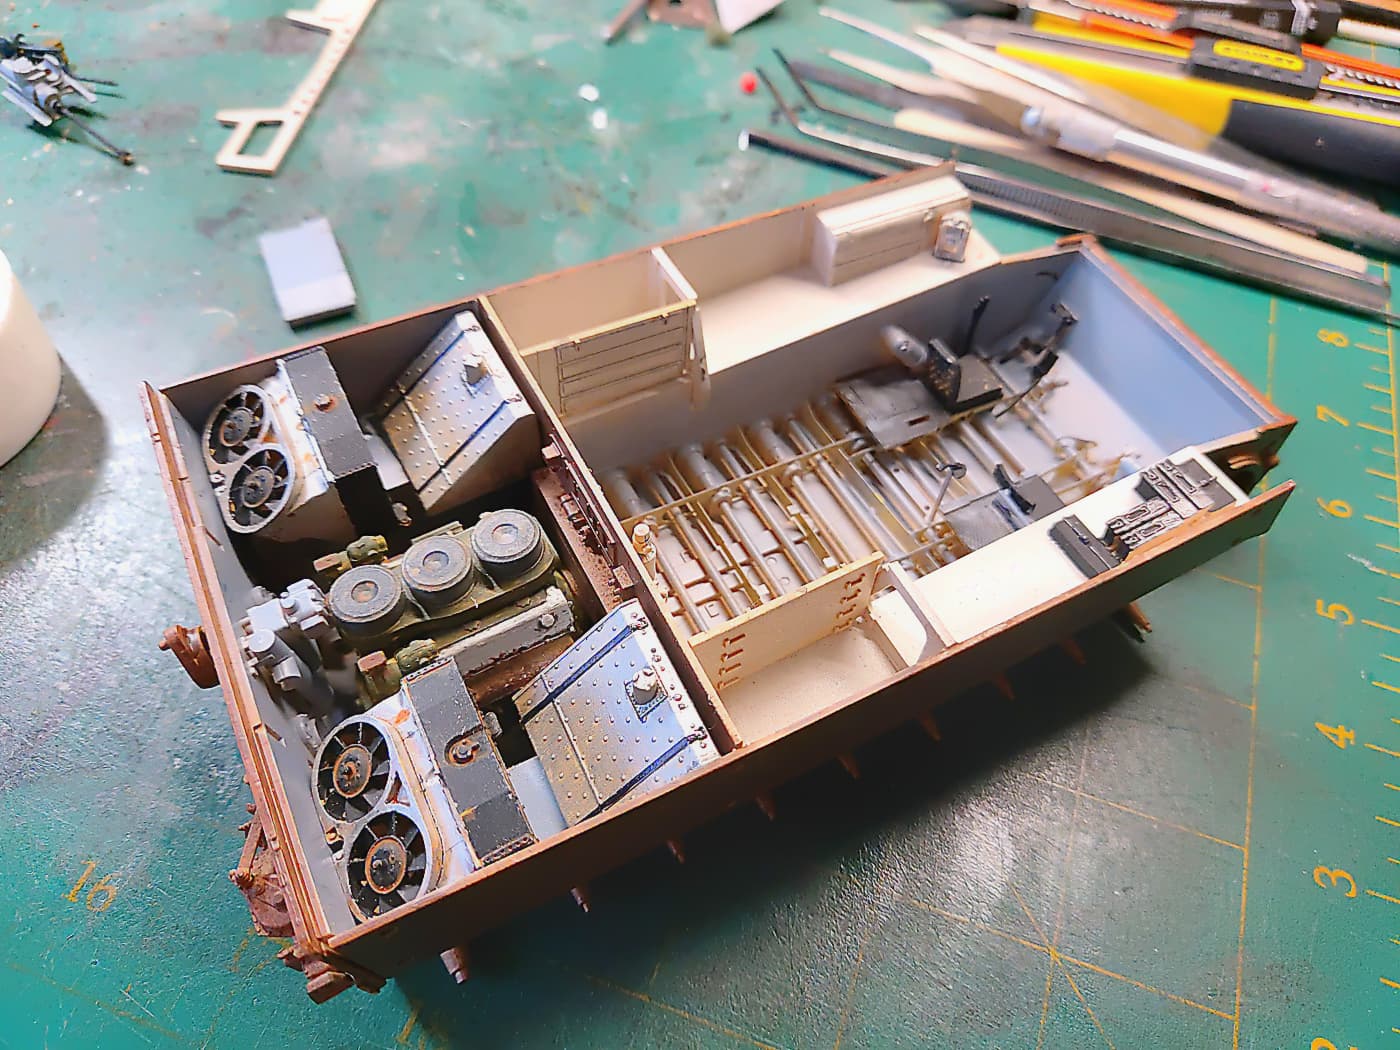
Image of where I’m up to. Mostly dry fitted. Excuse the crappy primer. There’s method in my madness. I think!!! 
Amazing build! Quiet an accomplishment:)
Look forward to more.
But how can an interior kit leave out the dashboard? That’s just a stupid mistake on RFM’s part.
It’s obviously so they can release an interior kit and then later release a “complete” interior kit
That whole interior and no dashboard? That’s like planning a wedding down to the last bag of rice and then forgetting to pick up the bride!
I was being tongue in cheek lol. Miniart did something like this with their T-44 where they released an interior kit, that if I recall was missing a bunch of drivers area detailing. They recently released the complete interior kit that as far as I know is identical with the drivers area stuff
Does your kit include the sprue with the radiator hoses? Because the RFM Sturmtiger didn’t and they sold it as a separate upgrade set!
No, I don’t find Aber’s instructions helpful at all! At least, not concerning the intercom!
That diagram on the last page doesn’t apply to any Panzer I am familiar with. It MIGHT be appropriate for a Sturmgeschutz. But certainly NOT for a Panzer 3,4, Panther, Tiger or Tiger B.
And when you compare the layout diagram to the final assembly diagram ON THE SAME PAGE, the Box 24 of the diagram is not there - they drew Box 20 in its place. They don’t know the boxes!
Now, Box 20 is correct for the later Panzers, but Aber don’t say which boxes go in the turret and which in the hull. Never mind WHERE they go - this basic fact is missing.
It’s a mess! Aber are guessing, and guessing wrongly!
David
The instructions for the main radio rack seem to match the kit offering from RFM for the Panther G, and the photographs in ‘Panther in Detail’ - book by Bruce Culver and Uwe Feist. A definitive guide for that vehicle.
Yes I have the T-44 without drivers area, but I have resin set from CMK I think. I think future releases will have the drivers compartment
Very interesting and informative stuff going on here and great start on your Tiger 1 Bruce. One can never stop learning when it comes to German armor I tell ya.
Again thanks for all the information.
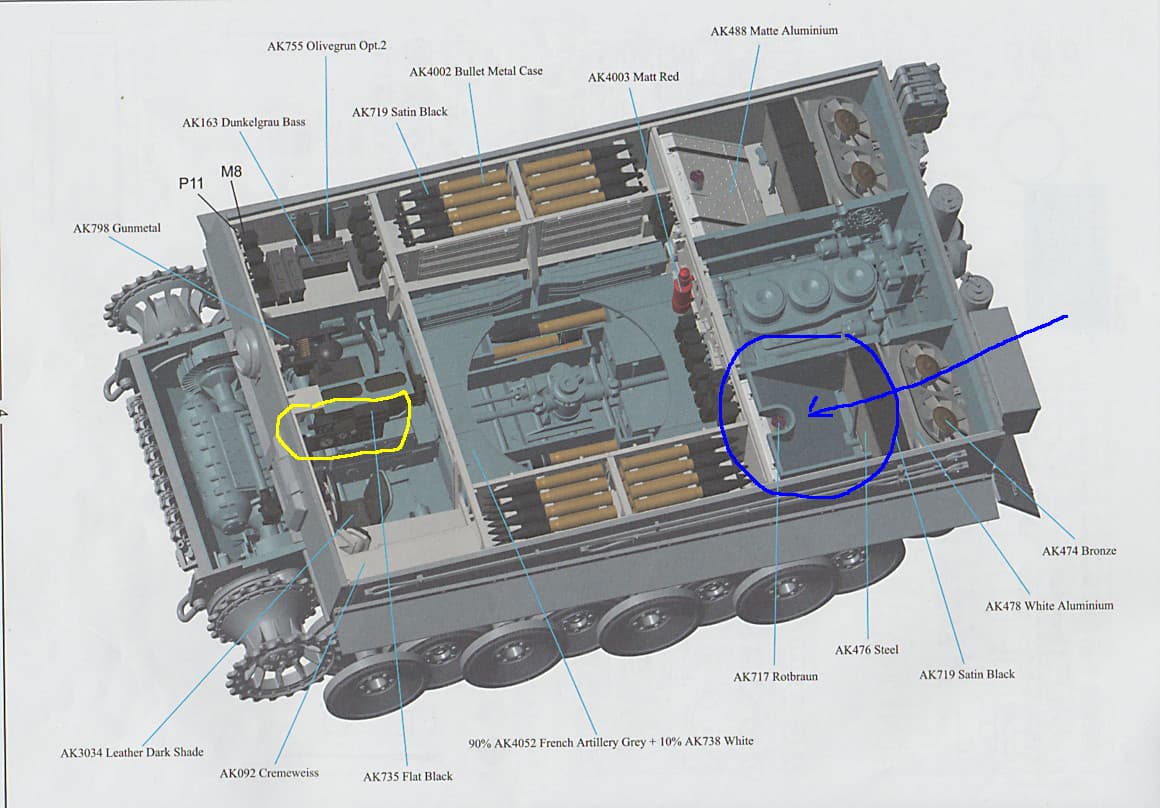
Just to prove I’m not nuts. Maybe not completely anyway!! Here’s the instruction page for the transmission etc. The yellow arrow points to the “missing” part of the radio. Only two boxes and not three. If you follow the red arrows you can see the top/back of the vision blocks. But they aren’t in the kit nor is the dashboard. No parts and no reference to them. But on the pretty pictures. The coloured green box bottom right also show the top of the spare vision blocks.
I’ve made up vision blocks and dashboard from styrene using images I have from the net.
bruce
I’ve cobbled together some sight blocks and a dash board. The white is PVA glue that will turn clear as it dries. A bit of a rush job but seeing it’s out of sight why am I bothering? Just cos.
bruce
I’m looking for some hints on assembling the Tiger wheels. Do you glue them all together then pull them off in one big block to paint them? To do so I will have to put some thin shims between the wheels to keep the clearances. Or do you paint them then glue them in place? If so how do you paint and weather behind them?
I’ve seen on YouTube them being pulled off in one block and it looks easy!! But is it?
bruce
The only method i’ve ever found to work well, is the paint before assembly method.