@Khouli what he said. It’s really the only way to ensure all of the plastic gets a coat of paint.
I’ve done it other ways and was a long game of touch up. That’s not really a big deal if apply mixing and applying multiple washes with a paint brush as needed is easy for the modeler.
Thanks guys. I took the plunge and glued them all as one piece. Yeah I know!! I may be sorry. My logic was paint them as a single unit. I used fine strips of styrene between the wheels to get the spacing right.(If you look you will see a bunch of nice round spacers. Yeah I forgot to put them in. Sometimes it pays to stay in bed!!). They have all been primed anyway. I want to assemble the whole unit so I can remove them for weathering etc. I have always painted everything first. Yet a number of folks on Youtube assemble then paint. So I’m trying their way. I have my doubts as so far it’s been a PITA. Maybe that just because it’s an interior kit.
I’m trying to have the finished kit so that I can lift off the top deck and turret to show the interior. The deck has a front to back warp in it that I’m battling with at the moment. I think the turret is too tight. But that’s tomorrows problem.
I think I may be pushing my luck now!!
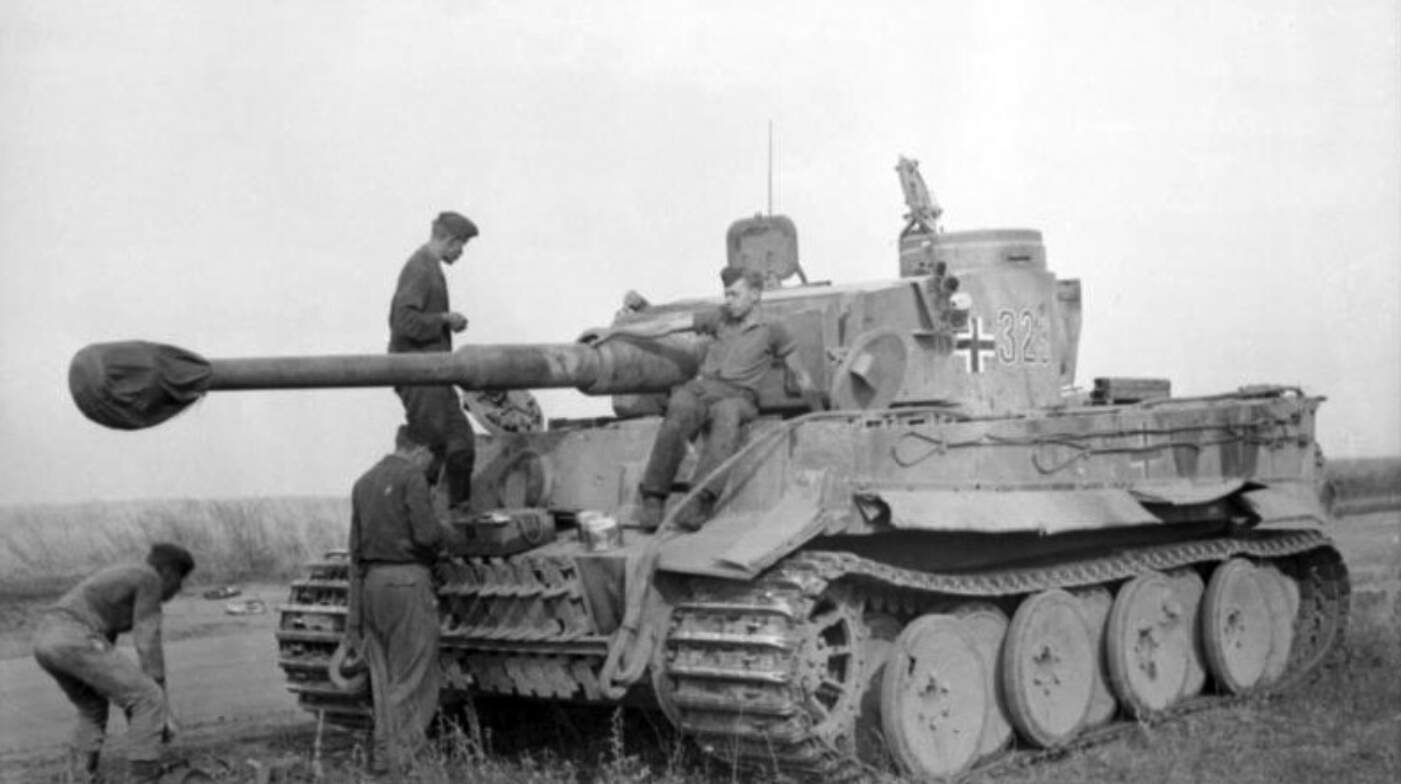
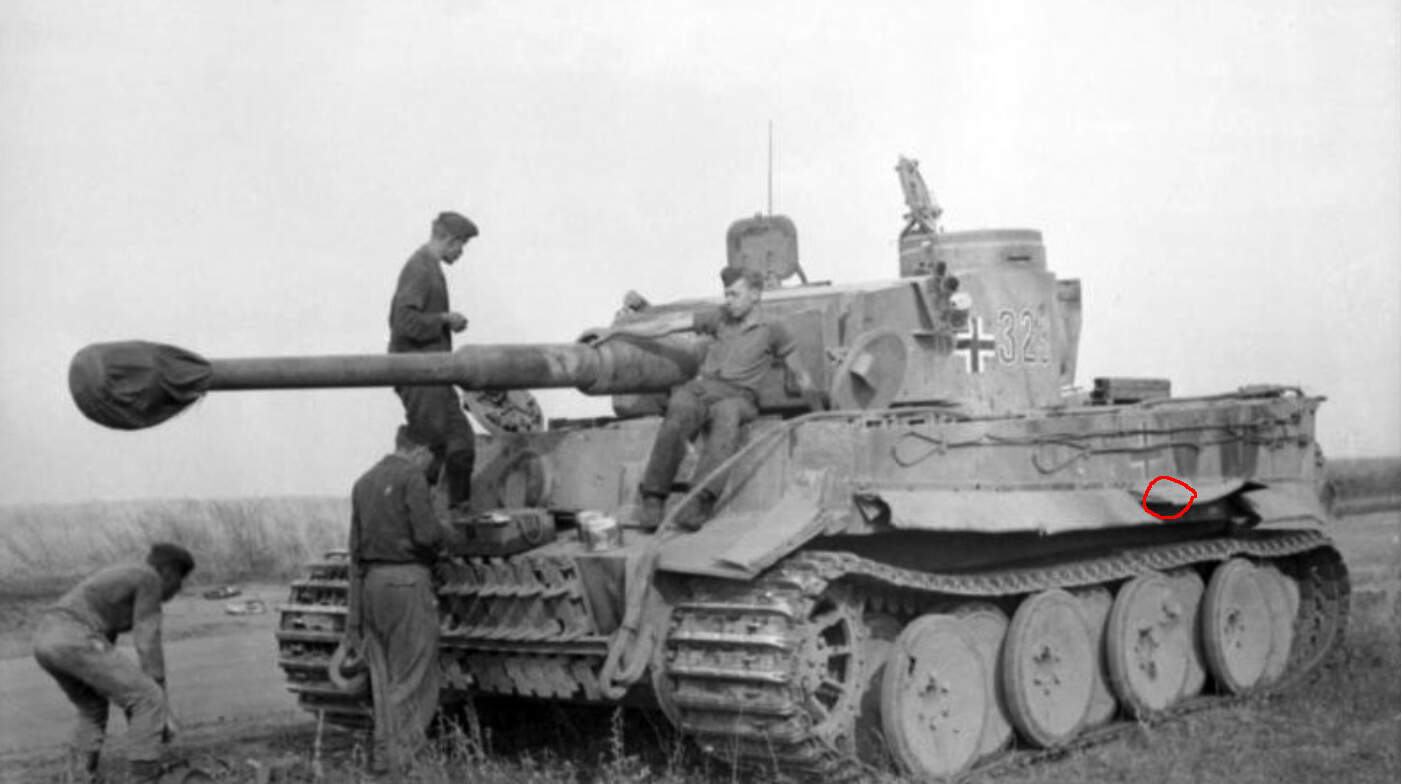
I’m going to ‘try’ and make my side skirts from copper sheeting. I want to bash them up a bit like the below images of 321. I have a number of thickness copper sheets. Thick down to razor thin. I can recreate the bend easier with metal. So my question is - These side skirts get bashed around a lot so I’m hoping to know if anyone knows what gauge metal they were made of. Thin is easier to work with but it looks too delicate on the side. Also did they have brackets or were just the top attachments enough to hold them in place? (I think the drivers side image is of 323 but I found it on the internet as 321).
Thanks guys. I found what I was after on Tiger1.info
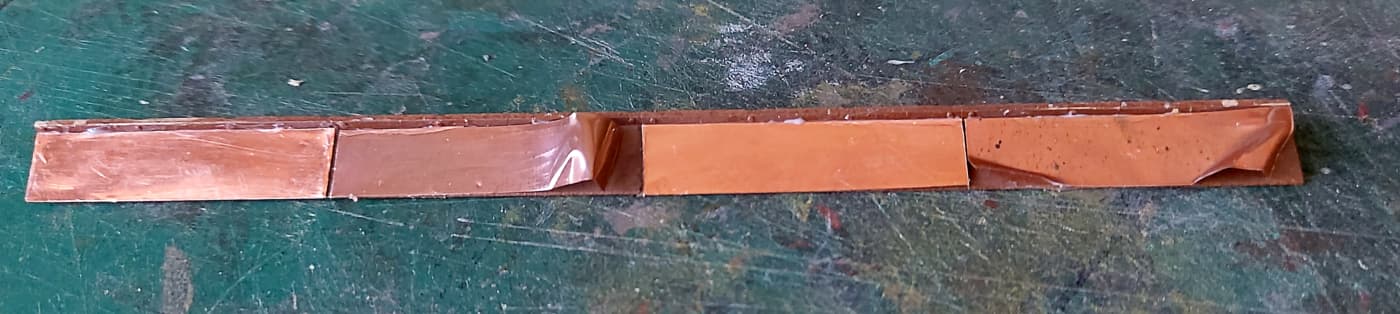
Here’s the first attempt. Just tacked together. Loaders side. I tried to figure out how to cut the strip with the mounting bolts. But decided that was too hard. So I used a thin piece of copper. Bent them according to the above image. Tack glued them to see if it’s ‘right’. Once I’m happy I’m going to remove as much of the plastic as possible underneath and still leave enough to hold the copper sheeting.
It looks a bit messy at the moment. I’ll clean it all up later.
Khouli I think you’re right. I may try again with one step up in copper thickness. Bend the top. And replicate the bolts with a small punch from behind.
I’m just trying to get the beat up look of the fenders.
edit
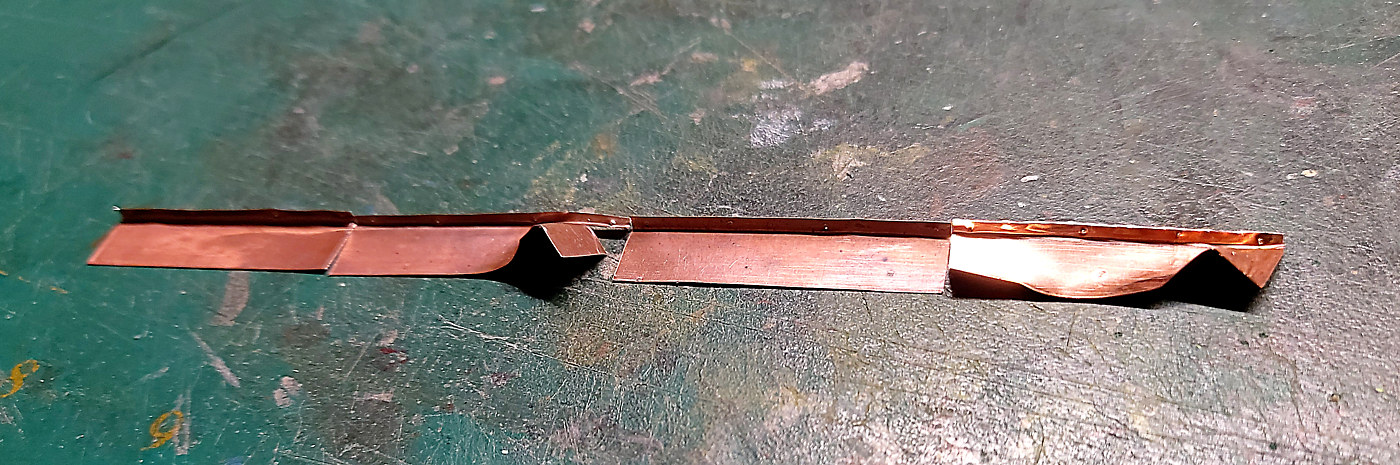
Here’s a quick try with just the copper sheet. With a bit of care I can go down this route.
Thanks srmalloy. That’s the information I was after. I think the rolled outer edge may be a challenge.
While looking for information on the web I found that there were a number of changes to the fenders. Some were as your image. Some had ends in them whiles others had brackets. So I guess like all Tigers they were different.
I’m looking for the beat up look so it may not be ‘exactly’ correct.
Do I need therapy. I started in model railroading waaayyy back. 40+ years ago. This 1/35 stuff is all new to me. Hence many dumb questions. The downside to 1/35 is its need for detail. I never build anything out of the box without some ‘modifications’. I have a ‘reputation’ in the train scene so I have a genetic conditions that requires me to do everything the hard way!!
Thanks DByrden. I never noticed that in the images. But now you mention it even on a poor image you can see the difference. But should it be the other way around? Rolled edges on the 323 and not on 321?
See the red circle that looks rolled!! Also here’s 321 but with the rolled edge. So which one is right?
Dang it I’m not a rivet counter. I’ll go the easy route and do a non rolled edge.
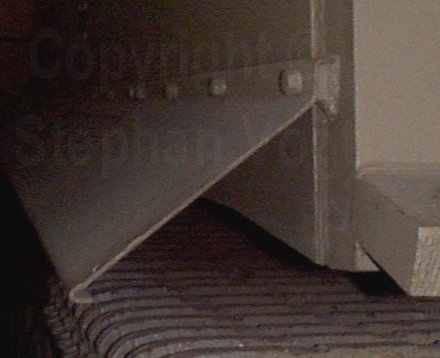
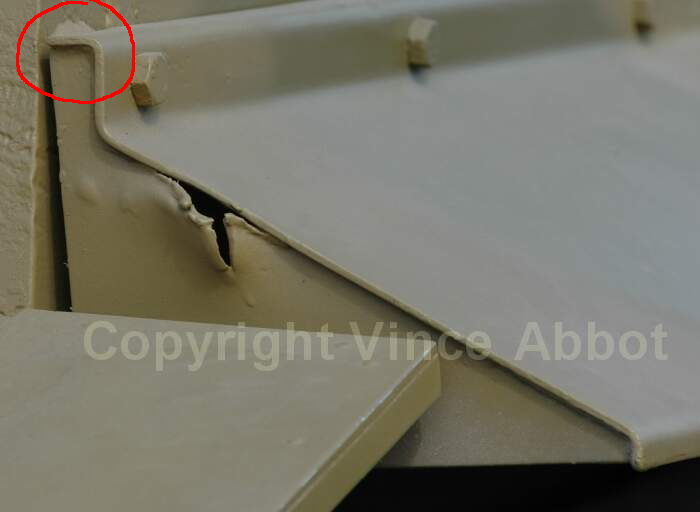
Thanks David. I’ve hit an issue that I can’t solve at the moment. See red circle. I haven’t the tools to do the 2 bends. I can bend it but not neat enough for my liking. And the kit has location ‘bolts’ on the hull to line it all up. The bottom curve doesn’t worry me. It’s just the right angle horizontal bend that is out smarting me. I’ll sleep on it and see what tomorrow brings.
Well, I don’t build enough to be an expert, but personally I would make a straight 90-degree bend in a copper sheet, then try to make the second bend alongside it, and if that succeeded I would draw and cut out the skirt around it.
Thanks David. My main issue is not having a proper bender. A PE bender would make nice straight lines. I’m using a straight edge and I just can’t master the straight line. The small edge always seems to get ‘wavy’. It must be a product of the copper sheet bending.
You have to work from the center out. So the 45 degree bend has to be done before the 90 degree. Other wise the 90 degrees is in the way.
There’s an opportunity for someone to make and sell these fenders/side skirts.
Another day on it and if no good results I’ll … don’t know.
An update. The fenders offered from a generous member weren’t the correct ones. But to be offered them was great.
In the end I worked on the kit fenders. Sanded and filed them down to a better thickness. Then bents and wrecked them. Not as much as the images of 321. But representative. (I found that at a certain point the plastic broke rather than bend. Filler fixed the breaks).
Here’s a couple of current images. Sorry that they are phone camera images. I made a real rookie mistake. I forgot to put the decals on before I started chipping and weathering. So I need to go back and blend them in.
 I may be sorry. My logic was paint them as a single unit. I used fine strips of styrene between the wheels to get the spacing right.(If you look you will see a bunch of nice round spacers. Yeah I forgot to put them in. Sometimes it pays to stay in bed!!). They have all been primed anyway. I want to assemble the whole unit so I can remove them for weathering etc. I have always painted everything first. Yet a number of folks on Youtube assemble then paint. So I’m trying their way. I have my doubts as so far it’s been a PITA. Maybe that just because it’s an interior kit.


 Thin is easier to work with but it looks too delicate on the side. Also did they have brackets or were just the top attachments enough to hold them in place? (I think the drivers side image is of 323 but I found it on the internet as 321).