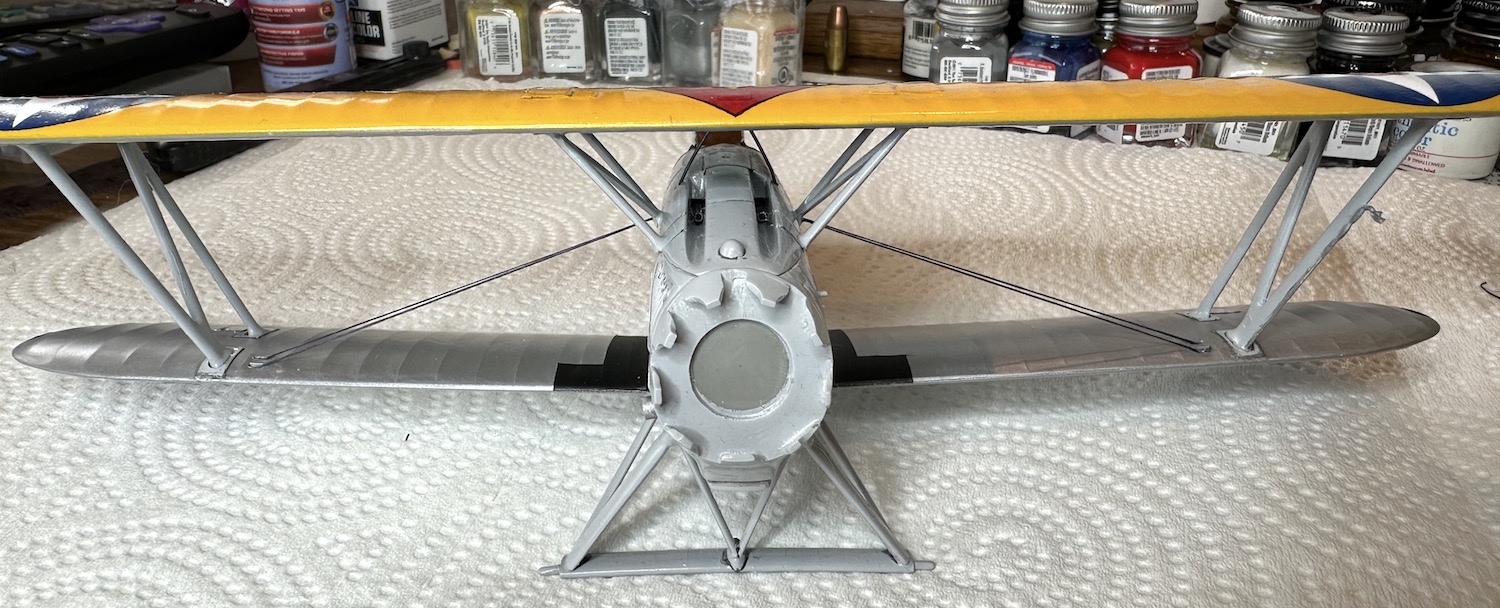
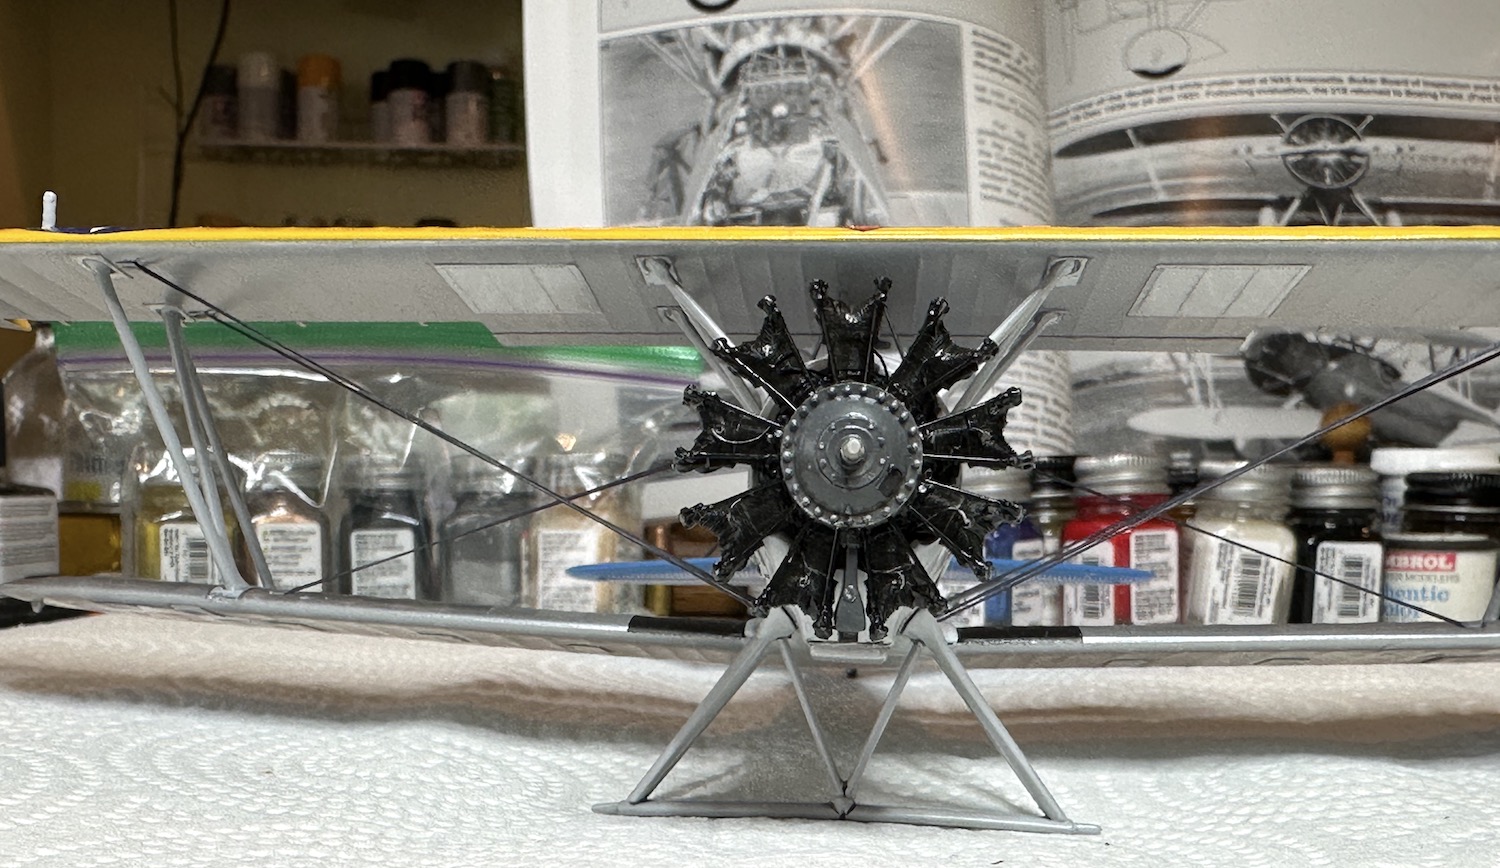
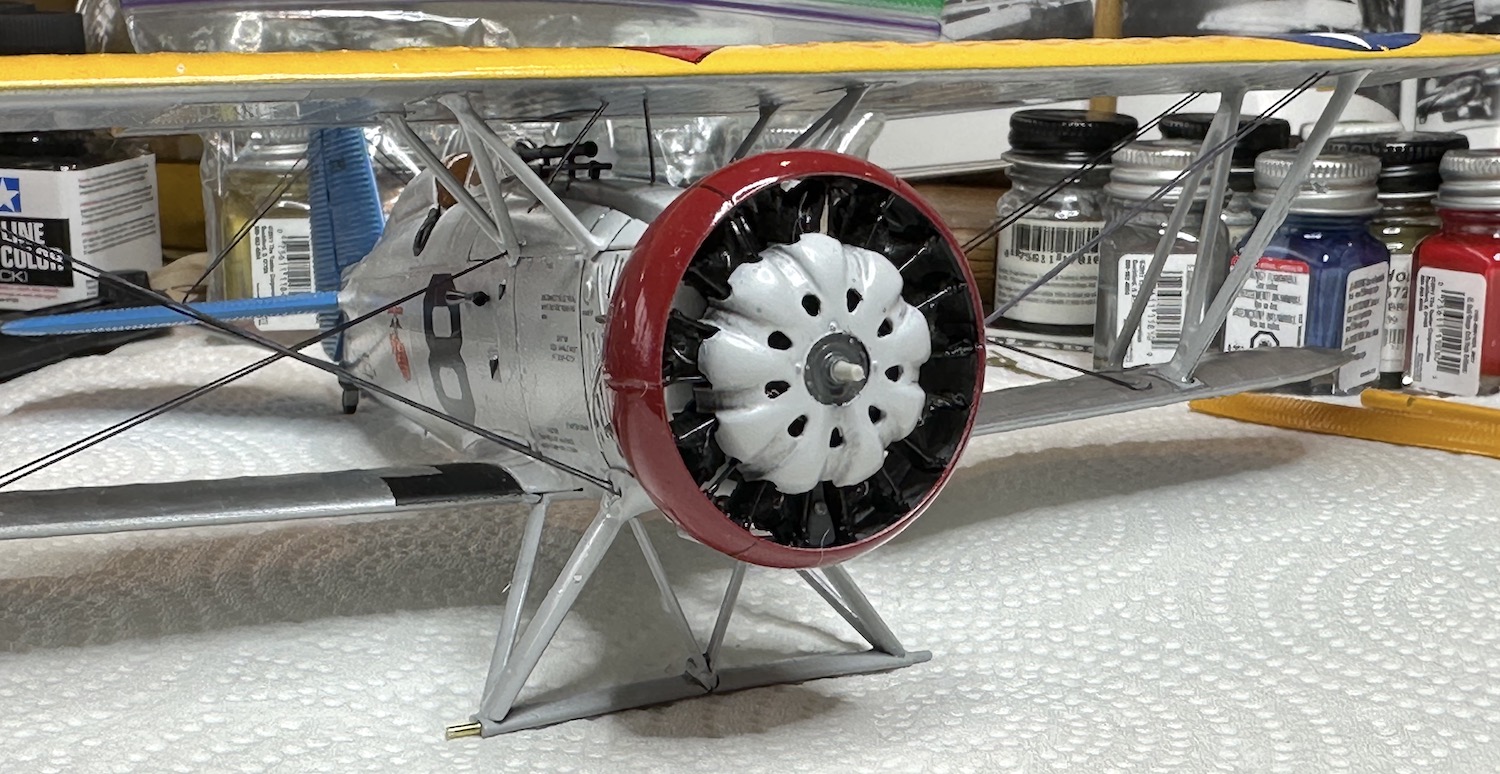
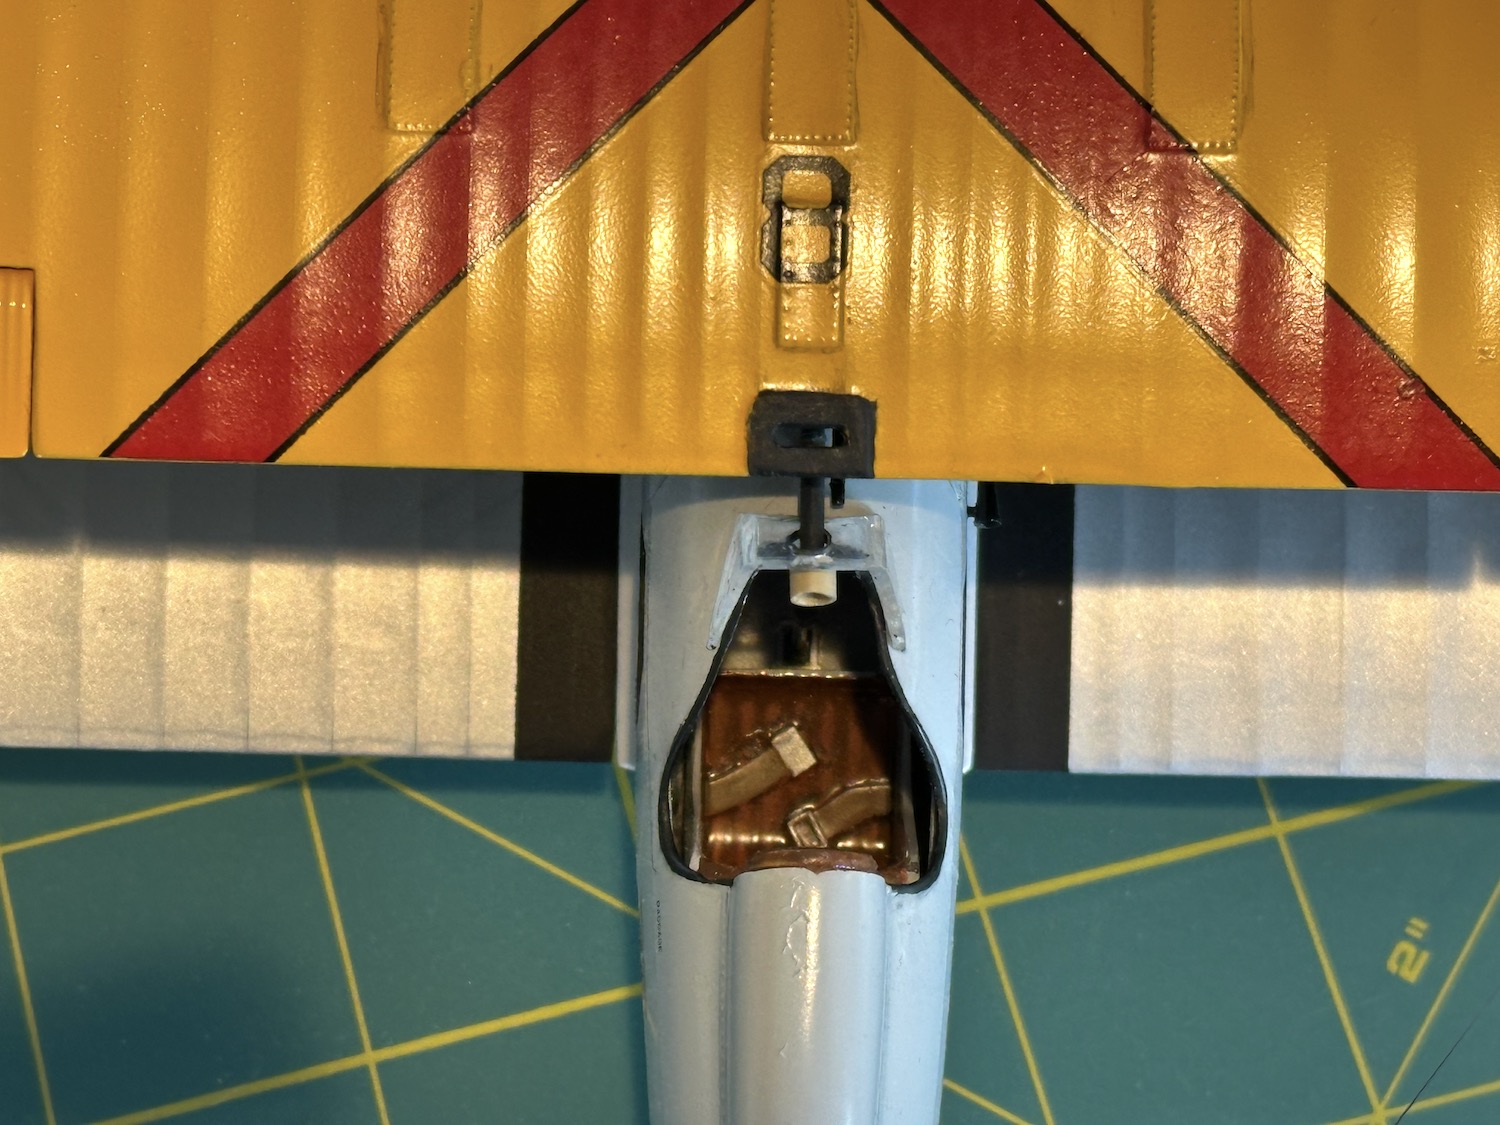
The rigging began with those hoisting cables. These attach the steel truss of the forward fuselage to a stranded steel cable accessed by removing a metal panel from the center section of the top surface of the top wing. I found this by looking over that wonderful Naval Fighters Series book.
They were made from plastic rods cut oversize earlier in the build. Holes had been drilled in the upper fuselage fairing between the cabane struts before that piece was installed.
Installing them was easy, a drop of CA gel glue was toothpicked into holes pre drilled in the bottom section of the upper wing. With tweezers the rods were inserted into the holes in the upper deck and then set down into the drop of glue. Easy-peasy!
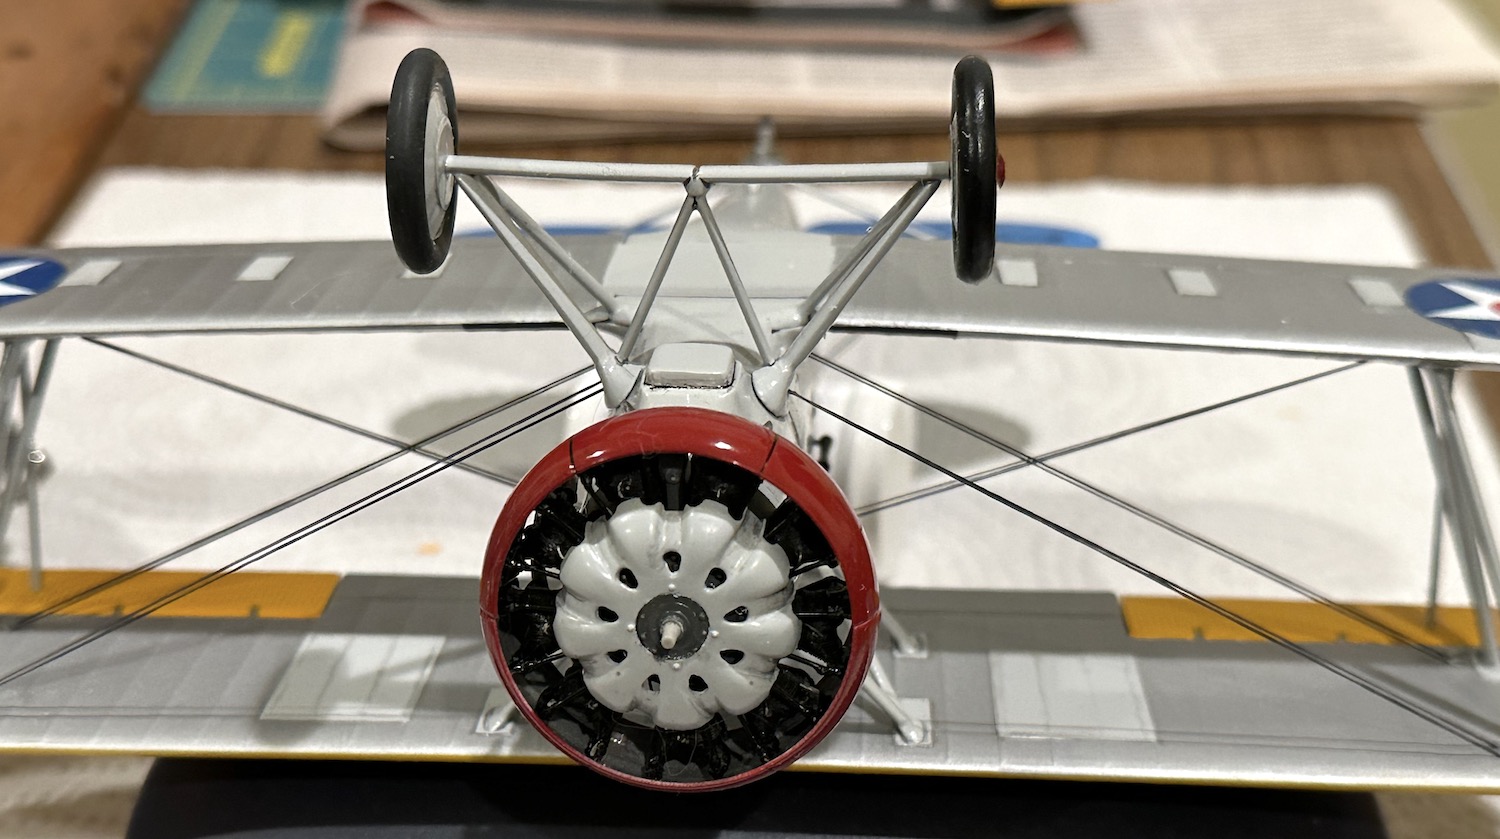
Next came landing wires. The holes in the fuselage and wings had been drilled before painting and were ready to go. The method recommended by EZ line was to brush a bit of CA accelerator into the hole and then holding the line with tweezers dip the end in a puddle of thin CA glue. I tried this but could not get it to hold. Its a method I will try again as a lot of this is just practice.
The next thing I tried was to take a toothpick with a blob of the thin CA glue and insert that into the hole. The EZ line was then set into the hole with tweezers. Sometimes that worked, sometimes it didn’t.
Next was to repeat the later process but using a toothpick to hold the line in place. Natch, the glue tried to grab the toothpick so a second toothpick was used to hold the line in a slightly different place while the first toothpick was removed. That often worked but mostly did not. Often the line just pulled free.
Still I had a method that might work 30% of the time so I went ahead and rigged the entire F4B that way. It took some time, but looked pretty good when done.
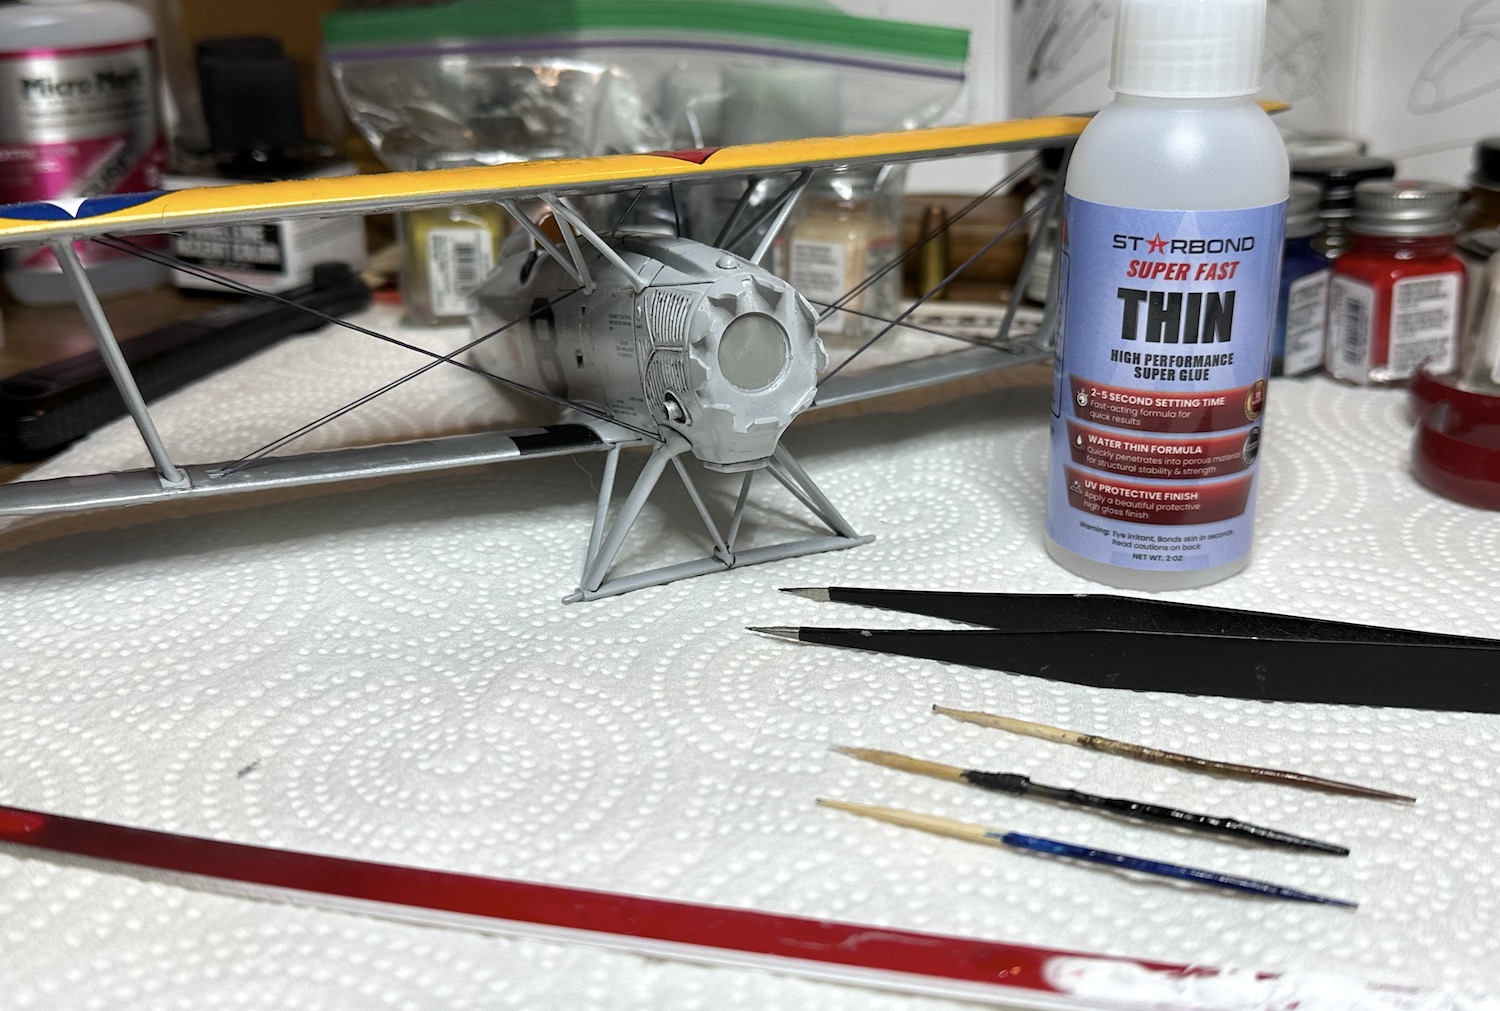
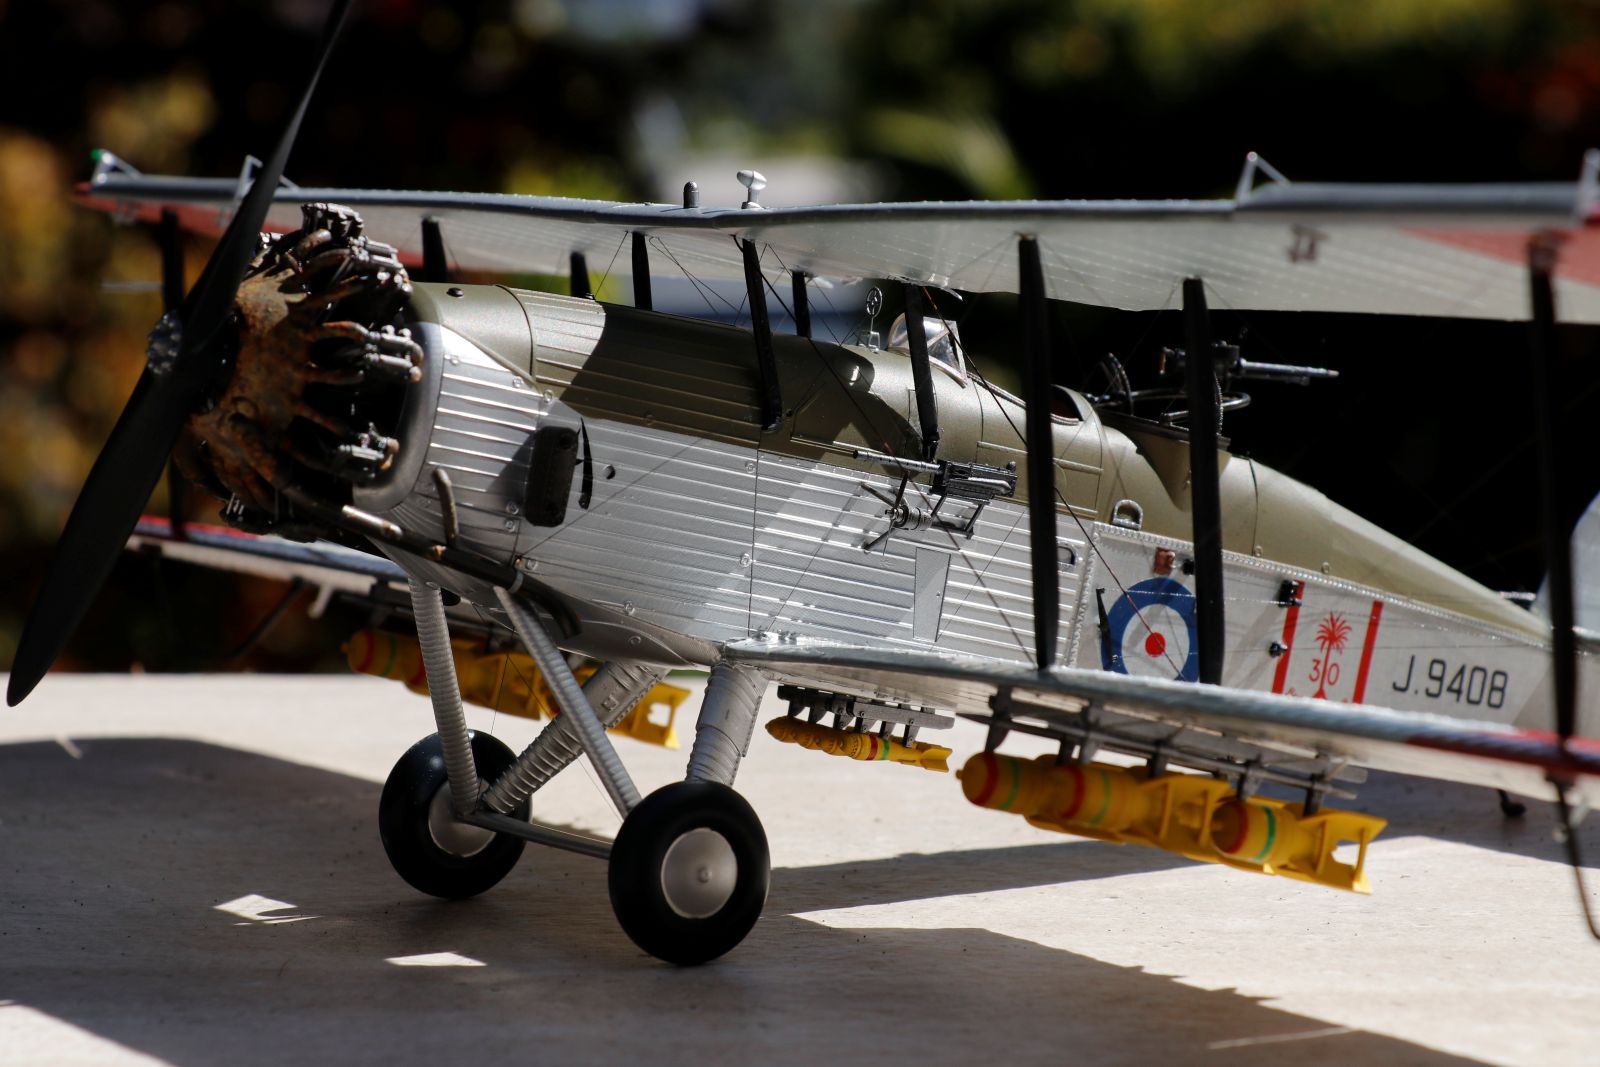
More rigging pictures here including one of the materials used to do the rigging. I could not figure out how to shoot pictures and rig at the same time so there is a pic of the tools used to do the job. All rigging except the control cables was the Heavy EZ Line.
Thanks guys, I was pleased with the way it came out. I feel confident enough to tackle another biplane now. I looked to see what the thickness of the line is but it is not mentioned. My micrometer has gone walkabout so I can only say that the thick is appropriate for this era of biplane. The thin is good for radio aerials but seems too thin for control cables.
If I had my druthers, I would like a medium thickness and a silver/steel color. They have a number of colors but black seemed to best fit the situation. I made a practice jig to play with before committing to an actual model. Now that I’m done with it I’ll see what paint does to EZ Line.
Some things I probably should have mentioned about my experience rigging with EZ Line - I cut it a bit too long and then anchor the line in the first hole with the thin CA glue using a toothpick. Then I waited a bit for the glue to firmly set. While this was going on, I anchored other lines. After some time, maybe 10 minutes or even longer, I would do a trial stretch. Sometimes the line would pull out but usually not. If held firm, I would grab it with tweezers and pull it out to where it was going to go and then stretch it a bit past it target hole. It was then trimmed a bit too short, maybe 1/2" or so. This stuff is amazingly stretchy! Then the hole would get a drop of the glue using the first toothpick and using the tweezers the line inserted into the target hole. The second toothpick was then used to push the line into the glue. A third toothpick was used to push the line into the hole while the first was removed. Its a bit of a dance but seems to work.
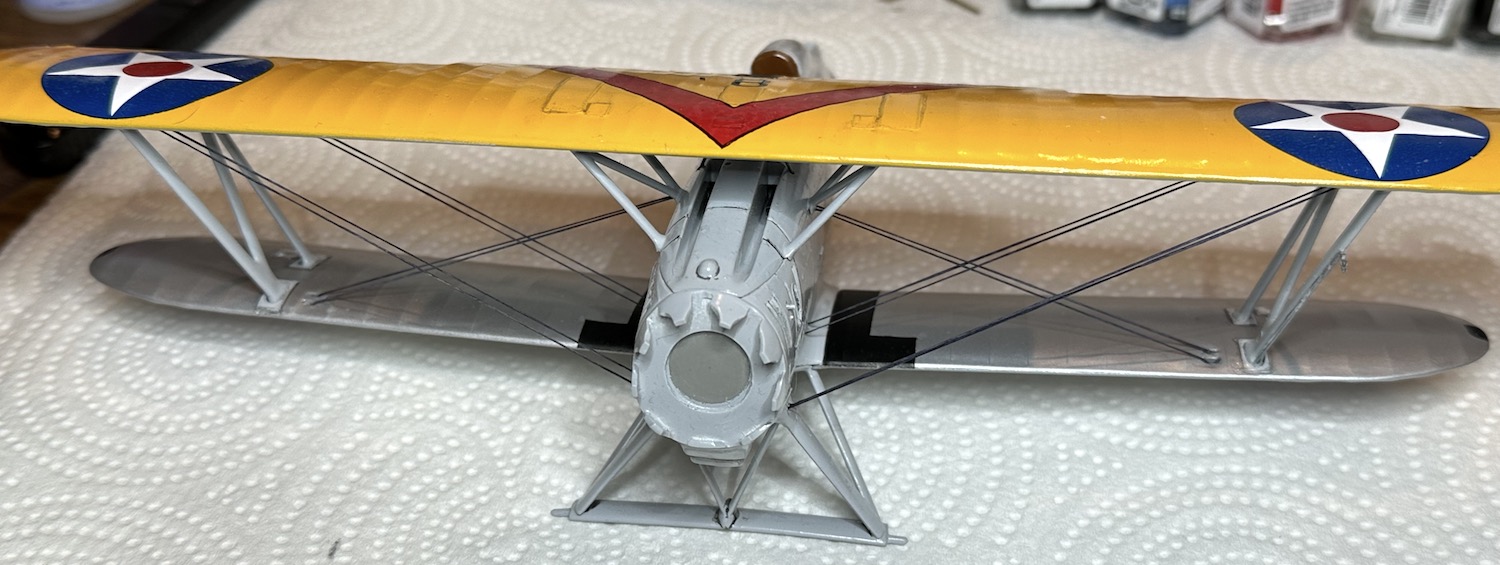
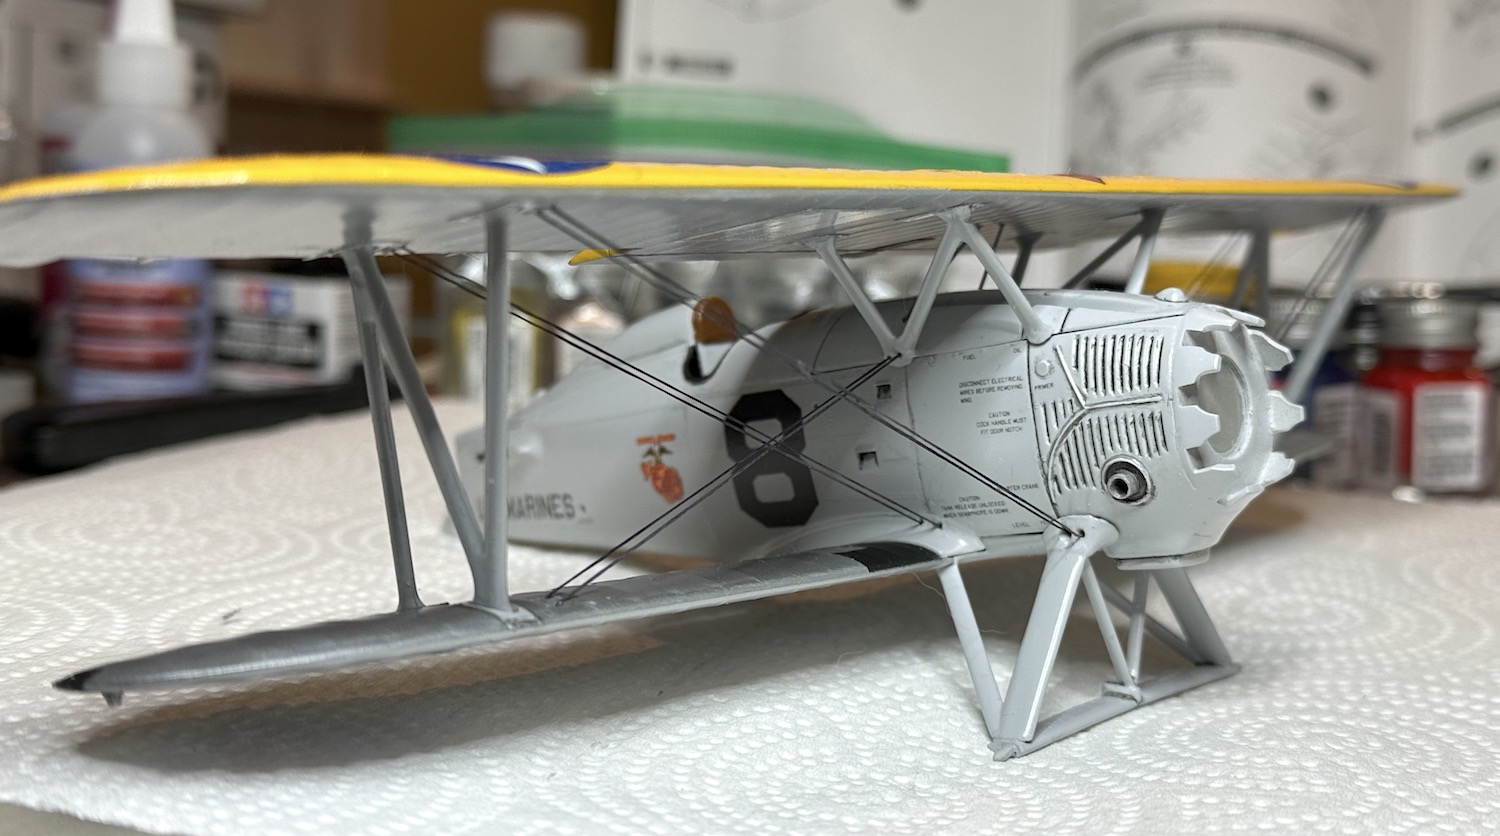
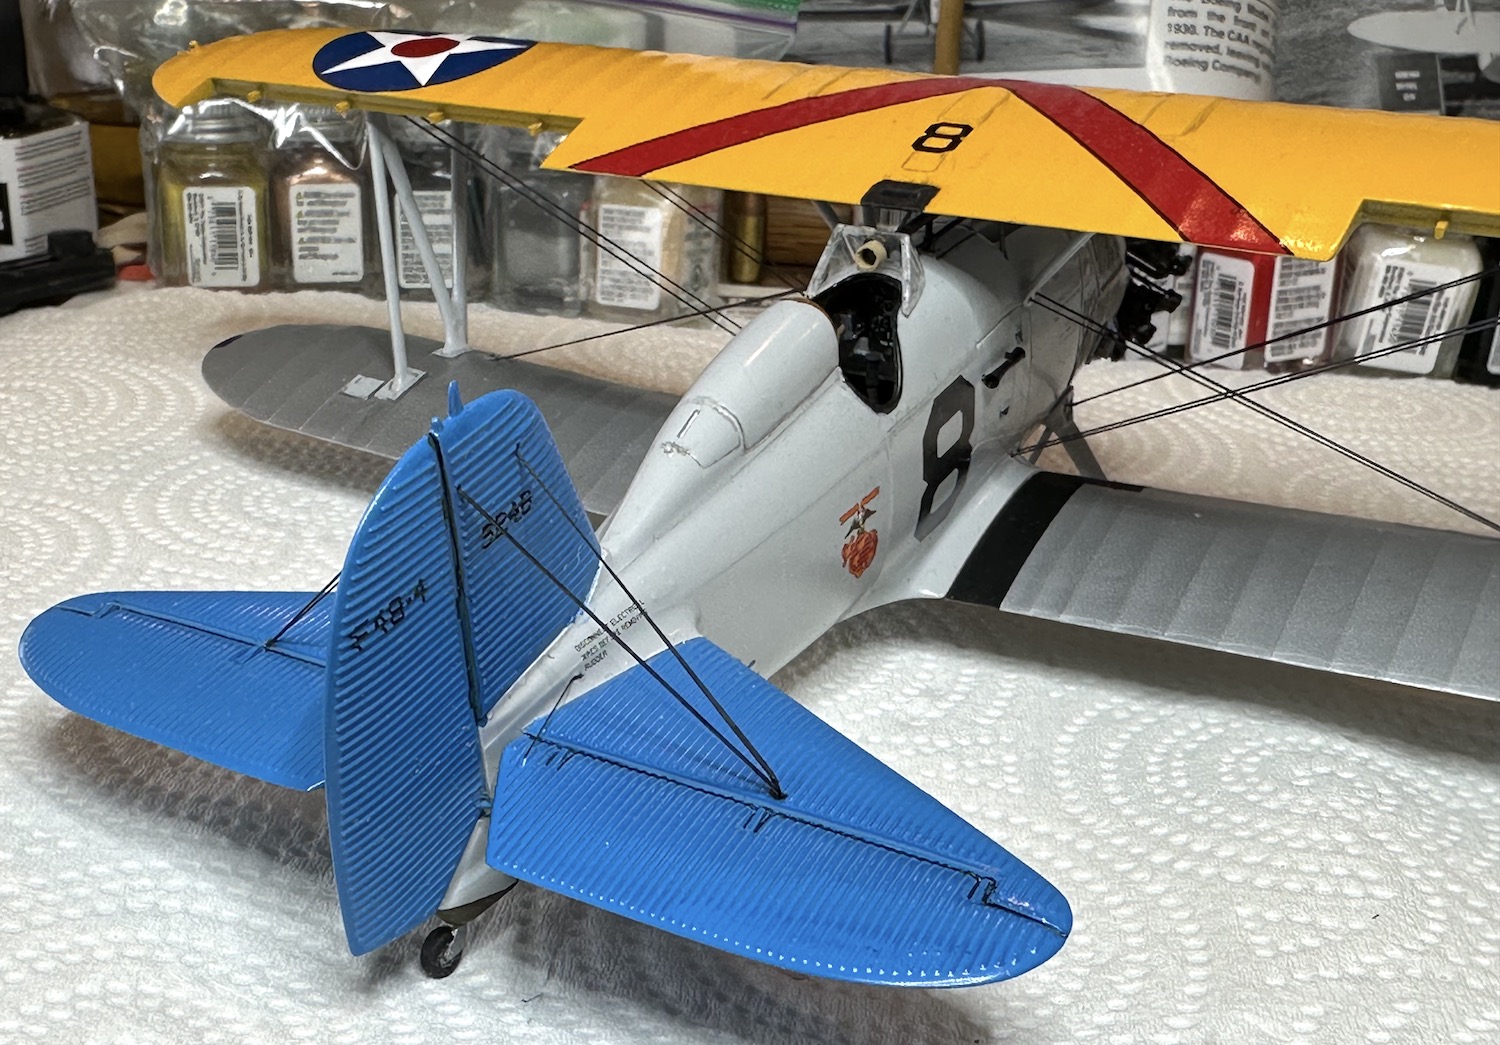
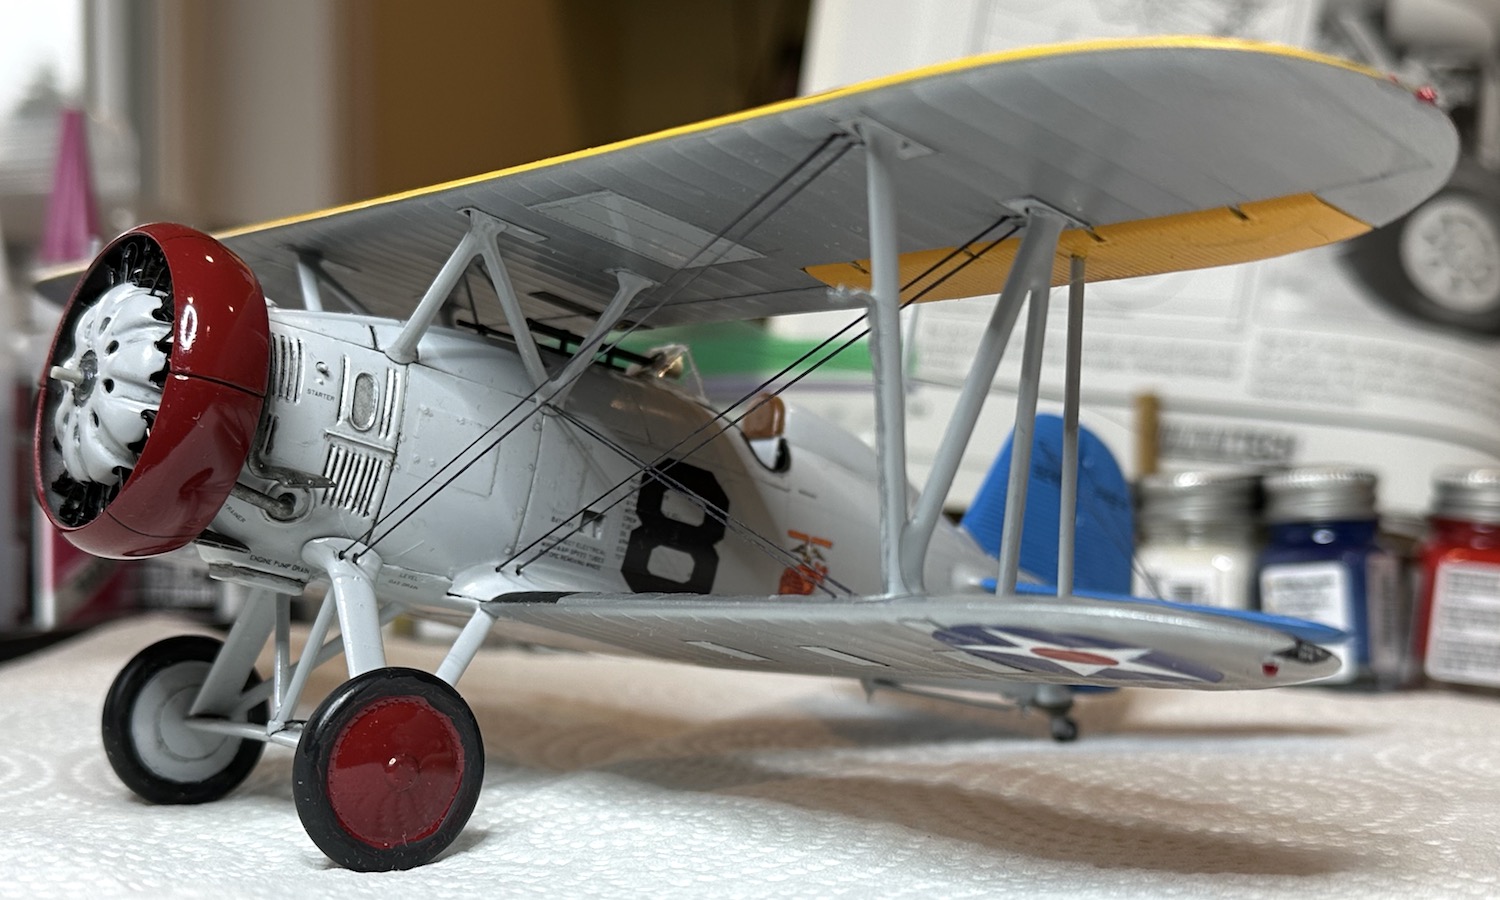
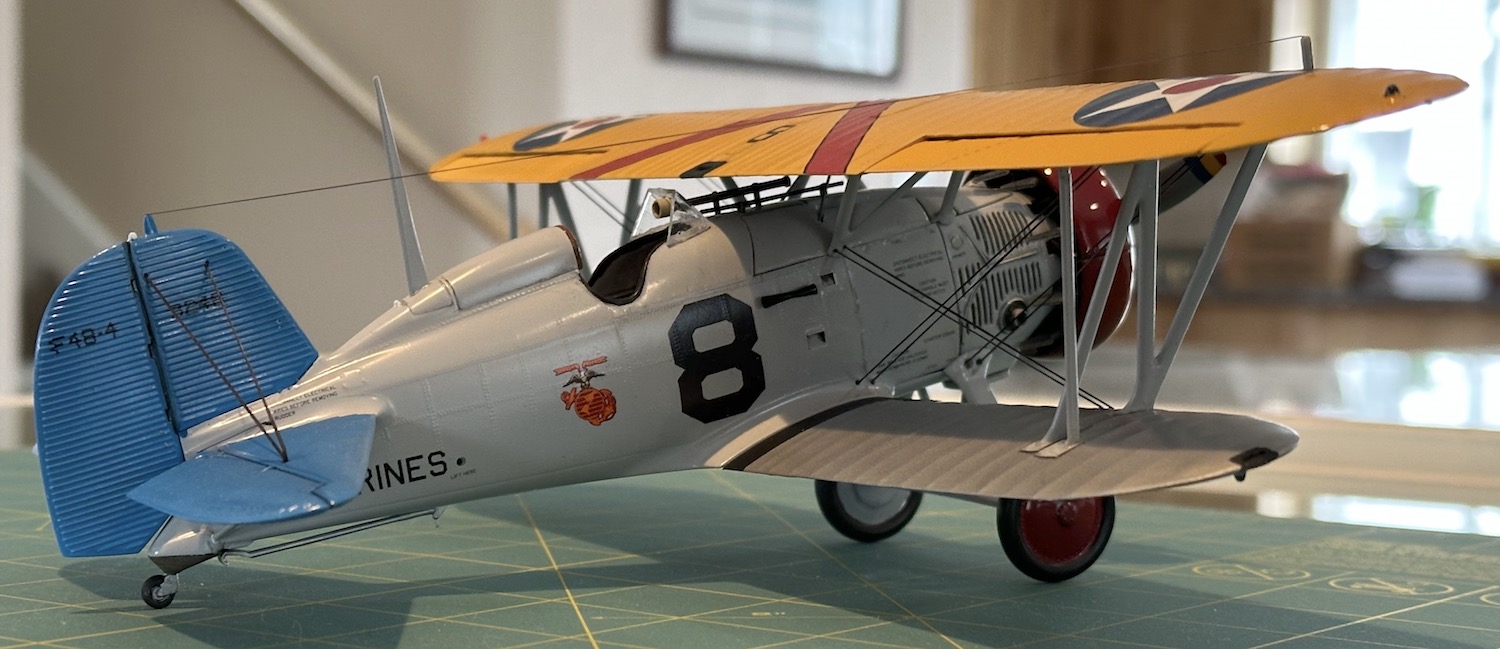
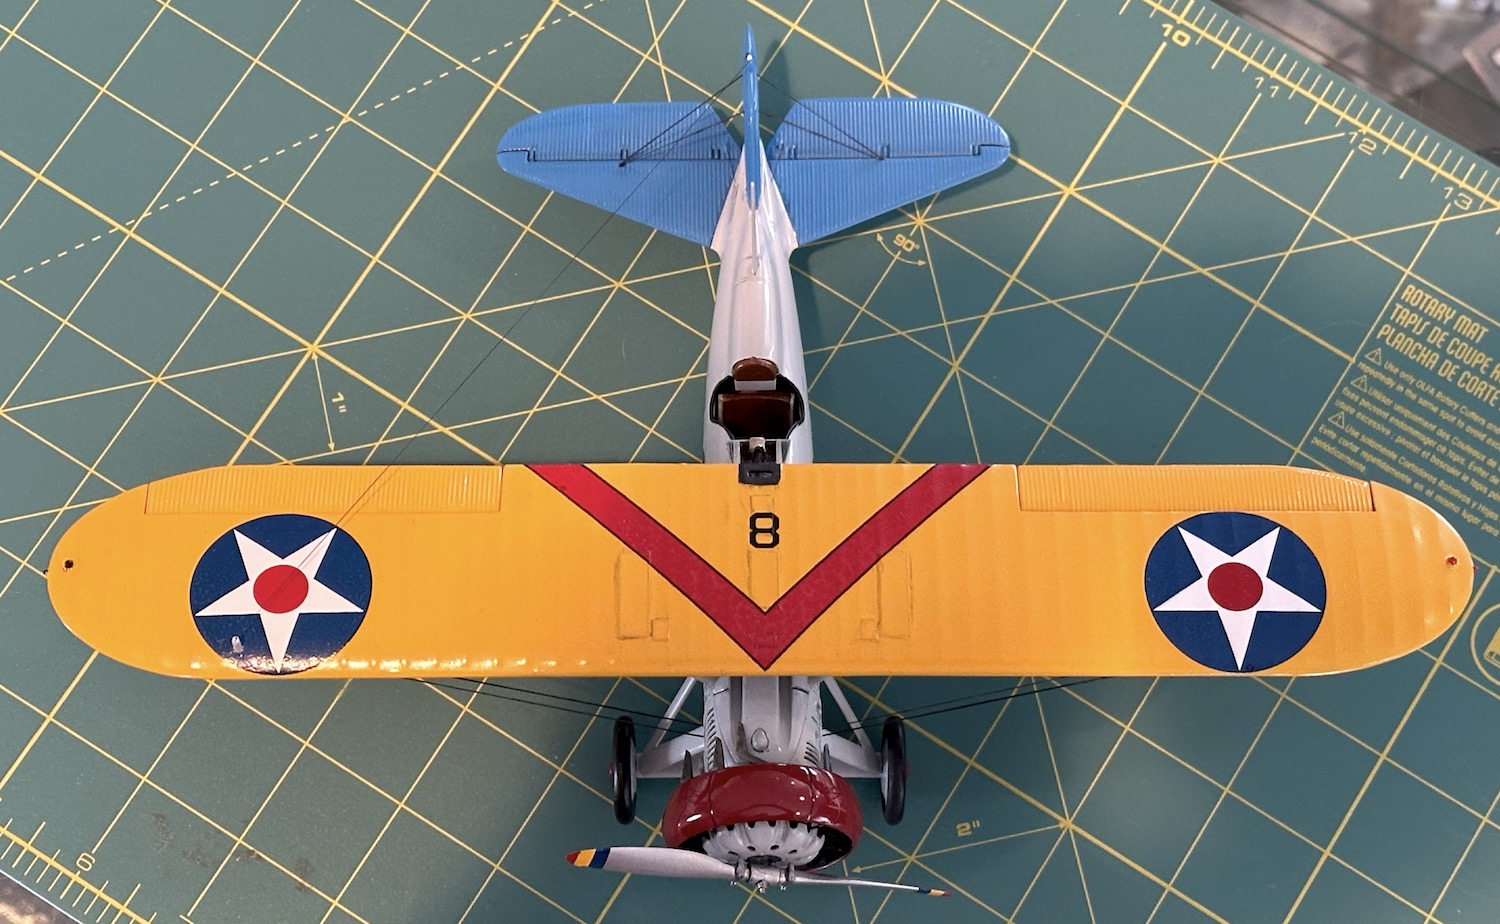
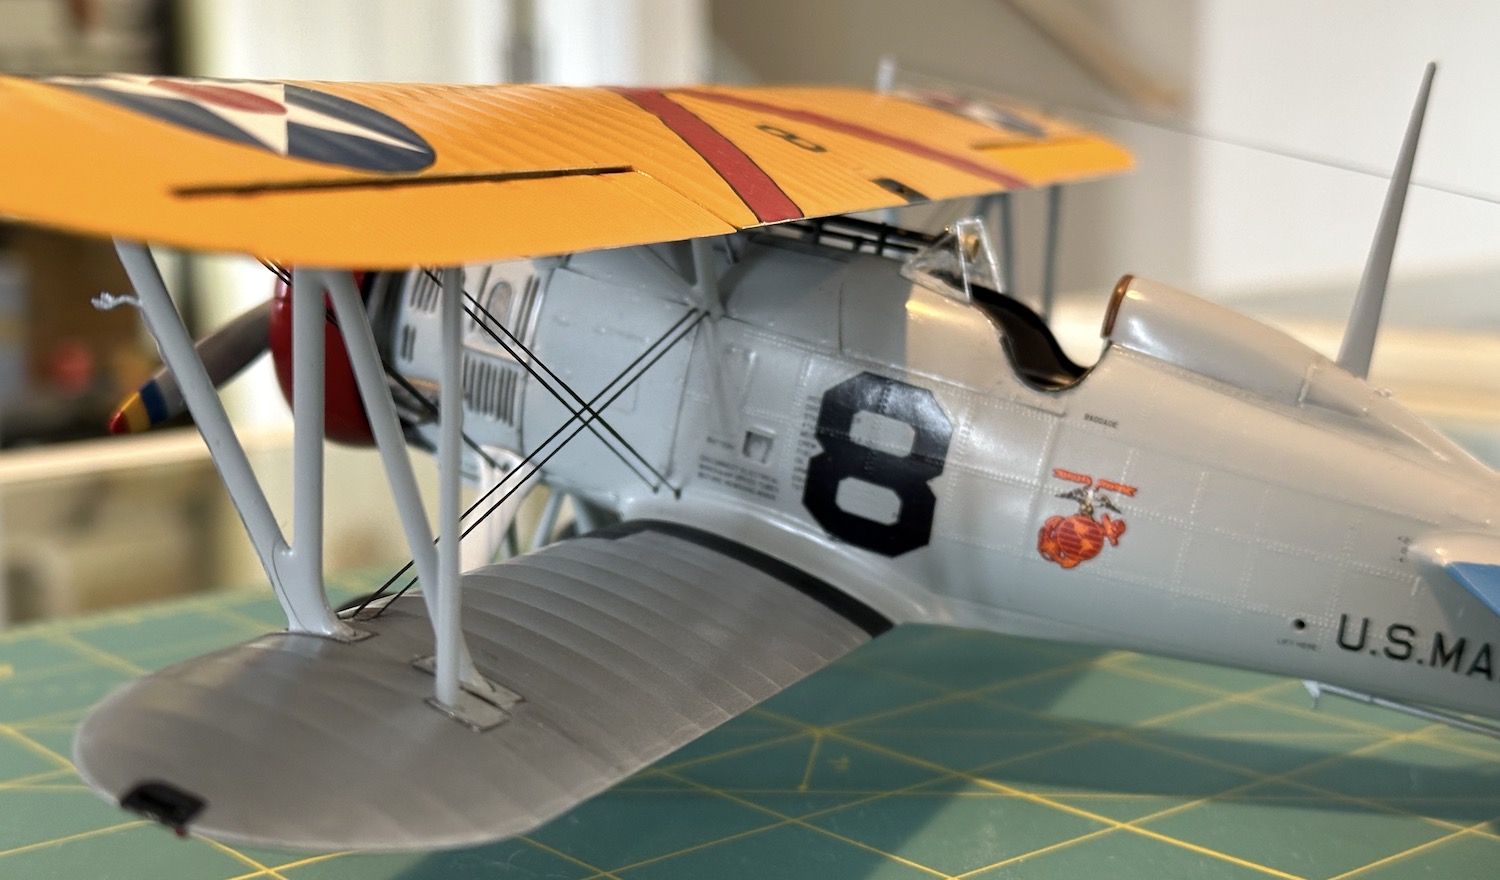
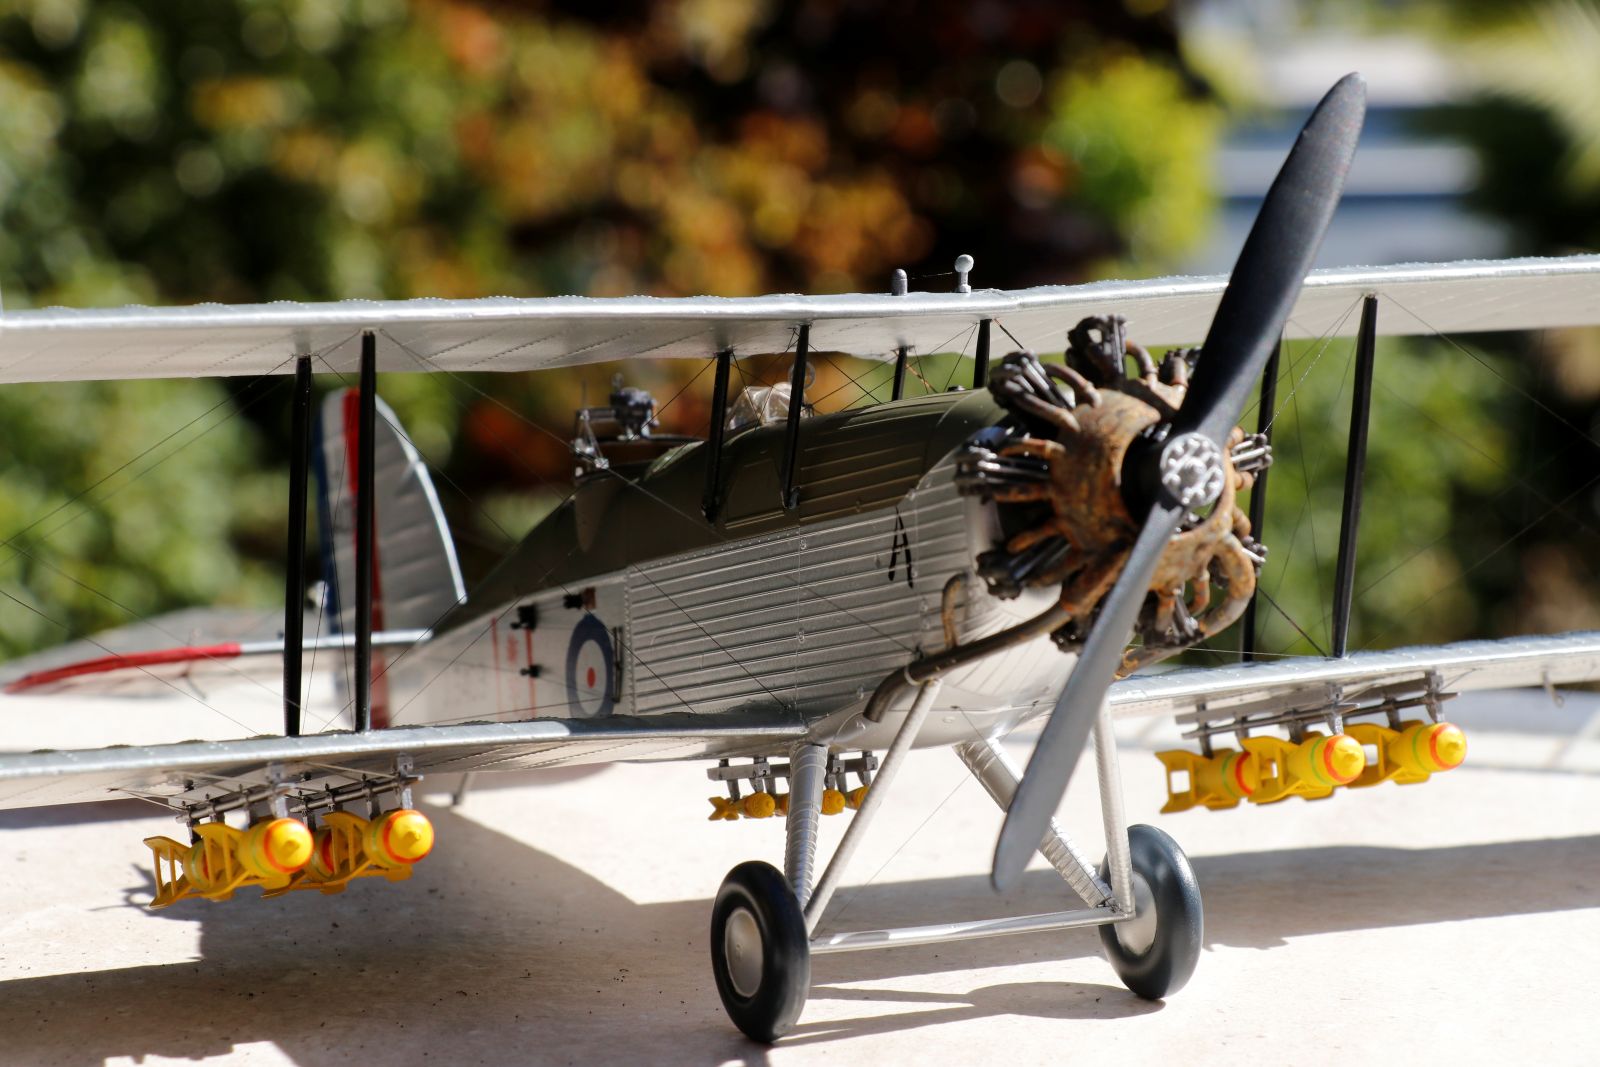
Here are some more pictures with more parts added. The rudder & elevator wires were done with the thin line. The Yellow Wings decal instructions said to paint both sides of the ailerons yellow. That seemed odd but looking at the pictures in the book there was a tonal difference between the ailerons and the grey panels so yellow they are and quite attractive too!
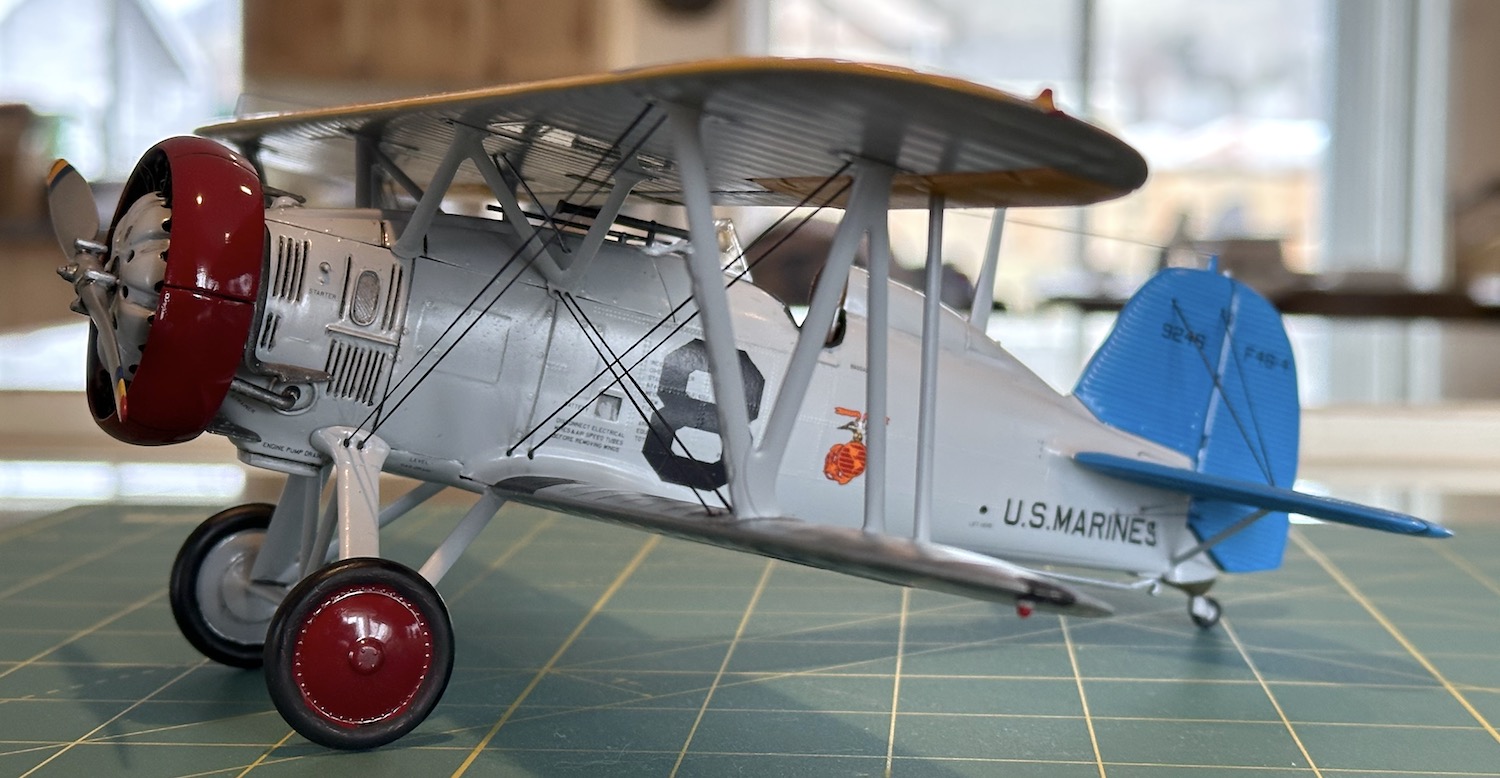
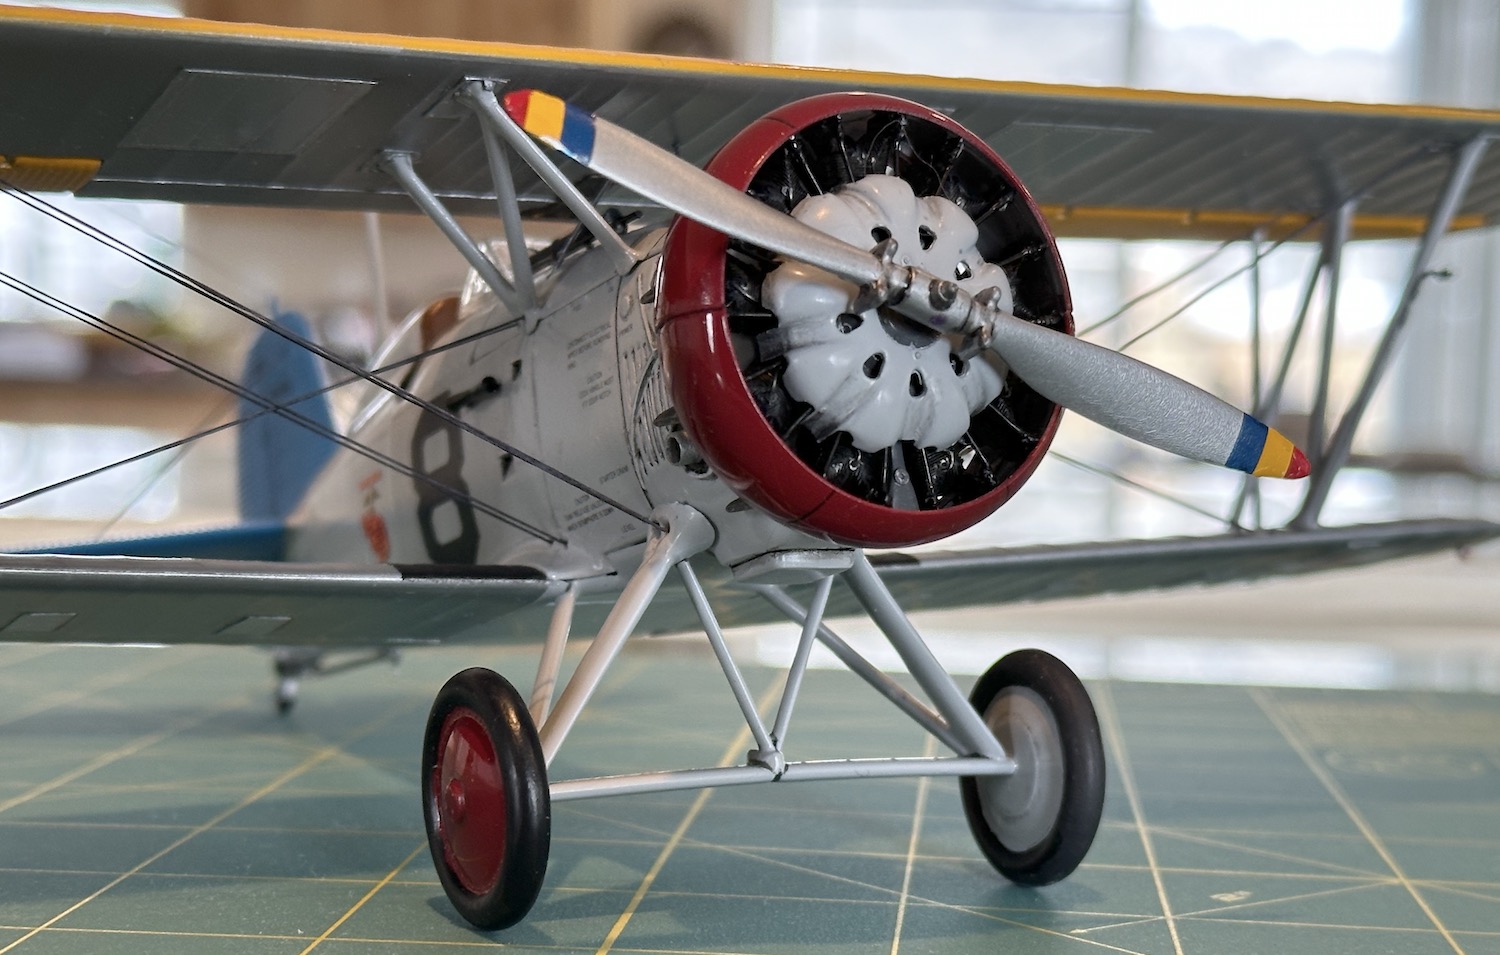
The 1/32 Hasegawa F4B-4 is done. It started as a quick out of the box build to learn rigging but morphed into something more. In the end it used a Vector resin engine, several decal sheets and some scratch built parts to doll it up. This kit is something like 55 years old and looks it in places but where it counts it mostly looks terrific. The detail in the fuselage panels is very nice and those wings look in scale with very nice fabric droop between the ribs. Hase kept scale thickness to them too, they look like the pictures in the book. There is some simplification here and there especially in the cockpit but that can be added to with bits & bobs.
One of the nicest things is how well it all fits and with the molded in cabane struts how easy it is to build and get the wings square.
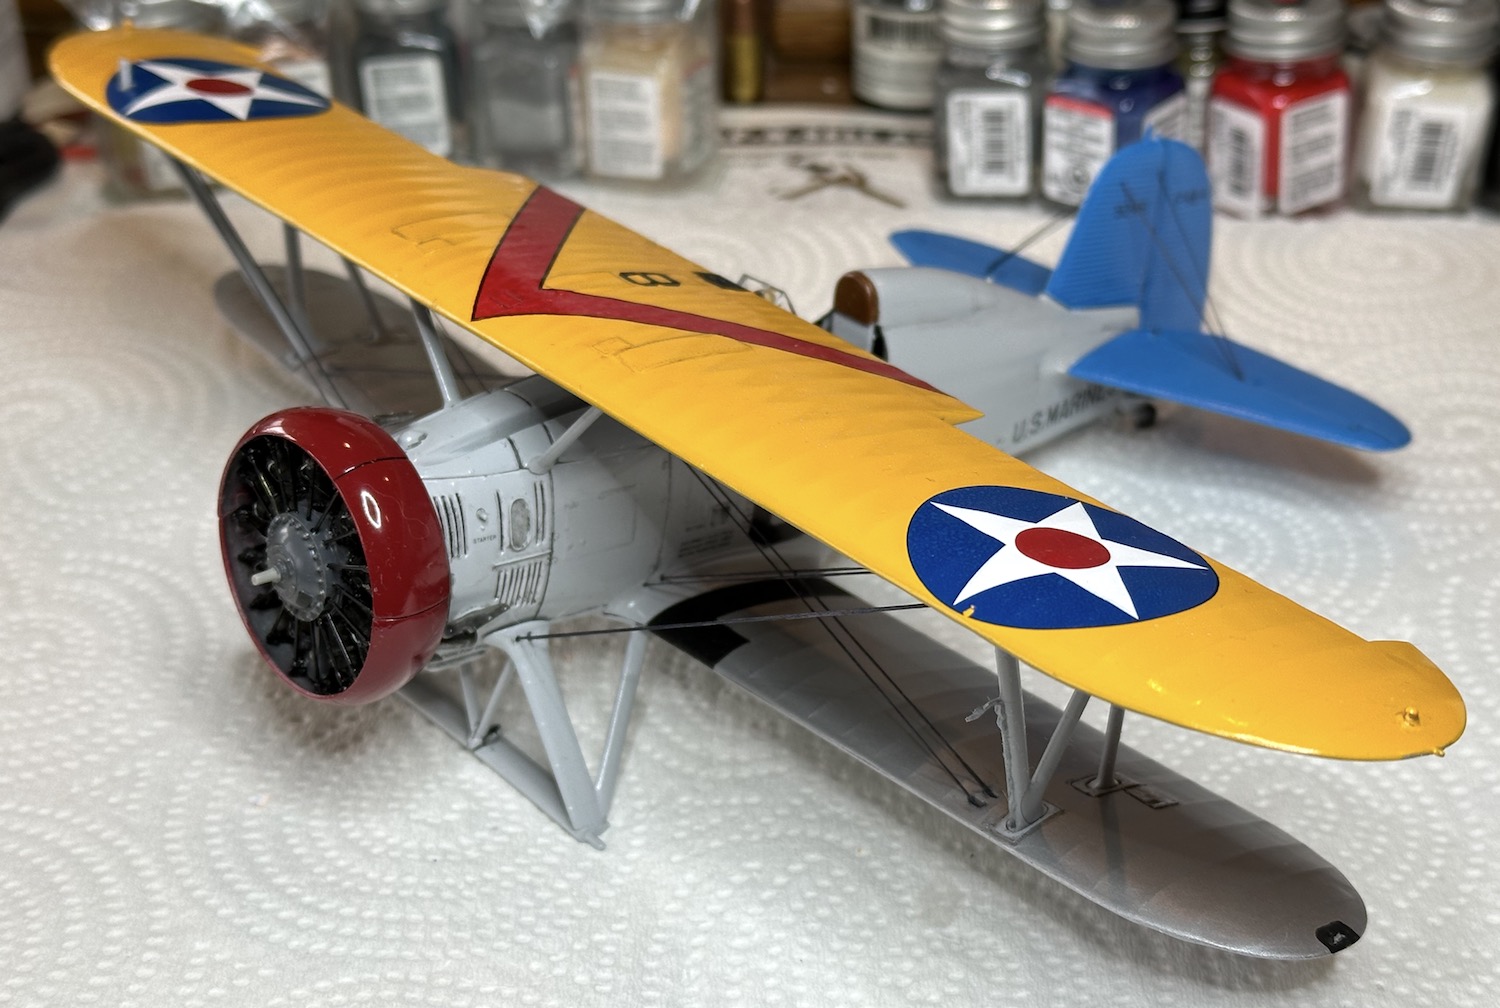
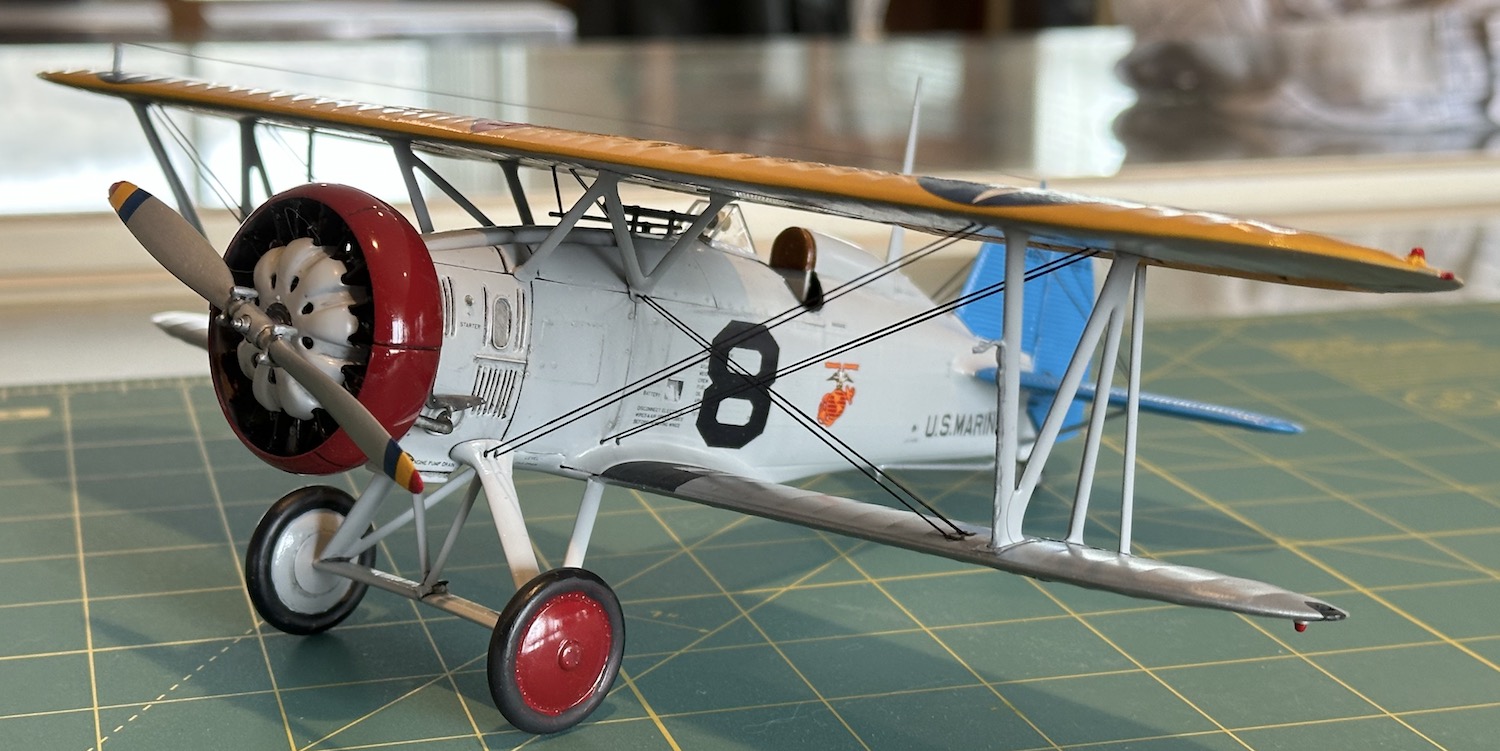
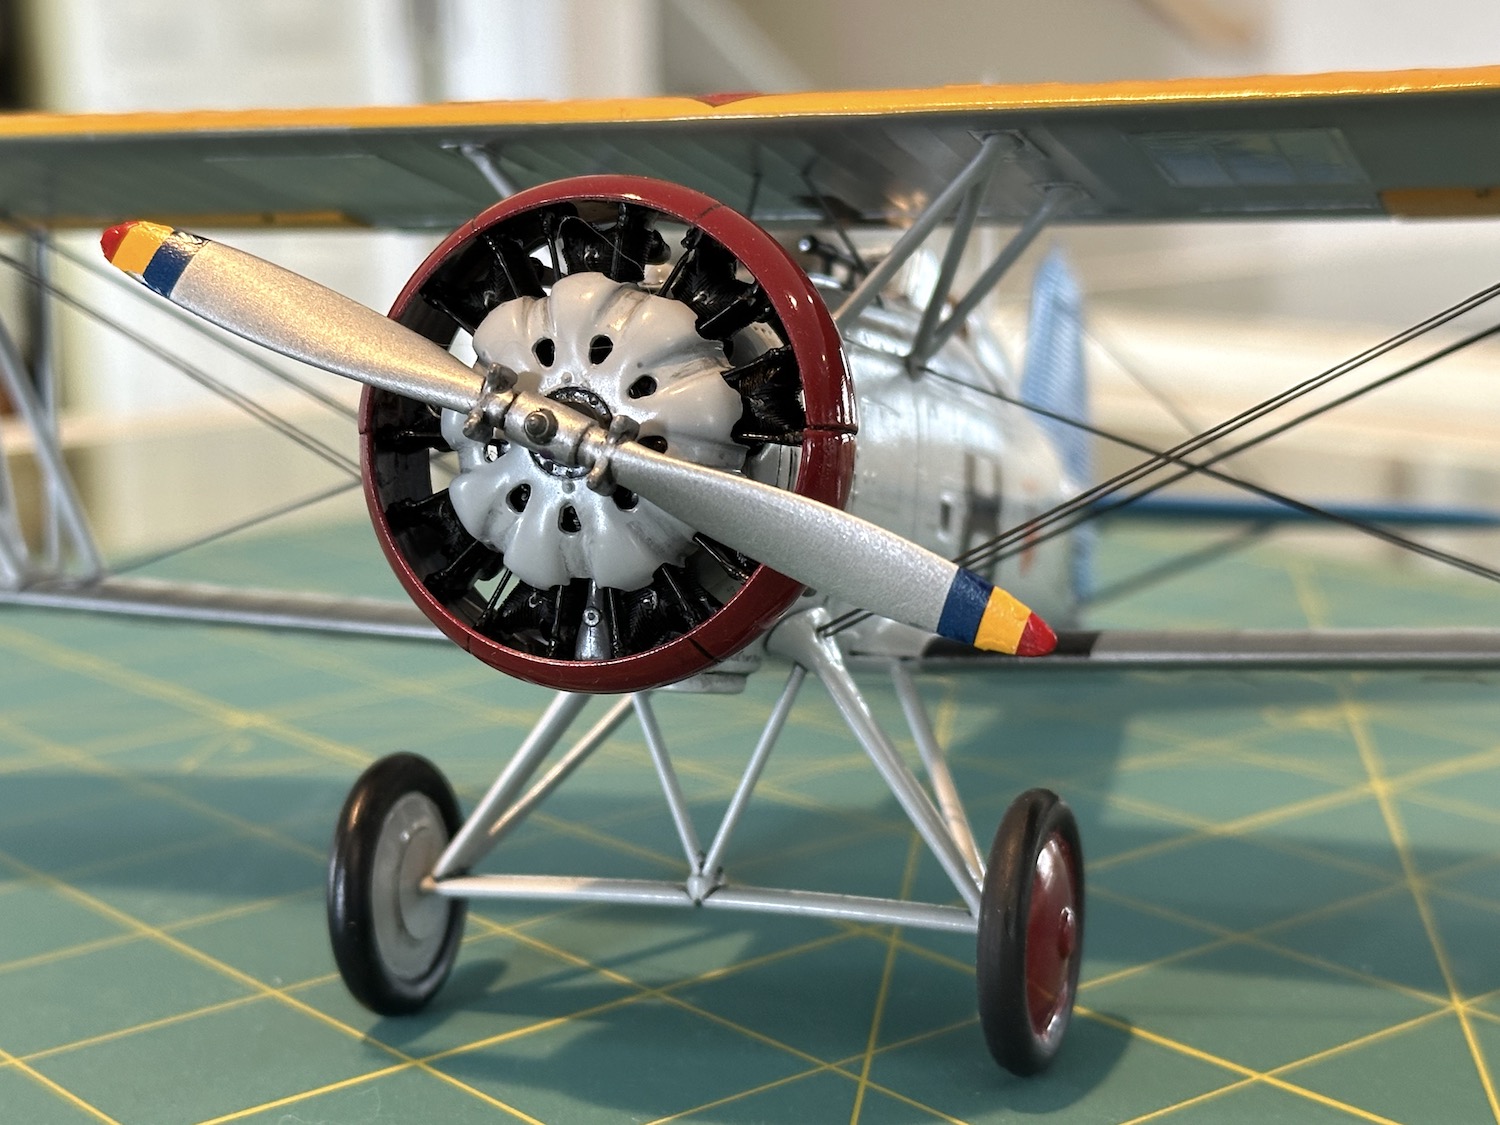
Here are some more pictures of the F4B before it goes into the display case. This last one shows off the scale thickness of the wings. There are uncomfortable separations between the upper & lower halves of those wings that leave a seam that looks awkward. I thought I could live with it better than losing the fabric detail to filling and sanding but my next build, the Hase 1/32 Curtiss BF2C-1 which has already been started will have those panel lines filled even at the cost of the detail. We’ll see which looks better.
Hi Paul, echoing Ryan, it does indeed look great. I wish, in hindsight, that I had chosen a lesser rigged biplane for my build now I see this neat little plane. I am glad the rigging worked out for you, it looks very tidy.
Thanks guys, it is indeed a pretty model, one I like looking at so much that I still have it out where I can see it as I walk by. Just the same, I have seen Betty Boop the cat eying it . . .
I wanted a simple build to learn how to rig an airplane. Hasegawa did a wonderful job of making a biplane easy to build and that was part of the reason for the choice. I too have a number of those resin kits made by the maker of the Wapiti. They are a good deal more challenging and hopefully in the end, more rewarding.
I look forward to seeing progress on the other projects in the group and learning more ways to get this job done. realisting turnbuckles might be a good next step.
Thanks for those comments. I learned a lot here and after getting the rigging in place was thinking “I dood it!”
I was reading an online review of the Curtiss I’m working on now and that builder had a similar technique to the one I developed. He used a steel pin to push the rigging into place rather than a toothpick. Once the glue had “grabbed” the line & pin he had only to twist the pin and remove it. No dance with the two toothpicks. I will try that on the BF2C-1 build.
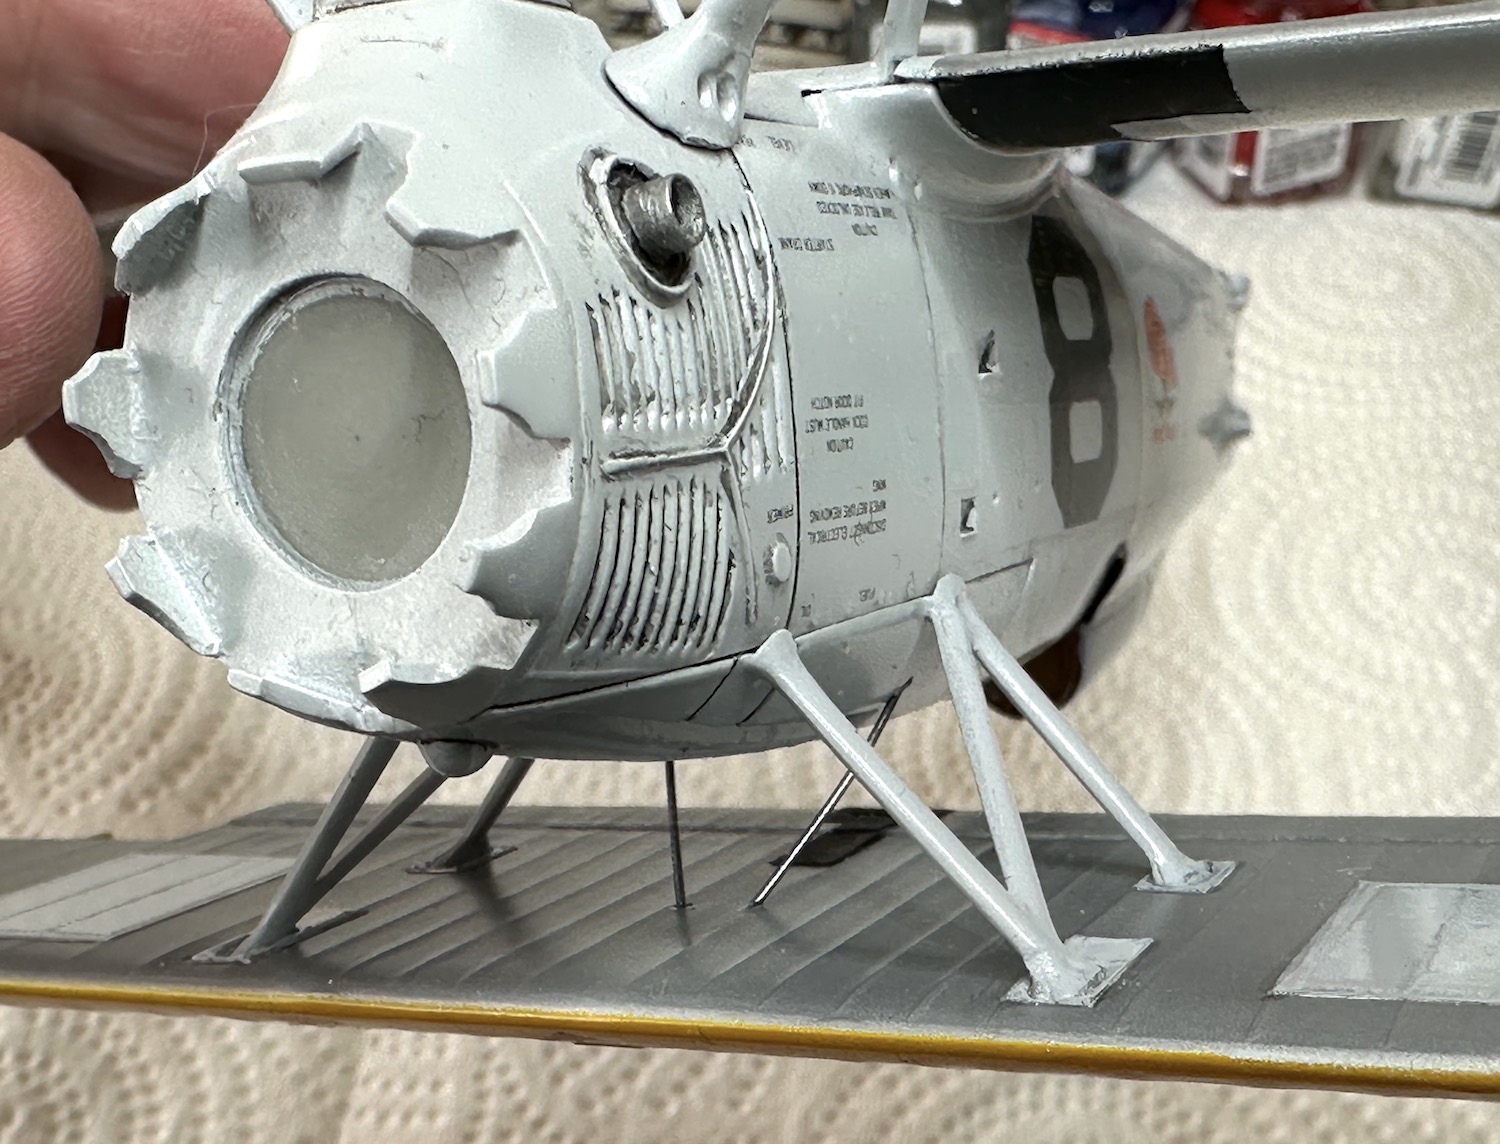
A point that came during my research of the F4B & the Curtiss is that both the NAVY & MARINES kept these aircraft in top condition. Even in service at sea, they look factory new, no weathering and the oil that radials spew was quickly wiped clean. The crews took pride in their work.
That Wapiti turned out wonderfully! You did a great job on what was a difficult build. How difficult was rigging it? Your efforts give me courage to tackle one of the Lukegraph kits in my own collection.