I have been bogged down by other things, and may not be able to finish in time. In that case I will go for part 3.
Ken
1 Like
Hi Ken,
Of course you can finish it in pt3, but are you close enough that an extension would get you over the line? I’ll have to make a call on that soon…
3 Likes
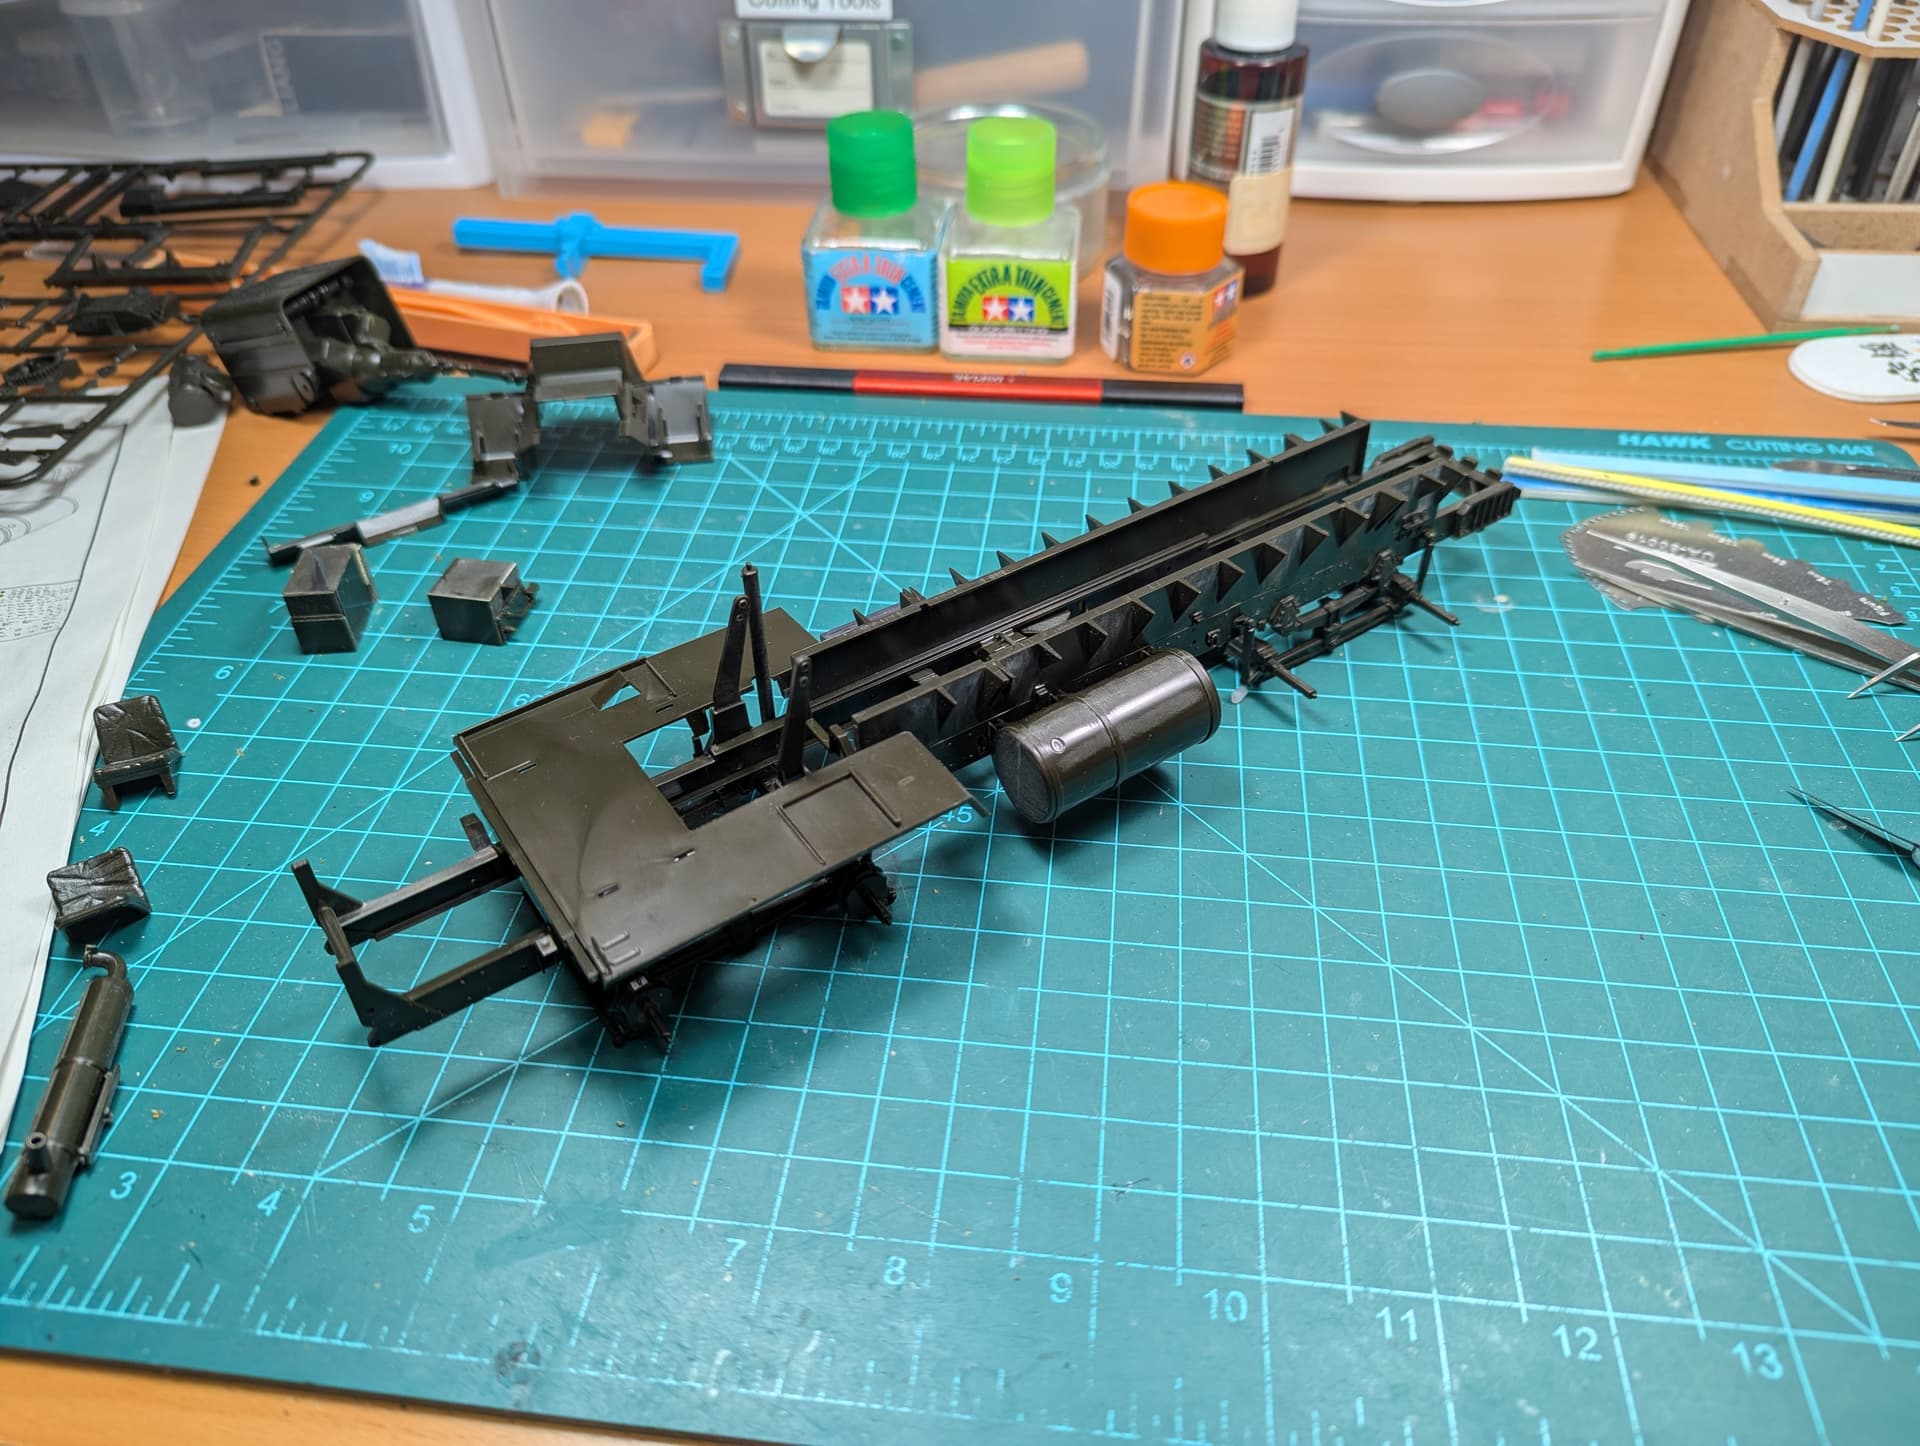
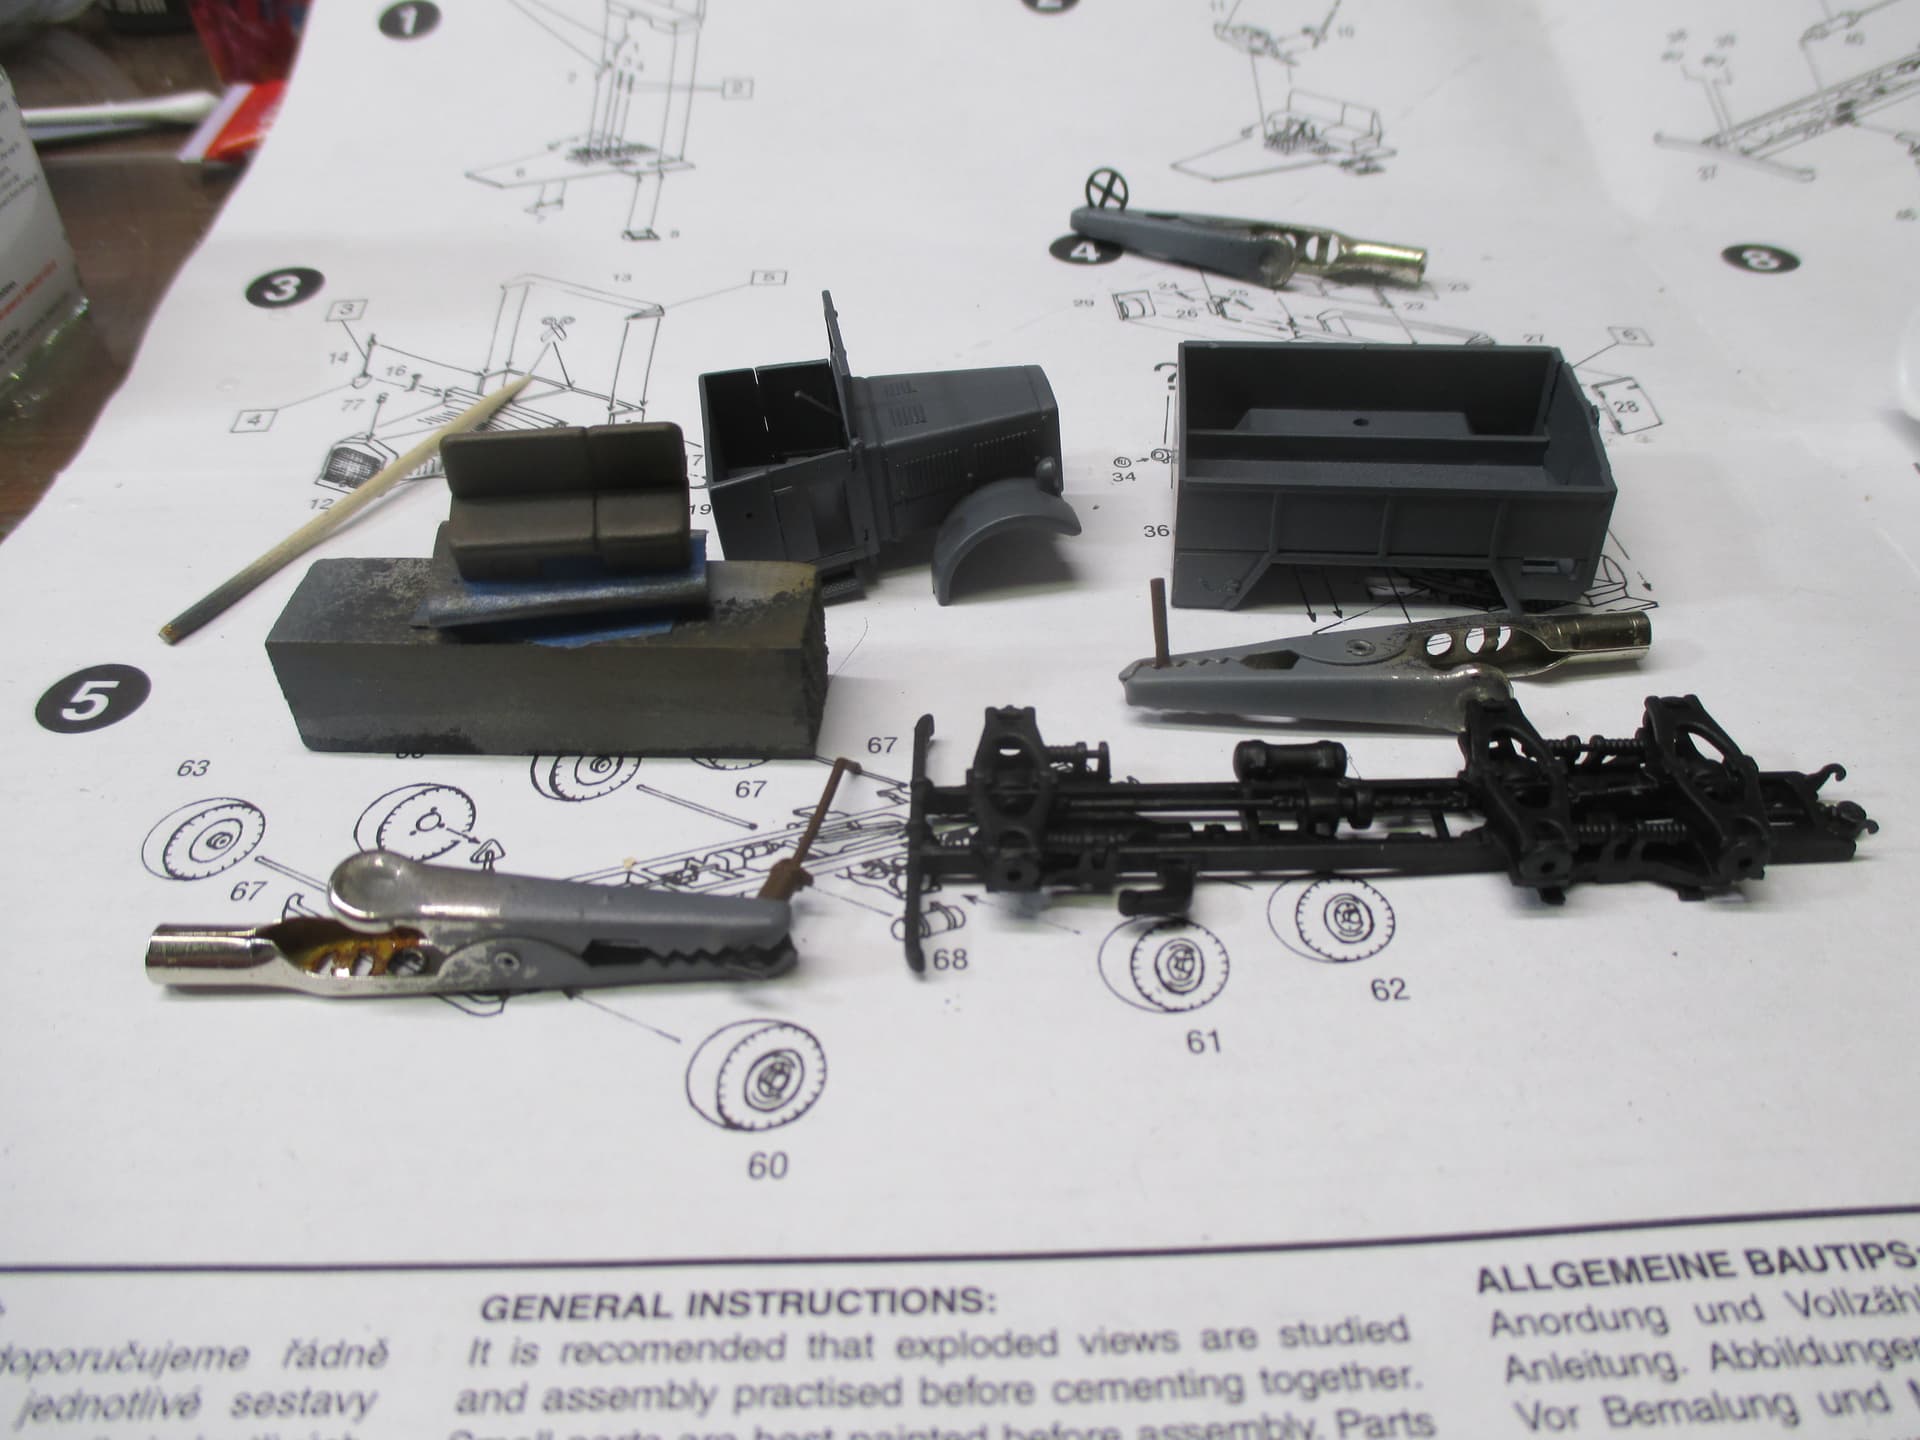
As promised (if a little late), here is where my HEMTT stands. I’m almost done with the frame, but haven’t made much progress with anything else. Every part needs significant work–either because of multiple sink marks, poor fit, or ejector pin marks galore. I’ll come back to it for part 3, I promise, even if it has become a slog!
4 Likes
I somehow forgot to post pictures of my finished(last October) participant…
Drafted Bulgarian Magirus S300 truck(Ministry of Road Construction) towing a Sturmboot trailer(Sd.Anh.108) from the Heavy Pontoon Bridge Type B:
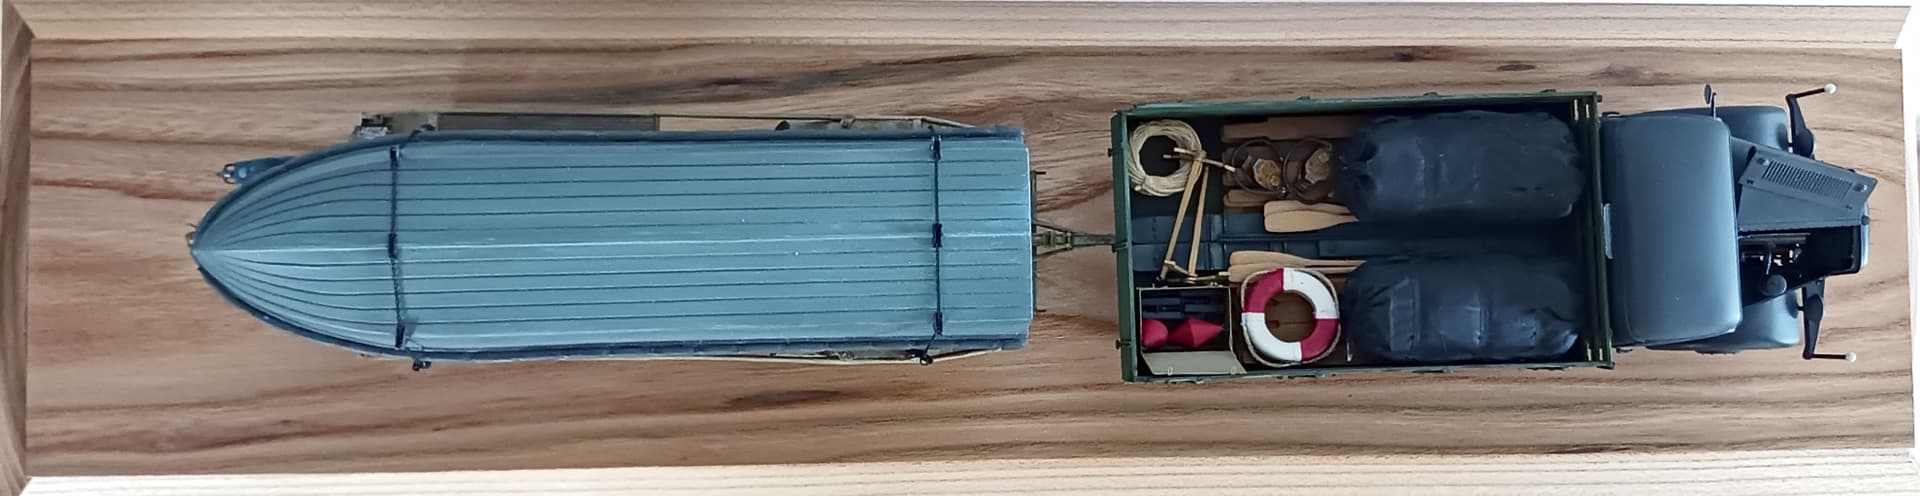
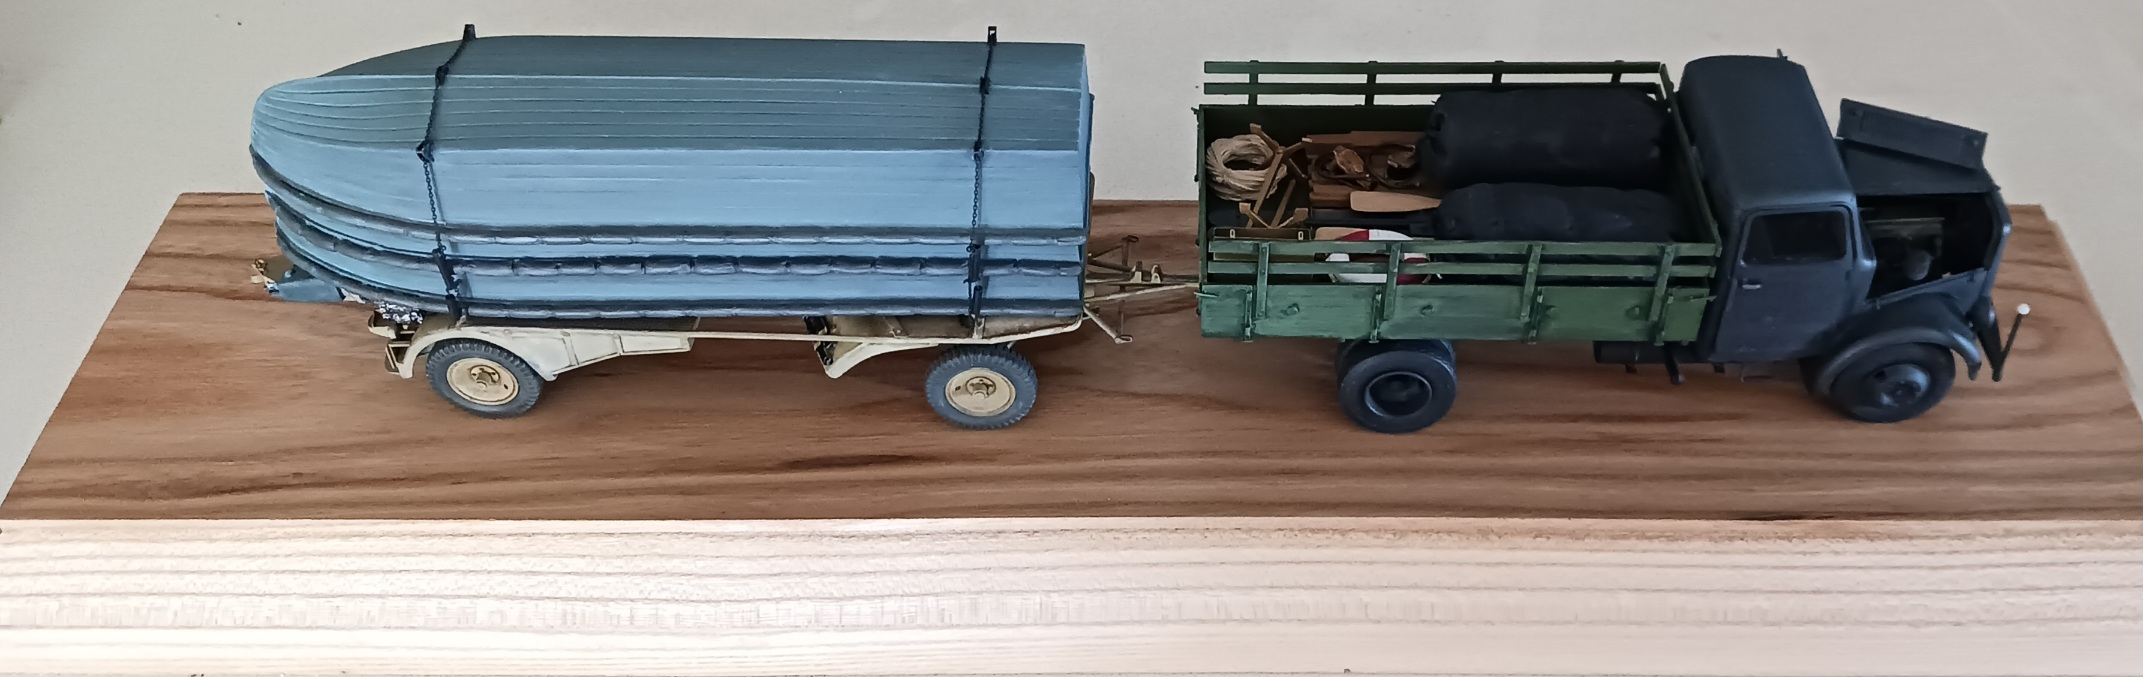
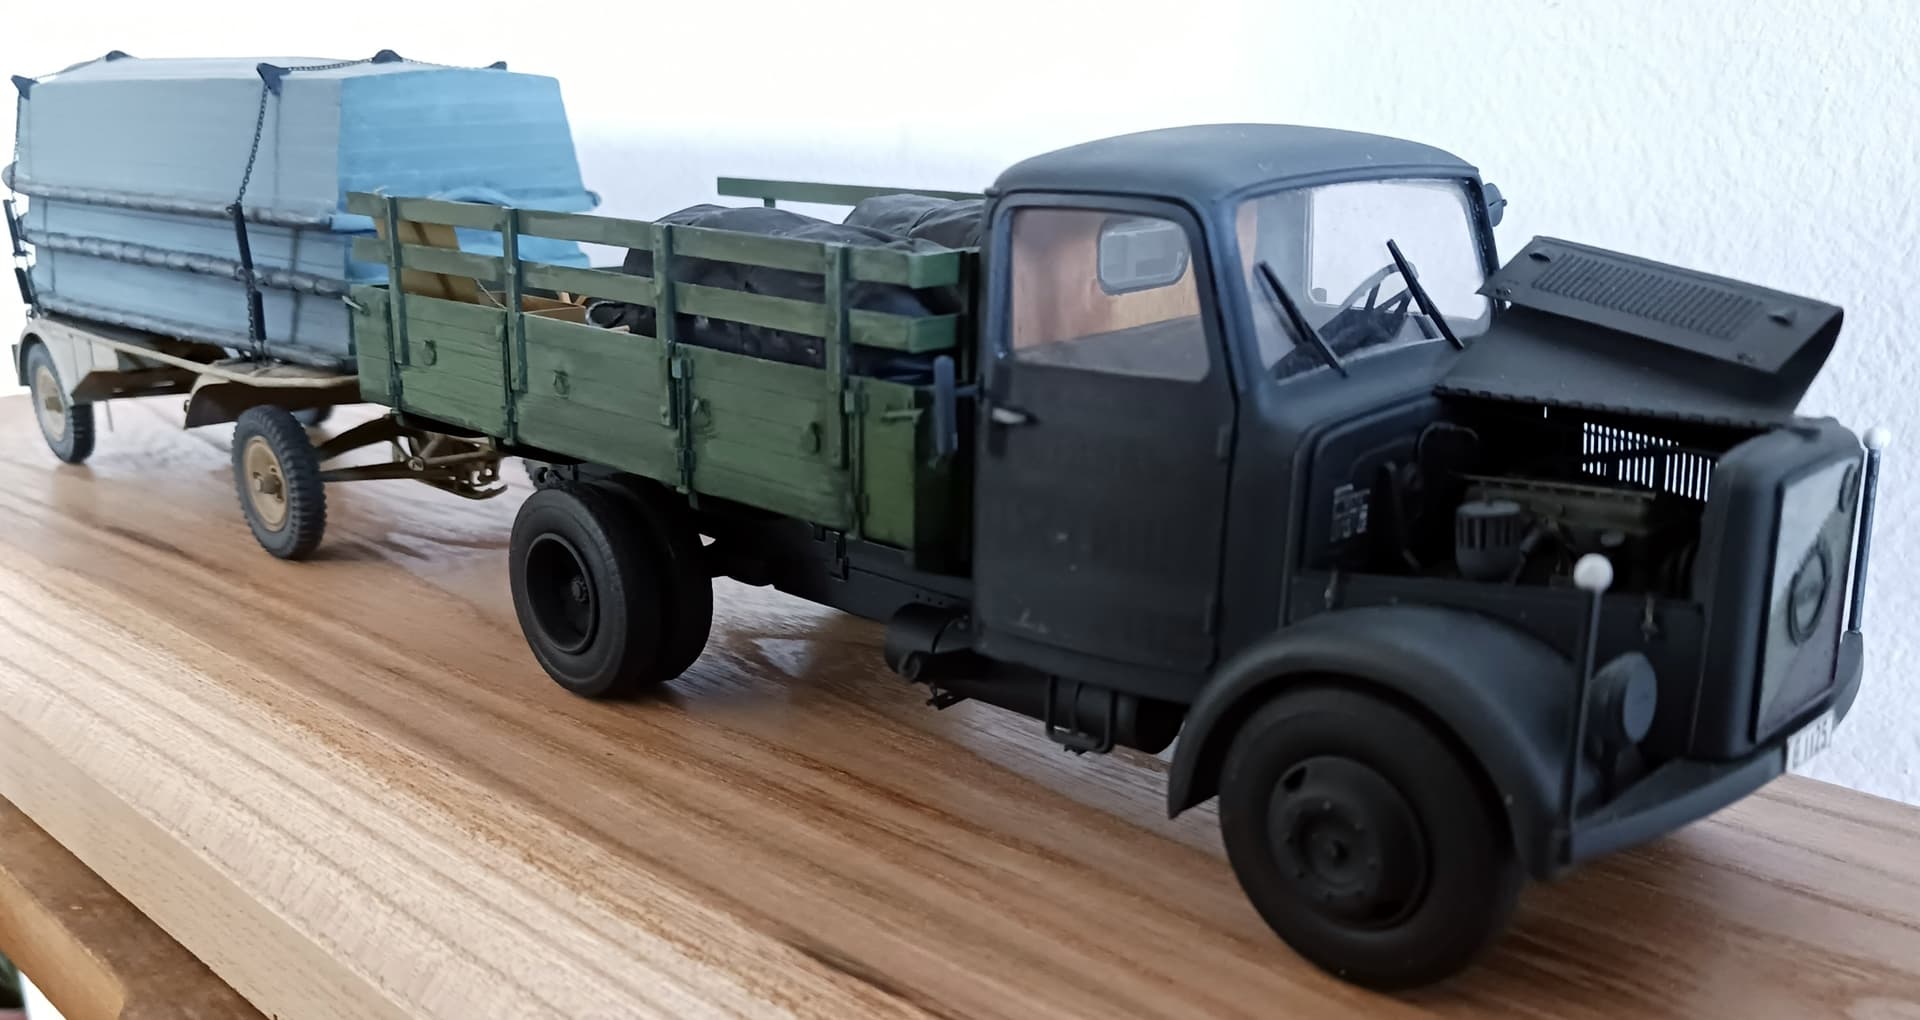
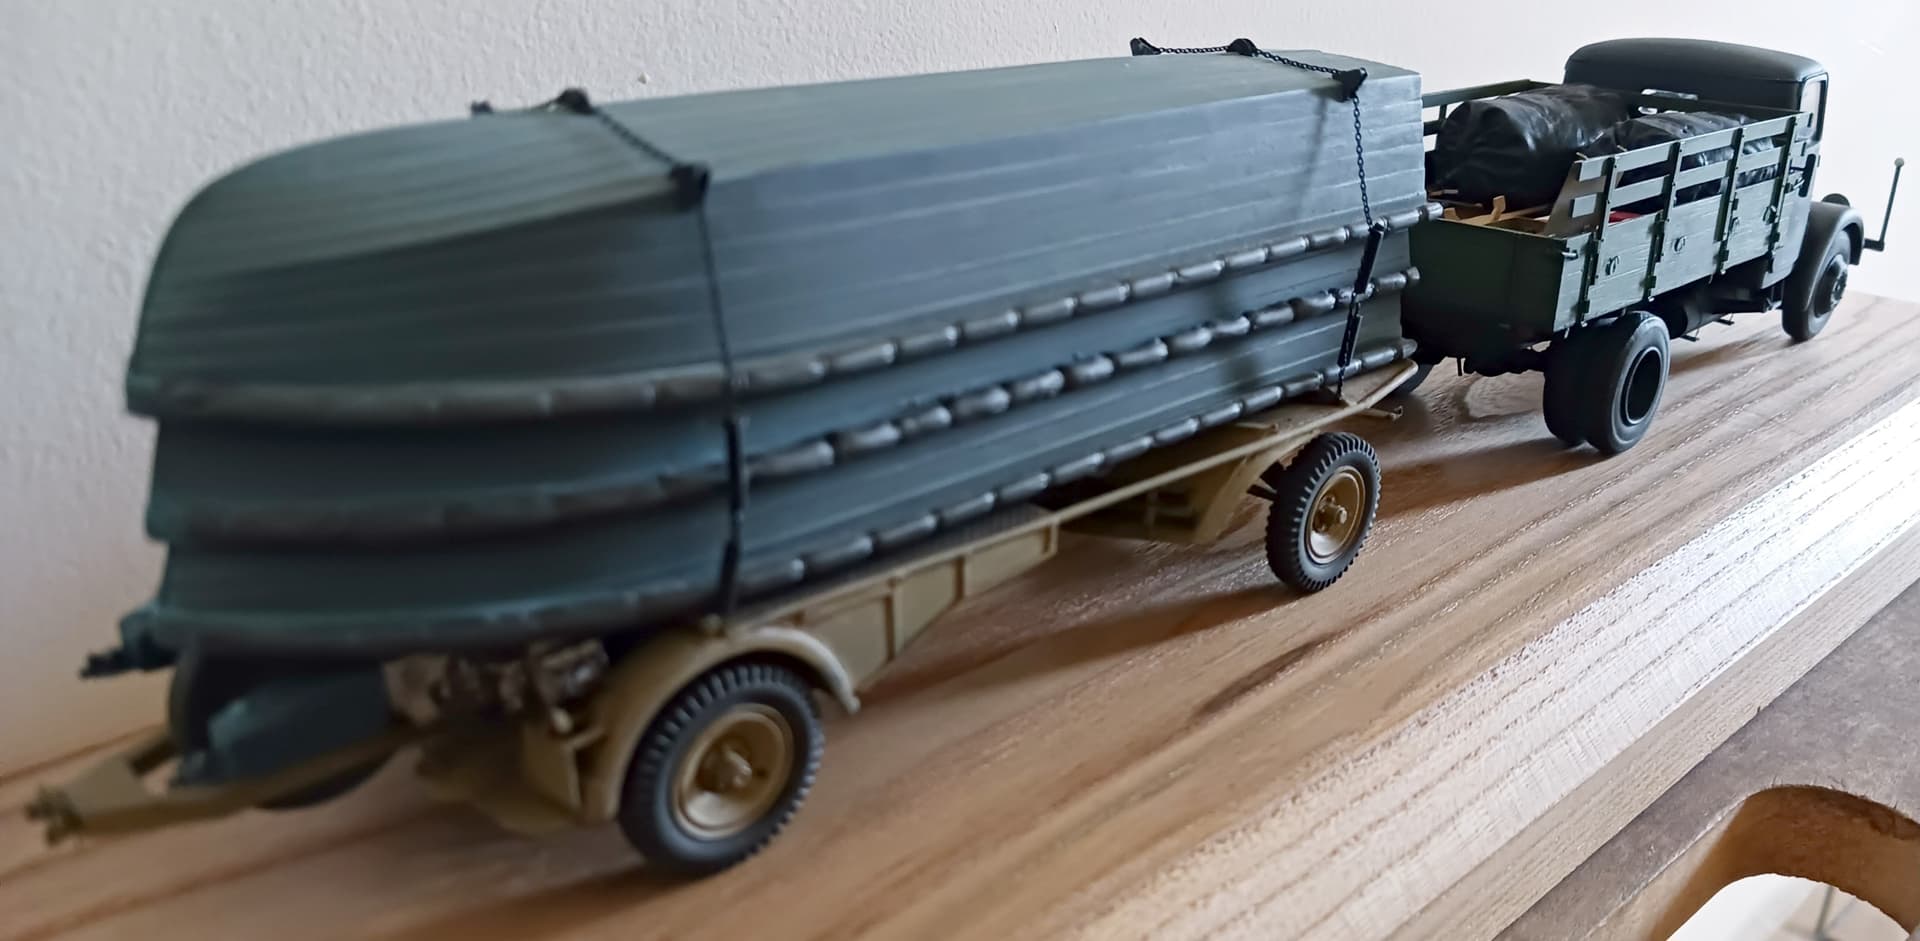
The truck was built from ICM’s KHD S3000 kit with some modifications, while the trailer- apart from the tires(Italeri), 2 of the Sturmboot engines(Dragon) and 2 of the Sturmboote(once again Dragon)- was scratchbuild.
Cheers,
Angel
12 Likes
Well gone, she looks great Angel. ![]()
2 Likes
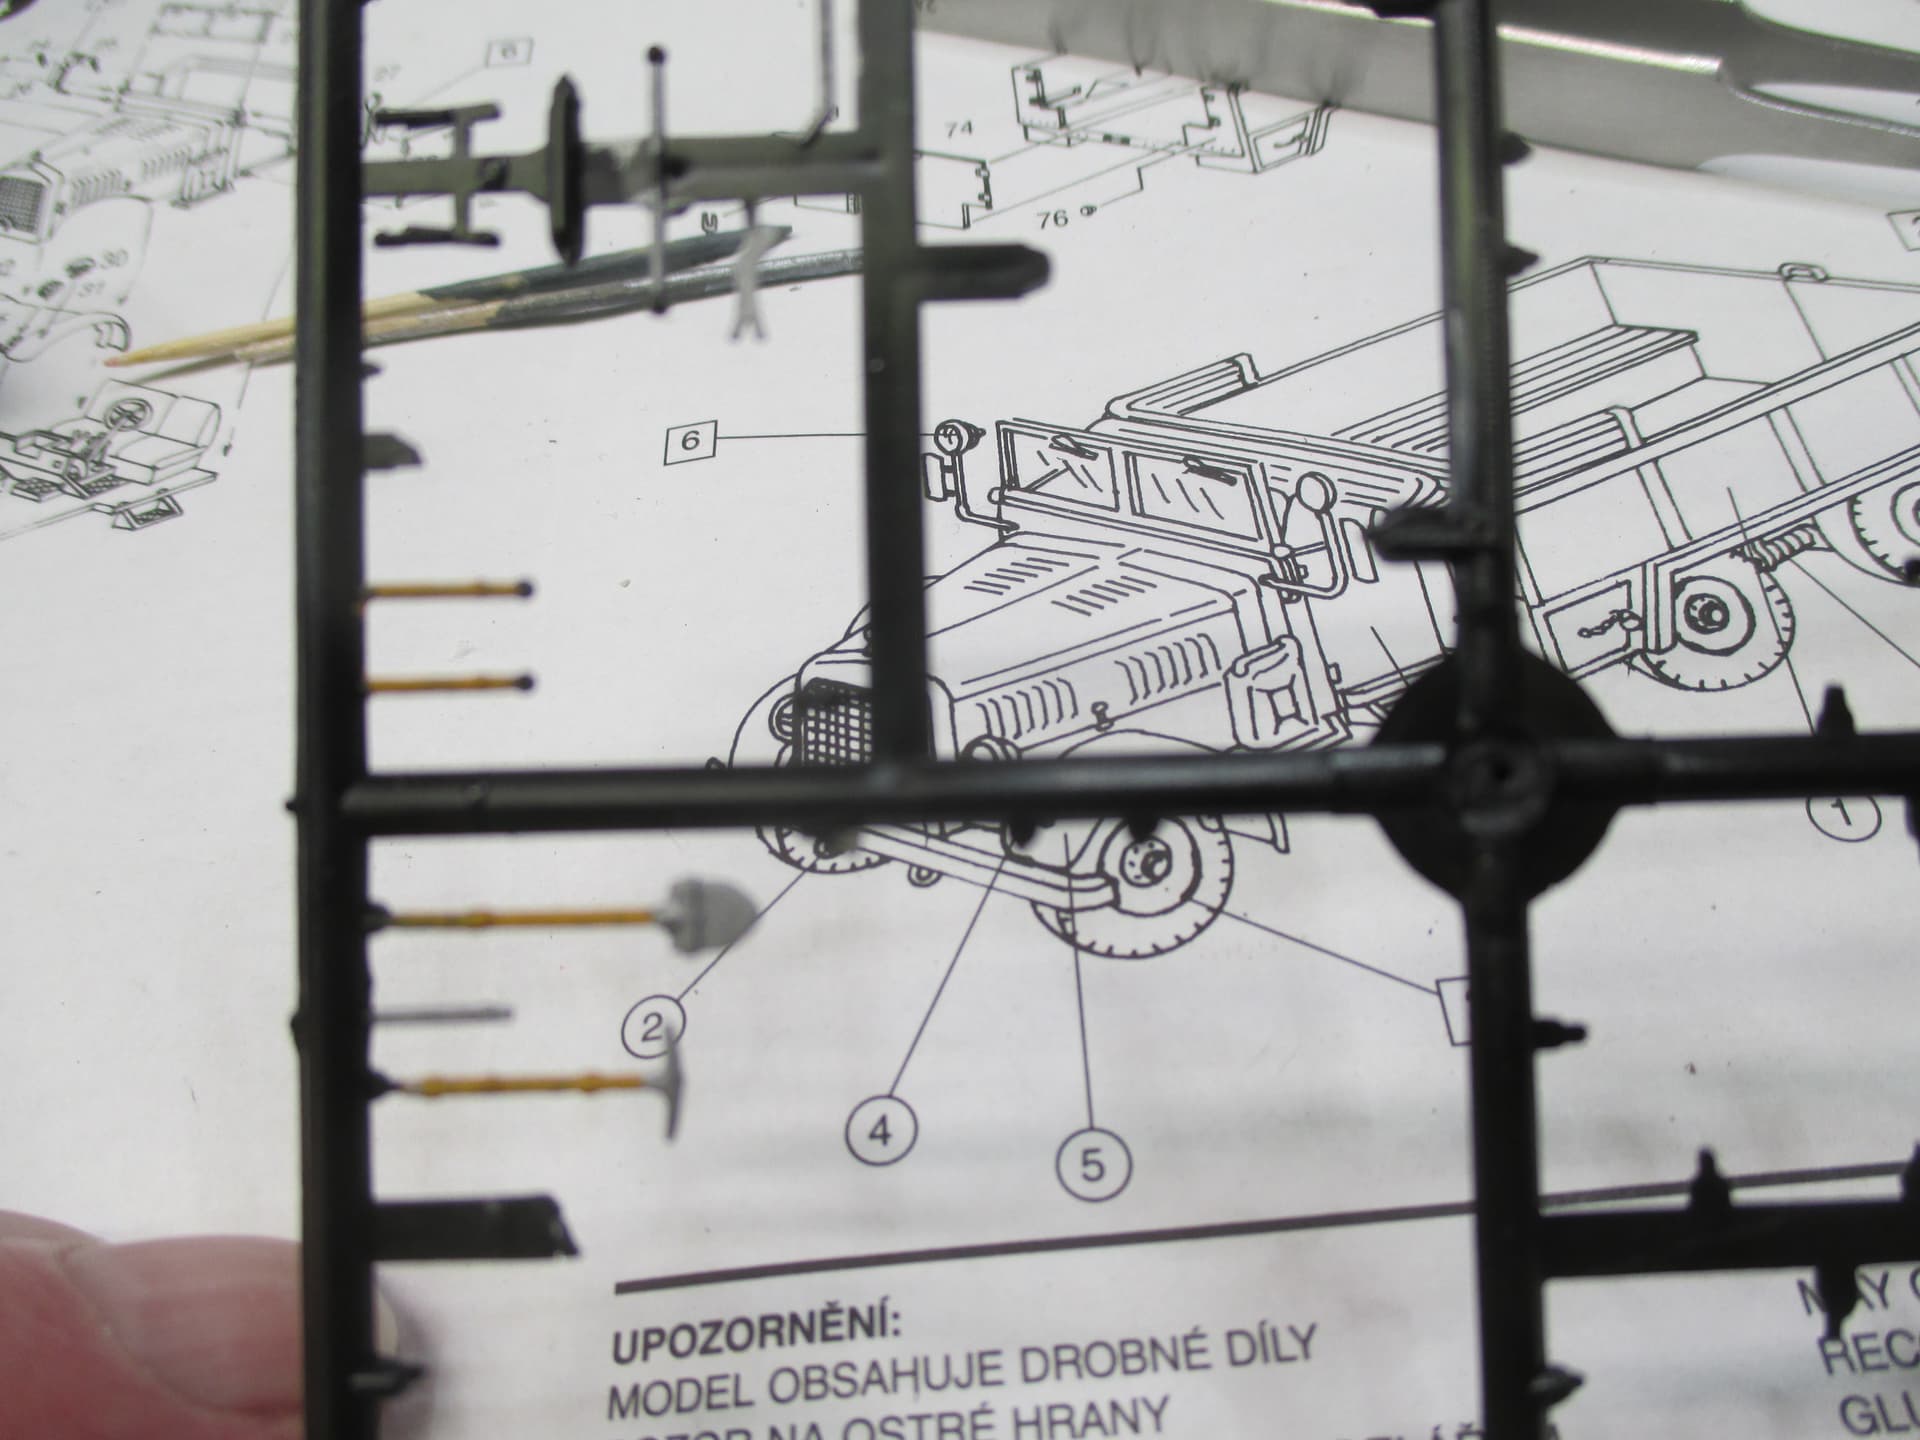
and the chassis ready for paint
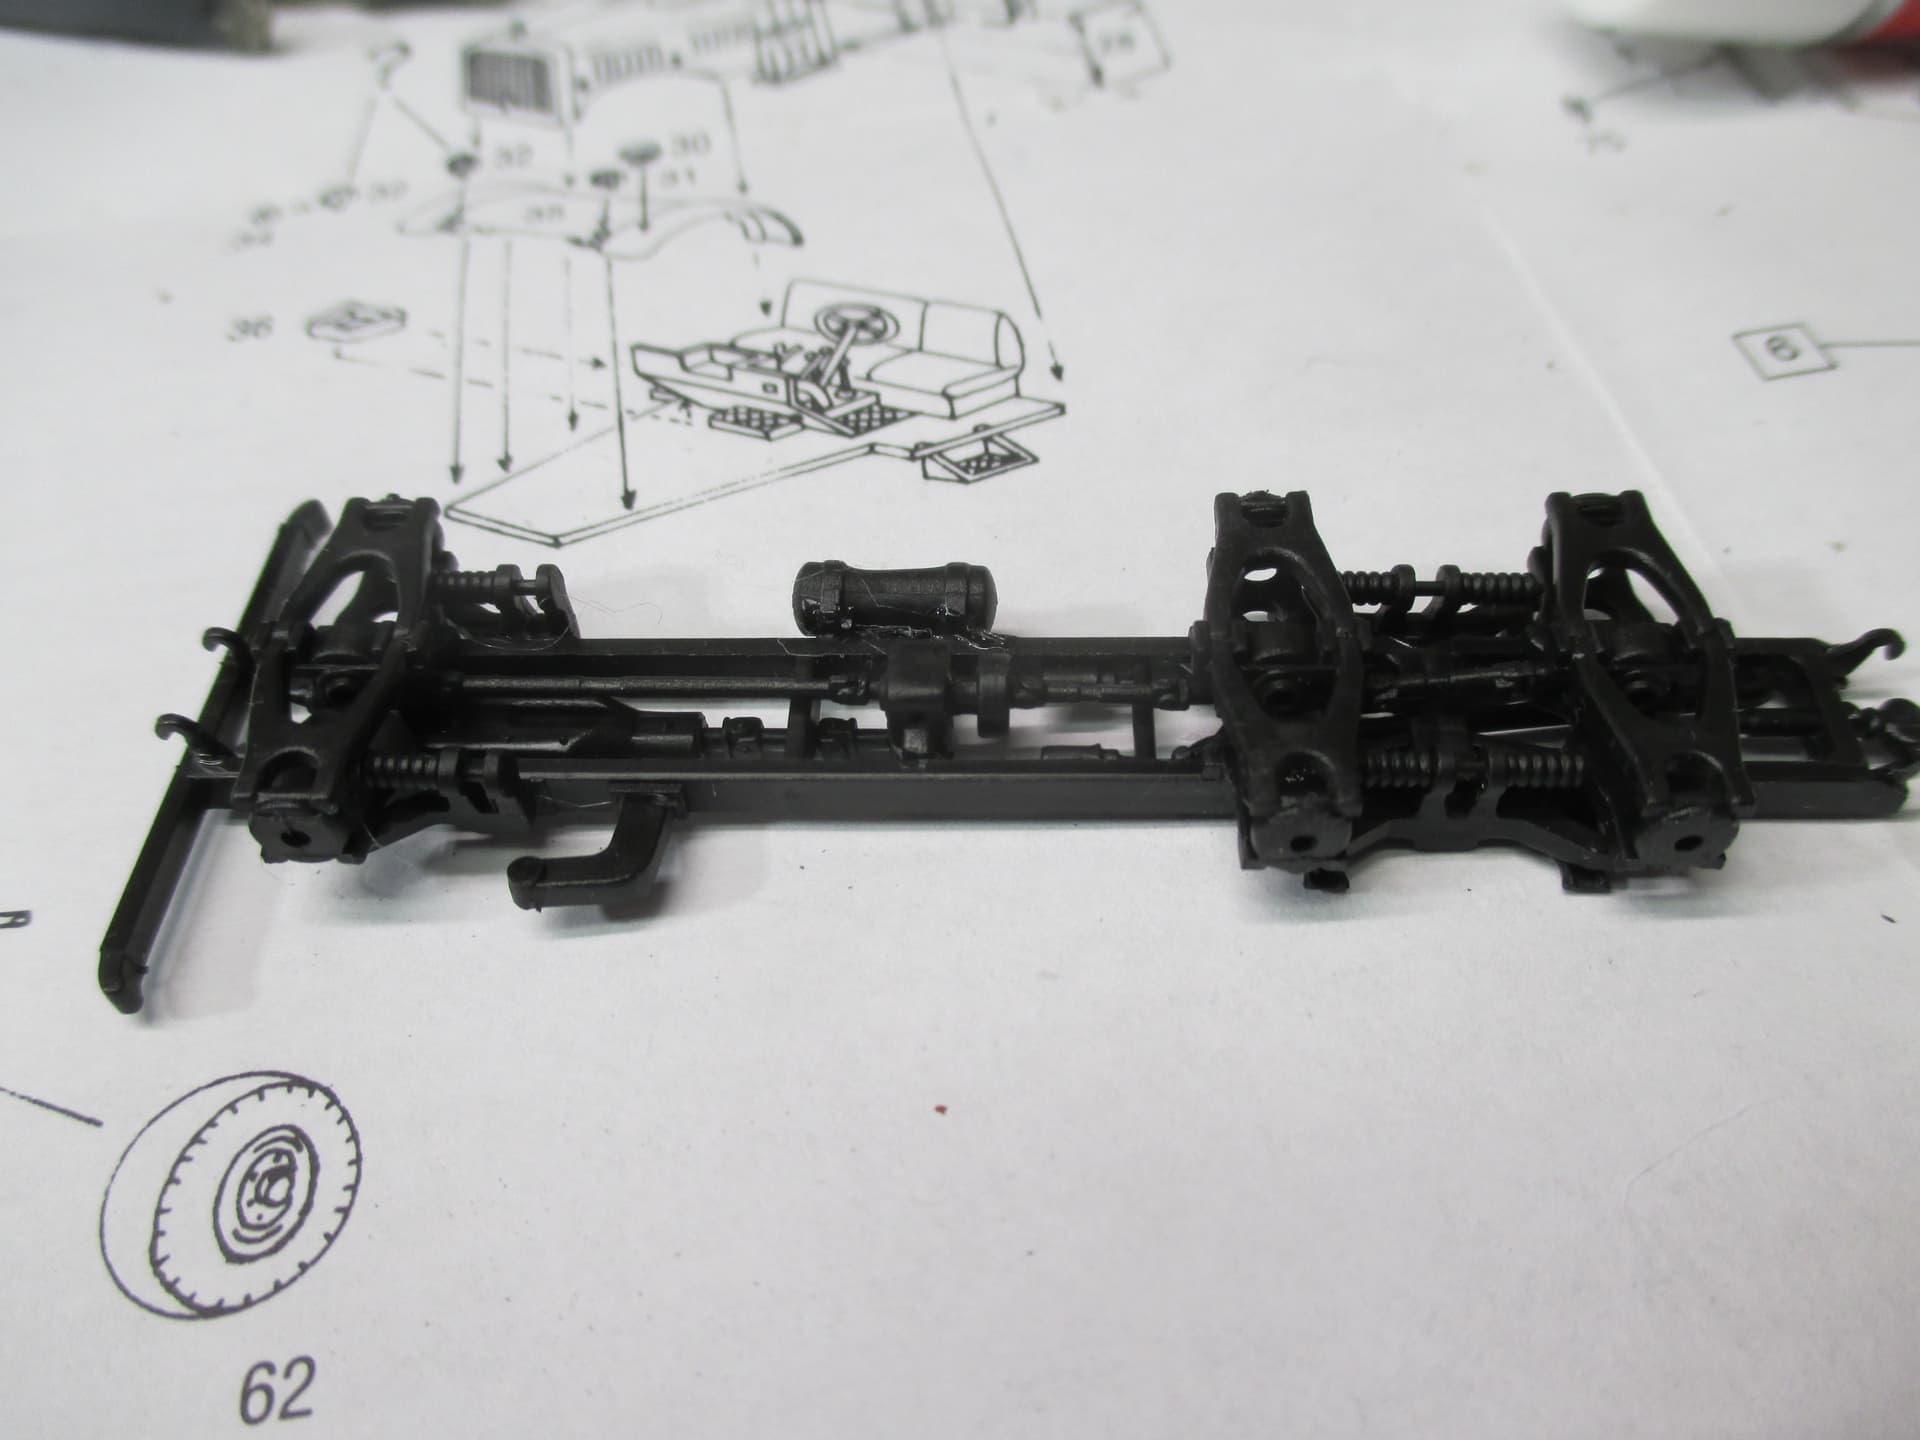

There are no pin and hole positive locators but it still went together easily. I did decide to put the exhaust system on after the frame was comletely together rather than at the start as shown in the directions, for easy painting and ease of assembly of the frame
2 Likes
Tom and Angel. Great finishes guys. Two very impressive builds. You should be proud.
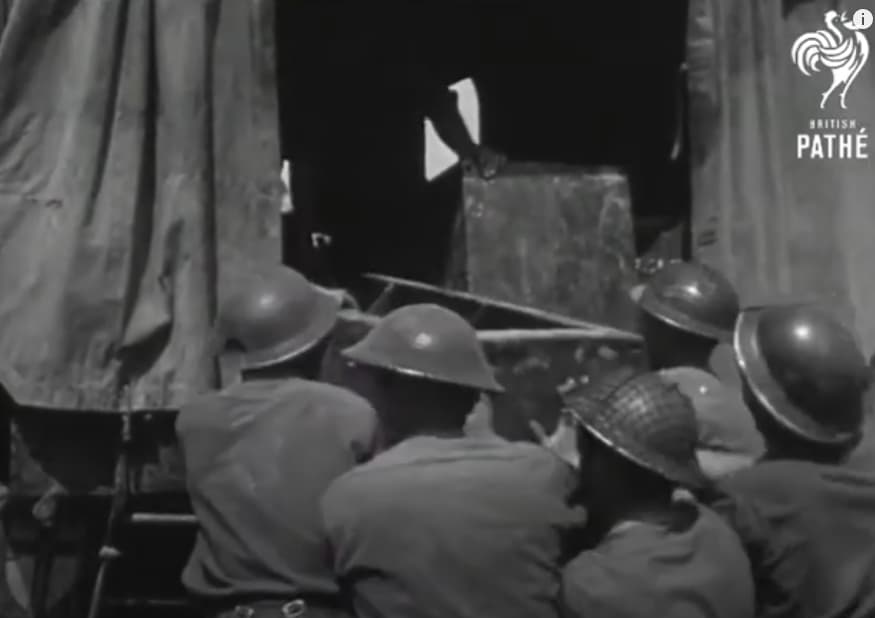
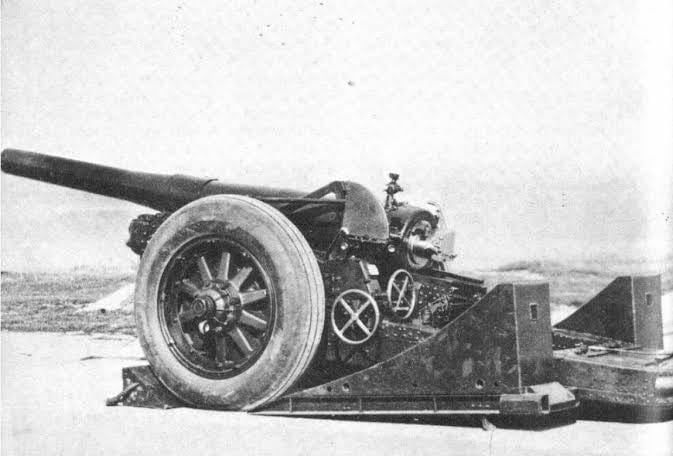
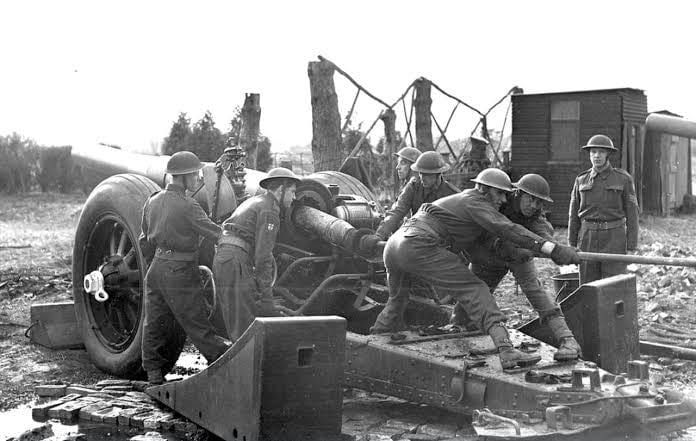
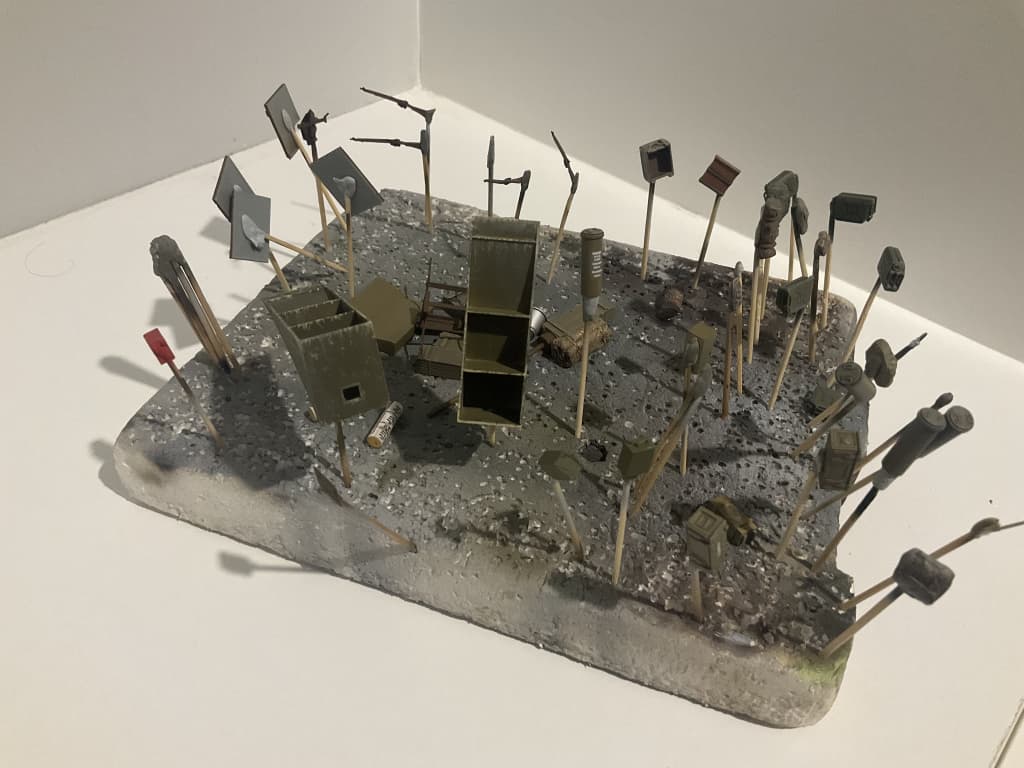
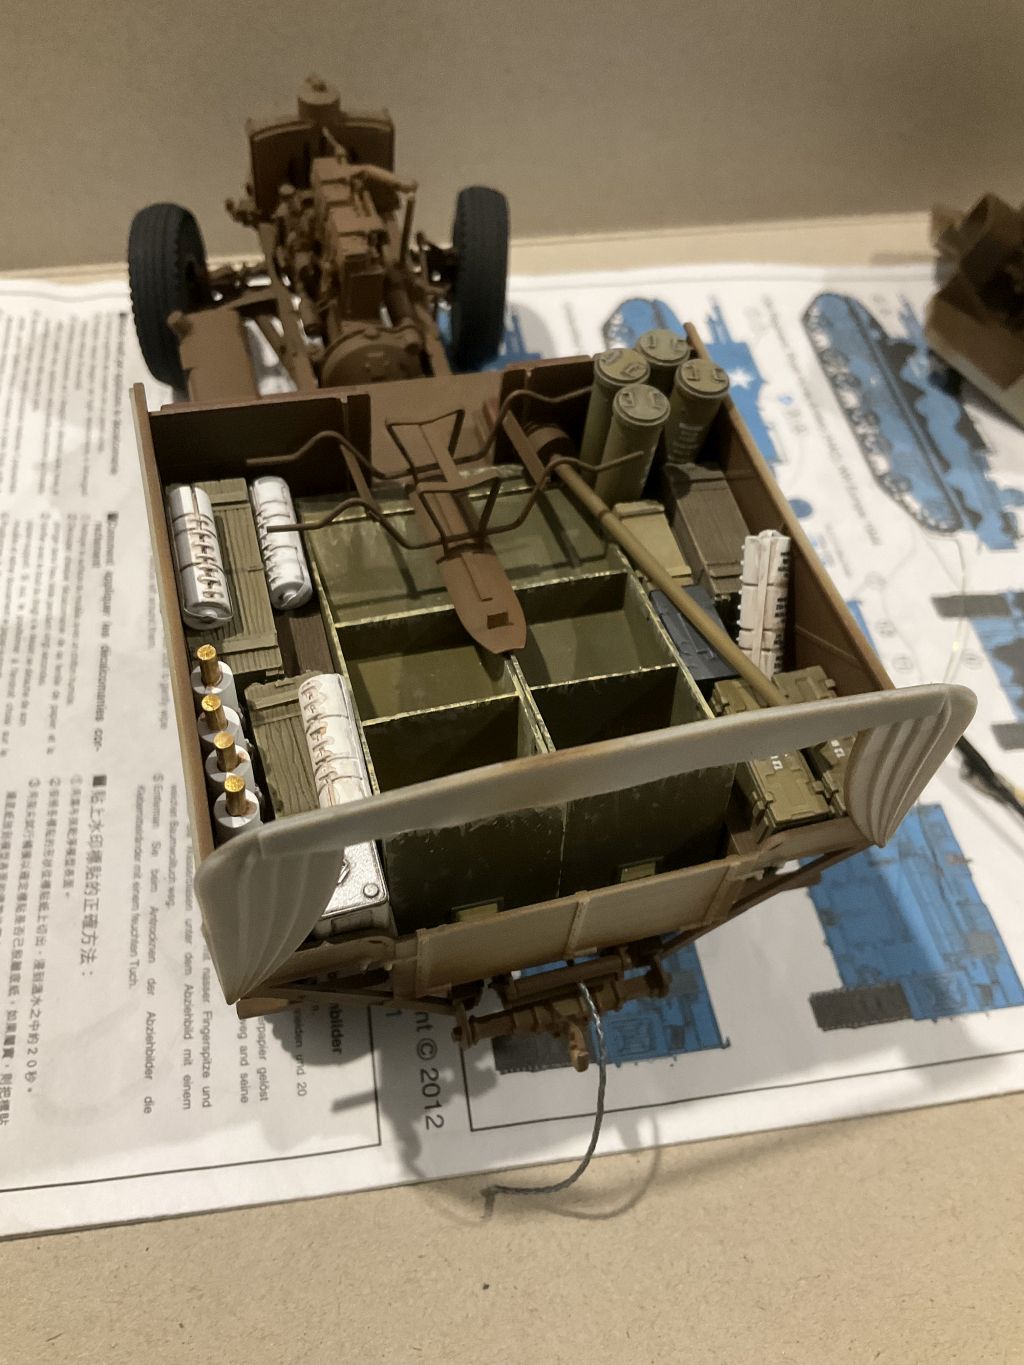
Well I have been busy painting all of the ammo, charges, charge containers, etc, for the BL 7.2 Gun to put in thee rear of the Scammell - only to find out they didn’t carry any of it! There were separate lorries used to transport ammunition. The Scammell’s just pulled the guns and carried the ramps and various other bits for the gun like the rammer, shell cradle, etc. The ammunition was transported by much larger trucks. A friend sent me this link to a video showing all this.
")
It is a great clip, with lots of useful info, such as how Thunder Model’s gun ramps are way too long and wide. The clip shows both ramps being pushed into the bed, but the Thunder ramps do not fit:
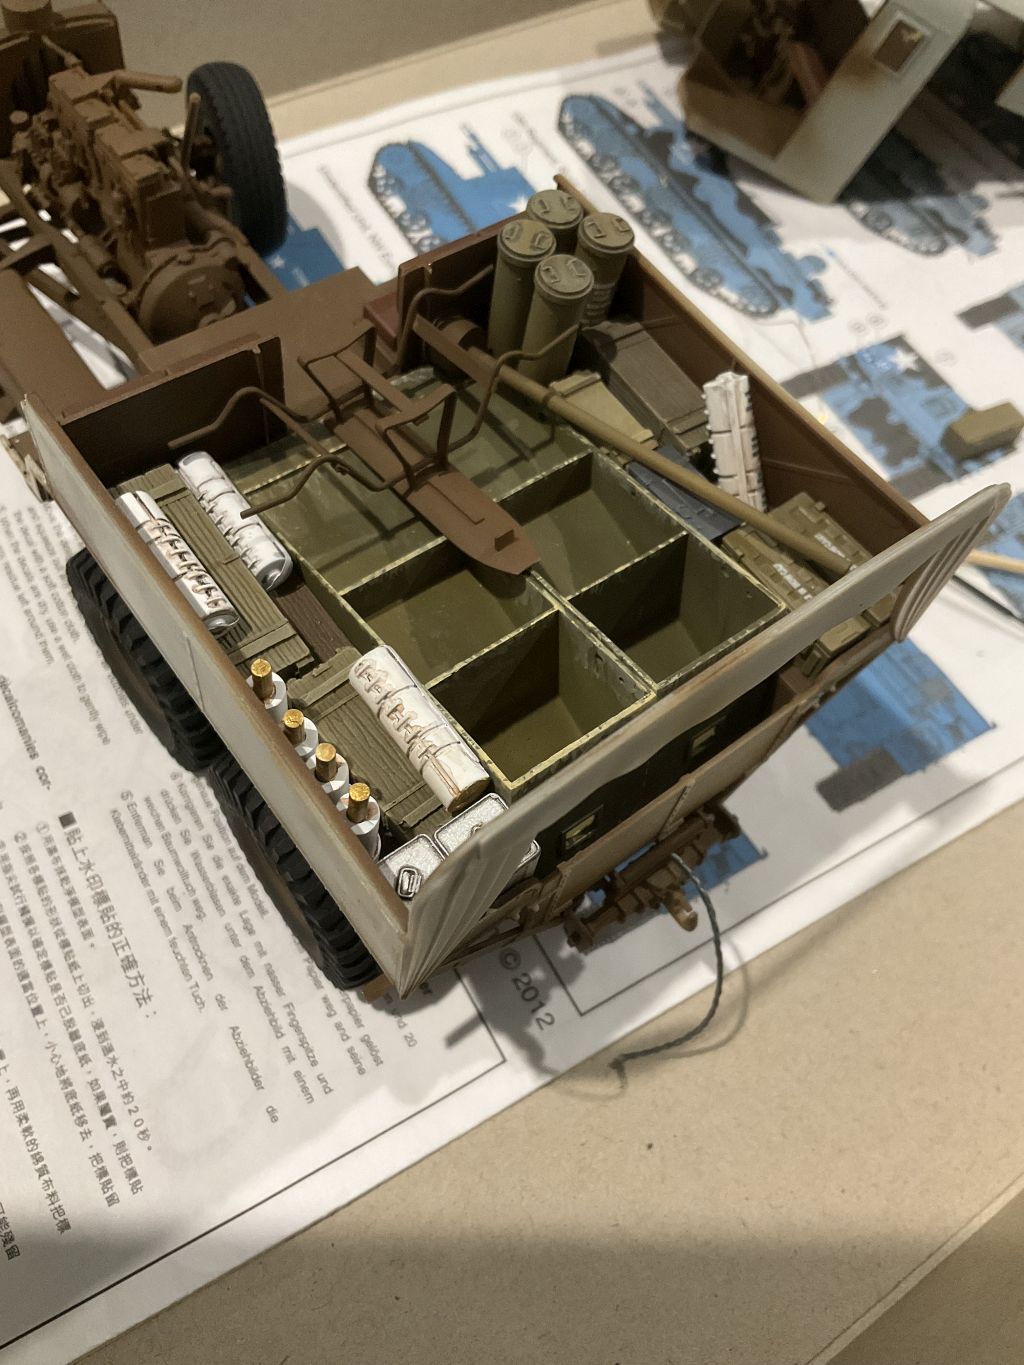
So a bit of Nip and Tuck has been undertaken as well as some detail work started:

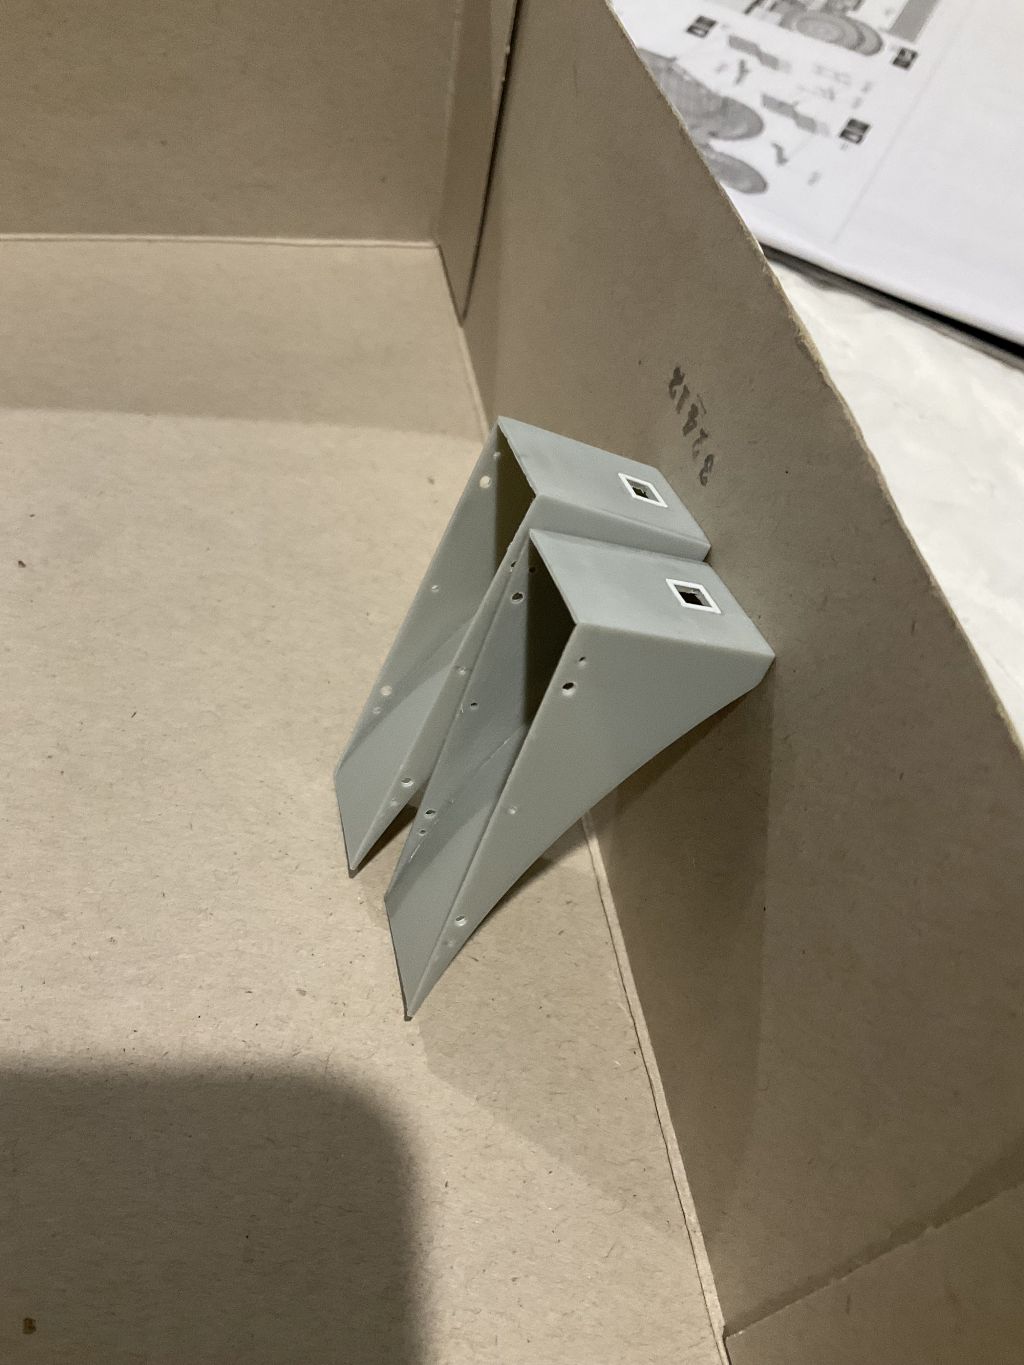
Still need to add the internal bracing seen in this still from the video:
References for the square hole that had to be cut out and the peg holes in the sides:
4 Likes
Thanks Pete! That gun is a beast, what with those giant tyres and the recoil ramps. Not sure I’d want to crew anything that big that had so much movement when firing…
@steviecee - that’s coming along nicely! What are the odds of making the deadline?
Not sure about an extension, as only one trucker said it might be helpful - how many of you think your builds would be done by July if I extended? If I don’t hear many responses I’ll leave it as is and they can finish in Pt3…
3 Likes
I am awaiting some paint to come in. The 2 LHS have run out of stock and are waiting for their deliveries to arrive, so I have gone the mail order route. My delivery is due any day. Hopefully I’ll finish in time, or at least get it done as far as a ‘clean build’ goes.
2 Likes
That’s OK Pete - just post what you can, when you can! (Deadlines can be a bit fuzzy for me…)
3 Likes
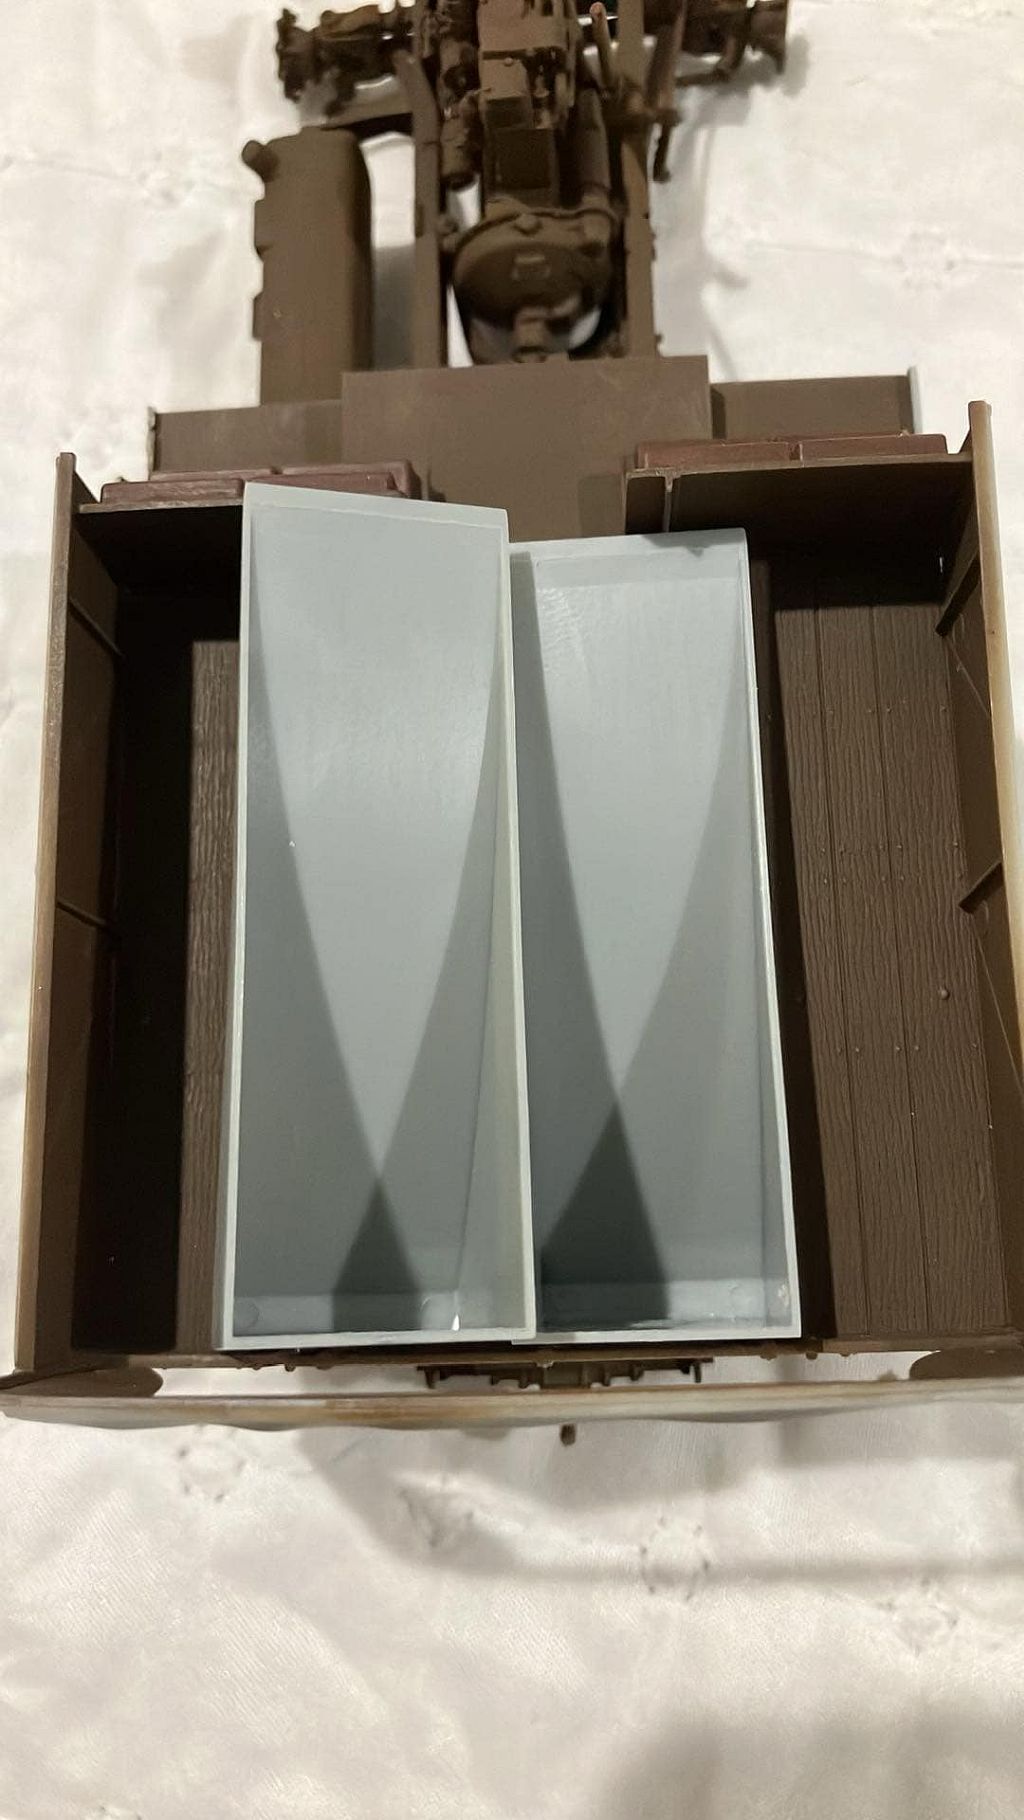
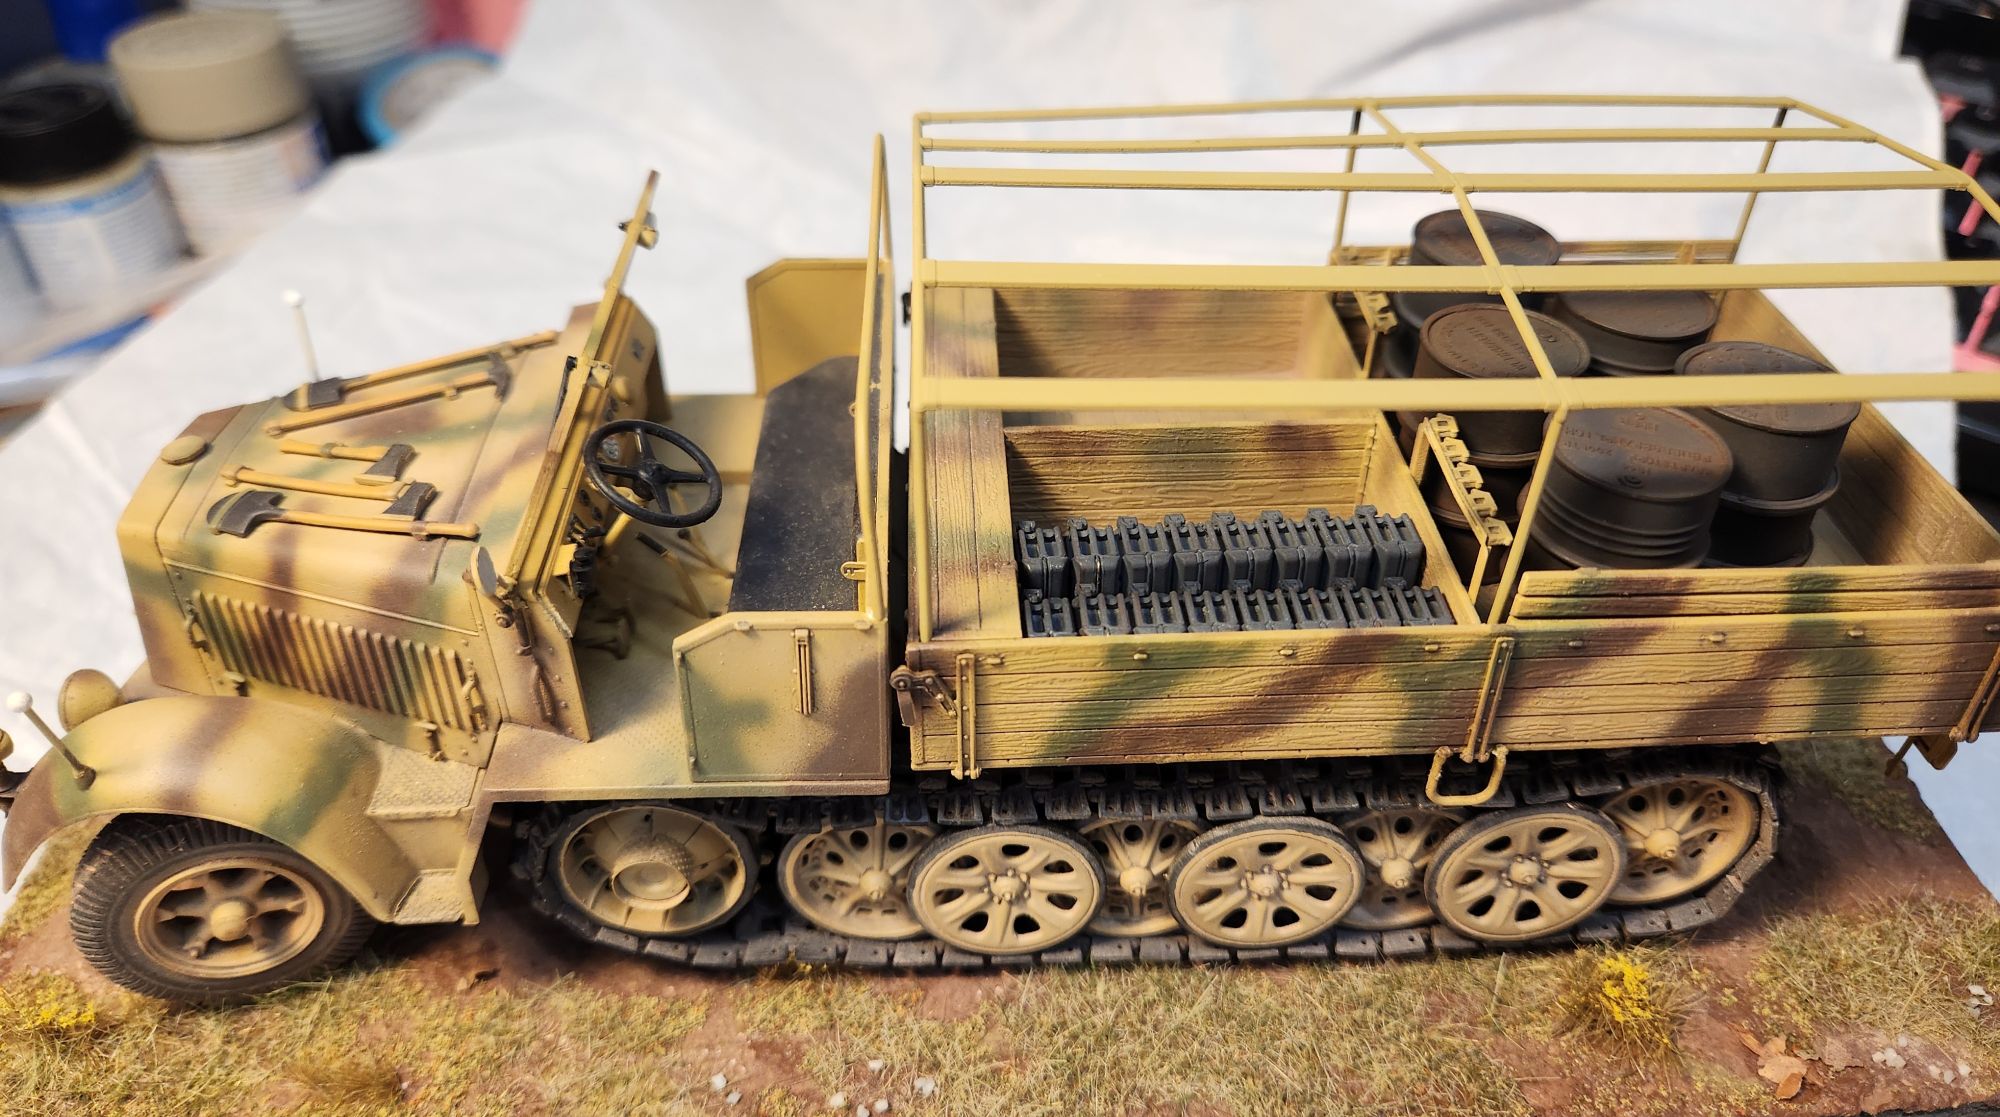
Well here are the ramps and other miscellaneous parts just about all painted and ready to go:
My paint delivery is supposed to be tomorrow… so time to add this to the cargo bed and close up the Scammell to ready for paint.
5 Likes
everything ready to paint

the outside rear view mirrors painted
the cab painted with RVM installed

the tools. gear shifts etc painted on the sprue
the wheels and tires painted

5 Likes
I am definitely calling this done for the present. I have some water cans to add so that won’t change the final effect much, but I am still going to try and create a set of folded tarps and toss them in the empty cargo space. I just bought some more modeling clay today but the weather has been garbage (had to stand in the center of the grocery store until a tornado warning ended) and I didn’t do any modeling today. If I get it to work to my satisfaction I’ll post a follow-up pic.
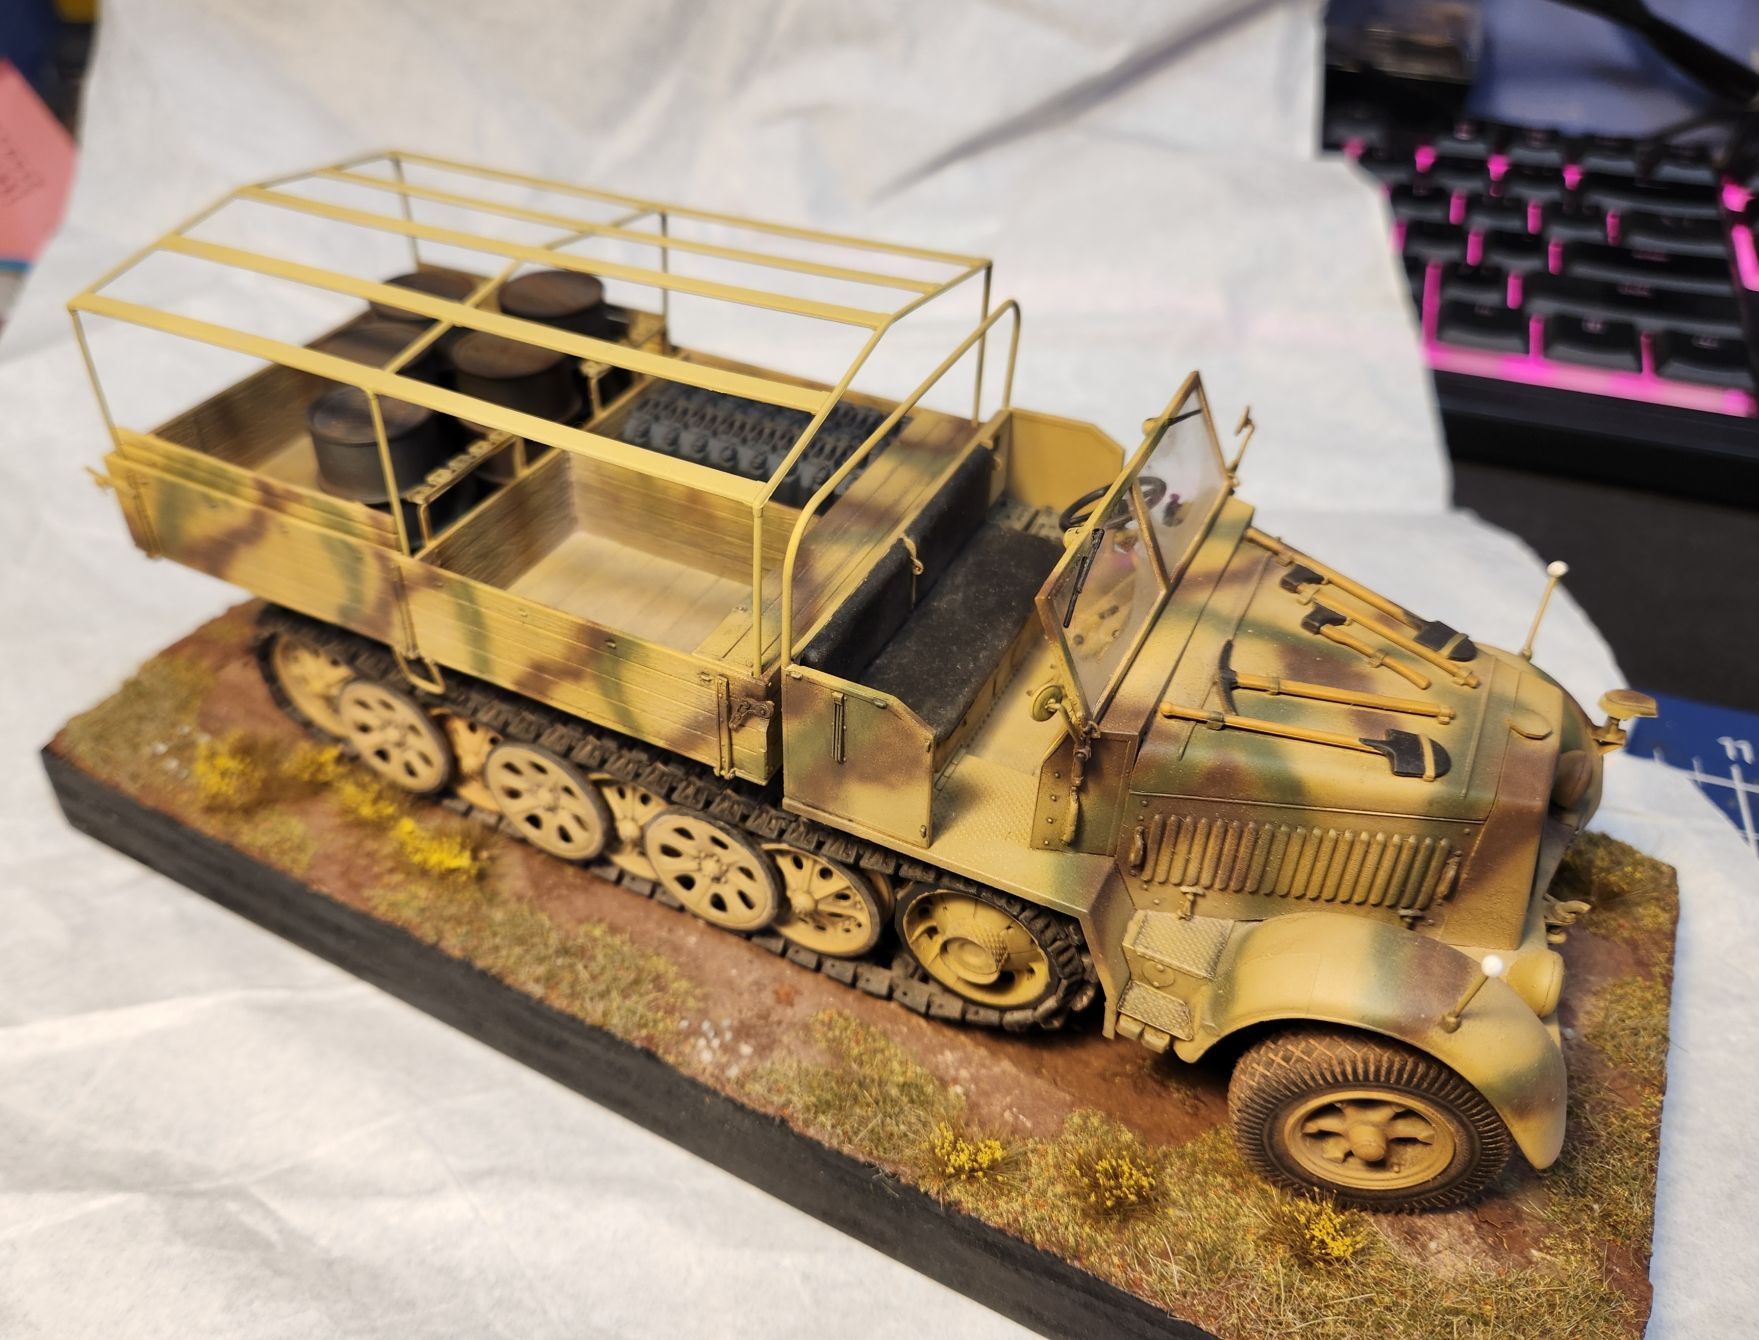

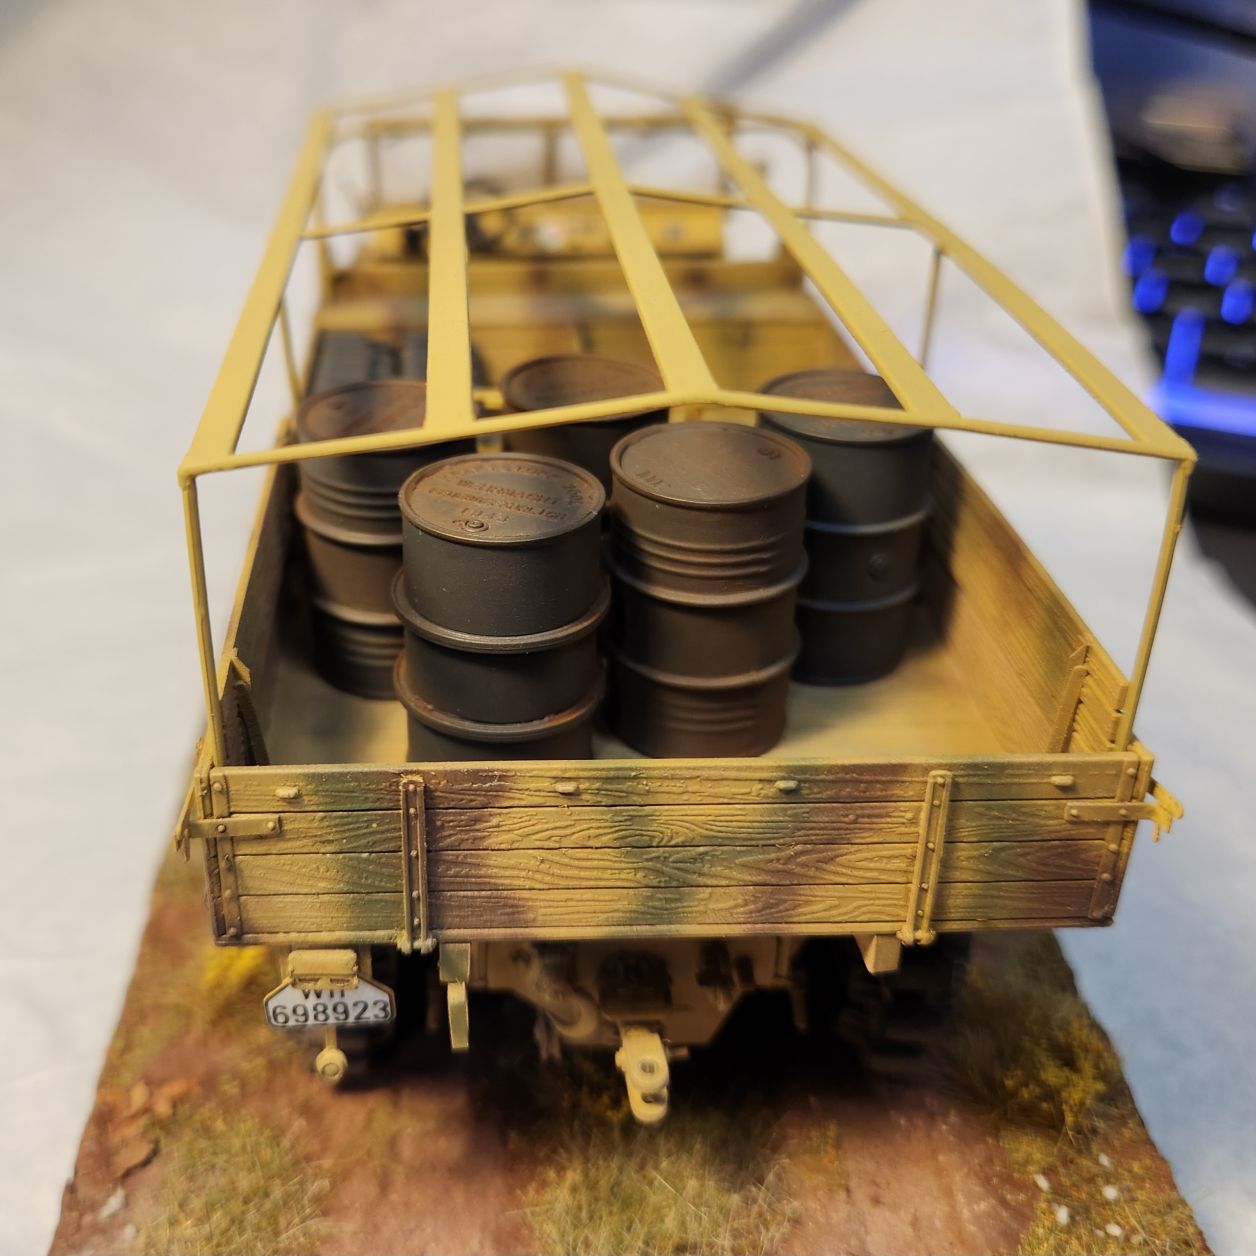
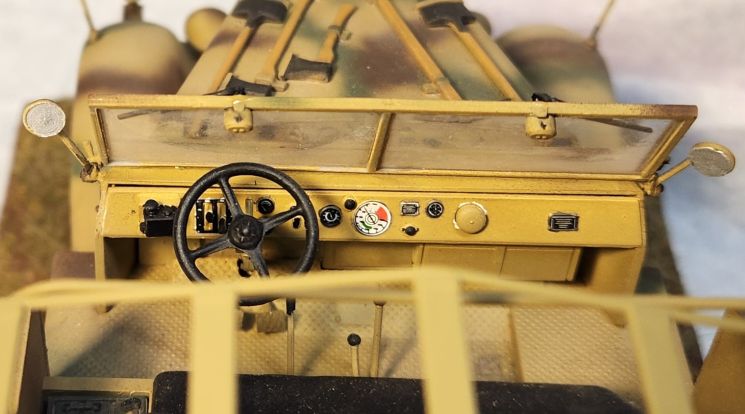
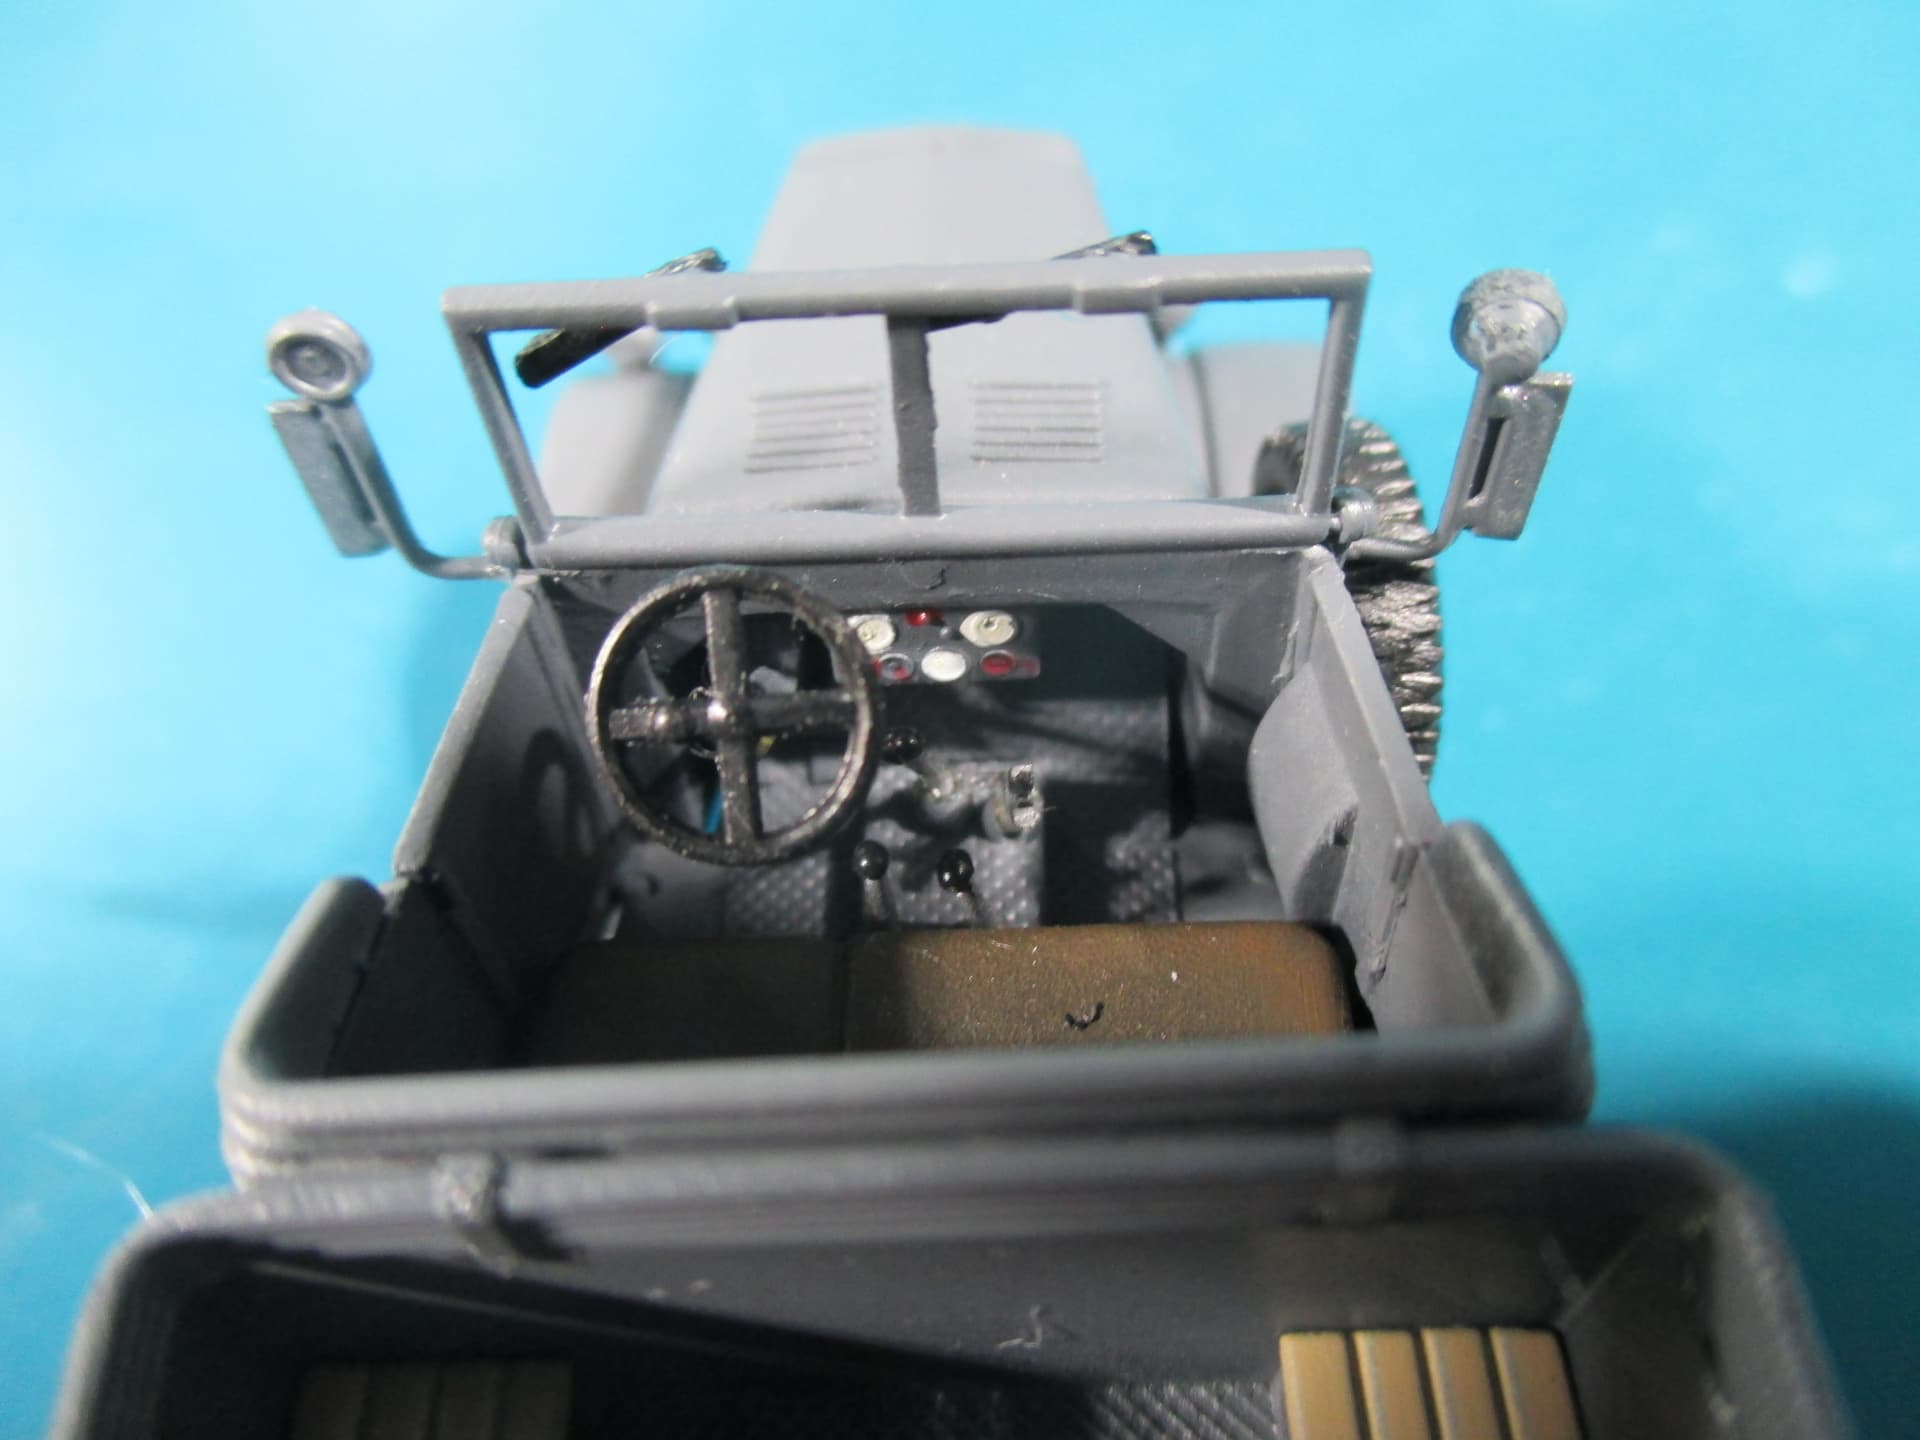
Don’t know how well they show but I did add levers to the left of the steering wheel.

9 Likes
Some great last-minute painting going on here! Just to let you know, life here is kinda busy and despite the campaign officially ending this weekend, I doubt I’ll get round to adding up the completed builds til the weekend after, if you catch my drift…
4 Likes
Drift caught.
1 Like
What D said,… ![]()
1 Like
Great job B. Another filler would be some ammo boxes. The crews of transport vehicles often used old boxes to store their personal gear and possessions, blanket rolls, Tent quarters, meal tins, etc. They also stored things like cookers, coffee pots, pans and pots, etc too - they would often make their own food from what they scrounged, as field kitchens were not always there… They also had things like lamps, folding chairs and such, pretty much anything that they acquired on the way to make themselves more comfortable.
May I also make some suggestions?
This pic suggests the tops of the axes were not painted:
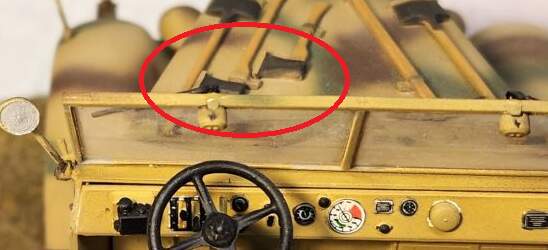
If you make the tool handles a slightly different shade, and do a pin wash around the clamps, it will add a bit more visual impact. Not blowing my own trumpet here, but the handles on my Sexton’s shovels and pick axe were painted with the same base colour, but I used a thin wash of that colour with a little reddish brown or ochre to shift the colour, just enough to break the monotone look:
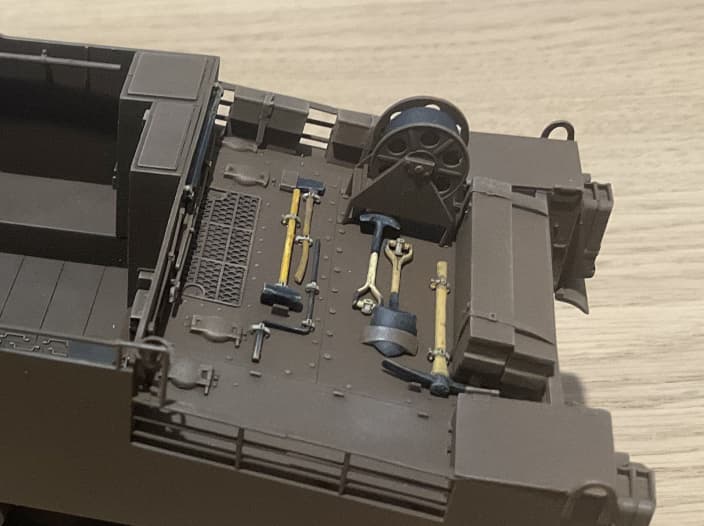
The sledge hammer and axe were painted different base colours.
4 Likes
The tops actually are painted (I just checked) but I think the lighting is washing everything out plus I also seem to not have cleaned as much of the brown filter off the backside of the tools as the pickaxe has a heavy deposit of it. What I didn’t do was go back over the handles with a filter for the wood, which I can actually still do without messing anything up.
So thanks for reminding me.
As far as the stowage, I am currently limited in what I have on-hand and now that I am on summer break plan to sort through my pile of extra parts to see what I have and what I need to start buying (I used a lot up building my Bergepanzer III). I do have some ammo boxes I am working on but they are only halfway done. I tend to focus on my the vehicles specifically and toss the extra parts to deal with later, hence the pile I need to sort.
2 Likes
Well Life got in the way of progress on the weekend. It was my birthday last week, and my boys surprised me with weekend of activities with them - to take my mind off other things that I’ll not bore you with.
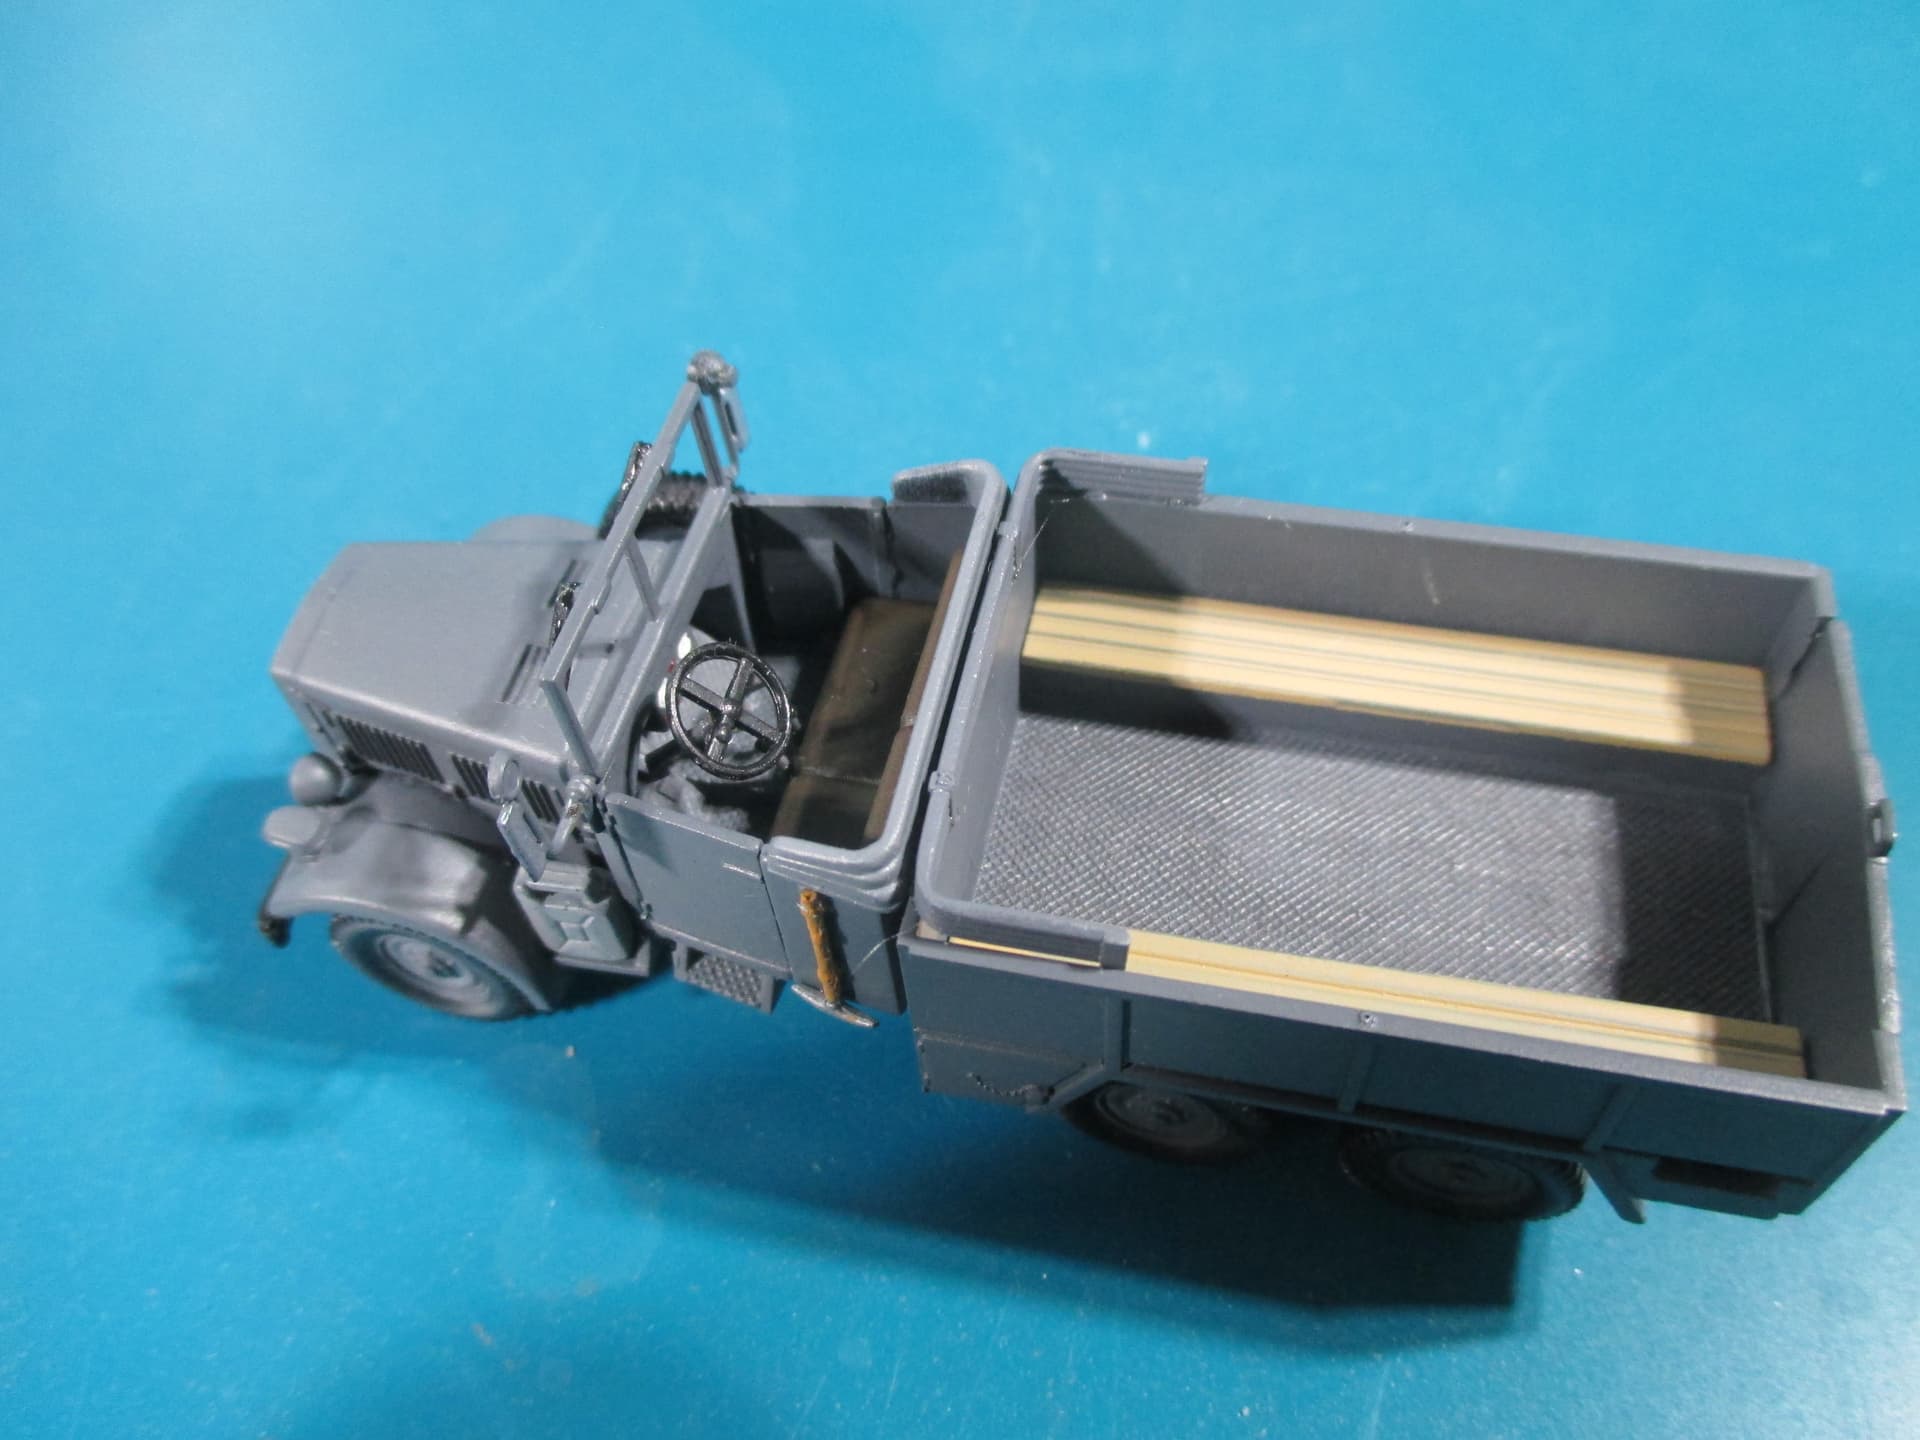
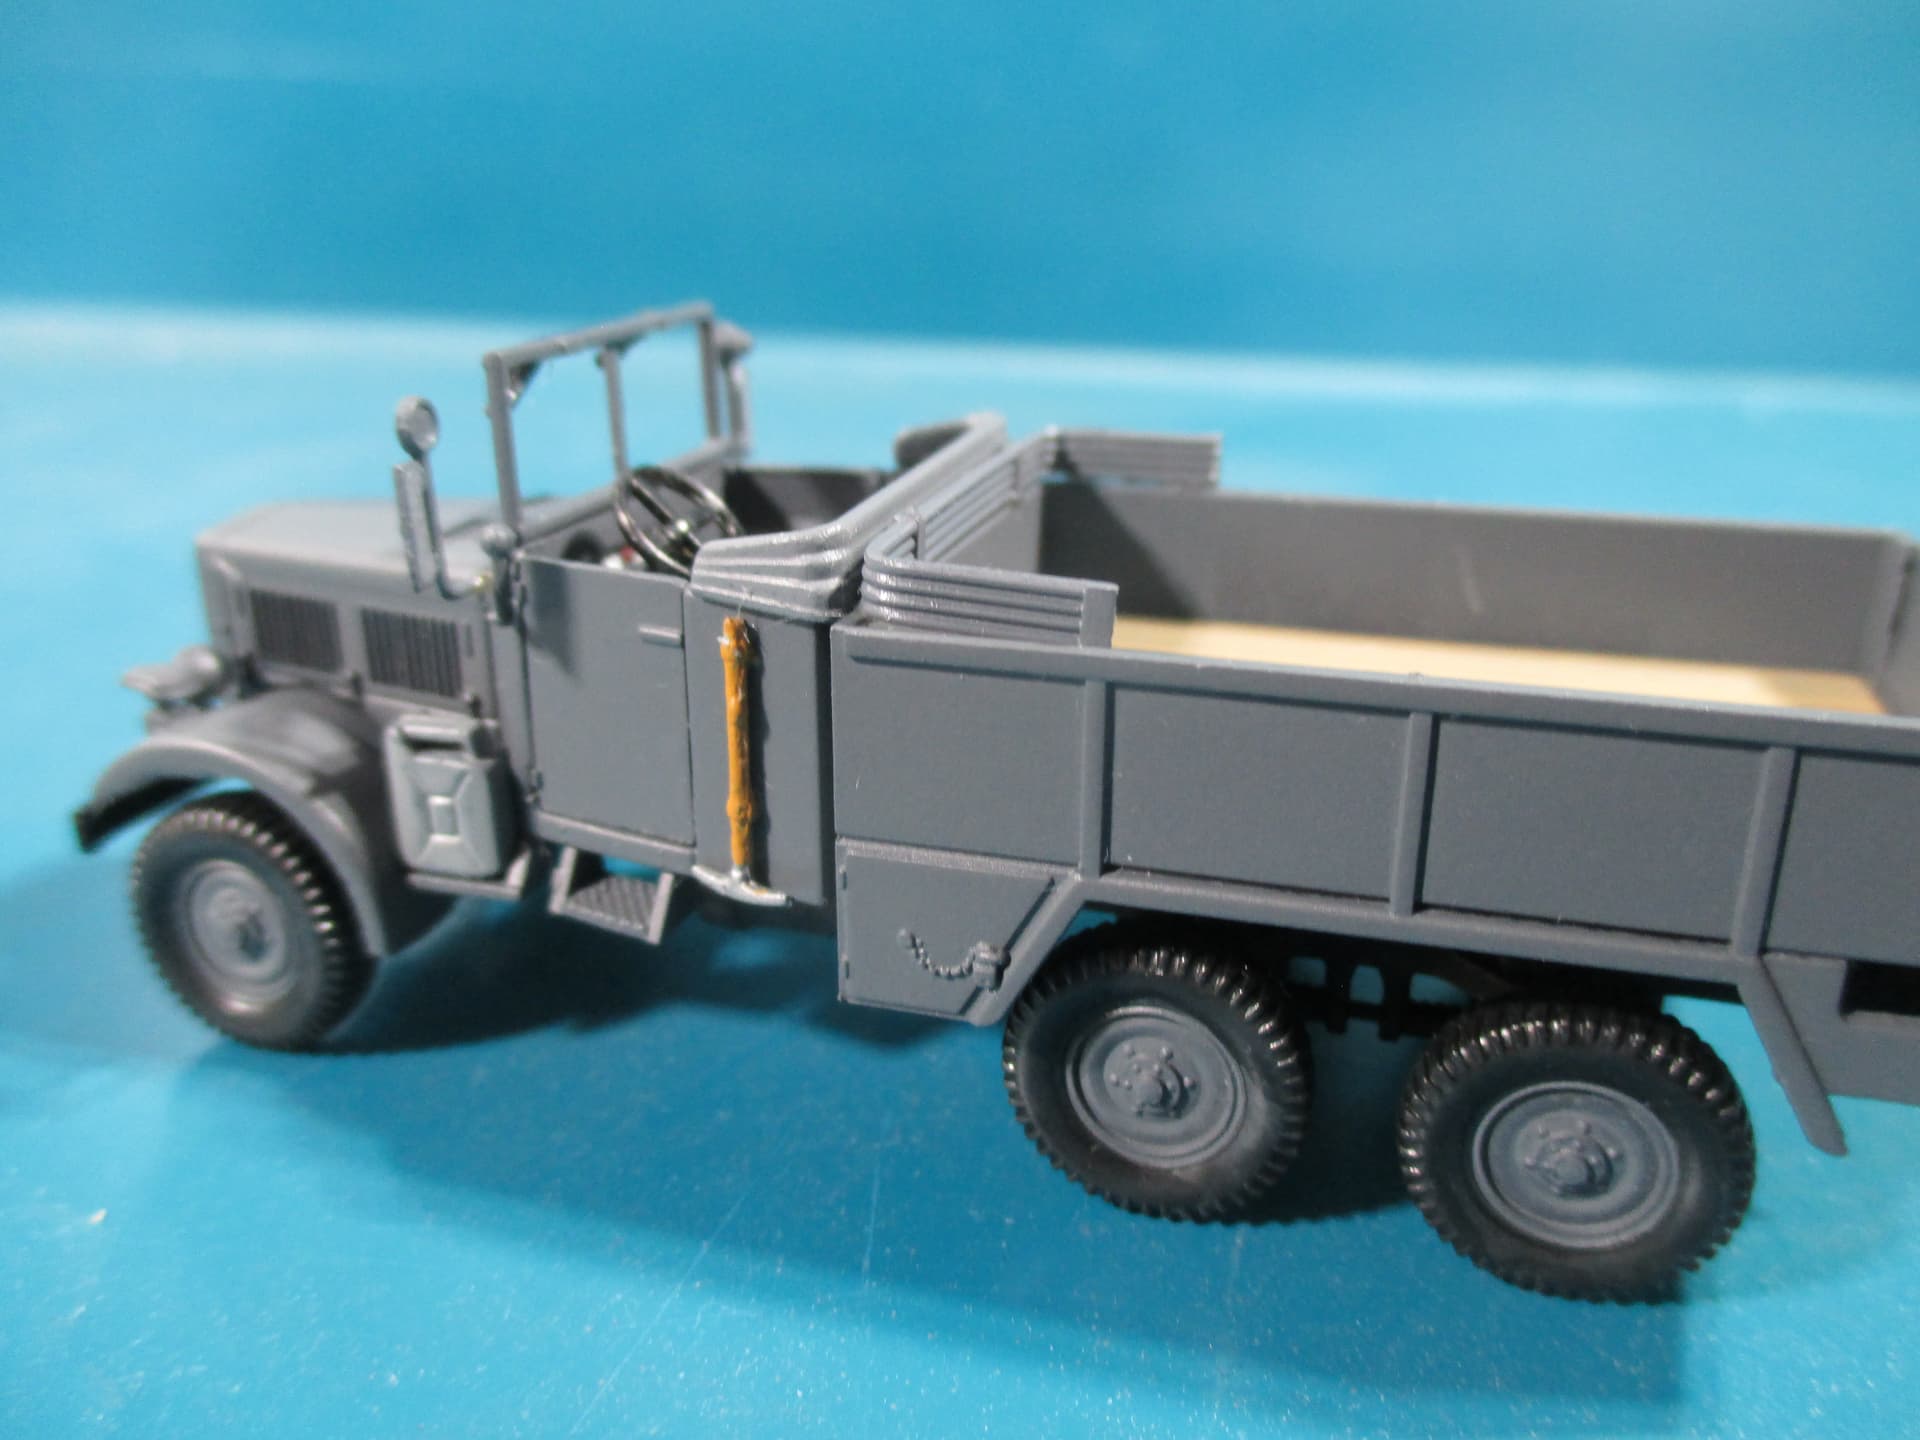
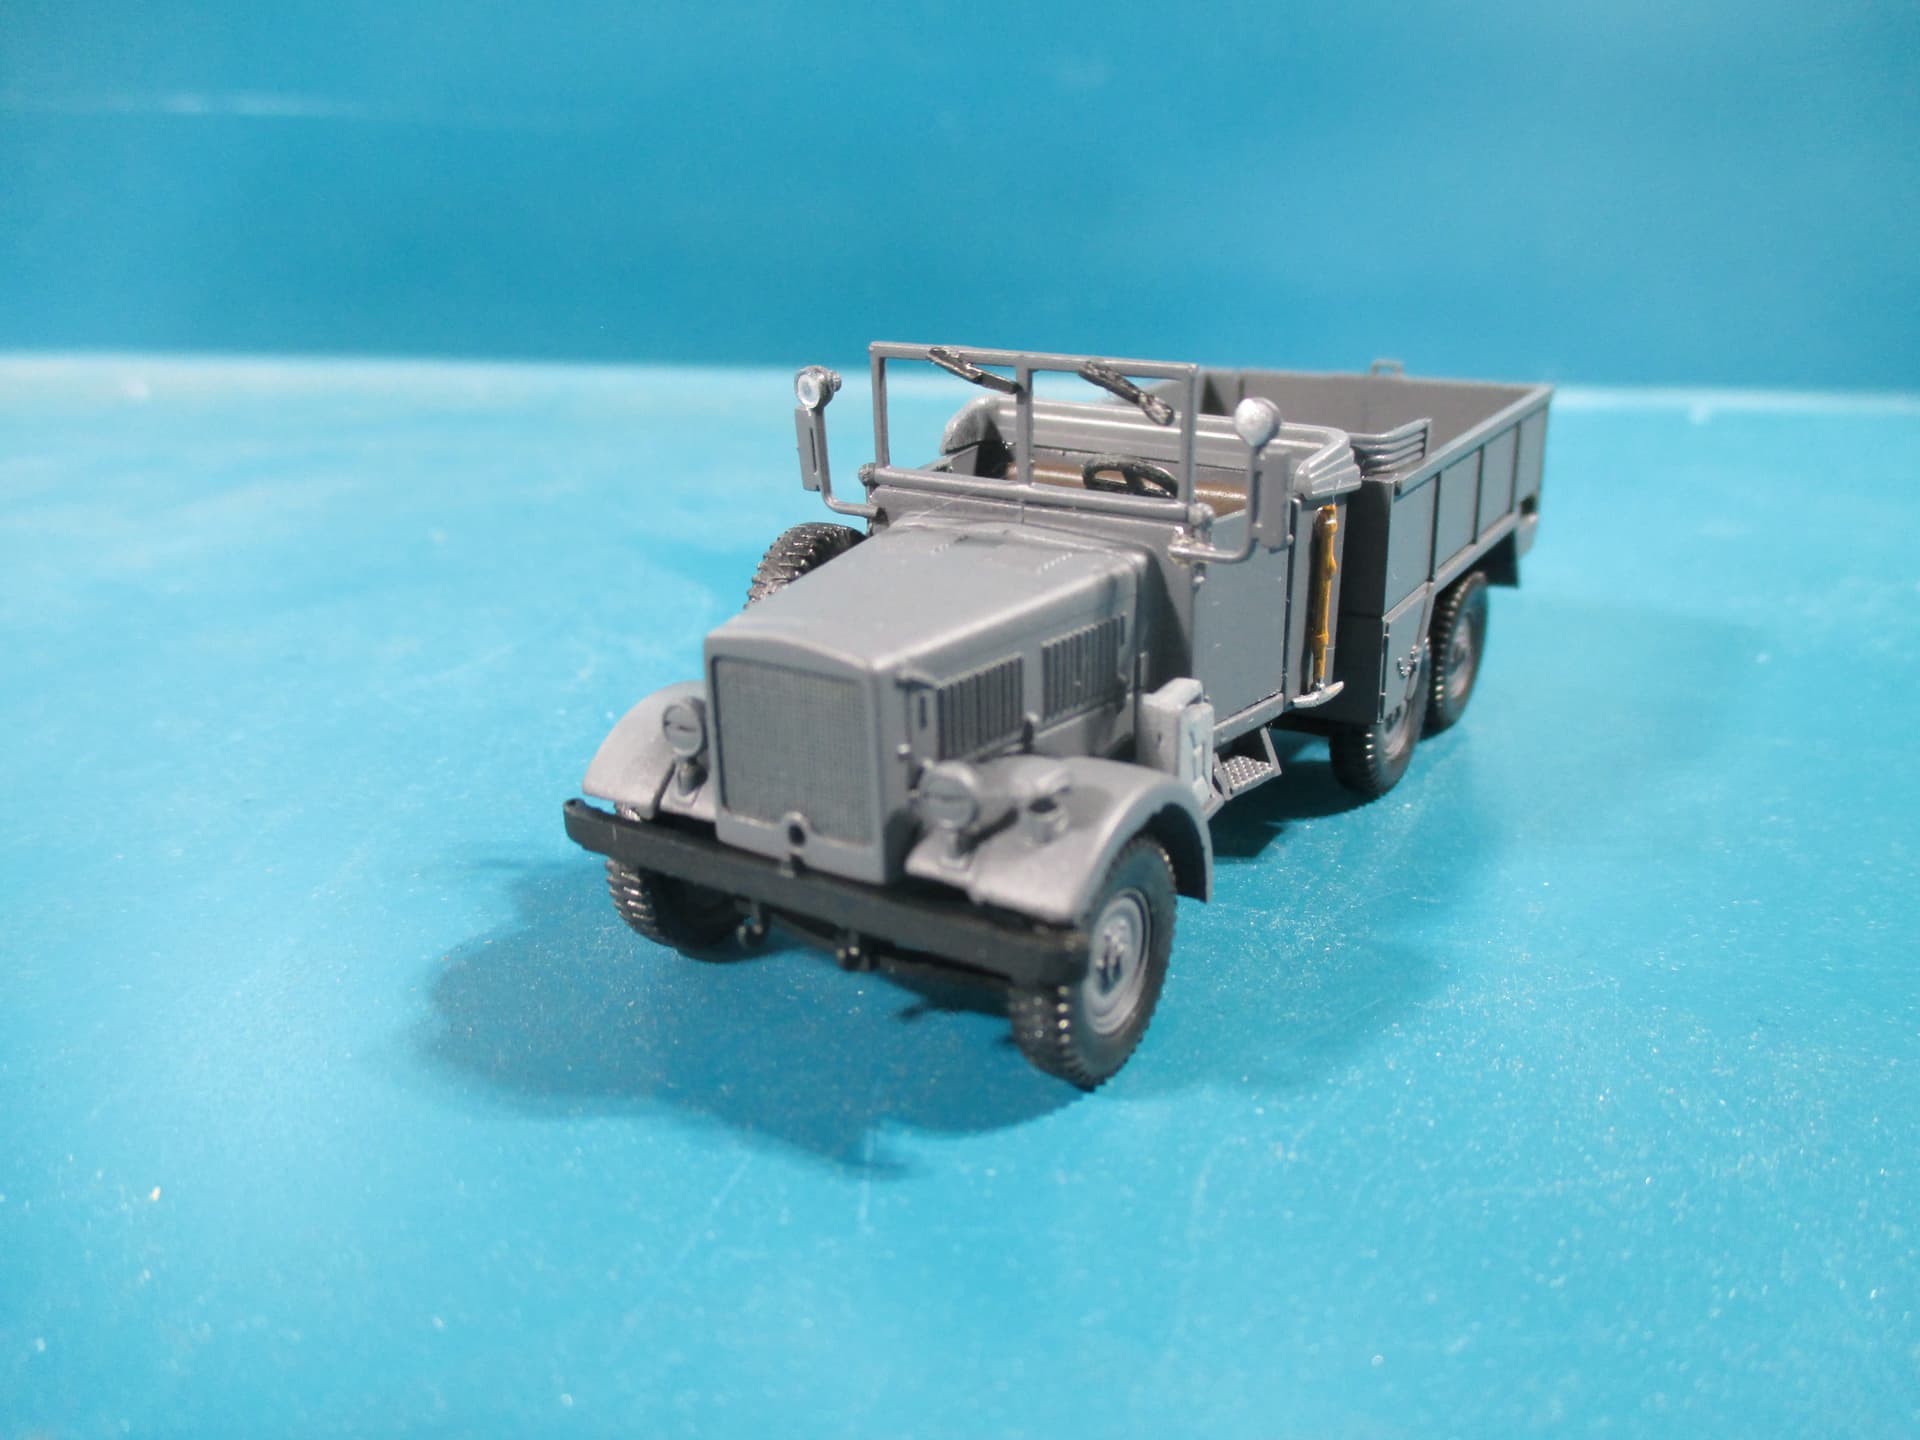
Instead I’ll post progress pics of the finished interior and where she now stands (literally as the wheels are on!):
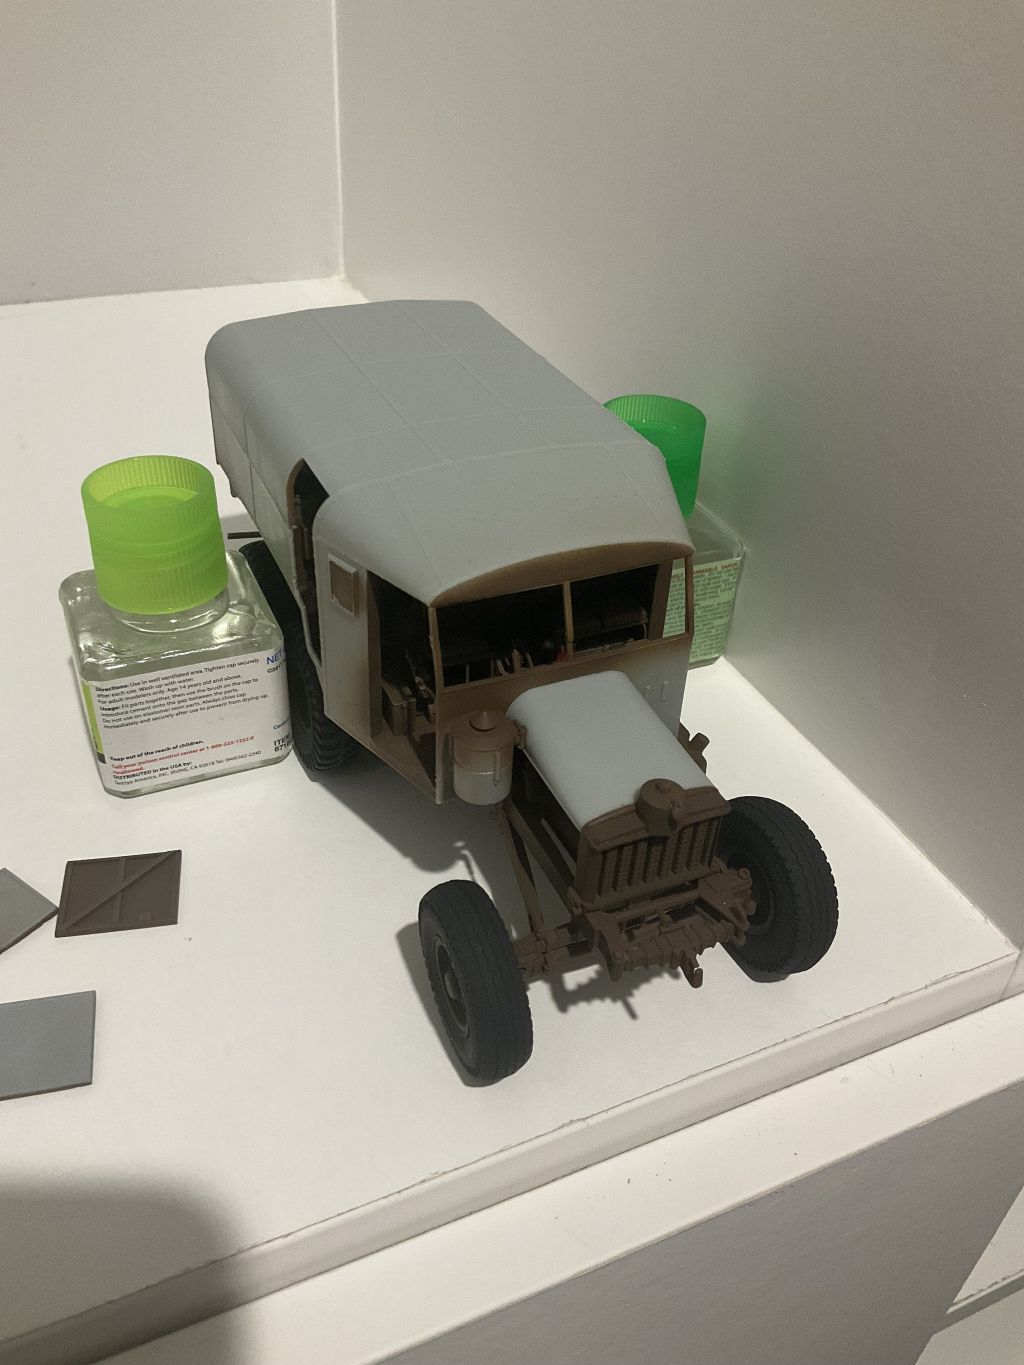
Tonight I found out there is a big issue with the doors not fitting. Thunder designed them to fit on the outside of the opening, when they should be flush. I thought I’d rectified that, but not the case.
So next few nights are fit the doors, fit the etch ‘mud flaps’ (for want of a better description) and add the front fenders, lights etc.
Maybe paint Thursday or Friday as I’m working from home and, as long as this blasted rain stops, I might be able to get a coat down and get the windows in (they are painted ready to go).
9 Likes