Myself I’ve been working on the “Protze” (German for “sling” as in the weapon), I have painted and weathered it to match the Horch:
I have also painted and weathered the Flakvierling itself a little:
I still have to work on the sight and the controls. There are also the folding loaders’ platforms that I want to show folded (didn’t have the guts or probably skill to do that back on the first go). As the way the loaders’ seats are mounted to the platforms is very sketchy, I have modified it patterned after the AFV Club kit:
So now I want to put it all together and paint it - it’s actually almost done!
Thanks Pavel, appreciate your support. Apparently the brake airlines are too big in diameter and I have to replace them and reroute them via the “pogo stick”. I’m part way with this and getting a little nervous, I have just over a month to build the CAT dozer and complete this project for the campaign!
Looong time ago I was building a CORRECT model of a Mack Superliner and I got into exactly the same problem. I solved it by ordering a very special wire called Kynar - it’s very thin and can be ordered in many different colours, so that you don’t have to paint it after installation - maybe this would help you, too! Good luck to you on the deadline!
Thanks Pawel, I’ve buddied up with a guy in UK on a non-hobby site who drove M916’s in Iraq with the U S Army. He’s been really helpful with some of the finer details on my build and I’ve taken some time to incorporate his various suggestions. I’ll be getting into the CAT build this week, so I’ve got a little over a month to finish up.
That said, this CAT dozer is maybe the most complex Hobby Link kit I’ve seen so far, and I’m a notoriously slow builder!
Cheers
BTW I ordered a roll of that Kynar wire in red, I have the perfect blue acrylic so it’ll double up.
I’ve found that it helps a lot to hit almost all of the parts out of the box with spray paint - in my case that was a black paint by Wurth. This stops the parts from being “tacky” and “funny to touch” and highlights all the funny pattern from 3D printing, showing you which areas to fill and/or sand (sometimes sanding itself is enough). If you’re pressed for time, you need some filler that works fast - CA or better some 2 componennt automotive putty where you apply it and are ready to sand almost immediately. My biggest problem were warped parts that just didn’t want to straighten - after I hit them with hot water and straightened them they somehow tended to warp back overnight. So in cade of the frame rails I just replaced the warped portions with rails I have scratchbuilt out of styrene - I was very happy with that solution. In case of the blade I was able to successfully straighten it. With many parts if you see a problem with them it’s faster to scratchbuild them than to save what is there. Anyhow, check the WIP out for tough spots - that’s what it’s there for! Hope it helps, good luck with your build and have a nice day!
Thank you Pawel, very interesting. I had some warping issues with my M125 truck and found that a 2 minute hot soak and the part(s) pressed between two pieces of wood overnight generally worked.
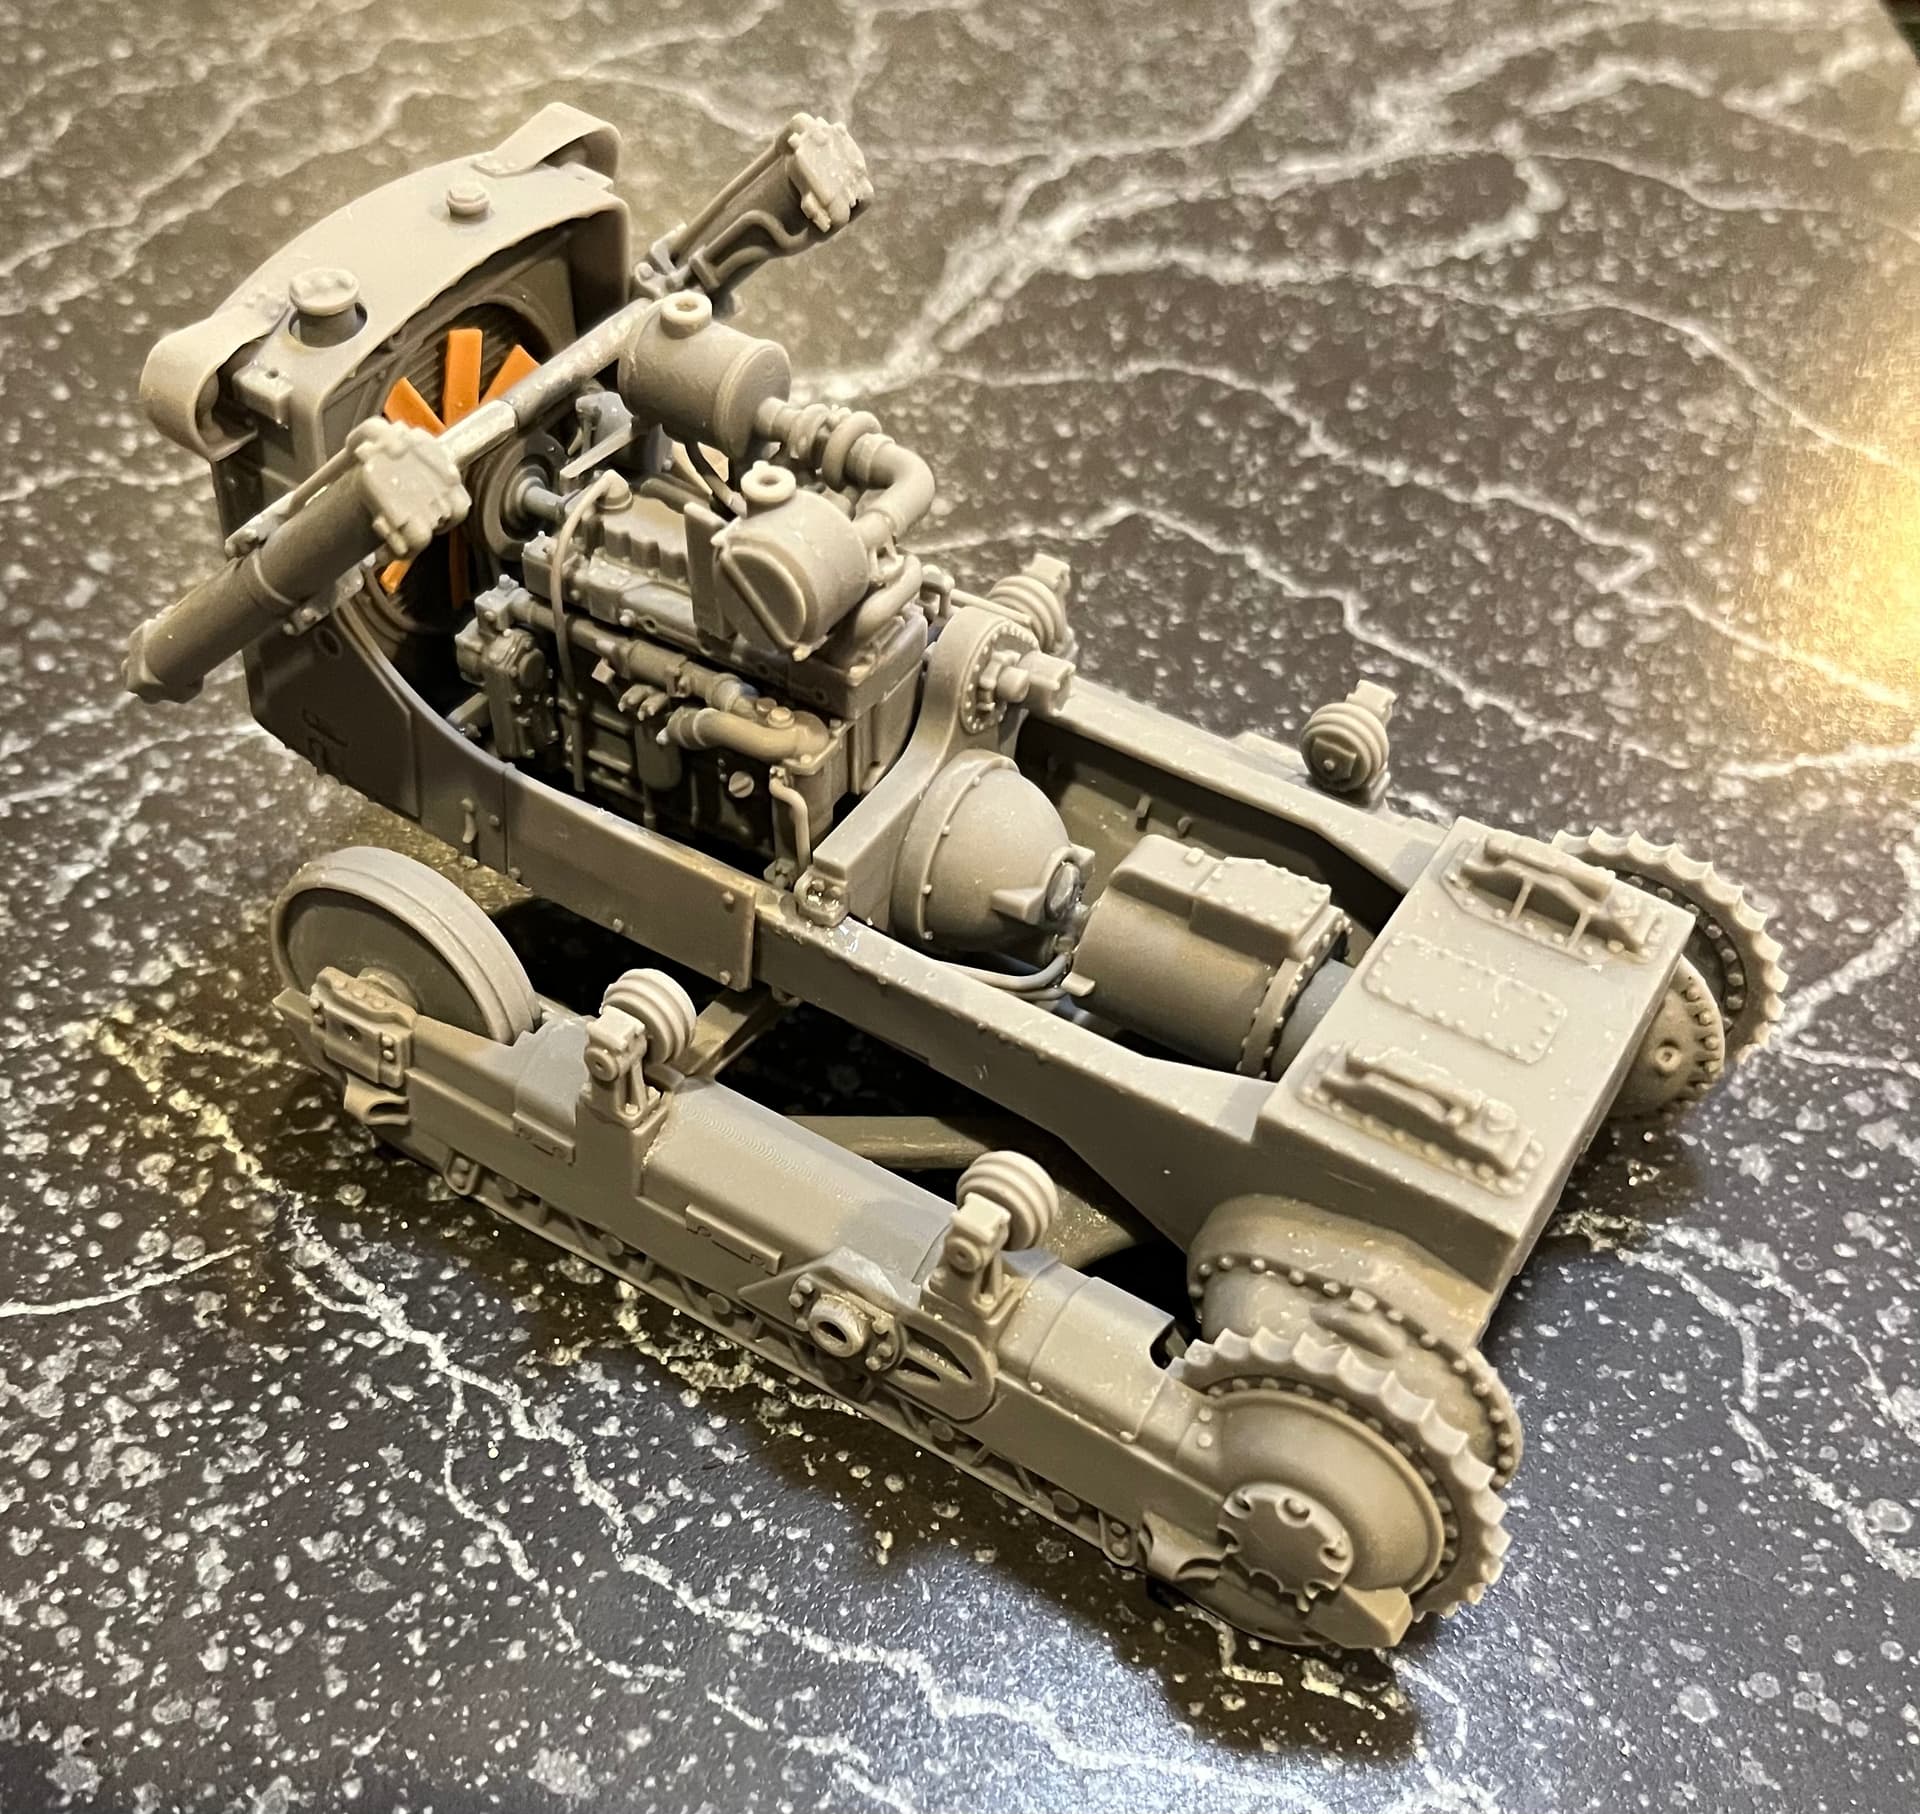
I’m having fun….releasing the engine pulley assembly from its “cage” as there’s too much material surrounding the piece to use my new method - warm air.
OK then. Let’s see; the frame and gooseneck is just two sections with the usual additional pieces for tiedowns, gladhands and the 2 onepiece ramps.
The wheels may need reaming out to fit over the hubs, the hubs may need sanding too. The wheels and tires will probably need reaming out to assemble easily.
The balsa for the deck floor is too small to allow the centre section to be one-piece, but you can hide the join under a load. The decals are junk. Wrong font, wrong size and in white only, That said, ODS and newer-era trailers don’t seeem to carry unit info numbers so…..Also, no data plate info included .
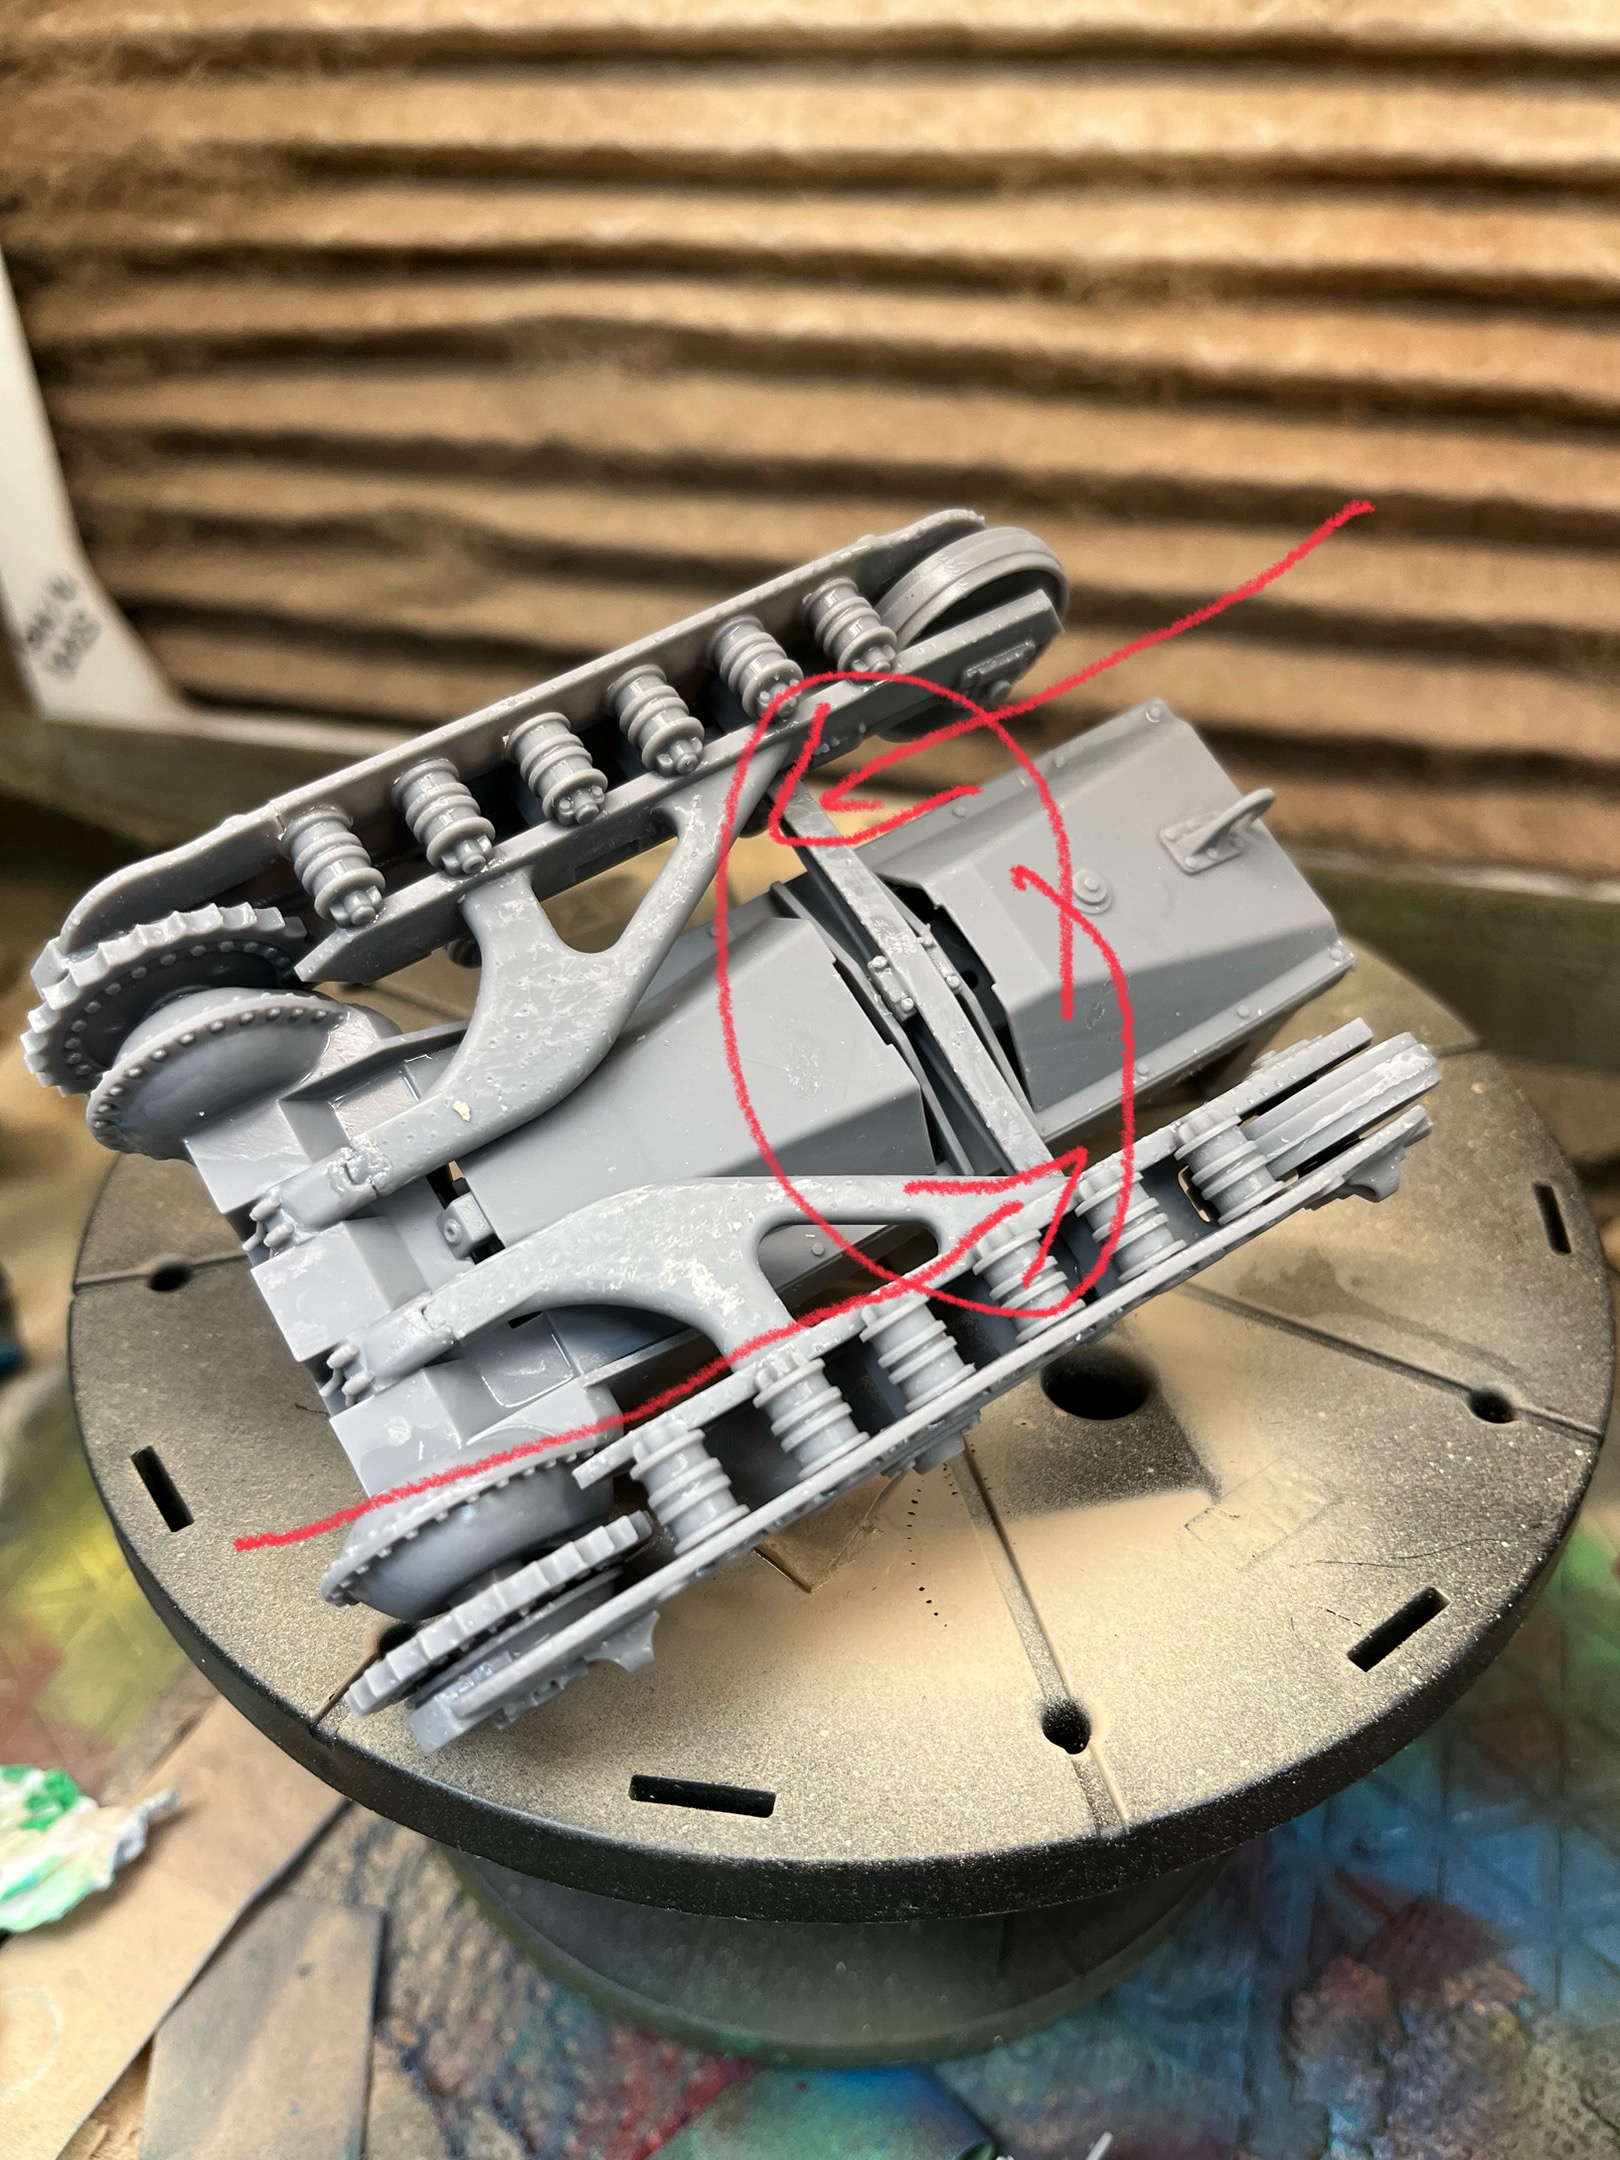
Very easy build all round. The frame and bogie go together almost like LEGO.
Note to prospective builders: don’t do as I did and fit the cross member and then come back later to fit the track housings. The cross member settled slightly out of alignment and this subsequently caused the two housings to sit skew on the frame and one end section snapped as I was ….. correcting it. All good now, but just a heads up.
@Denimo - I like your tractor a lot! Good luck with it.
And I’m done with my flak.
So here are the photos of the finished flak itself:
And here is the stowage in the Horch:
Honestly the Horch seems to be a little too light to pull the Flakvierling which weights almost two tons together with its trailer. But I didn’t wait to build it for so long to obsess about historical accuracy now! And the whole combo looks like this:
I had fun building it and knowing how mych better I am now in comparison to when I‘vebuilt the Flakvierling for the first time (over 30 years from now!).
Thanks Pawel, your build is looking great too. Yes, I’m steadily getting the CAT put together and I hope to have it all tied-down by mid-December. The tractor-trailer just needs the air and electrical connections trimmed and connected and then the project will be complete!
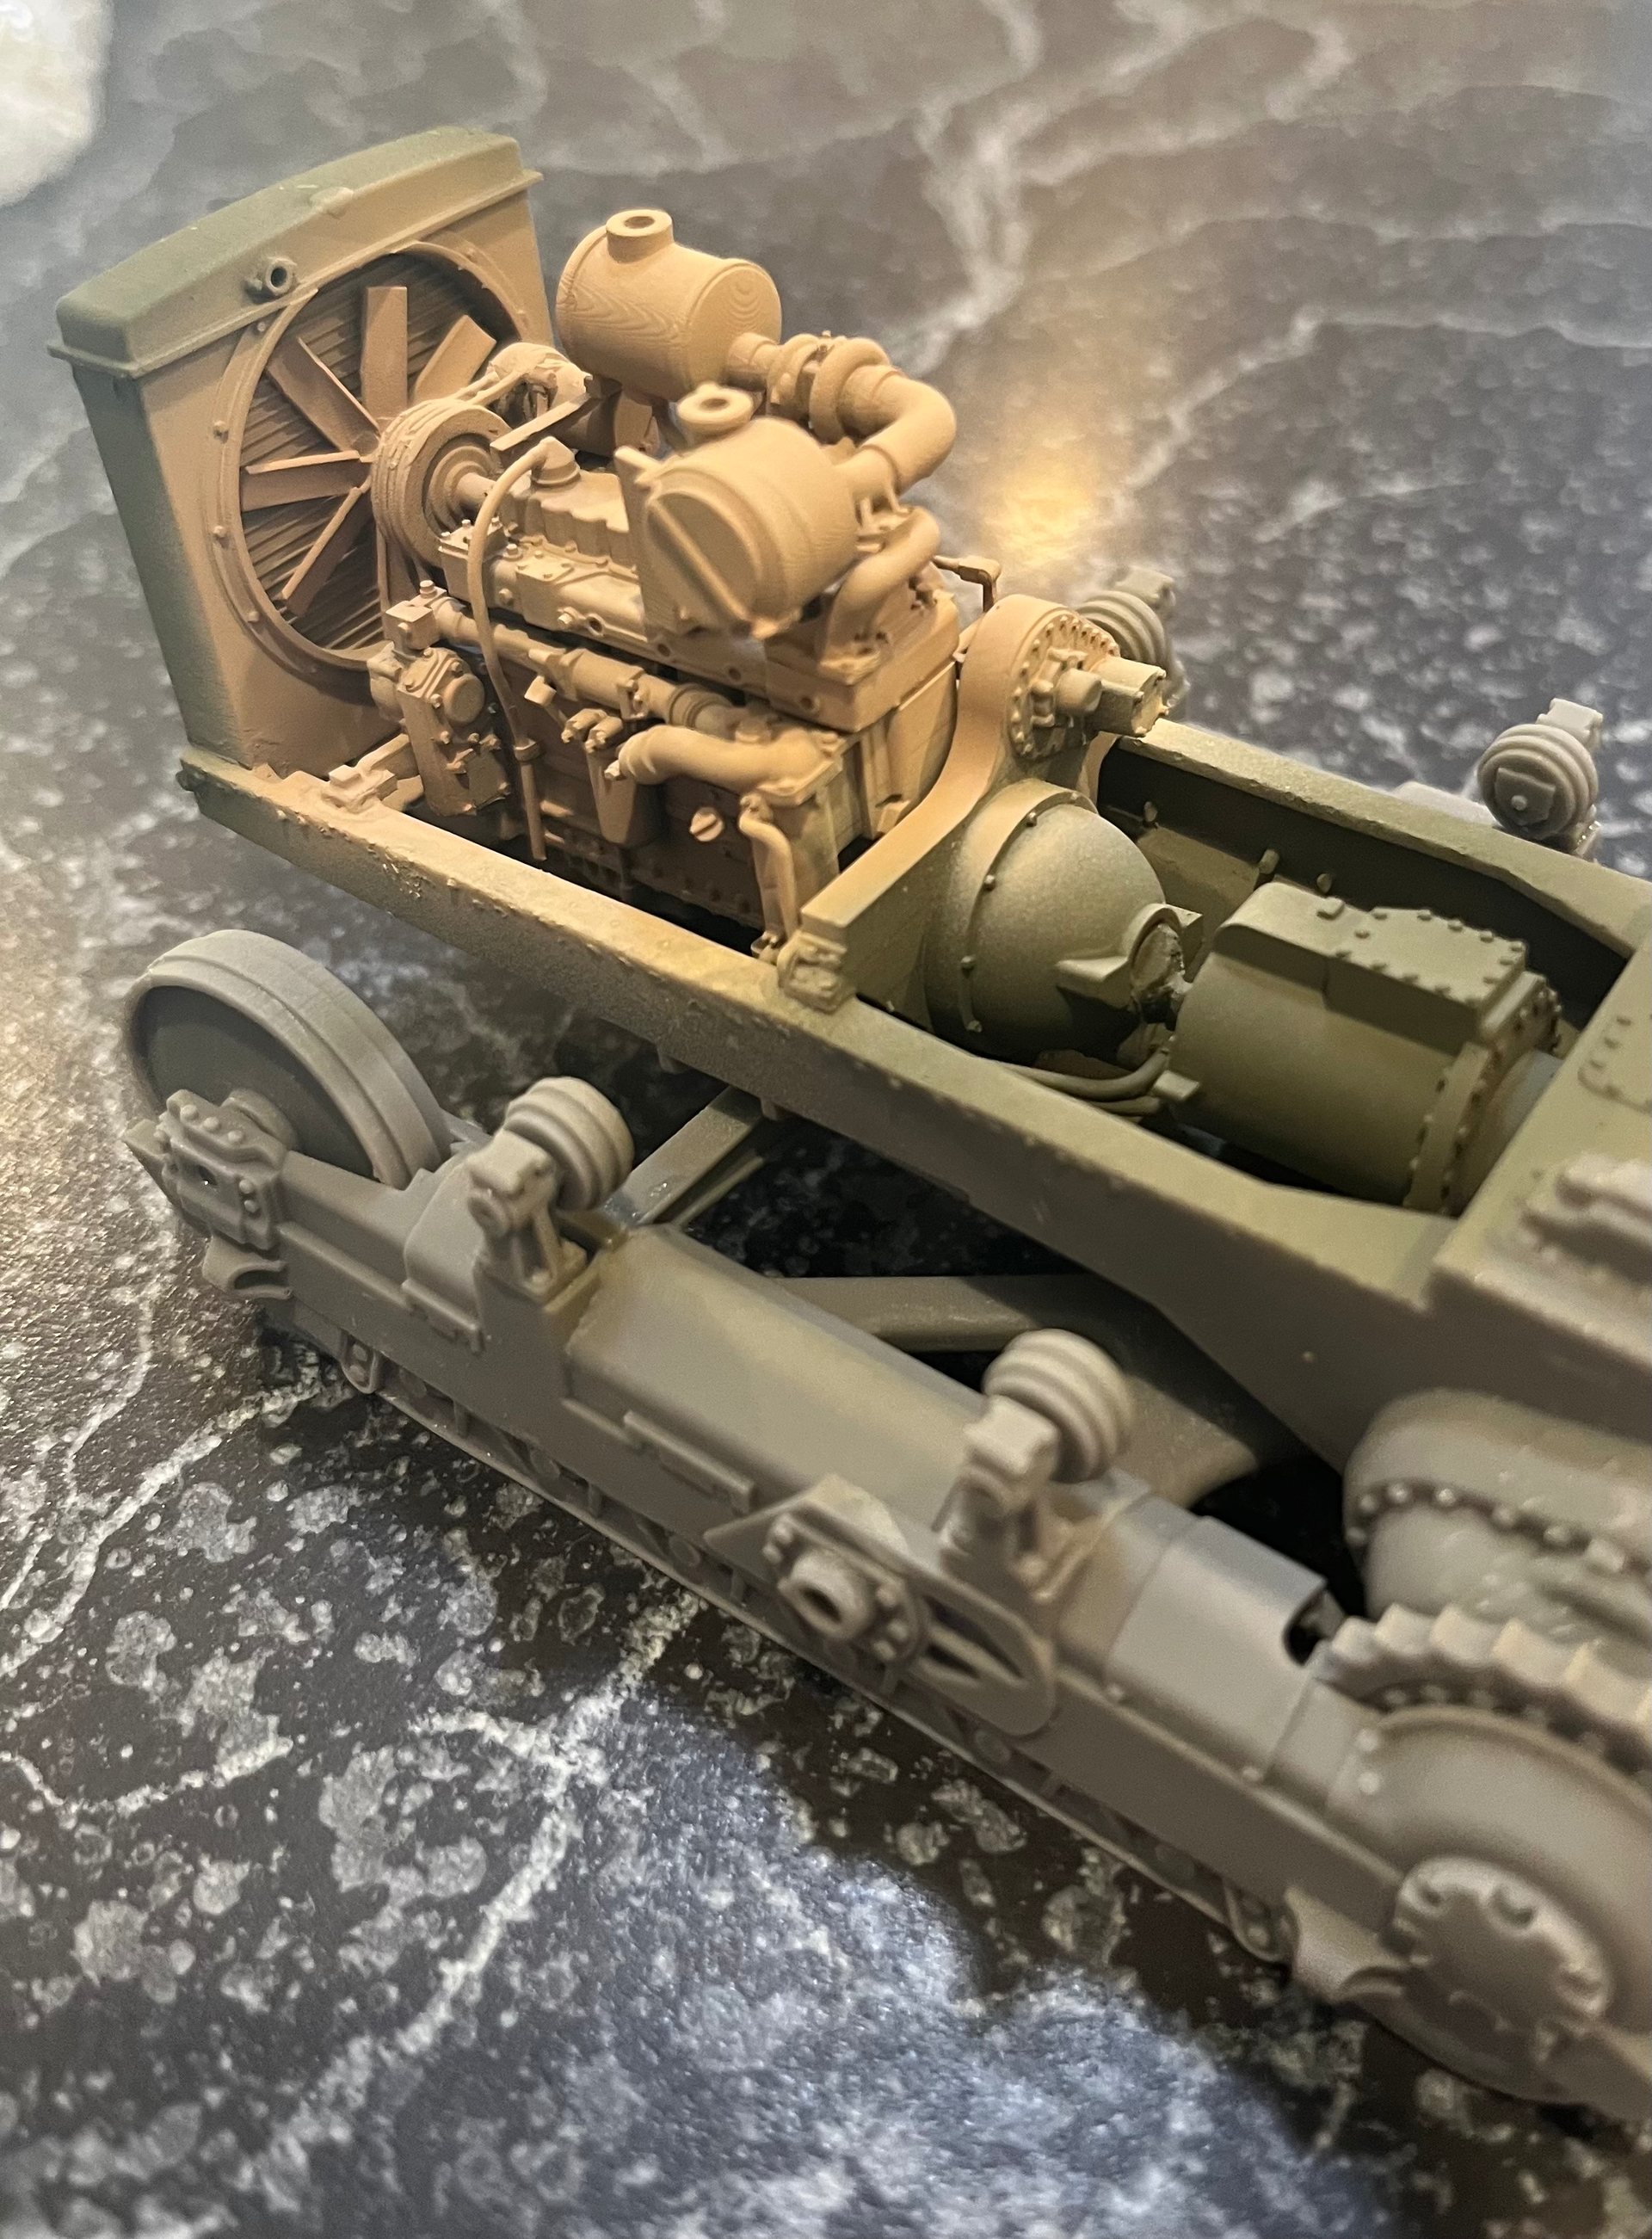
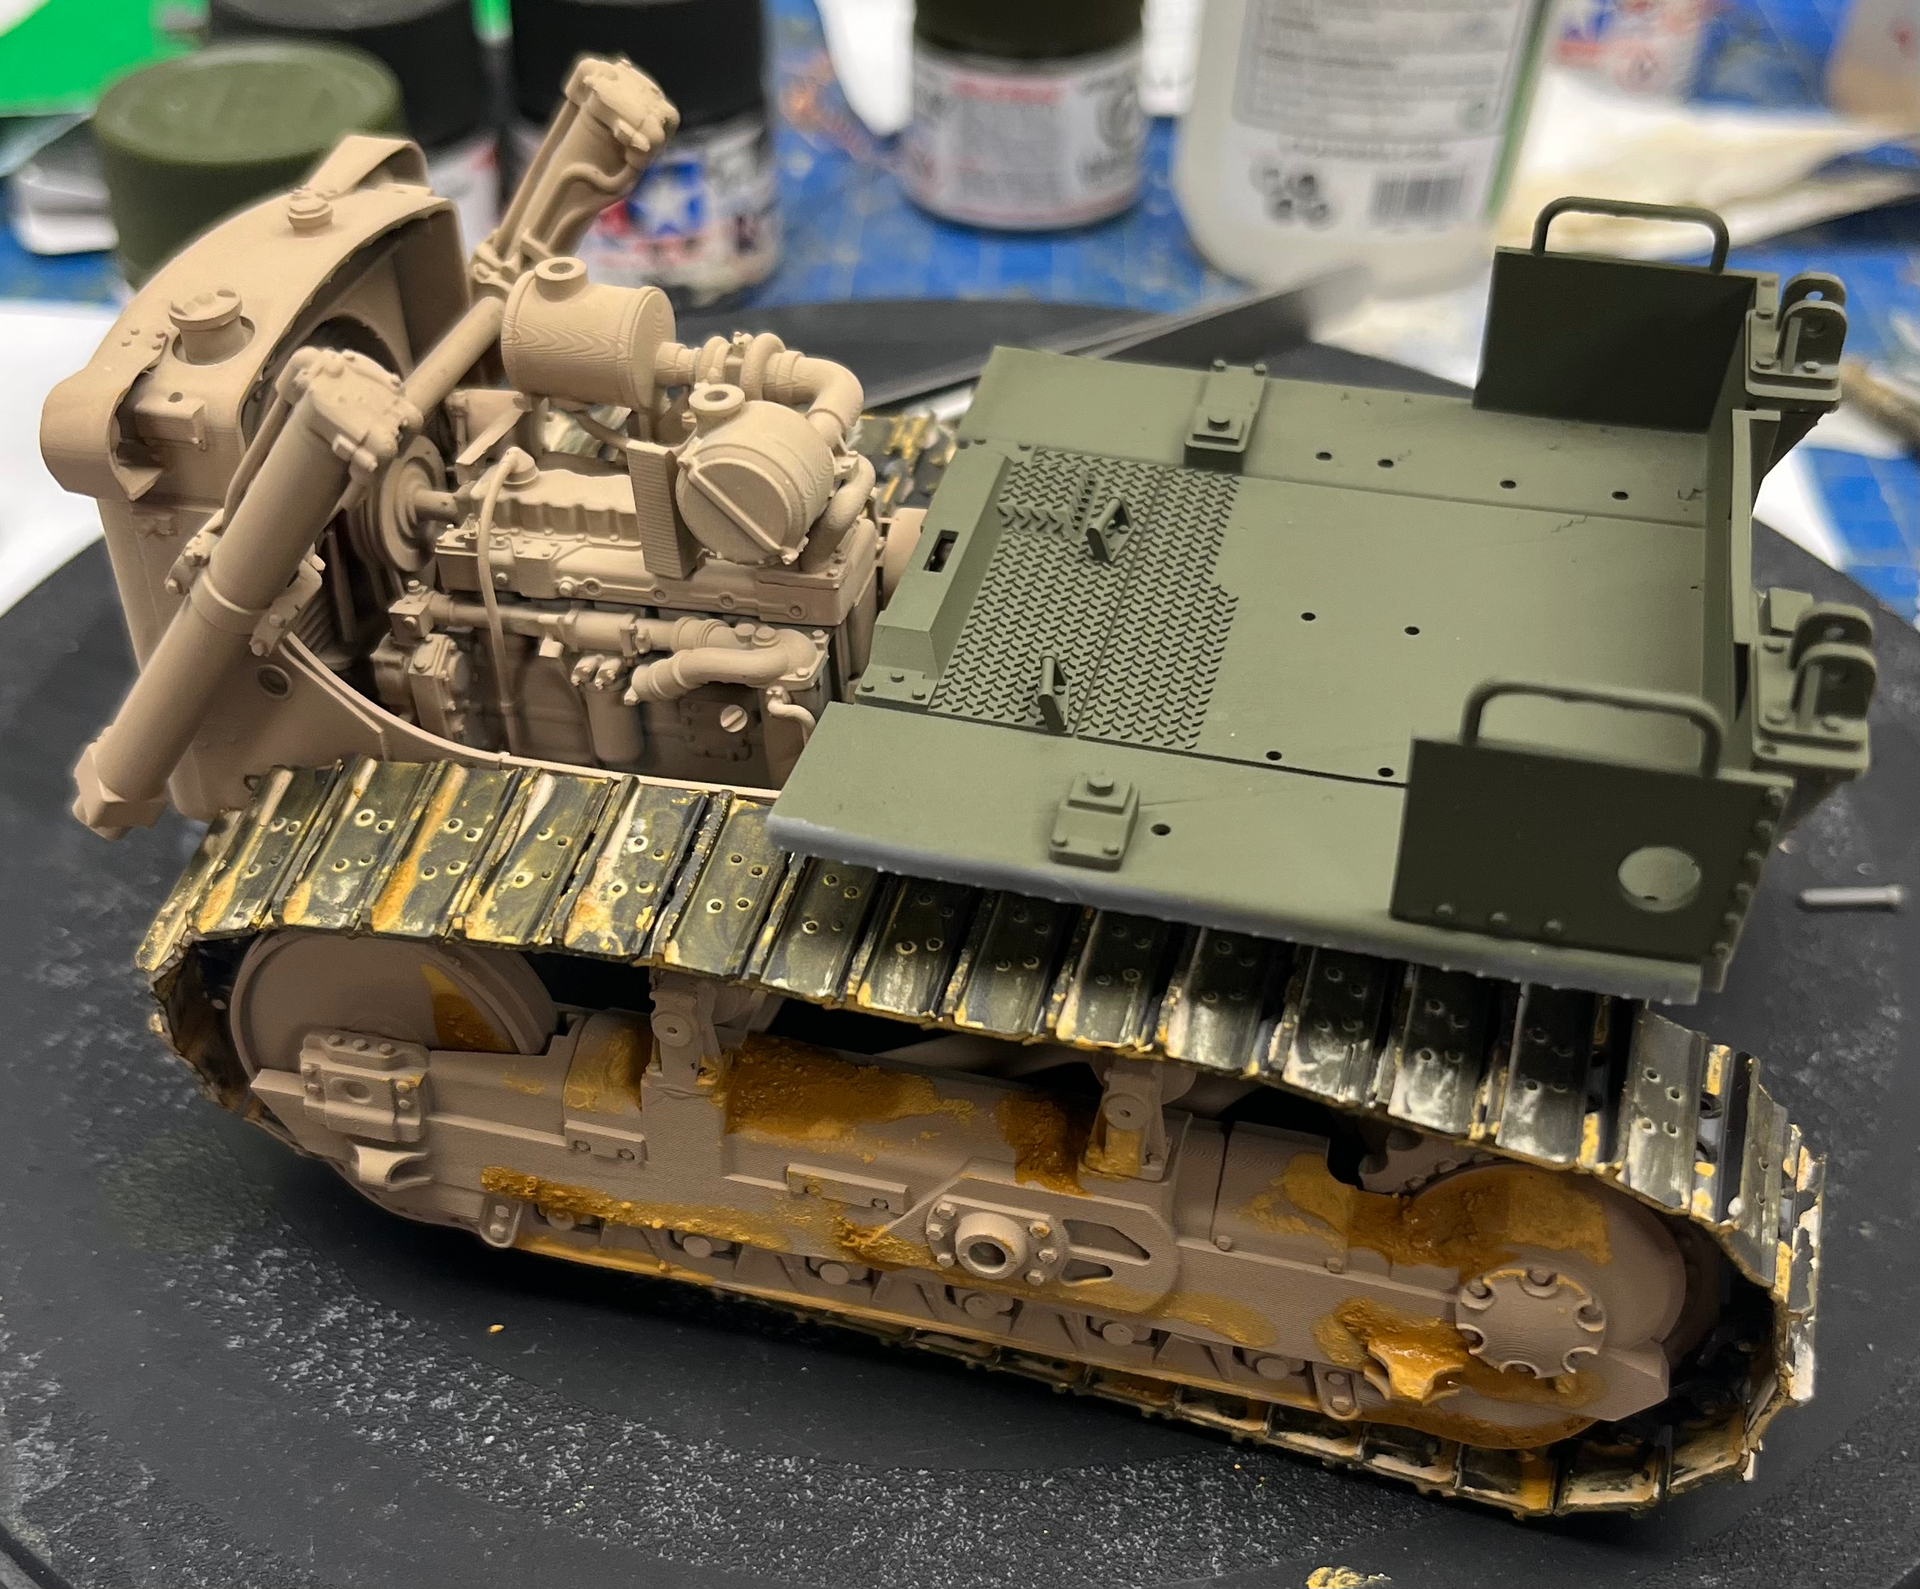
The journey continues. The tracks came together well, although the final o/s track pin is proving to be a bit challenging. I’ll finish the underside of the cab floor in an Olive Drab, but spray sand color “where they could get to it.” Once I’ve furnished the driver’s area I’ll be opening the last box of the project- the HL armoured cab.
Cab interior finished except for data plate decals. Except……for the fact that I miss read the instructions and fitted the wrong diesel tank. Easy enough fix and I’m moving on to build the armoured cab tomorrow.
Excellent job on the Horch and Flakvierling Pawel. It was not a particularly strong towing vehicle, so you are likely right, but as you say, the main thing is you had fun and that is what the build is all about! Thanks for joining in.