If you’re interested by my experience with this model you can have a look at my site. I’m pretty sure I posted it here too.
Enjoy your build.
Olivier
If you’re interested by my experience with this model you can have a look at my site. I’m pretty sure I posted it here too.
Enjoy your build.
Olivier
I’m already taking one step back for every step forward with this kit. Details are great but my fat arthritic fingers just won’t cooperate sometimes. I’ve already had to fix a couple of things but on the positive side, I did manage to get the rear hull plate done.
 IMG_4952 by Russel Baer, on Flickr
Doesn’t look like a lot, right? Well, that’s about three hours worth. Yikes. I could have used the kit-supplied plastic indie track links but each one had four knockout pin marks so I subbed some spare R-Model links. Of course then the securing brackets didn’t fit, yada yada yada. In all fairness the weld beads added to that time considerably. And I had one road wheel break off at the axle, my fault entirely, but in the process of trying to separate the inner and outer wheels I ruined the outer. Hmmm. One Tamiya Merkava wheel wheel, with grooves cut into the rim, now resides on the right rear. Painted it will be just fine.
 IMG_4953 by Russel Baer, on Flickr
I have another AFV Club Cent in the stash and I’m thinking seriously about consigning it. I know there’s lots of people who absolutely love AFV Club products, I myself have built a couple of their M60’s, but I have to say this one is not as buildable as those. My opinion may change later of course, but I enjoyed the Amusing Hobby Sho’t Kal I did last year quite a bit more. This is not so much a criticism of AFV Club kits as it is a statement of my abilities and comfort zone.
Olivier, I’m going to look at your build now and see what you thought of it. Seeing how you knocked out the Doher I can only imagine…. ![]()
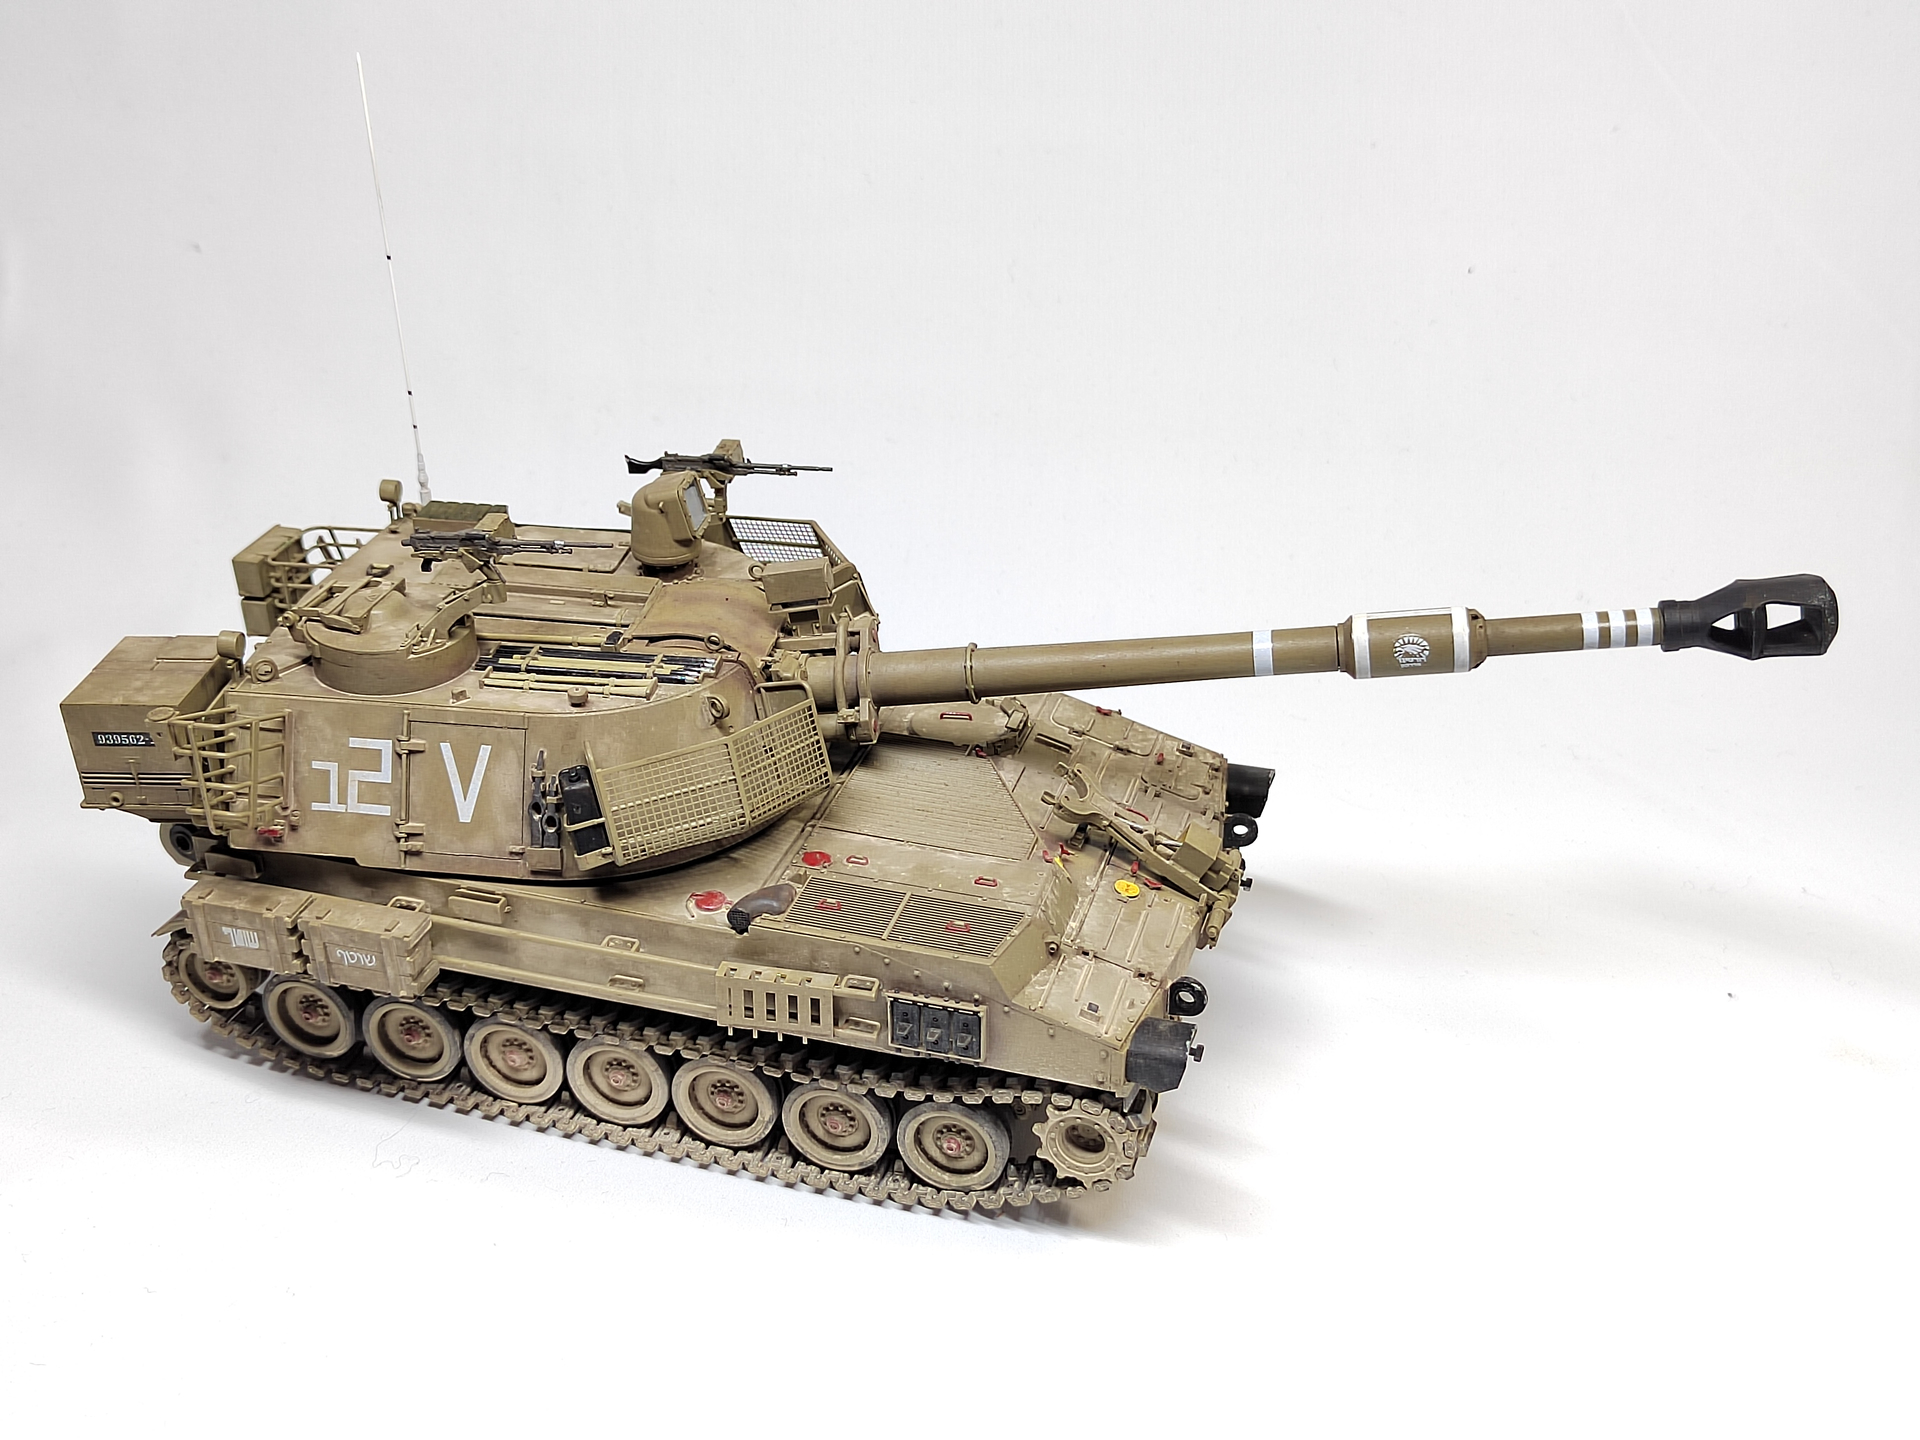
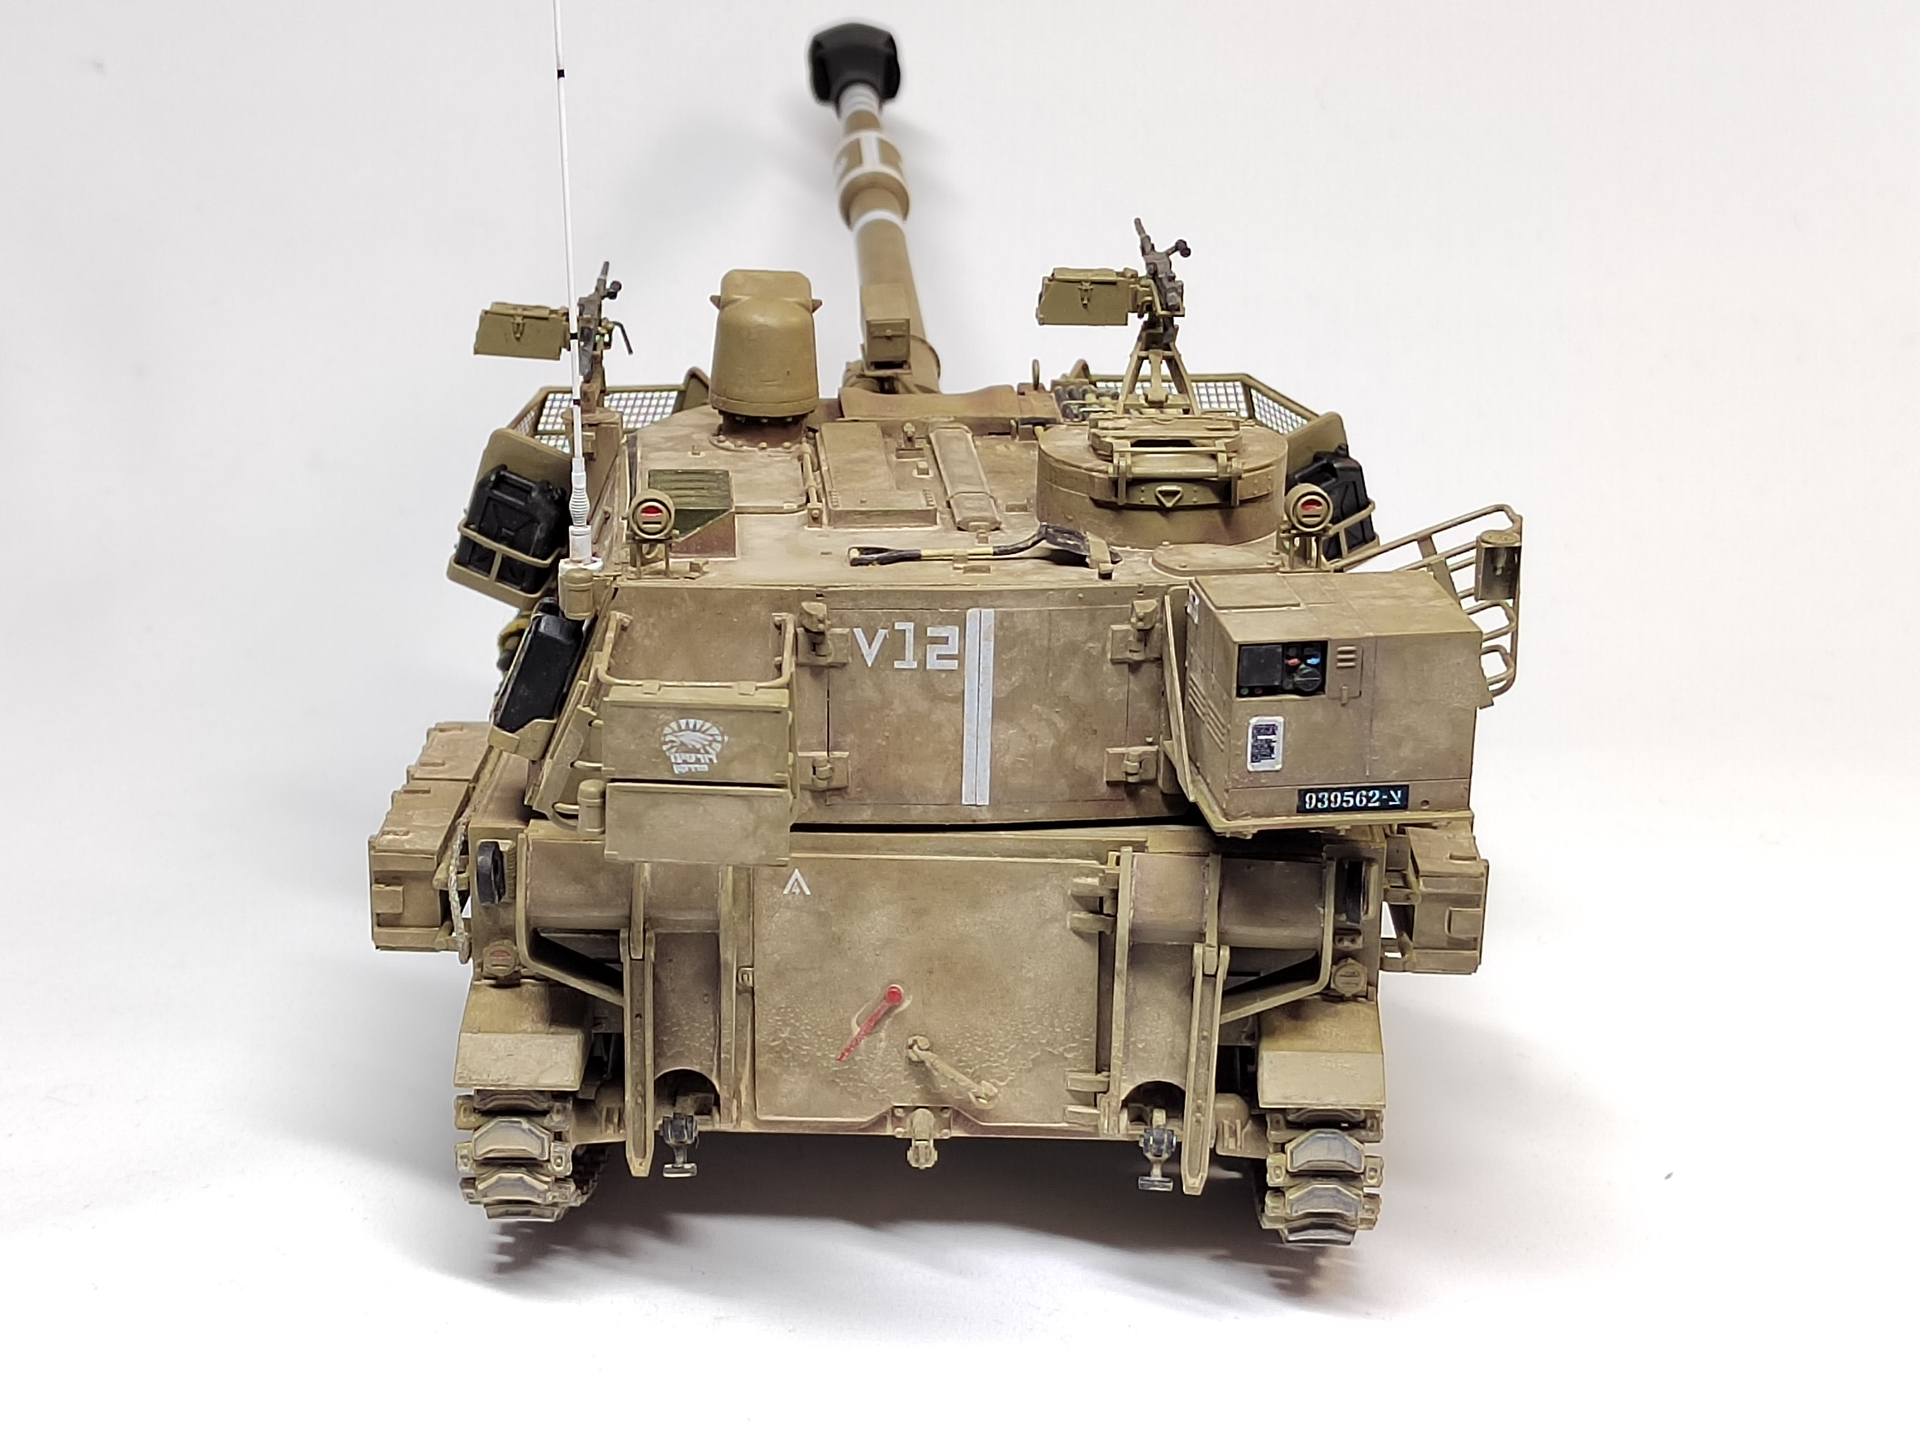
I finally weathered my Doher mainly with Syrian ground and North Africa dust pigments. The tracks are the kit ones which I glued on top of the roadwheels to simulate the sag.
This concludes my participation in the campaign which I enjoyed despite the kit flaws.
Olivier
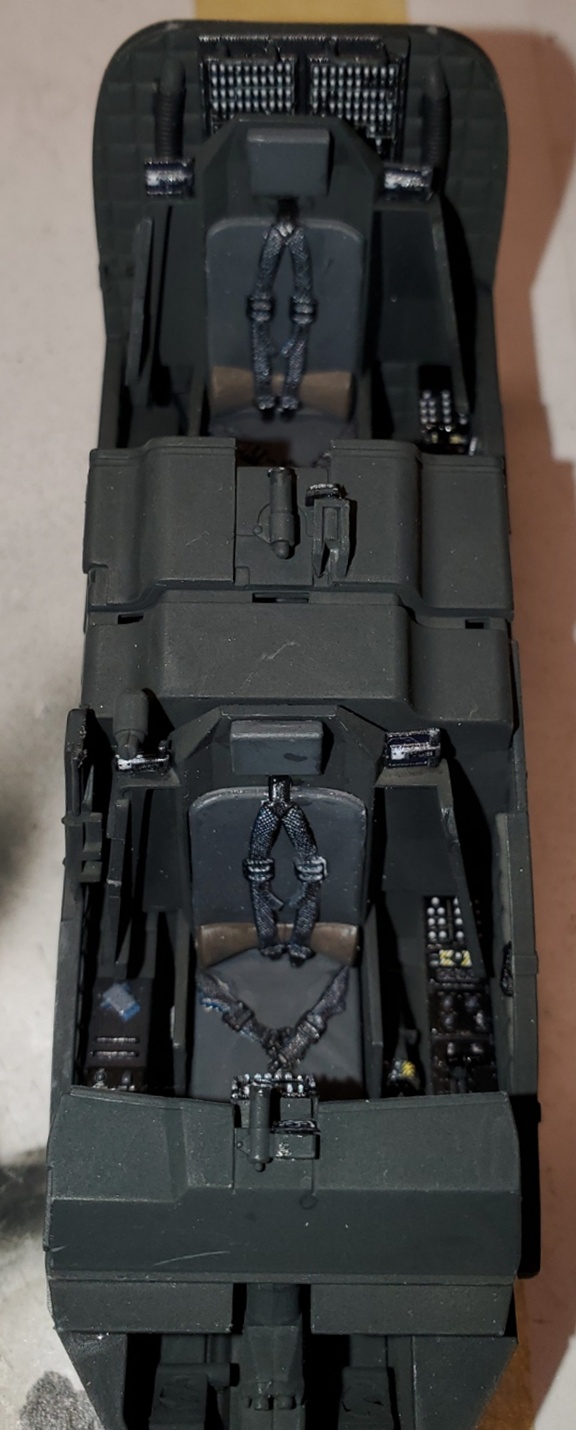
Some (slow) movement on the Meng AH-64DI. I’m using Kelek interior 3D decals. A first for me, and I think they’re coming out pretty well.
Great work by everyone else!
Michael ![]()
![]()
Anyone else unable to load pics? I’ve finished off the cockpit and am trying to post some images but the system is giving me an error message.
Michael ![]()
![]()
This is why….
I’m winning. Some of the engineering on this kit makes me wonder, or maybe makes me realize just how well certain other kits are engineered.
Pics:
 IMG_4955 by Russel Baer, on Flickr
 IMG_4956 by Russel Baer, on Flickr
Running gear is done and I’m working on the hull now. Fit is okay so far. I did change up how the upper parts went on. The instructions have you go from front to back but the location of the driver’s compartment cover is very vague, so I did the middle part, the turret ring first since it’s got a very positive location, then the engine cover and driver’s compartment cover.
I have just started another kit that will be my second for this campagne.
First bits have been glued on these past few days..
Looks familiar…. ![]()
My ugly face is on the instruction sheet ![]() so it’s a bonus.
so it’s a bonus.
Well I finally have the replacement canopy for my Avia S-199 “Mule”. The past couple of days I completed the masking of the canopy and glued it on temporarily. Got the parts primed.
Next was preshading. I still need a lot more practice on thin lines with the airbrush.
I’m looking forward to following your F-15I build as I have that kit waiting too!
The FJ’s were all captured by the IDF in 1982 from the PLO band the Syrians we had a ton of them and some landys as well some guys with some govt pull actually took a few home with them and got them road legal in Israel.. some real vitamin P right there.. (protexia)
Got some RLM02 on the”Mule” today. Added some light grey to lighten some areas.
After allowing the paint to dry gor the Mule sealed up with a coat of gloss so decaling and weathering can be accomplished.
Just an FYI. Not sure how much you are a slave to bolt counting but the weld seam you added behind the driver’s hatch shouldn’t be there. That piece of steel is Infact a single piece bent down on the front to match up with the glacis. If you check this post I made in another Centurion thread you’ll see what I mean
Thanks for the extra info, but I did that line because the fit there wasn’t great..
Looks like things are working again. Thanks, Jim!
Here’s the finished cockpit for the Meng AH-64DI with Kelek 3D decals:
Michael ![]()
![]()
Still working on the hull, got the fenders and bins on.
 IMG_4960 by Russel Baer, on Flickr
 IMG_4961 by Russel Baer, on Flickr
The putty on the right side bin was probably necessary due to my assembly sloppiness but it’s not much.