damn you … why didnt you say it needed loads of work … My SWMBO really dislikes you now
1 Like
Read the part about the suspension on the Gal Batash if you want to discourage yourself…
I love a challenge ![]()
![]()
2 Likes
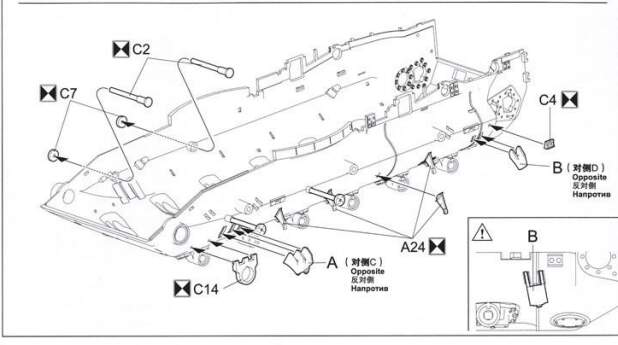
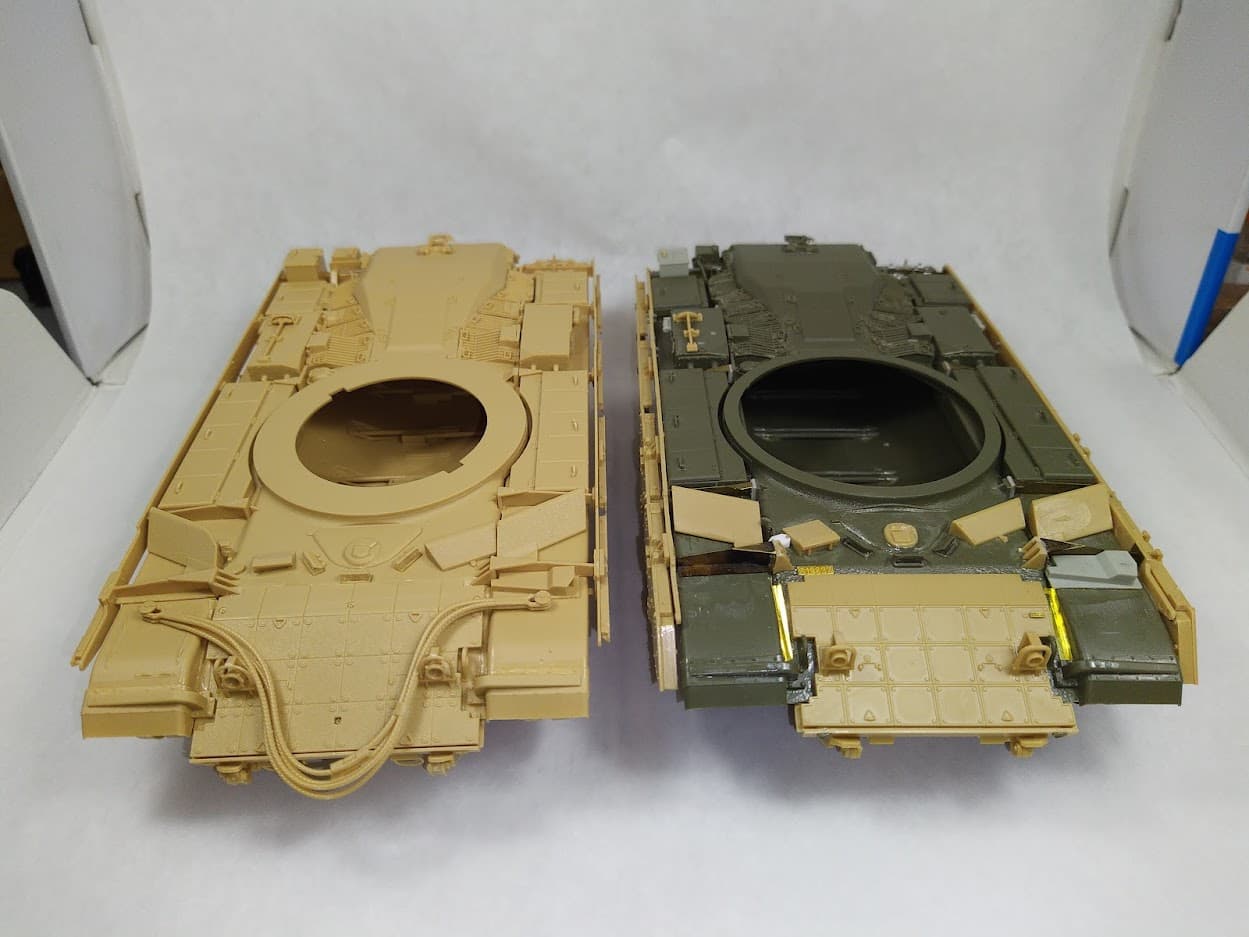
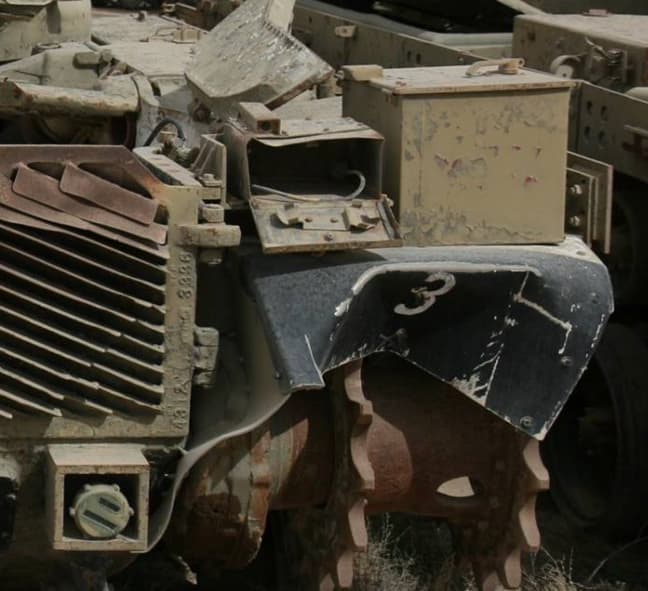
Back to the Gal Batash and some details that Meng provides
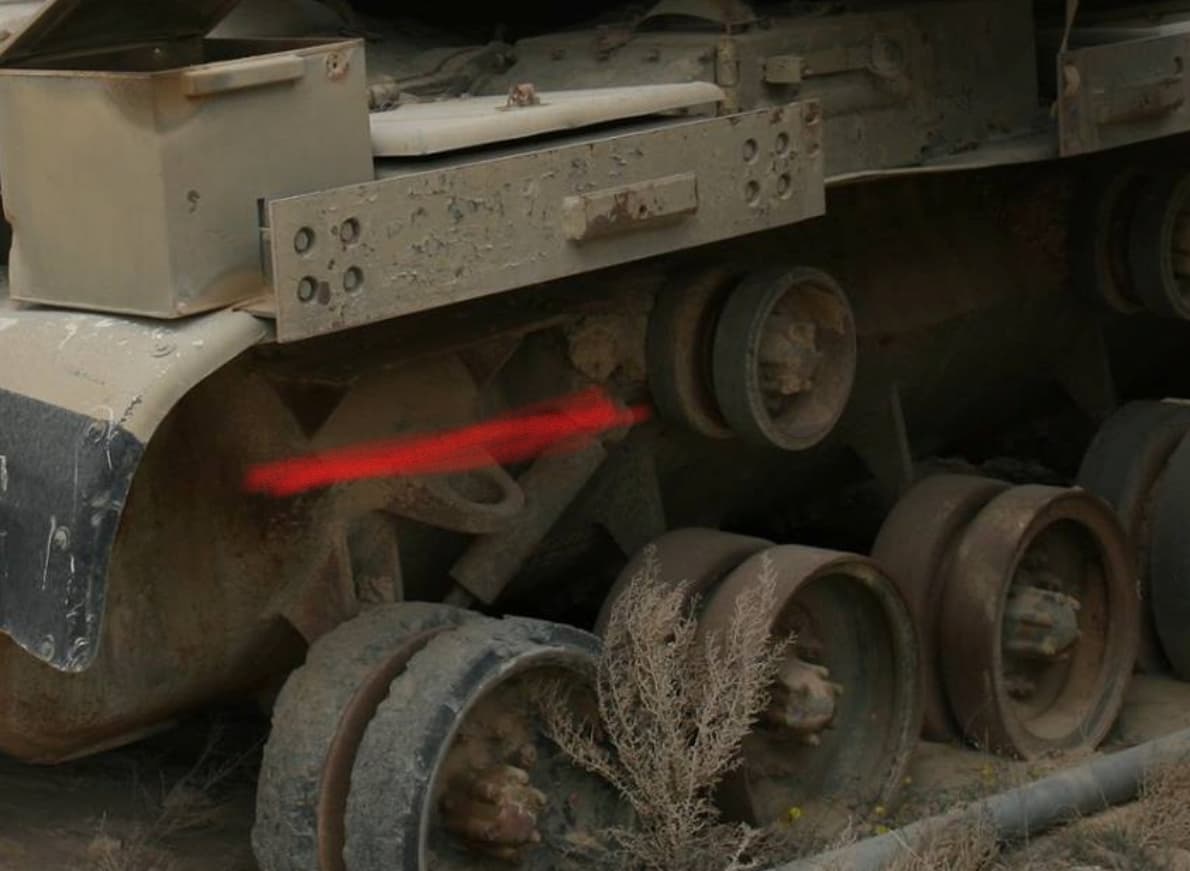
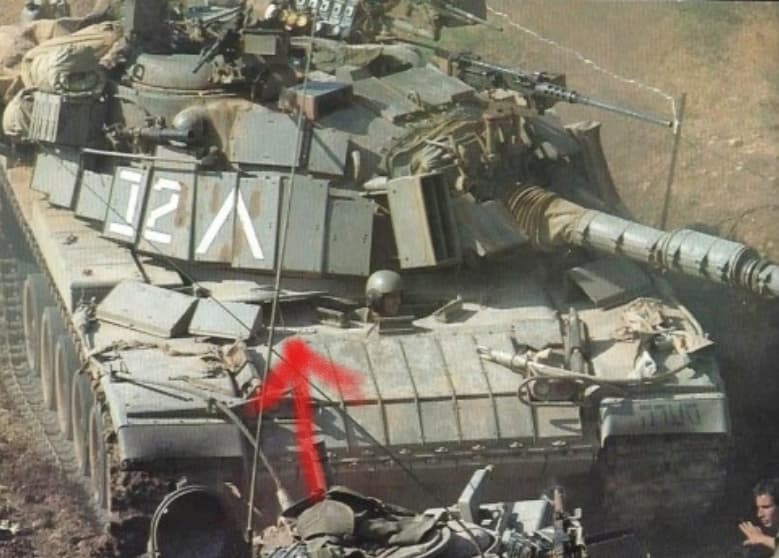
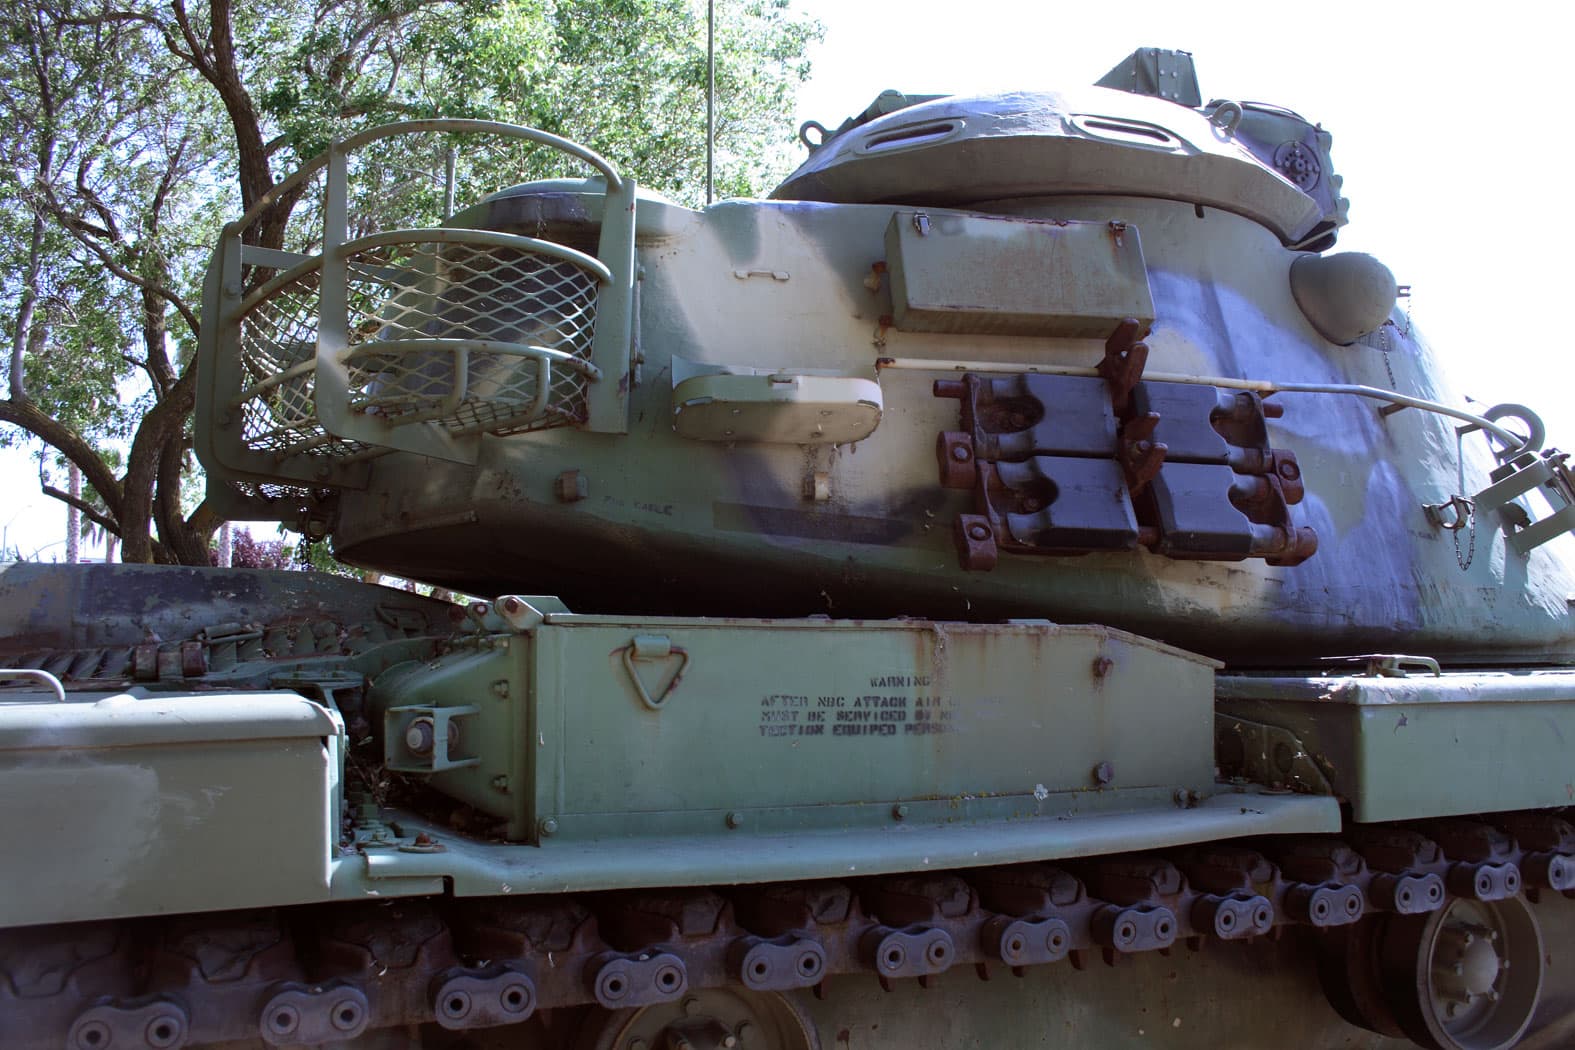
Part C14 which is probably a reinforcing bracket/brace for the front road wheel.
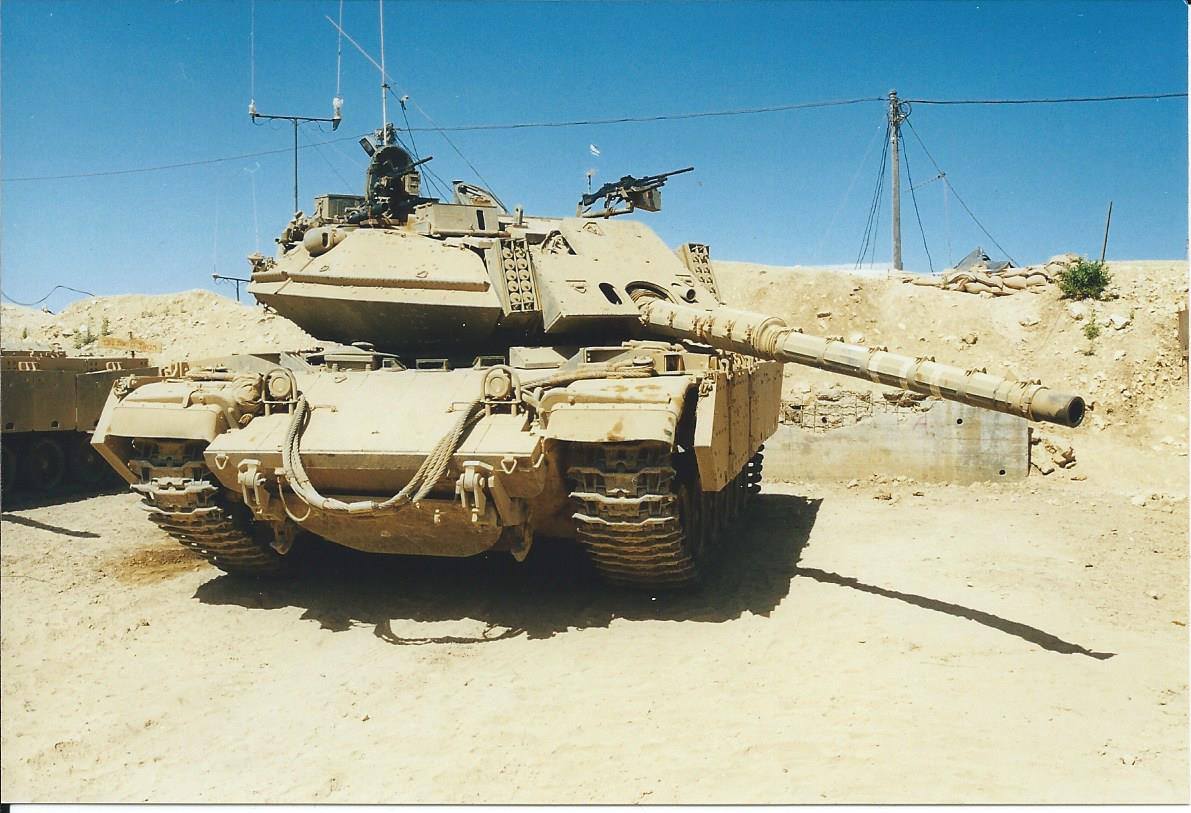
It is visible in photos of the tank from the front:

Part C10 which is probably a track alignment bracket
A interesting detail in this kit is that Meng provides three pe number plates for the vehicle, whilst in their 6B Gal kit there are only two. It should be the other way around, you need three plates for a 6B Gal (2 at the back and one at the front)
and two for a 6BGB
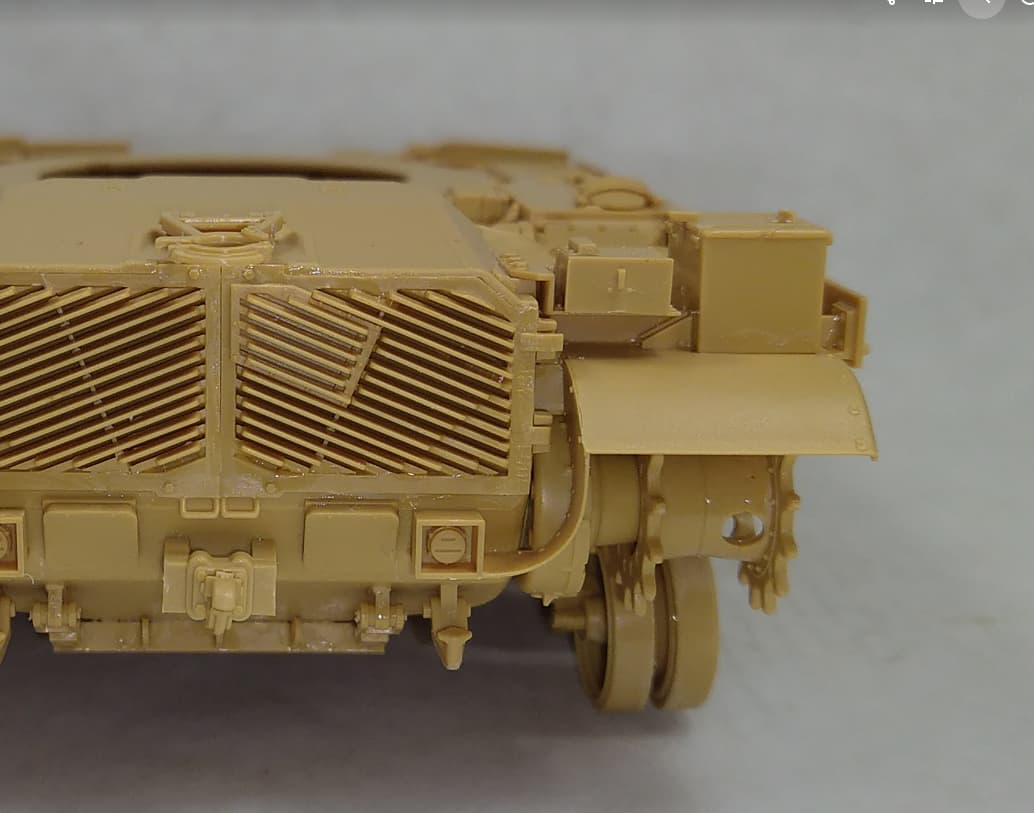
The shock absorbers from Meng are too thin, especially part C19 and it is a noticeable detail.
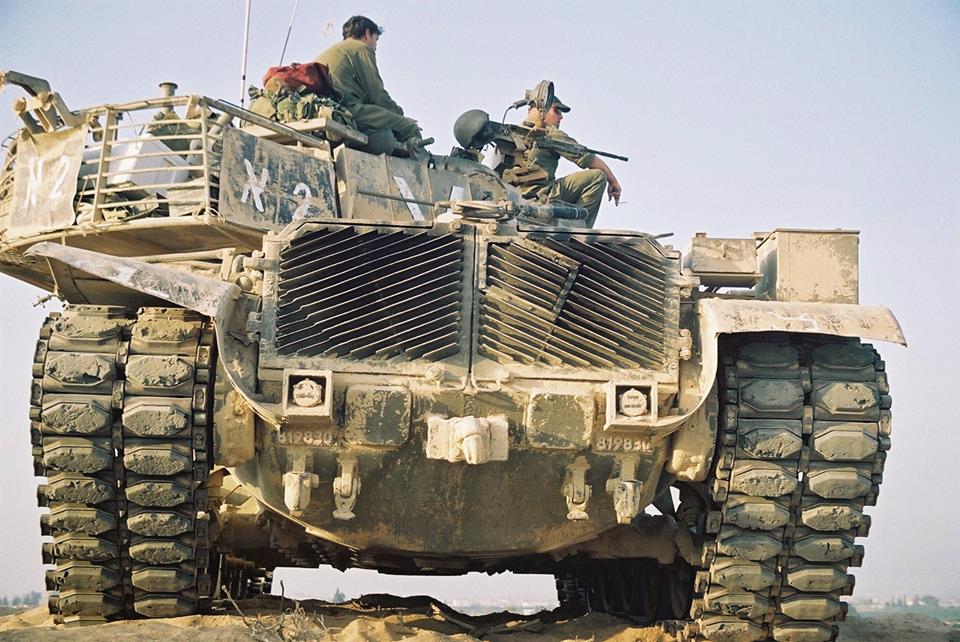
Meng provides the correct driver’s hatch, with the IR periscope, a modification done to all of the Magach 6 variants from the 6B and onward (6B, 6B Gal, 6BGal Batash, 6R, 6M, 7A, 7C)

1 Like
I have a meng 6B Gal Batash in my stash; I’m keping an eye on this thread. ![]()
1 Like
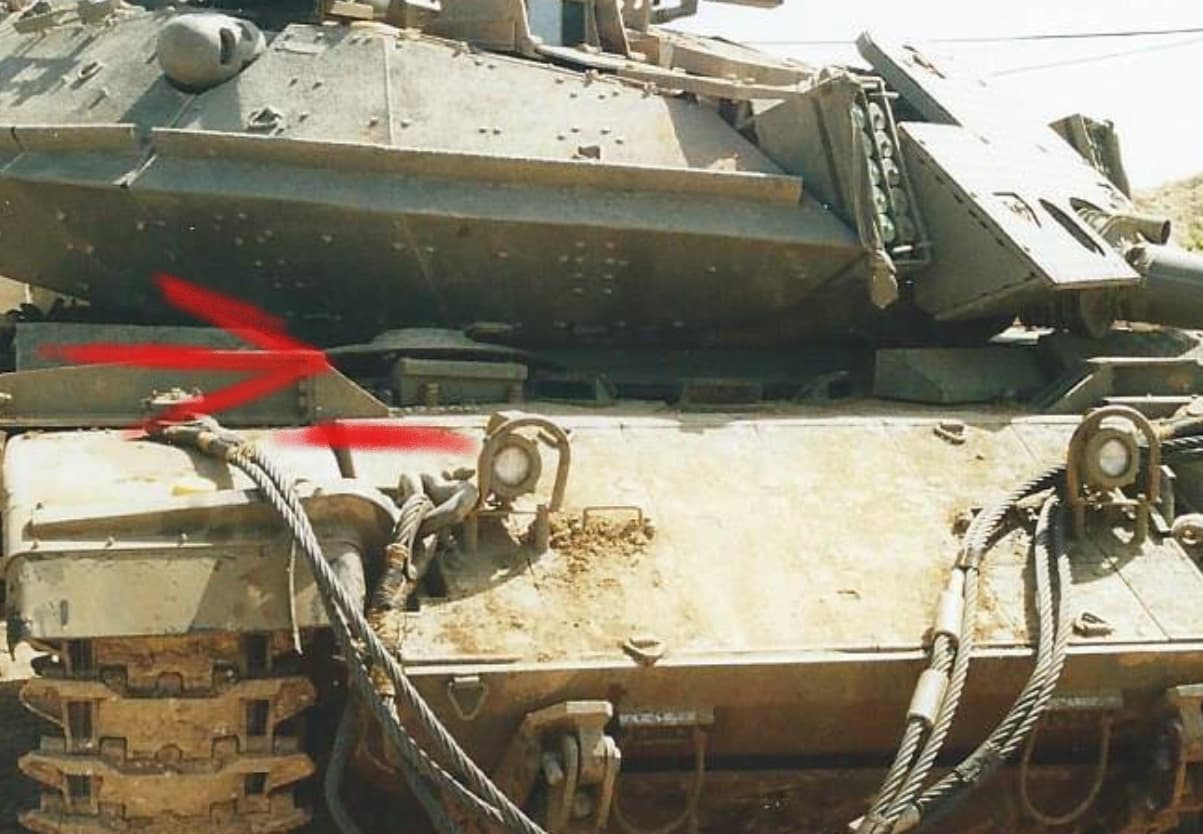
Meng also provides Part C17, which is a protective wedge for the front suspension arm
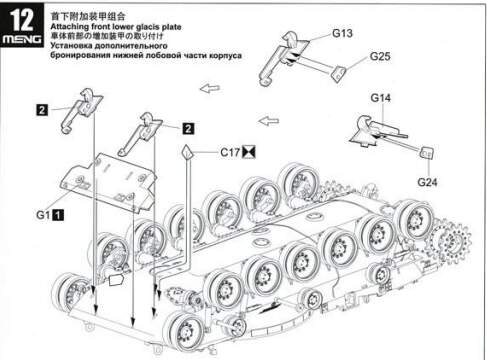
This wedge is visible on only Magach 7A, 7C and the 6B Gal Batash. (the Meng 6B Gal kit includes the parts but the instructions do not mention them, correctly.)

Meng instructions show part A30 to be added to the air cleaners
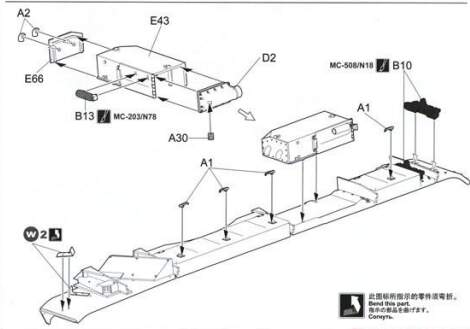
It is not ofter seen on IDF air cleaners, although I have a couple of photos showing it. If someone chooses to omit it, he will have to fill the hole on the bend. My suggestion would be to just add the part.
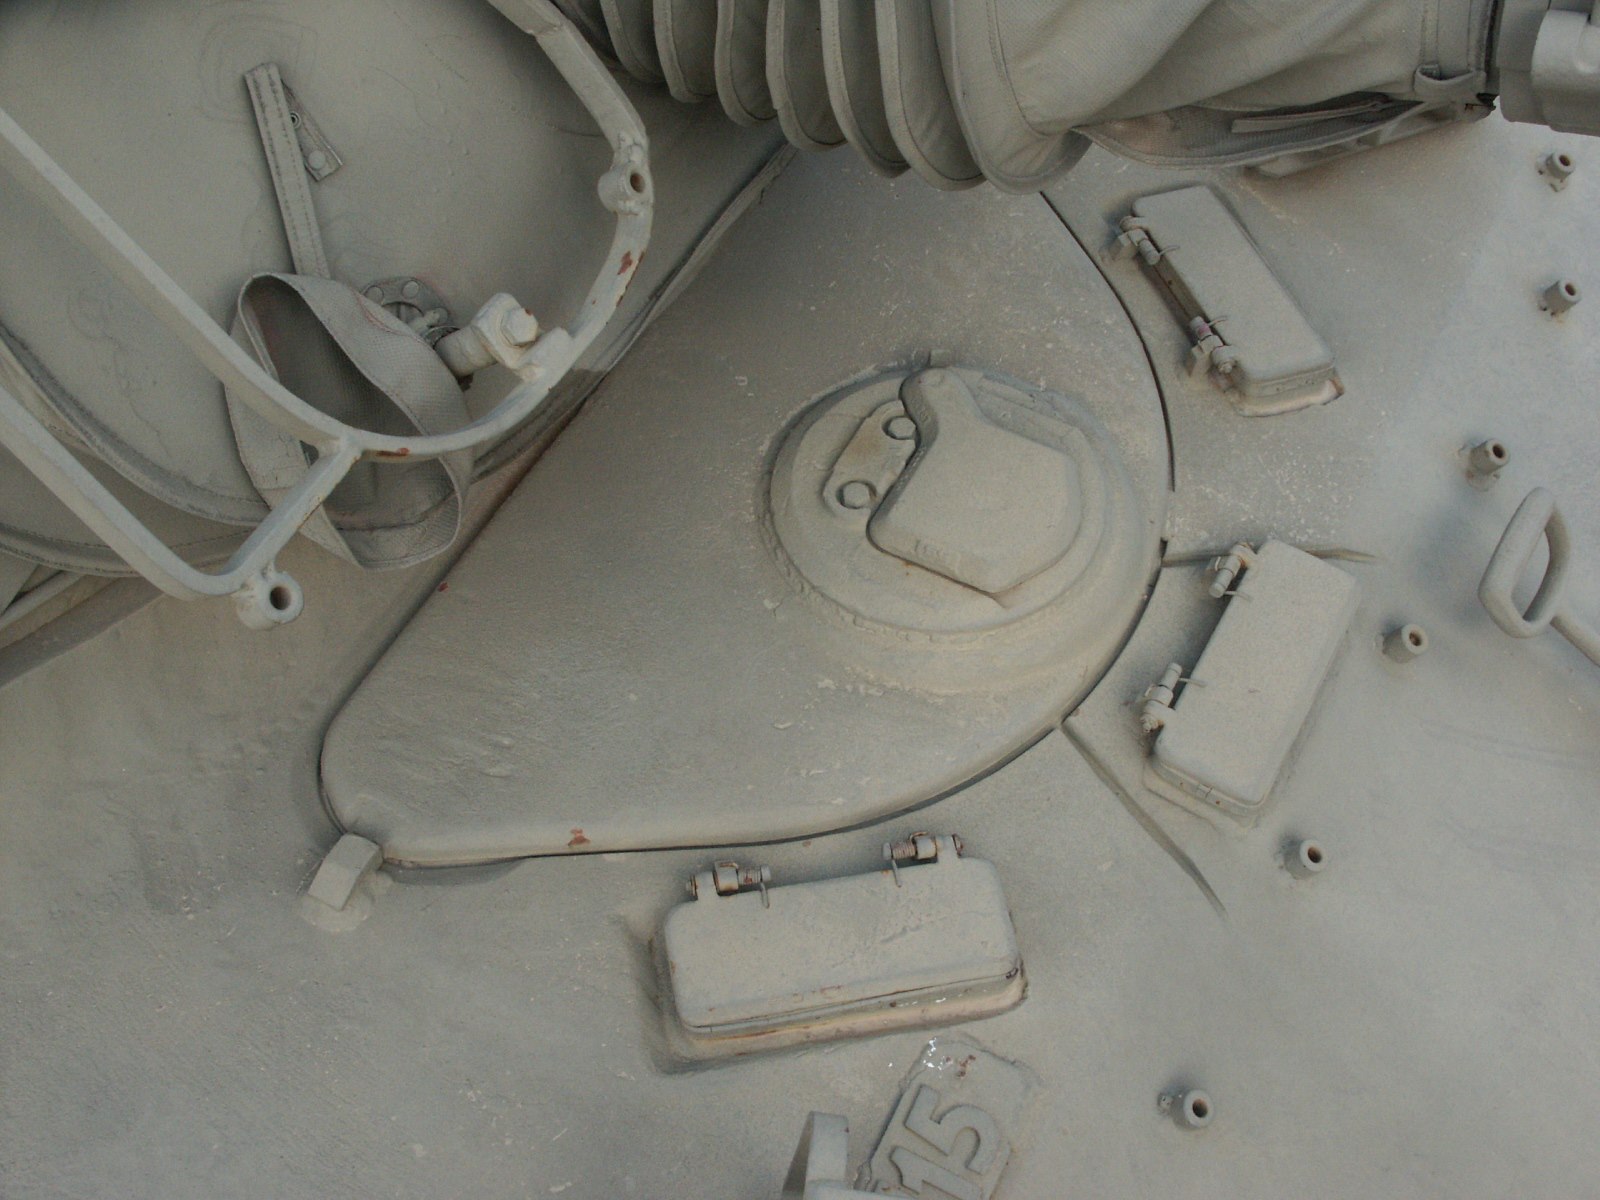
Part E17 proves an impressive attention to detail
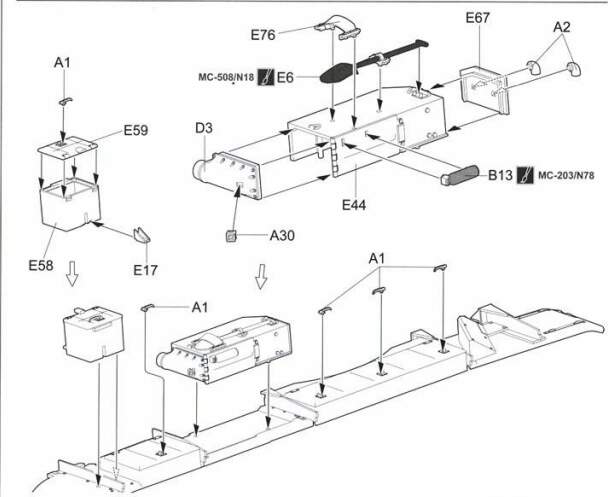
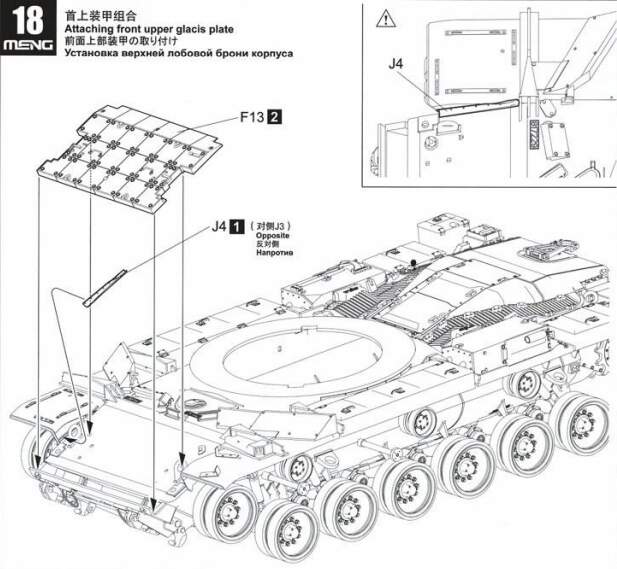
I did not like parts J4, which would be better if they were provided in pe and not DS like plastic, they are too soft and lack detail. AFV Club pe parts are very nice.
The shape, size and positioning of the Baltan blocks (ERA blocks) looks spot on except two details. There should be a couple of bolts provided on the front of part G26
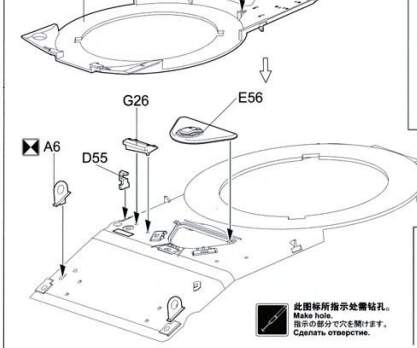

and the angle of part G23 should be adjusted so that its front corner clears the viewing angle of the driver’s periscope.

A detail Meng missed is the reinforced mounting bracket for the infantry phone at the back, but I think I will be able to sleep at night knowing it is not correct.
Those are the details I noticed up until step 21 of the instructions.
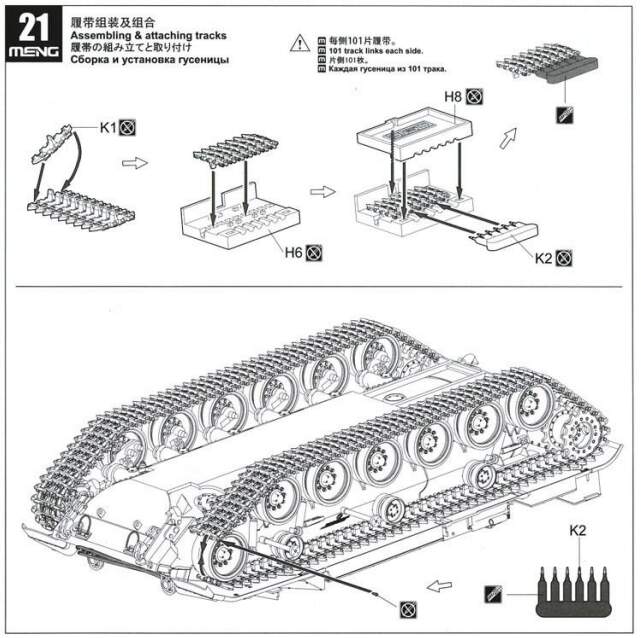
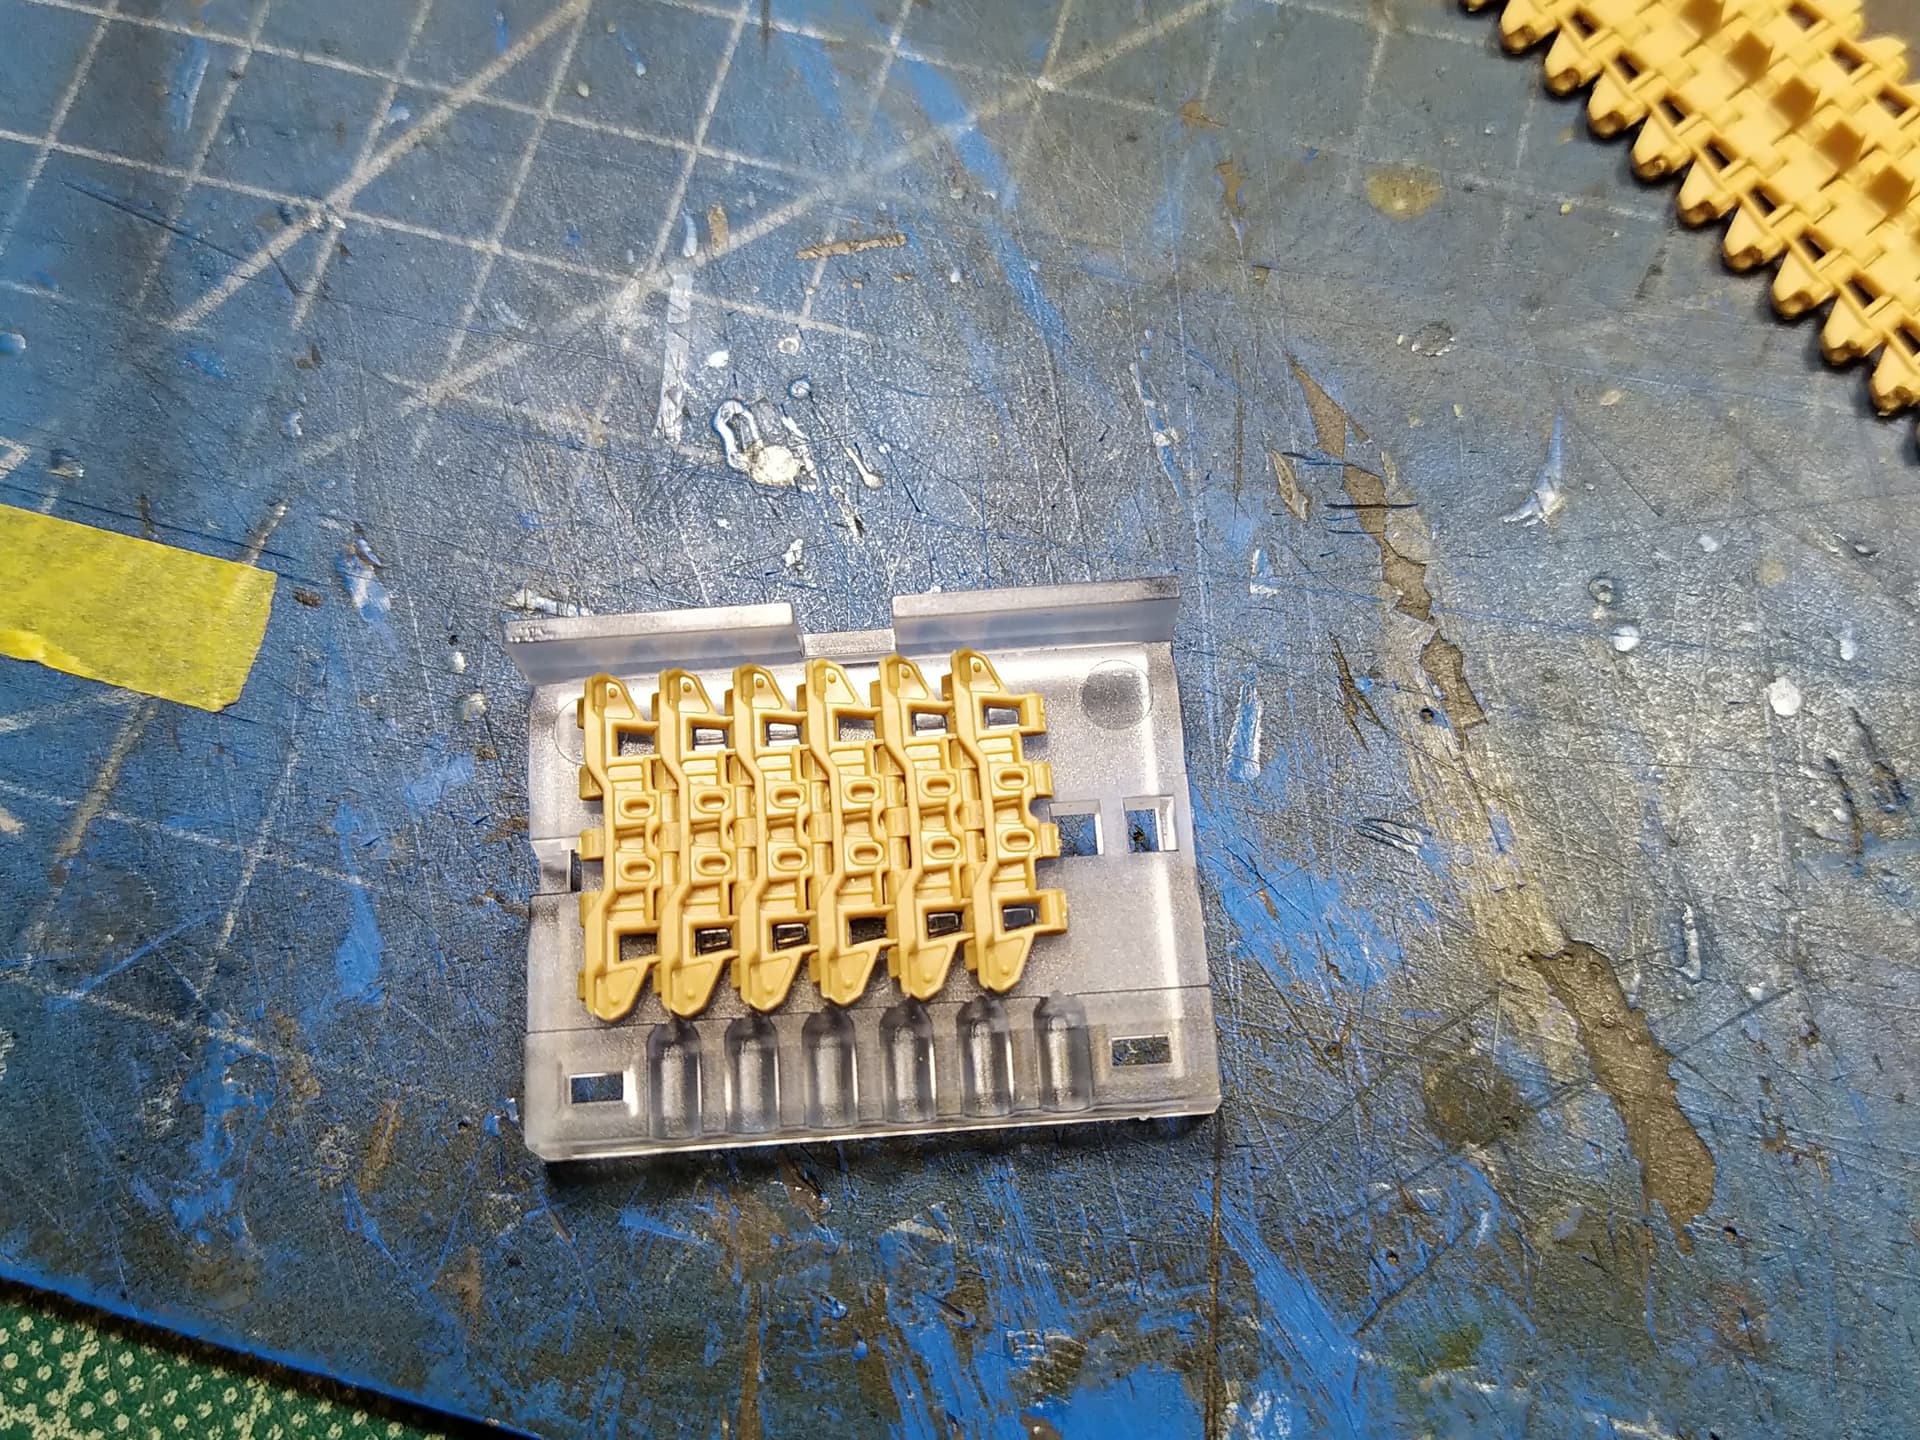
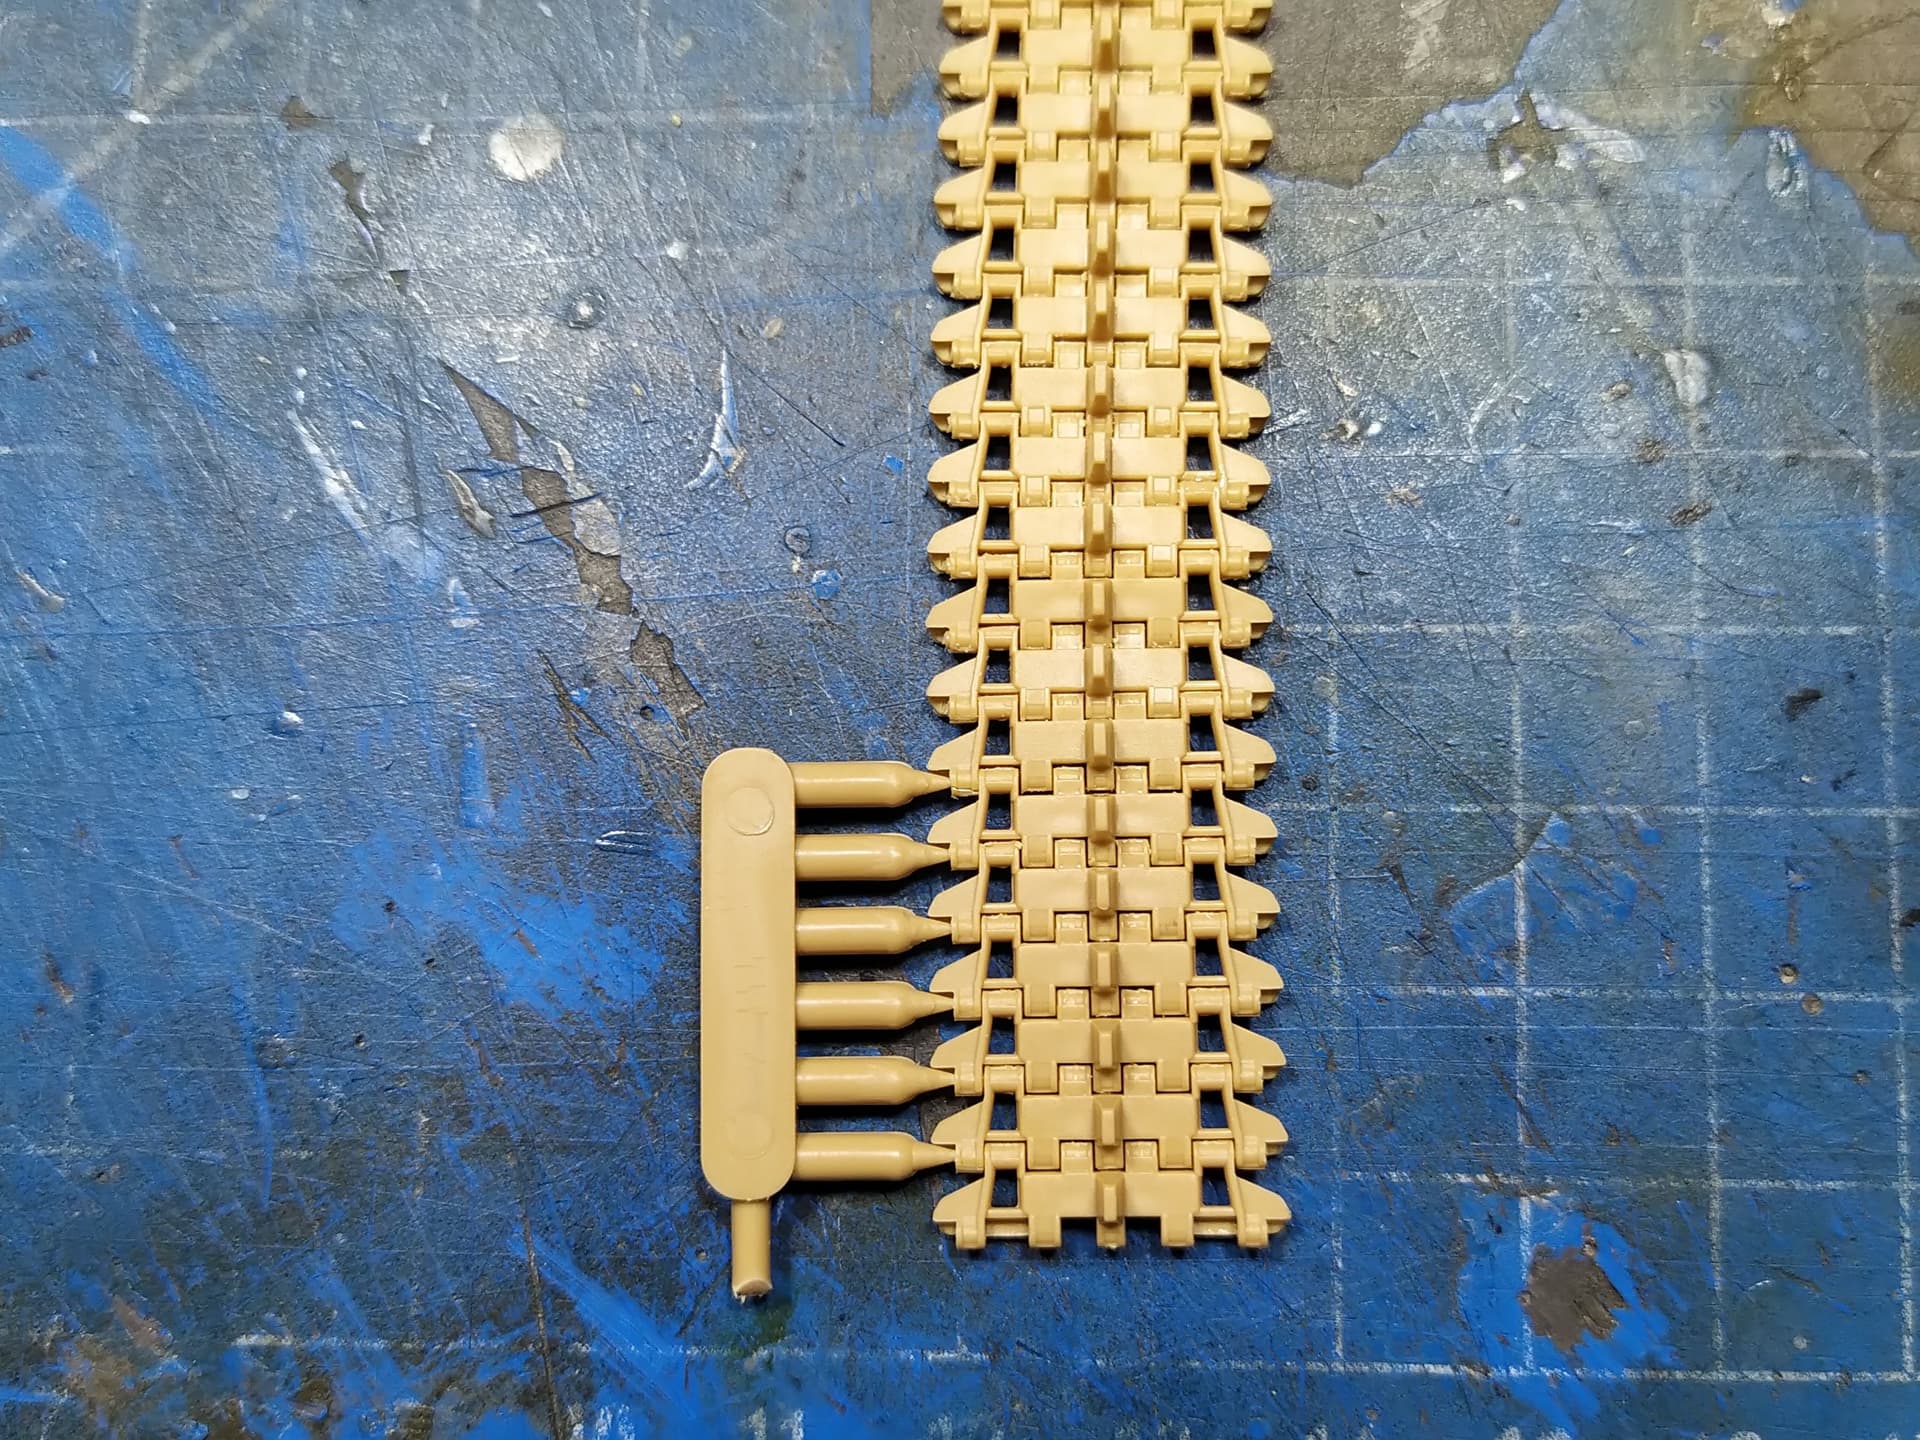
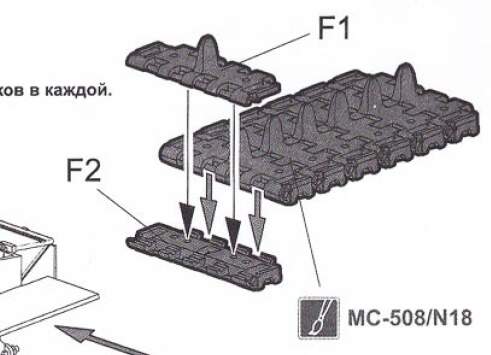
I have started assembling the tracks but the jig provided is helpful for adding the track pins only to one side. Also the soft plastic makes the pin holes expand under pressure so I had to add glue after installing the pins. More on this in the next post.
2 Likes
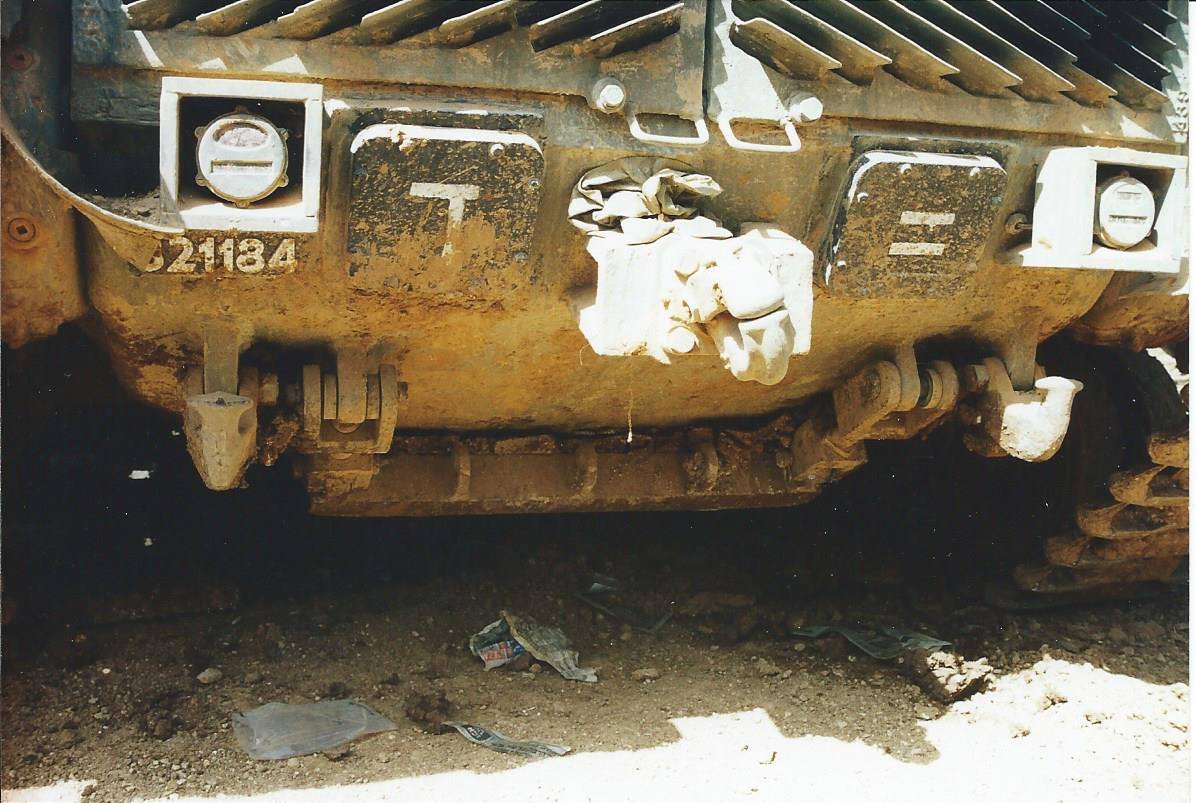
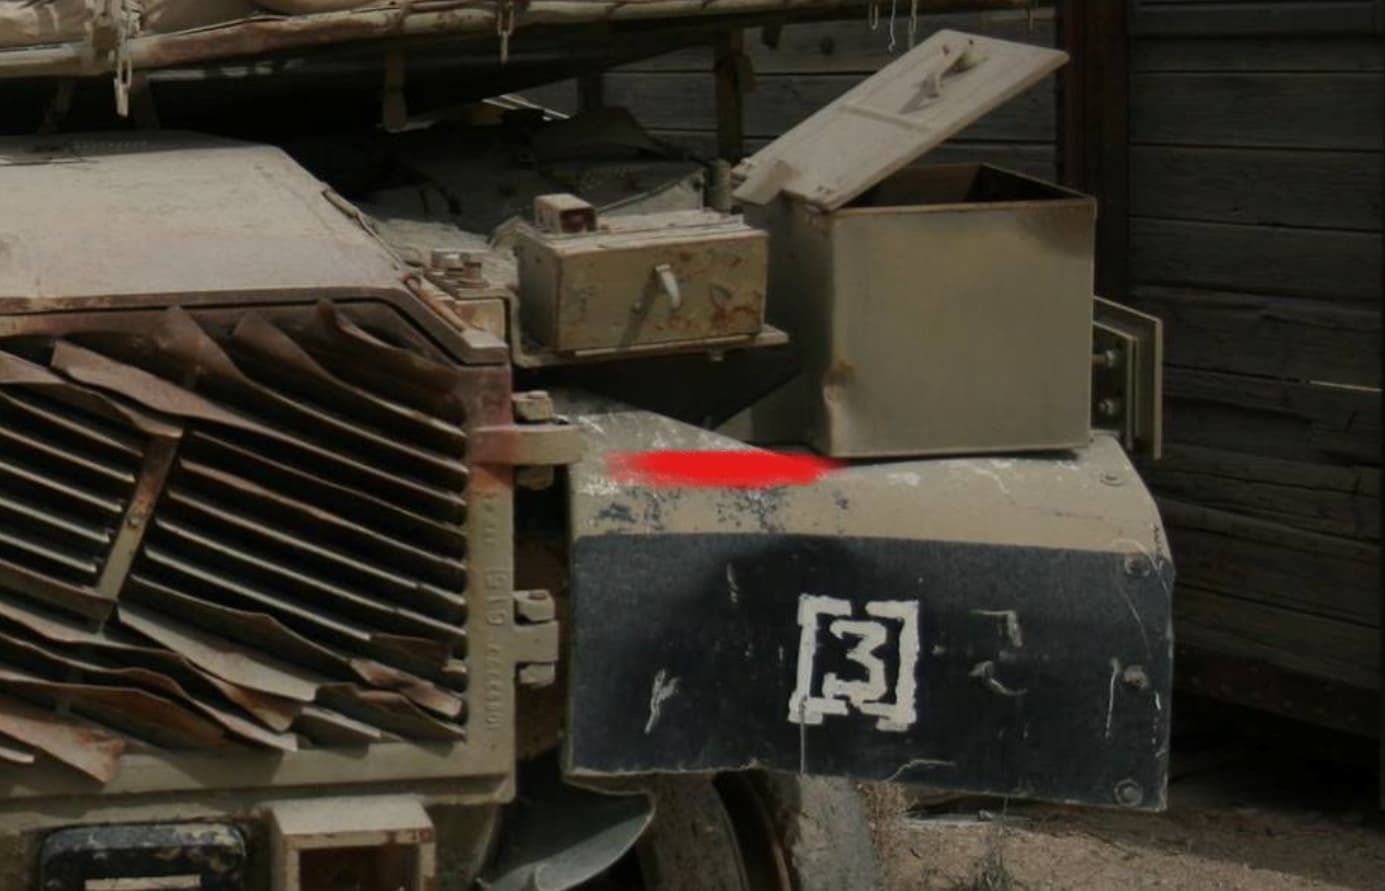
I can confirm…

However, that part is common on American M60A1s and A3s.

It’s basically a metal guard to protect the Air Filter flow Gauge, which is made entirely of plastic.

4 Likes
OMG, now that’s comedy.
3 Likes
This is a fantastic thread @gtdeath13, thank you for pulling it all together. I have plans for several IDF M60 based models and the detailed info here is extremely helpful.
1 Like
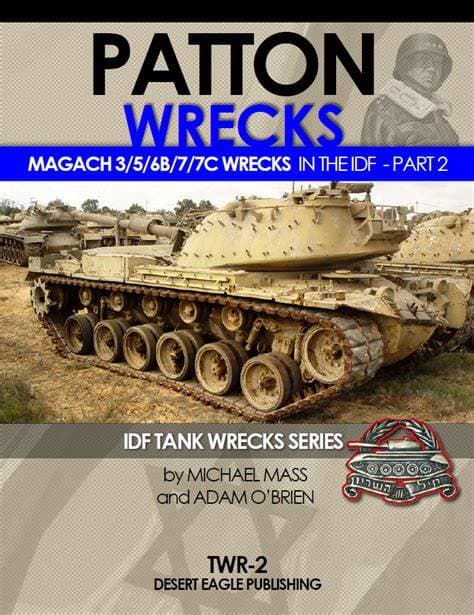
I strongly suggest you make an investment in reference books. Specially the “IDF Armor Series” by Michael Mass and Adam O’Brien from Desert Eagle Publications.

They cover every variant of the Patton Series of MBTs, from the M48 to the Magach 7. Good reference source with lots of color pictures on the tank’s exterior and interior features, along with service history, units and operations.
There’s even a book on wrecked Pattons in IDF Service.
2 Likes
That would be quite an investment to get all of those books, aren’t they like 60 bucks a pop ?
1 Like
$40 on fleabay. I wouldn’t buy them all in one shot. Just buy the one for whichever variant your building and work your way up. That’s what I’m doing. Already bought the one for the 6B Gal batash, the Nagmachon Heavy APC and the M113 Zelda APC variants.
Mine were shipped from Poland, so i had to pay extra for that. I only buy one at a time. ![]()
They’re pricey, but well worth the price IMO.
1 Like
Thanks everyone for the kind comments and contributions to the thread.
The books from Desert Eagle are a great help. And they do make a small investment if one is intending to collect them all.
Continuing the build with the track…

At first I thought that you need to add the pins on both sides but I was wrong. You install the links on the jig and add the pins only to one side.
On the other side there is a small locating pin but combined with the soft plastic it is completely useless. Add the four sprue attachment points on each link and we gave a winner!!!
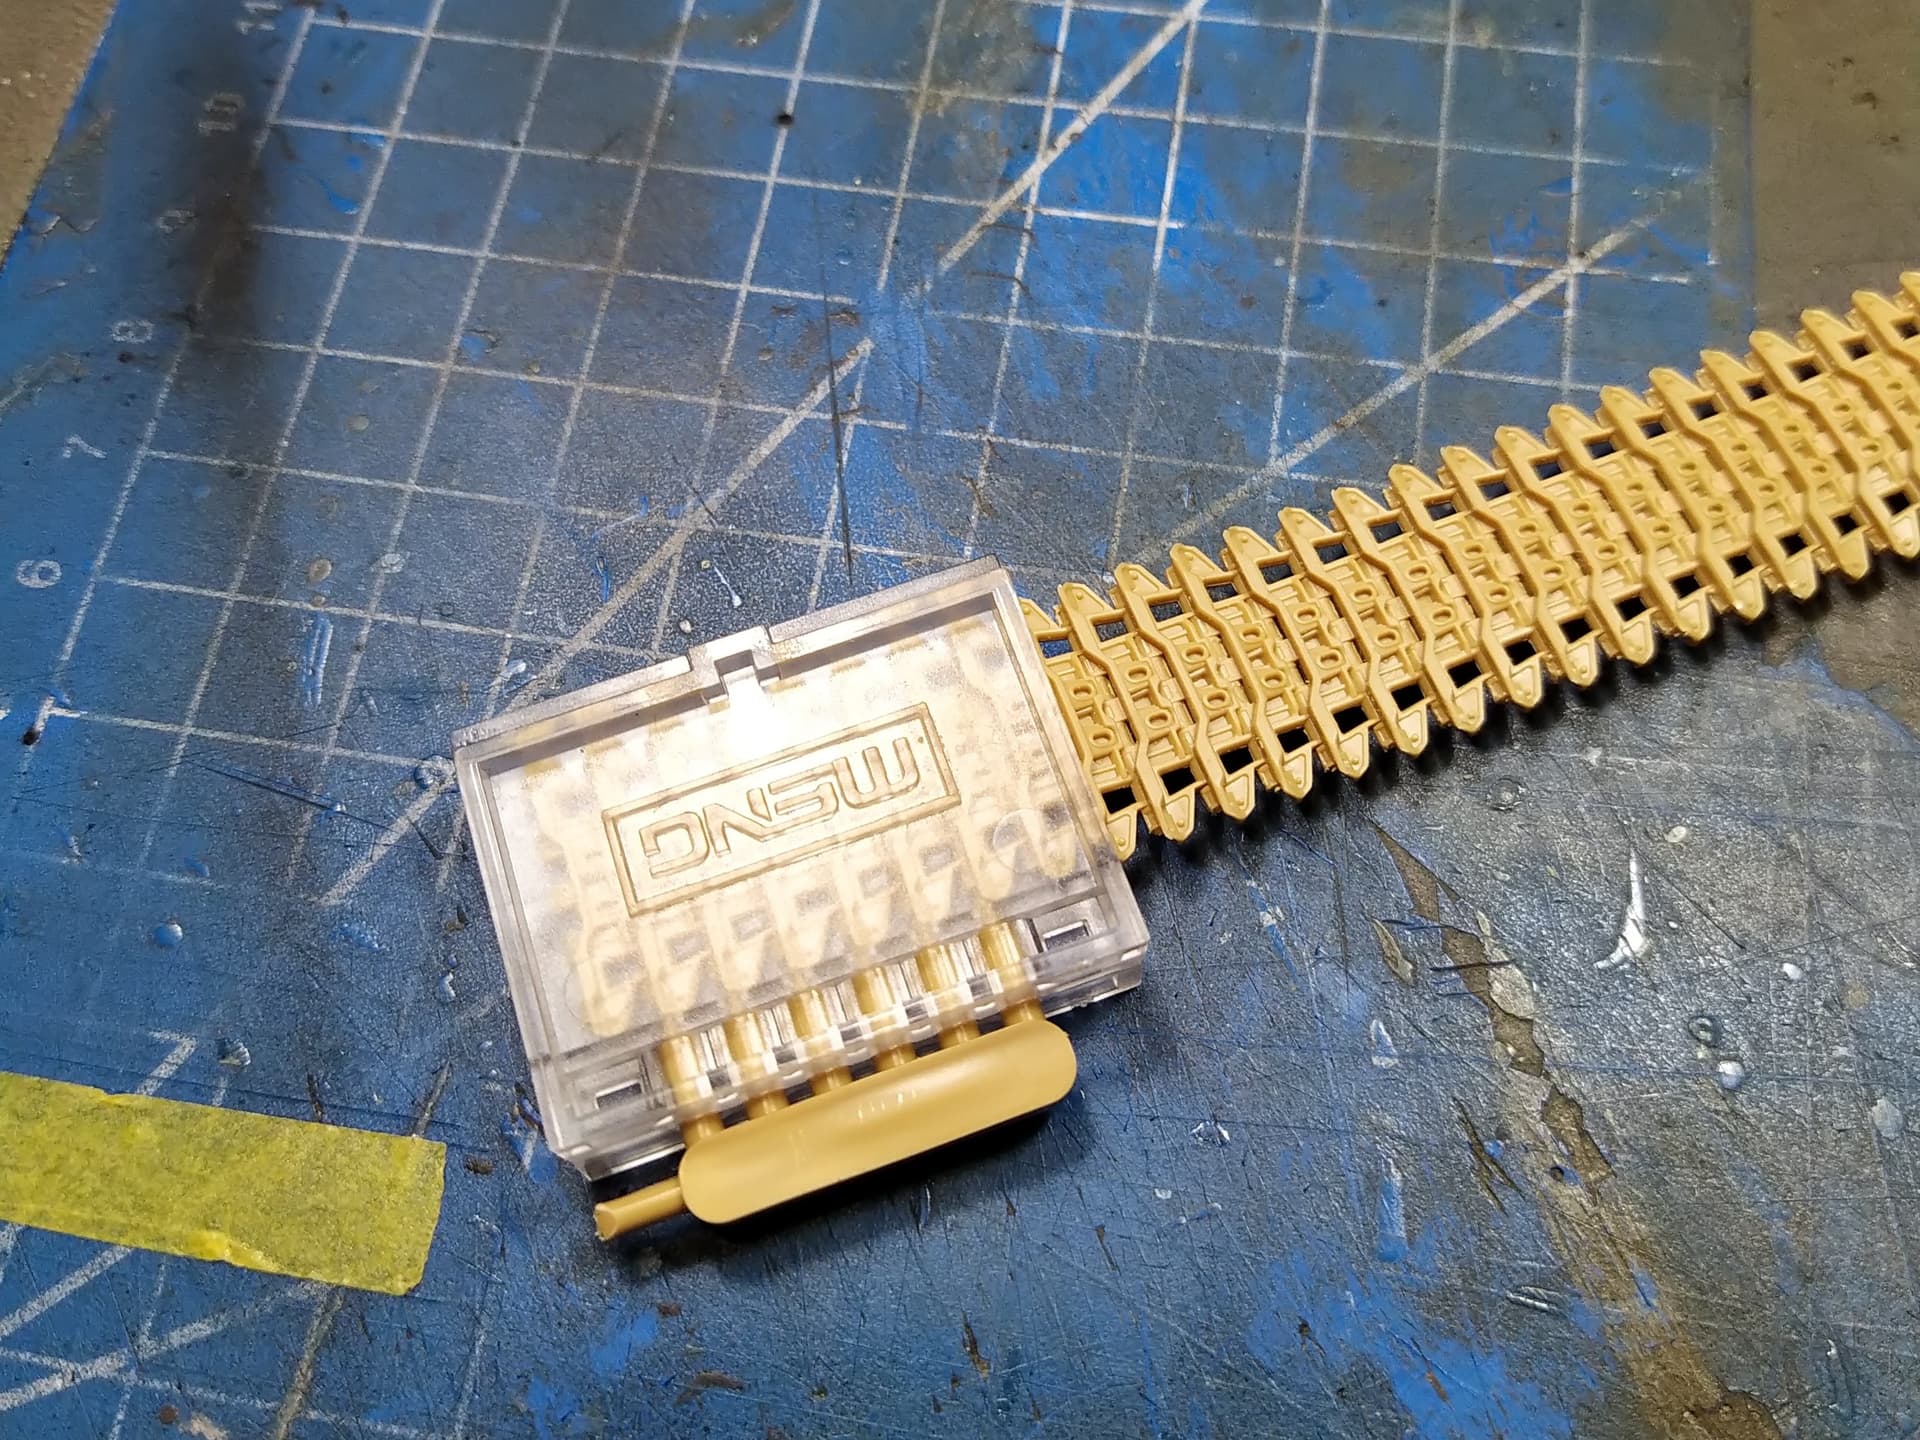
What you are left with is a track with pins showing only on one side…


1 Like
The “Worst Engineered Track” award is well-earned. Have you tried to put the tracks on a Meng M1A2 together?
I tried; and failed miserably. I said “F That” and went with a set of R-Model metal tracks and called it a day.
1 Like
I have to admit I find the Abrams track very easy to put together, just time consuming… Any track with engineering similar to the Bronco various tracks is just a time consuming choir. But this Merkava track from Meng… oh boy.
@gtdeath13 Nikos,
Are there any punch marks on the Meng track links?
Enjoying following your build. Thank you for sharing.
1 Like
None whatsoever. The only cleaning/sanding required is at the sprue attachment points and it is an easy job because of the soft plastic. Detailwise and moldwise the track links are exceptional.
2 Likes
I concur, the Merkava Mk IVM tracks are also a well known nightmare.
2 x parts per link, 95 links per side + ejection pin register on every single part + precision gluing possible only by robot = AM track links obligatory (possibly for all Meng kits by the looks of it).
3 Likes
And it gets even worse, the plastic is brittle and does not glue well plus the seam at the side is very irritating and in the end you have to glue all the links together for the track to hold so it is not workable.
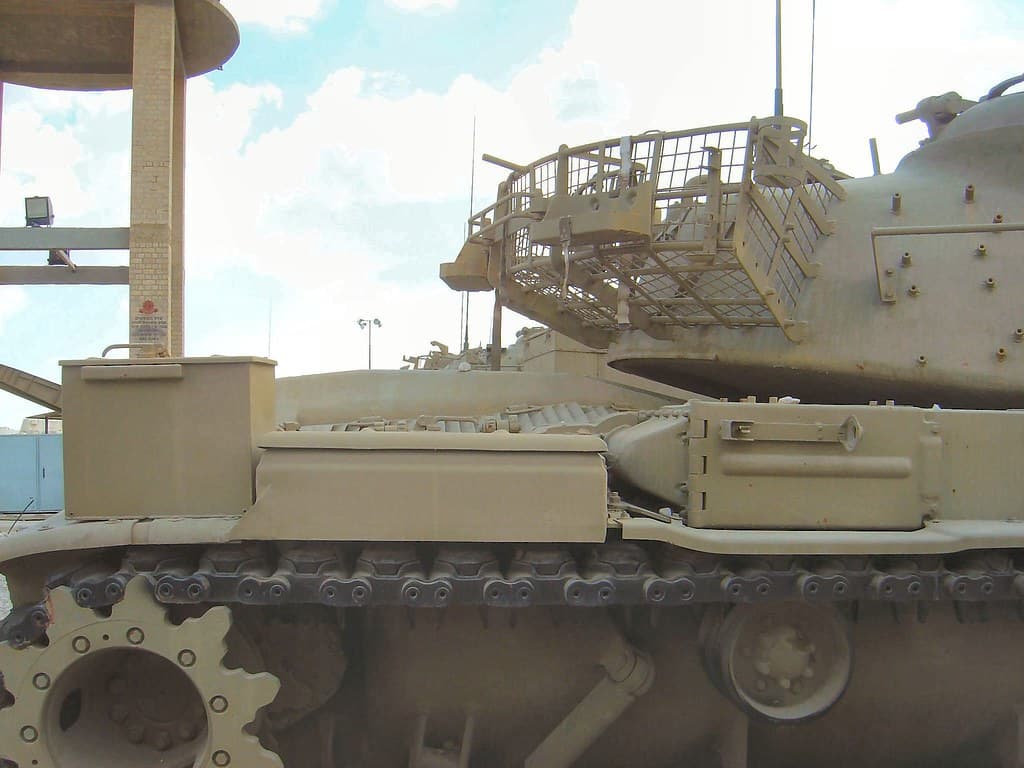
Notice how thick the track is in reality (plus the side skirt)

2 Likes
Pall Mall, ouch!
That’s a seriously sad pack of smokes ![]()
1 Like