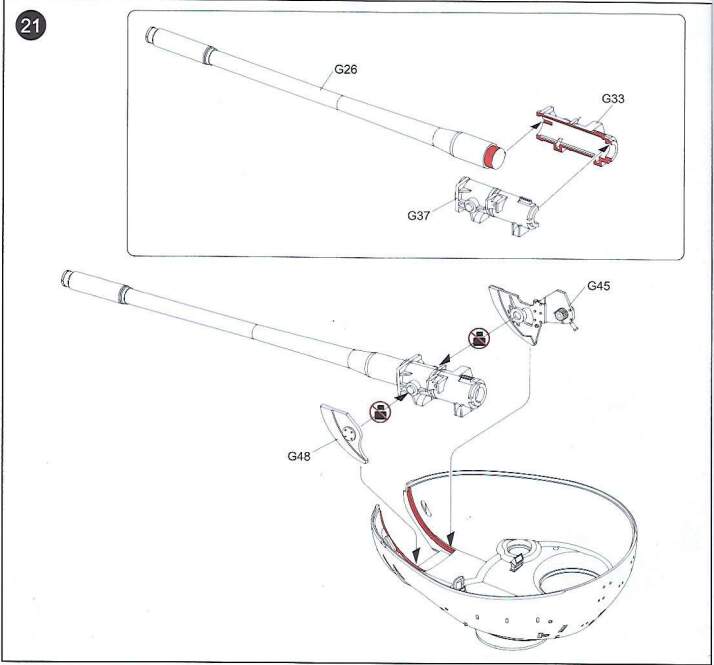
Does the kit have a full breech or any other internal parts ?
1 Like
No; but i have a feeling that RFM will be adding and interior kit sometime in 2025. You can see the interior side of the main gun (G33/G37) has features that can allow to add a breech mechanism.
4 Likes
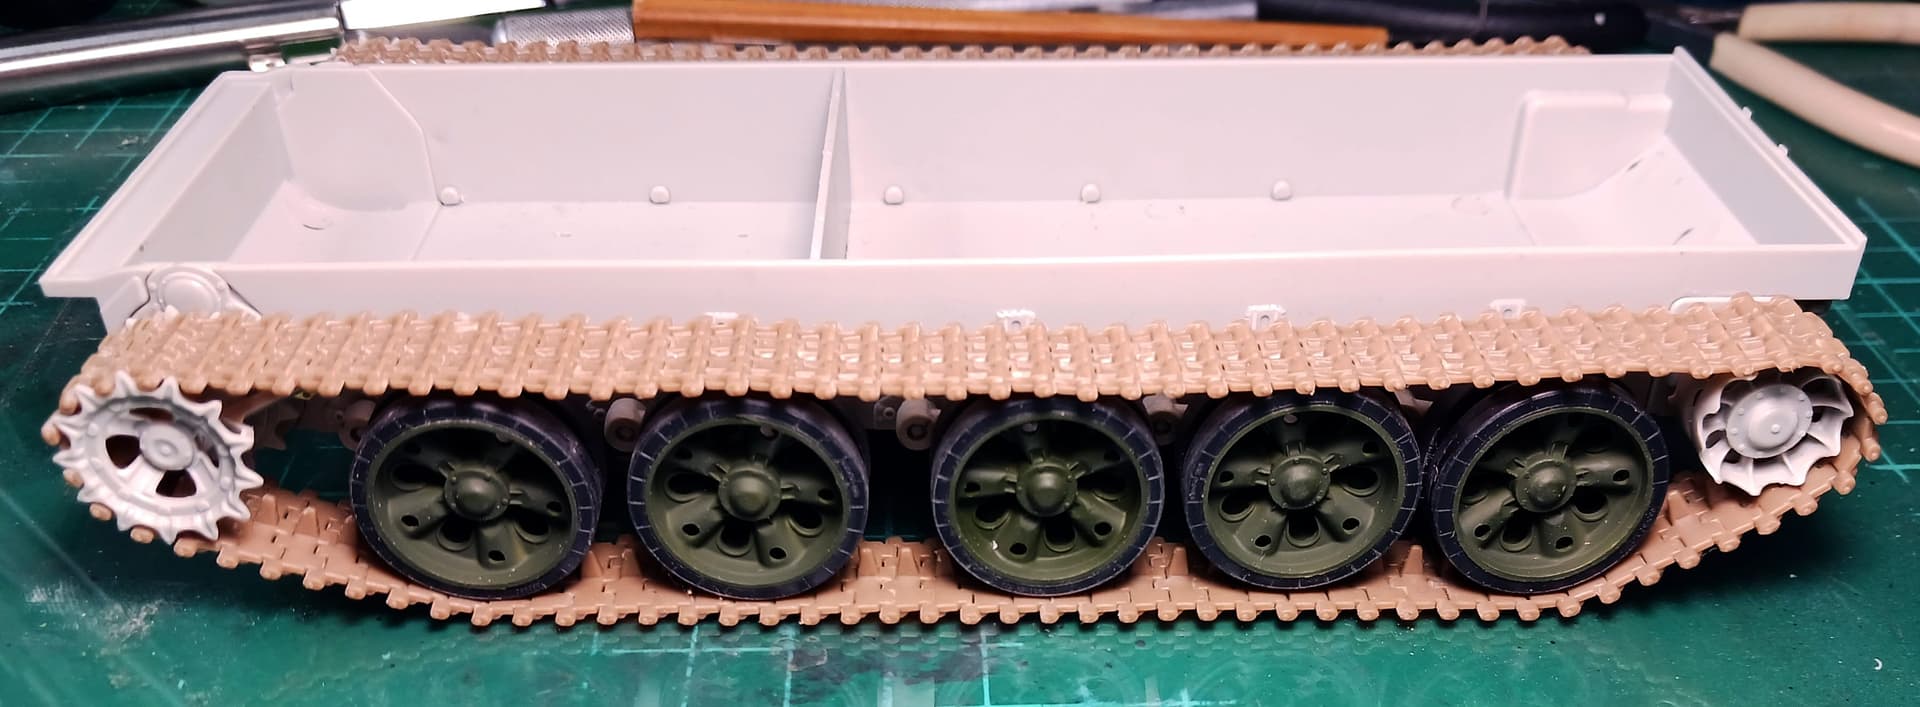
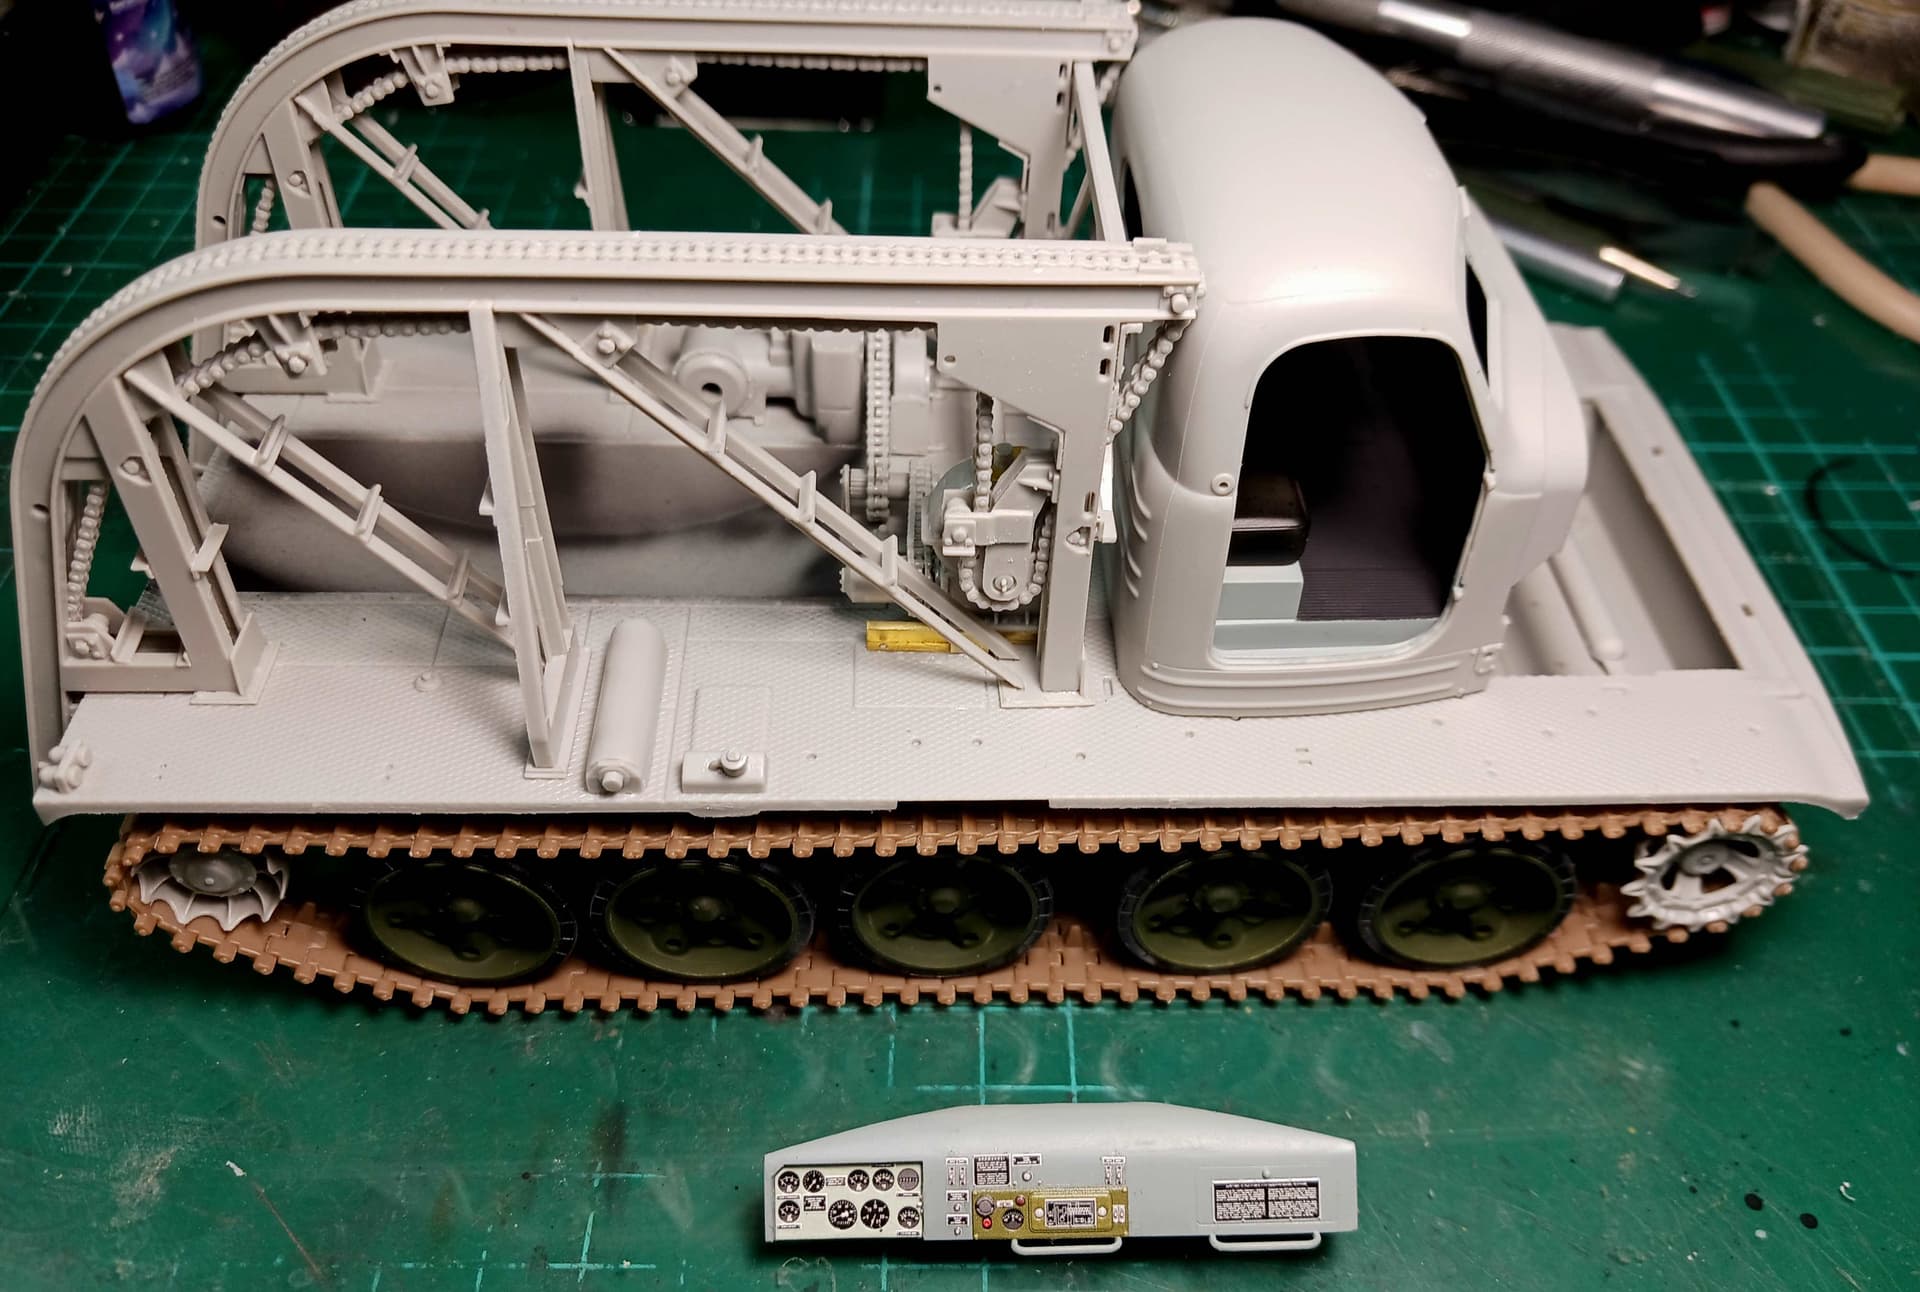
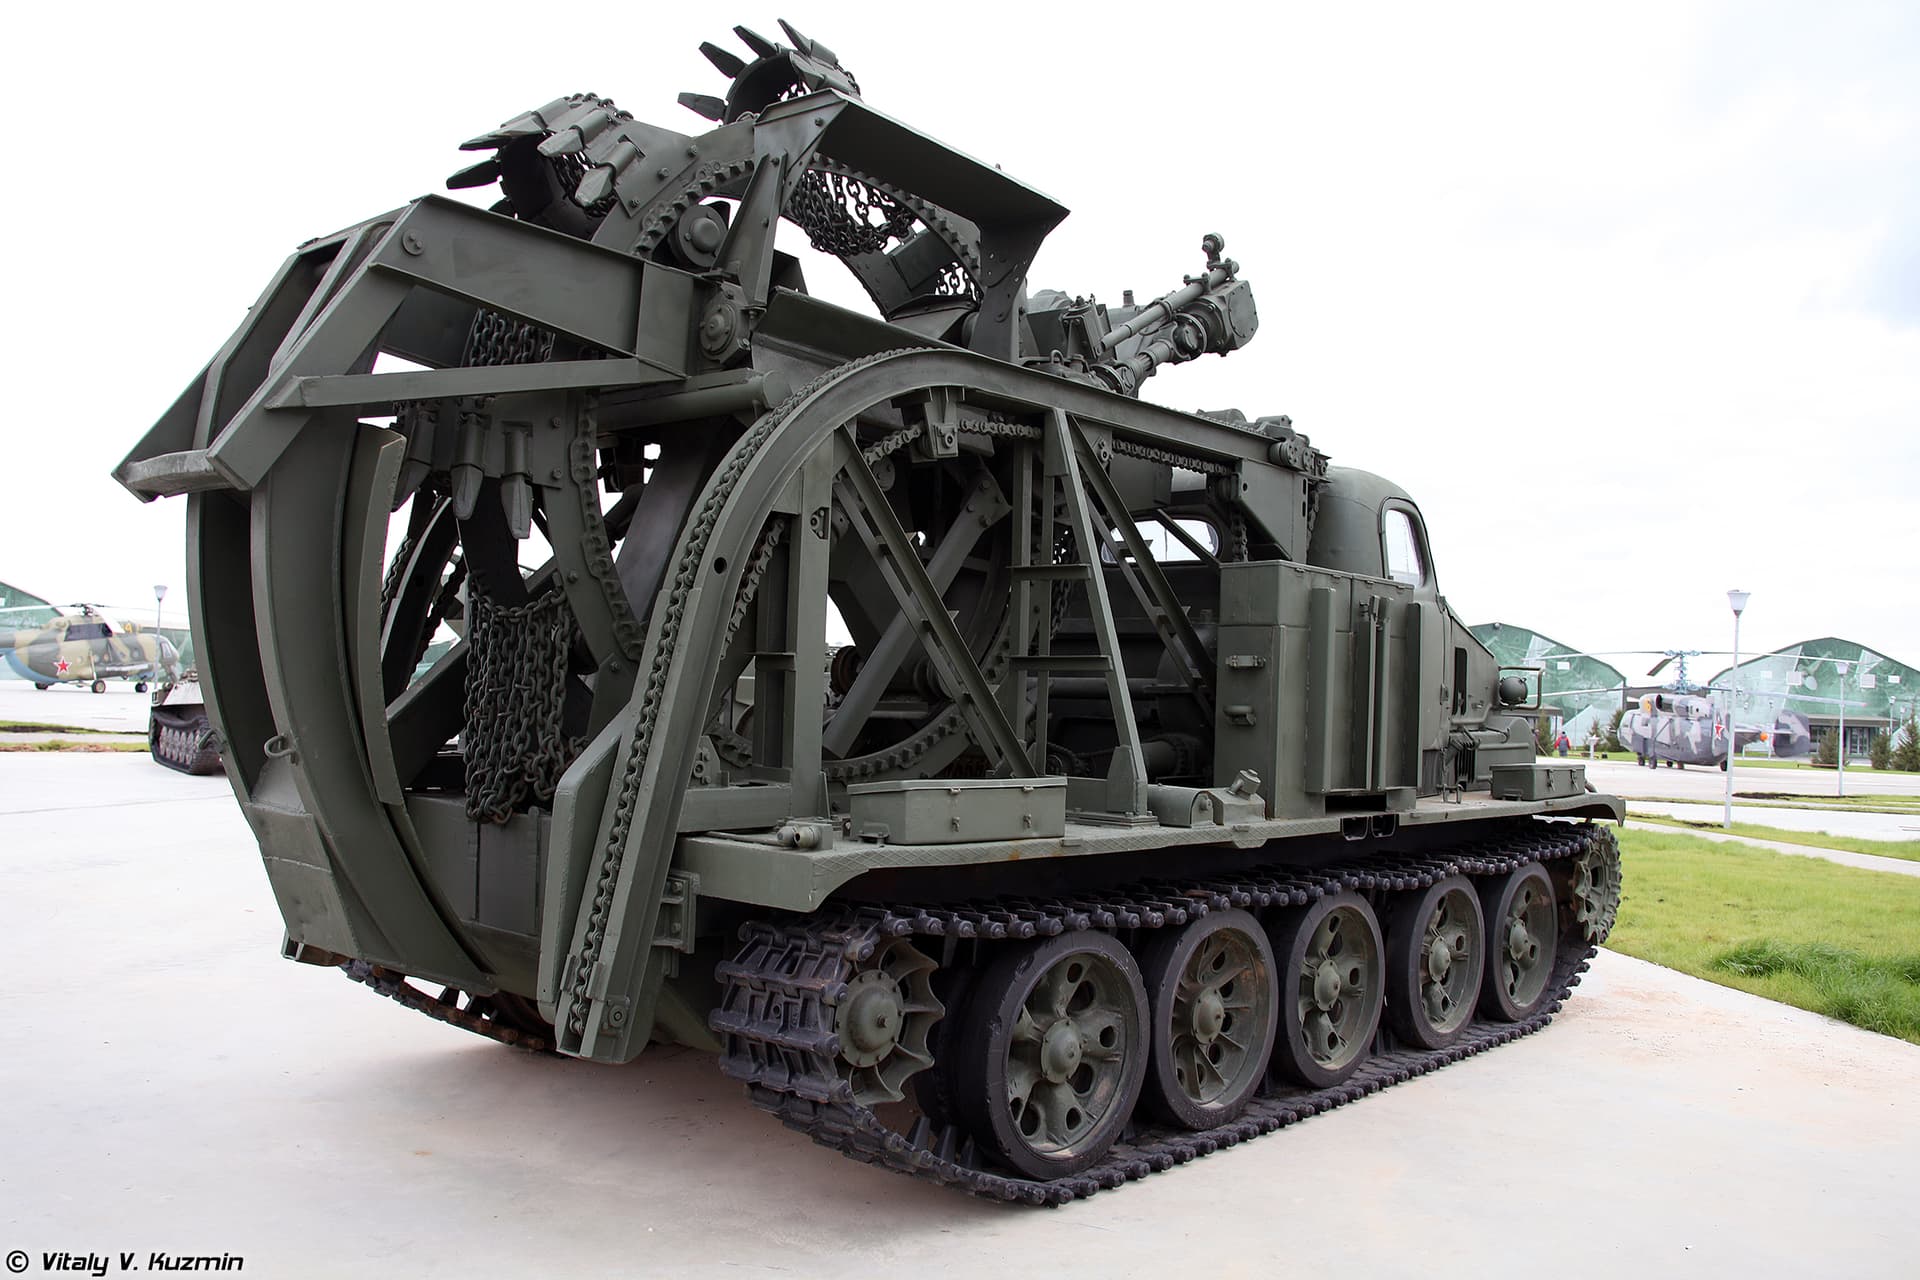
Some work done on my BTM-3 in the last 7 days:
Running gear and tracks built
Supports on the platform built
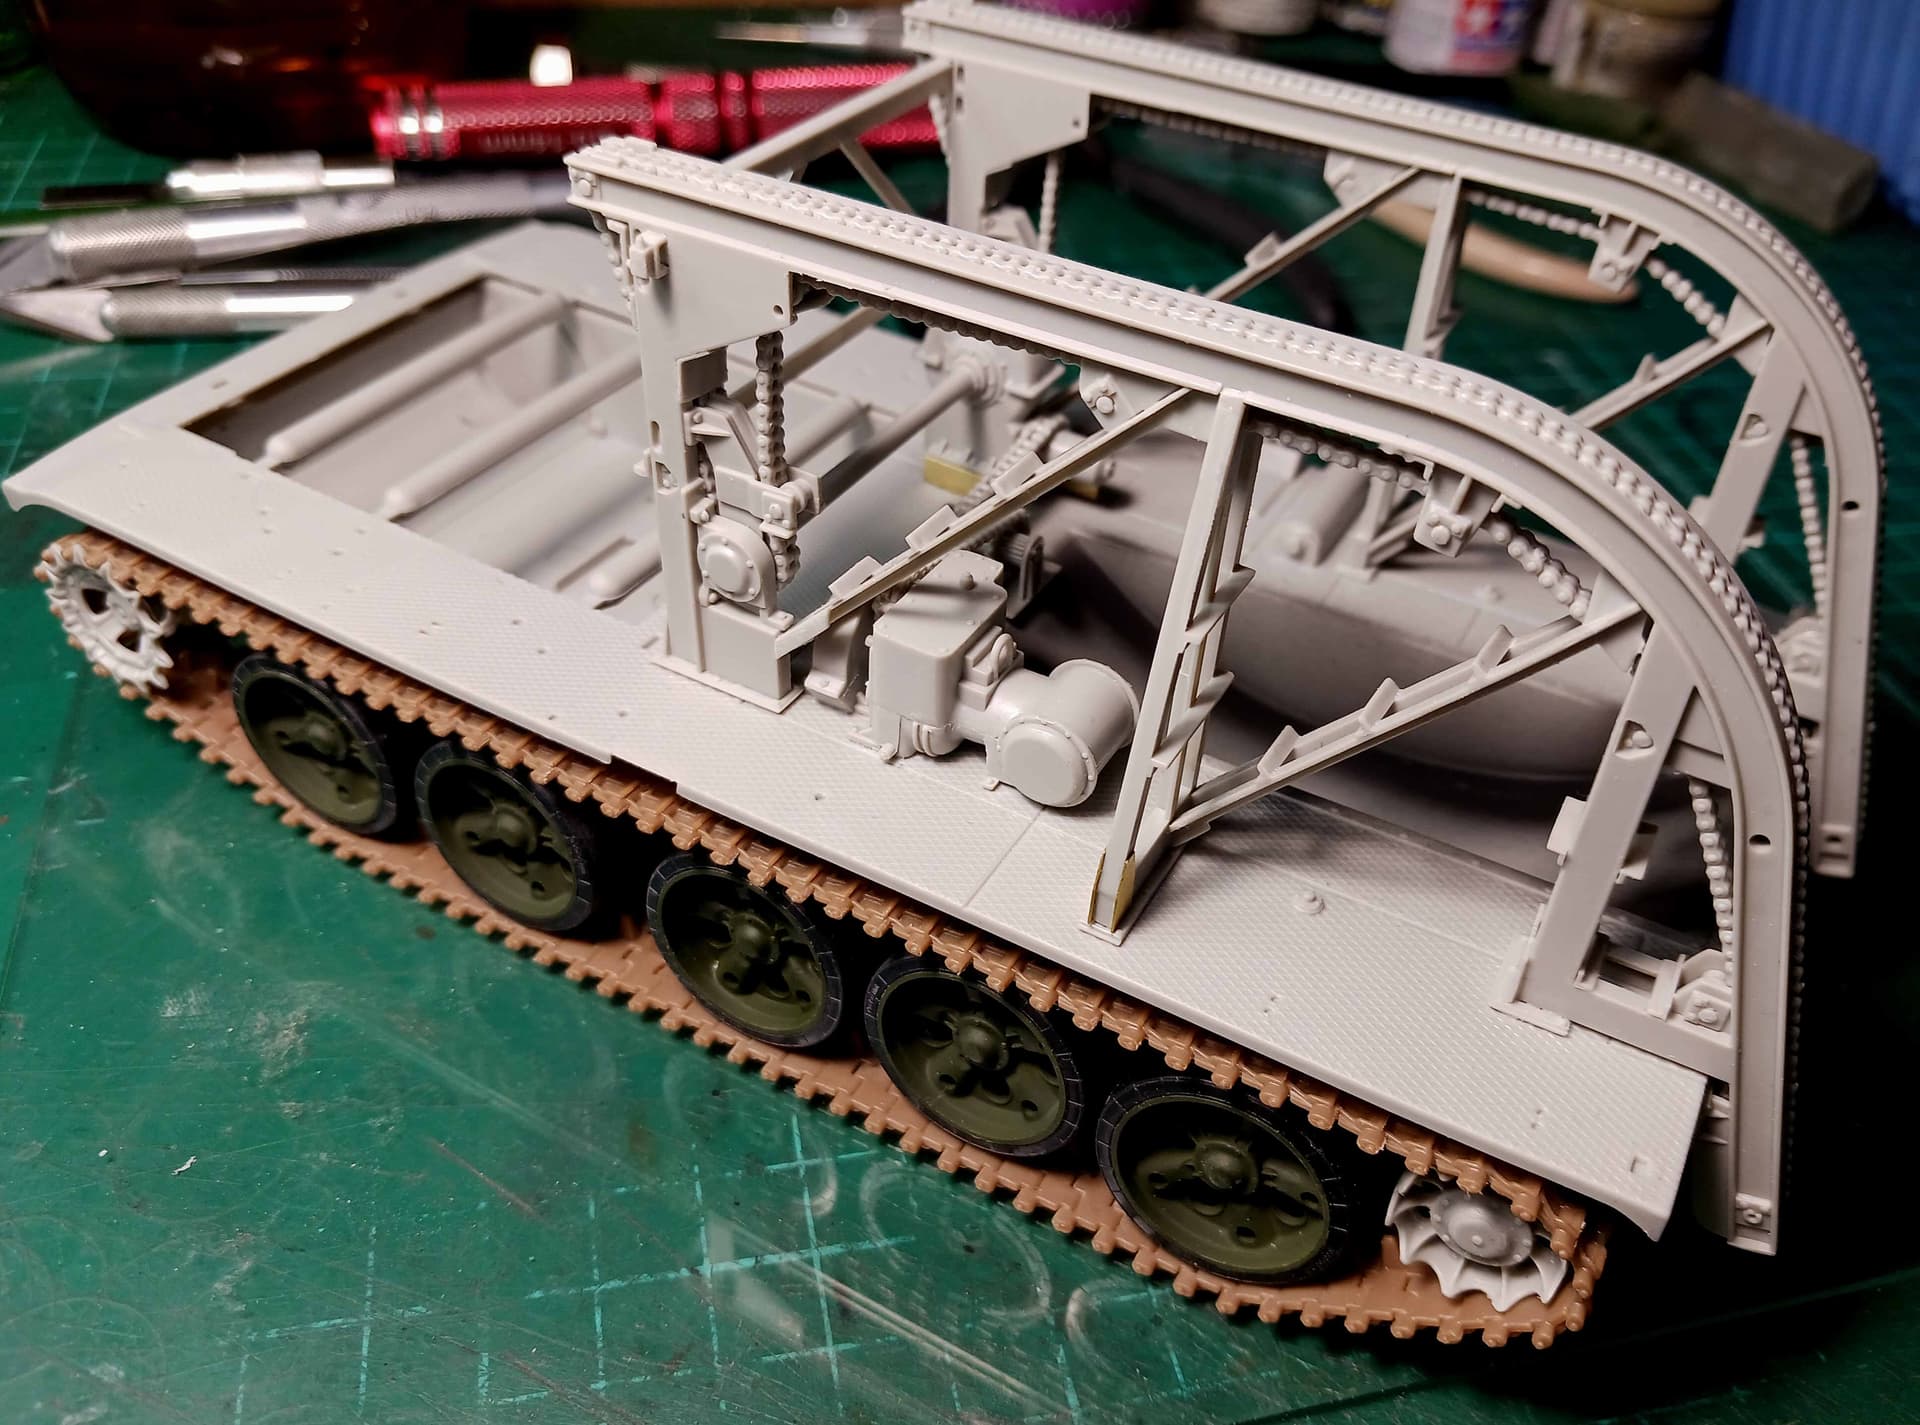
There are some omitted details I will add before priming and painting the platform
Cabin built and its interior painted, some tiny- and not so tiny- bits prepared for priming and painting
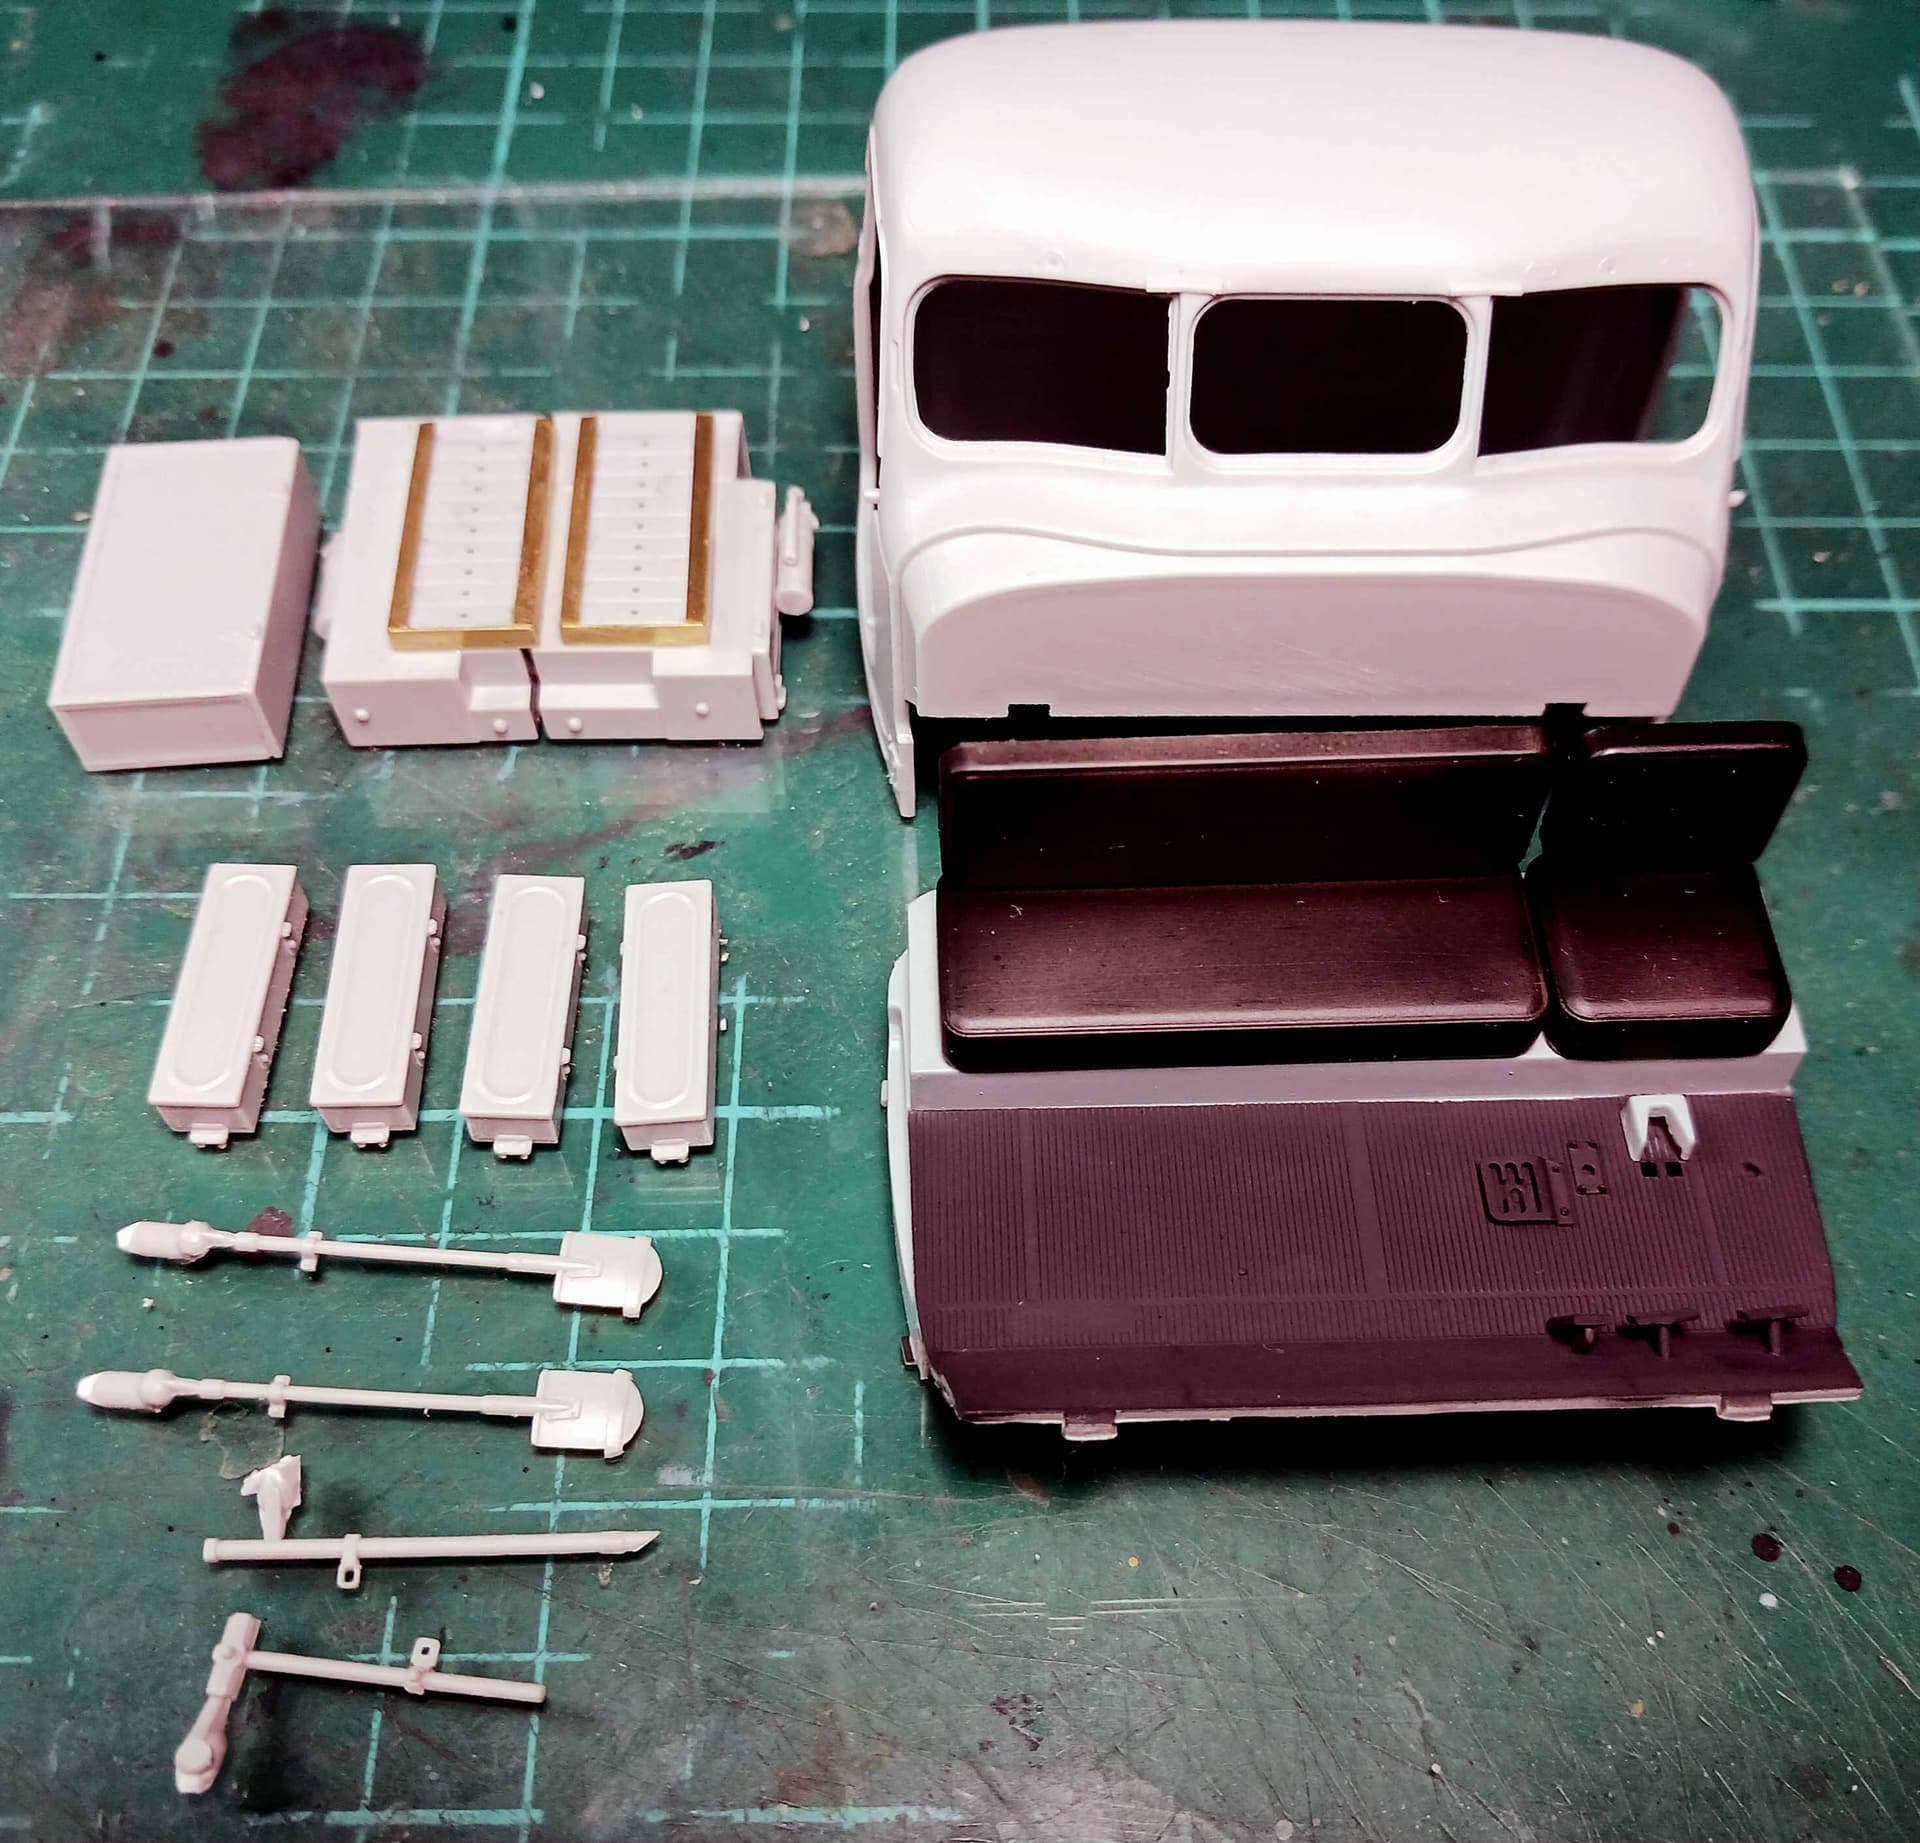
Dashboard decal set by Quinta Studios is definitely a game changer
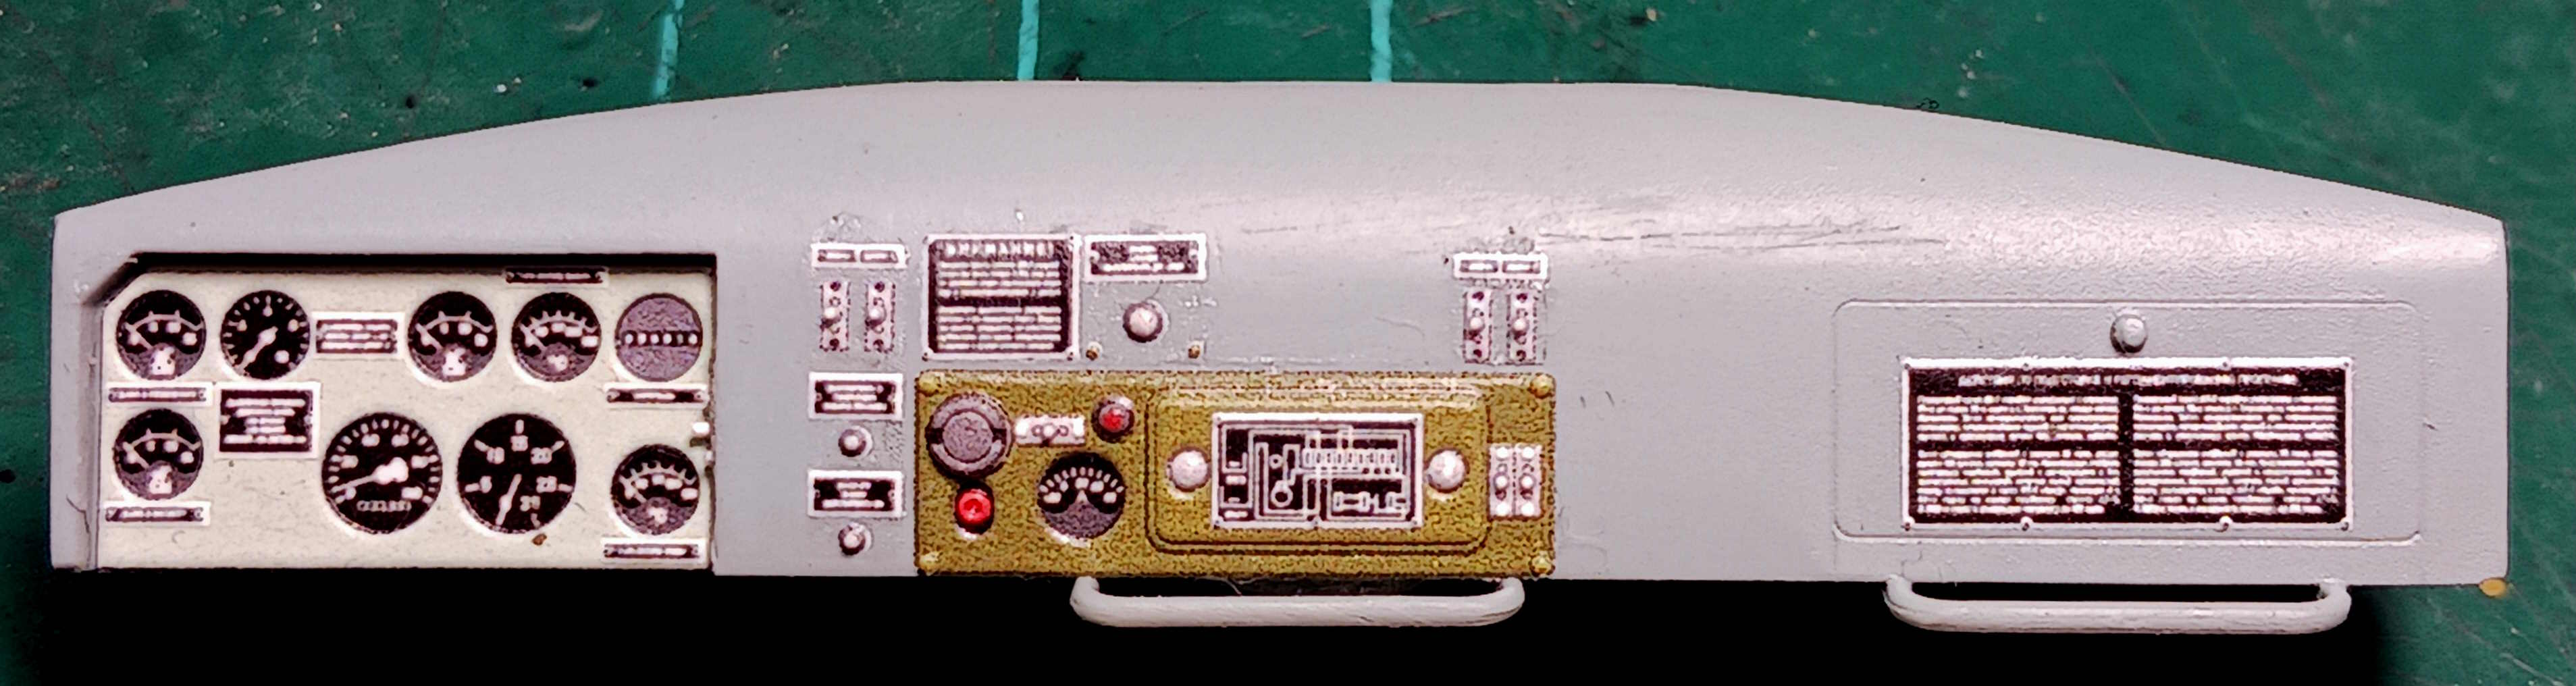
Cabin doors were also prepared for assembly and painted with interior color, will show them next time.
So this is my BTM-3 tonight
Cheers,
Angel
17 Likes
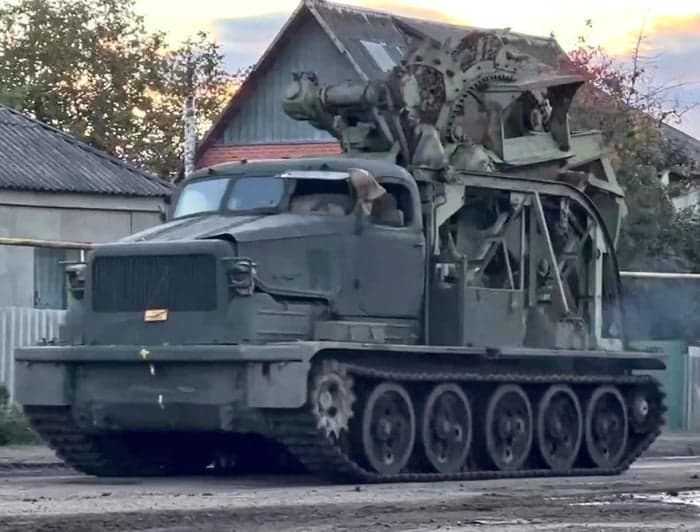
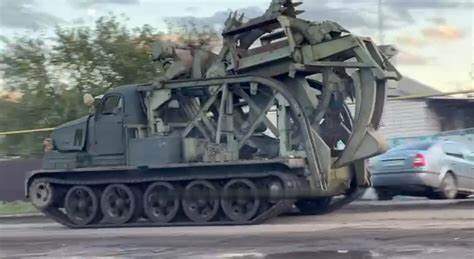
I remember seeing one of these in Ukraine and i thought it was an odd vehicle to see rolling around.
11 Likes

That’s definitely the color I’m looking for. Looks great. ![]()
3 Likes
Decided on a this instead of the KV-122
Lot of plastic in the box, sorted for what’s needed in middle frame and removed what isn’t in bottom frame.

Cleaning wheels, decided to try Revell’s Liquid Tube Cement and was shocked to discover it’s good ![]()
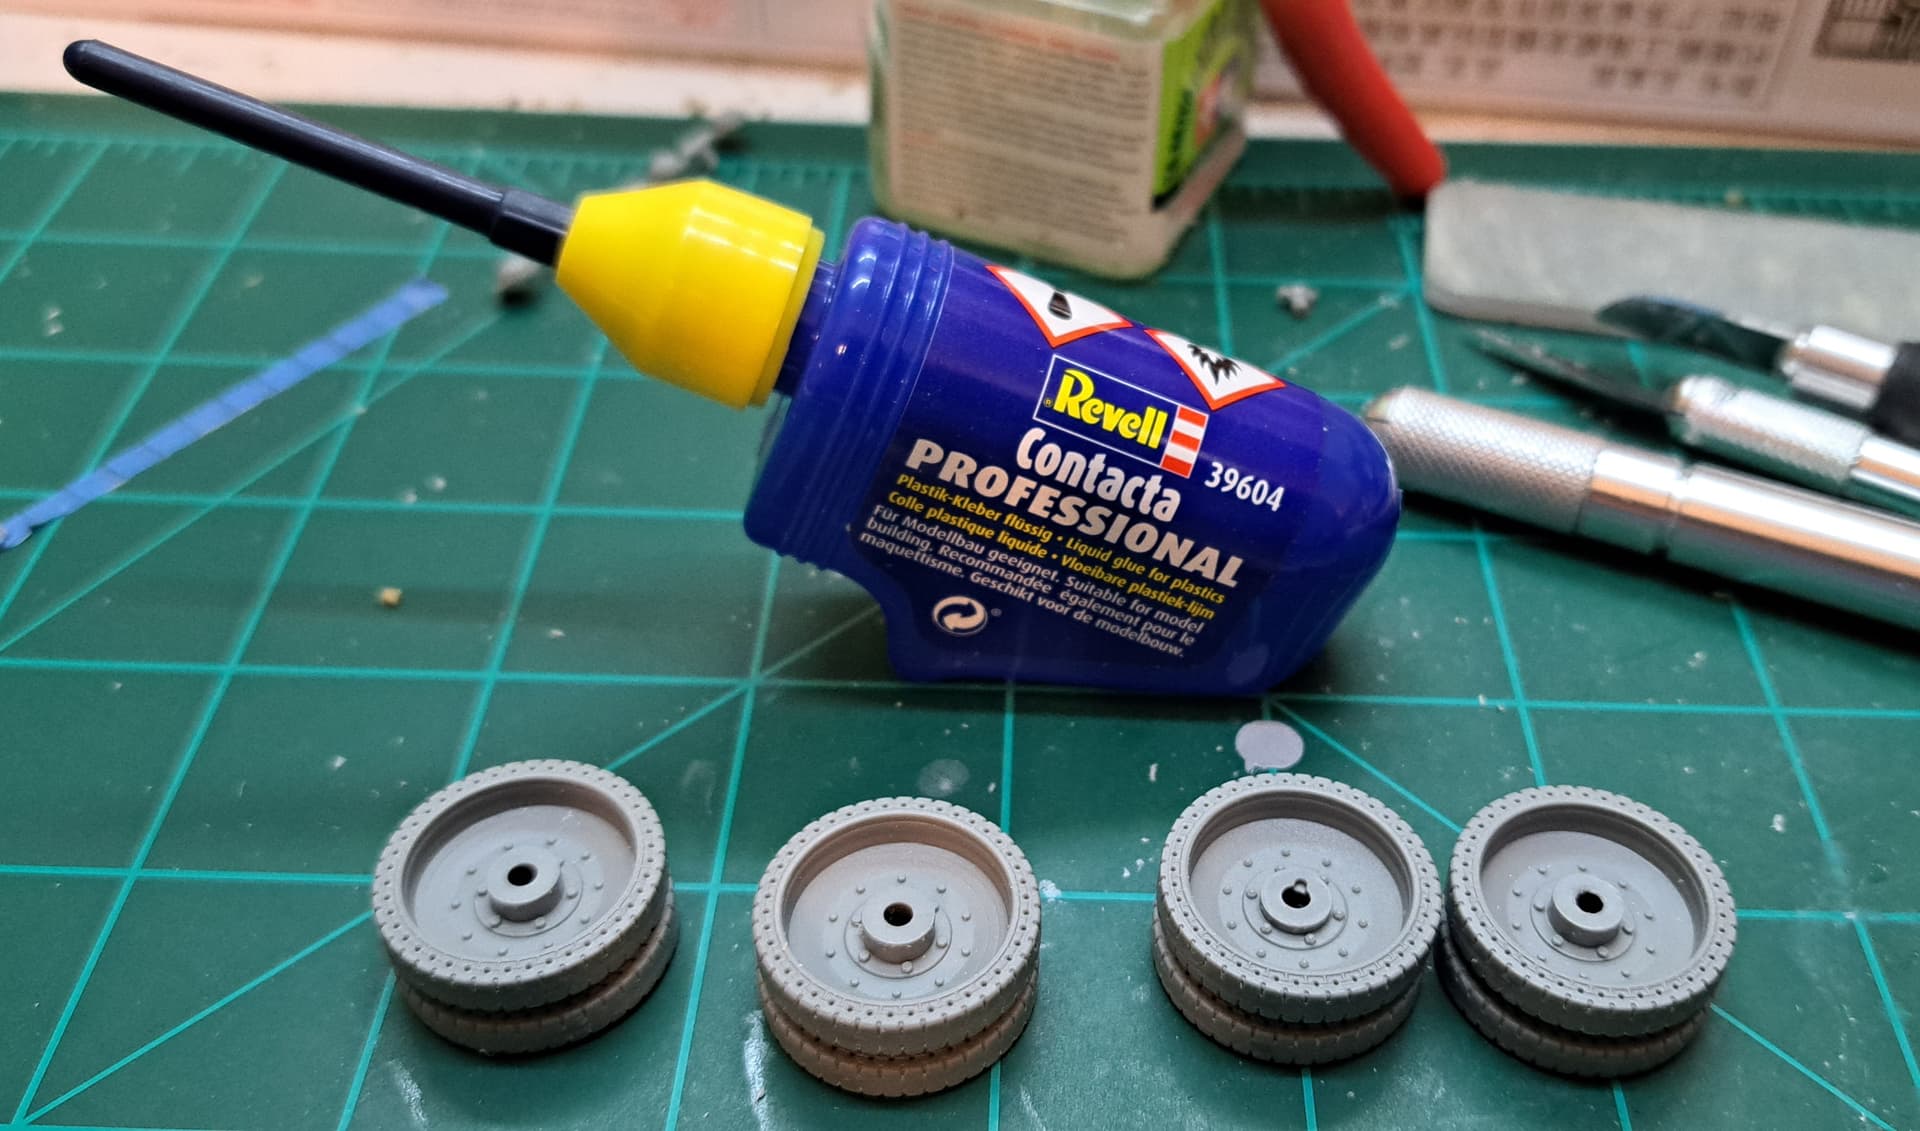
6 Likes
It is my main workhorse. It is good because it is sticky and holds the part itself. In addition to this I use two Tamiya ones: yellow (basic) and a little green (it is quite specific).
2 Likes
In my eagerness to get going I made a mistake: I took the wrong T-26!
The green one was meant to become a Spanish Civil War version, so that is what I will continue with.

The Finnish one will be this Mirage kit:

6 Likes
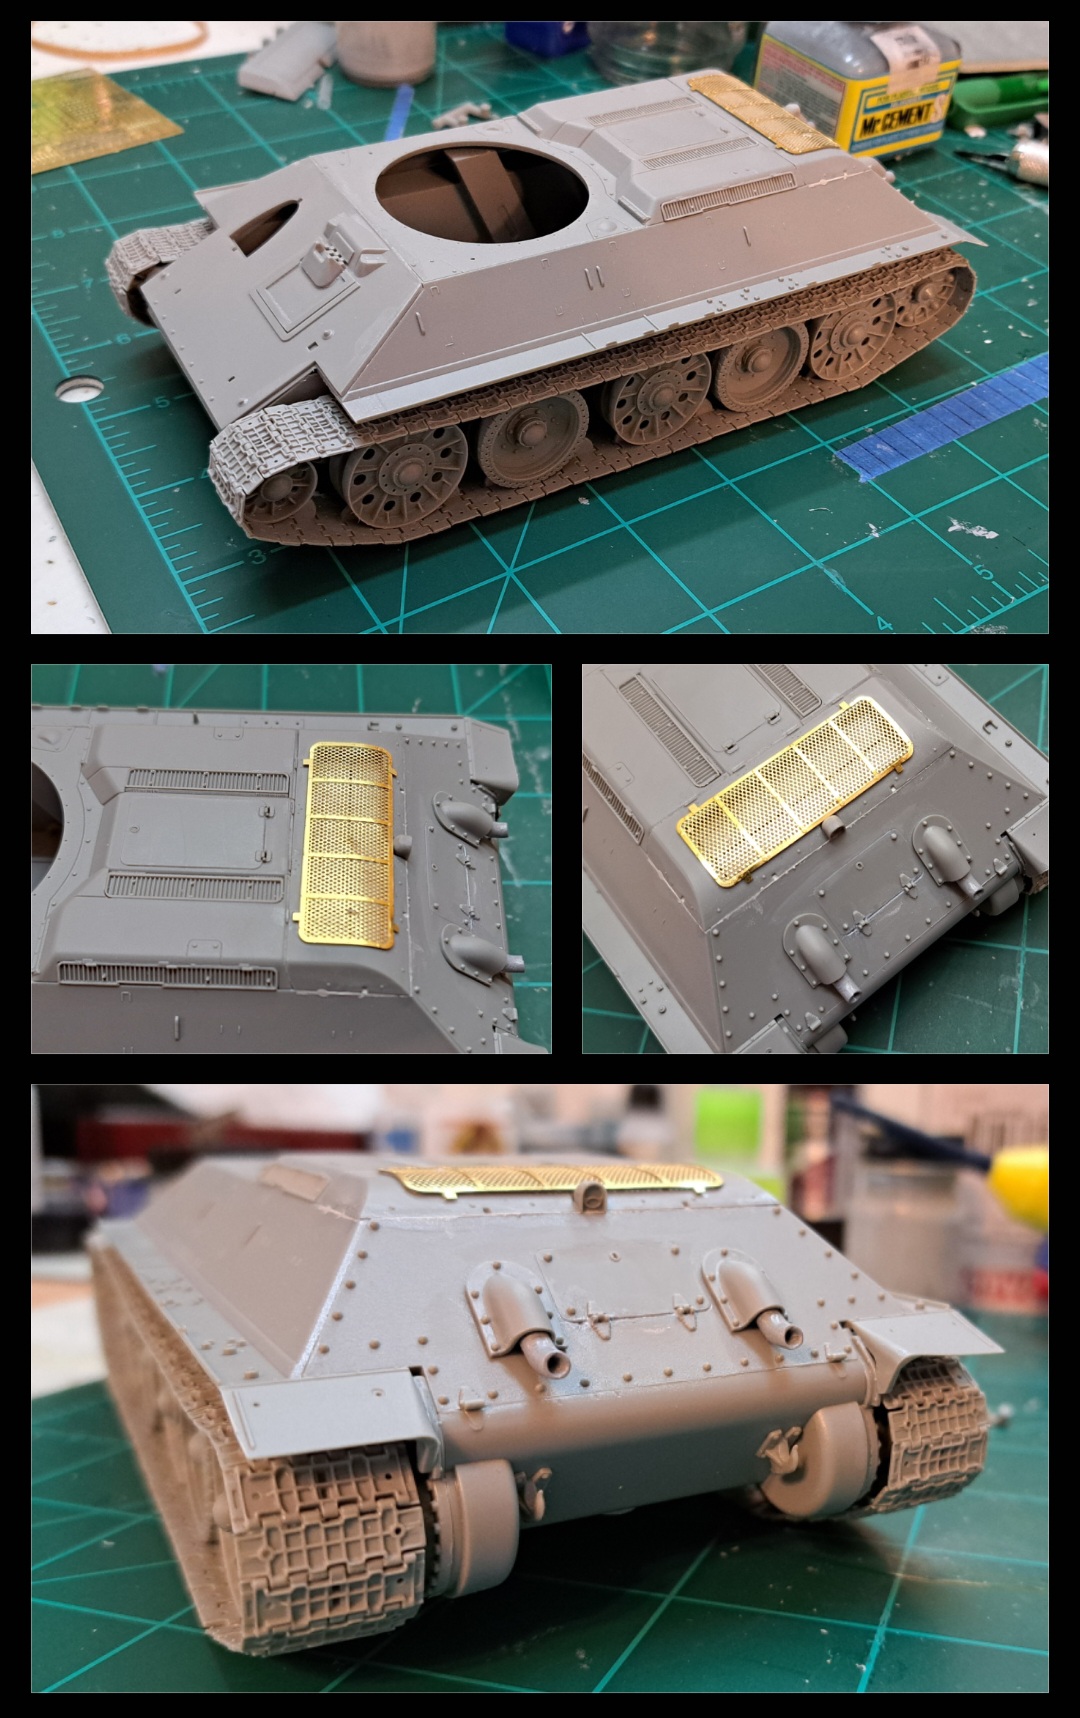
Did some minor work on the fenders, along with starting to add the PE to the rear engine deck, along with some other details. I also did my first attempt at annealing the brass parts. There’s an s-angled piece of brass that goes under the rear stowage box on the left back fender, needed to strengthen that one parts because it holds the bulk of that particular part.
By now, most of the hull is complete, minus a few details, which i will work on this weekend. I added the tow cables eyes on their specific places and will add the wire cables once everything is measured up.
So far, this build has been easy, albeit with a lot of little details and parts, but it is what I love about RFM kits, they go together easy right out of the box, but with a much higher level of detail than your average Tamiya or Academy kit.
I’m really liking this build up to this point, and i am sure this will be a great model once complete.
(Placeholder for images once I take them).
3 Likes
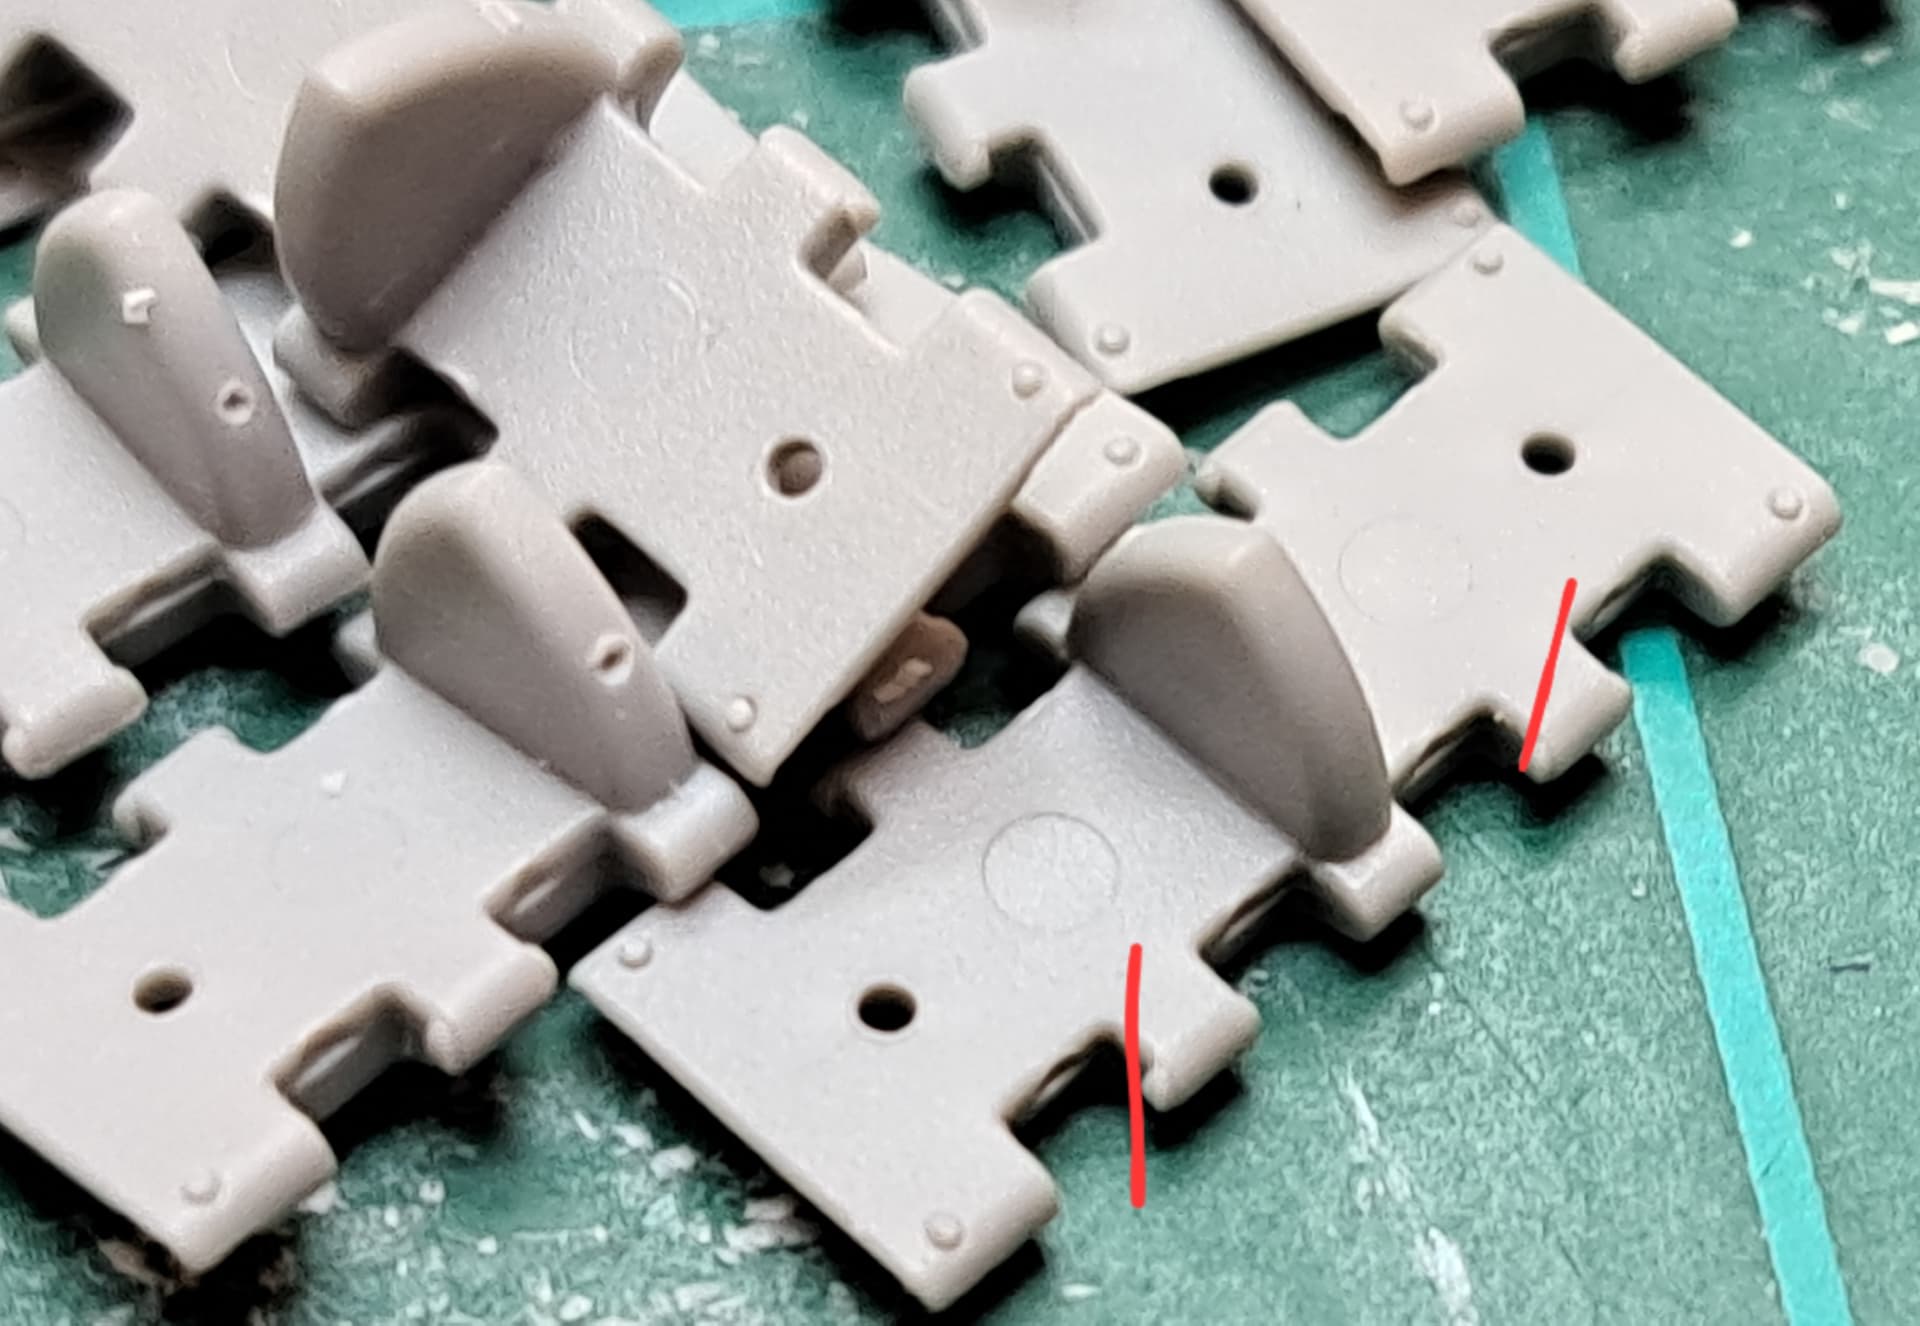
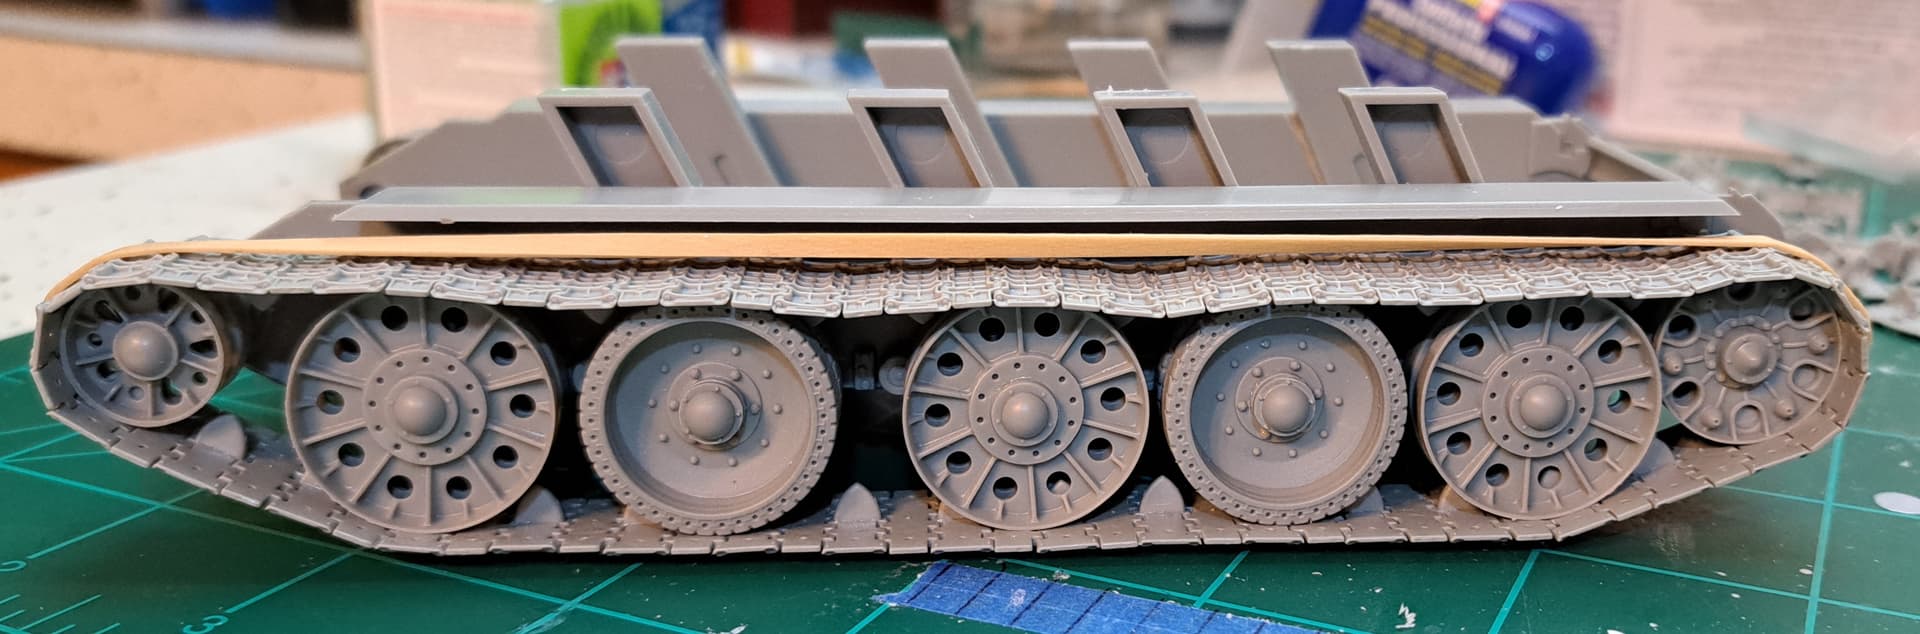
One track run done and test fitted. Cleanup and prep a bit tedious as usual but assembly goes fairly quickly.

7 Likes
This paint loooks great for the T-55!
2 Likes
Tedium. Painting the rubber track blocks. This will occupy most of the rest of the afternoon.
Edit: Life is good. First run went much faster than I expected. Sipping Williams Sonoma hot chocolate while I worked also helped. Onto the second run. If it goes as quickly as the first I might even paint the tub and wheels.
2 Likes

4 Likes
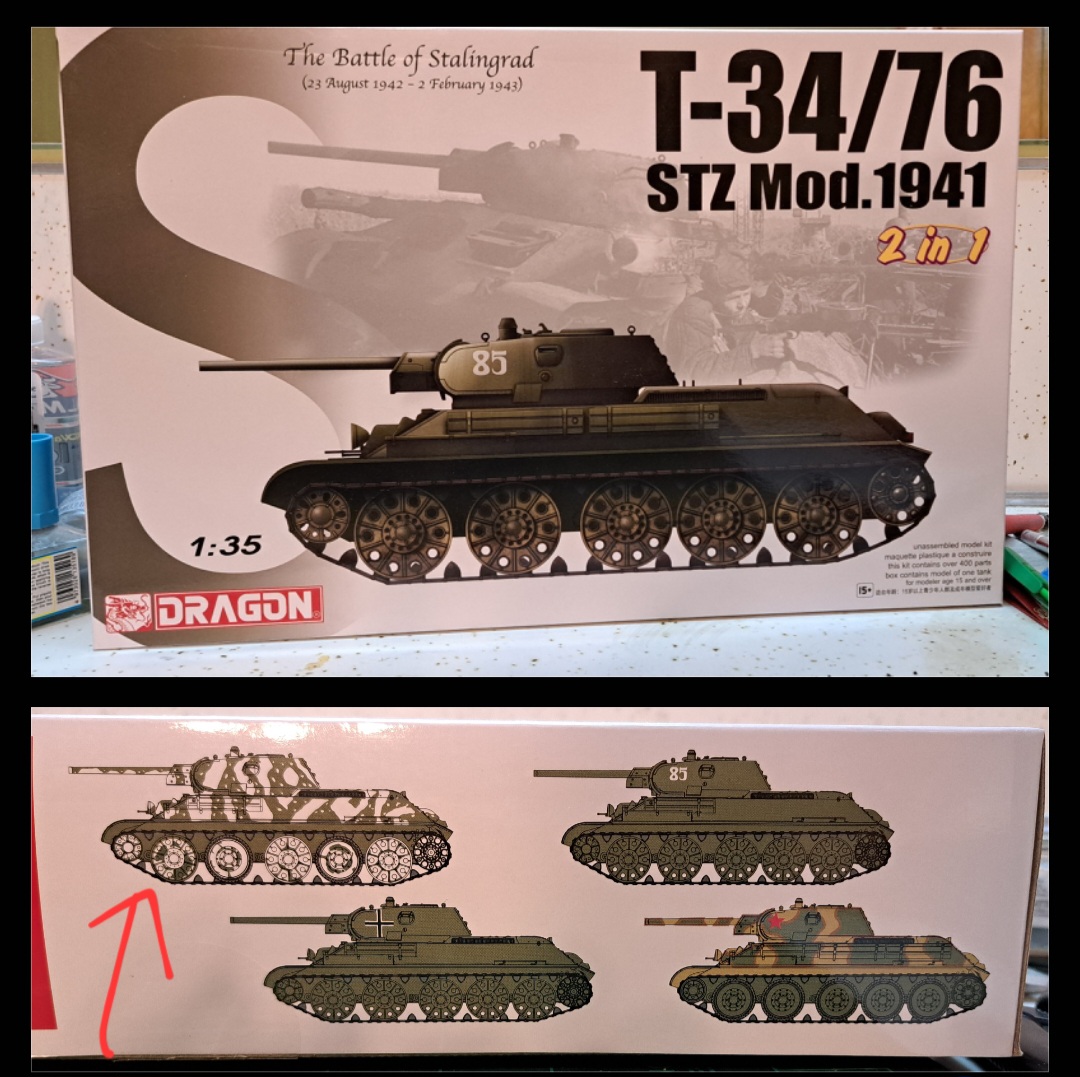
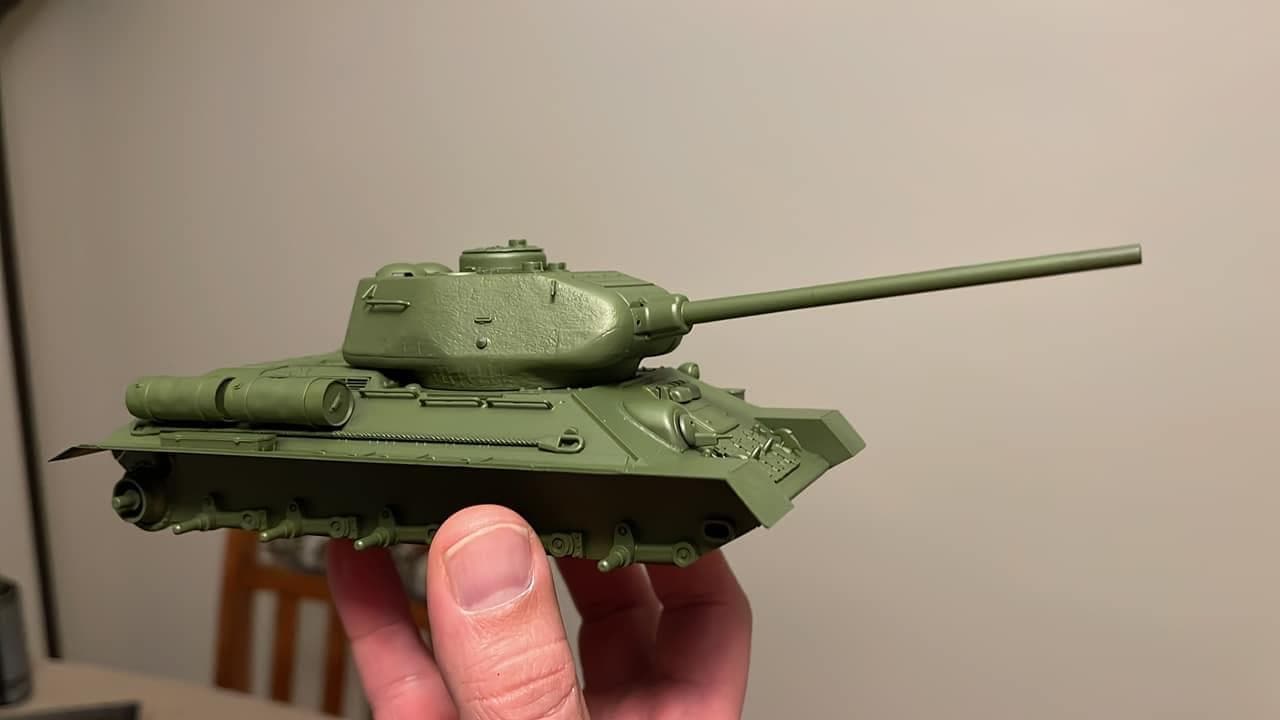
The Dragon T-34/76 STZ 1941 kit is well on the way to becoming my favorite Dragon kit ever. It’s been Tamiya/Ryefield like so far.
6 Likes
Nice clean build!
3 Likes
Indeed. Very nice build. I built a TRamiya T-34/85 a while back, despite being a post-war tank, I really liked how it came out. I might tackle one of Ryefield’s offerings.

Typical Tamiya “Shake n’ Bake” build. Got the base build done in a couple hours…
Then I painted in Russian protective green spray paint from AK Interactive - which i would it to be too bright for my taste. I could’ve just left it as-is and do the washing and weathering to darken it, but…
Then I repainted the kit in vallejo 4B0 and it came a shade darker, which calmed my OCD down.

Then applied clear coat and decals before sealing it all up. it was a simple build, so no extra details were needed.
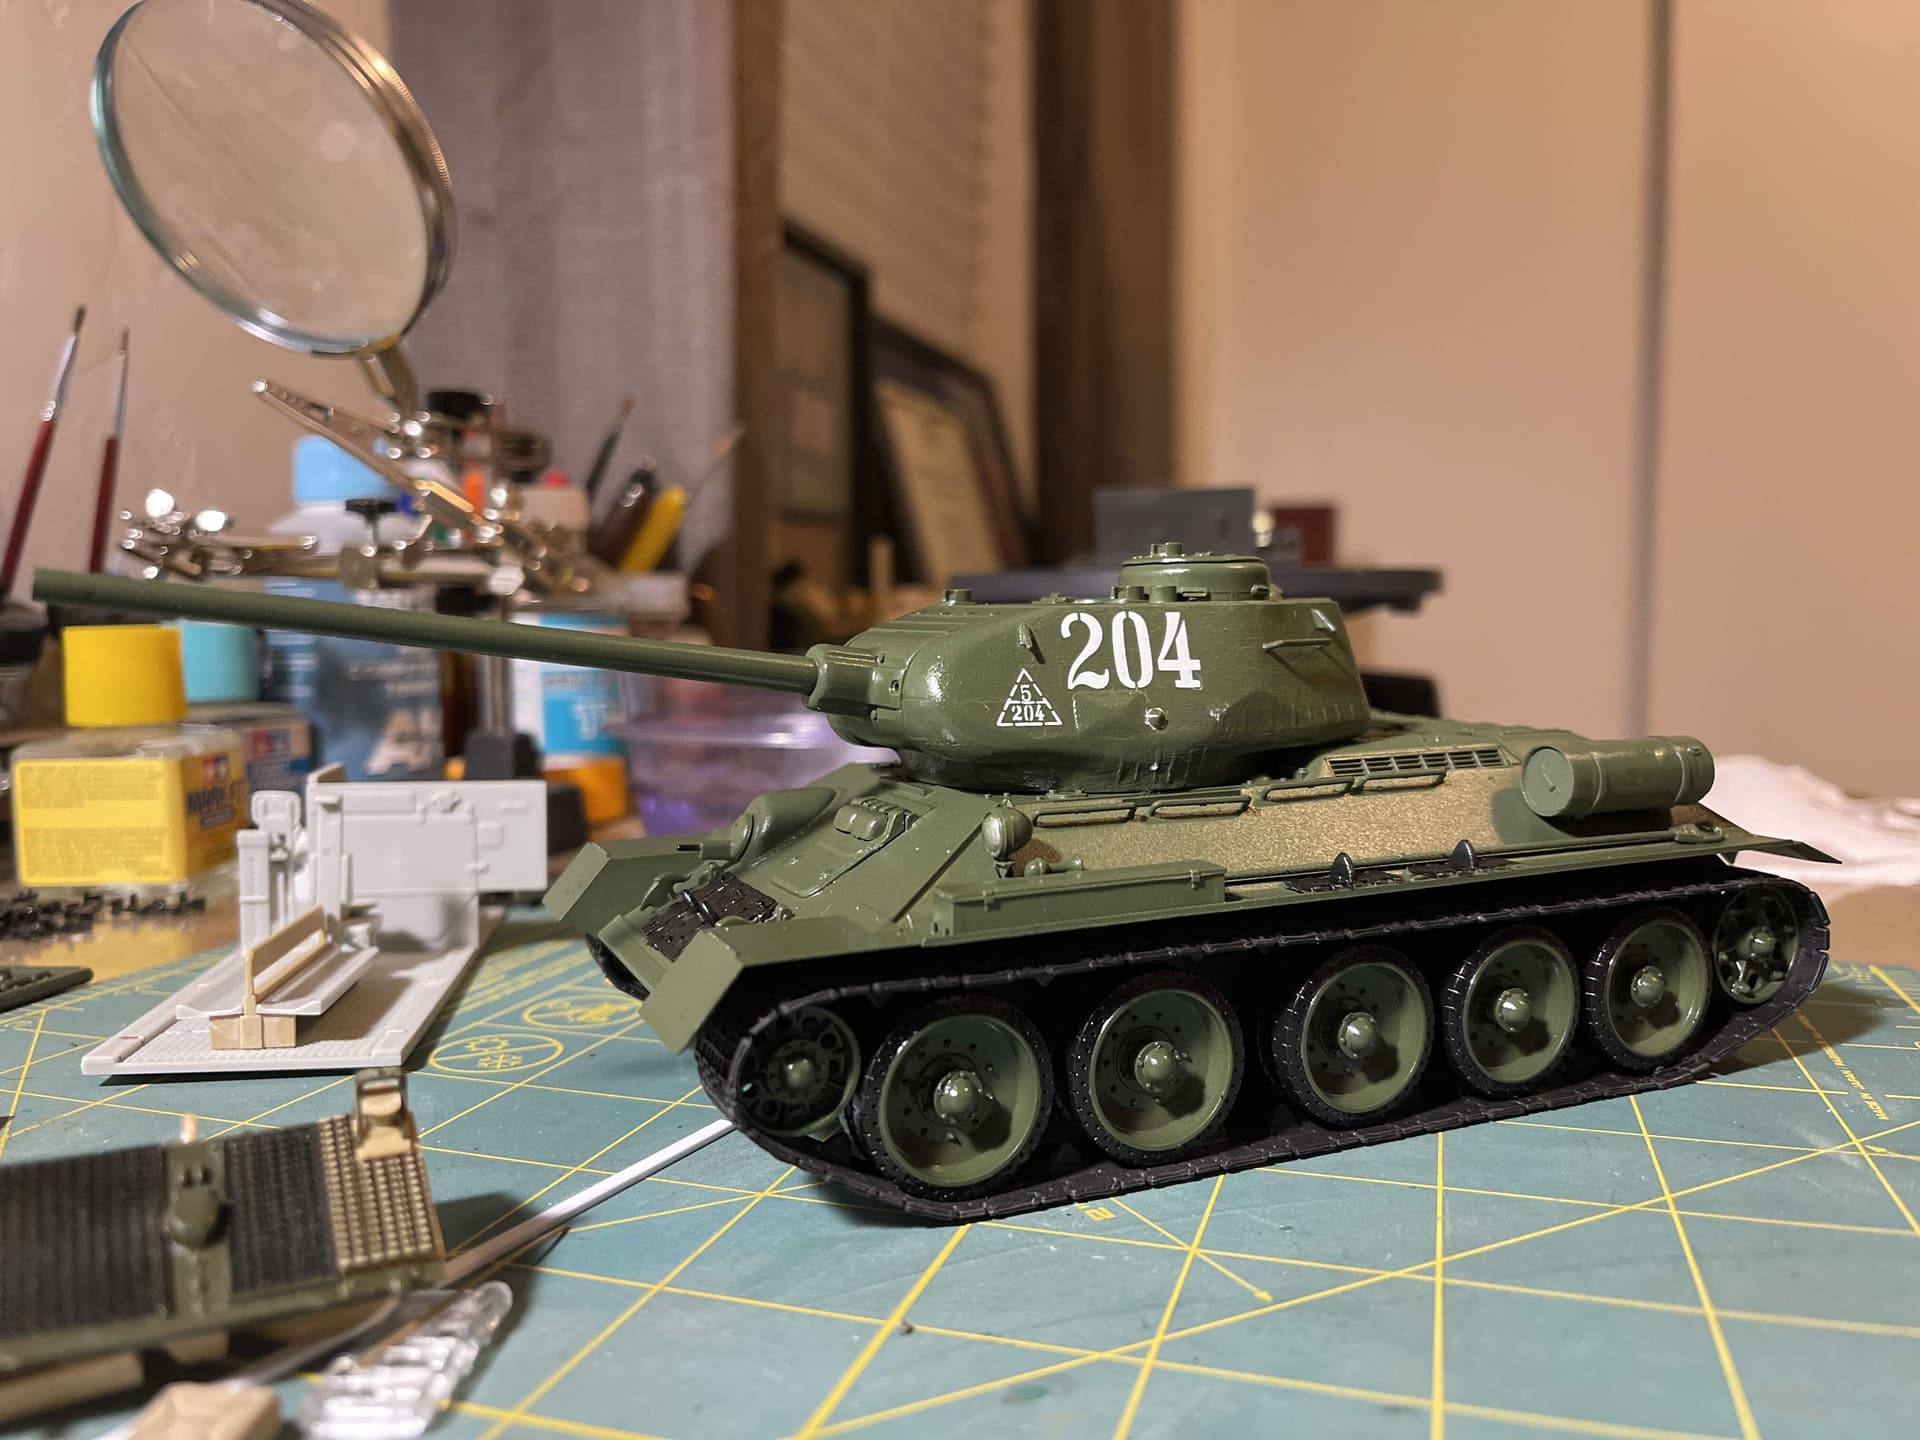
it was a fun build.
10 Likes
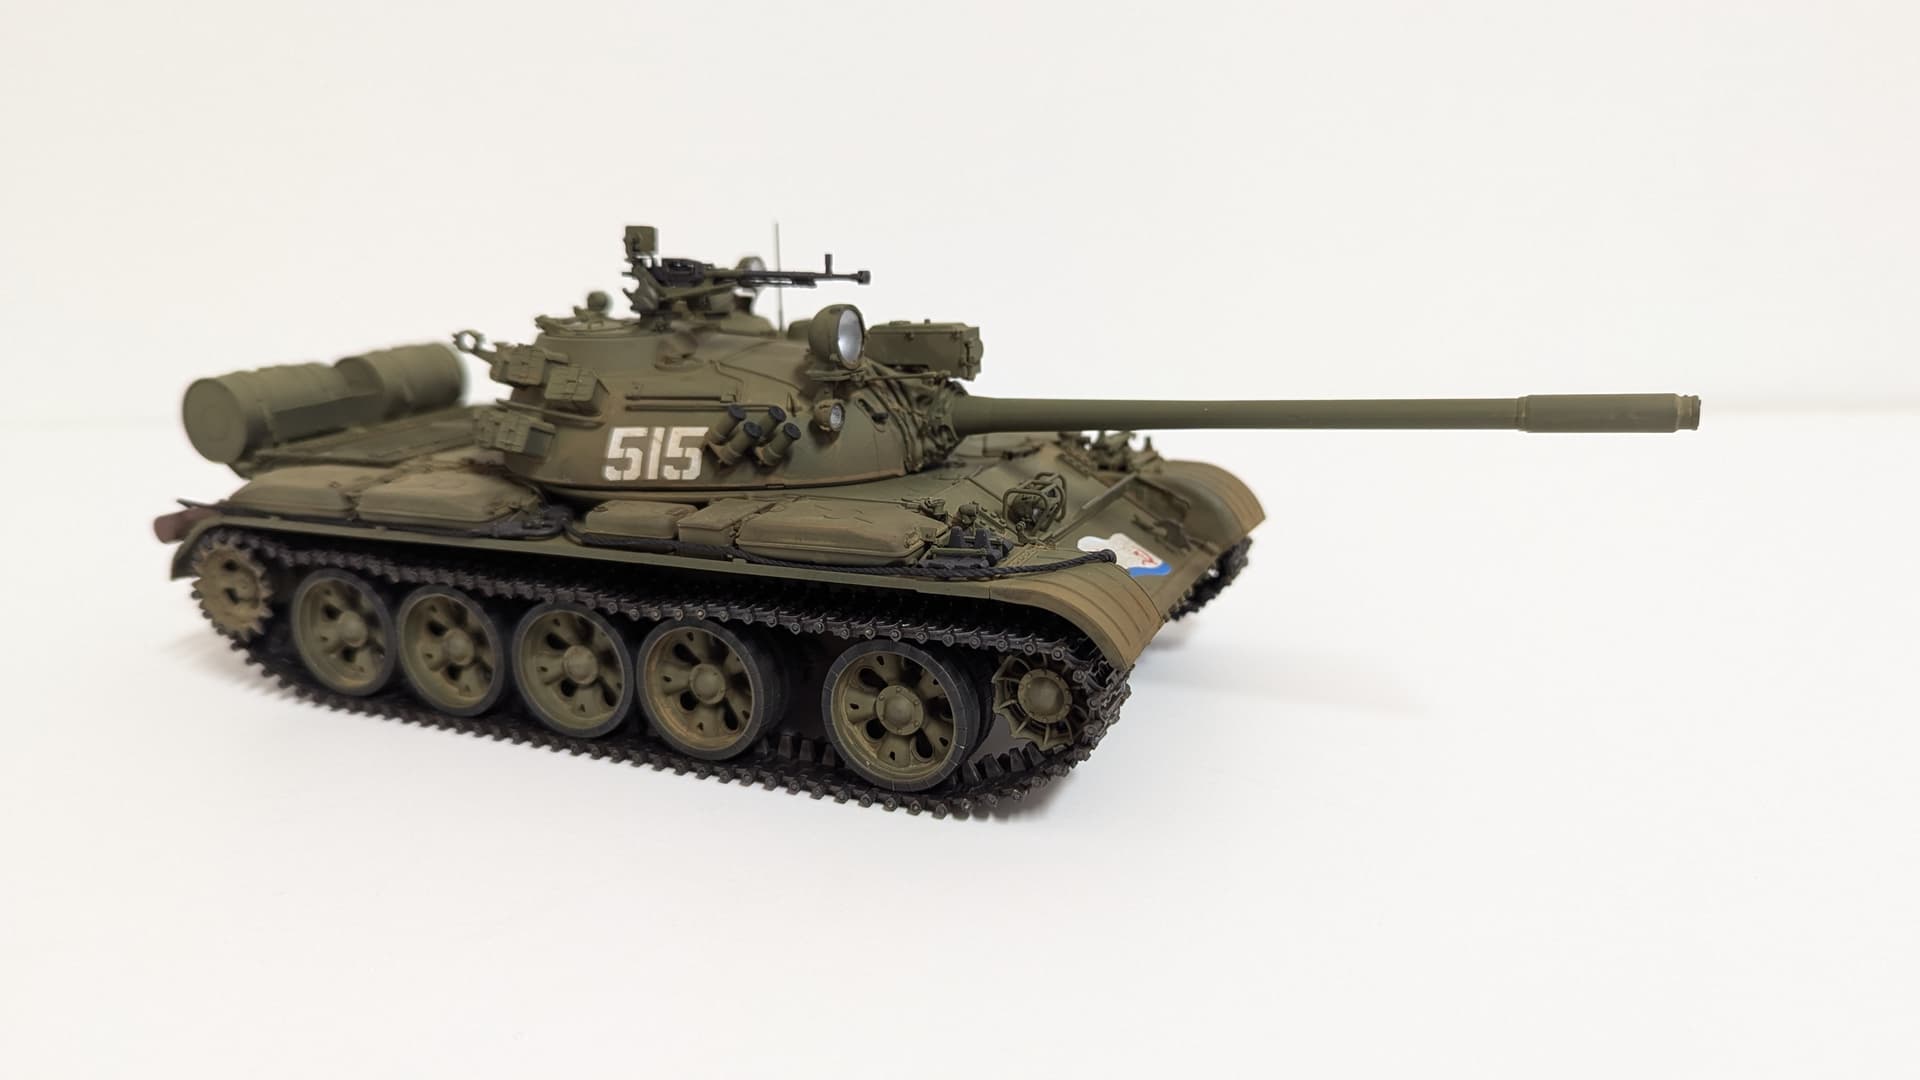
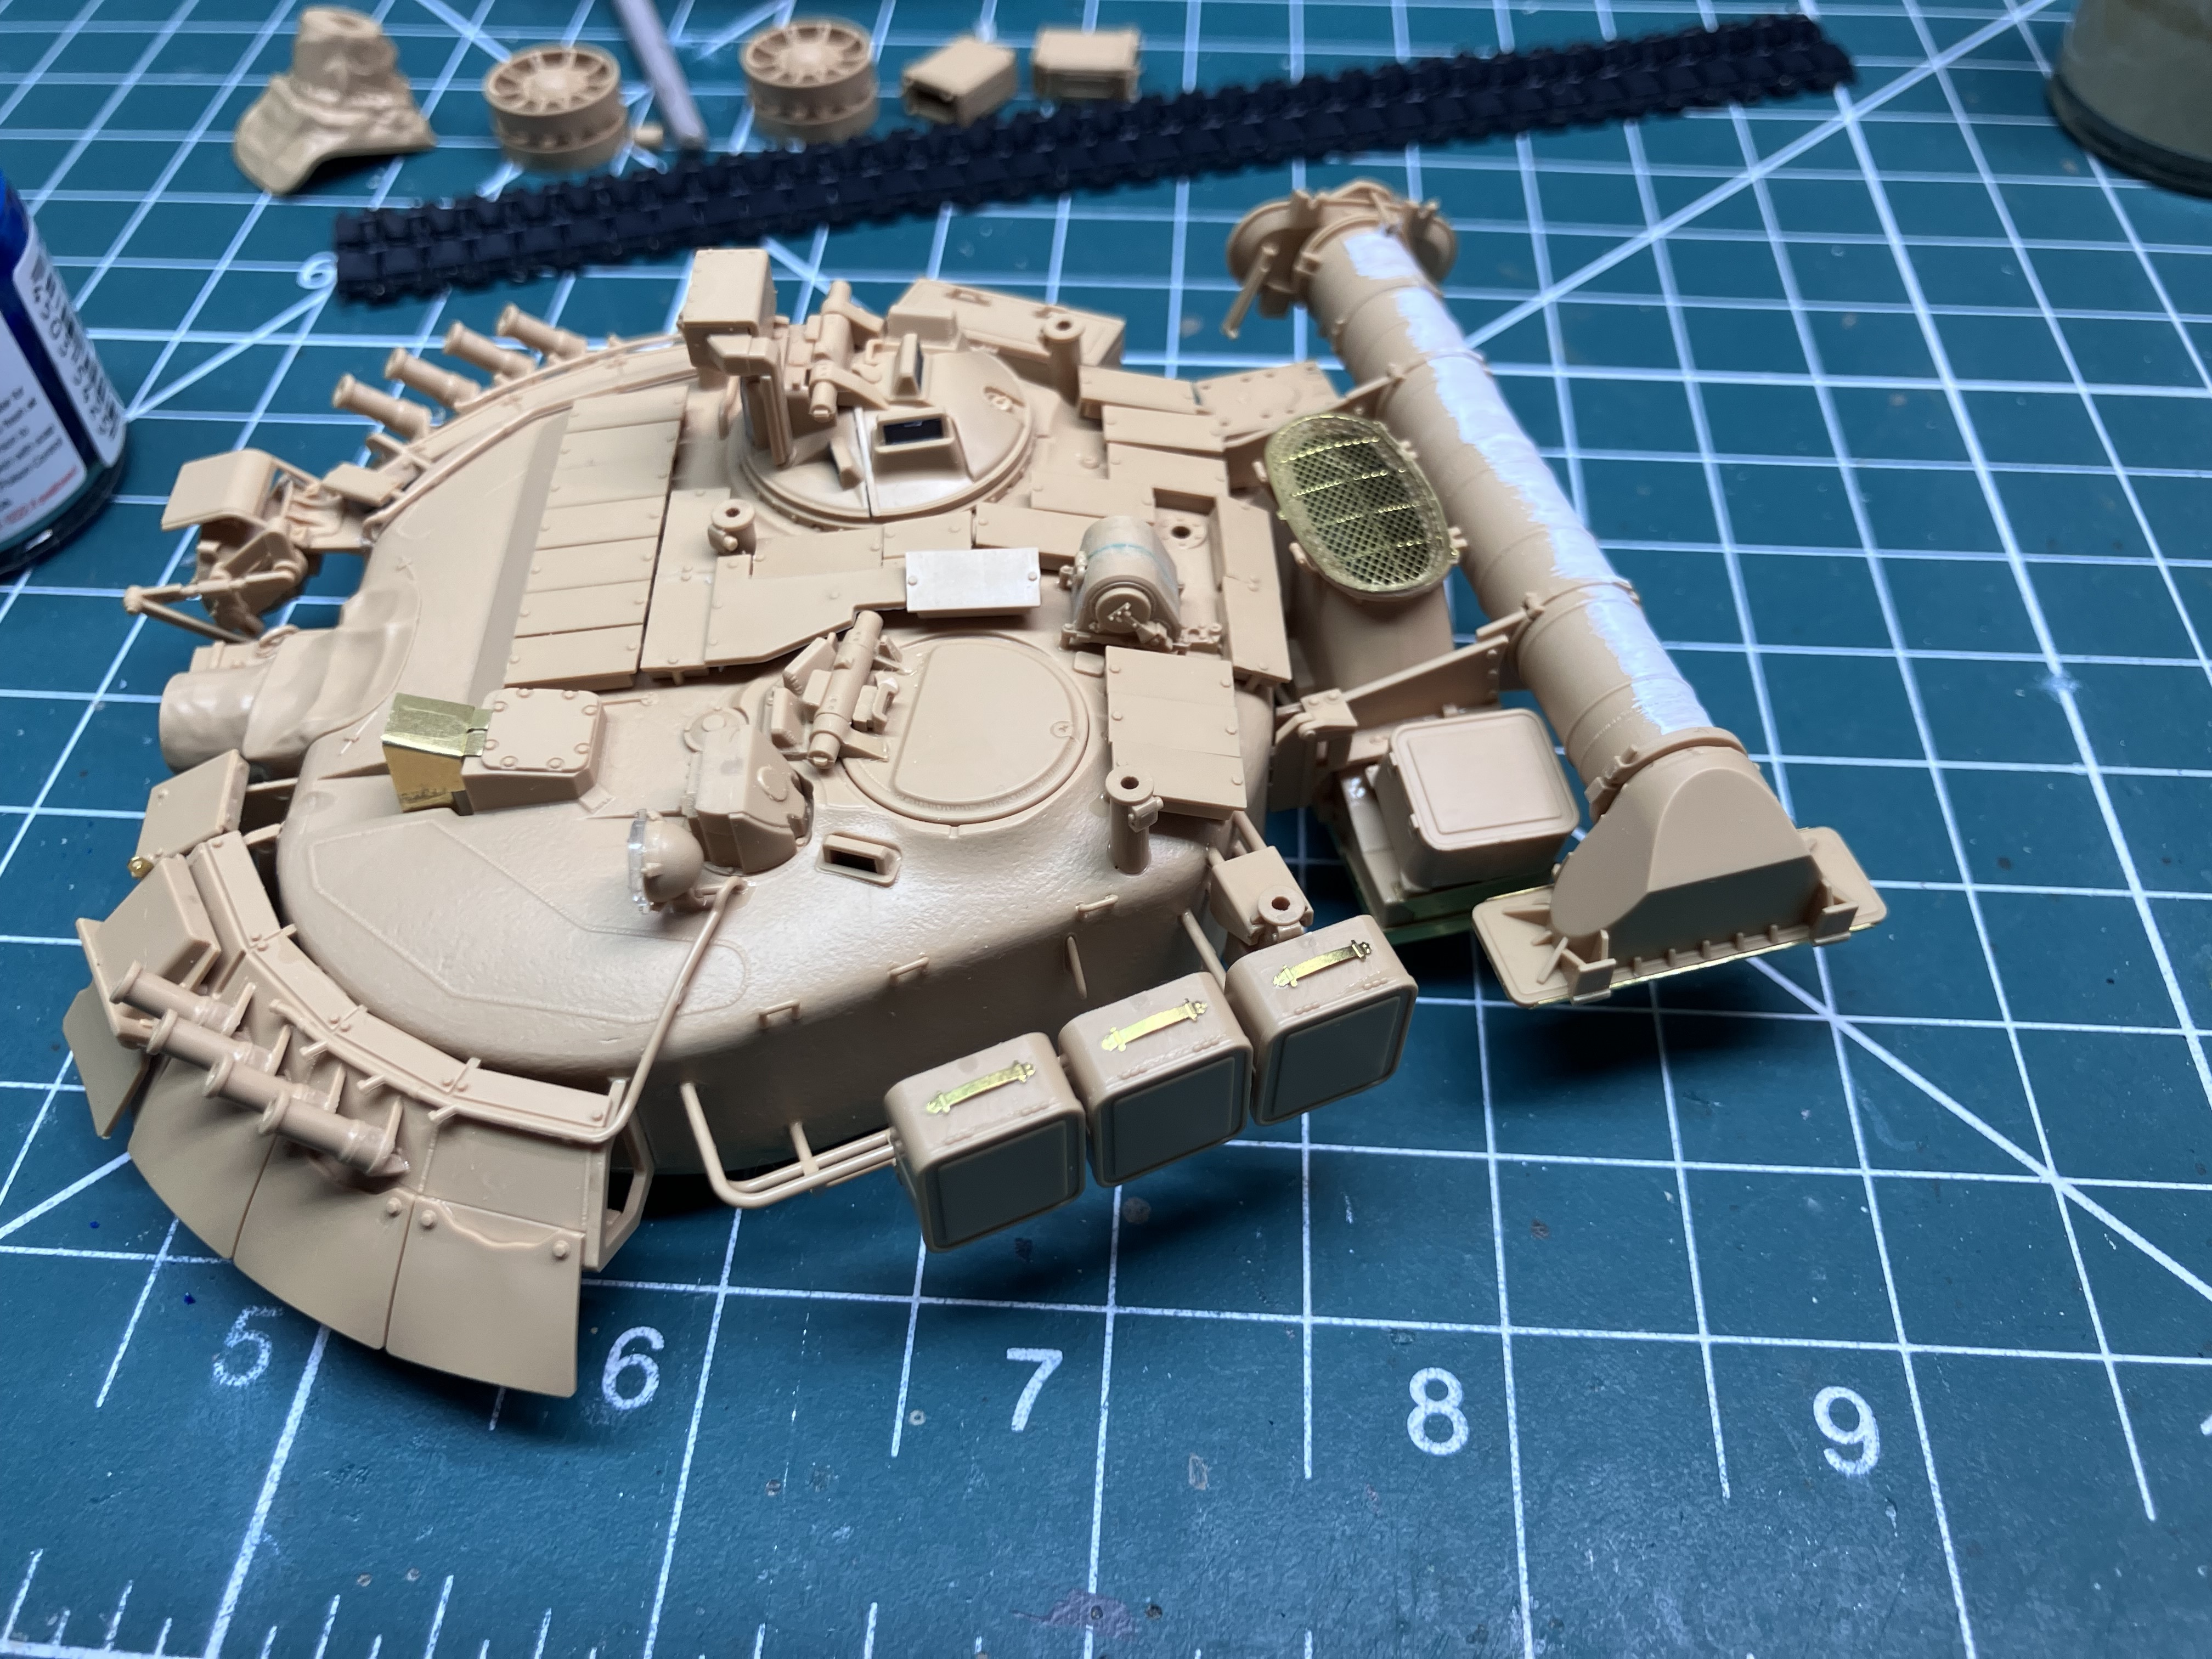
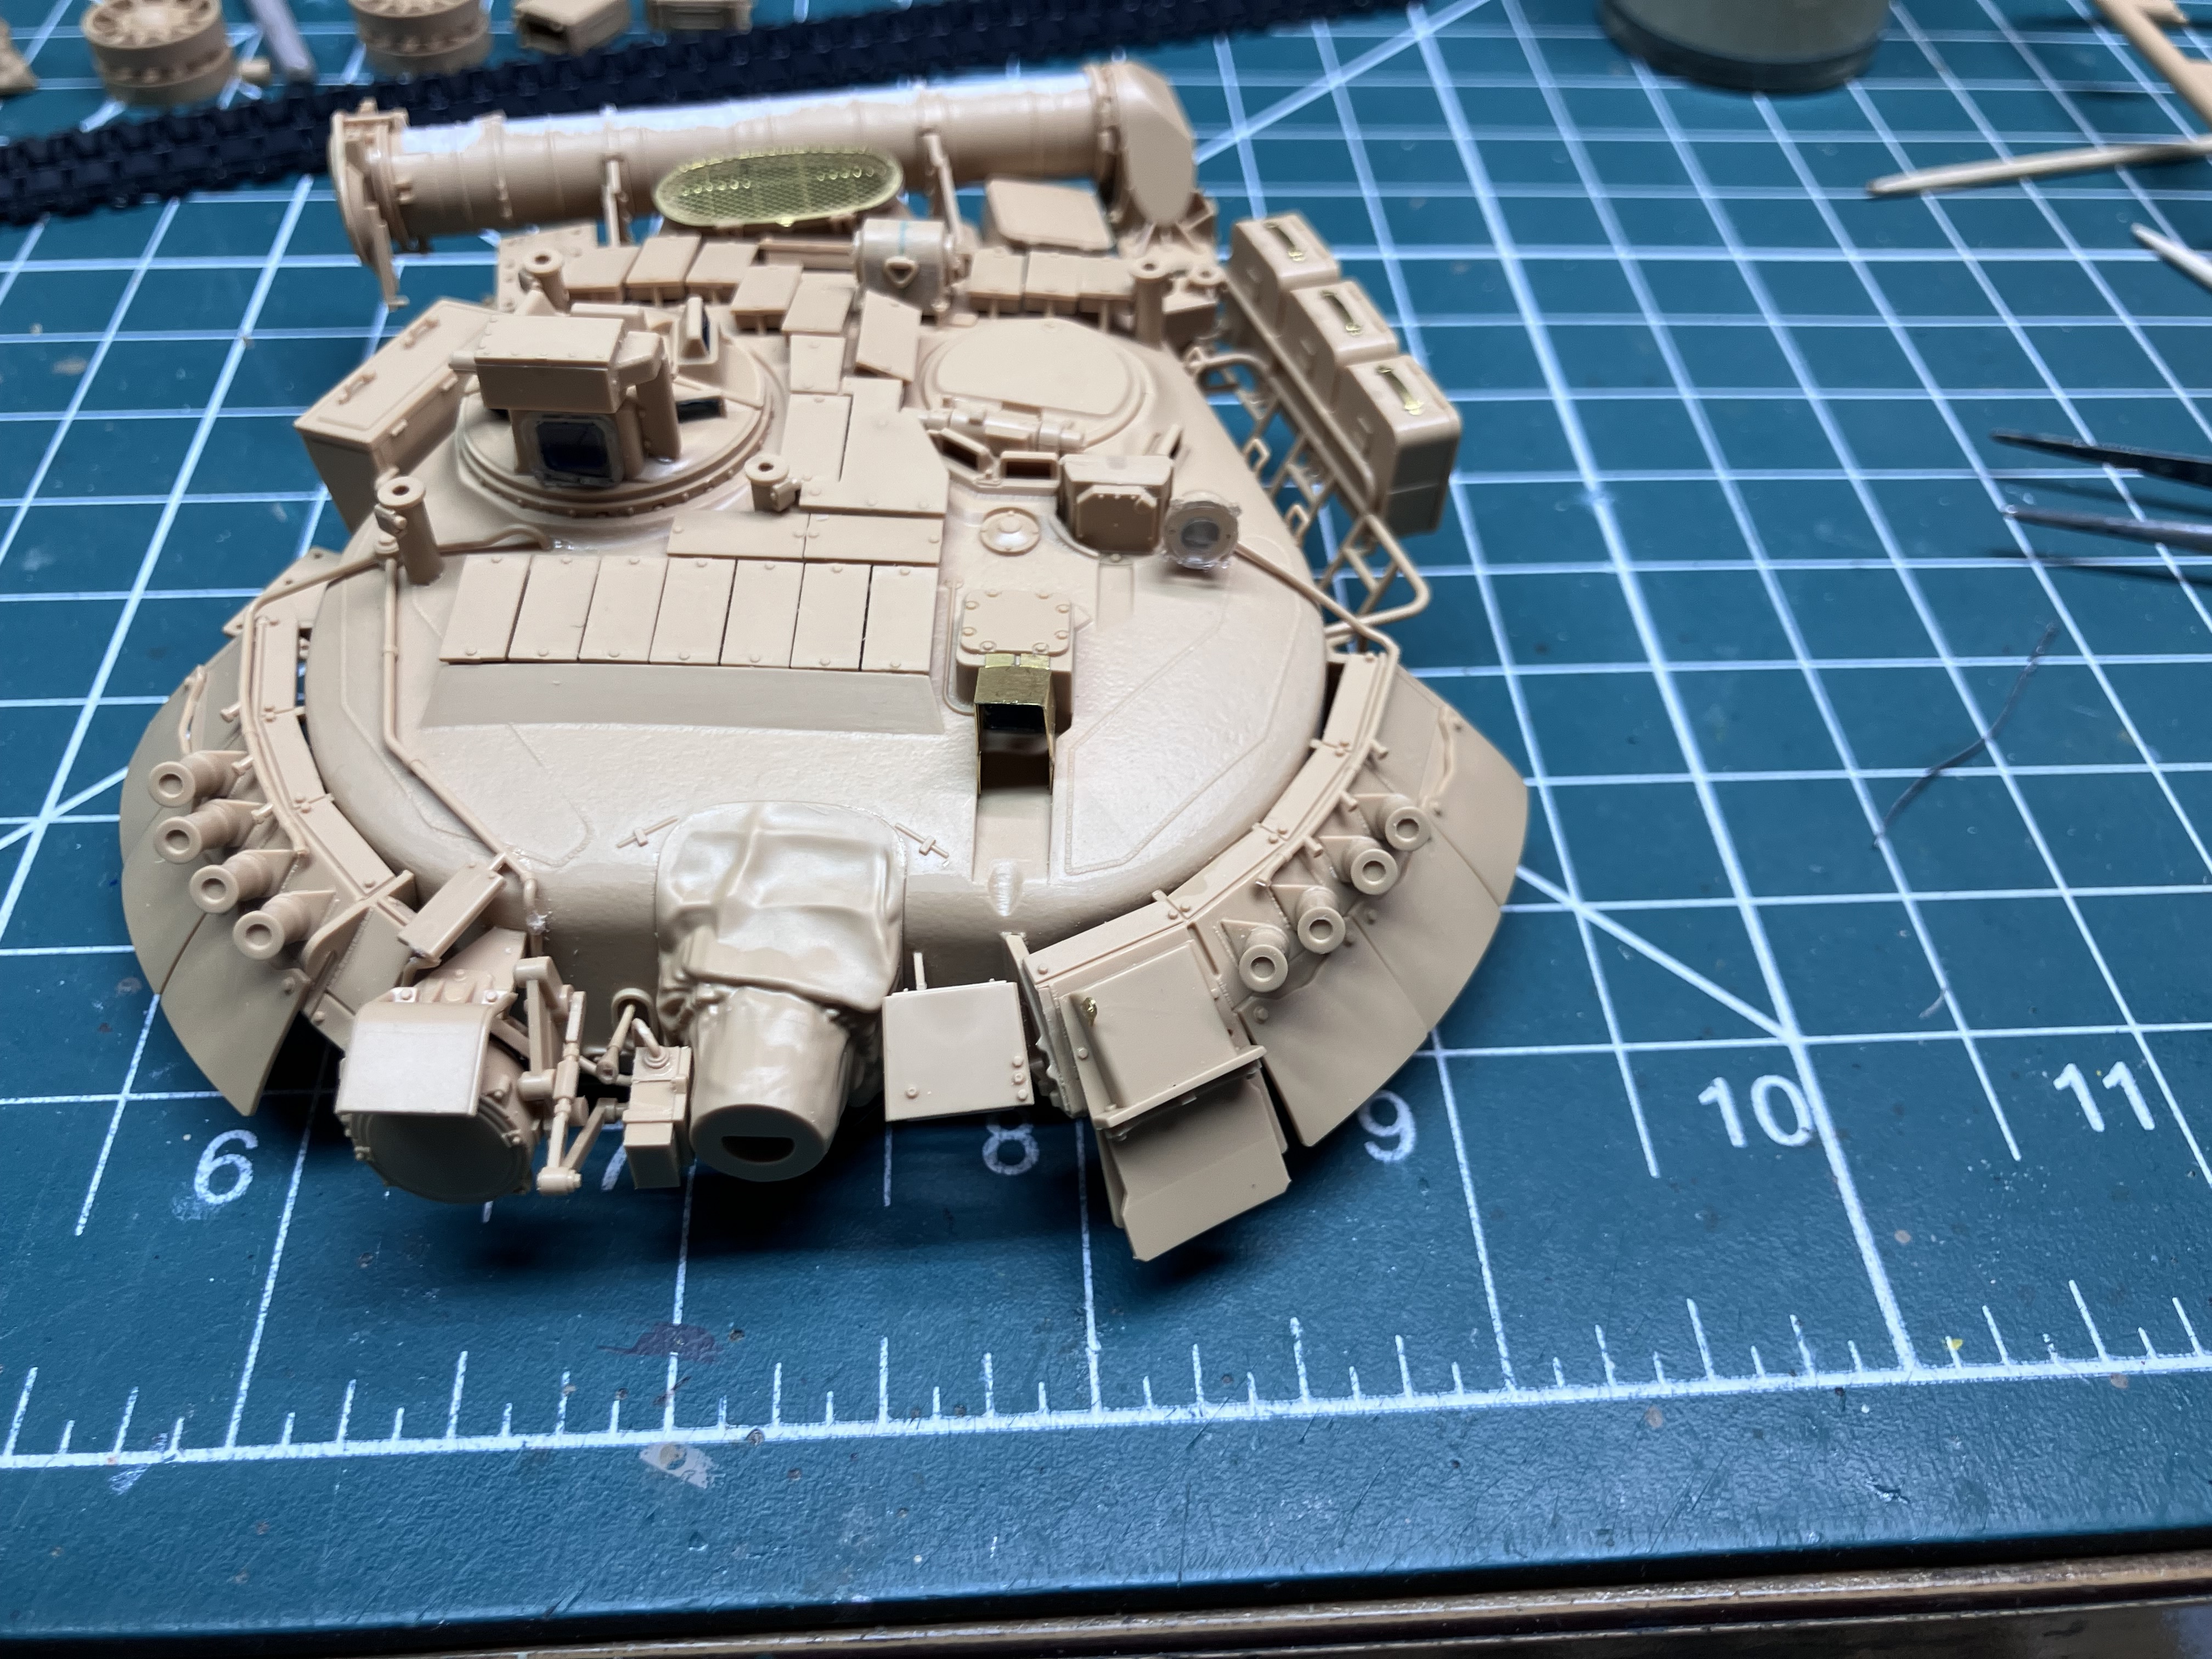
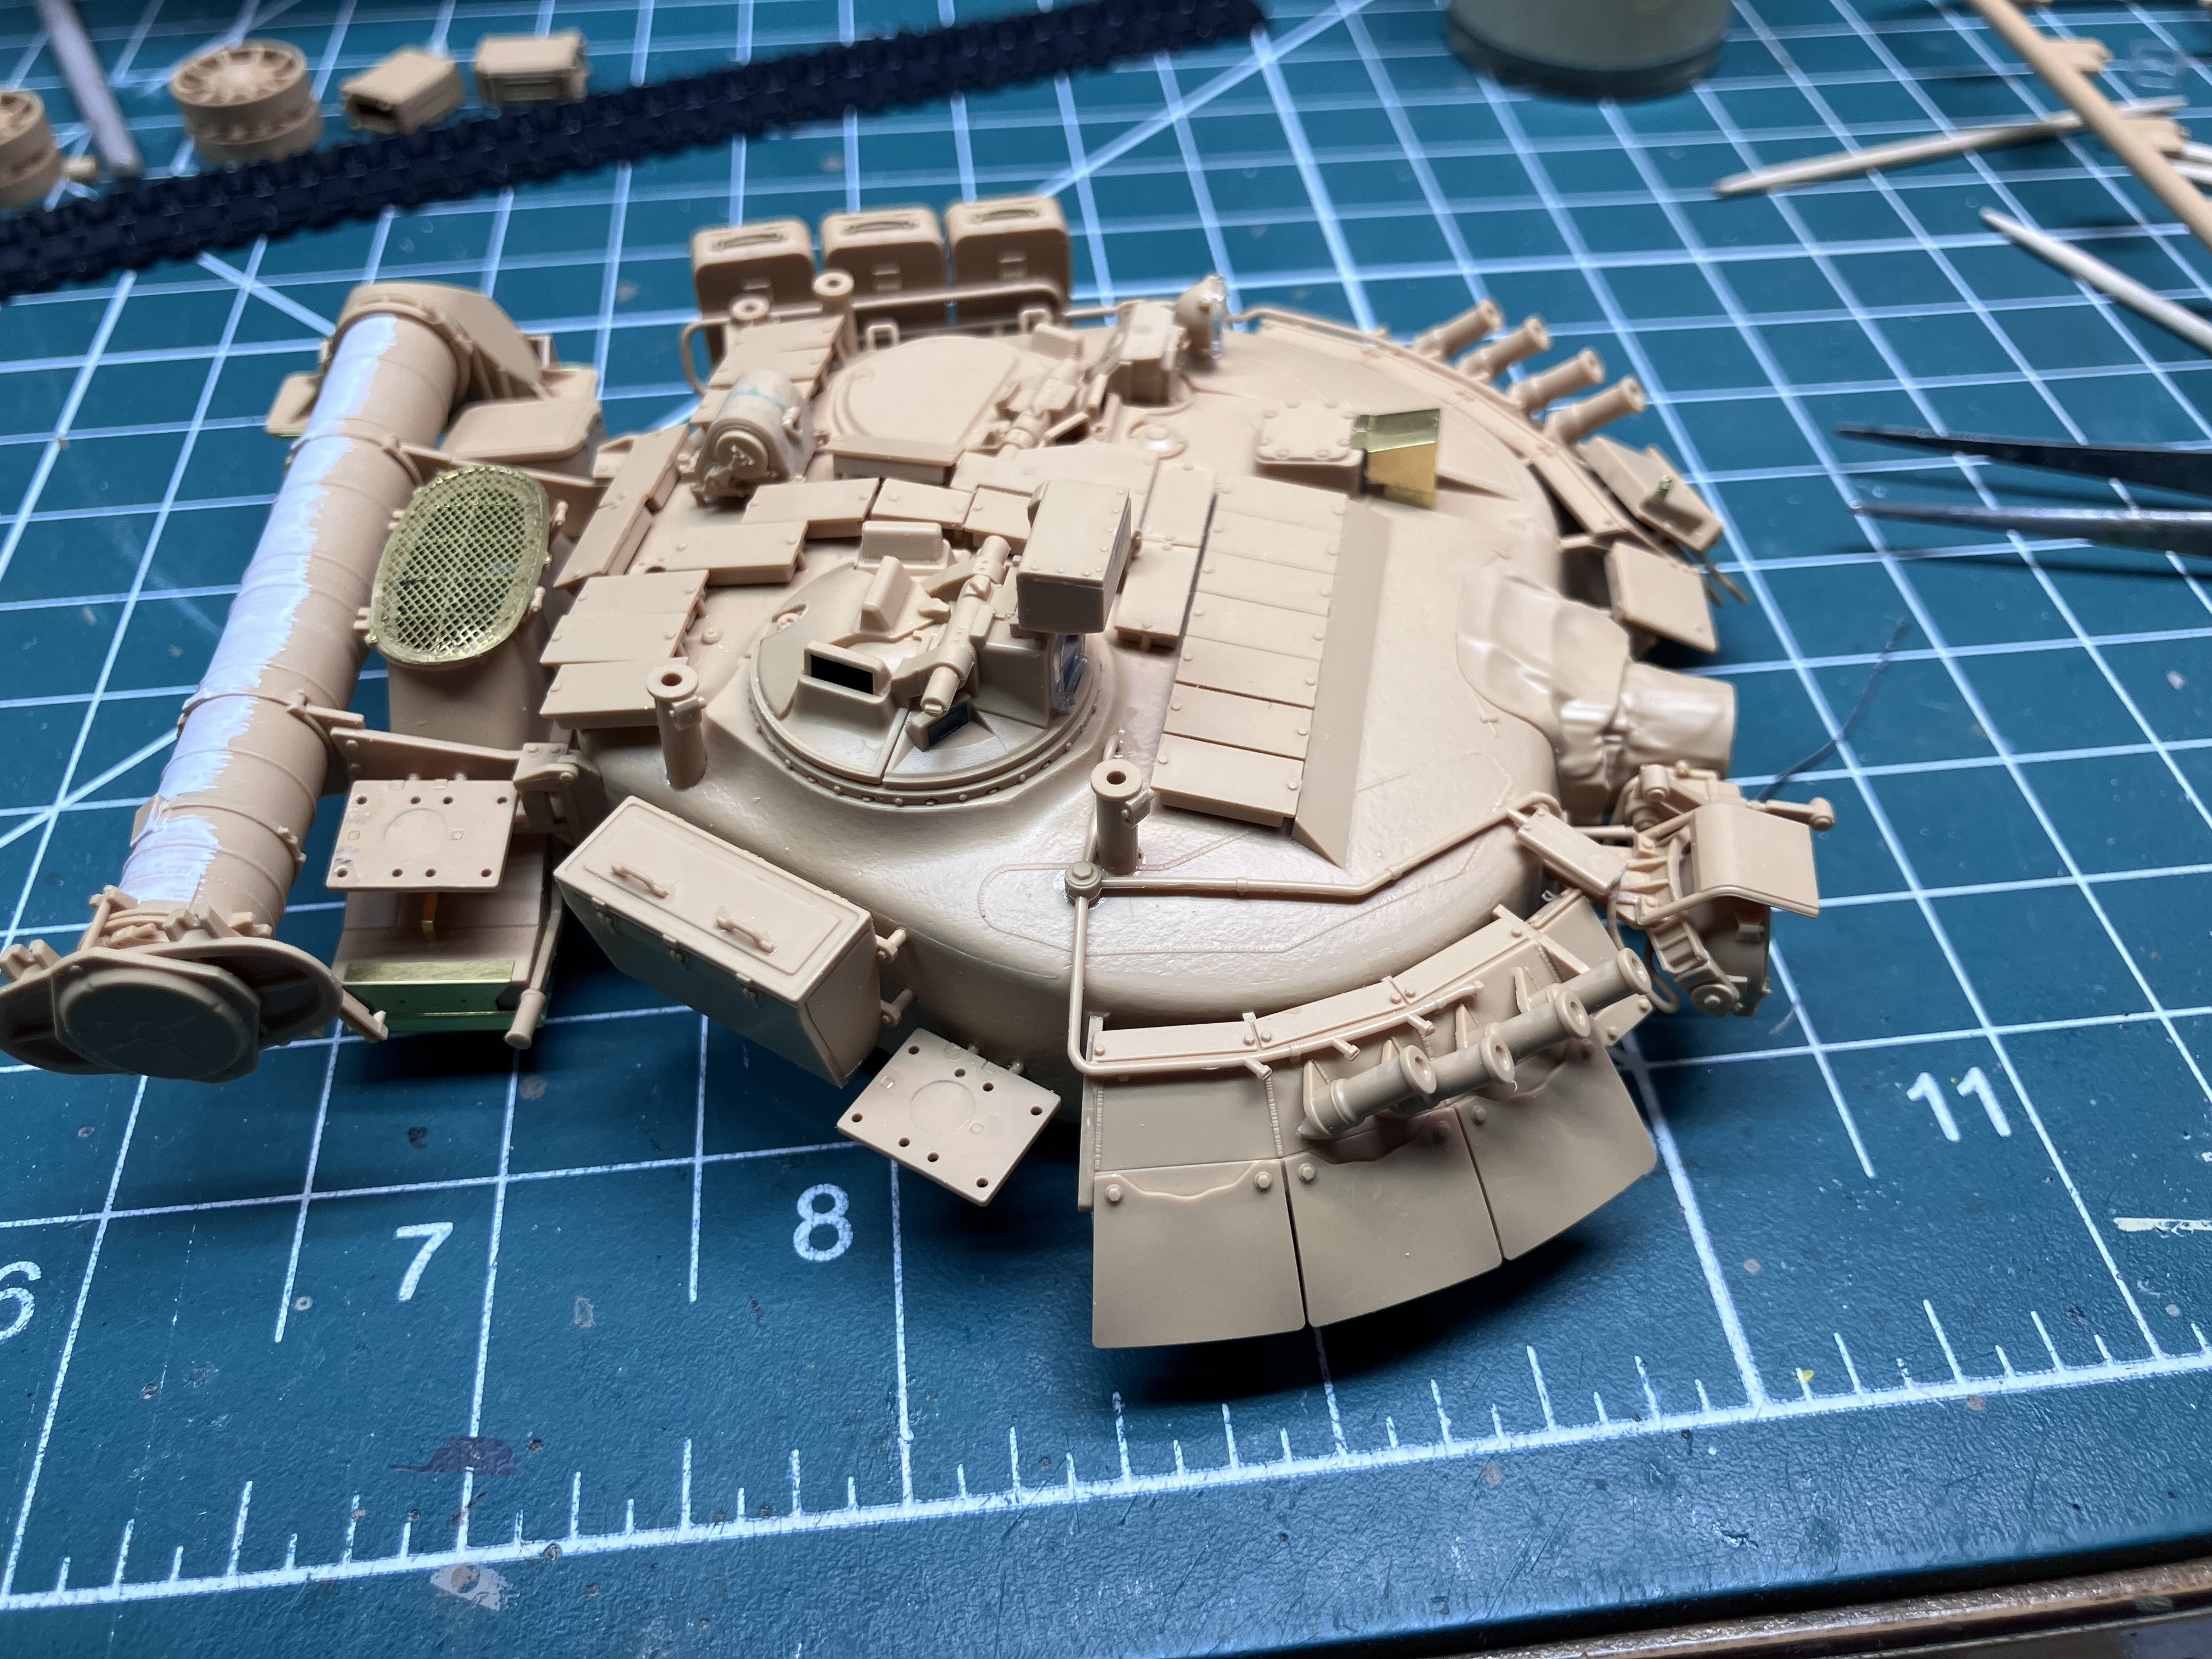
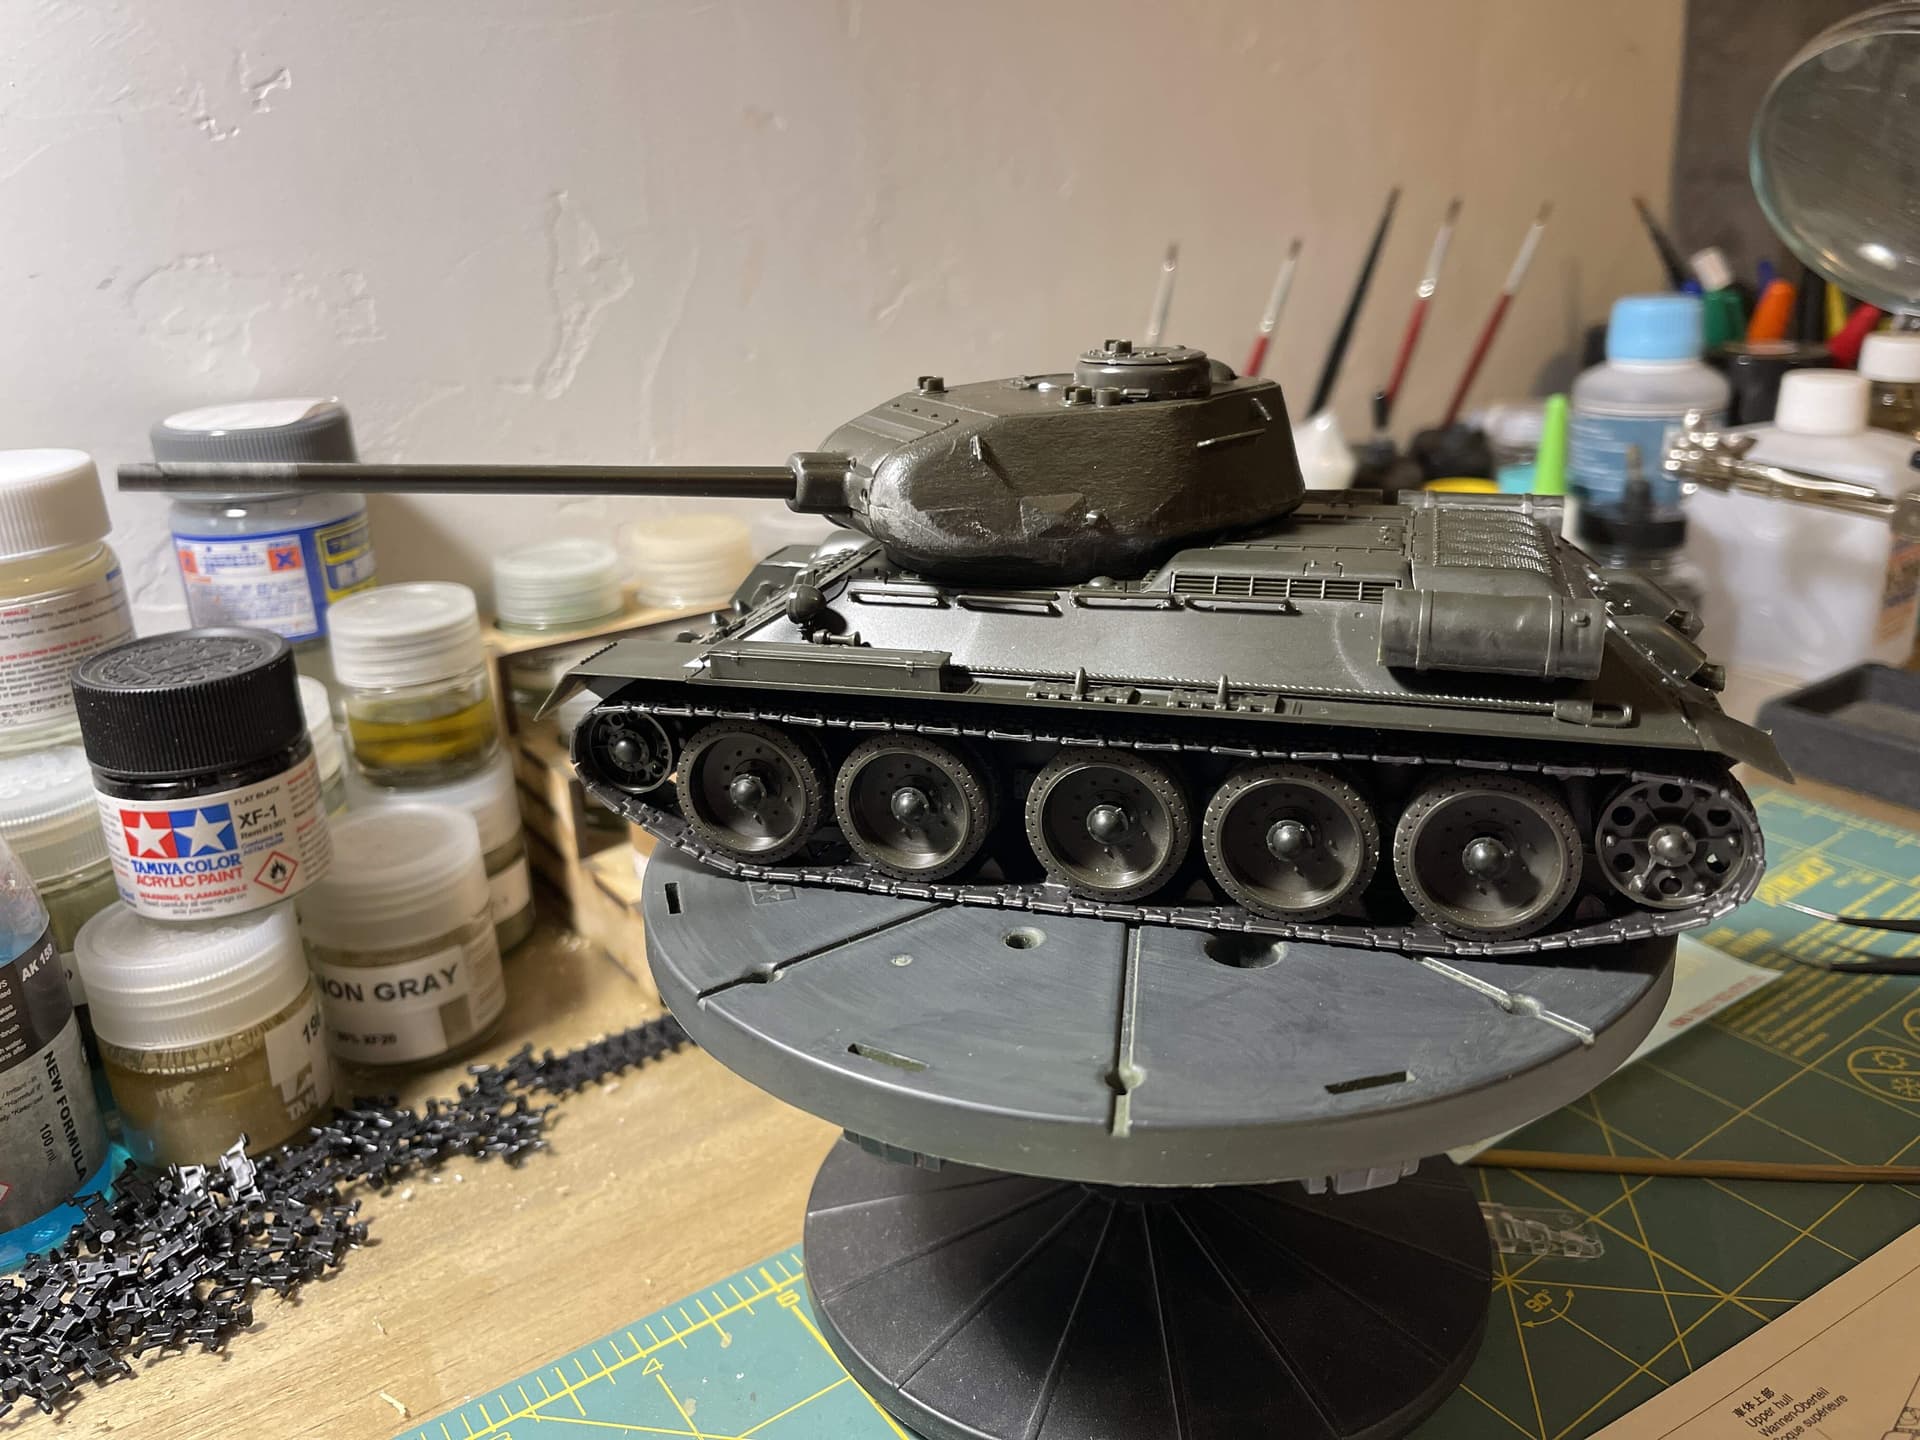
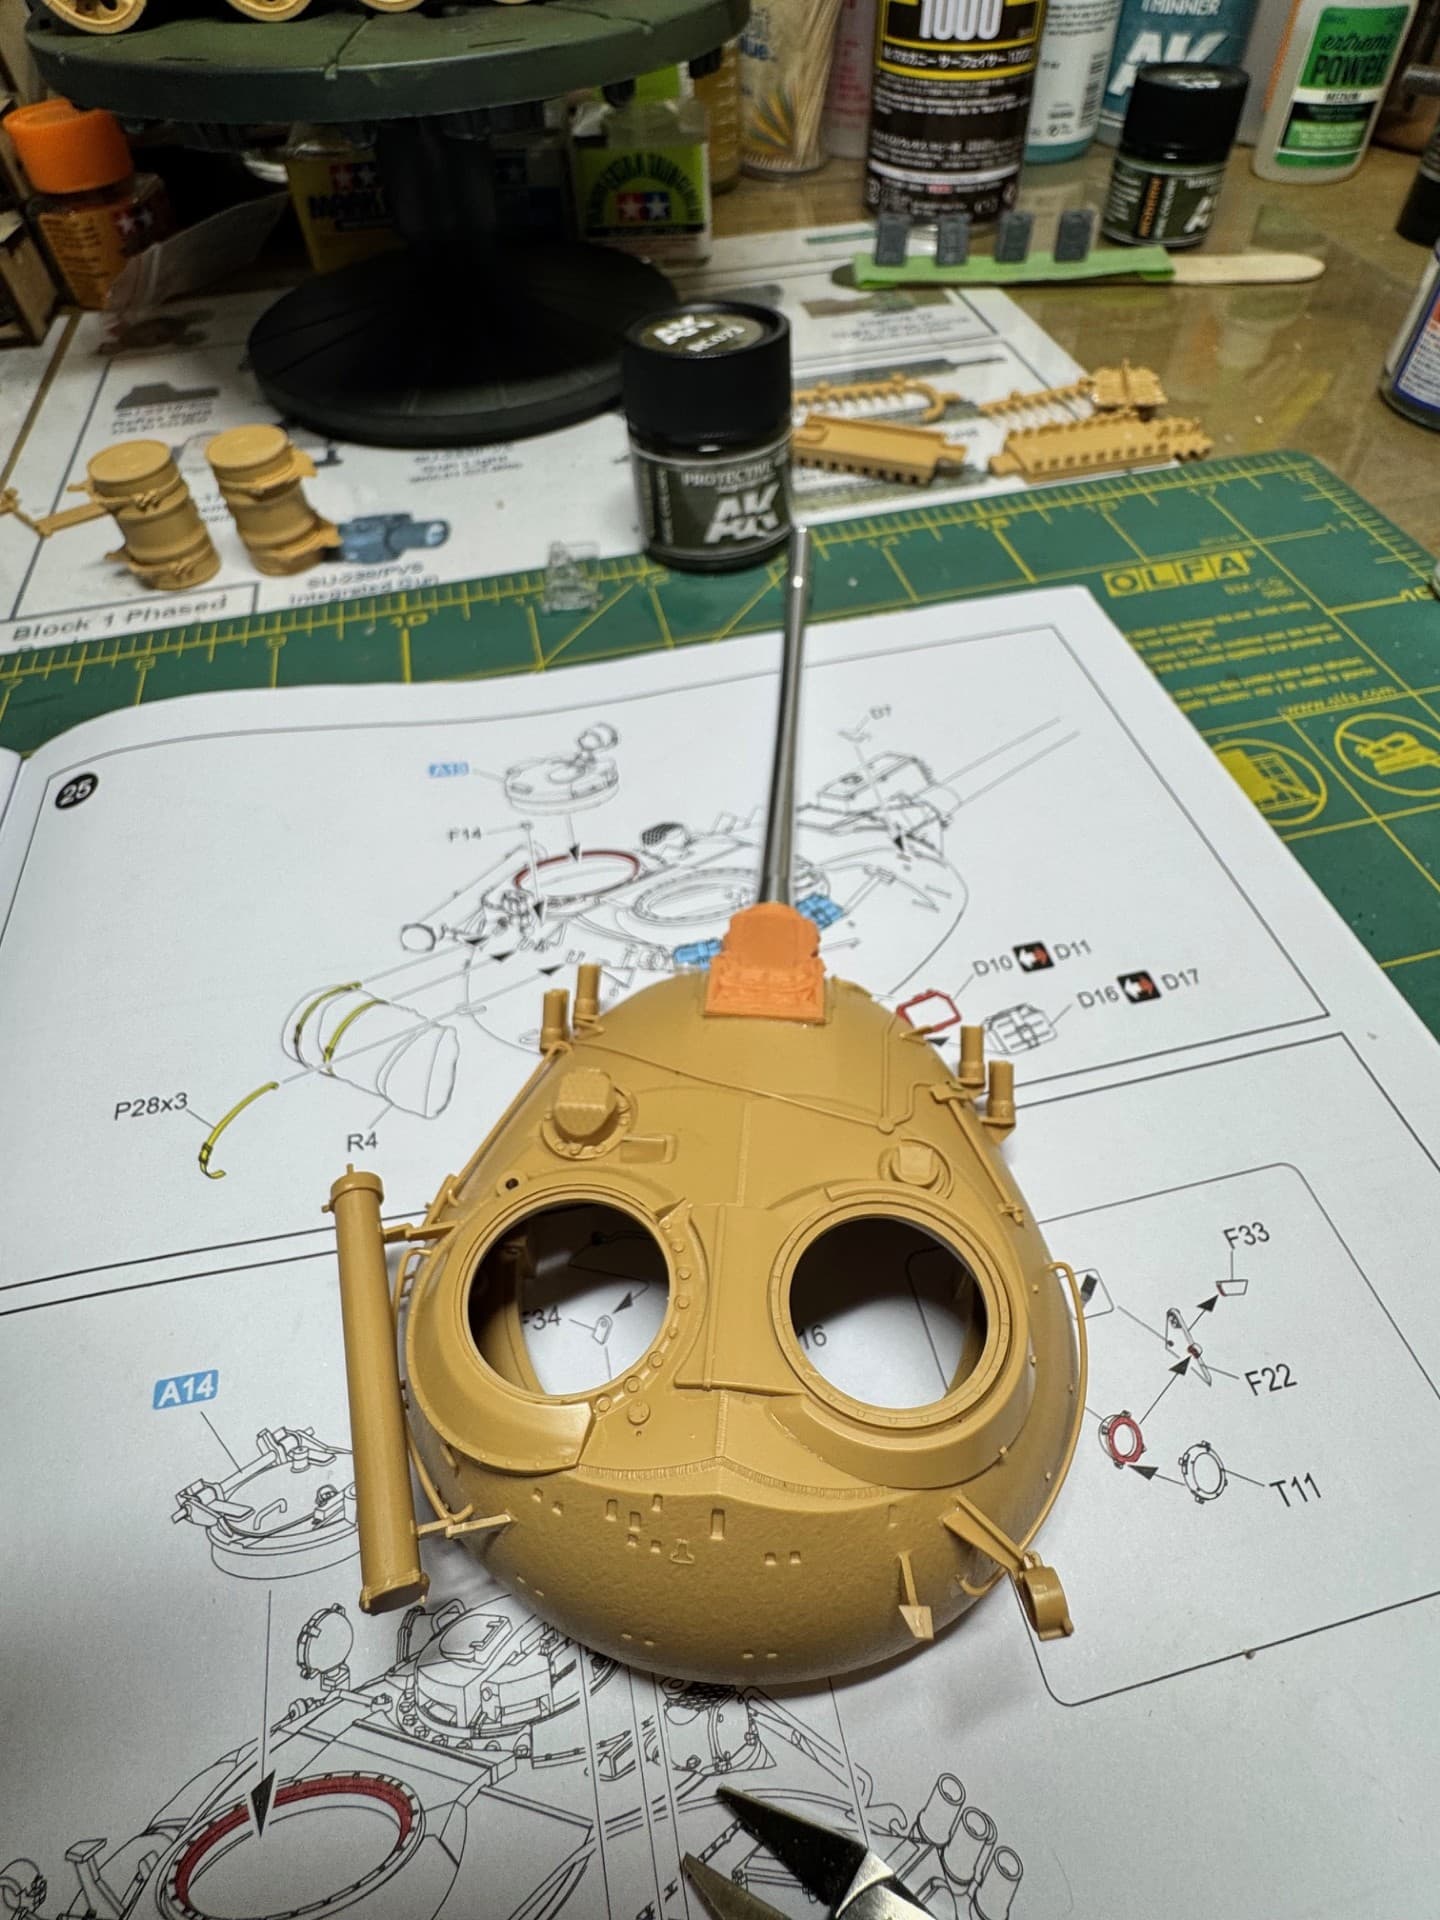
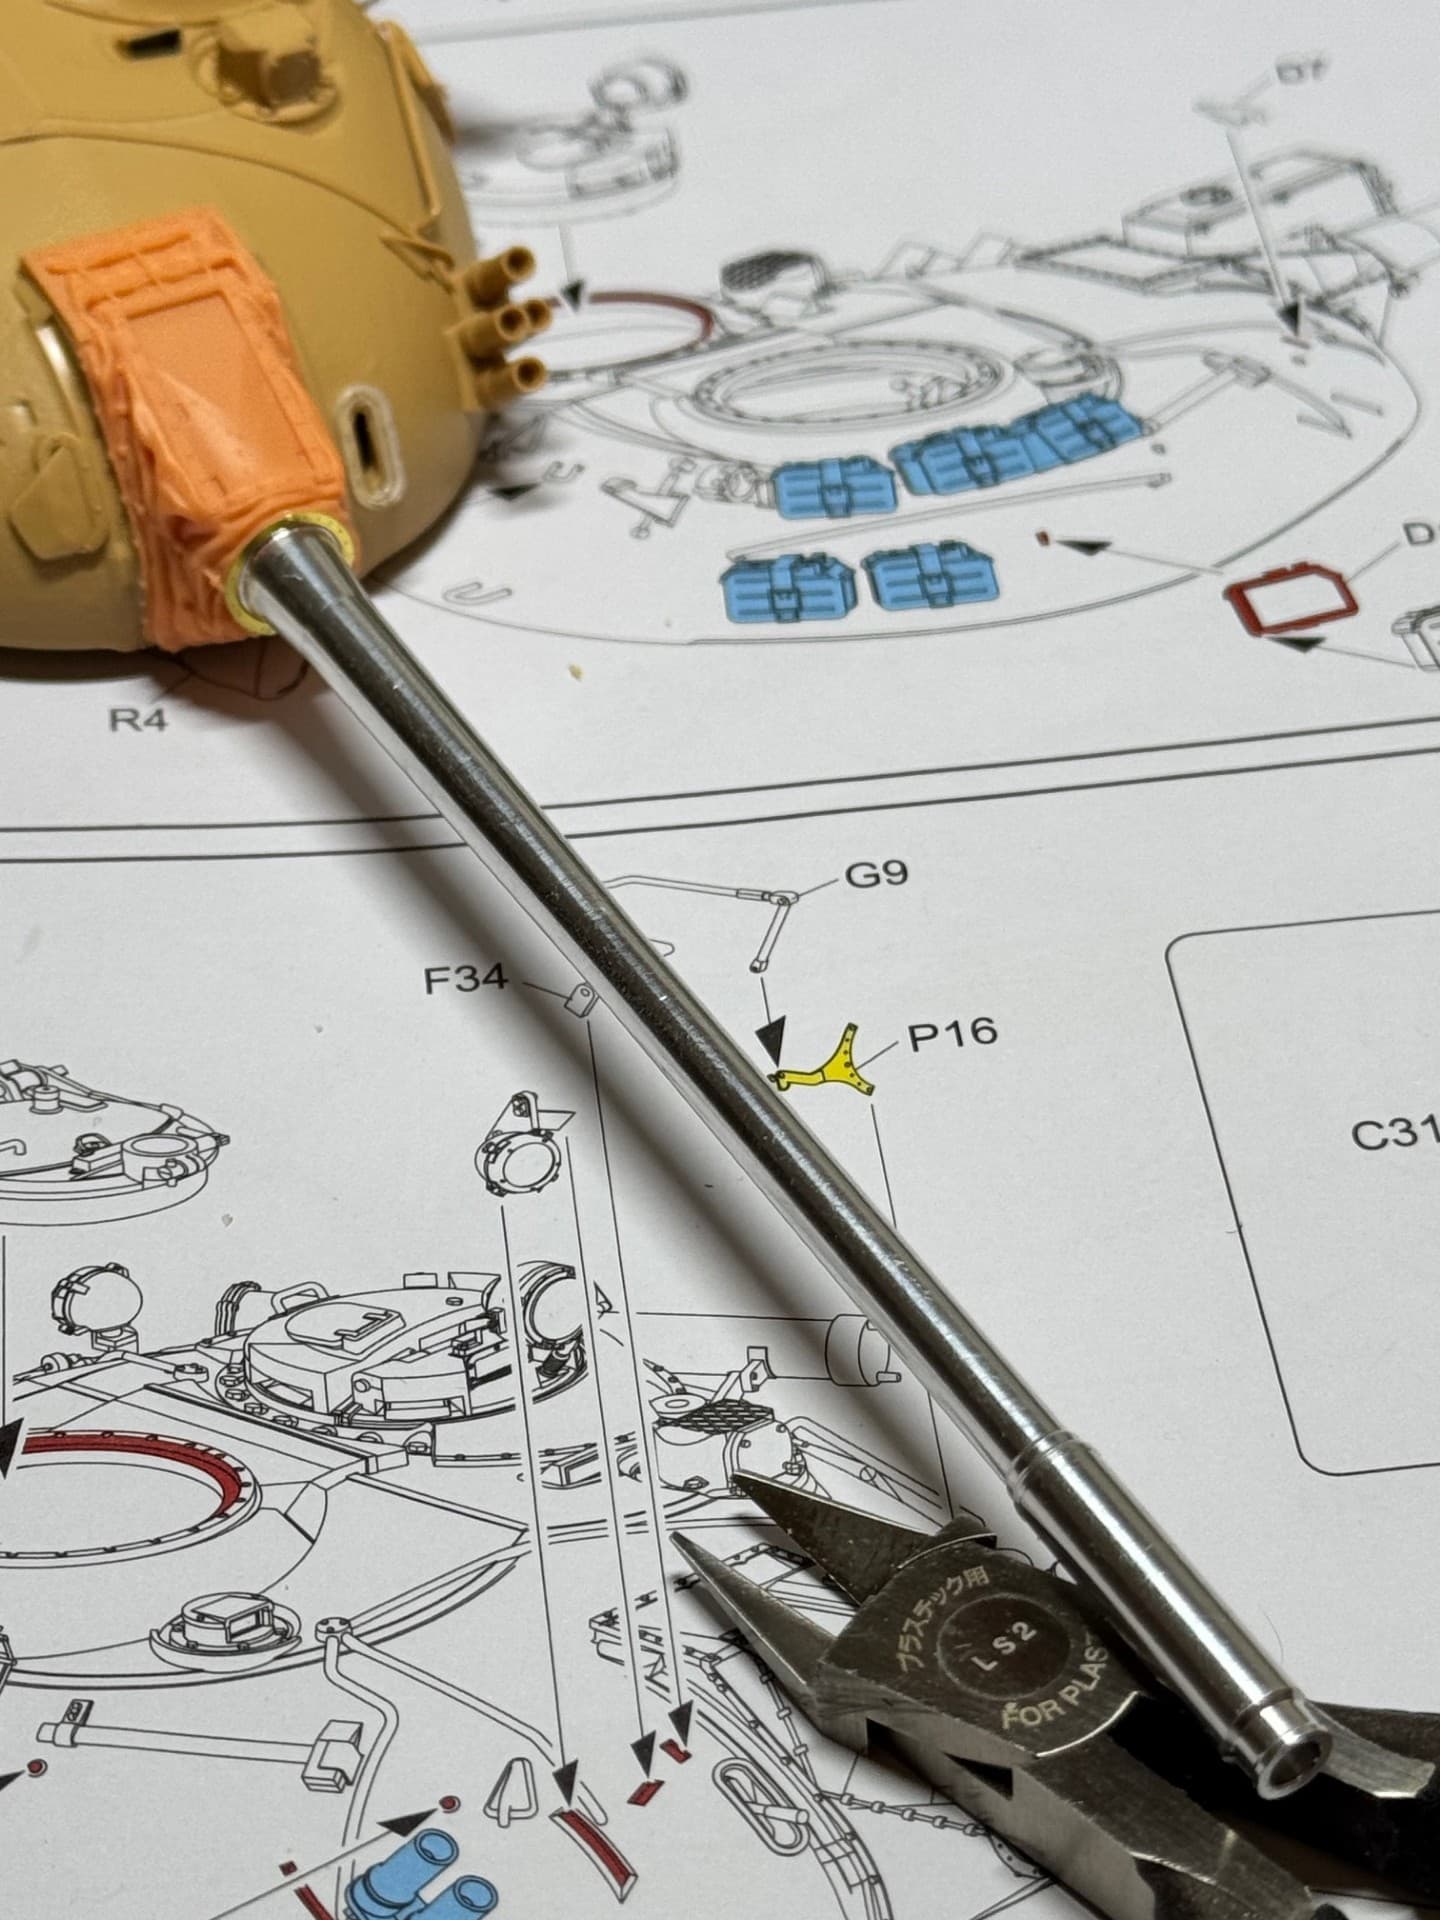
Back to my T-55 build. The hull is pretty much complete, minus a few details that will be added once everything is priumed and painted.


Now, focusing on the turret. Lots of little bits and bobs to go in, but so far, everything is going in as expected.
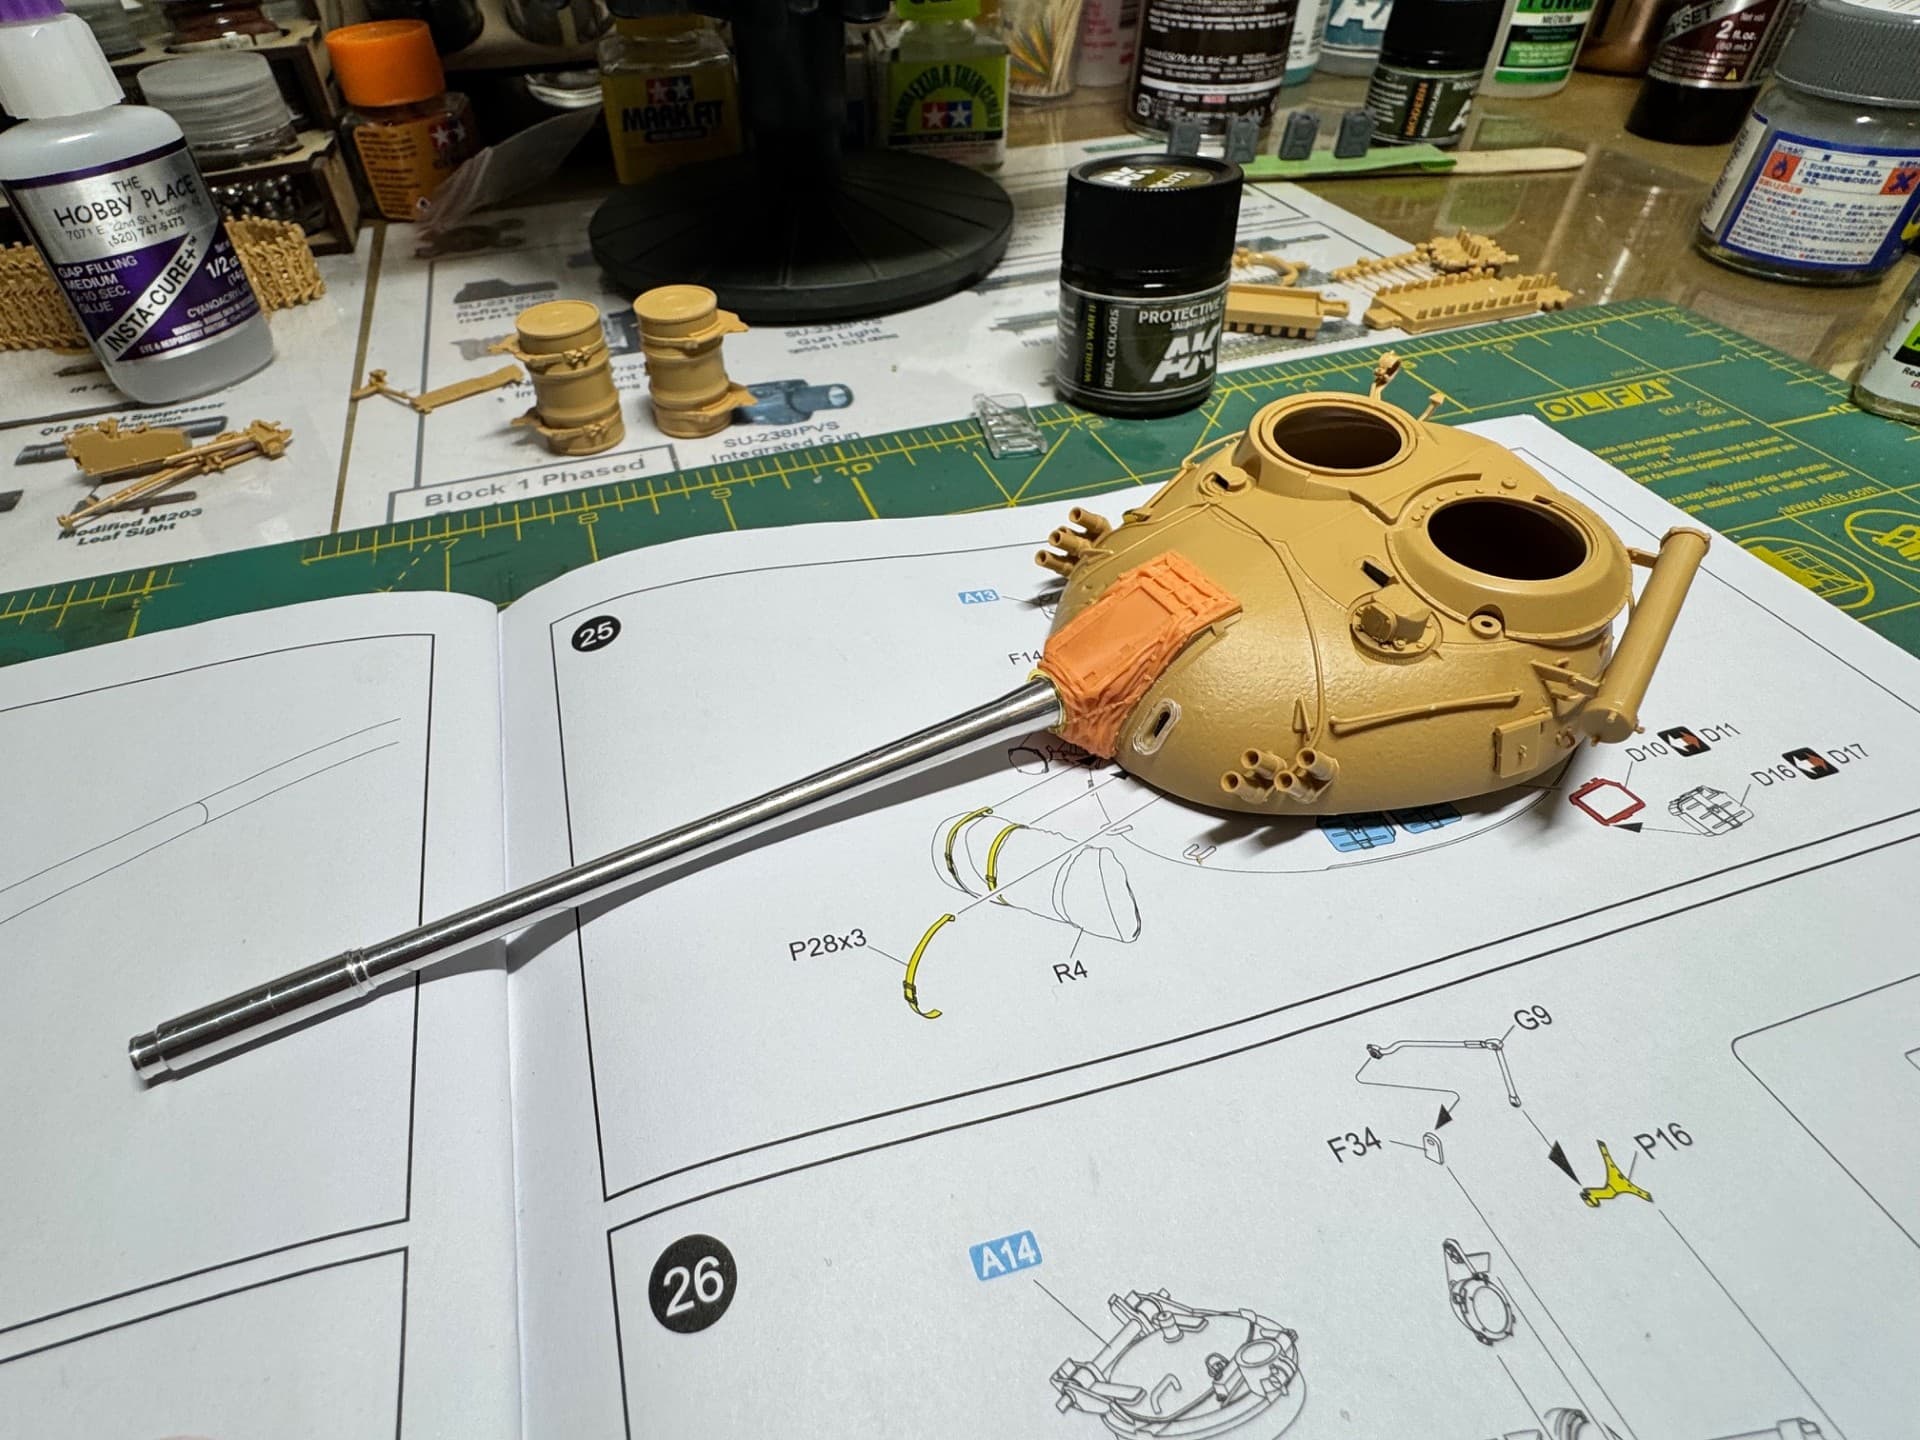
I really like the cast texture on the turret. Though i hade to drill some dimples on the turret, so I could glue the bars on both sodes of the turret (I installed 3 of the four ones so far).
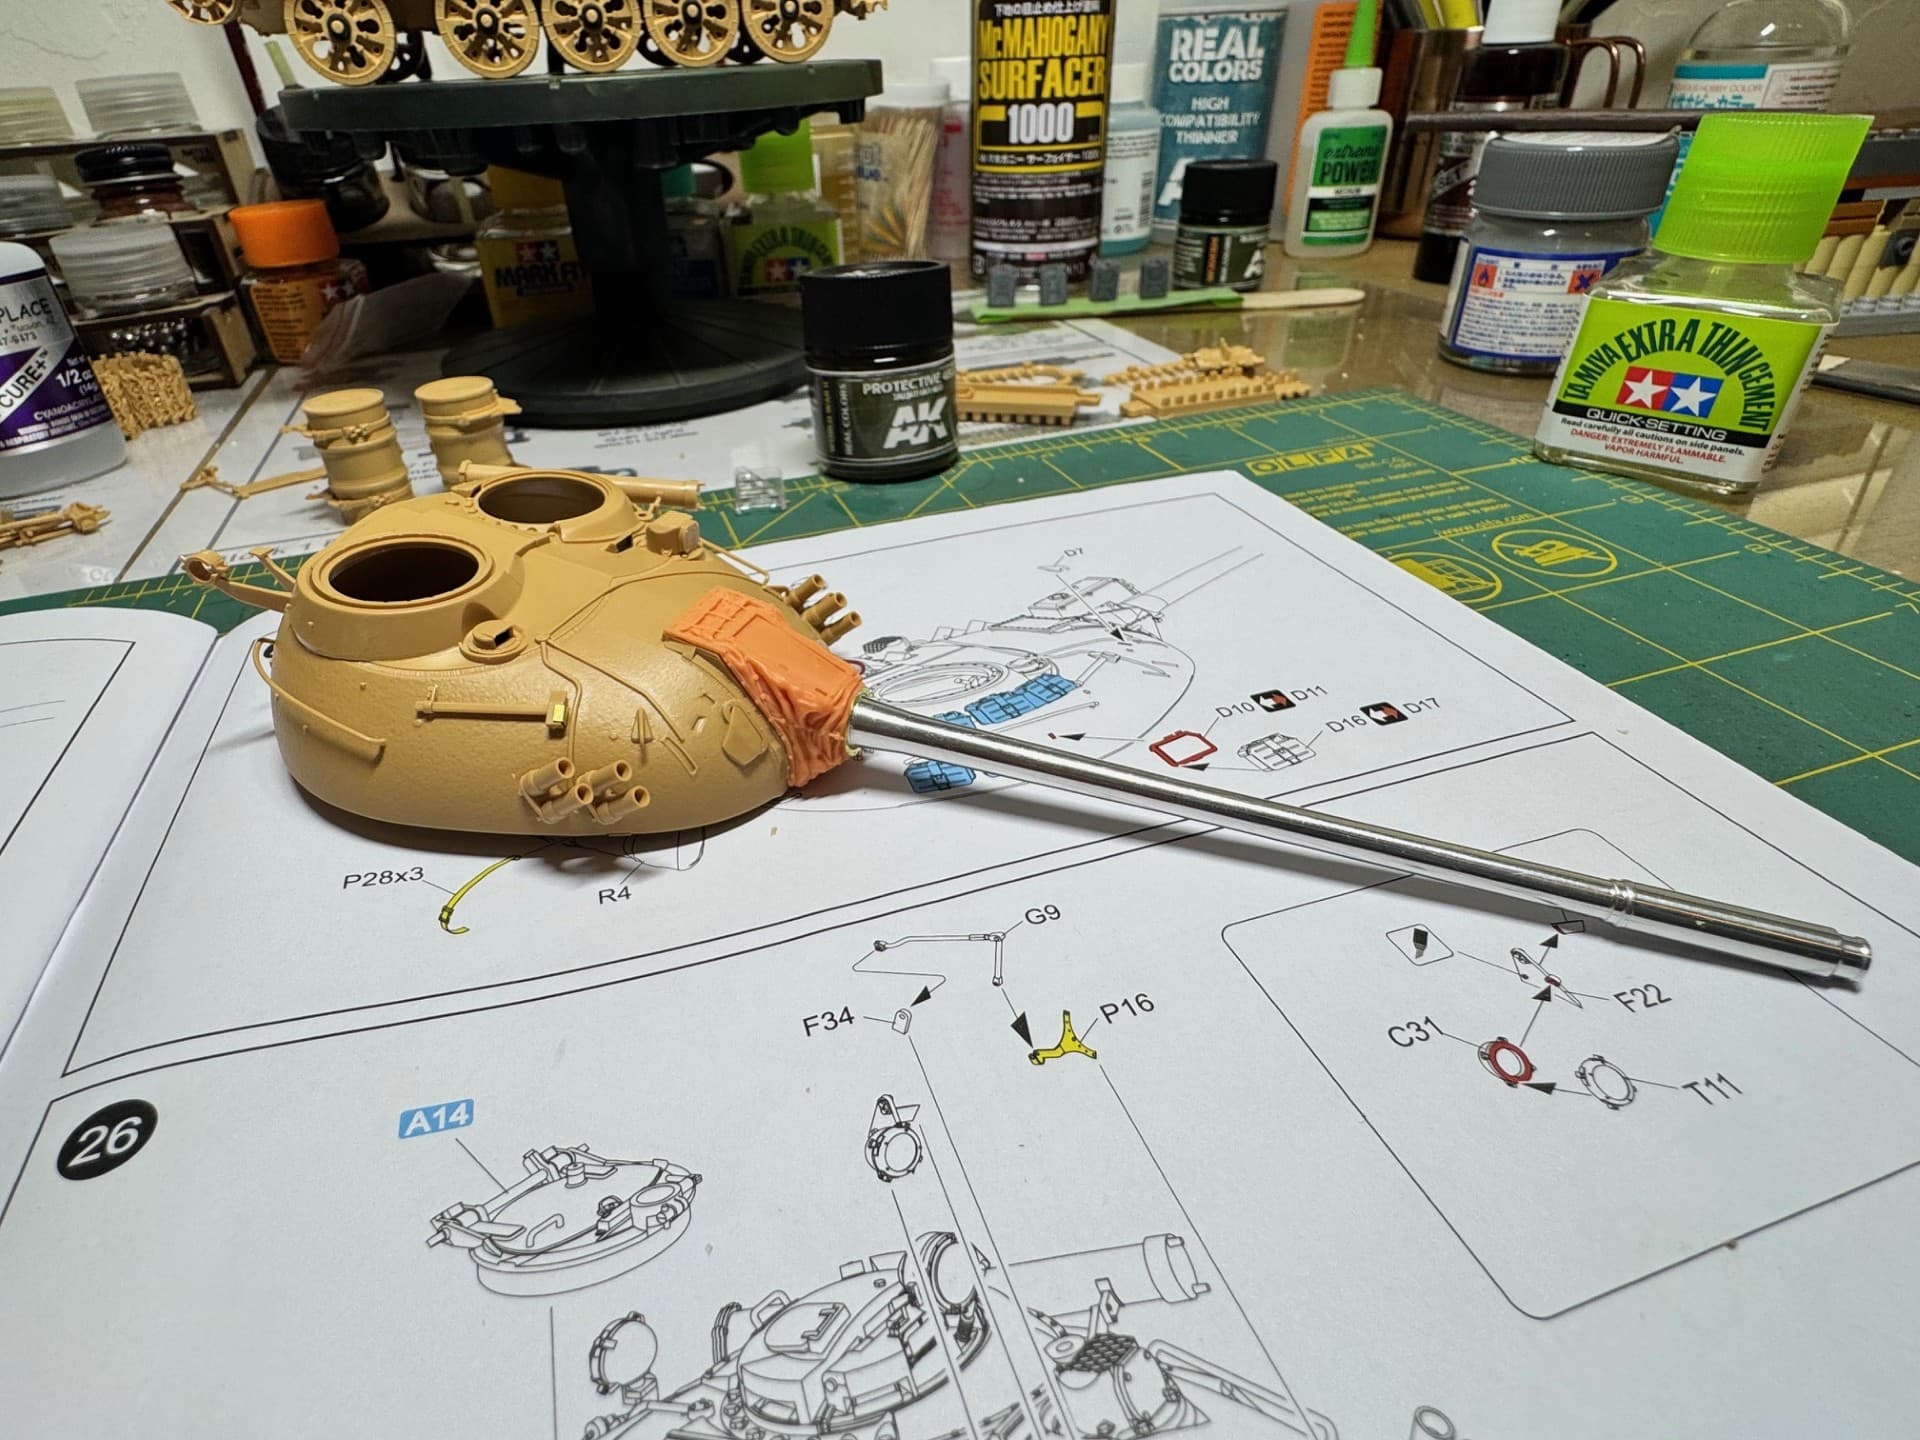
The kit provides you with options for the smoke launchers with or without the rubber covers on them; I went with the latter because they look nice like that.
The 3D printed canvas mantlet cover is a bit brittle, so attention should be taken while prying the reinforcements off. the aluminum barrel makes the turret a little front heavy, but once everything is glued in place, it should be sturdy. The kit barrel has elevation, but the mantlet cover prevents you from elevating the gun - i imagine on future releases, especially if they add an interior set to it, it will enable you to elevate the gun better.
14 Likes