A few tricks as seen here for making custom, straight or tapered leg, scale model ladders of various sizes and widths built exactly to your required specs:
. . .
2 Likes
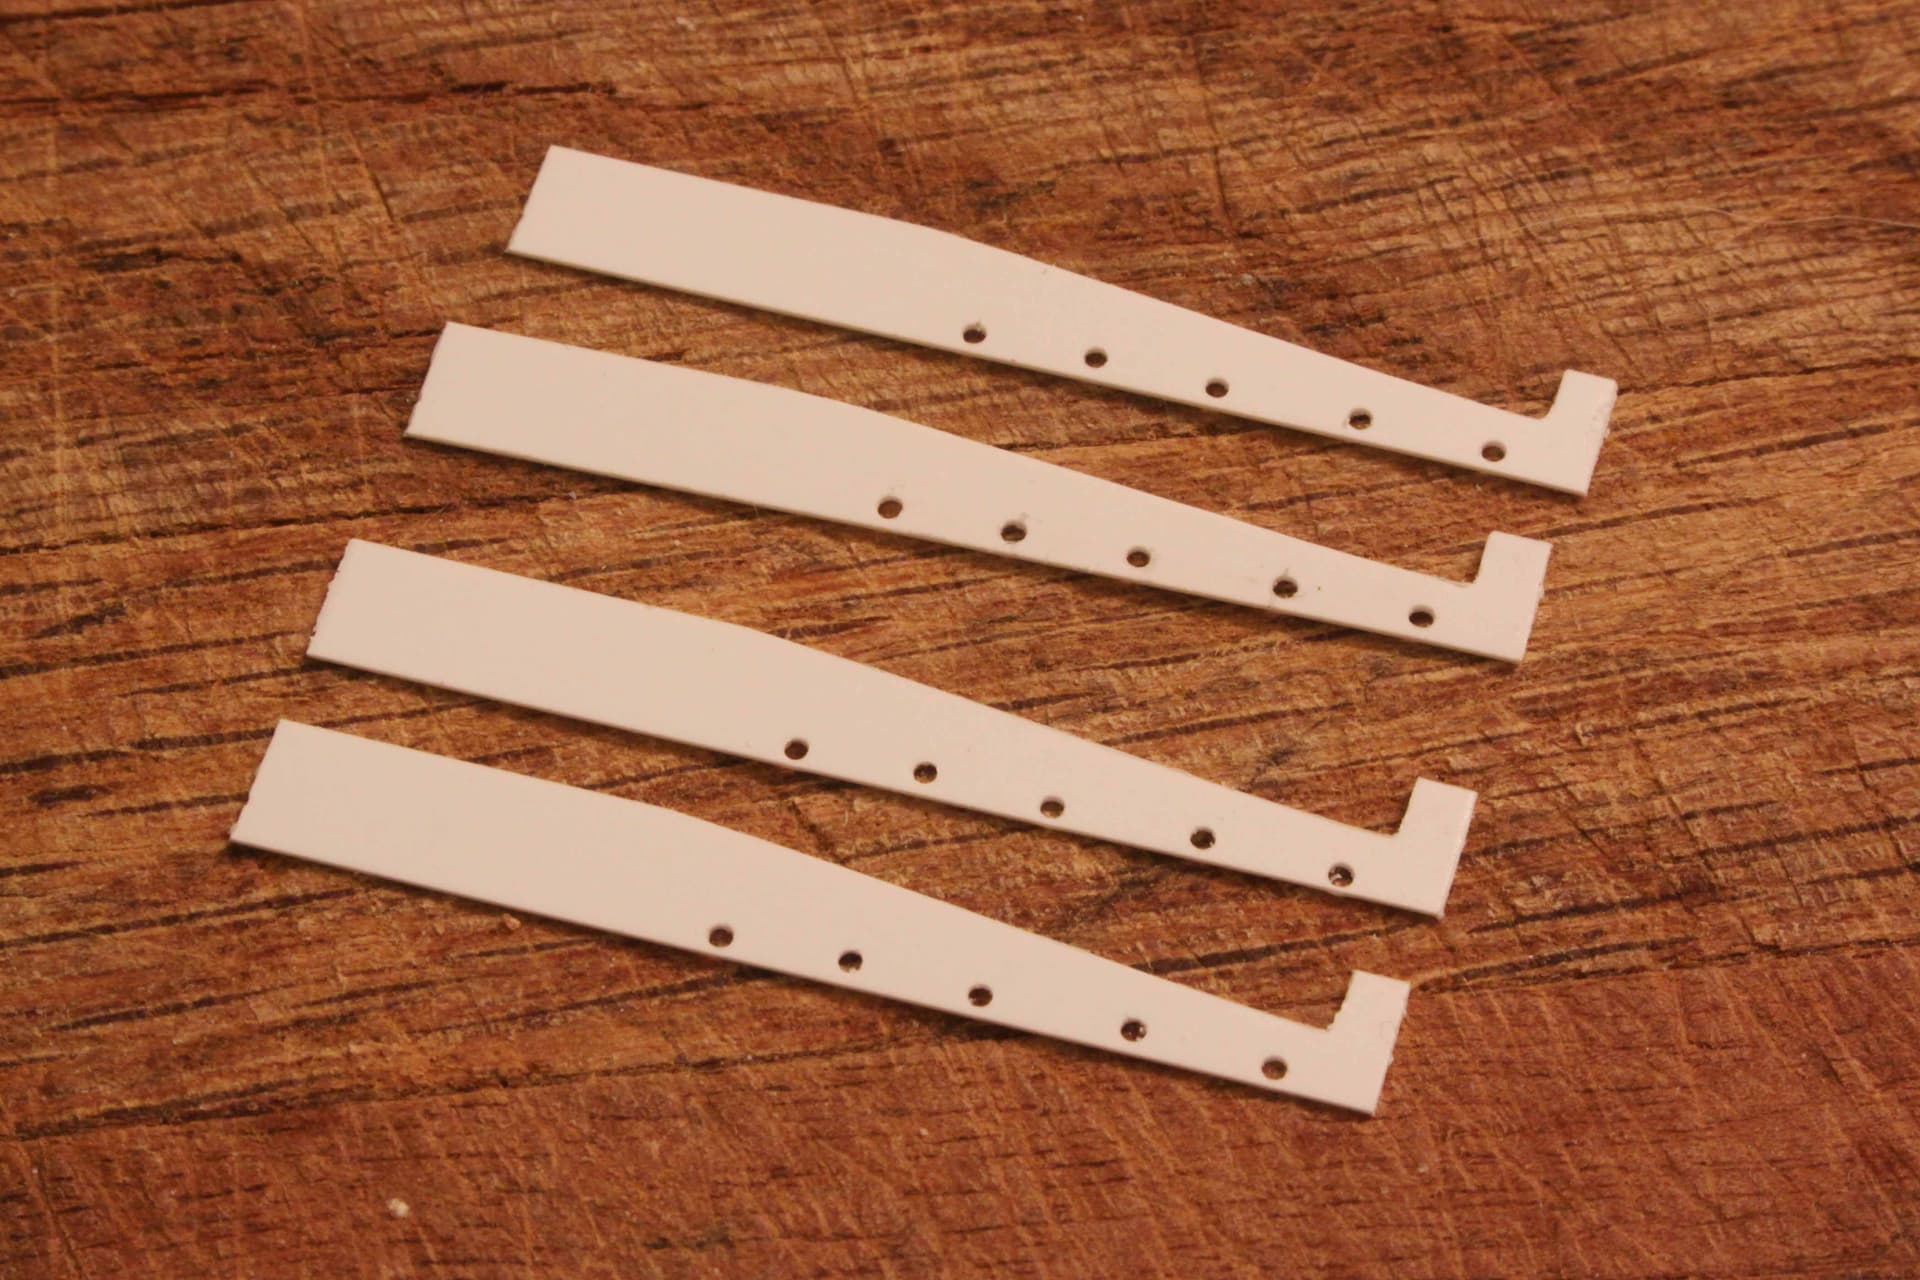
- Start out with the desired size of vertical strut legs you will want for your finished ladder but cut them overly long.
-
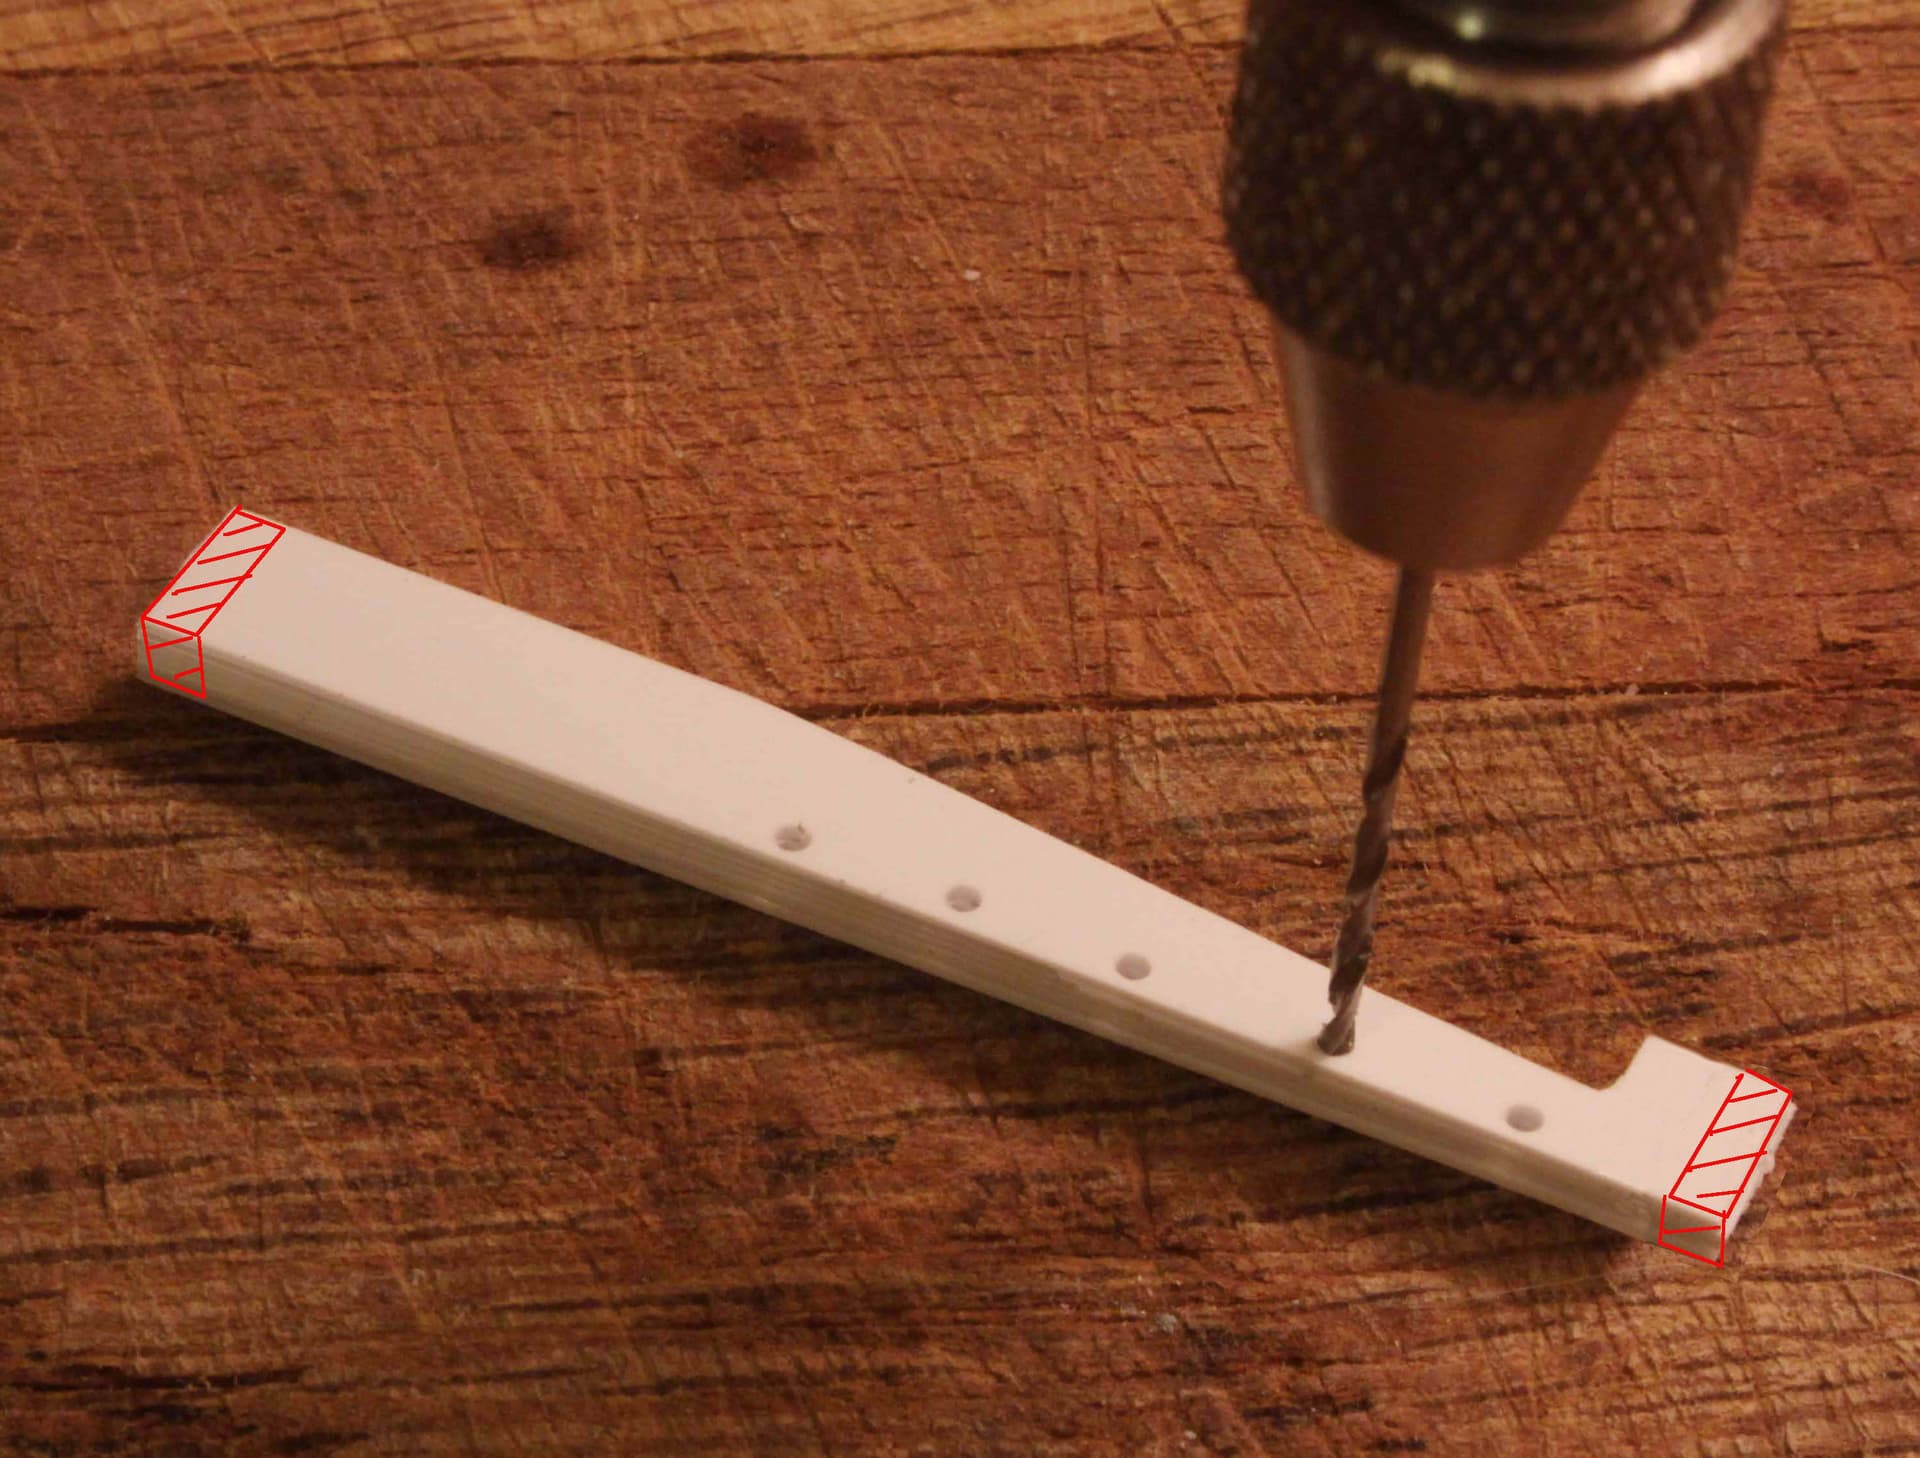
Glue JUST the left and right most tip ends of the struts together back to back.* (Red indicates glue area.)*
-
Using a scale rule or set of dividers, mark the uniform spacing of the ladder rungs you intend to make. (Dividers are really better for this job! They let you adjust the uniform rung spacing to produce a ladder of exactly the desired finished length.)
Typical Draftsmen’s Dividers

-
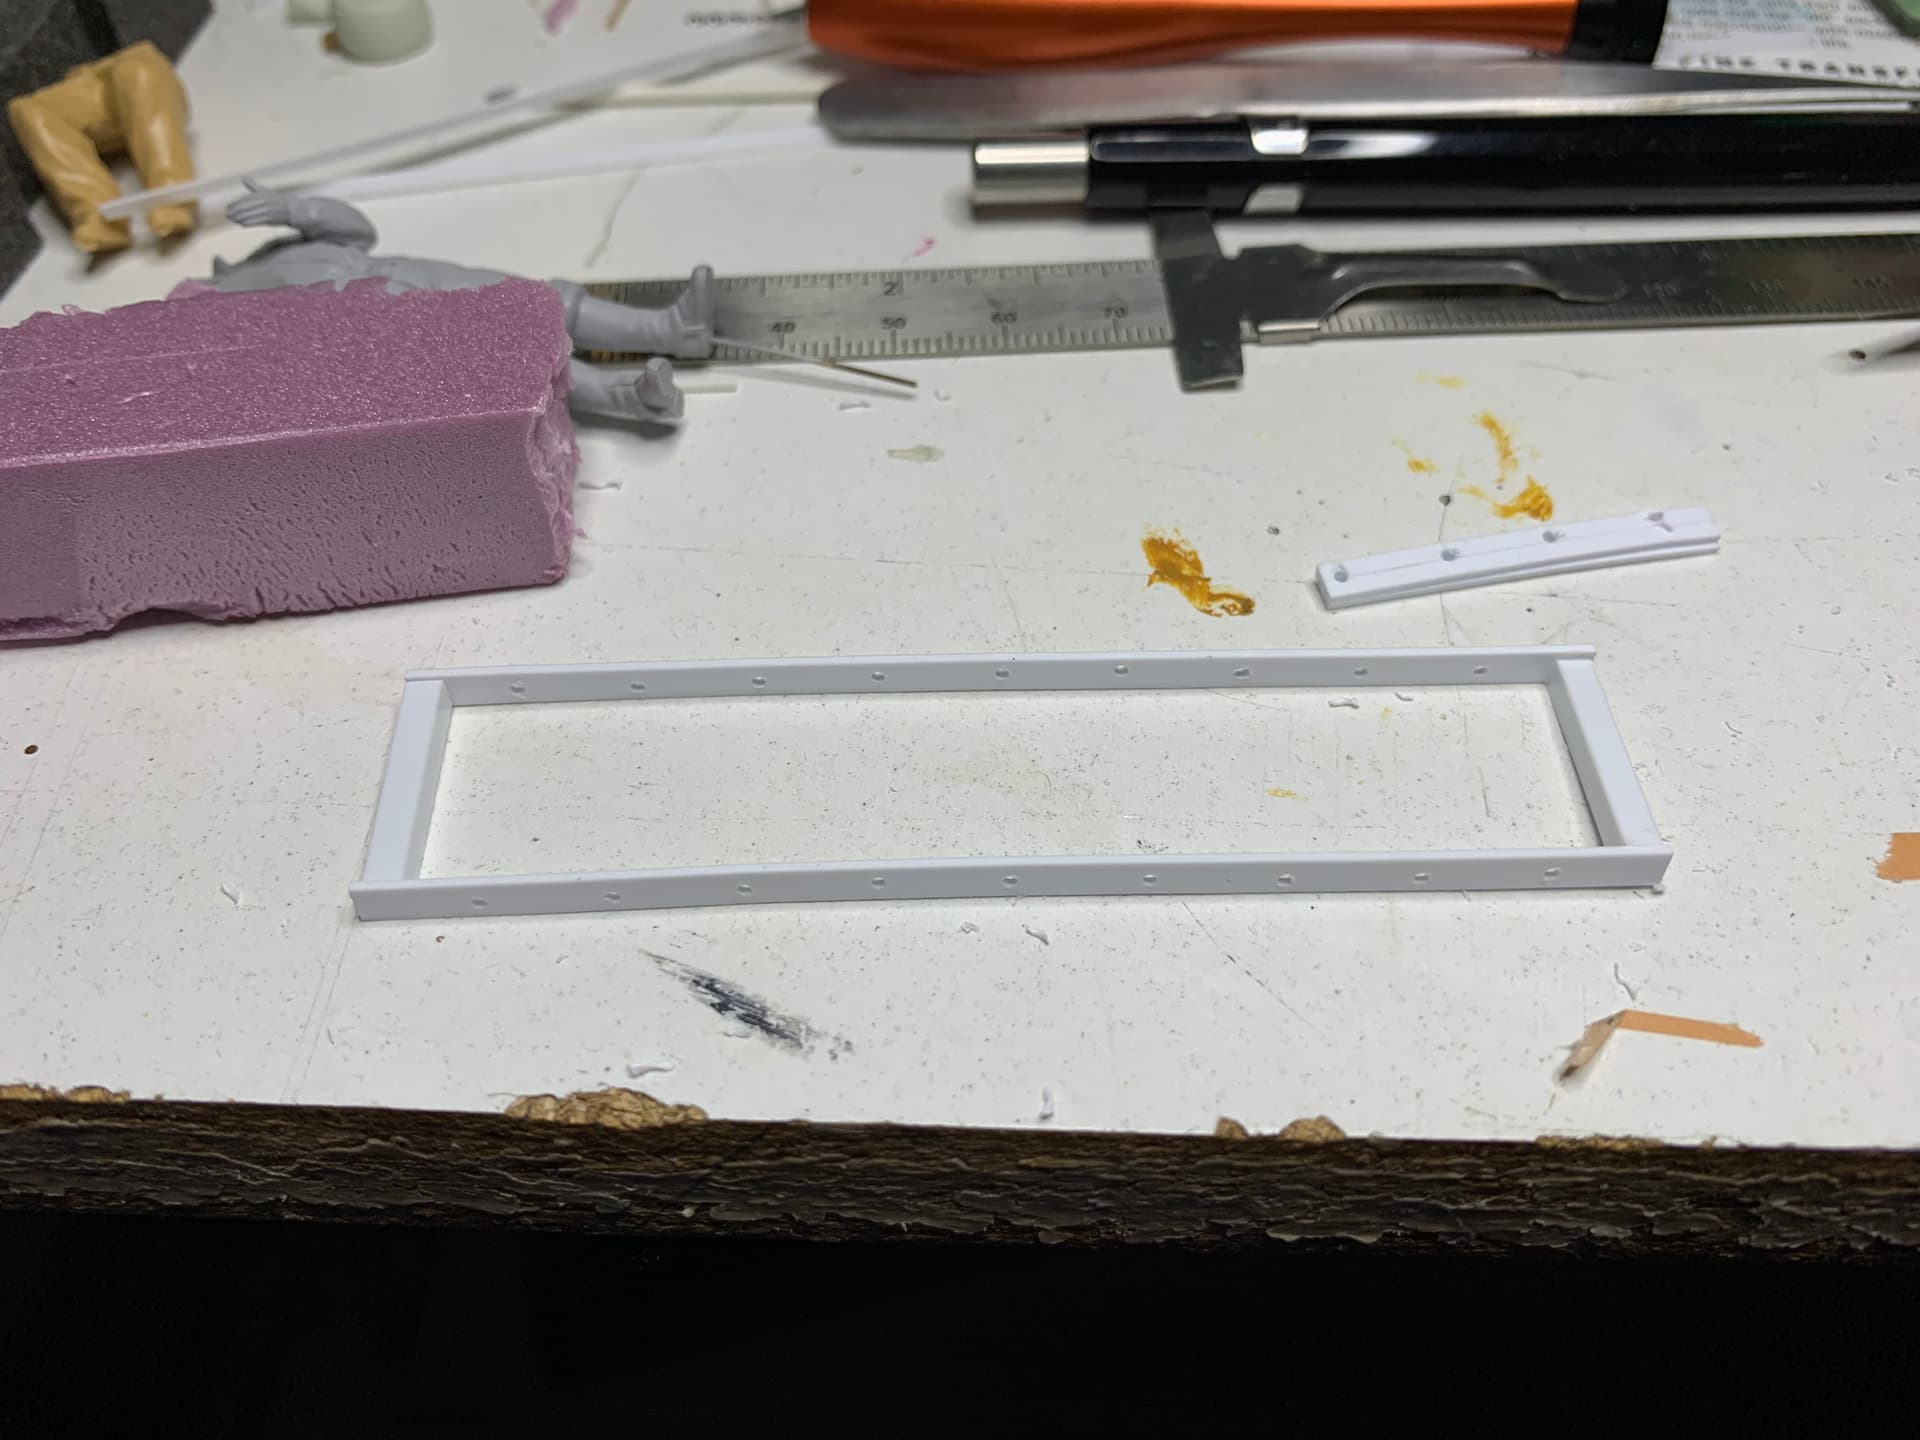
Drill the holes for the ladder rungs through BOTH leg struts at the same time so you insure that the holes are aligned with each other and have uniform vertical spacing. (See Photo Above)
-
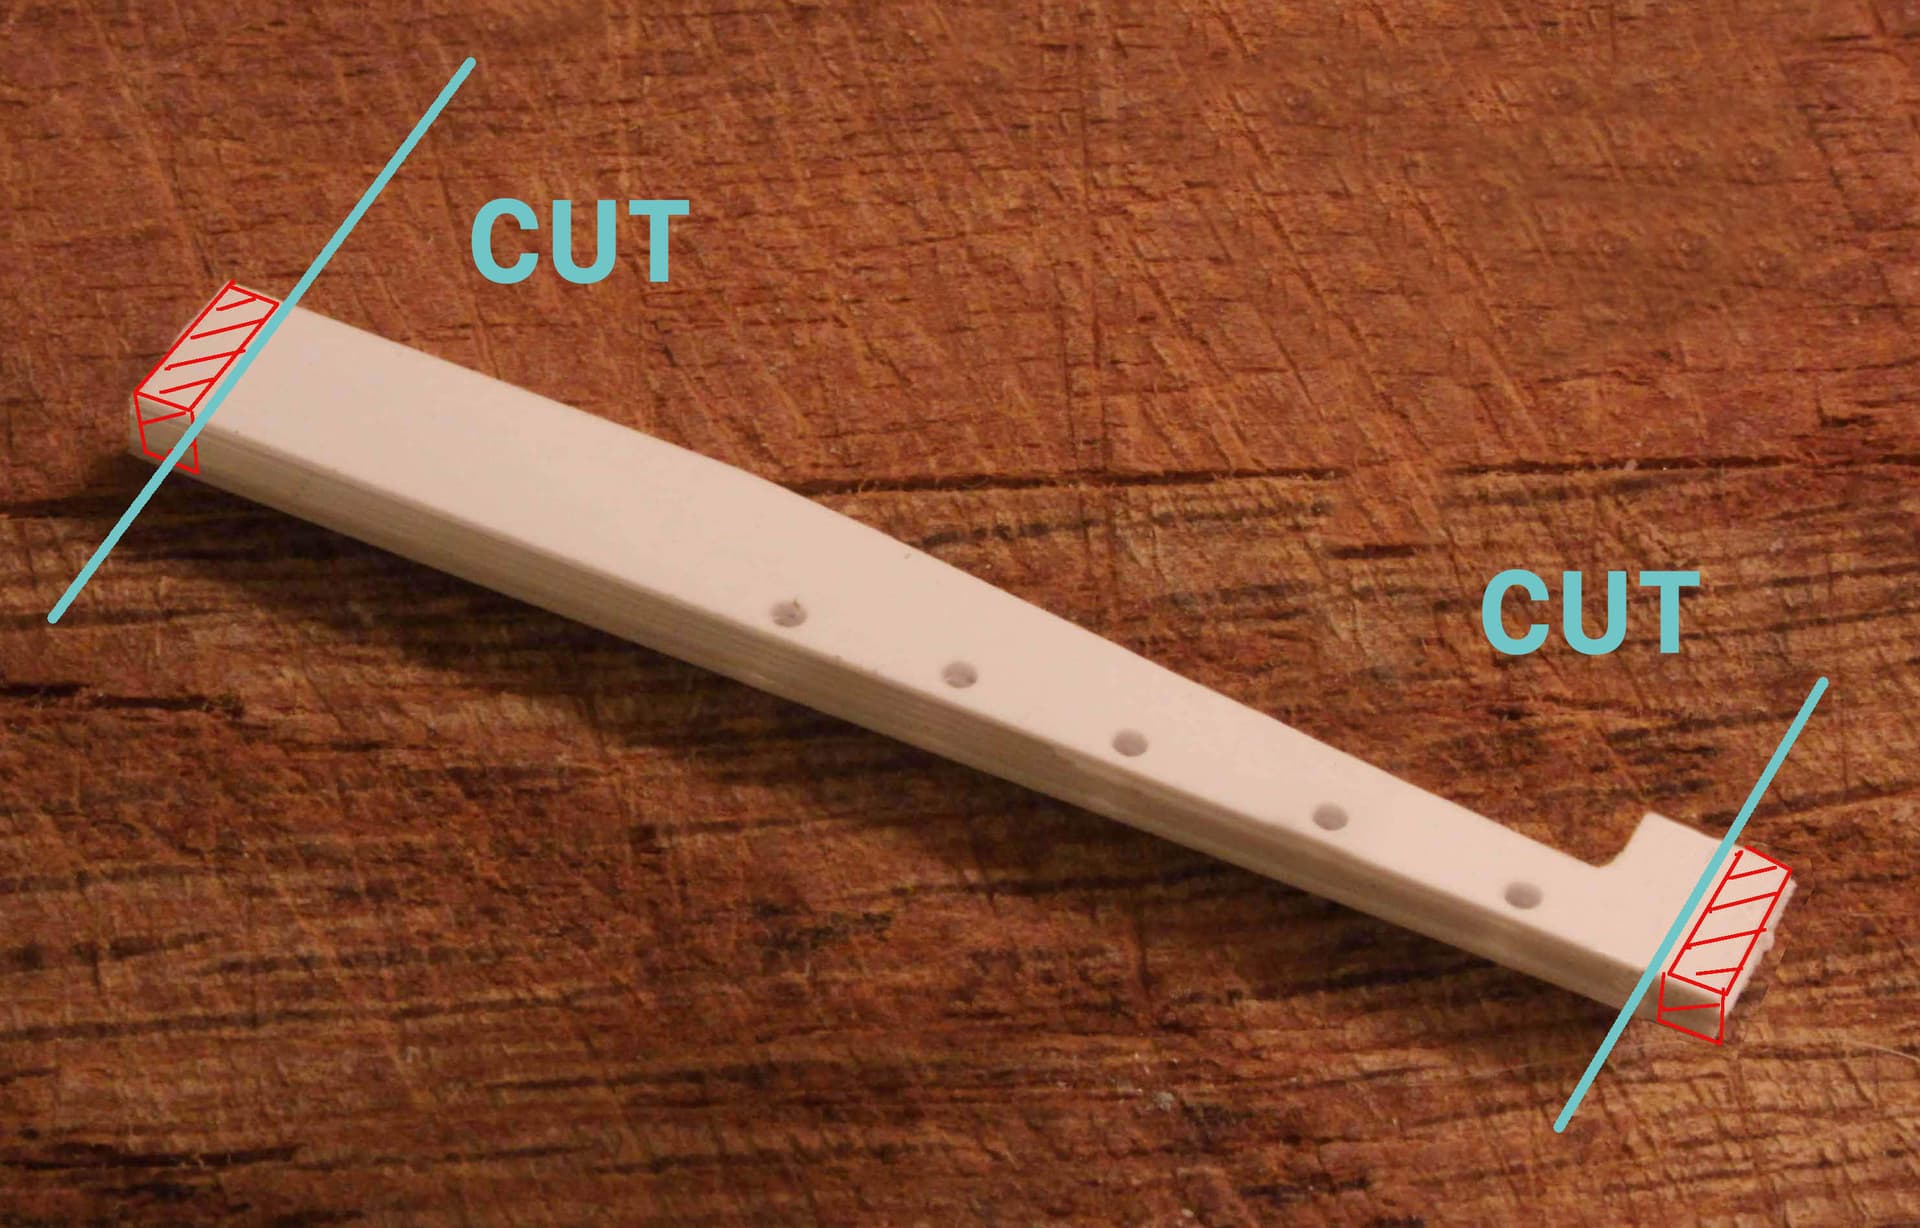
Now separate the ladder struts by cutting off the glued ends. (CUT; don’t just peal the glued struts apart ~ there is a reason for this that will become obvious later.)
3 Likes
Great technique for keeping everything even and aligned. 
Nice tip. Thank you
Thanks guys
___________________
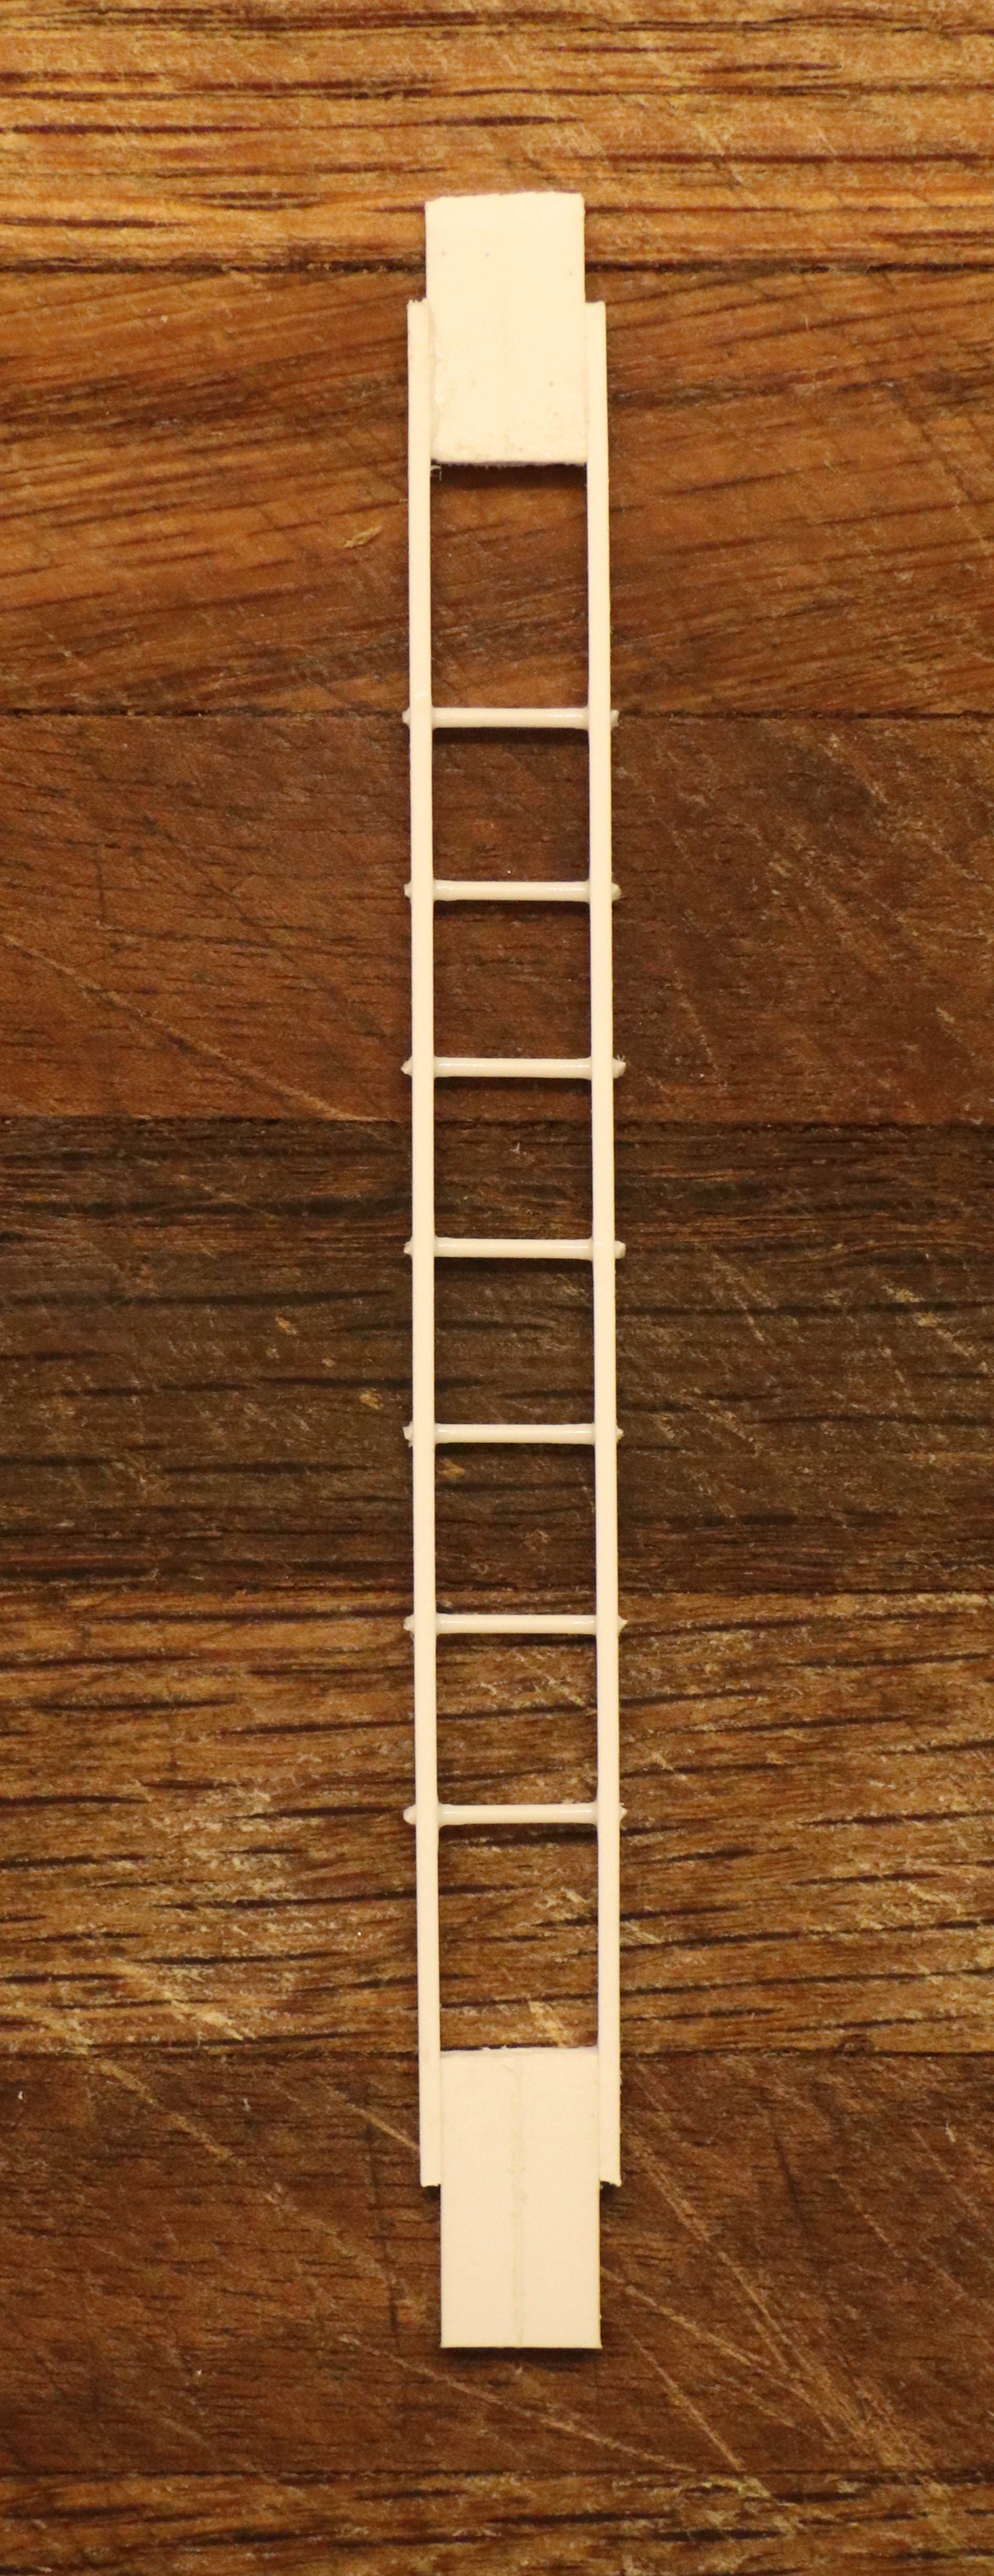
Cutting the ends off allows you to maintain a uniform distance between the bottom ladder rung and the current ends of the vertical struts in order to keep everything aligned so everything about the ladder can remain square later on.
- How cut spacers that will represent the desired width of the ladder you are making.
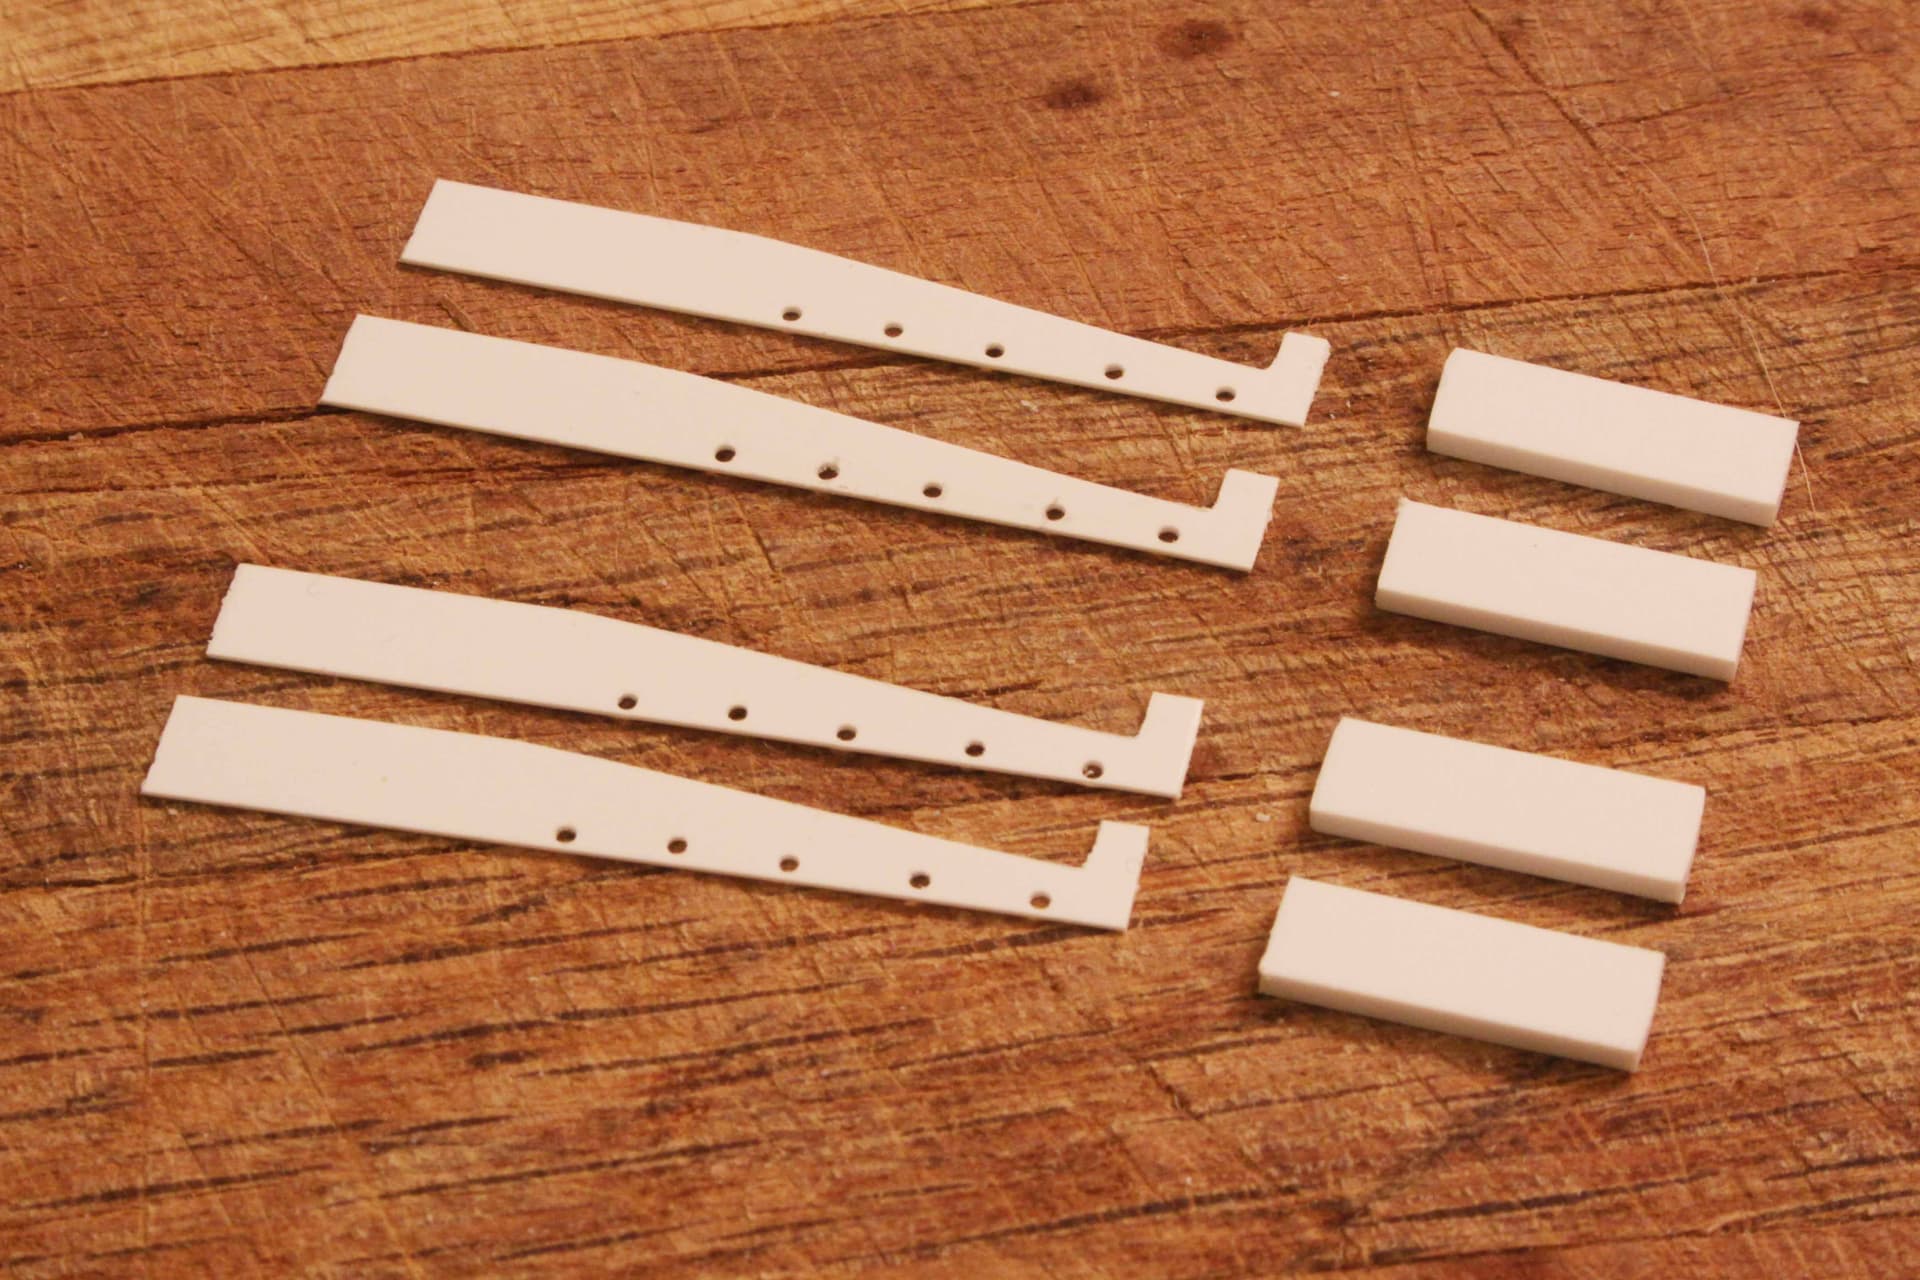
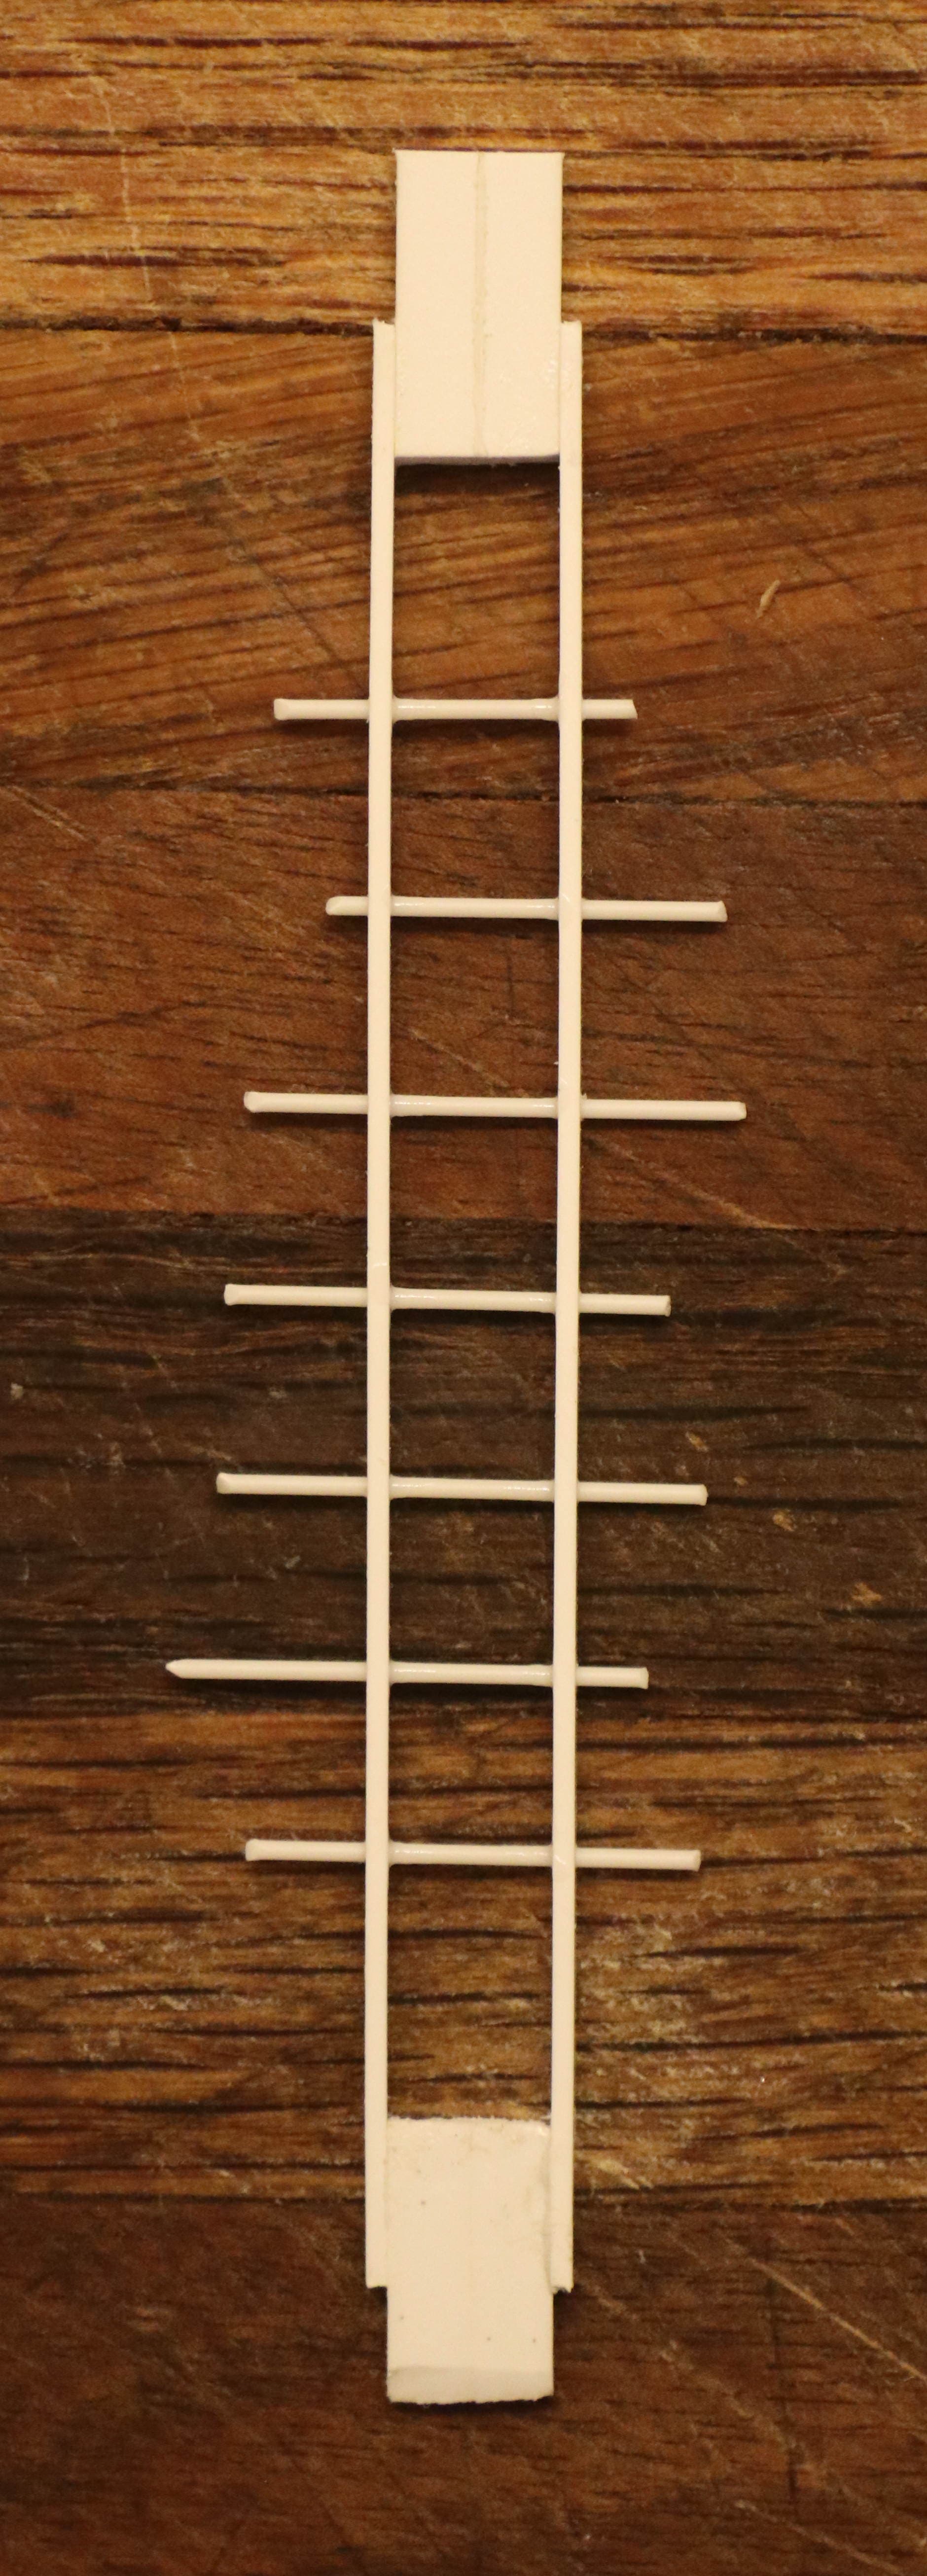
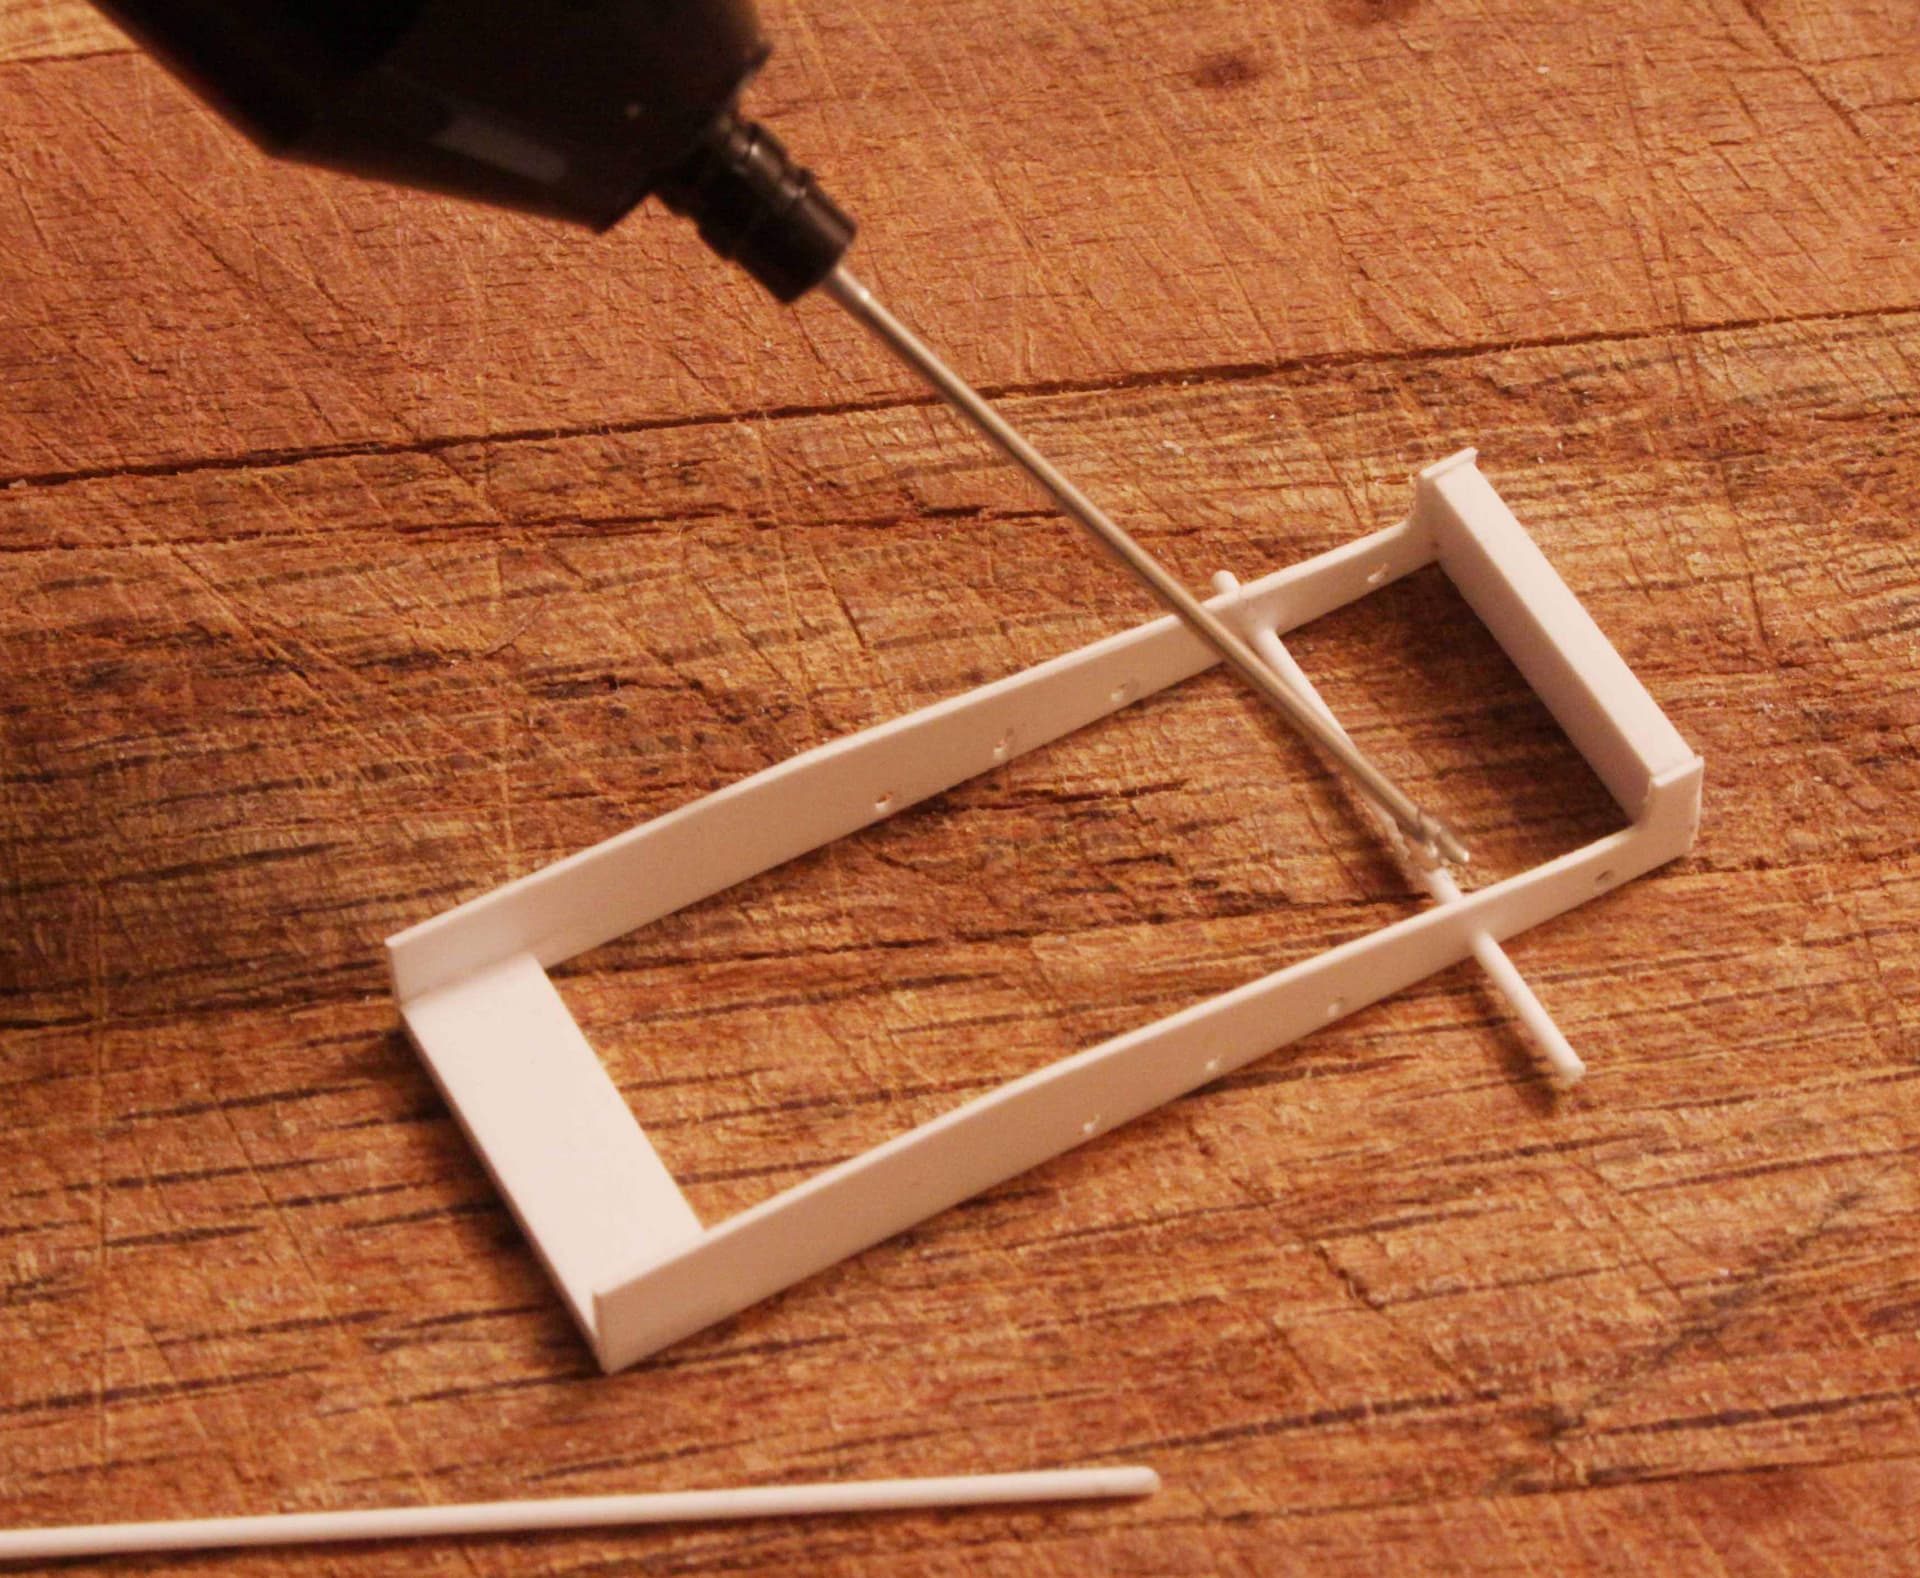
- Glue your spacers in with the whole assembly up against a 90 degree carpenter’s square or any thing you know will give you a square frame. Once the spacers are dry and everything is still square you can then start inserting the round rods to make the individual ladder rungs and gluing them in as well.
3 Likes
-
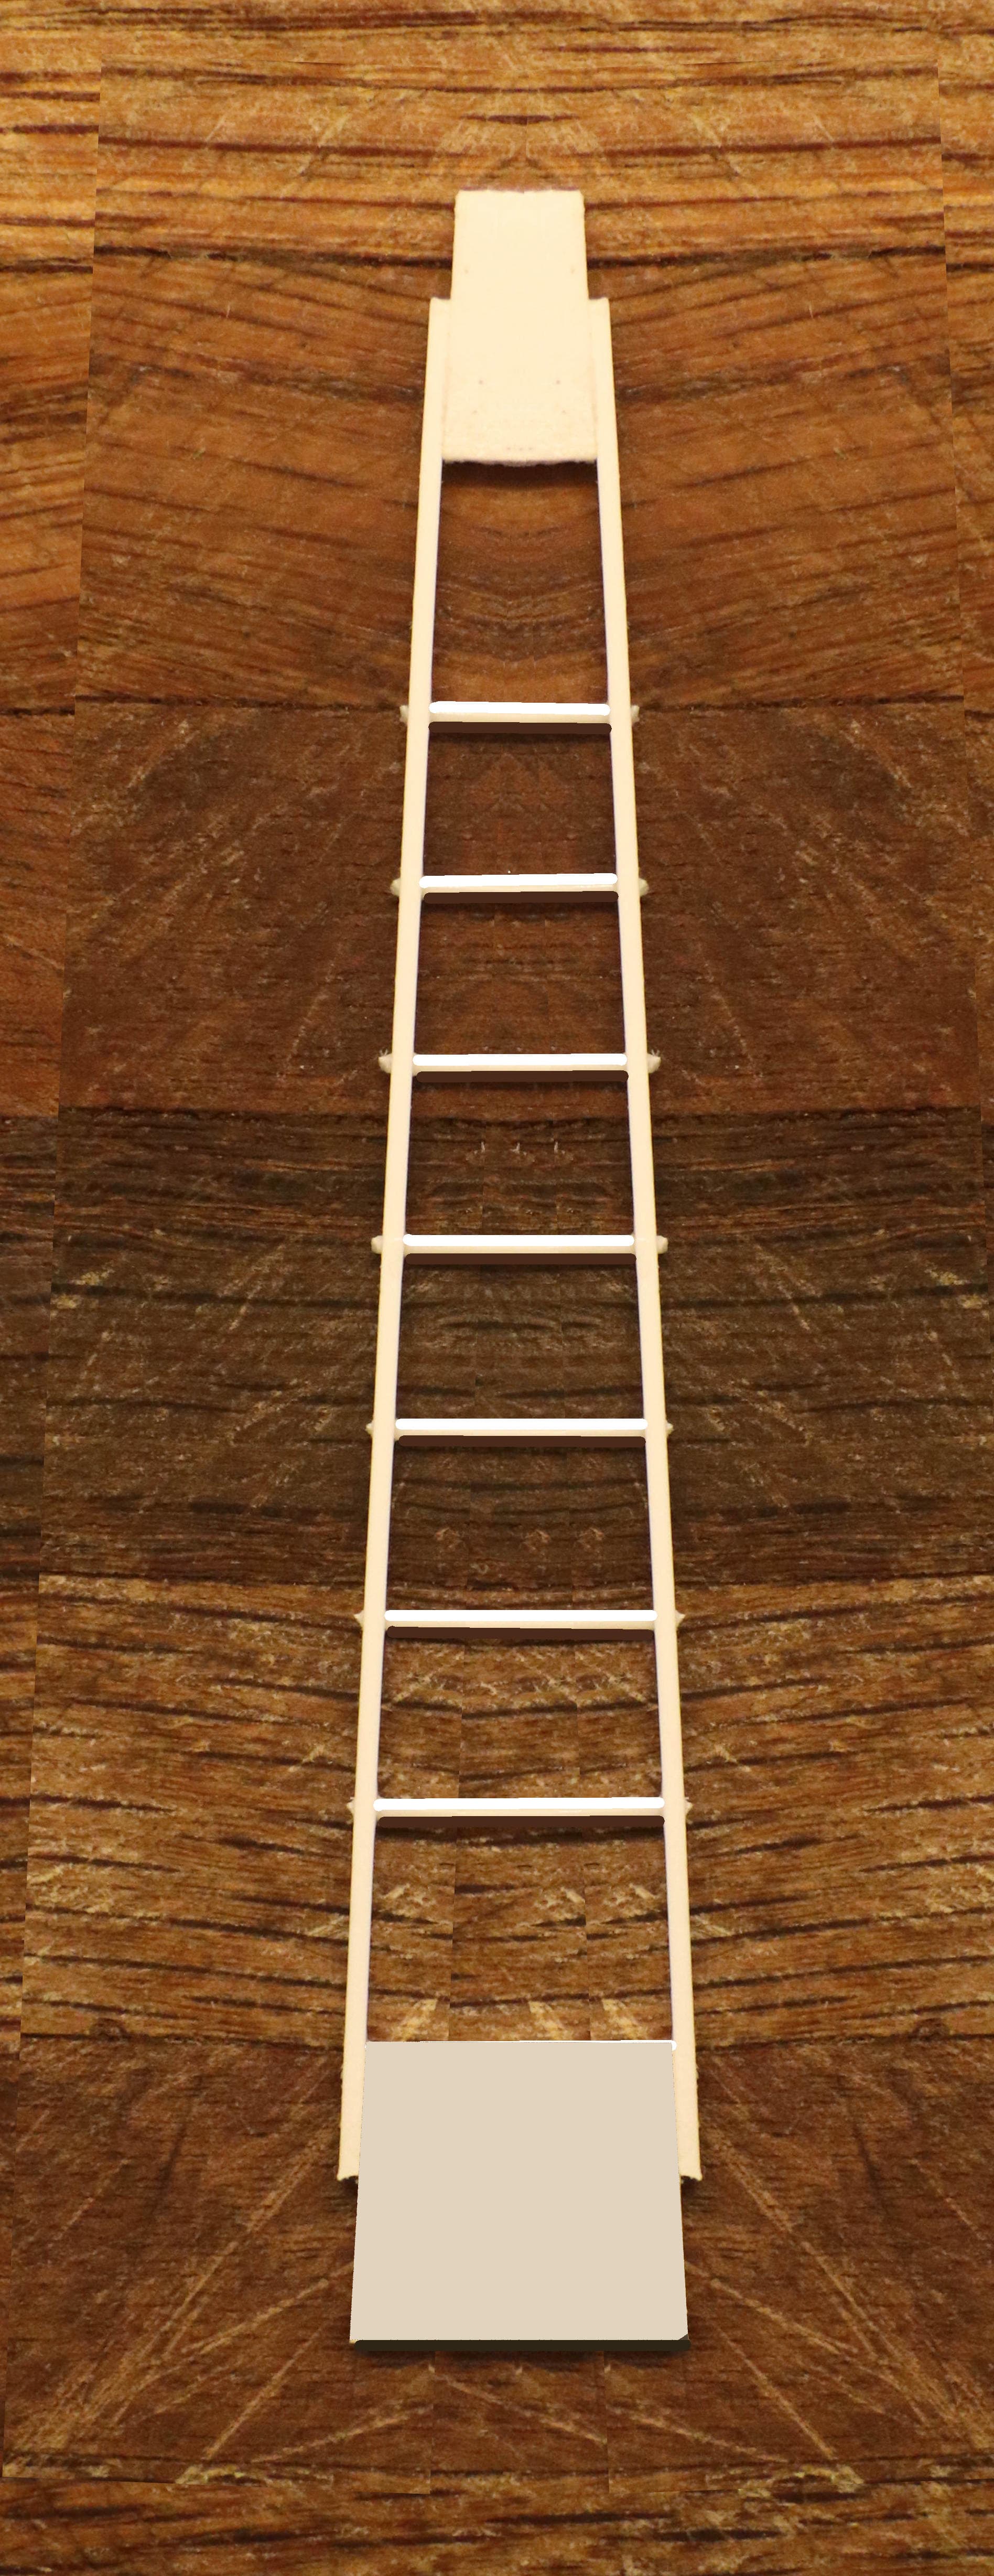
Now trim the outer ends of each ladder rung off. (I suggest leaving just a little dimple of the rung out past the side of the strut to represent the bolt head or spot weld holding the whole assembly together,)
-
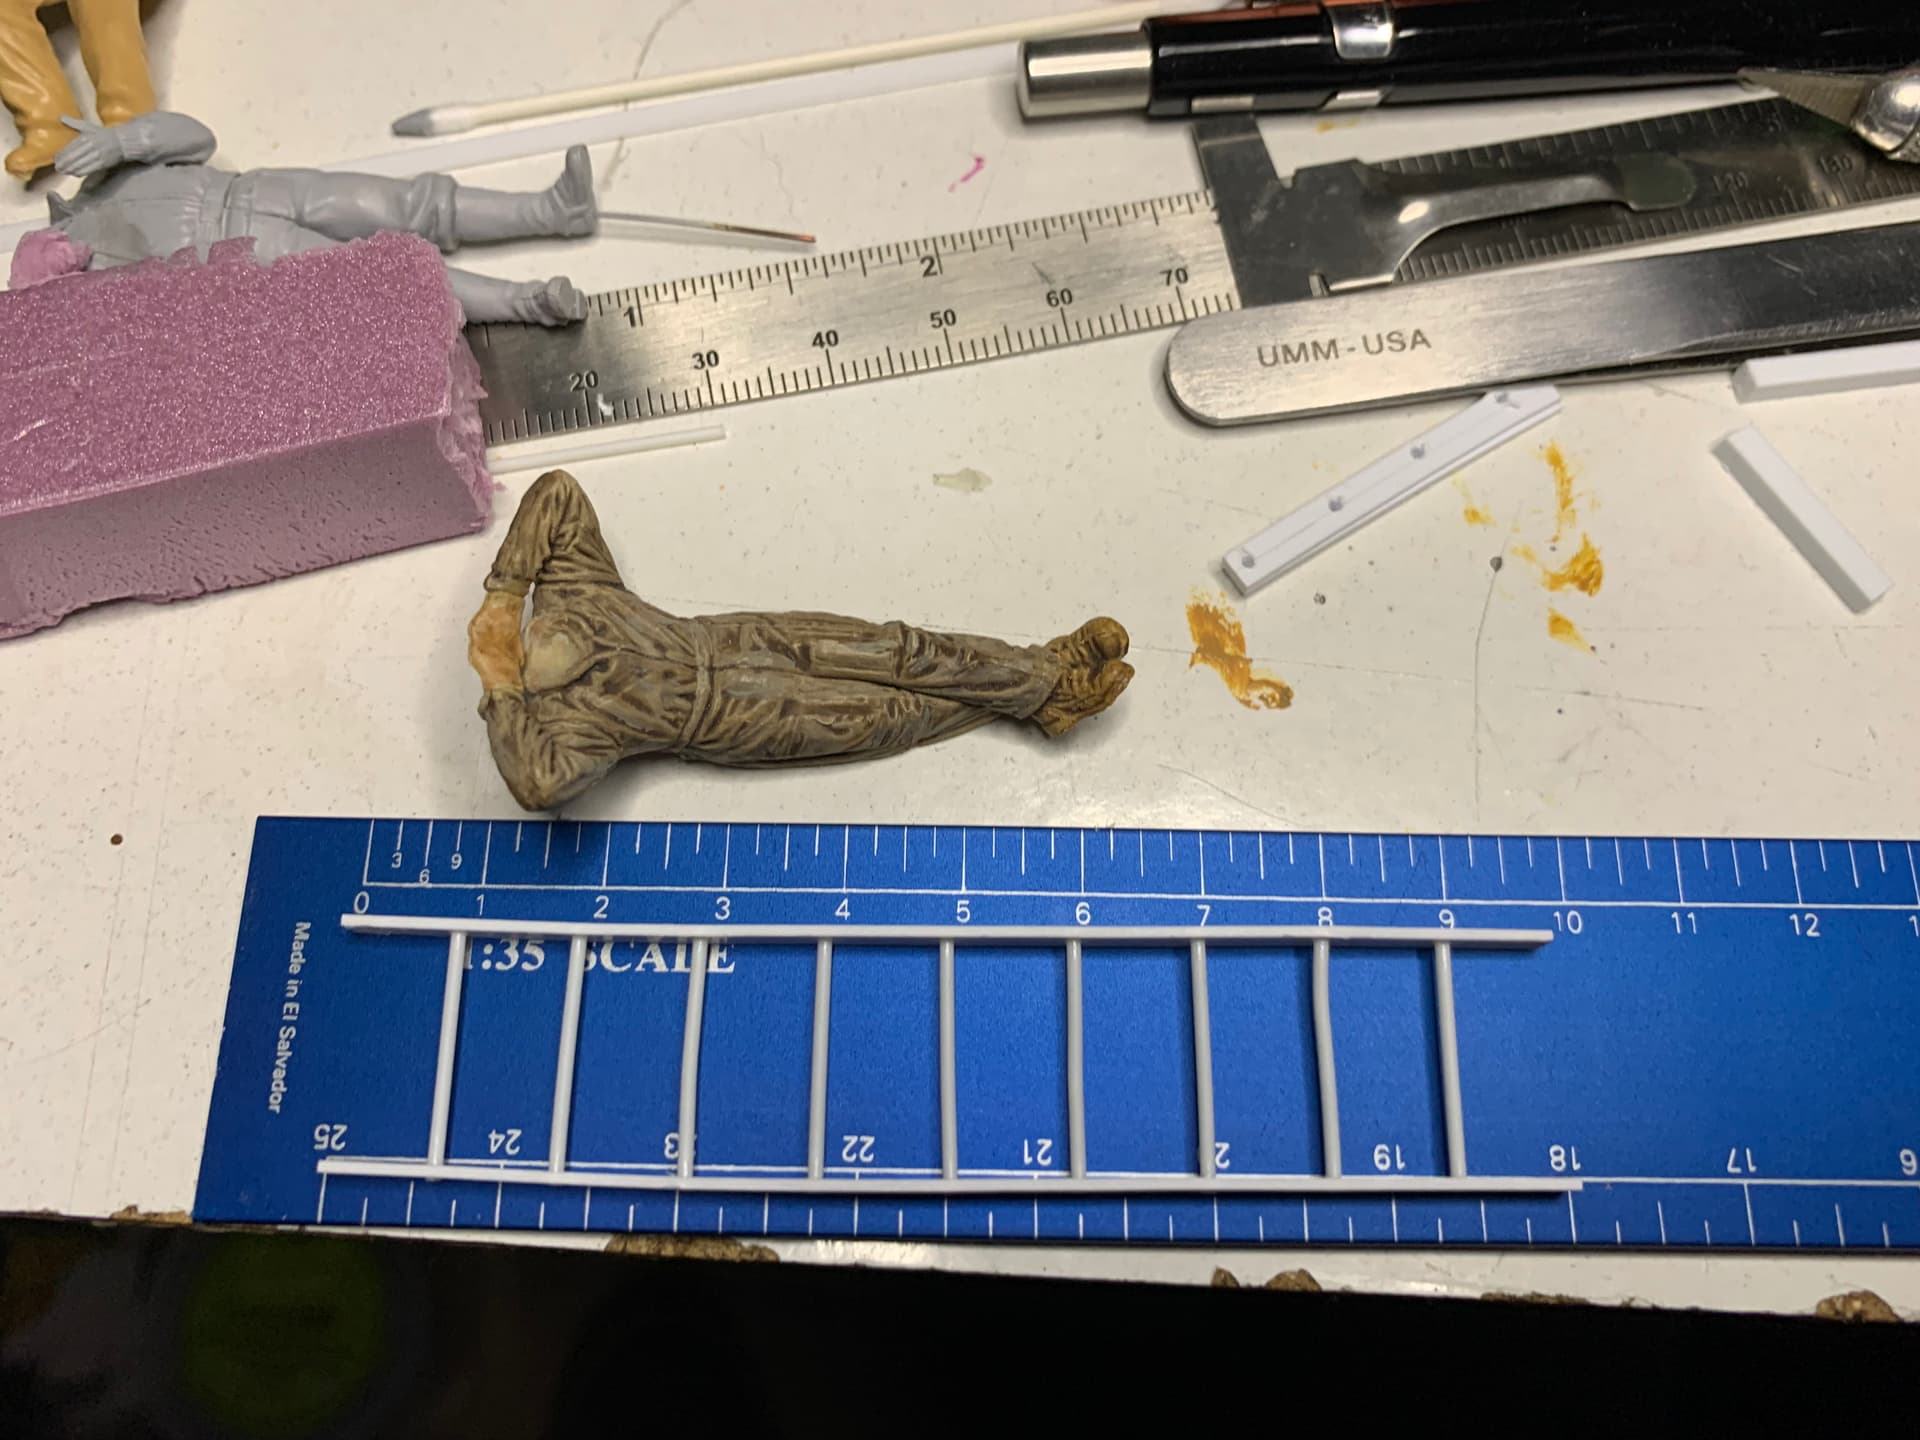
And now it is time to cut the ladder to length.
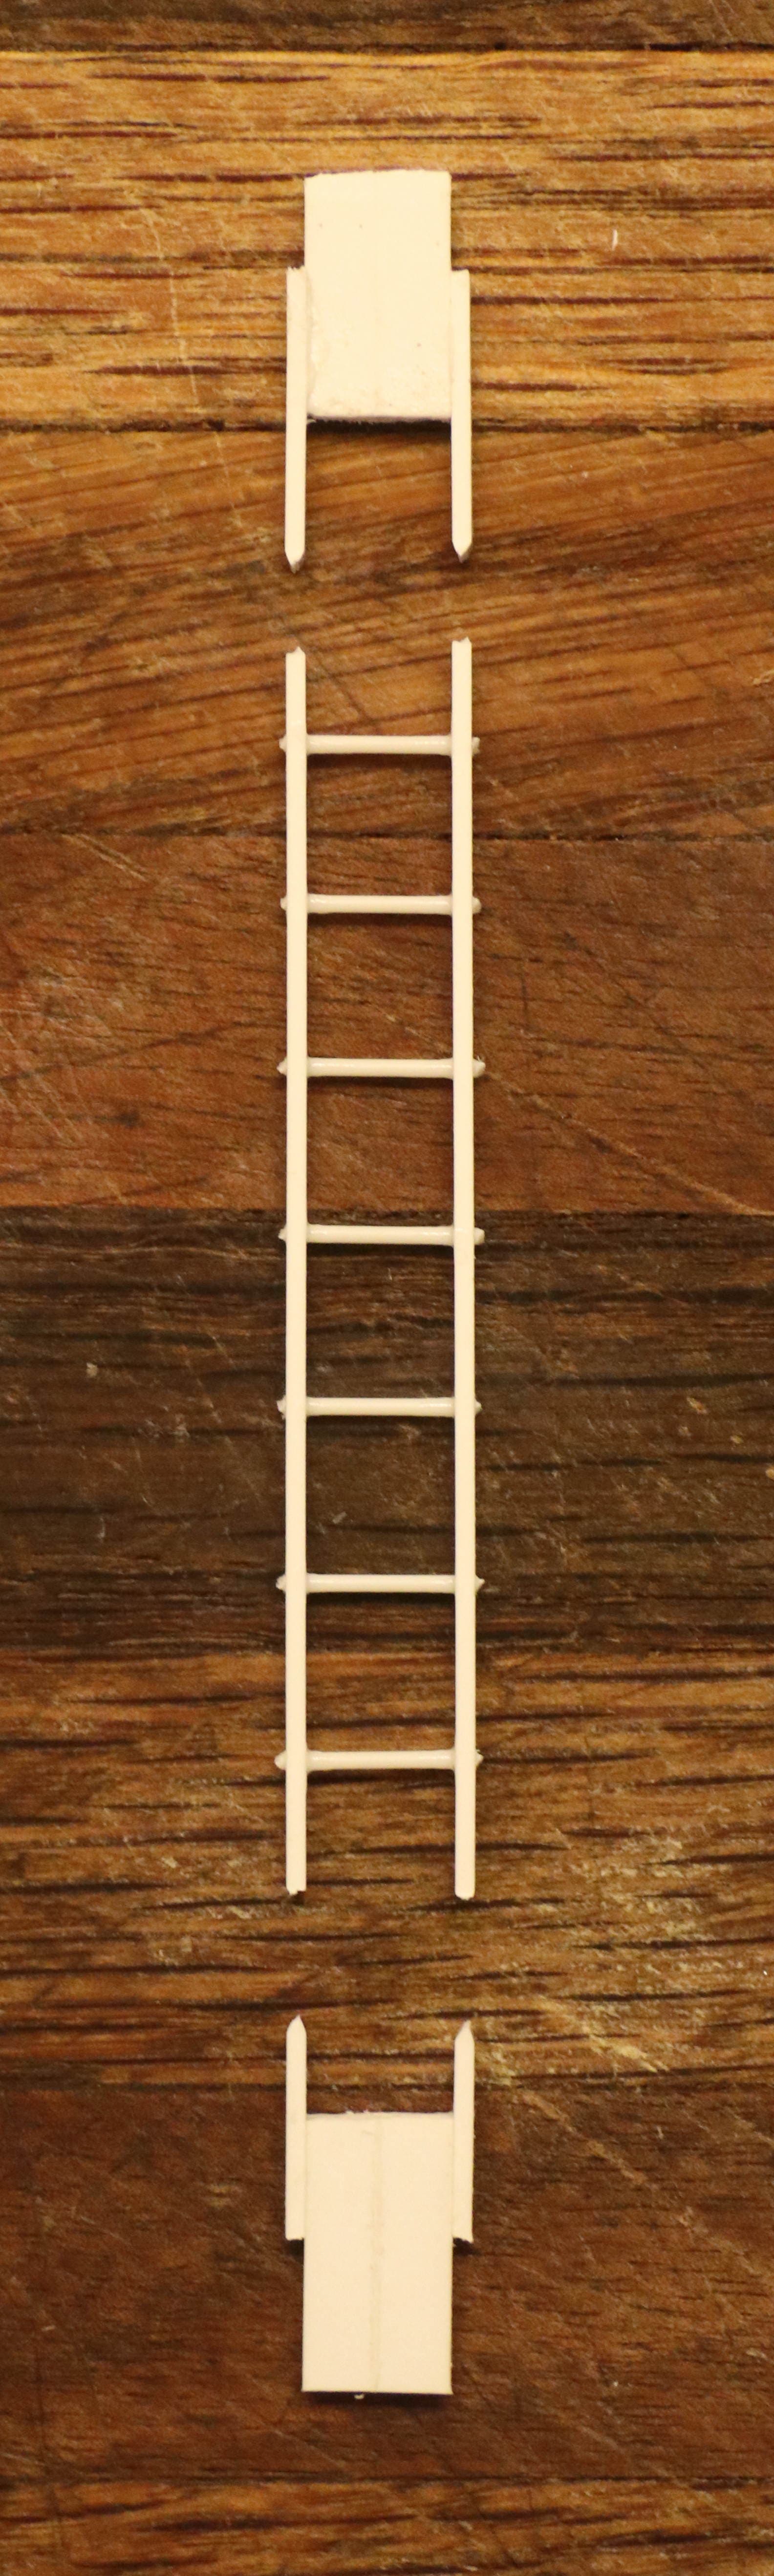

- Leave some bolt head detail on the outside of the ladder for a more detailed appearance.
4 Likes
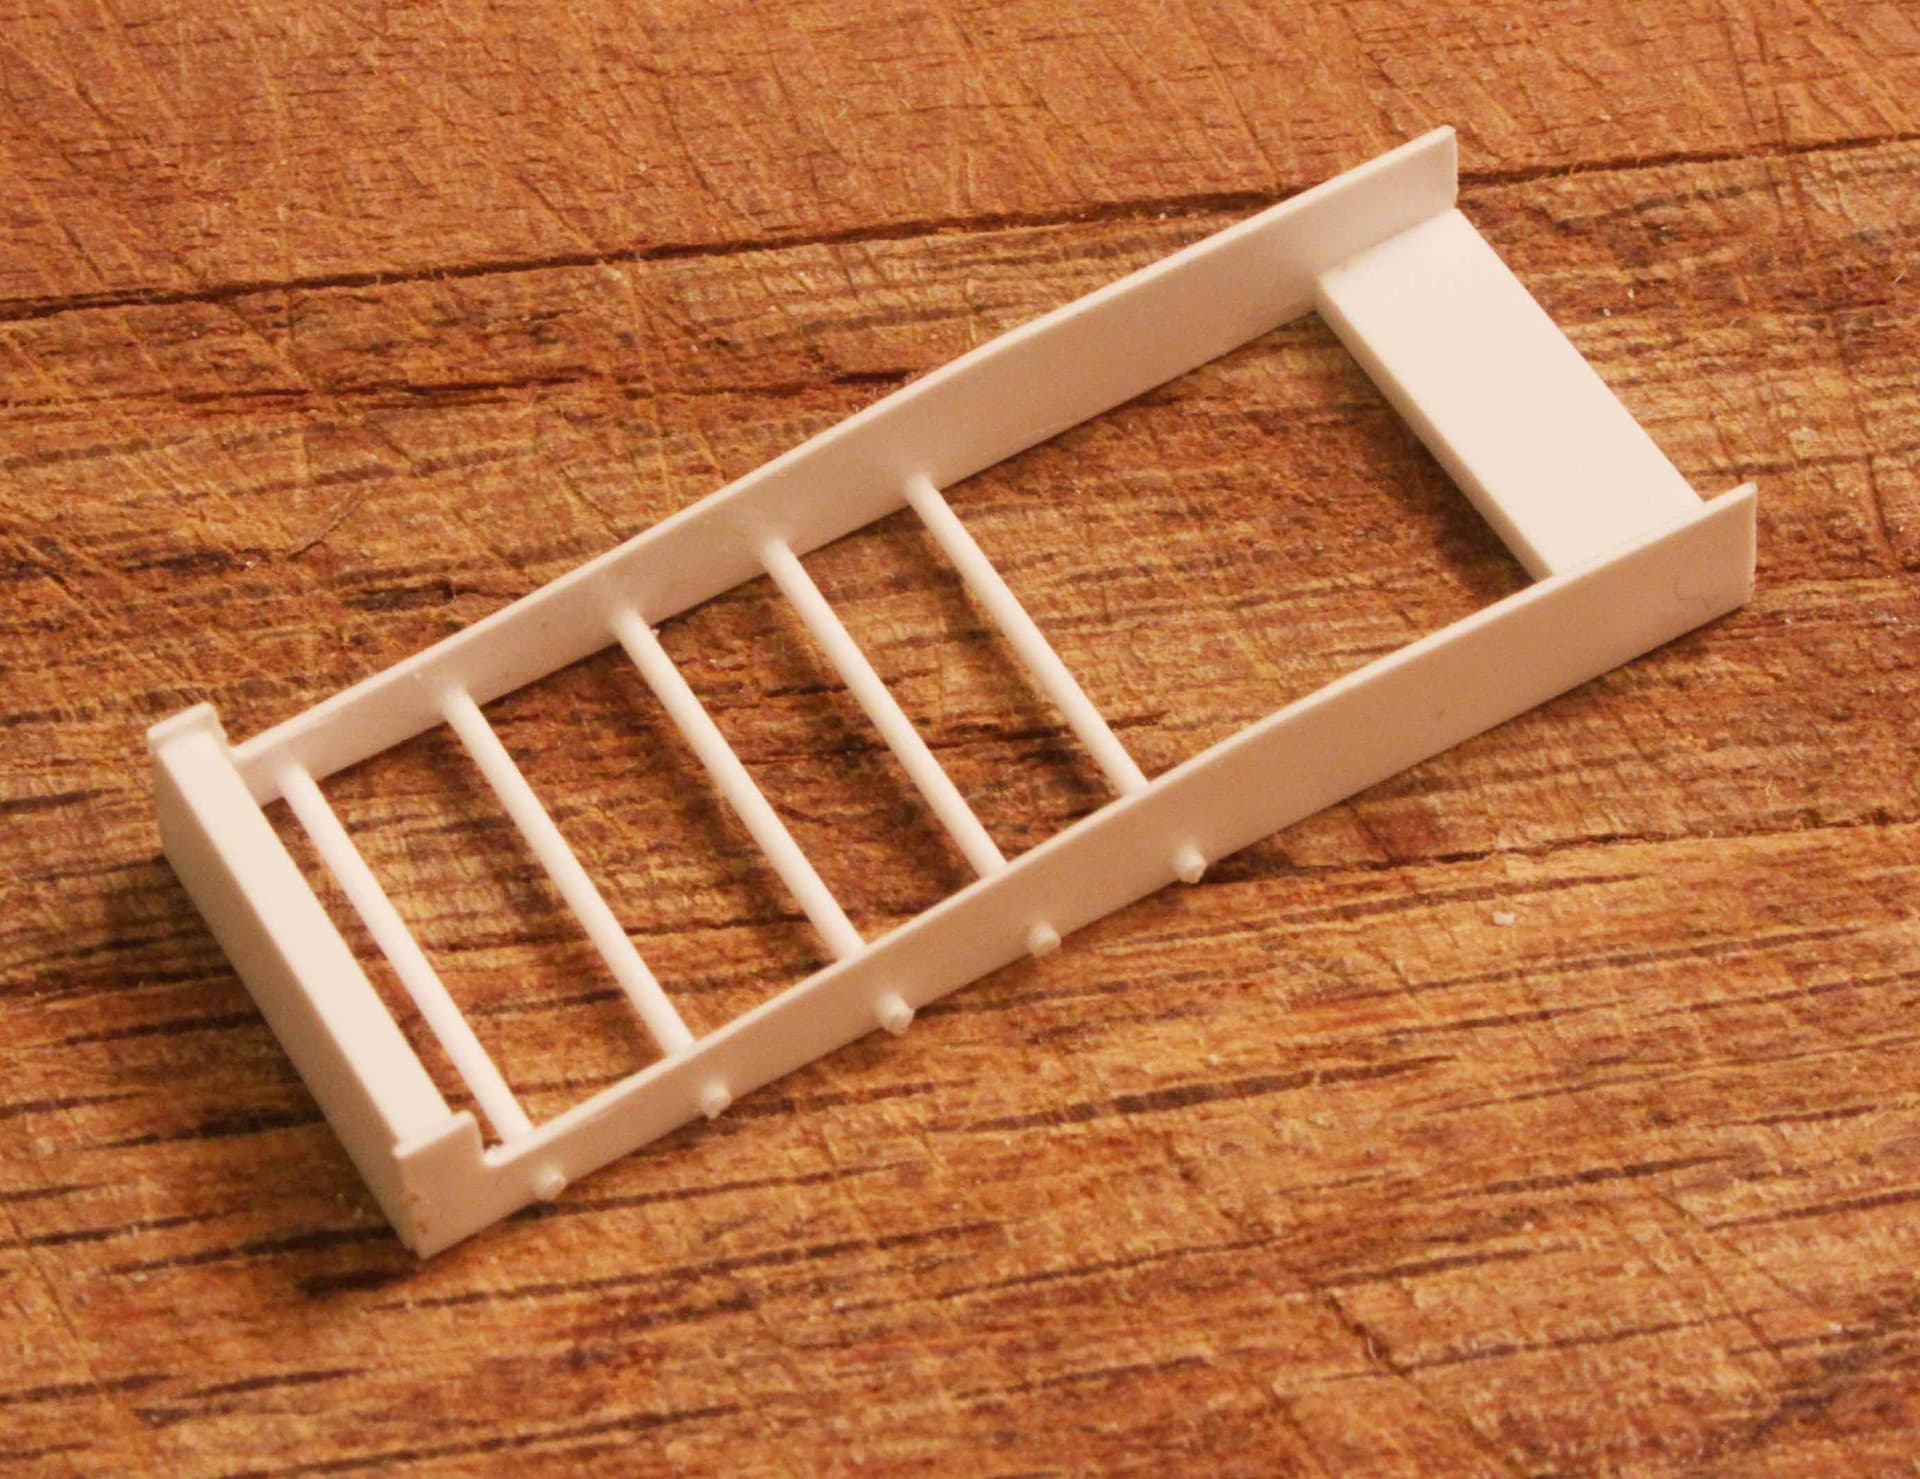
As you can see in this example, ladders don’t always have to be used as ladders. Sometimes they can become a structural part of a model; a rack, a grill, a fence, a railing, and yes, even a ladder!

6 Likes
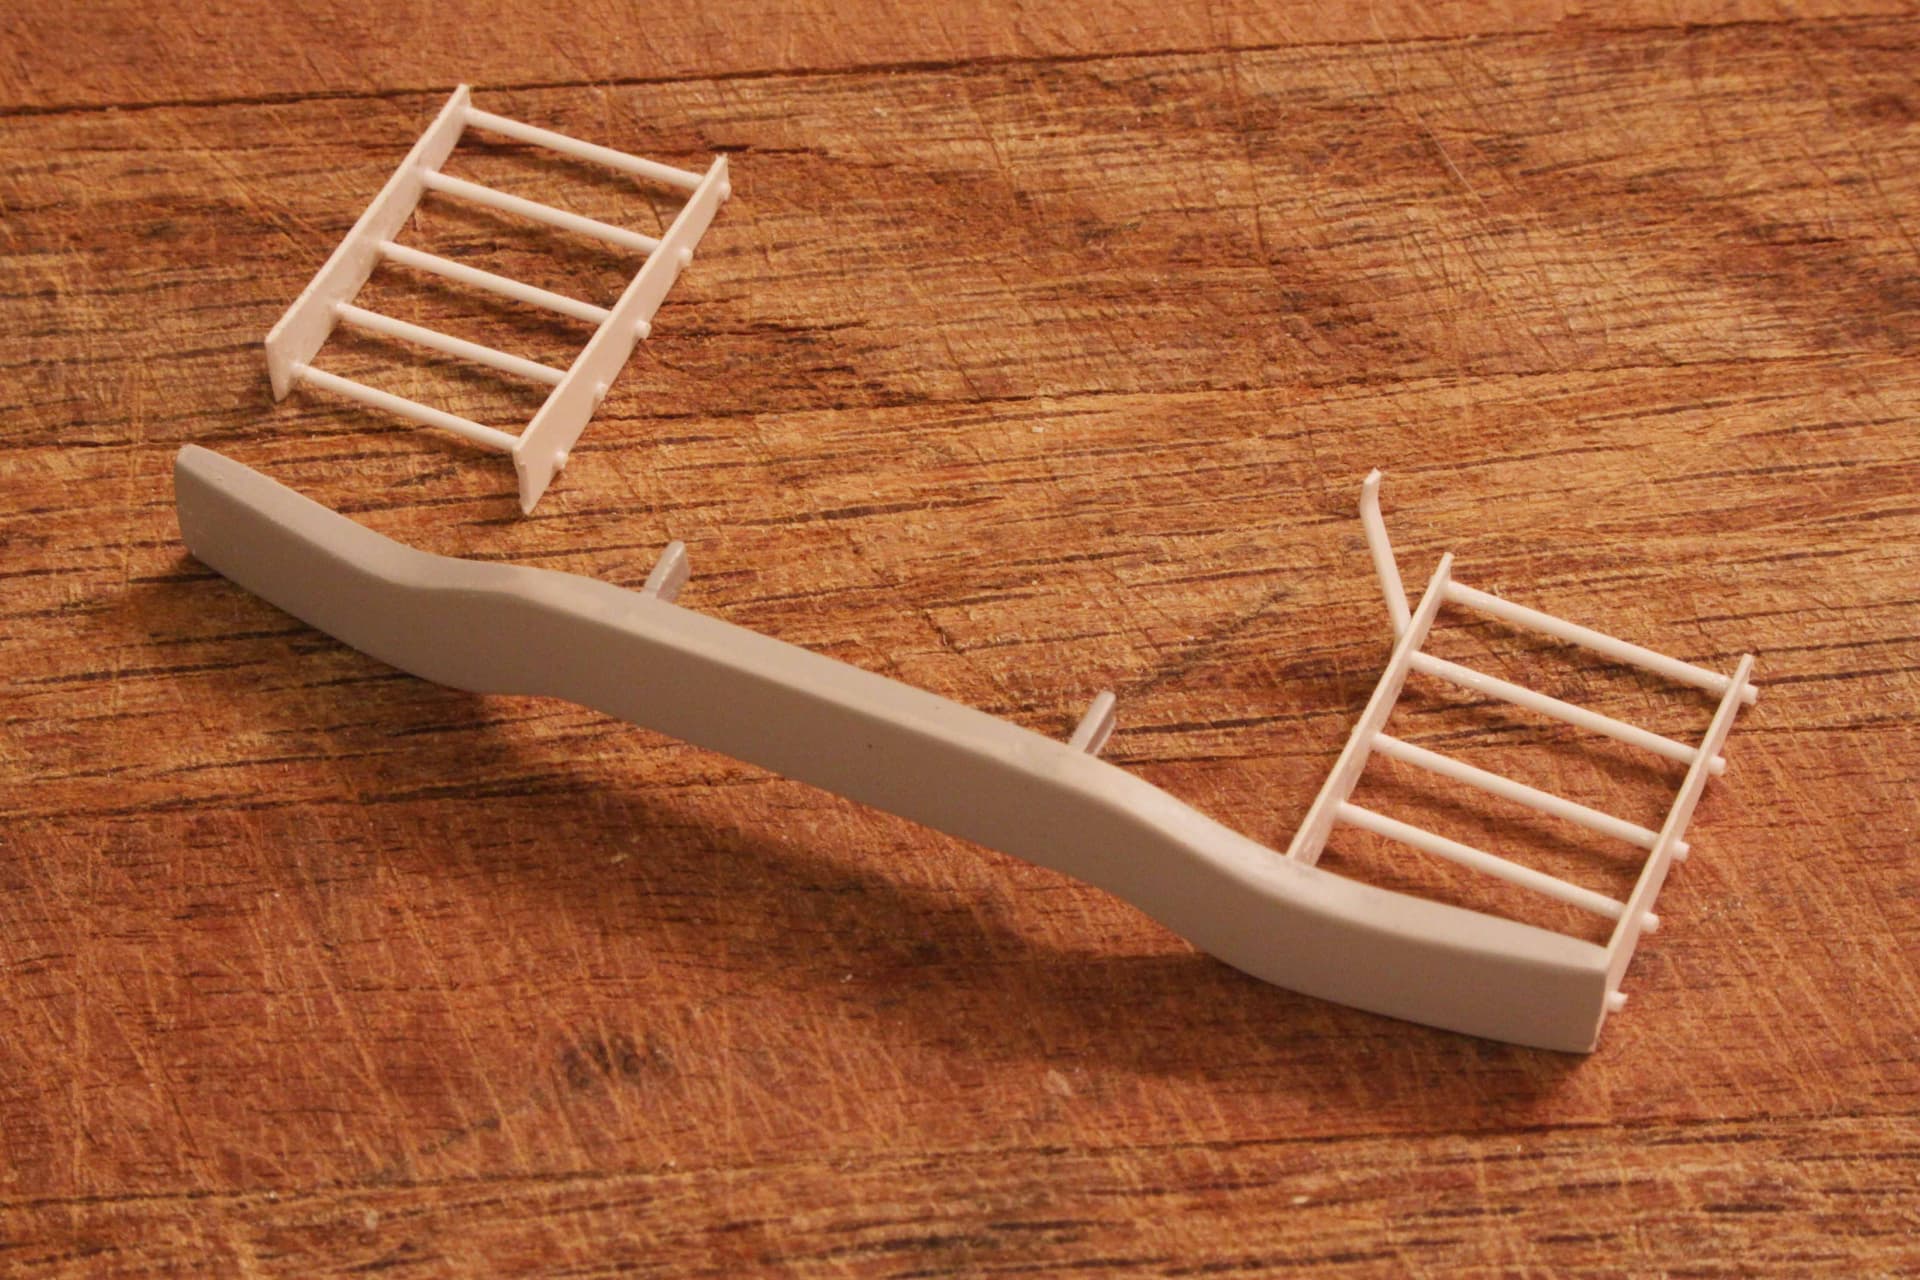
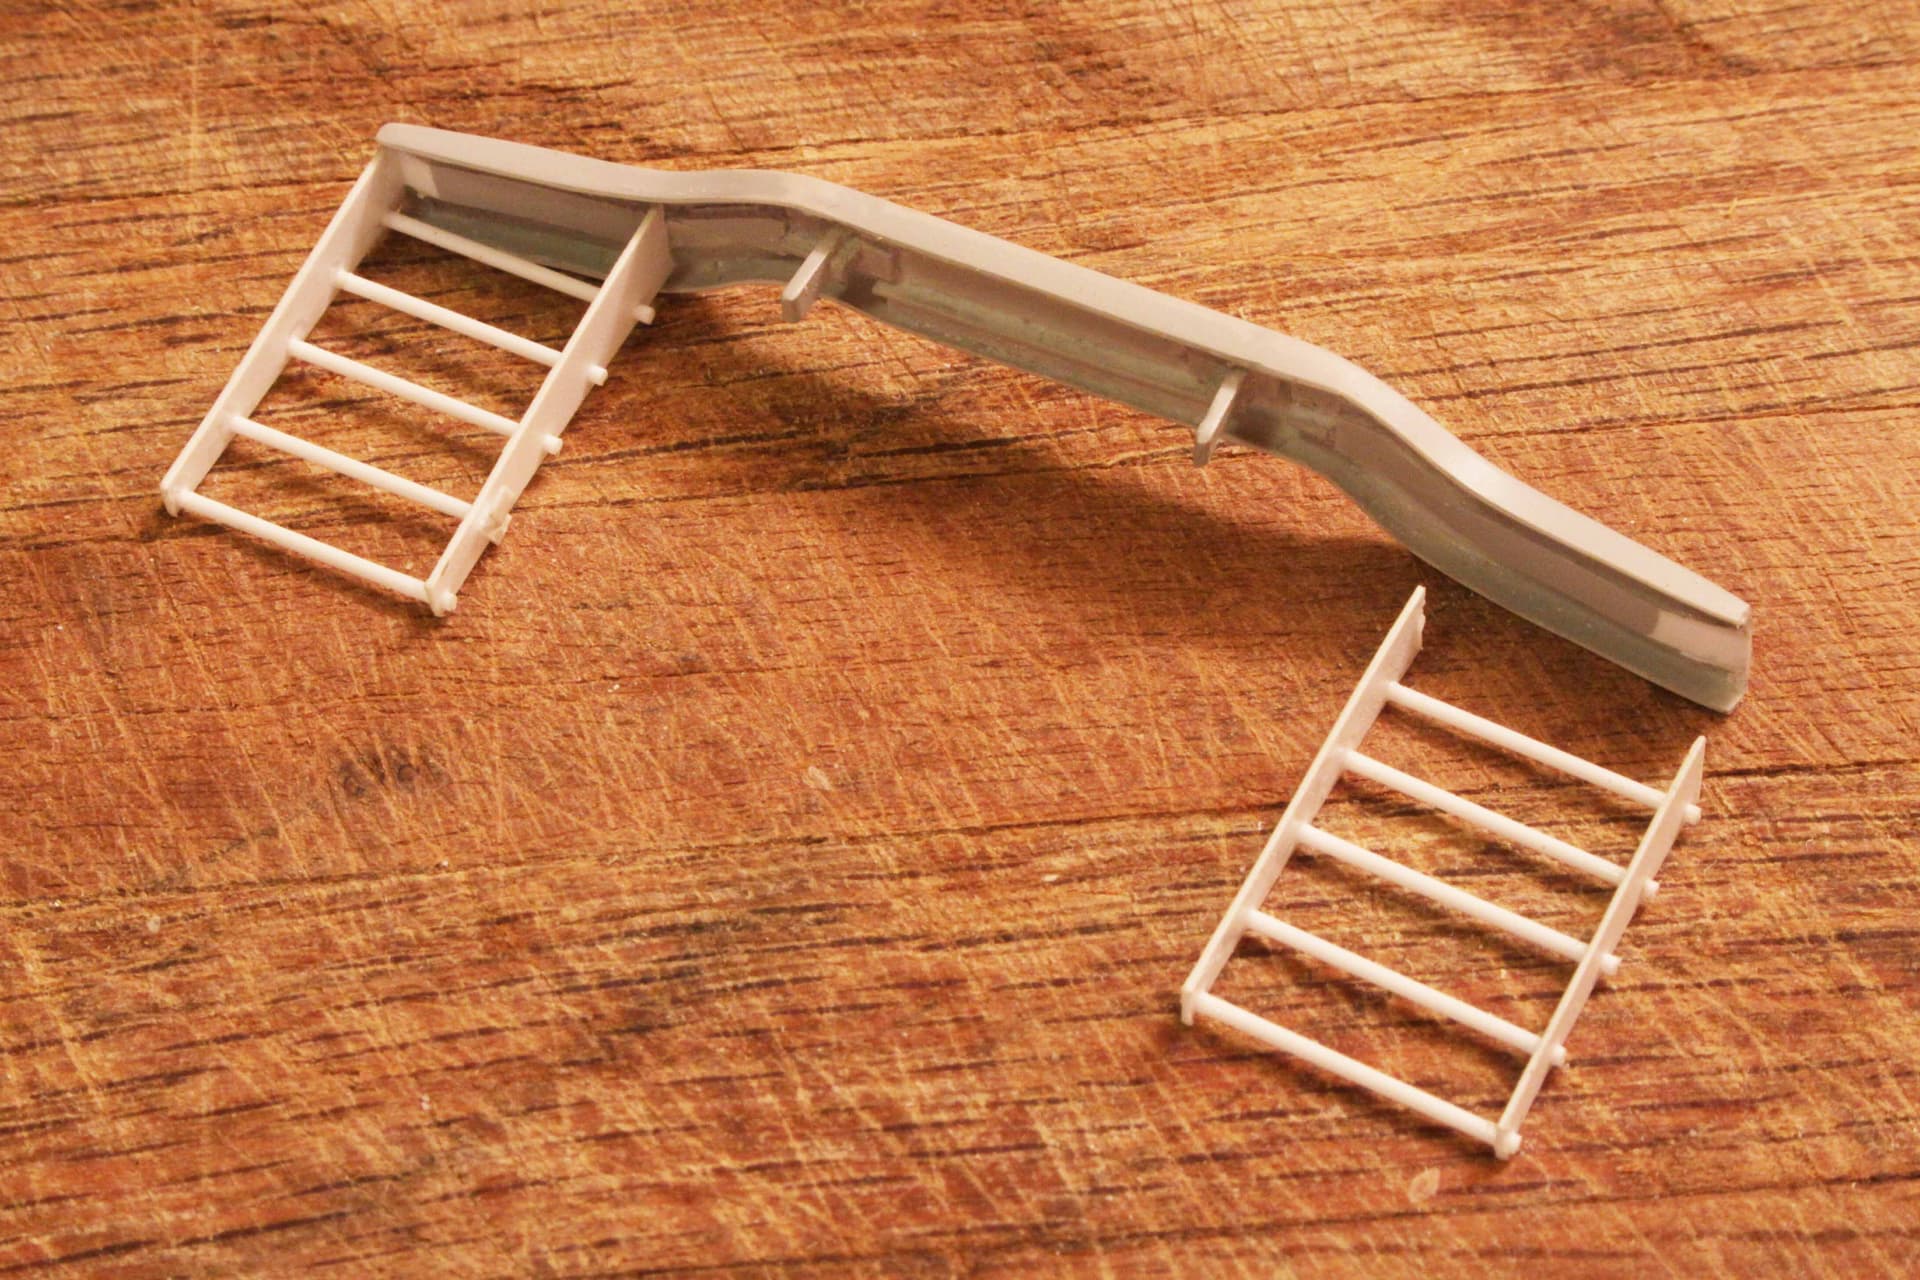
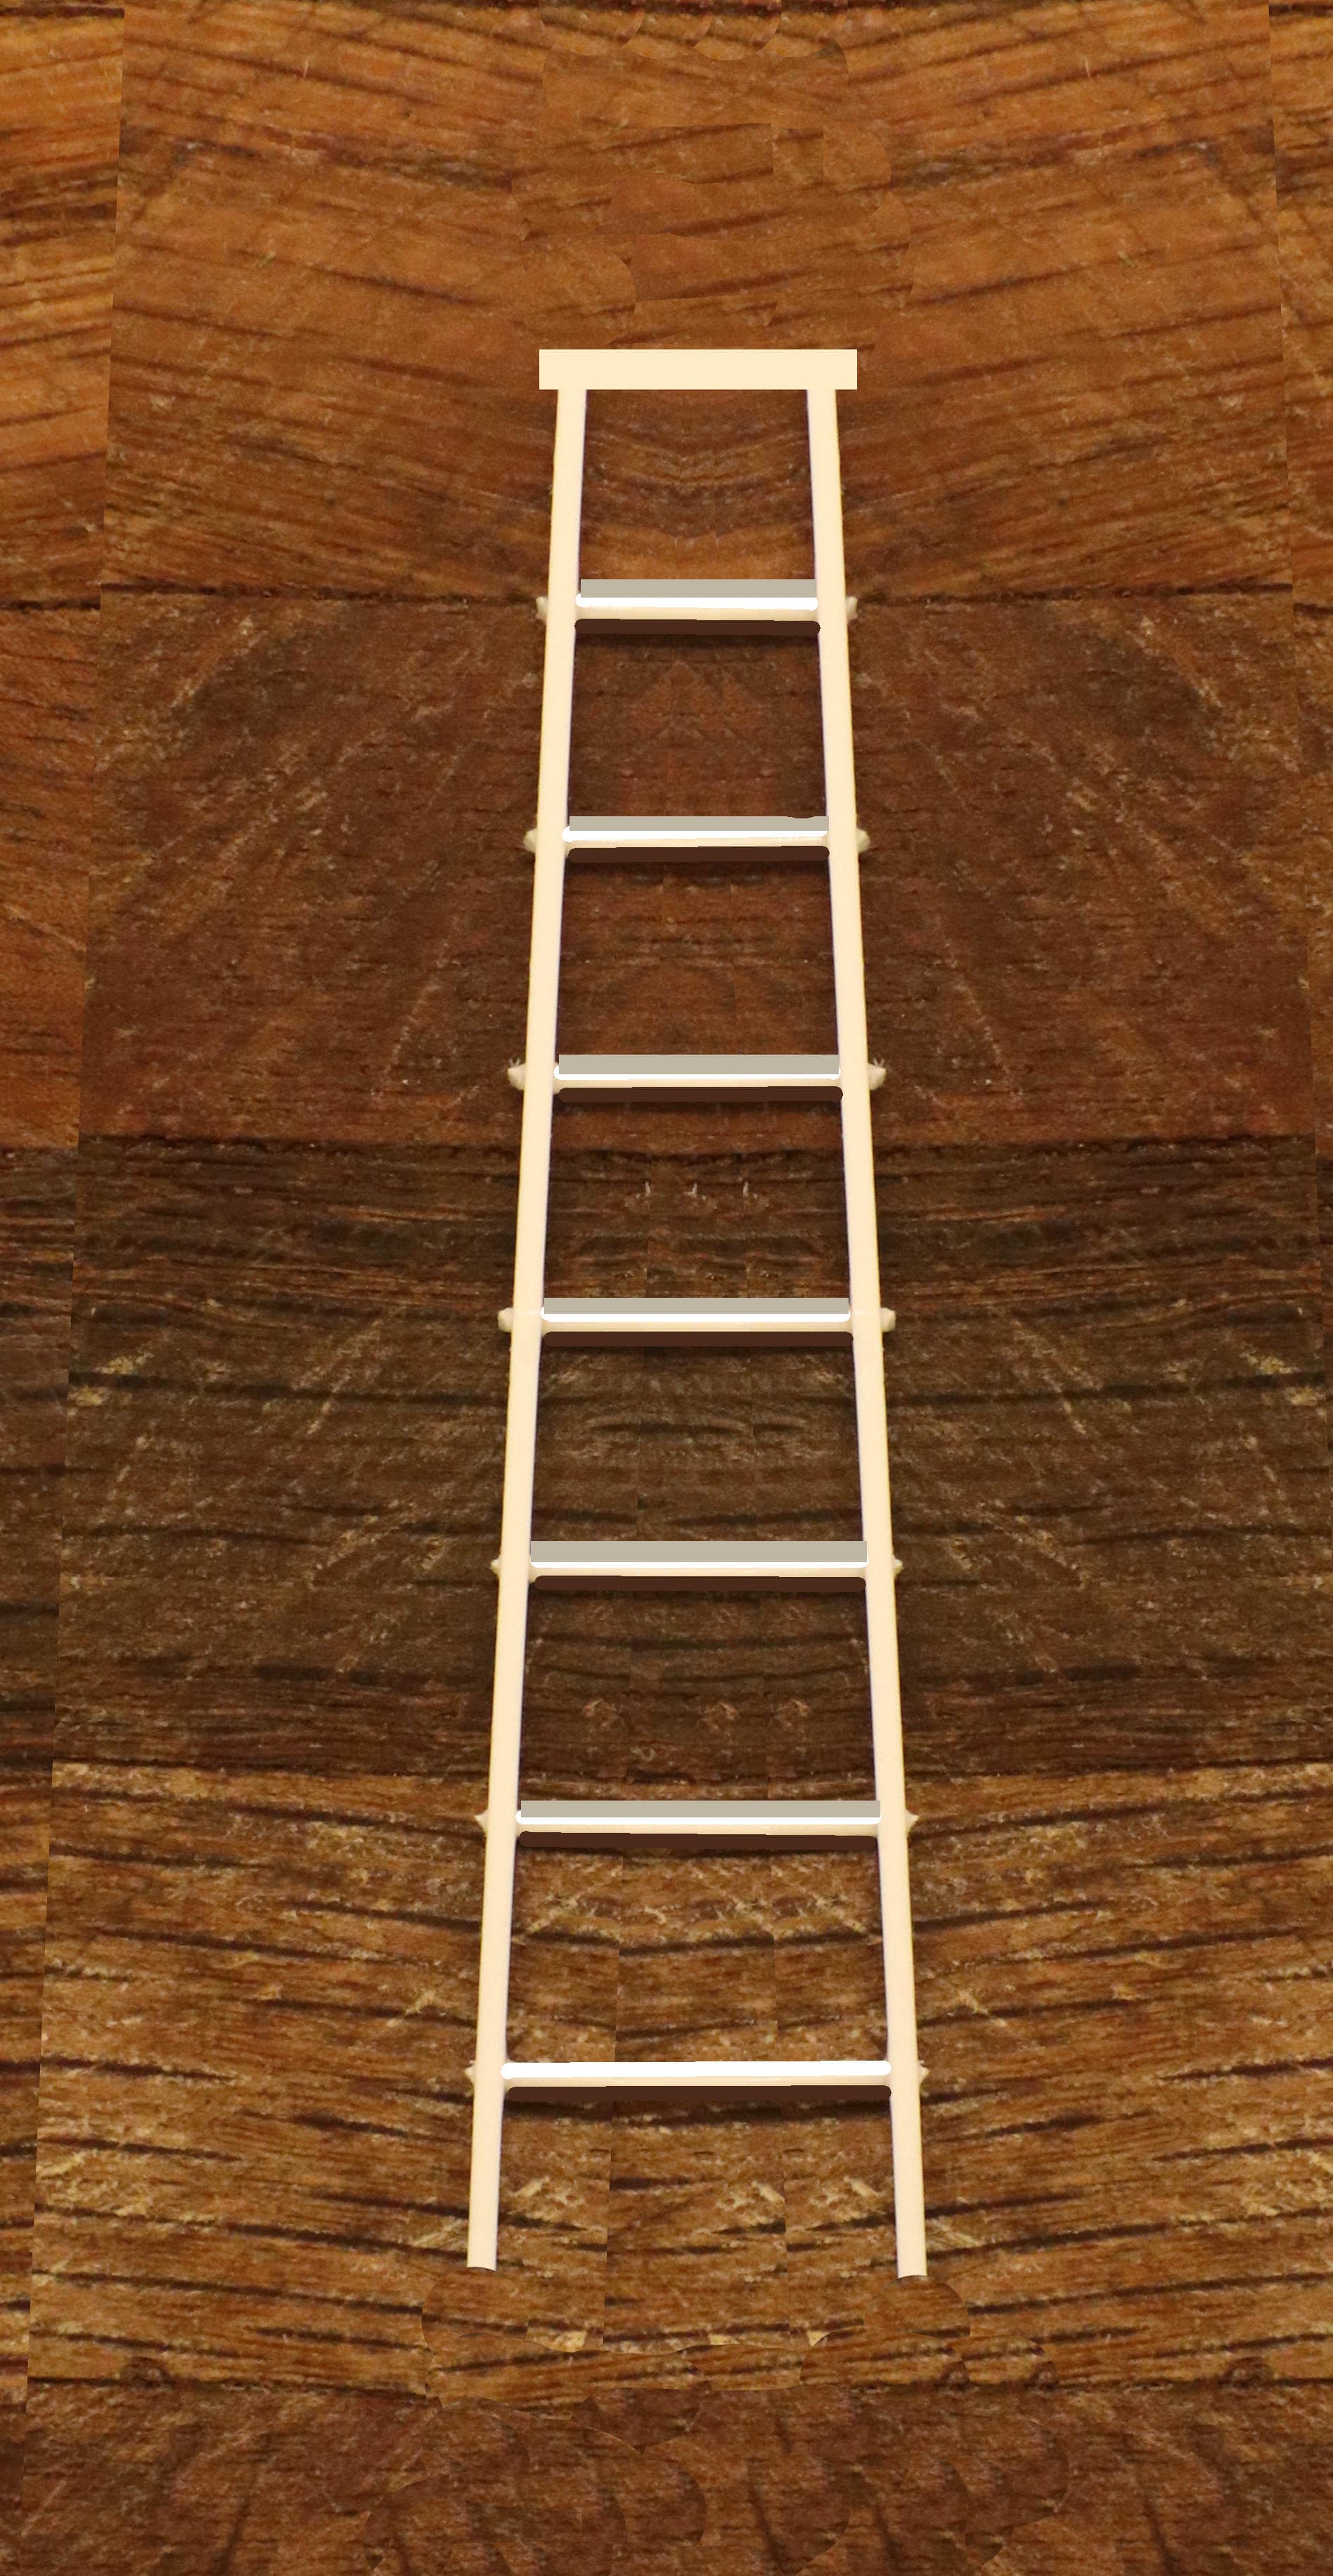
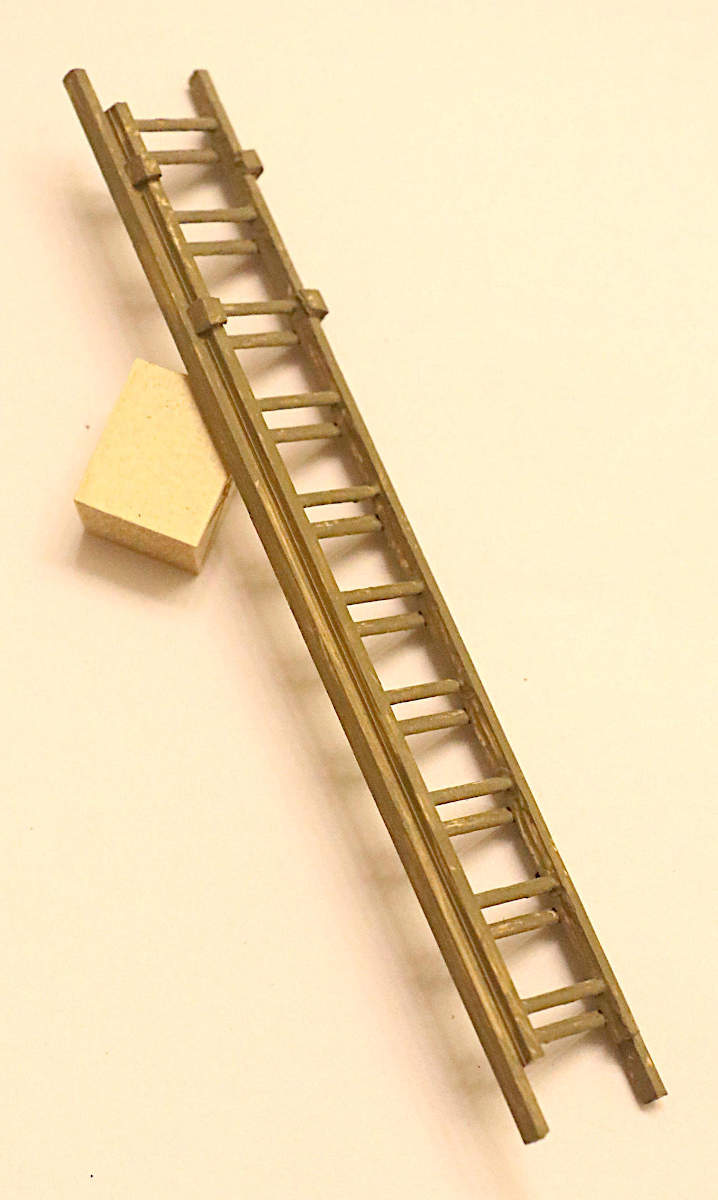
Finished Ladders:
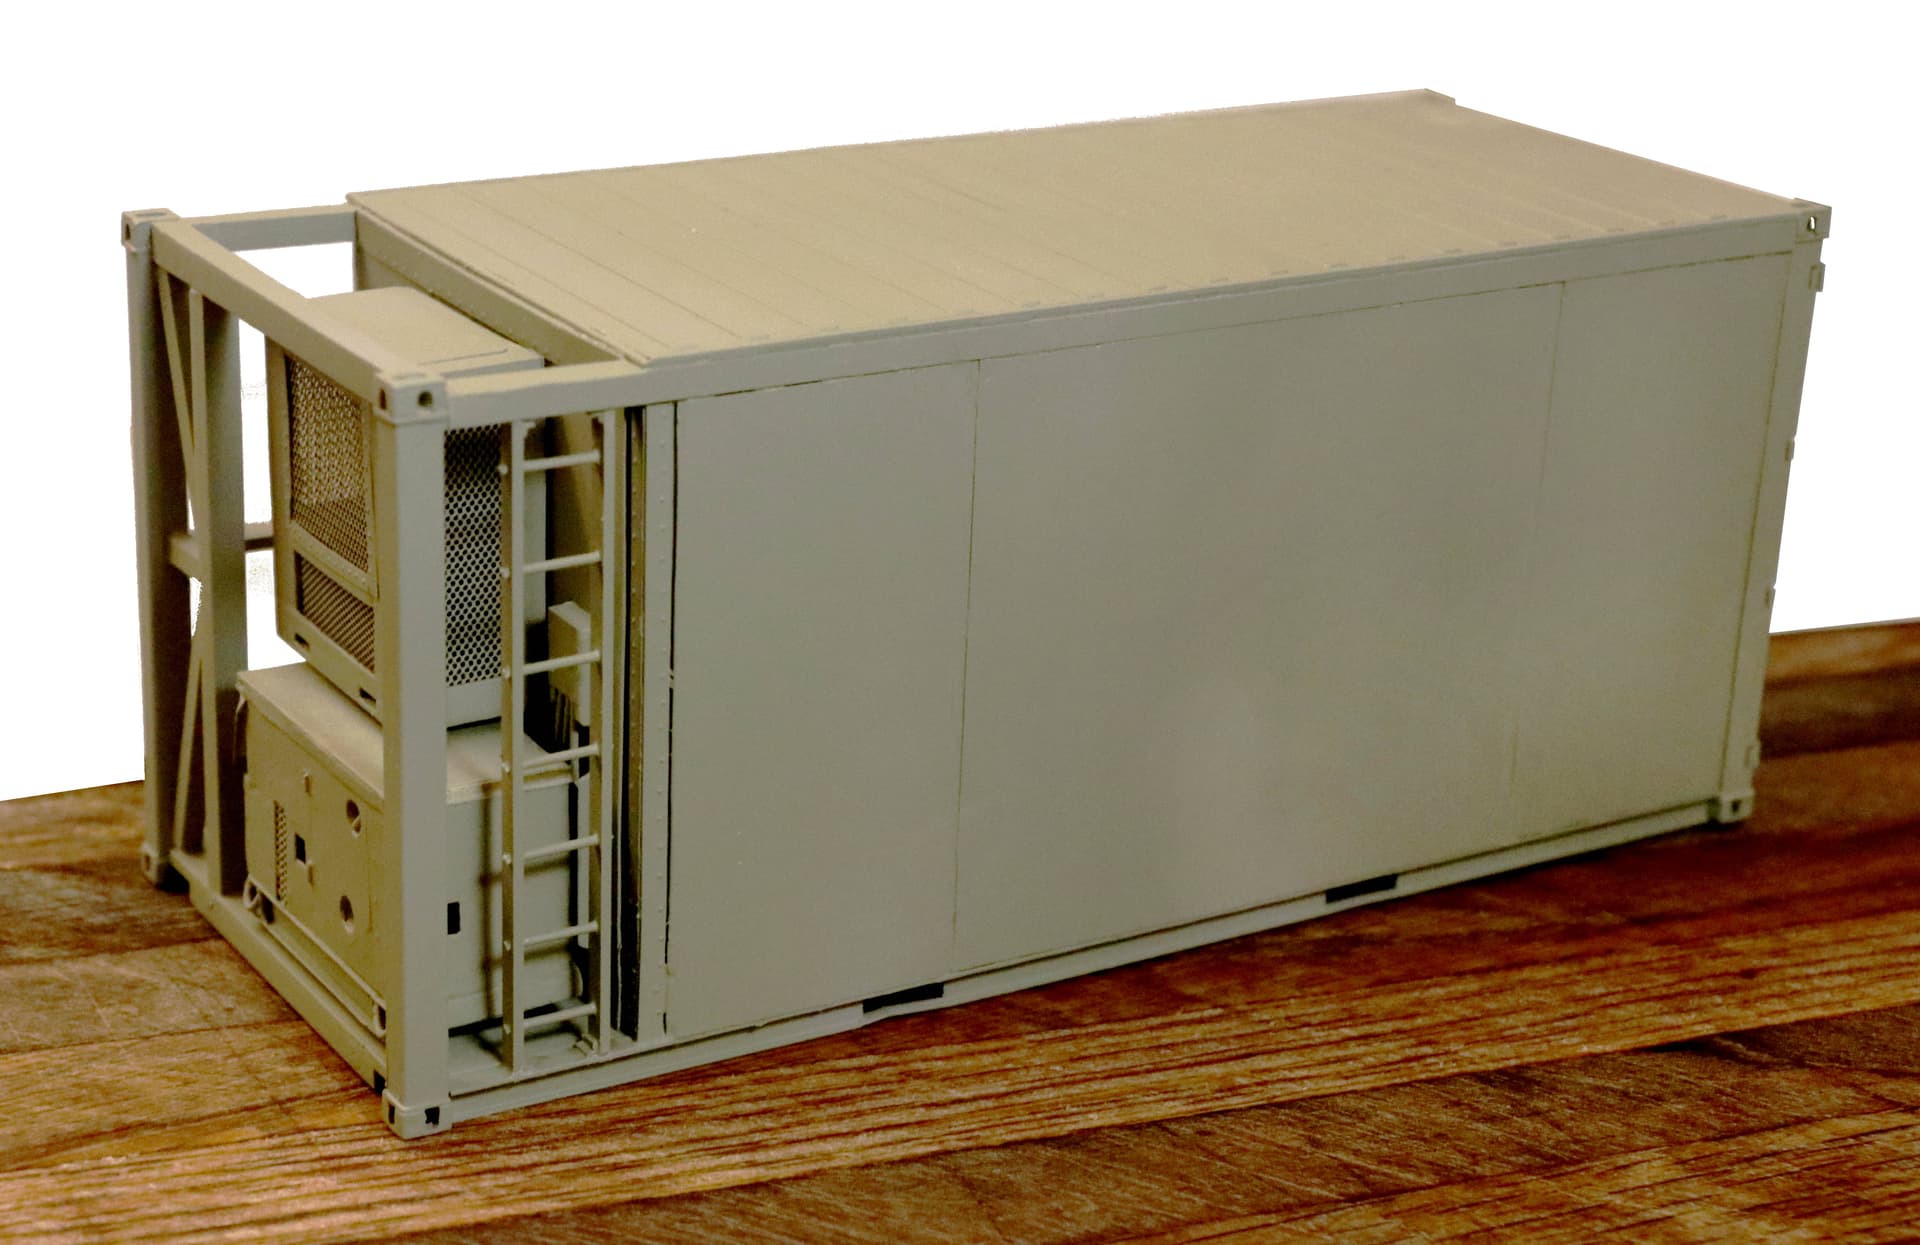
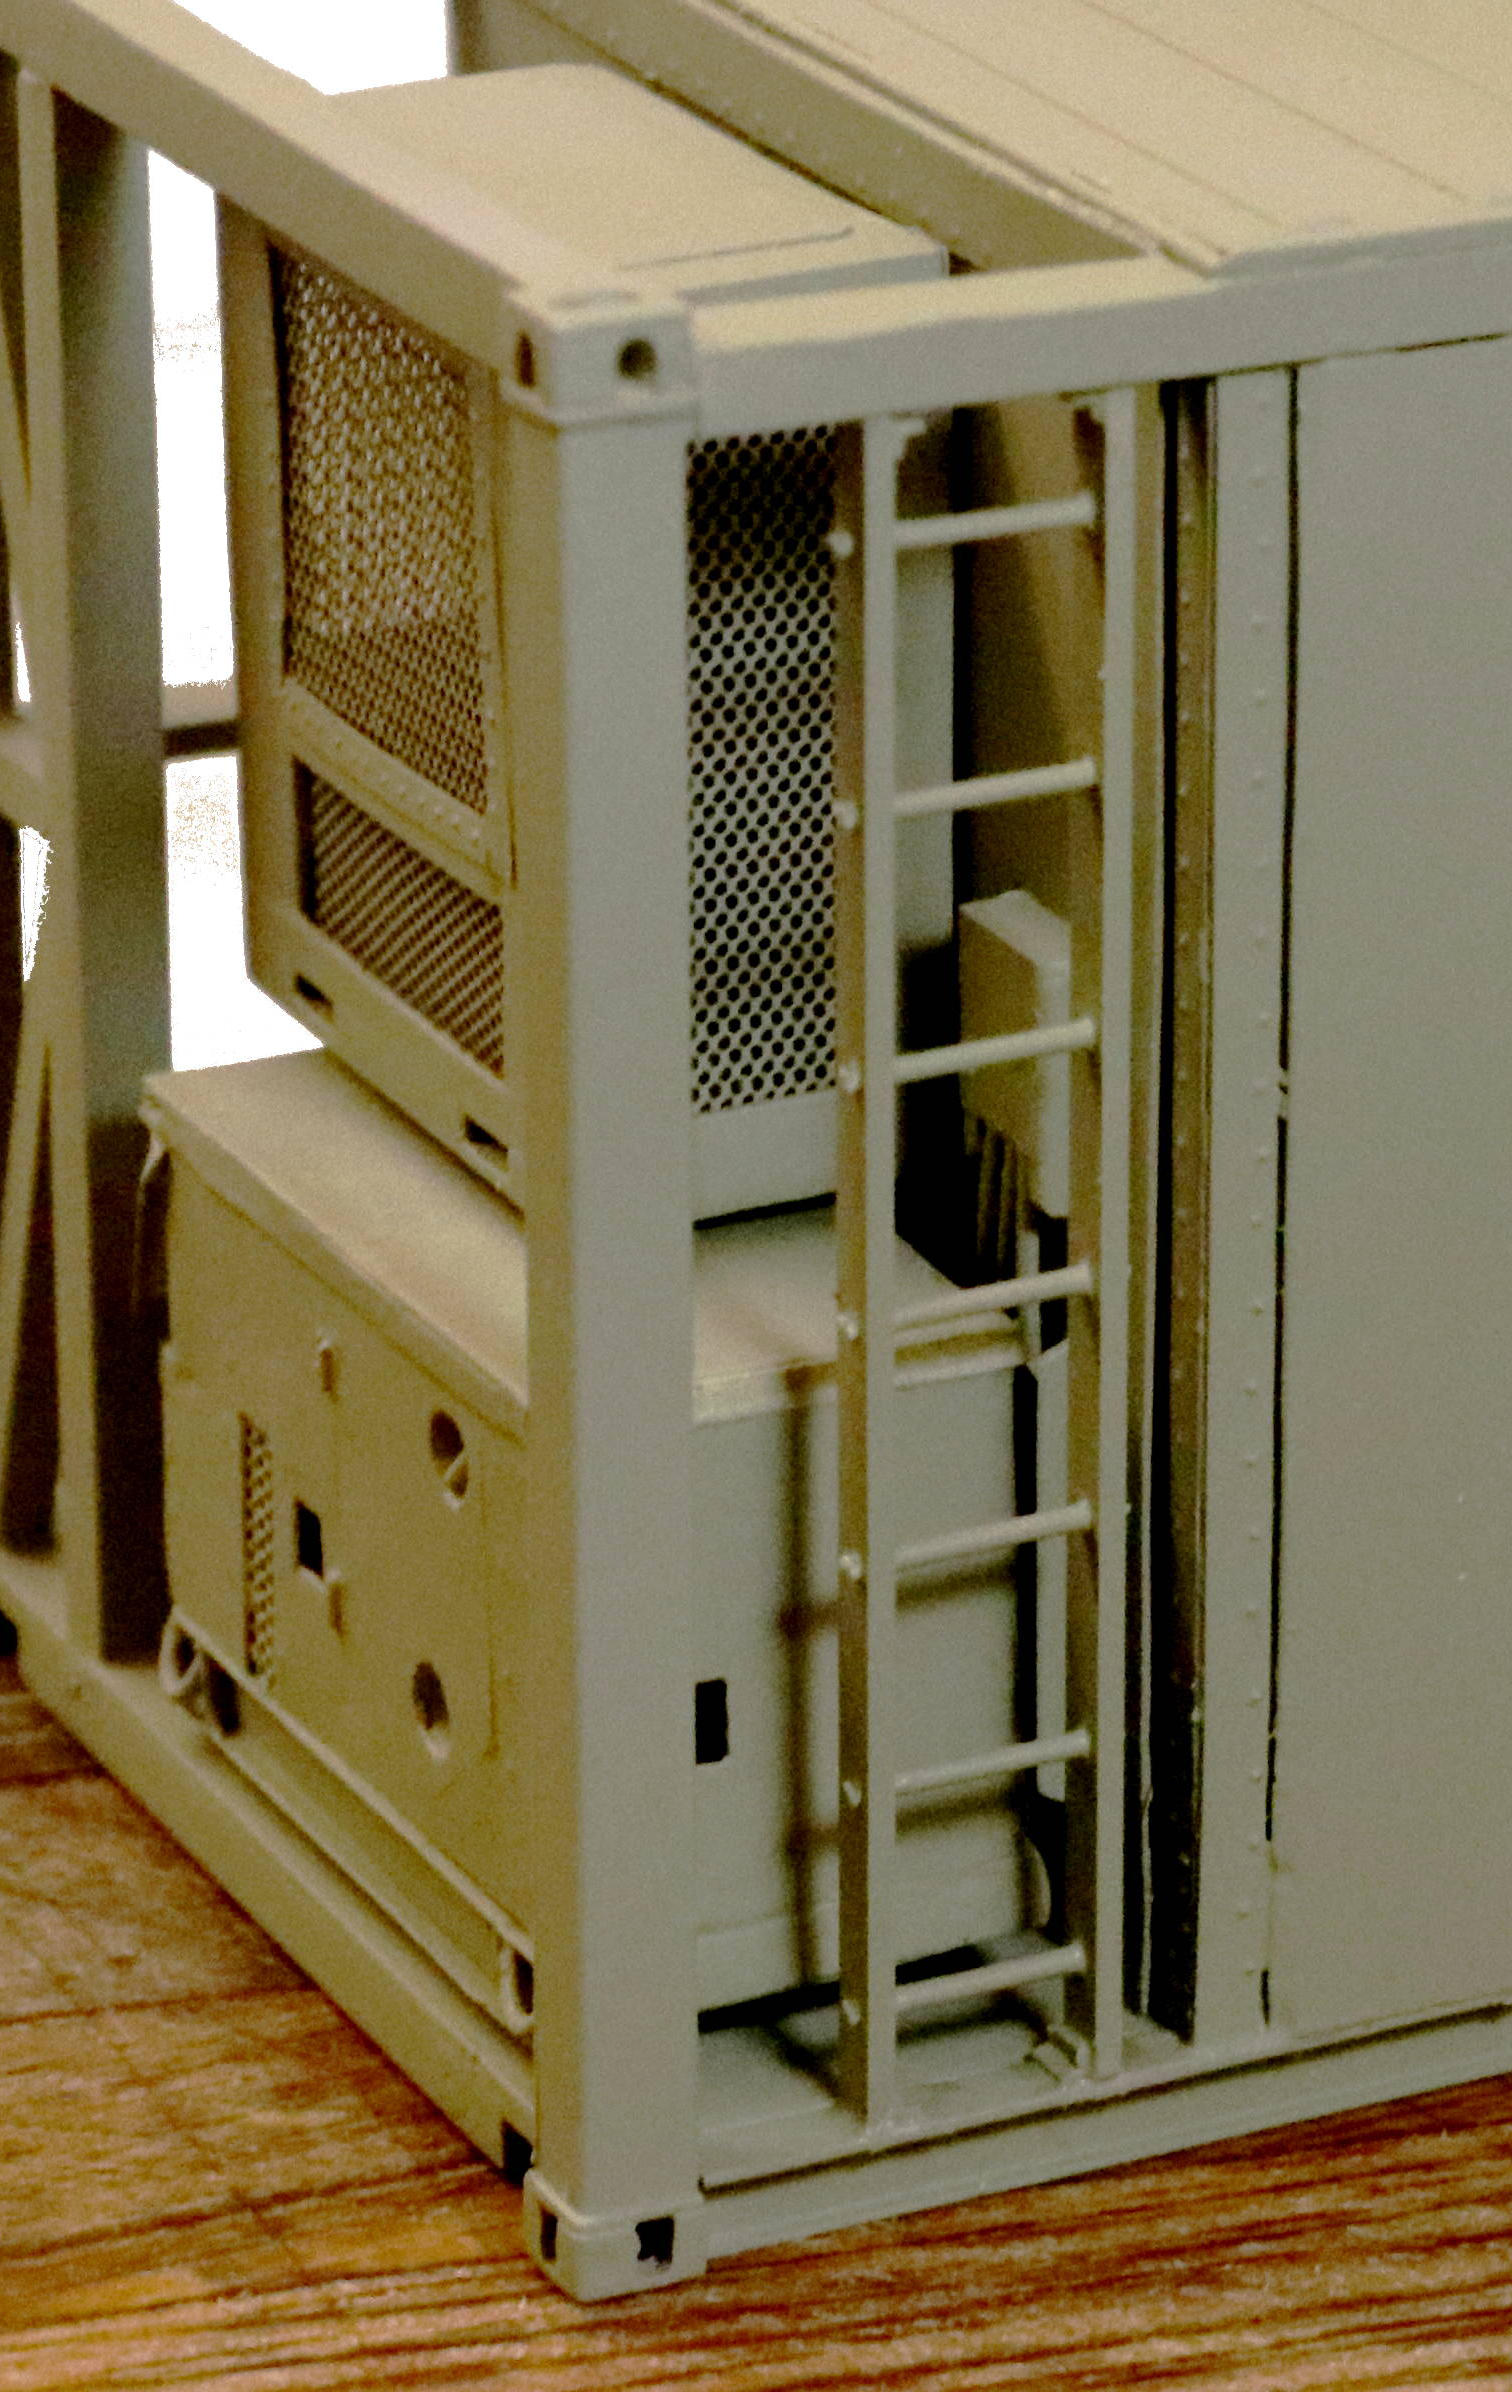
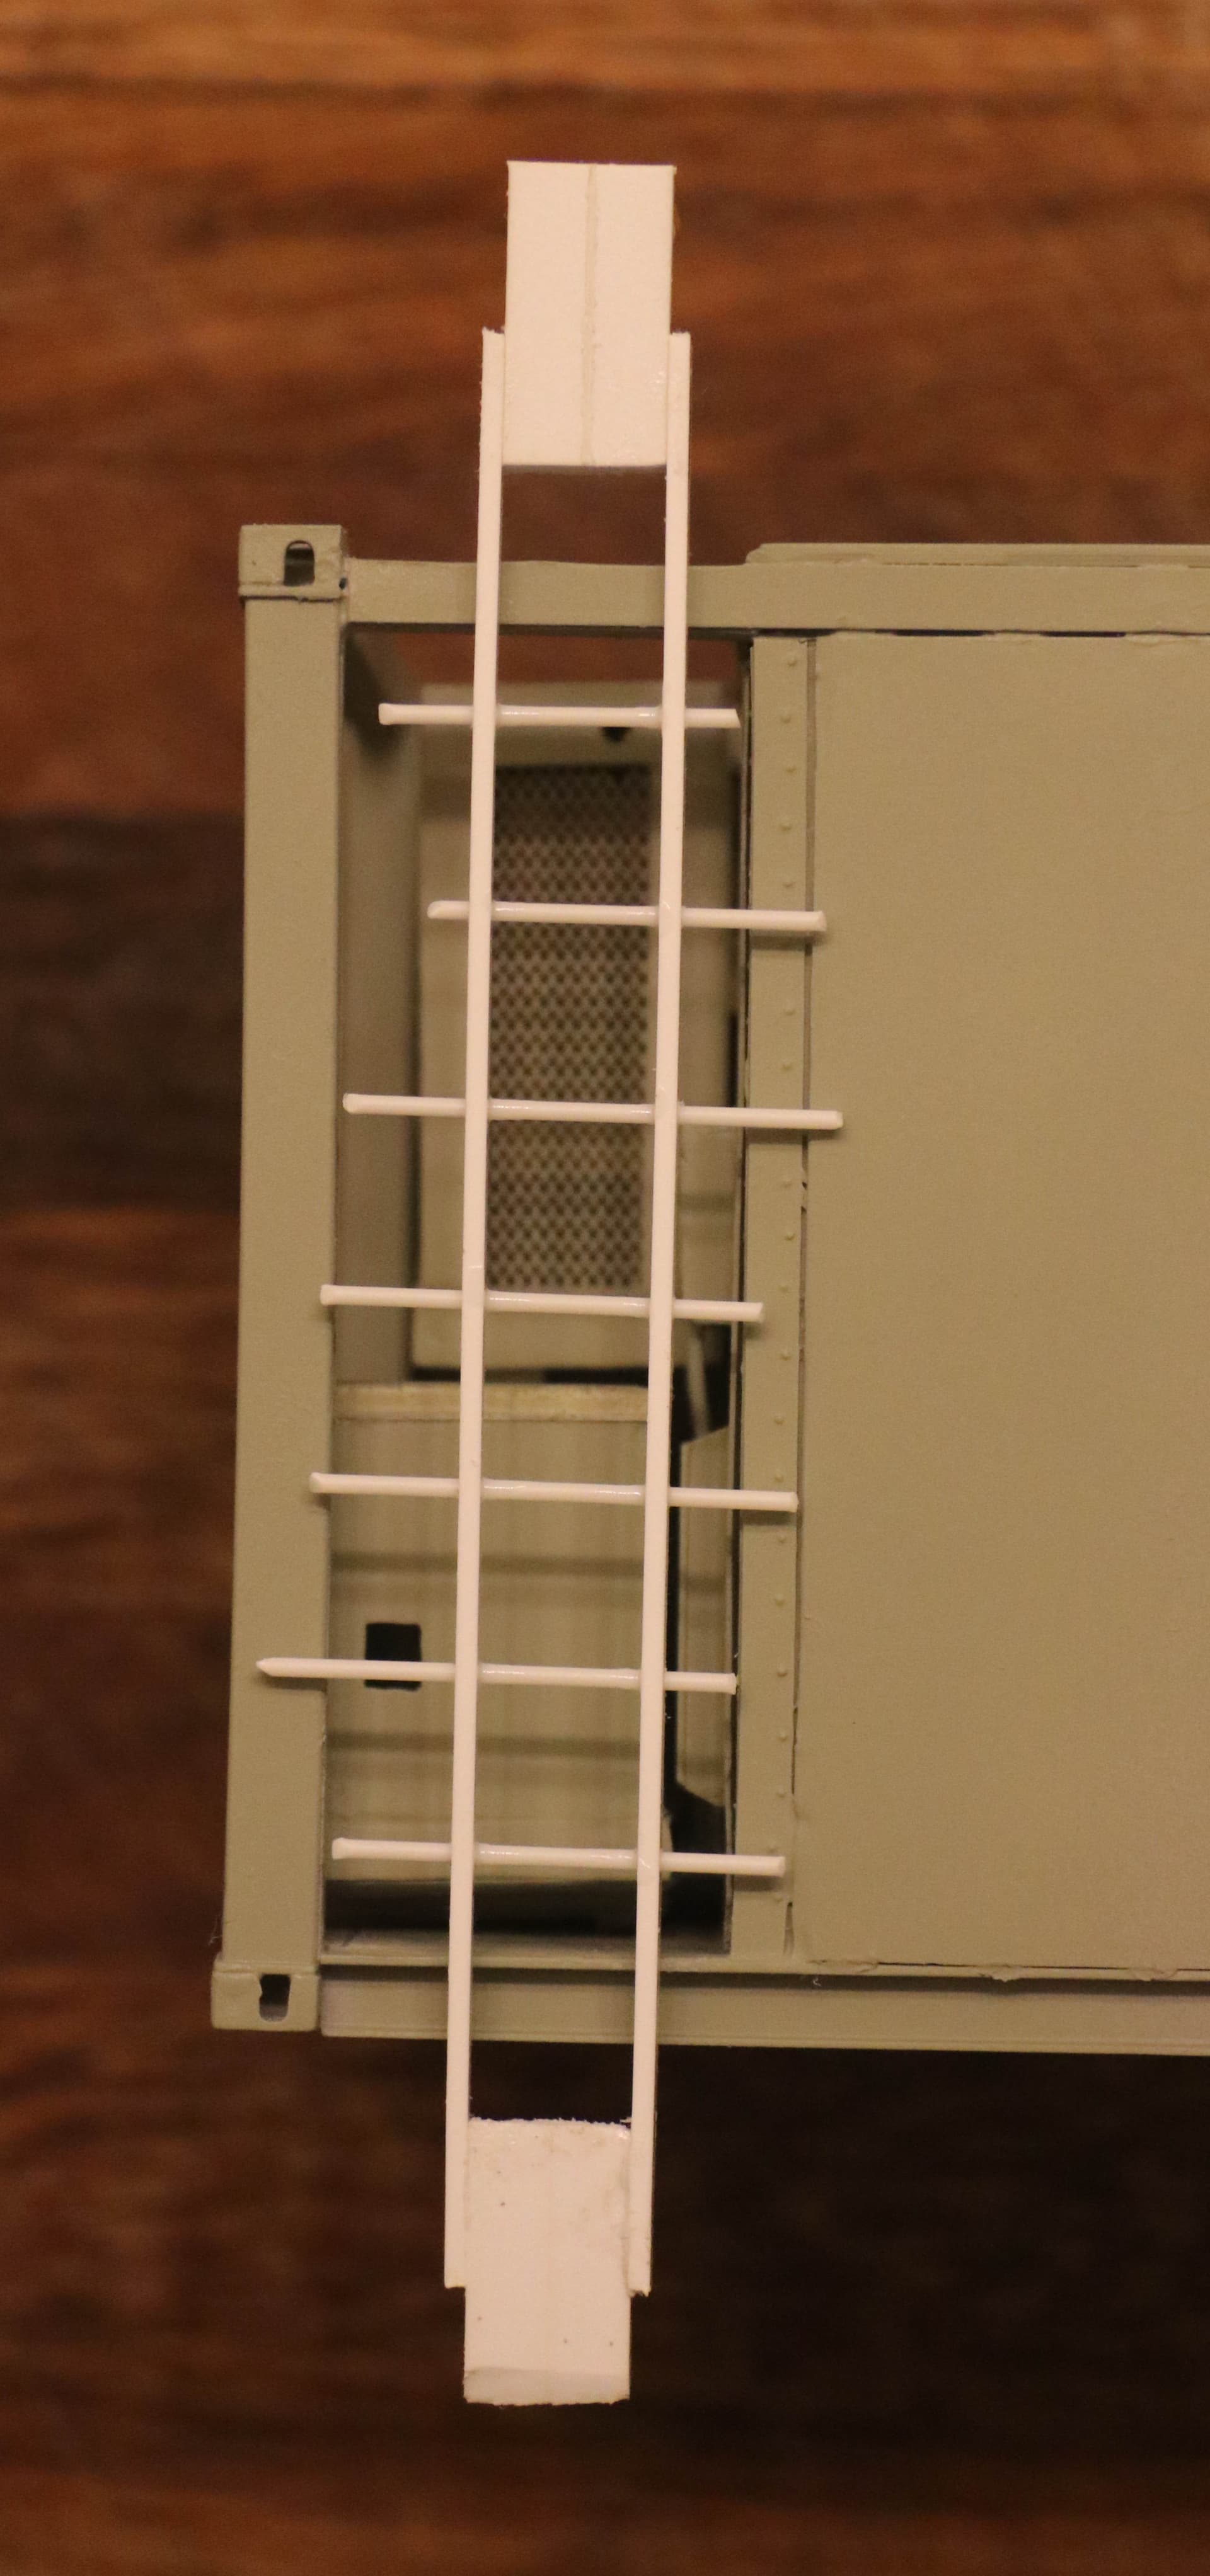
20 foot Refrigerated Container with roof access ladder:

Ladder racks for Mack NO Artillery Tractor:
(These storage racks would also look good on the CCKW with bumper mounted winch!)
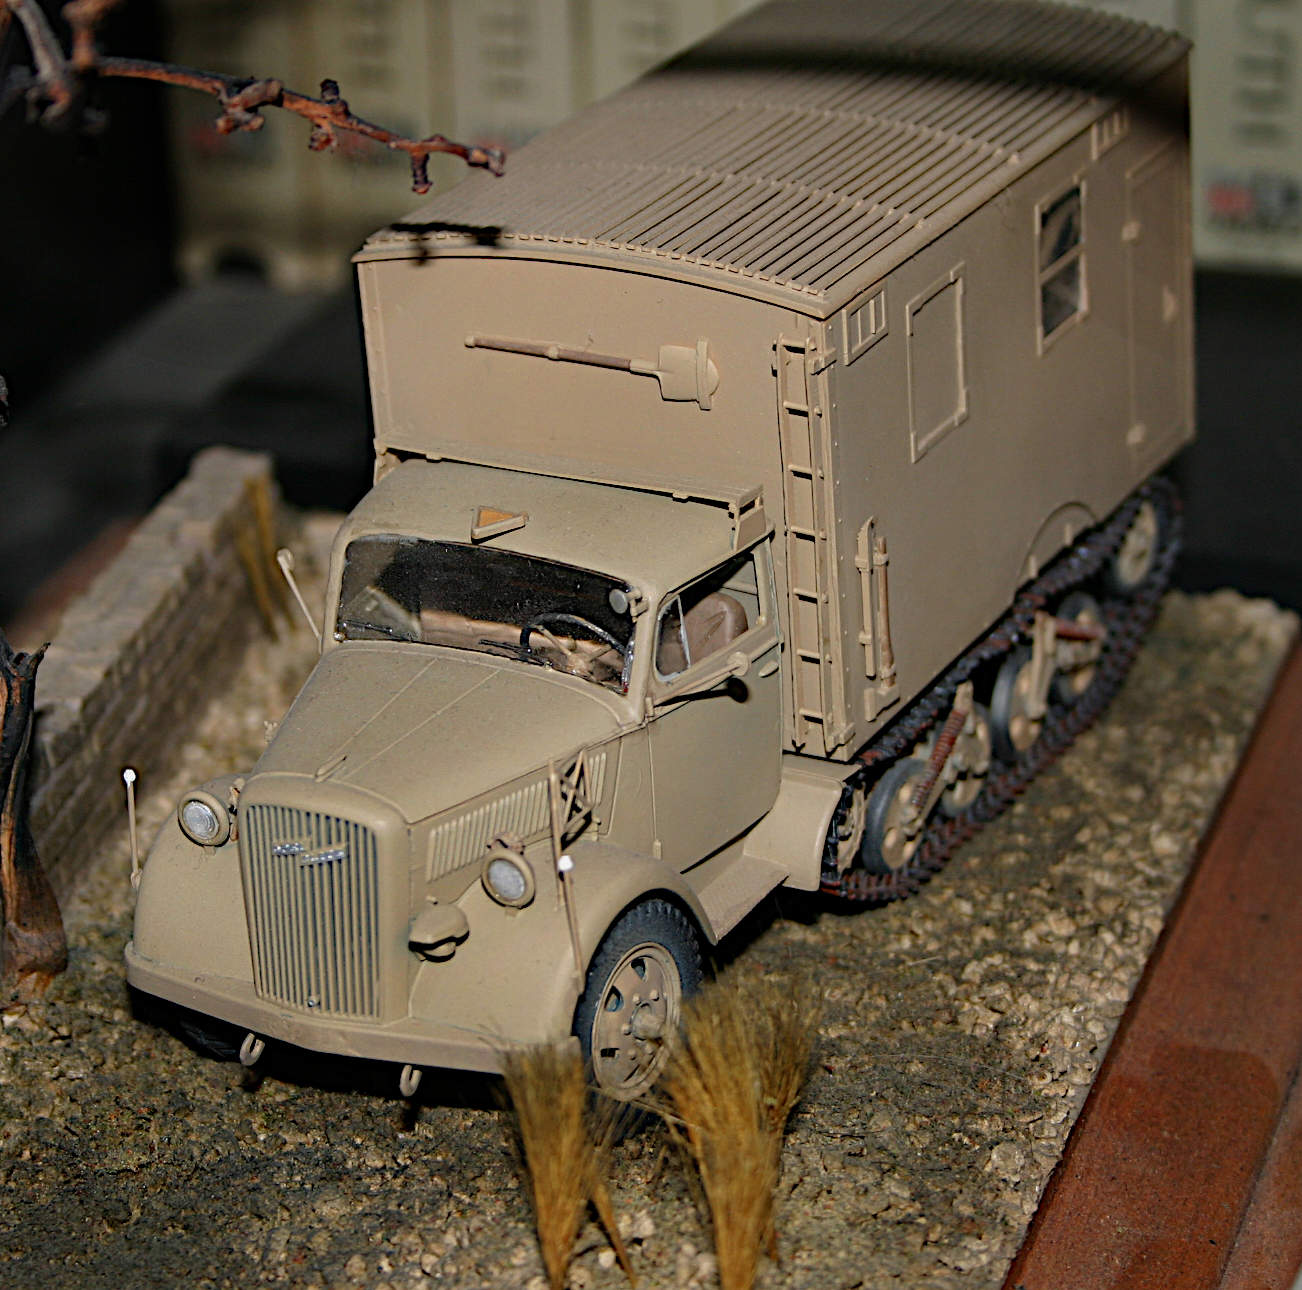
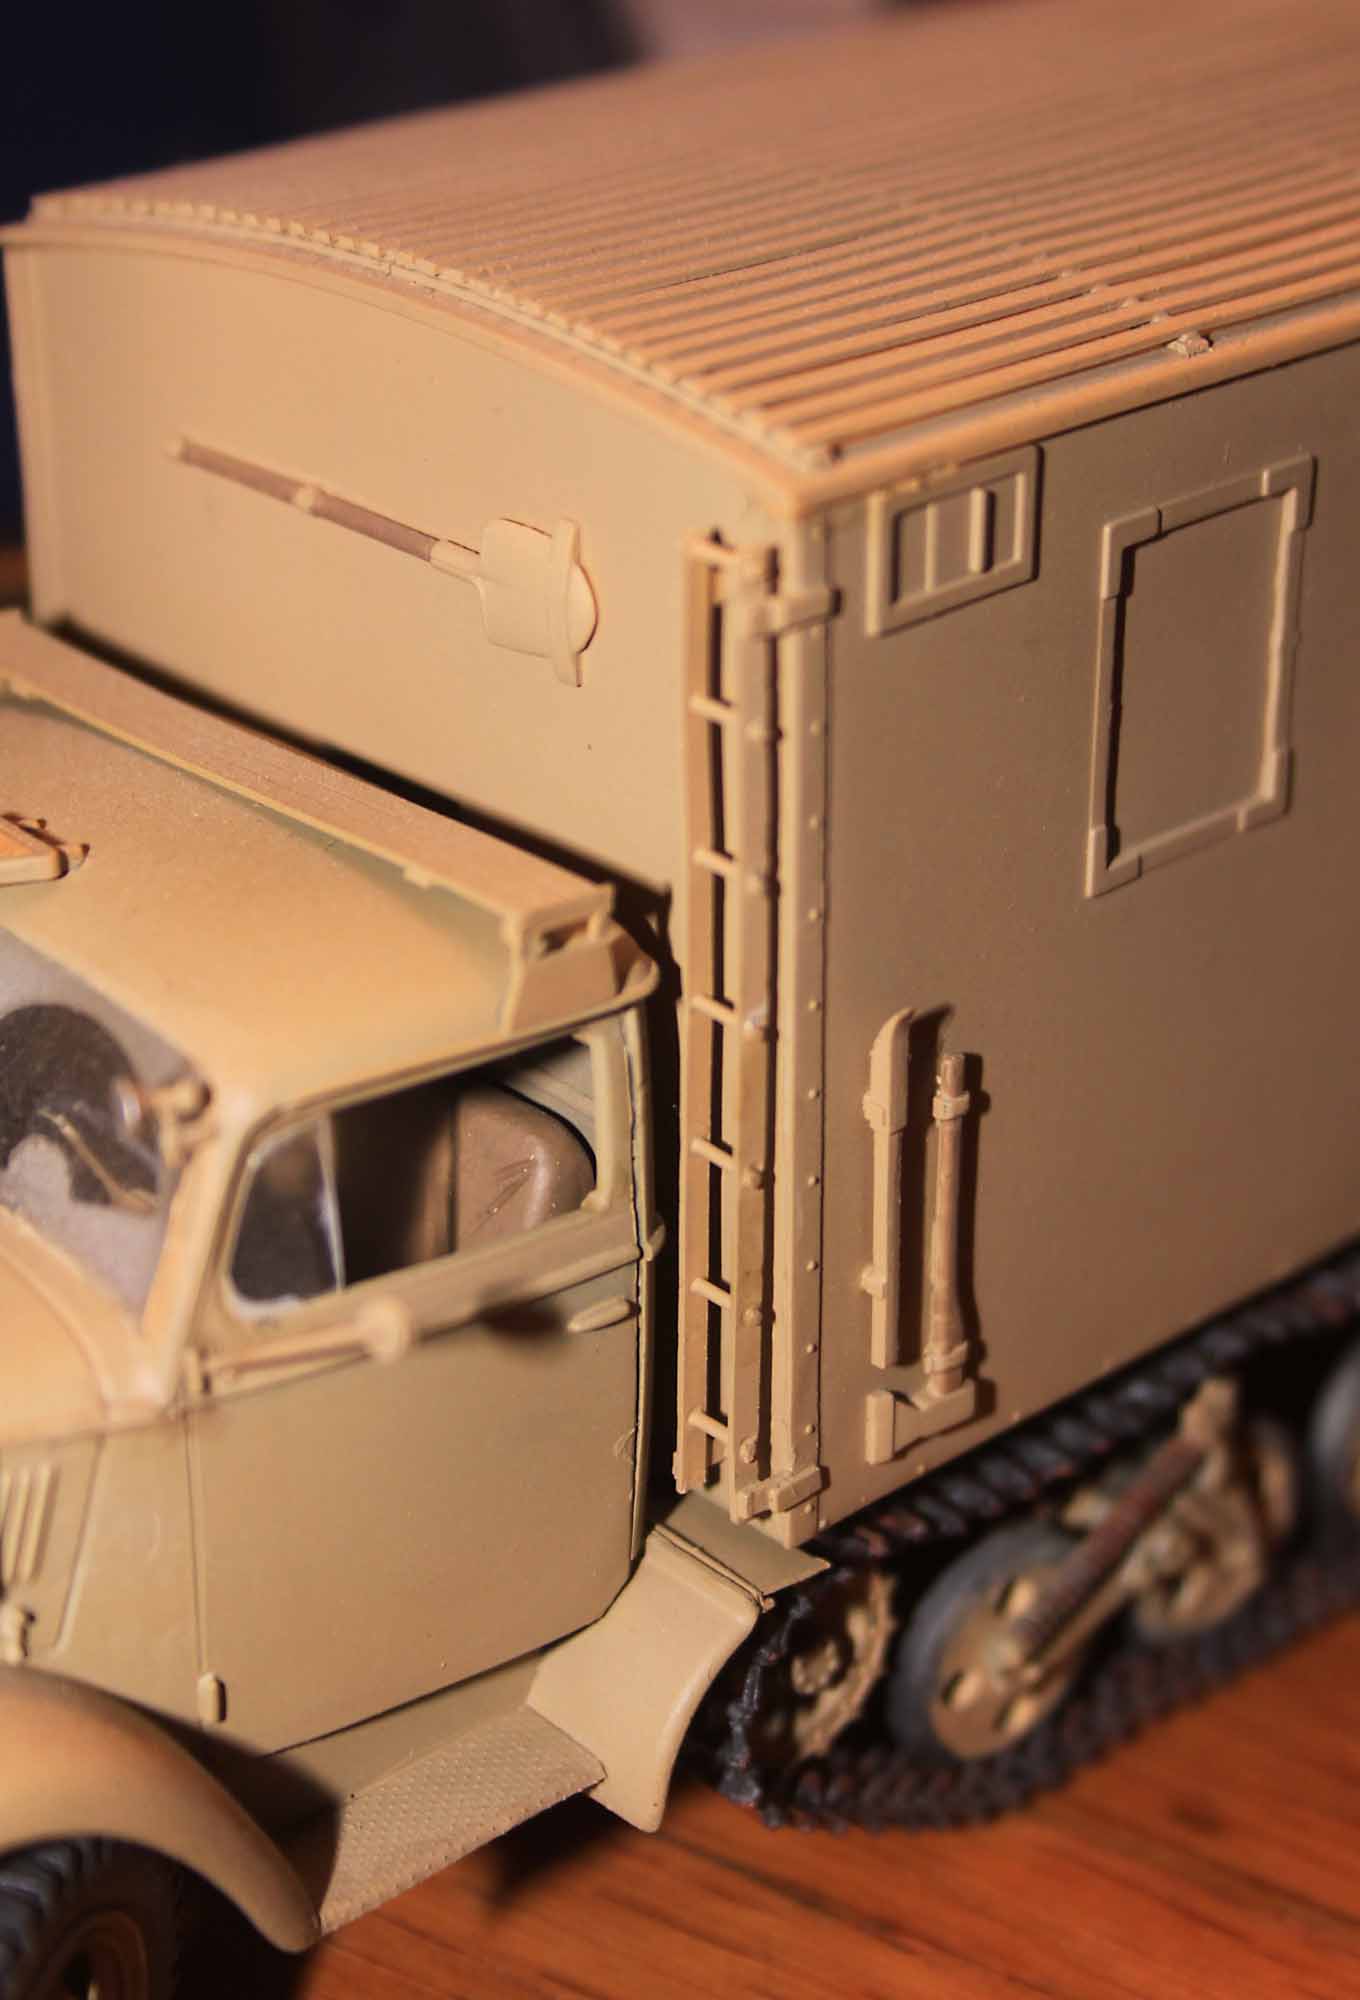
Opel Maultier V-2 Cable Service Vehicle with roof access ladder:
5 Likes
I want to build a ladder for just for the fun now. I can use some new tools. Thanks.
1 Like
I know exactly what you mean Tank!
Plus they are better than most injection molded ladders ~ no mold lines to remove and no flash.
2 Likes
There is no reason the same technique could not be used for making tapered ladders as well.
. . . .
Perhaps use smaller cross rods and add a flat tread plate (board) just above each rung (rod) to make a step.
(Thats how most wooden painter’s ladders are made anyway.)
2 Likes
(post removed)
This technique is excellent and I will surely use it soon, thanks again!
1 Like
All you need do is slightly taper the drill hole on the inner side of the vertical ladder strut with your #11 X-acto blade to allow for the slight angular play between the rod and the strut.
The glue will more than fill the slight gaps left in this type of construction.
2 Likes
Another ladder example plus something slightly different:
Another of my custom ladders is seen on the right rear corner in this photo of the GA3-66 Radio Van. But the access stairs on the left are something a bit different.

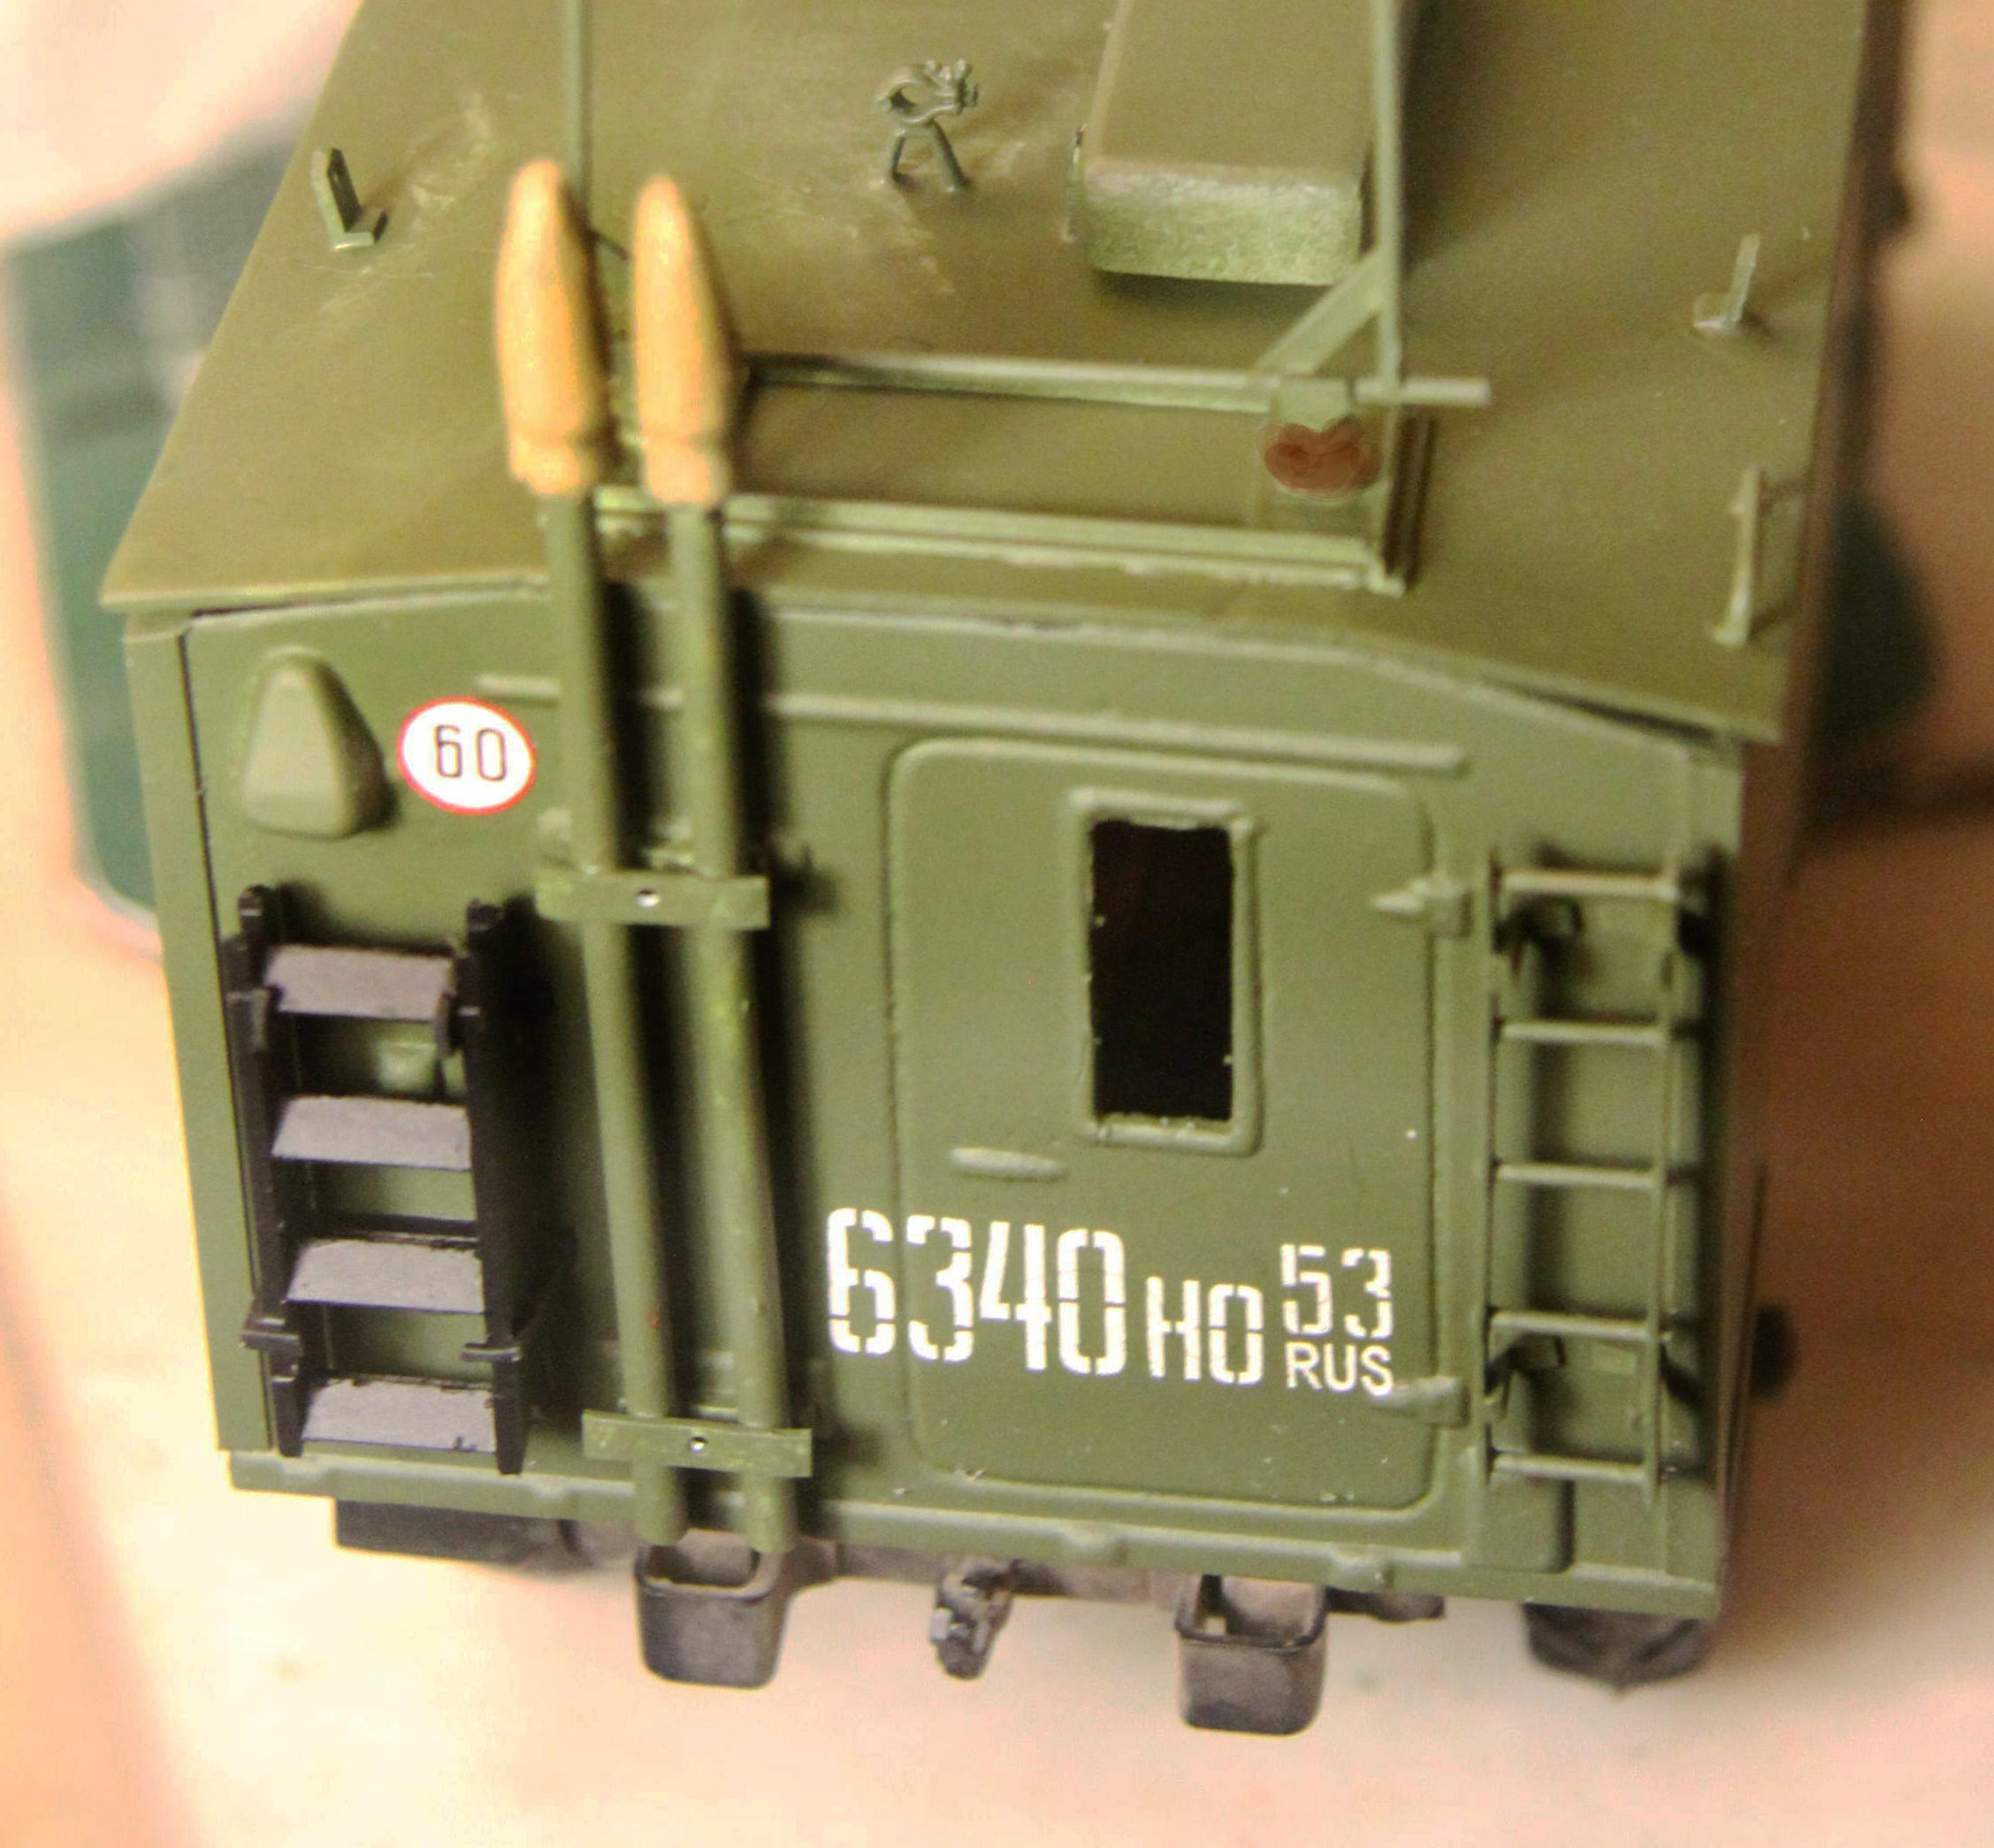
I was not looking forward to the attempt at scratch building these small 2 door access stairs but I hit upon an alternate solution. Evergreen Plastics offers a very nice molded HO scale staircase similar to this. In the end all that was necessary was for me to remove every other stair tread to convert a 1/87th scale staircase into a nice 1/35th scale stair.
(And save myself a whole lot of work!)
3 Likes
Couldn’t resist building a ladder with your method. Hope you don’t mind the photos of my attempt.
Using what I had at hand Evergreen #136 .30” x .125” for the sides and #211 0.04 rods for the steps. My block was #175 .10” x .10”
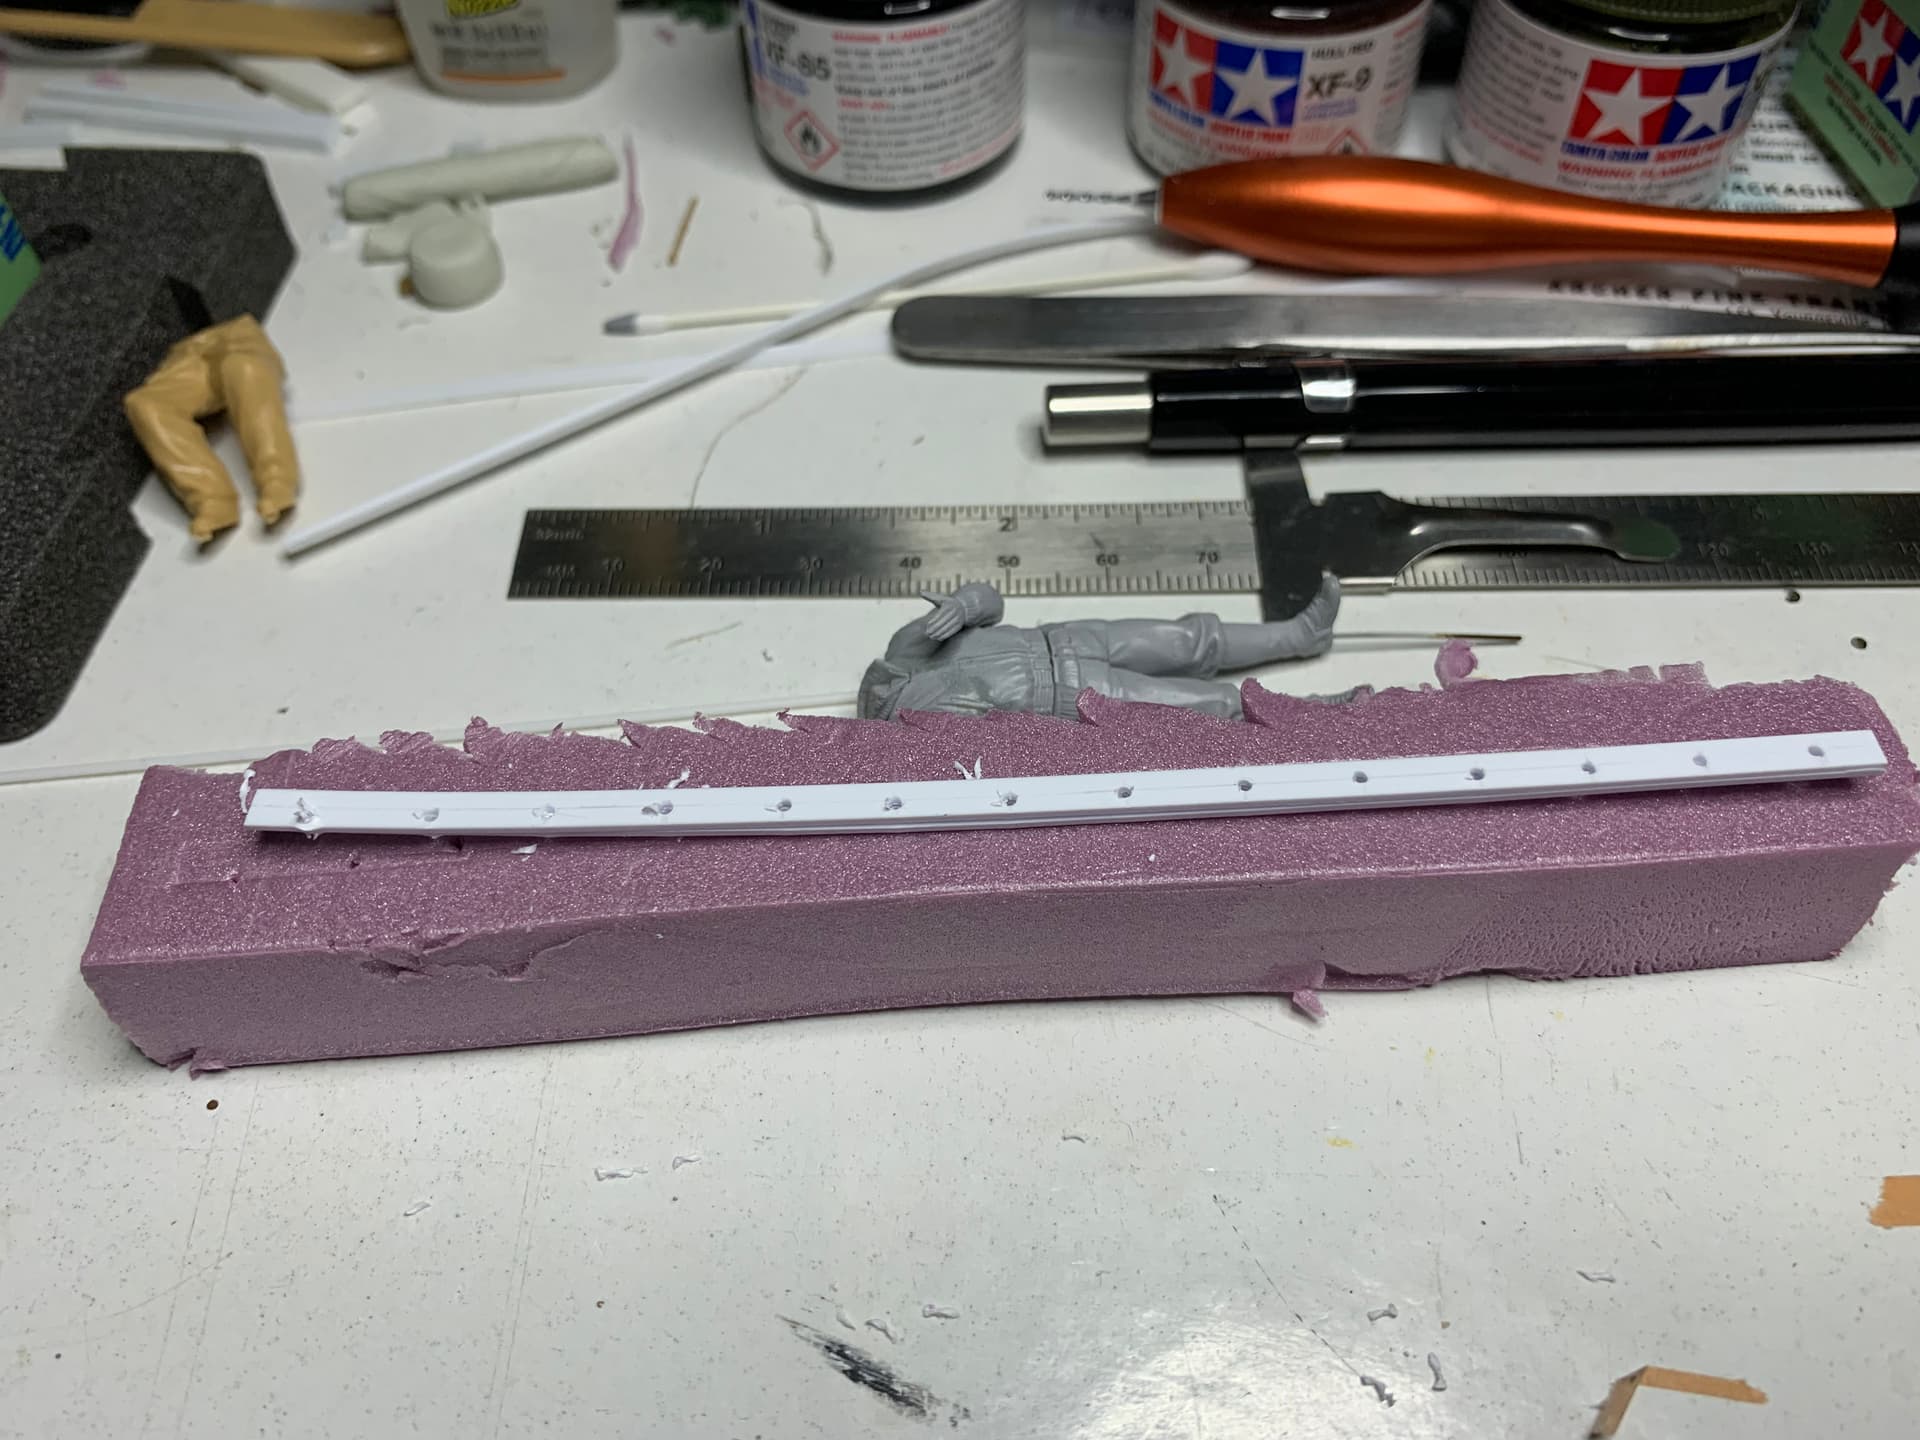
I cut my length at about 14 scale feet. Probably should have used tape to keep the rails clamped together more in the middle to help prevent the bends when drilling.
After I cut my steps out at about 2’ on the chopper, I made the blocks shorter….but only accounted for one side board width and not the other. I did the same dang thing with a 1:1 ramp out the back of the house a few years back.  I did that cause I didn’t want to waste material plus using the chopper is fun.
Not the best 10’ ladder and I probably wouldn’t use it myself as I know the builder. With some work to weather up it can sit in a the bed of a truck or elsewhere and look the part.
Thanks for the technique Mike.
3 Likes
Sweet!
Don’t mind the posts at all - all submissions welcome.
Mike
1 Like
On a Ladder Related Note:
Plasistrut makes an assortment of multi-scale molded plastic ladders in various sizes. I got one that was 5/8th inch wide and thought of making some sort of extension ladder in 1/35th.
I took a second section of ladder and cut and narrowed the rungs along one side. I then glued this to a section of uncut ladder, added some small “ELL” brackets made from “C” channel and I had my extension ladder.
(I could have made it fully functional but did not see the point.)
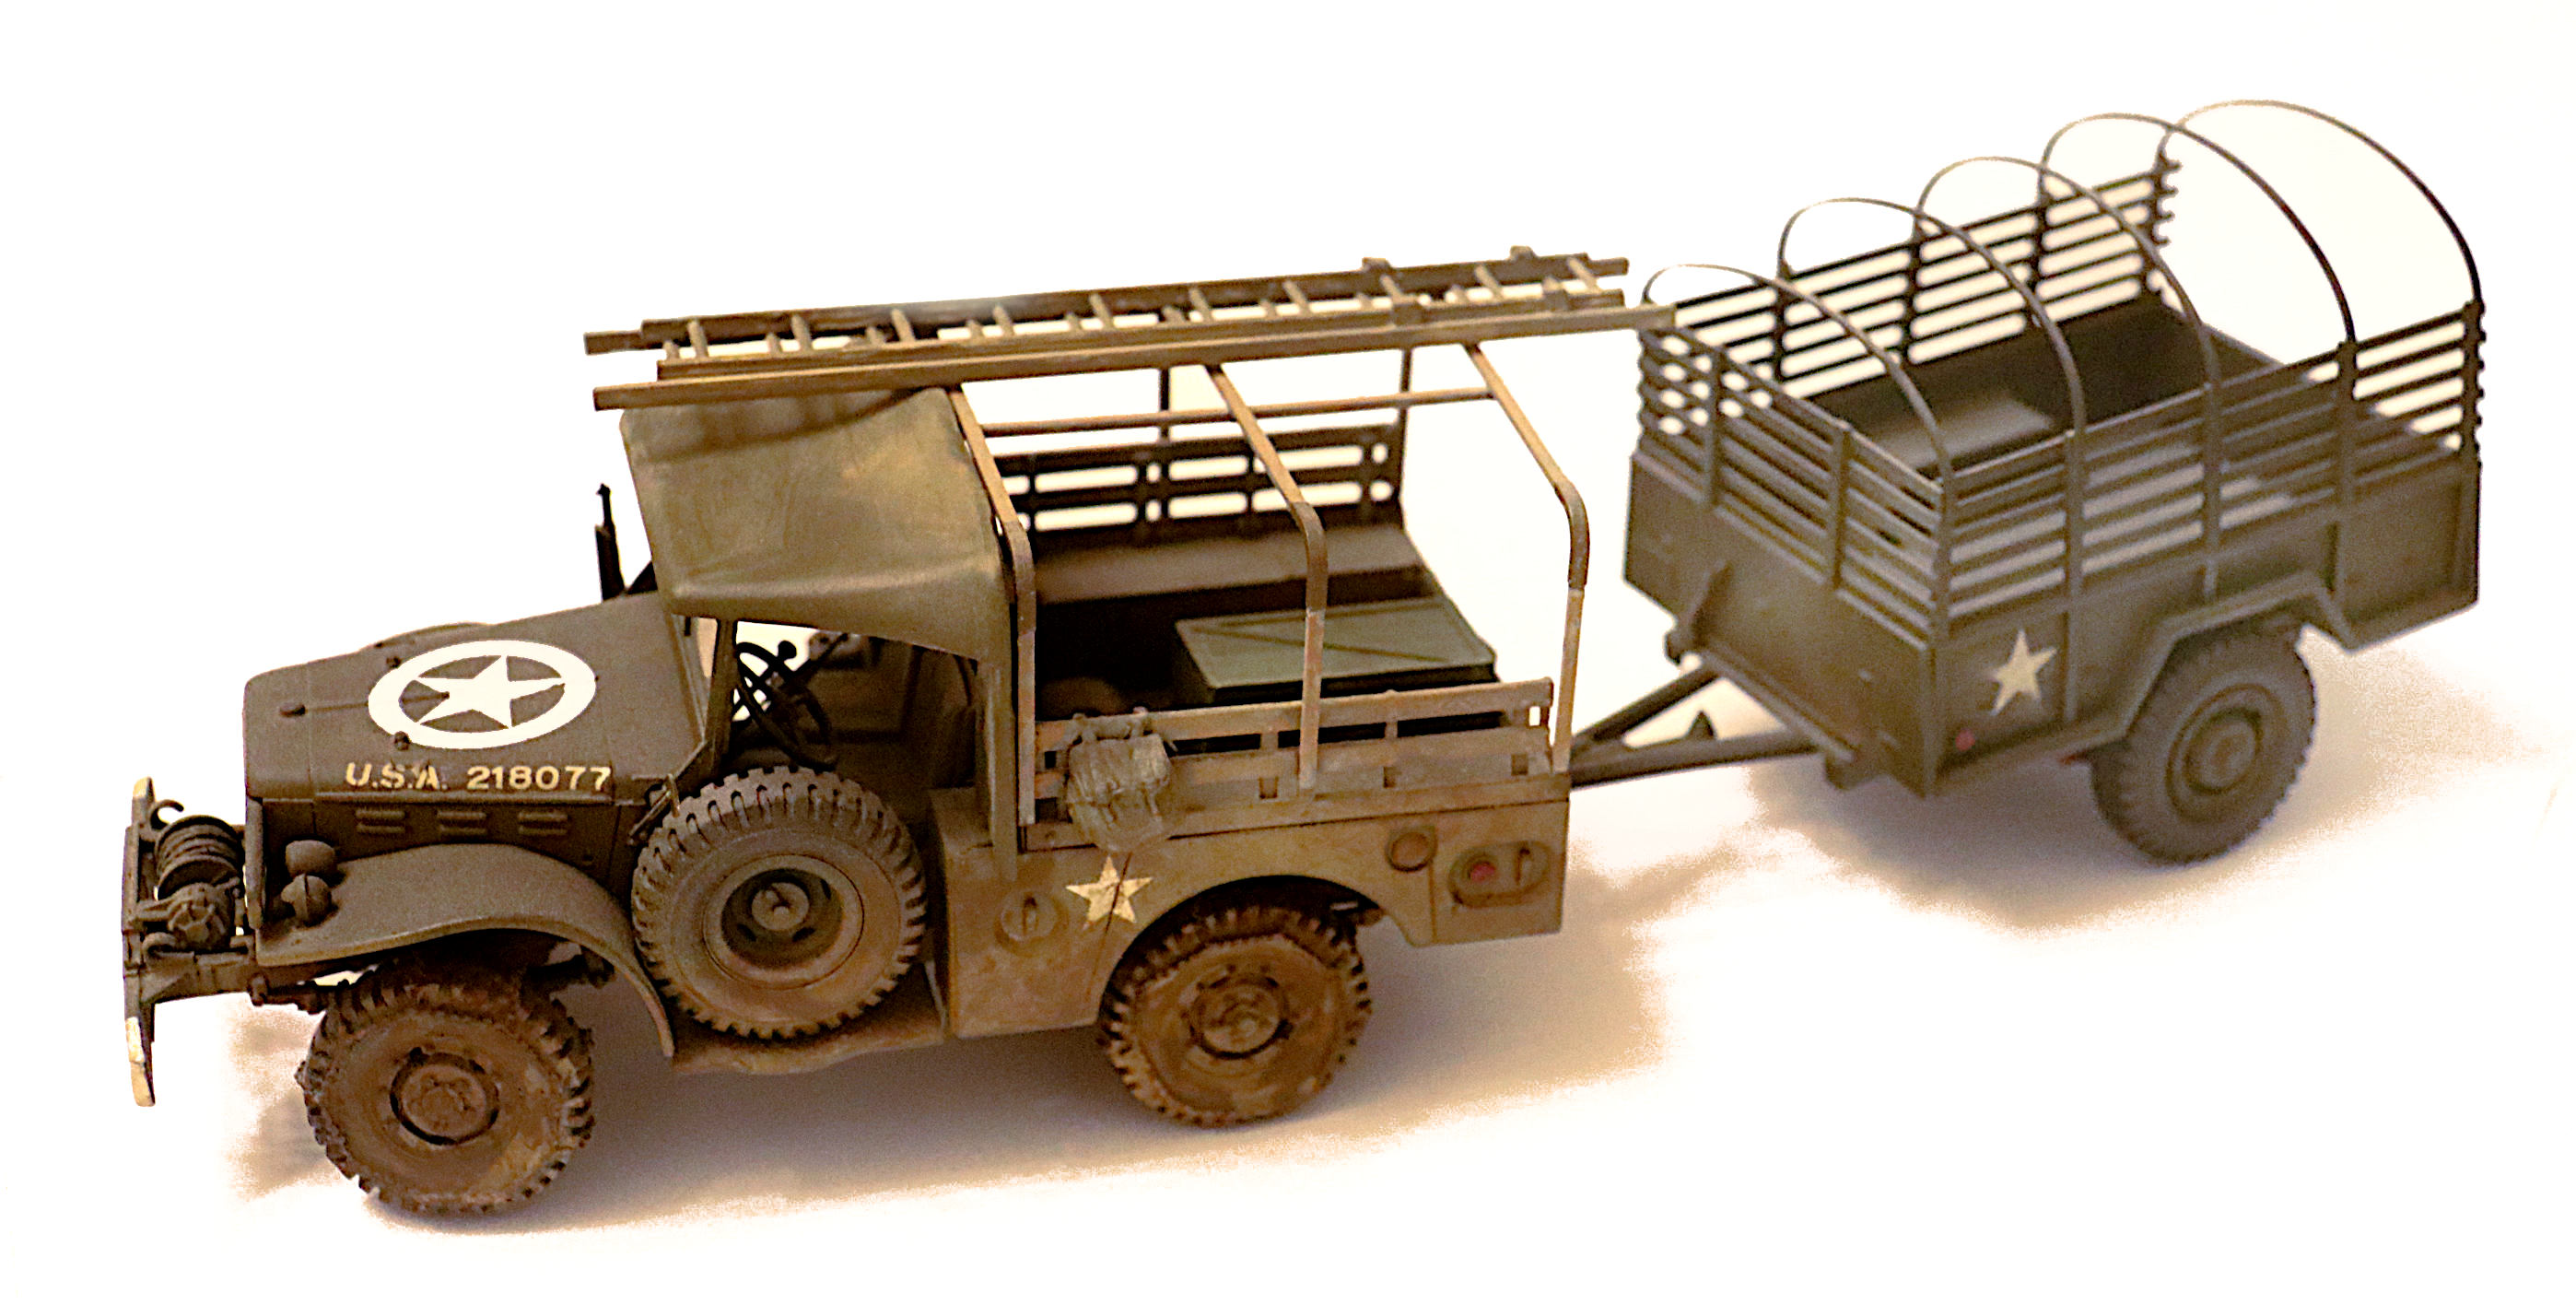

Seen here is the old, OLD, Italeri WC and M100 trailer. * I added AM resin tires with chains, some extra kit and lots to mud to the vehicle. Somewhere/somehow I came across a set of the Skybow wood framing for the rear WC loadbox and added that as well, plus chopped the Italeri stock cloth top to create something a bit different.
*(Sometimes it’s just fun to build one of the old standard models - which are actually still quite good - no worries about not having a nice engine, no worries about cutting the hood open - Just the chance to focus on the vehicle itself in its’ work-a-day appearance.)
3 Likes
Hey Tank ~ as to you alignment problems there in the center while drilling your holes:
Try drilling on a more solid surface such as one of those green plastic “cutting mats” rather than that thick chuck of dense foam.
I buy the smallest size mat, (5" x 5") to drill and cut on and then simply replace it very 6-8 months. I use this on top of my BIG desktop cutting mat to protect the larger one.
2 Likes
I’ve used this technique before but I really like your additions to keep everything aligned and square!
Nice mini tutorial!
1 Like