Fantastic stuff, Roly. Really impressive kit and you’ve really done a super job on the weathering. It is going to look the business when completed, cant be far off now?
1 Like
Thankyou, however it is not in the same league as your airbrush work.
All the pigmentation needs doing now, which will take a while, finally, I have some equipment accessories, pulled together from a number of different kits, to paint and stow in the storage area to the rear of the crew hatches.
Then the whip antennas and then I reckon that will be it.
2 Likes
I’m in the middle of a RFM Canadian Leo 2A6M build that just will not end hahaha, cant wait to get the airbrush onto it! Seemingly endless hours on the build, just taking absolutely forever. I find the painting and weathering stages take vastly less time than the builds for me. I’m not actually a natural at all with glue, clippers and a file. I don’t mind it but not when it goes on endlessly like this Leo has. I’ve bult the Border and Tamiya Leopard 2s and they took half the time this one has. But hopefully the end is in sight…
Looking forward to the finished pics of the Namer. What do you have up next after, or haven’t you thought about that yet?
I’ve got the Tamiya F-35A in 1/48 with a bucket of aftermarket bits and pieces for a RNLAF commission build up next, but am considering the Meng Namer after that, funnily enough.
1 Like
Have the HobbyBoss Puma AEV c/w mine rollers and carpet mine firing system - another monster. I also have the Border Merkava Mk IID c/w full interior on pre-order for the end of January. I ‘might’ go and do the Tamiya Uhu i have in my small stash, just to ring the changes a bit. I have the Aires detail set for the Uhu.
2 Likes
Its a great kit, goes together well. Comes with rubber band tracks so consider A/M Friul if that isn’t your thing.
2 Likes
Brilliant work on those rollers. Really great finish ![]()
2 Likes
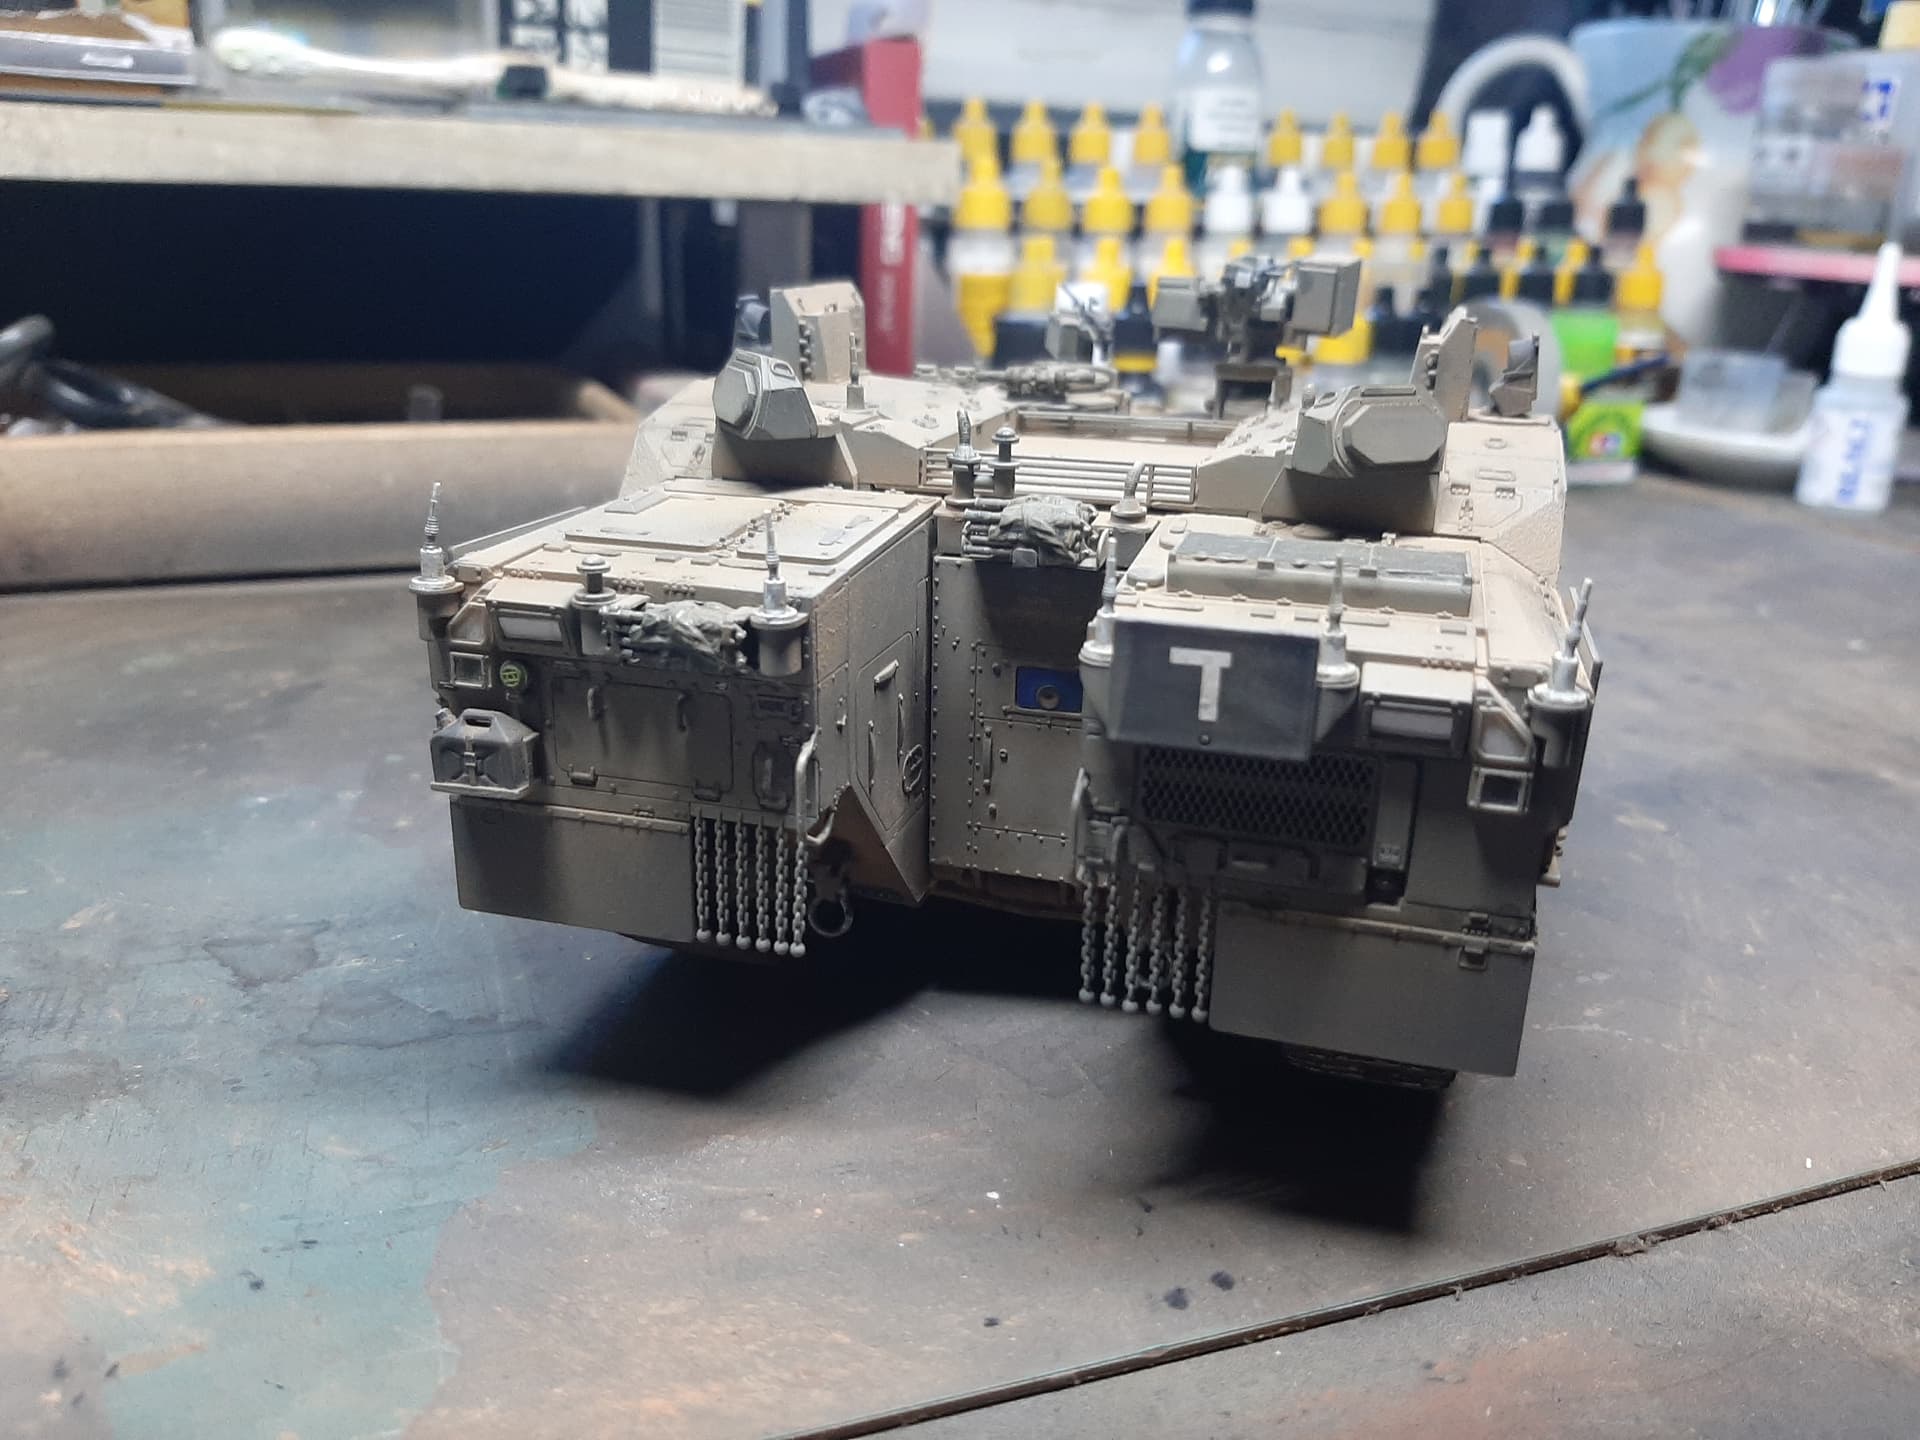
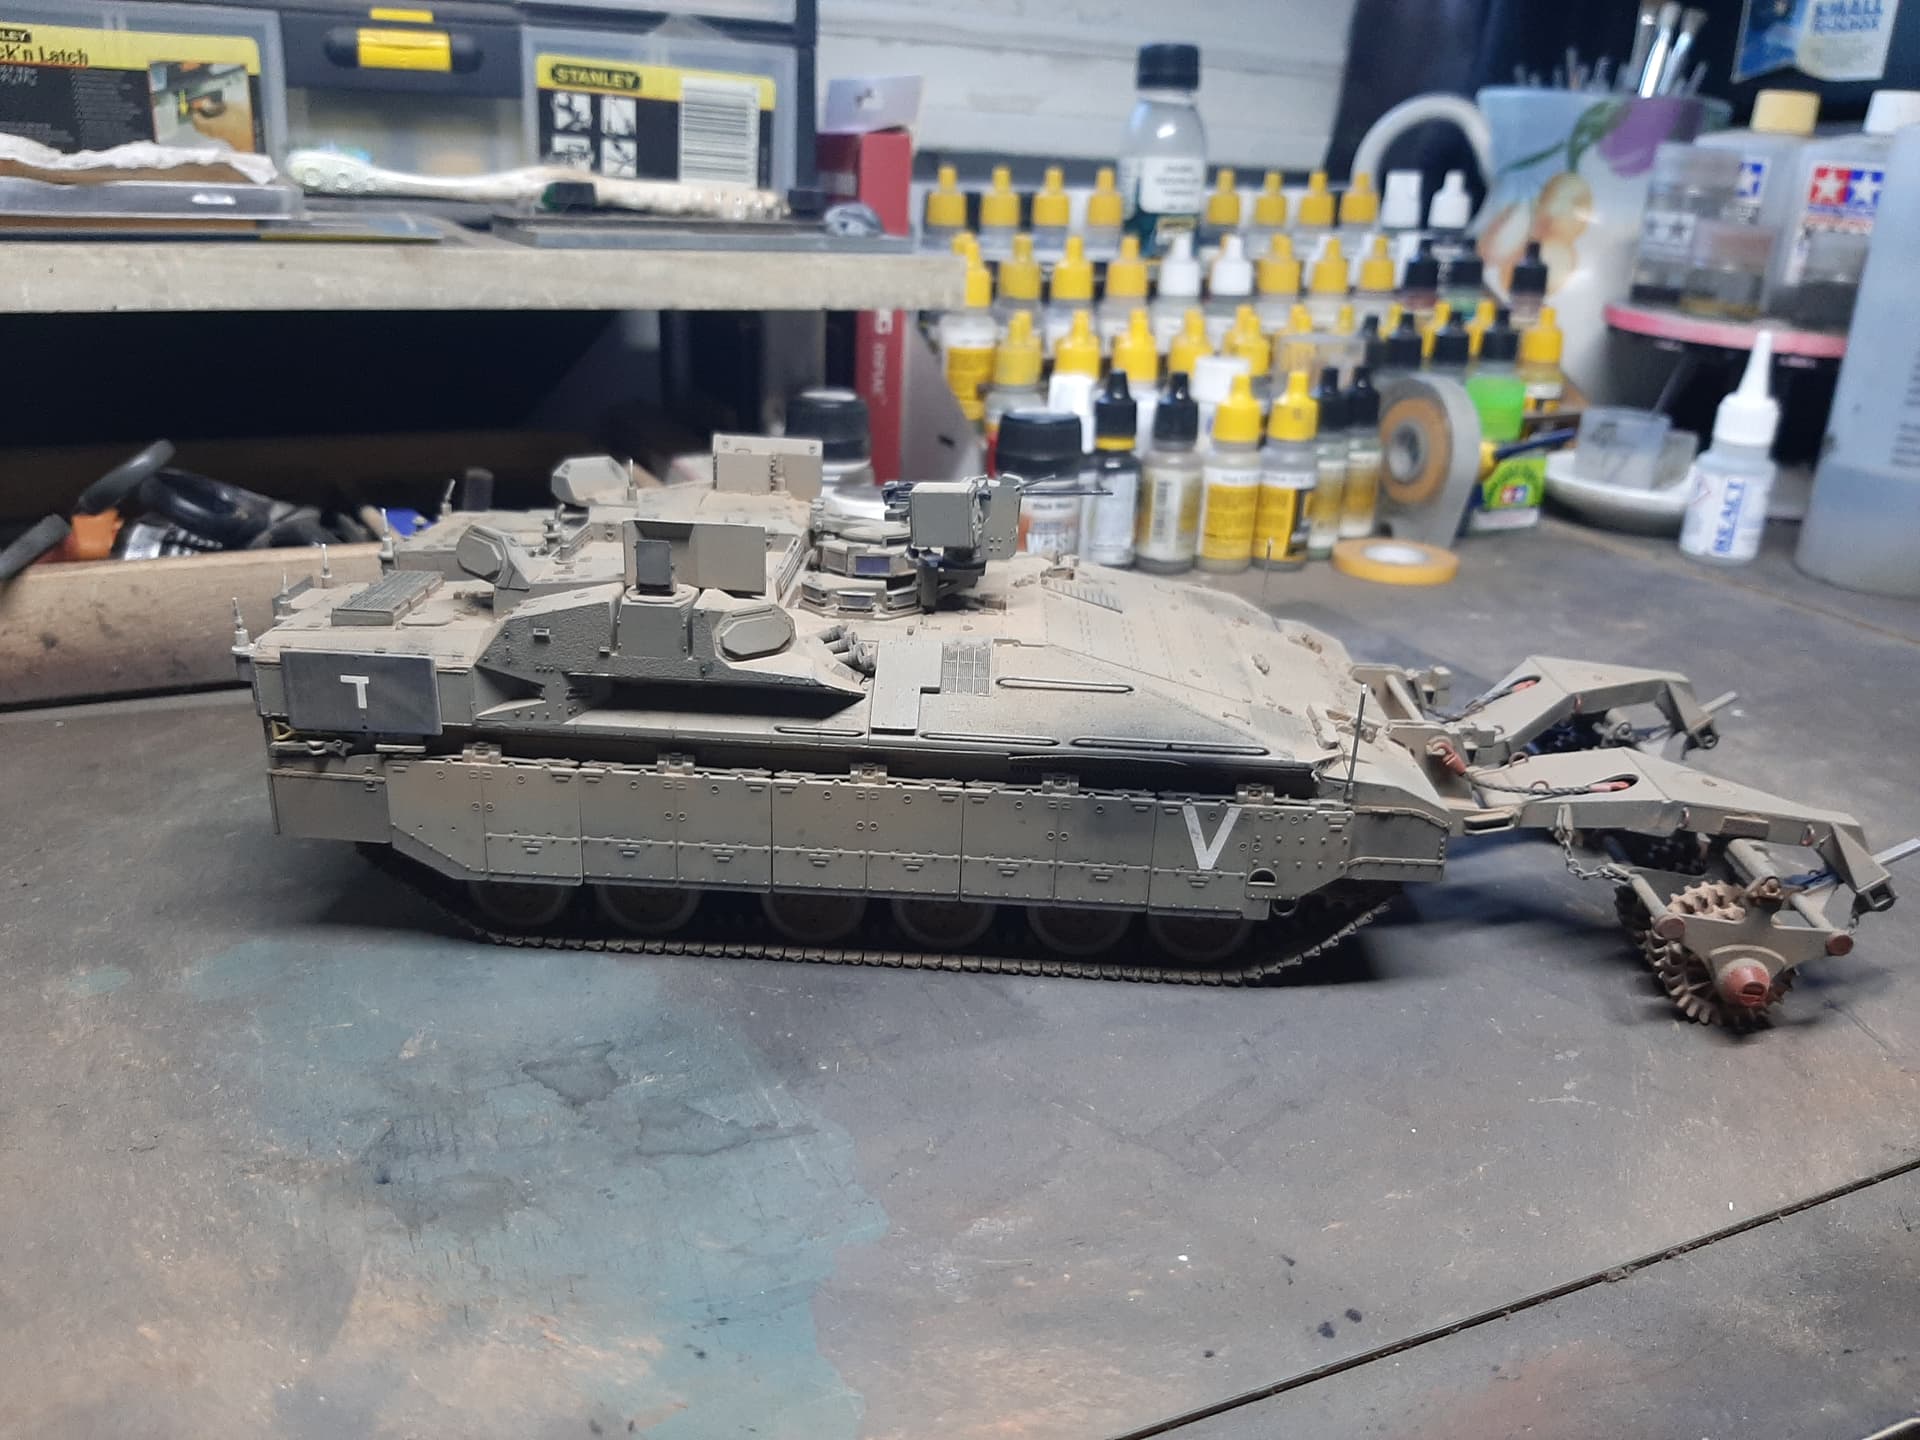
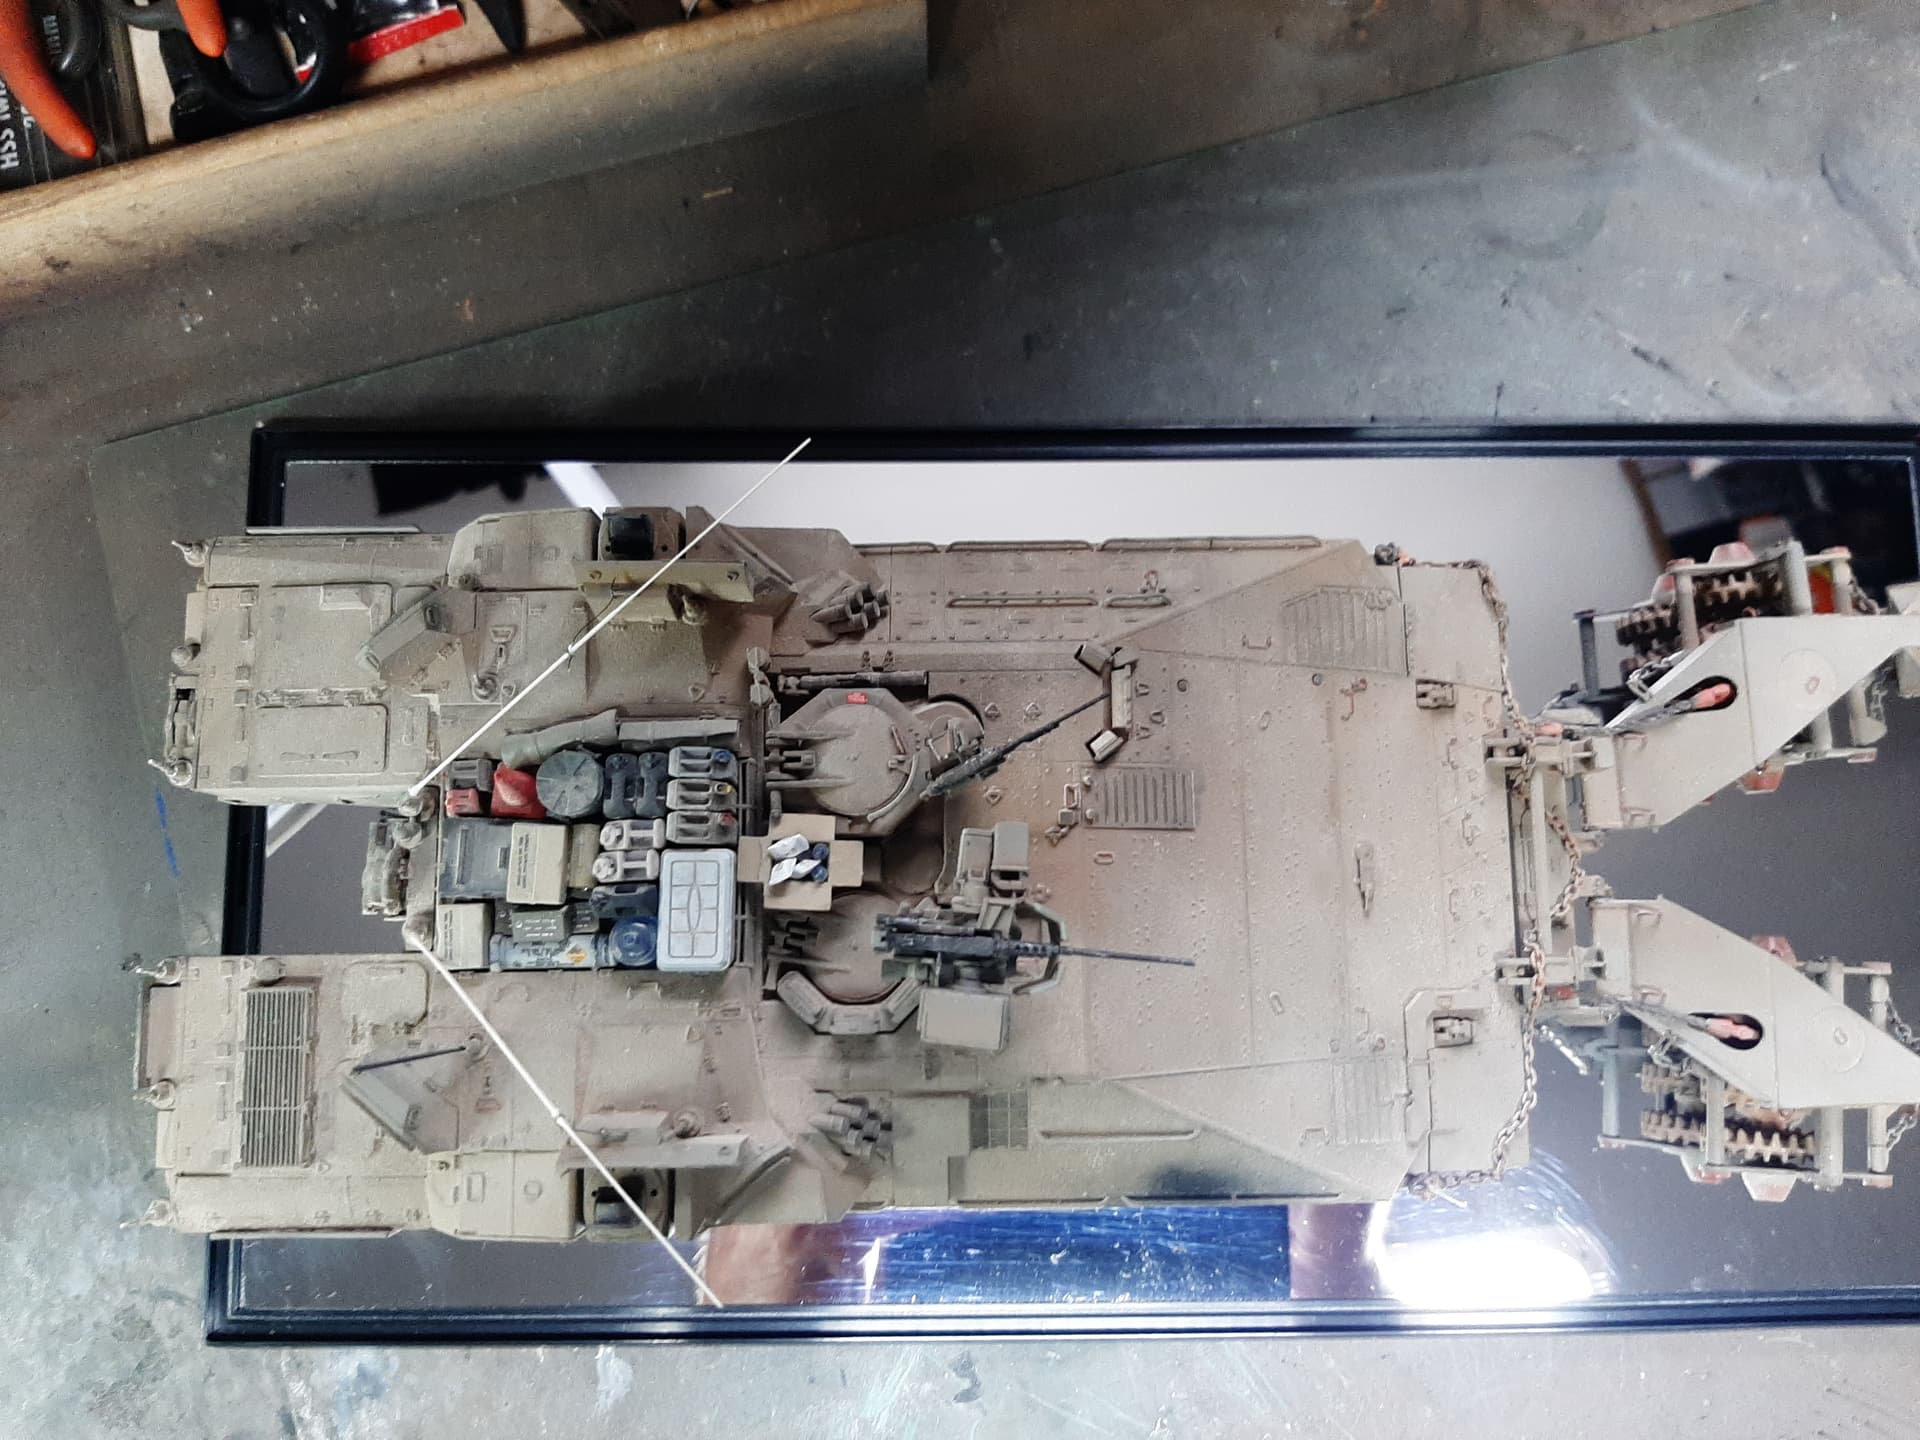
First pass with pigments, African Earth and Golan Earth. It came out quite well.
Now it is time to accessorise before finishing off the pigment work, probably with some Sinai Sand.

13 Likes
That is just beautifully done. An excellent model.
1 Like
Really nice detailed build. The finish is exceptional, not over done … nice and subtle so not to distract from the wagon… ![]()
2 Likes
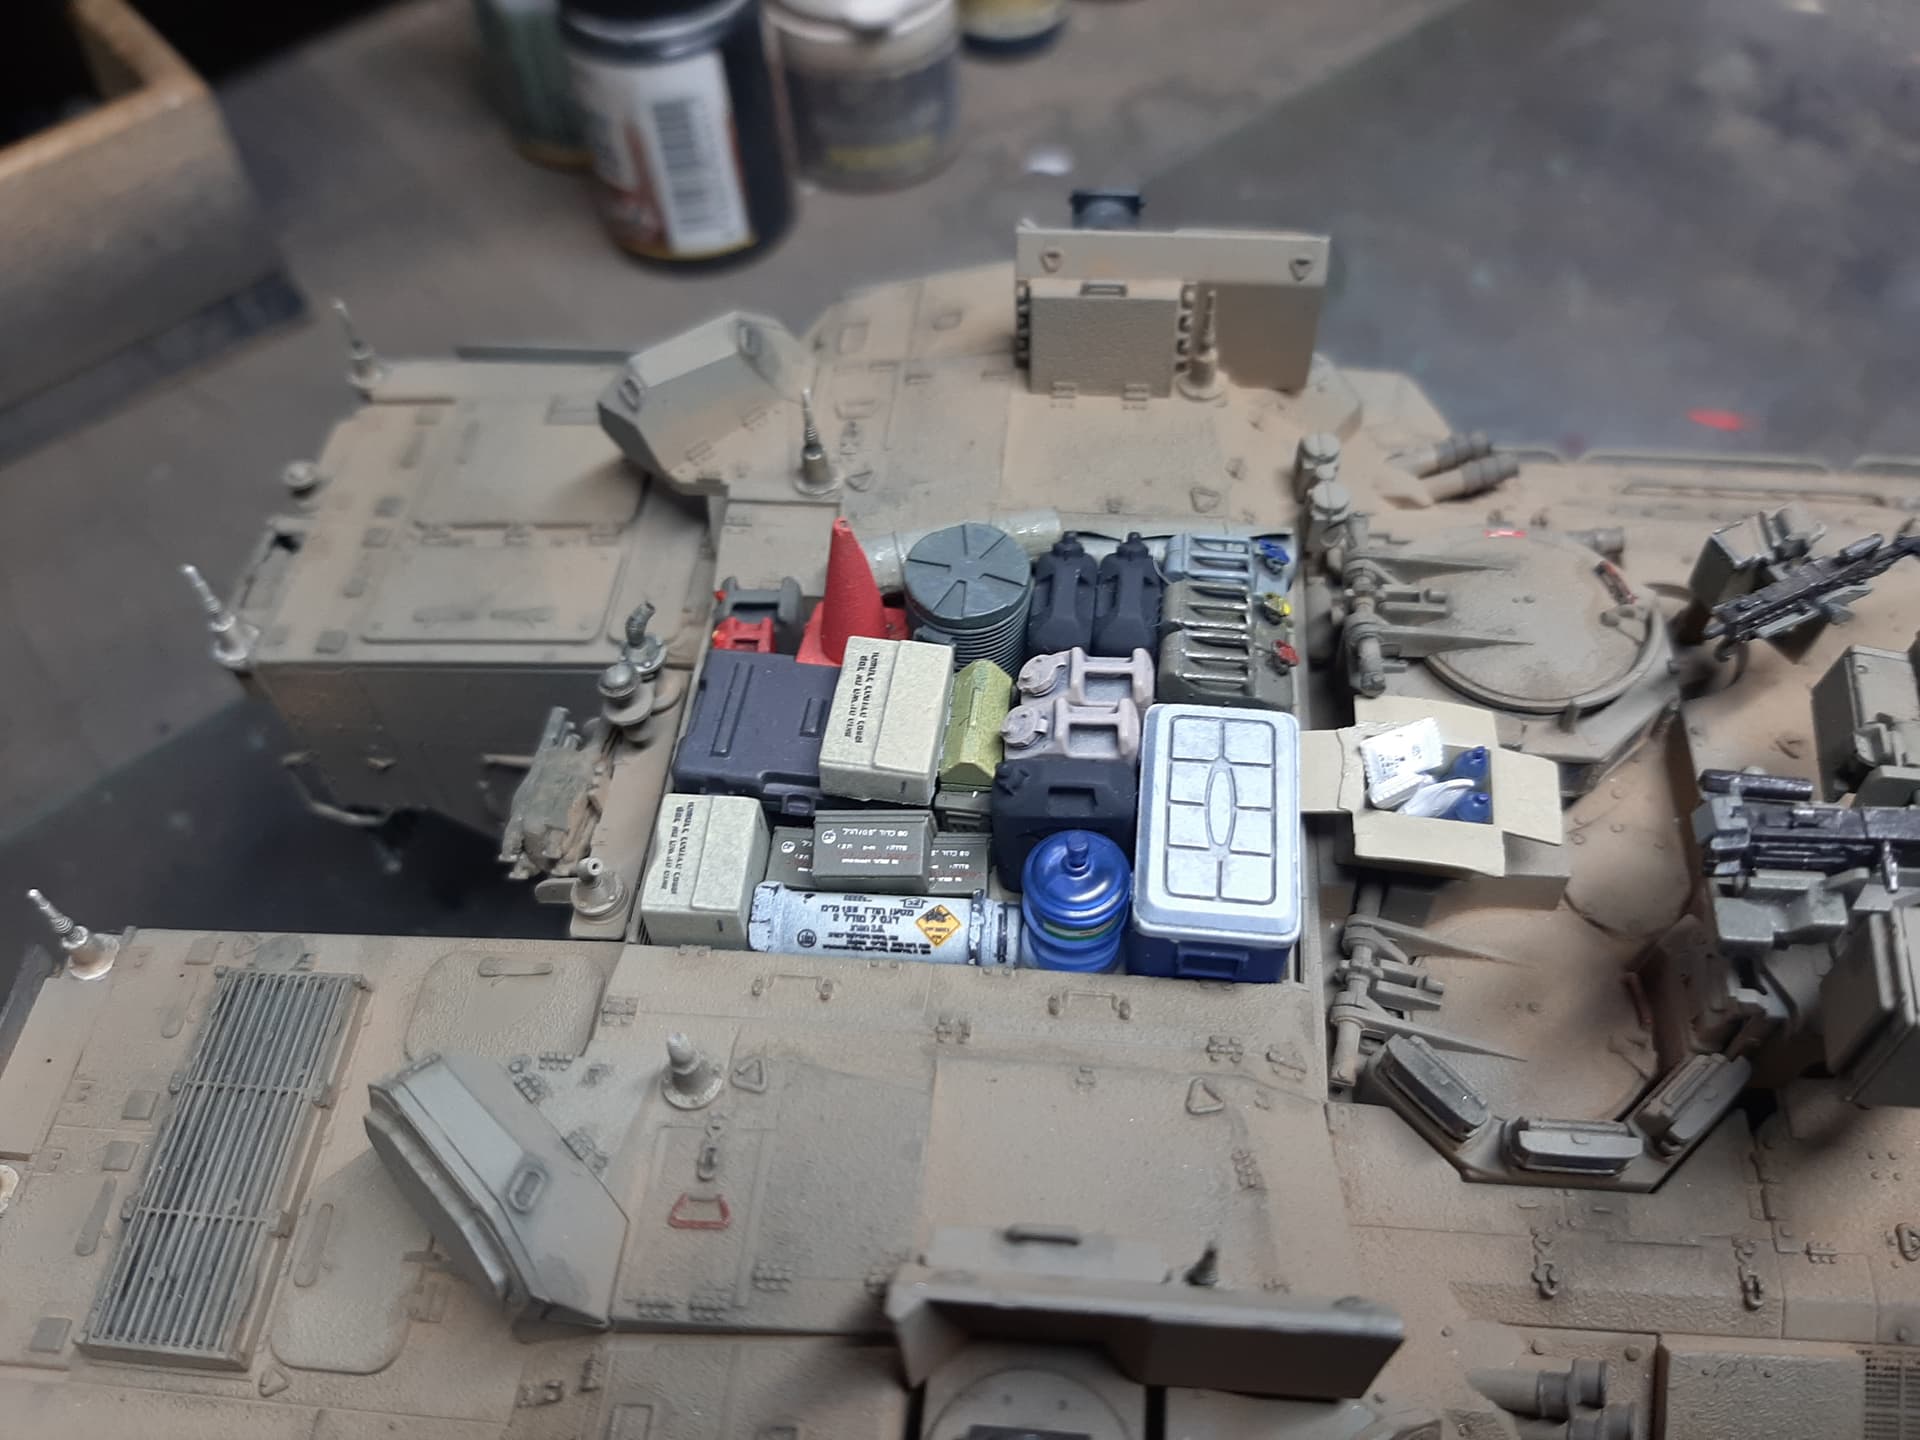
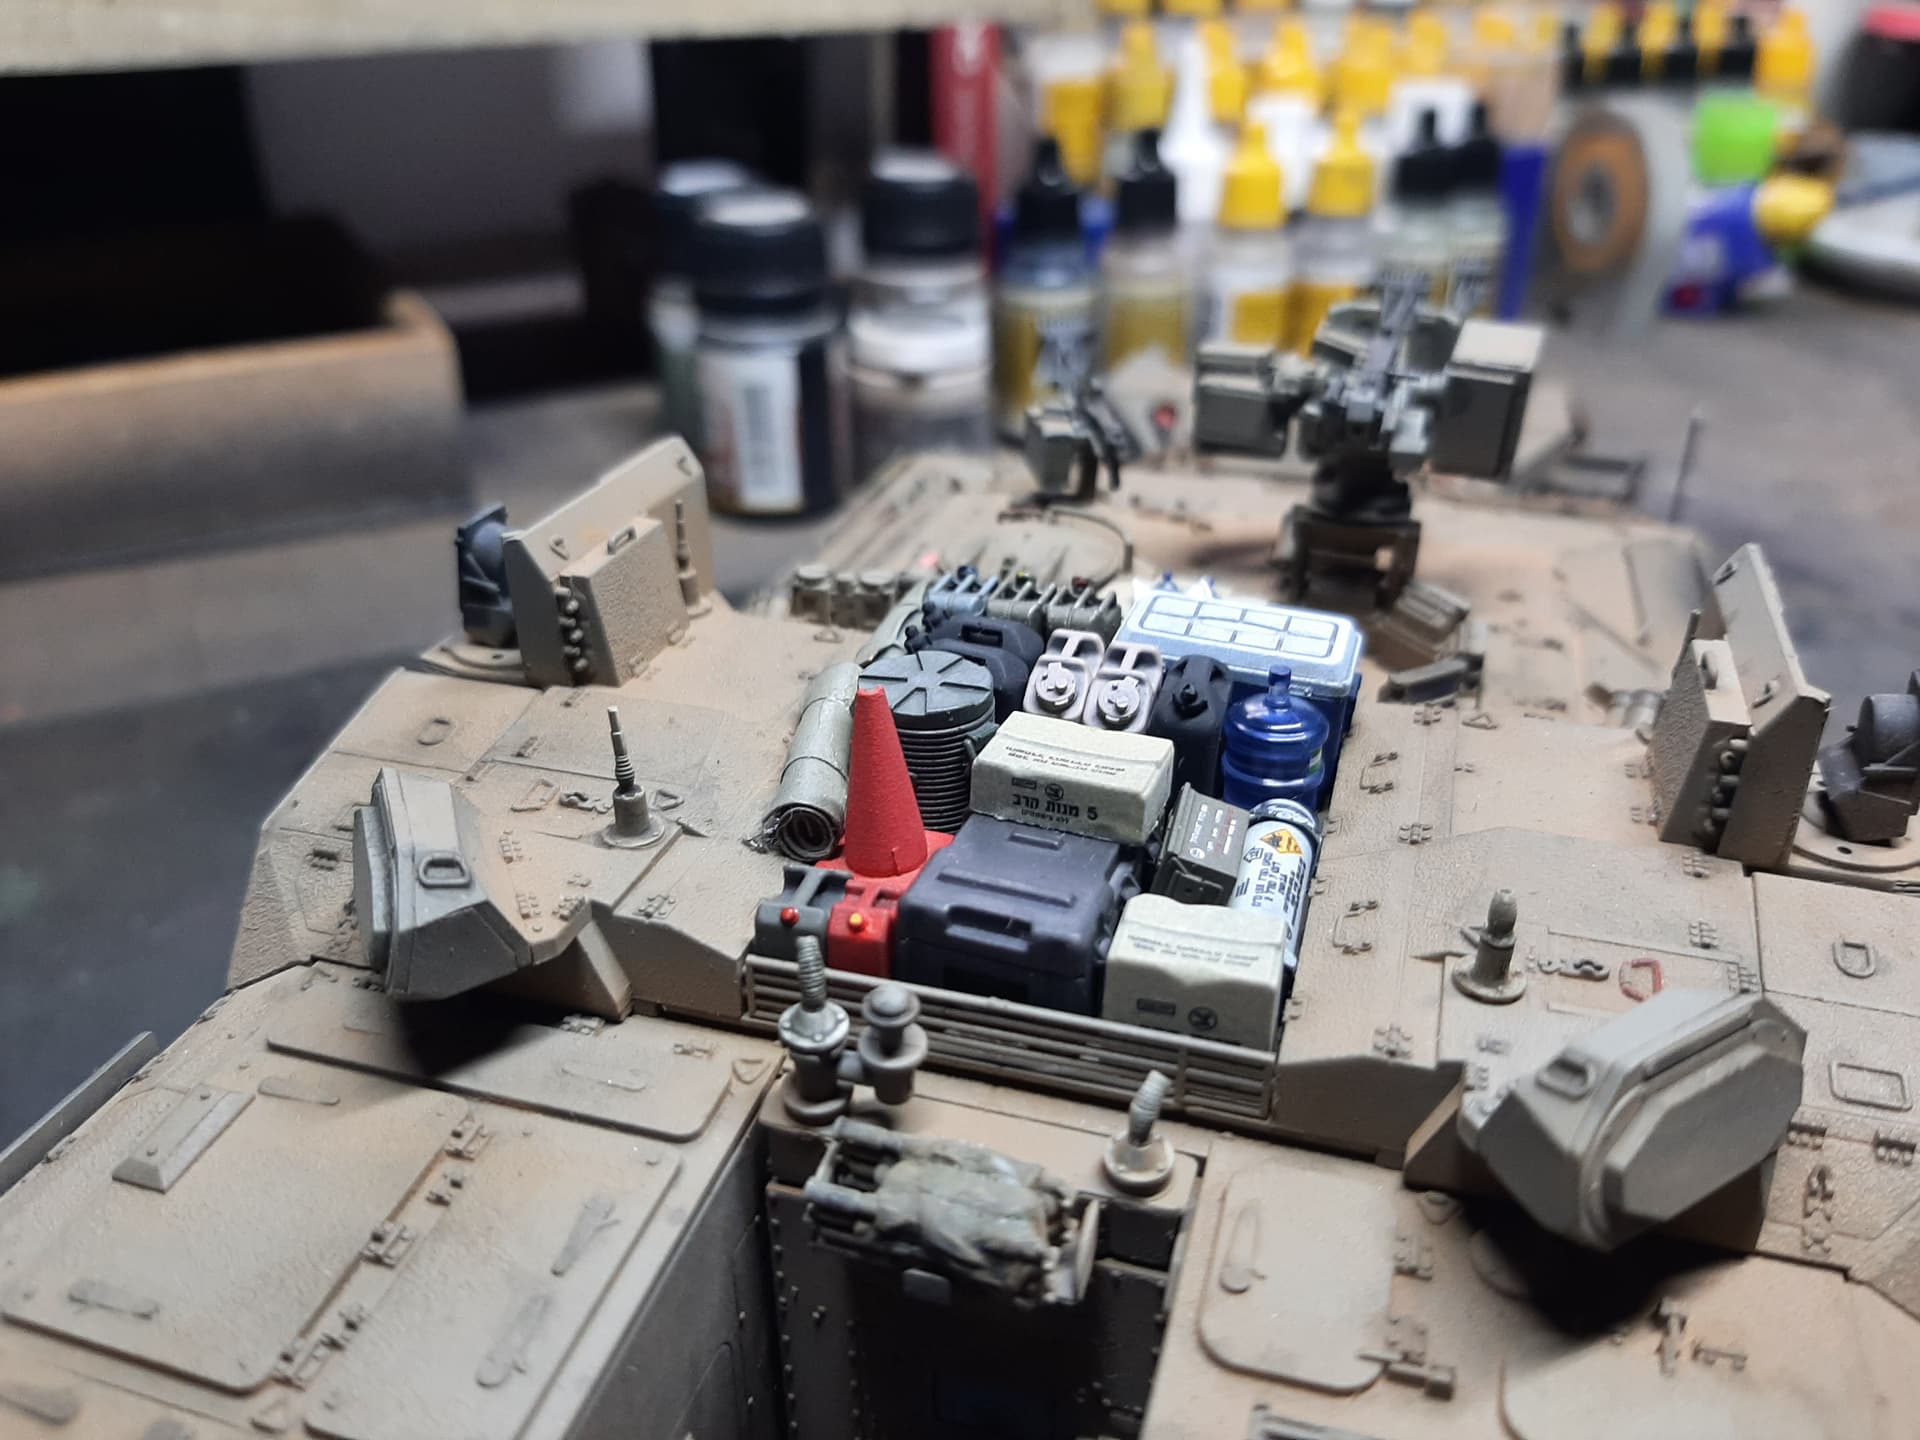
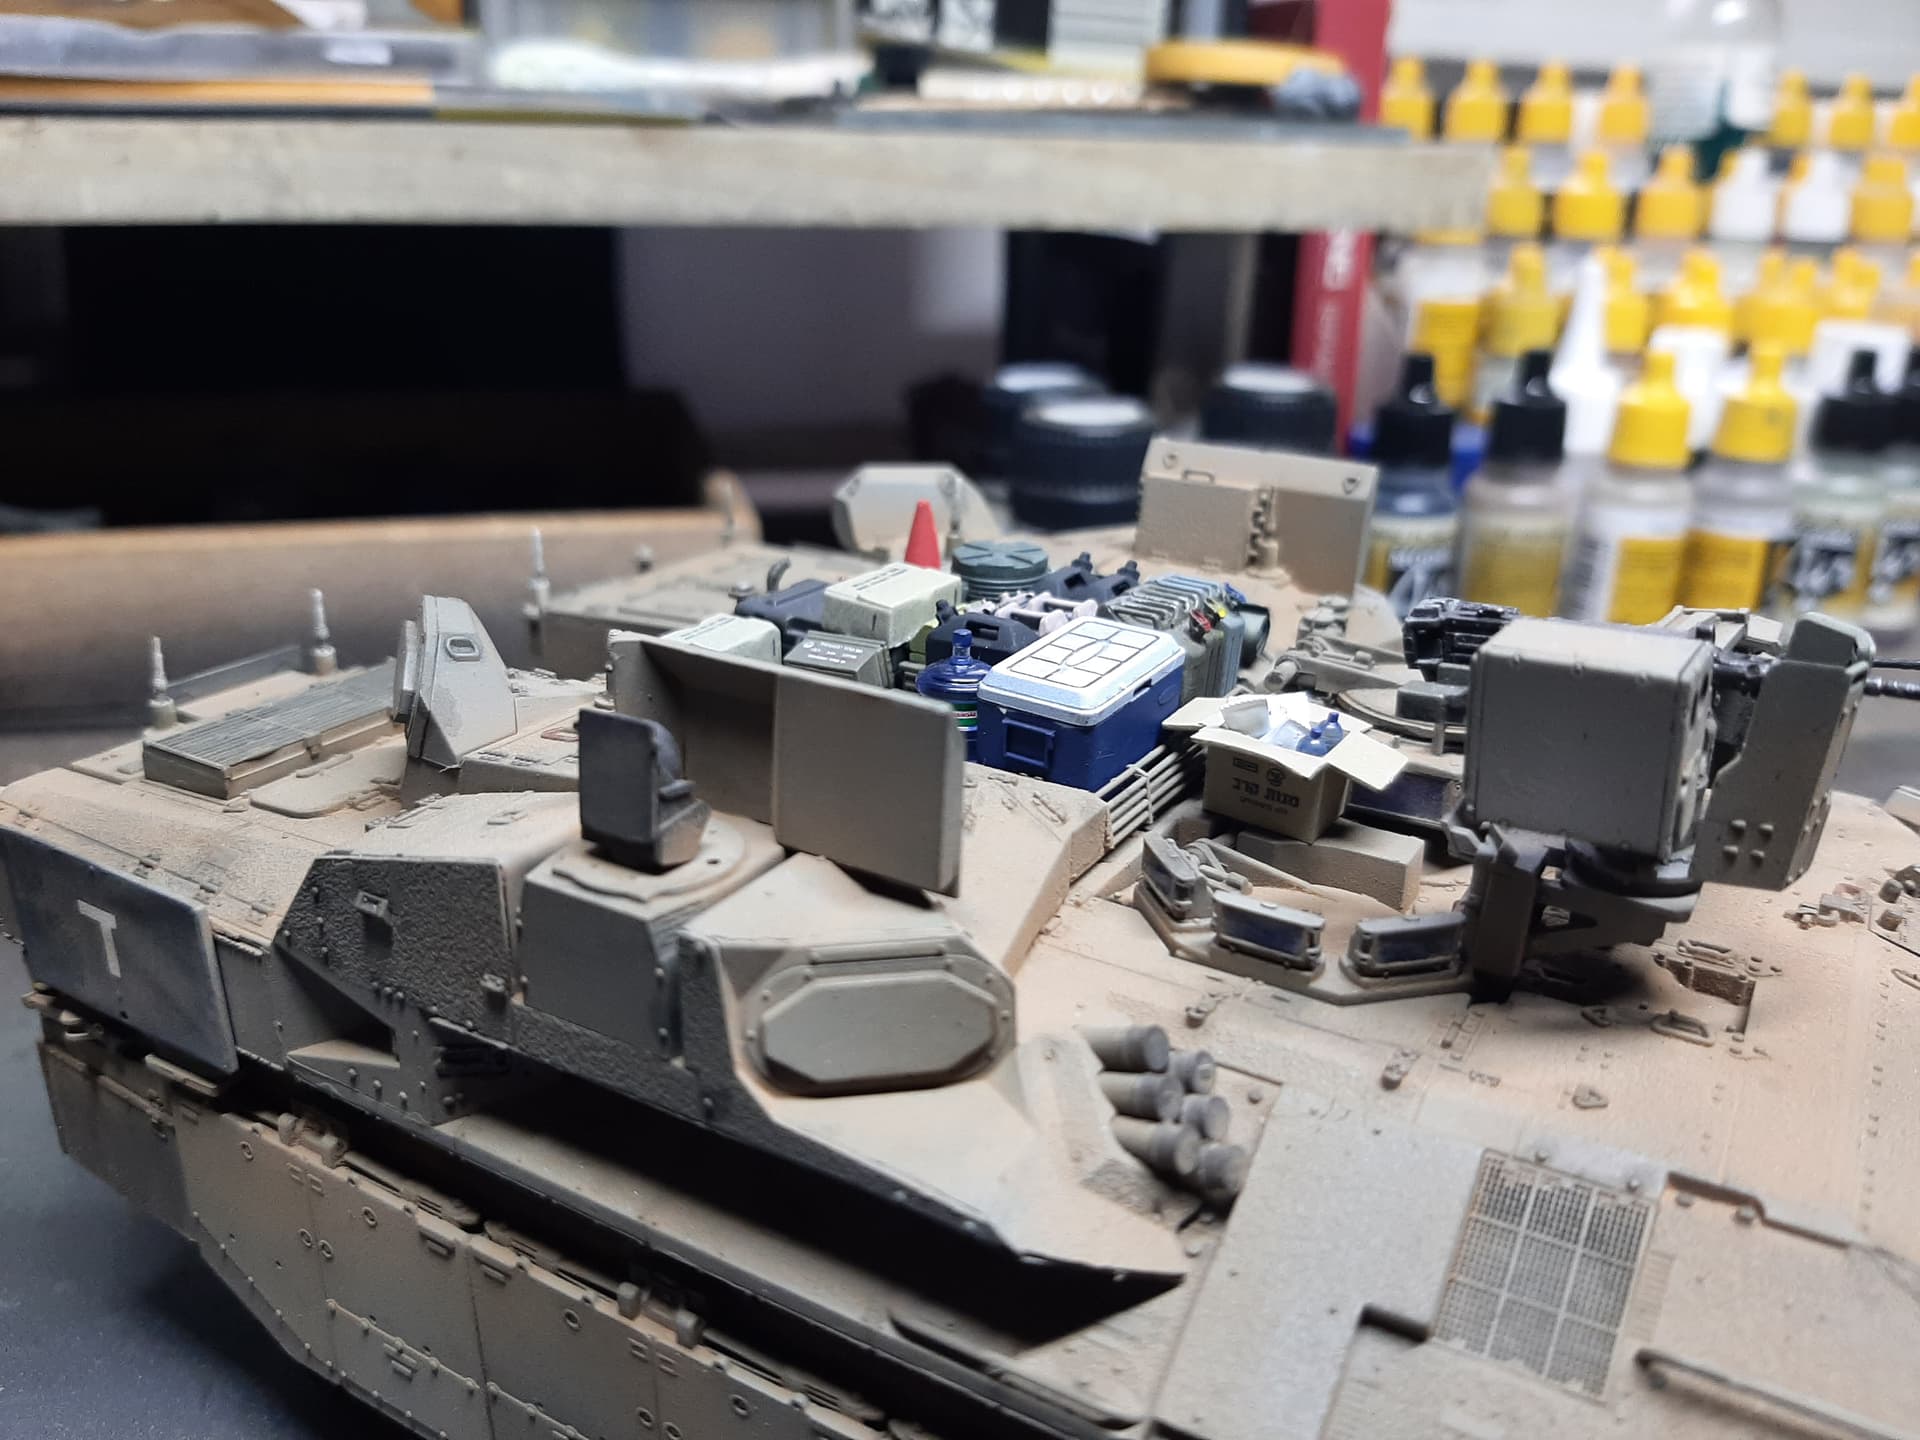
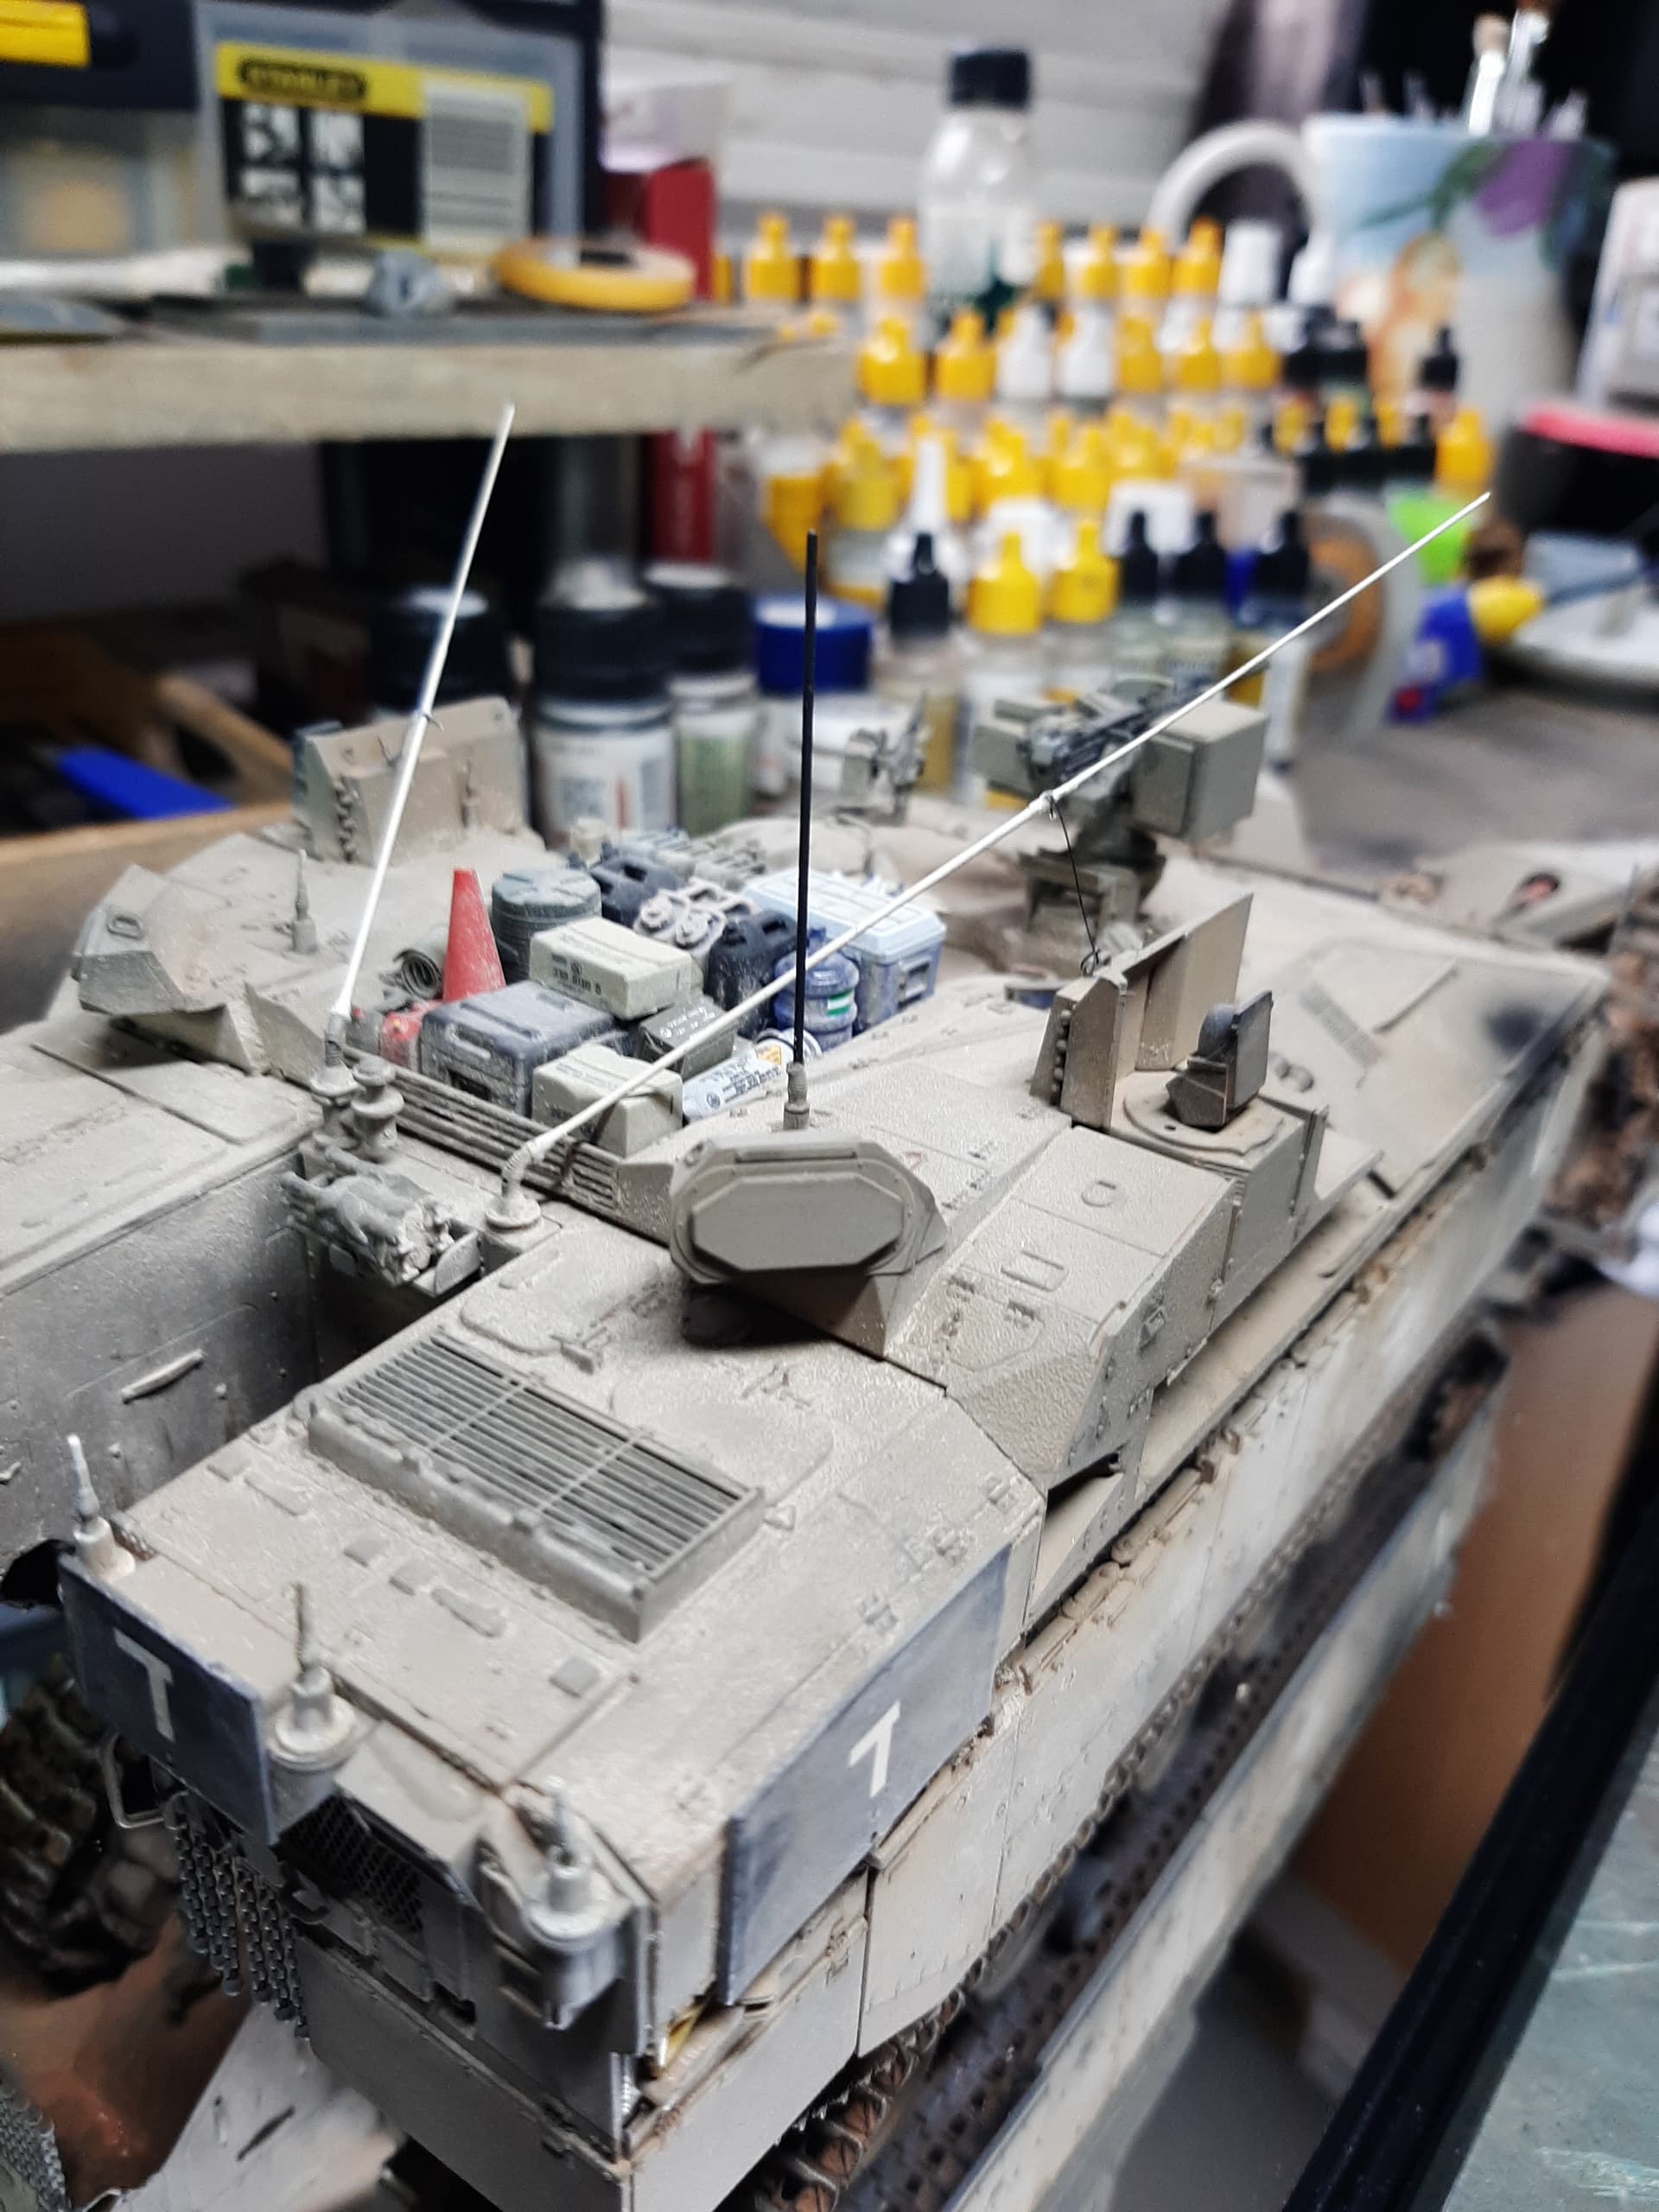
Here we are with some equipment accessories to the build.
Various items, from different Legend Productions and IDF Accessories by AK. It is a fairly eclectic mix, but having seen pictures of IDF in action recently on another Topic, it seems to me that with IDF, you can’t be too eclectic!
Also, something new to me, a mixture of military issue and appropriated civillian stuff, thus allowing a bit of colour contrast. My largest challenge was wondering just what equipment would be being carried - and I settled on (mainly) tools, POL and rations. I reasond that personal equipment would be stored internally in an APC so left that off the top - besides, I wanted to keep everything more or less below the stowage basket’s profile as I din’t have the means or the inclination to fashion tie-downs.

5 Likes
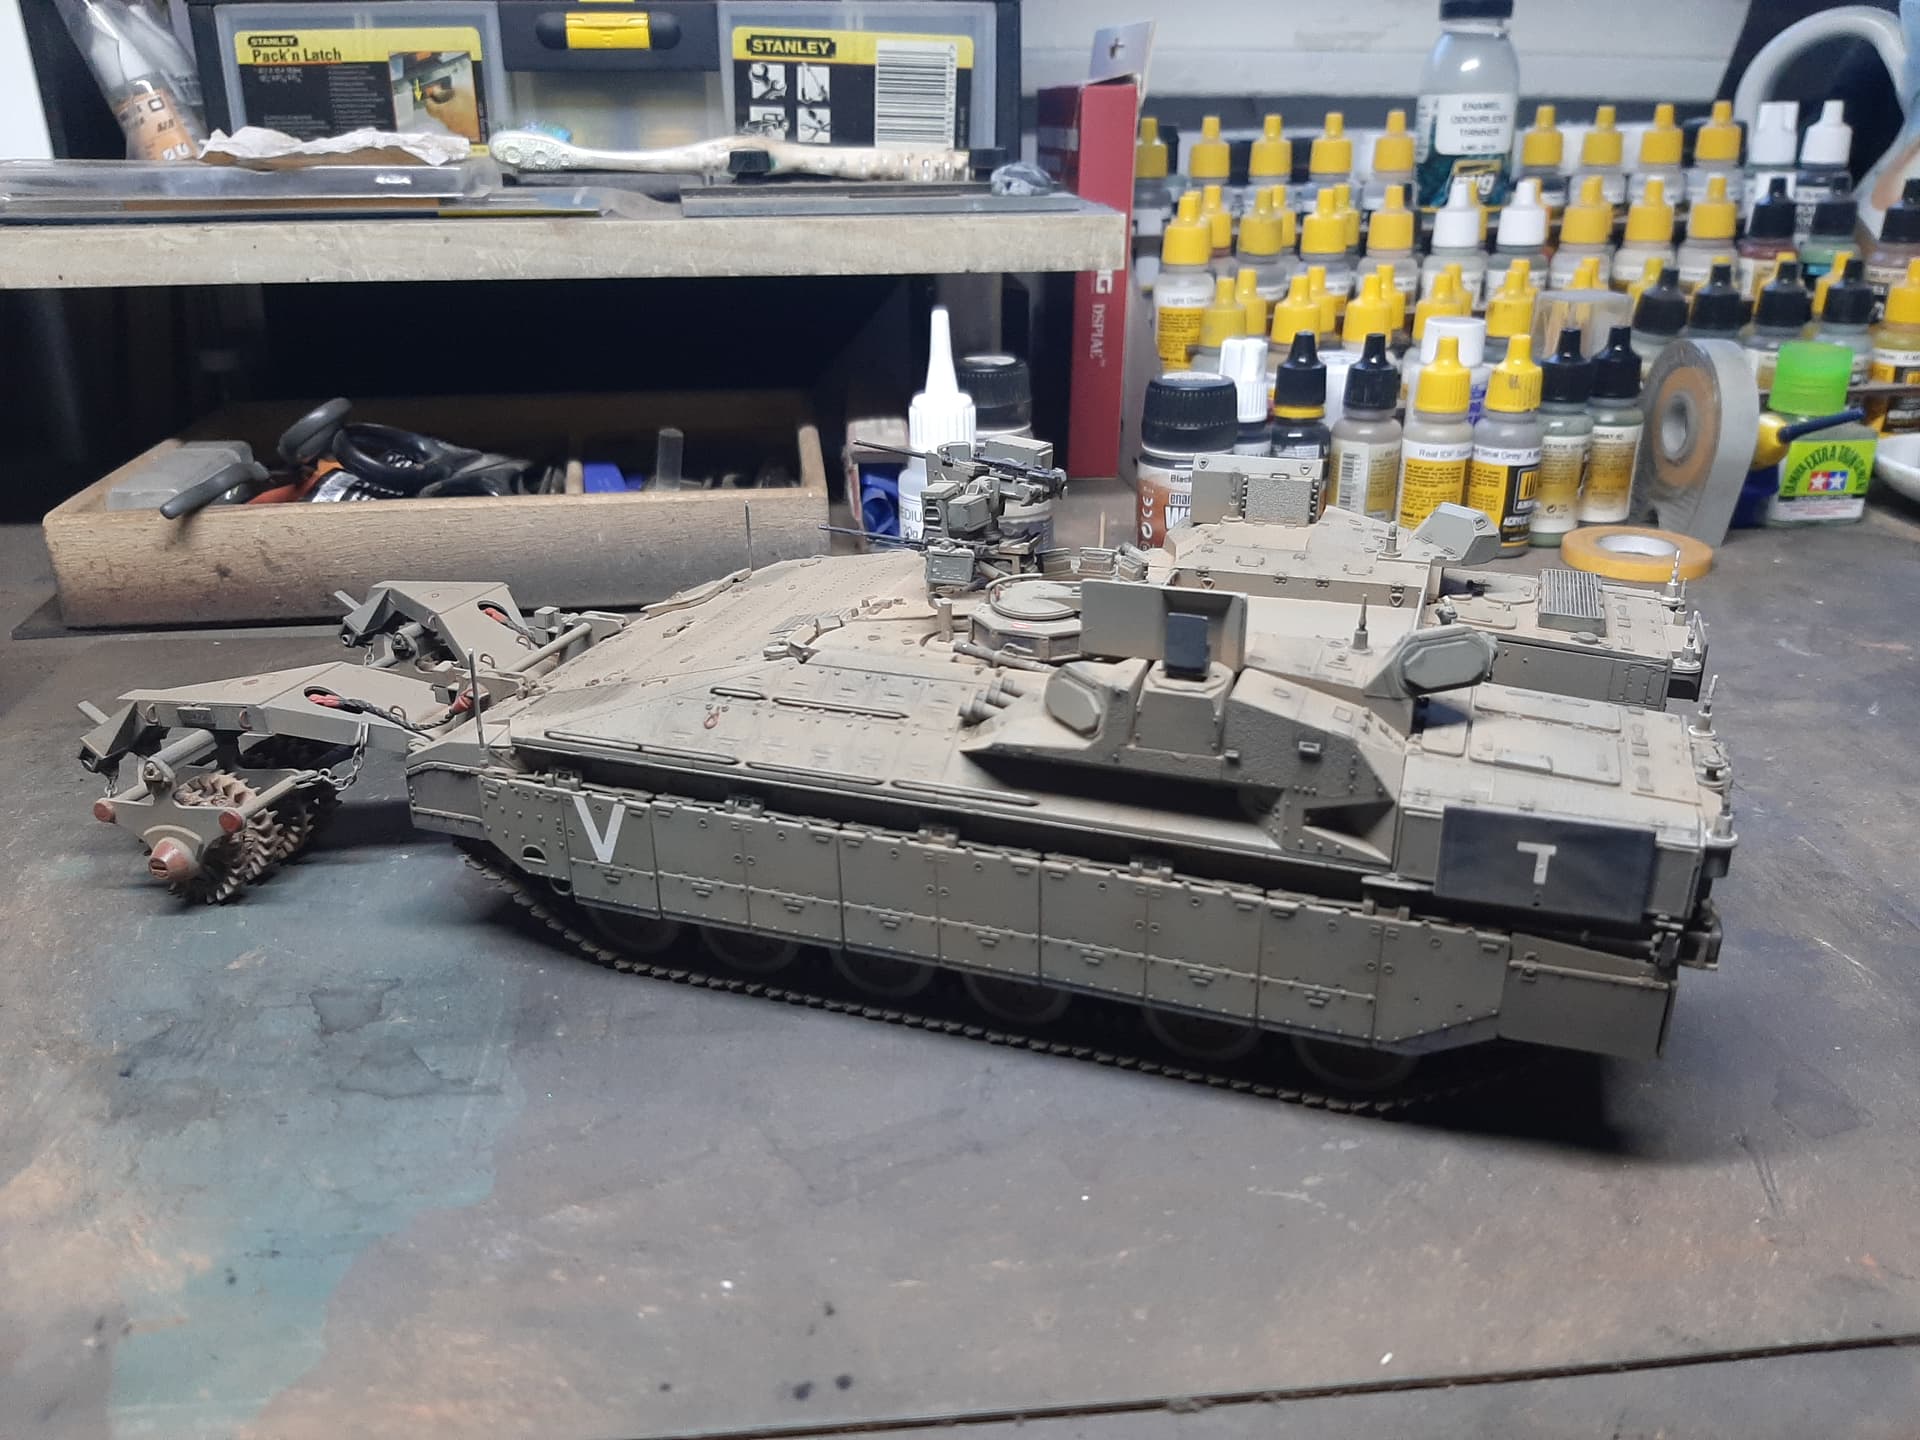
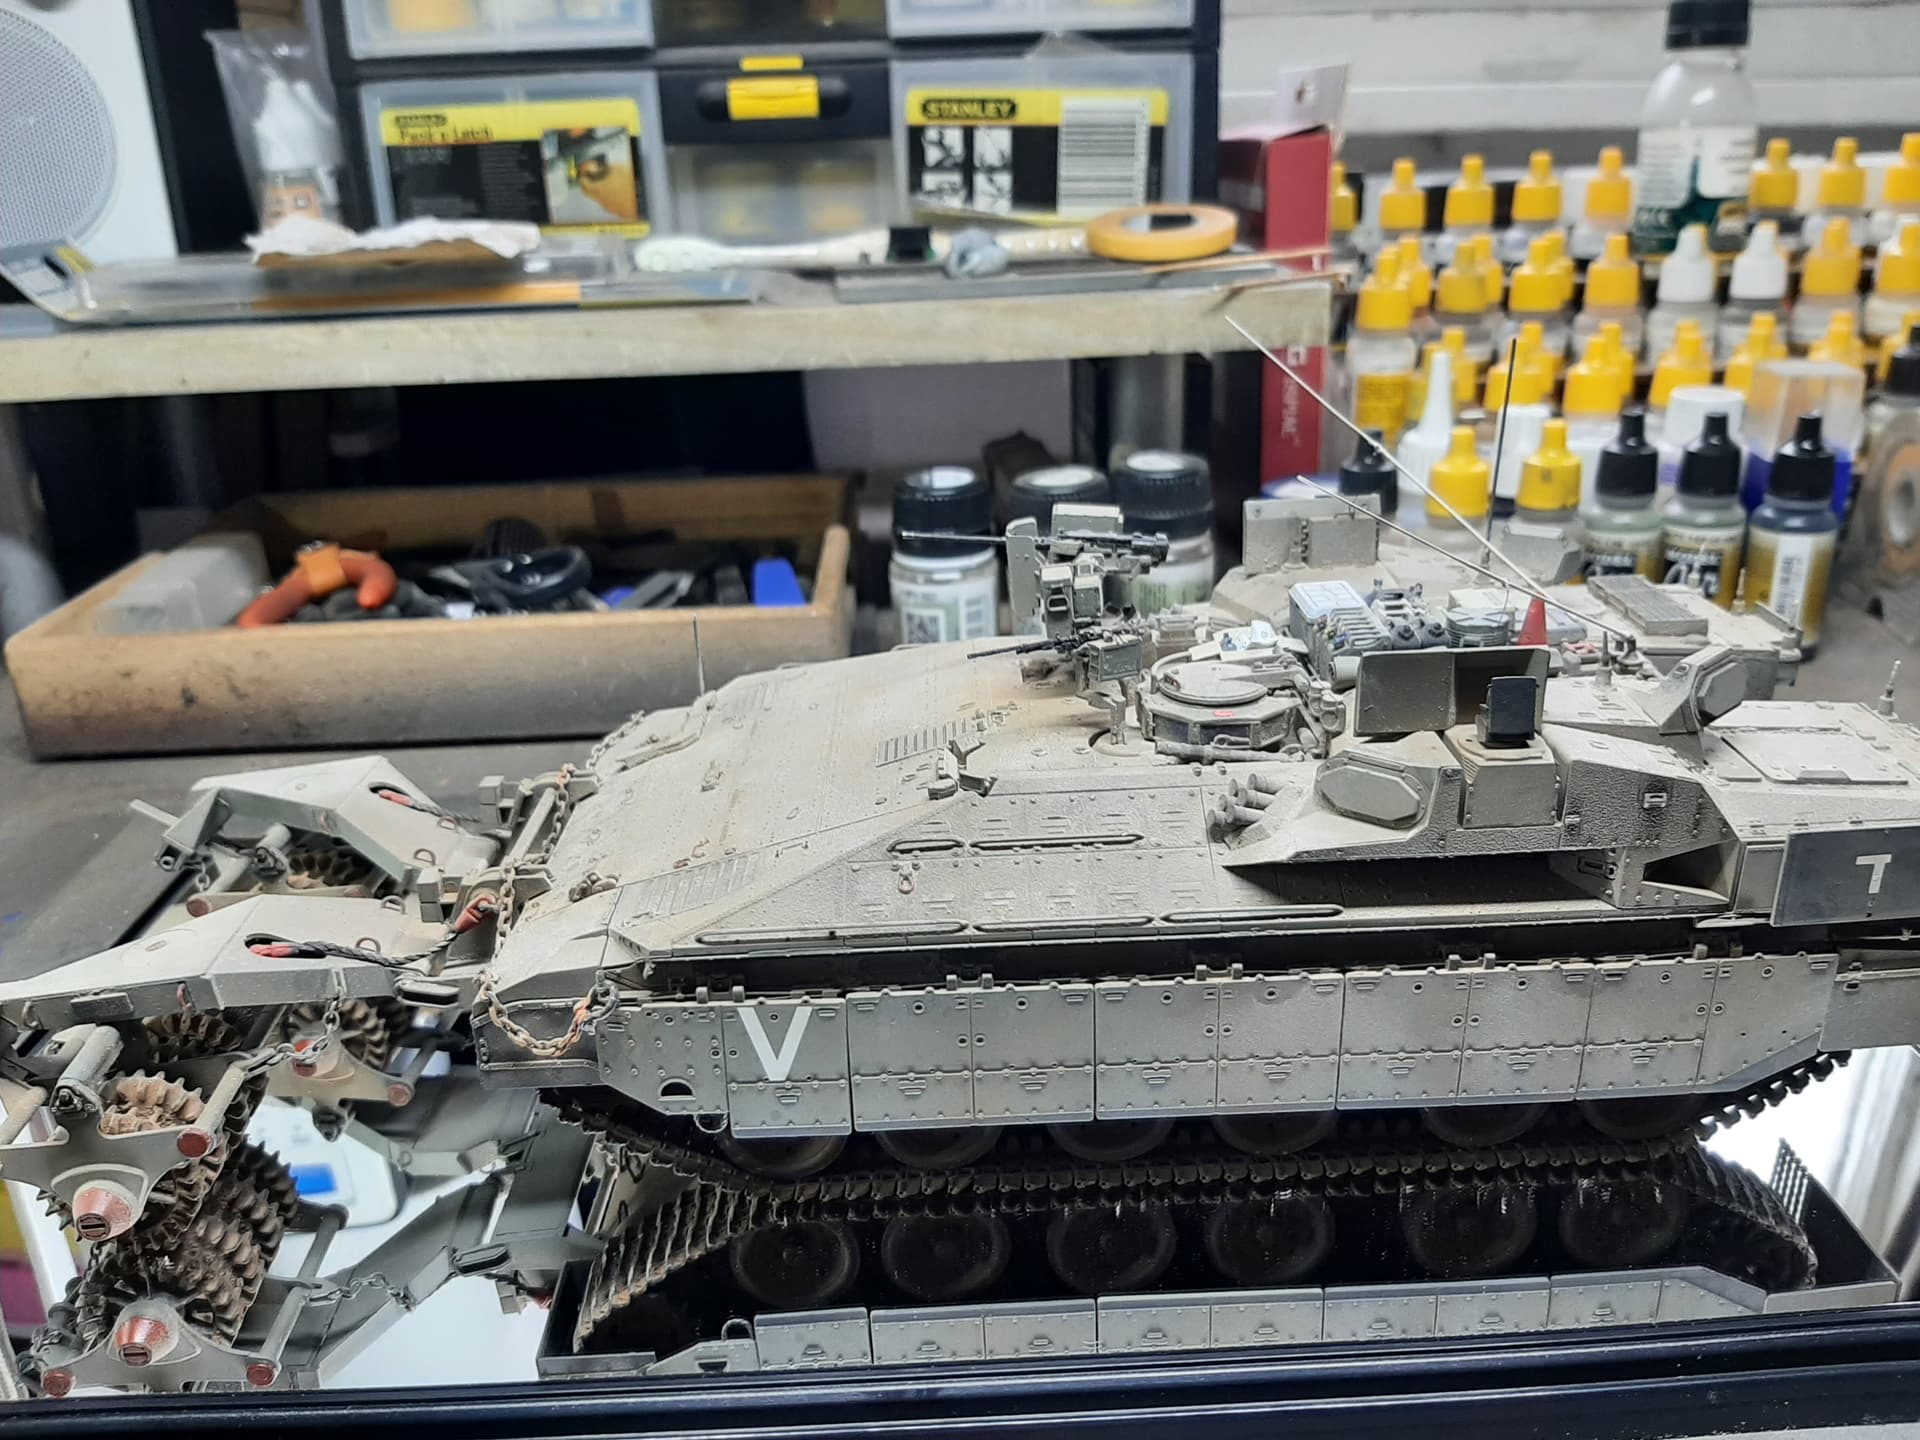
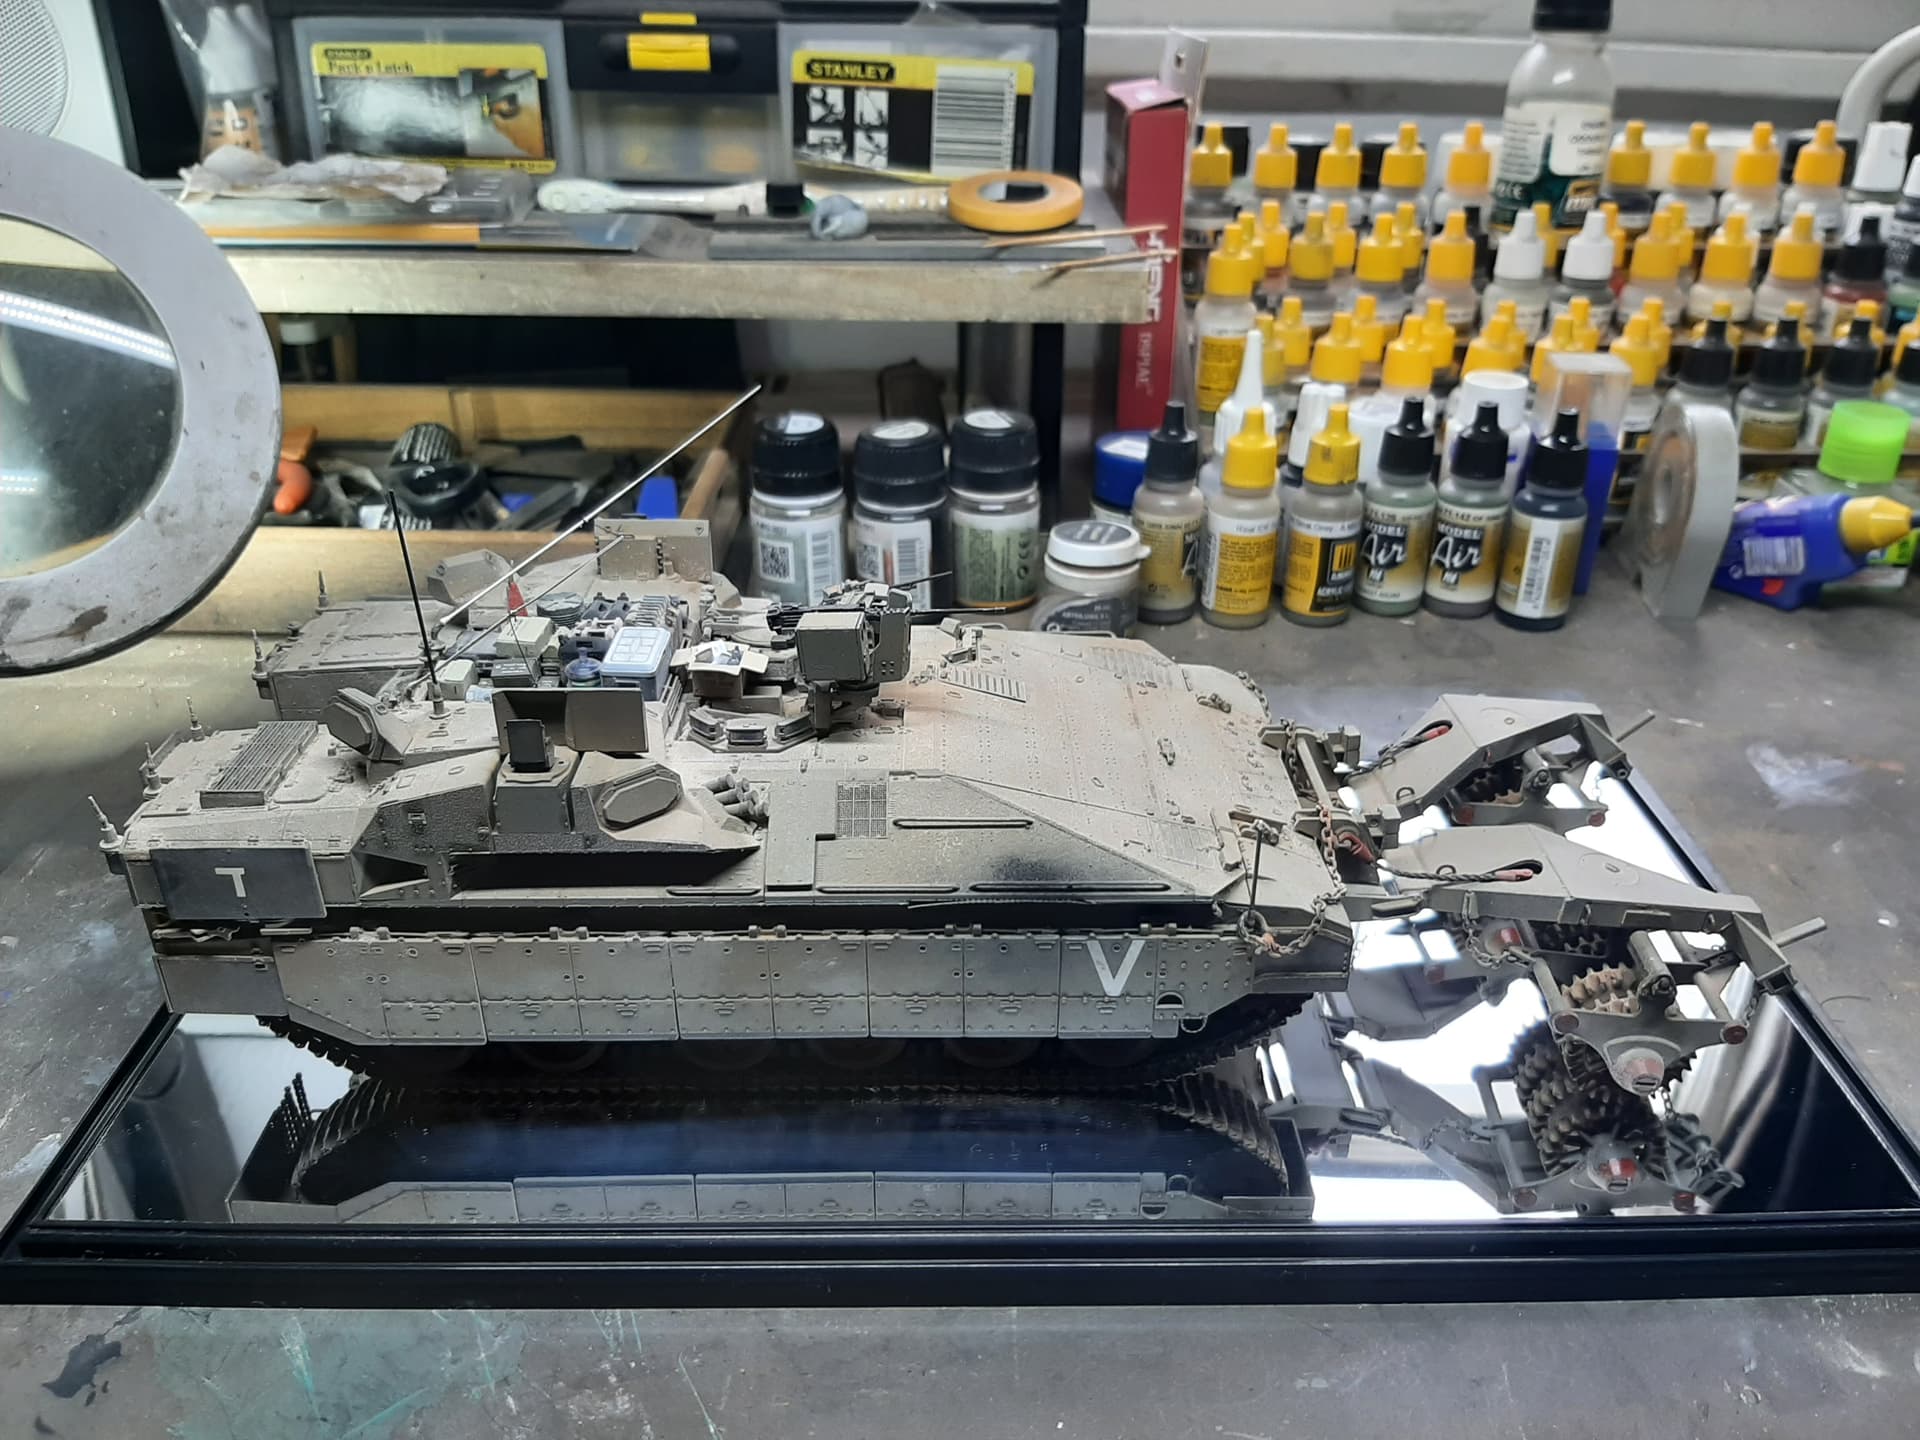
And i’m going to call this done.
The antennas were mounted and then the whole vehicle got a very light dusting with Sinai Dust pigment.
I actually think the finished article is quite good, but i’m definately open to constructive criticism. Sorry some of the pictures are a bit blurred.
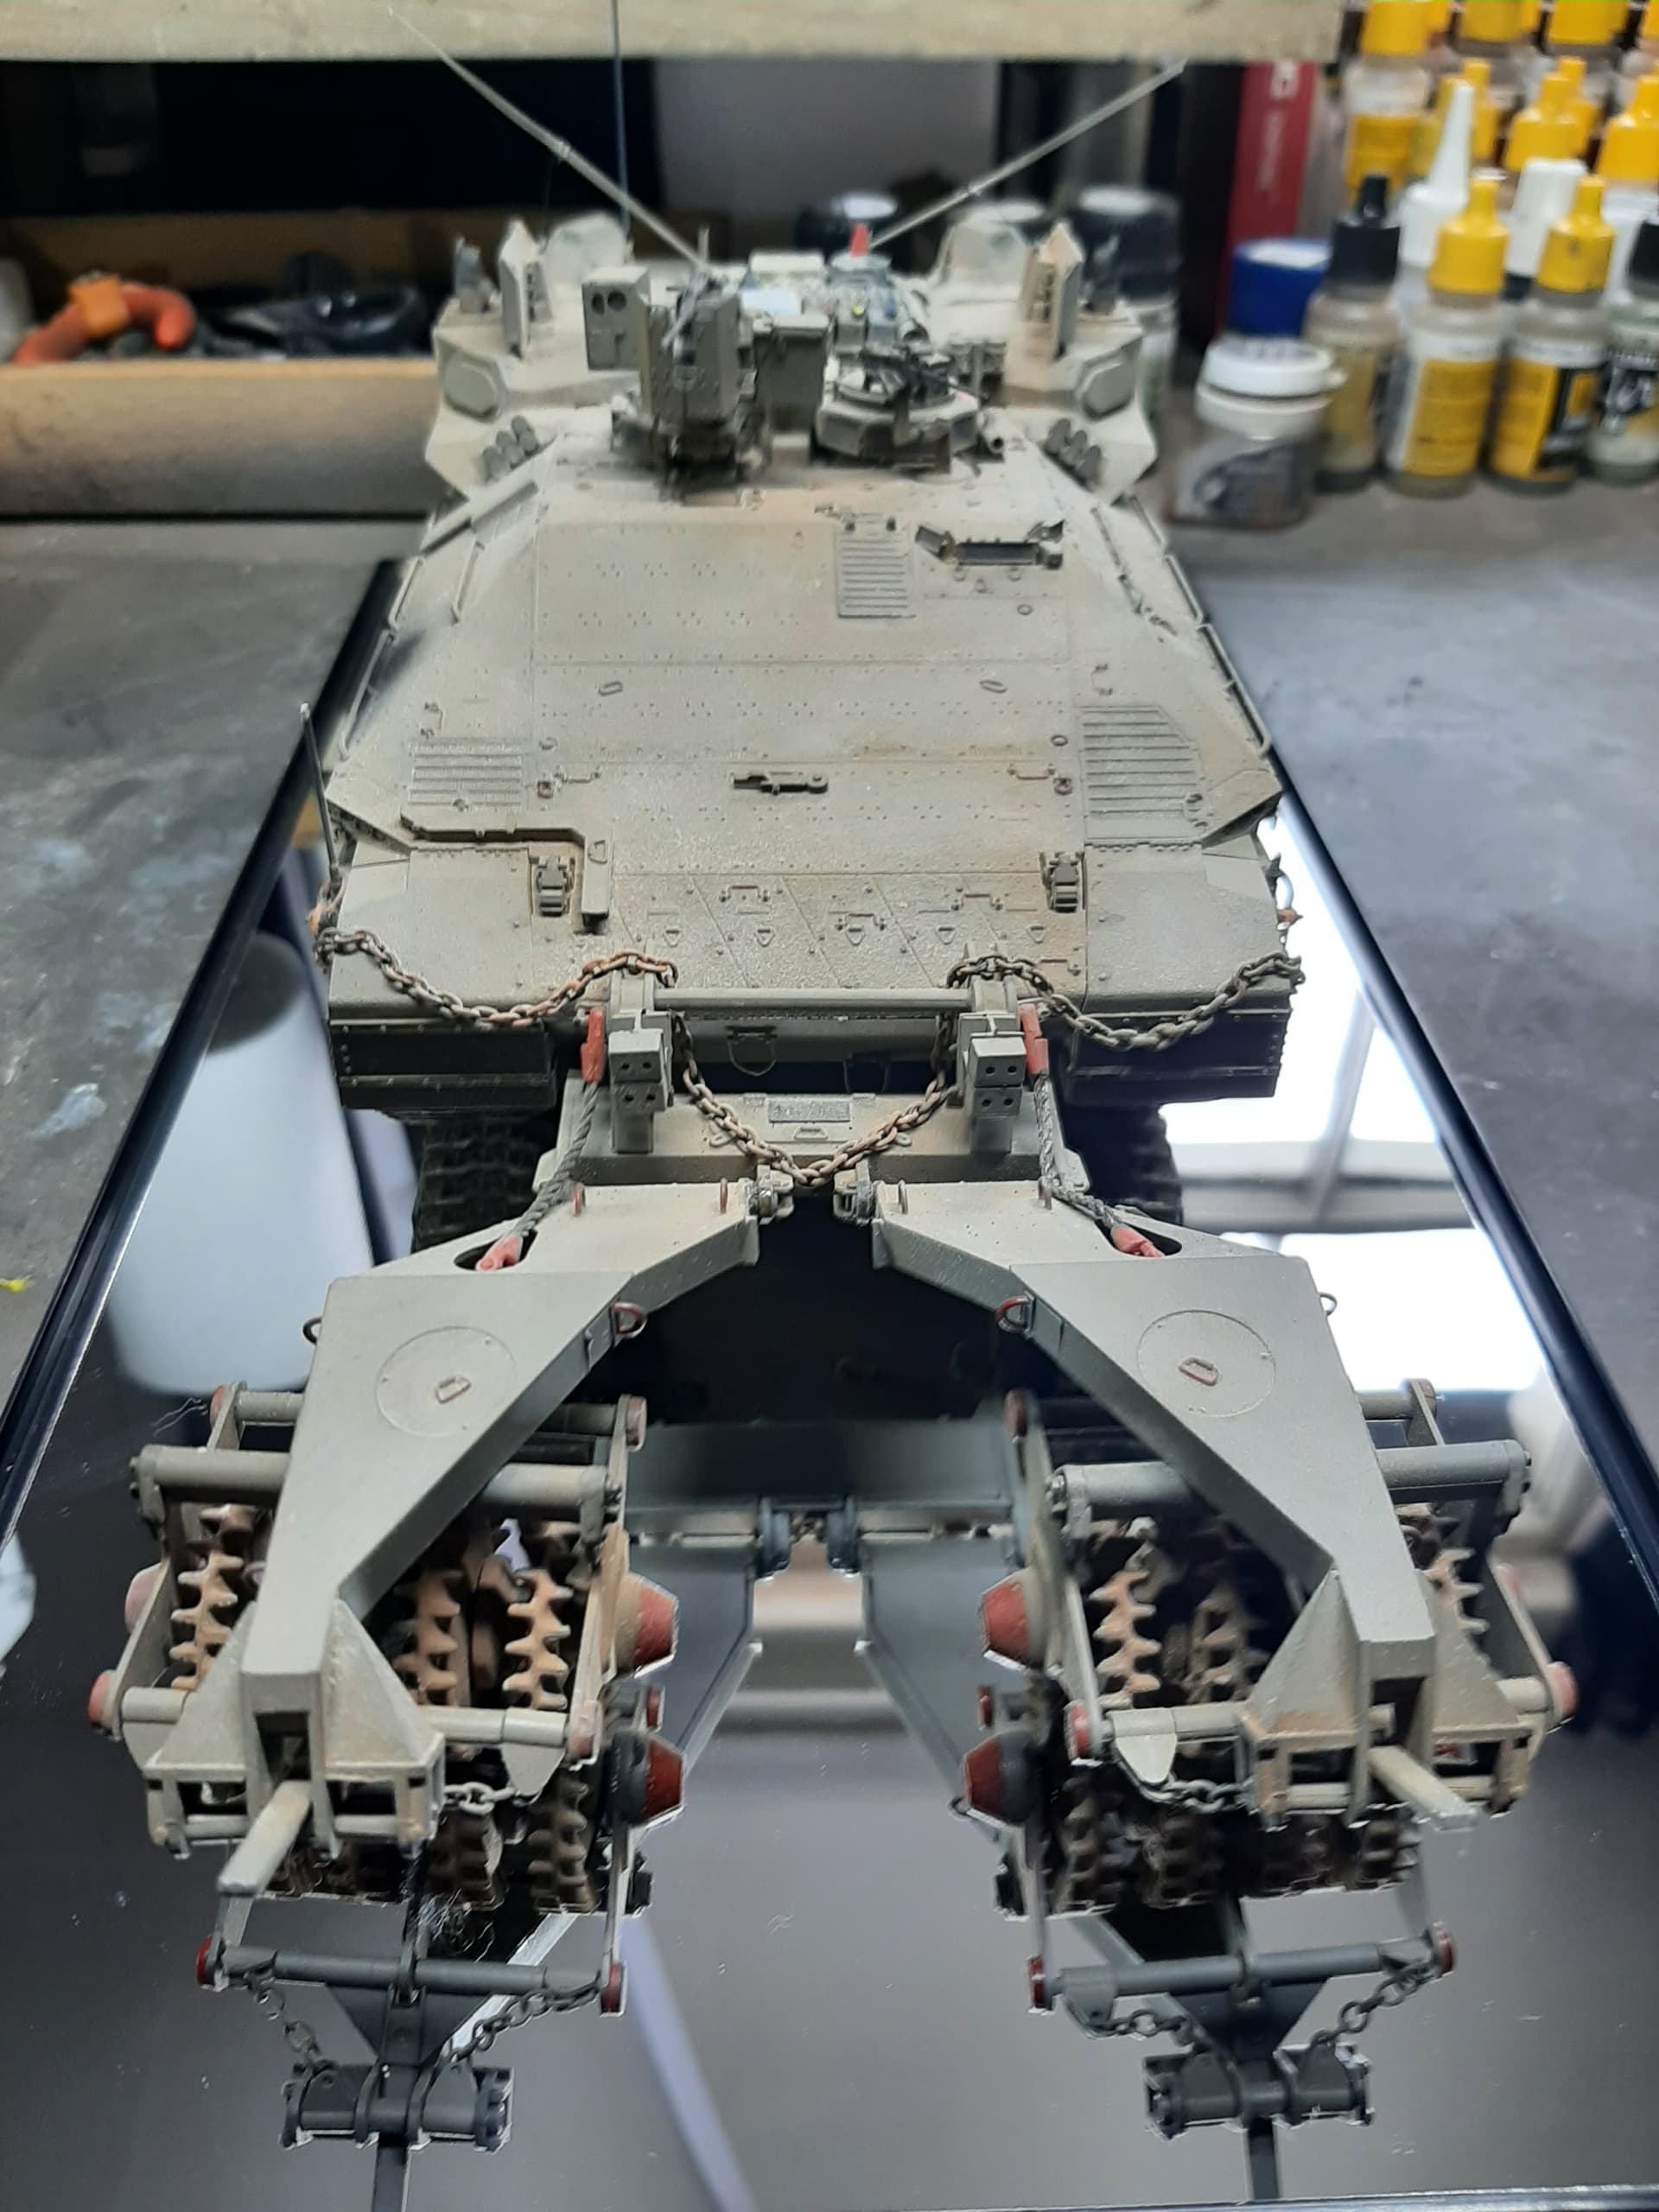
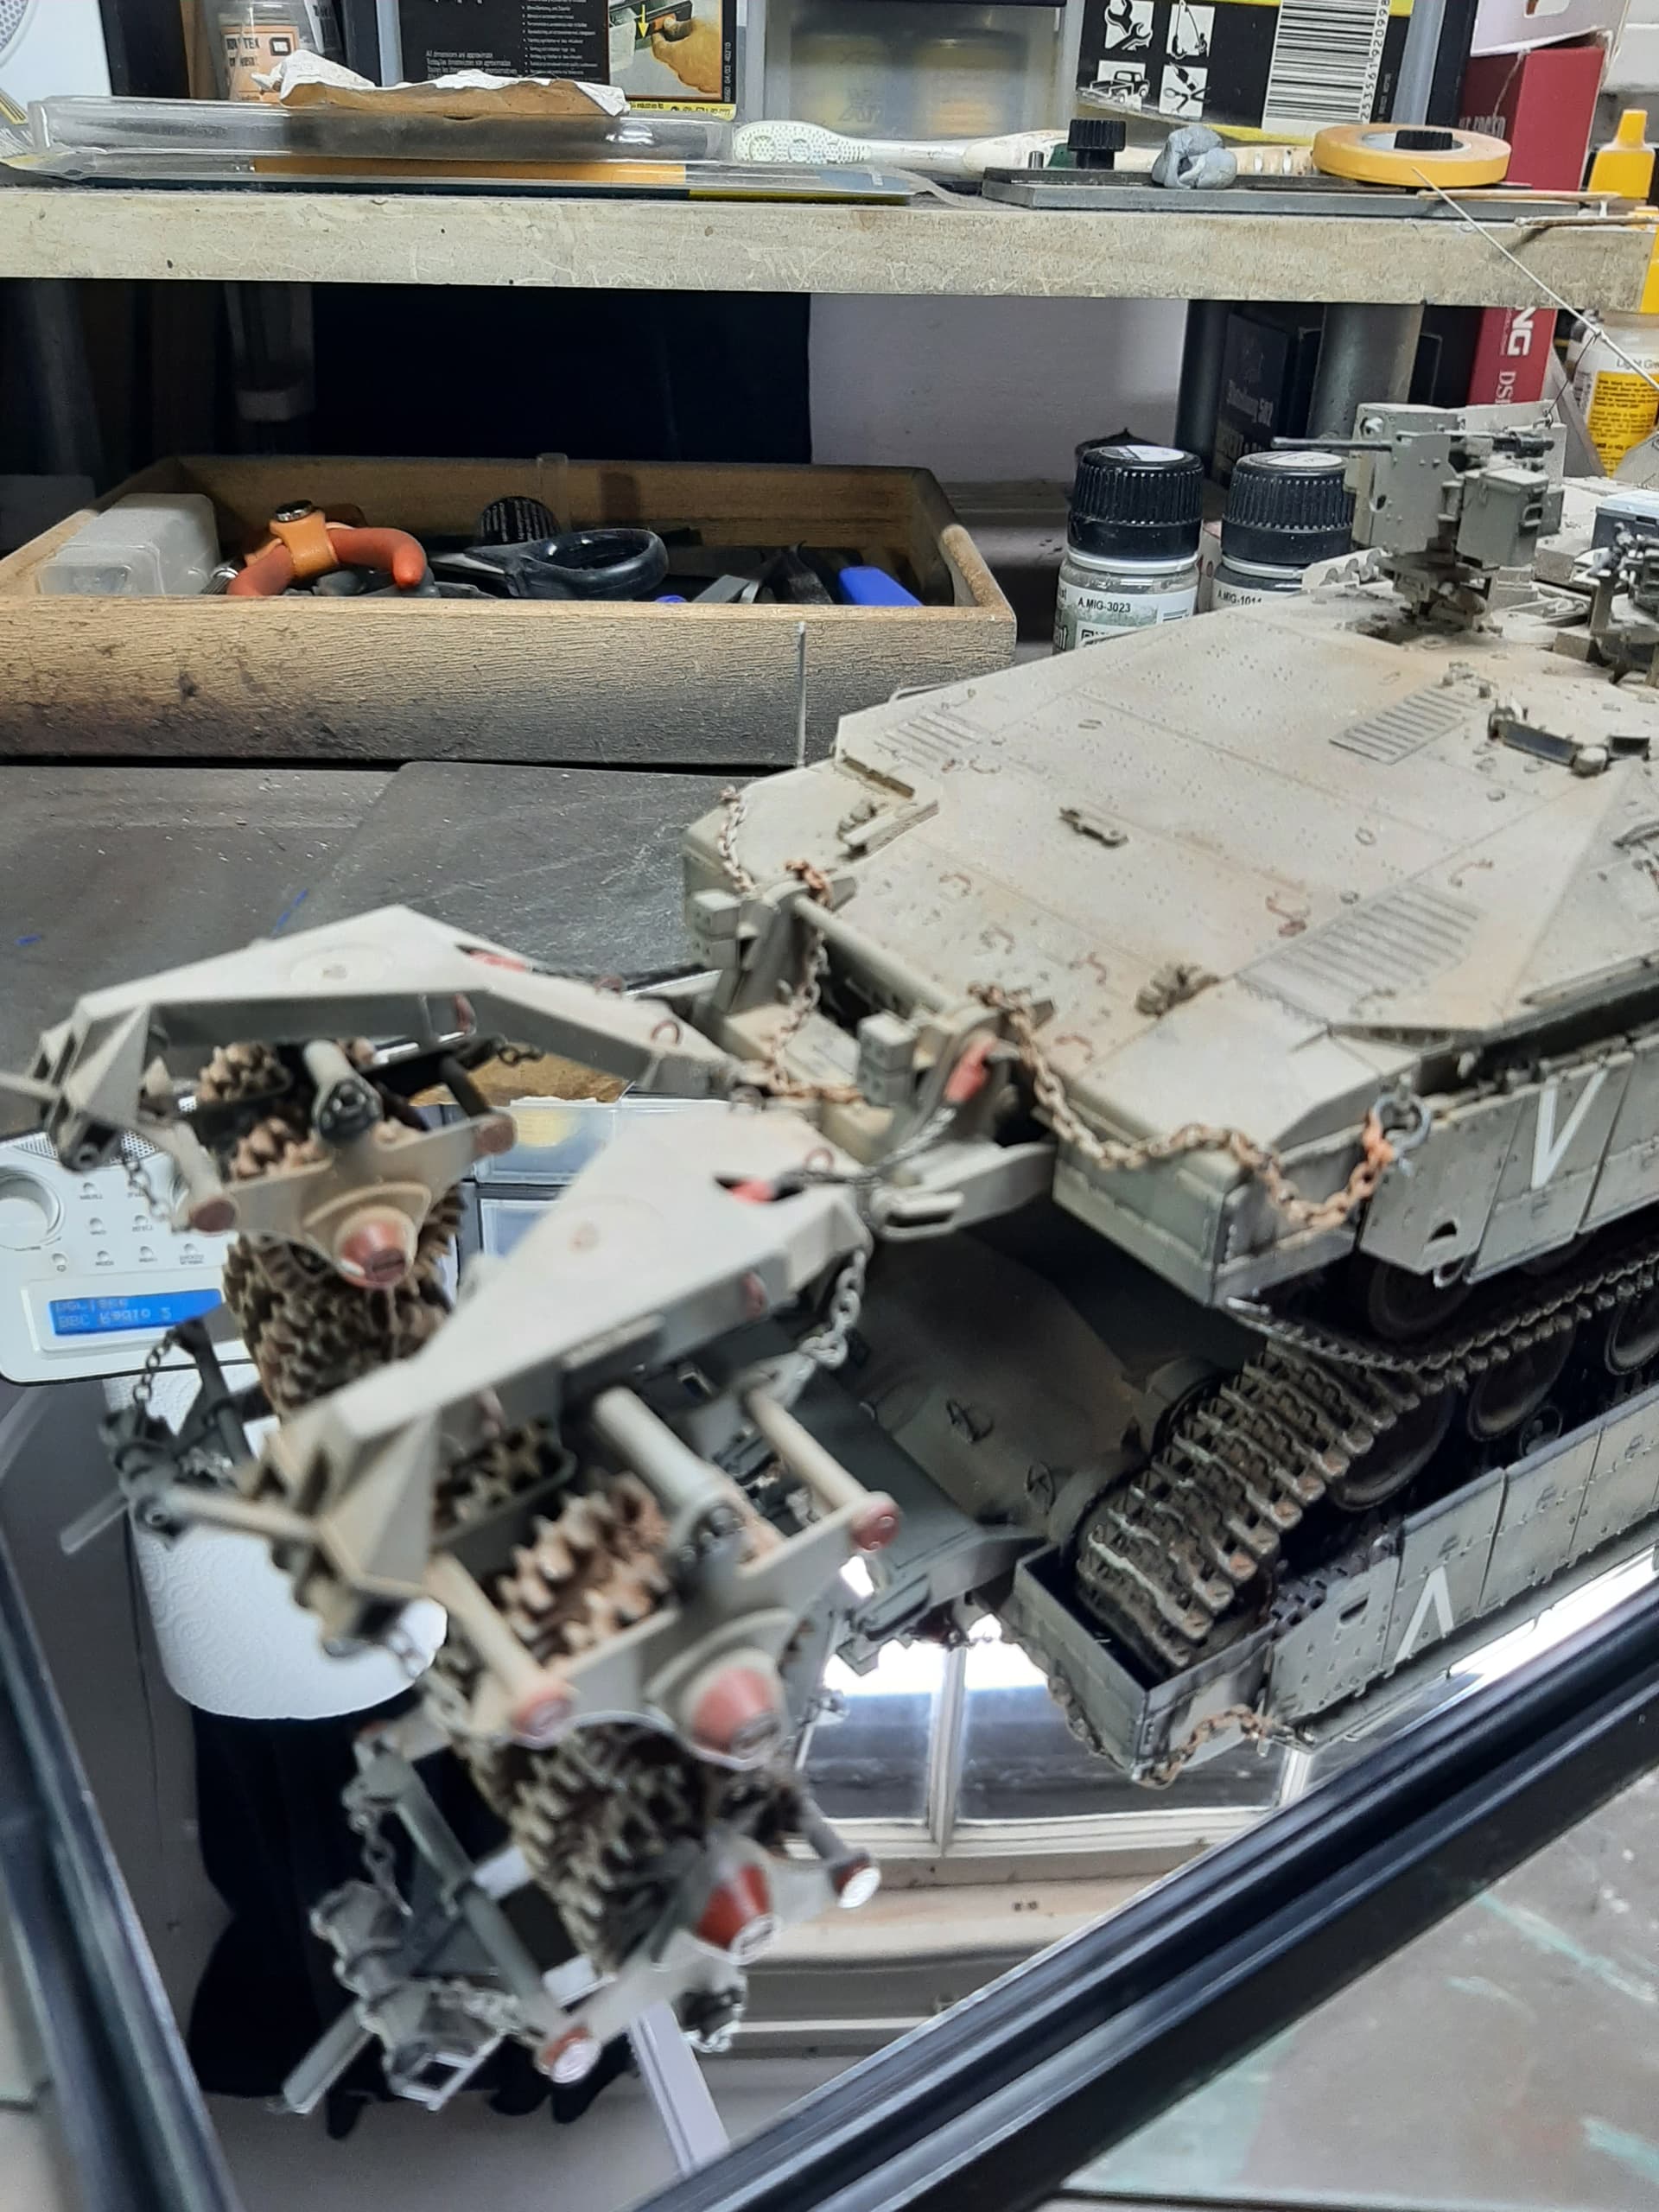
This is a great kit by Meng, it goes together well. If you’re tackling this yourself, its worth really studying the instructions to see where you need to skip around/build modularly - because if you follow the kit instructions to the letter, you’ll be left with some very fragile parts sticking out just when you find you need to turn the vehicle upsidedown or on its side, its up to you.
The mine roller was a pain really, maybe not a pain, but fiddly and with hindsight, I wouldn’t have bothered because i’ve got the HobbyBoss PUMA AEV and that means i’ll have two vehicles with an identical mine roller fitted which just wont provide contrast. The supporting ‘cables’ on the mine roller are at least 5mm too long i’d say, so 27mm is more like the length you need to cut them. But try this yourself, don’t take my word for it.
Anyway, I hope you enjoyed this build and that it has given you some inspiration, even if that’s just a little bit.

10 Likes
Excellent model! It’s been great following your build; lots of skill and effort put in to this one. A lot of little things to look at and the overall appearance is damn fine. With the plethora of photo references we have you have definitely captured the look and feel of the real deal. Outstanding work.
Thanks Matthew, appreciate it. Off to do an aircraft methinks - Tamiyas 1/48 Uhu…
1 Like
Looks very nice.
I think the mirror on the base is not a good choice. It somewhat confuses the eye on the shapes and color of the vehicle.
I would polish the track guide teeth (use whatever you used on the track polished metal surfaces).
The bent antennas should be more curved (that is why I always avoid bending antennas, I cannot achieve the proper look)
The dusting on the surfaces is excellent.
Overall an impressive display ![]()
![]()
![]()
3 Likes
Thanks Nikos, appreciate it.
All points noted. Yes, the case mirror… I agree, frankly, I didn’t know it came like that until I opened the display case box yesterday…
I did polish the guide teeth, but its hard to see in the pictures. Used a pigment for this, so it probably doesn’t stand out too well - whereas the track shoes were taken down to bare metal with an emery board (Friul tracks).
Aha! yes, the antennas, my cunning solution is to use the display case lid - once this is lowered onto the base, and providing your guestimates weren’t too far out, the lid pushes down the antennas into a nice curve. However, i will concede that I discovered this by lucky coincidence on my Merkava MkIV…
Cheers, i’m pleased with it.
What do you think about the stowage basket equipment?
Thanks again Nikos.
2 Likes
It is too tidy. This is something most of us get wrong, tankers do not have time to arrange everything neatly in place. You could also add the tarp that most vehicles have, it has a distinct green camo pattern that adds variation to the colors of the model.
1 Like
Great build and finish. The weathering looks just right… Super work and lovely details as well… Really Jumps out ![]()
2 Likes
Beautiful build from start to finish. great work, Roly.
2 Likes
Thanks for the feedback Nikos.
I’ll bear that in mind, perhaps I was transposing my own experience of service on an AFV in the British Army to the current IDF, but i’d also used pictures of other modellers’ Namer builds and used them for inspiration.
I wouldn’t say we were fastidious, but everything in our CES had a place and everything in its place, that way if you needed something in a hurry, you didn’t need to rummage through a pile of crap to get to it. Also, it was ‘fairly’ common for crew to have to switch vehicles or take over another vehicle at short notice, and so knowing where the CES would be according to the SOPs was important. The only thing we used to free style with was personal kit and rations.
I really wanted to craft a tarp or cargo net, but a tarp would at least partially cover the equipment, thus negating any effort i’d put into dispalying the stuff and I couldn’t be arsed to make a net…
Lets just say, I used artistic licence on the finish to this build… ![]()
4 Likes
Truly fantastic work, Roly. Your attention to detail, finishing, superb weathering and use of different methods etc are genuinely excellent. You should be really chuffed with this one mate, it’s outstanding. I’ve really enjoyed following this build thank you for sharing it.
Looking forward to seeing you tackle the Night Owl now…
2 Likes