Its looking great Michael. With the wheels and bodywork on, its going to look amazing!
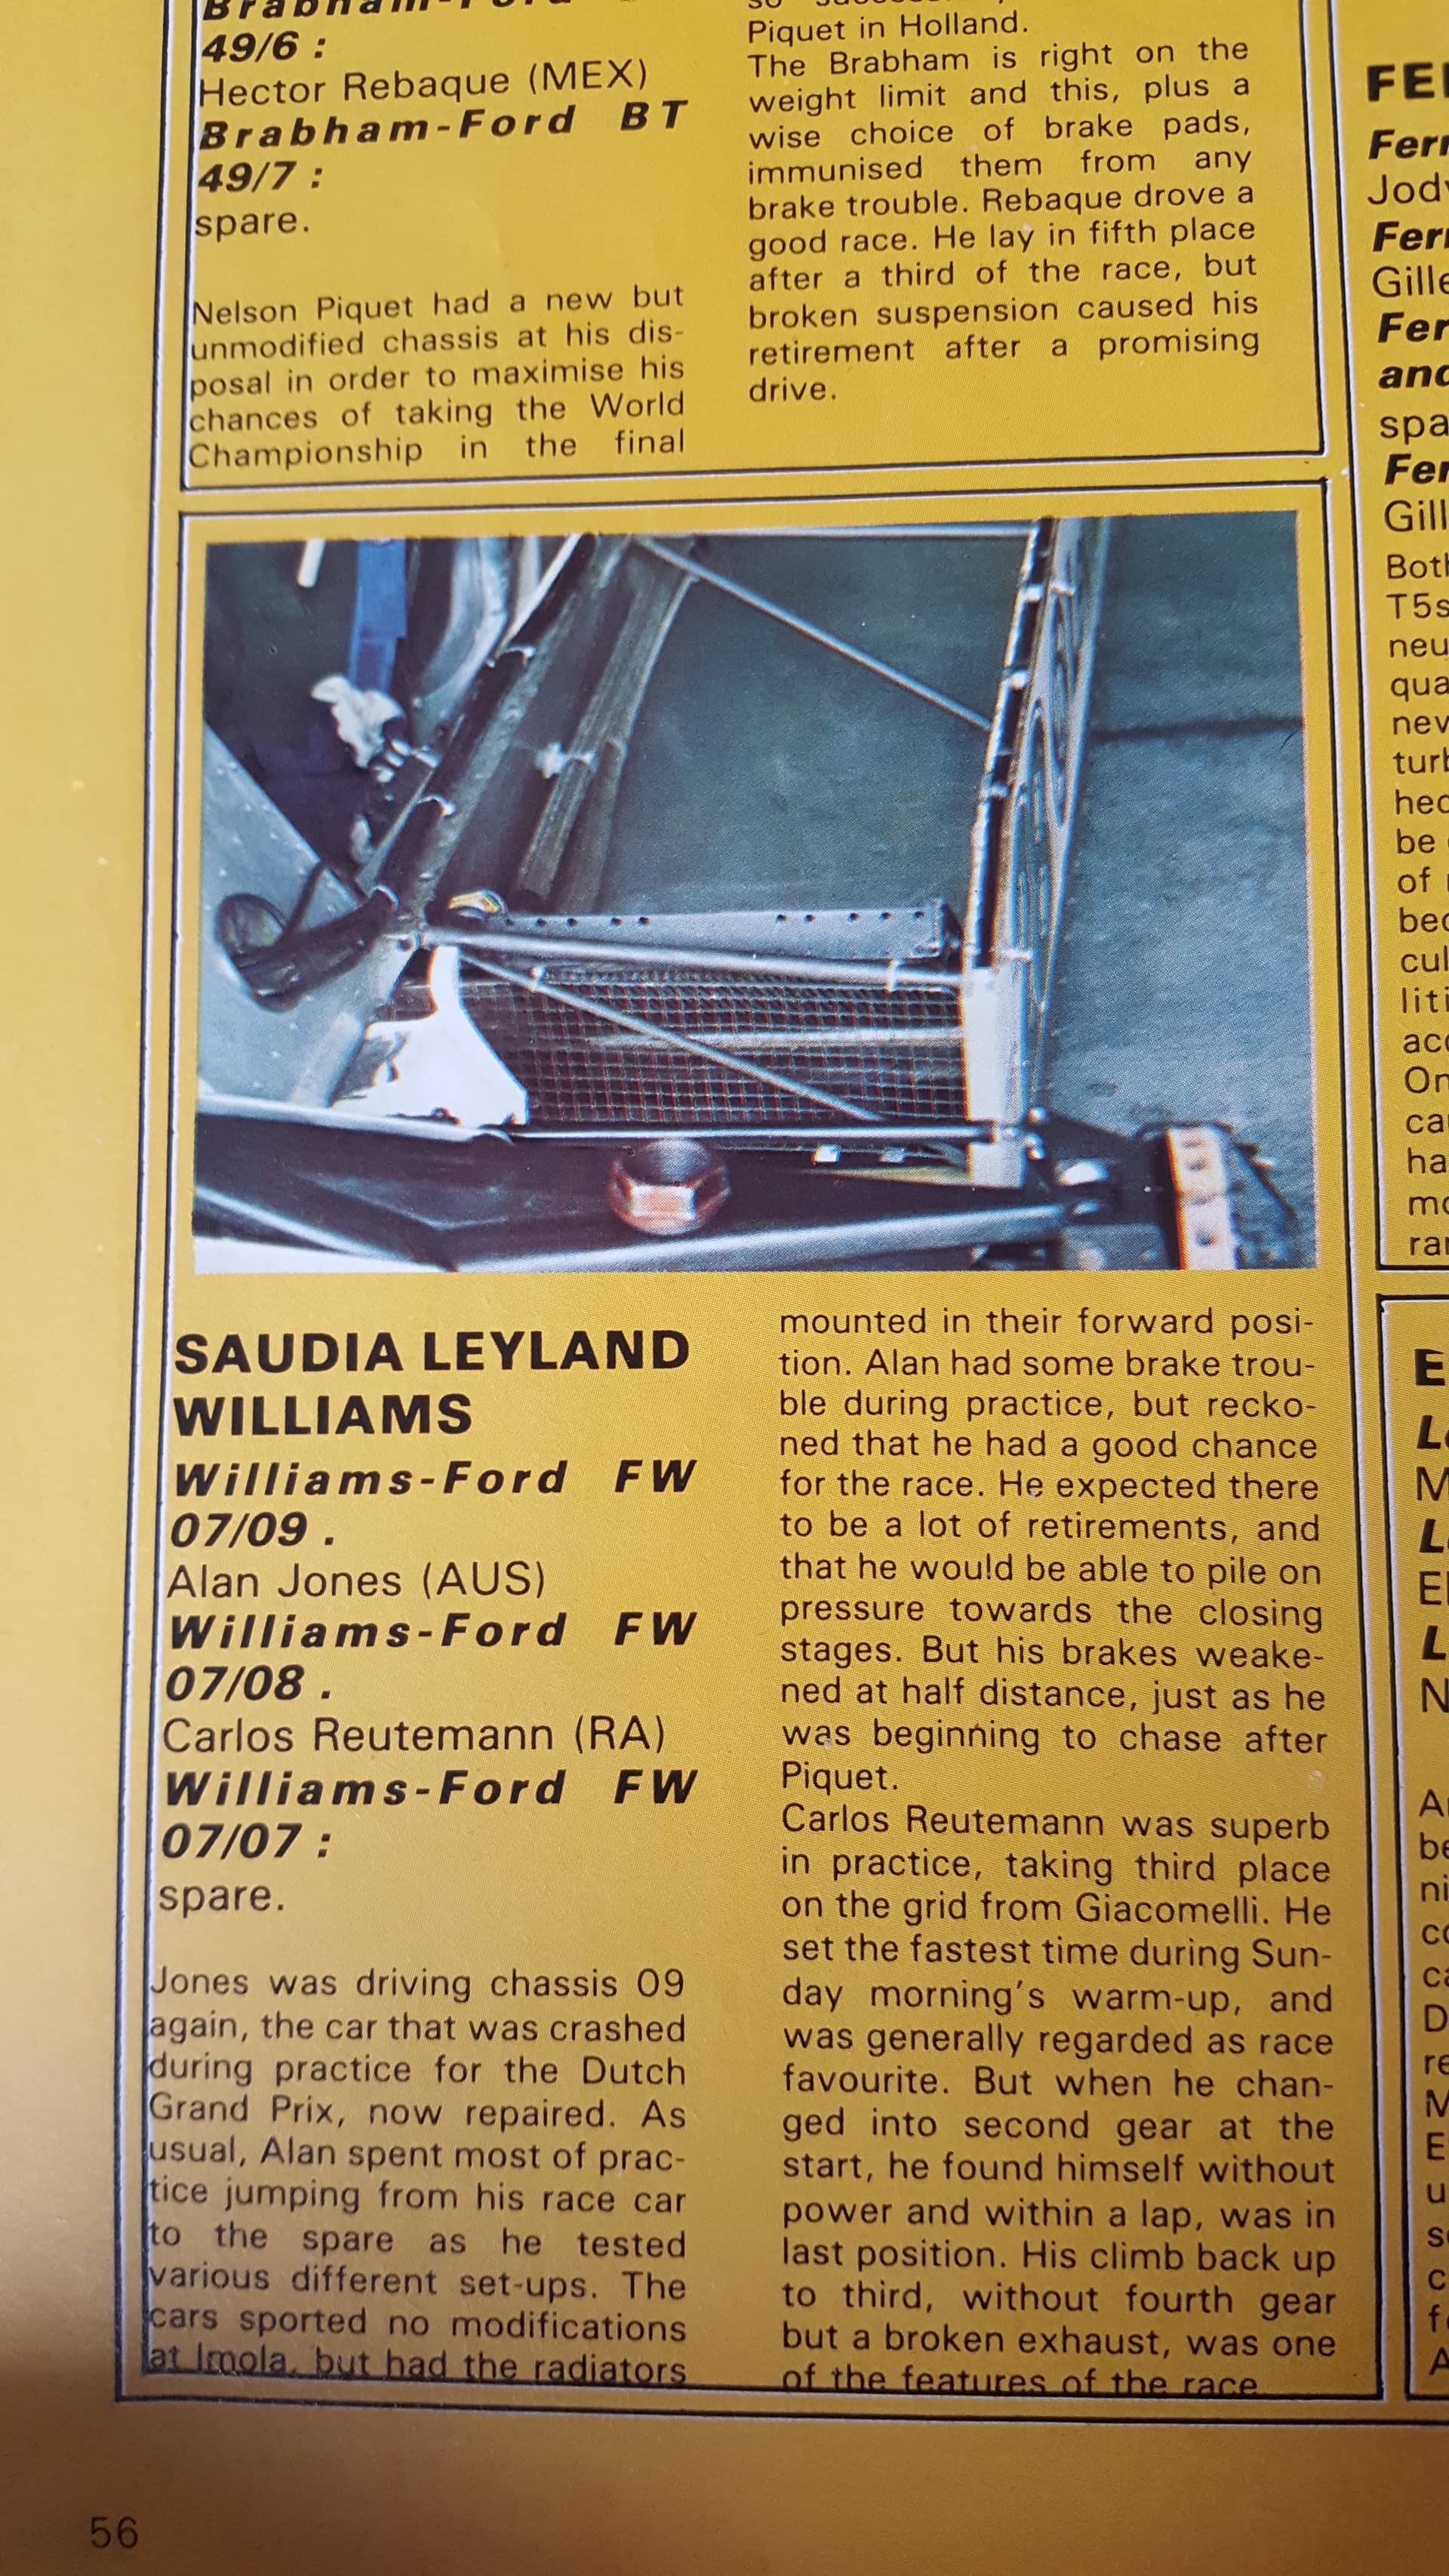
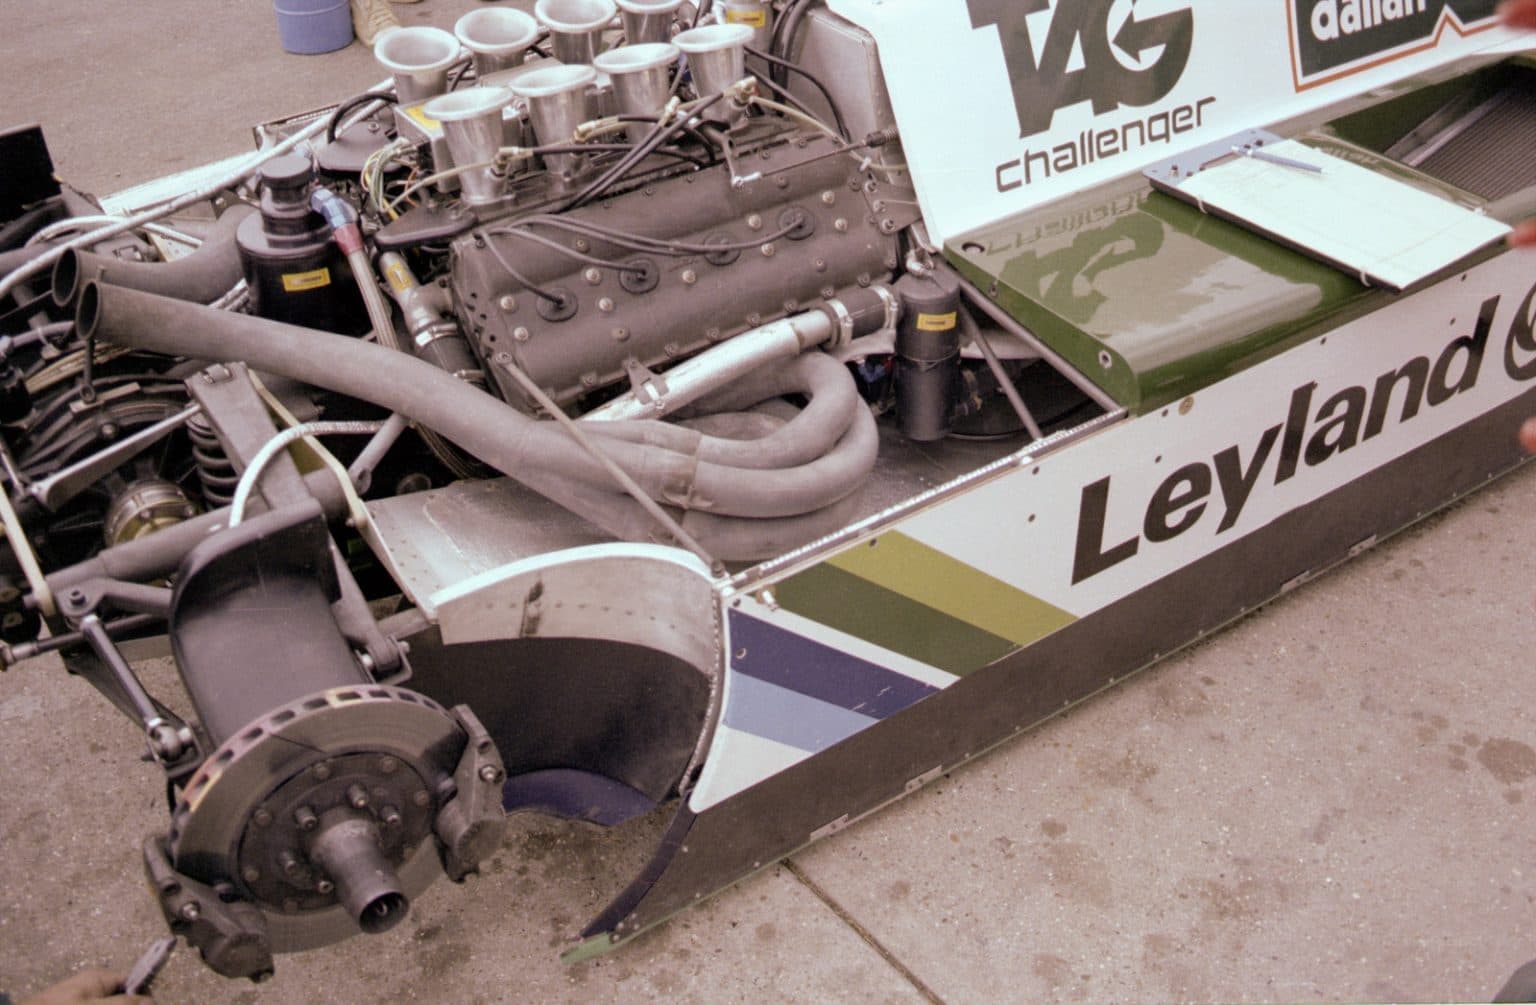
It not easy to find a good photo but Williams always used mesh screens on their FW07 series cars. Circuits weren’t as antiseptic as they are nowadays so flying stones and vulnerable radiators were always a problem.
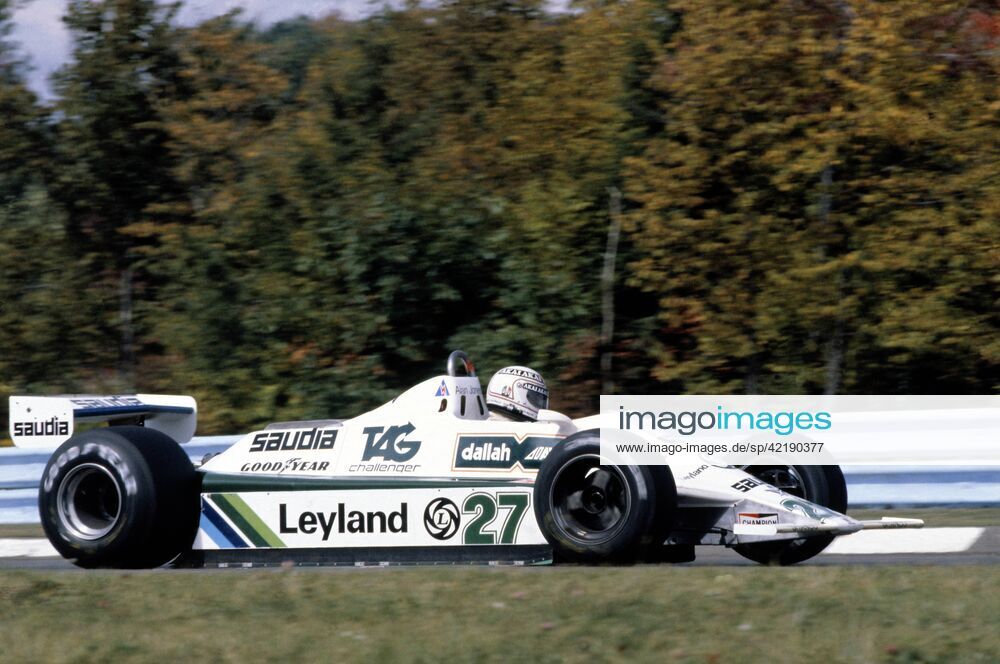
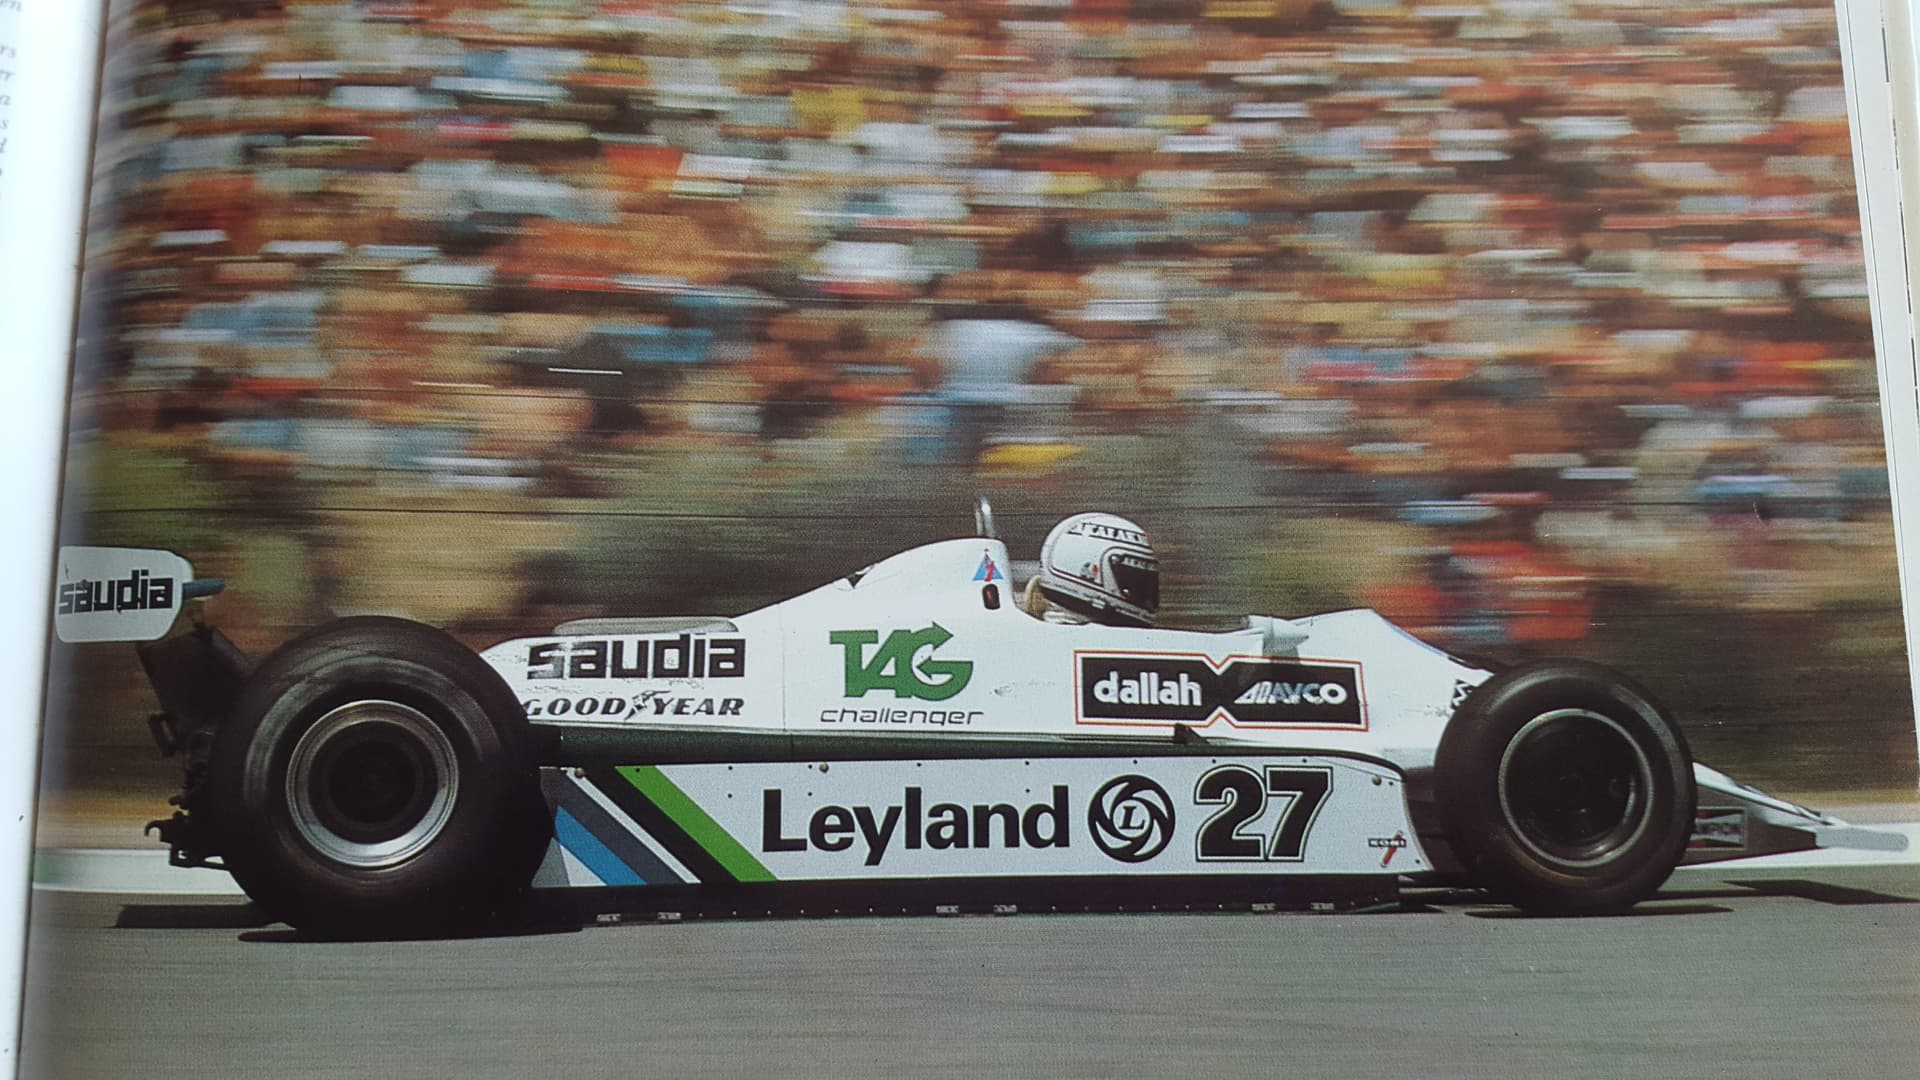
This photo is from the 1980 Italian GP - the race just before Canada.
MFH have supplied both green and black versions of some of the decals as its really tricky to tell which colour some of them were. I have some photos which might help if you like.
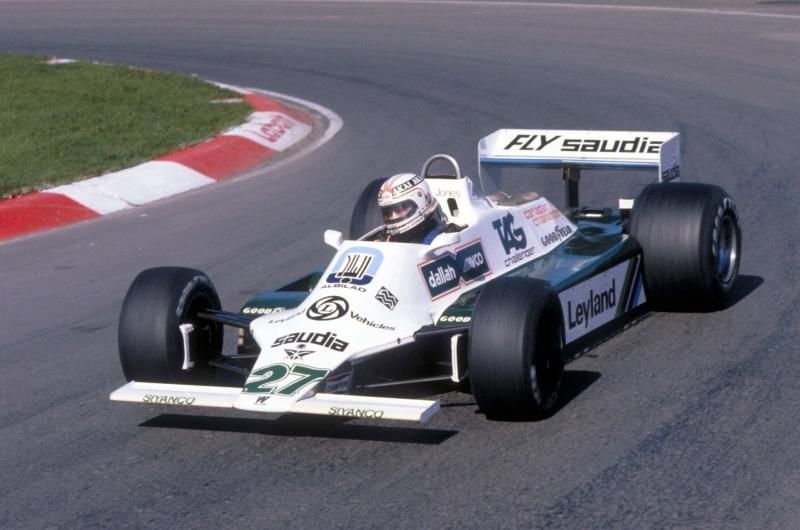
Thanks Phil. Any photos you have the #27 at the 1980 Canadian GP would be great. I will probably start decals next week if I get the painting finished.
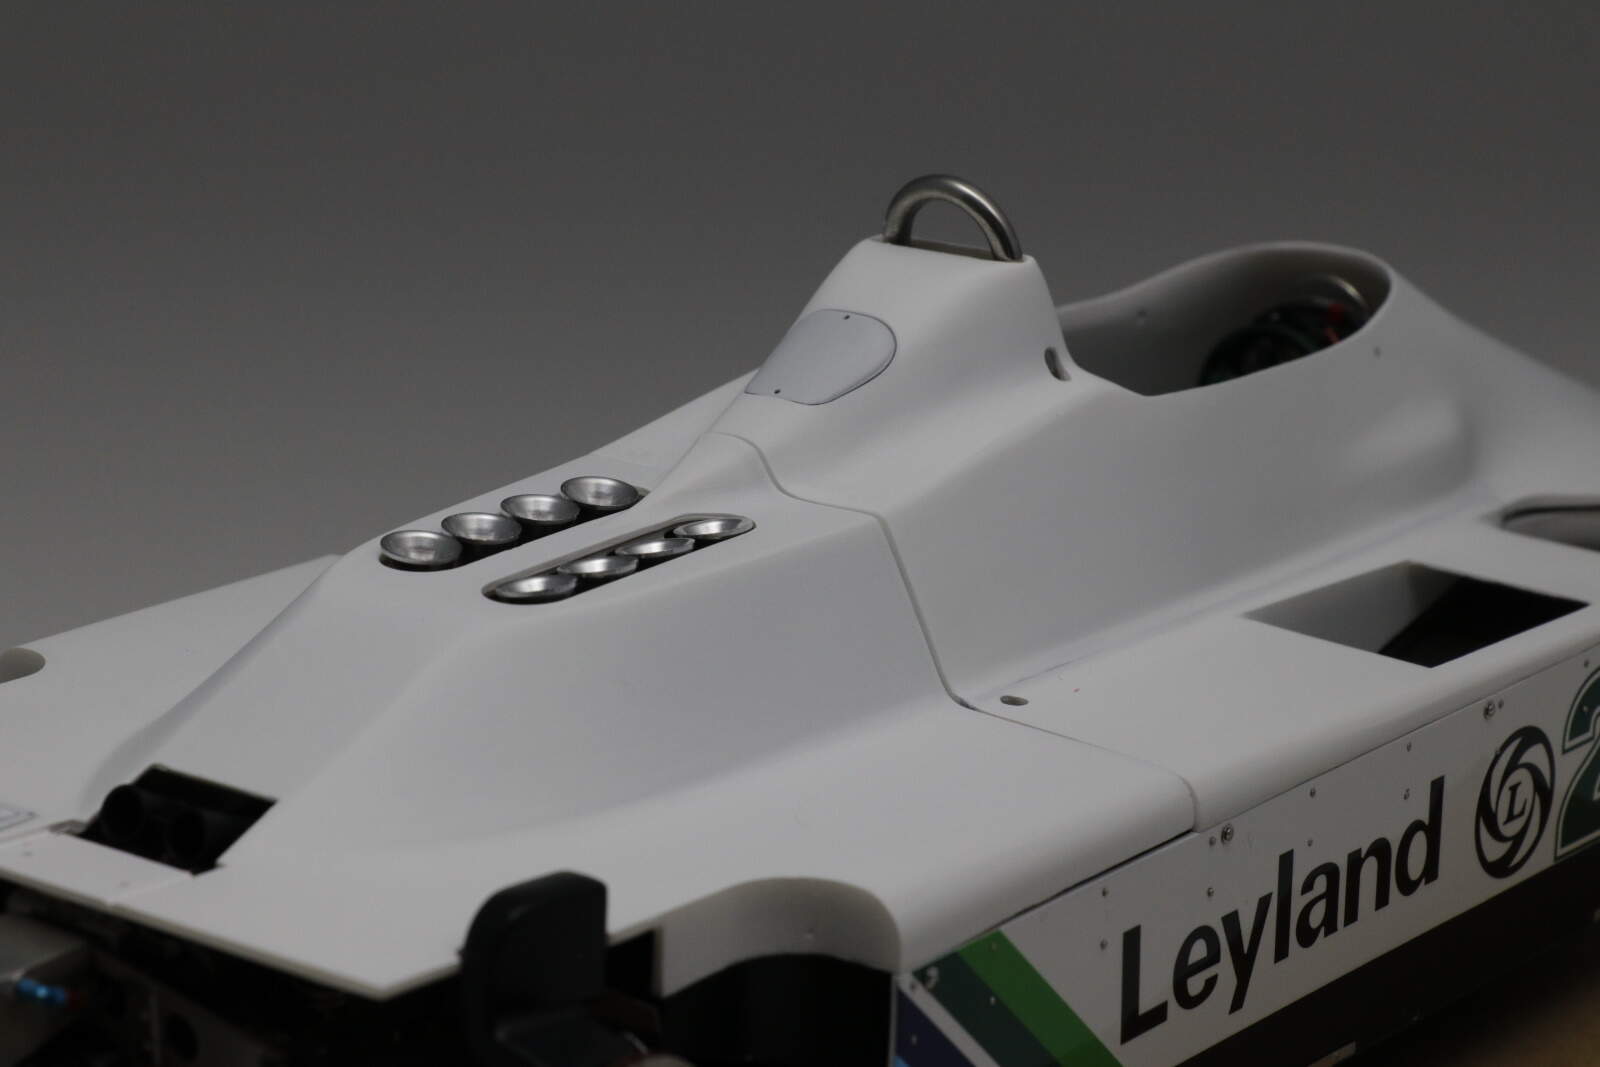
I am still working on the upper body shell. As you know it comes in four parts. So far I have joined the monocoque cover with the side pod covers. Fitted separately the gaps were just too annoying for me. The next decision I will make it whether I make the whole lot one piece. The engine cover is not bad but again the alignment is not the best. It would also make lining up the Saudi green on the flat parts much easier.
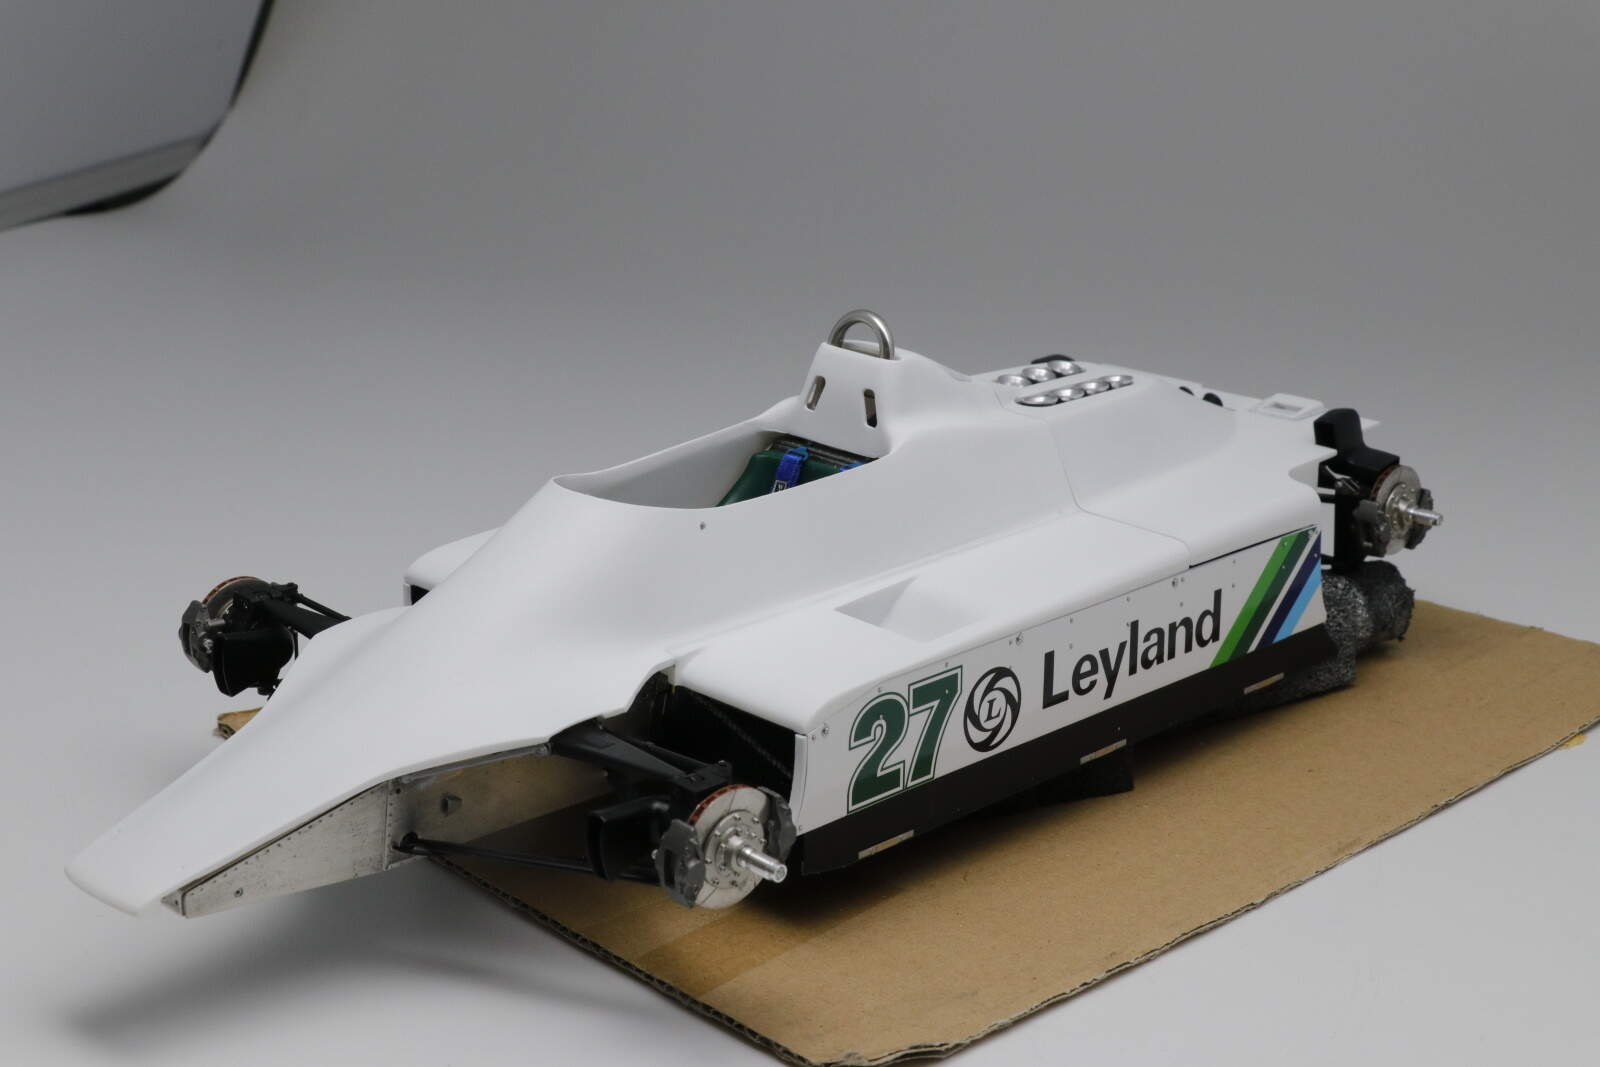
Thanks Joel, that is the way I have gone so far. Here is the body shell fitted. The front three sections have become one because no way was it going to look neat as three separate sections. That took me a few sessions but it looks fine.
but I am pretty sure if I make it one section I will not be to get it on the body. I have spent a few days on this but I am not sure what else can be done.
So I will leave as two sections, get it painted and wait for some pictures from Phil before finalising.
Michael,
1st off, the 3 front main sections fashioned together now have an absolute perfect fit, and looks fantastic. As for the engine cover, I’d get it as good as you can, but not attach it so the engine/tranaxle can be displayed when wanted. I’ve got plenty of pics of F1 cars from that era, and if you look closely at the engine cover sections, not all have that perfect fit just from constant taking them off and then putting them back on.
As your engine cover now sits, looks darn good to me.
Michael, looks like you’re treading ground which Patrick Head, Neil Oatley & Frank Dernie trod in 1980.
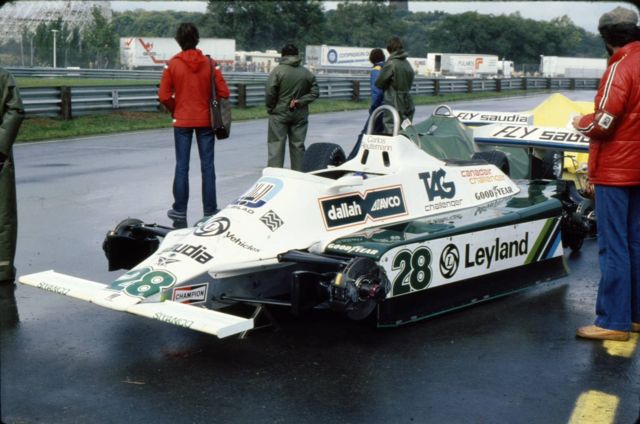
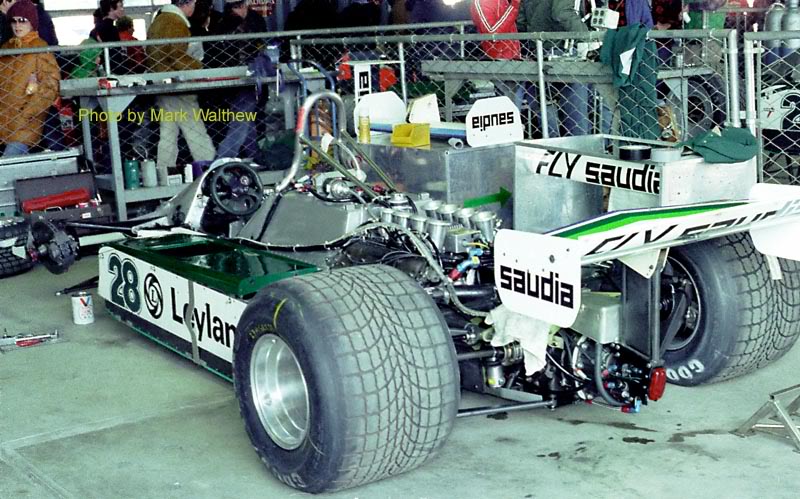
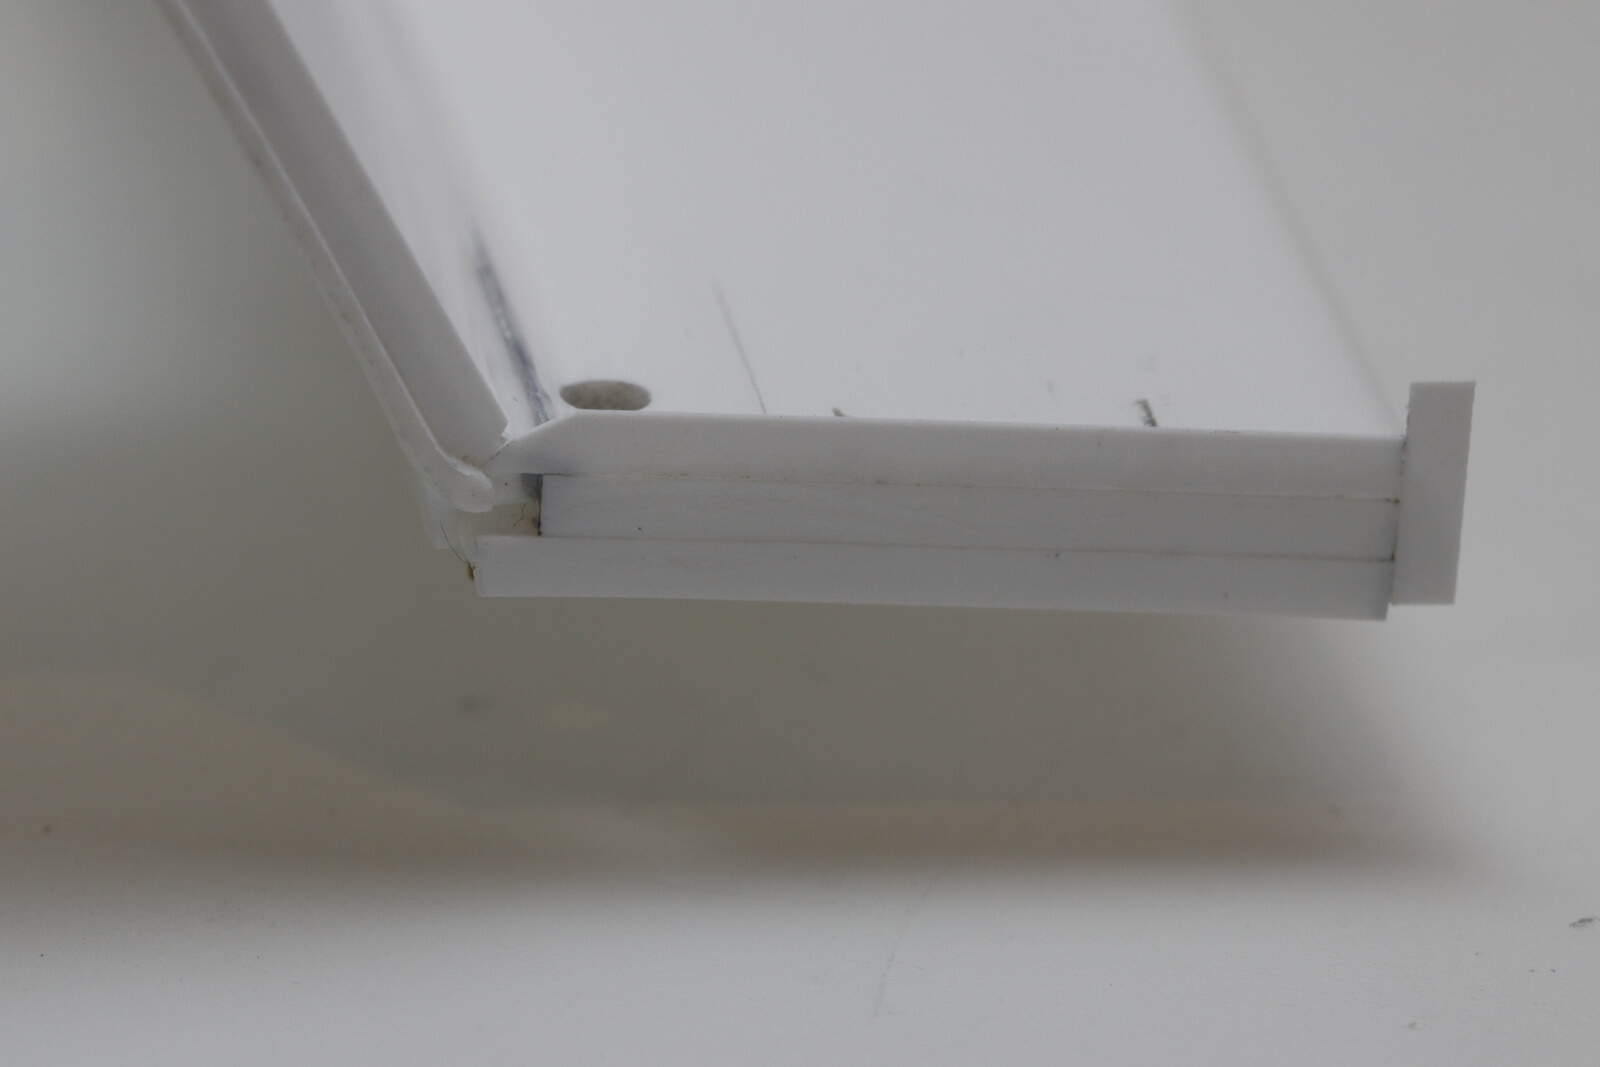
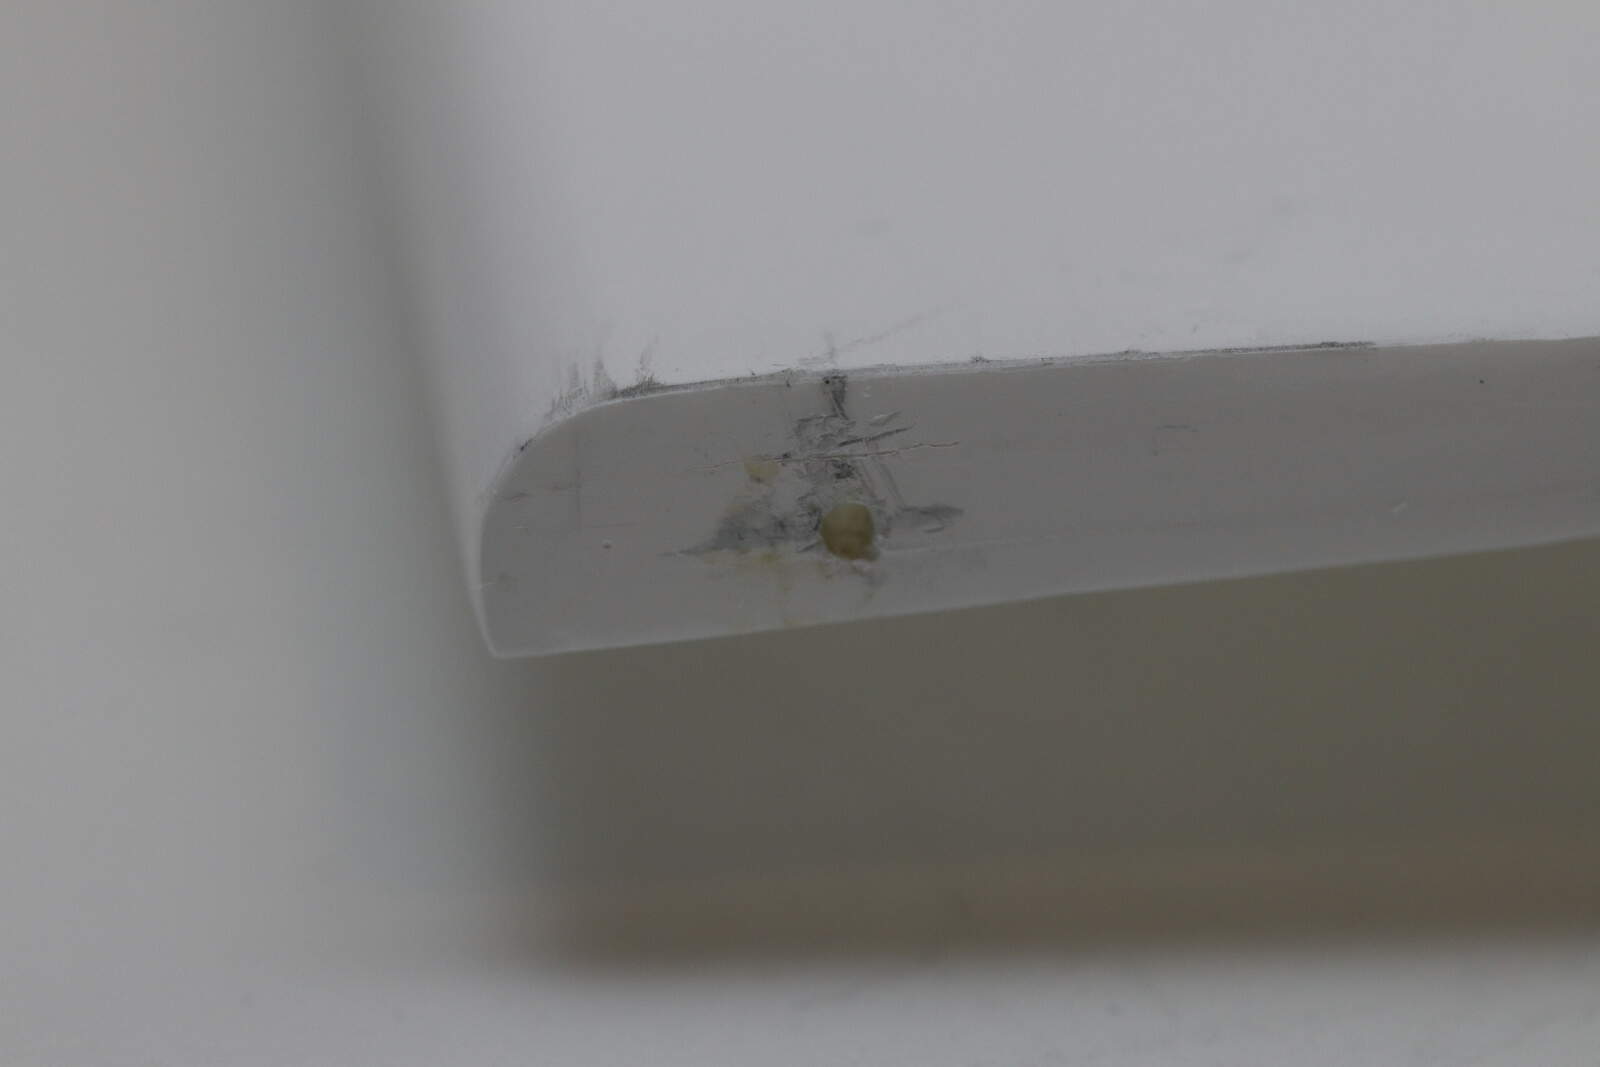
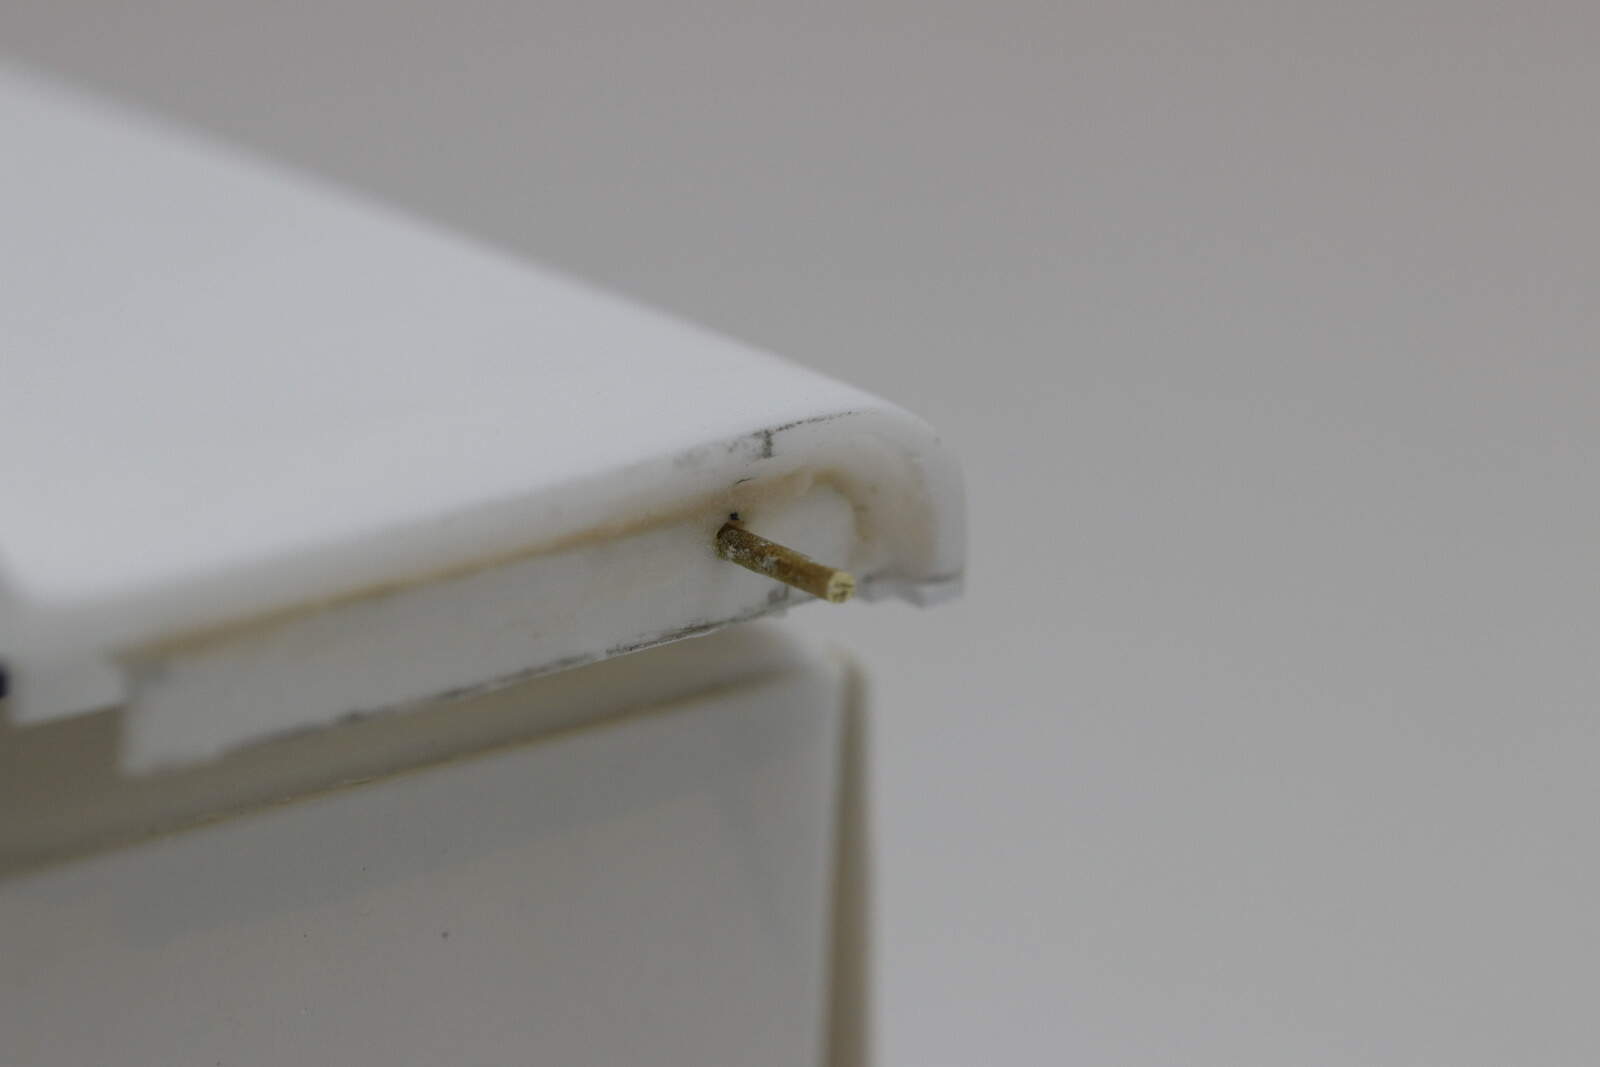
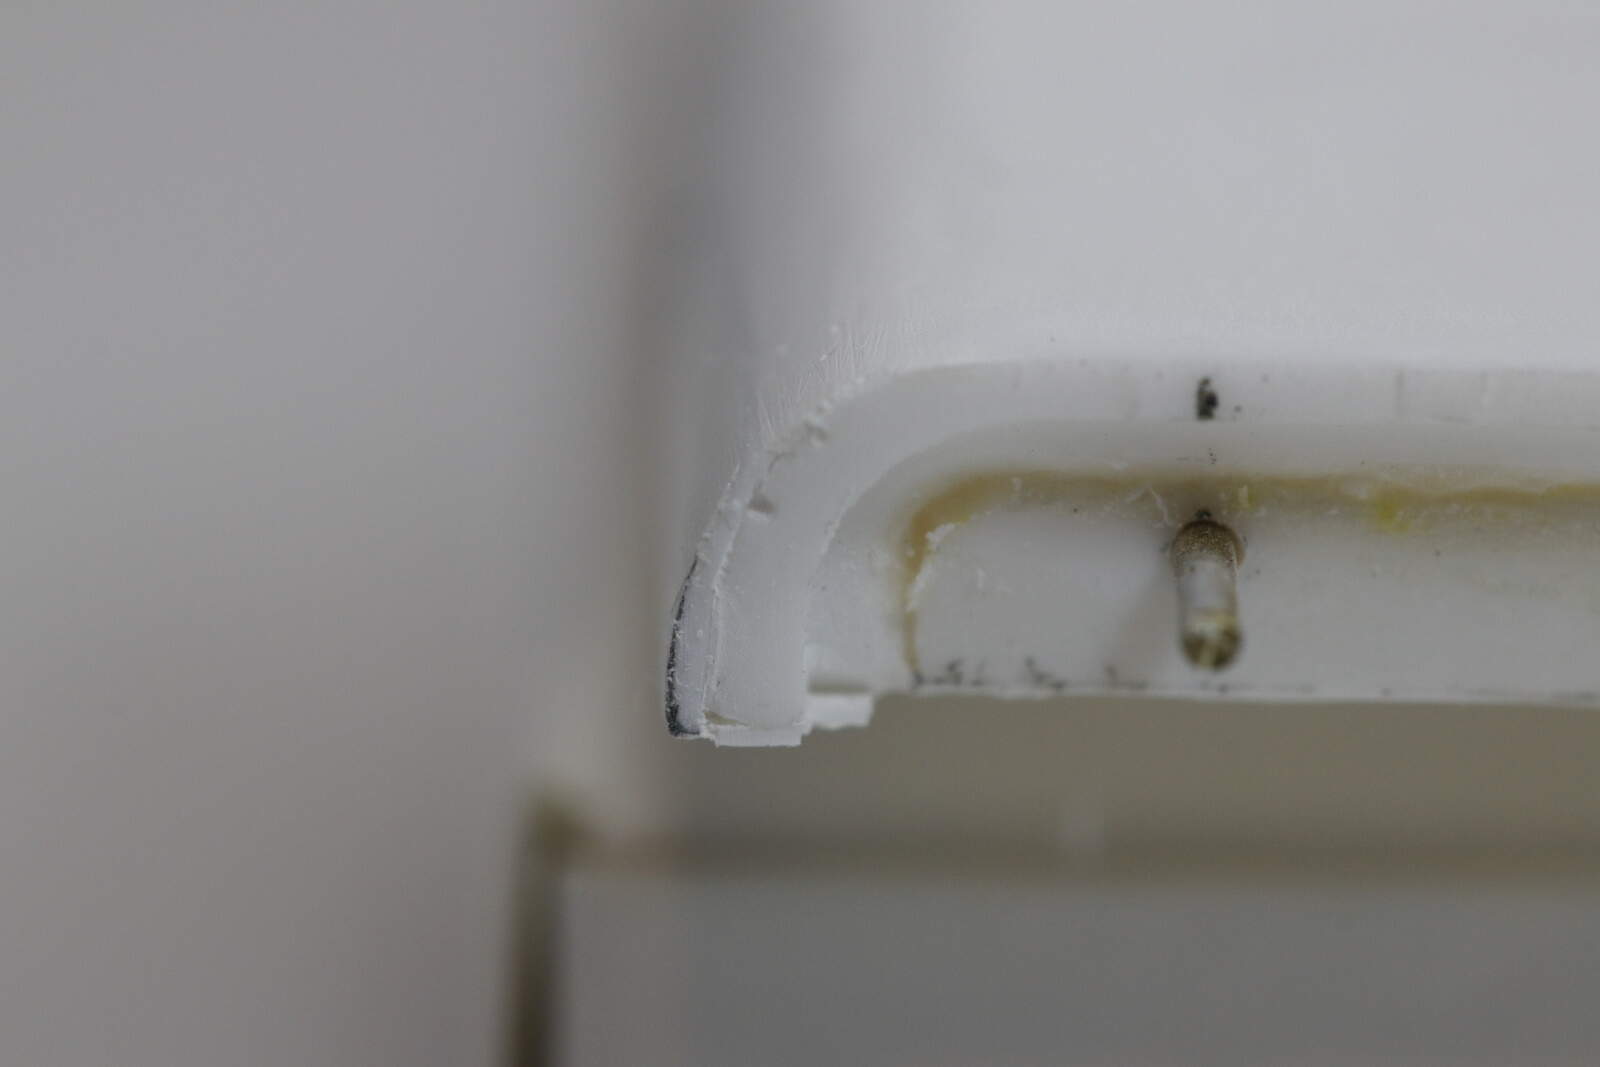
They solved the problem by using two pegs on the front flange of each side of the engine cover and corresponding holes on the rear flange of the sidepod lids. Like this:
Like Joel said, you’ve got the cockpit cover and sidepod lids lined up beautifully so this trick would complete the look and perhaps allow you to leave them all removable to show off your fine work?
Joel you’re right about tatty bodywork on some F1 cars of the time but Williams really set the standard along with one or two other teams. Their bodywork was always immaculately aligned.
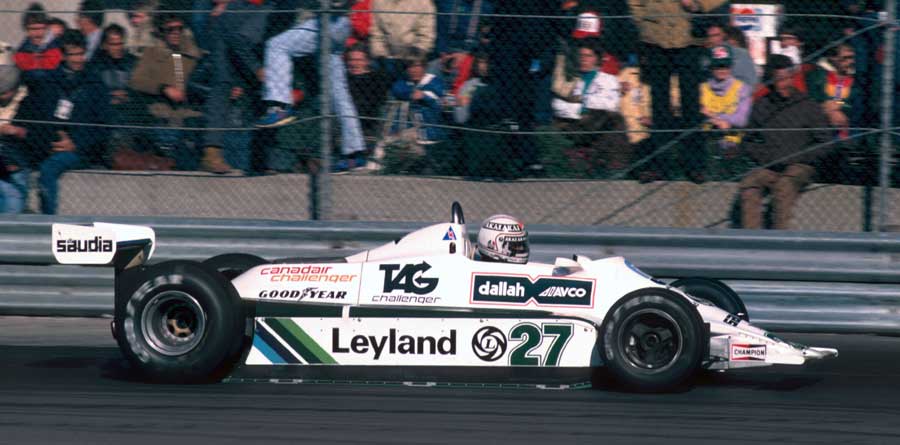
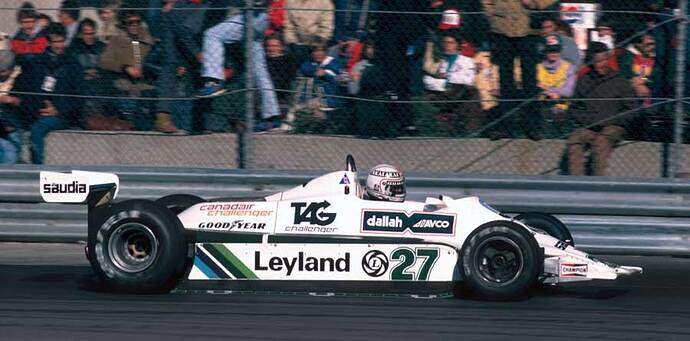
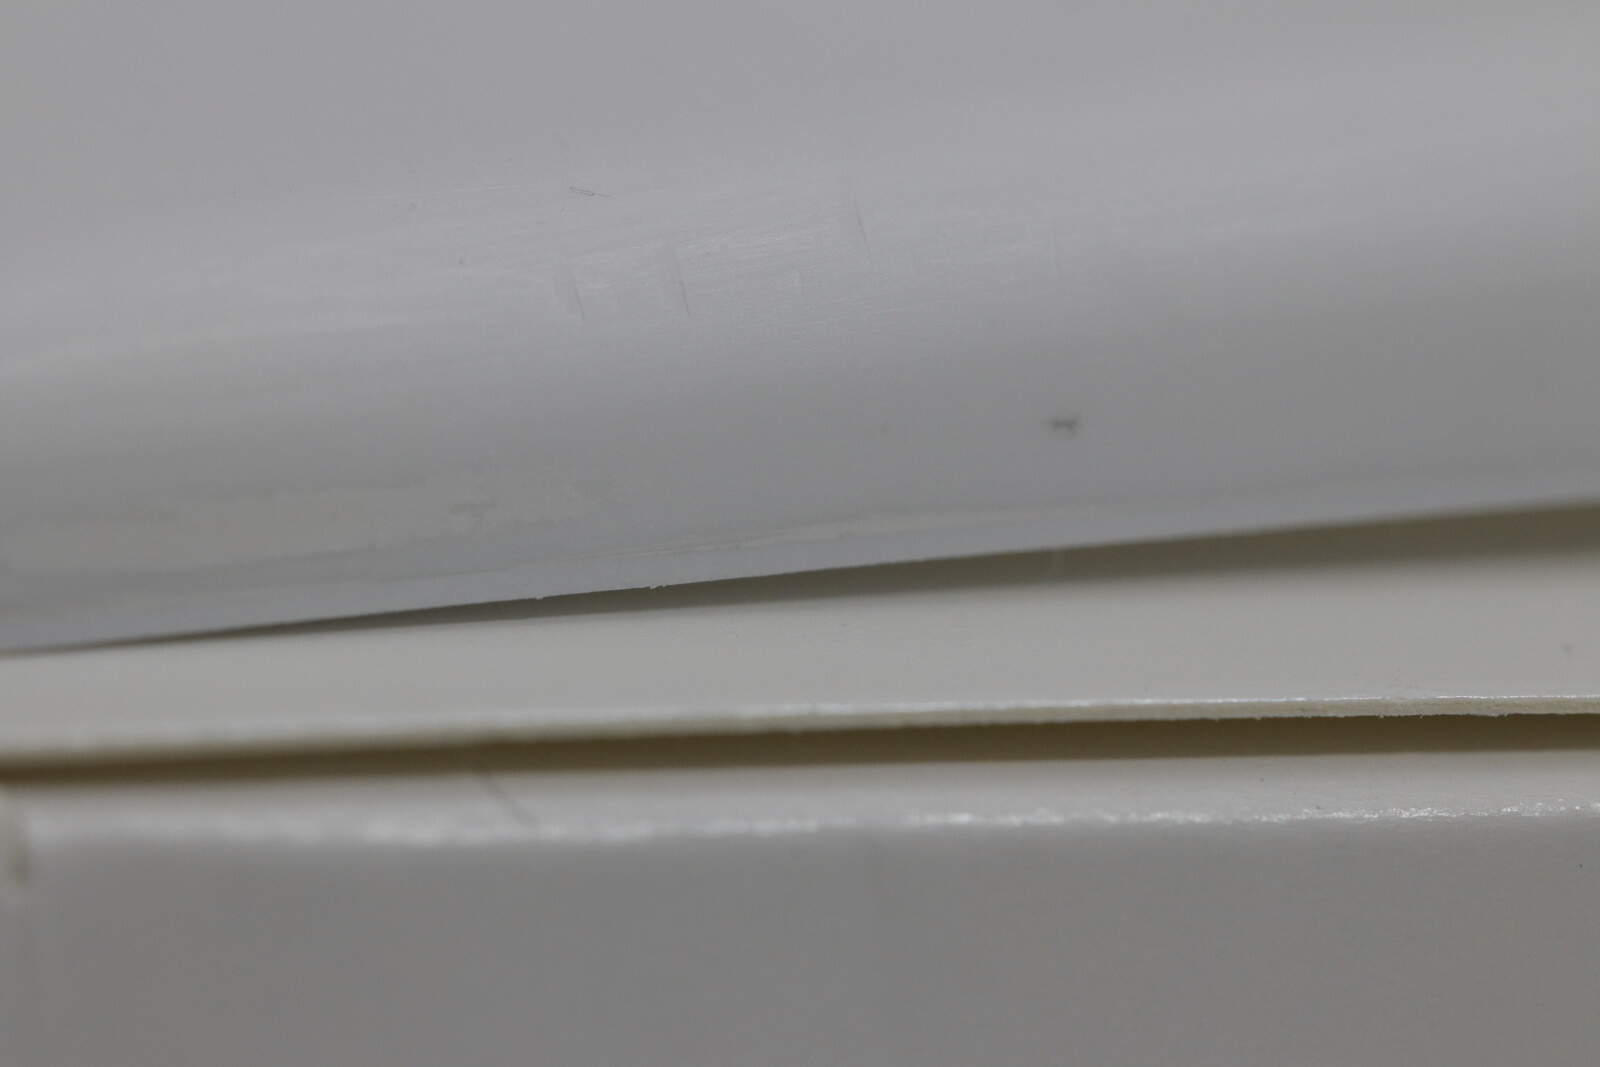
Ironically, one of their few interventions was on Alan Jones no. 27 at the restart in Canada. When Jones & Piquet collided at the first start, Alan’s car had its engine cover ripped off. When he lined up for the restart, the Williams boys had made sure the new engine cover would stay put - they secured it to the sidepod lids with duct tape:
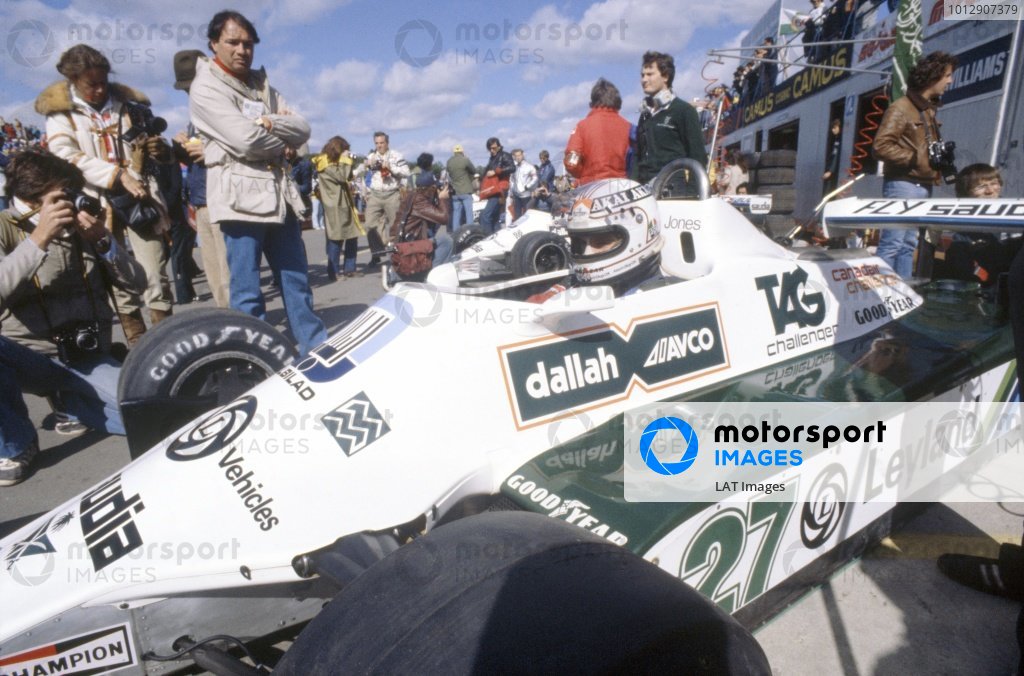
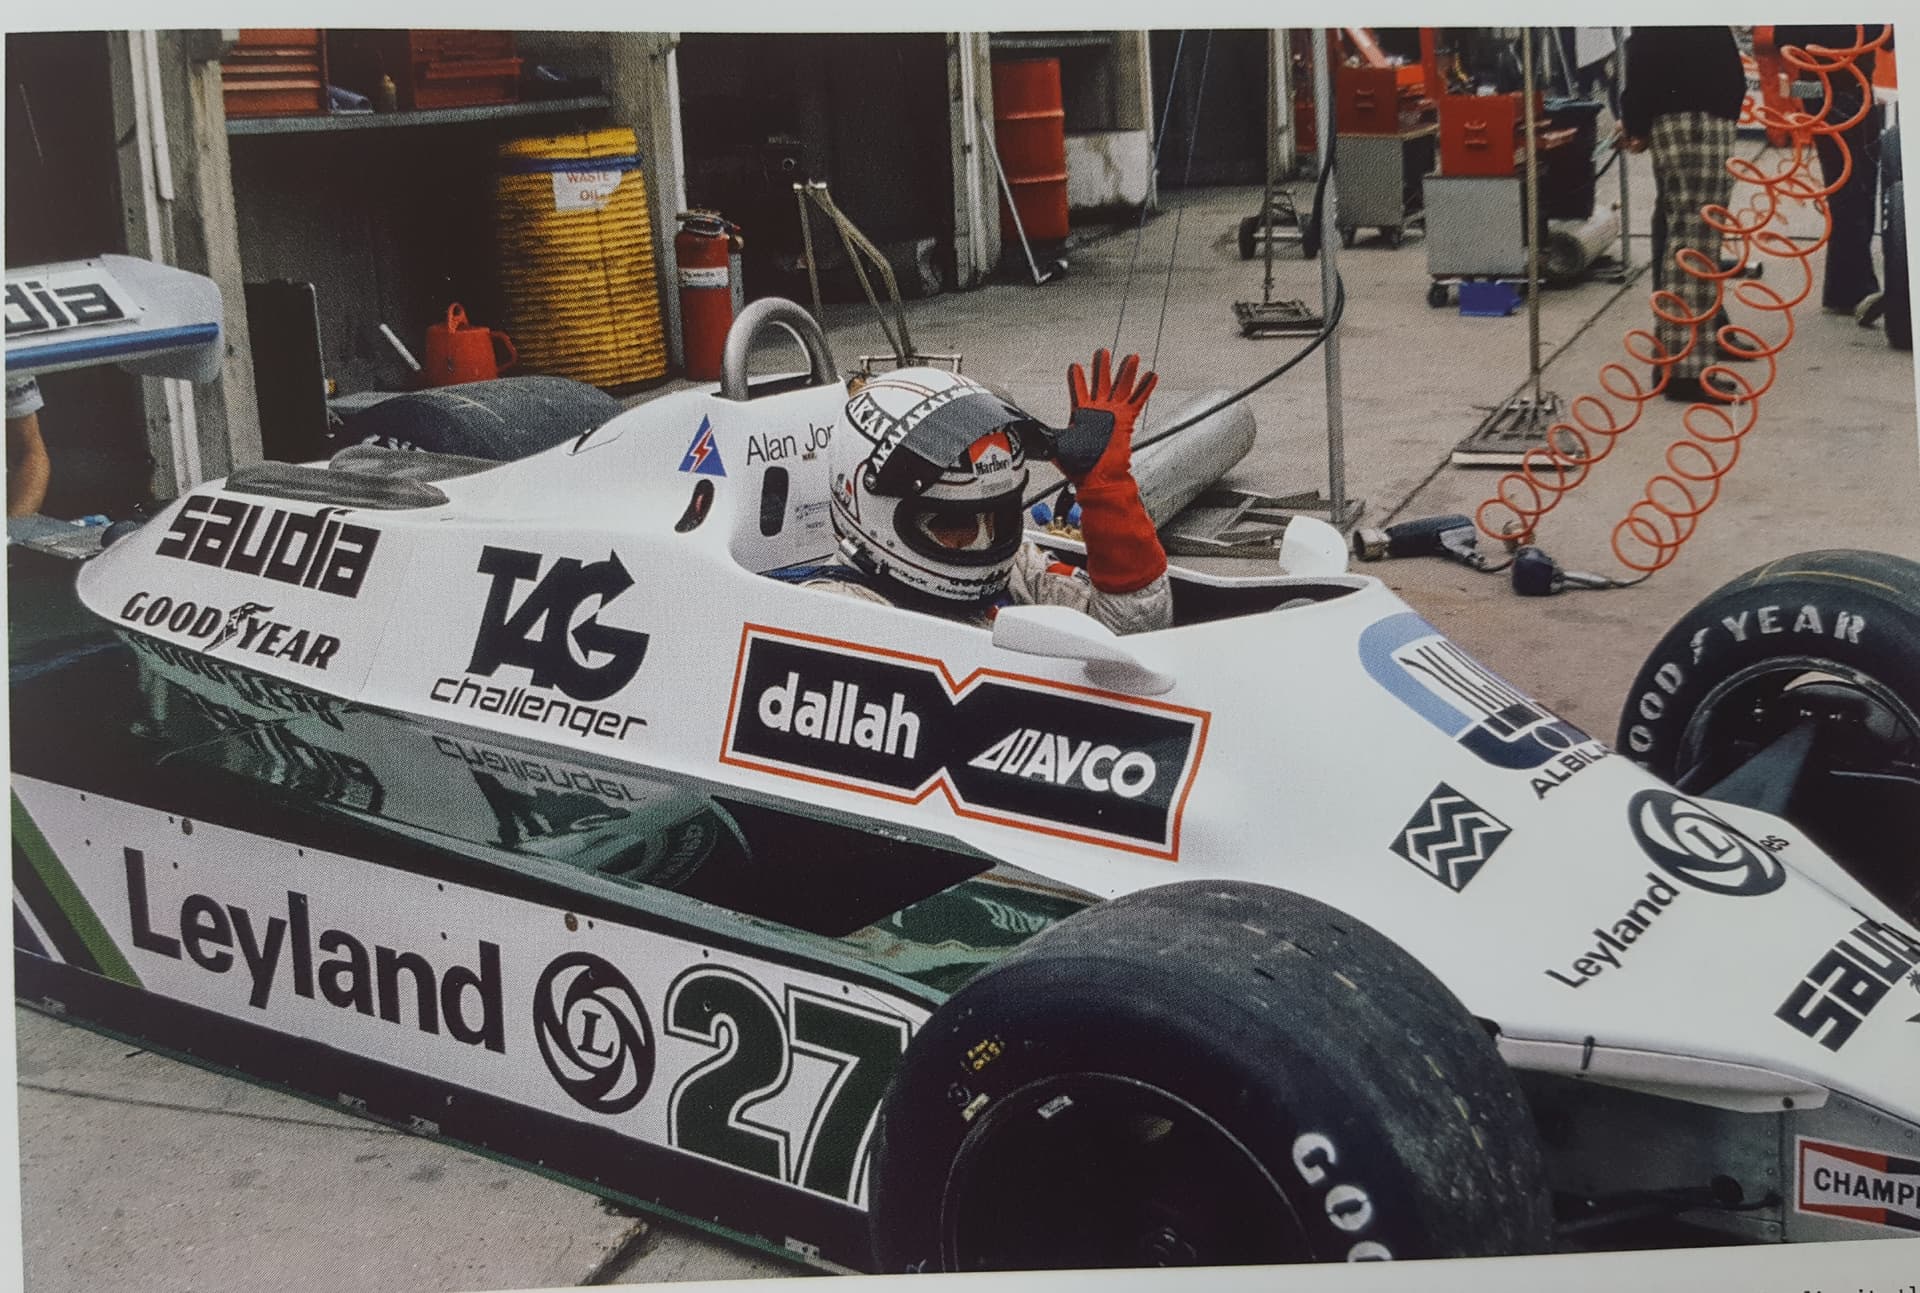
These are from Watkins Glen where the cars were in the same spec as Montreal. The only decal difference was SAUDIA being back on the engine cover. Incidentally, Canadair Challenger appeared there in Canada because Techniques d’Avant Garde had bought a batch of the Challenger business jets to sell.
As we’ve mentioned before, MFH have provided a number of the main decals in both black and green. I reckon this is because its not at all easy to tell which colour they should be. I’ve had a bee in my bonnet for decades about this.
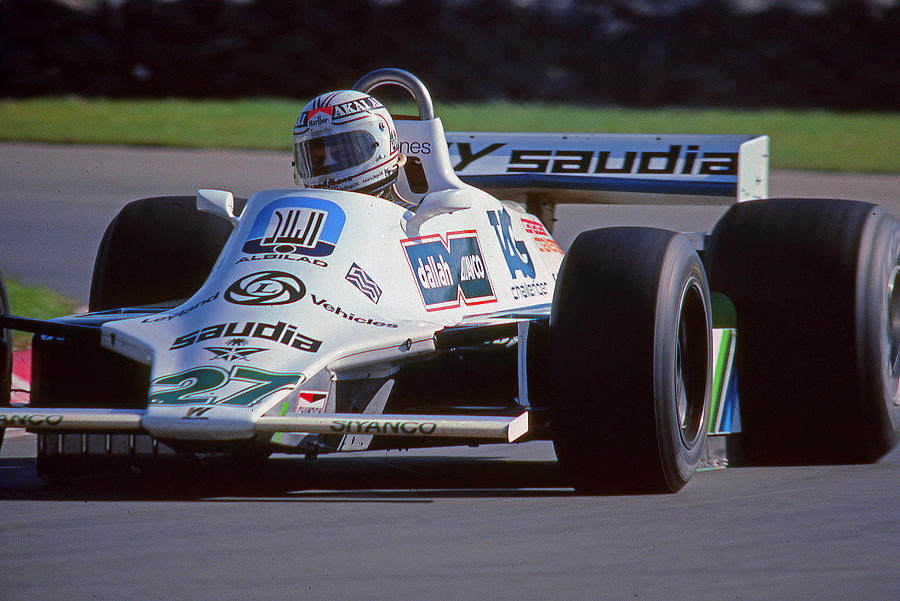
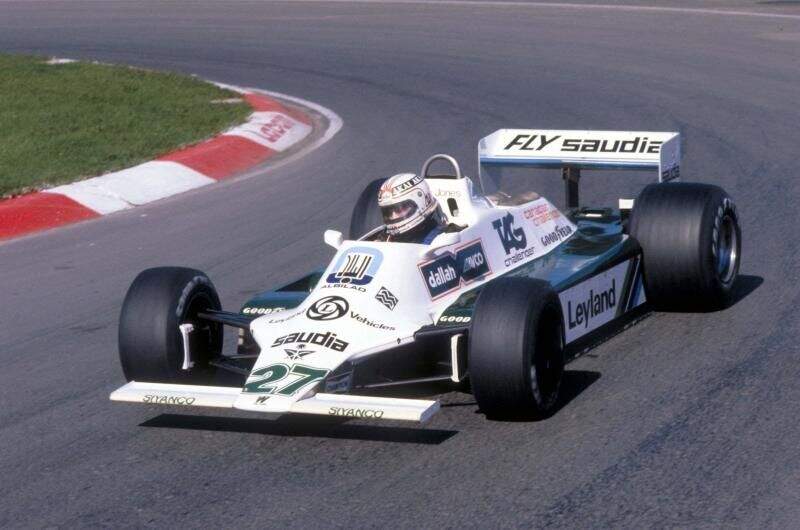
These last photos will, I hope, help to distinguish between the green and black. The lighting and angles make a big difference to the apparent colour of the decals on the cockpit and engine cover and the Leylands and race numbers on the sidepods.
After years of looking at photos & videos, I’ve grouped them like this:
Front wing:
SIYANCO - green
From the front of the car
Race numbers nose (& sidepods) - green
Saudia triangular logo - green
SAUDIA lettering -black
Leyland lettering & circular logo - black (same on sidepods)
Square squiggly logos either side of the Albilad decal - green
Side of cockpit cover:
DALLAH AVCO - black with white lettering & red outline
TAG Challenger - green
Top of cockpit cover:
USI - black
Side of engine cover:
SAUDIA lettering - black
GOODYEAR logo -green
Rear wing:
SAUDIA lettering - black
Saudia triangular logo - green
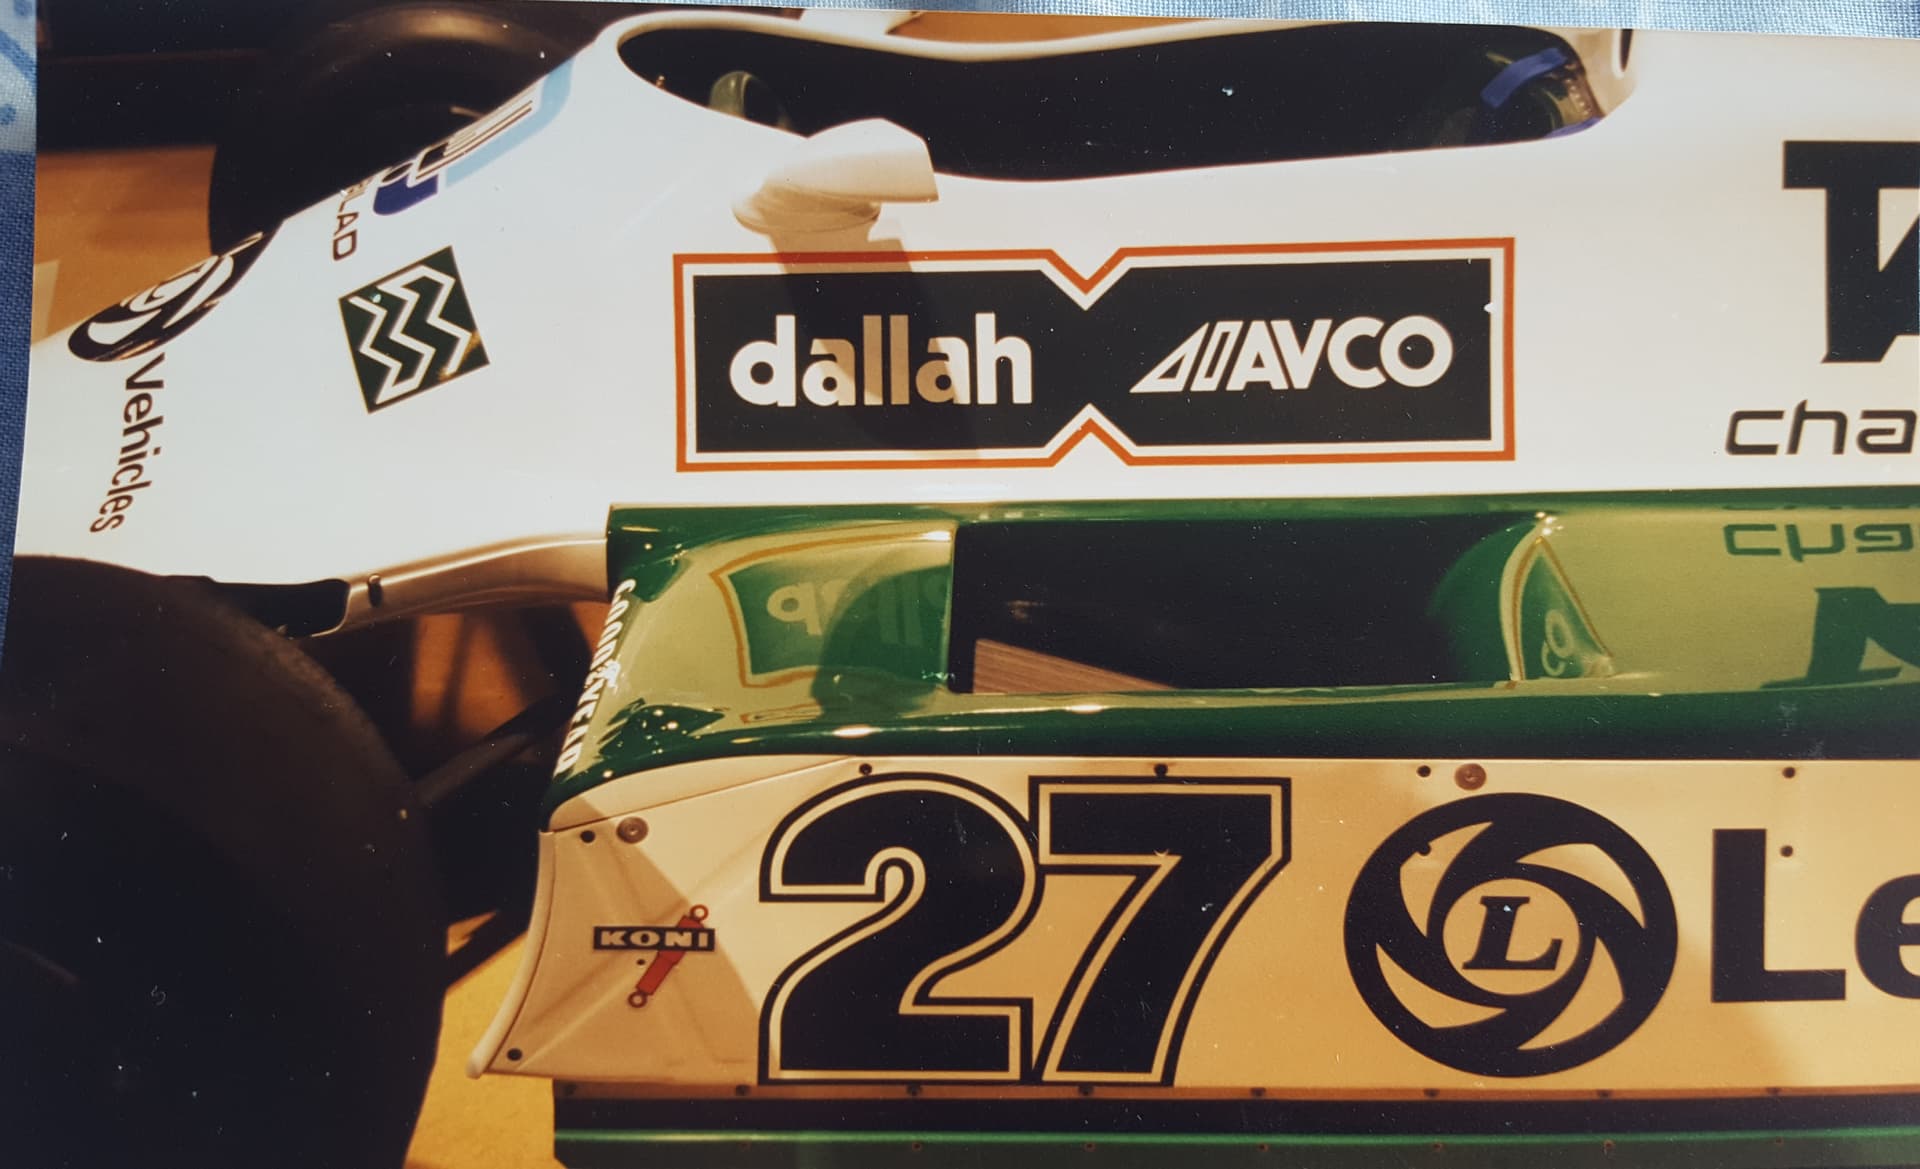
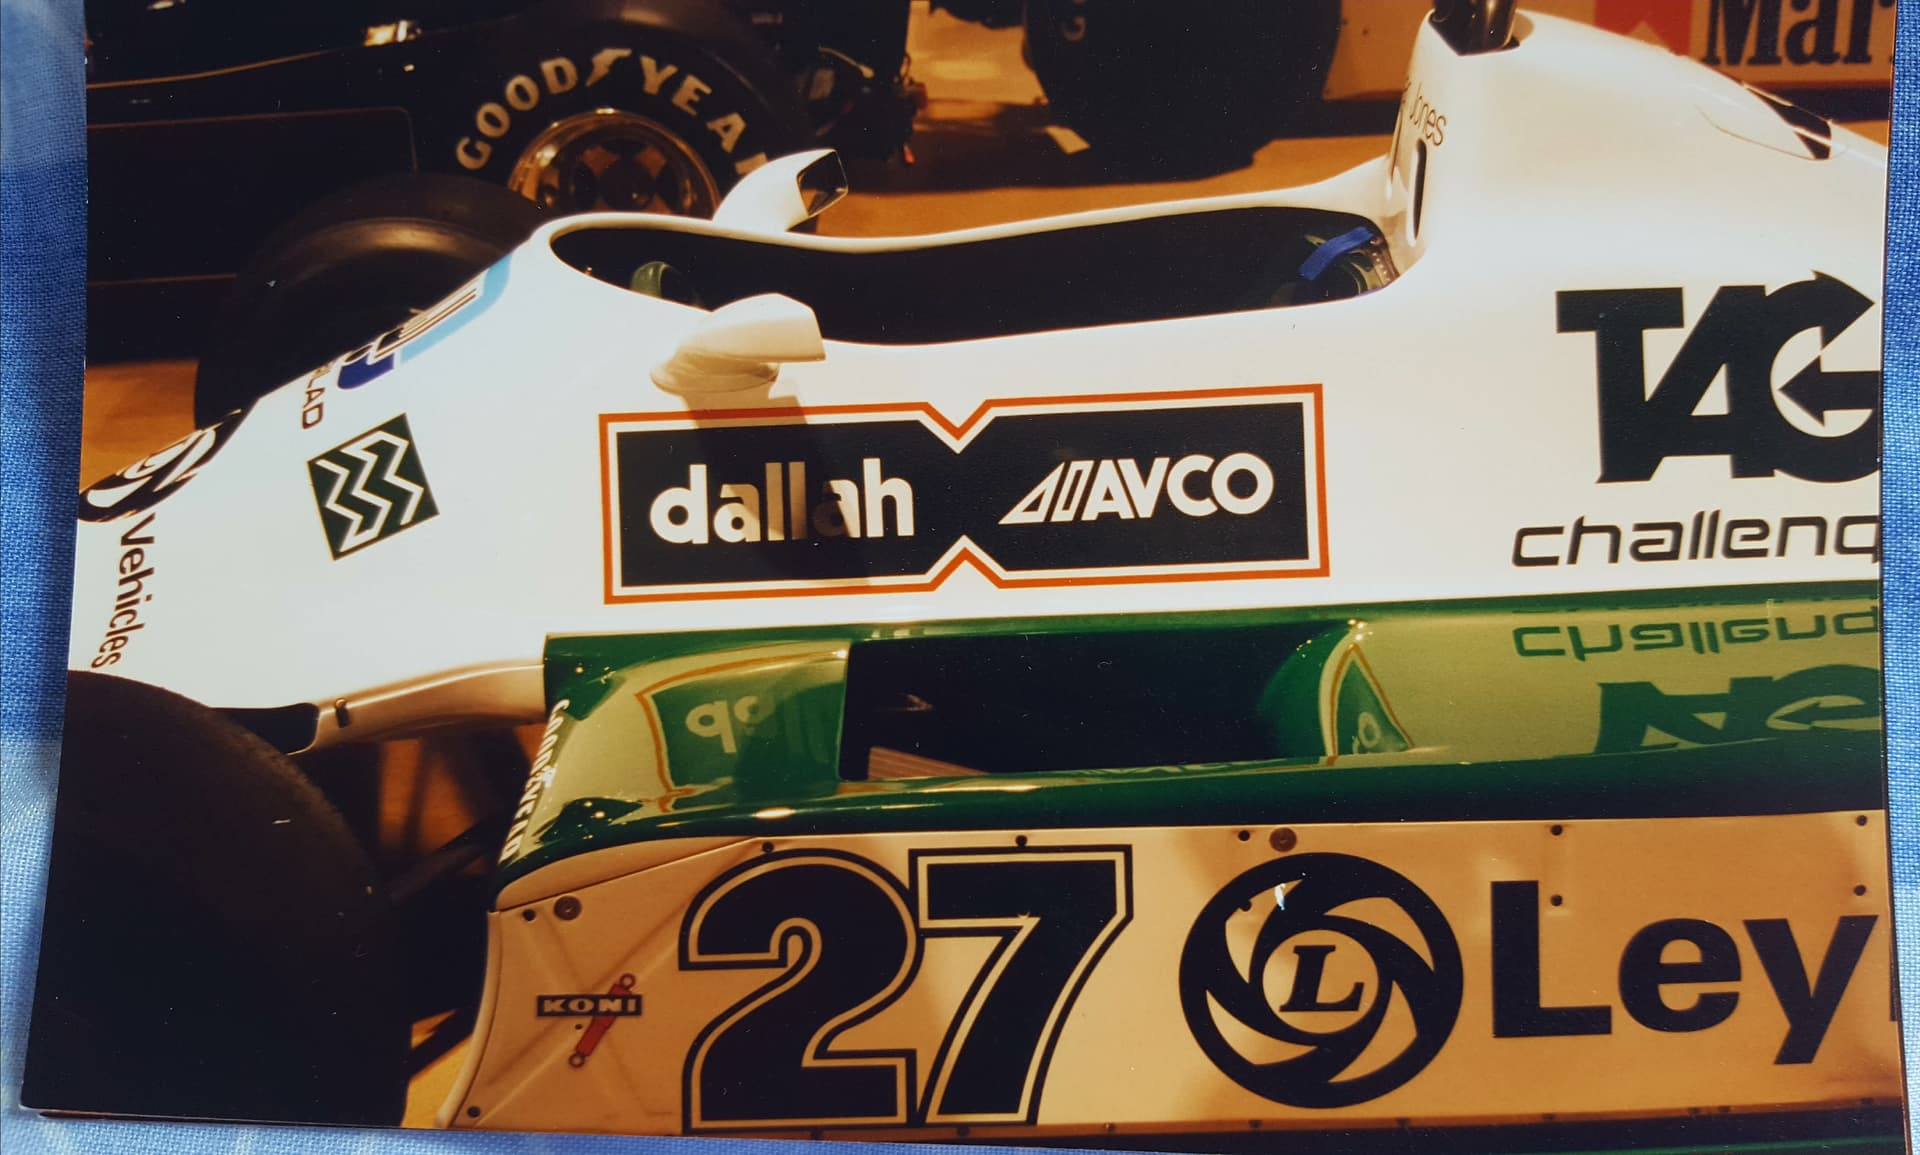
I took these pics of FW07/09 when it was exhibited at the Autosport International show in 1995. It was running in historical racing at the time but the decals look extremely close to original to my eye.
Thanks Joel, yes I am very happy with the front section. The rear section is annoying and Phil has given some ideas with his photos.
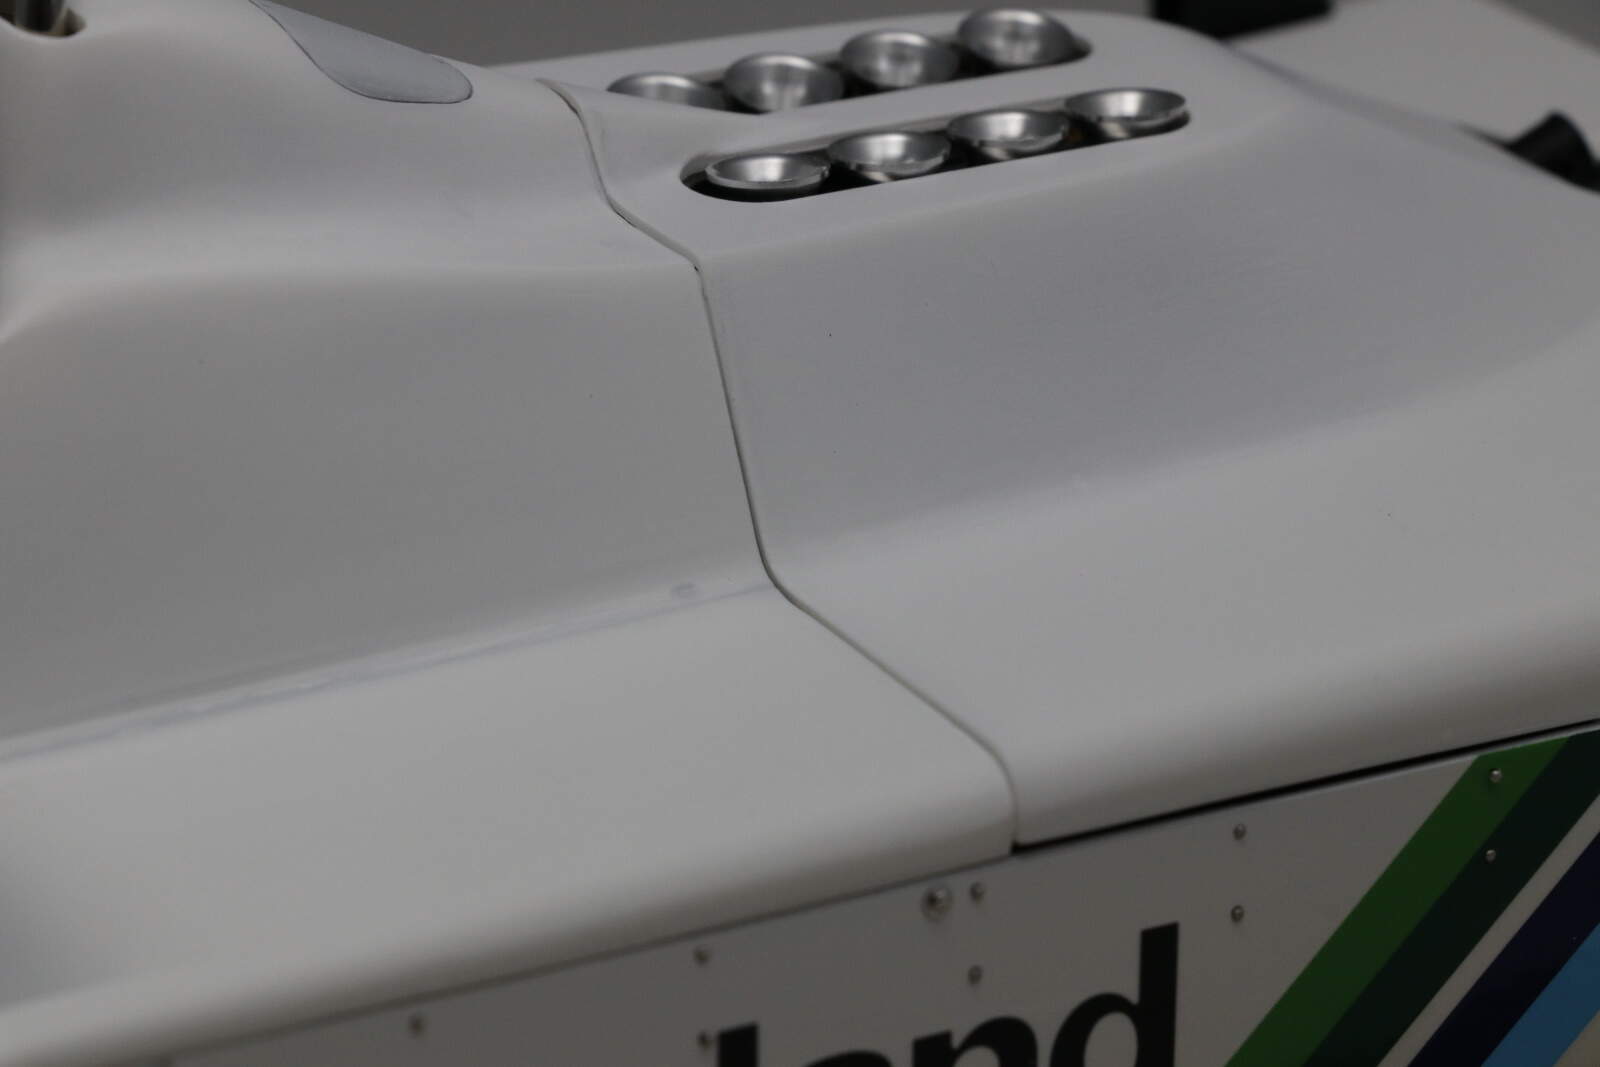
Two things with this photo is the gap is quite wide, you can a definite panel line there between the two sections and who knows maybe silver duct tape would be the answer.
One of the reasons the front sits so well is that MFH use the locking pins as they are on the real car except there isn’t one on the front part of the engine cover. I guess the solution was as Phil pointed out in his photos about the pins between the ywo parts.
Hi Phil, the photos are hugely helpful and leave so much to unpick here. Let’s start with the decals. I agree with all but this
Side of cockpit cover: DALLAH AVCO - black with white lettering & red outline
I think on the cars that raced in Canada it is green rather than black
I think from this photo that the Dallah Avco matches the TAG and sidepod colouring. And I am not just saying that because MFH only supply it in green
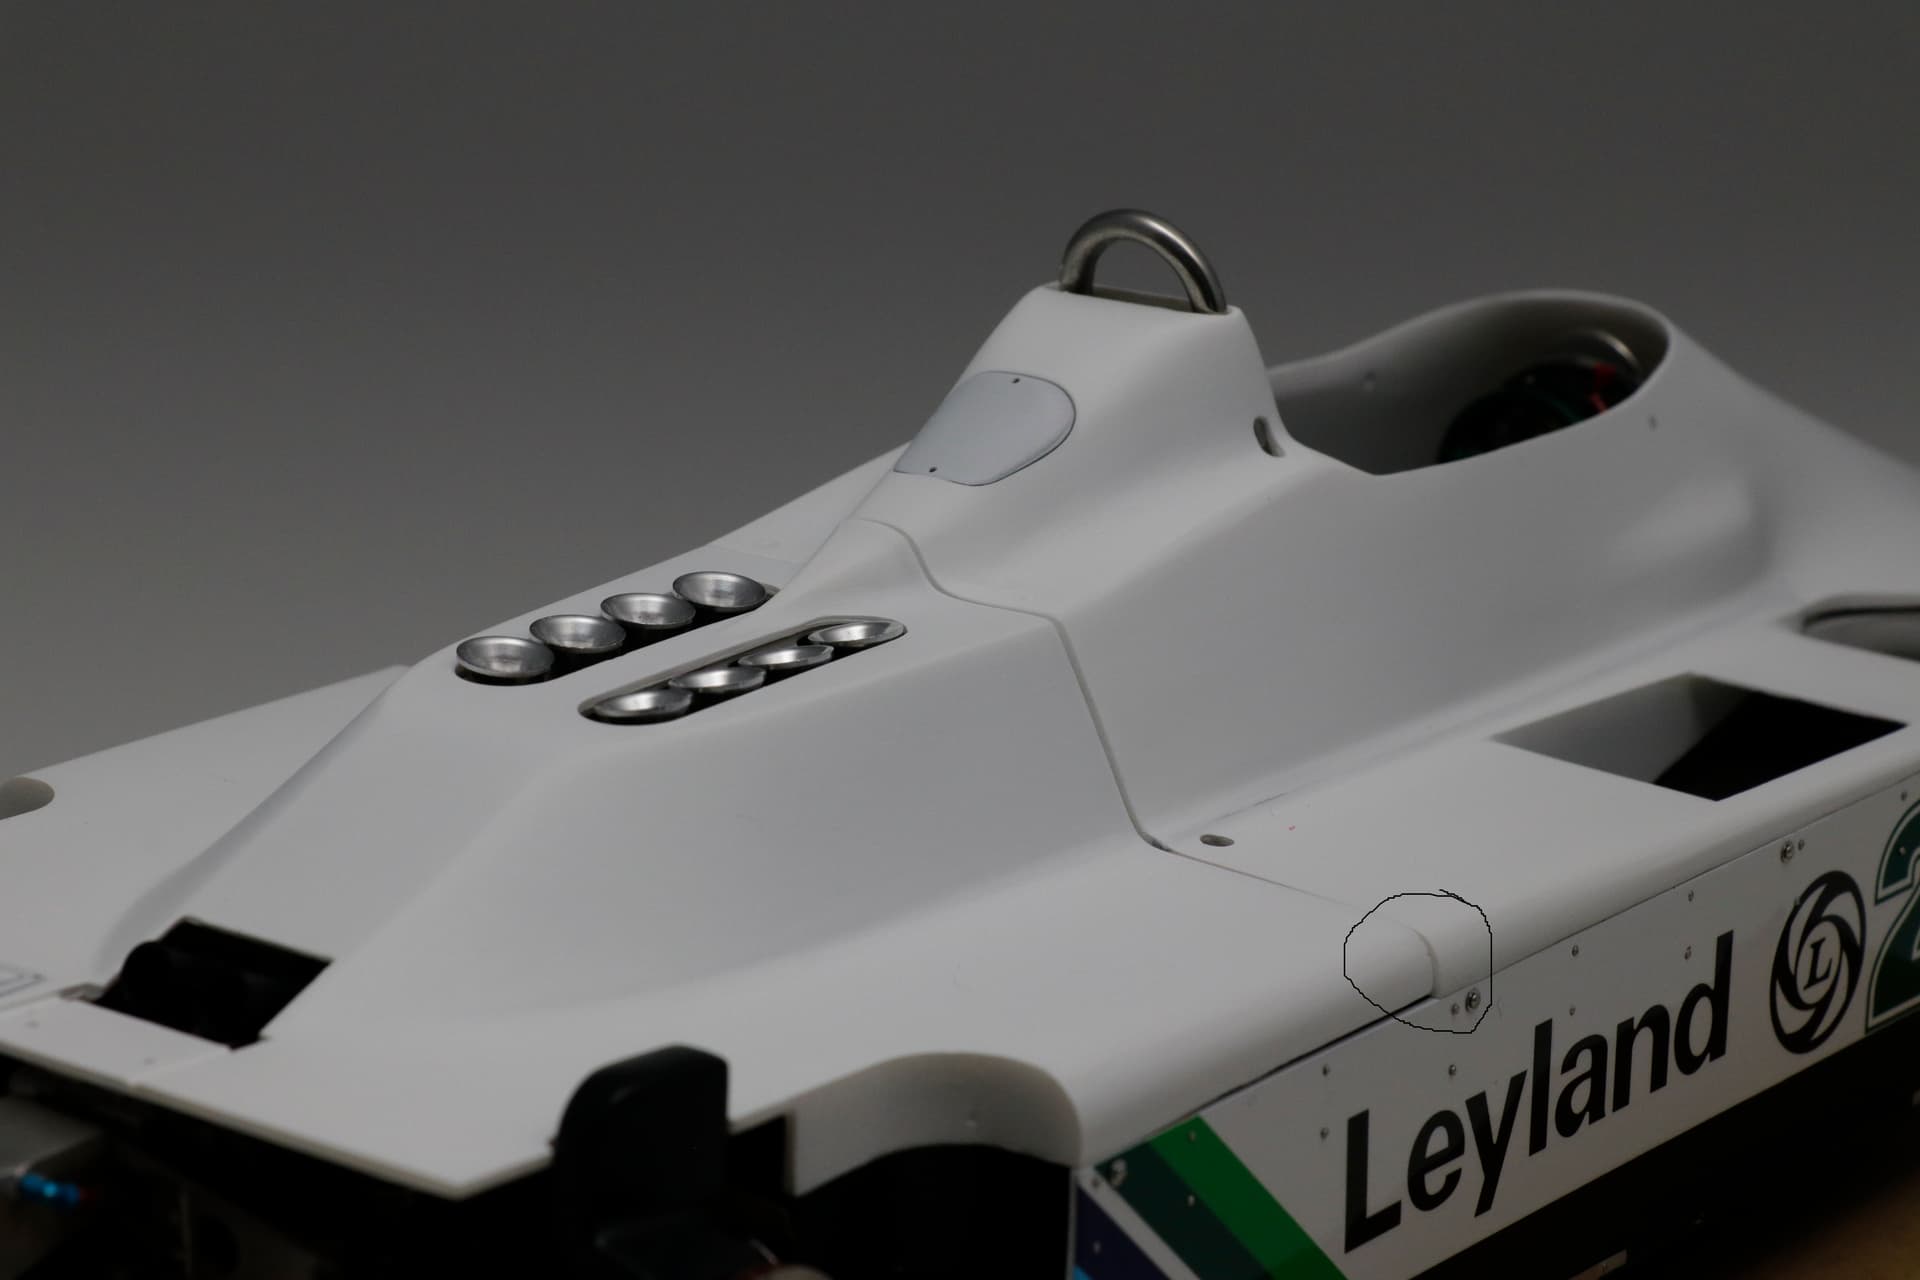
Next point of interest is the sidepod paint coverage, The restored cars somewhat cheat and paint the whole of the sidepod green. See under the Dallah sponsorship the way the green is squared off while on the 80’s car it is angled back away from the join.
MFH noted this as well and allow you to paint the whole cover green and provide a white decal to cover the corner. I might just try masking it and see how I go. In that top photo of the sidepods there is also an annoying piece of the cover just to the left of the 27 which is painted white. There is a decal for that too which I may use rather than try mask the curve.
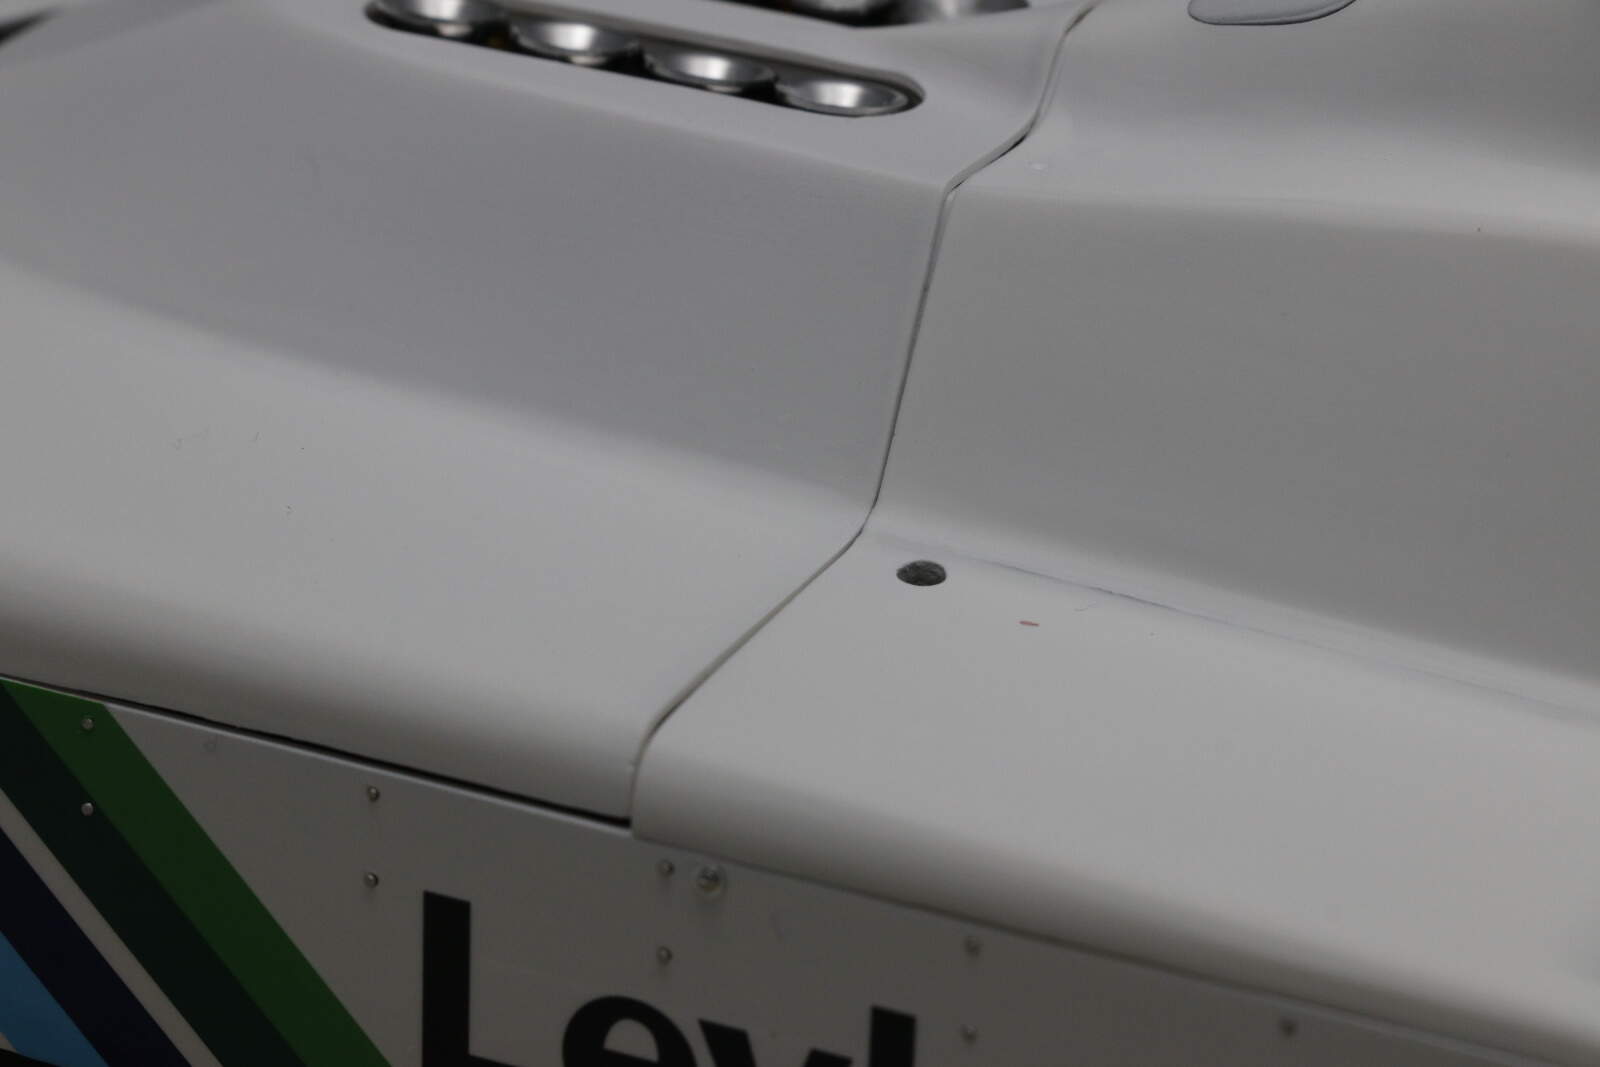
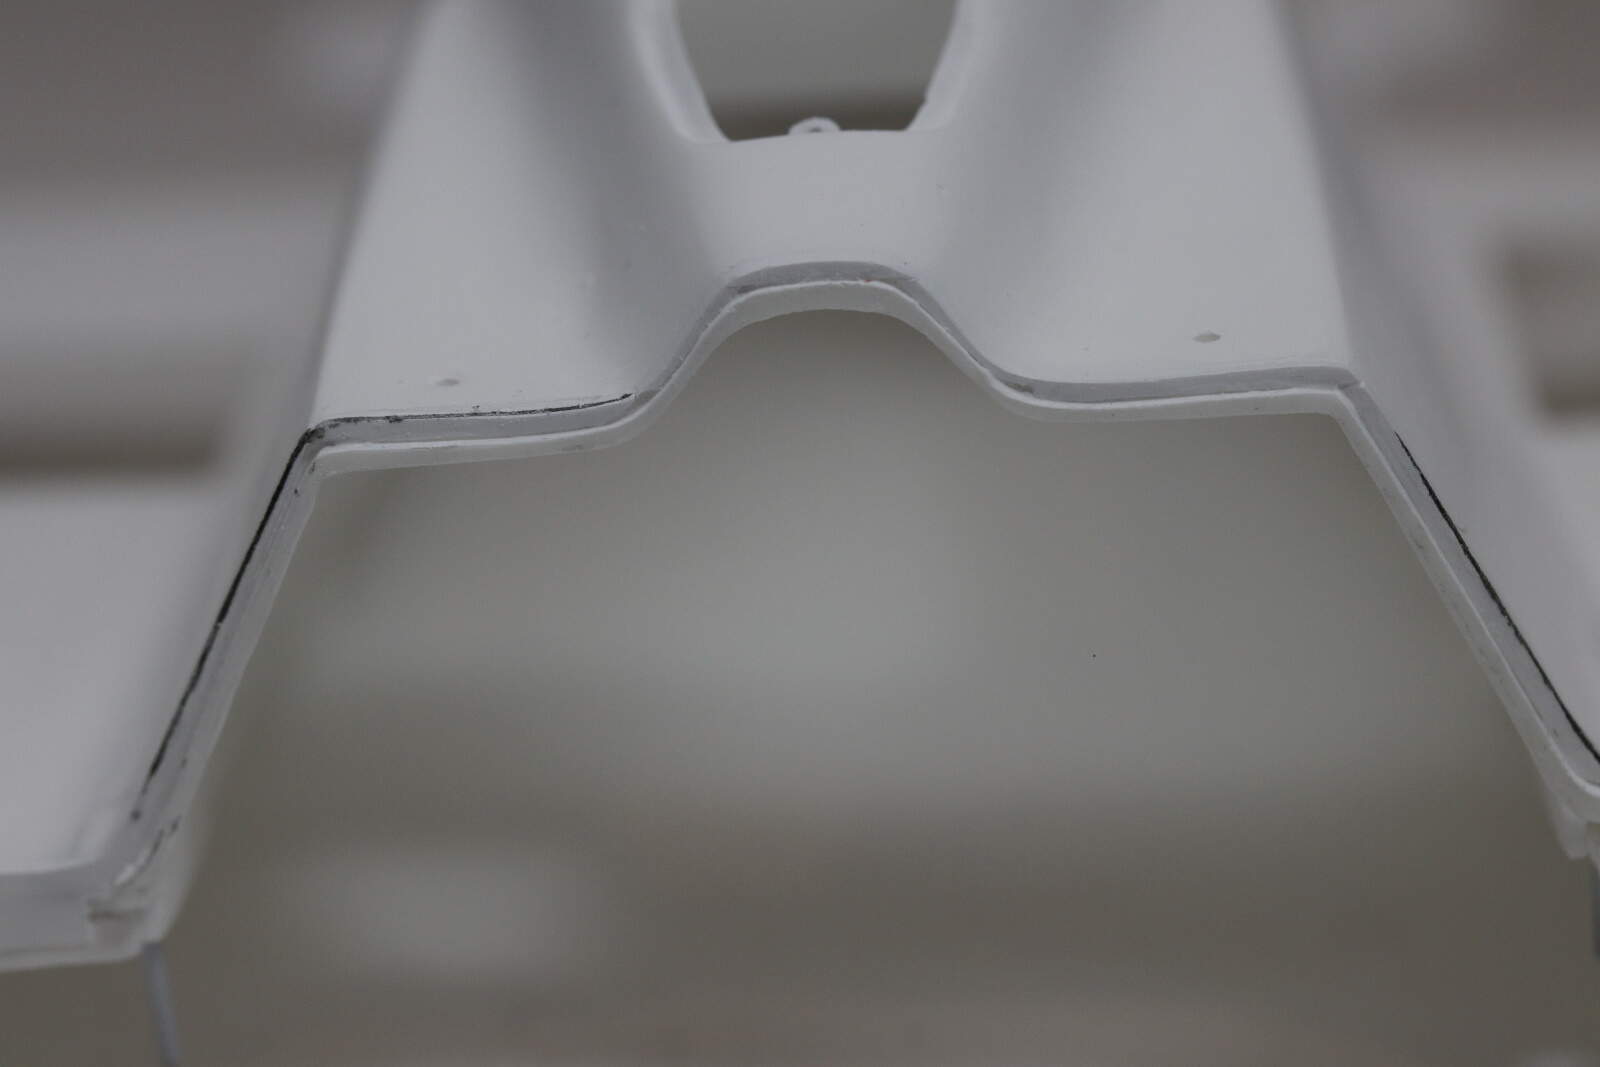
Lastly, the pin idea. They way rear of this top panel for the sidepod is shaped is certainly repeated by MFH
However the engine panel has no equivalent shape and is just thin curved resin so nothing to attach some pins. I might see if I can shape some evergreen to match and try for a couple of pins like the photo which would help level it off. Not sure it will help close the gap though, bare metal foil may yet be the go.
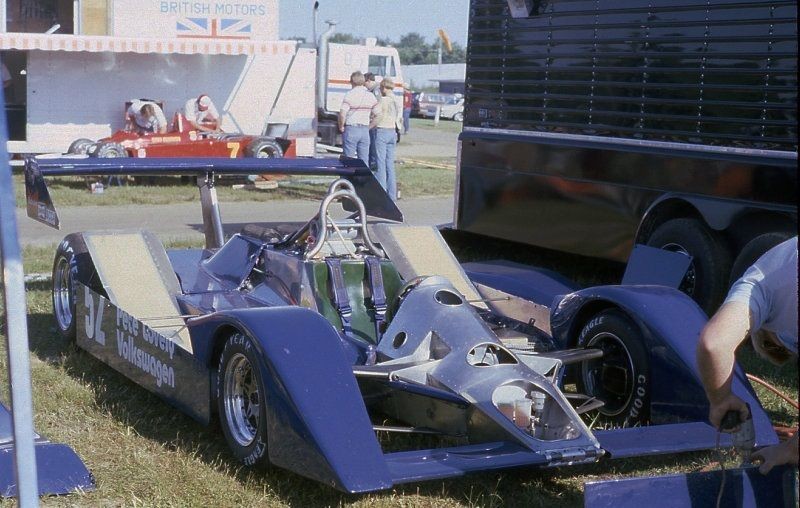
And thanks for the Can-am photo. Maybe a conversion to far!
Again thanks for the photos, they’re were very useful.
Michael,
I’m more of a F1 generalist, while Phil seems to have a expertise on the Williams stables. The pin solution seems to be the right way to go, as they have to have secured the engine cover some how so it stayed in place.
This is such a great thread, Michael’s awesome work plus the back and forth discussions with all of the images and info contained, it doesn’t get any better folks!
D,
I totally agree with you. It’s really great to have another race car enthusiast with a knowledge base that far exceeds mine. And with the fantastic build that Michael’s working on, it’s as you said: It just doesn’t get any better then this.
Michael, you’re very kind about the photos. I’ve driven myself crazy over the years trying to sort out this green/black decal thing, as well as all the various technical changes during 1980, so when I opened the kit box and saw what MFH did, I laughed out loud. It was reassuring to see even the professionals weren’t sure!
I’m not so sure about the Dallah Avco decals in Montreal. Williams really didn’t change any of their sponsorship logos after the Belgian GP when Dallah Avco went from their previous script style logo to this block style one. I’m still inclined to think they were black but there’s only green ones in the kit. In the end, like everything else, its personal preference and choice. I often wonder how WWI & WWII aircraft modellers can try to determine paint colours from old (mainly b/w) photos but I guess I’m trying to do the same thing.
The main thing is your finish line is in sight and I can’t wait to see your creation in its full glory.
Joel, I’m no expert but I’ve spent far too many hours over the years researching the FW07 cars in a very amateur way.
I should have spent more of that time learning to build and paint like you have with your beautiful 1/24 Porsche 917K which I have been following.
Phil,
Reaching the status of an expertise on a car, a team, a series, an era is something that at least I’ve rarely seen. Most guys I know including me are a “Jack of all Trades”, where we know just what we need to know for a certain build, and even then often make amateur mistakes.
Learning to paint and build is easy compared to a life long focused effort to increase your knowledge base.
As far as the correct colors for certain markings, did you ever try to get in touch with Williams via email or post and ask those questions? I’m sure that there is staff there that does remember or can look it up in official team records/pictures.
You may know the old modeller’s truism that reasearch material is the enemy of the completed model. Well, me and the FW07 series cars are a pretty serious case of this happening. I have a stack of 8 Tamiya 1/20 FW07 kits, at least half a dozen aftermarket decal sheets for various versions and I’ve never finished any of them!
I bought the oldest of them the day after Keke Rosberg won his F1 world title in 1982 and 40 years later it is still half finished with a rebuilt full monocoque, scratchbuilt front wheels and some bodywork converted to FW07B spec.
So when I read MFH had produced their 1/12 kit I just had to literally put my money where my mouth was.
Michael’s lovely build has inspired me to build my MFH kit and it has also made me wonder if I can get anywhere near Michael’s standard of work. That’s the beauty of internet forums I guess.
Its great to to be able to chew the fat with like-minded folks though isn’t it?
I often thought of asking Williams Joel but somehow I never did it. Now that Frank is gone & the team is just another commercial enterprise, it doesn’t feel important enough anymore.
Phil,
Sure sounds like you’ve got one of the worst cases of “dedicated to just one Make”: Williams, one type FW07, but the entire evolution of that type. Nothing wrong with that. In my aircraft modeling days, I knew several modelers who focused on just one plane type: Mustang, Thunderbolt, Me109, FW190, Zeros, and that’s all they researched and built. But most of them did build to some degree. Richard is an expert on Japanese aircraft, and Brian on the B-17F. I felt then like I do now that you follow what truly interests you, you eventually develop an expertise in that subject. Build models, write books, or what not, it’s your calling. And sharing with all of us is what makes our hobby so special as each of us can use what we see is important to our modeling.
From my point of view, I’m a modeler, just an average one at that, but I do try my best, and I focus on just one build at a time. I recently tried a 2nd build when my 2nd 917K build just spiraled down hill. I ended up reboxing it as I lost interest in it as the call from 917K got stronger and stronger.
Following Michael and Richard’s move to the darkest side of our hobby will take dedication, but the end results will be stunning I’m sure.
And yes, I love getting into conversations with you guys about race cars and race car models. Usually I learn more then I offer.
As for reaching out to Williams for information, most large racing concerns especially in F1 have a historical dept (person or two) that can most likely furnish you with all sorts of information including pictures. It’s never to late, and with the MFH kit now on your bench, it’s a great time to finally try that route.
Well after about 10 days of not wanting to do anything with the car because of the body fit, I summoned my mojo and got back to figuring out what I needed to do. I needed to lengthen the front shell to close the gap between the two parts, I needed to lower the rear shell so the two horizontal planes were level, I needed to widen the rear shell on the left hand side to align with the front, I needed to deepen the both sides of the rear shell because its was shallower than the front, and I needed to narrow the front over the fuel tank because it was wider than the back, other than that the fit was pretty good!
So lengthening the front to close the gap - and it should be remembered that we are talking minimal amounts here I used some 2.0x0.25mm strips to achieve that.
It worked, though it did allow me to discover with the front and rear matching on the flat it left a gap between the top panel and the side on both sides. It also showed that the RHS rear panel was narrower than the front.
So on the RHS I widened the the side with some 2.0x0.5mm and 2x0.25mm strips and covered with Tamiya putty to blend it in. On this side I also needed another 2.0x 0.25mm strip to deepen it.
I know it all seems a lot for a quarter mil or half a mil here and there but it does look better. when I have finished I will post some photos and you can be the judge.
@cosimodo - Glad to see you back at it with a vengeance Michael. I know I’m repeating myself but it is a shame to face these issues given the cost of these kits but on the other hand I suppose it can be seen as part of the challenge they present… is it a Zen thing ? Does the joy of success in fixing something exceed the joy in not having to fix ? It certainly looks like you have it on the run . @Joel_W - I take exception with your statement that you are an average modeler - far from it buddy - modest to a fault . LOL
Michael,
Absolutely nothing wrong with taking time off to refocus on the issues at hand so that you can move forward once again. Honestly, I seem to do that all the time these days. Just checkout my opening post on the IMSA Mustang GTP car. To me, the important thing and what I looked for in your post ASAP, was that you had each fit issue identified, and just as importantly a workable solution.
I’m more of a tab man then a pin it guy these days but that’s 1/24 scale. In 1/12 scale I’m sure that pinning is the best way to go.
Excellent work in achieving a positive solution to each issue. The last few pics show just how well your solutions worked out.
As a general observation, I’ve been a long time member of just two auto sites with #2 being almost full race car orientated, and most of these guys put me to shame. There’s 4 guys that build nothing but MFH kits, and they run into these problems with just about every kit. The newer the kit, the less issues, but still these types of issues exist. Chris #1 (there’s 2 Chris’s in this mix), and I remember his Porsche 917 Pink Pig build. No matter what he did or tried the driver’s door just wouldn’t fit correctly, as well as the rear deck. He ended up displaying it with it off to show off the engine/trans/suspension. My point is that the best of them run into a wall that they can’t climb over. You climbed over all of your fit issues. Well done.
And Richard,
I’m truly humbled by your assessment of my building skills. Thanks so much for your constant positive words, and keeping me focused to move ahead.
I just checked out that guys F104 collection. My God!! That must be a world’s record for sure. Haven’t seen his post or answers as I rarely get to Aeroscale these days. But as for what happens to collections once the builder passes away is generally give away what you can, which isn’t much, then the rest just gets tossed into the recycle bin. How sad, but how true.