Well I learned a new word! Thanks
Let me know when you might be ready for photos and measurements of that Graflex Flash Unit.
The helmets (and the cameras) look really outstanding!
Well I learned a new word! Thanks
Let me know when you might be ready for photos and measurements of that Graflex Flash Unit.
The helmets (and the cameras) look really outstanding!
If you want to send them over you can do that now. I’ll be able to circle back around to it eventually. In the meantime, your helmets and cameras are ready and I’ll be able to ship them out with your helmet on Wednesday.
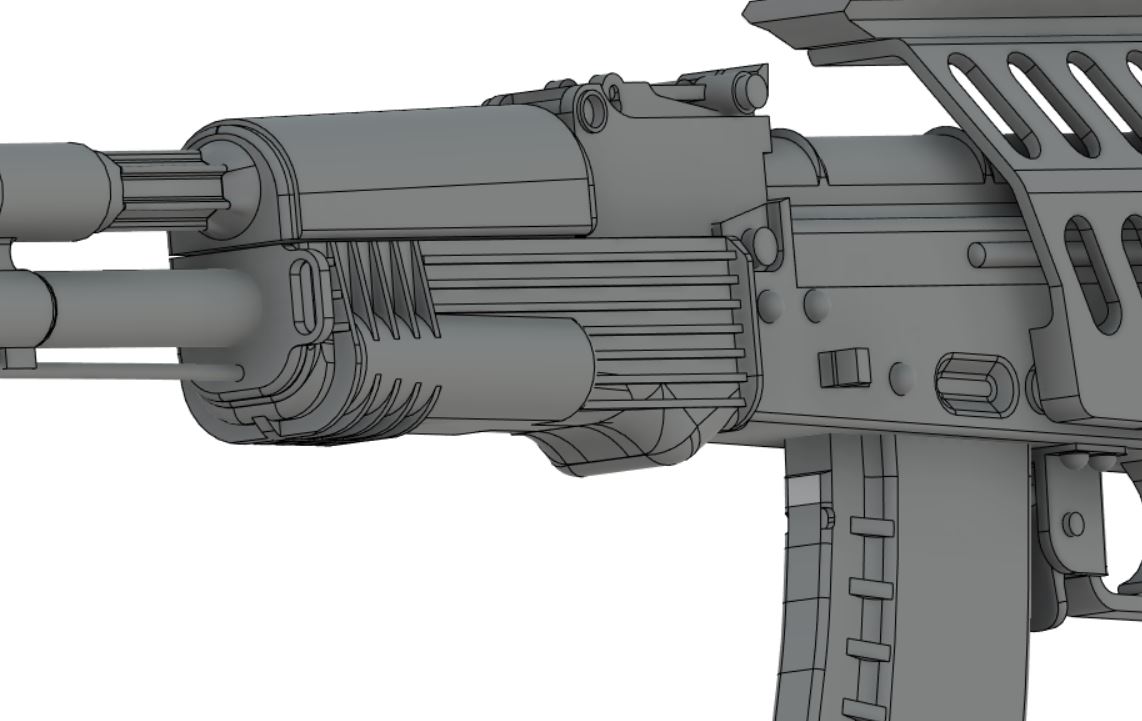
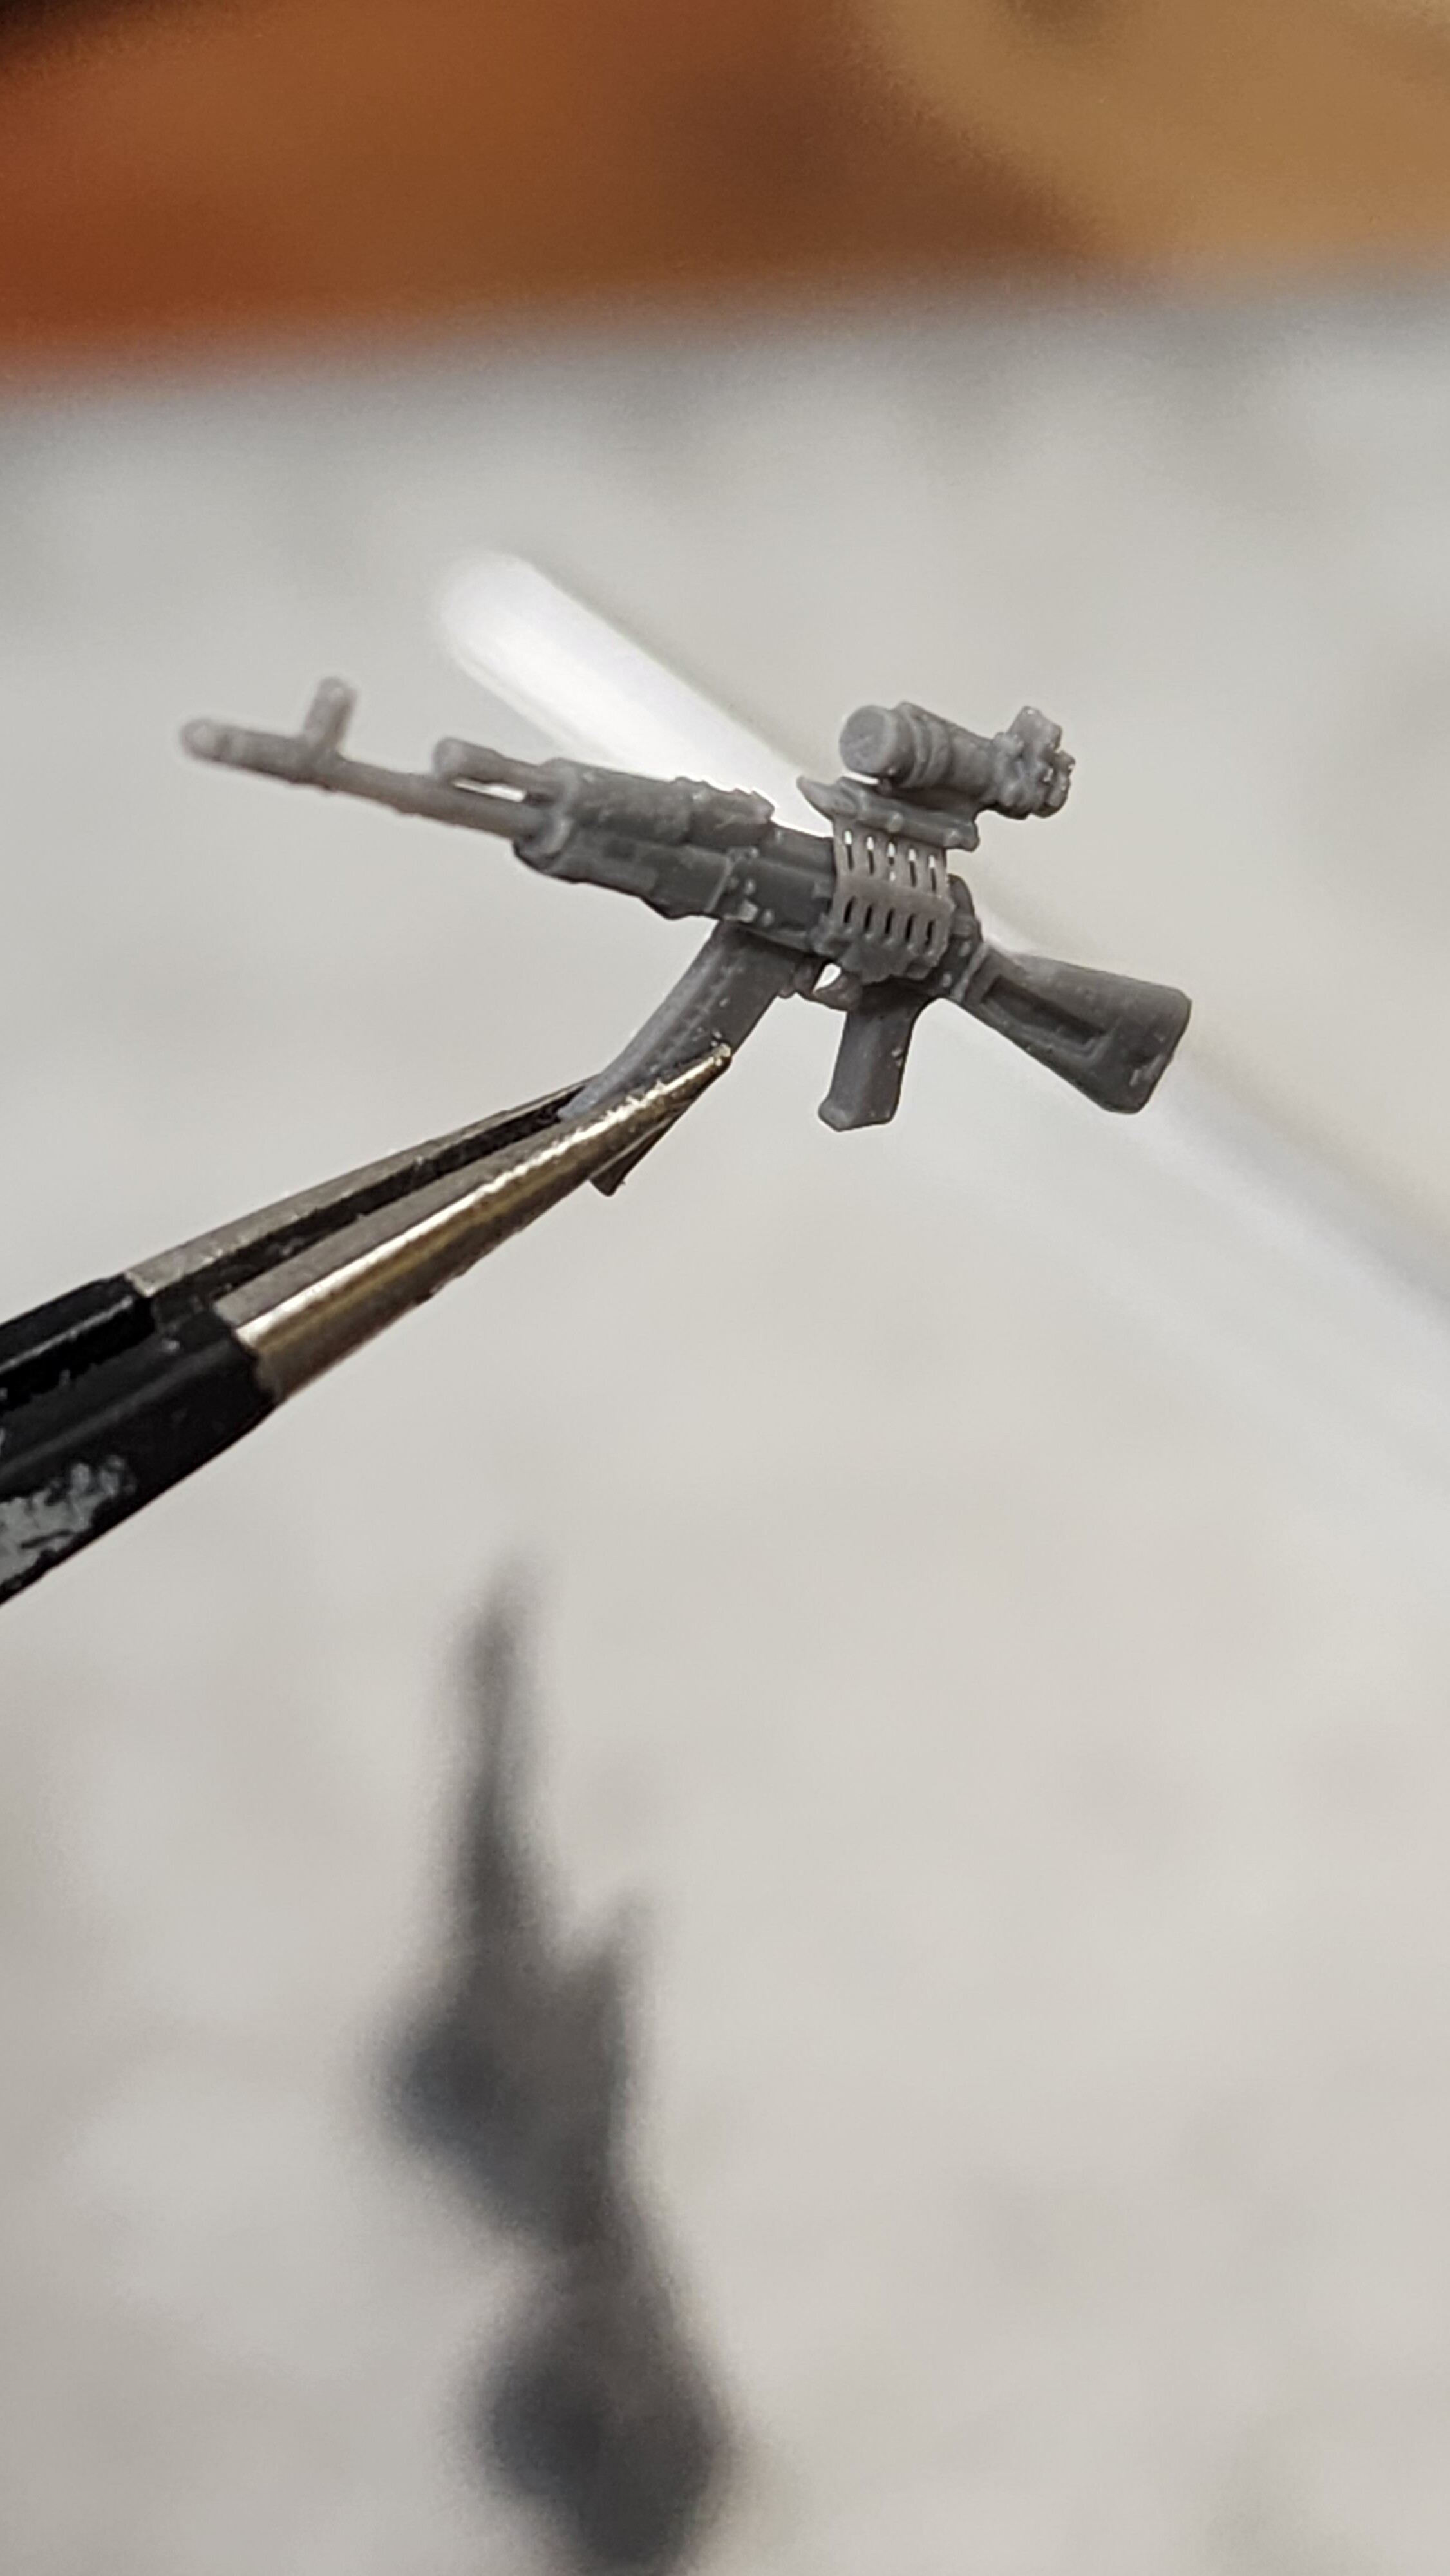
Only 2 updates today. Little work done on the AK-74M because it’s late and it was quick. Handguard ribs are finished so all that needs work is the locking latch on the optics riser. Usually, if I don’t have large chunks of time to dedicate to the more in-depth projects, like the LTAS, I’ll take a small bite out of the smaller on-going projects.
I’m also trying to get the catalog finished in my remaining spare time. It should provide an easier resource to search through than trying to find a random product on this thread or browsing through the shop. For now, here’s the cover. It’s a bit sloppy here but it’s been cleaned up on a later version I have saved on a thumb drive.
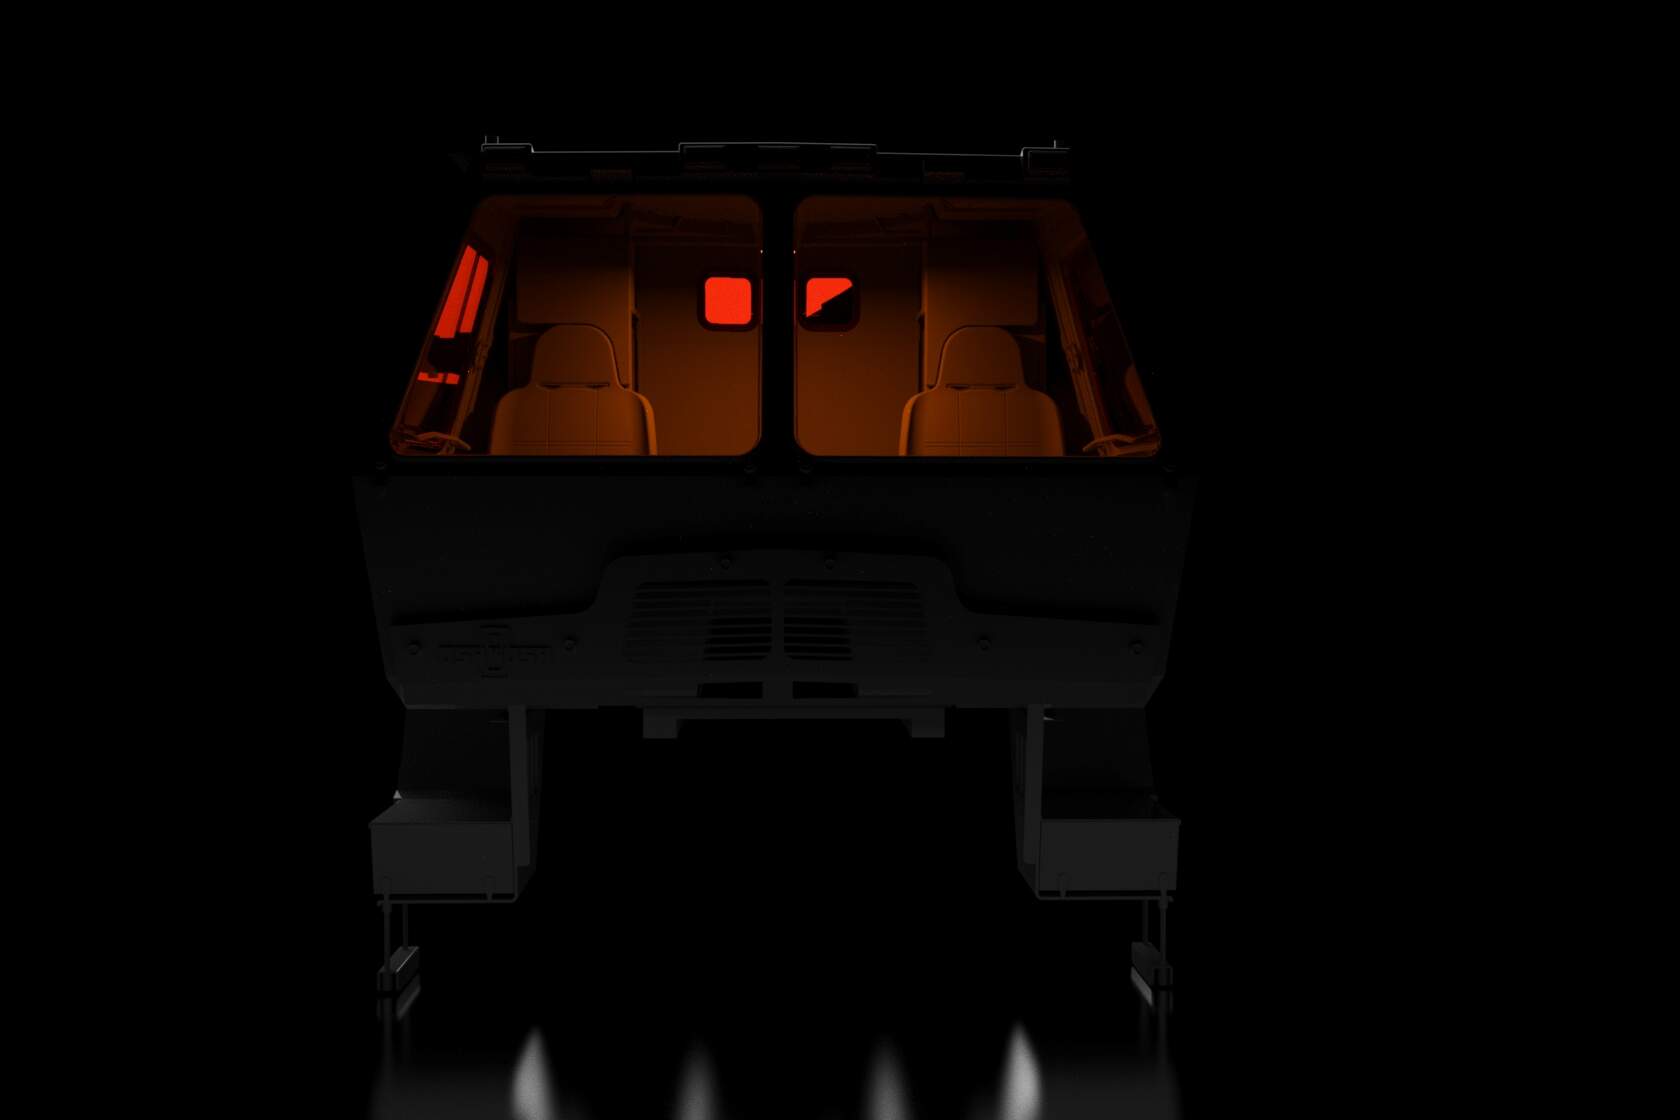
Because I really am getting close to finished on the LTAS cab project, at least the design aspect of it, I decided to make a render. The passenger side seat isn’t ready yet but that’s only because I’m finishing up the driver side and then I’ll just mirror it over.
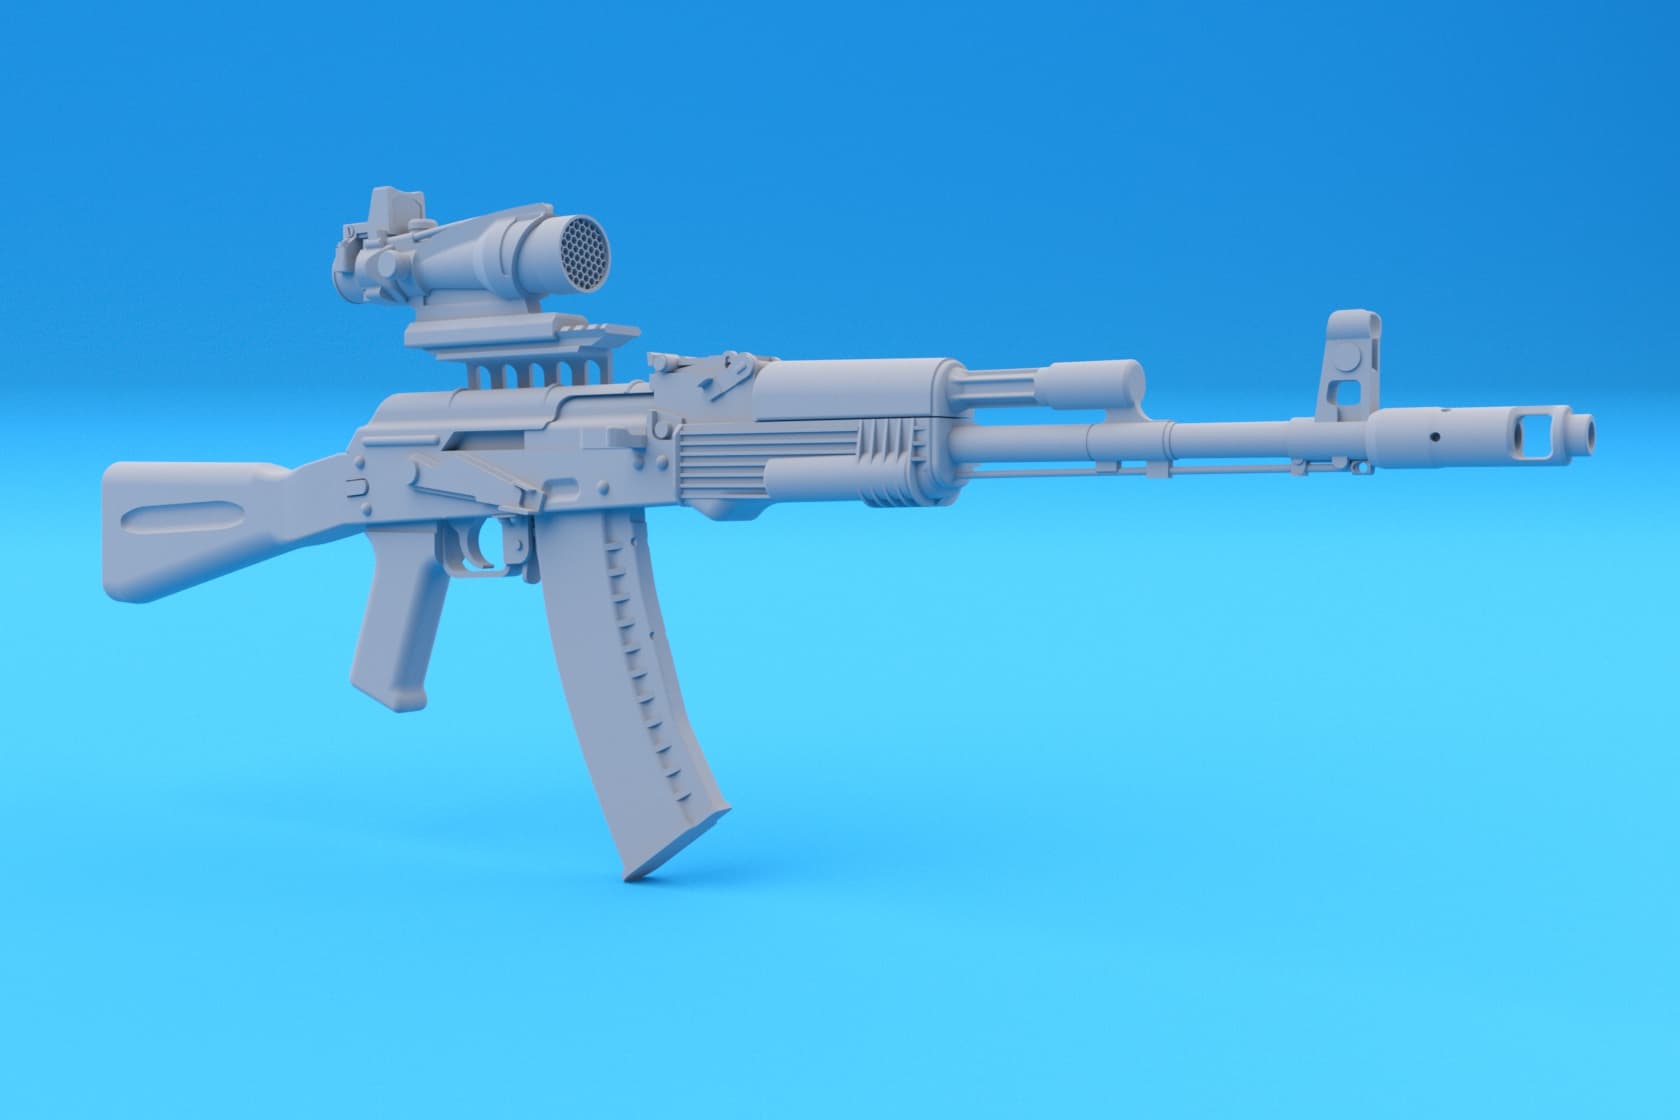
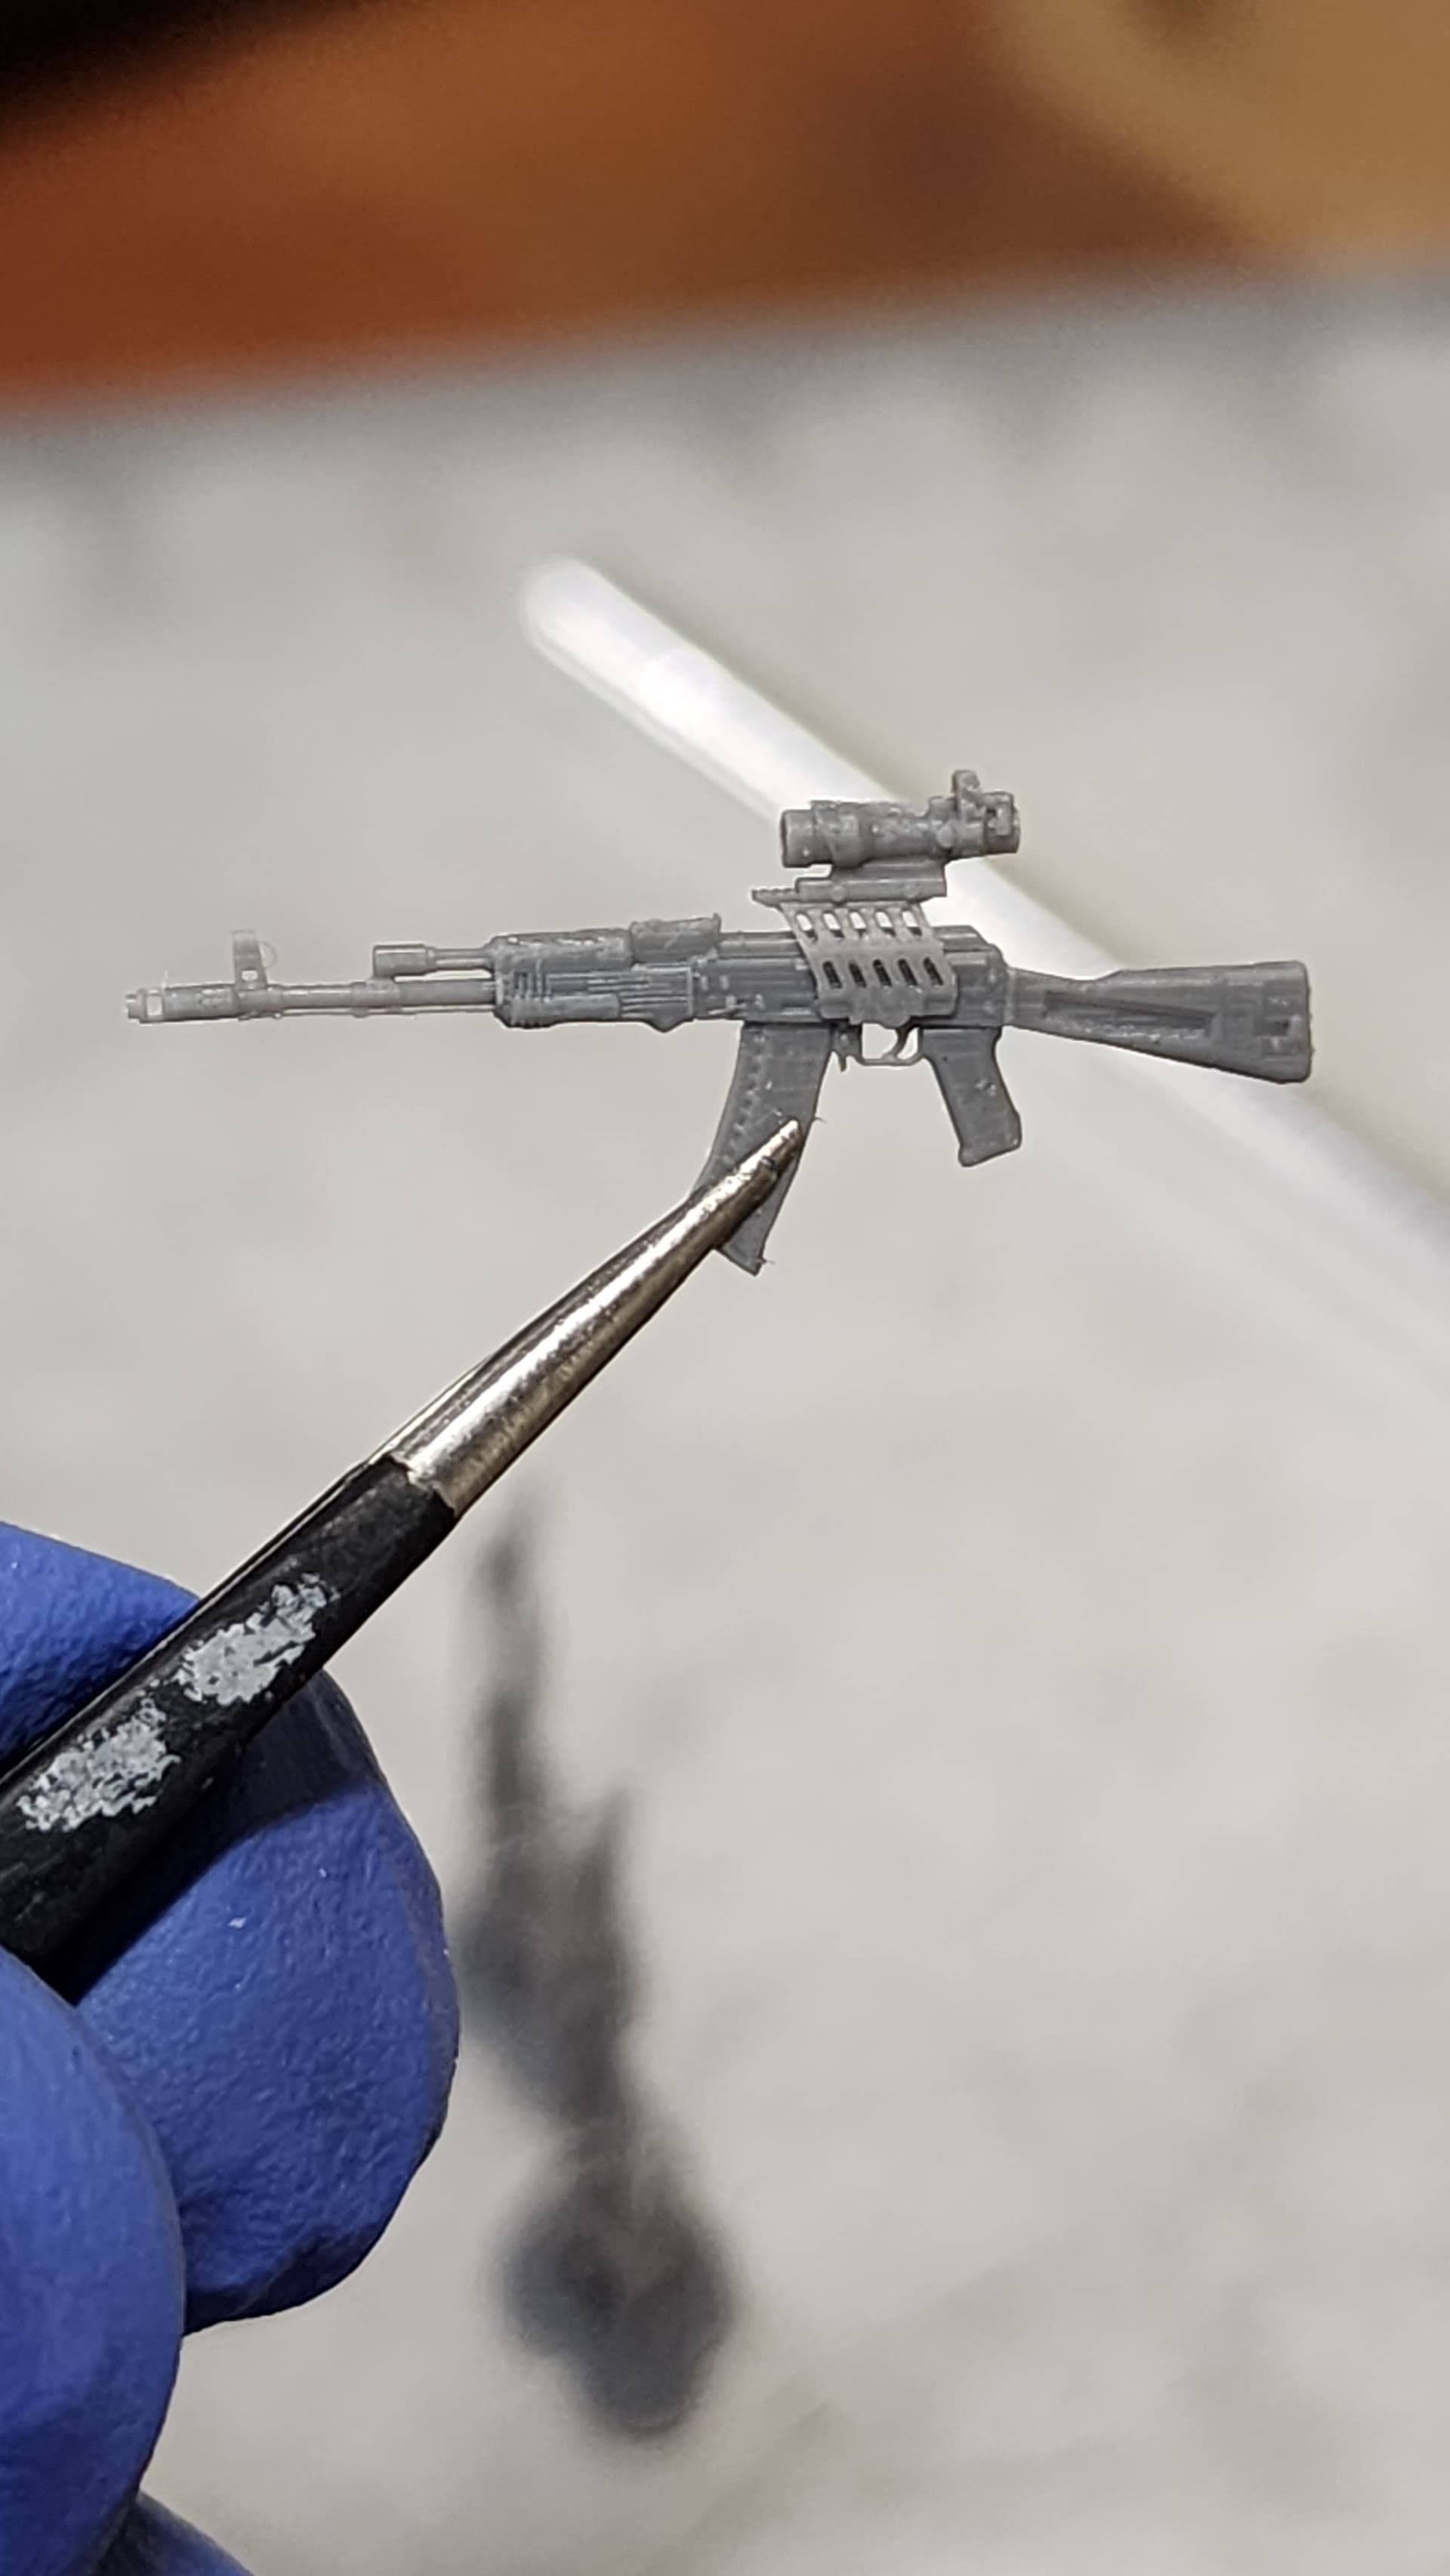
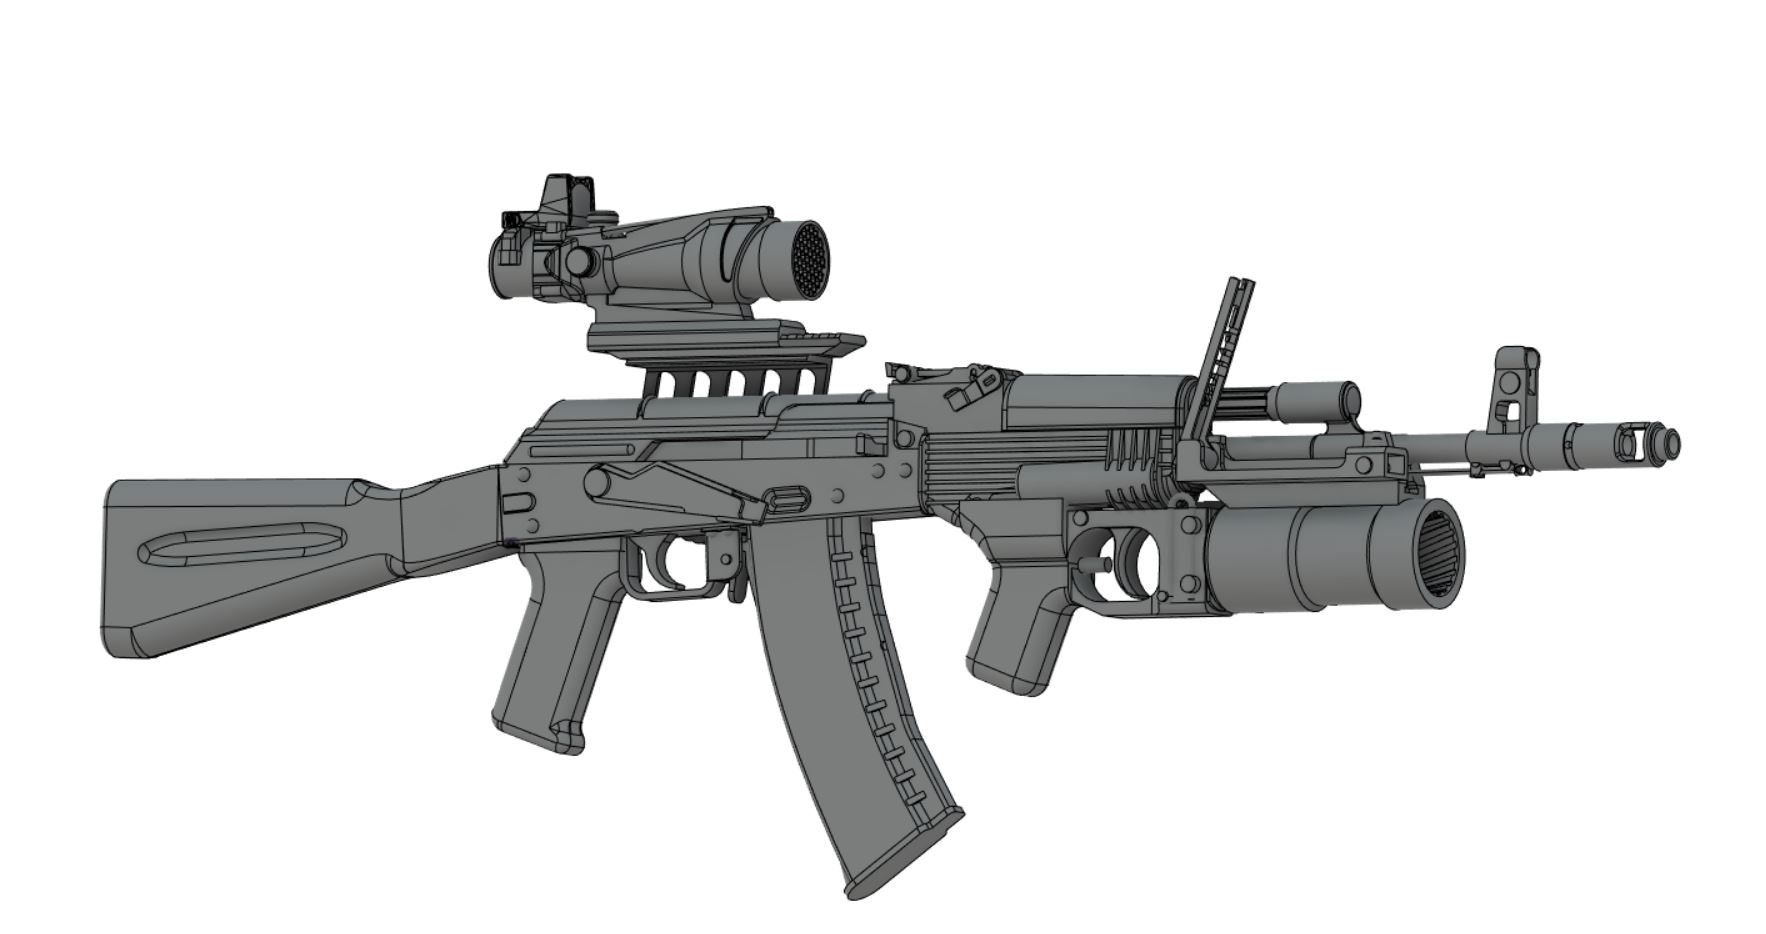
And also the AK-74 with ACOG is finished and rendered. I’m running a test print to see how best to attach the sight. Whether by my usual way of having it printed together or with a separate sight/gun combo.
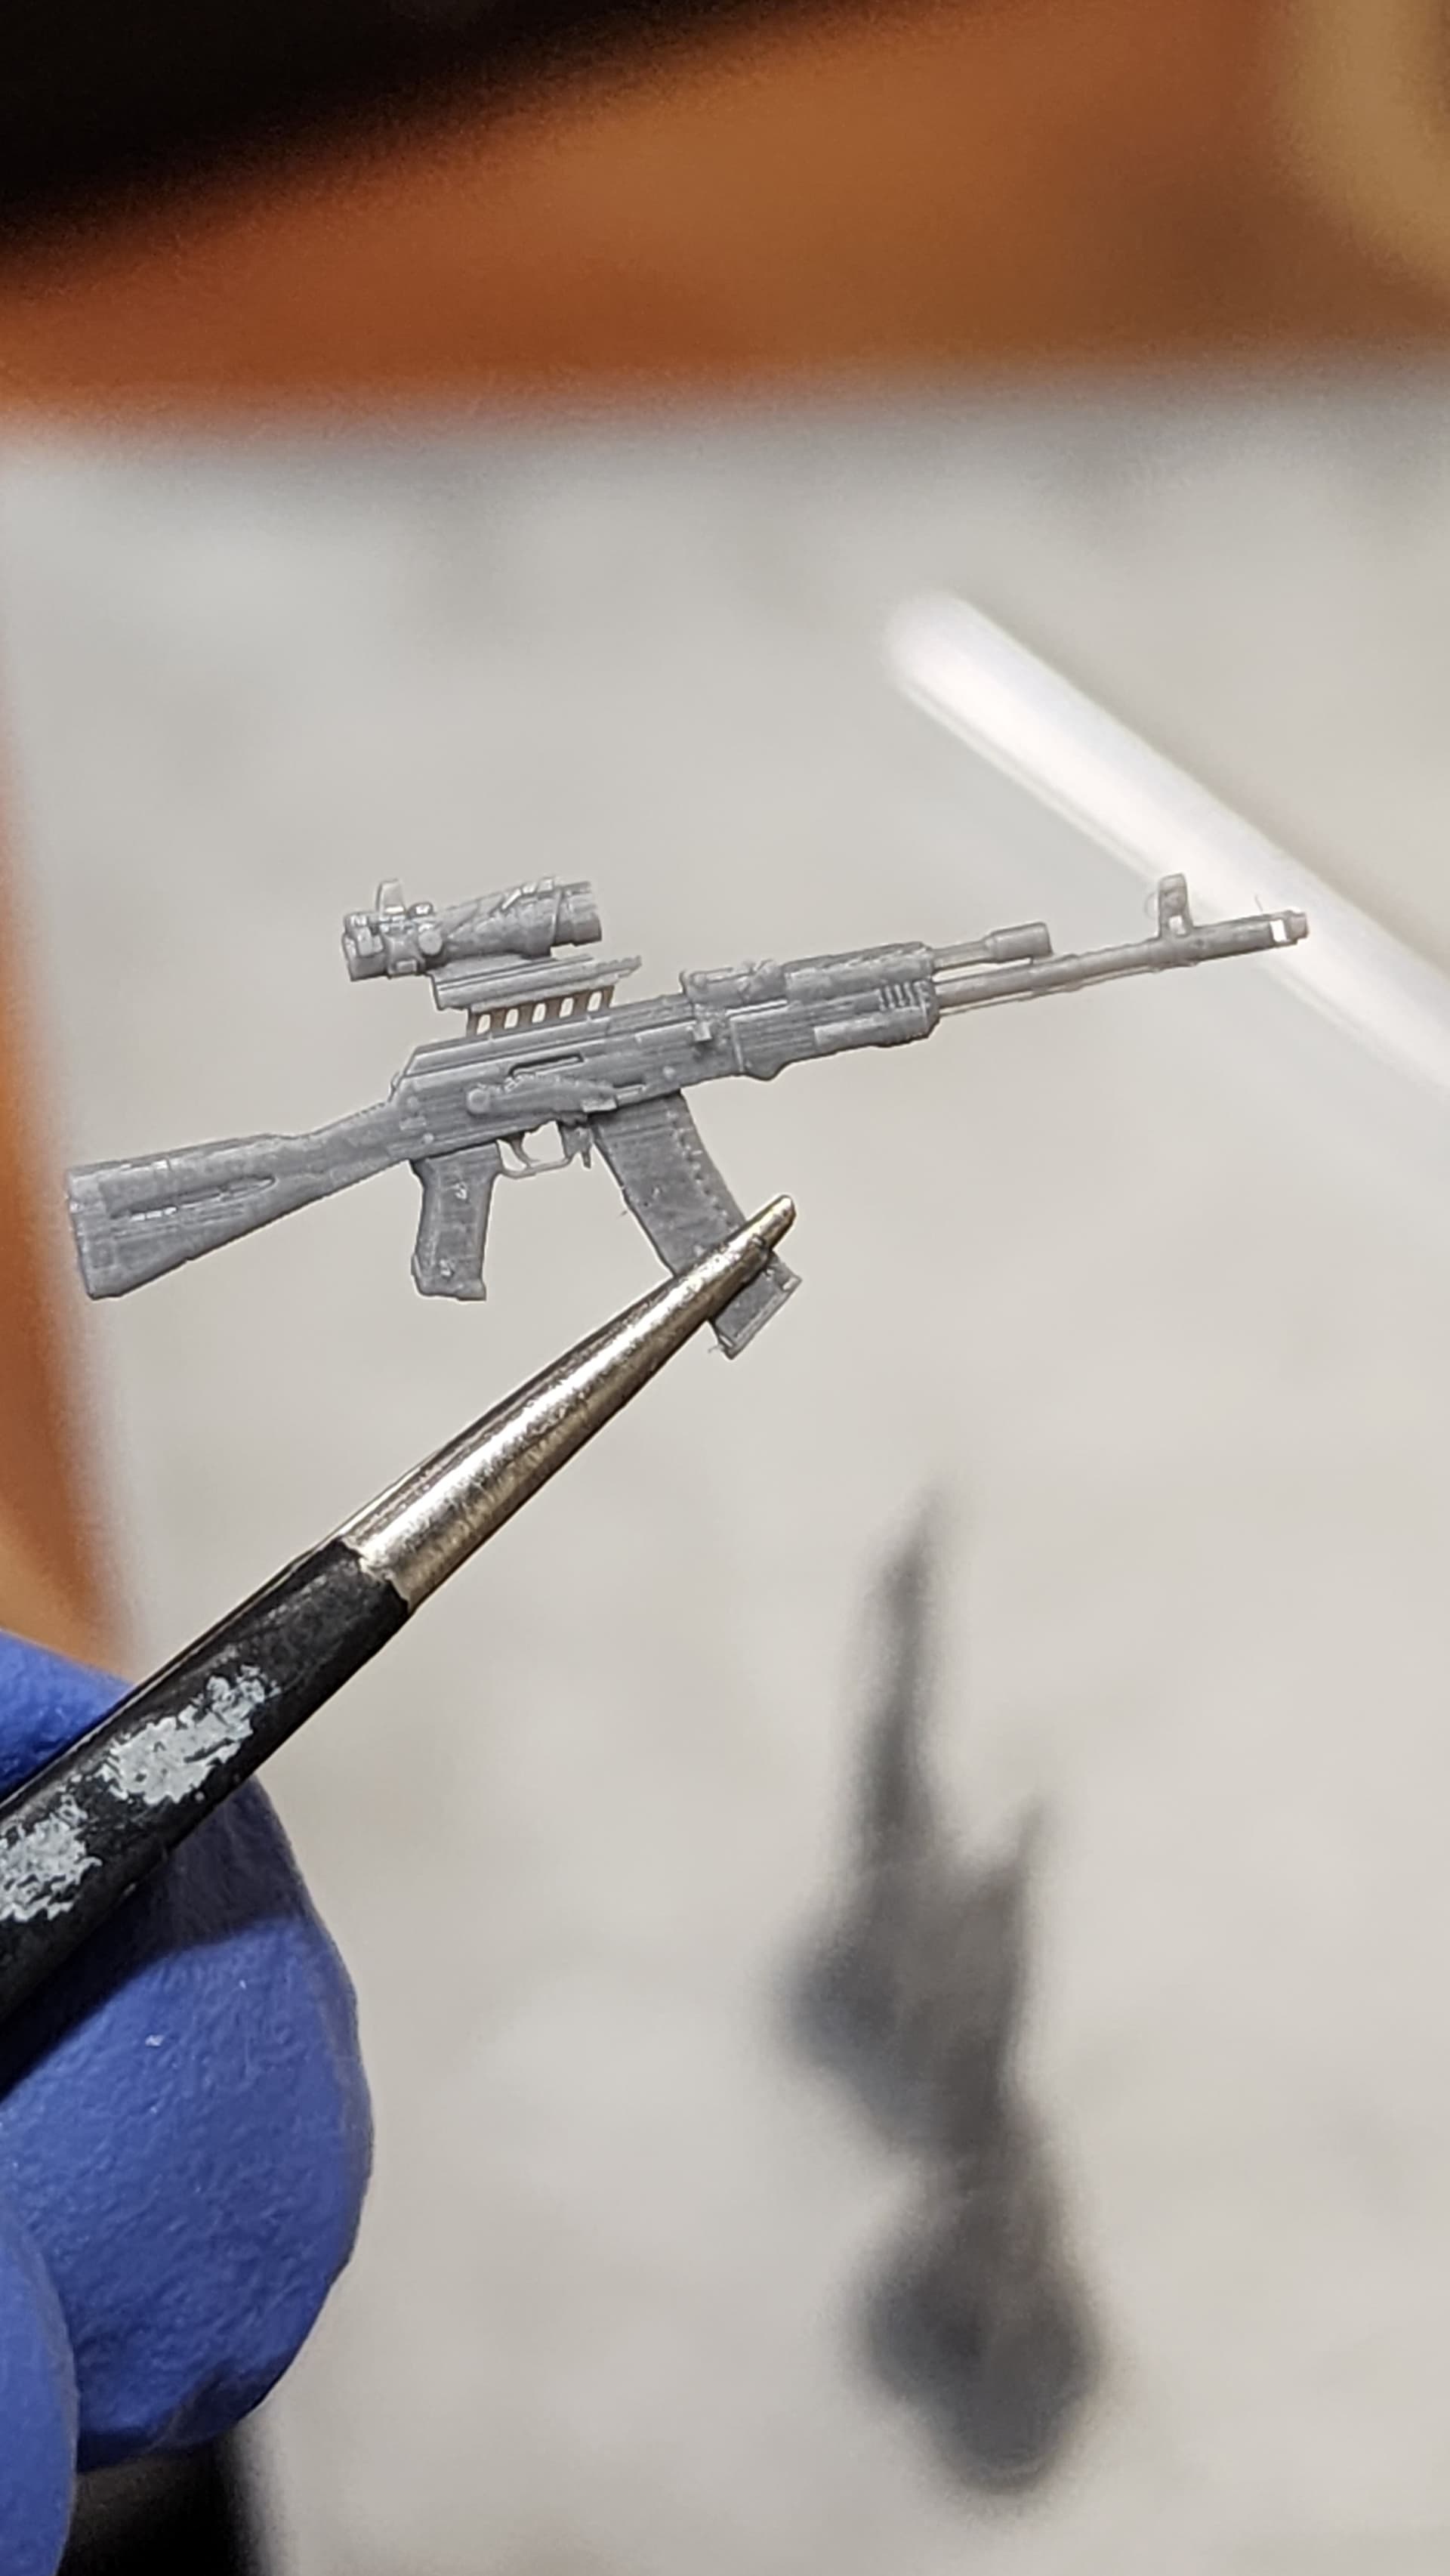
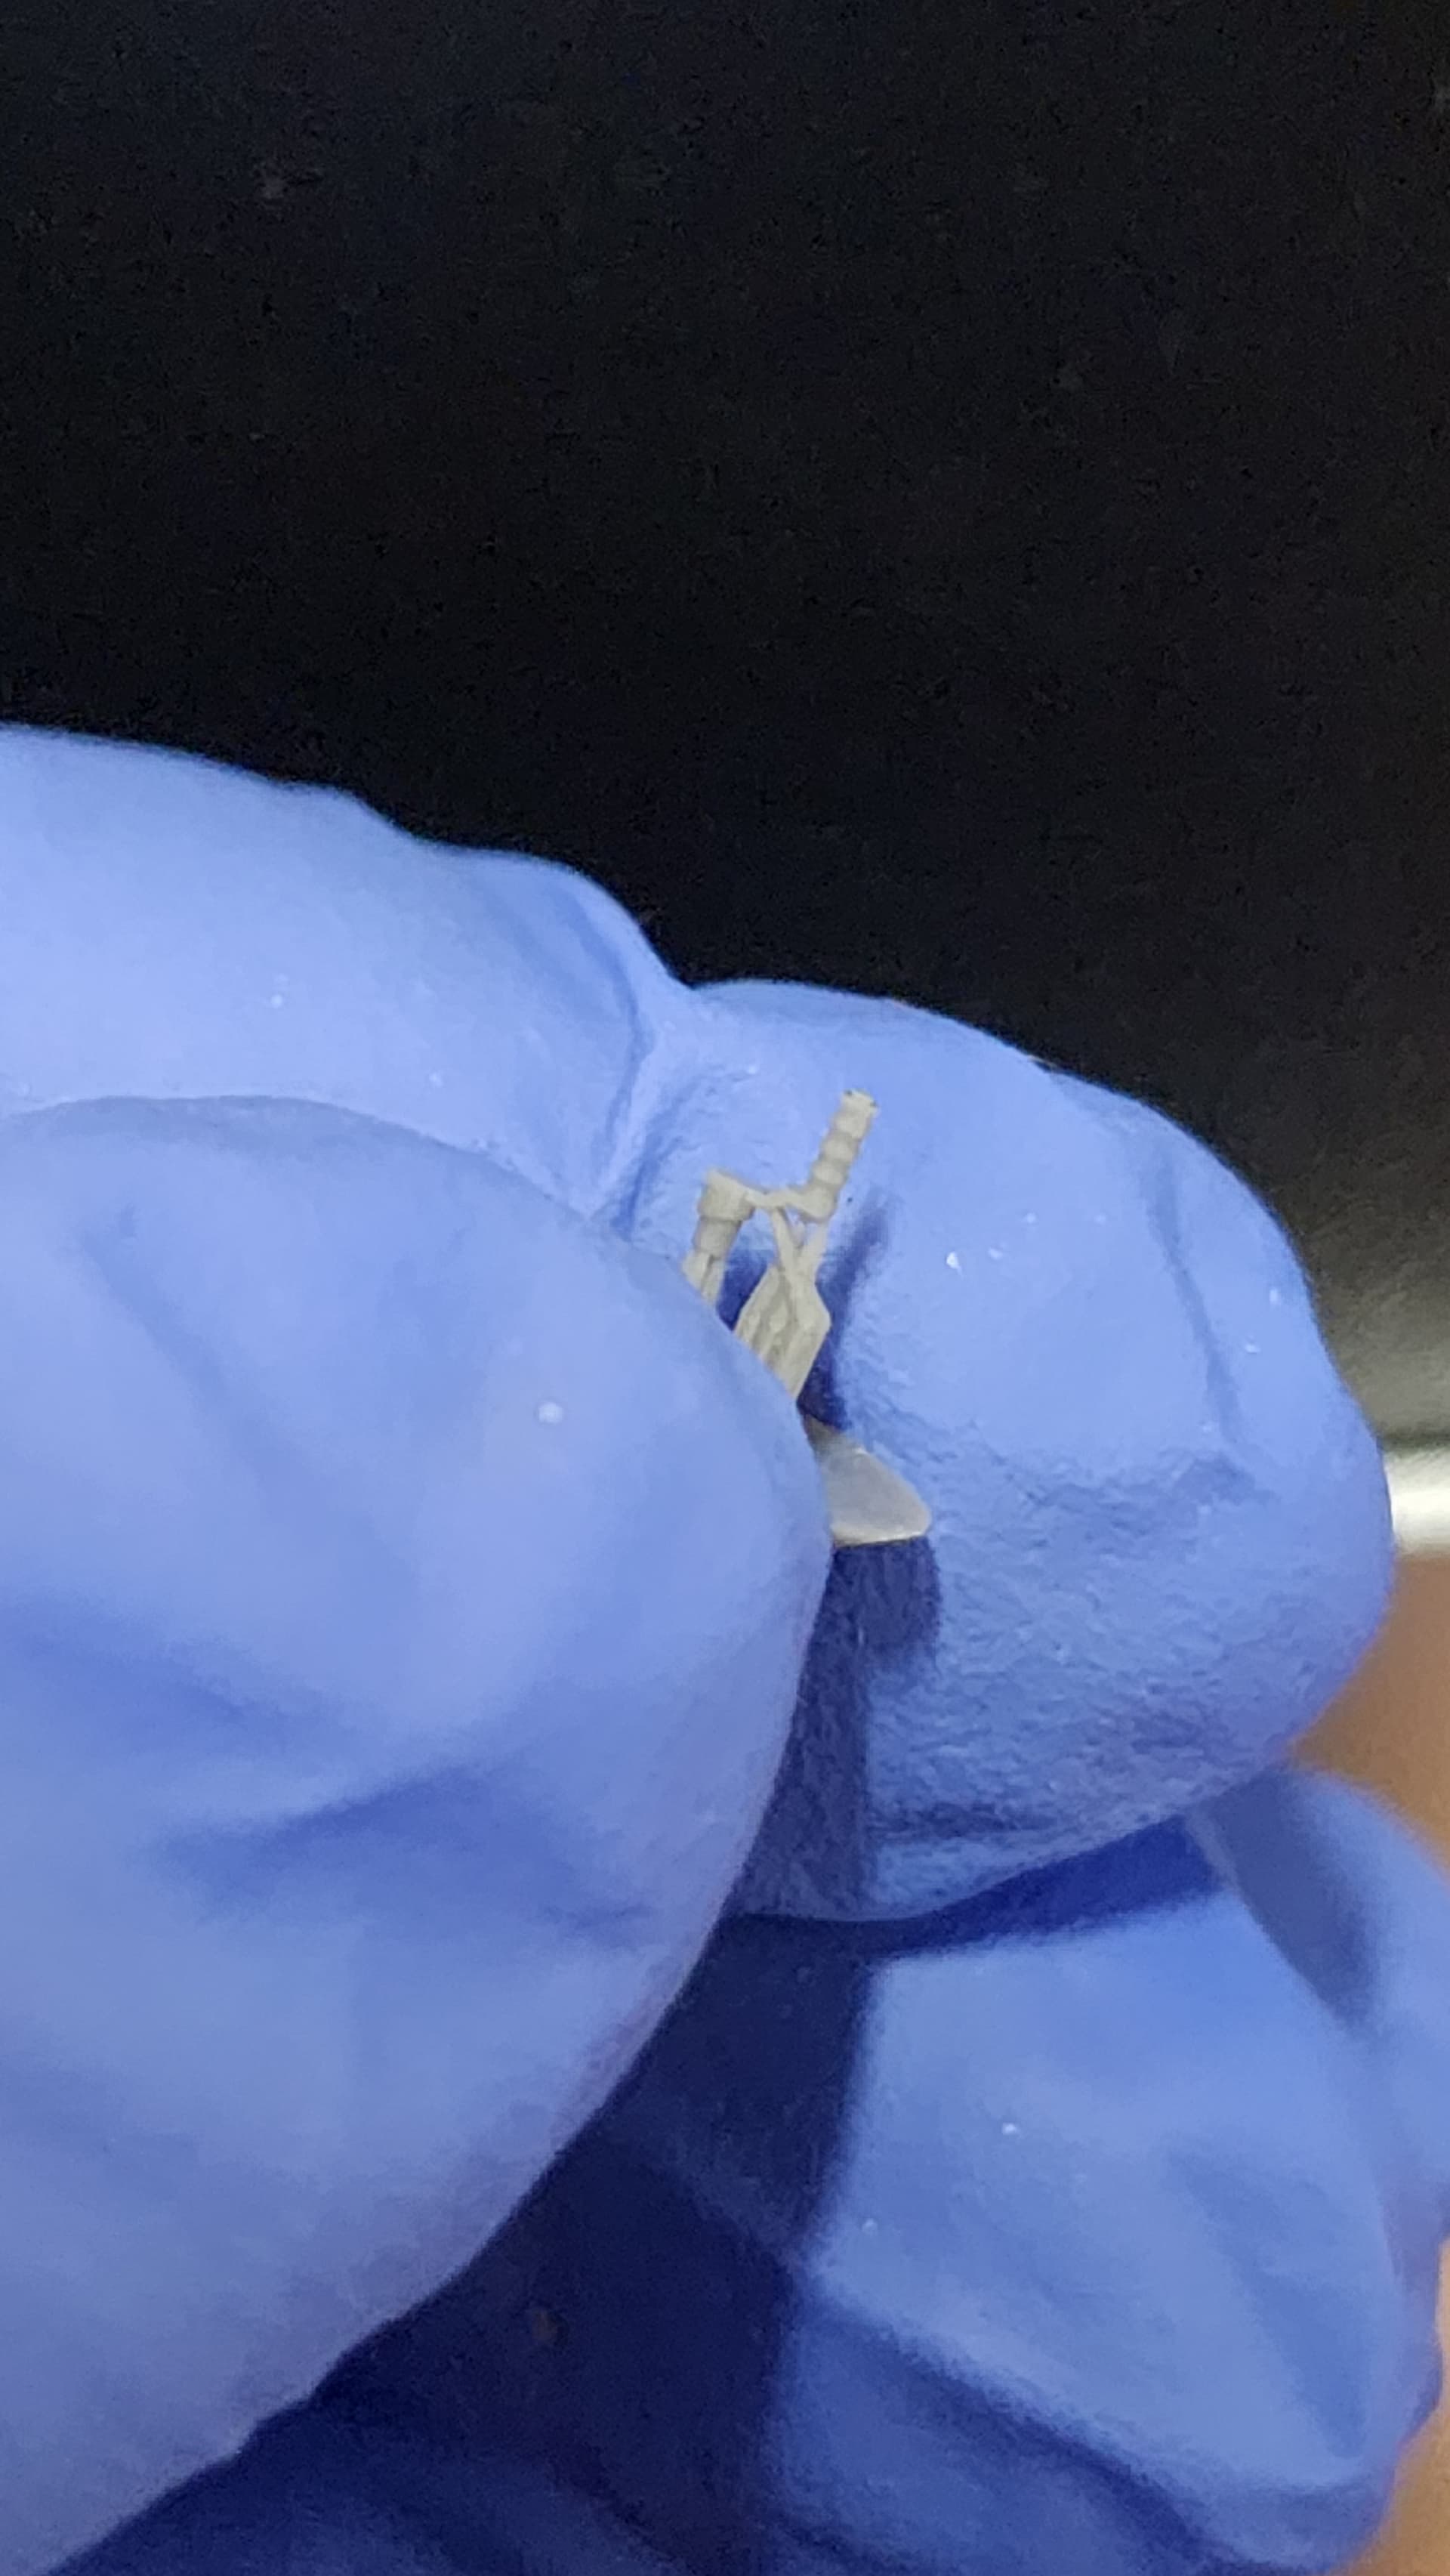
And a successful print of the ACOG equipped AK-74! The variant with a separate sight mount didn’t work out. The mount is just too fragile to handle without it fracturing like an earthquake fault zone.
I tried to test print the cab and interior for the LTAS cab. Nothing printed except the door handles. So here they are! It’s hard to see and my phone camera was having trouble keeping the part in focus but you can make out the shape of the handle itself.
The LTAS Cab is looking great. One note, there should be a middle seat as well, 3 seats total. I can’t wait to get a couple and install them onto Trumpeter’s FMTV.
I’ll have to compare the FMTV seats to some the pictures I’ve been using, but I think the FMTV seats might be able to be used as the middle seat. I’m not sure off the top of my head so I’ll have to check. Biggest concern at the moment is making sure it prints well… Or at all.
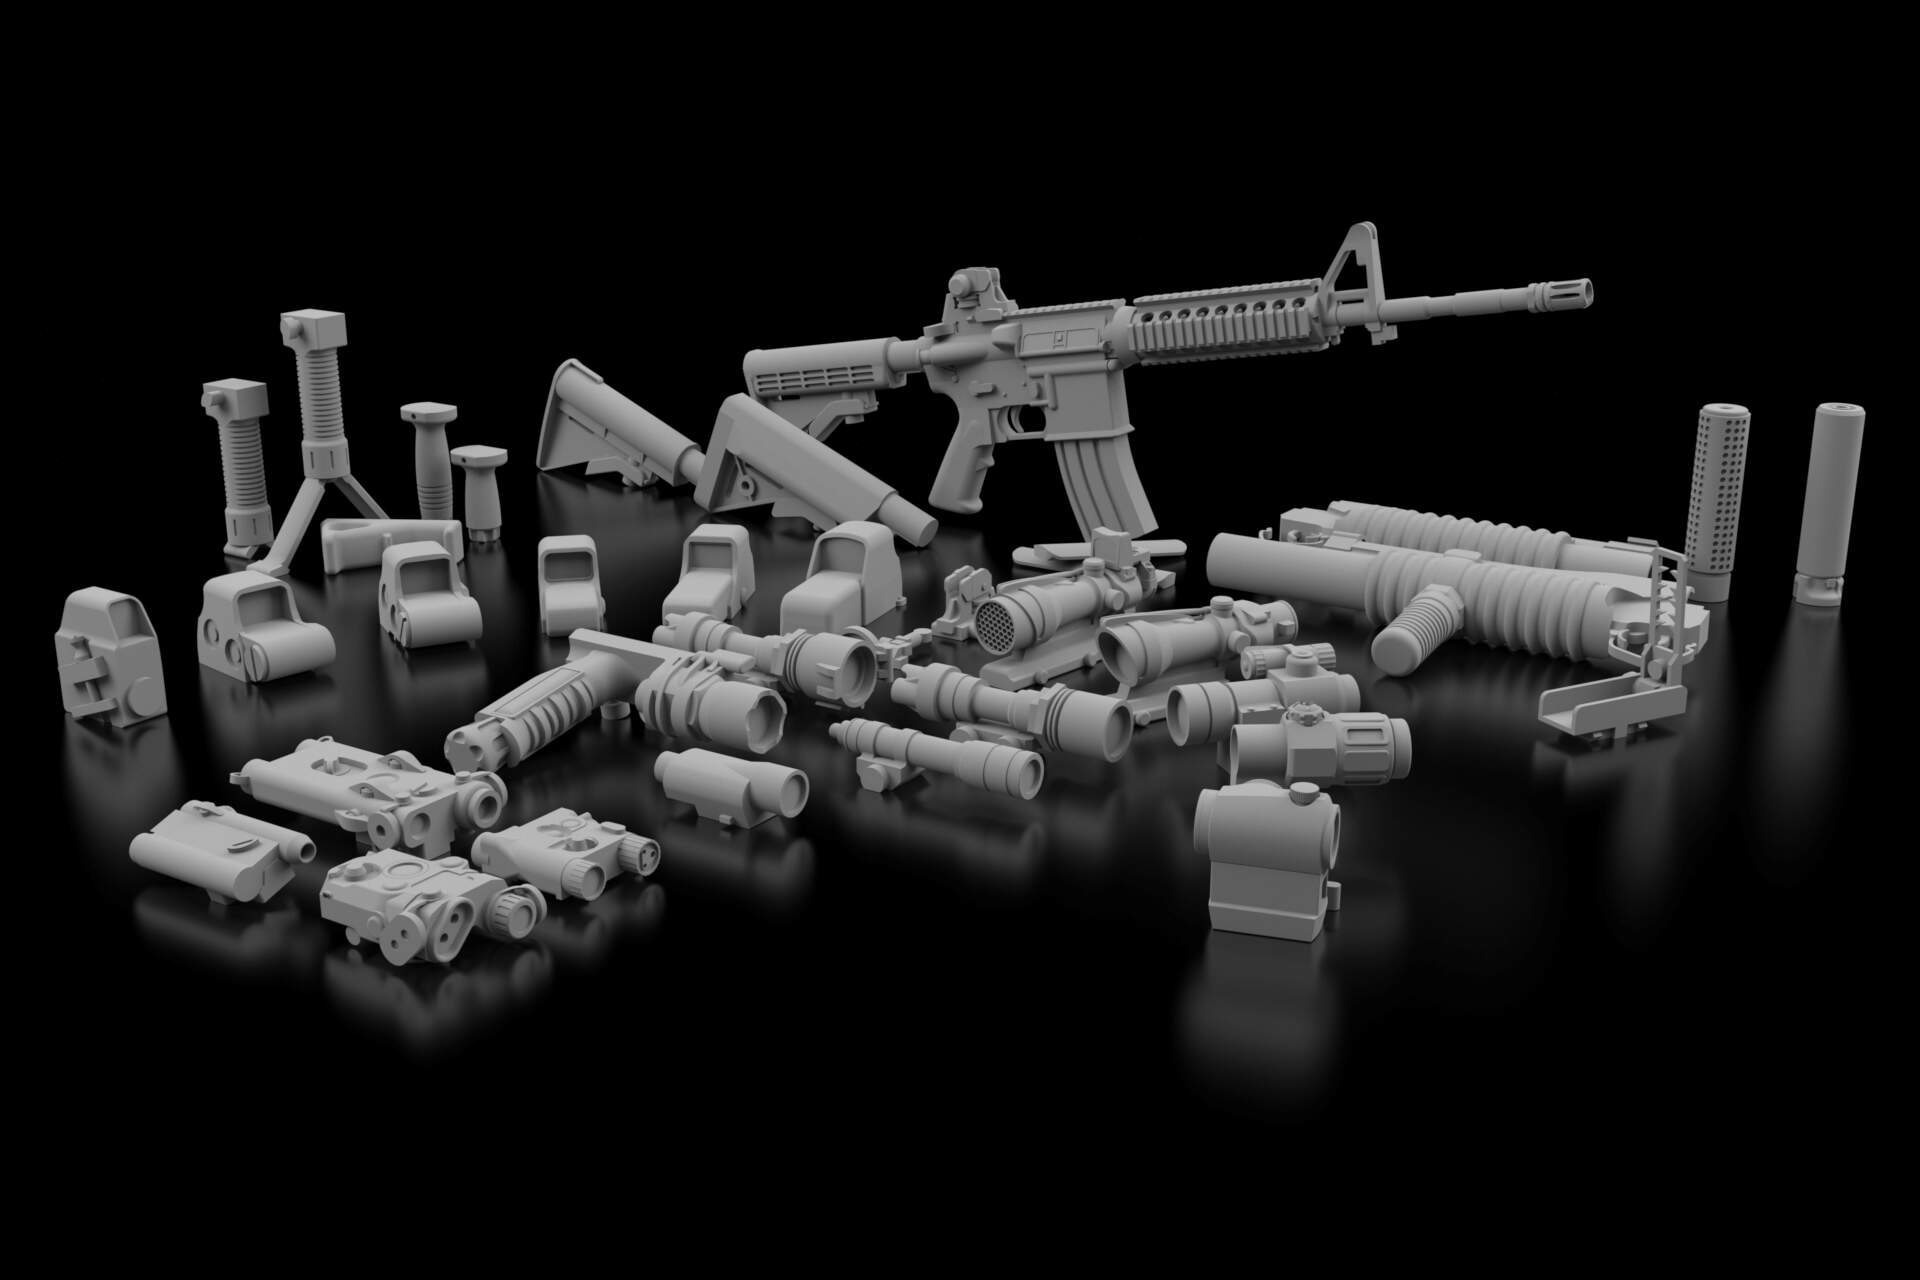
I recently put together a render of all the accessories available for the M4 carbine and Mk 18 Mod 1 that I’ve modeled and offered so far. I’m also doing it for the Mk 18 Mod 0 and M16A4. So far this is everything available. As I do more, I’ll add them to this.
I have you thought about selling like a master set for each one, 3-4 guns and all the options so folks can pick an choose themselves?
Much like the Live Resin series of offerings?
I’ve thought about it but I wasn’t confident the rails could be easily trimmed enough for the parts to sit on them. I’ll make a few adjustments and try it out though. Buuut I was definitely planning on this approach for 1/16 and up. At least offering the standard “everything-you-need-in-one-set” set alongside the prepositioned and premade sets.
Bit of a late, small update but a little something I’ve been working on off-and-on for a little bit now. Finally mated with the AK-74. No final renders yet but that’s upcoming.
Sorry for asking about something you made so long ago, but how did you do the lifting hooks in whatever program you use? I’ve been trying to make some similar hooks for myself but really struggle with them.
So I use Fusion 360. To make the lifting books I first made a sketch perpendicular to the face of the barrier. Then I made a plane along the line and a sketch on that plane. I drew a circle and then used a sweep command to sweep it along the path of the line. I moved the body to the right position afterwards.
So I’m not sure if I’ll be able to print the LTAS cab yet. Everything I’ve tried hasn’t worked so far and I’m running out of ideas. I’ve been trying to print the parts at 50 micron resolution thus far so I’m going to try at 25 microns. It’ll take longer and would be more expensive but hopefully it’ll actually work.
Early bird gets the worm, right? Well not really because I’m actually working, unfortunately, but I did find something about this meme particularly relevant right now. Maybe the double stack mag? I dunno. Maybe I’ll find out in the morning… Or, well, later.

I hope you can work it out. I am really looking forward to getting a couple.
I’m looking forward to printing it! The most recent print got most of the way through before failing. It’s been a very frustrating day. At least I finished this.
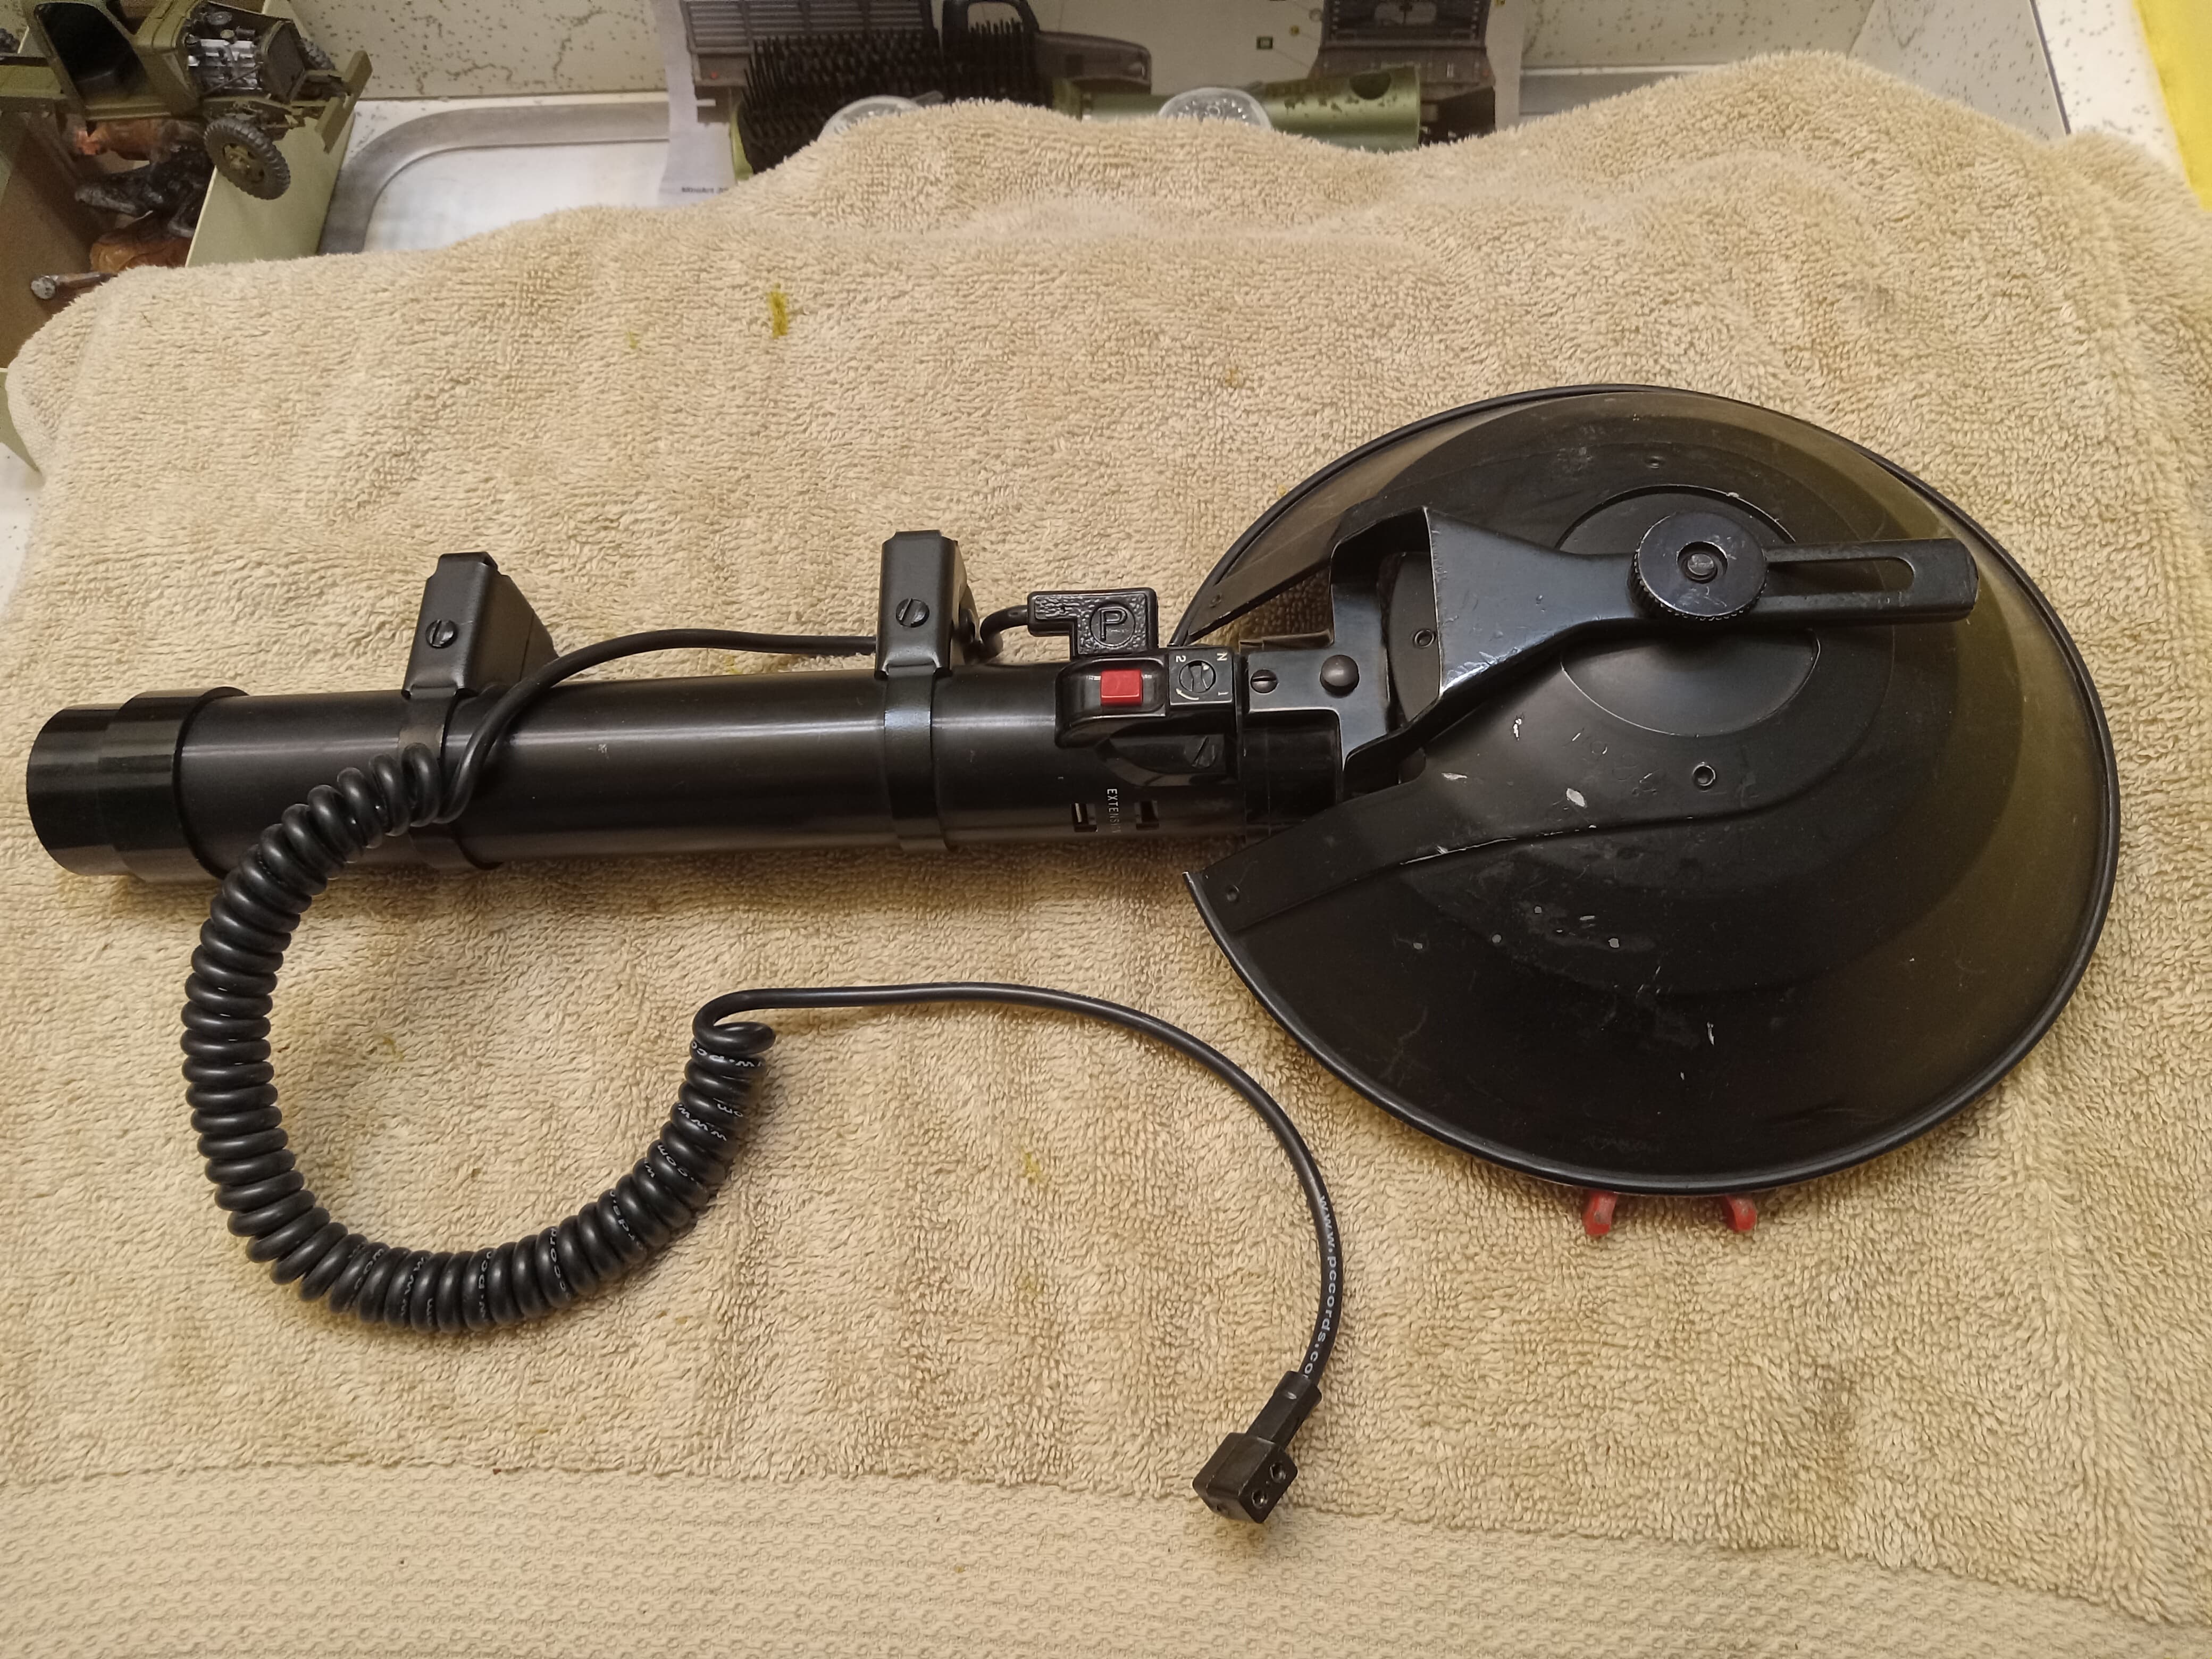
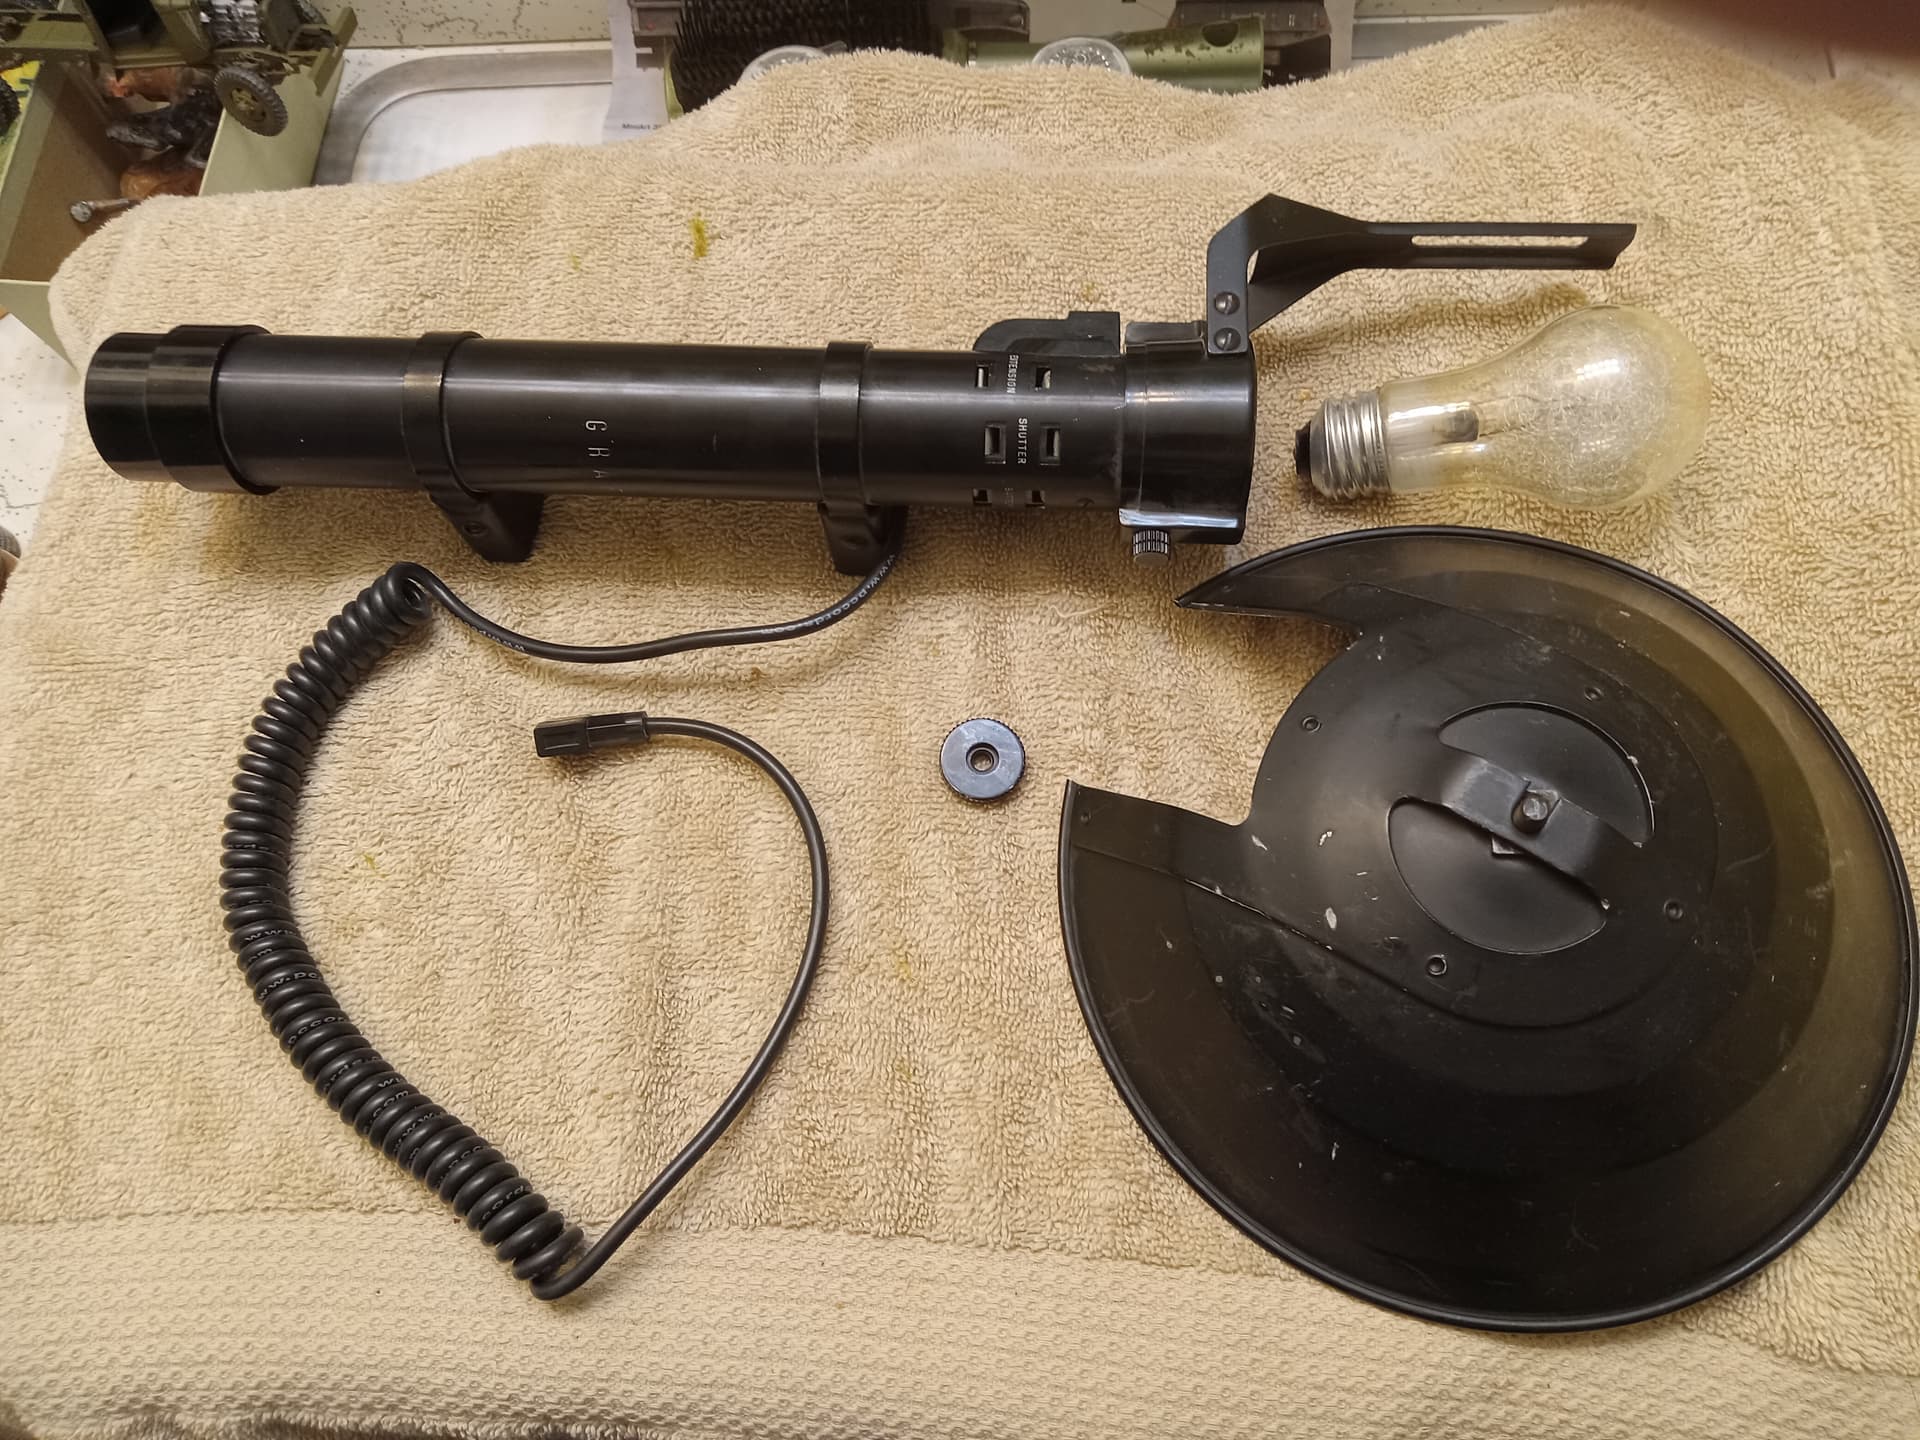
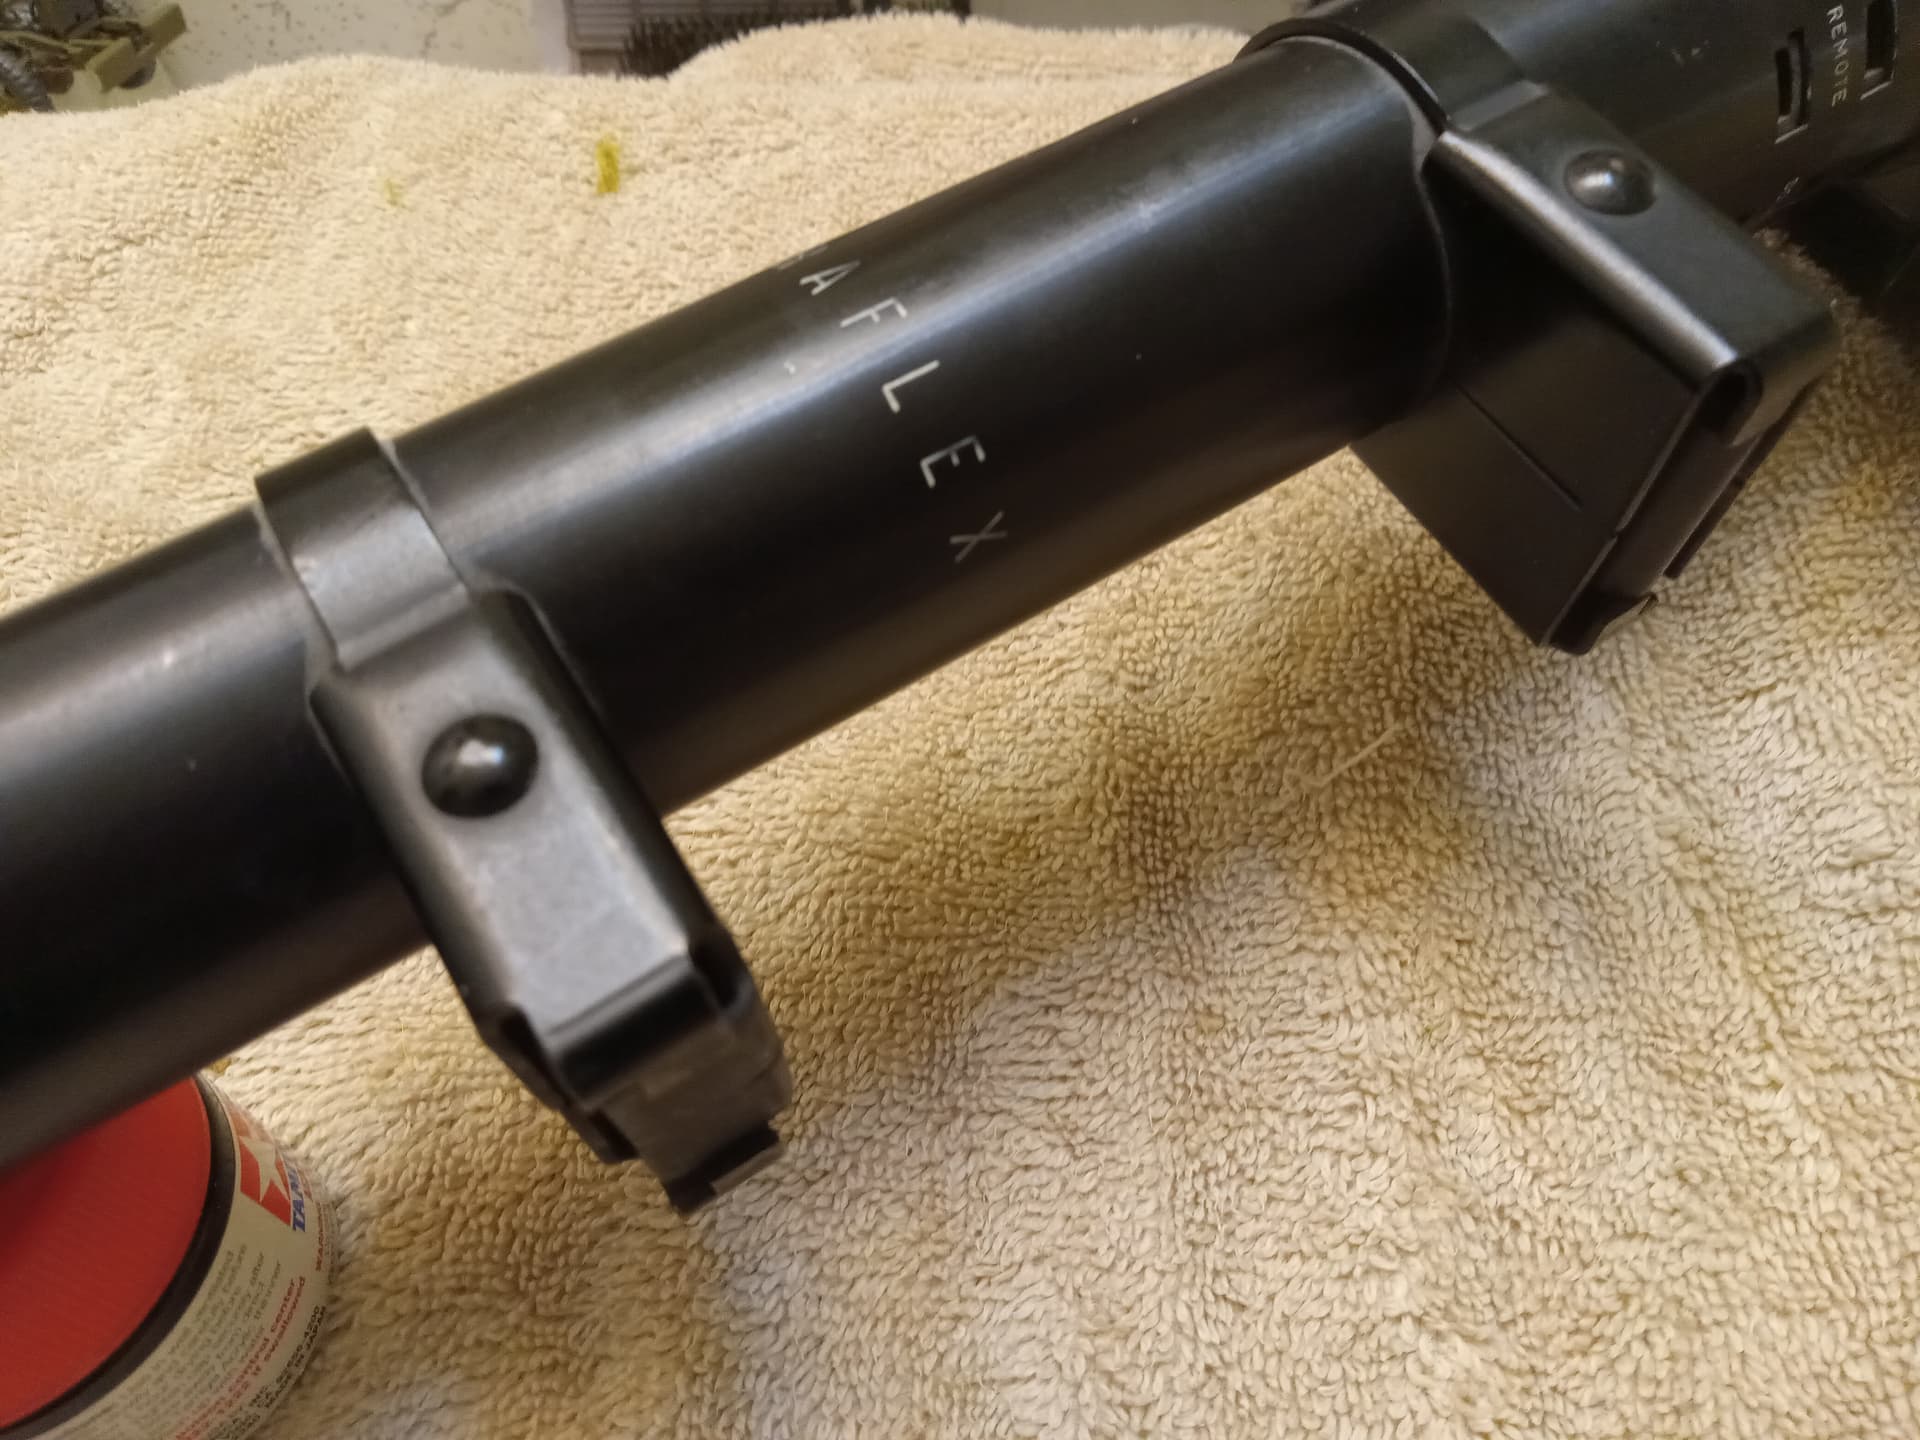
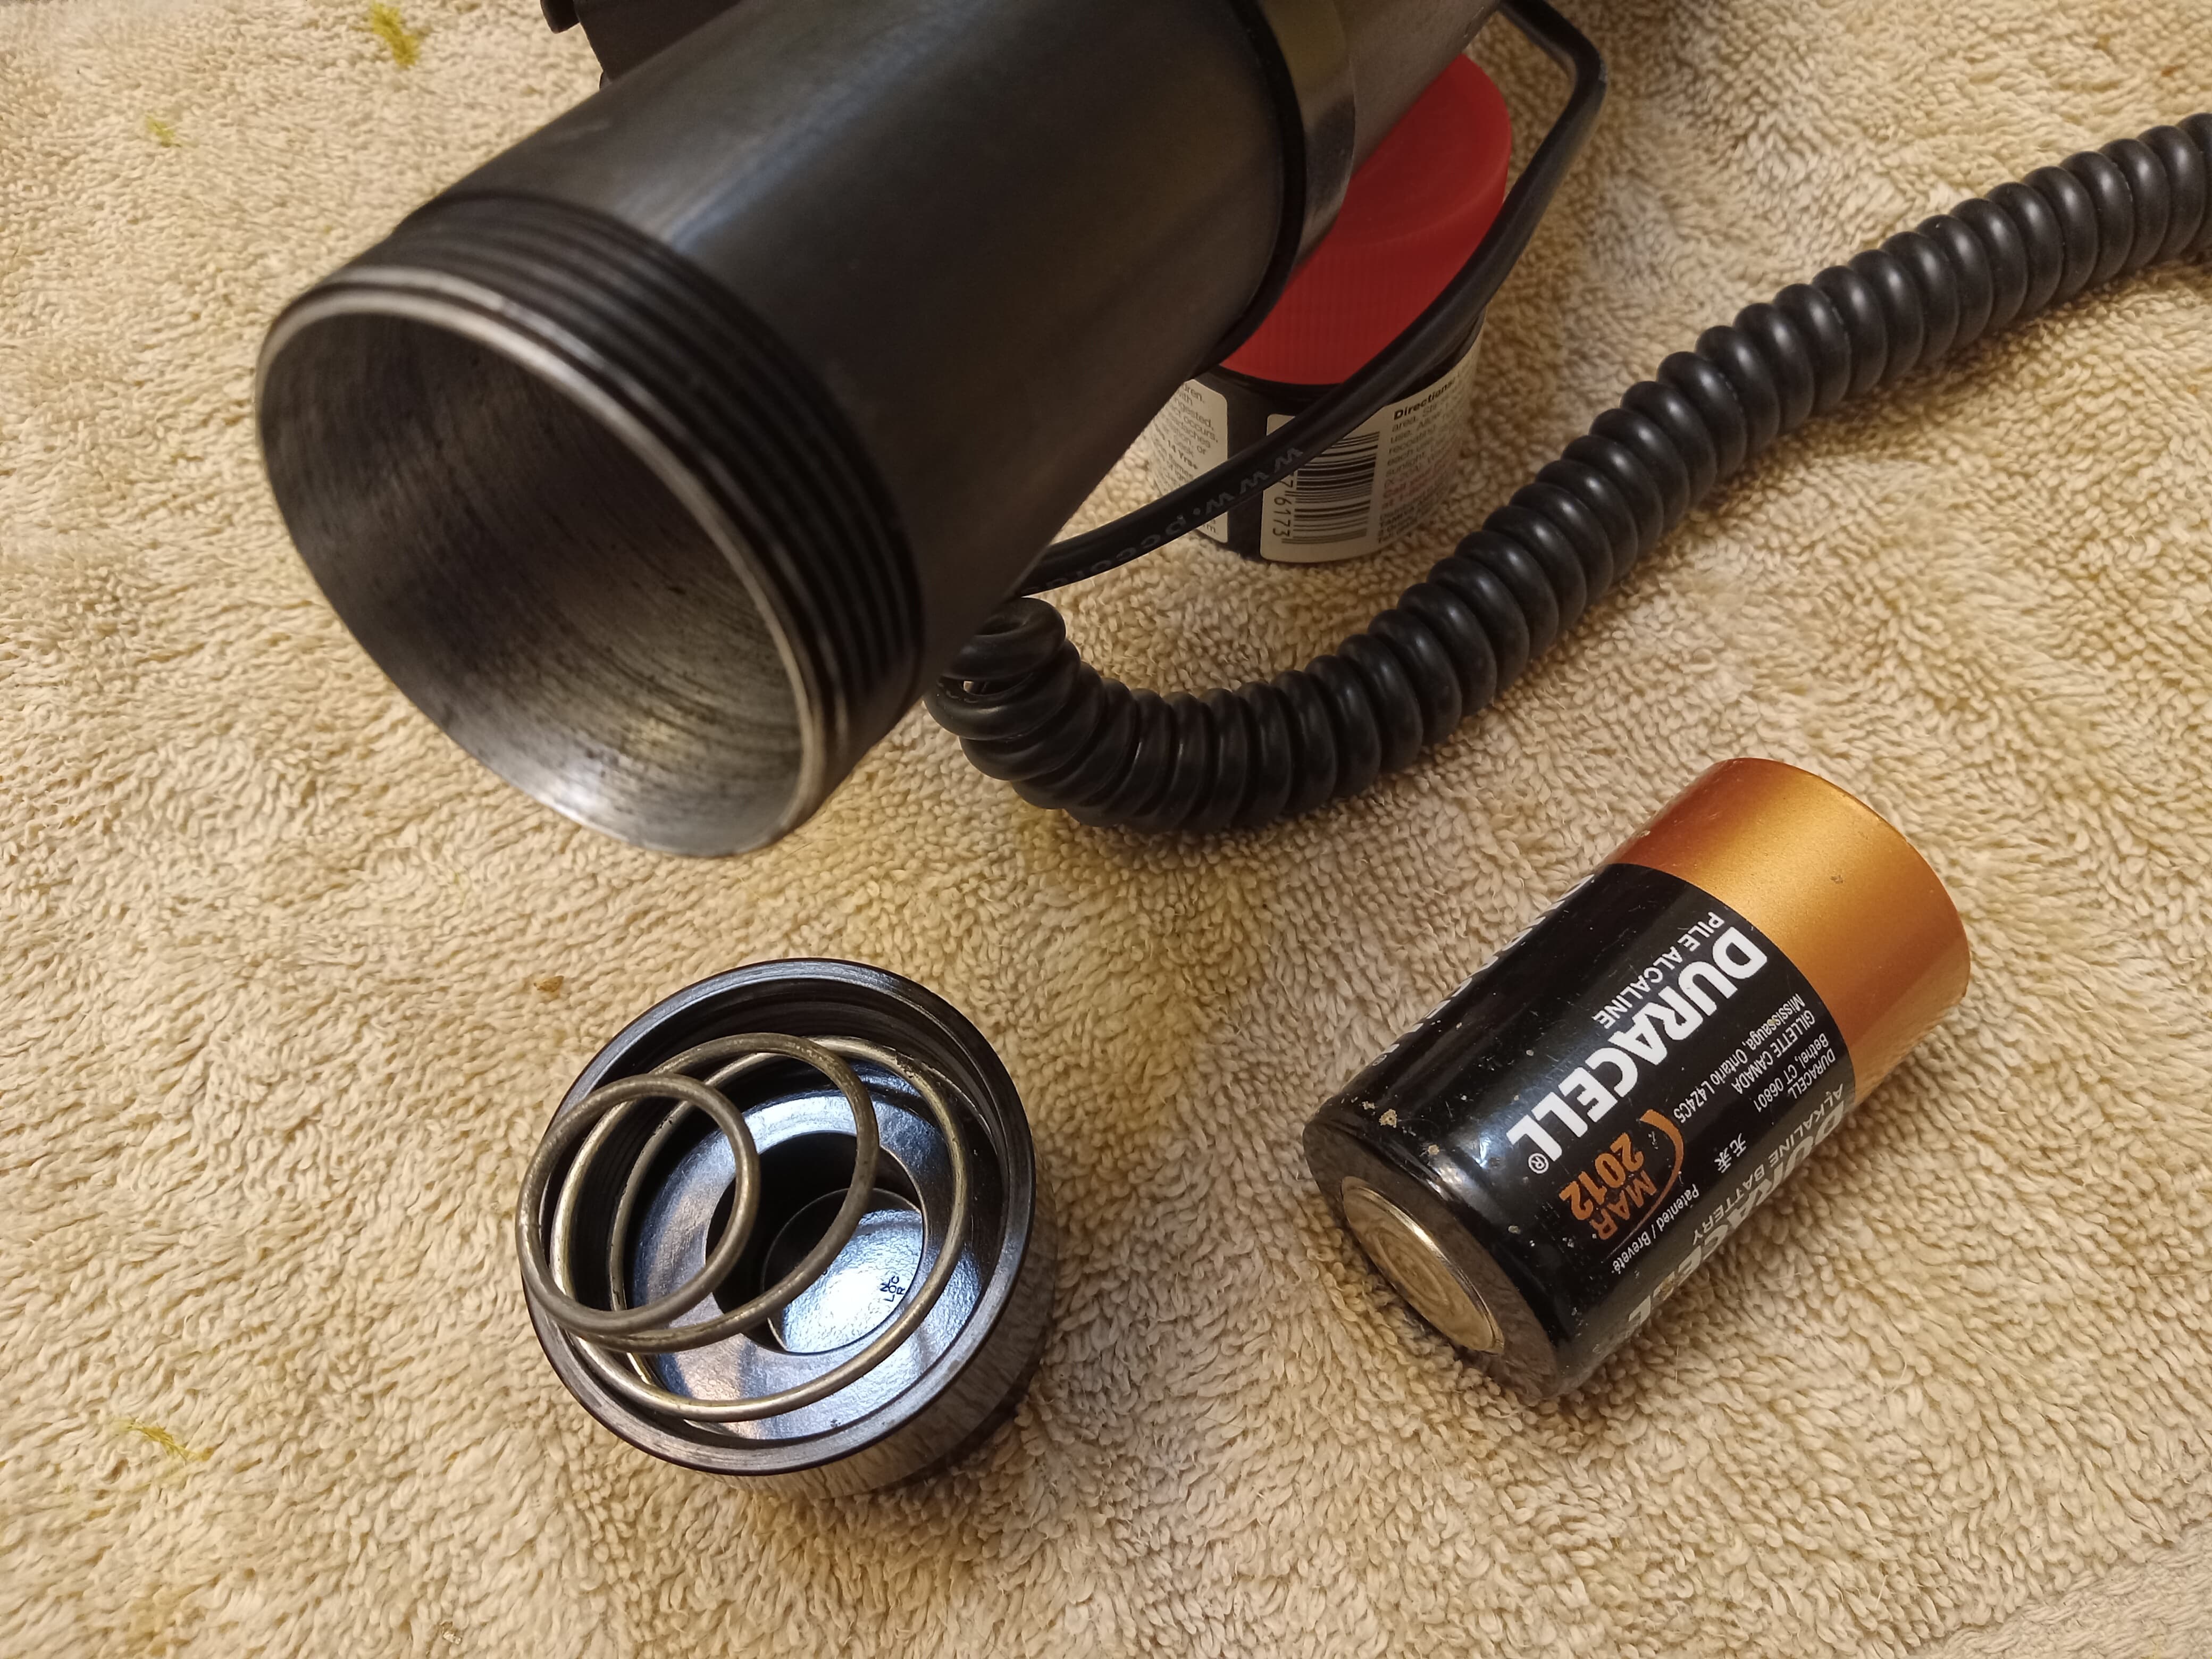
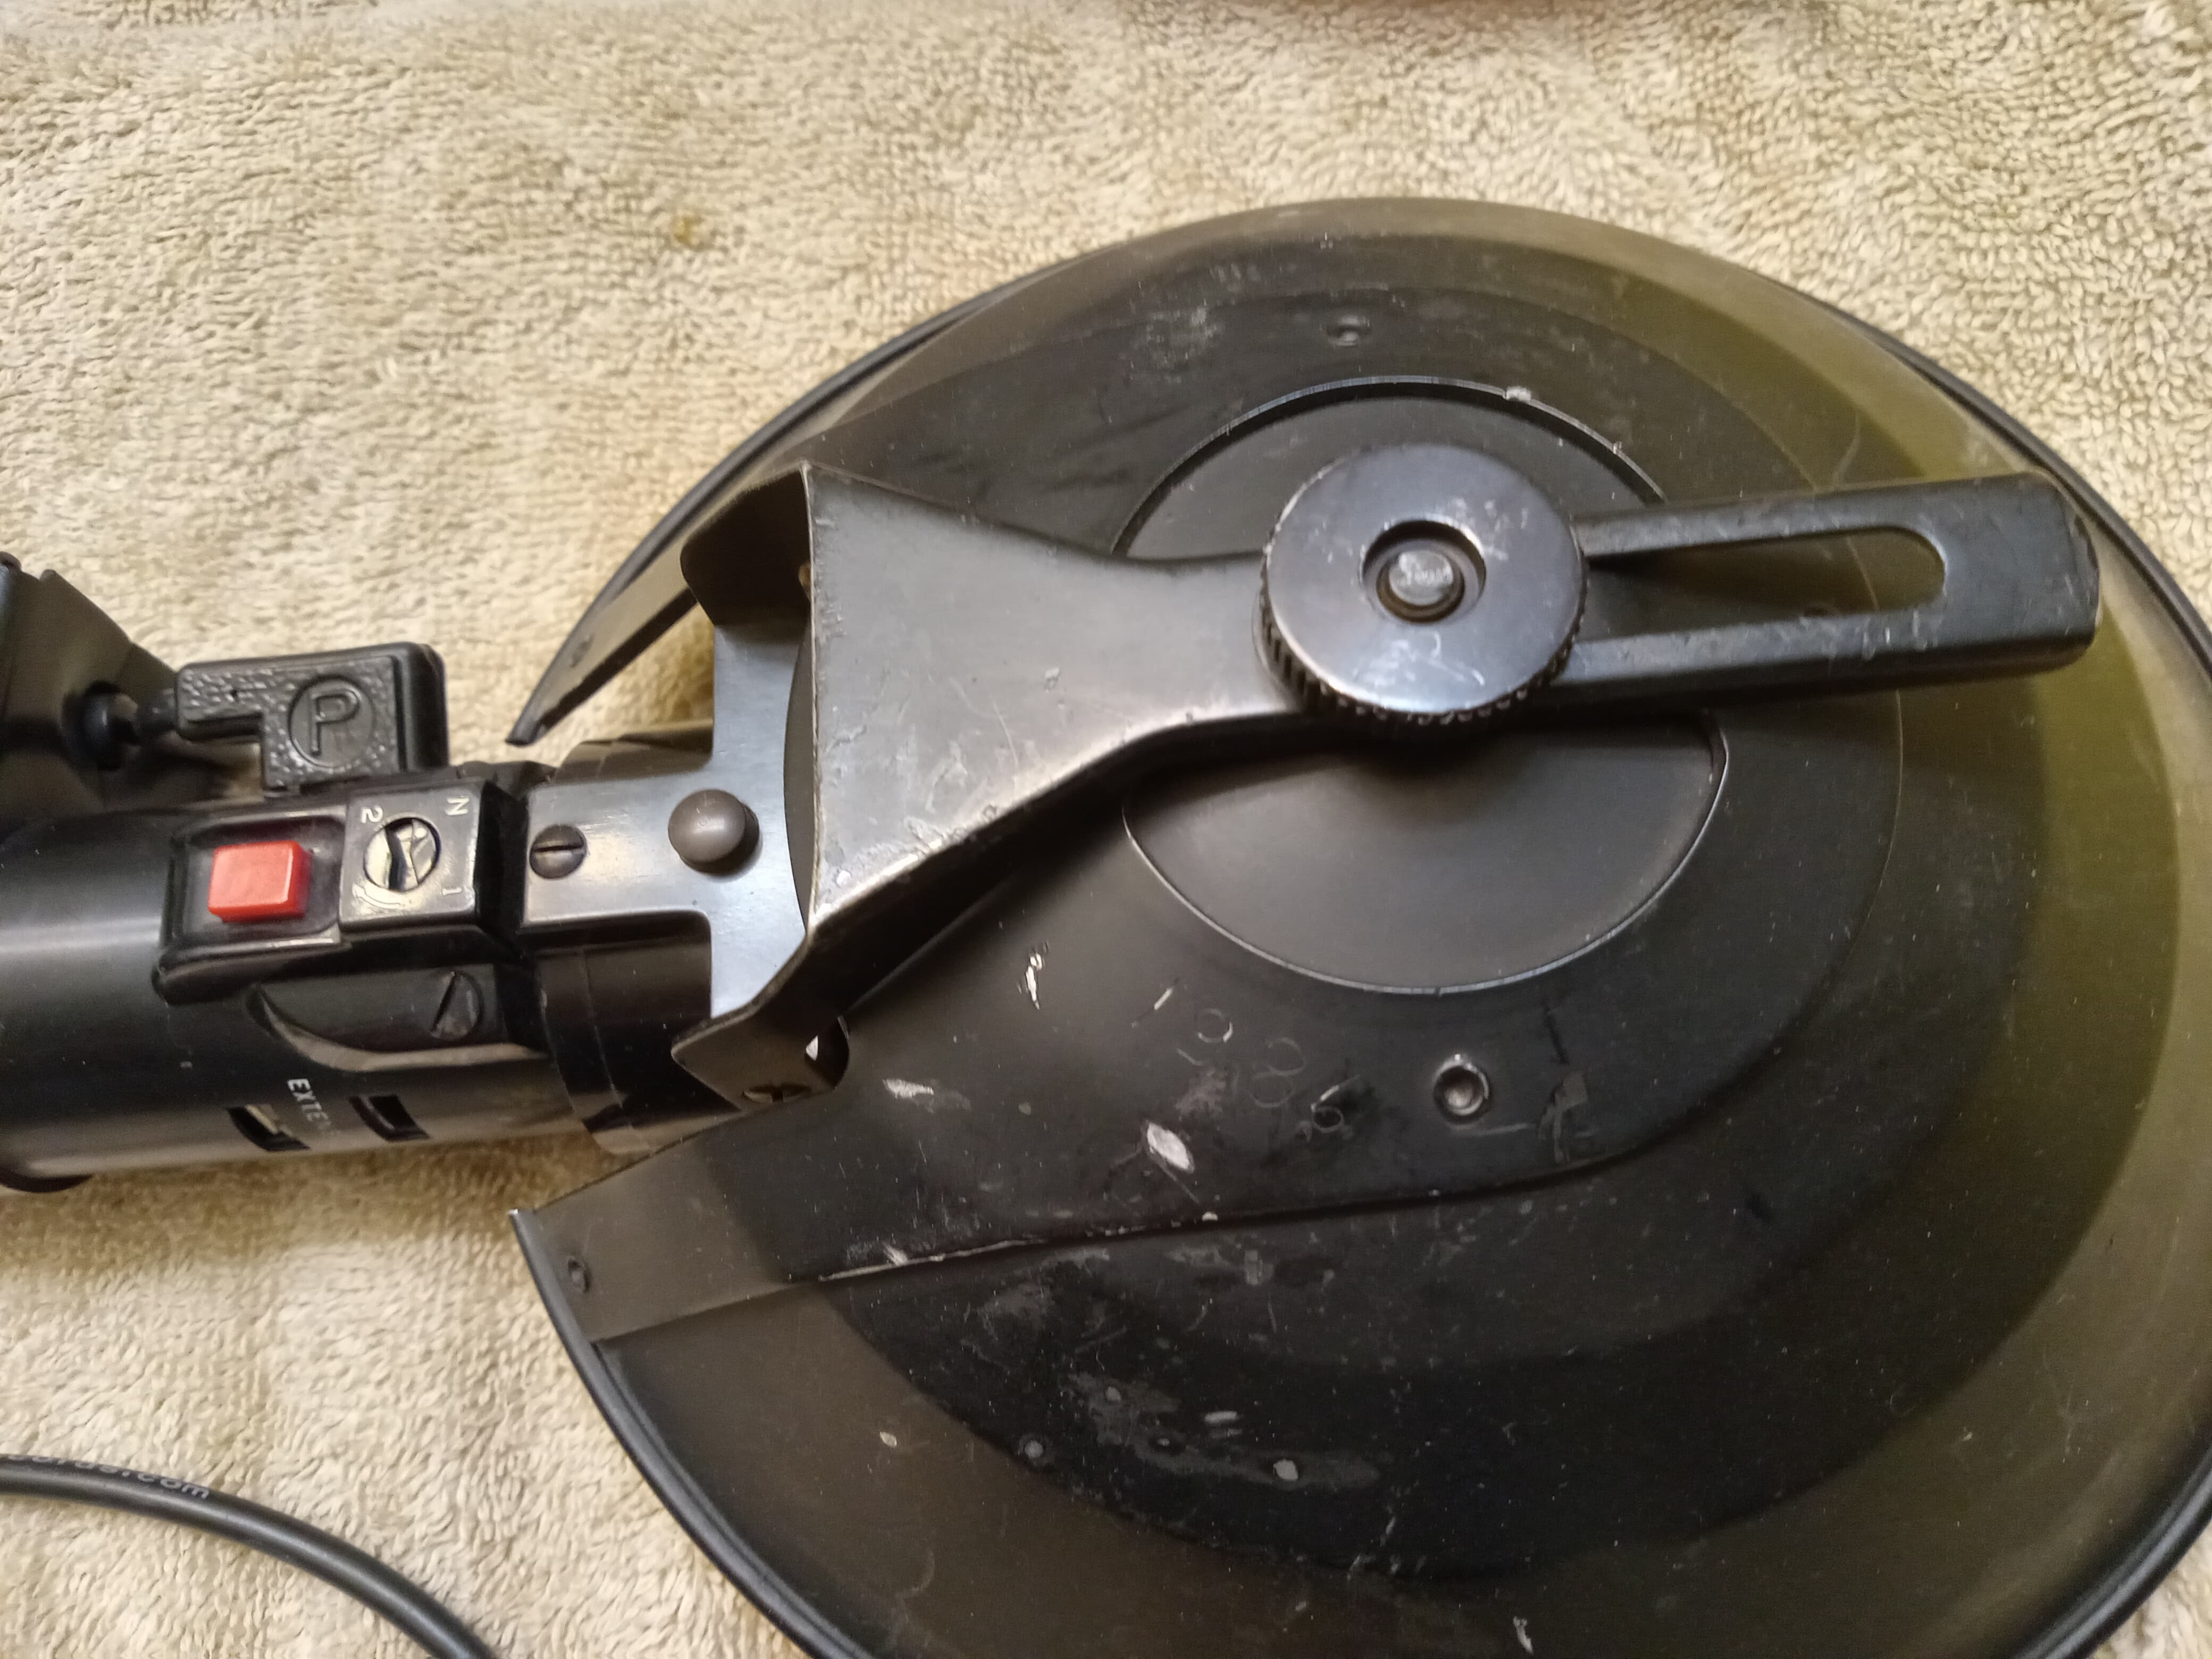
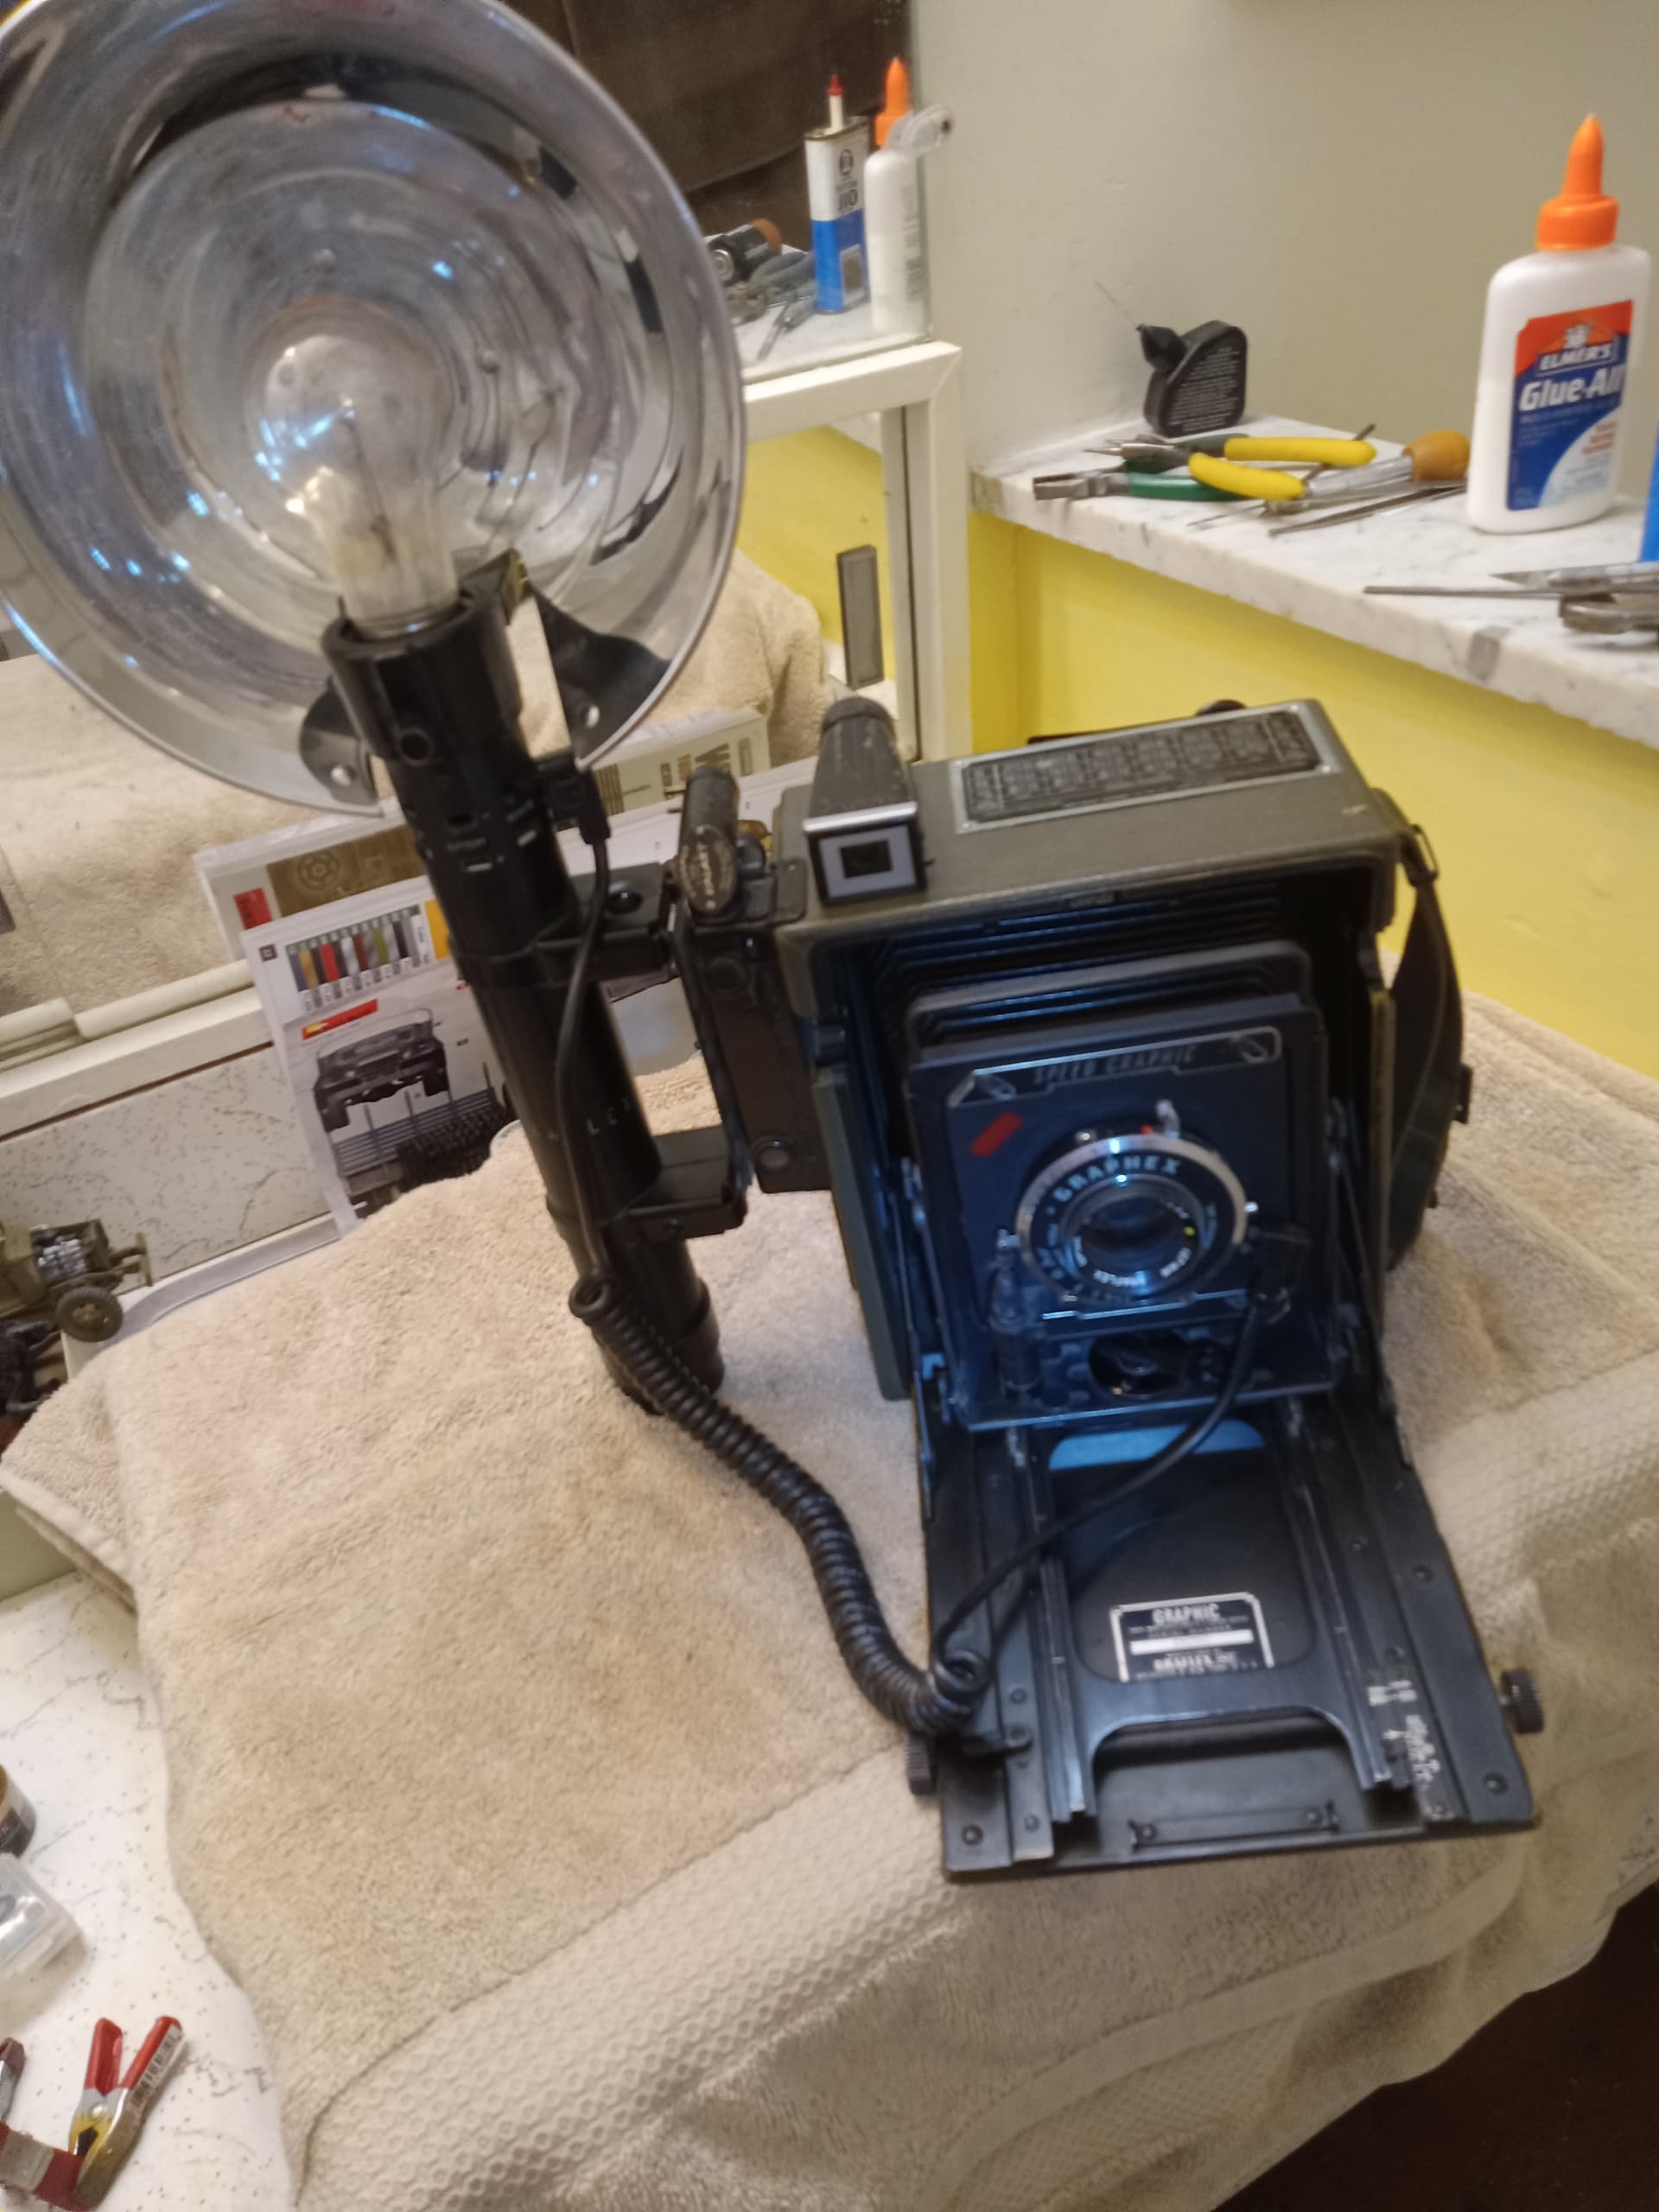
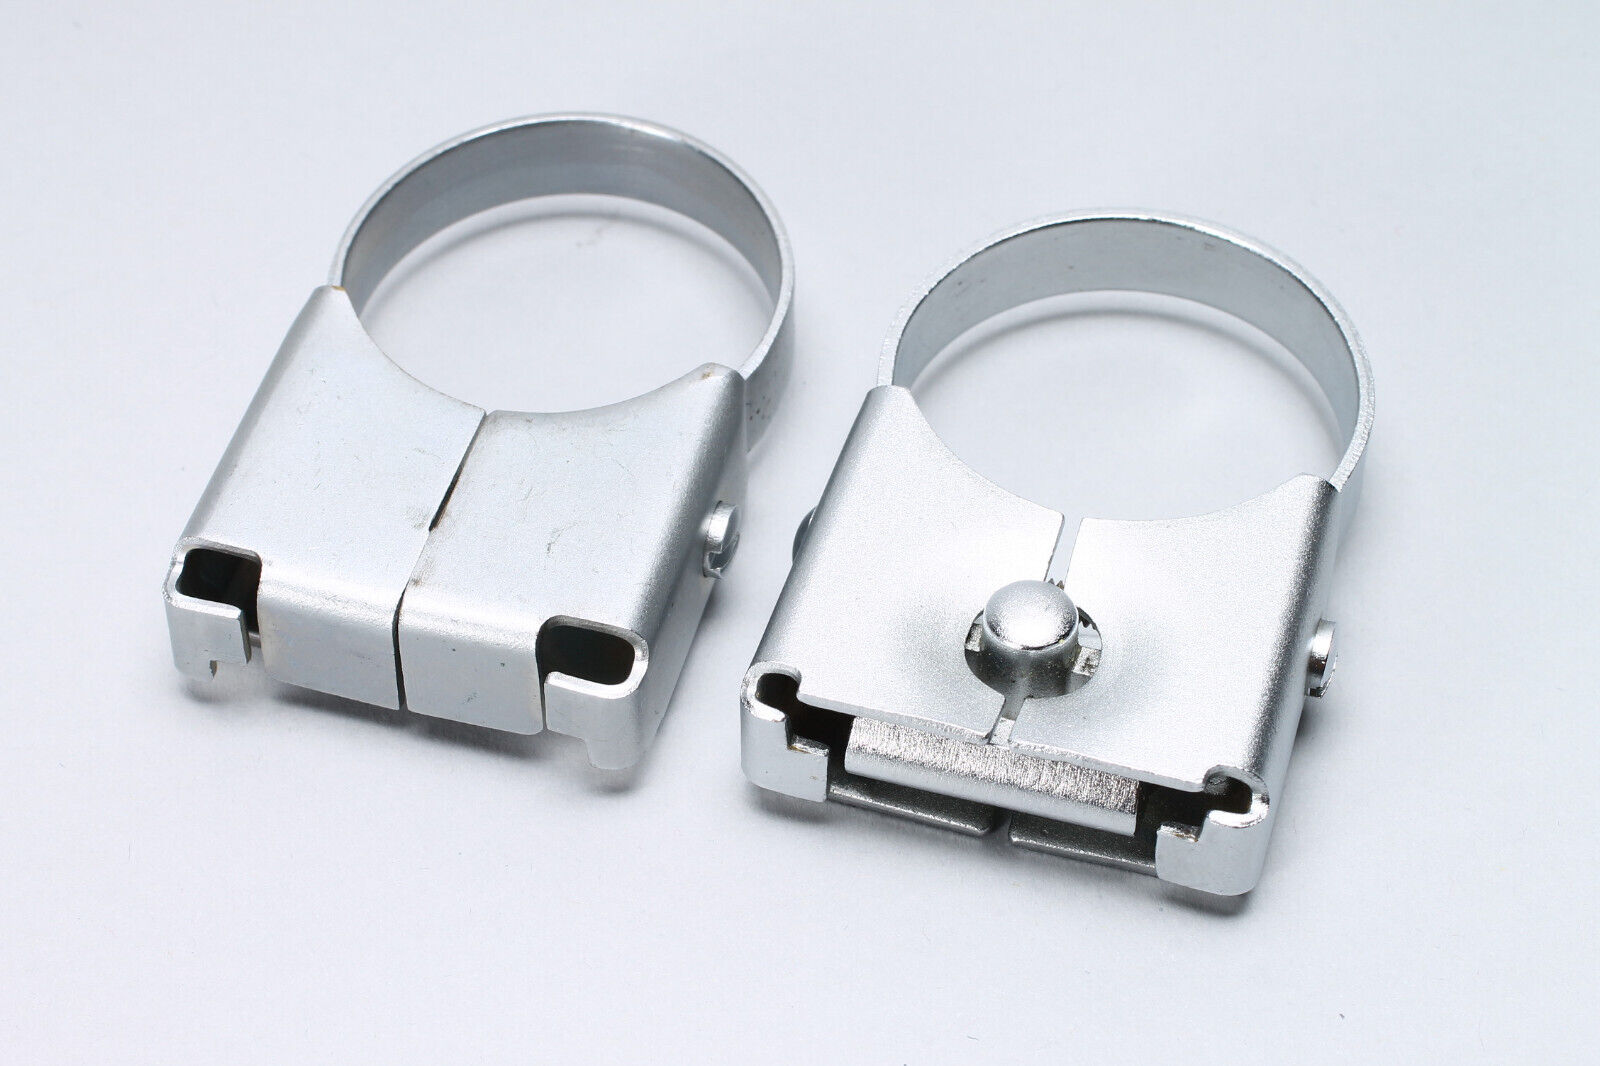
Here are photos of the Graflex flash unit. Measurements to follow shortly:
Earlier, smaller Graflex flash units attached with just one quick release clip. This later design is/was more sturdy and much less prone to coming loose when using the flash itself as a carry handle for the camera. (Which was done VERY often.) Still there is just one quick release button on the top clip which immediately releases the flash unit to then be held “off-camera” for a softer and more varied lighting.
Dimensions of Flash Unit:
Twin mounting clips can be positioned anywhere along the length of the flash handle as long as the 3 1/4 inch interval spacing between them is maintained.
Link to the Graflex Shop:
Showing wartime early Graflex Flash design