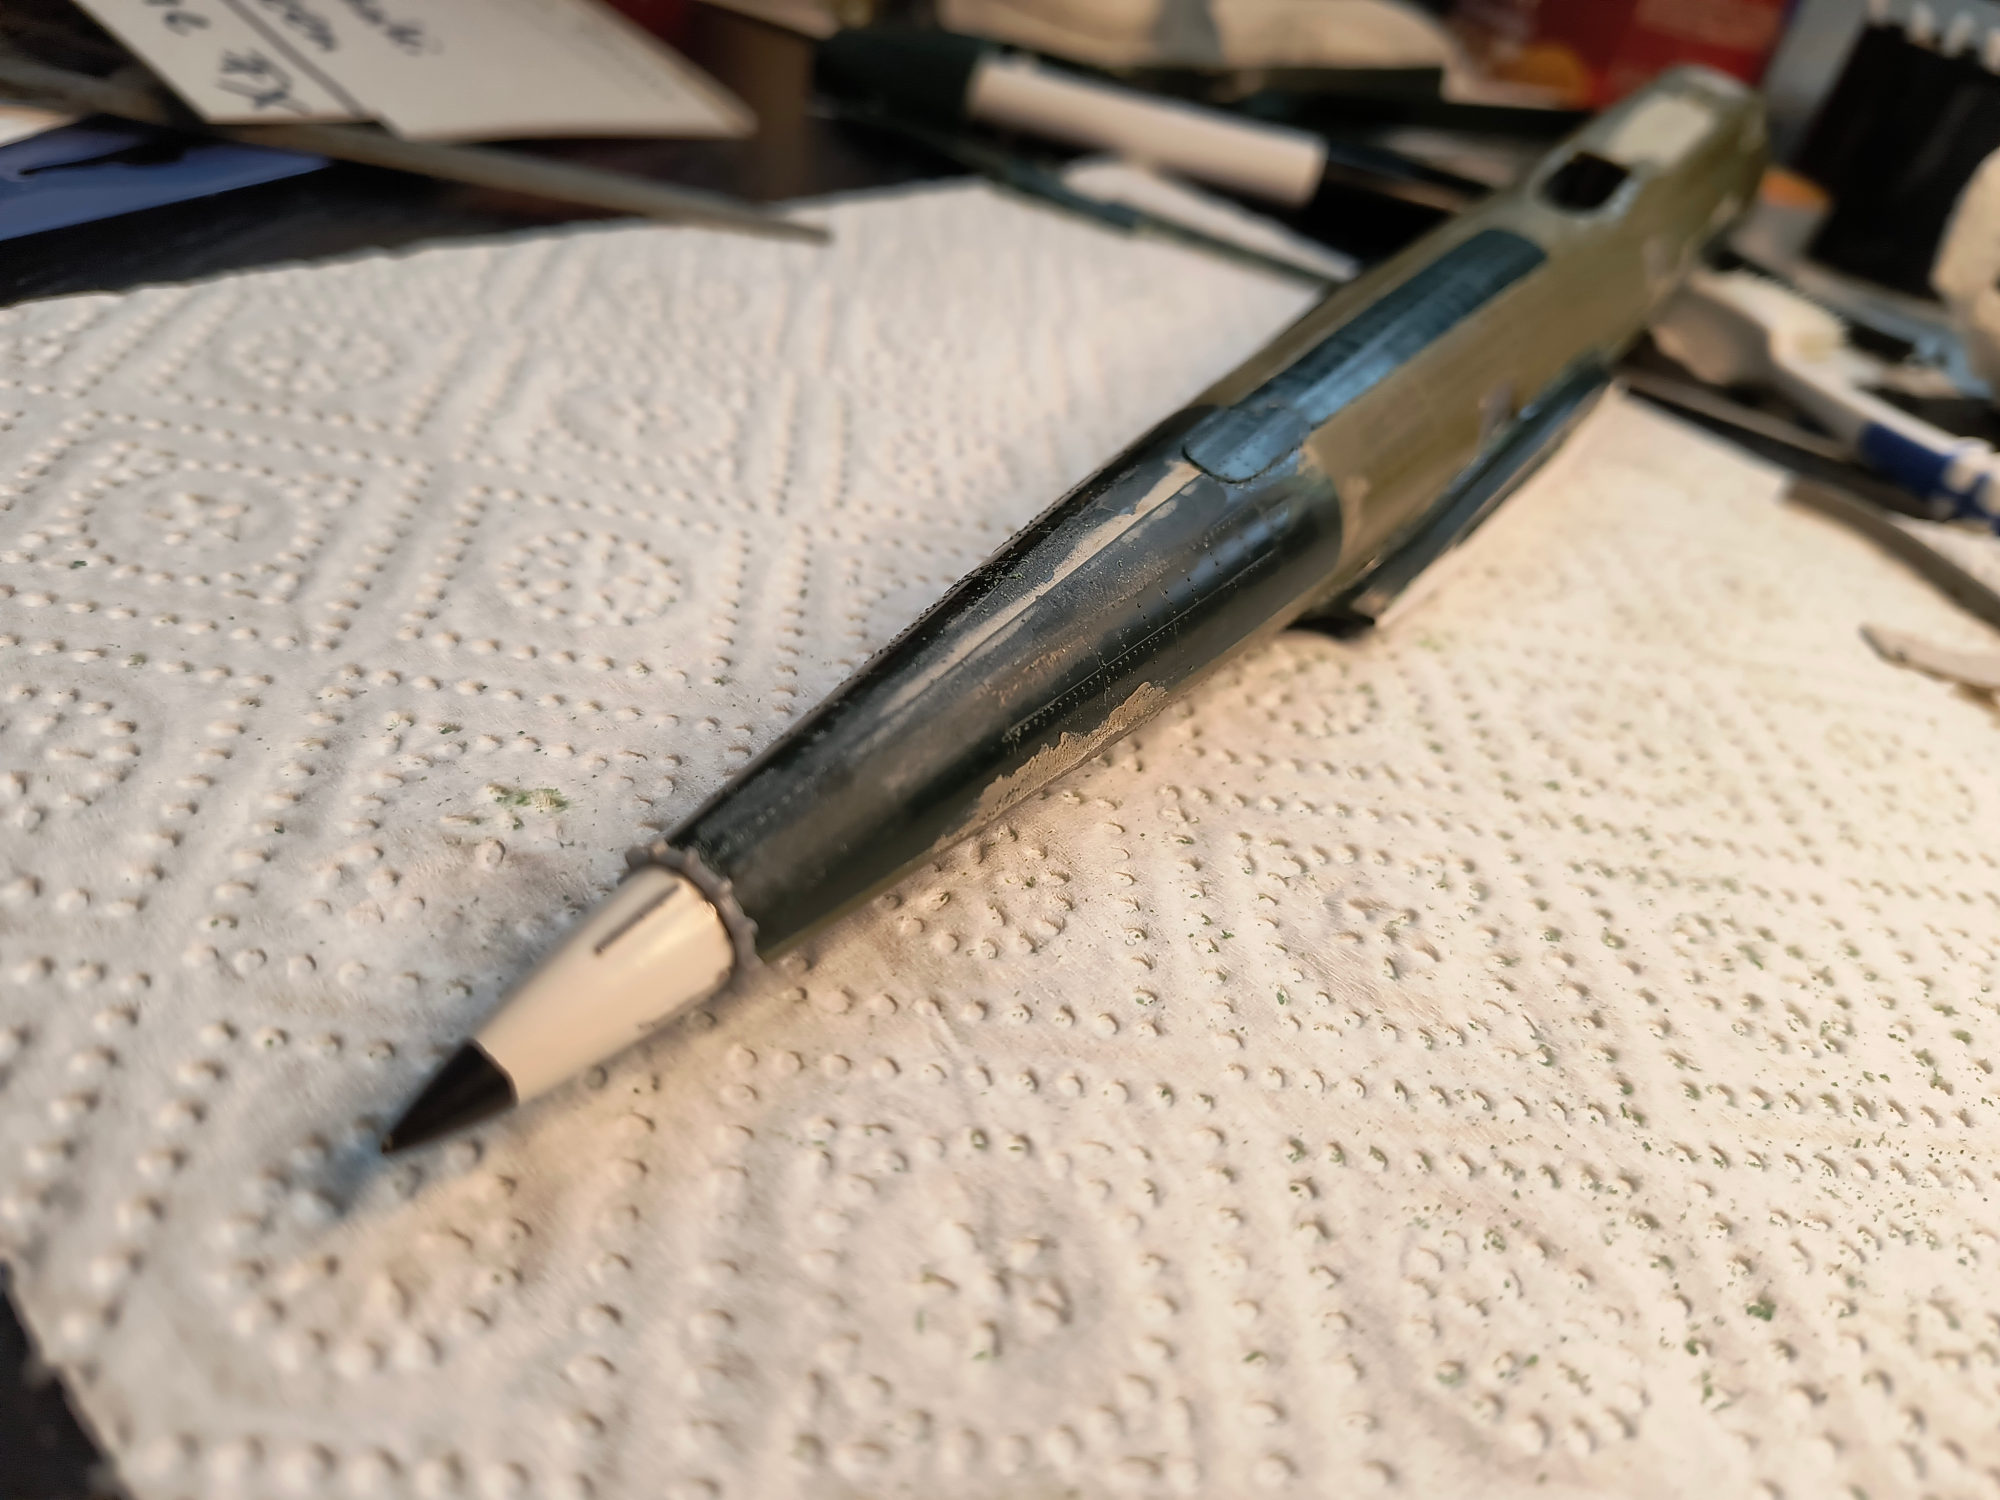
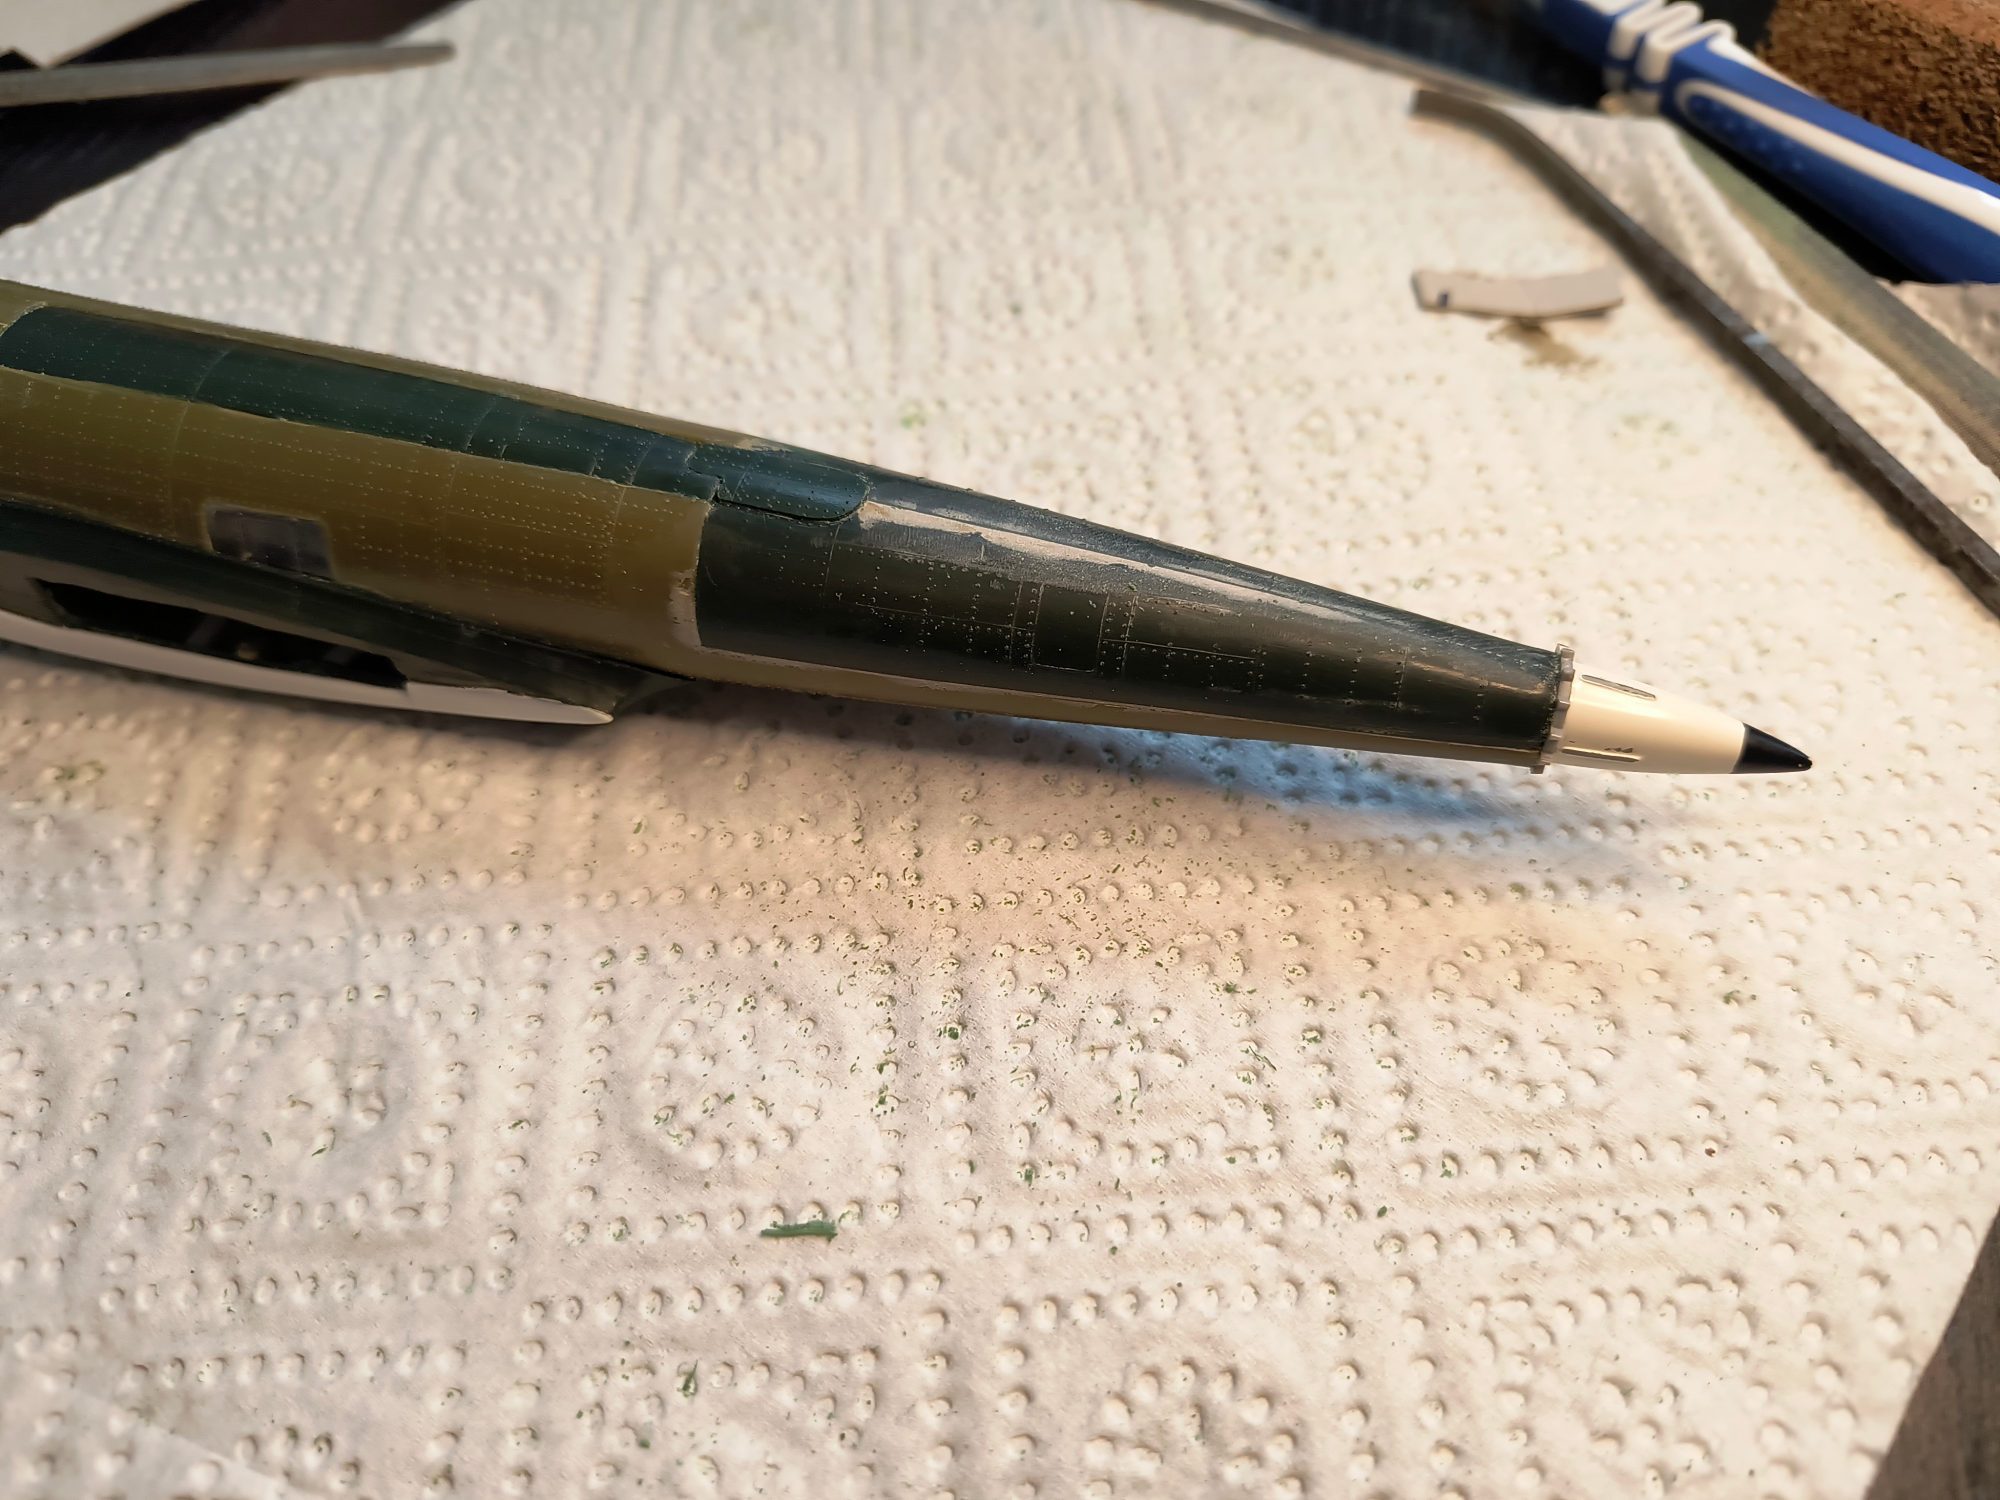
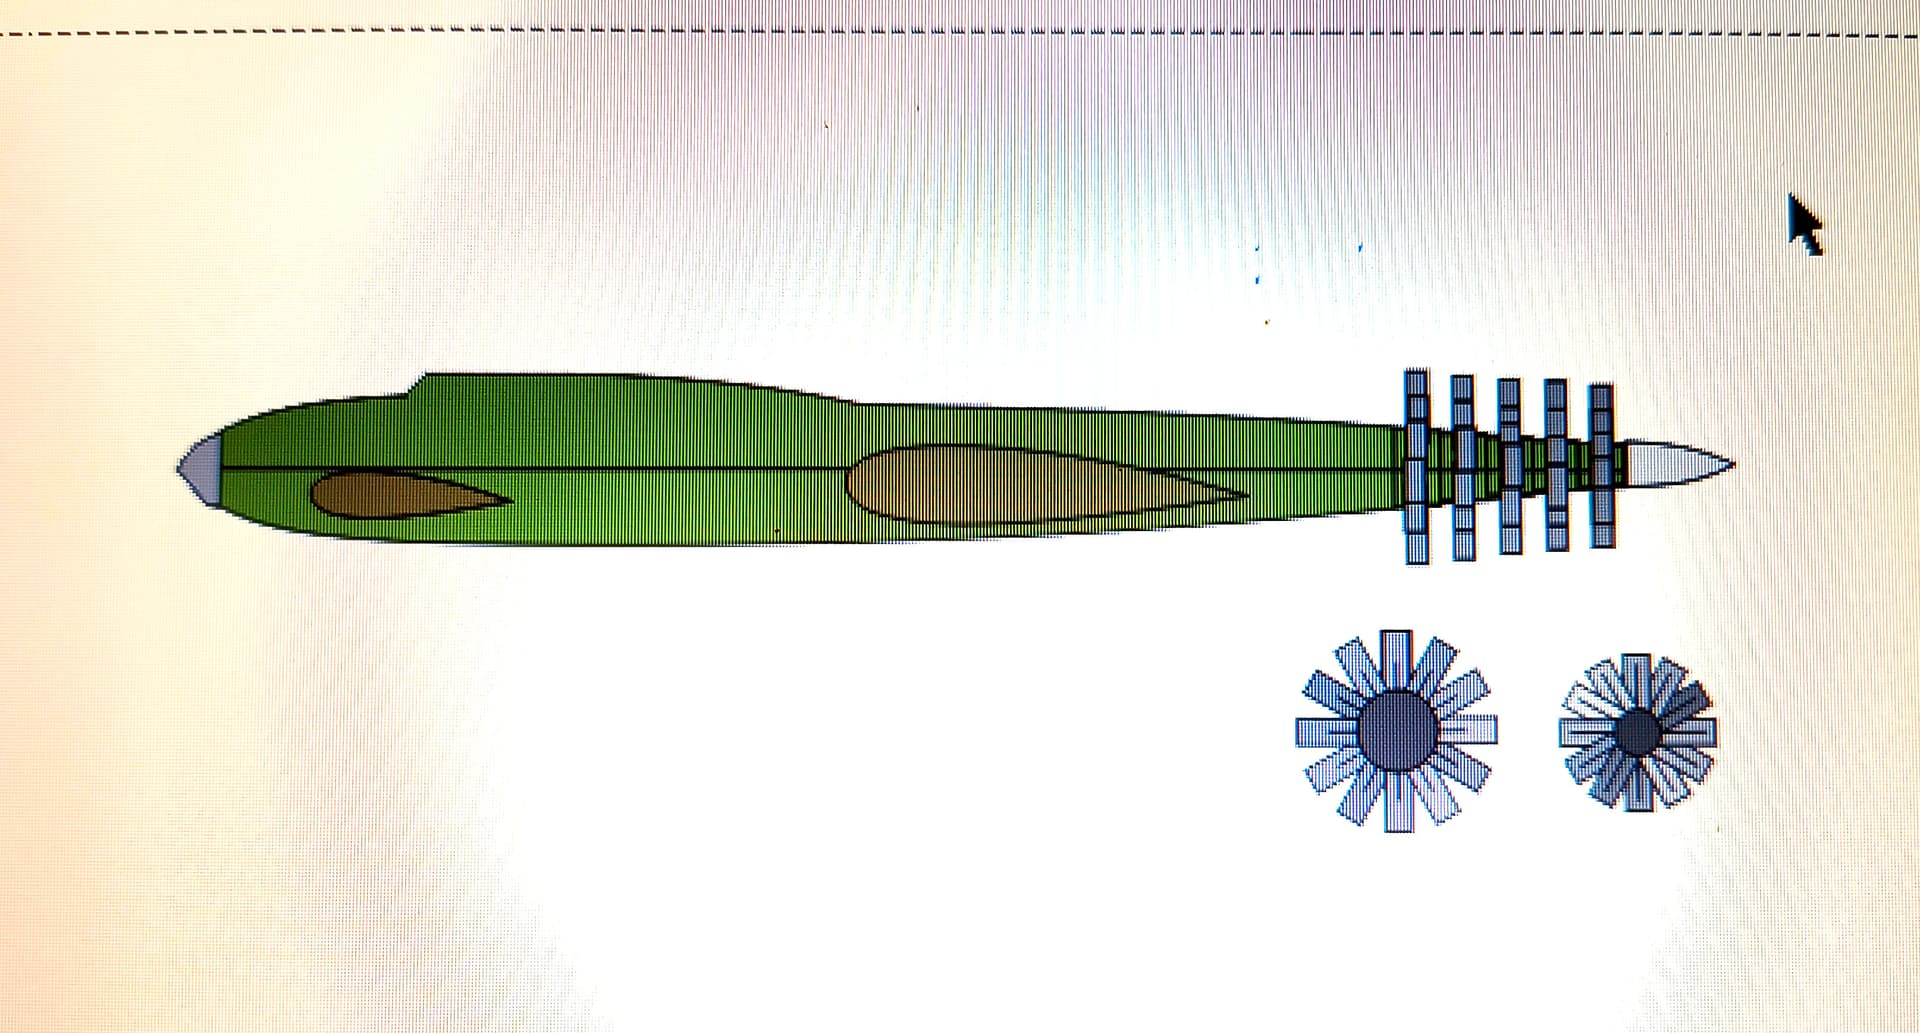
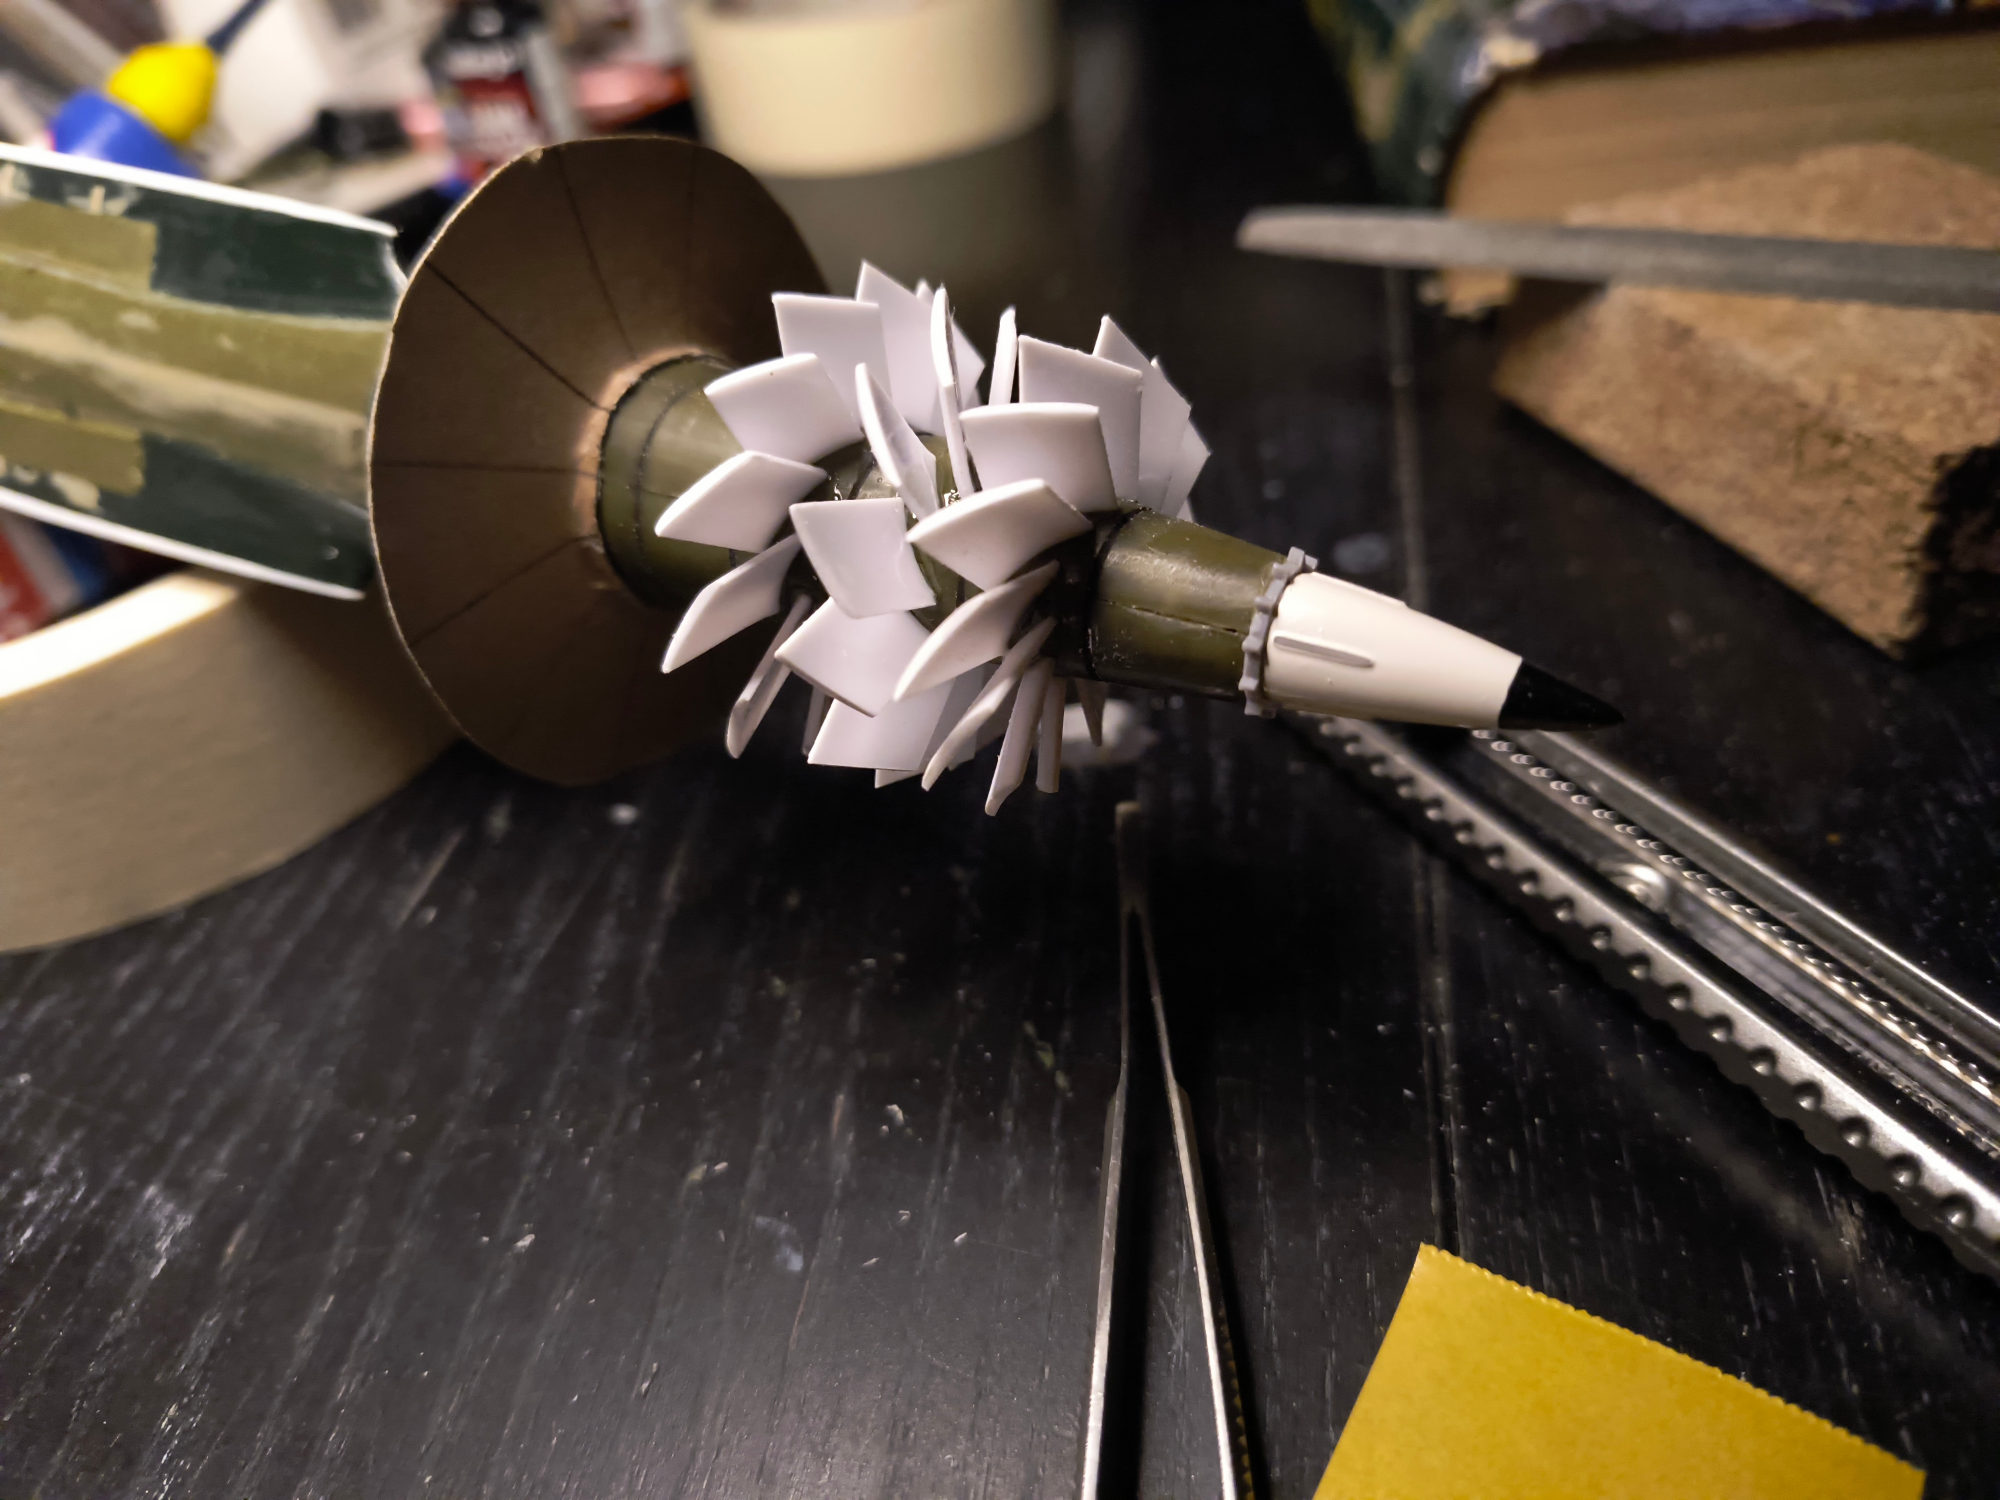
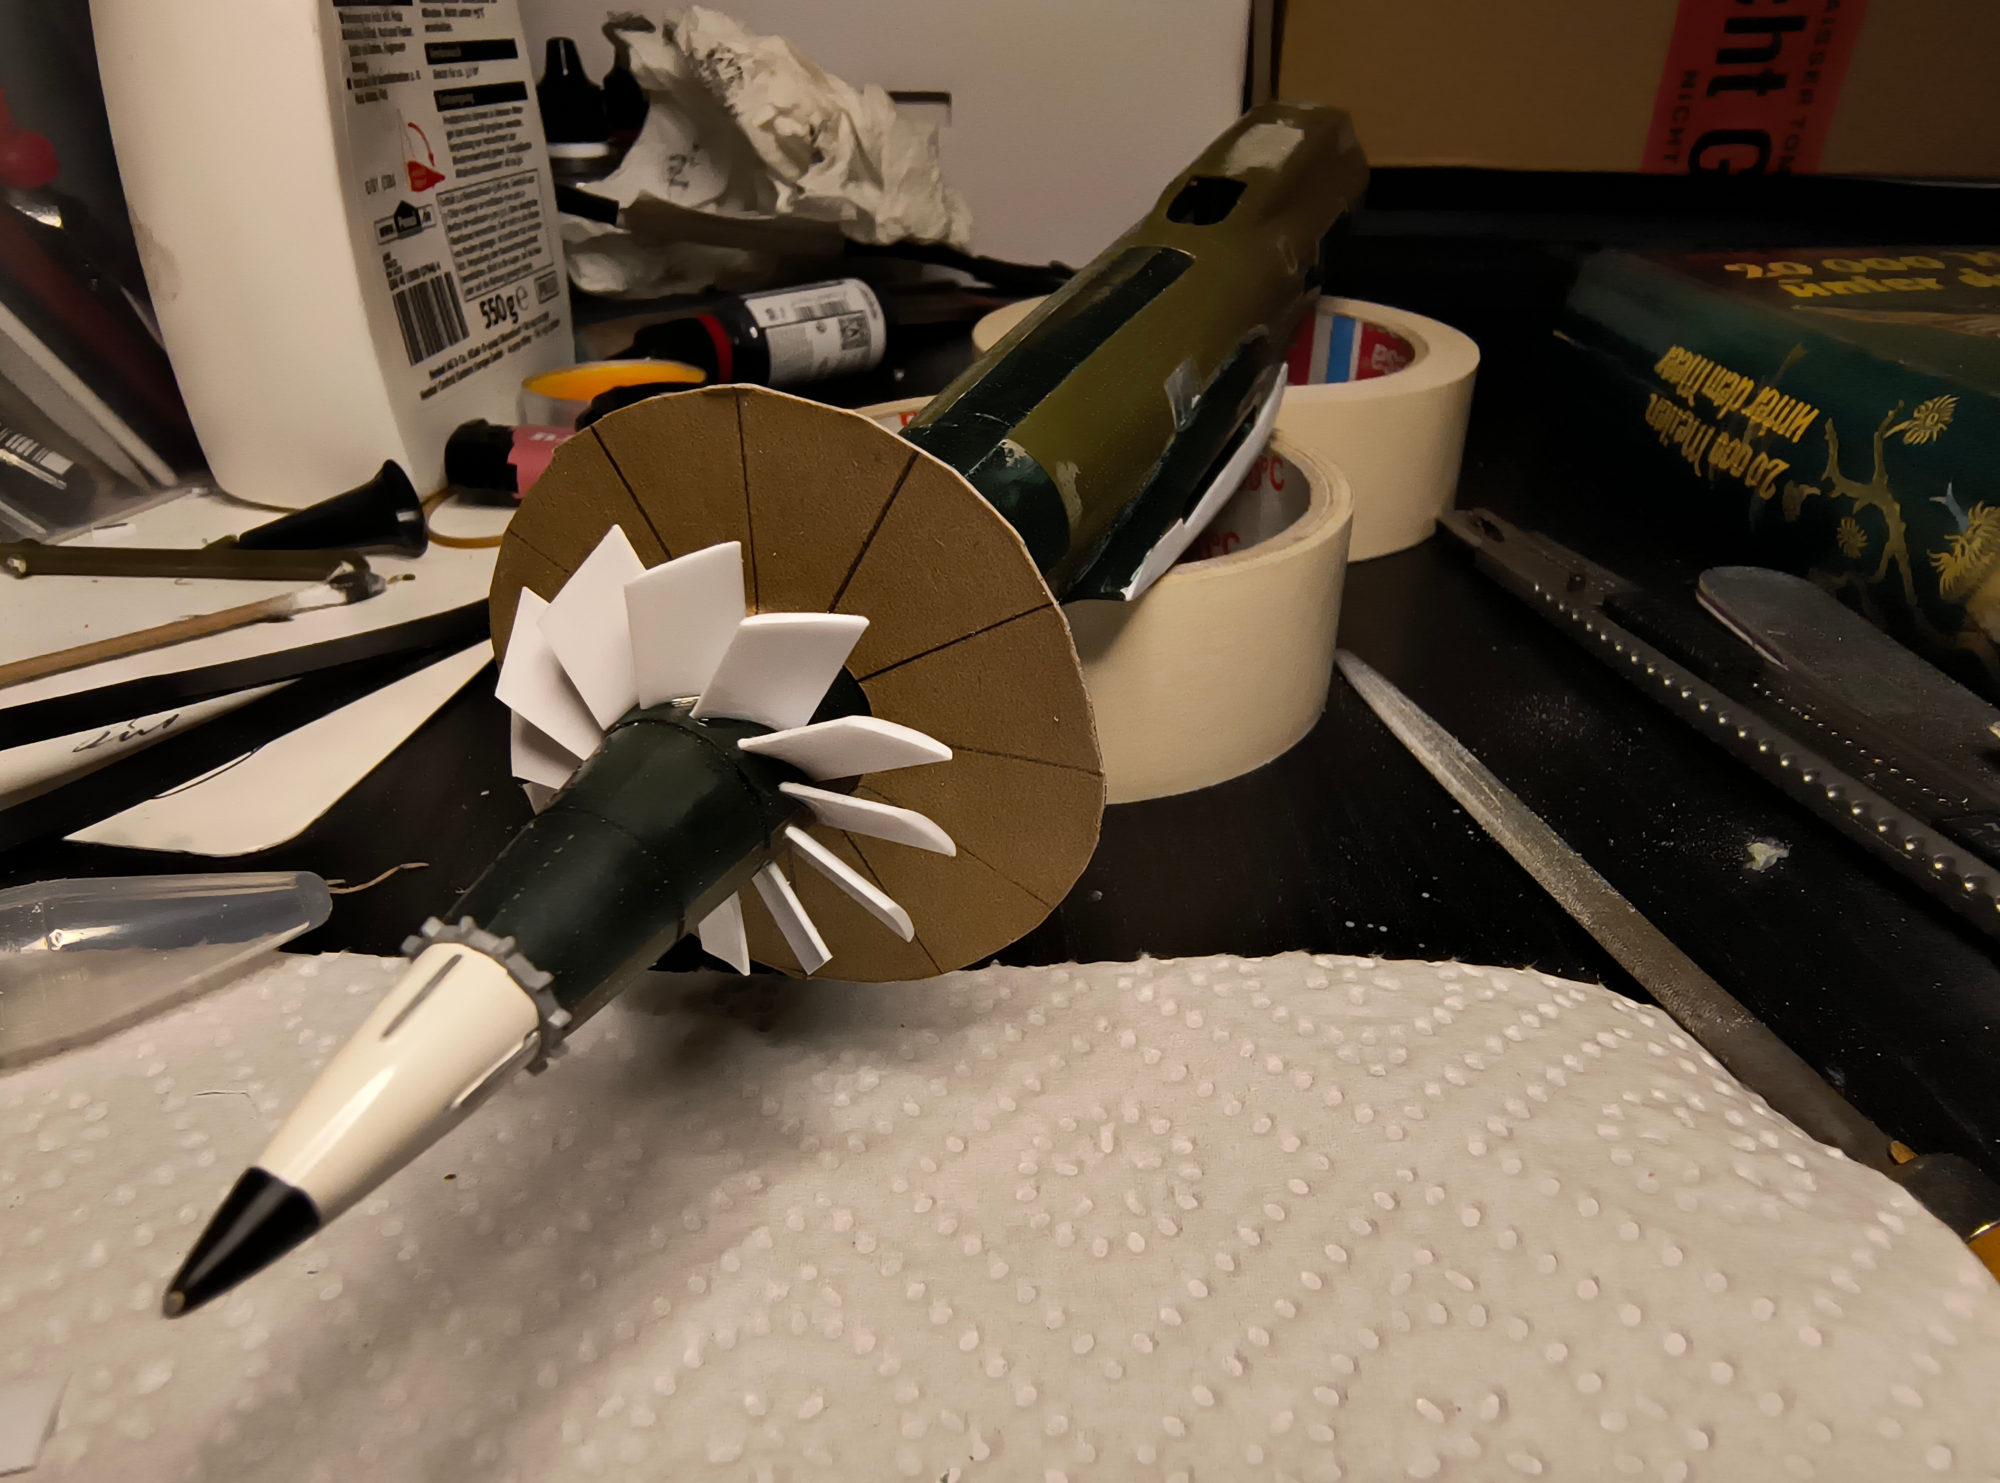
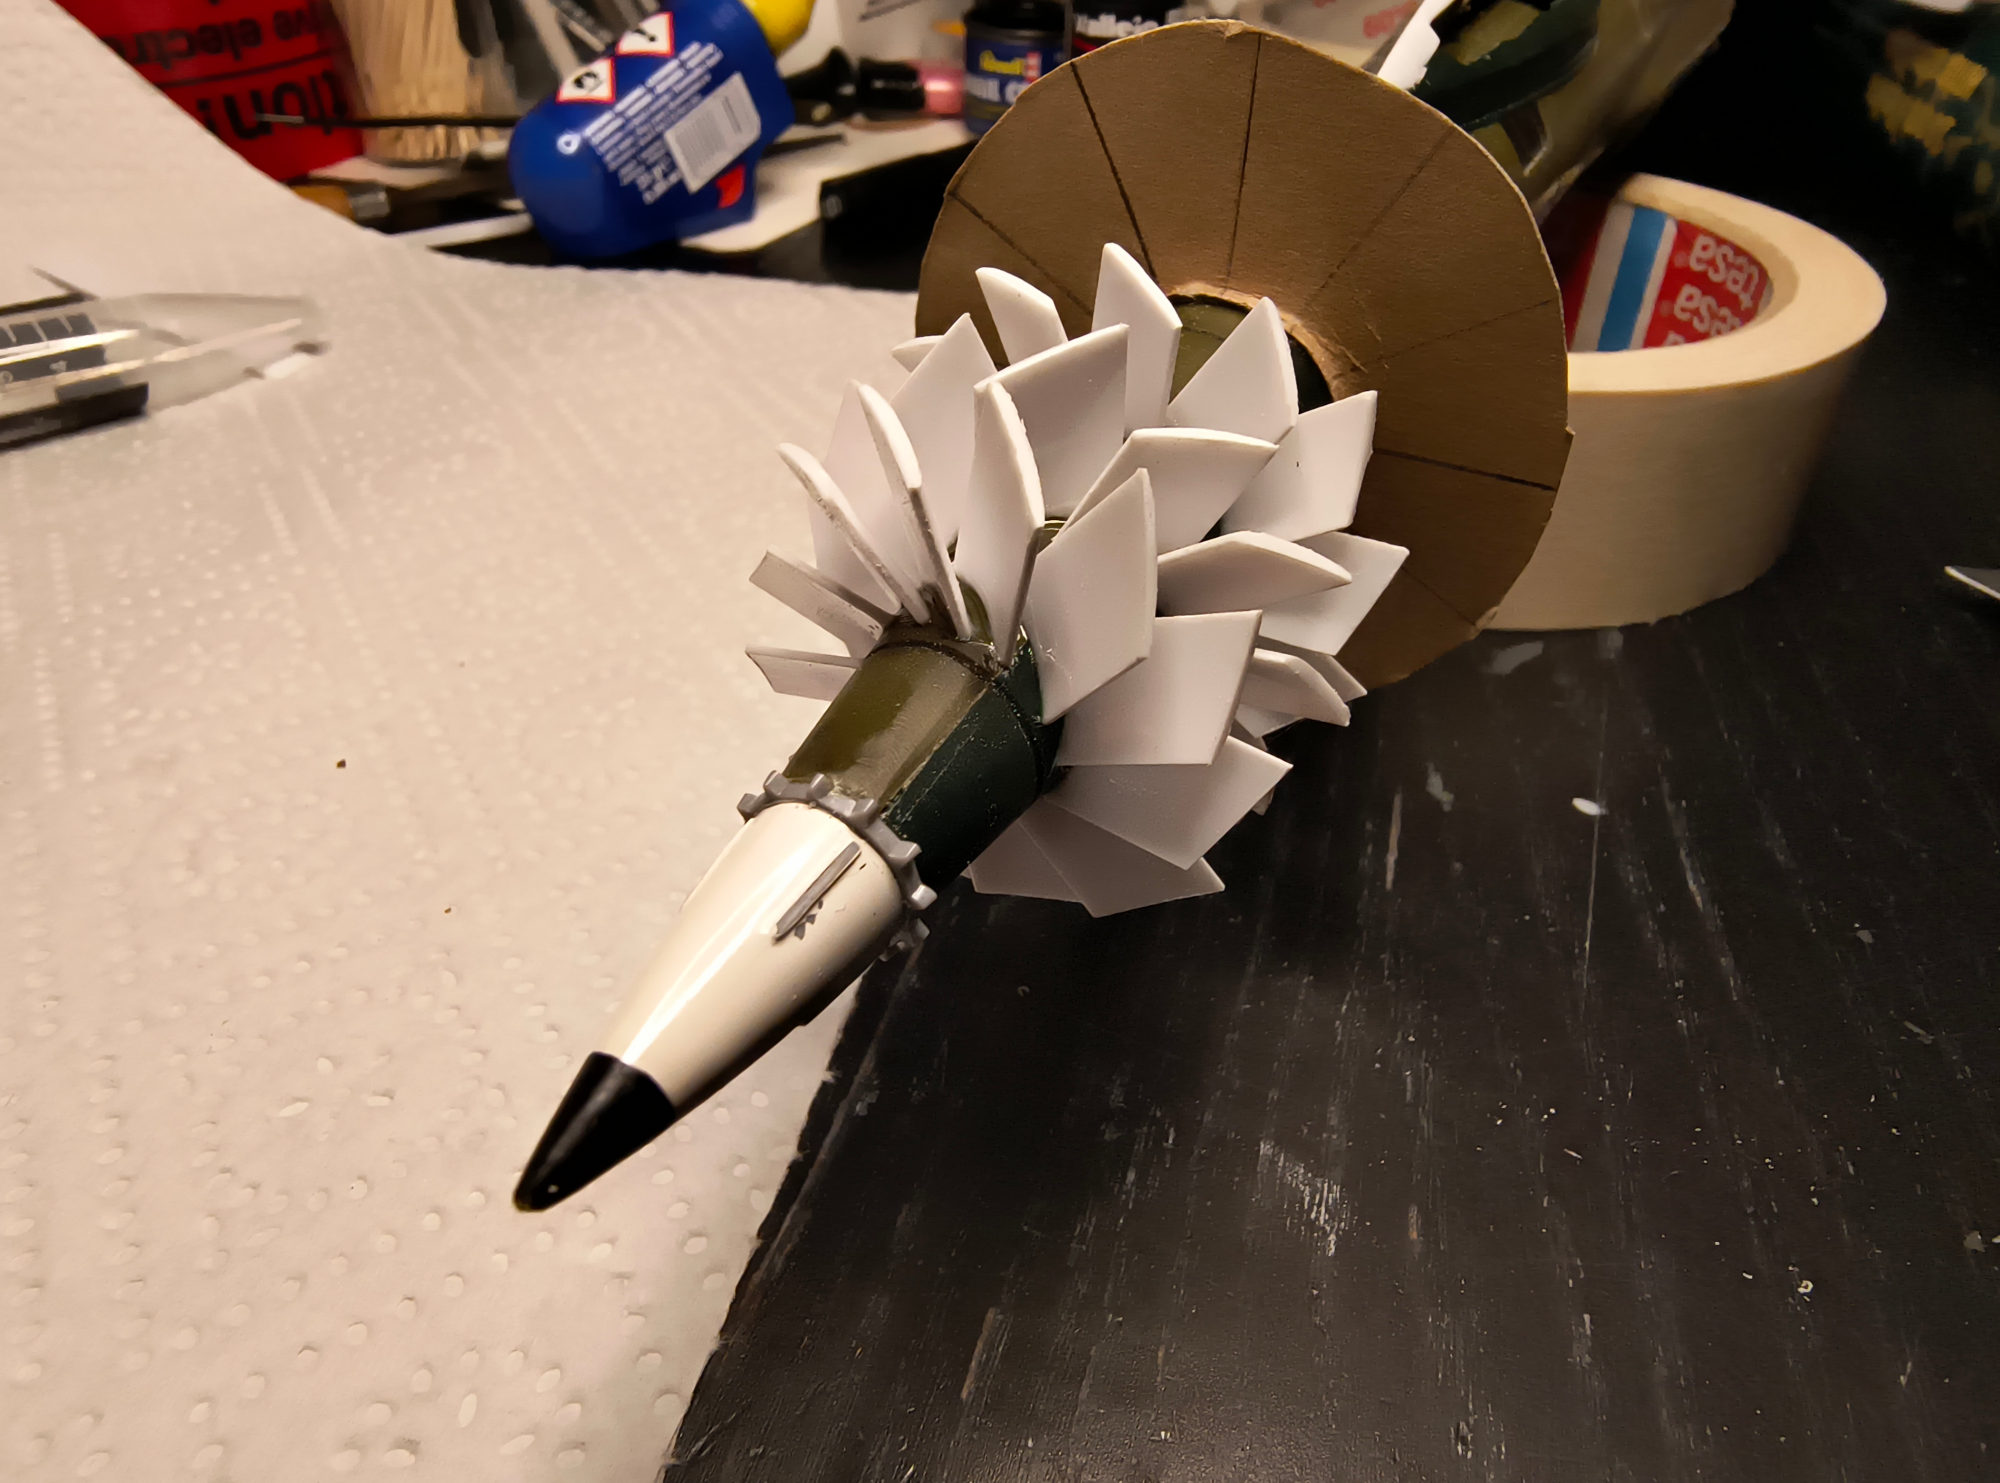
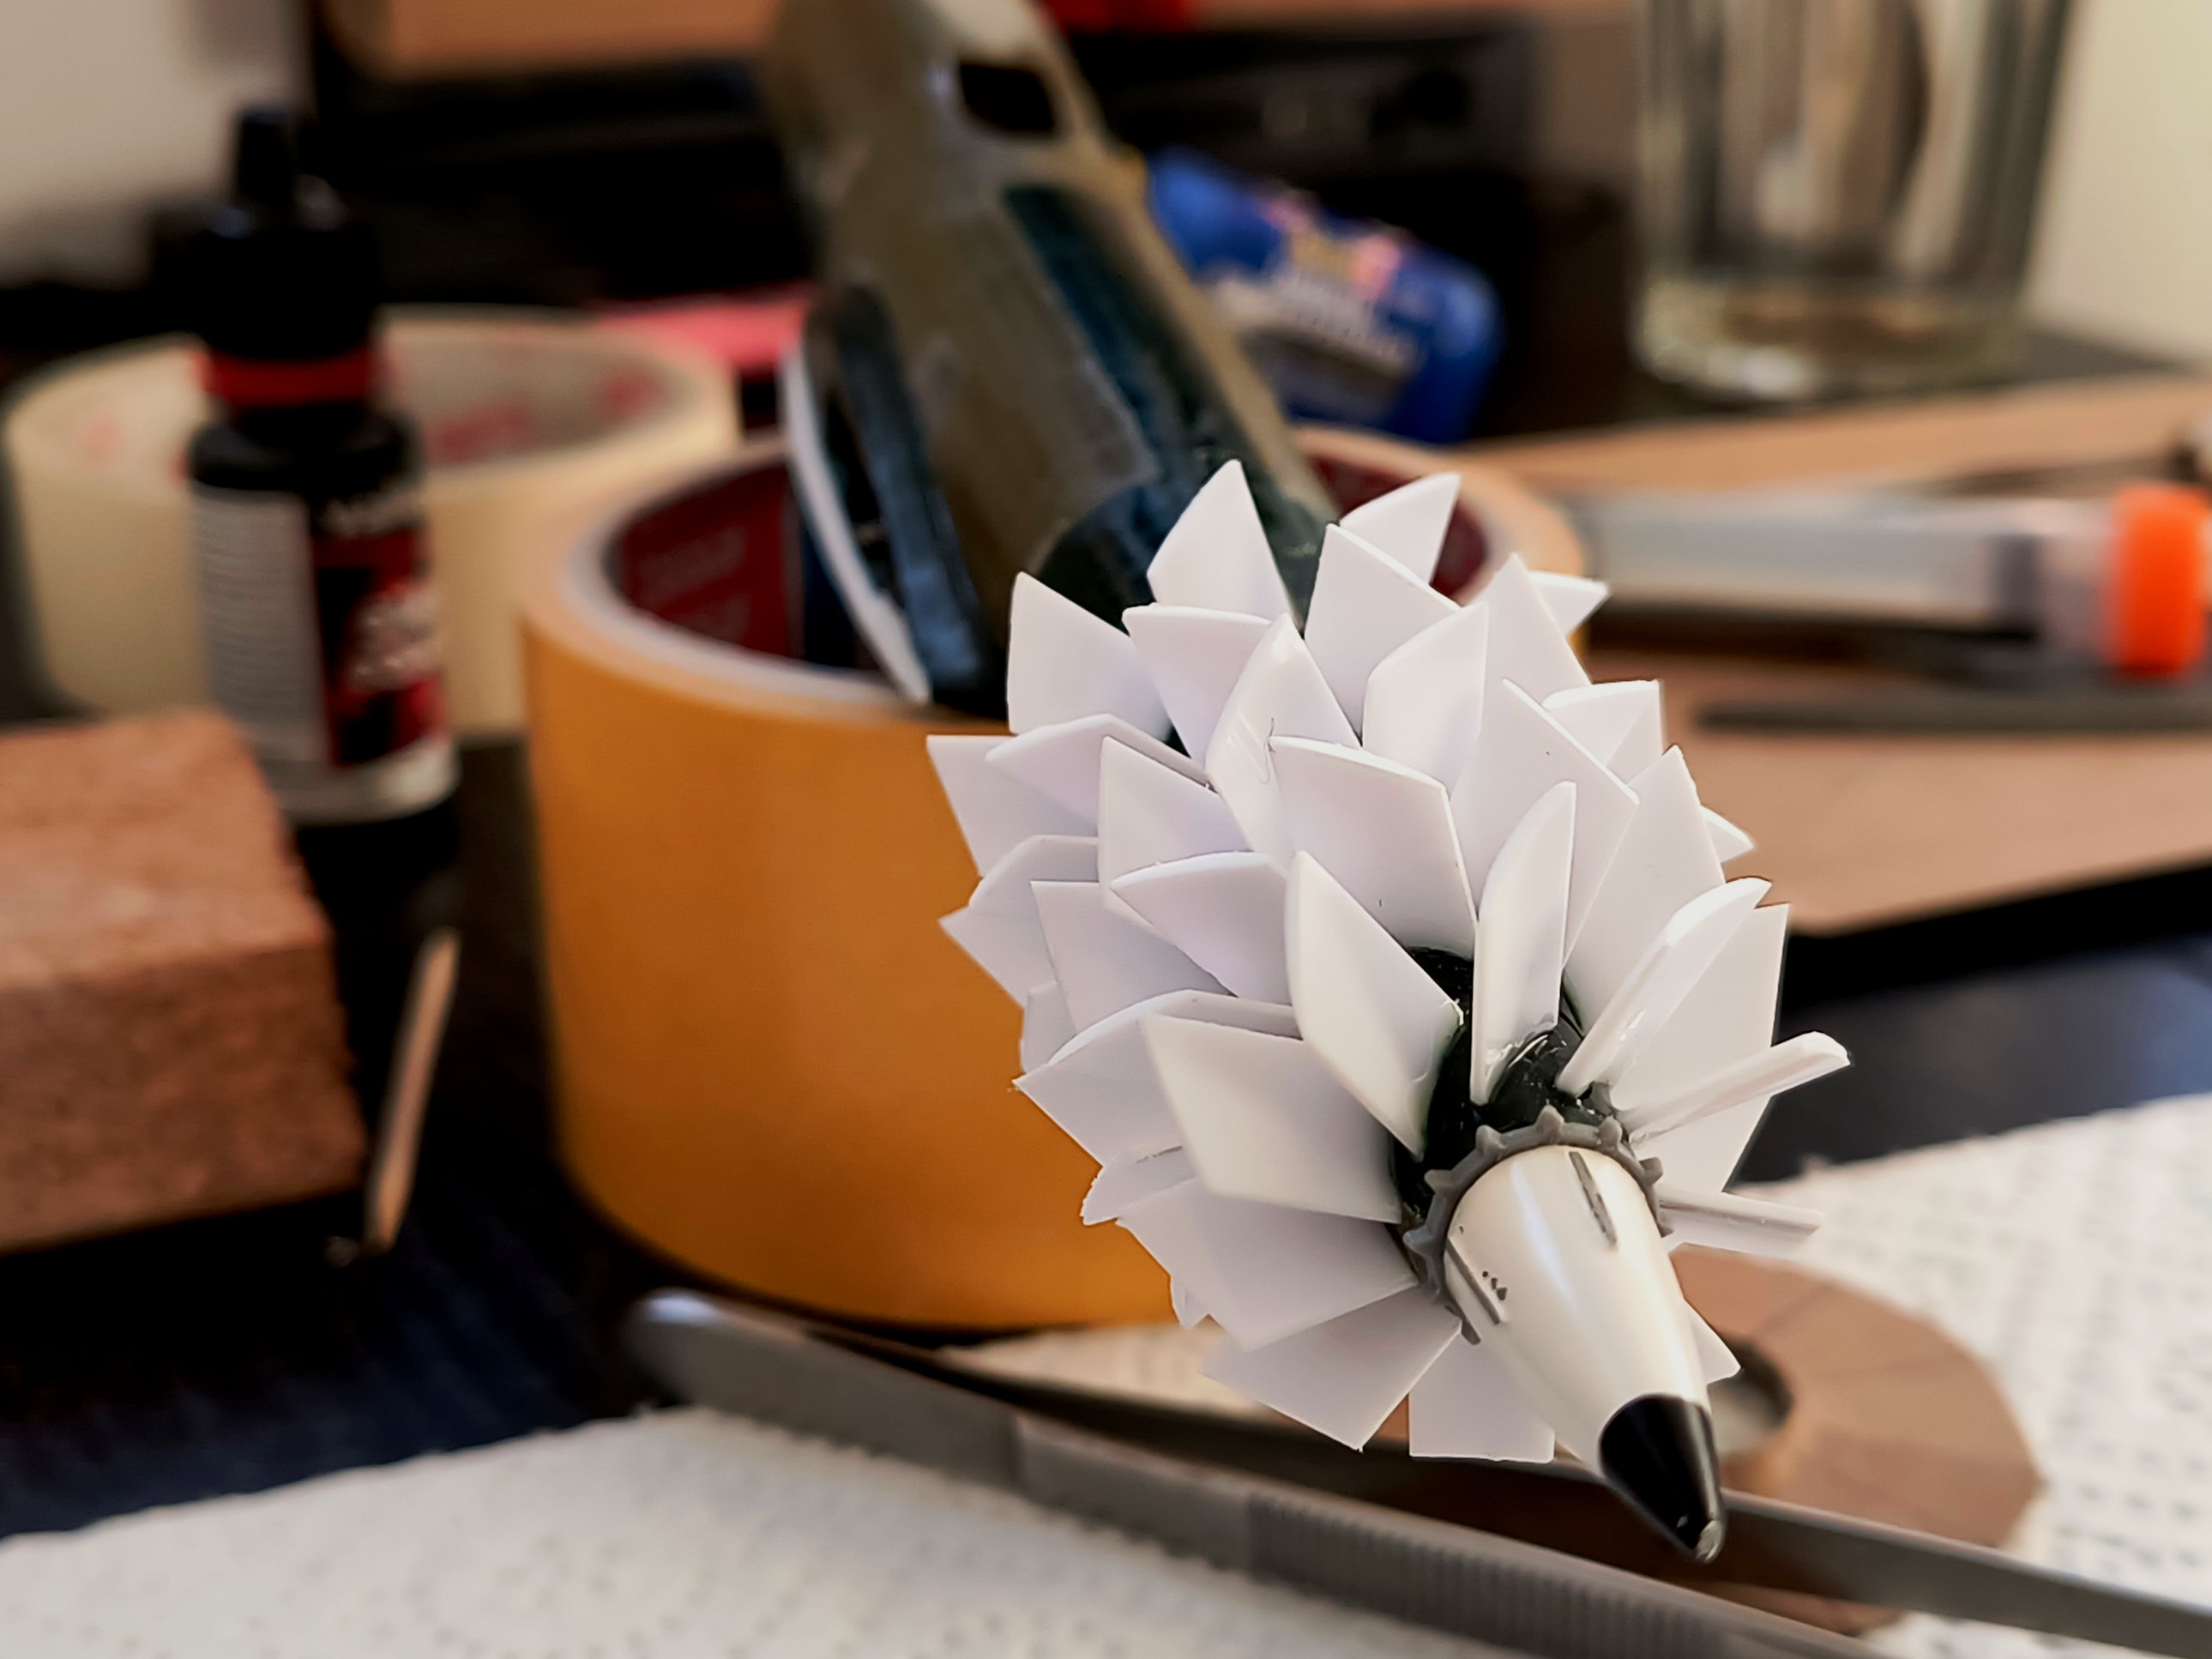
The standard wing engines are used for the “compressor driven pneumatic power transmission to the central rear prop system” . 4 engines are better under safety aspects. The central drive will produce a surprisingly bigger speed compared to standard systems .
Please look at the added air intake between the engines !
It is 3x bigger than the air intake of a Messerschmitt 262 .
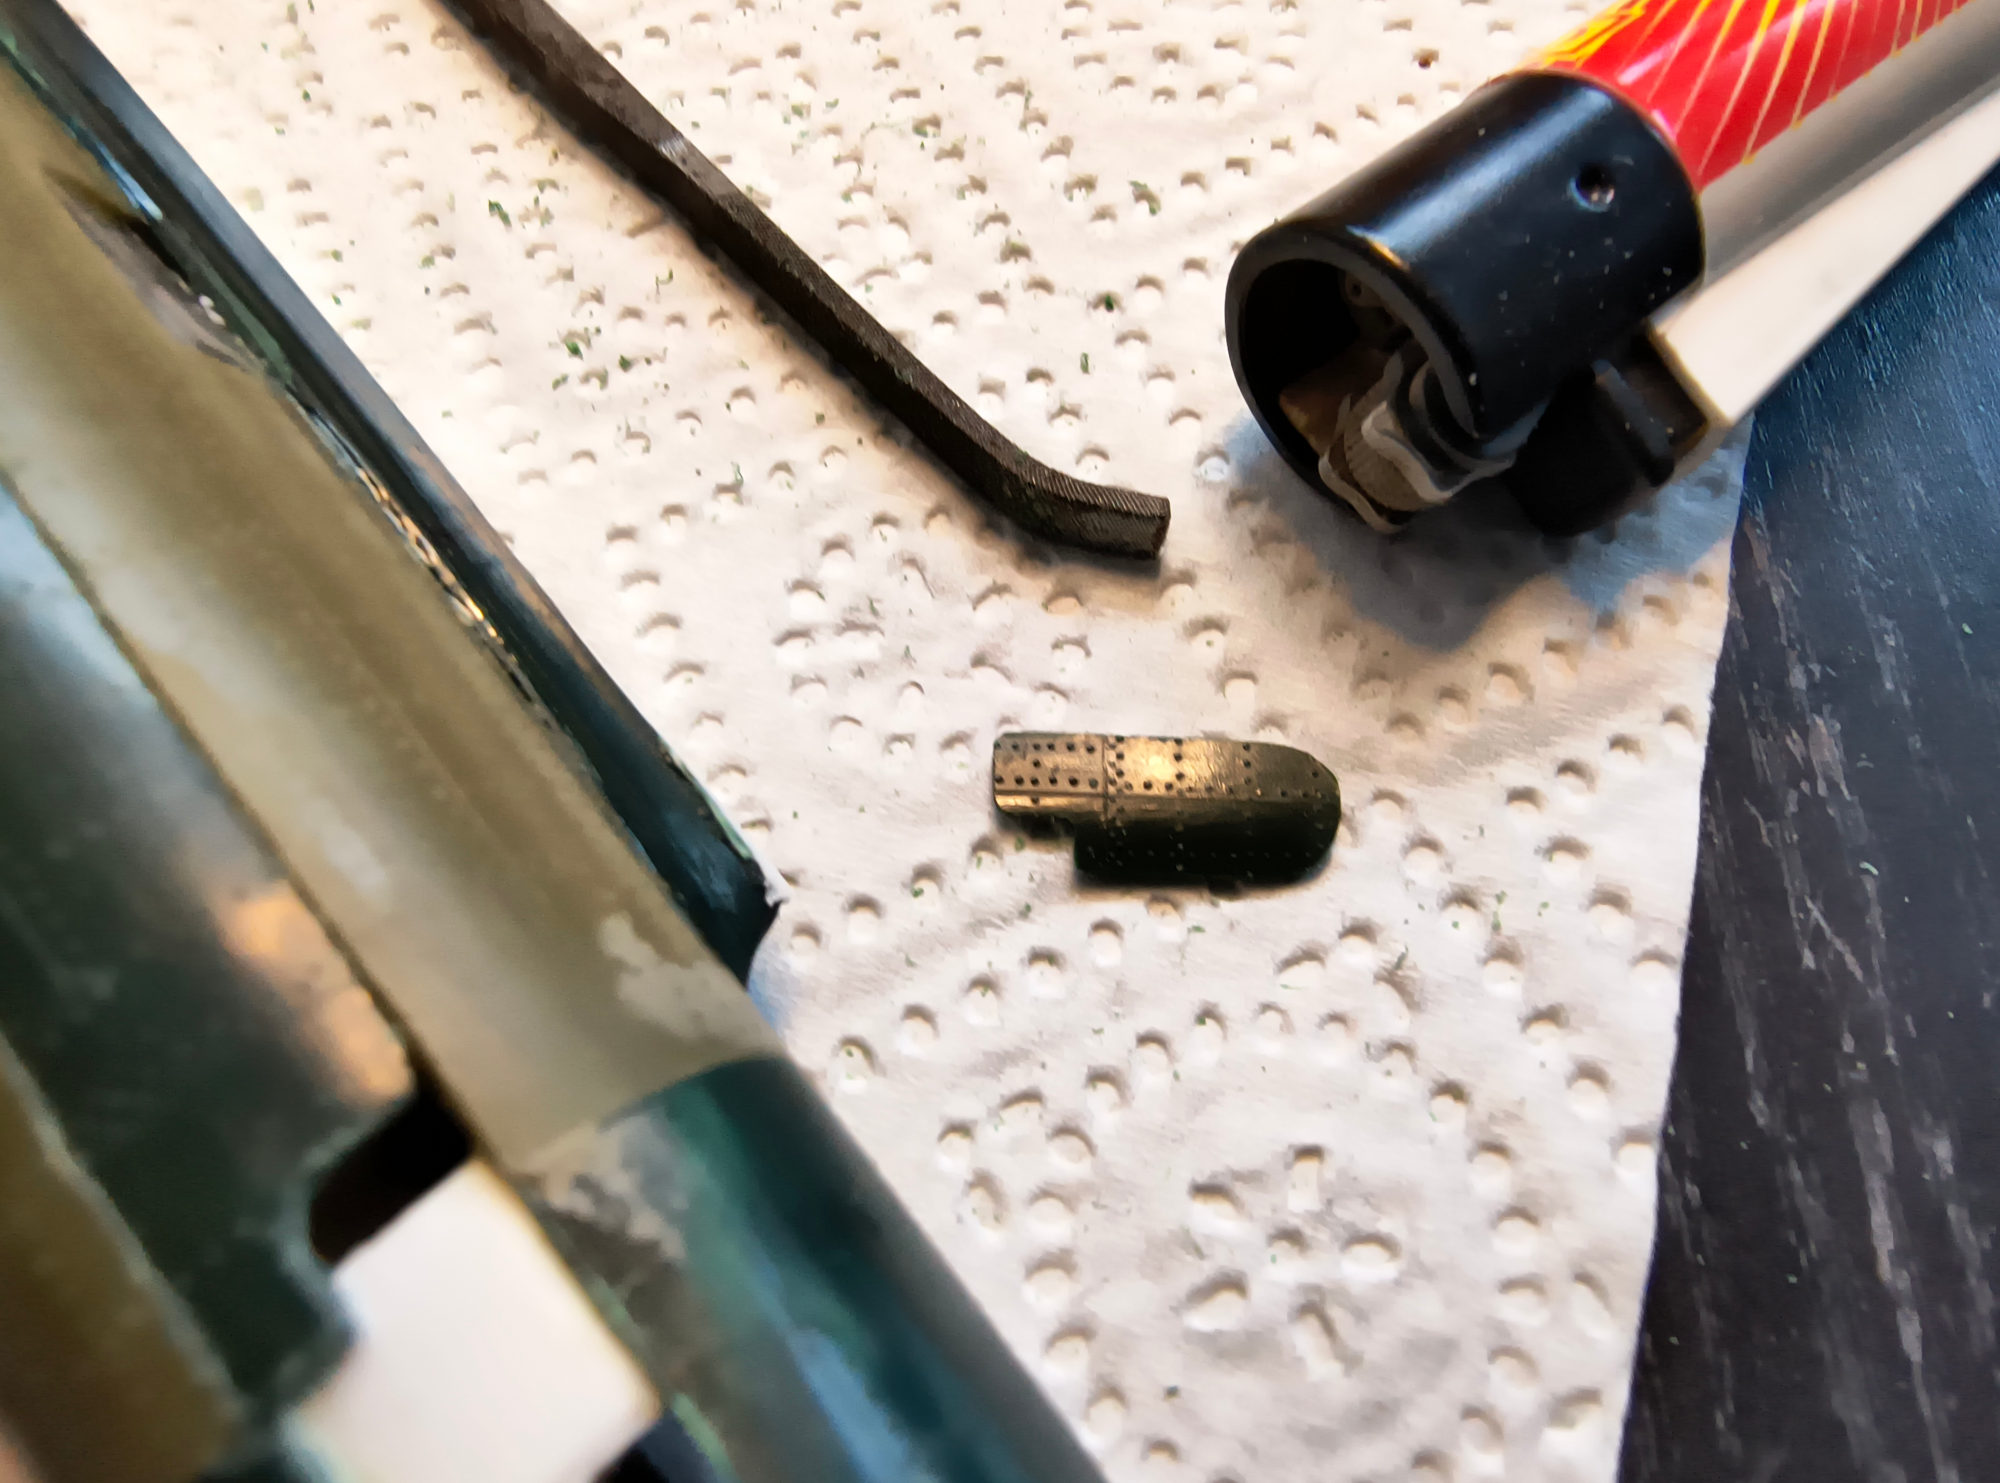
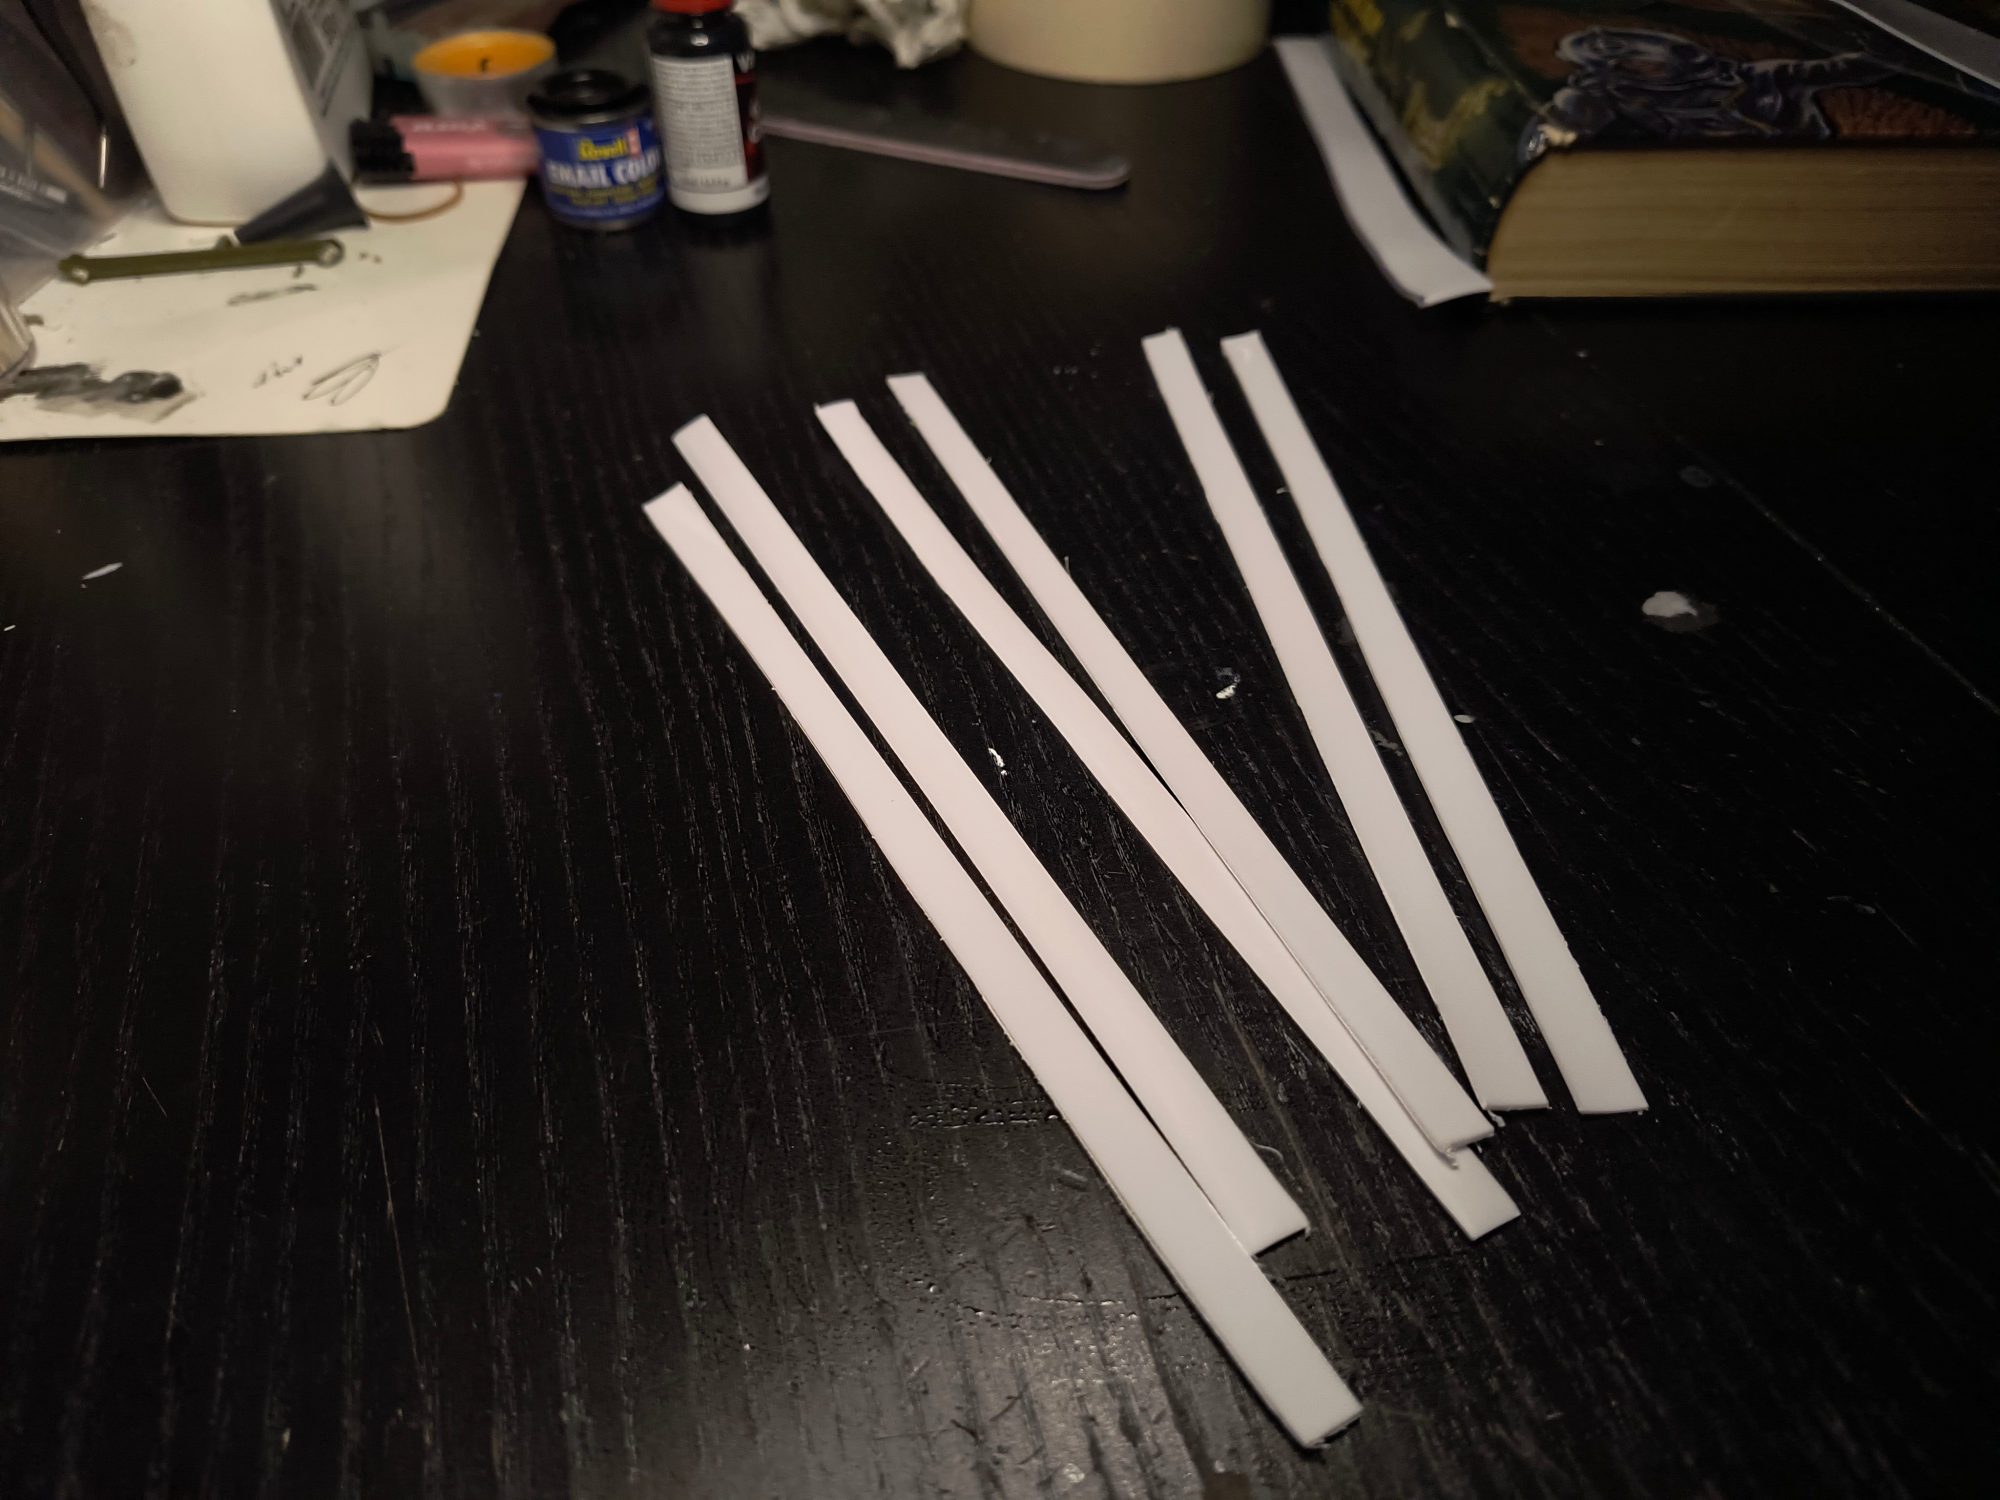
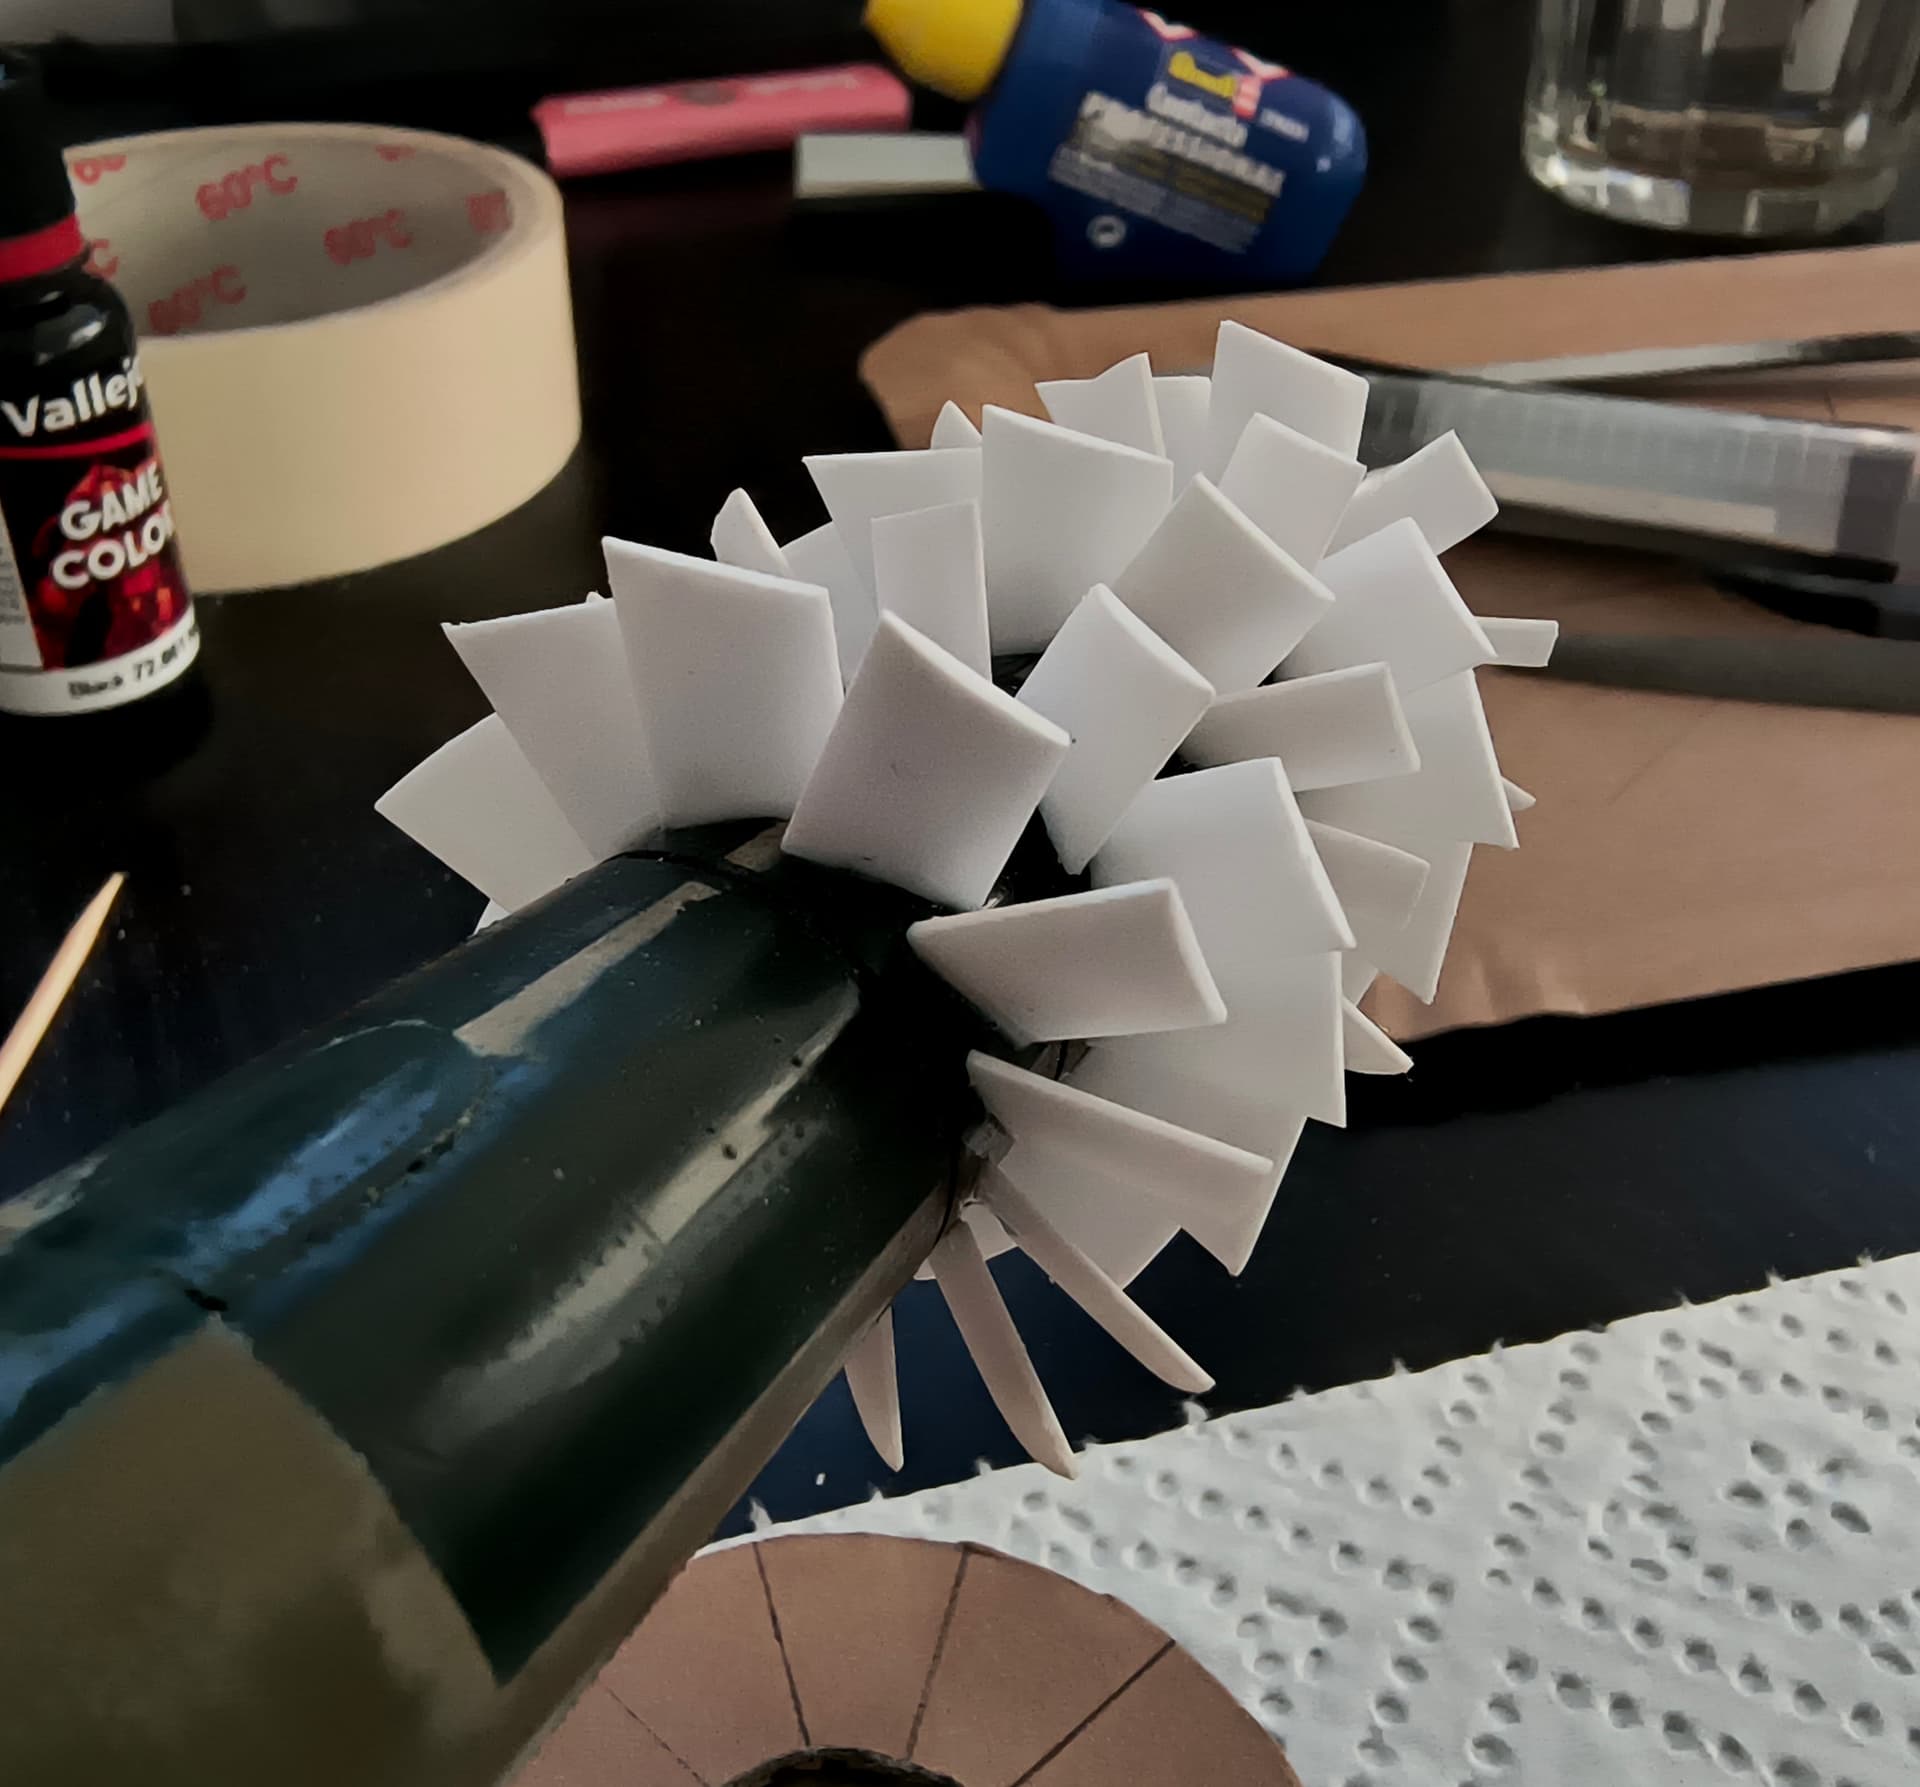
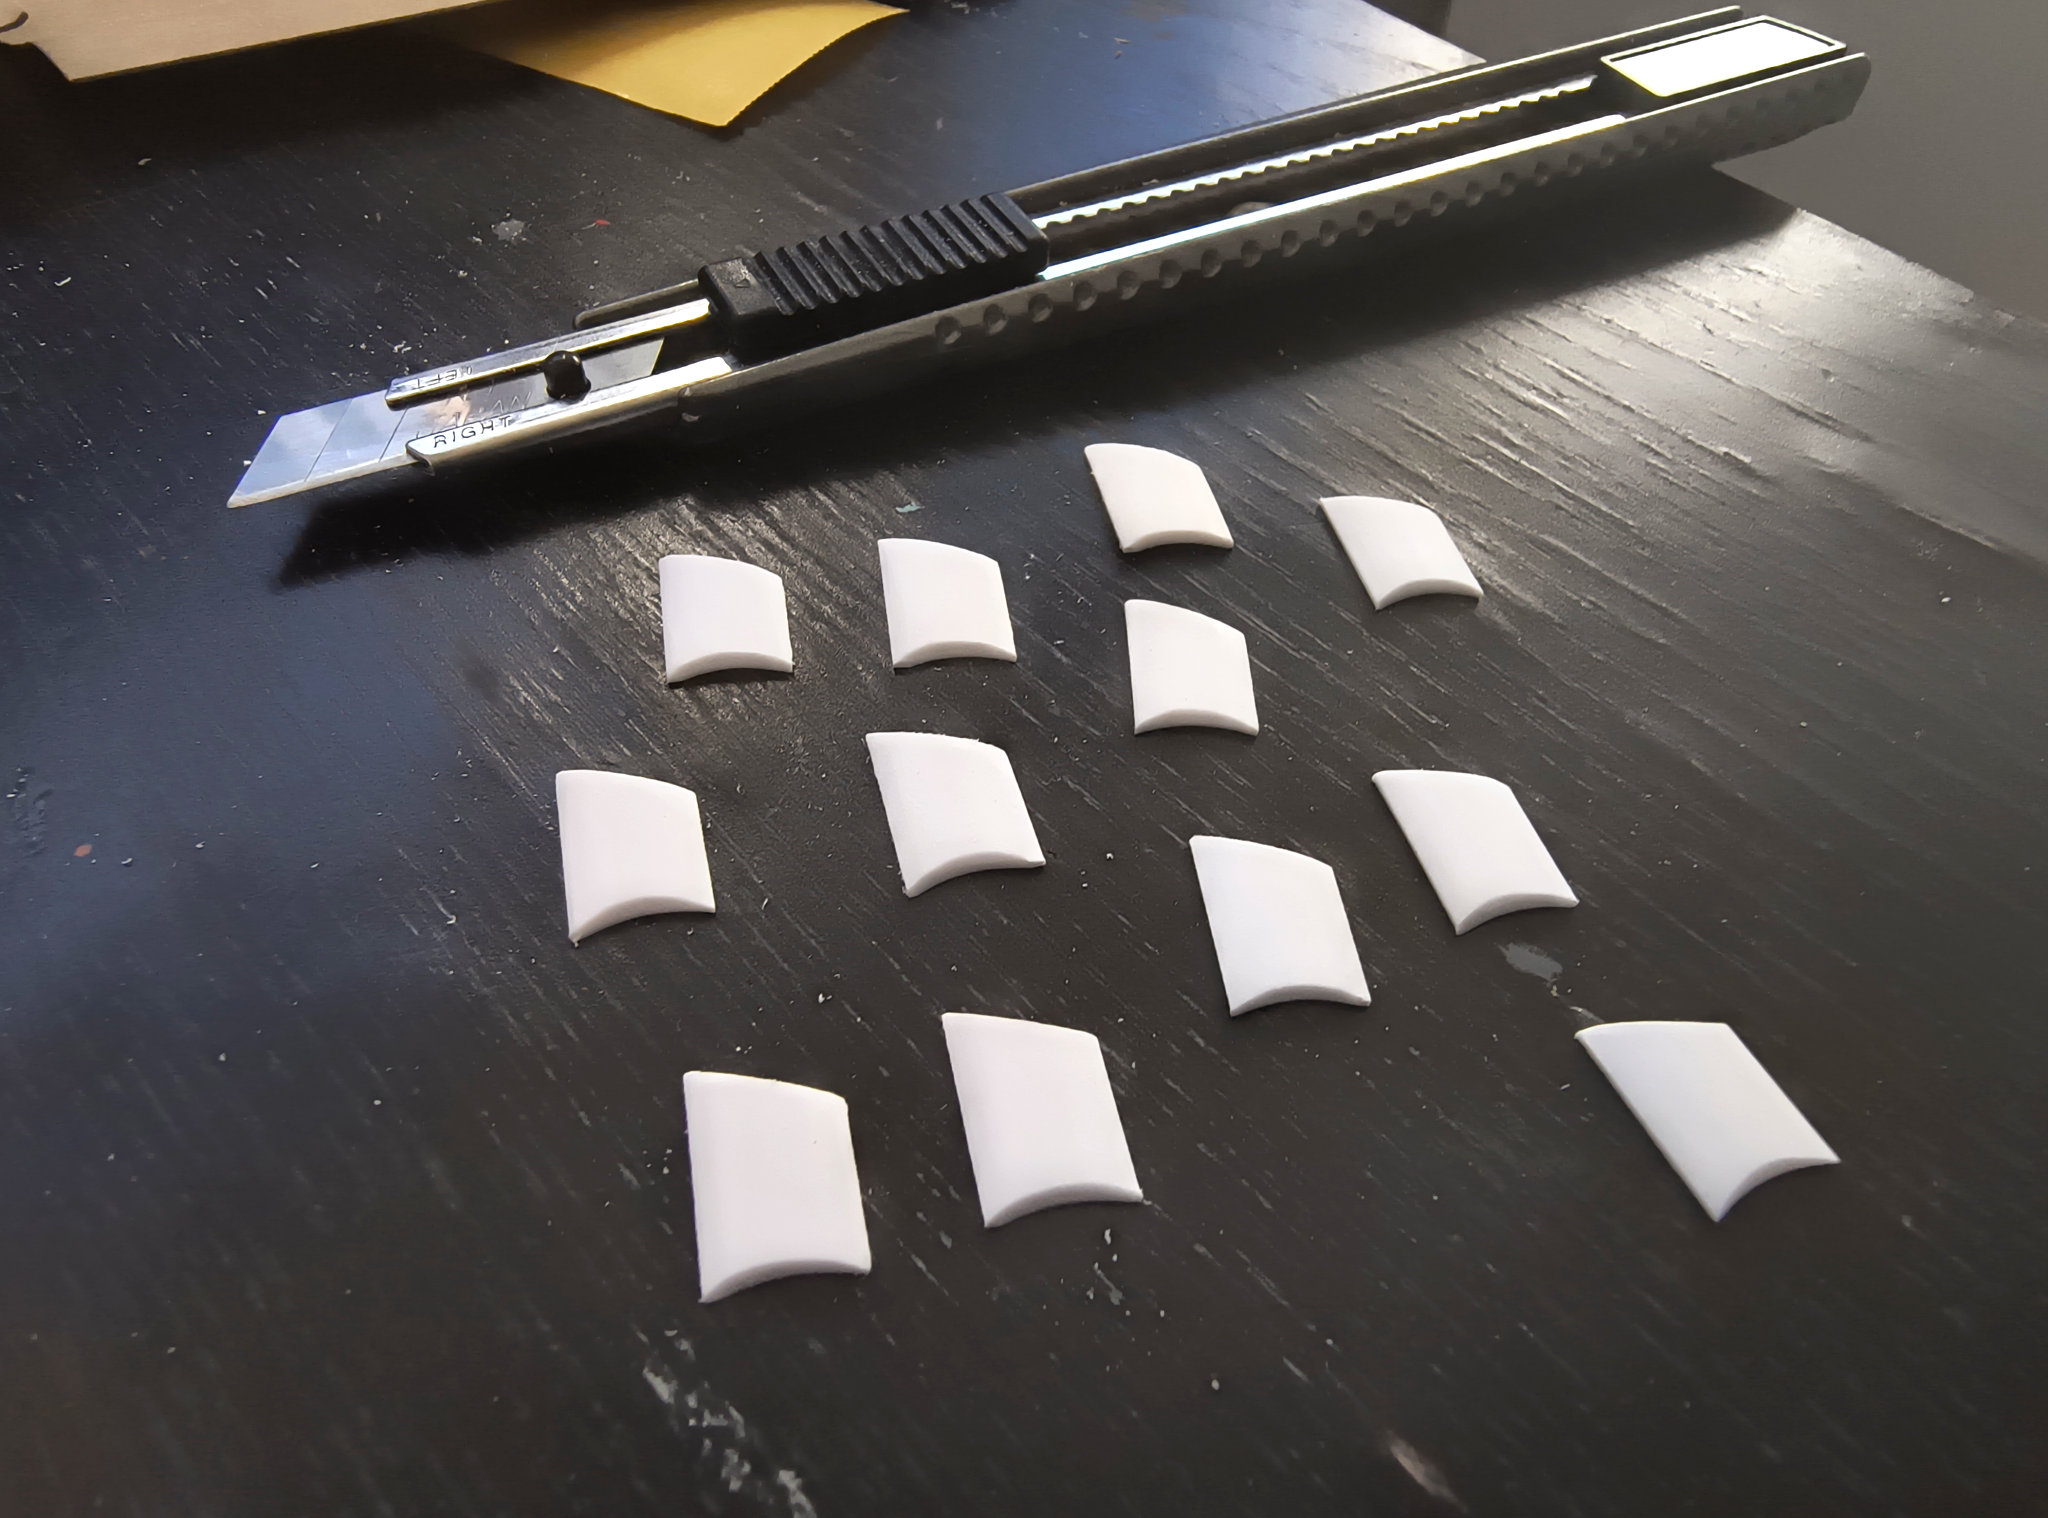
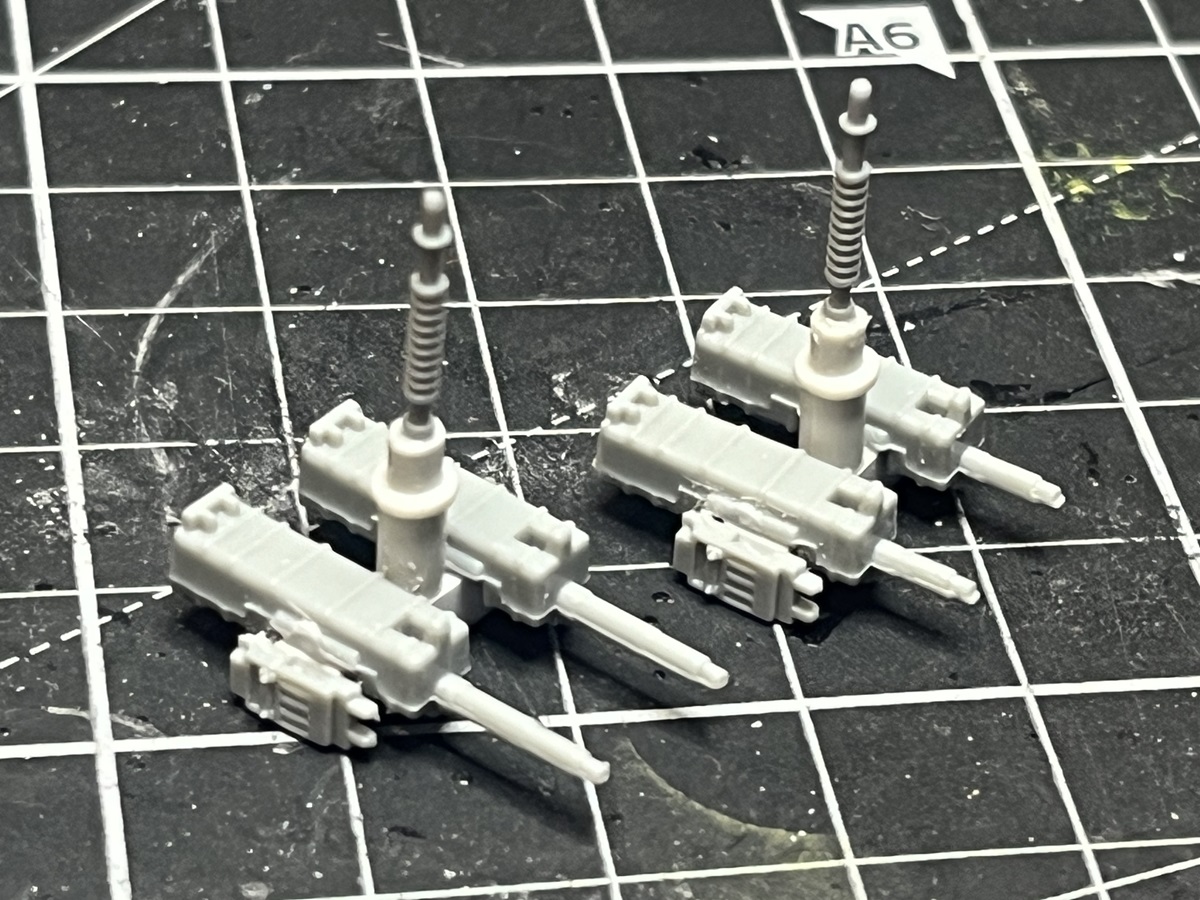
The rear spinner is in place, so i have to work on the lines of the rotating sections for the props , i think 4-5 props with 10-12 blades per section .
I need to find out how to get the blades in shape , with heat and pressure , that problem should be solved next week. Than we have a WORKING WEEKEND at the club , funny event, and one month later a exhibition .
“What is this, some kind of enemy code? … Hans! Bring the Enigma Machine… Schnell!”
Well, I can explain… The Wash didn’t act exactly as I expected, but after a wipe-down with Isopropyl alcohol, it now looks like this. Still looks weird, I know, but I’ll most likely be going back-and-forth until I find a happy balance before adding surface texture.
Yeah, I tend I agree… As it just so happens, I grabbed that bottle of Vallejo Dark Grey Wash (76.517) off the shelf by mistake, thinking it was the darker Vallejo Black Shade (73.201).
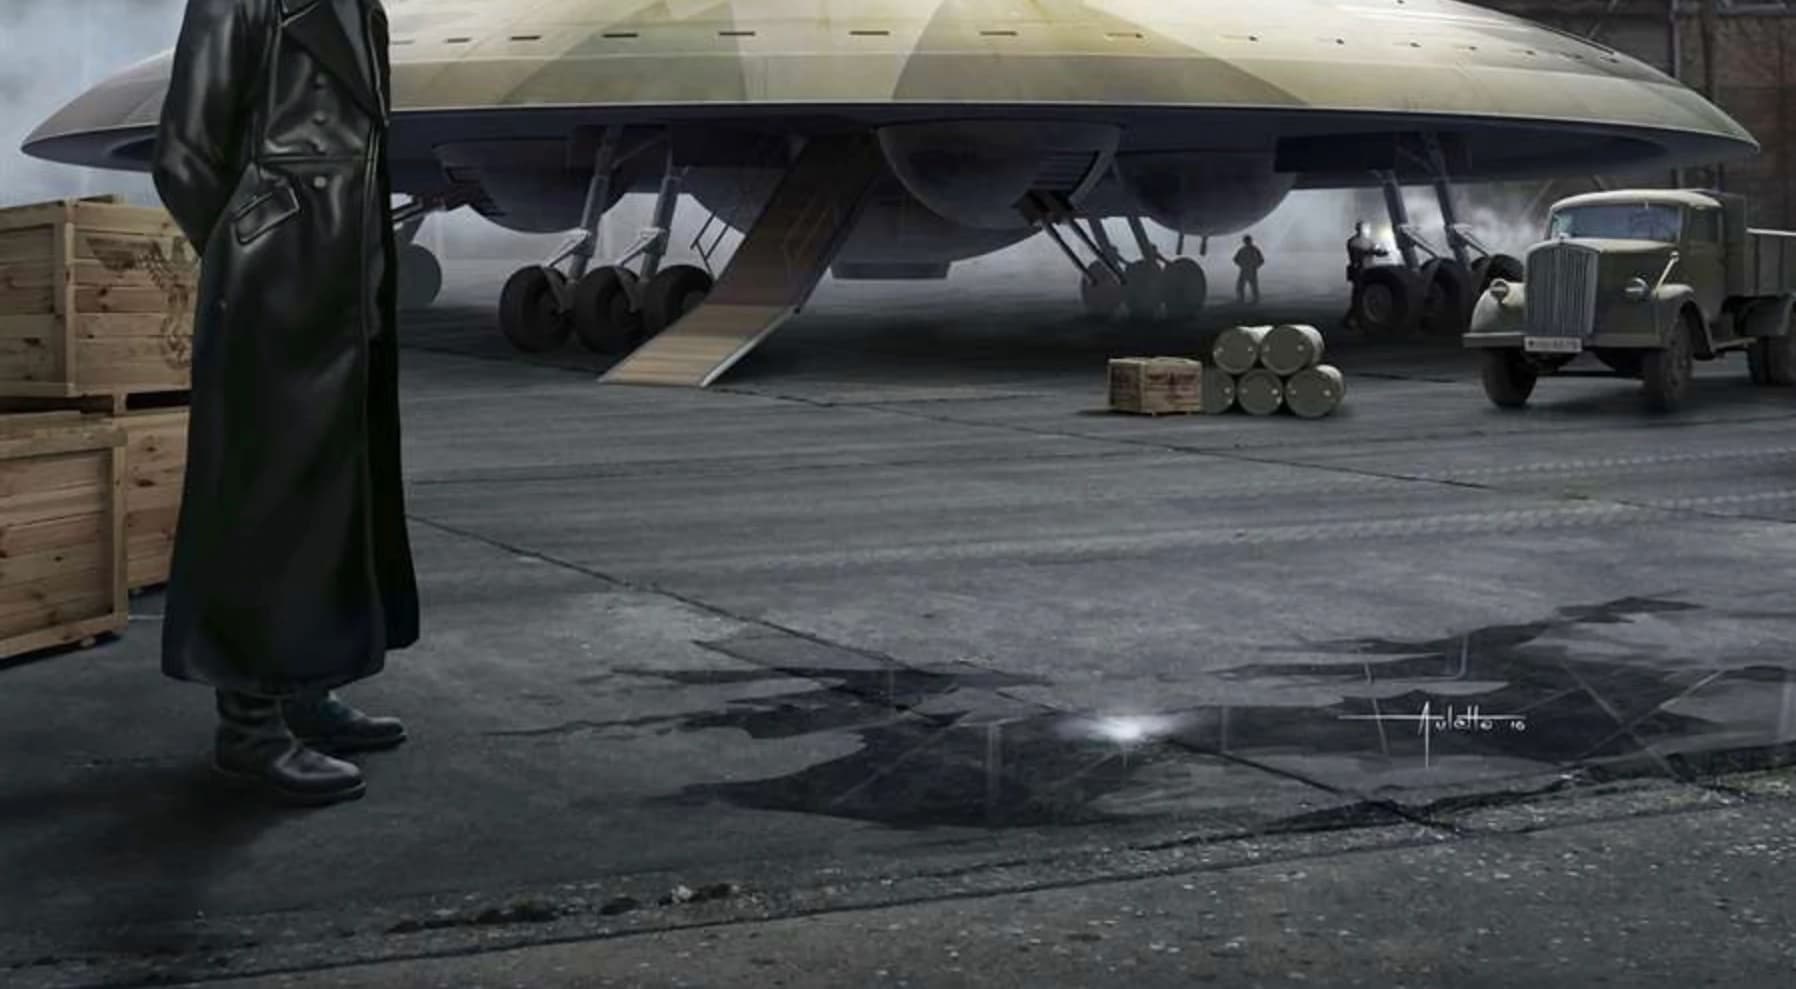
Mike , the first picture with the signs on the ground is so nice !! A beautiful piece of art !
But the result is also very good , do you do a layer of clear coat over the first and ad another washing ?
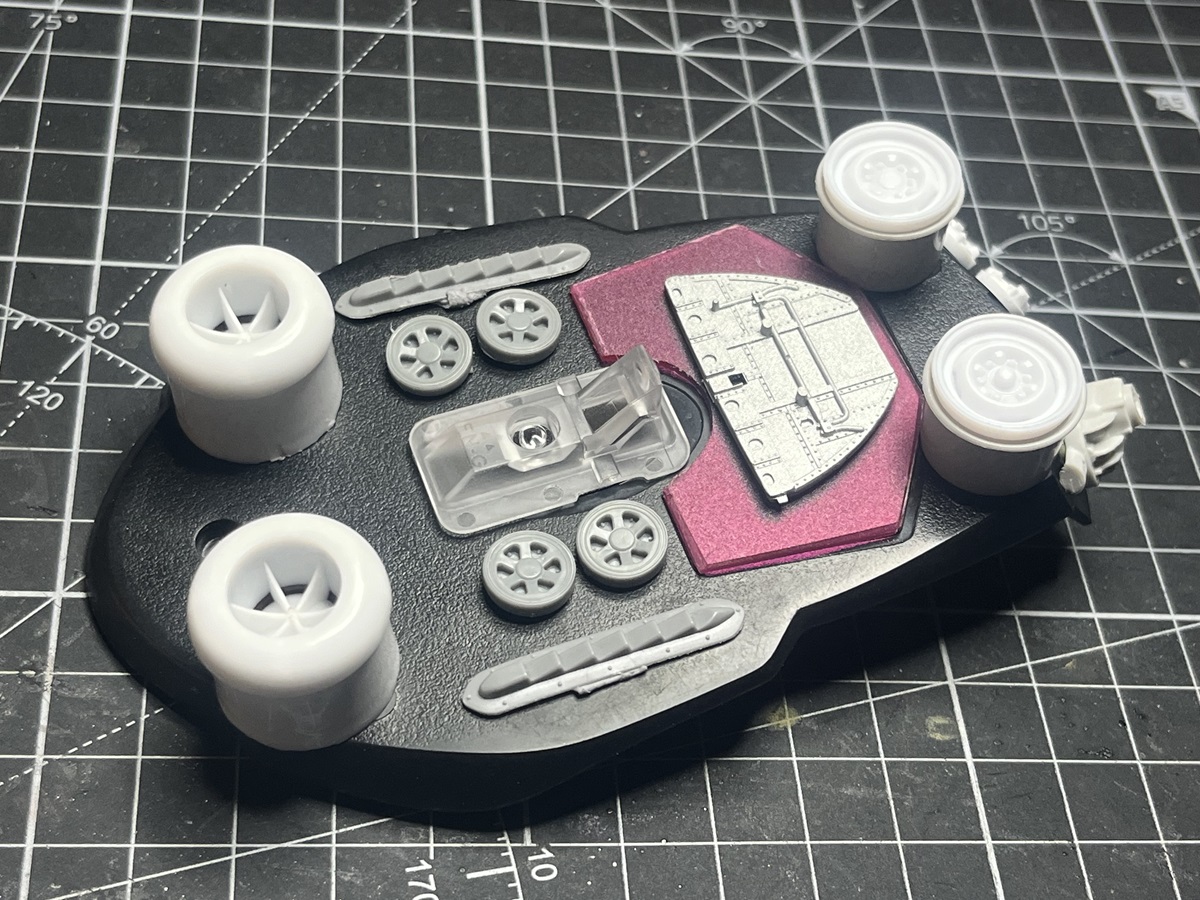
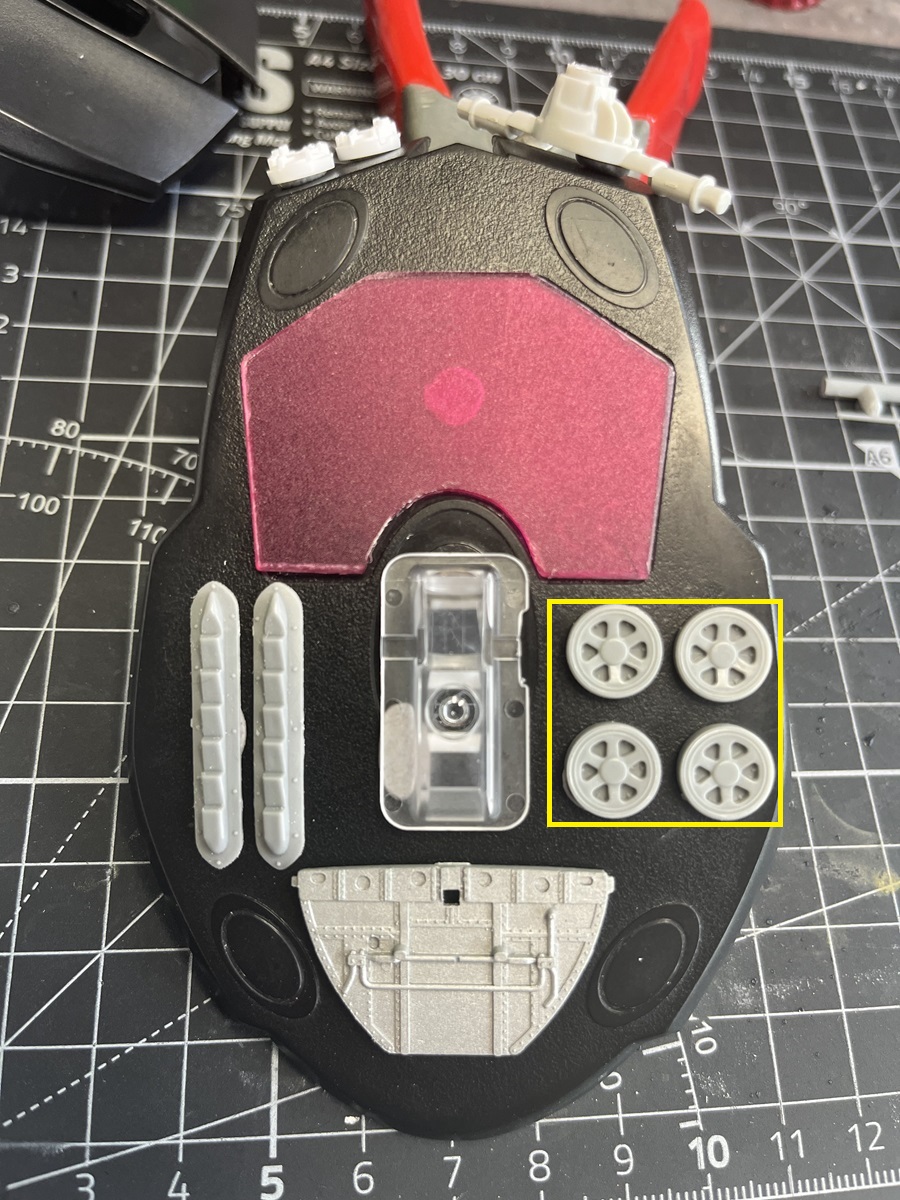
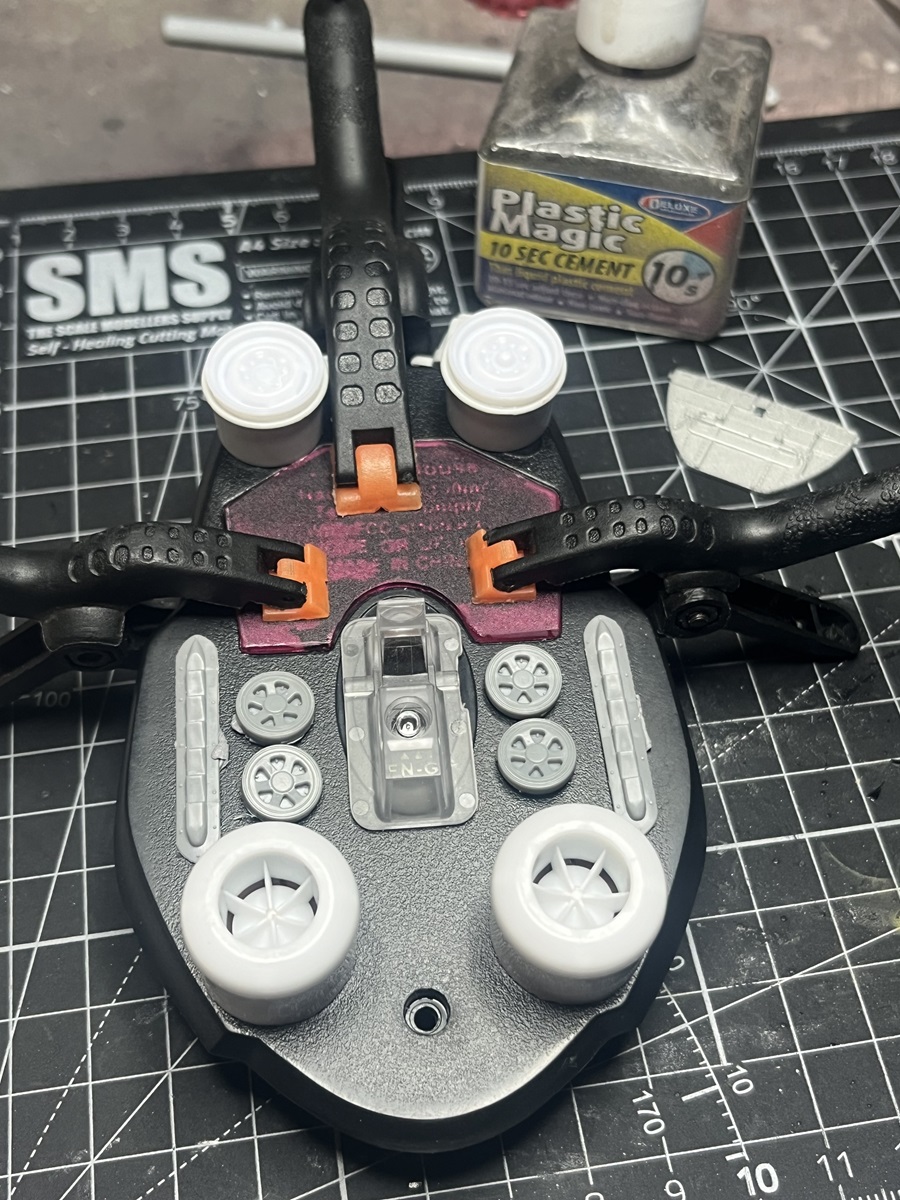
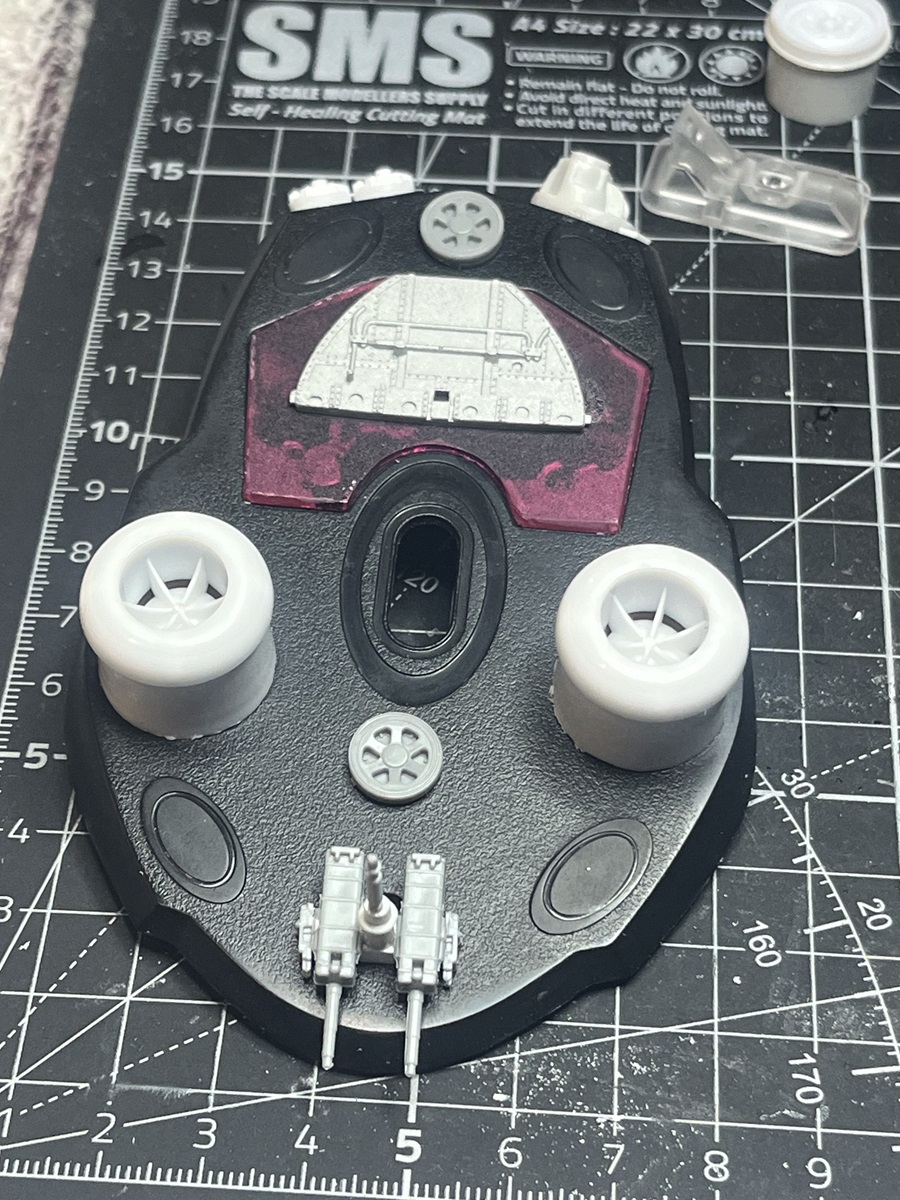
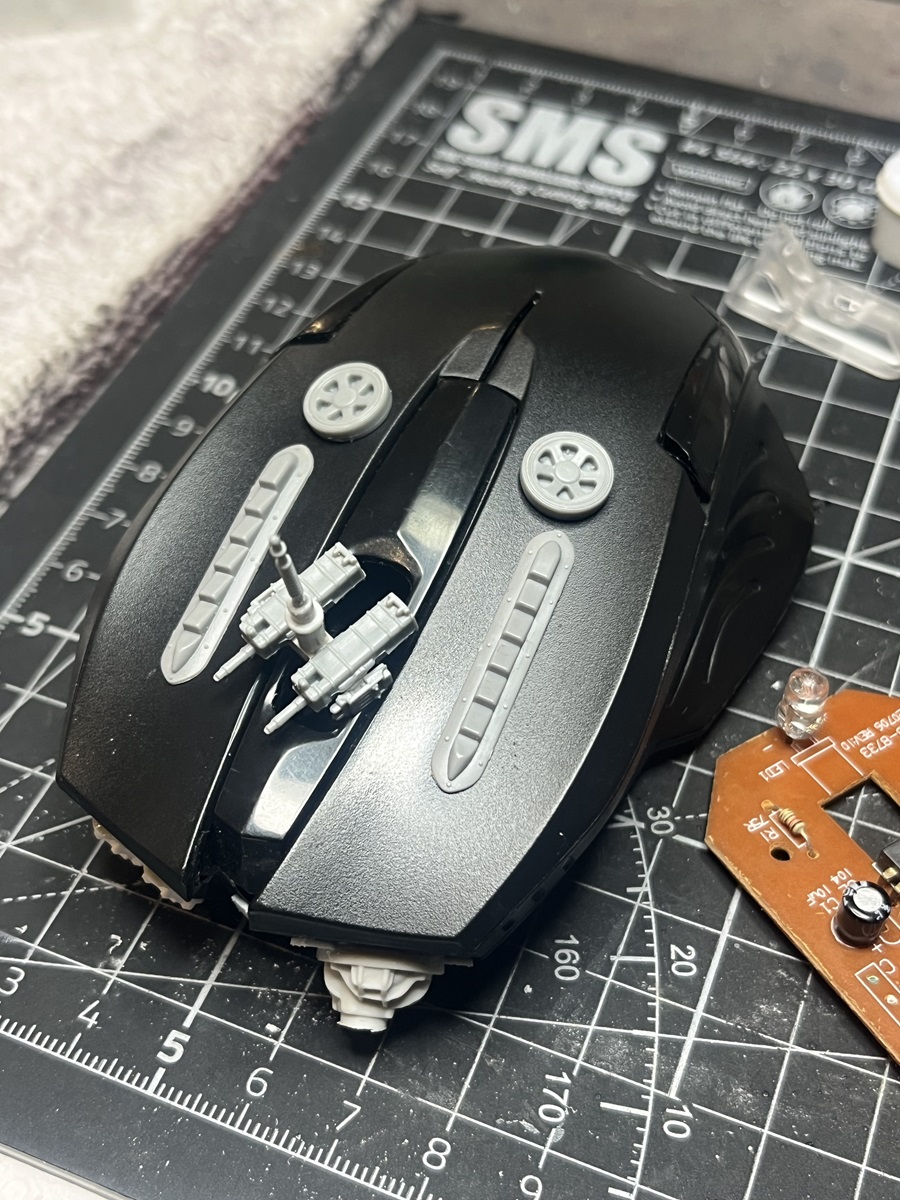
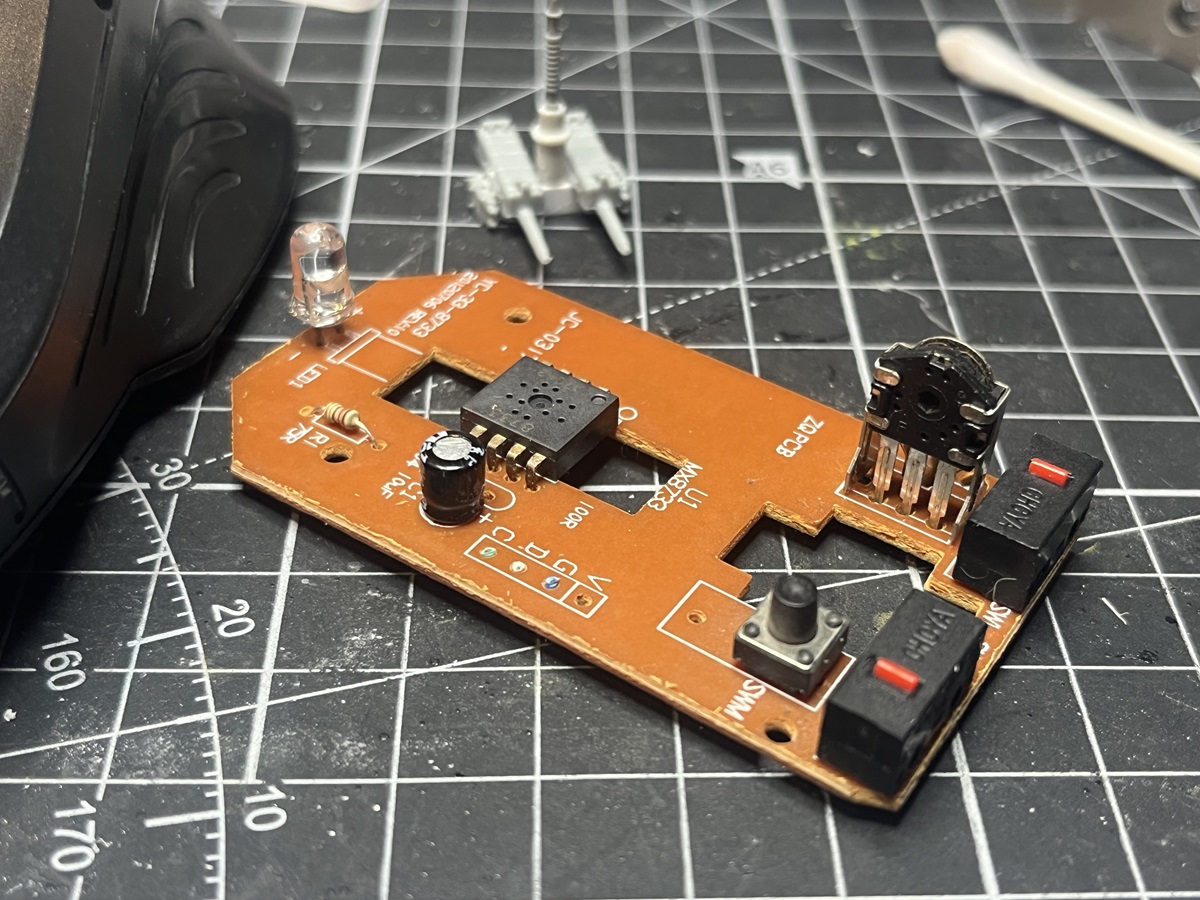
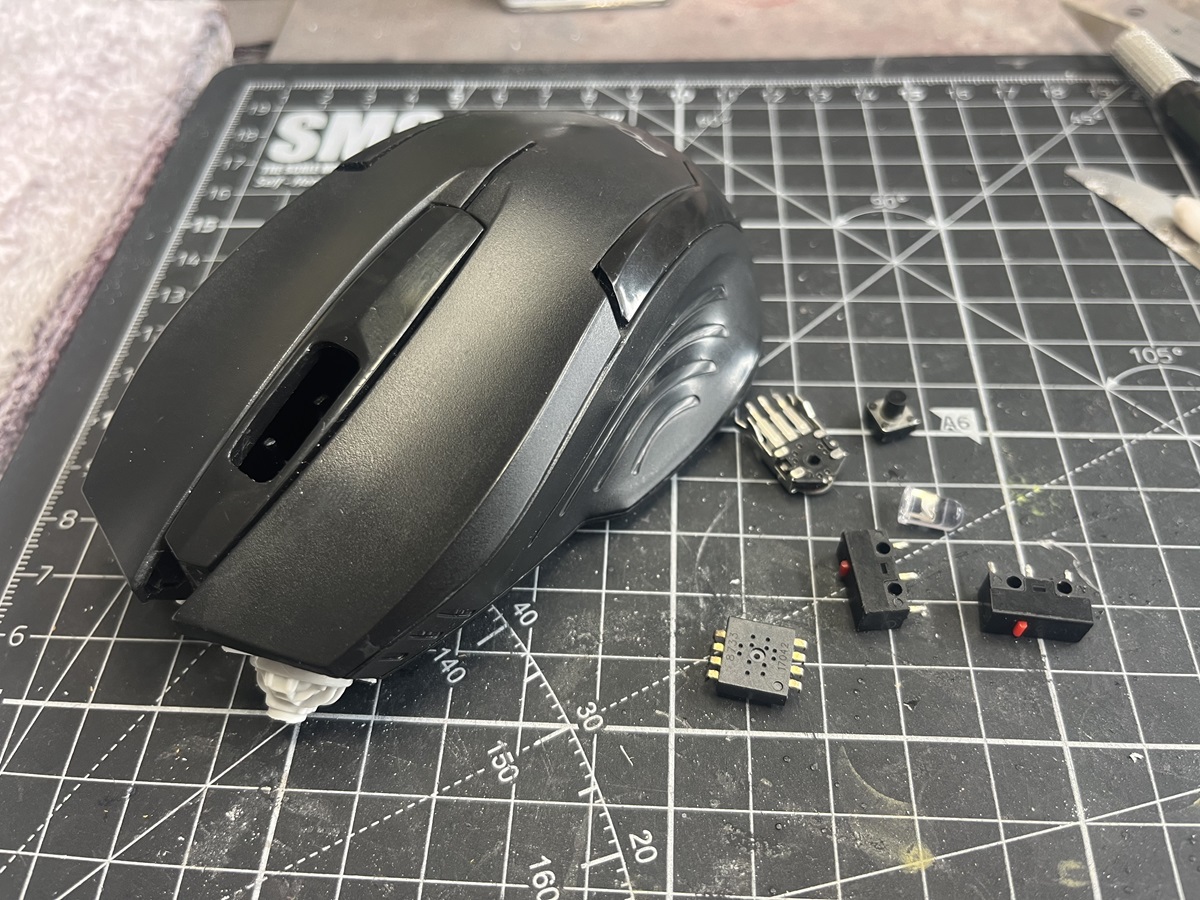
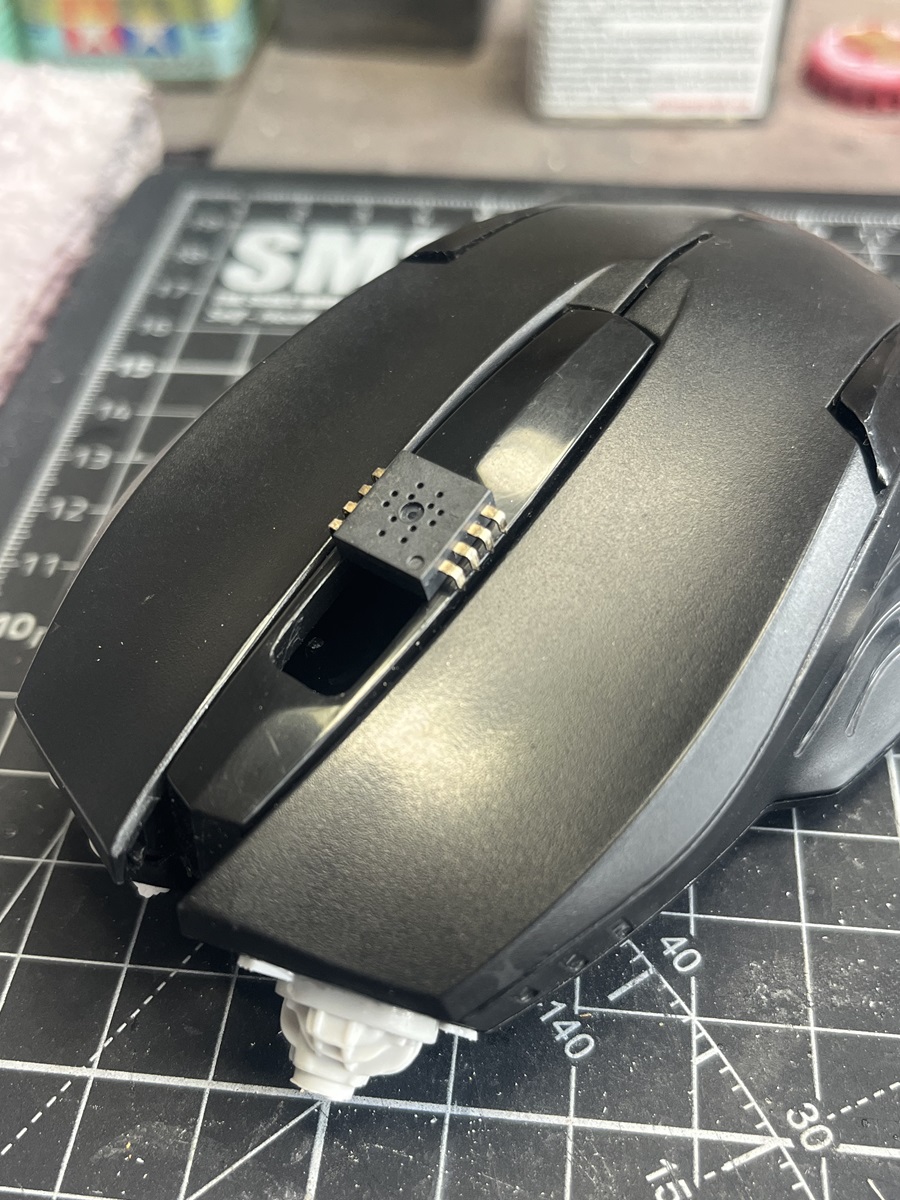
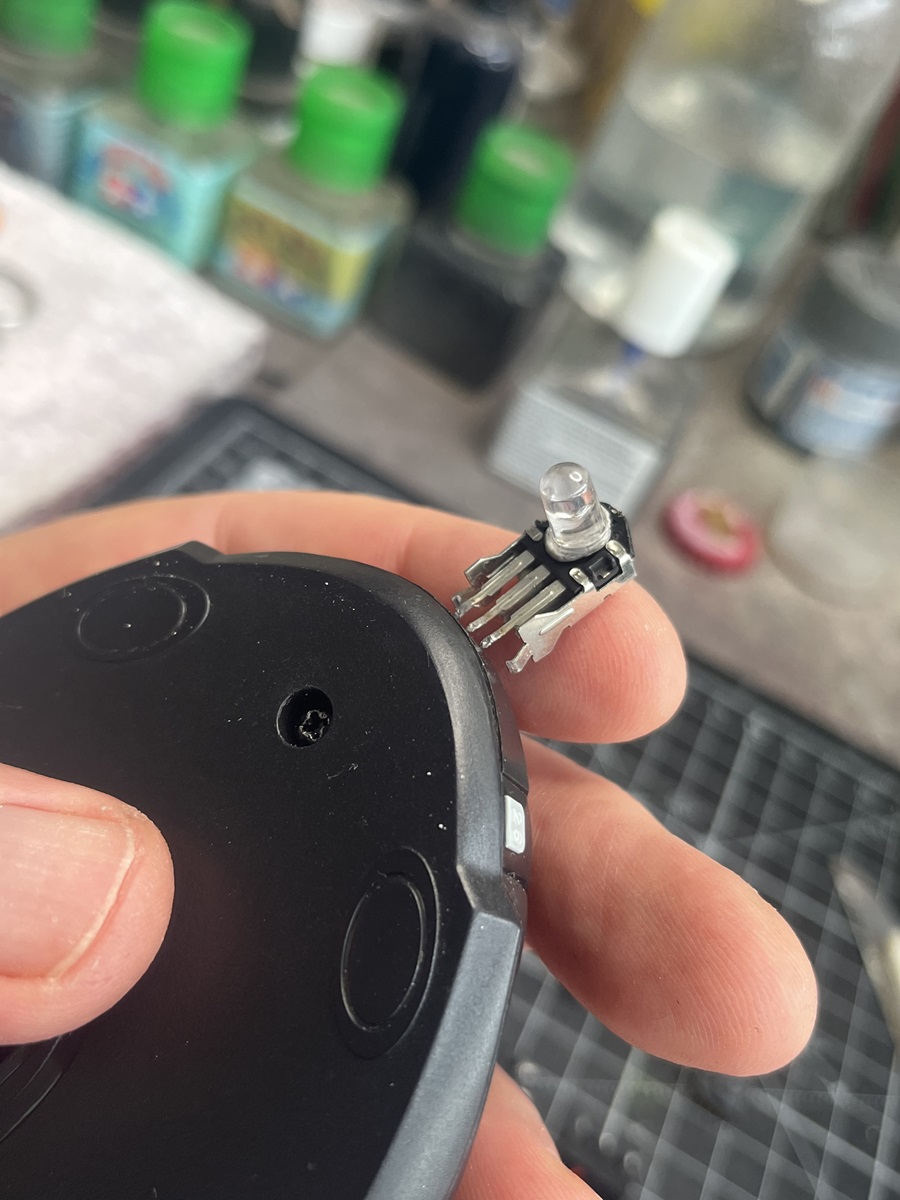
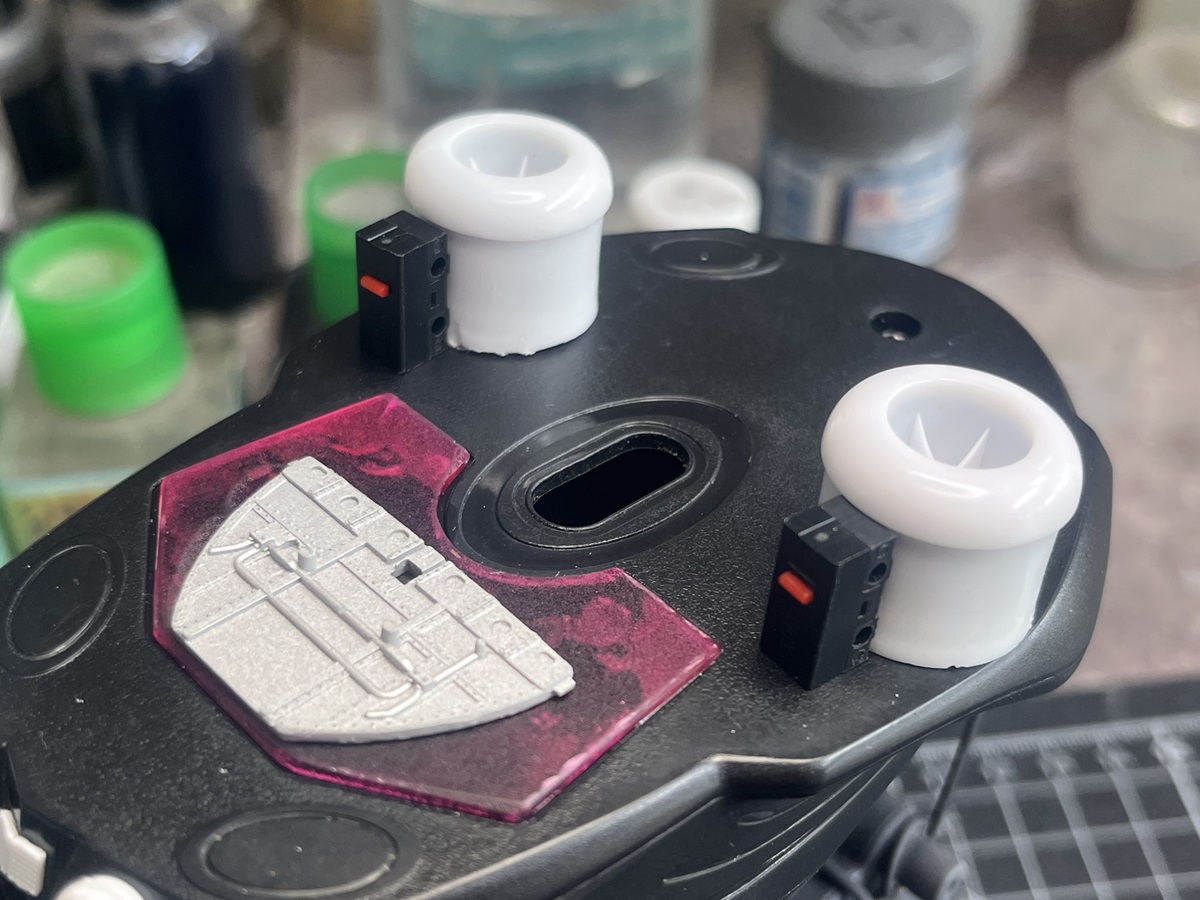
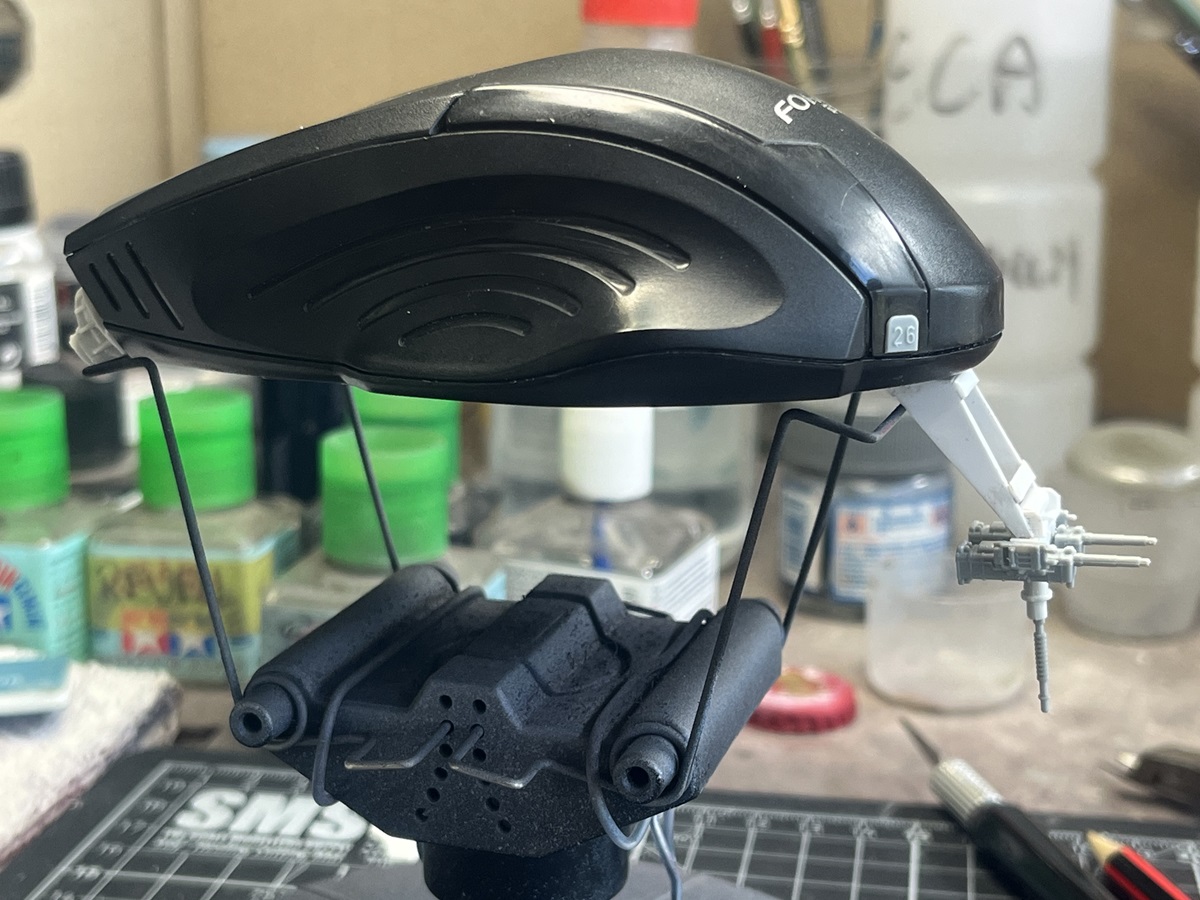
A very small progress report on the “Mouse Thing” . . .
I stole the caps off two of my kids “Pop-Top” drink bottles to use for larger lift at the front end, and the two 1/25 wheel rims will be mounted on bent shafts at the back for smaller lift and directional control.
I think I have also found that the Deluxe Products Plastic Magic “10 sec” cement will bond the styrene to the mouse plastic, that will save a lot of mucking around with CA!
With regard to the vehicle itself, I’m thinking this will be an unmanned recon/surveillance/comms drone so I can load it up with antennas and dishes and a few self-defence toys and not worry about cockpit or windows at all. Keeping it simple for my first attempt at something like this!
@ Damian (AussieReg). Nice work repurposing a variety of household items! “Dad! Have you seen my drink?” “Uh…”
“Deluxe Products Plastic Magic Cement.” That’s a new one on me. Might have been useful when I was glueing drinking straw segments to Styrene, as super Glue was almost useless.
——————————————————————————————————————————
@ Gerrit (Killnoizer). Wow! Those props! You’ve done amazing work on their profiles!
Thank you! That’s just my inner Kindergartner slapping paint around!
To answer your question: I didn’t use a clear coat because I wanted to see what some of the stains would look like… and I was being lazy and just wanted to get going. On that note: For my second pass, I just now applied a clear coat (‘Holloway House Quick Shine Floor Finish’). … The medical experiments continue…
——————————————————————————————————————————
[EDIT]
I wound-up going back to using Vallejo Dark Grey Wash (76.517), as the Vallejo Black Shade (73.201) just wasn’t cutting it. I used it undiluted this time which helped make the joints appear more prominent.
For different layers of washing with Valejo Acryl , a technique which I try to use instead of airbrush, I use a incredibly fast drying clear coat from the art shop . Dry in some minutes ! And keep the work safe ( what also could give fast results ) .
I am lazy , too , and every bad mistake needs time to make it again .
I have tried so many different glues for a resin kit , nothing works well , except super glue or 2K . I think the real good stuff is forbidden in Germany .
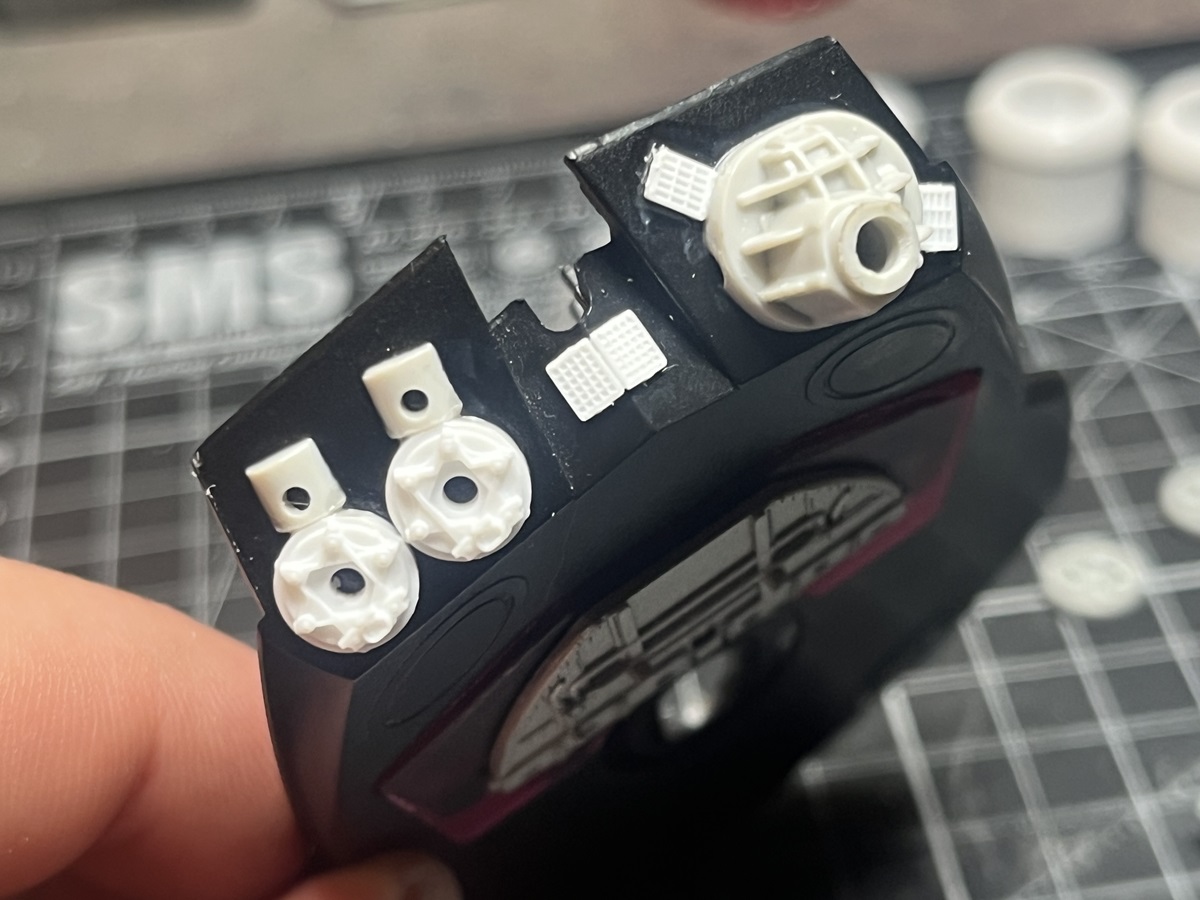
I decided to re-jig my approach to the underside and pull the main lift back to the middle a bit where it will be more balanced beneath the heaviest section of the profile. This will also open up space at the front end for hardware with a clear forward-facing aspect. I can add some receiver dishes and antennae there as well. I will make up a mount for the guns to keep them further forward and raised off the deck.
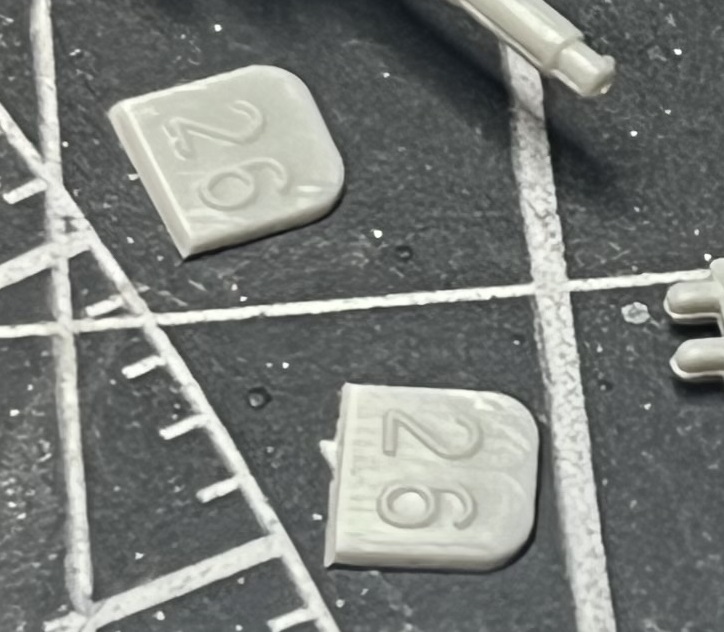
EDIT: Something I forgot to mention, I picked this up a while back and you guys might already be on to it, but the part number tabs from your sprues can be used to provide a really cool raised serial number detail for scratchbuilding.
More tinkering today, this pure imagination stuff is very addictive!
I dismantled the PCB and started thinking about where things might go. I really want to use all of these major components in the build somewhere. Just seems right!
I also played with some sheet styrene and sprue and made up an offset mount for the front guns, still some tubes and wires to be added. This will fit to a base mount, just Blu-Tac’ed in place here . . . .
I‘ve prepared the parts for the weekend workshop , together with 30 members of the local scale modell club we got a big room for two days . Funny event 2-3 times every year !
But maybe I decide to take a smaller project with me, must look at the things on Friday .
But the impact of the B17 would be BIGGER , remember I am the only whatif builder in the club ( but working on that fact … )
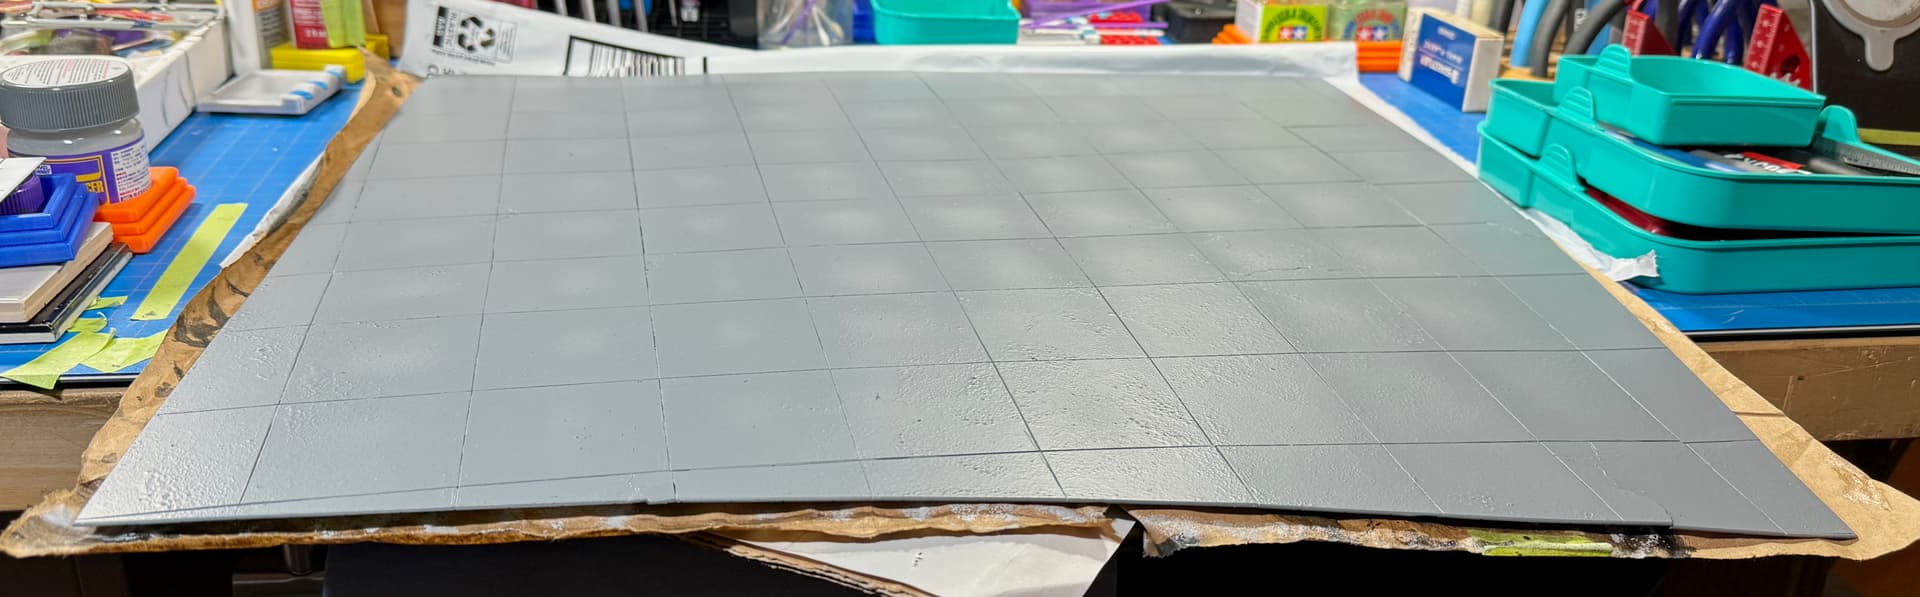
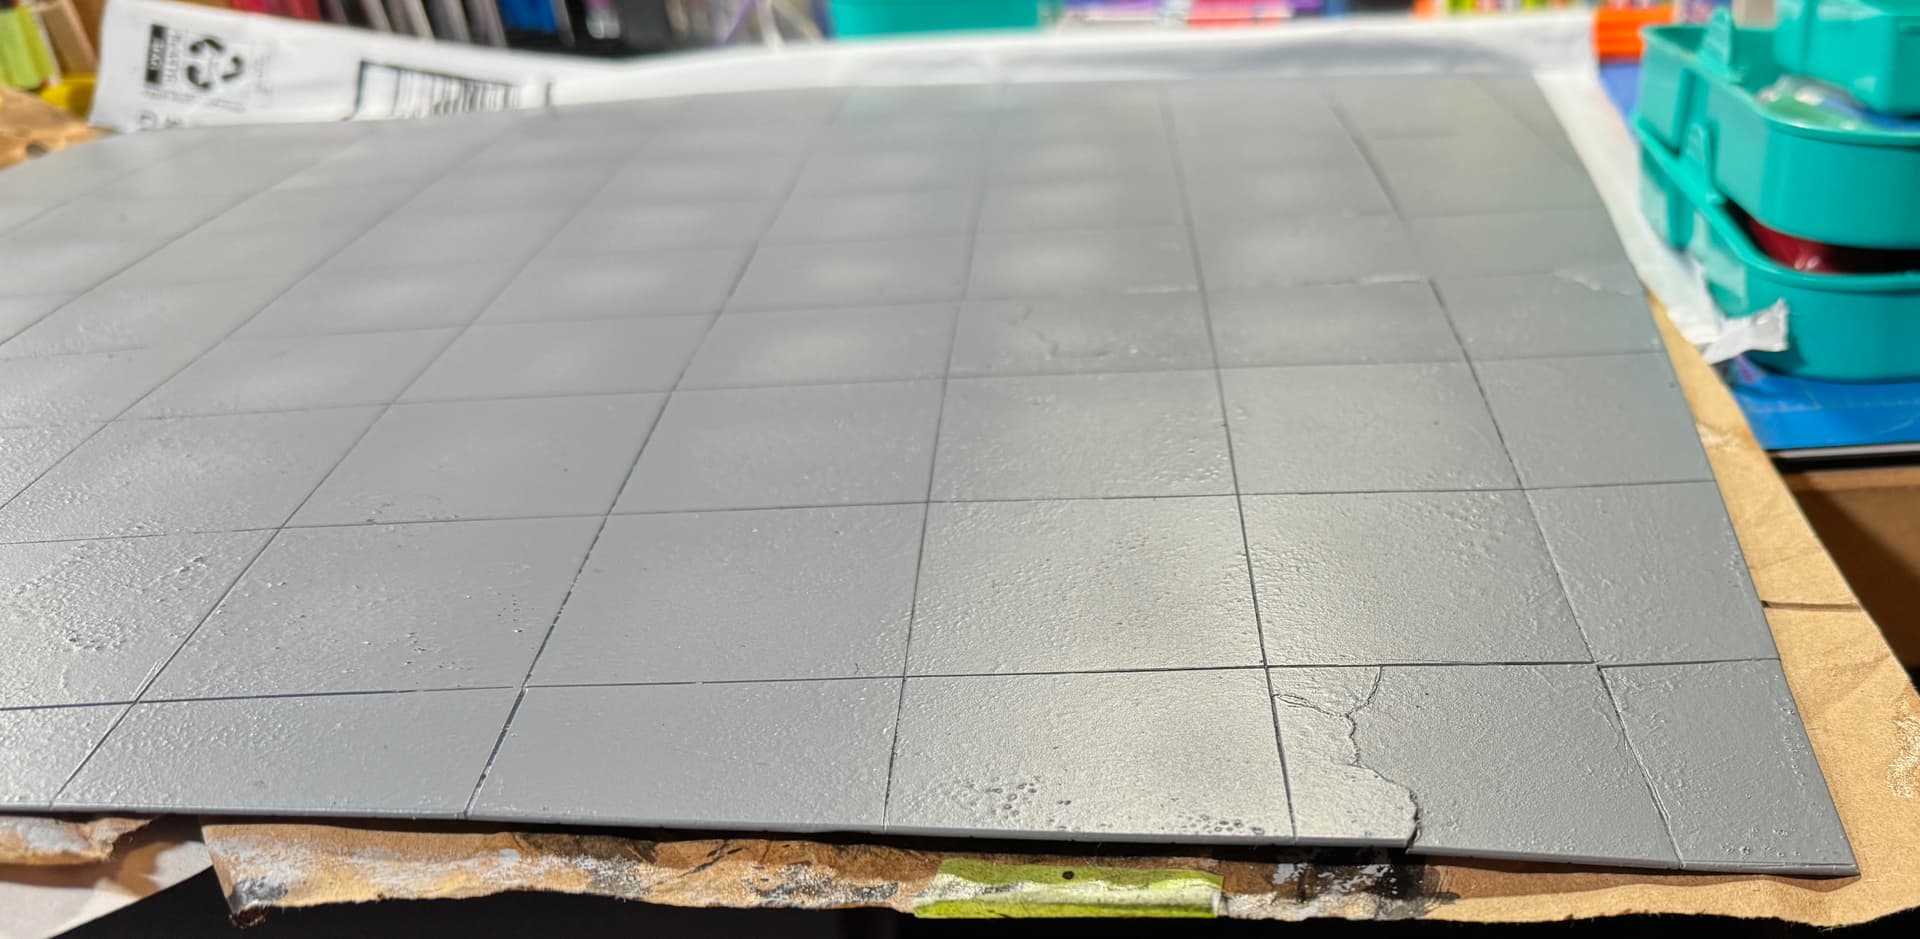
The minute I saw a three-day window of warm weather coming to my side of the Rockies, I shifted gears and took full advantage to go outside to spray and pray.
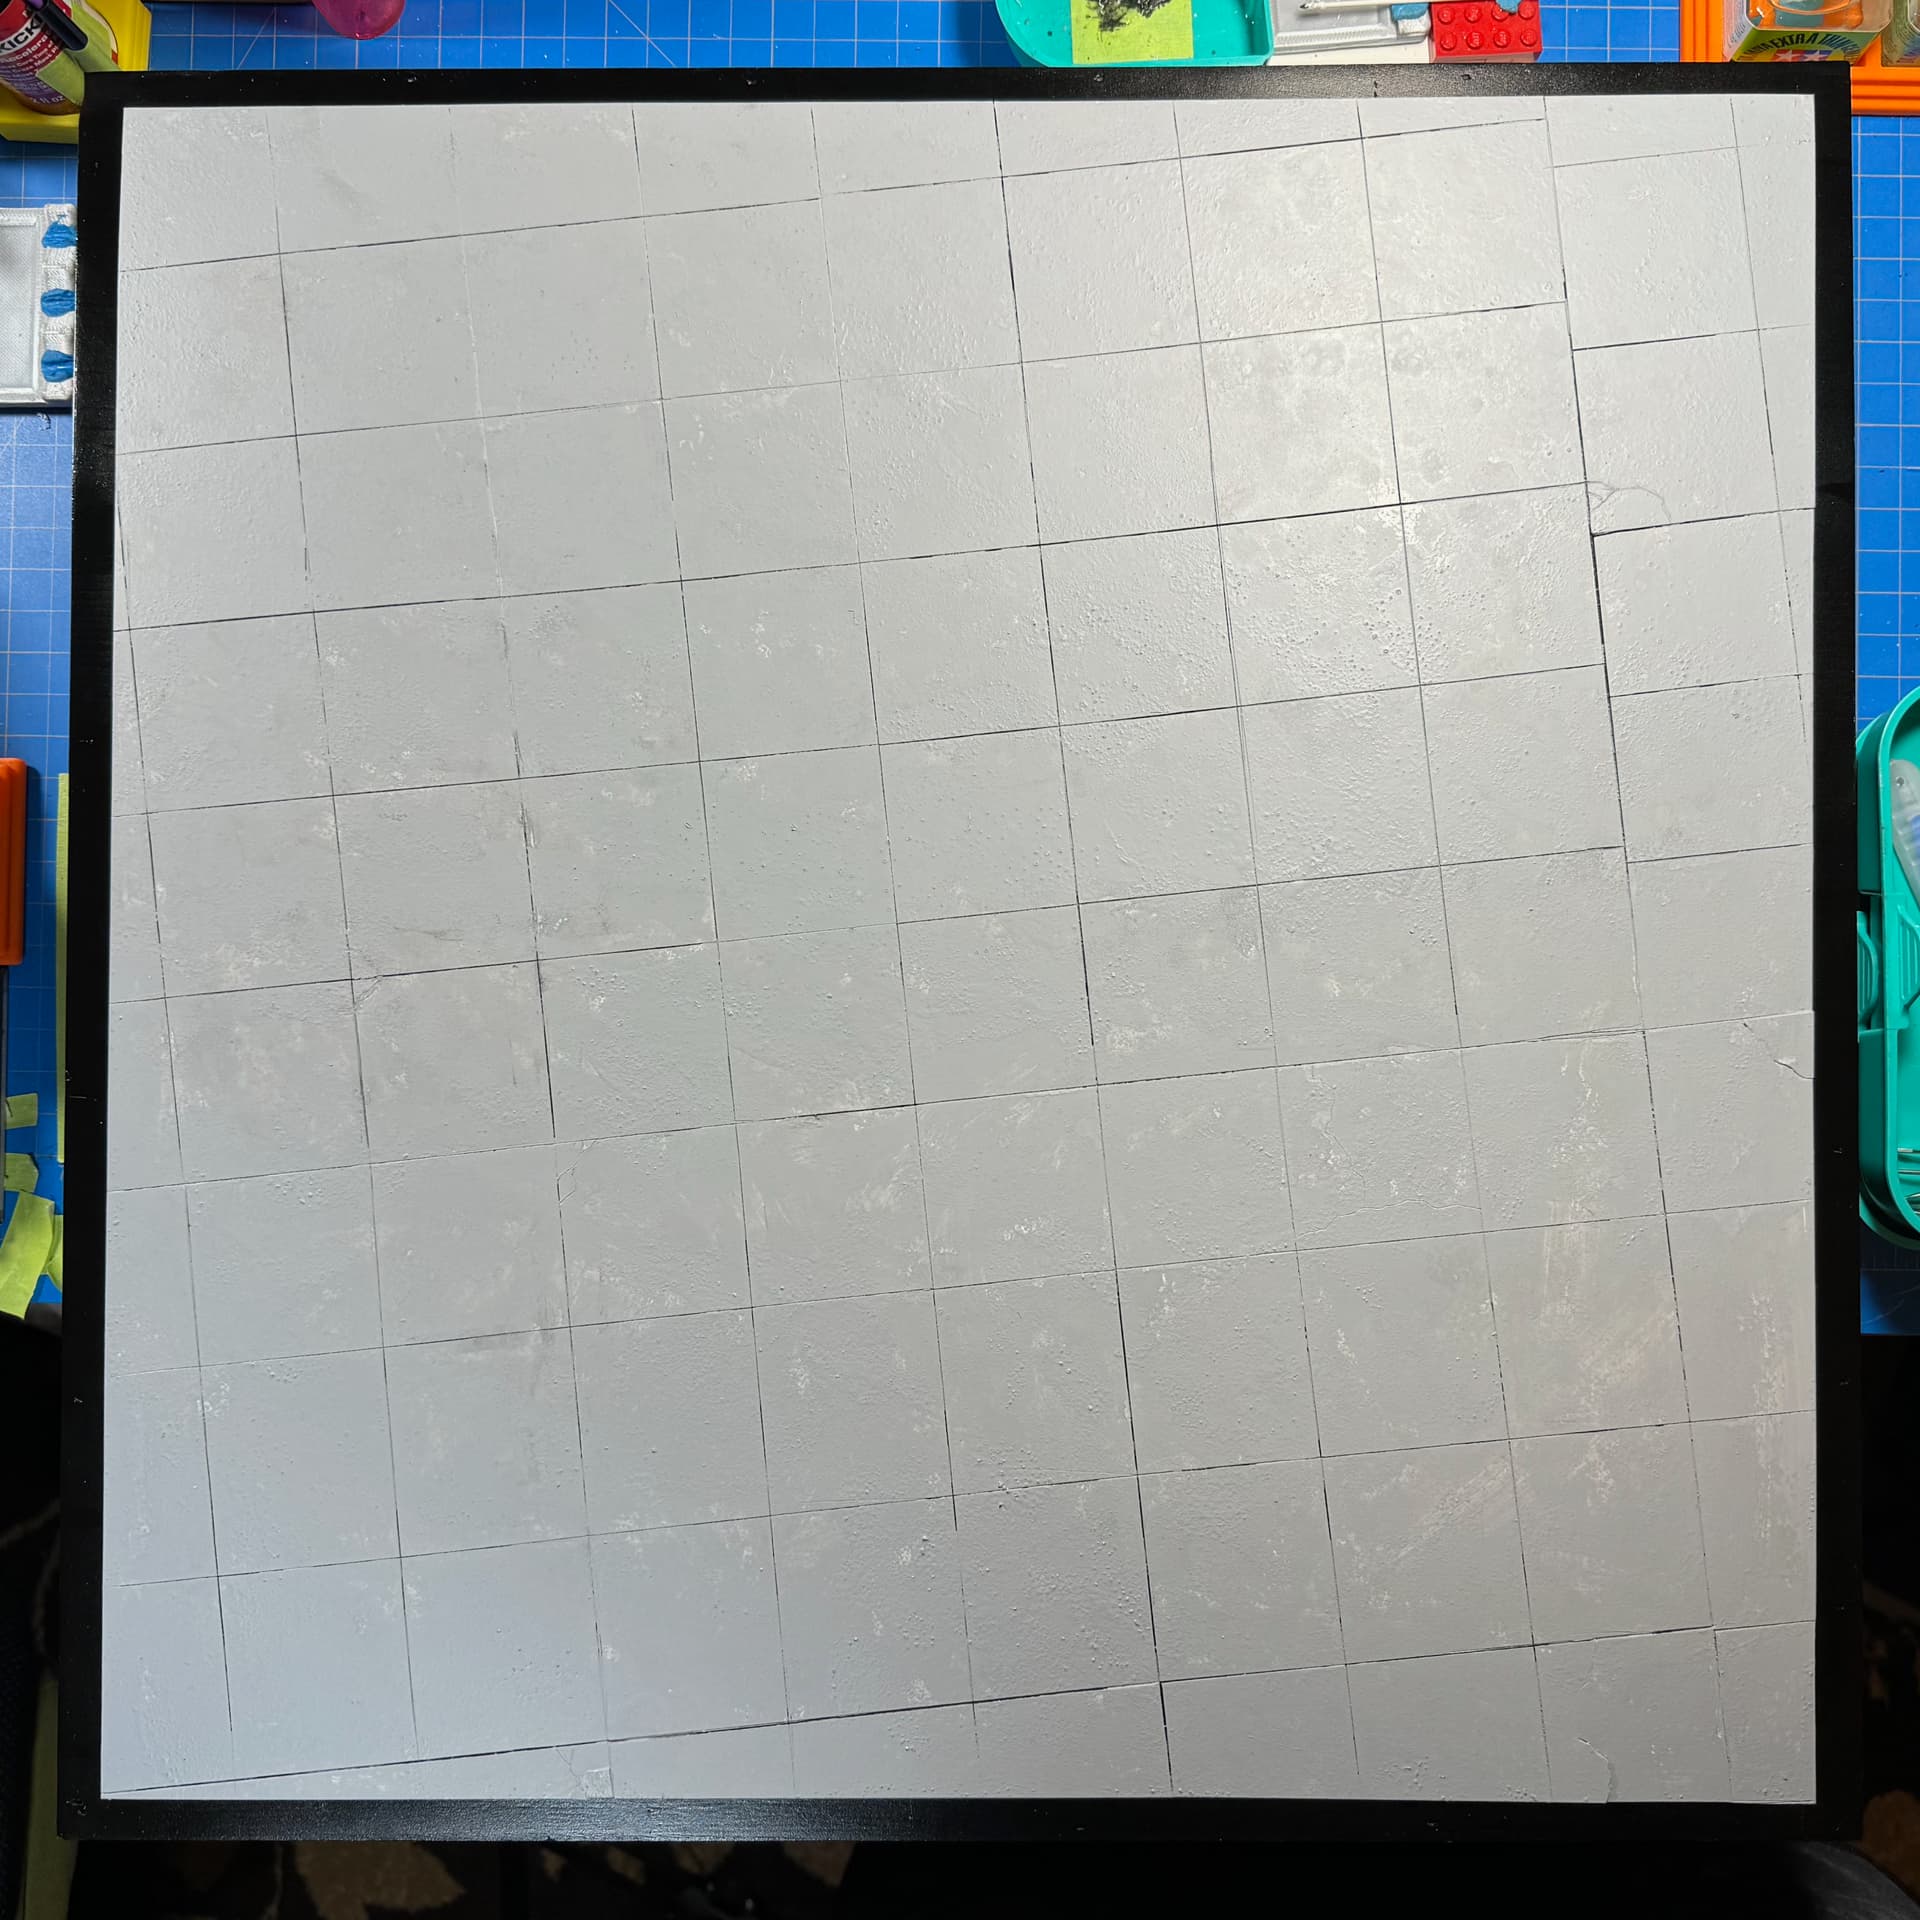
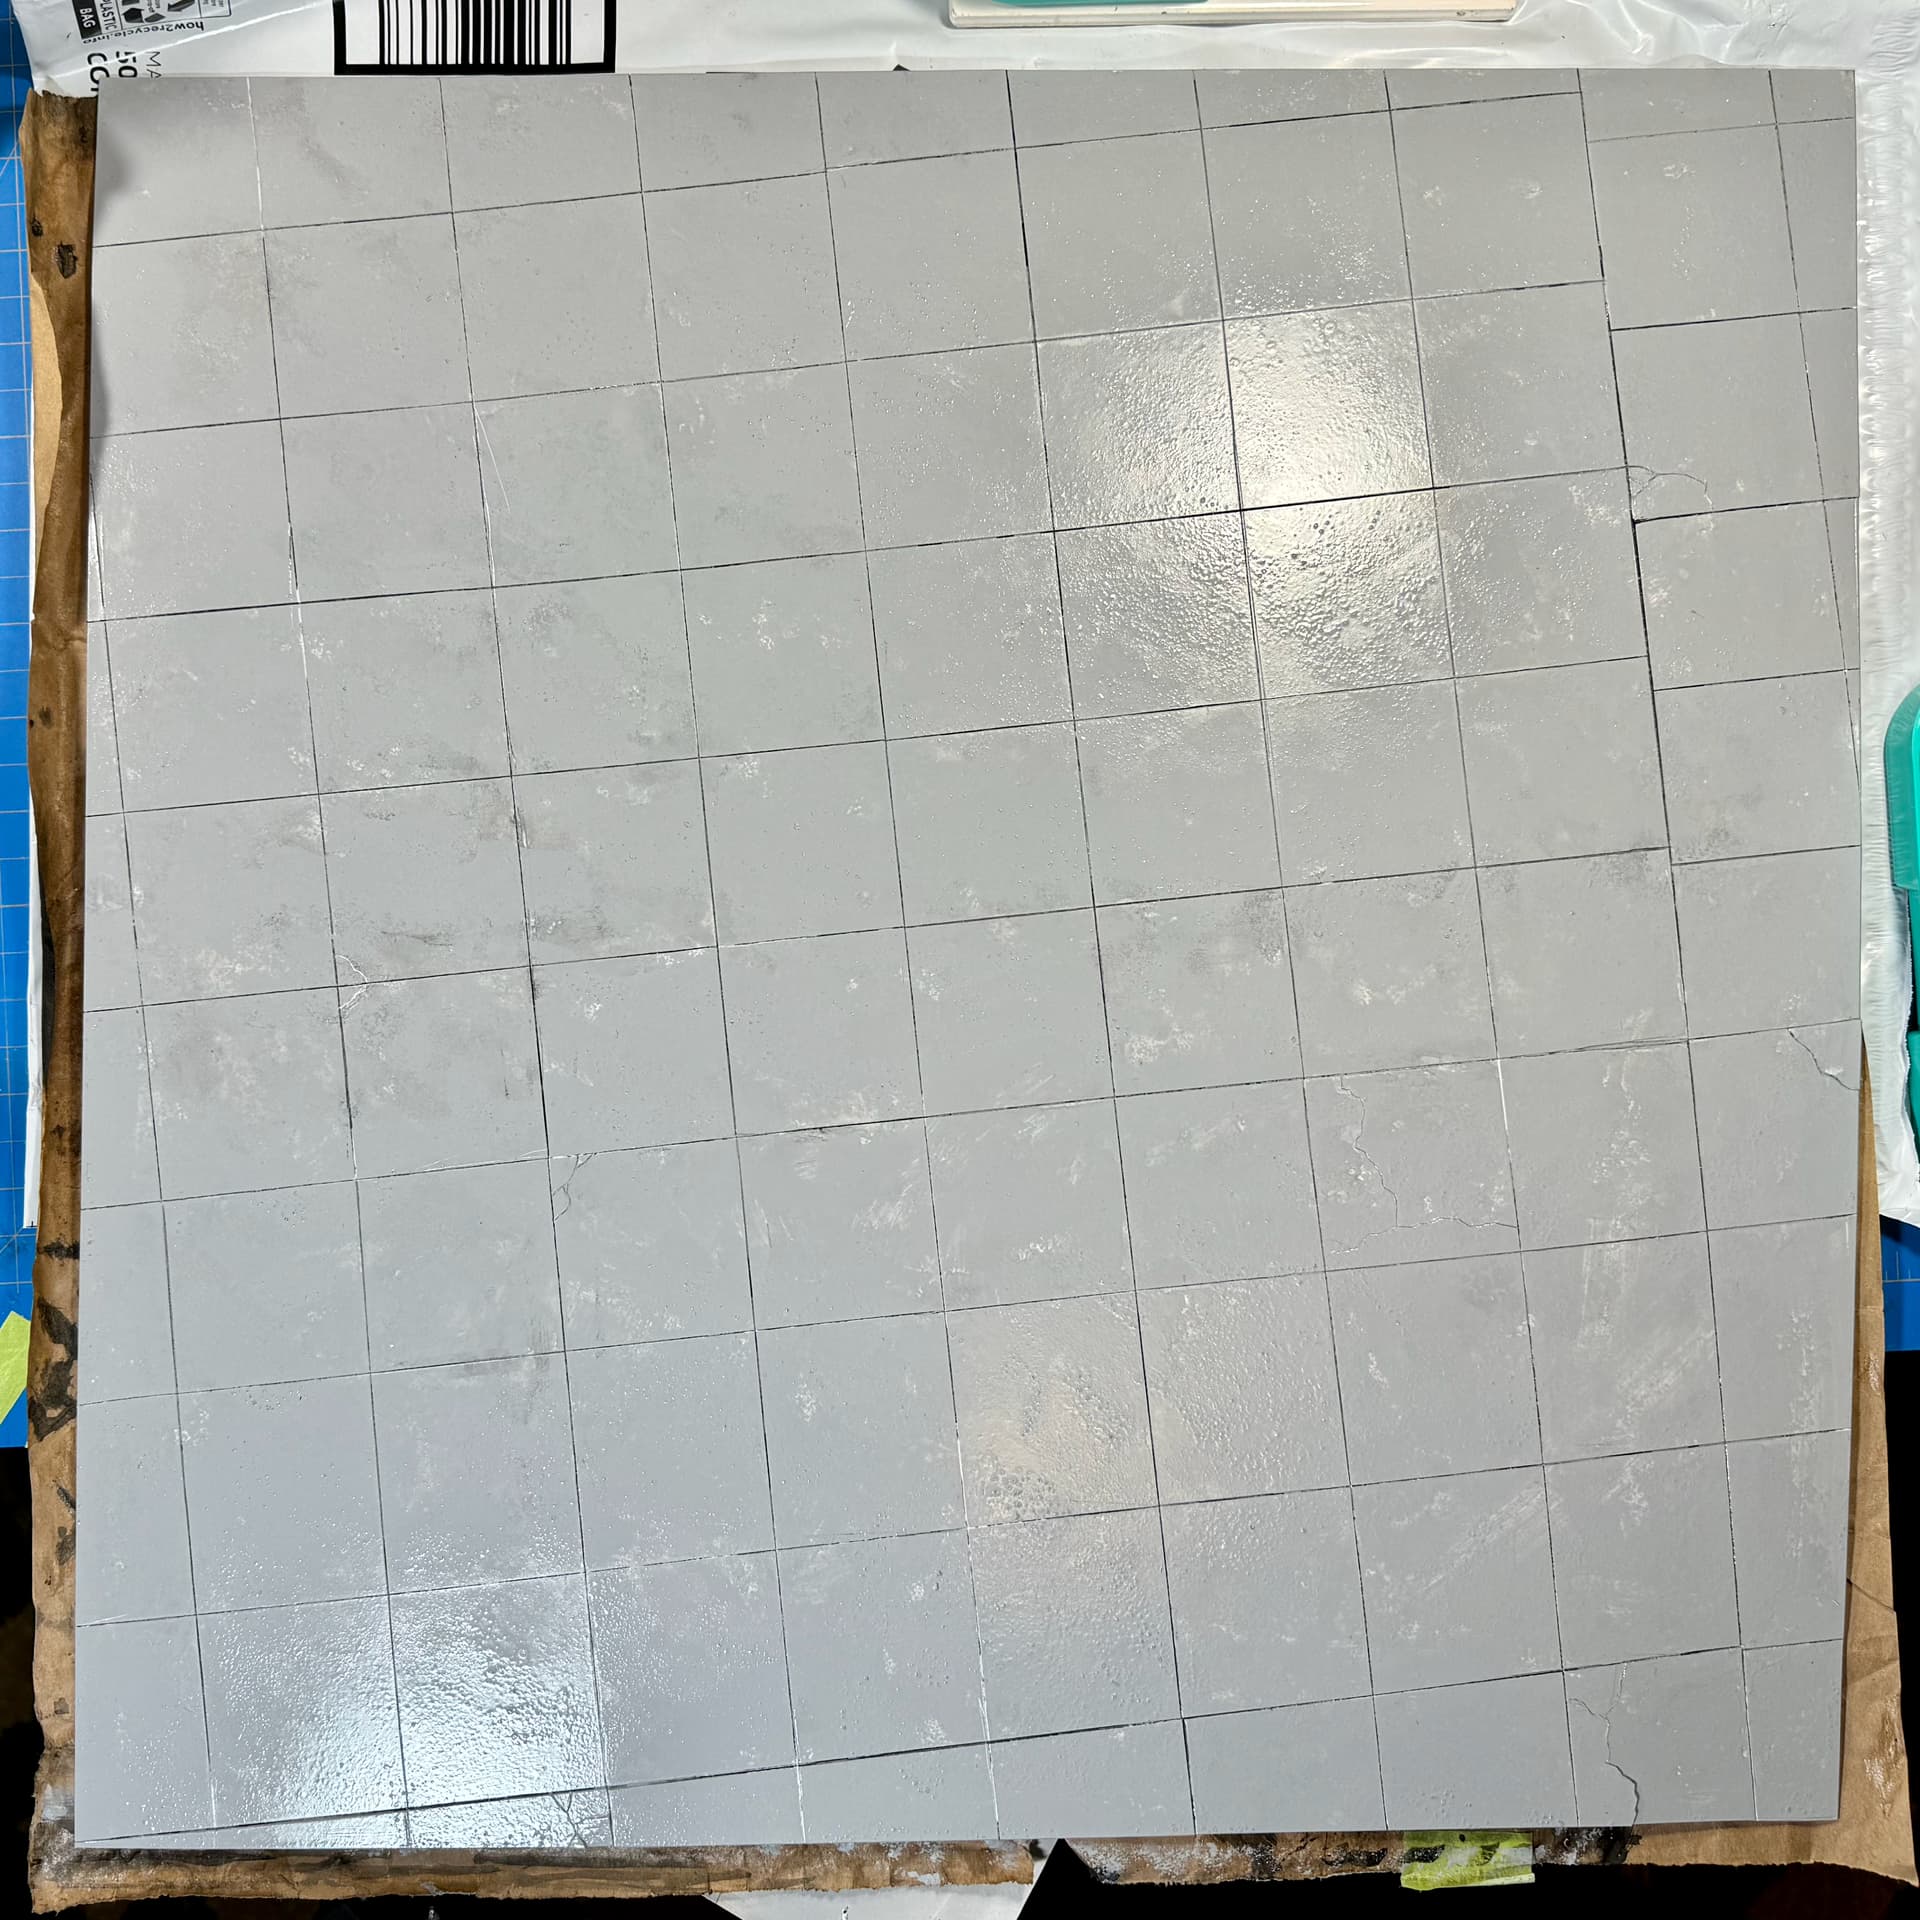
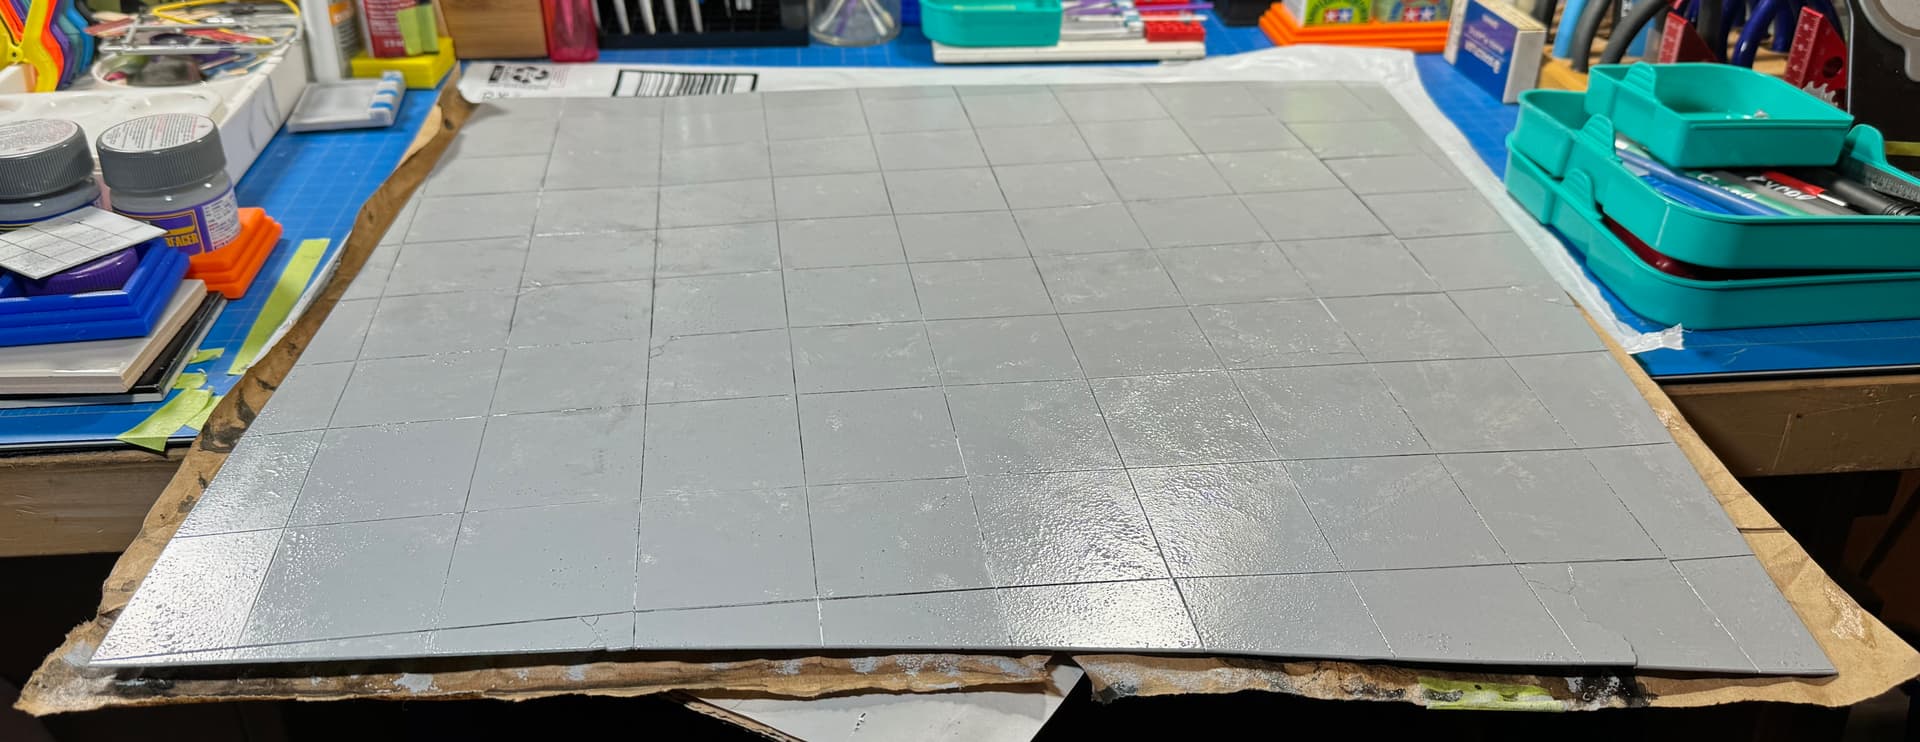
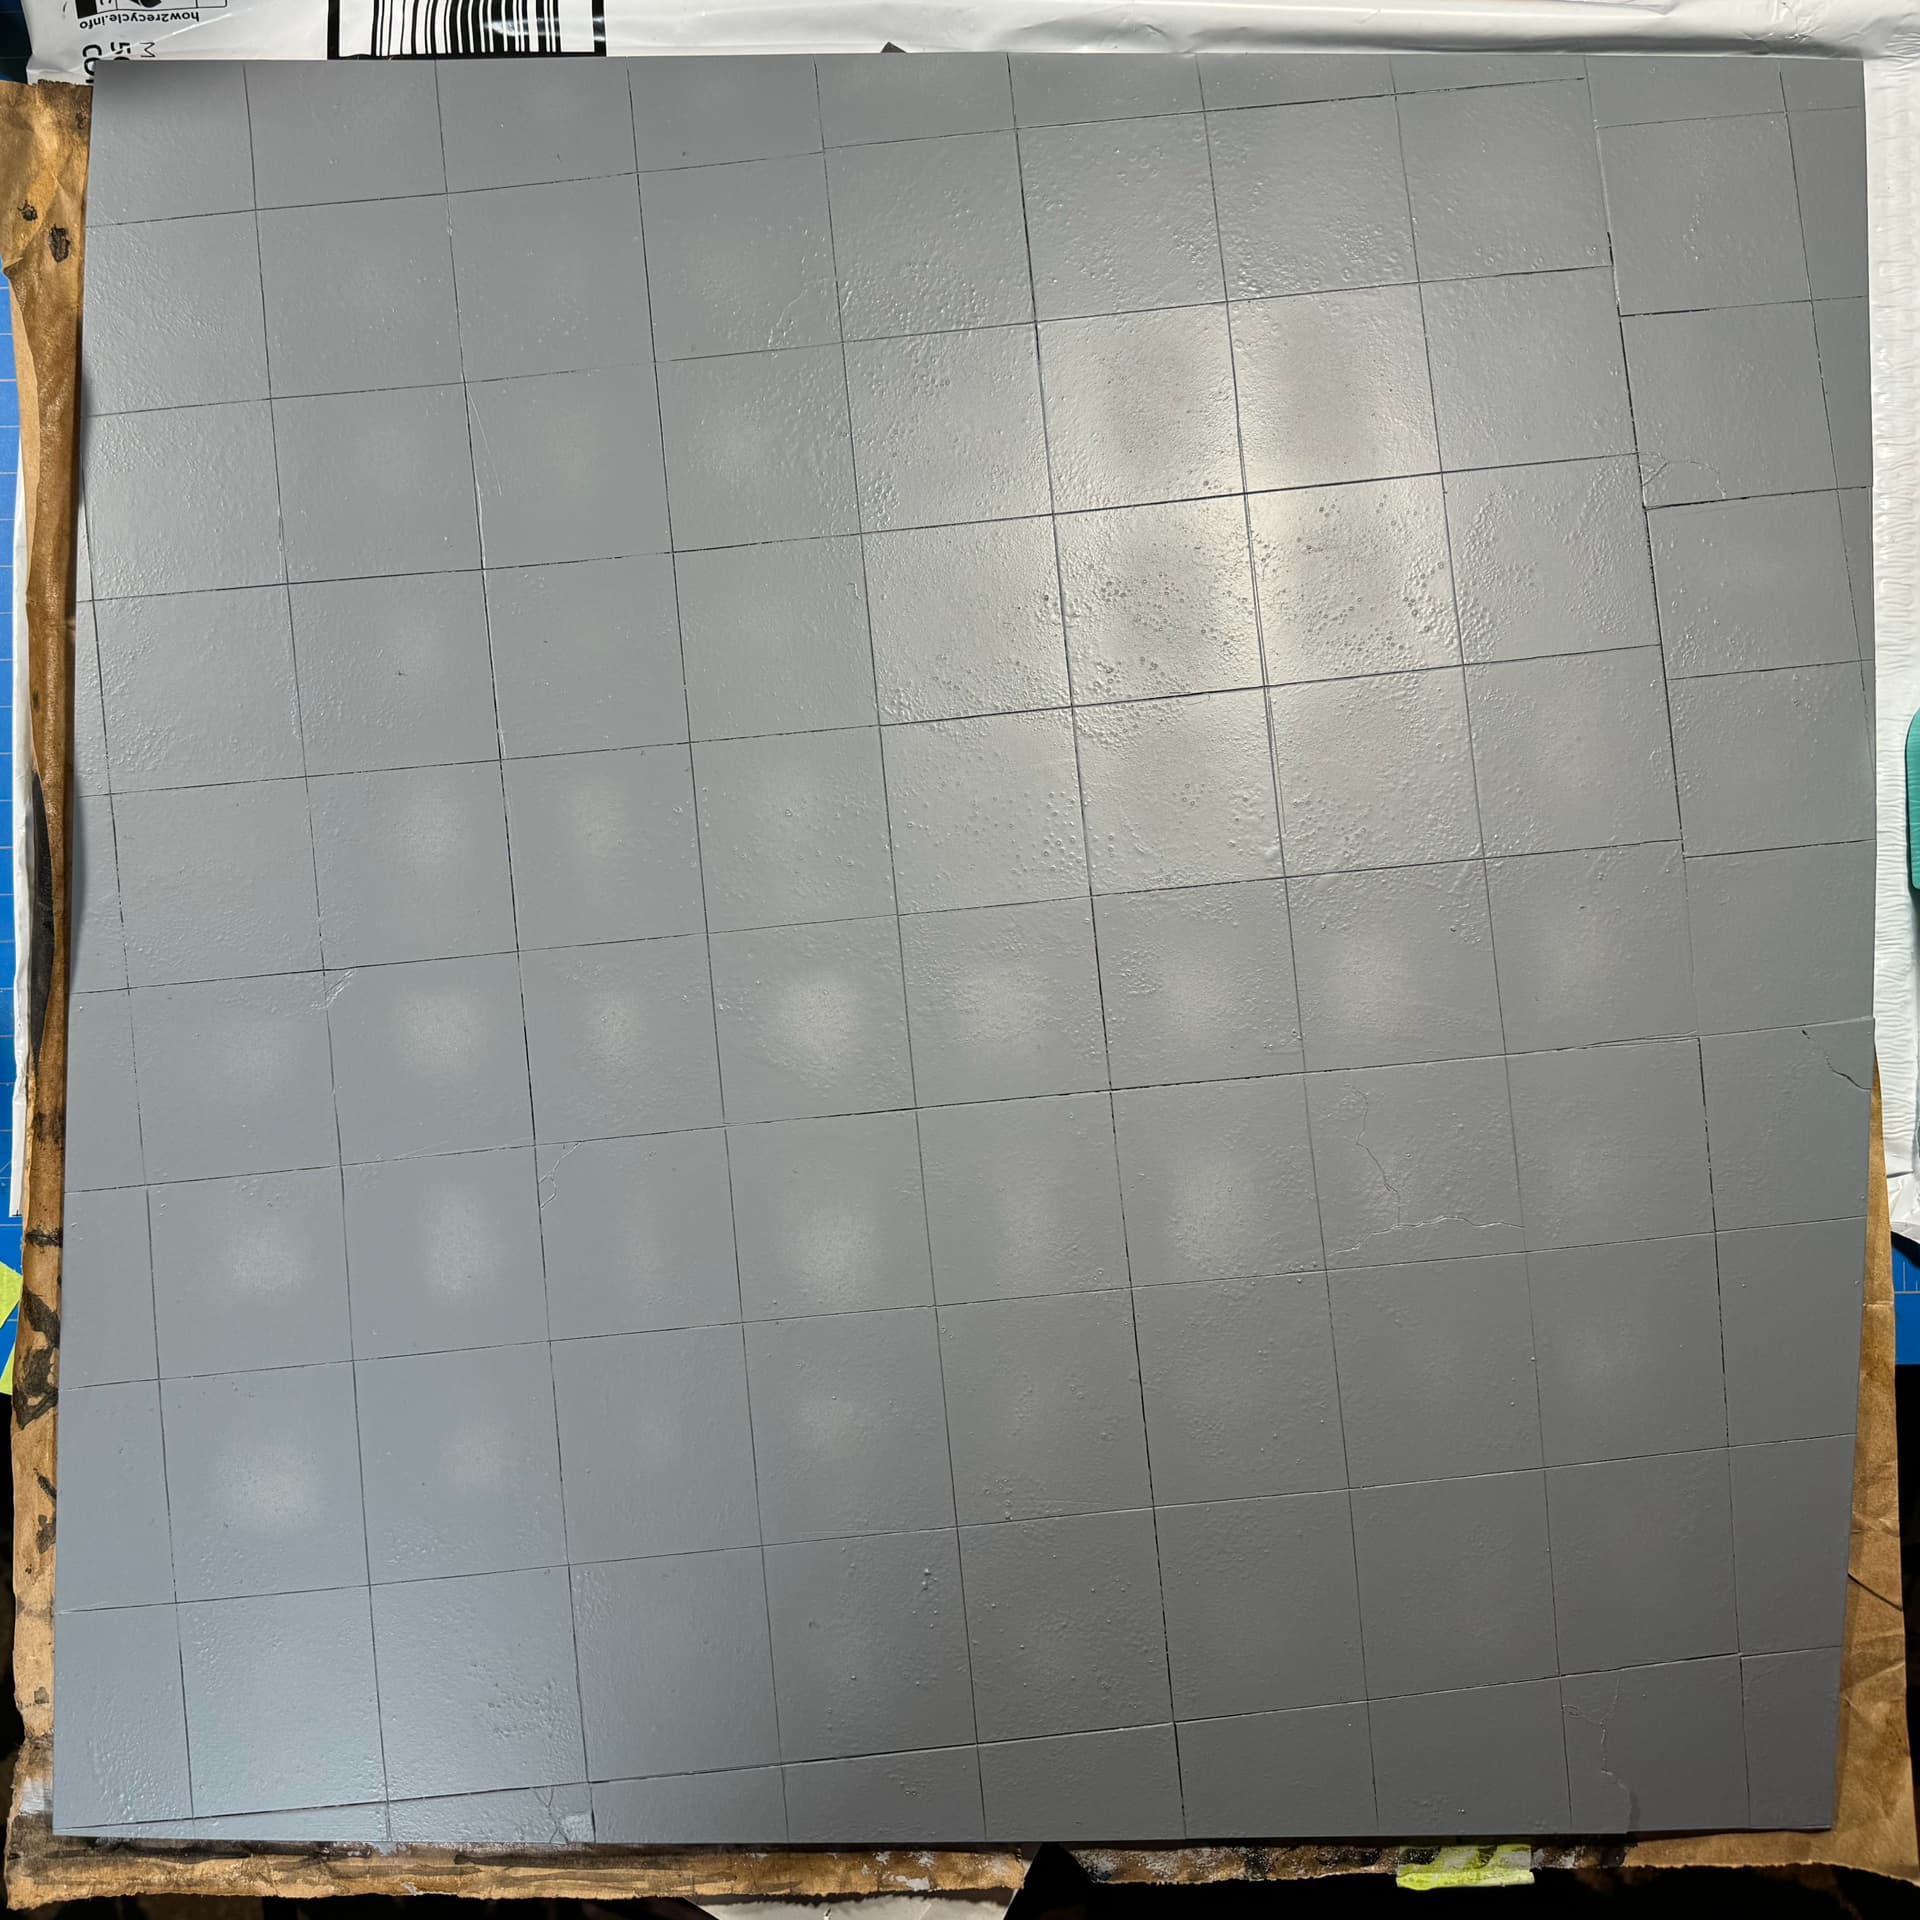
Days 1 and 2.
Painted the lower wooden tray base with a few coats of Rust-Oleum (7798830) Semi Gloss Black.
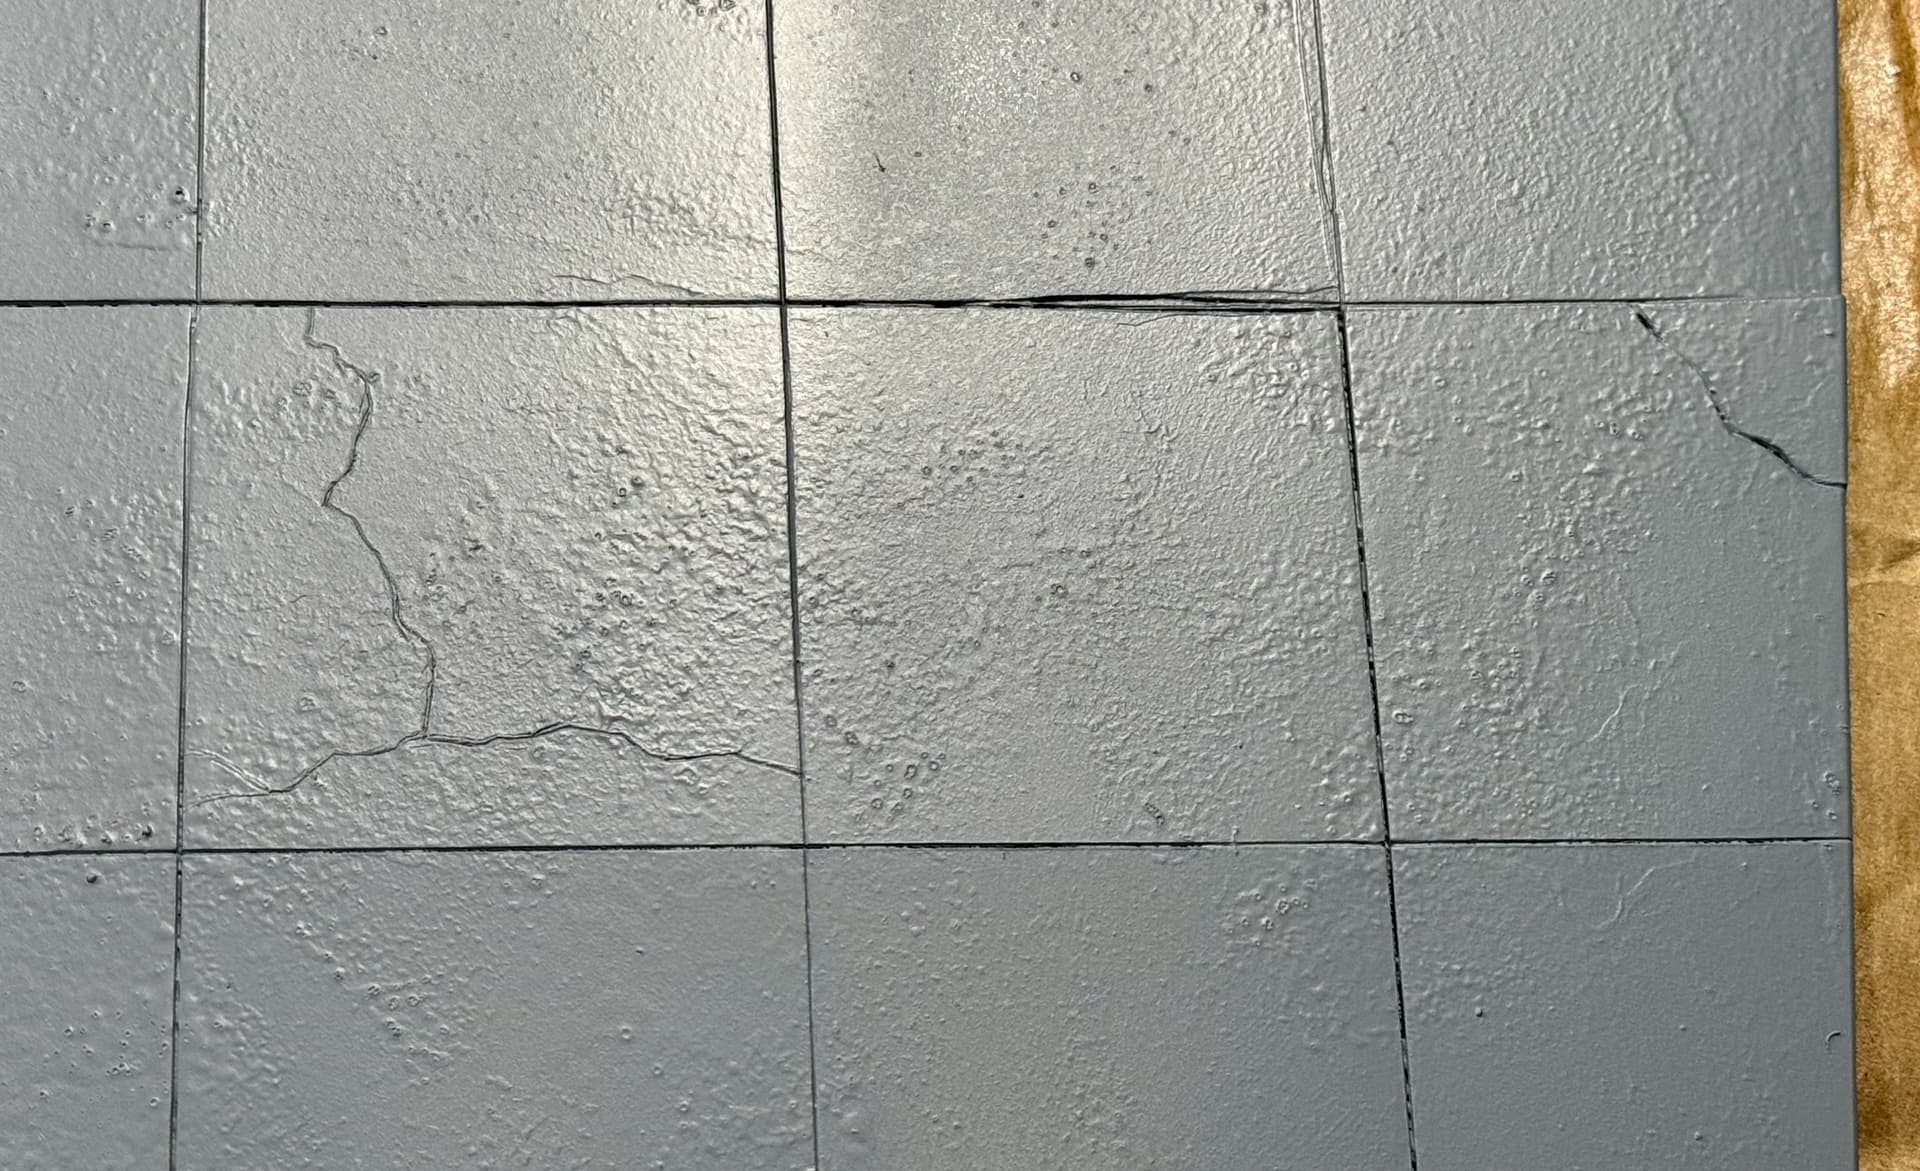
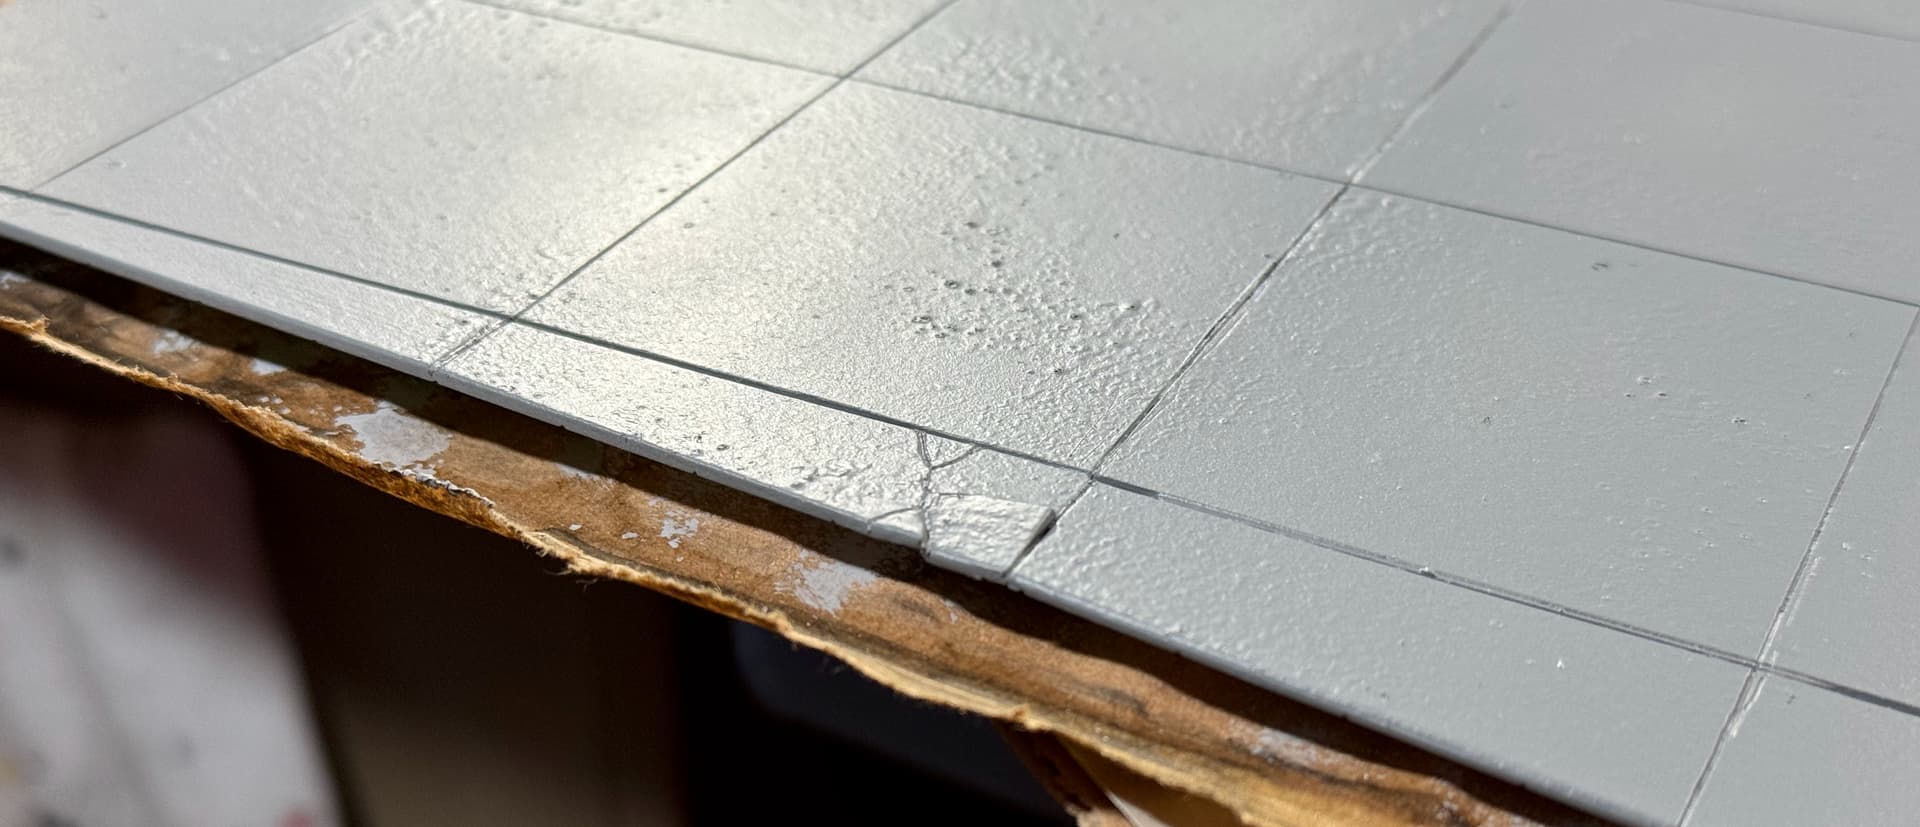
Textured the concrete slab with Mr Surfacer 1500 — random sponge stippling. Unfortunately, this obscured some of my previous scribing and mottling efforts.