A place for you, yes you to post your current projects.
My current muse that I need to get back too.
A place for you, yes you to post your current projects.
My current muse that I need to get back too.
Not a scratch builder myself, at least not to the extent you are but I really enjoy seeing other’s work and creativity. You are off to a good start. Goofy looking van in my opinion but hey… ![]()
![]()
Hey I resemble that remark.
It is goofy and thanks.
My scratch building skills are limited to simple things like crates, racks, etc. I would like to be able to do more complicated things but my problem is that I am unable to conceptualize the process. I can see the end product that I want but don’t know how to get there. If I see how someone else does it than I am able to copy the process which is what I used to do when various modeling magazines had those types of how to articles. Hence I am mostly an OOB builder with just simple mods on occasion.
I get that. Hopefully our resident experts can provide some assistance with their techniques.
I love it when the Evergreen comes out to play! ![]()
![]()
—mike
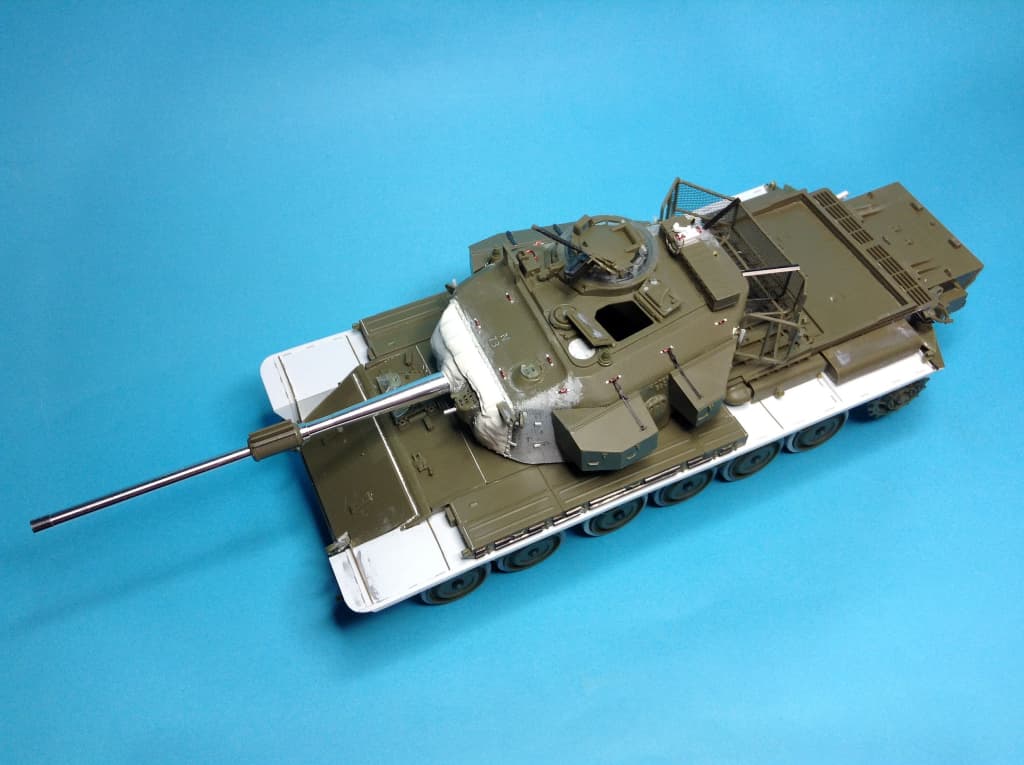
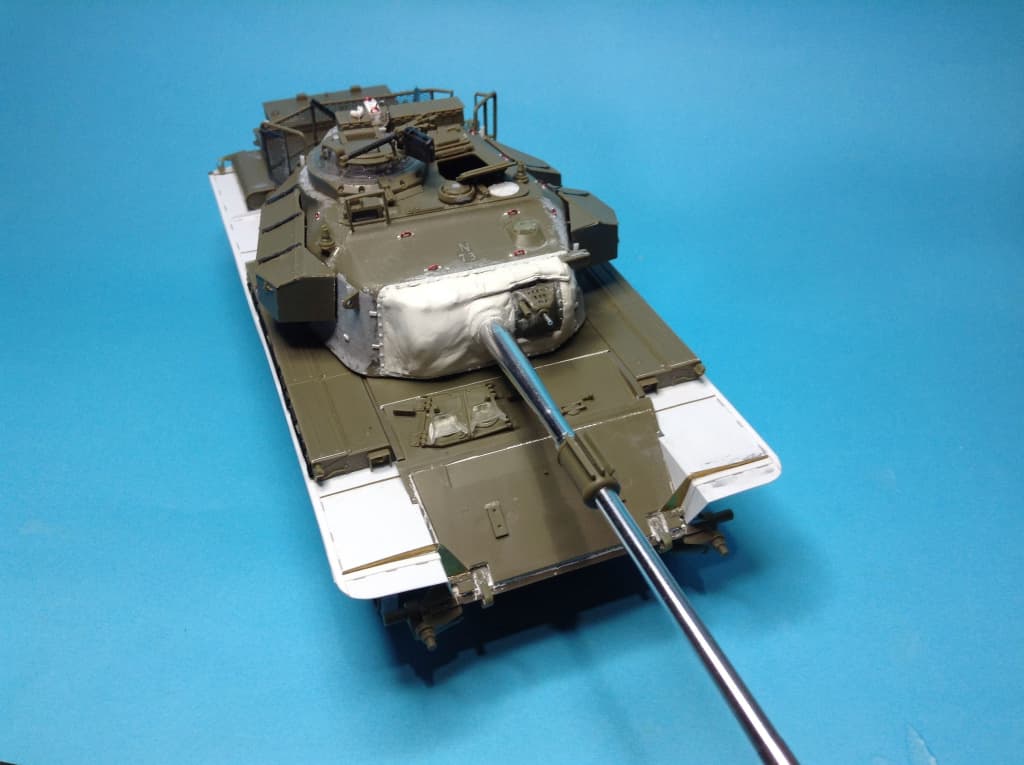
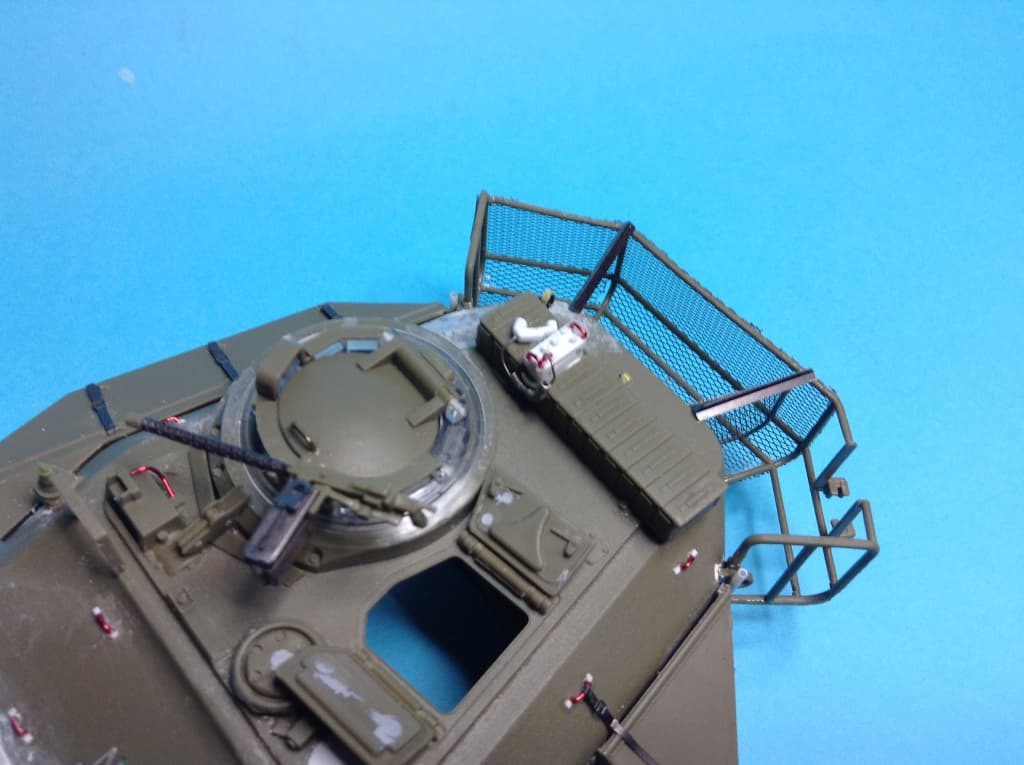
I’ll play. The Centurion I built for the ‘Fist of the Empire’ build. Altered to be 1971 fit out:
Replaced fenders, scratch built the canvas mantlet cover and search light cover as well - plus some bibs and bobs.
PRC 25 radio:
Painted and weathered, just in the process of painting figures and stowage right now.
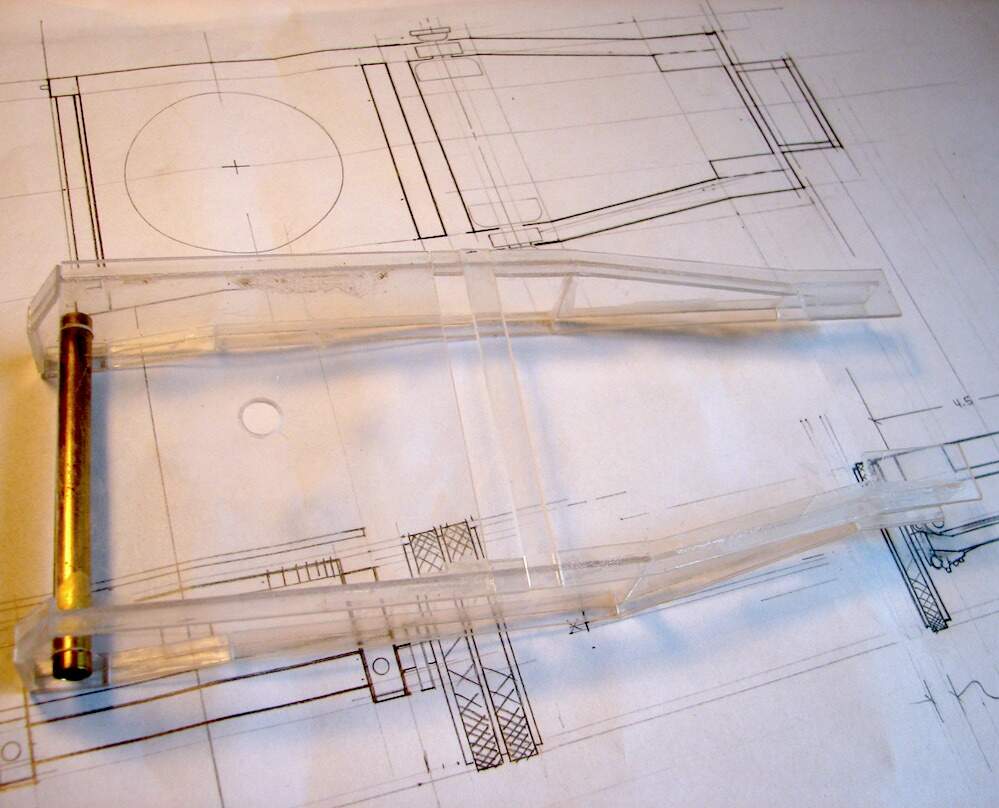
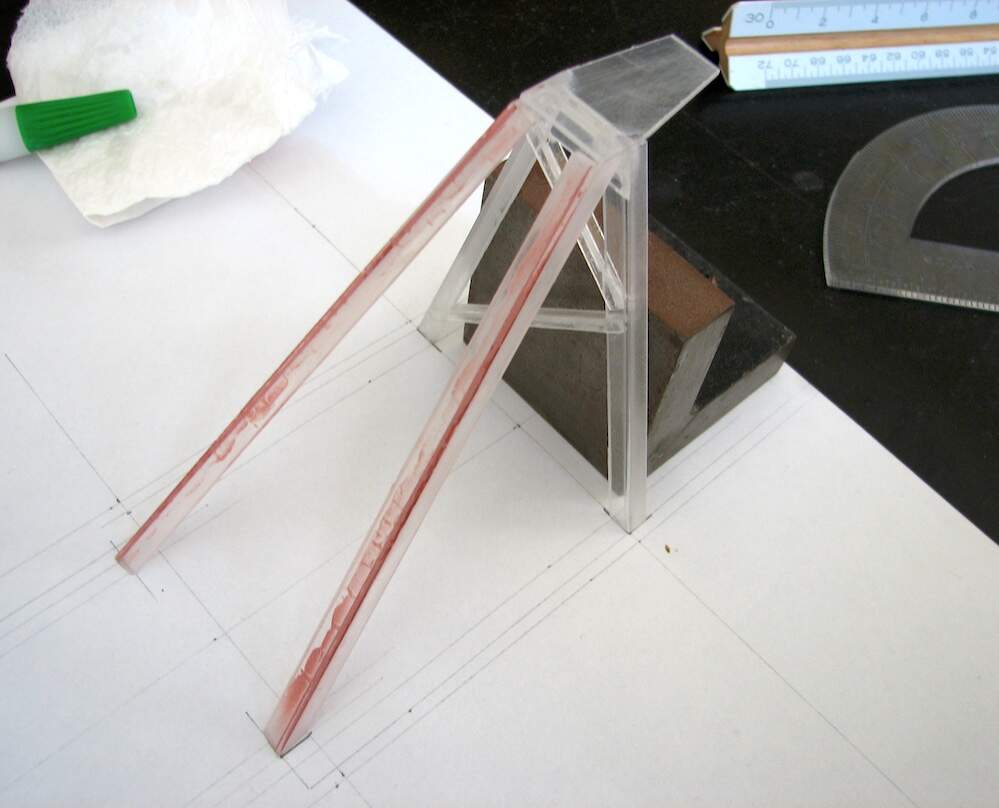
Scratch building starts with breaking the part down into obvious basic shapes. Cubes, Rectangles, spheres, cylinders, circles, etc. The real trick is getting the overall size and proportions right. I know a guy that builds a rough part in plasticine to play around and get the size of small parts, then cuts the styrene based on that.
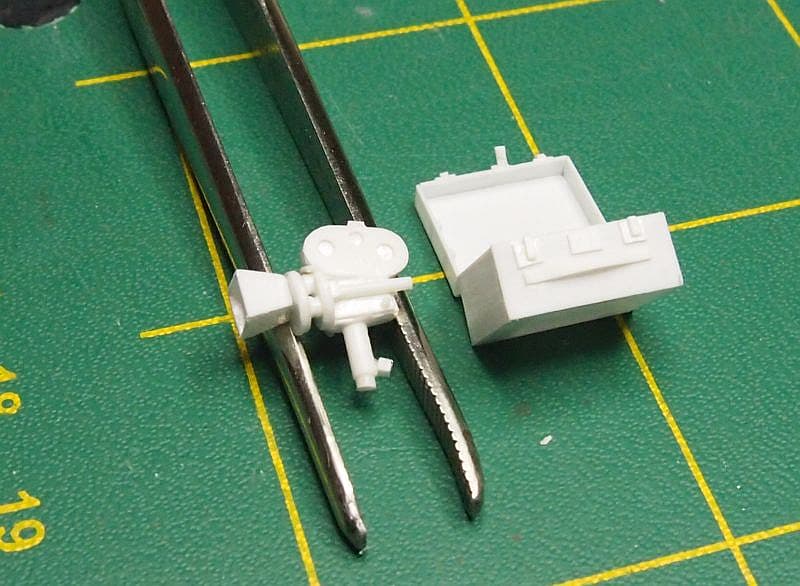
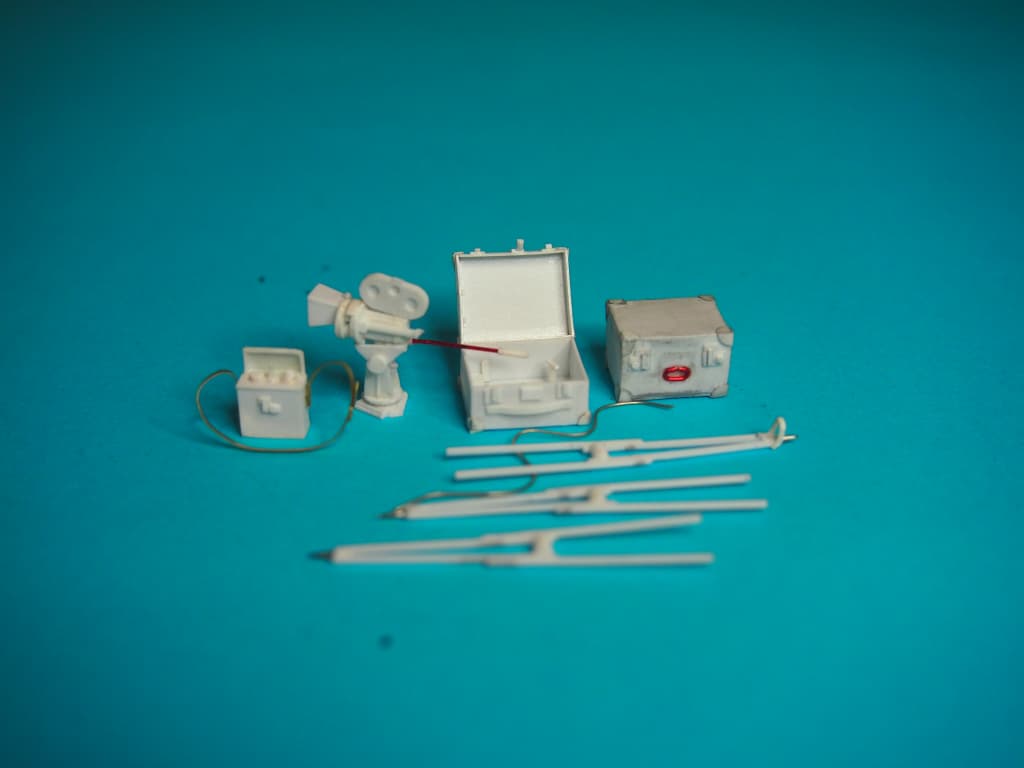
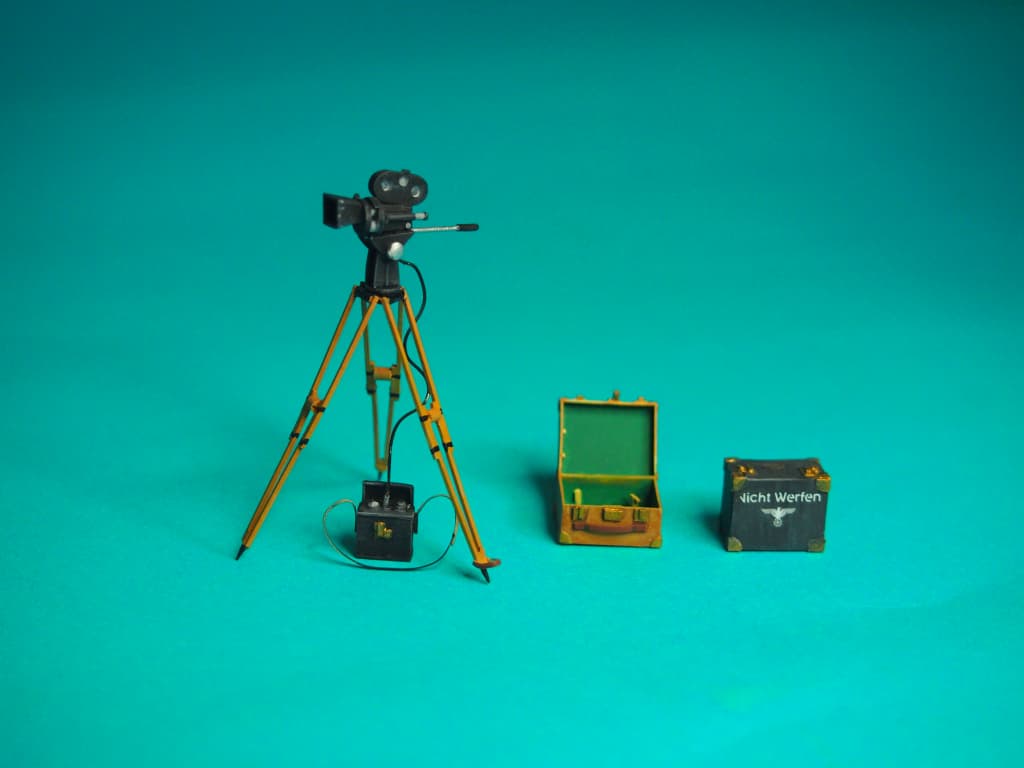
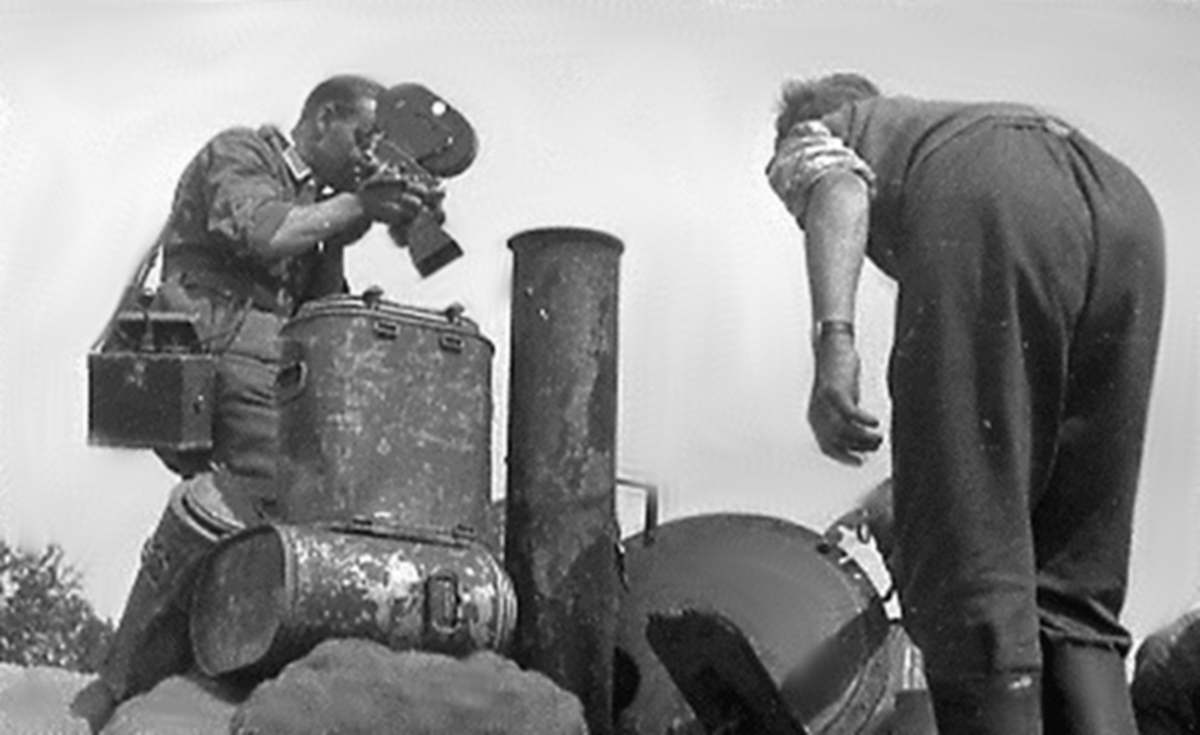
This is a good example of something that looks complex but really is just a bunch of shapes glued together. I built this 1/35th scale Ariflex camera set up back in 2019:
There is a rectangle with the ends rounded for the film cannister. Rectangle for the body, with a thin rectangle for the side hatch. Cylinders of styrene, a disc of Styrene, truncated triangles for the lens cover, etc
The actual model is half the size you see on screen.
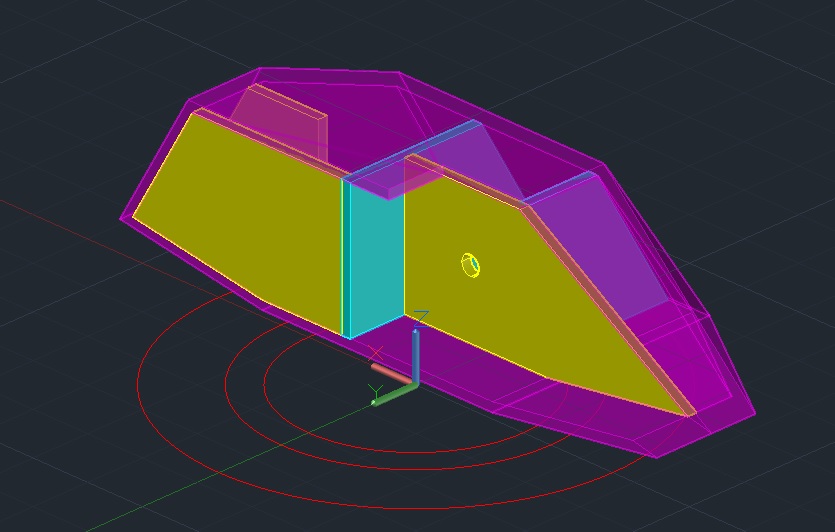
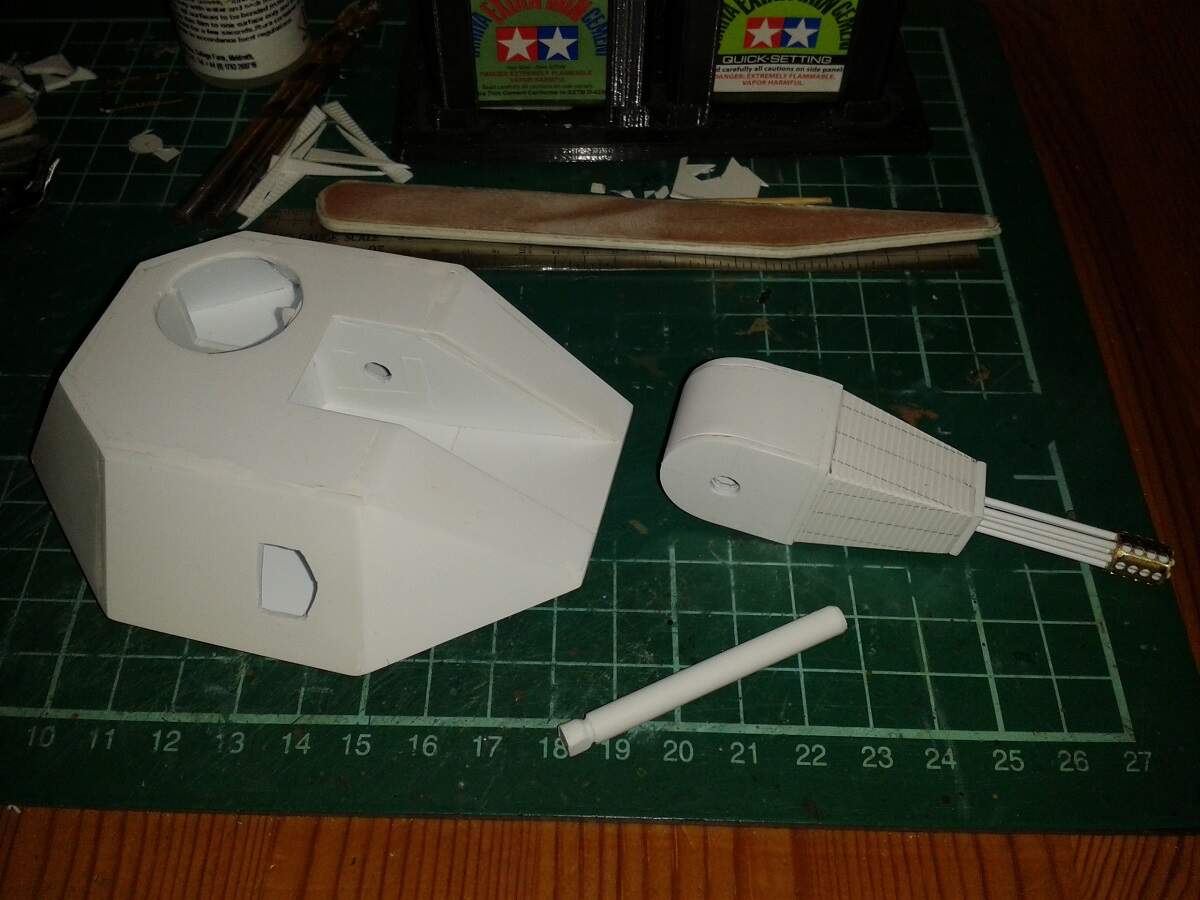
Hmm. I’m certainly no expert (spent five decades proving that!) but here’s one I’m working on. I needed a turret that was never built (it’s a competitor for Sgt York that didn’t get past the proposal stage) so no kits to plunder. I measured and drew it in CAD first, then printed out shapes that I cut from Evergreen, and then added lots of simple details. It no longer looks like this, as I’ve added paint and am almost finished…
I’m currently building this
I started cutting plastic a week ago, but had this trailer in planning since I found (and grabbed) 2 Dragon Sturmboot 39 kits a year ago.
That’s a Sd.Anh.108(aka Sturmboot Anhänger), it was built around a thick tube and it’s a very nice challenge.
I’m using wheels and a couple of modified fenders from Italeri’s Sd.Anh.51 kit, will need to scratchbuild a third Sturmbootmotor and a Sturmboot upper hull to put between both Dragon Sturmboots- due to material thickness they stack quite differently from what’s on my refference pictures.
Plenty of work ahead, but I intend to hitch the Sturmboot trailer to a Magirus S330 truck, converted from ICM’s KHD S3000 truck.
The couple will represent another Bulgarian Bridge-building combo from WWII.
Cheers,
Angel
“Mikey likes it!” ![]()
Great information and builds as expected @petbat, @barkingdigger and @ayovtshev.
Don’t forget about my M1009 CUCV project.
I hope to get some paint on it tomorrow.
Stunning as usual Angel. Just stunning.
Tom, great work and great example of breaking down the design into components (Basic Rectangles)
Missed this thread Gino. Glad you posted it. I’ll be watching.
Wow, it all starts again with great work!
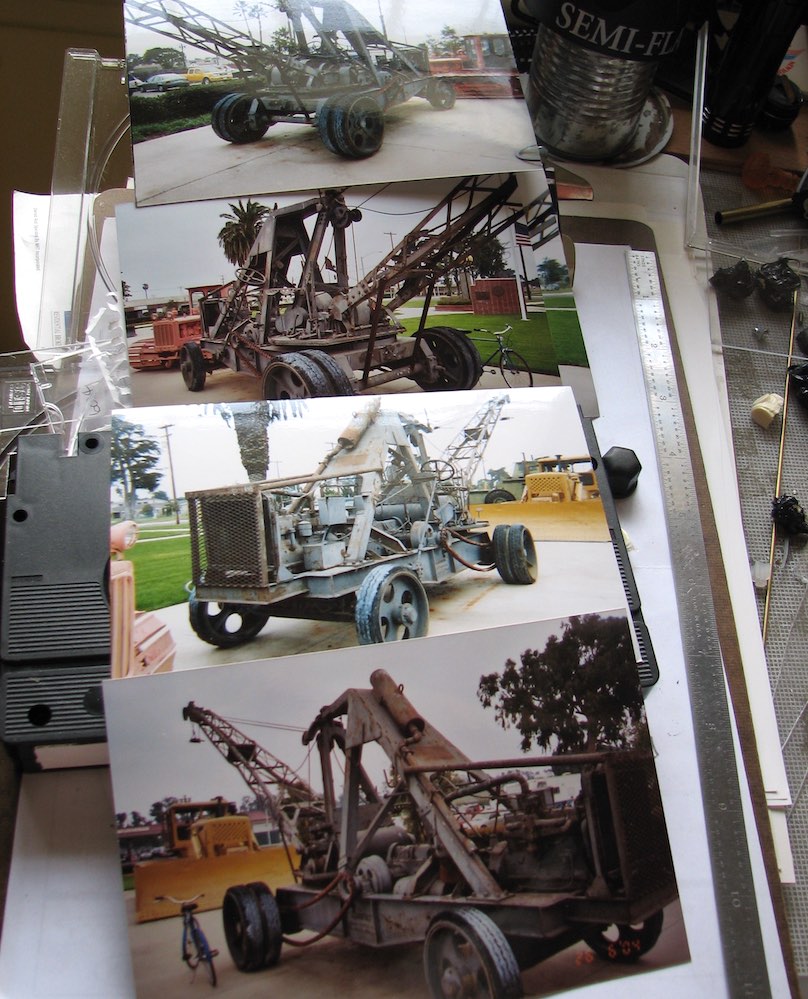
Cranemobile from Bay City Shovels modified by the US Navy. I started this in 2006 and was in the ACUTR campaign
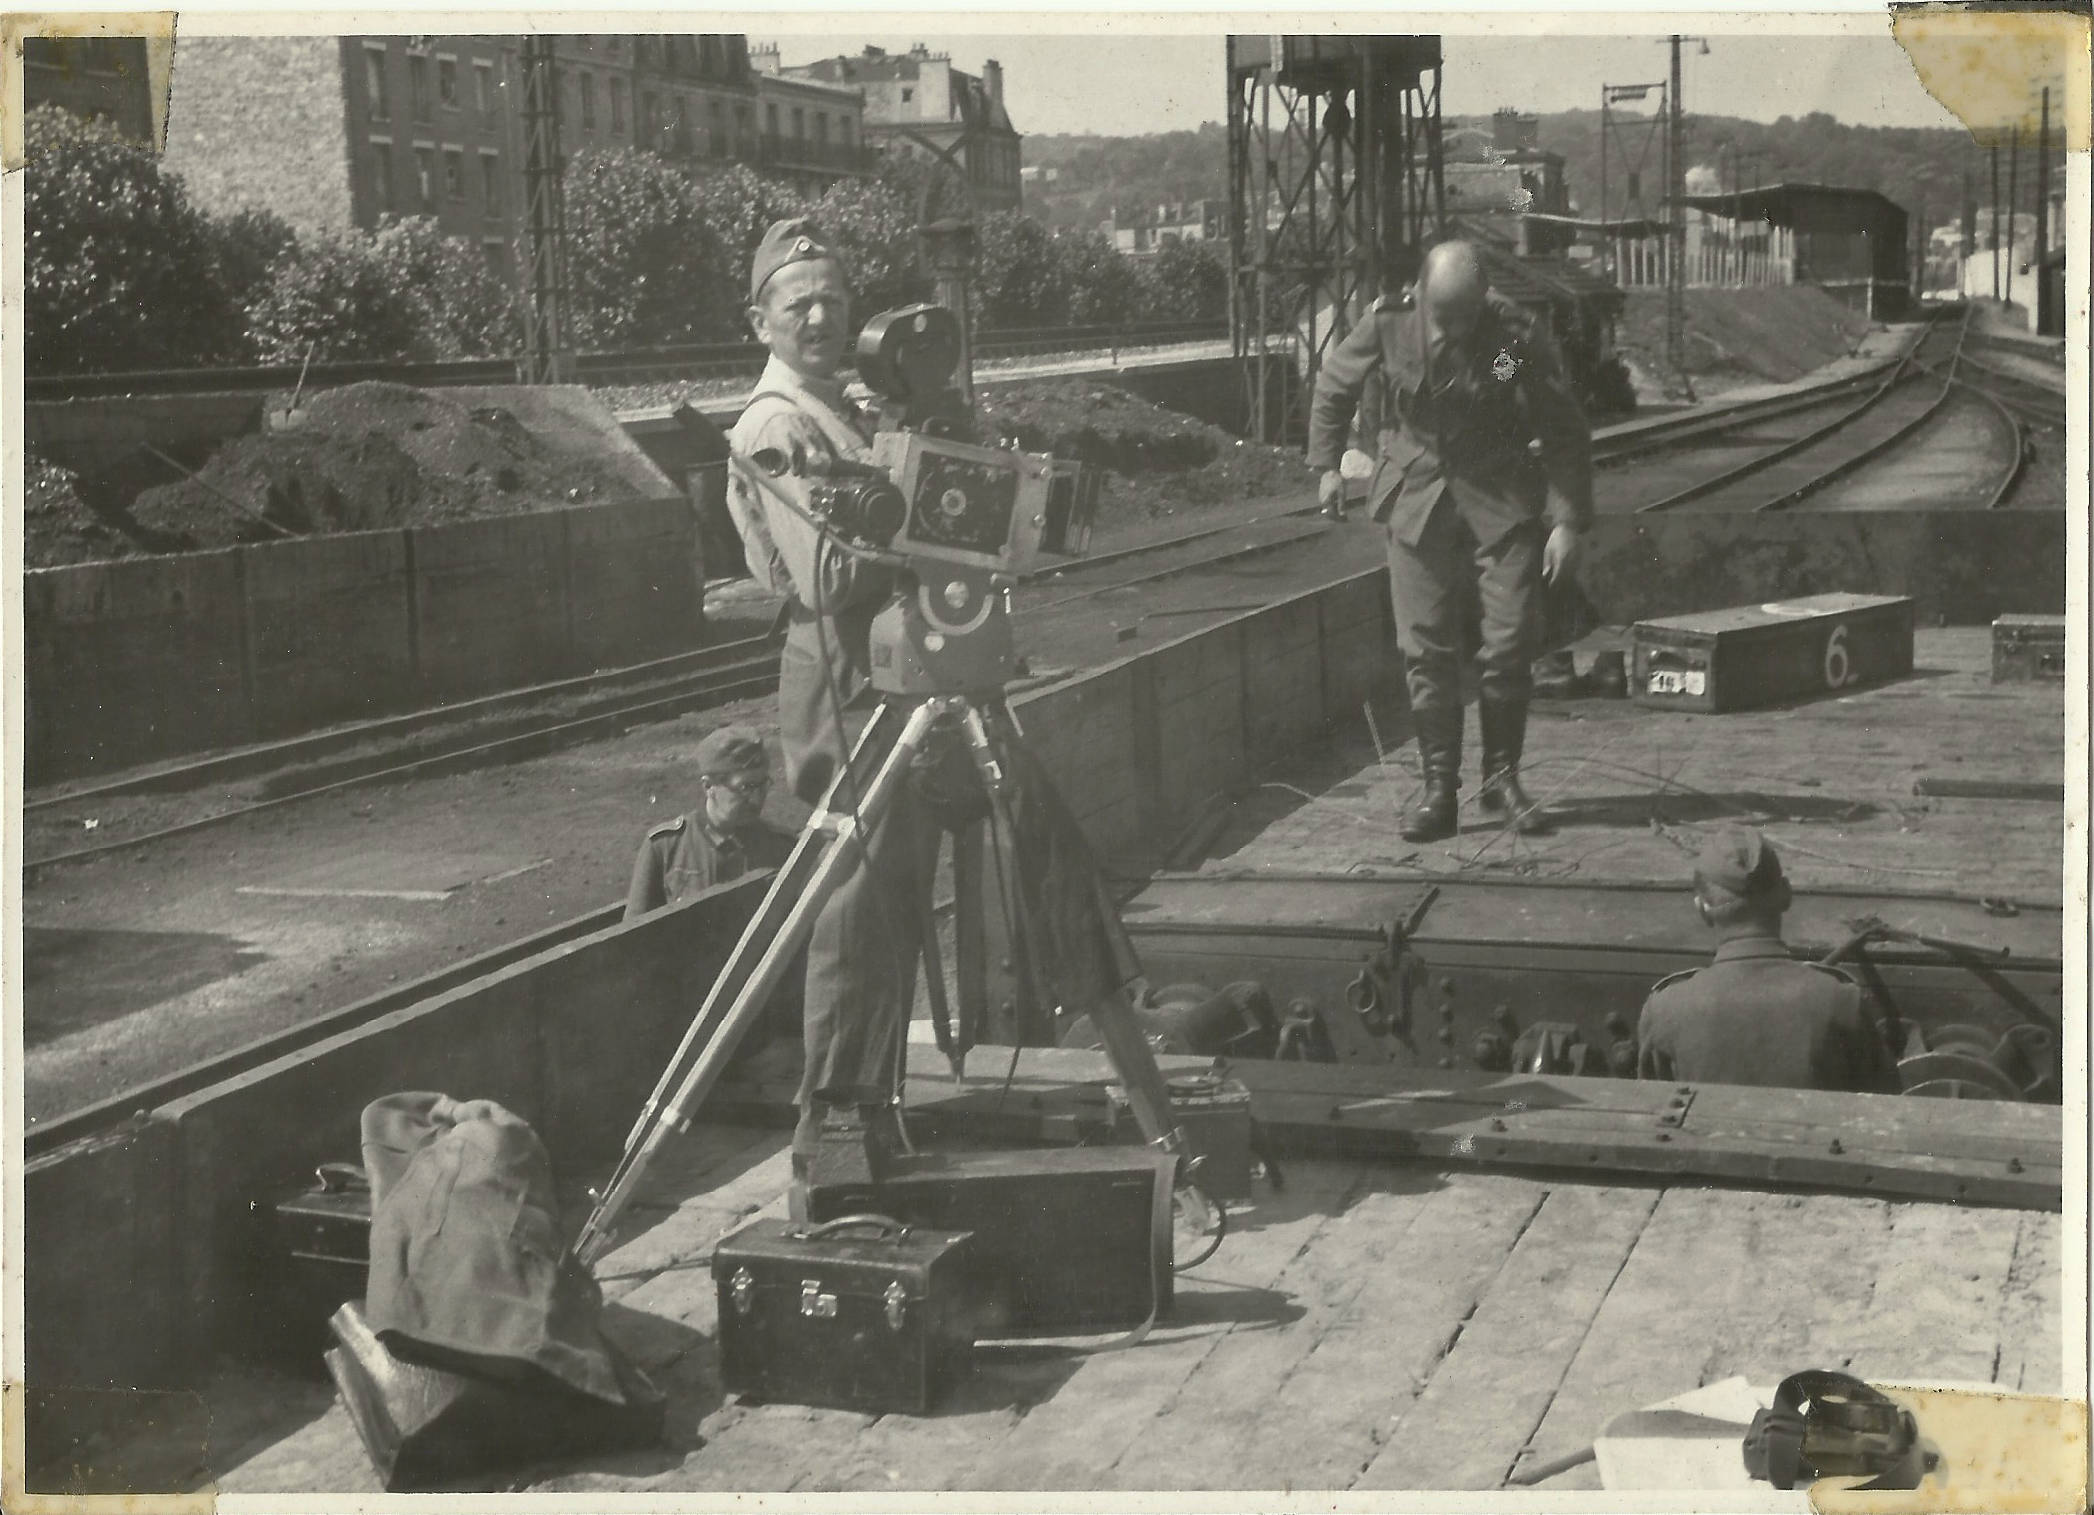
Great camera work Peter.
Being a Combat Photographer (Reenactor) I love seeing this sort of work! Even more I would love to own one in 1/35th.
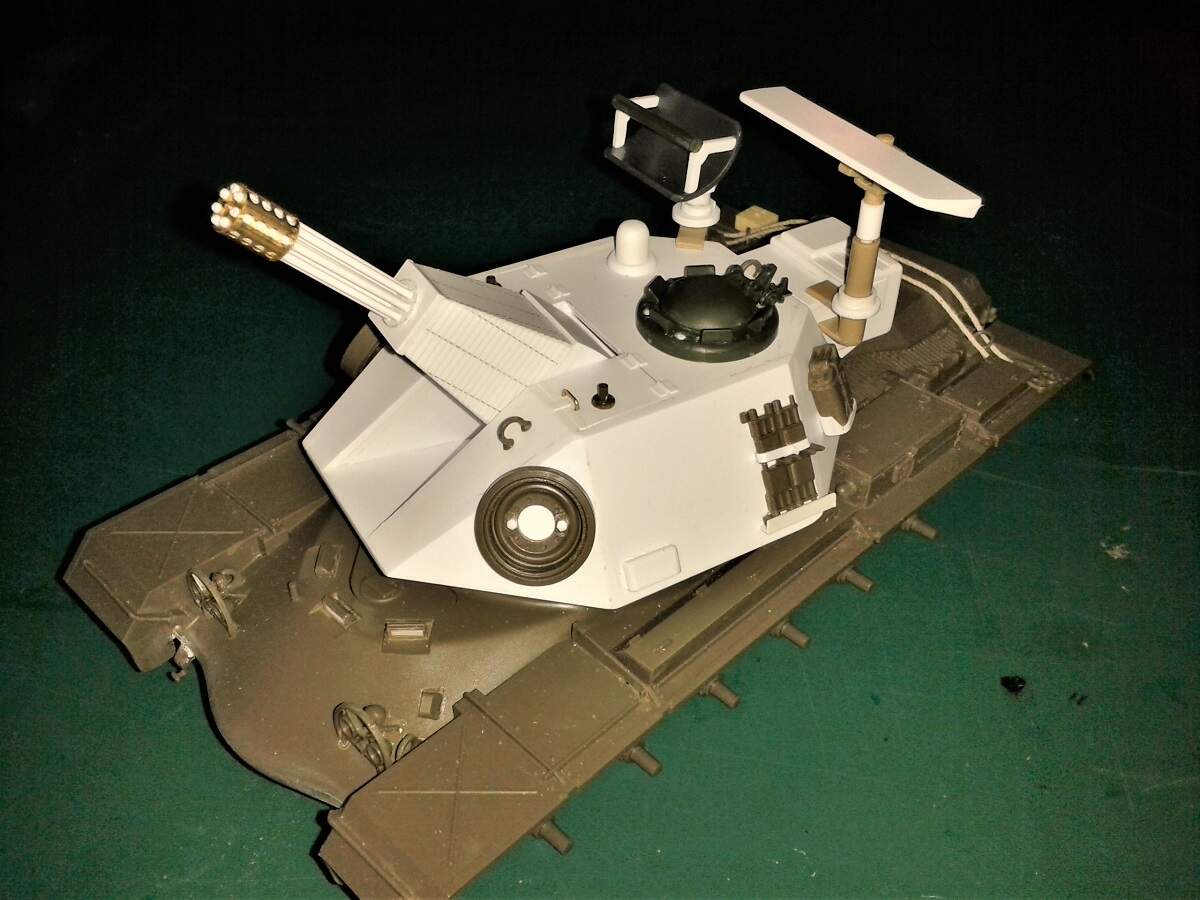
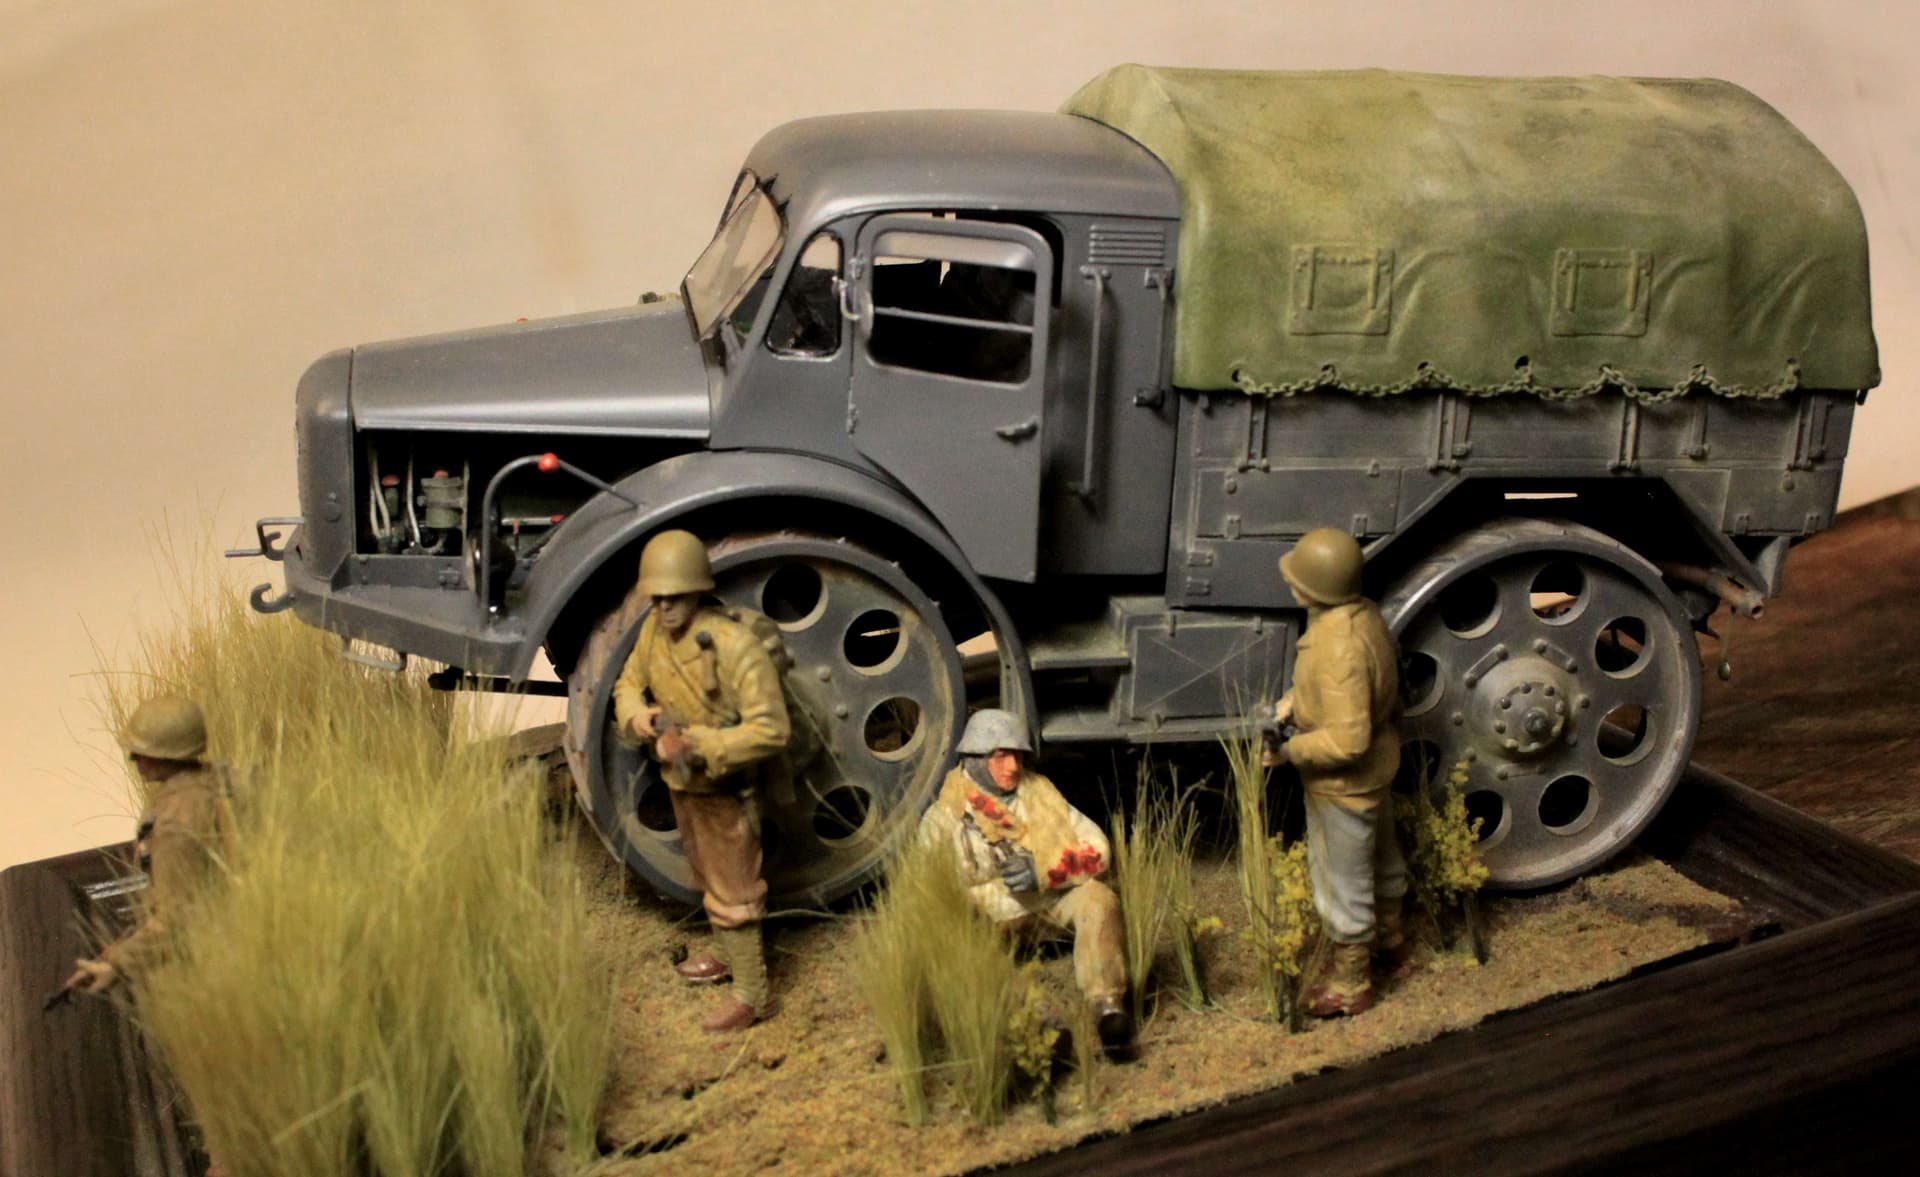
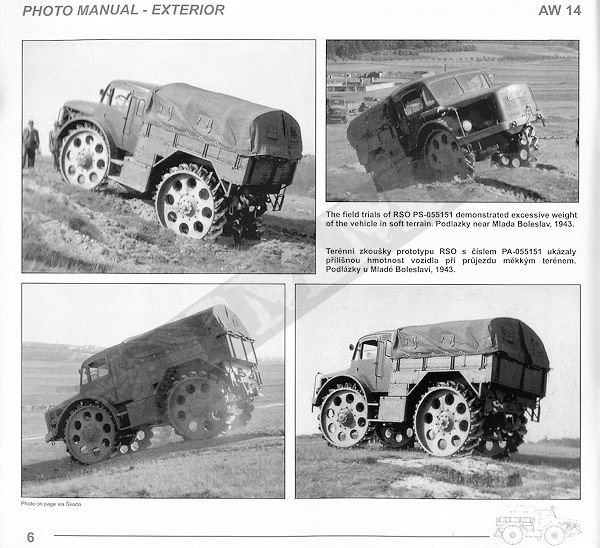
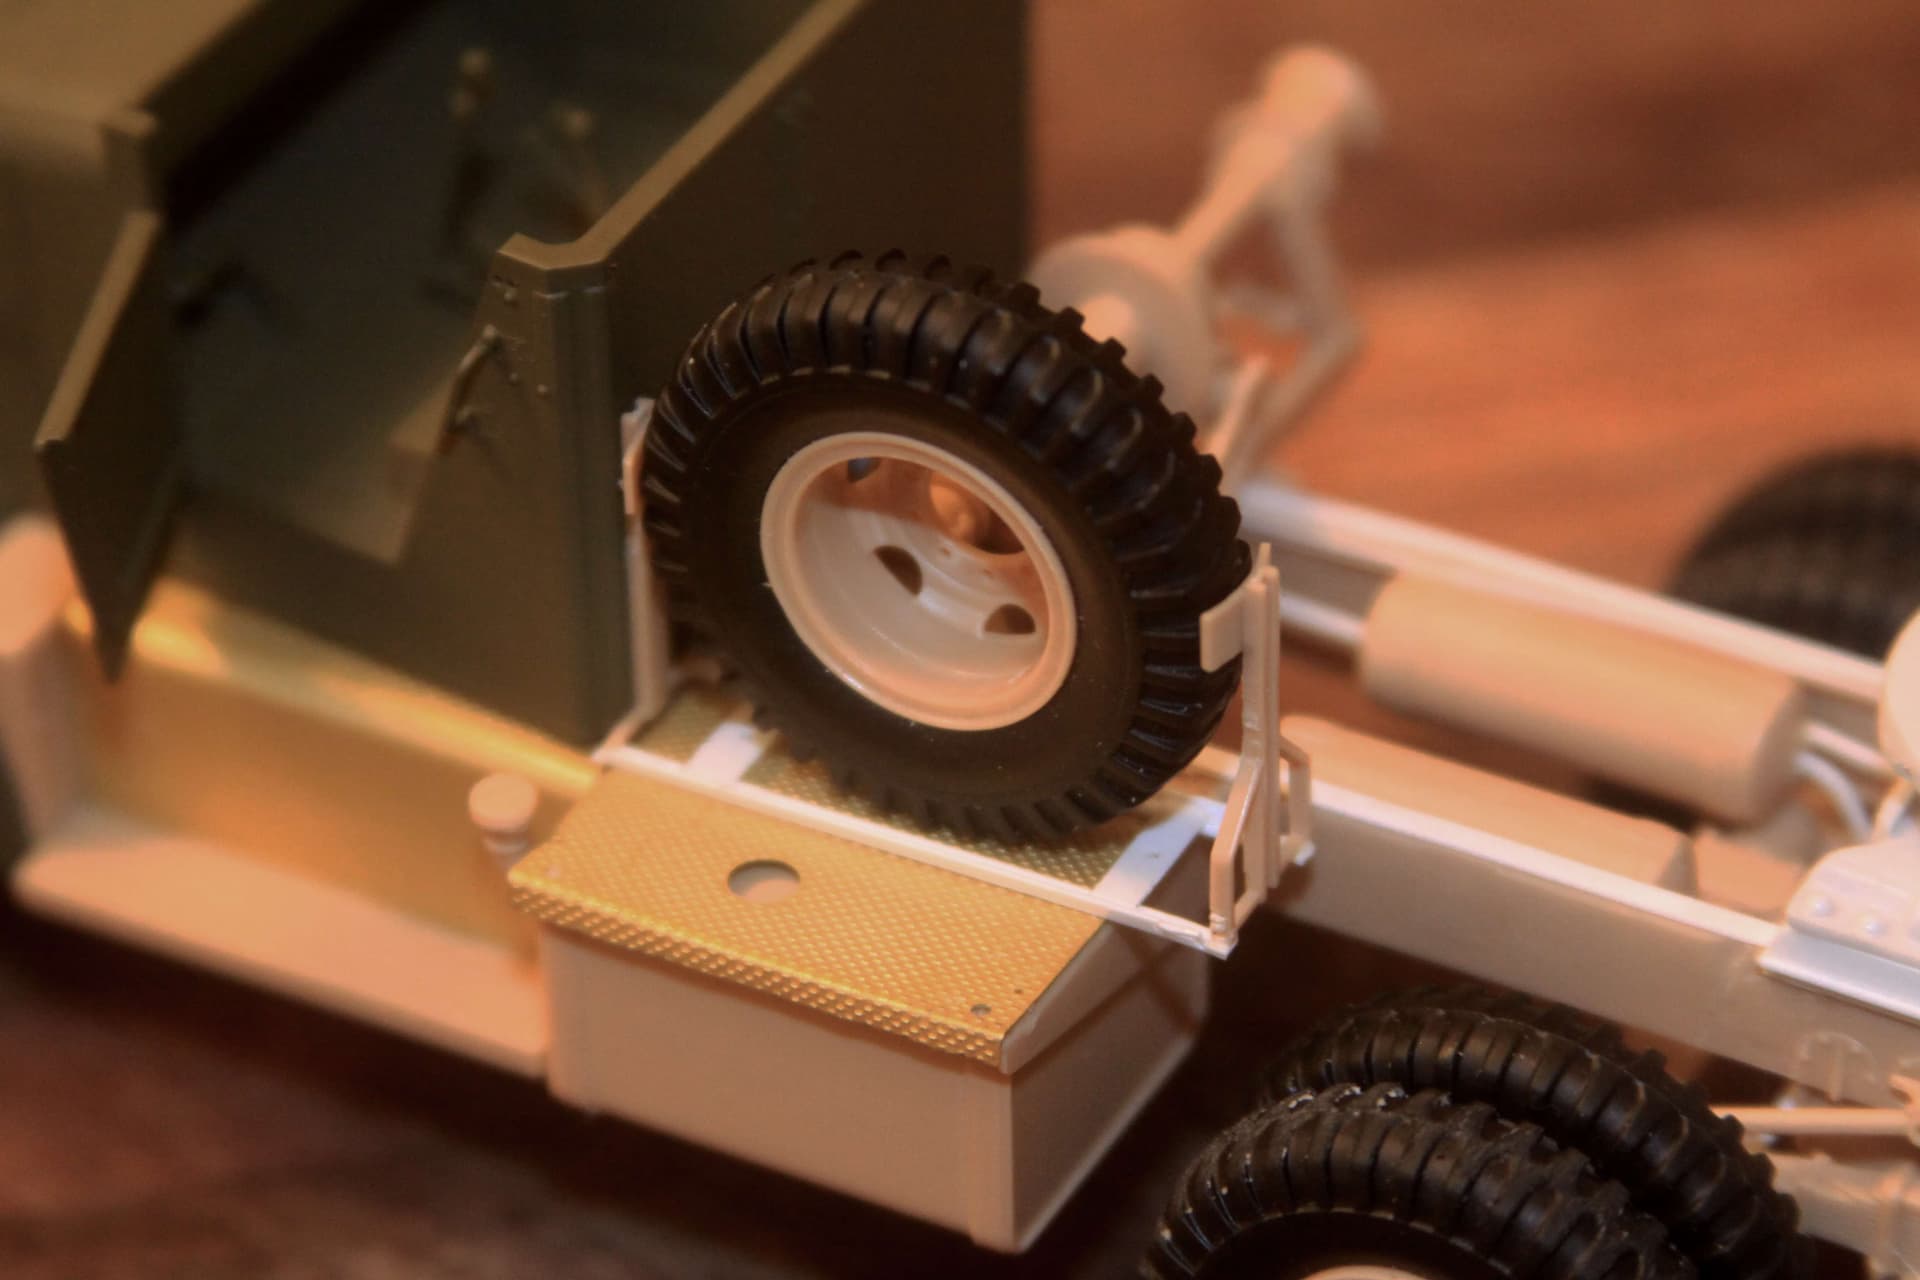
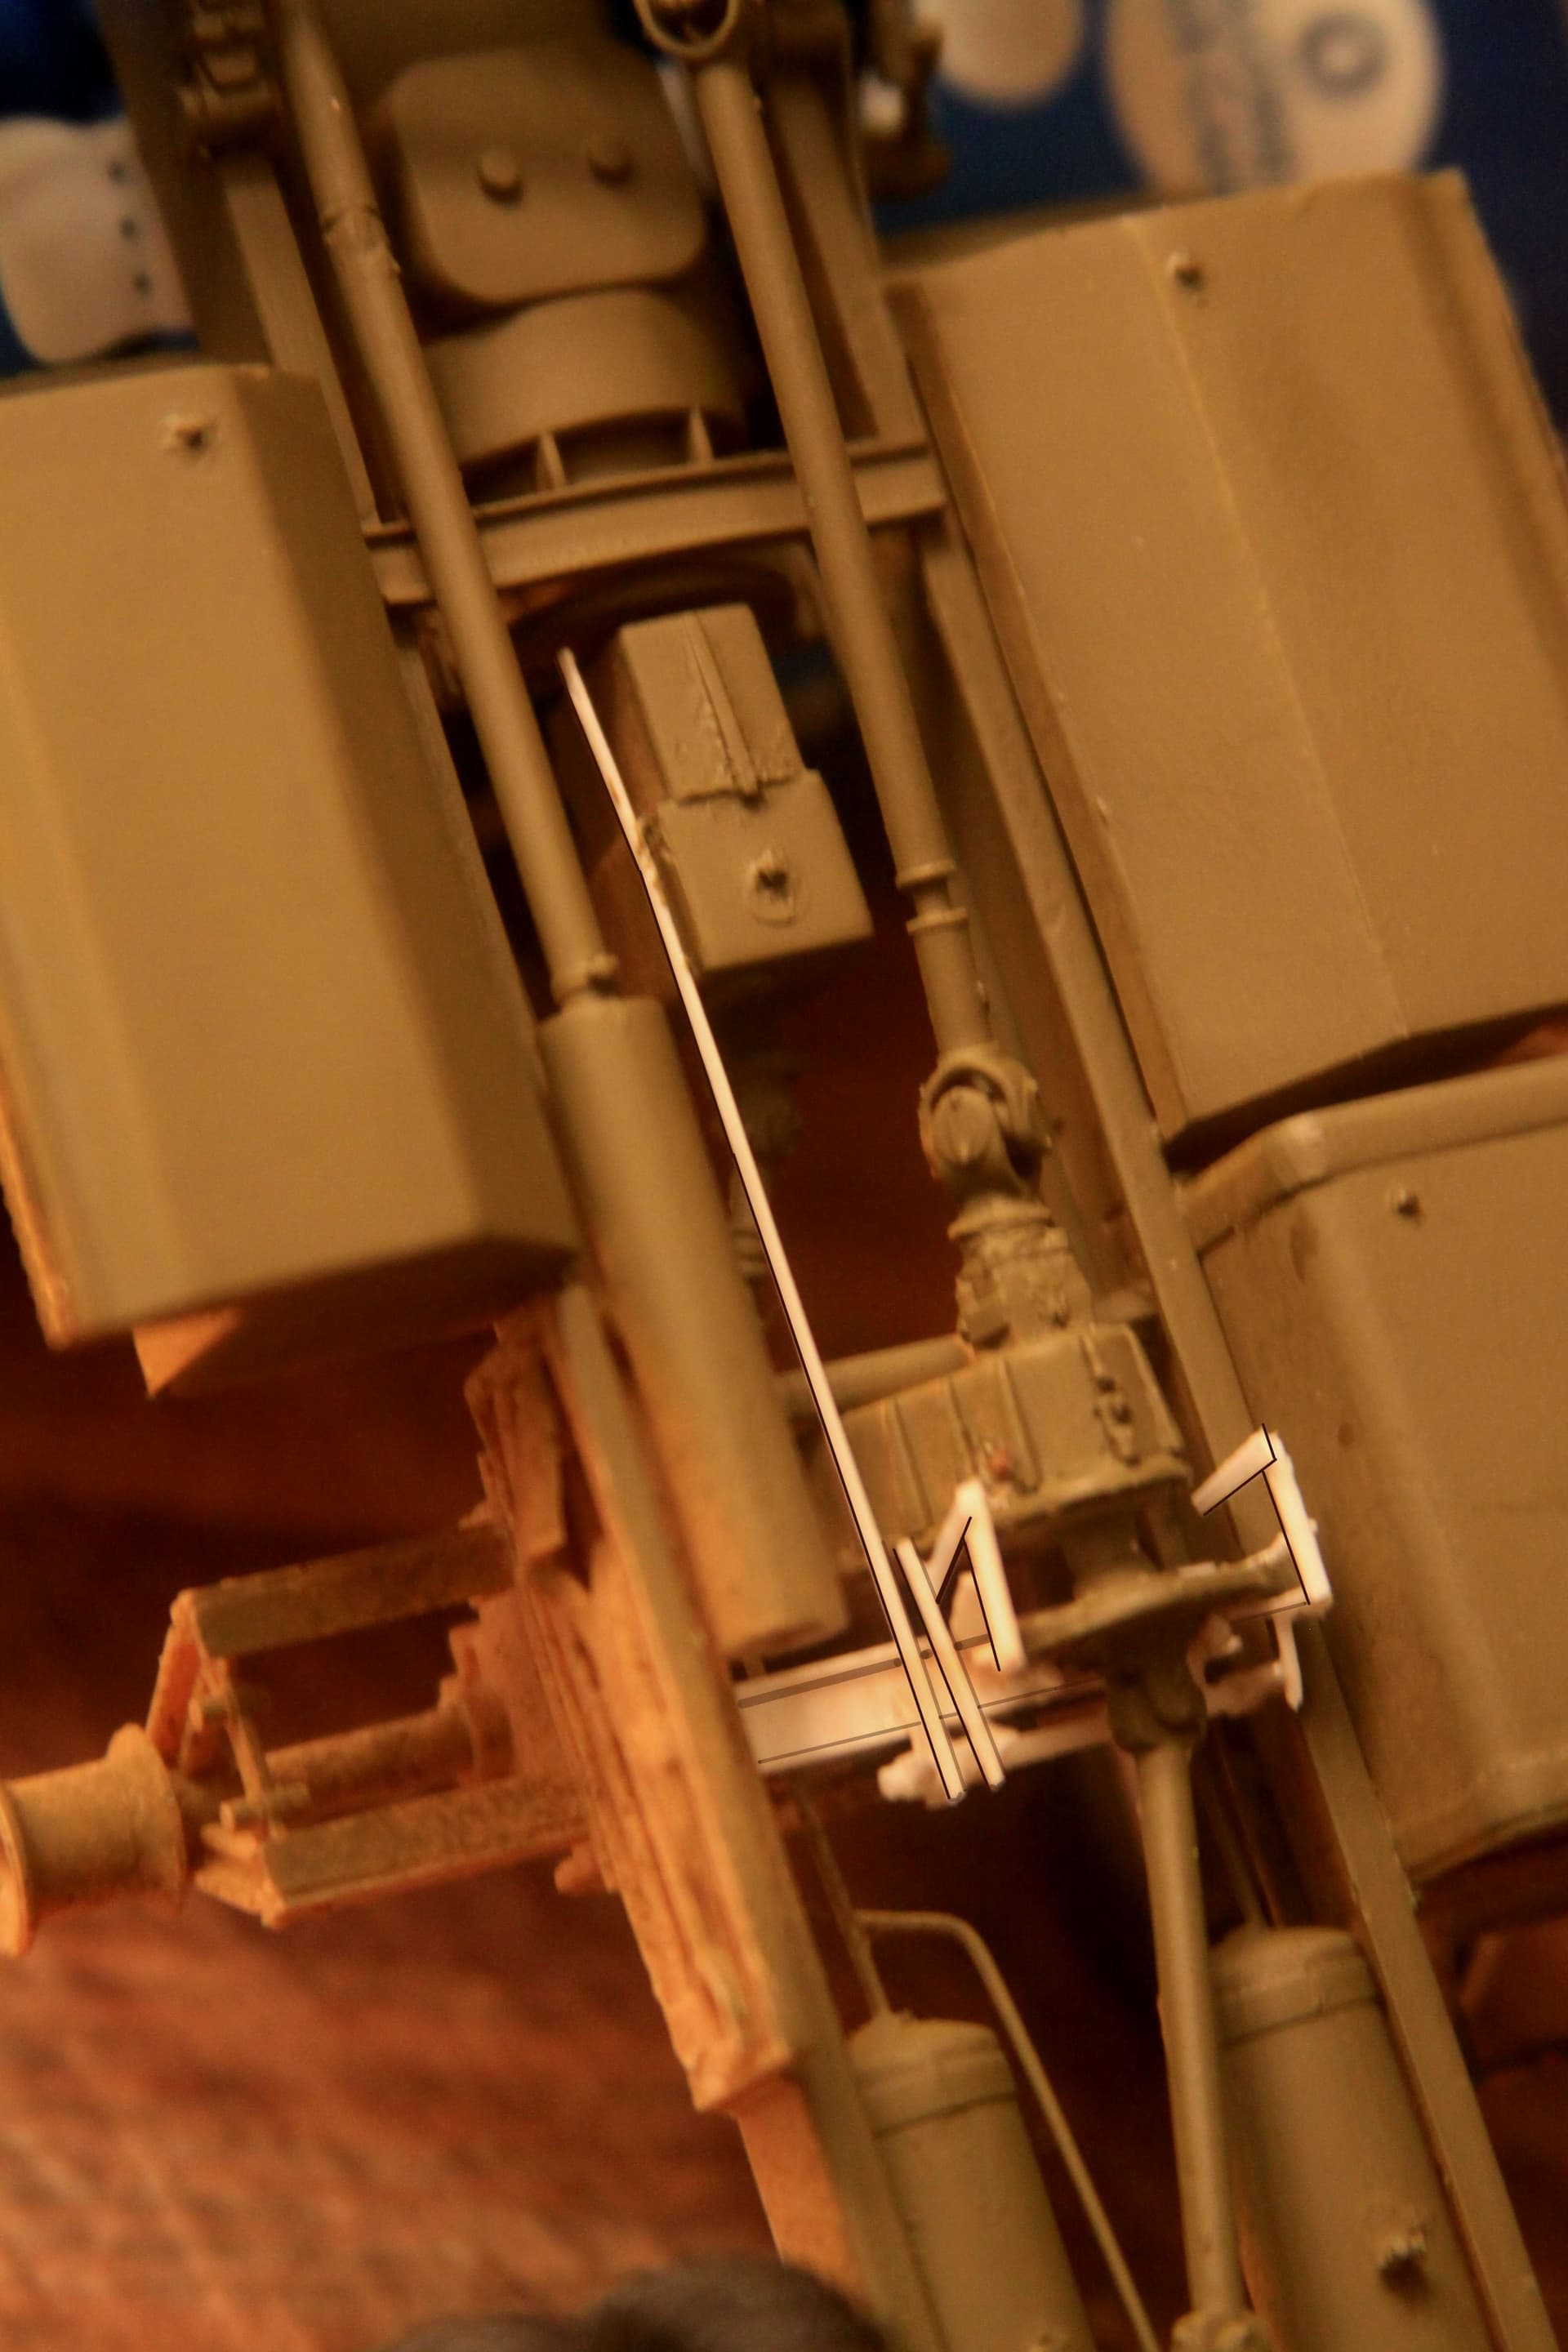
Skoda RSO Ost Prototype: (Conversion)
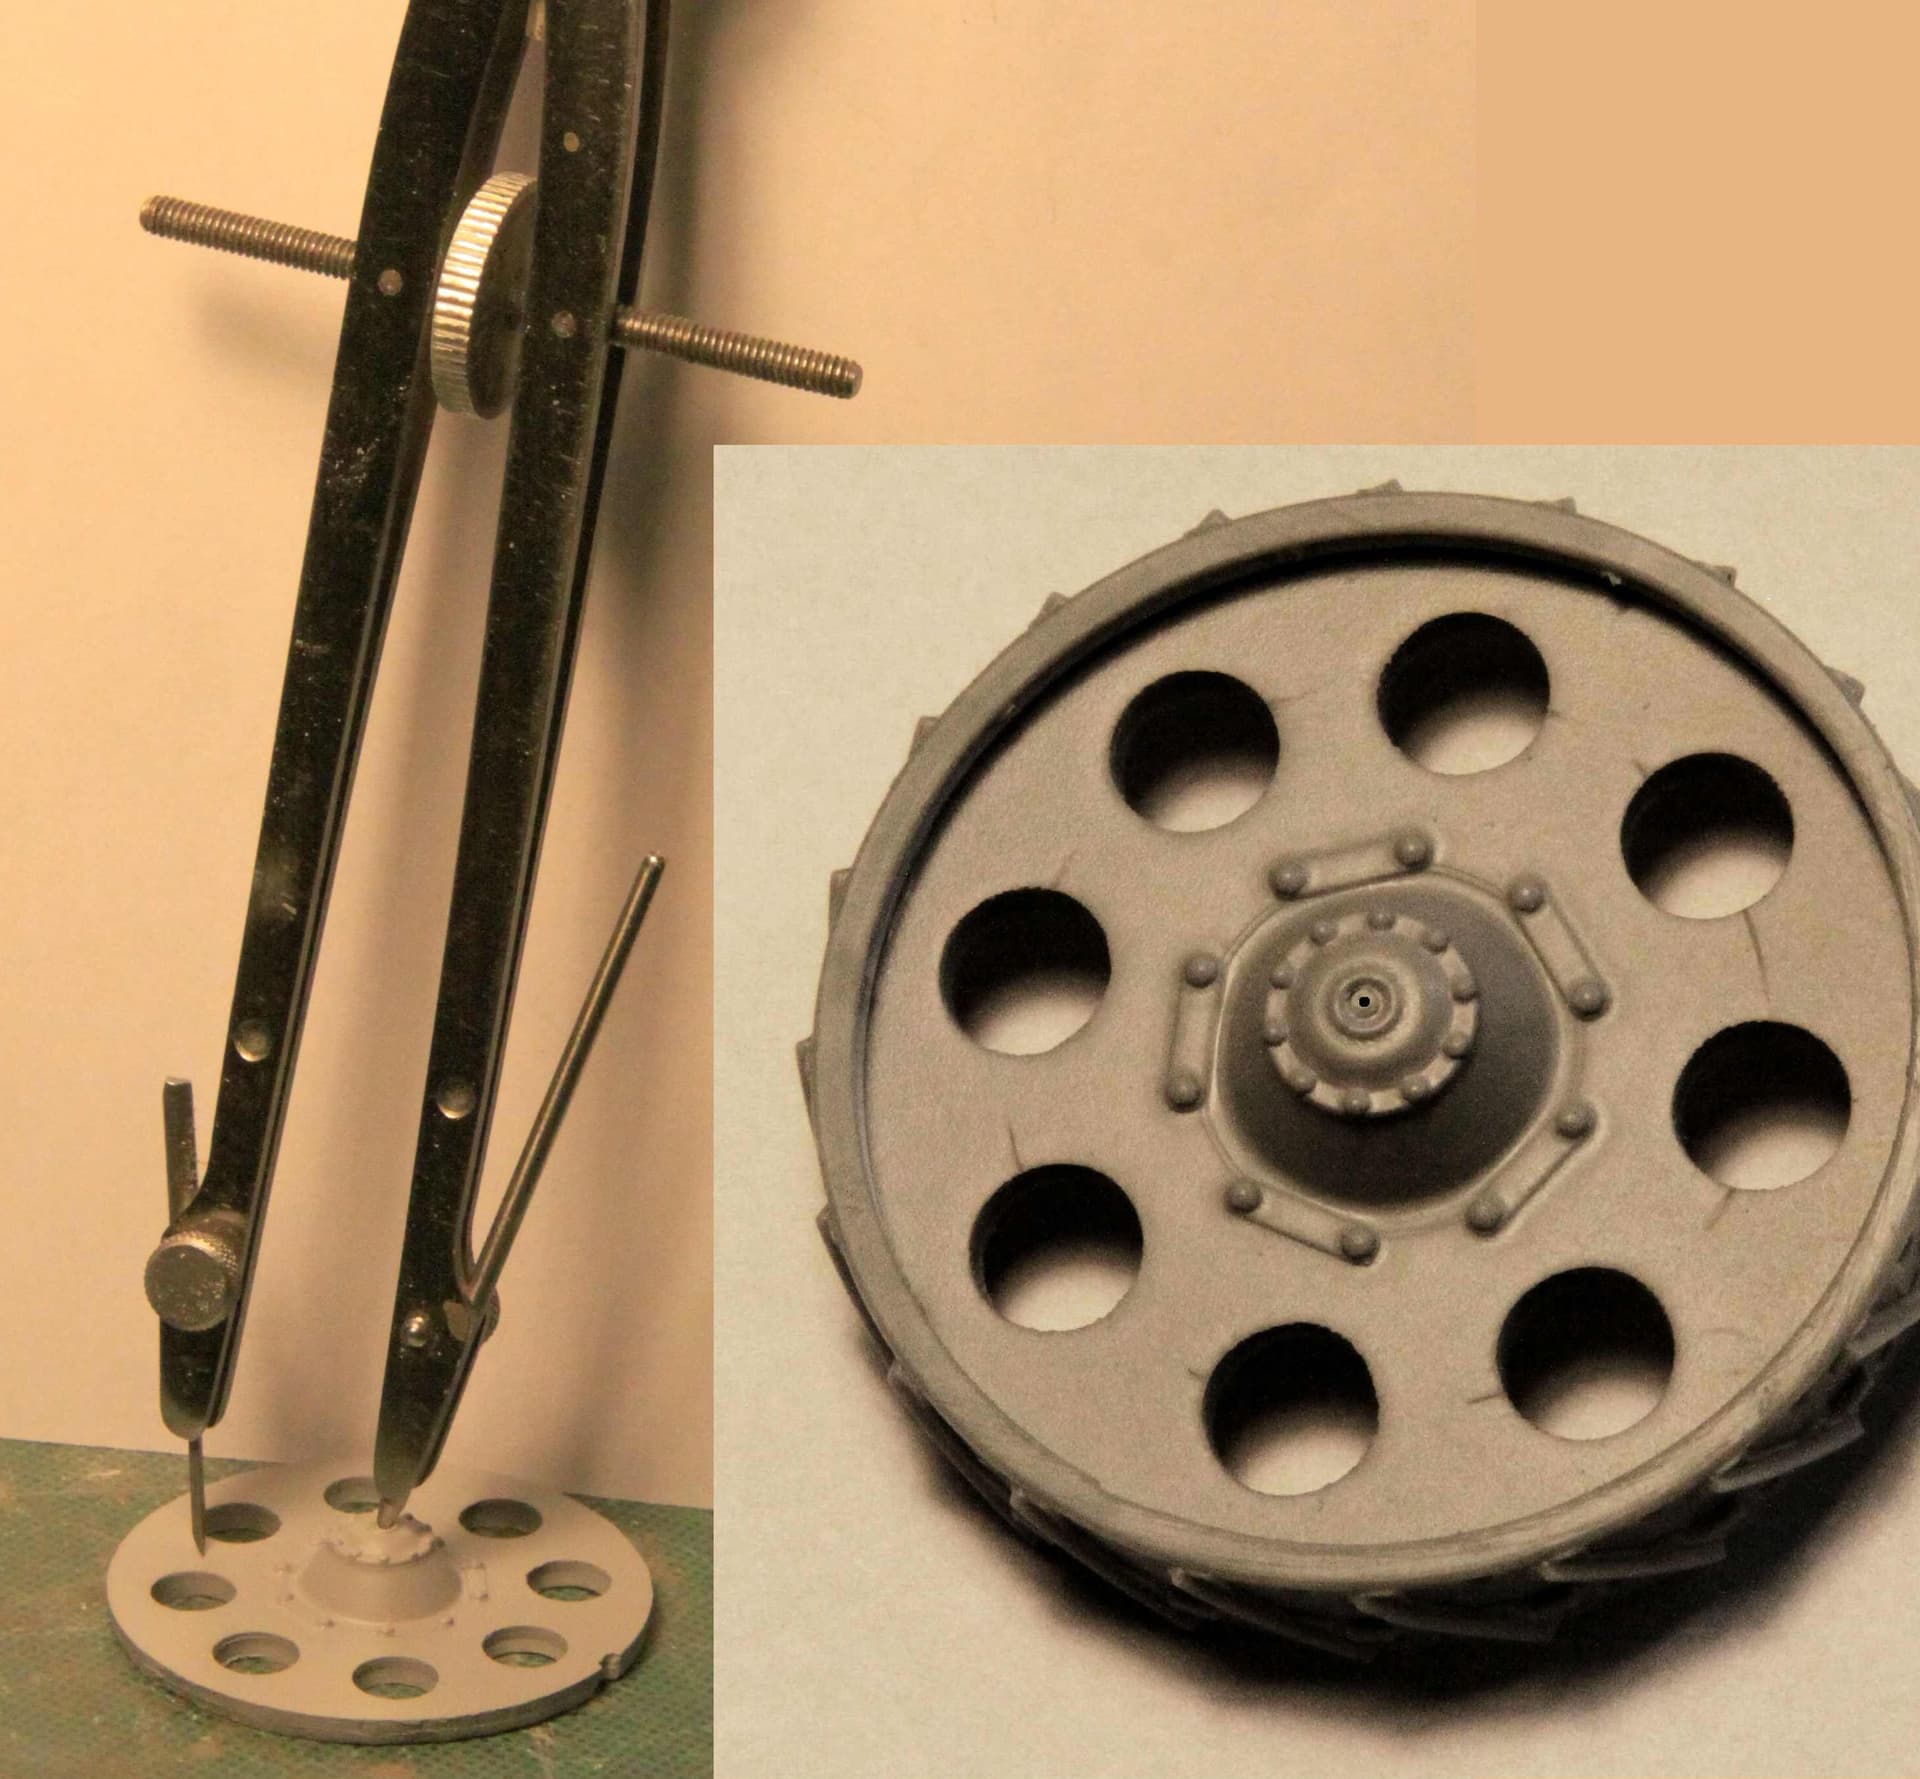
Hand drilled wheels (not resin) as well as other scratch built details such as the lower saddlebag toolboxes.
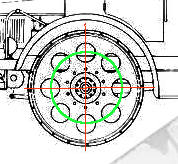
Drill’n & Wheel’n:
First drill a small hole in the center hub of each wheel to accommodate the compass point. Then scribe a circle that will represent the radial center line of all eight holes to be drilled. (The green circle shown in the drawing below.)
Then draw or scribe a center line that passes thru that center hub point. (The red horizontal line on the drawing below.)
After that draw or scribe a vertical line at 90 degrees to the horizontal line. (The red vertical line in the drawing below.)
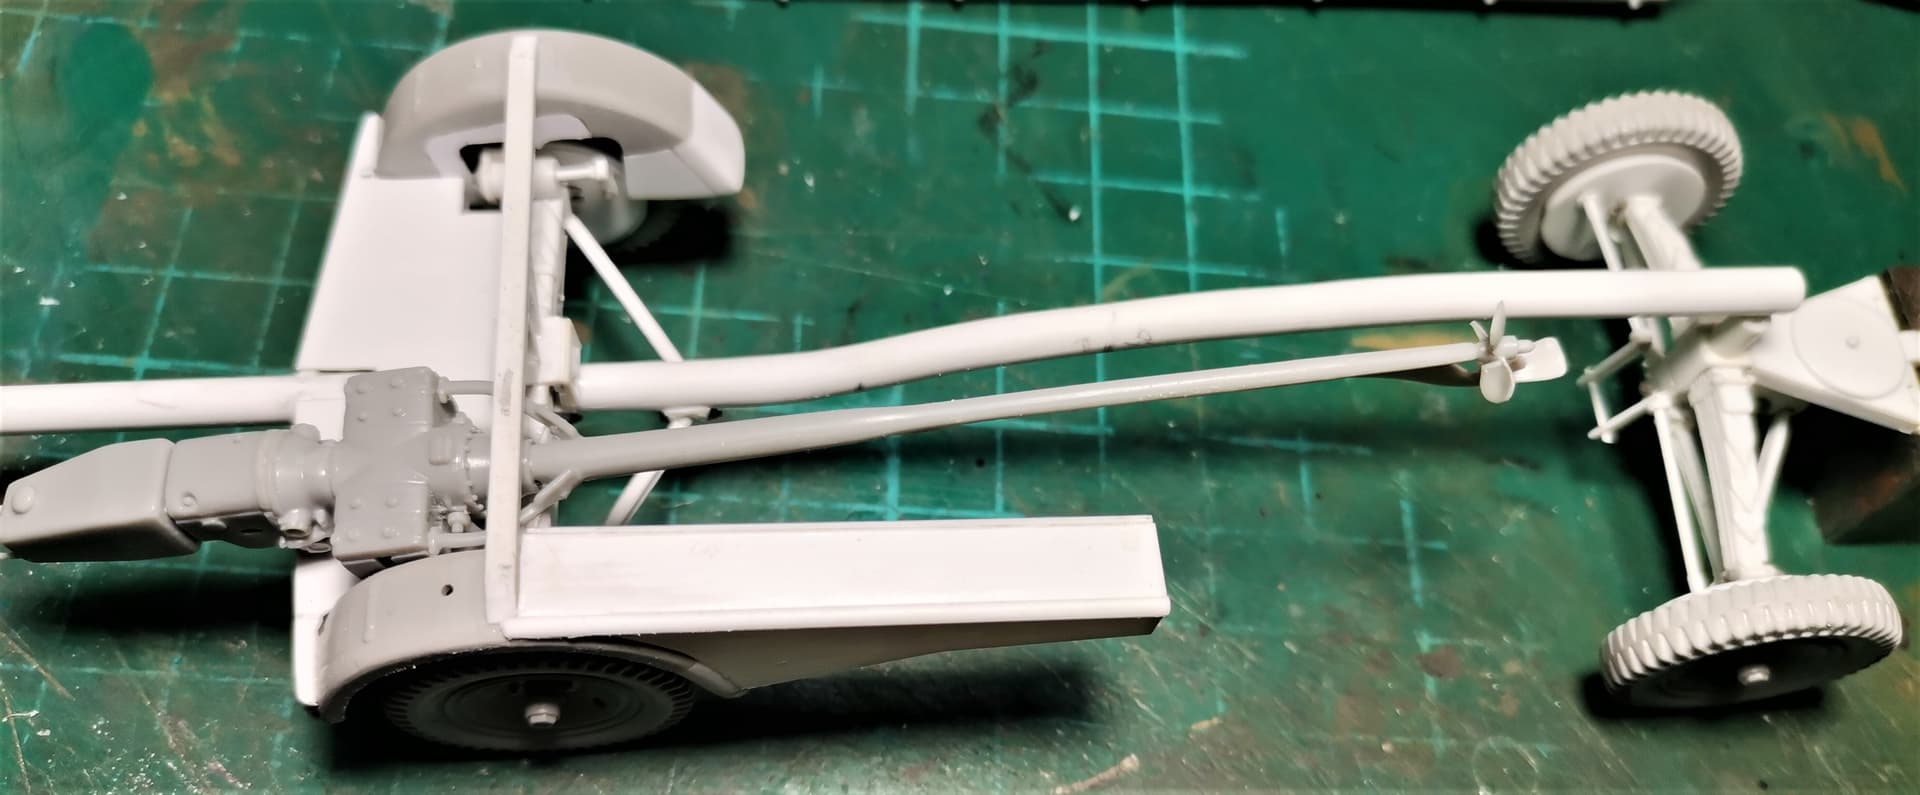
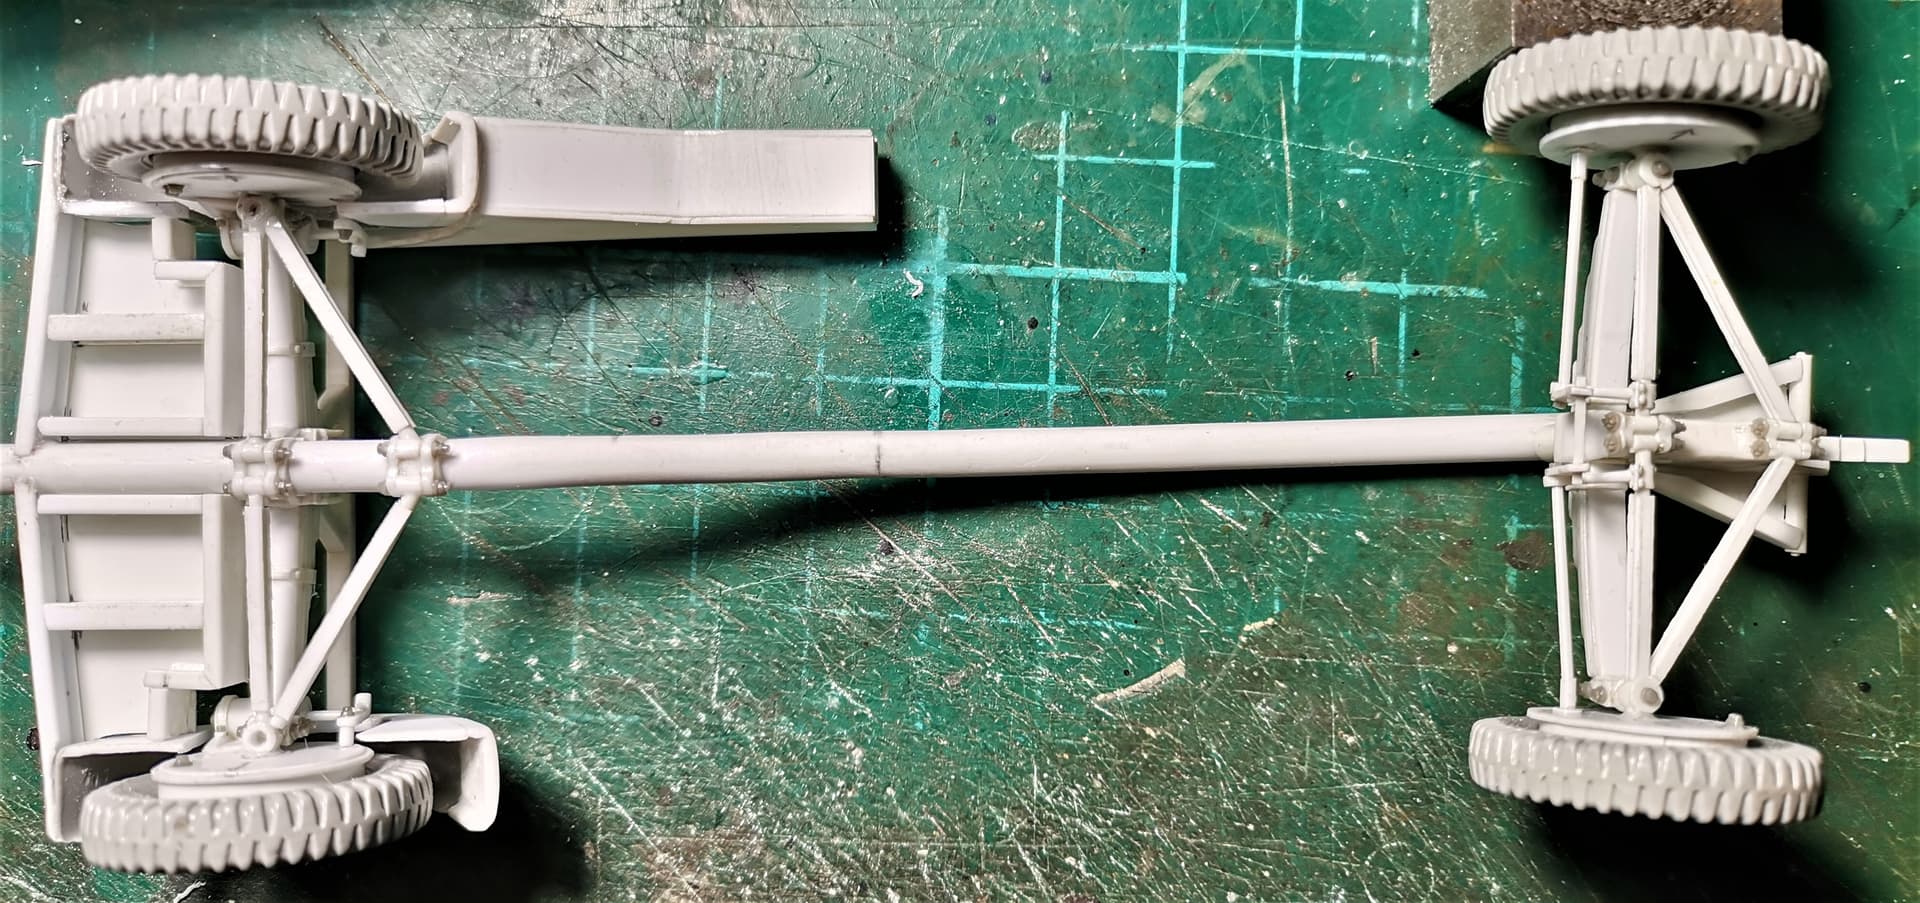
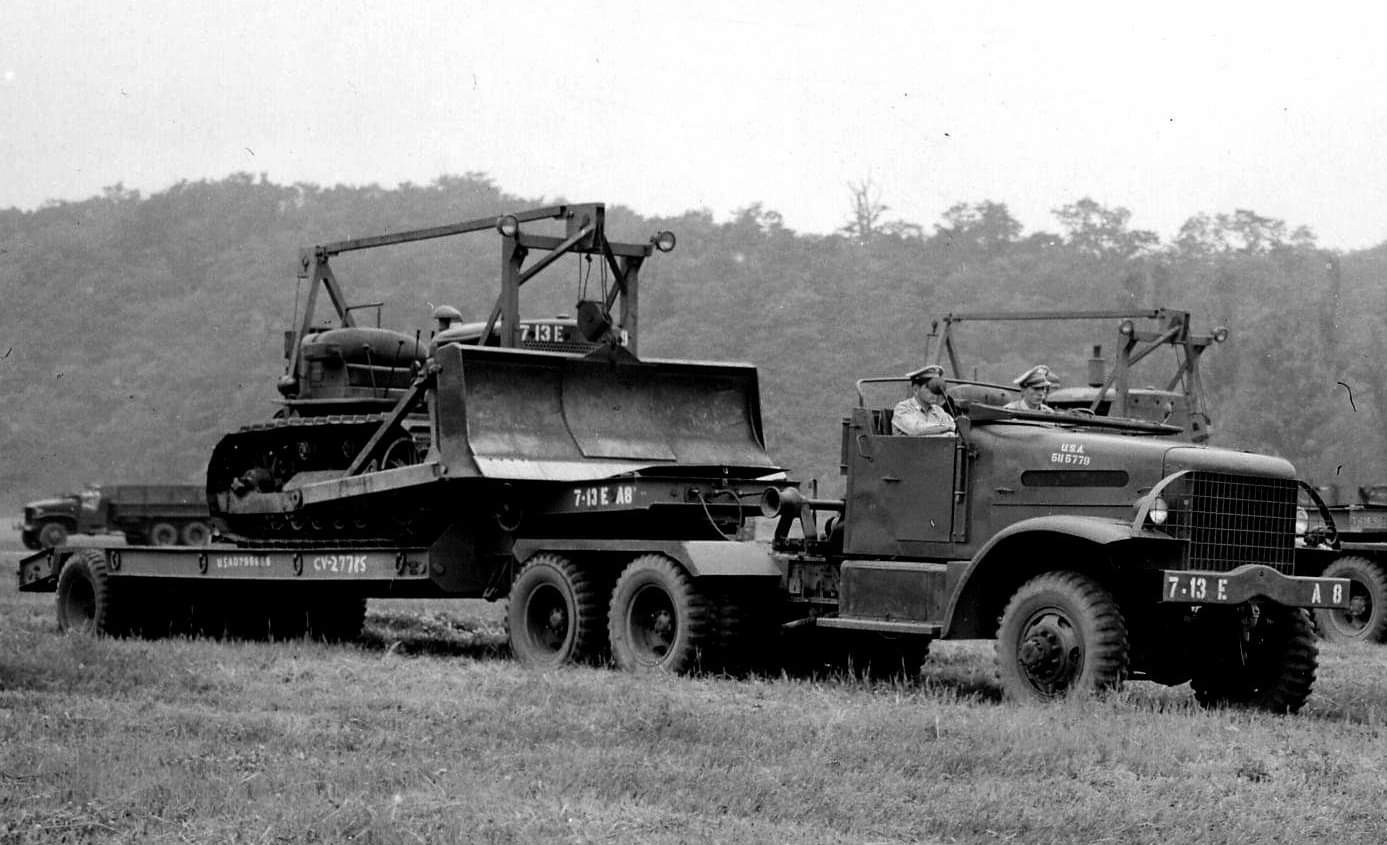
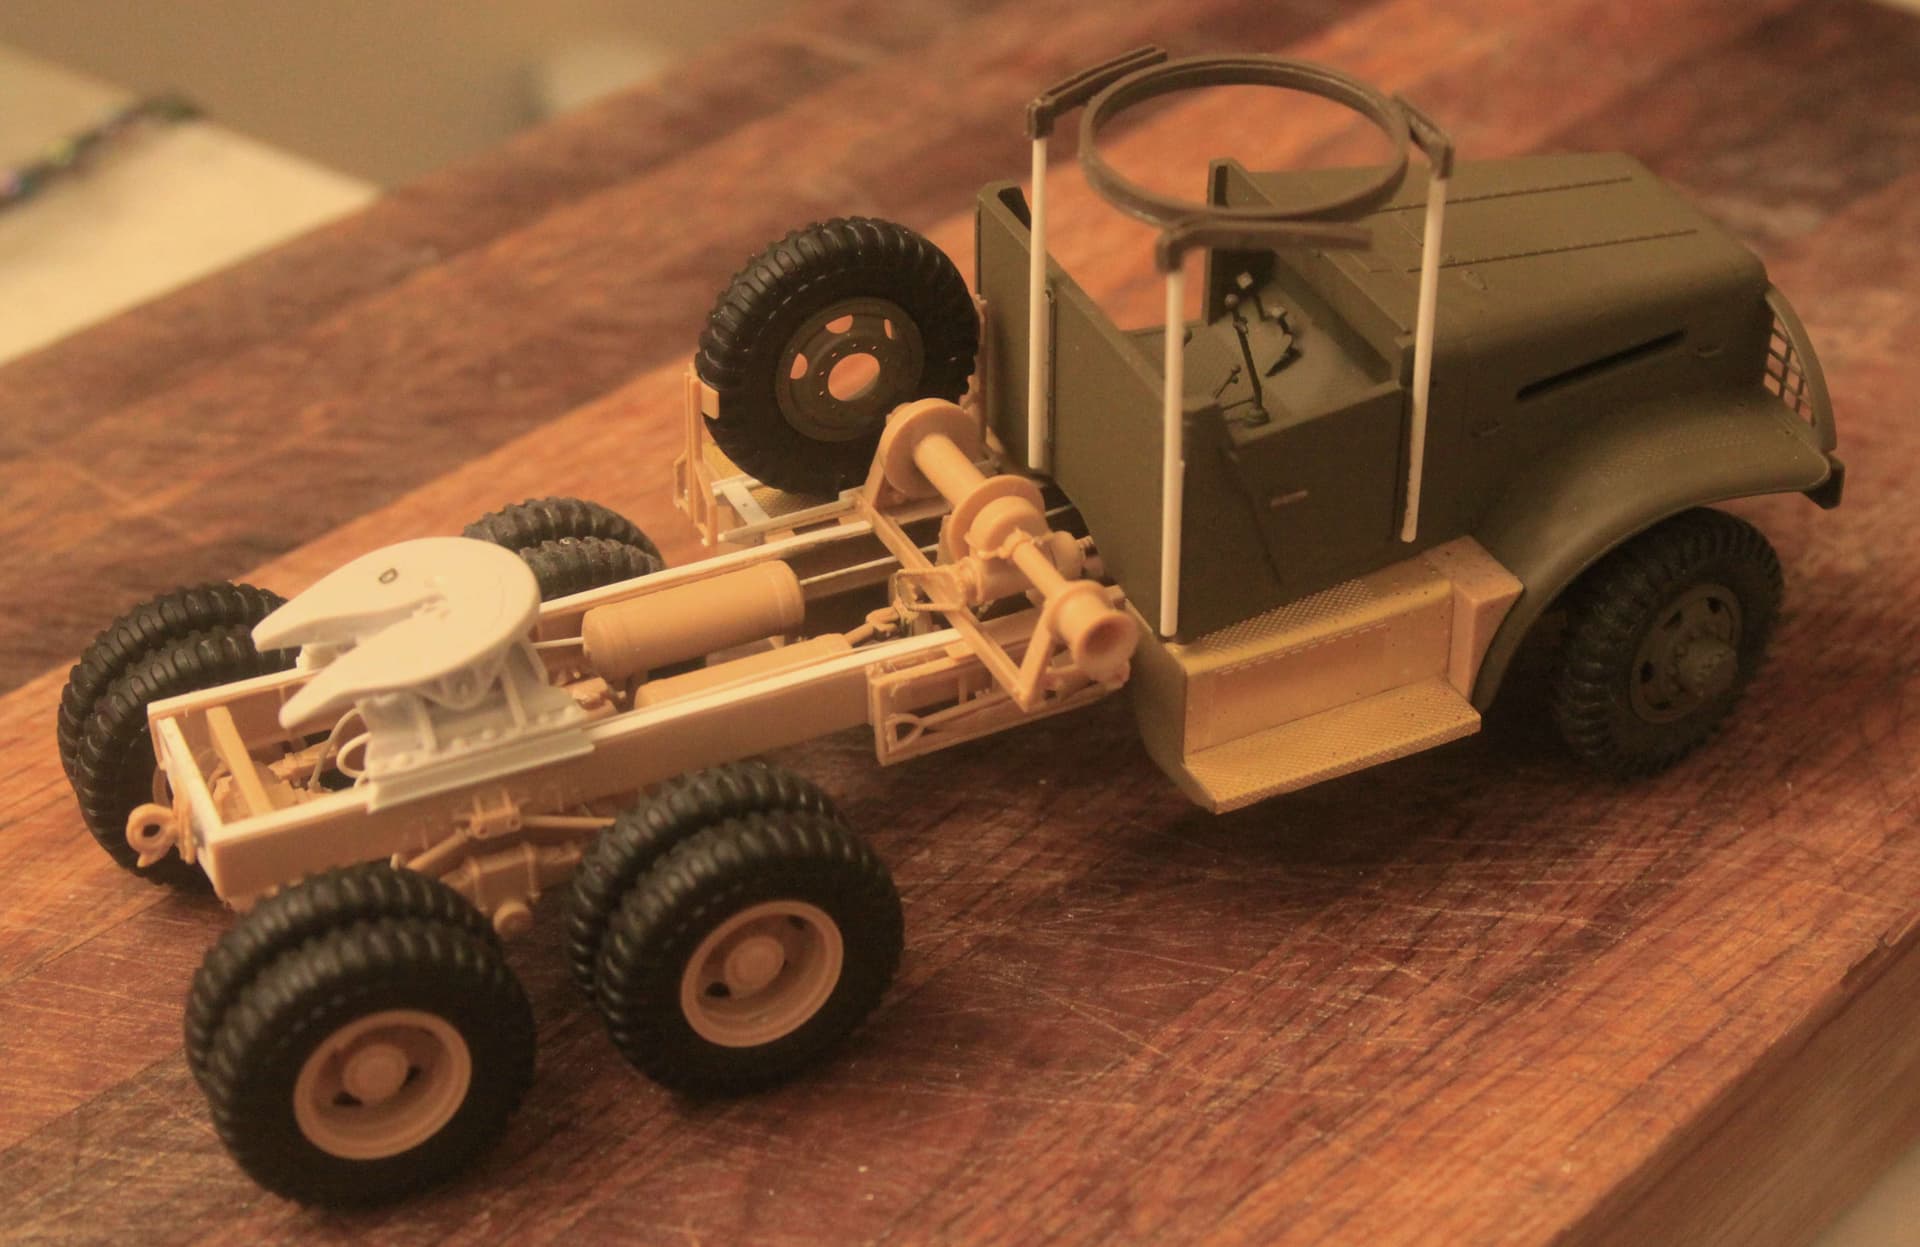
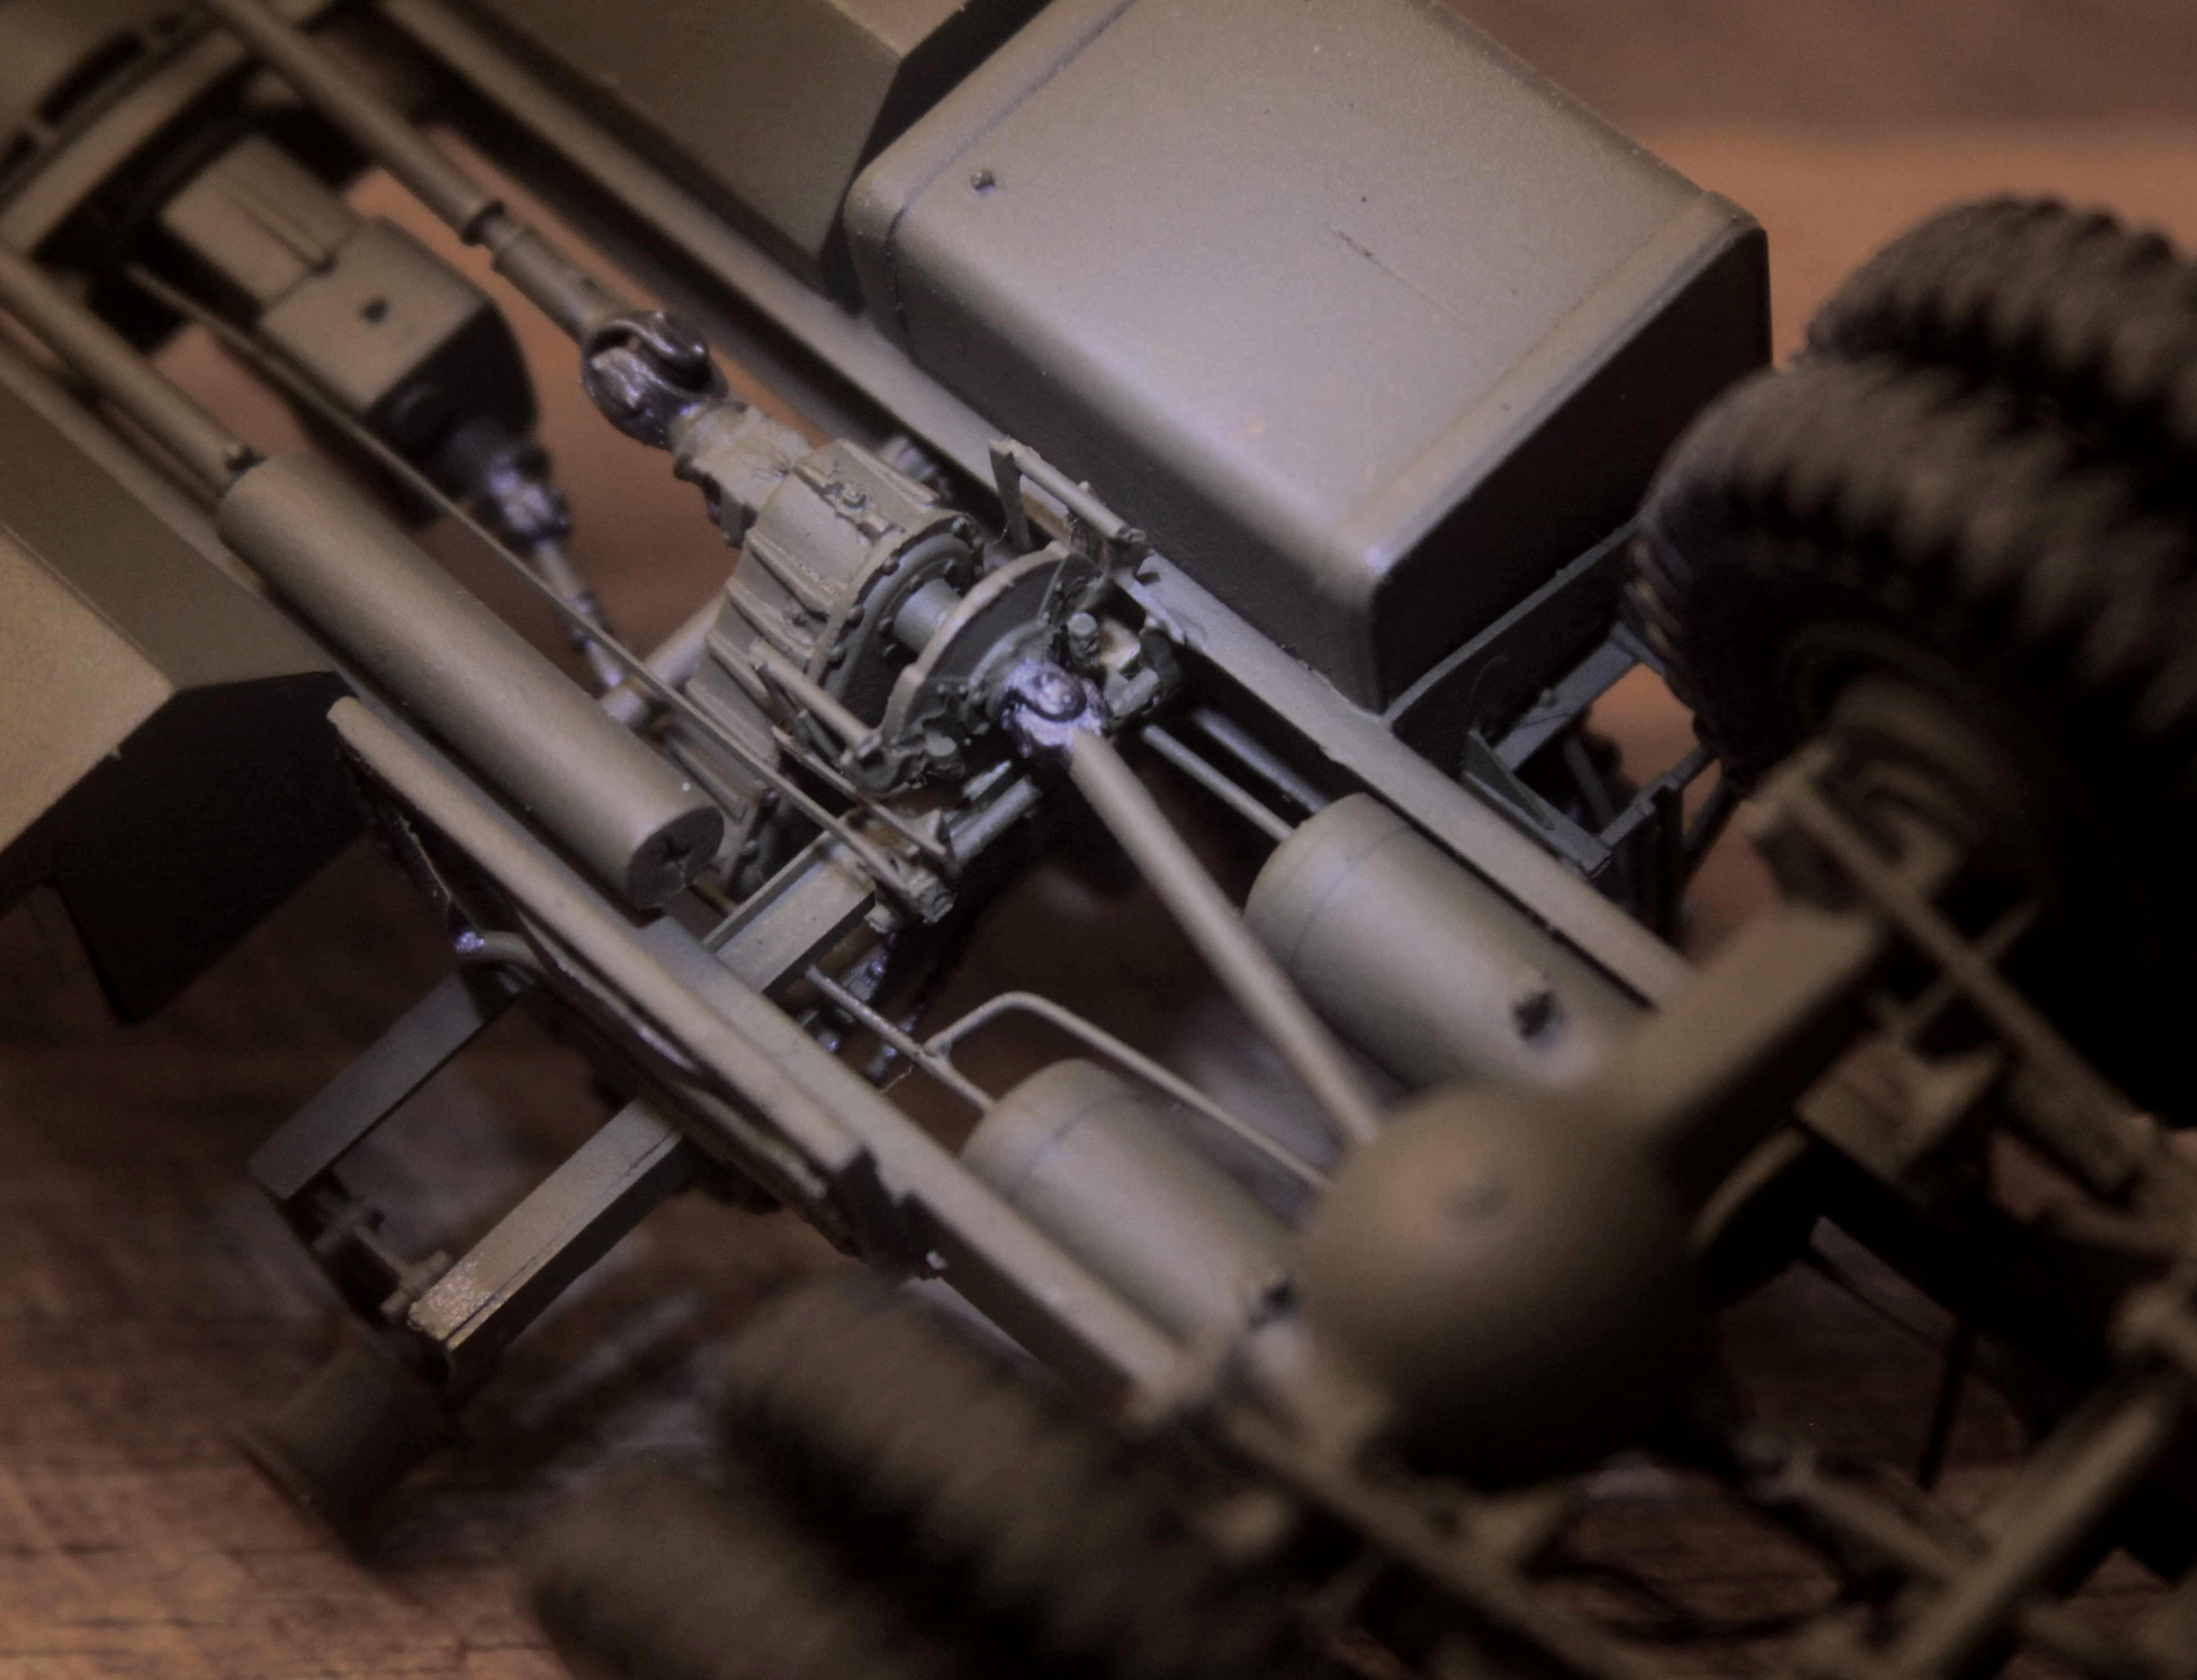
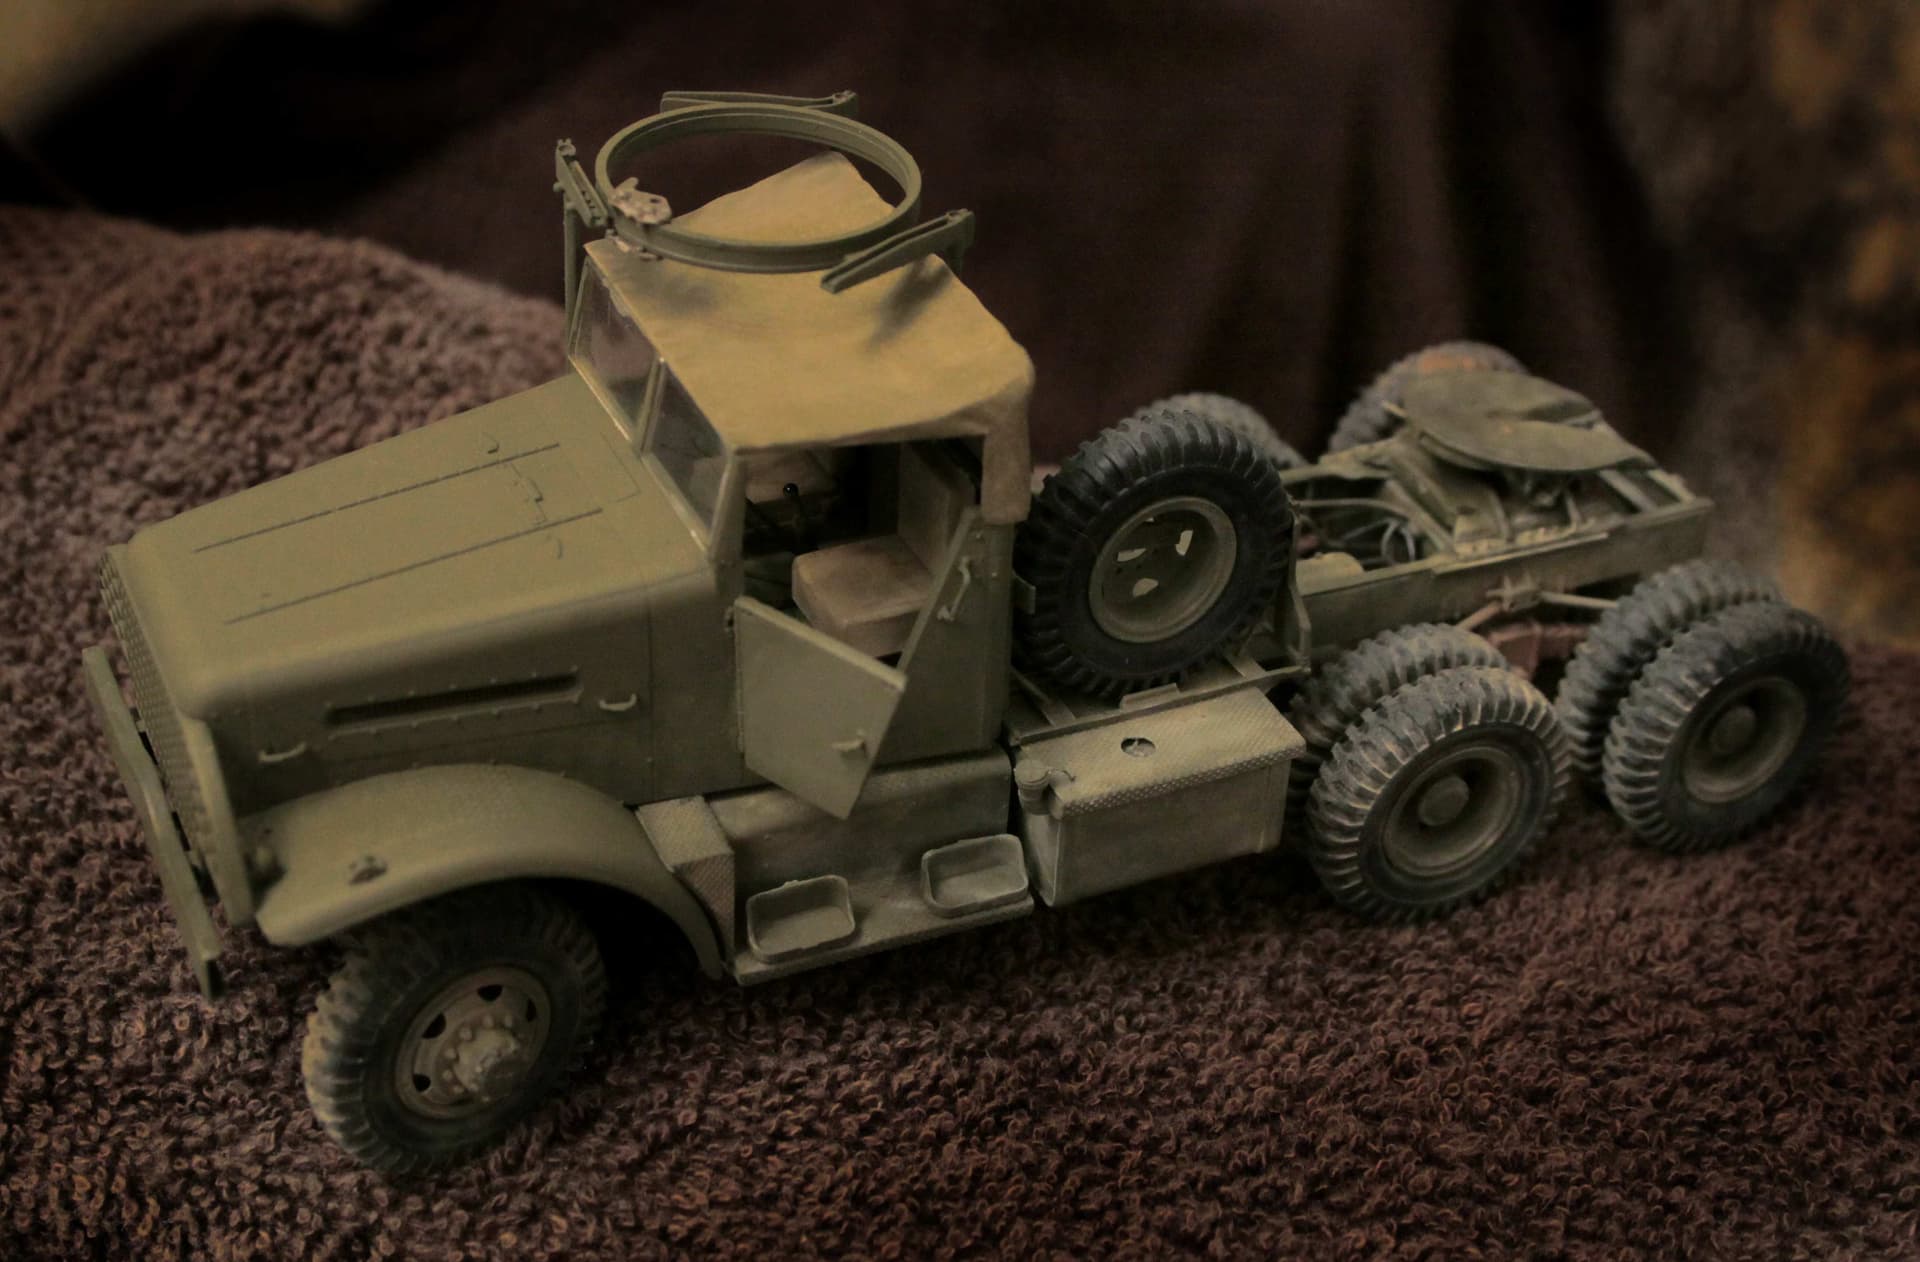
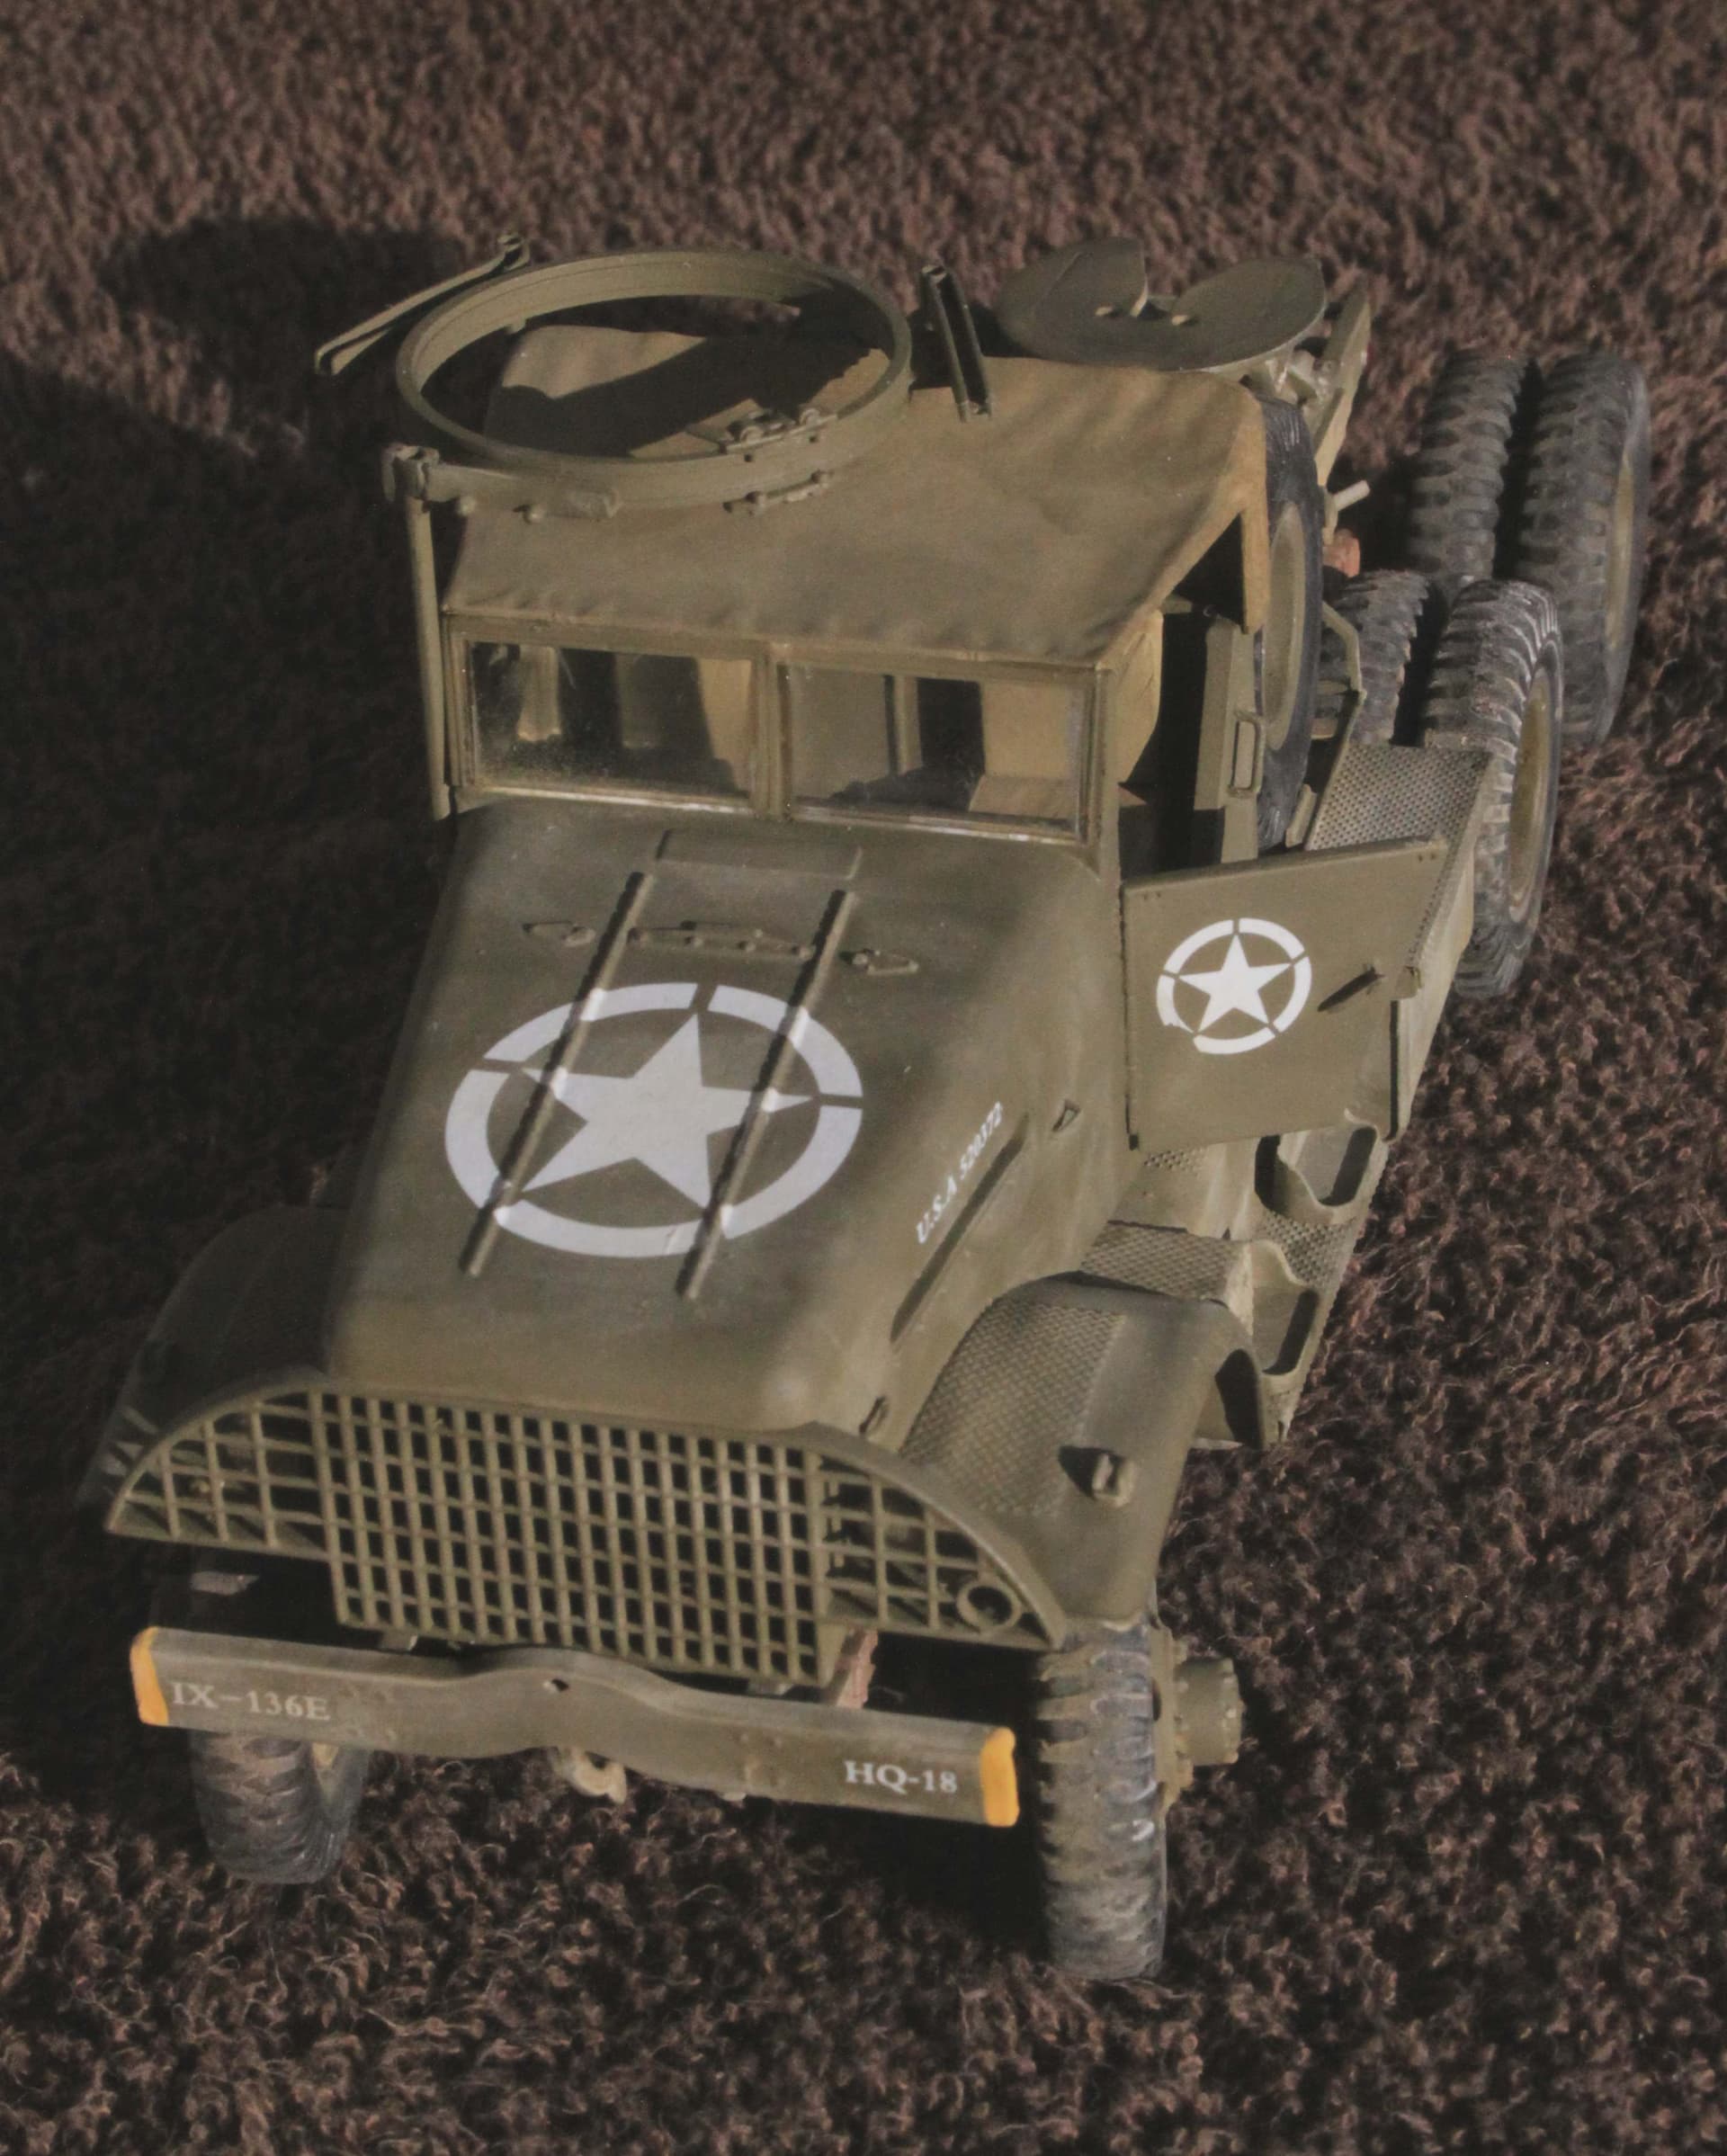
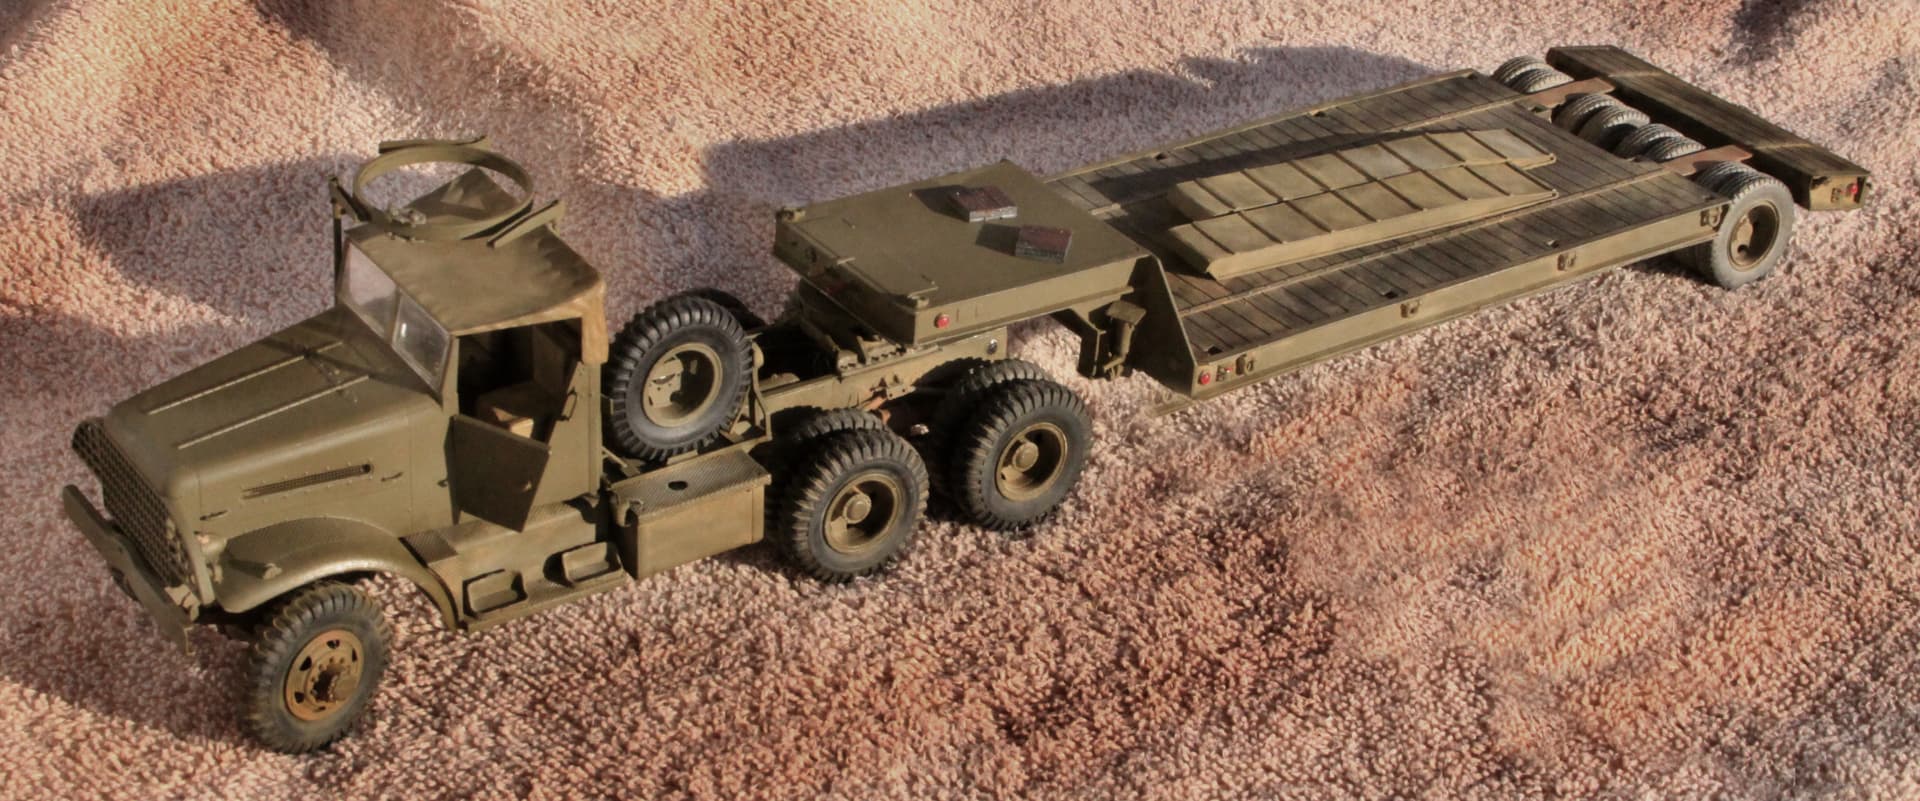
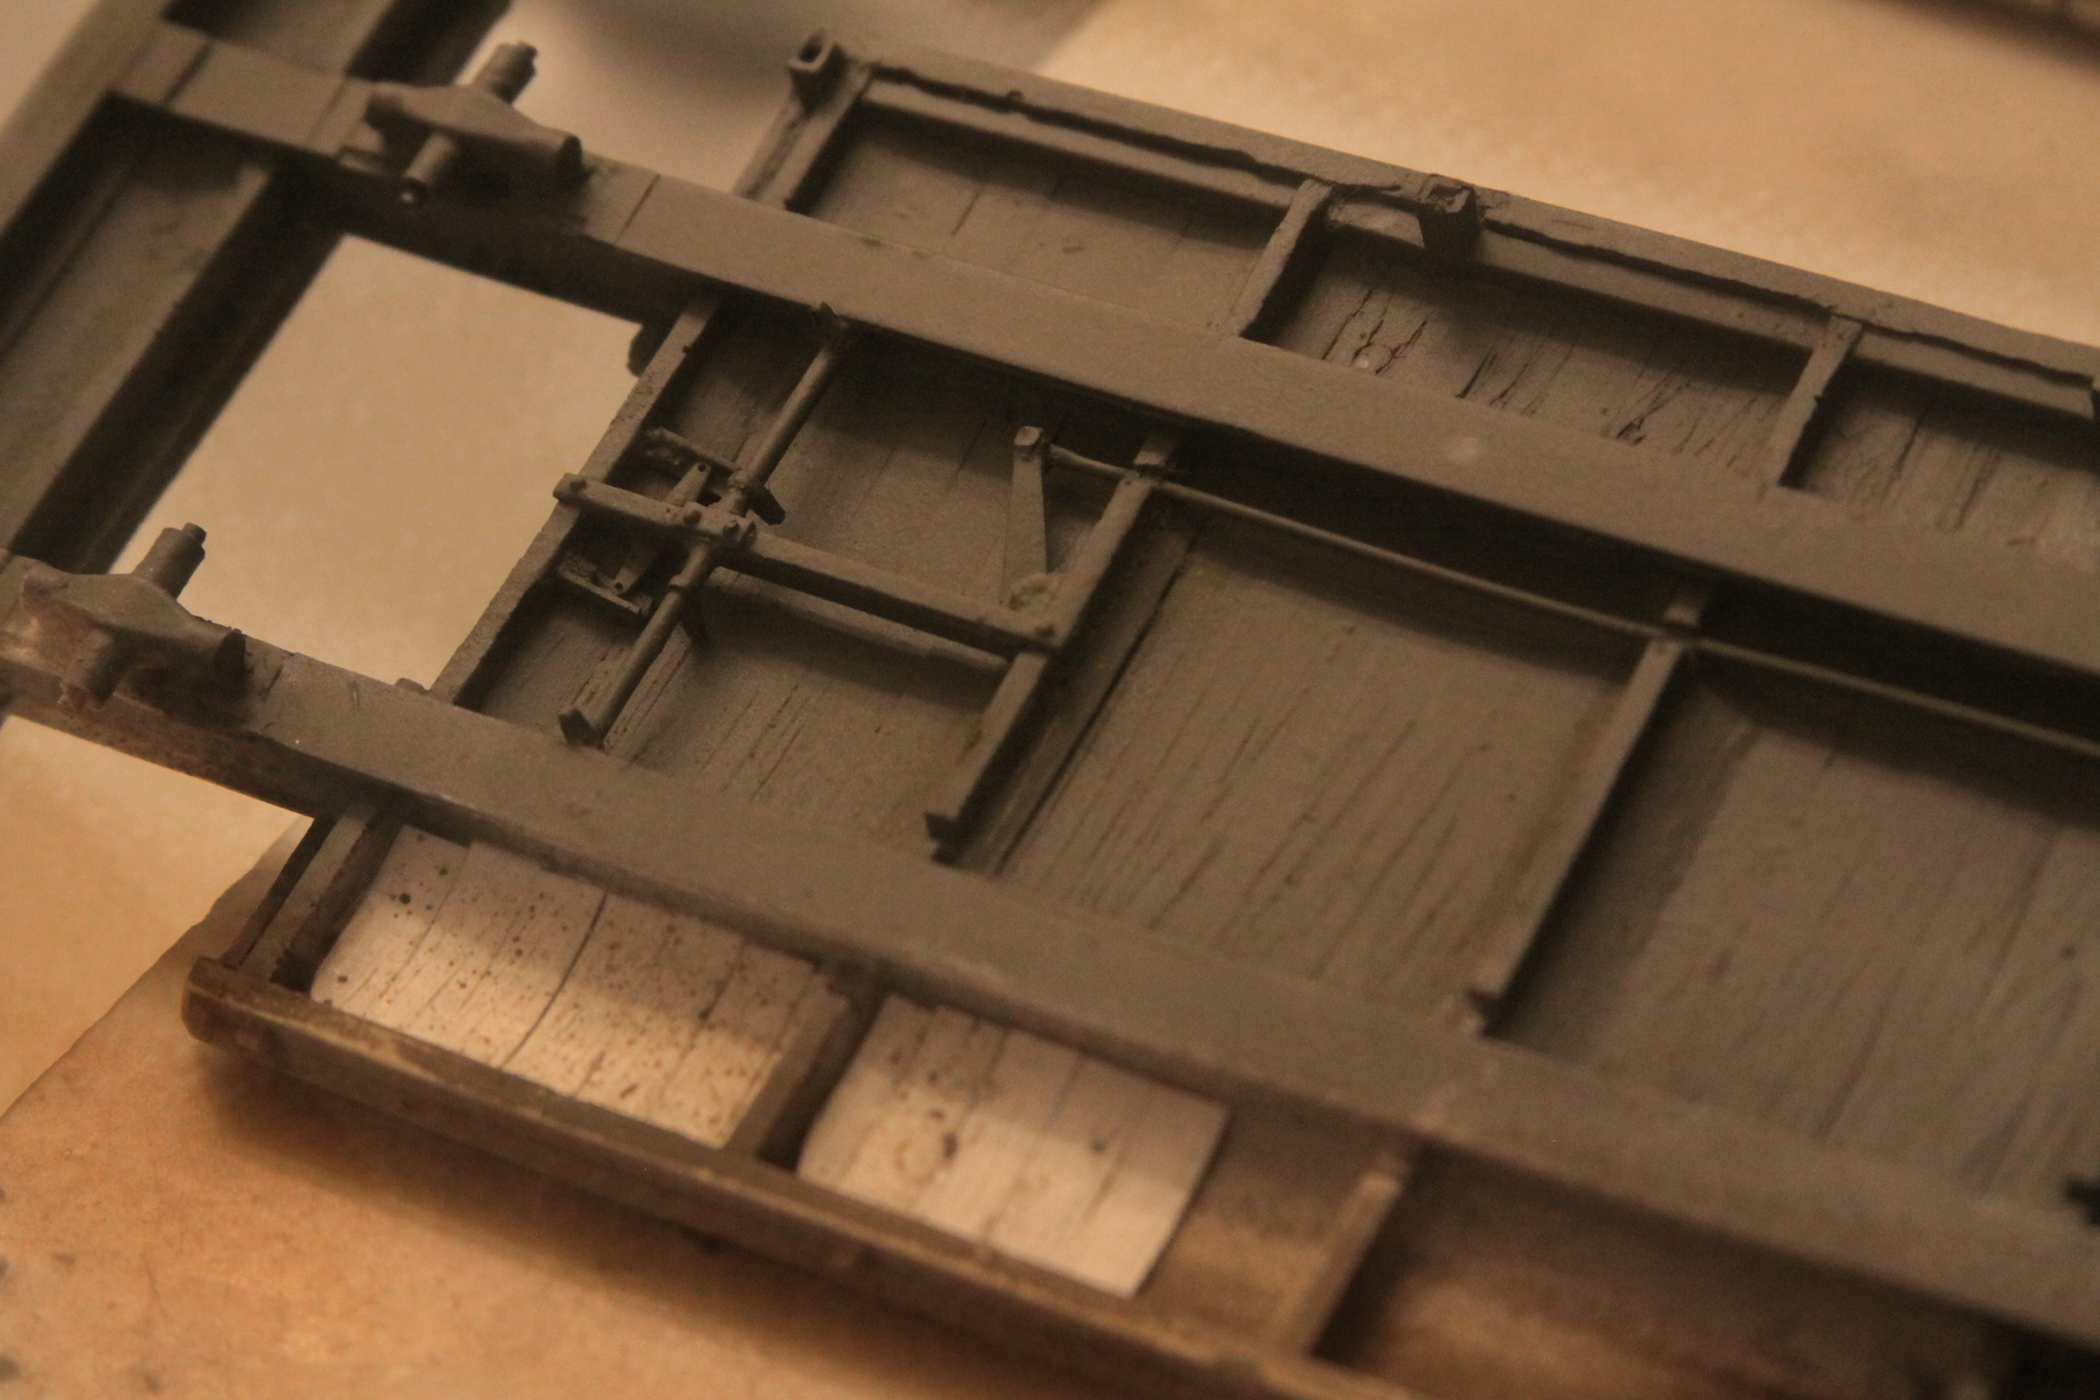
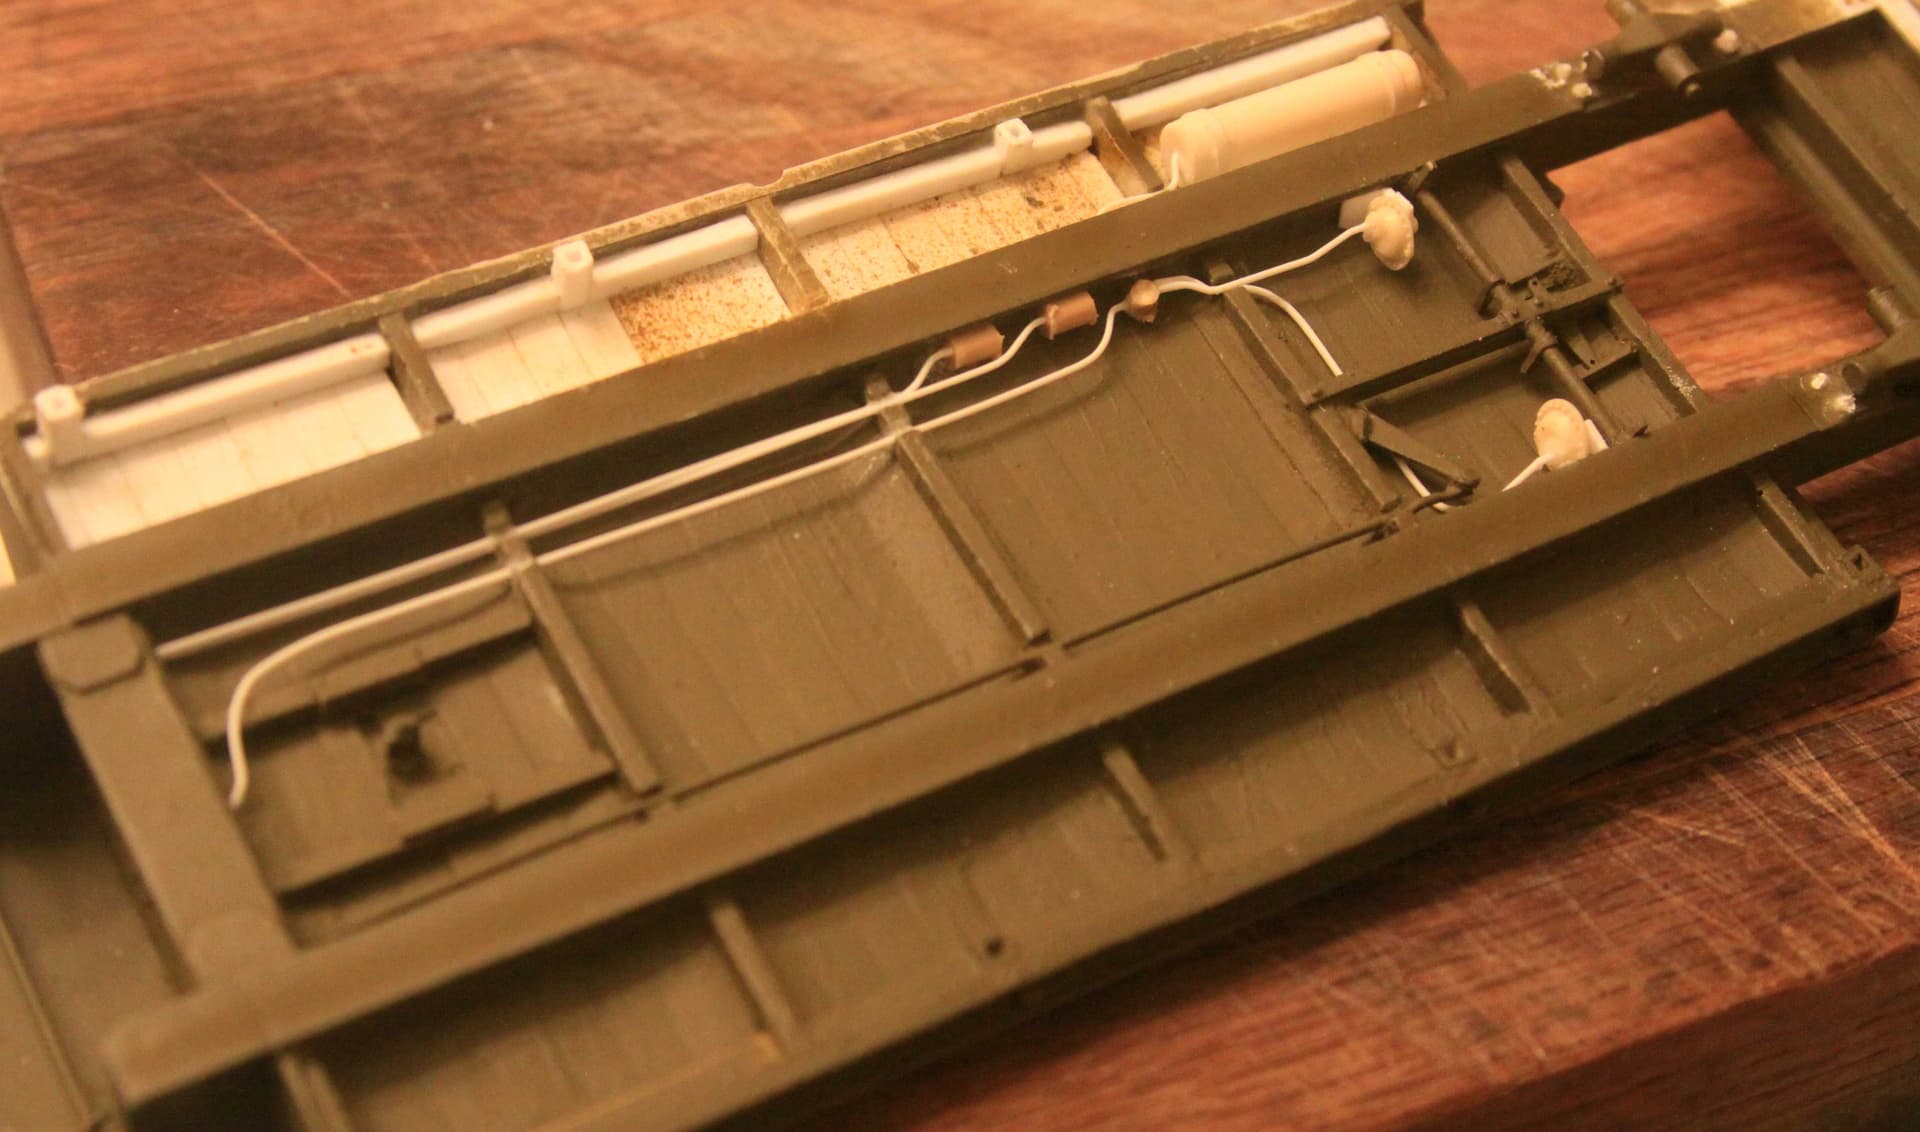
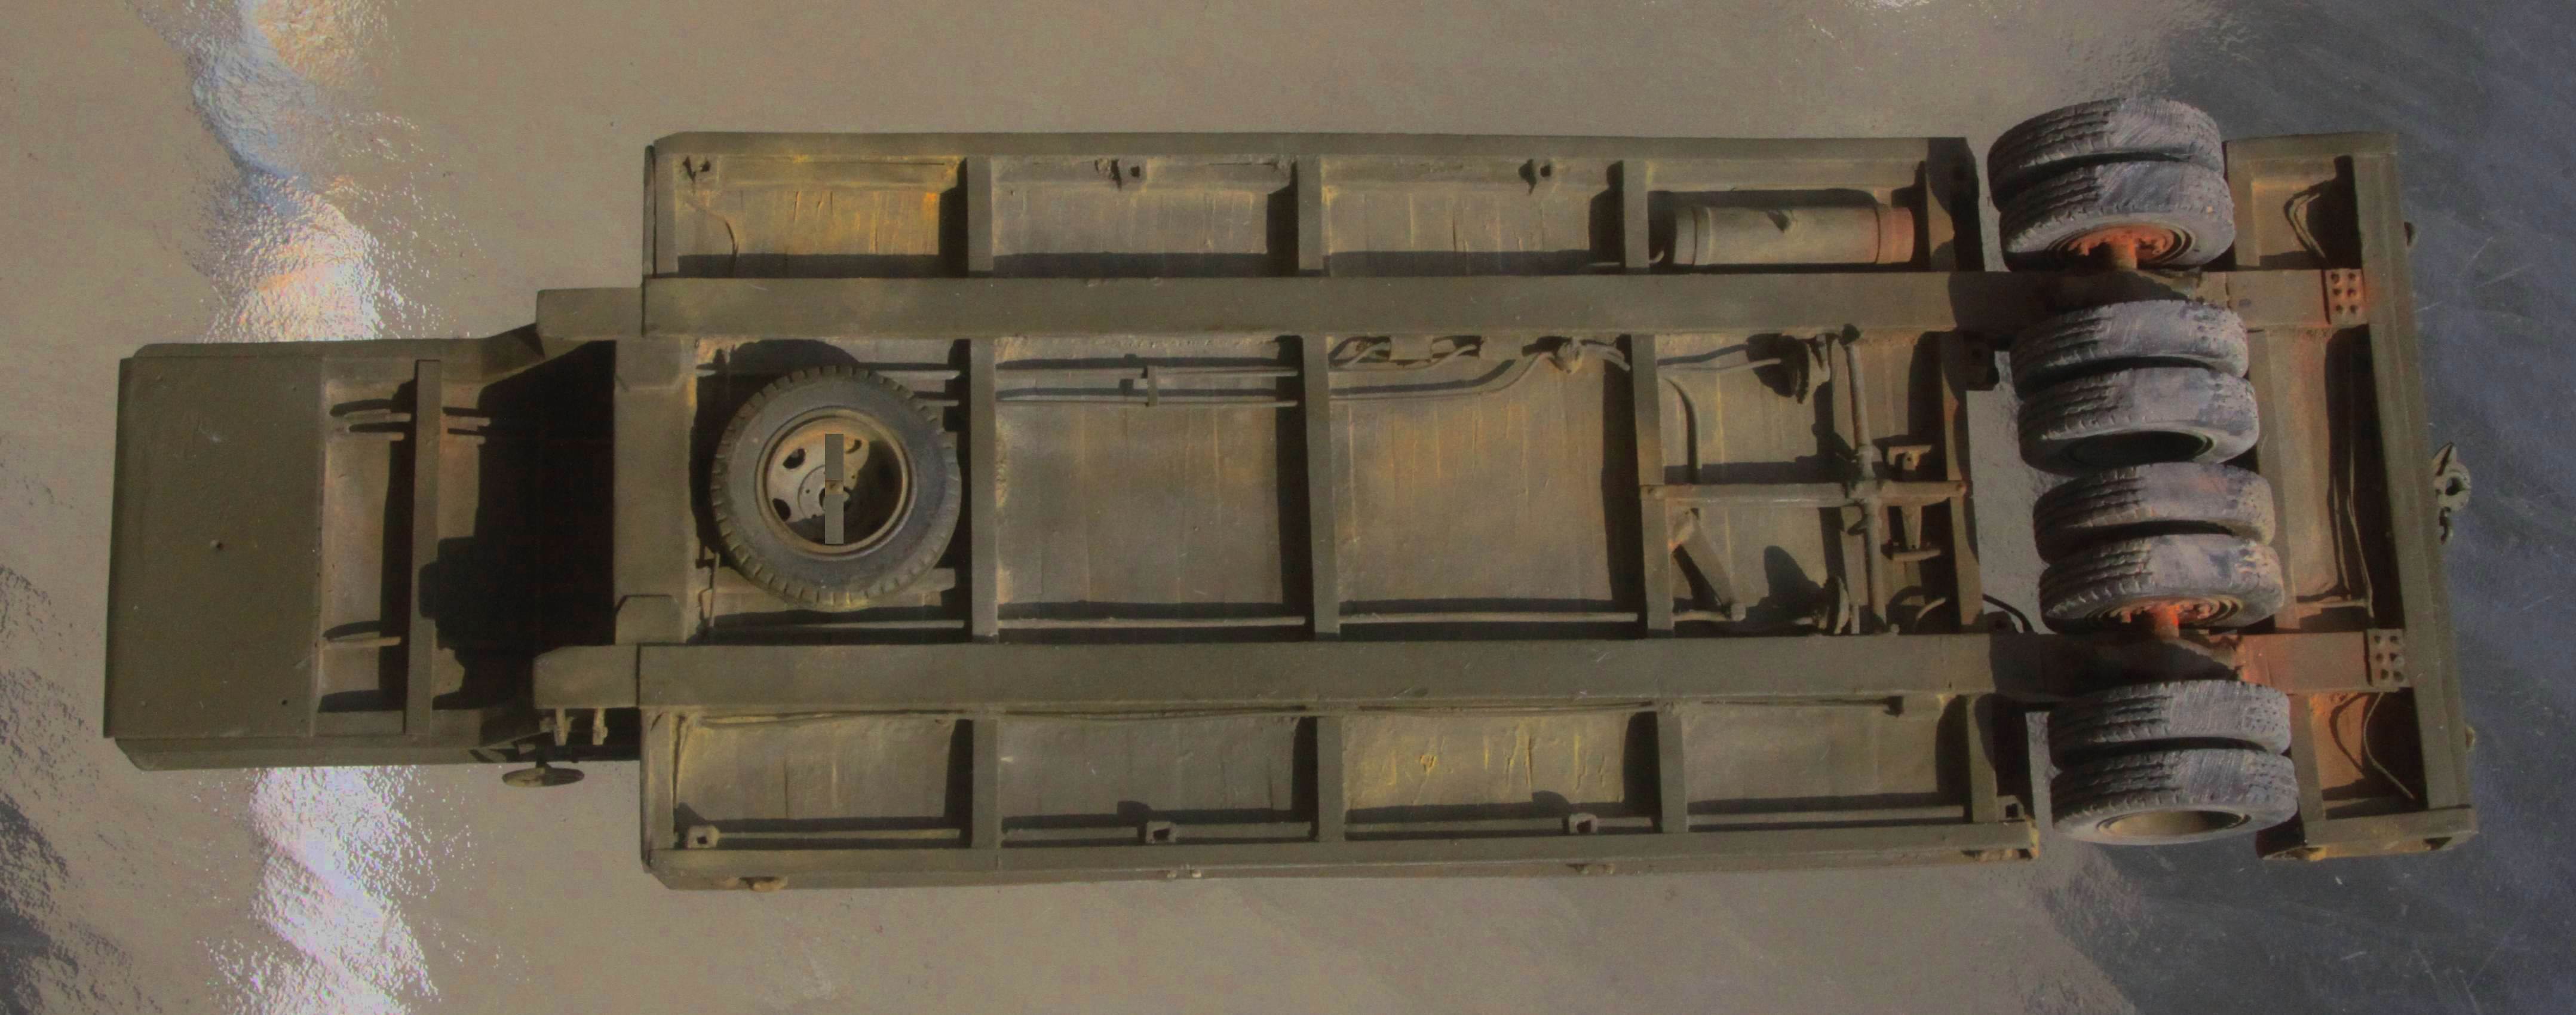
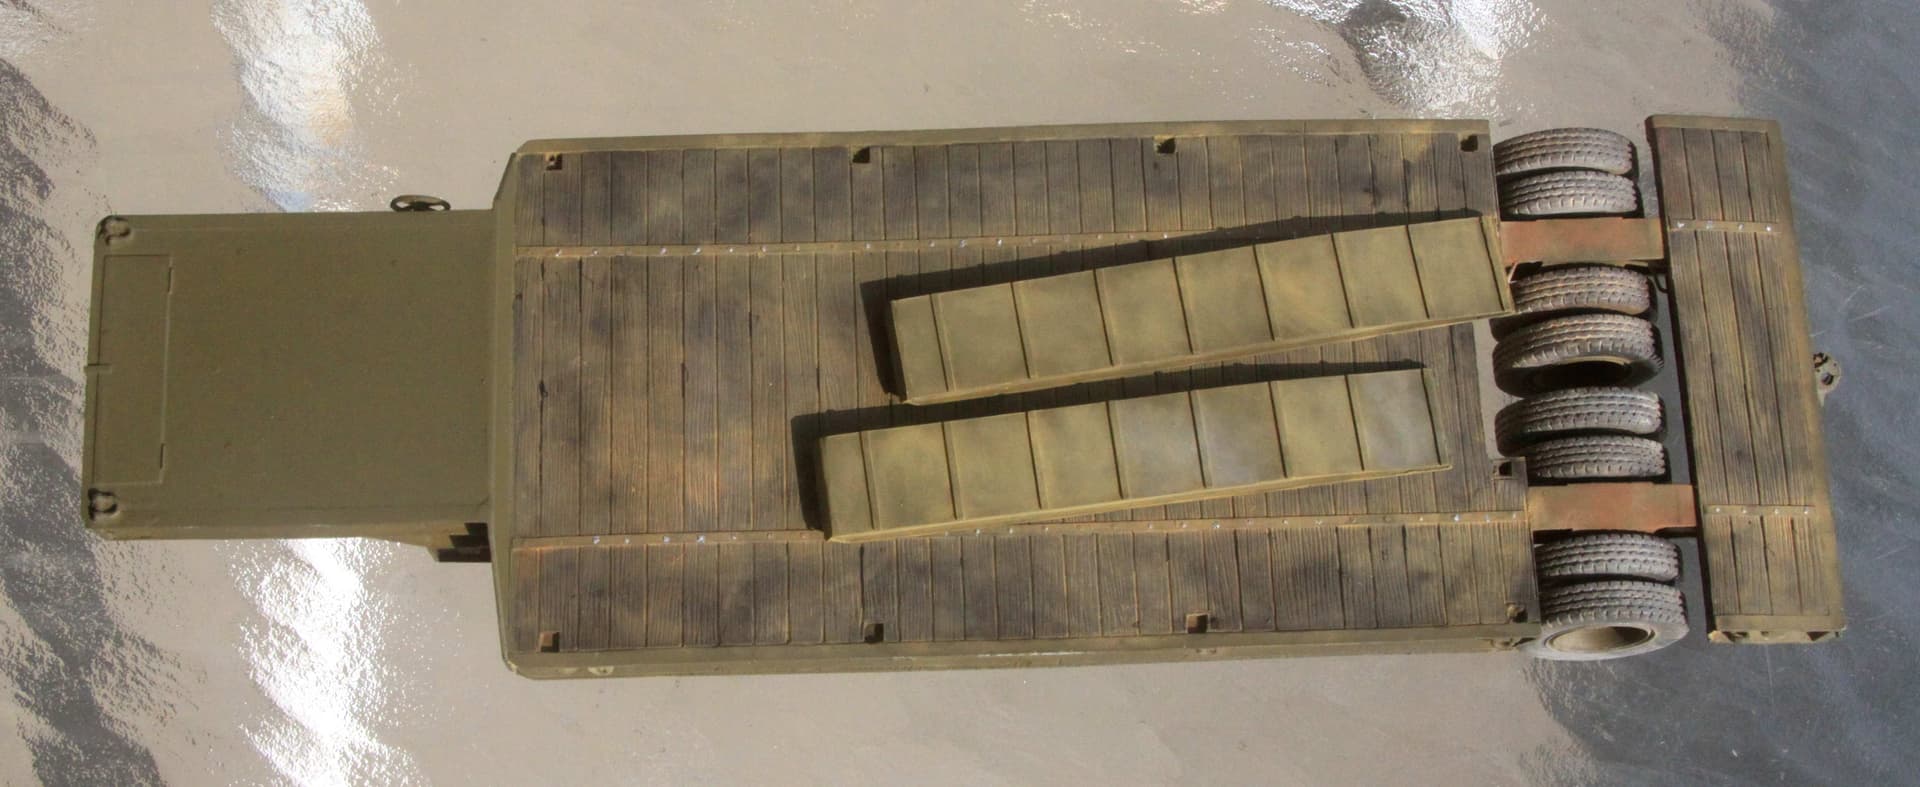
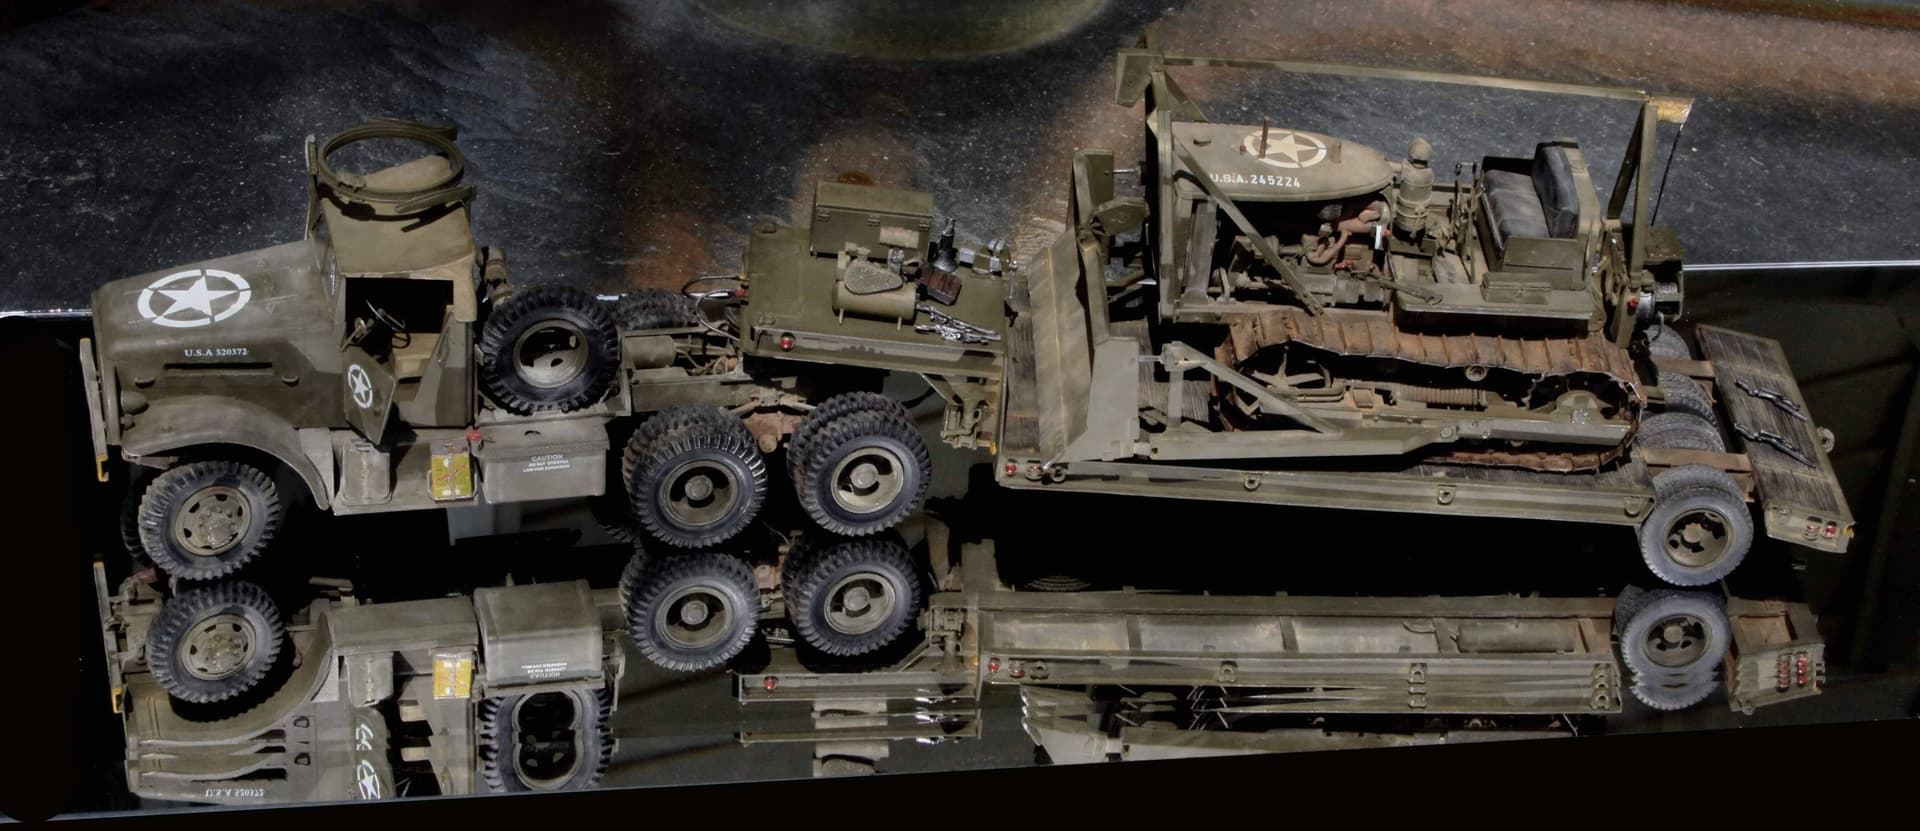
White/Corbett 666 Semi Tractor & 20 ton Flatbed Trailer: (Conversion)
.Trailer is a resin product from PSP via Scale-Link in Britain.
Extensive underbody detail was added.