This is really looking cool!
1 Like
Thank you KSone!
—mike
1 Like
Here are two views into my M548 cab.
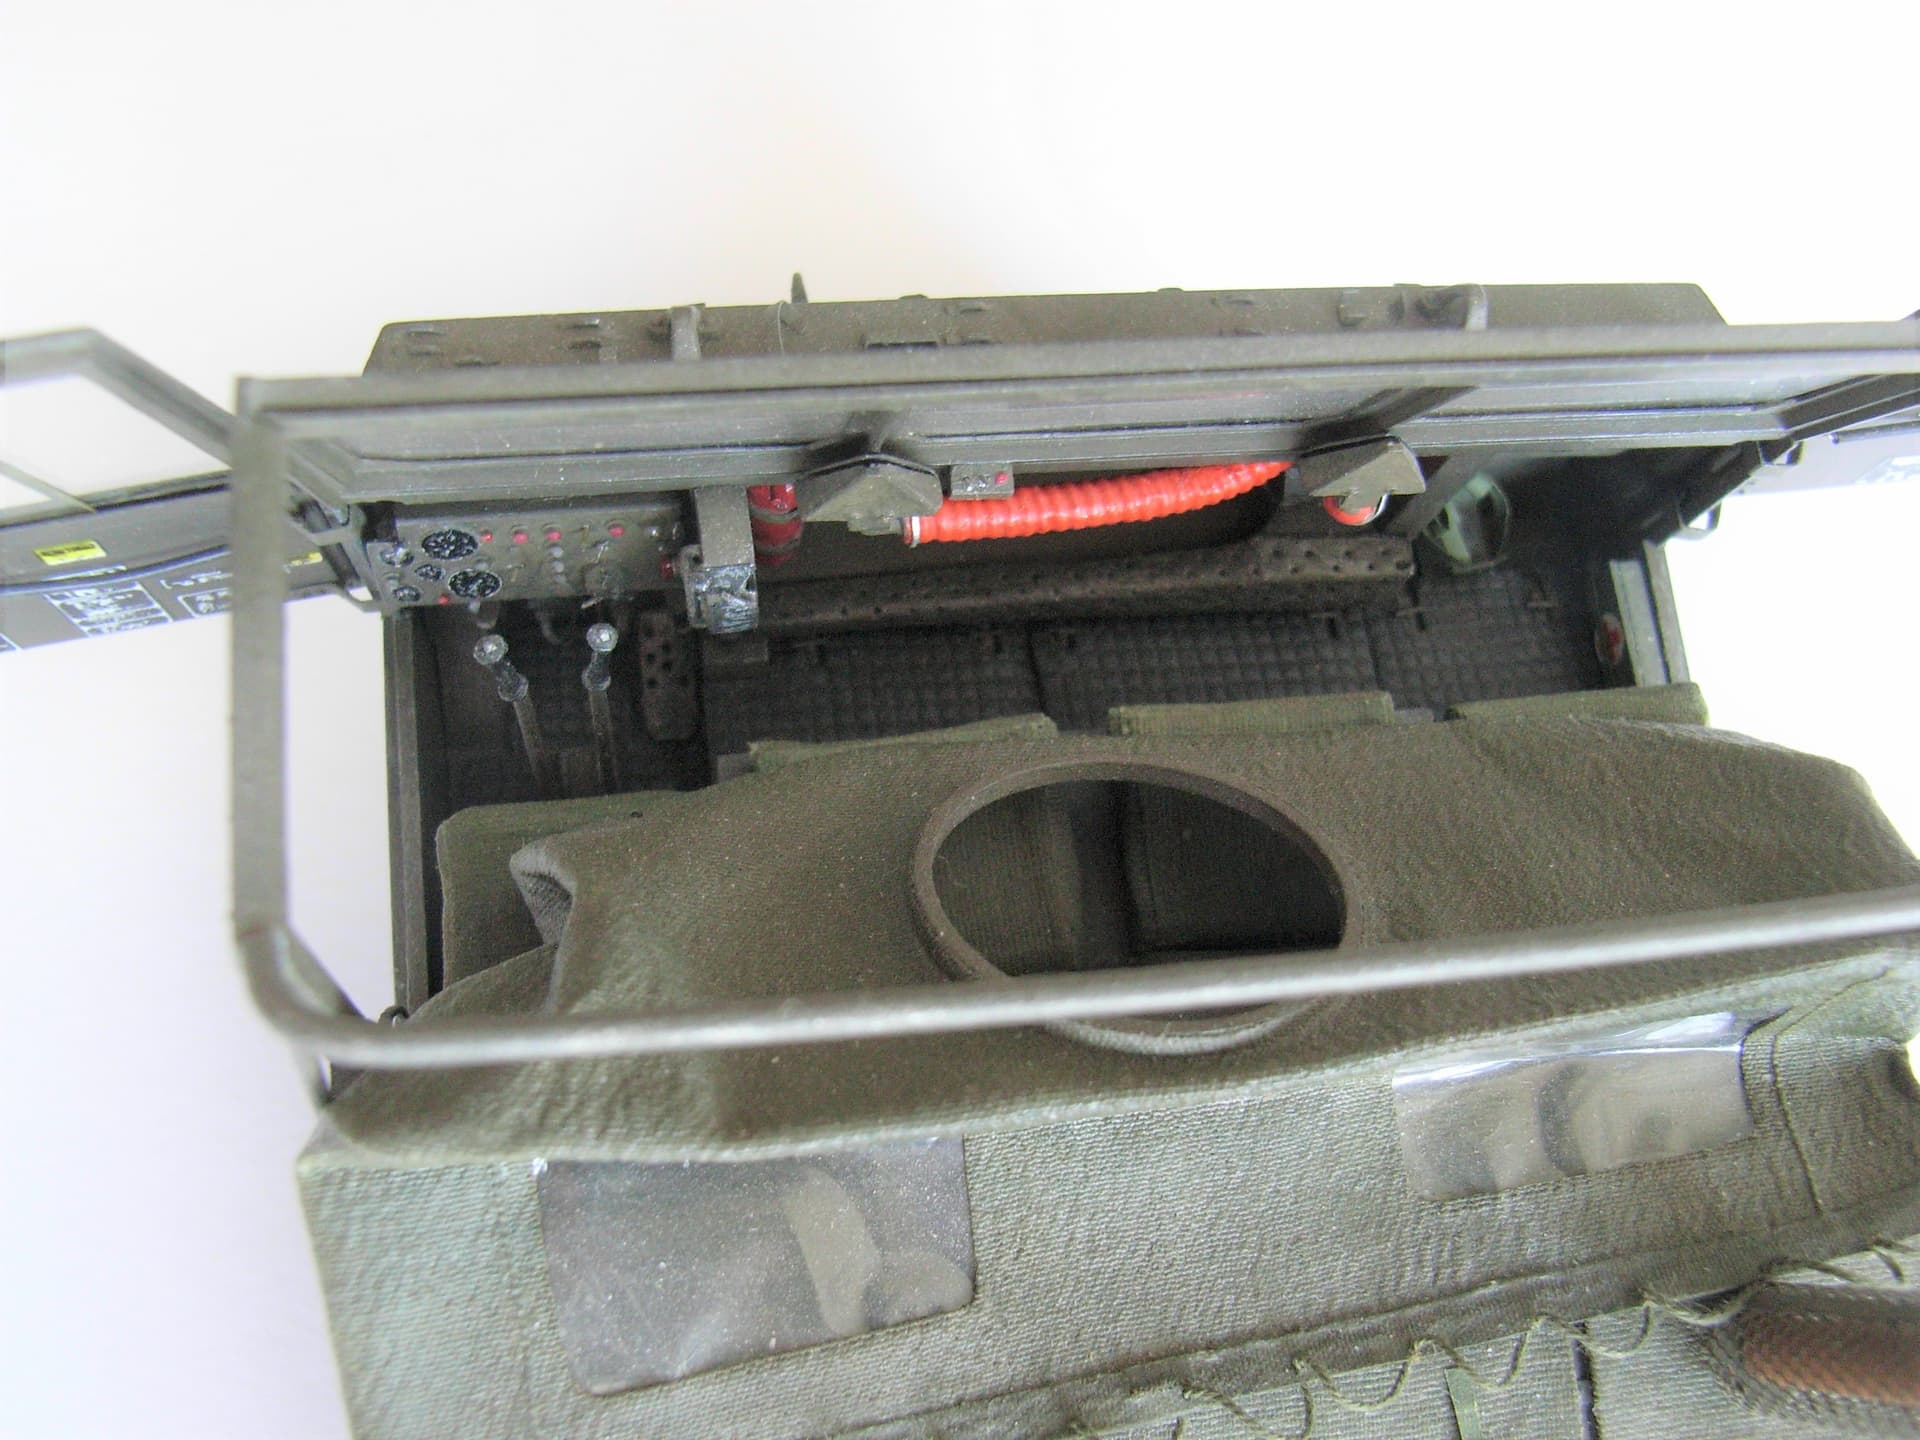

The defroster ducts have a 1mm copper wire core with a ball pen spring around it and several layers of white glue to flesh it out, the heater outlet is lead foil with pin pricks. The “rubber floor mats” are from aluminum foil off a champagne bottle (it’s amazing how many different patterns there are). Seat covers and canvas roof are from silk fabric just soaked in water color (not diluted white glue) with cellophane candy bag rear windows. The door windows are acetate replacements and slide in new frames of thin styrene sheet, the opening chains are insulated wire, and the working hinges were bent from sheet aluminum. Also note that the exhaust stack has a heat protector from the shear foil of an electric razor (once again, a wide variety of patterns available).
10 Likes
That ductwork looks great ! Does the canvas roof remain flexible after you soak it in the paint ?
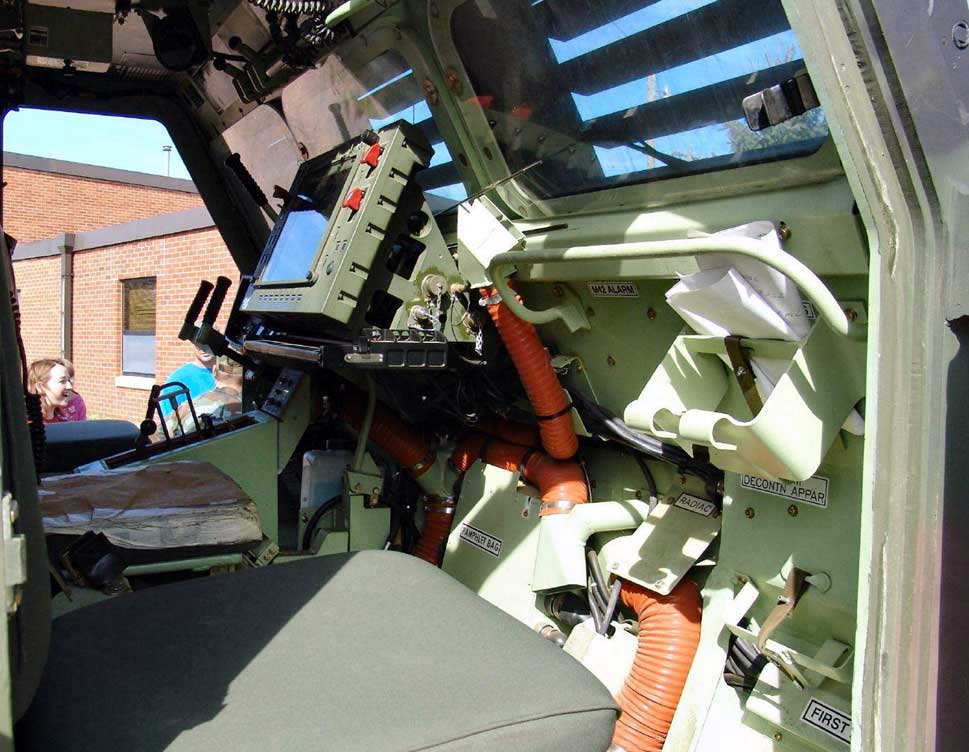
Where the defroster tube orange like that from the factory? Not questioning, I just want to confirm.
Looks dang good.
Yup, and still are.
M270A1 MLRS with the same orange air duct tubes.
3 Likes
Outstanding - Thanks
I always like any excuse for a splash of color to make things pop!
@PzAufkl, where did you obtain the placards at in the inside of the cab doors? BTW, your amazing work helps me further with an M727 conversion I’m planning.
The placards on the doors are from AFV Club’s Chaparral kit.
As for the flexibility of the watercolored silk - basically, it becomes stiff, as from diluted white glue. But as these colors (the real cheap stuff, kiddies’ paint sets) aren’t designed to join things and harden, it only takes a little moisture to make the silk pliable again. Maybe it would even work to knead the dried textile to make it sufficiently flexible - I haven’t tried that.
1 Like
Thanks a lot!
I see, I asked because it looks like it’s pulled away from the roof framework and thought maybe that was just to allow you to get some photos of the cab interior. Thanks !
Well, it is installed in the pulled away mode: to spare me the correction of the wrong MG ring mount’s rear feet mounting points on the engine deck, with the welcome side effect of a better view into the cab.
1 Like
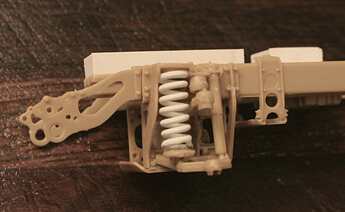
Here is a link to an earlier post for an easy trick to rolling some real coil springs for all those HEMTTs and MRAPs out there.
7 Likes
A Modeling Idea: (Lightbulb!)
Speaking of loads for your softskin trucks:
Something that just came up in another thread:
I don’t think I have ever seen modeled: A German truck with one or more of its’ cargo sides folded down. Most all German trucks and farm wagons will fold down everything but the headboard by the cab. (Fairly ingenious if you ask me.) Left and right sides plus the tailgate can all be folded down for loading but all anyone ever models is the tailgate down - Even Tamiya with their two soldier figures rolling an oil drum up into a Blitz truck.
p.s. I have seen them propped out to make a large level work deck when the vehicle is being used as a flak transport or a shop truck. But never just fully dropped down for side loading.
Kinda wish I had an Opel Blitz on the workbench right now.
1 Like
Several kits out there provide the drop-down option. Though not really scratch-building, here’s an example… Old build of the ‘Sd.Kfz.7 8 ton Half-Track’ towing a ‘5cm Pak 38’ (Both OOB DML kits).
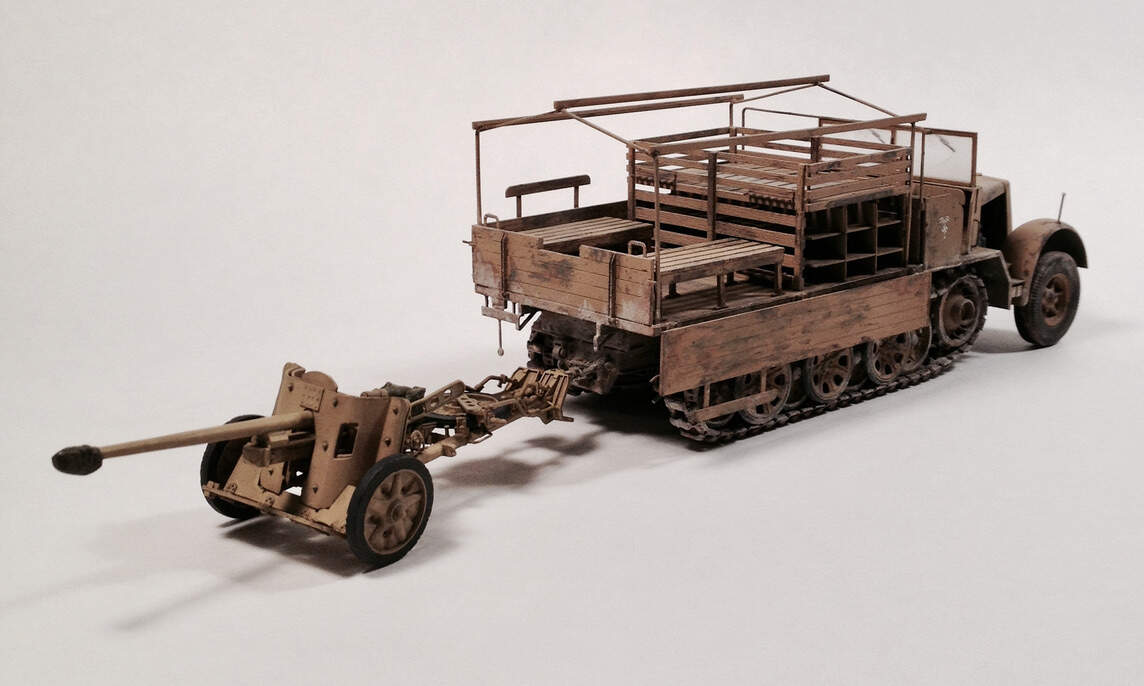
—mike
5 Likes
Sweet!
Most every Opel Blitz will accommodate this and I assume the new Das Werk farm wagon kit will as well.
I was politely booted out of a Stationery store after I’d unscrewed maybe 20 different types of biro in vain looking for the right spring. I was going to say “…even though I re-screwed ‘em all” but…well you know what I mean ![]()
4 Likes
PzAufkl
Nice work.
I used some thick elastic cord, such as is found as drawstrings in fleeces and outdoor gear, for the ducting on a HobbyBoss AAVP7, I only added details, such as the ducting, the hanging ropes, but I did scratch & correctly stow the slave cables and broom!
1 Like
Wish you would repost that truck /garage dio again on here. It is both amazing and insprational!
The level of realism you achieved, plus the quality of your lighting and your photography is nothing short of mind bending.
You and @Dioamartin should start an ILM/Wetta Workshop type model business of your own together!