Something I am simply proud of:
Please pardon the arrogance.
For the most part on this thread I have tried to show aspects of my scratch builds that in turn illustrate building techniques in a how-to format. However this time I am simply going to show a full scratch build that I have always been rather proud of.
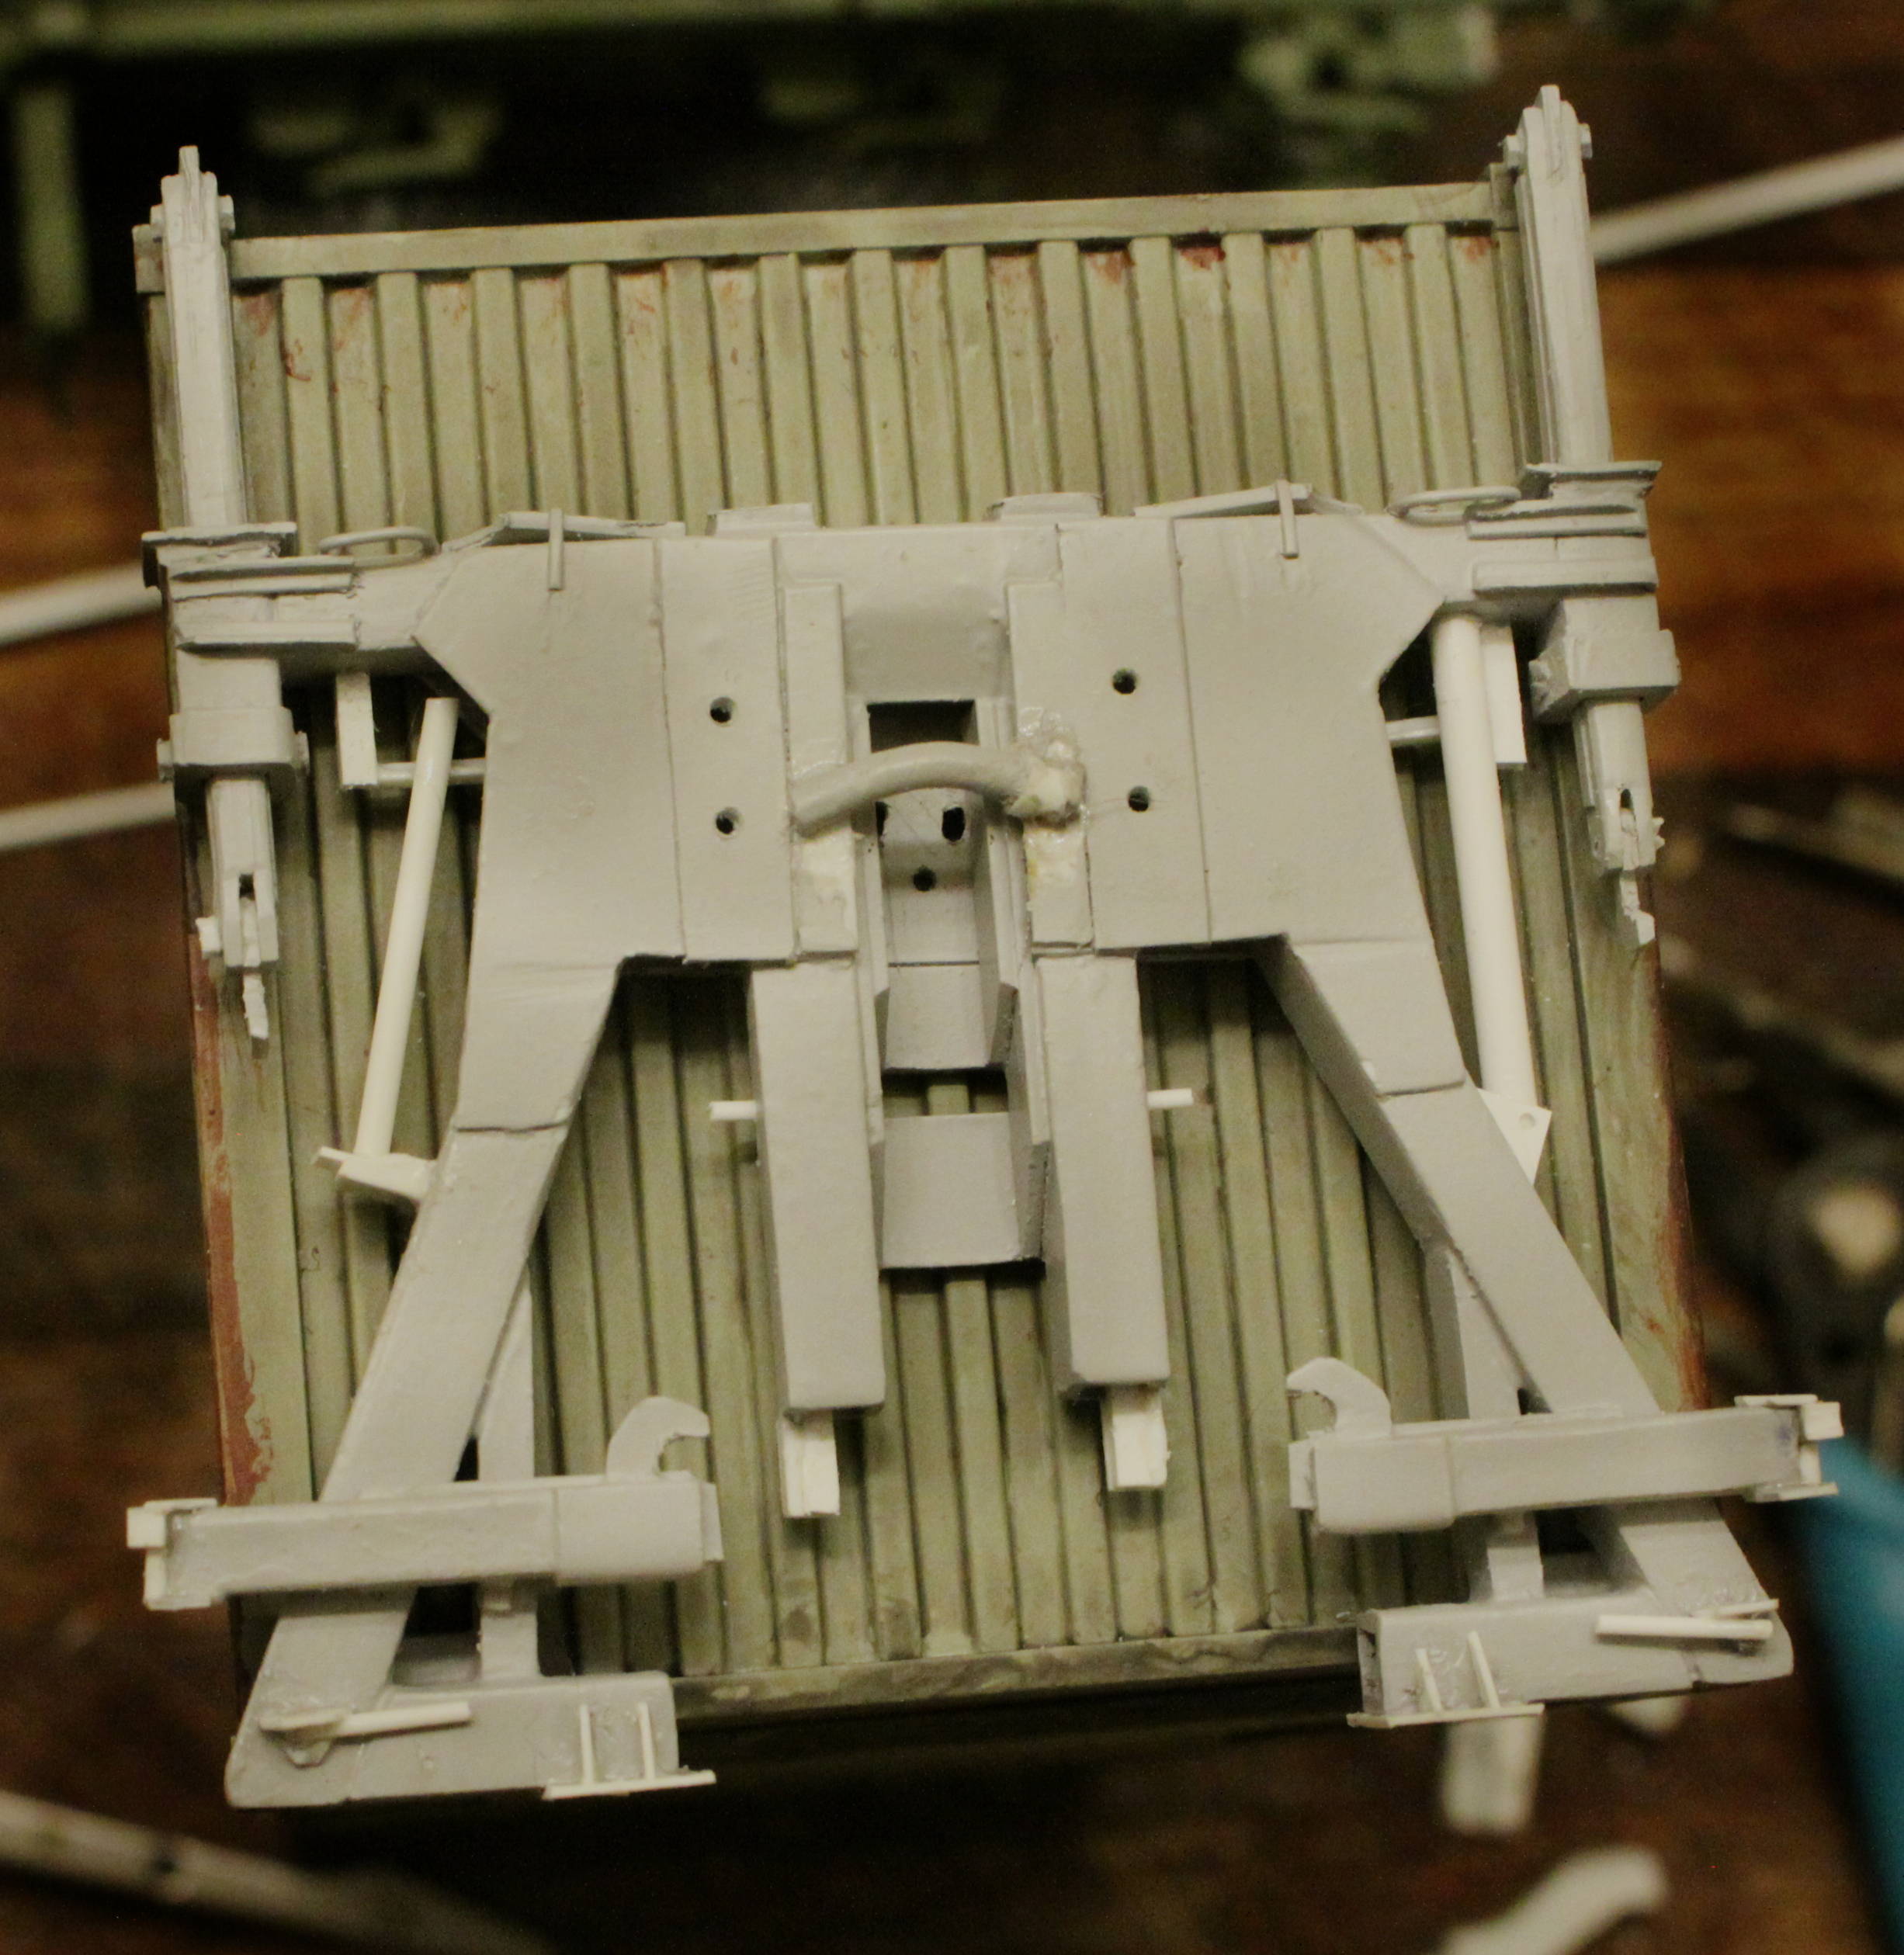
Modern Container Handling Unit (CHU):
Total scratch build -
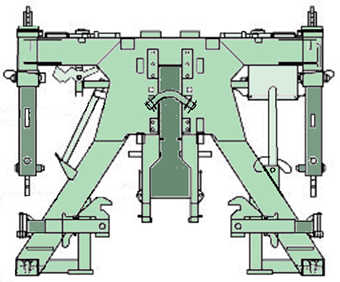
When Trumpeter first announced their new highly detailed HEMTT A2 LHS (with Load Handling System) they also showed their upcoming release as having the CHU included, However when the kit actually came to market it was missing the CHU. It was another year before the kit started including the CHU!
This ticked me off to no end and I started thinking; “so could I possibly scratch build this exceedingly strange item?”
Lots of Evergreen square tubing to the rescue!
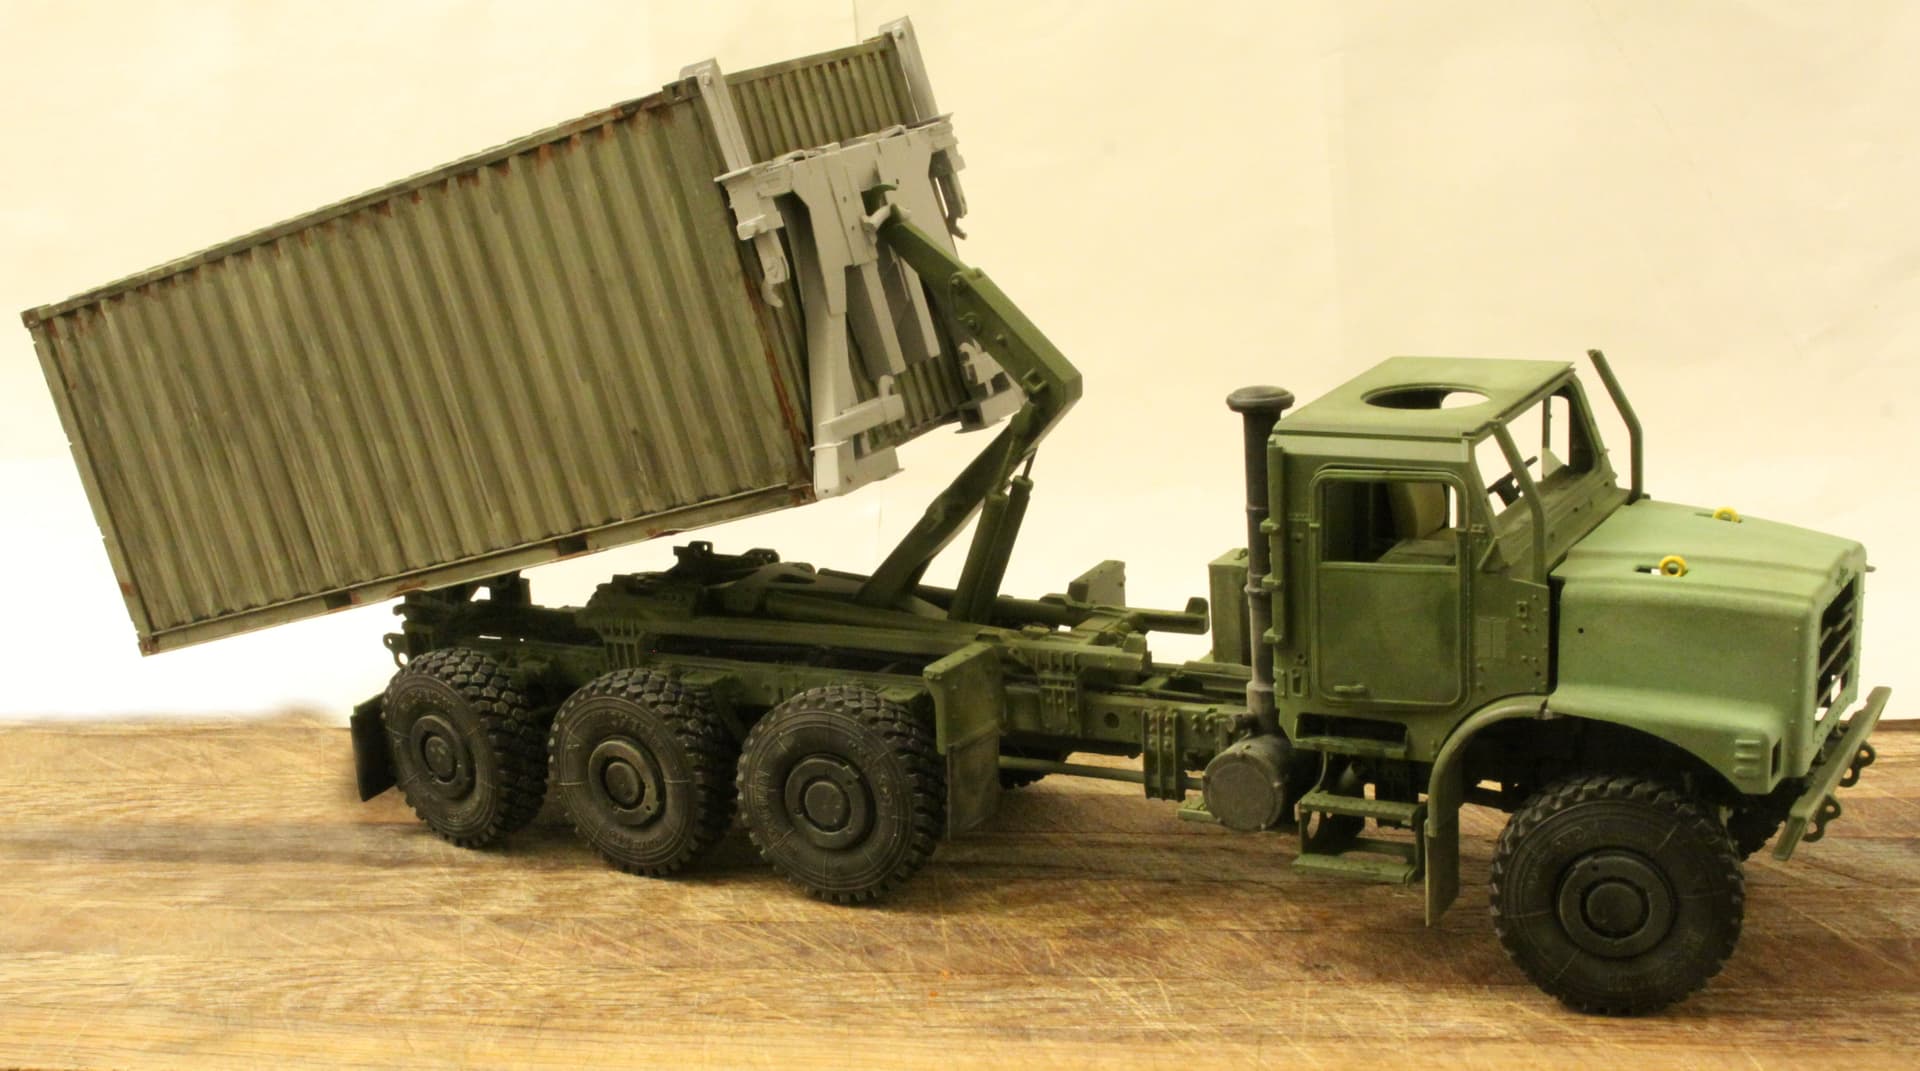
The upper sliding vertical arms with hooks actually function and will adjust to containers of different heights. My CHU is removable from the container. (Not glued on.) and will actually pick up a container as intended.
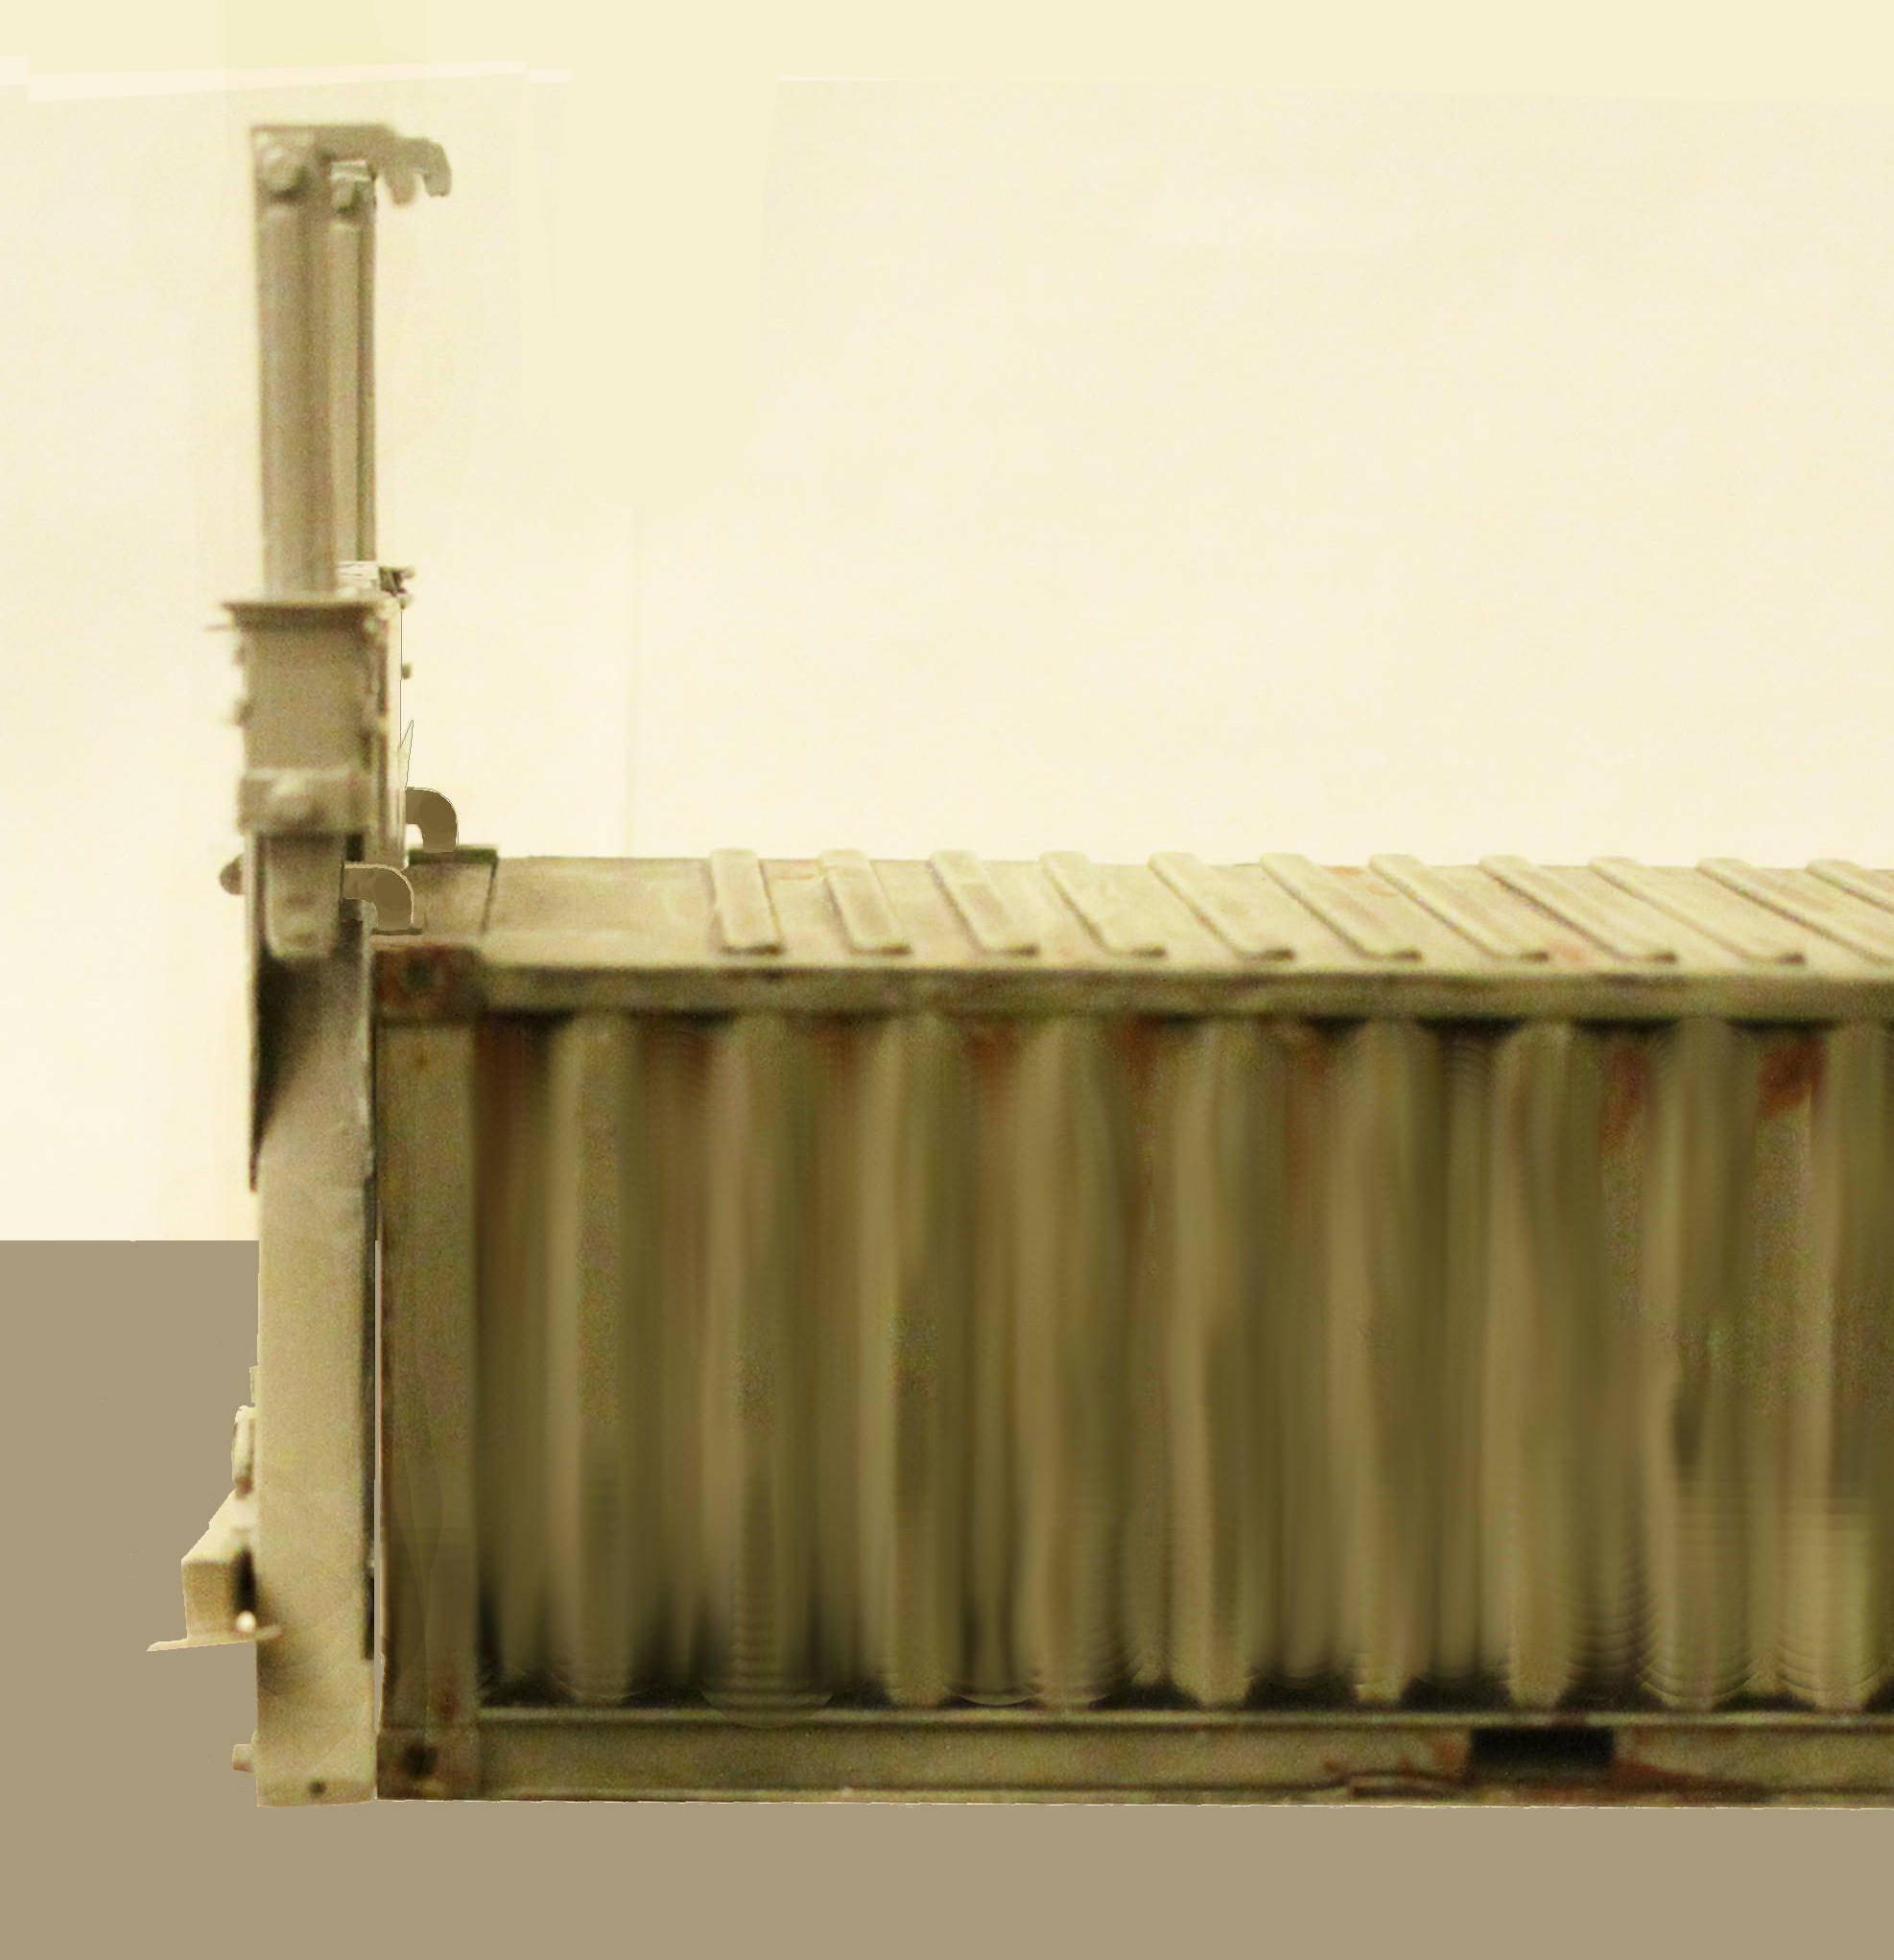
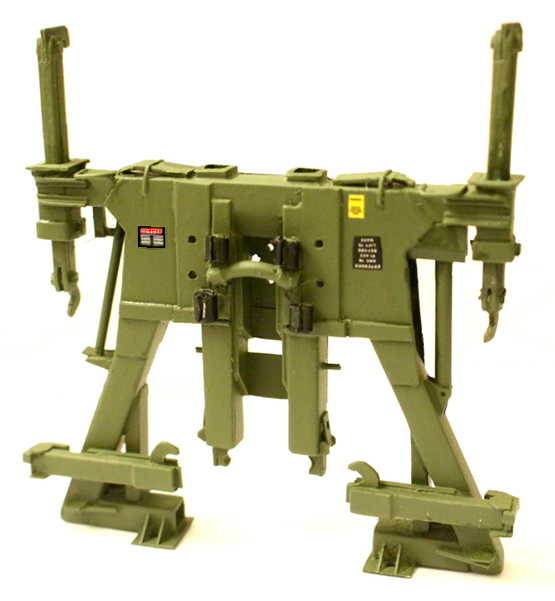
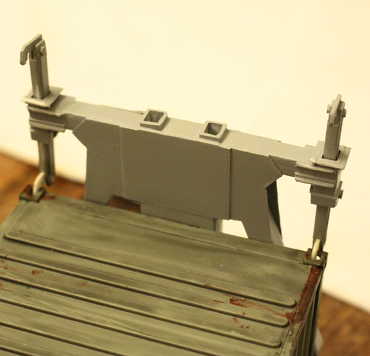
Alternate Half height artillery ammo containers. (Very Heavy)
Shown here with CHU using the lower hook arms.
Links to a couple of CHU builds and How-To’s:
Sorry we are unable to generate a preview of this web page.
Scale 3D printed CHU digital model: by Michael Goldberg @MikeyBugs (Just for we nuts out there interested in the supply side of modern combat.)
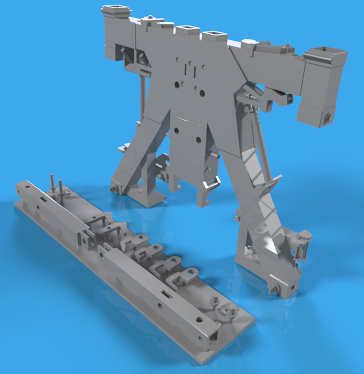
Link to Mike G’s Shapeways page on his CHU:
6 Likes
I should actually try to revise that now to make it better for my printing. I totally forgot about it.
1 Like
That’s what I suspected. Most likely not worth my time to sell just a couple.
Not with the Trumpy version out there in plastic - but then you have to buy the whole kit - or at east the right sprues to get that one.
It is also incomplete without the connex rests at the rear of the truck. The complete CHU kit includes those as well.
True!
(I have mine scratch built but just sort of lost interest at that point and have never installed them on the vehicle.)
Hi Mike,
It seems we truck/softskin enthusiast have some of the same goals. First of which seems to be adding parts and details that don’t come with kits, and without some work, wouldn’t otherwise be visible 
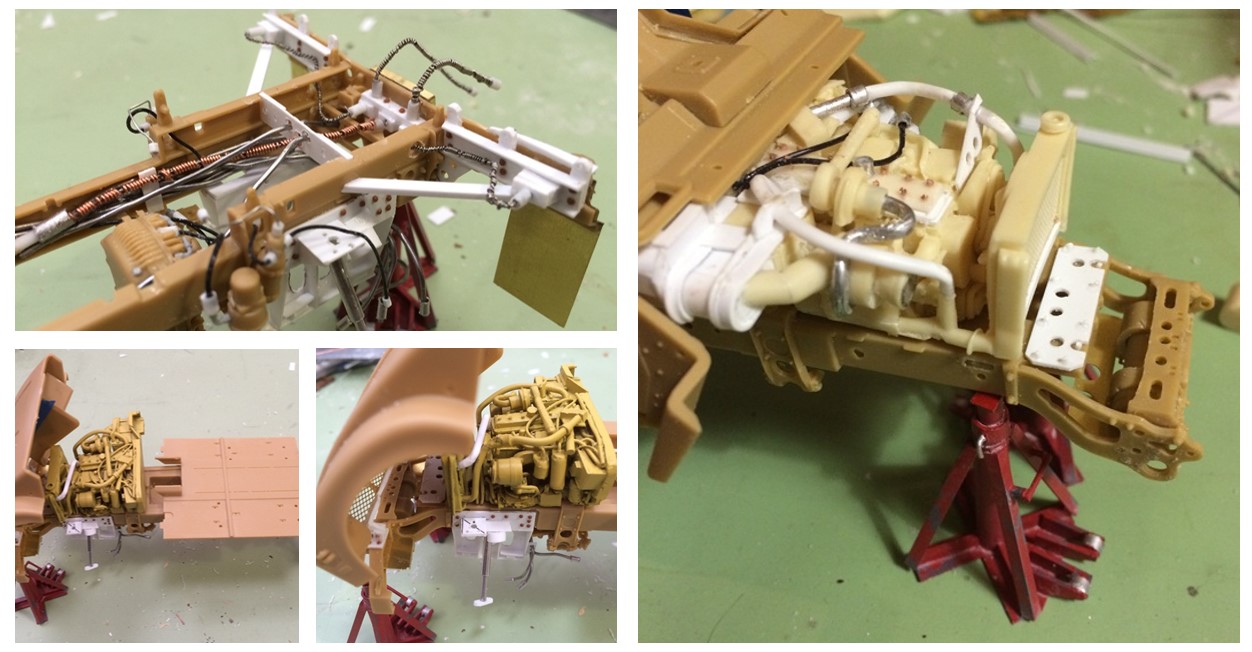
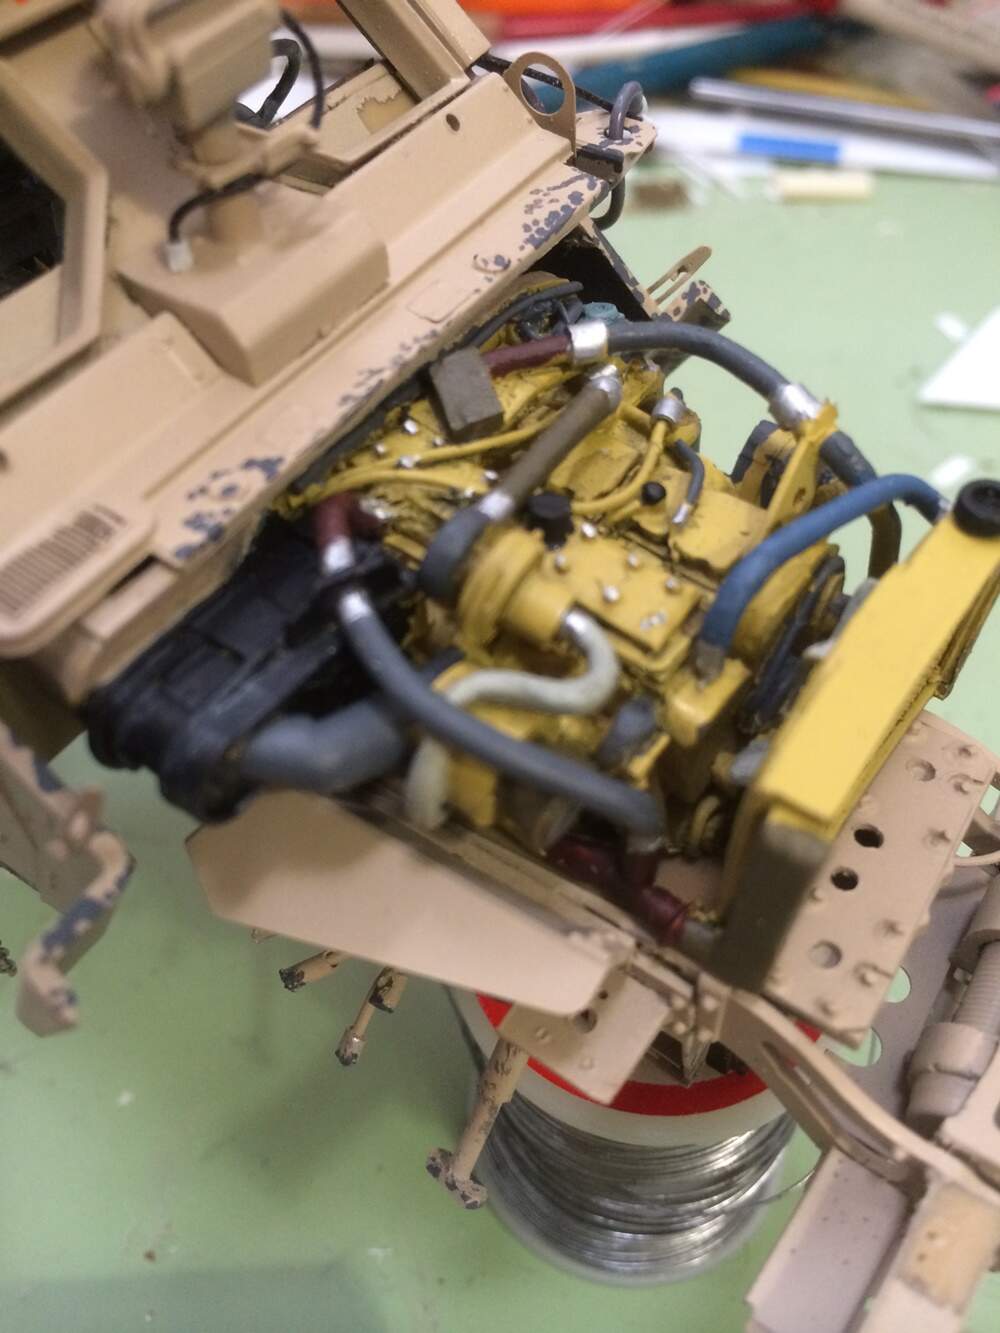
Some time ago I built a truck shop dio, which I posted on Armorama. One of the sub-projects included an MATV, with it’s Cat C7 engine exposed. As there was no model of this at the time (this was built using the Panda MATV kit), I used a CMK resin kit as a foundation for the engine (which is, in retrospect, is only generally similar to what I was trying to make), and did what I could to adapt it to look like the C7.
At the time 2013/14, it was hard to find images of this engine. I found two pics of the engine in an MATV, and images of the base C7 engine on the Cat website and went from there. As I recall, Gino posted a few times on the blog too (thanks!), as he was going about doing something similar. Please have a look:
As you can see above, the CMK resin kit with several mods. This is nowhere near as precise as using a CAD/3d print version, but it did the trick for my purposes. Looking back on this, I didn’t do a very good job on the intercooler - at all! I have since learned a bit more on how they work and what they are supposed to look like! (ie plumbing/routing from the turbo, and back to the engine).
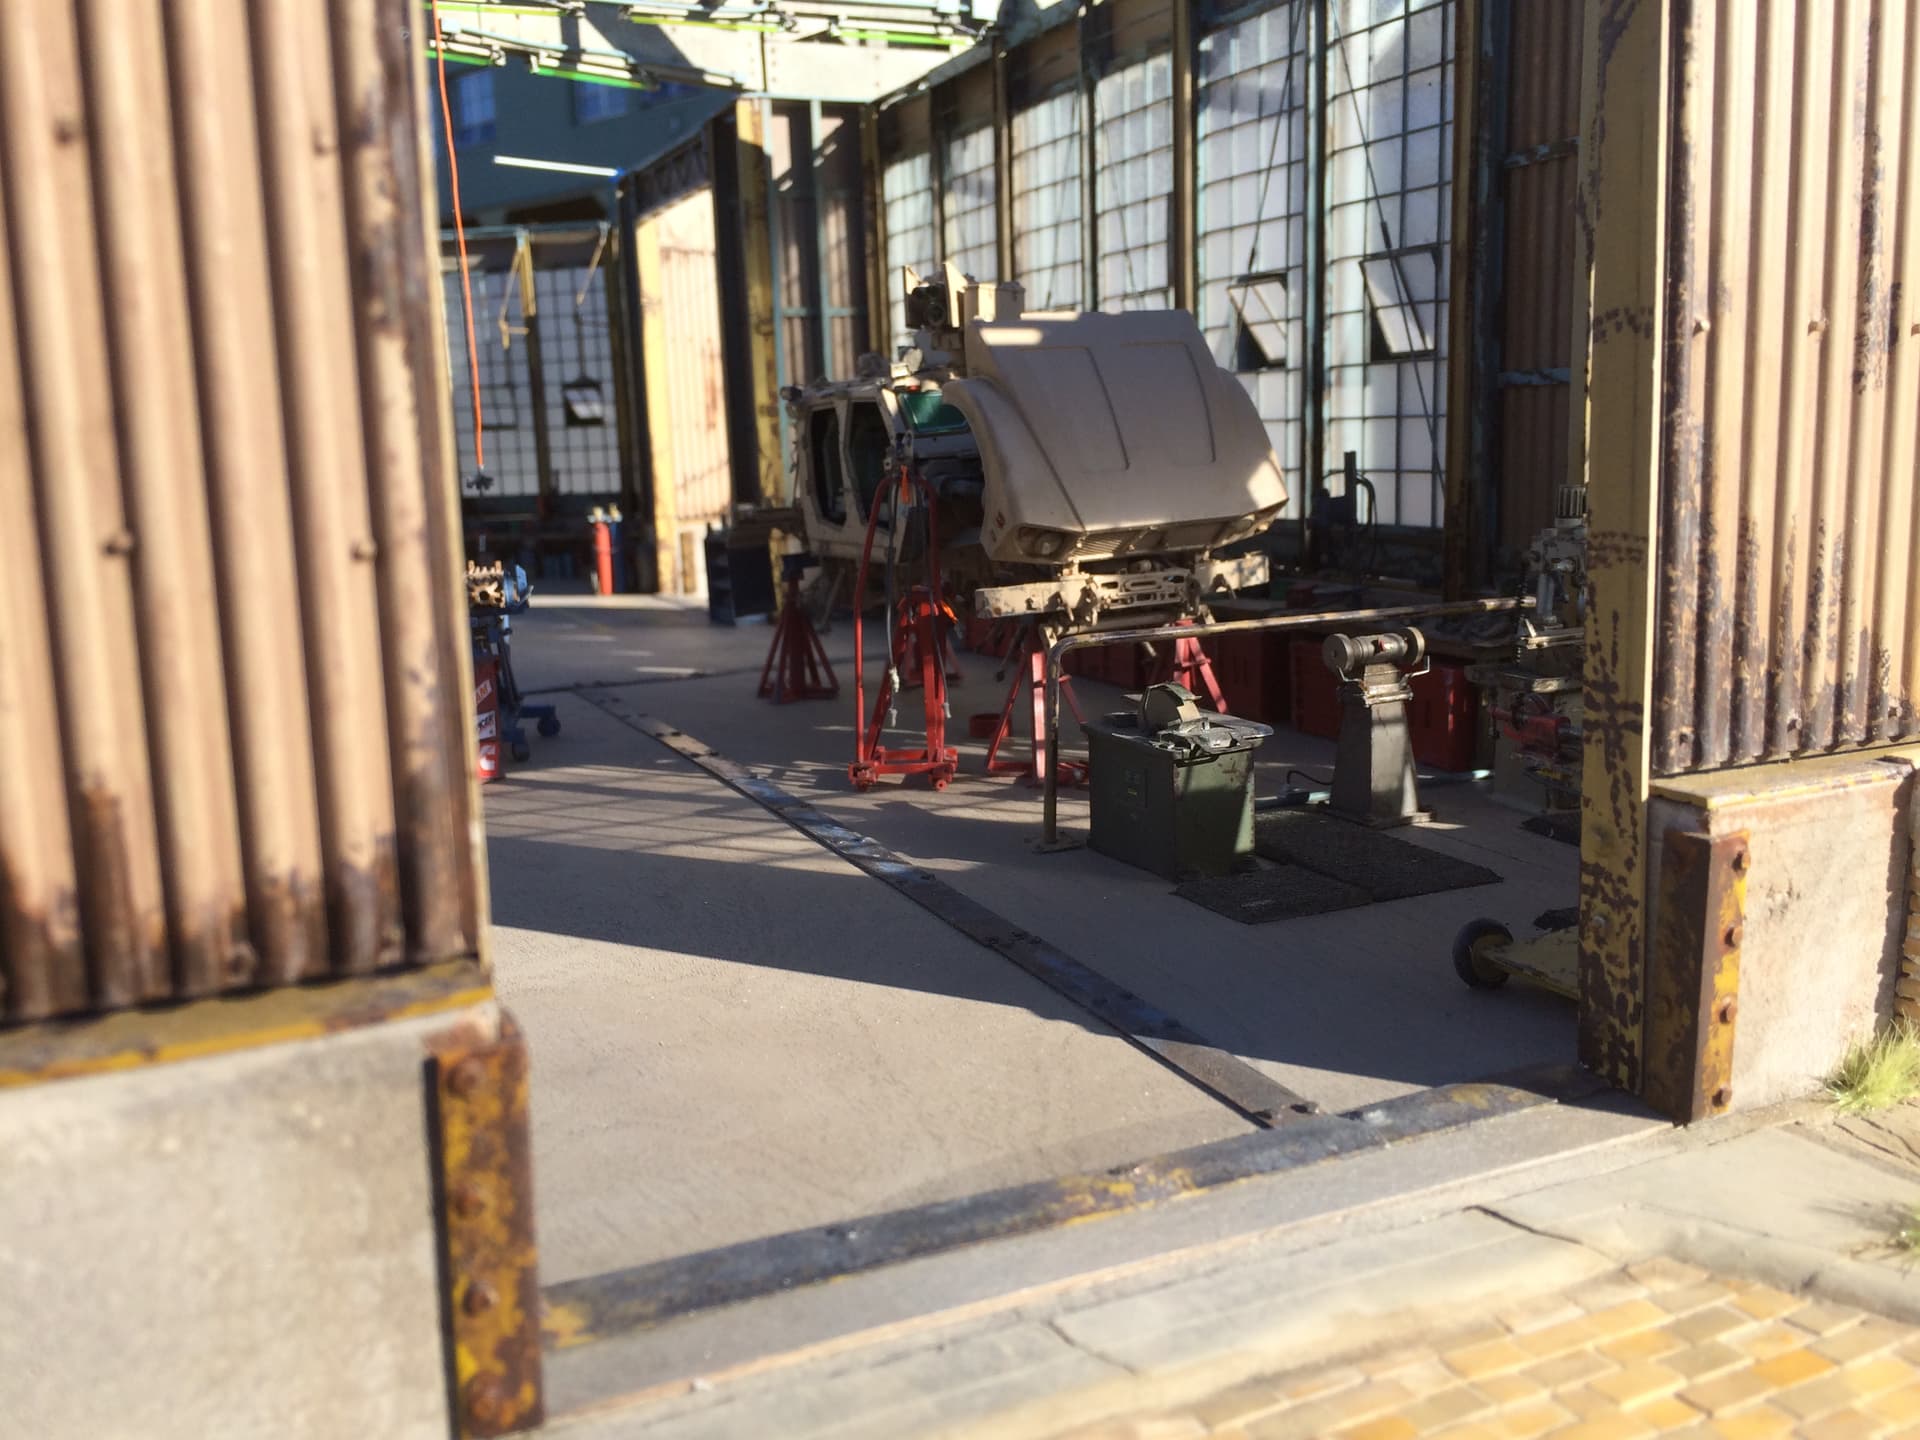
For reasons lost to me, I kept the kit chassis, but scratch built front and rear suspension, and added all sorts of various details. Below is how it was used in the dio:
And there you have it.
Cheers and keep on scratching!
Nick
13 Likes
Yup, I remember that truck/dio. It came out looking really nice. Most people do not know exactly how the engines look anyway. I believe you used the CMK M923 5ton engine set as a starting point.
1 Like
Precisely. Nick, I think I helped you with a project way back when I was in Iraq. If you need engine photos on your next project let me know. I have photos of all of them, including the M-ATV.
1 Like
I remember it well. Still, (always will be) an amazing build!
You should do a full spread here, all over again on your garage dio, as your original post is long lost to the archives!
1 Like
Hi Rob,
Yes, you did indeed help with several projects - to others out there, yes, 18bravo’s images are really helpful.
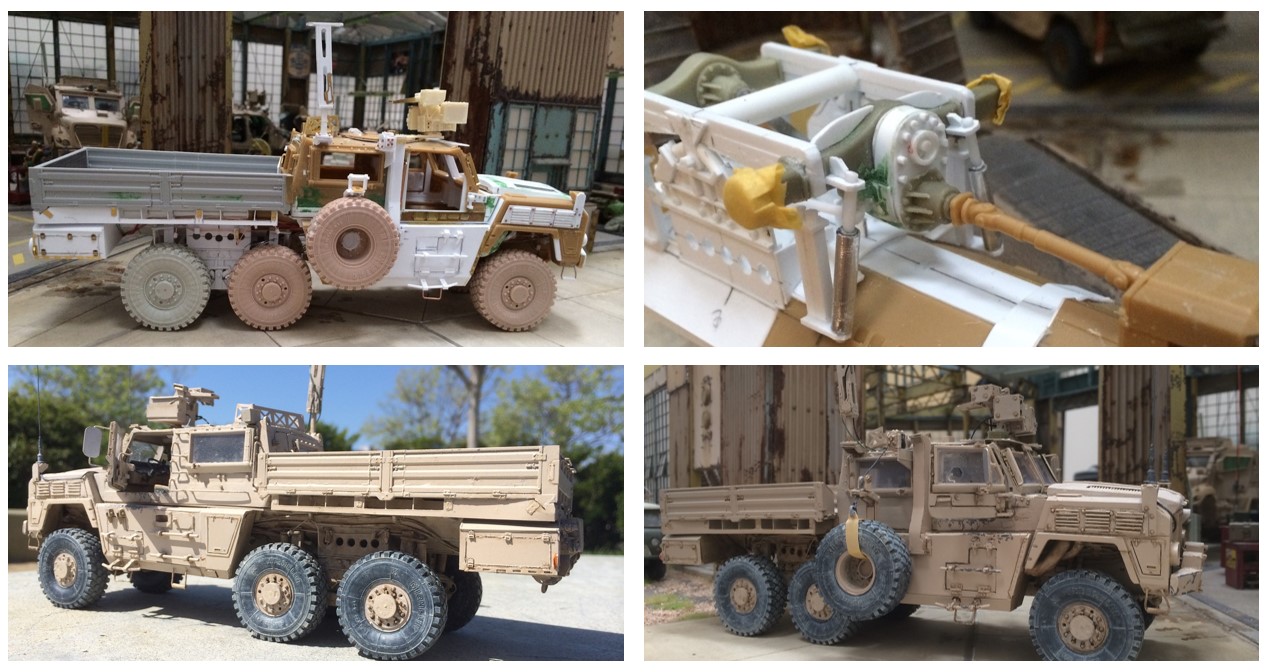
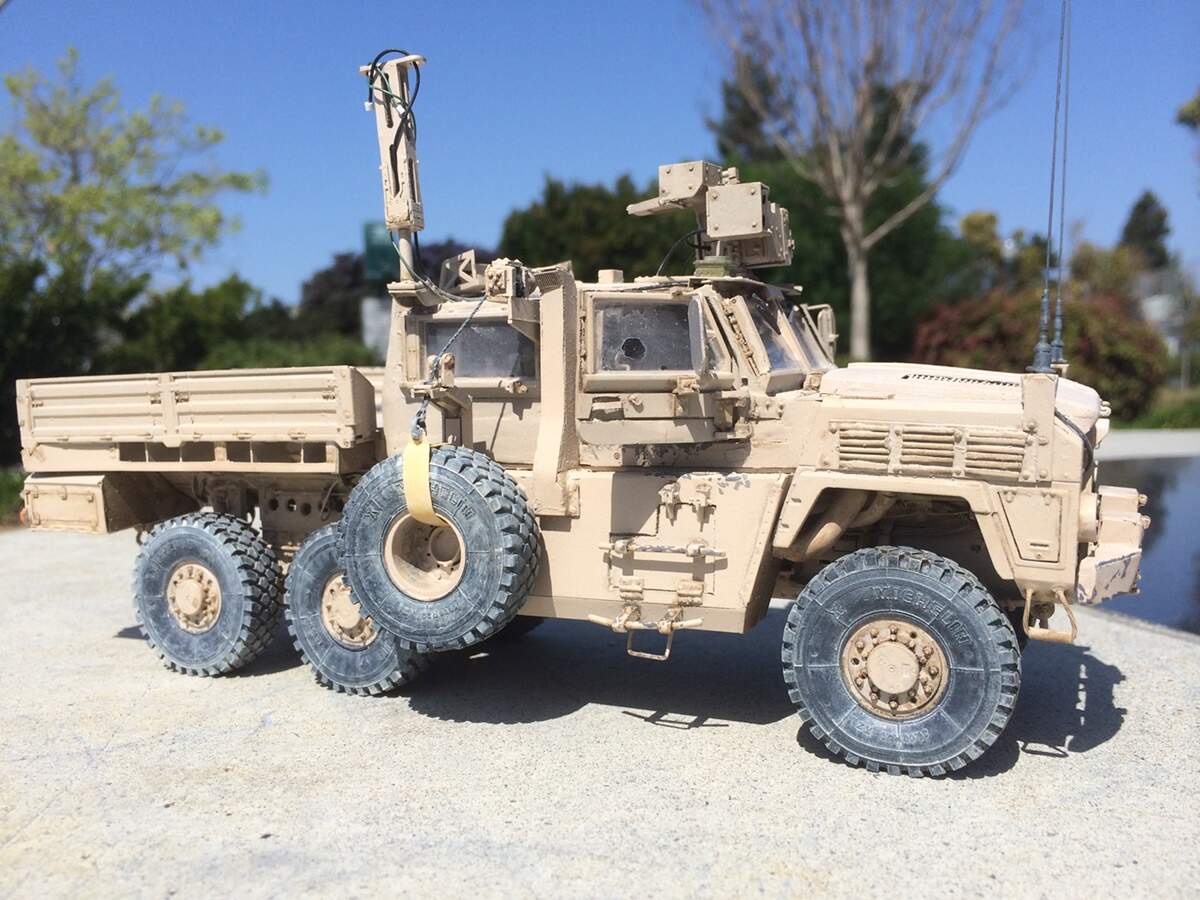
When you sent over some MATV images, you included a few of the SOCOM RG-33 utility. Naturally, I concluded that I needed to give it a shot
Mercifully, I have since improved at scratch building (those front louvers are awful), but here is my try:
uhhh…yeah - probably not my finest work. But, live and learn!
Of the various builds I’ve tried, I might try this one again. Some of the base parts are from the Kinetic RG-31, you can just see the blast resistant hull on the pic on the upper right. The tires and wheels are from an MATV. Interestingly, the rear suspension on this sure looks a lot like the Hendrickson I made on the Peterbilt. This truck uses a solid front axle. I have no idea where I got those rear axles - I think the bed sides are from an M1083 but don’t recall.
Hmmm…I might just try this one again
Cheers
Nick
11 Likes
I think it looks fantastic. Of all the people who have those photos you’re the only one I know who even tried it.
2 Likes
I love utility vehicles, and that’s an absolutely gorgeous model.
2 Likes
A Model that very happily got finished BEFORE someone offered the same kit in Styrene:
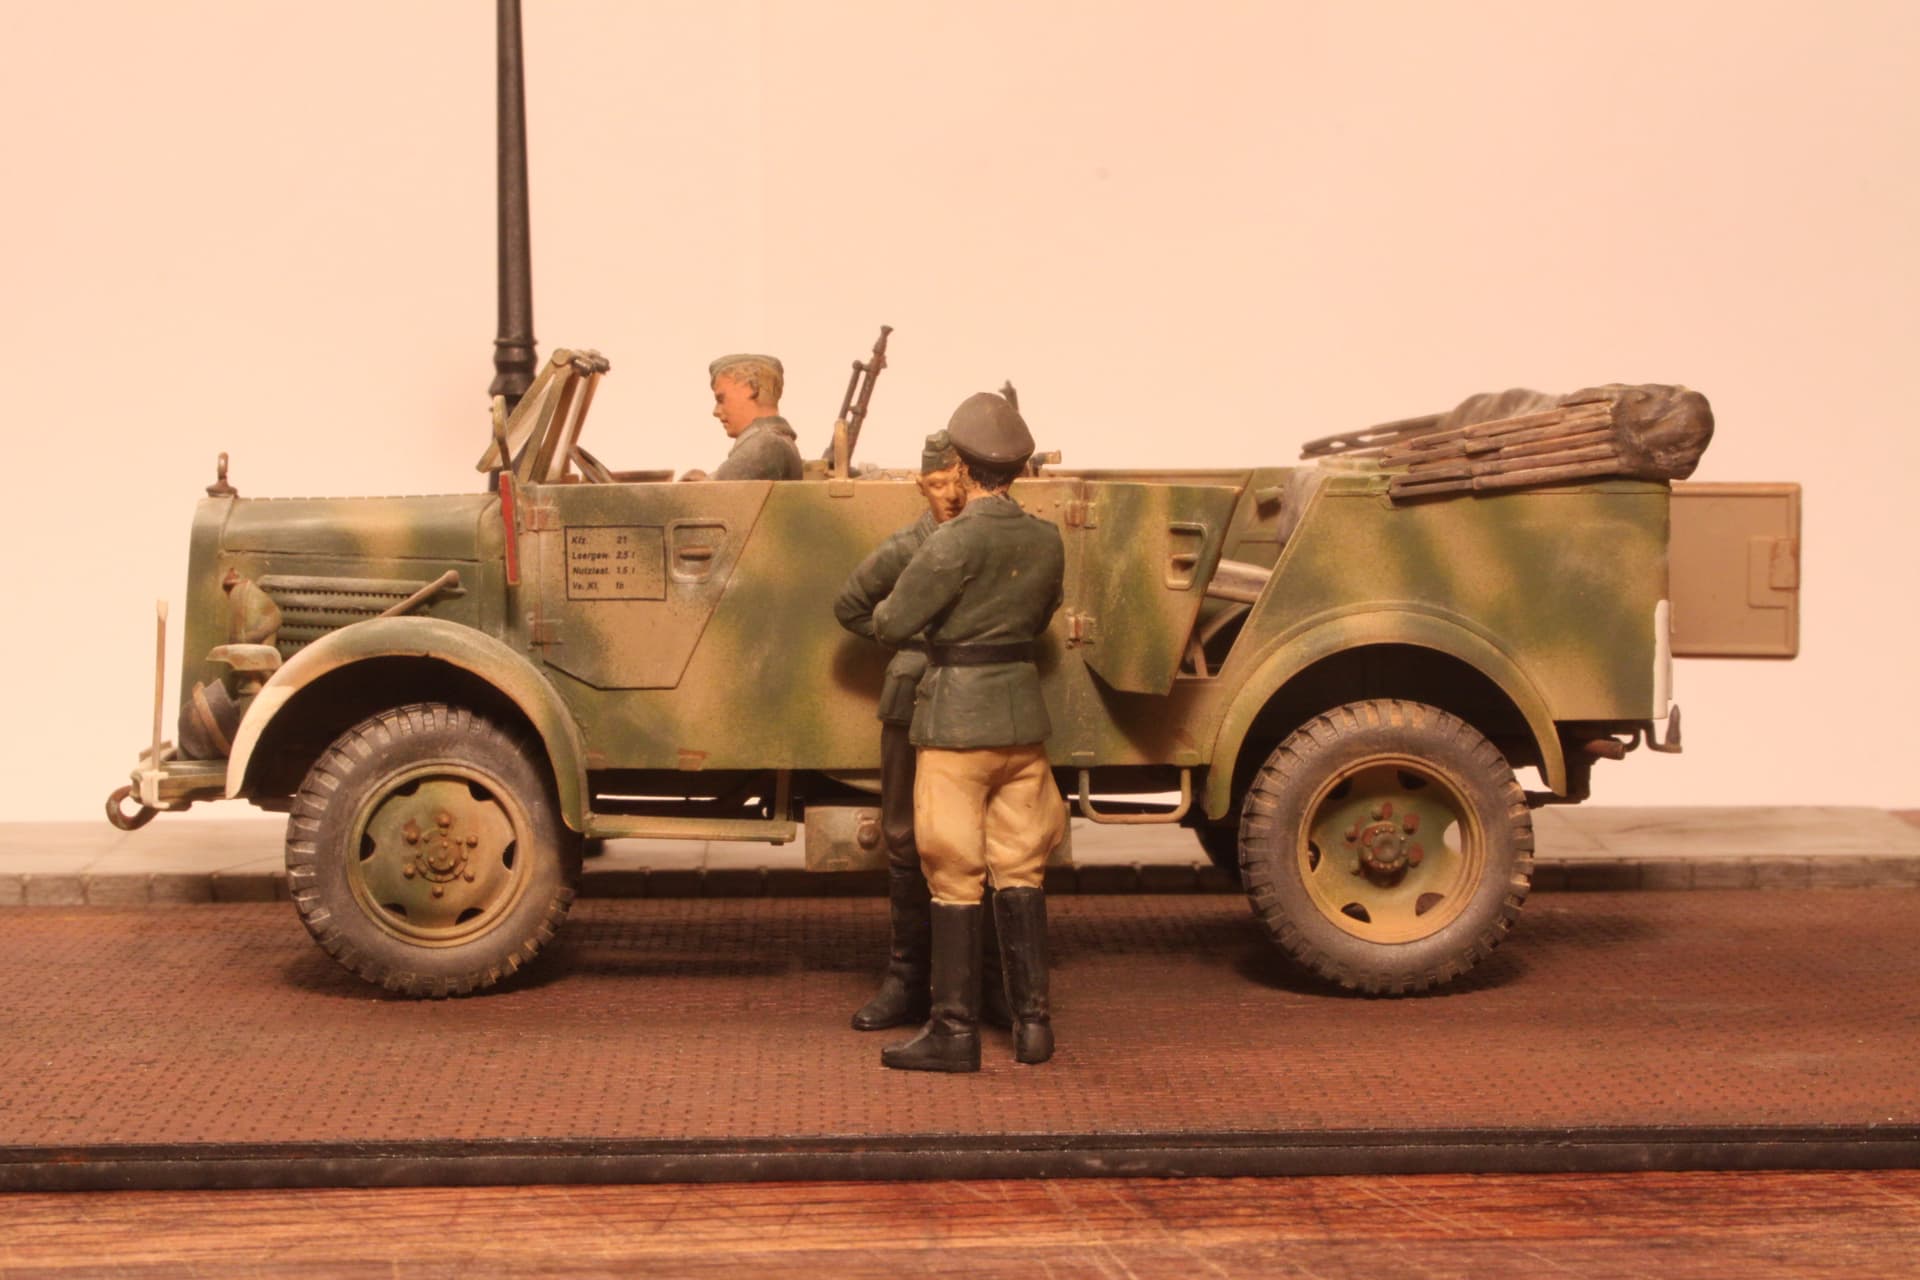
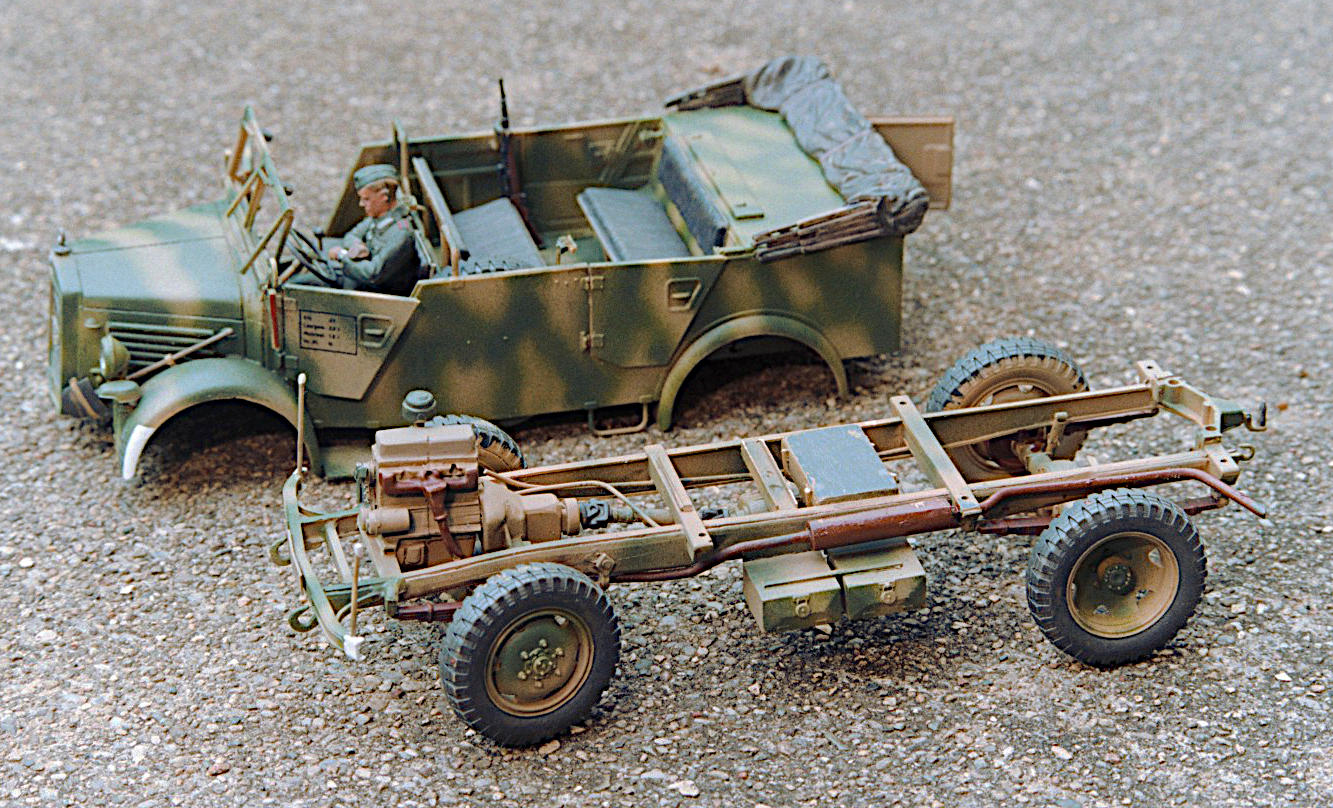
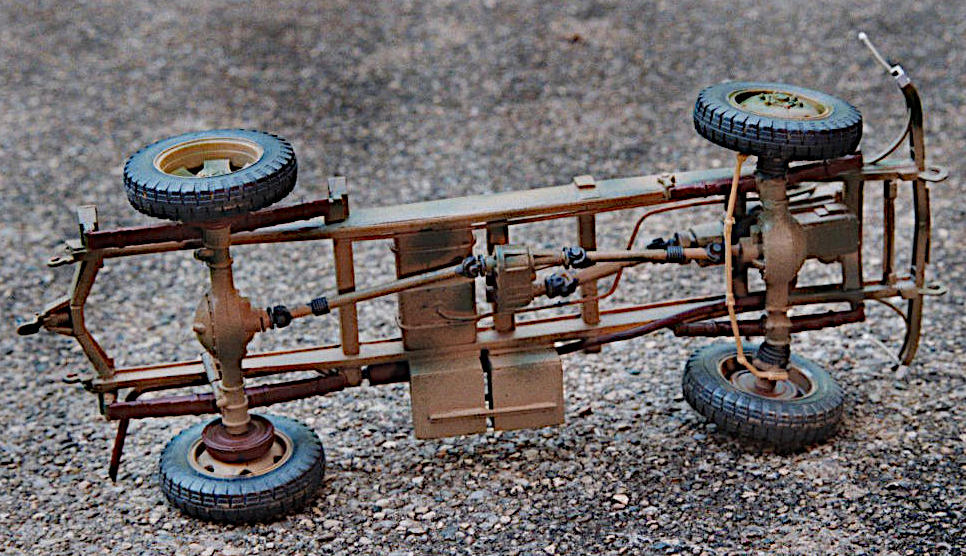
Mercedes Medium Field Car Conversion - a combination of the Tamiya Steyr field car body and the much altered bonnet from the Italeri Mercedes truck. Model also required a custom built chassis and engine; part scratch and part repurposed Italeri and Tamiya parts.
The Mercedes 4x4 chassis rides much higher than the Steyr 4x4.
Also the Mercedes side frame rails were “C” channel rather than box beams
as on the Steyr.
The Steyr actually incorporates the front differential into the engine oil pan which allows the chassis to ride much lower to the ground. (The Steyr was actually front wheel drive that, when desired could also engage the rear axle, unlike every other 4x4 out there.) Mercedes took the more traditional design route, hanging the front differential under the engine which then forces the chassis design to ride much higher/taller to allow space for the front axle, differential and suspension under the engine.
6 Likes
Well, as they say… “Back to the drawing board.”…
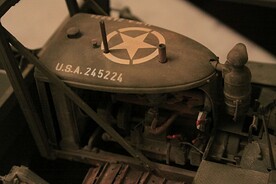
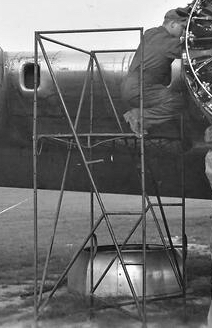
Inspector No. 172: “I don’t feel very safe up here, especially with this silly concrete base attached to my feet! Ach, my heart!”
Group image description:
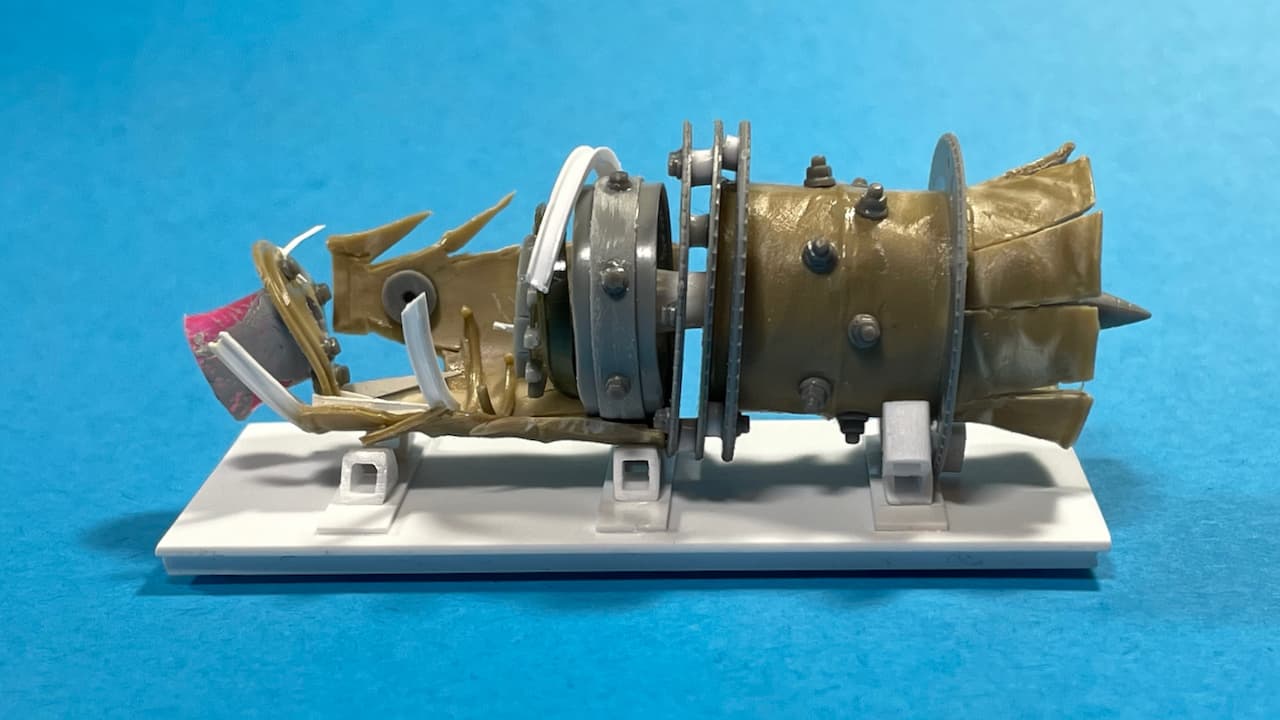
• Background: 'Flam-Out!’ 
 … as in catastrophic engine test.
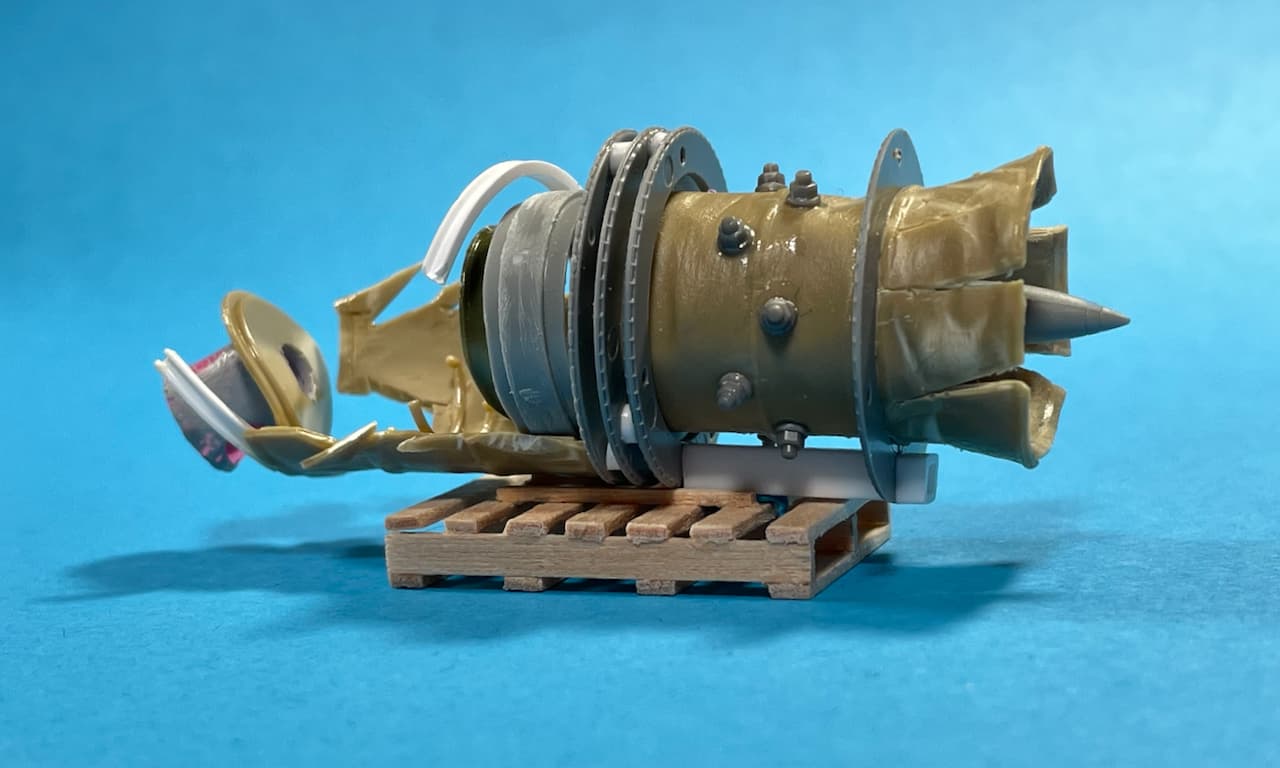
• Front Left: ‘Raketenantriebssystem’  (experimental rocket propulsion system). Just for giggles, I tested to see if it would actually fit inside a spare Tamiya Fuel Drum.
• Right side: The ‘Riesige Sprengbombe’  (huge explosive bomb) atop the ‘Bombenschlepper’ (bomb mover).
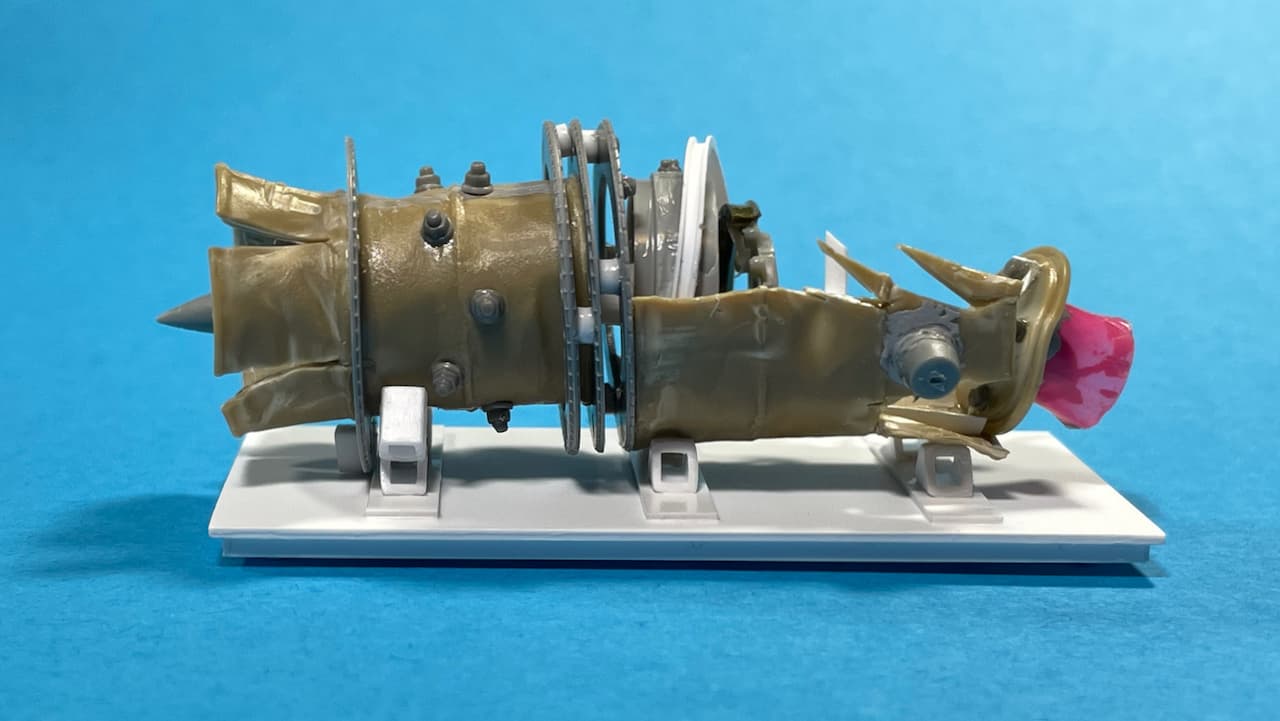
Another view of the catastrophe.
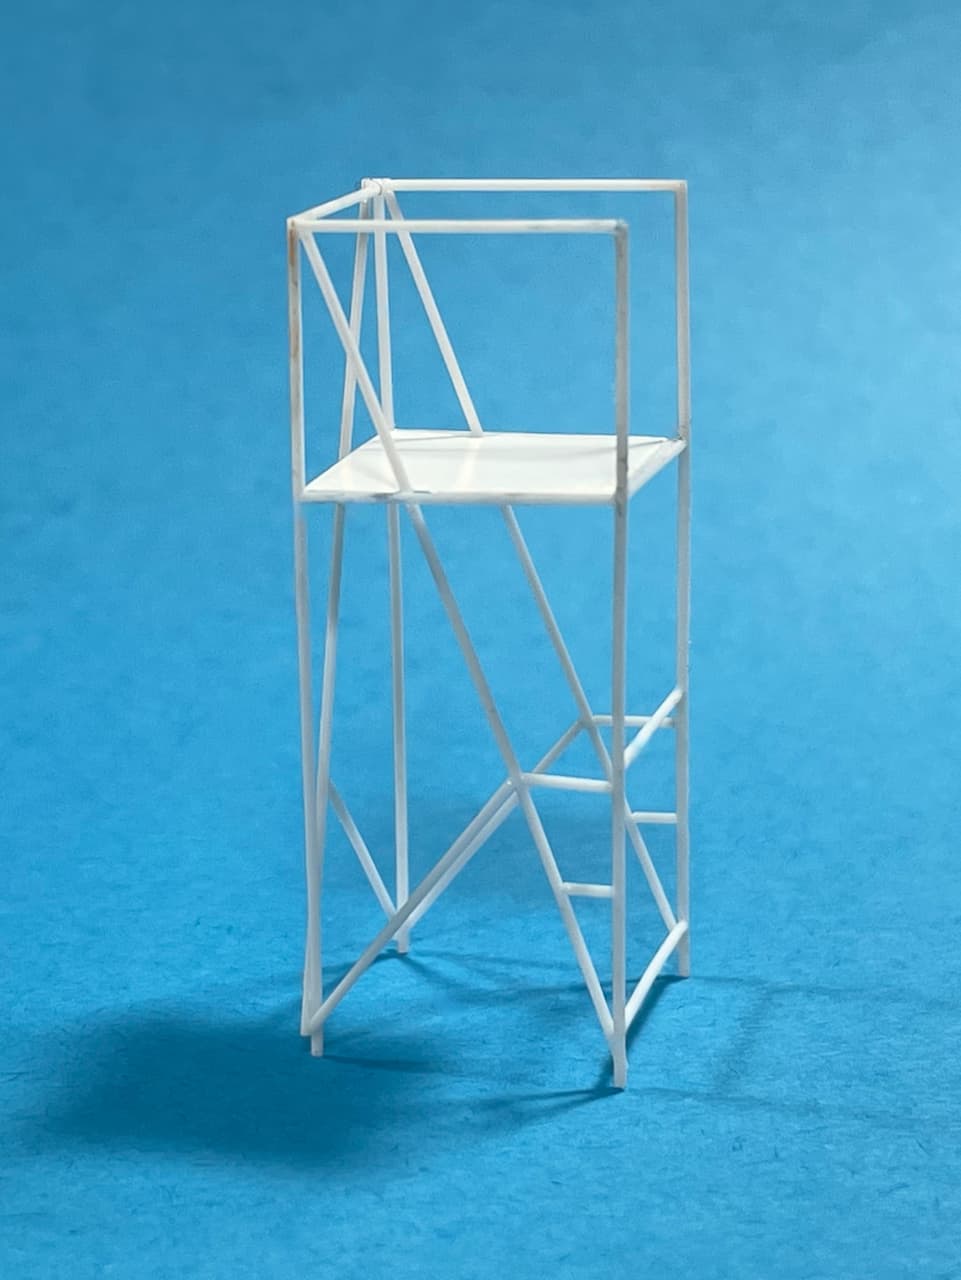
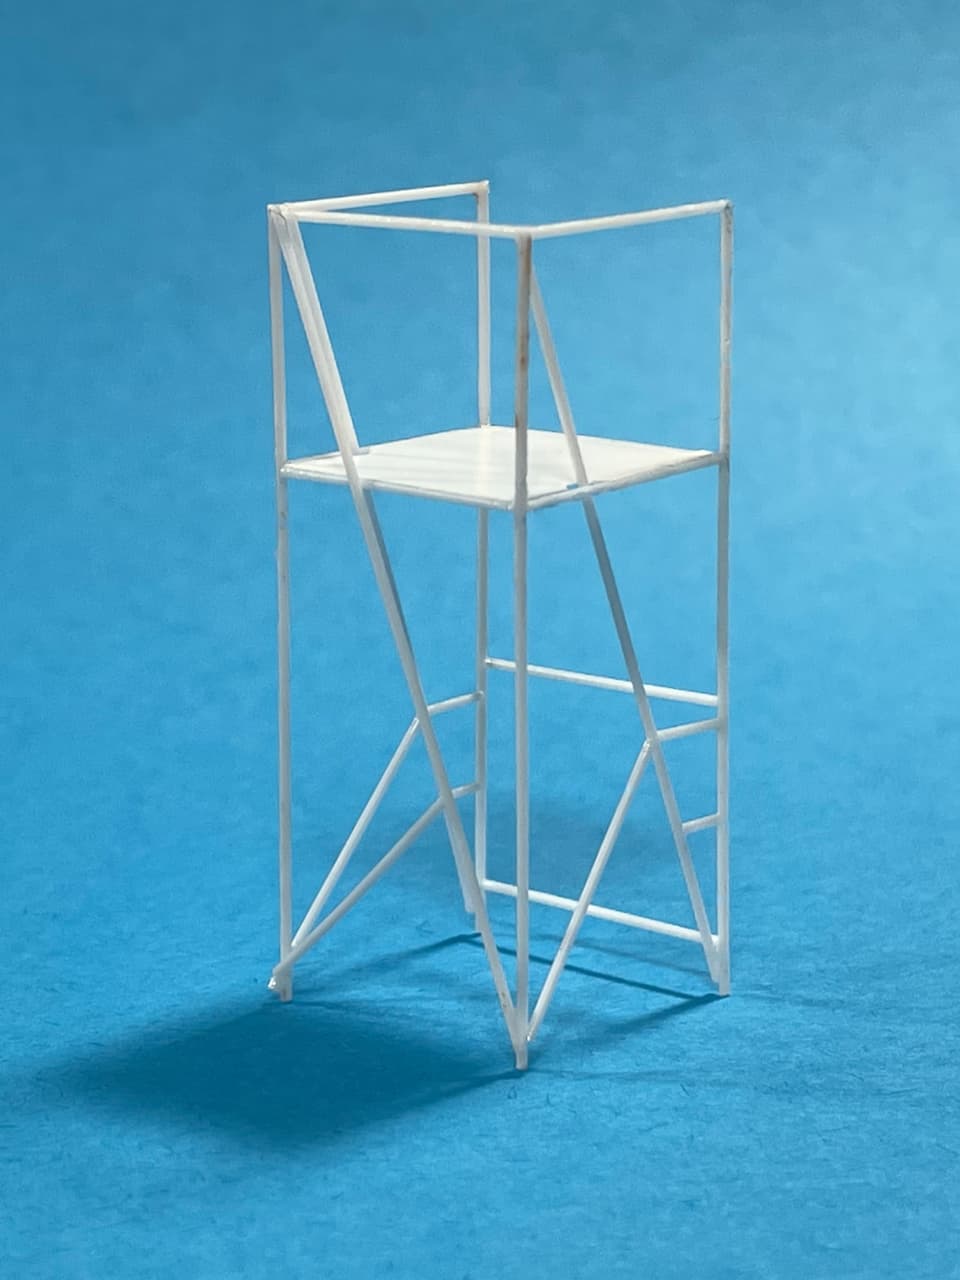
Lastly: I cobbled-together an ‘Engine Repair Platform.’ Note: Still waiting for OSHA (Oh-boy, Scaffolding Hazard Awaits) approval. 
.
You know the drill.
• Evergreen Styrene Rod (218) .020” (0.50mm)
• Evergreen Sheet Styrene (9009) .005" Thick (0.13mm)
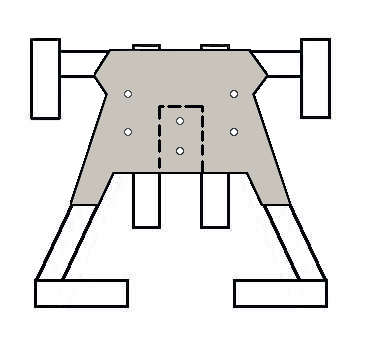
Below: Reference image is borrowed from the outstanding ‘Lucious Lady’ build thread over at ‘AreoScale.’
(Image for reference only)
Happy scratch-building!
—mike
11 Likes
Great work, I especially like the Raketentriebwerkkaputgrossezeit
4 Likes
So cool!
I like the repair platform most of all.
2 Likes
Thank’s guys! Glad you enjoyed the little mini-builds. 
—mike
1 Like
But wait! There’s more… Another skid kinda’ like the first one only different.
The wooden palette was proving too weak to support the mass of the ‘Raketentriebwerkkaputgrossezeit.’ Sooo… ‘Motortransportplattform’ (engine transport platform).
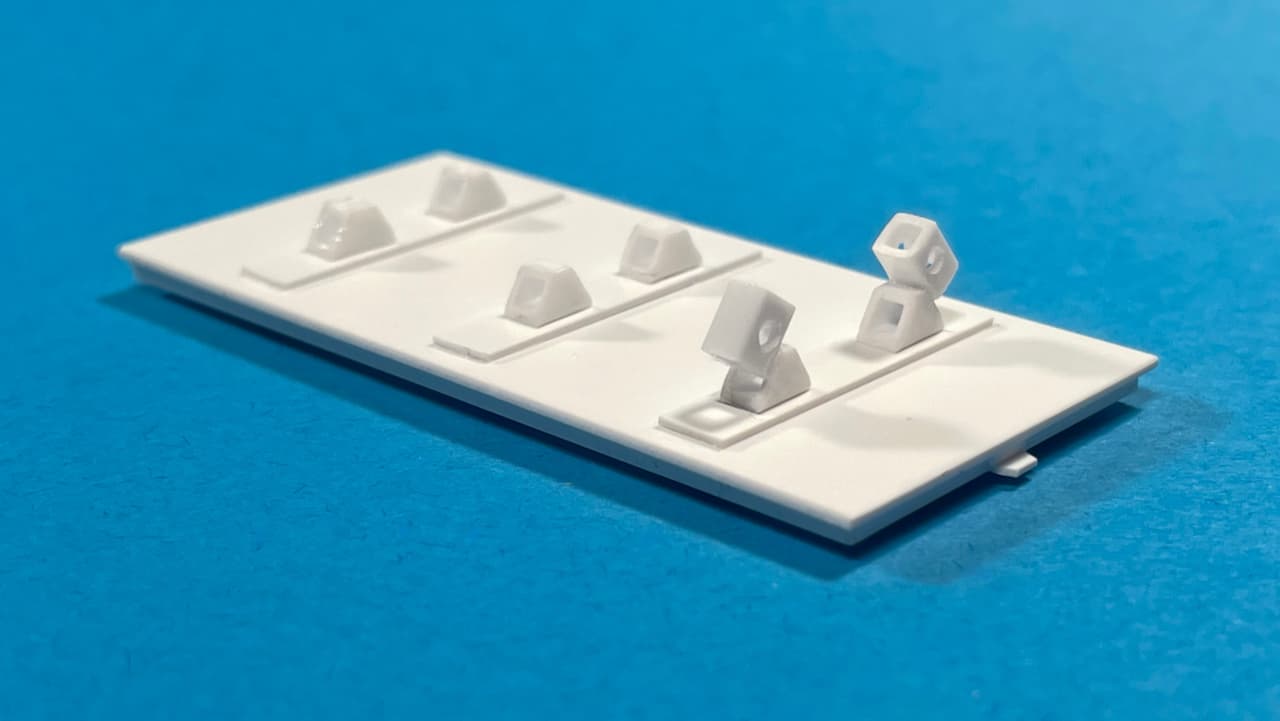
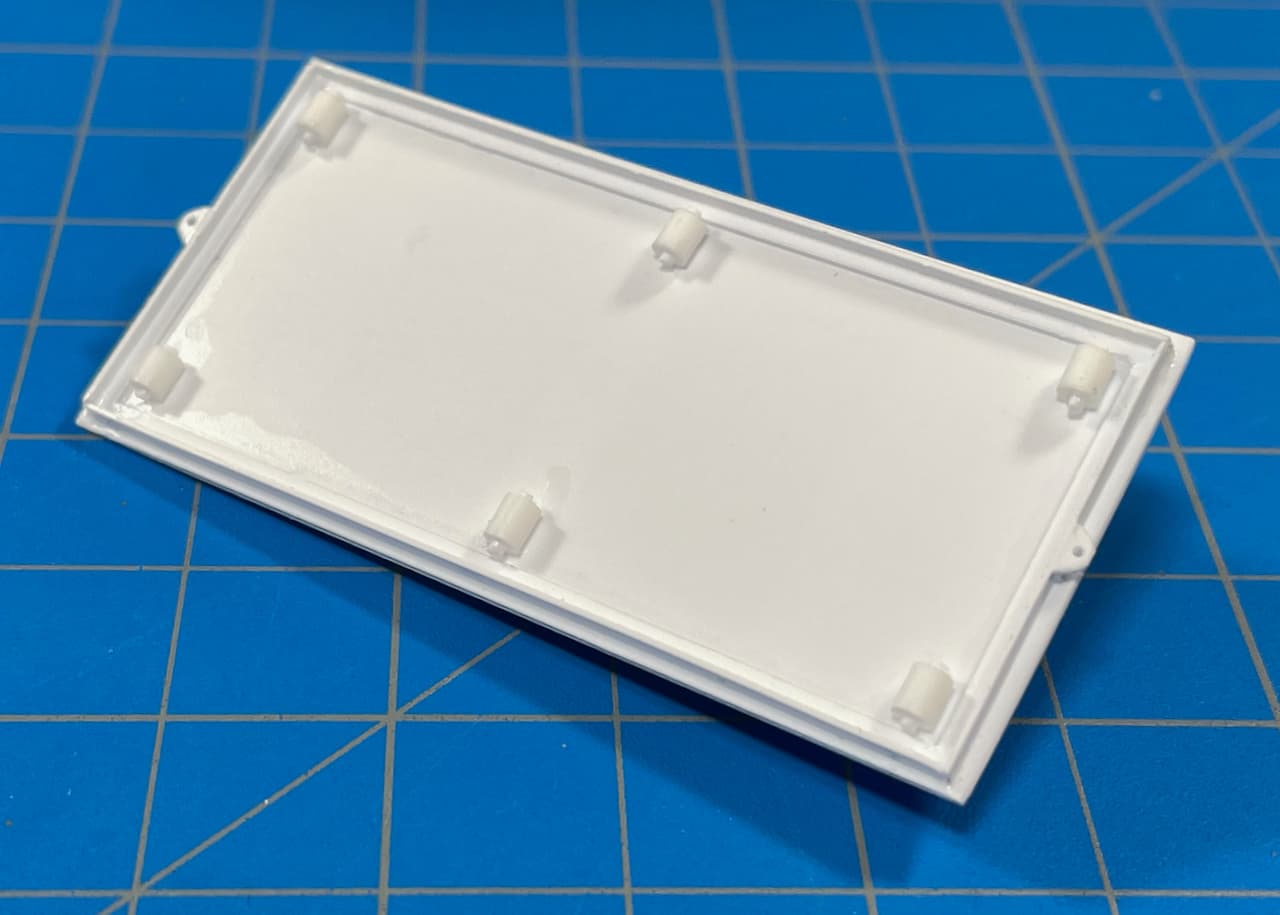
Adjustable chocks implied here…
Here’s the underside with implied castors.
PS: As soon as I can dig-up another Tamiya Bucket, that straw horn is outa’ here!
—mike
10 Likes