Reynier! Yes, I myself have long been convinced that the best base color for metal parts is gray with its various gradations. From dark gray to light gray. From light blue-gray to dark blue-gray.
Polyethylene palette - the best solution, in my opinion, for our modeling work! Does not deteriorate with any acetones, solvents, etc. Very easy to clean. ![]()
I stopped using aluminum palettes. They somehow constantly oxidize and leave black oxides. Only stainless steel or polyethylene.
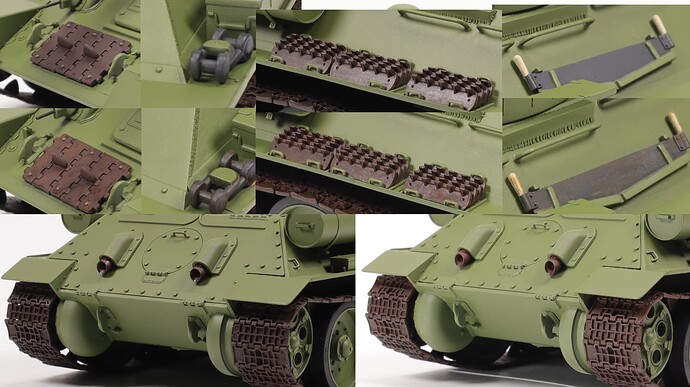
Analysis of the stage “Rusty washes.”
There are a lot of thoughts, but I want to keep them within a few sentences and summarize them.
In general, there are changes. Considering that they were applied on dark surfaces and very liquid-diluted, they are not as contrasting.
If you plan further, not very intense weathering, then washes can and even, probably, need to be applied.
If you plan further not very intensive weathering or do not plan it at all, then, in my opinion, at the painting stage, you can paint all the “rusty” parts with Tamiya XF-84 Dark Iron paint.
If you are planning further intense weathering, then this stage can probably be skipped. ![]()
But, I am a supporter of the painting and weathering scheme “From new - through operation - to used”. A large number of thin, barely visible layers of various paints and weathering compounds is just my way. ![]()
Features of the use of rusty washes.
You need to be very careful and control the process of application and drying. Avoid stains. Places, where stains appear, must be shaded.
109 hours of work.
Stage of work - “Dry brush”.
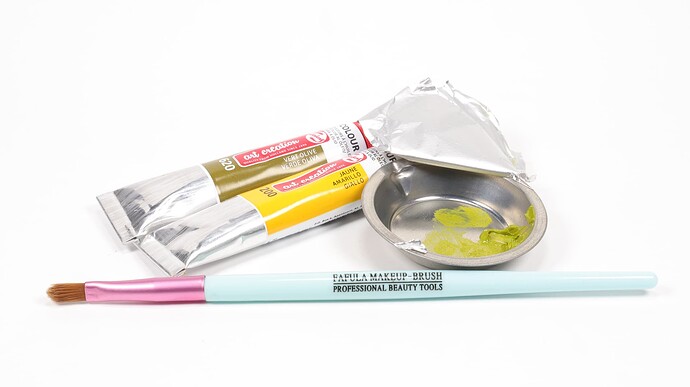
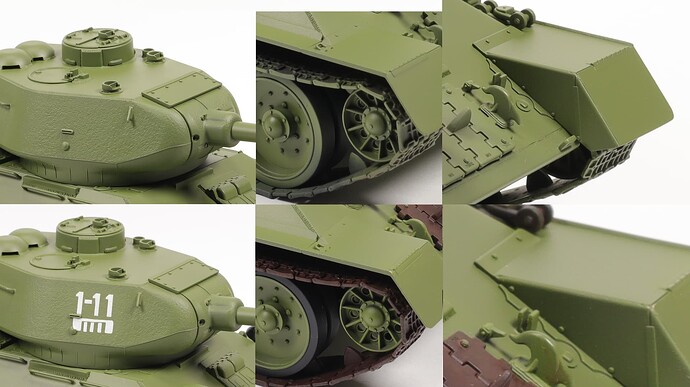
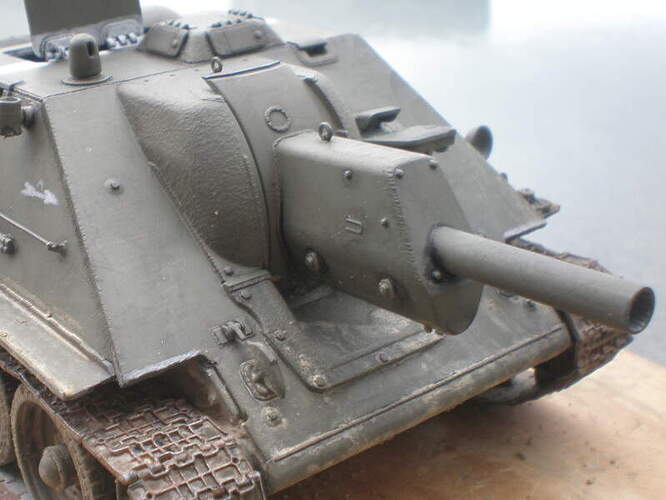
Used oil paints. The mixture turned out to be a little grassy in color. But since I applied it with an almost invisible layer, it had almost no effect on the overall color.
Unexpectedly for myself, I opened a makeup brush. It is quite hard but allows you to shade the paint well. And its main feature is the rounded tip. When you wipe the brush on a cloth or napkin, the tip remains clean, and paint residues linger only higher along the pile and on the sides. As a result, when working, the tip does not smear adjacent horizontal surfaces, and the side parts apply paint where necessary.
Analysis of the stage “Dry Brush”.
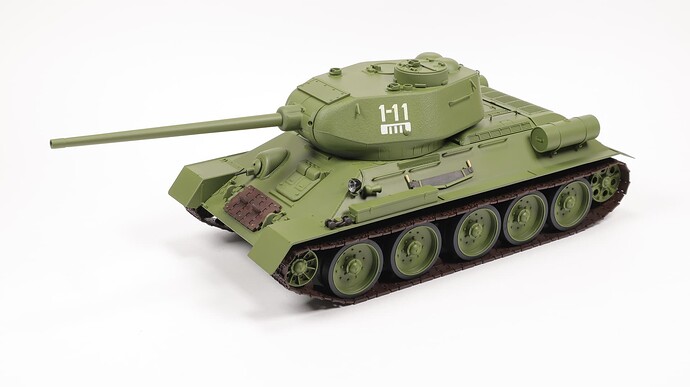
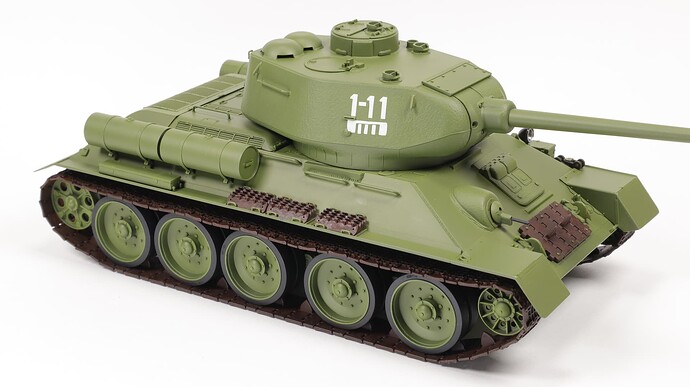
Major changes can be seen on idler wheels, drive wheels, and bolt heads on road wheels.
In the process of work, the feeling that the model becomes some kind of “blurred” did not leave. I did a photo comparison. Although the “before” photo is slightly darker than the “after” photo, YES, it is. The texture of the armor of the turret has become less expressive, it has become poorly “readable”.
Lots of questions.
Did I do the right thing by mixing just such a grassy color of oil paint?
Should I worry about it now in light of the upcoming weathering?
And was it necessary to use the “Dry Brush” at the moment?
Simply, I was hoping to make the parts and components of the tank a little more visible, and more contrasting, in order to determine the further direction of work on washes and chips. And it turned out the opposite. I just “blurred” everything.
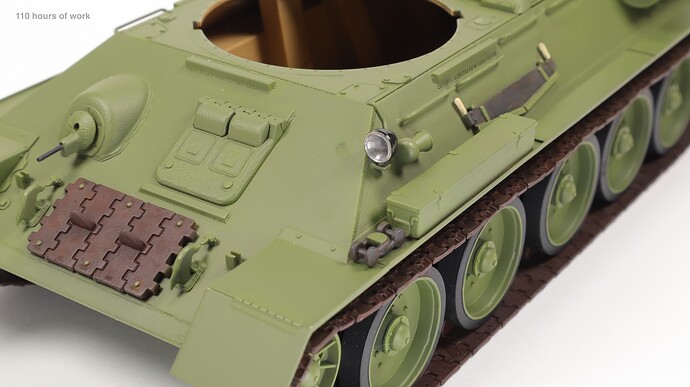
110 hours of work.
Engaged in fitting glazing for headlights.
I took the lens for the headlight from the ISU-152 kit from Tamiya.
Well, what can be said? Not only is it perfectly transparent, but it is also made like a lens - concave on both sides!
Yes, it is without the “grid” inherent in all headlight lenses. But! I have a question. When did Tamiya release his ISU-152? That’s right - in 2009!
When did RFM release its 34s?
P.S. I didn’t manage to take a picture in such a way as to convey all the charms of this headlight lens. Plus, traces of adhesive tape, with which I sealed the lens for the headlight itself, so as not to scratch during fitting, and the worst enemy of the modeler - dust also did not contribute to this.
I don’t think there are right or wrong ways, just techniques to get the results desired in the finish.
There’s many ways to go about finishing a model. I’m not really into doing the new school Mig/Spanish method. I tend to favor an old school approach. So please consider that as what I say may not apply to your goals with finishing.
I like to work from dark to light generally speaking. I use enamels for basic paint because they can be directly mixed with oils paints for dry brushing. Usually that means base color plus a touch of Titanium White oil paint or yellow to lighten.
Example
Likewise, with dry brushing, my goal is often to be subtle to help make an edge pop.
I won’t clutter your wonderful thread with my rambling on dry brushing. If the above is of interest, Old-school-shadow-painting-finishing might be worth a look.
Vladyslav your T34 is a perfect construction, your eye for detail is exceptional and so is your patience. RFM should pay you good money to show what their kit looks like when built exactly correctly.
I am unsure what your vision is for the completed vehicle, so please forgive me if I am not understanding. Many model-makers fight hard to ensure their models do not look like toys, they prefer to make their models look “realistic” (whatever that means!), there are 100 different versions of “reality” as Wade has already shown.
If more contrast is the goal, there is a logic for working from dark to light - if you start with highlights, the secondary dark tones will reduce the highlights. Dry-brushing a more intense version of the original colour makes no sense to me and, as you have discovered, doesn’t really help. A better dry-brushing shade would be a lighter but washed-out version of the original colour.
At the stage you’re at now, I used a random dilute dark (dark grey) wash which accumulated in recesses and varied the tone of larger panels…
Like you I had intended to then dry-brush edges and salient points to further increase the contrast, but decided against that idea because it seemed unnecessary – ordinary daylight automatically creates that high-lighting effect.
Nobody is right and nobody is wrong, it’s your (amazing) model and you must do what you like. Who knows, your final weathering may well make everything work. I think Wade and I are just trying to suggest alternative approaches ![]()
Wade! Thank you for another comment on this thread!
I fully agree with you about the ways and methods of achieving the final result. It all depends on what we want to see at the end of the work.
I also like Old School. It has a lot of unshakable things. One of them is a dry brush. Which not so long ago was hidden in a far corner. In vain. With its help, we can make the model very well “readable” and realistic.
At this stage, I wanted to slightly lighten the edges of all the details and the texture of the armor in order to more clearly imagine the stage of working with paint chips. But, the wrong color did not give me such an opportunity.
At this stage, I wanted to slightly lighten the edges of all the details and the texture of the armor in order to more clearly imagine the stage of working with paint chips. But, the wrong color did not give me such an opportunity.
I have used Humbrol enamels before. The chicest paints (if they are of the old spill). And this time I also thought to take them. But I thought - I bought a new set of oil paints?! Gotta try it! And in the end - a small failure. Usually, when I mix oil paints, I use the classic color scheme of the three primary colors - pure yellow, pure blue, and pure red. And green is always mixed from yellow and blue. This time I decided to use ready-made colors. Haste. The second enemy of work!
Or maybe I could try adding white or yellow to the base color. But I don’t like dry brushing with water-based acrylics. Not that. Better than enamel or oil has not yet been invented.
“…I won’t clutter your wonderful thread with my rambling on…”. Wade! I would not like to hear such words from a person with such unprecedented experience in scale modeling! Any of your comments in this thread only adds value to it both for the entire community and for each of its members individually! In rare moments of free time, when I can disconnect from everything, I carefully read your Three Amigo thread and your other comments in other topics. What can I say? Everything is very clear and understandable. With explanations and rationale. The quality of the work done is great! I read and watch with pleasure!
Tim! Thank you for your comment on this stage of work!
I fully agree with everything you have said. Partially, I have already covered my thoughts in the post above. But I want to add this. You build dioramas, and models of vehicles with interiors, and paint miniatures. Therefore, you are constantly working with color and light! Painting the face of the figurine is already a huge job!
After reading your post, I made for myself not just a conclusion on some specific steps, but a more global conclusion! I need to learn how to work with color! Learn to feel the color! Then it will not be very important at what stage and which of the techniques will be involved.
Well said - feel the colour, I love that phrase. It’s so subjective, in many ways like music – we all know what we like & don’t like, sometimes others agree & sometimes they don’t. All that really matters is what makes us happy.
You’re quite right, it seems crazy but I probably spend more time on colours than on actual construction. So I’m way over at that end of the spectrum, while most others probably spend far more time on construction than painting. And I’m still learning, I don’t think there is a single model in my cabinets that’s “perfect”, there is always something that could look better - my SU-122 is a prime example (Incidentally, figure painting has always been my worst nightmare – thanks to many other better modellers here, I’ve learned enough to make mine just slightly better than terrible)
We’re dangerously close to discussing “scale colour”, a subject that has been kicked around several times before on this forum. It would be wrong of we spectators to de-rail your blog with another debate here. The basic principle (which I think most would agree on) is that any colour becomes less intense (duller) the further away you are from it. As you say I do mainly dioramas, so to suggest distance all my colours are faded. For example, to fade a pure green I usually try mixing it firstly with progressive small blobs of orange until it looks more like an olive drab, and then blobs of mid-grey. It usually looks either too dark or too light when applied to the vehicle, but that can be corrected with progressive very dilute washes of either near-black or near-white.
Whatever, let’s get back to your T34 ![]()
Vlad, thank you for the kind comments!
That makes sense to me, using a little dry brushing to help map edge areas for chipping
Dry brushing with acrylic may work pretty well if a drop or two of extender is used to slow dry time. Bit of base color plus white drop of extender and a drop of water. I’m really not up to speed on acrylic techniques.
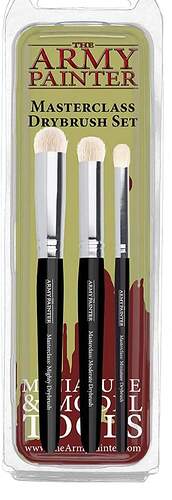
One last comment of dry brushing. Stuff like these Army Painters proved worthless junk in my experience dry brushing. Those things shed more hair than my cat ![]() does…and it all ended up on the model.
does…and it all ended up on the model.
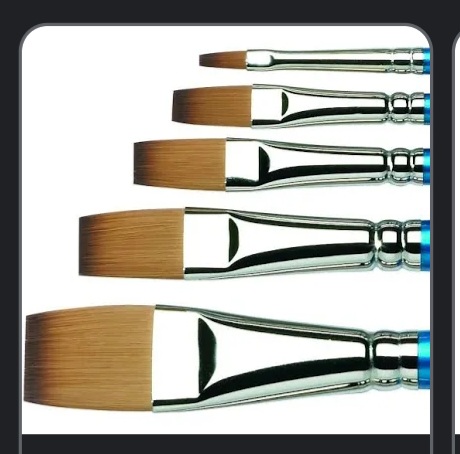
A good quality red sable small flat brush like the one shown below has worked best for me. Slow ![]() but better control etc than a big brush.
but better control etc than a big brush.
BTW - I agree with Dioramartin. We don’t want to get thread off track.
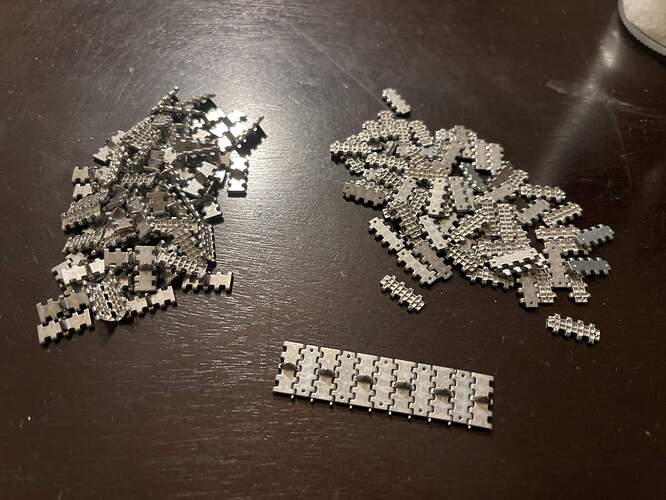
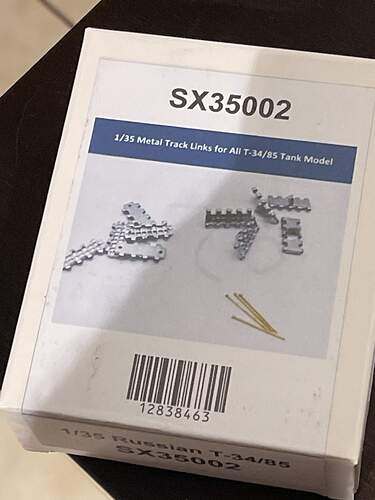
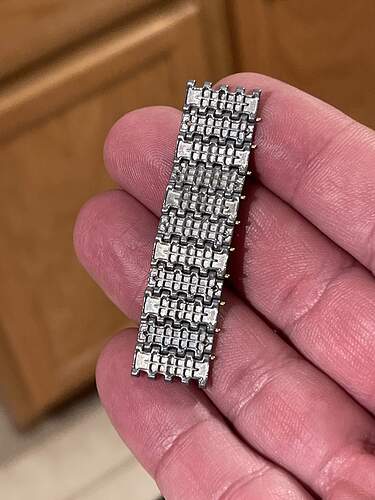
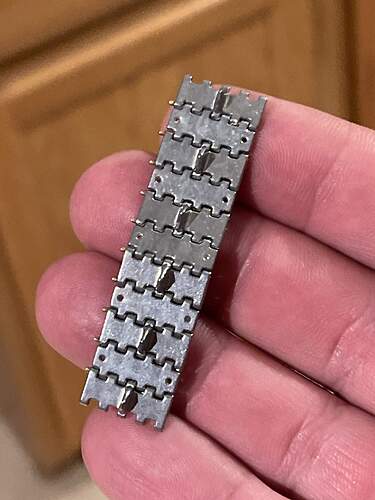
Got my
Metal tracks in today. Put together a couple links real quick.
The pin heads have to go on the inner side of the tracks; they stick out too far. But they should look good.
Tim! Thank you for another comment on this thread!
In my opinion, any discussion is not only the search for the optimal solution to problems or answers to questions of interest but also the replenishment of knowledge. And as this blog goes from a “fun quick build” to an attempt to build something interesting, any discussion is welcome!
And with color I will continue to experiment. Only now it will be more thorough, without fuss and haste.
Wade!
I always use paint retarders both when painting with a brush and with an airbrush. For almost all the paints I have, I also have the original paint retarders.
I don’t like painting with Tamiya’s or Mr. Hobby’s water-soluble acrylics with a brush. When a retarder is added to them, they become somehow watery and lose their covering ability. Although, perhaps, these are some of my subjective feelings.
Not a single hair fell out of that penny makeup brush I used. But, in fairness, it should be noted that I did not use it that much.
Reynier!
Looks good! But, I would still cut off these pin heads. At least in those areas where they will be viewed (front and rear of the model). Are they not too big? ![]()
In the meantime, I will continue.
This is the plan for the near future.
- I will finish the headlight.
- I will do a little “toothbrush splatter” with Tamiya’s washes.
- I will make a very light wash.
- I will cover the model with a barely visible layer of “dust”.
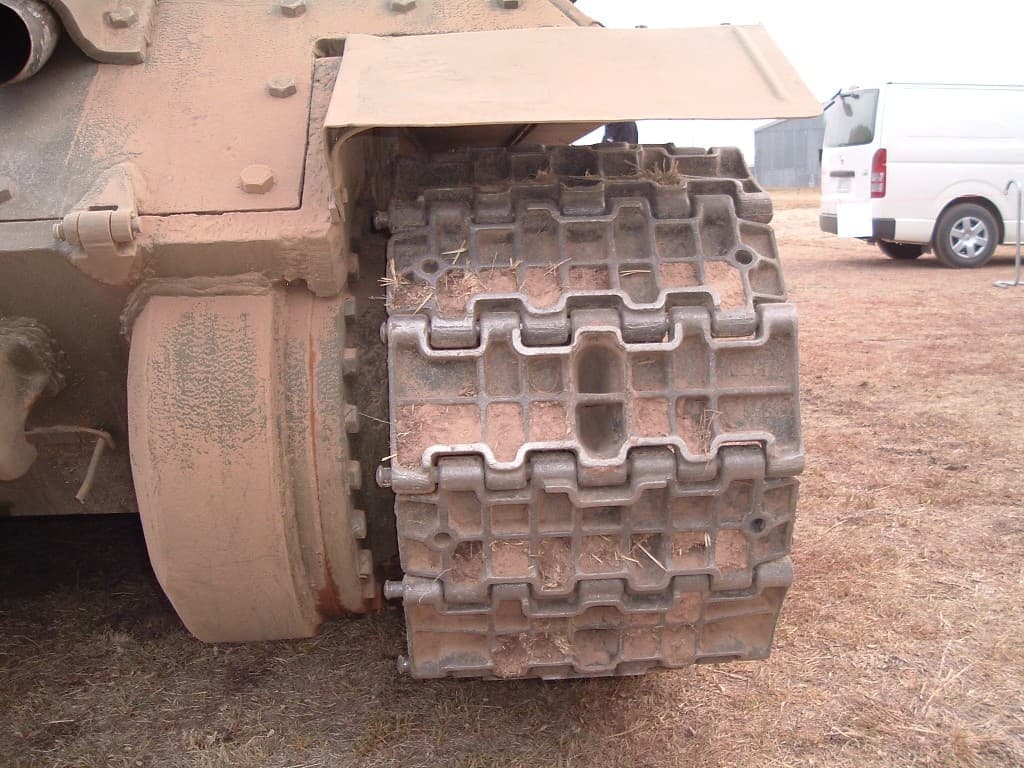
I mean; looking at this picture, I’m not really going to cut the heads off. I mean, I could, but i rather not for the time being.
Yes, it looks logical! They may not be cut.
And in front? Could the pins, having passed the bump near the drive wheel, come out of the joint so quickly again?
a possibility, nothing a few whacks of a mallet wouldn;t fix. ou can see the second pin from the top being “in place”.
