I was so hoping to finish this stupid cursed model by the weekend.
Thank you for the advice, Tom and Wade. Turpentine may be banned in California. Curiously, lighter fluid is not. One wonders who paid whom for that carve out. Perhaps California will ban pine trees. If pine trees are banned, how will that work with the many bans on cutting down trees?
Having just read a lot about various paint thinners, I still do not understand the difference between the various paint thinners. They are mysterious and abstruse.
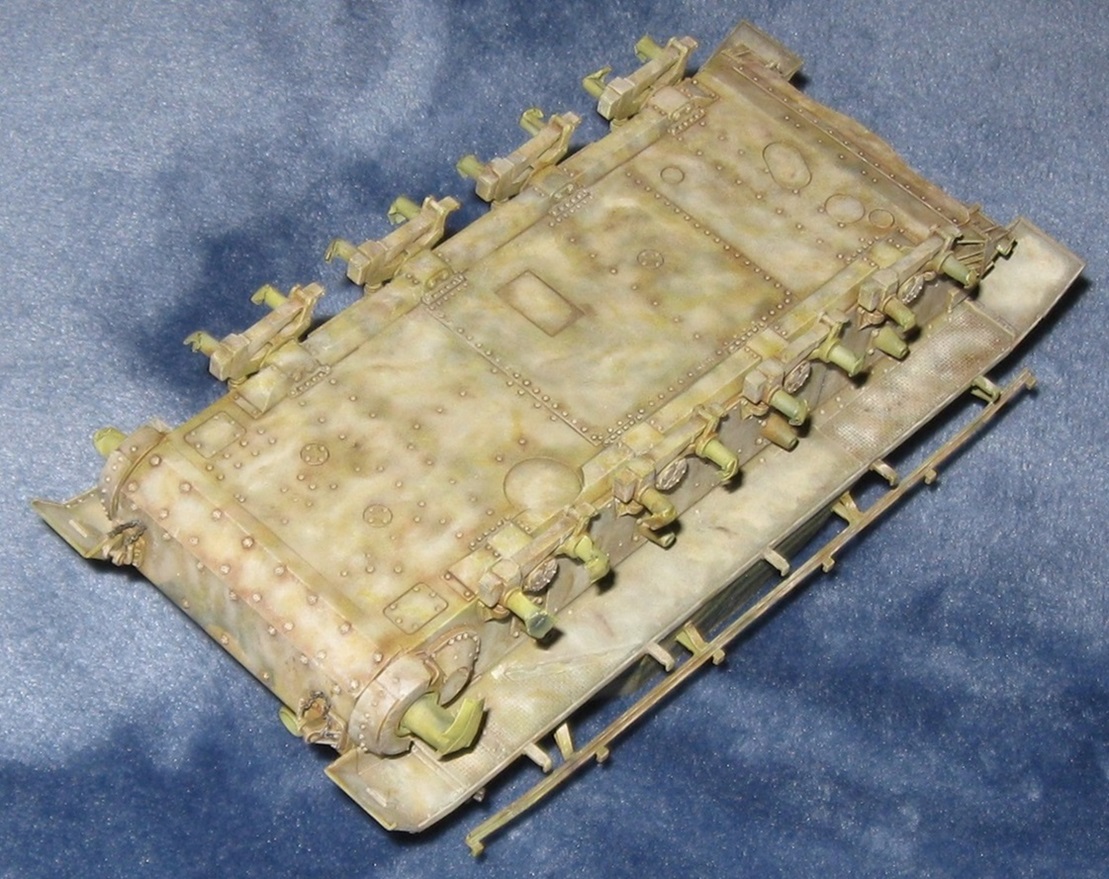
Does the bottom of the tank look okay? I stippled and smeared Israeli Armor Sand and Wood Brown on the bottom of the model to cover the tide marks and lighten up the paint. In my opinion, it now looks better but very light. Following Matt’s advice, perhaps a very selective pin wash with a dark brown color would put everything back in balance?
And…I am out of Panzer Dunkelgelb. Of course I am.
2 Likes
Looks pretty good to me. I tend to agree, after paint has had time to cure follow with a dark brown or raw umber selective pin wash.
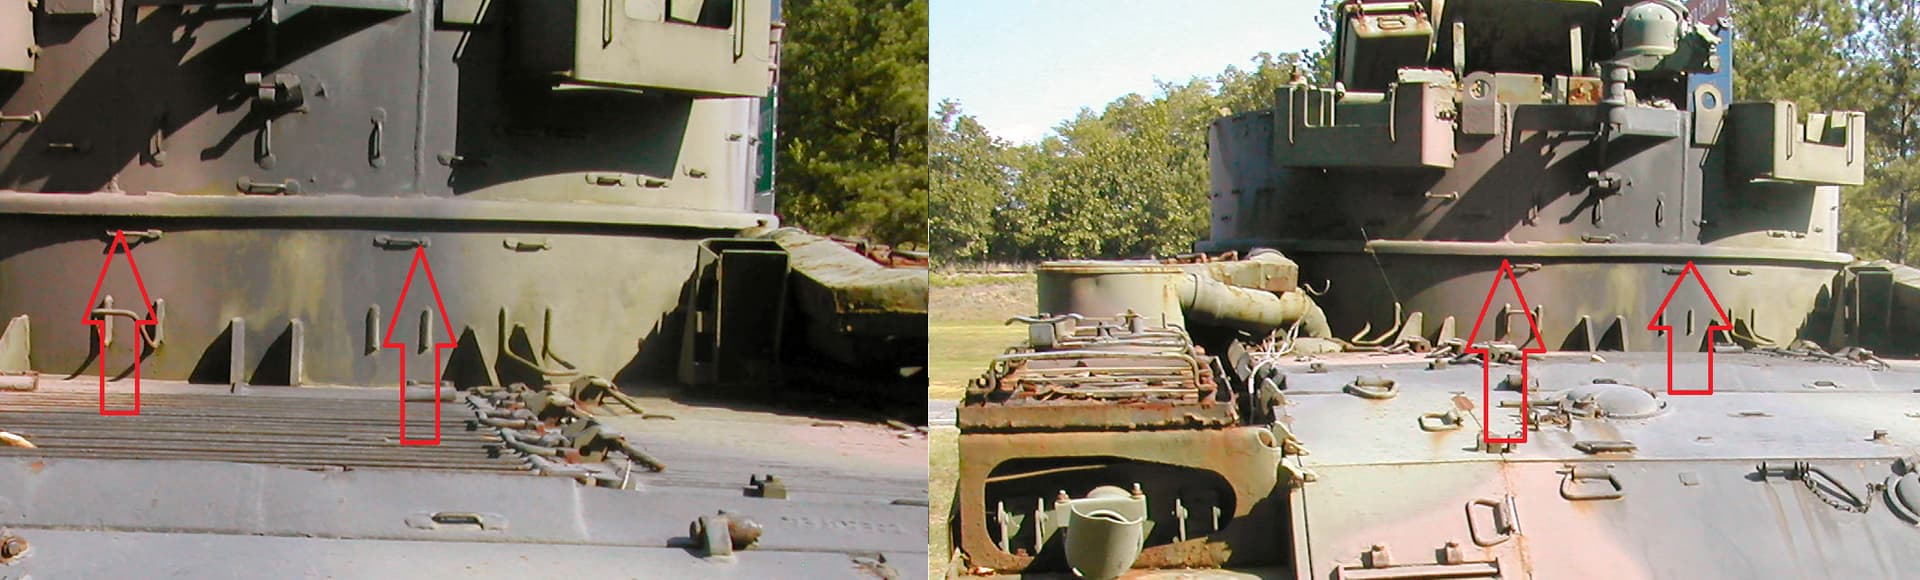
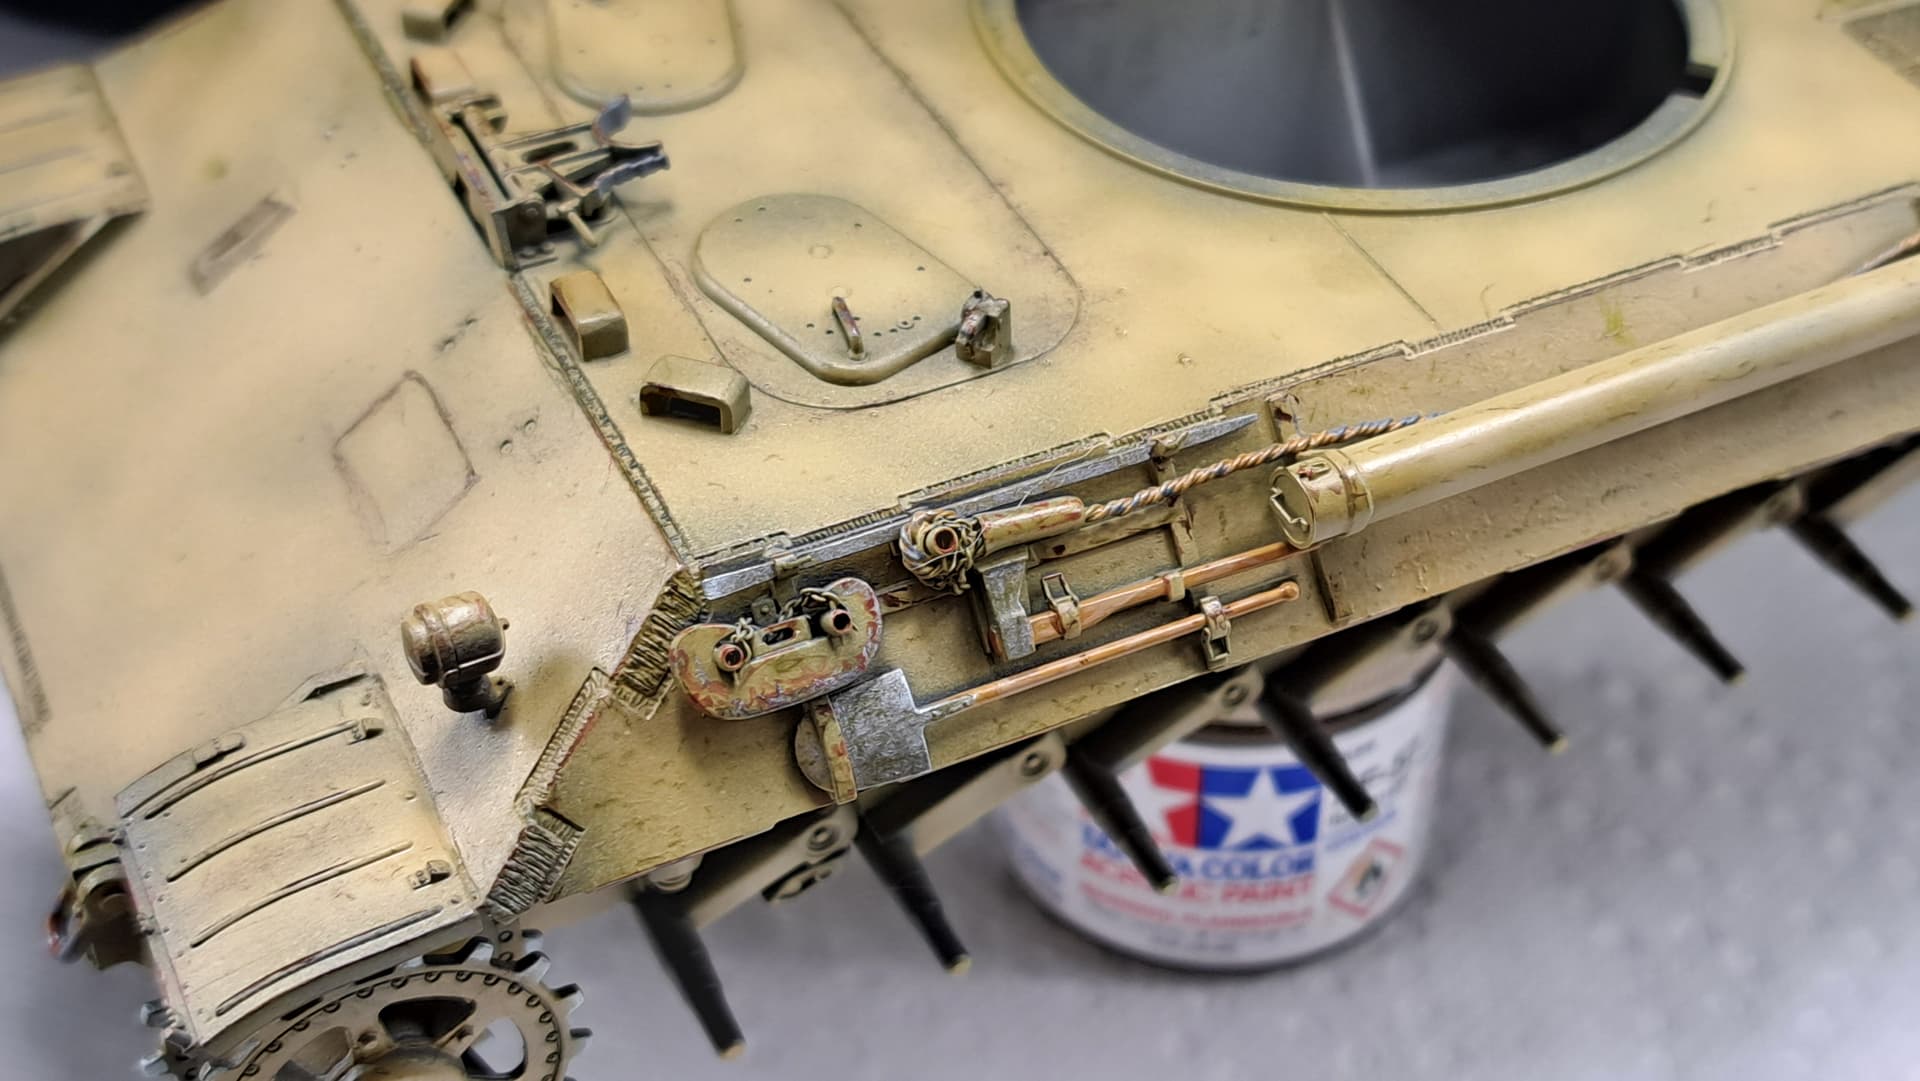
For example the blue marked details appear to have a wash around them and rhat helps them pop. The red details might likewise benefit from a slight pin wash. Of course that’s all personal taste & opinion etc.
Regarding thinners this is a nice thread especially the first post that shows the various evaporation rates of common thinner chemicals.
britmodeller: the-science-of-lacquer-leveling-thinner
FWIW -
Basically, thinners with a lot of “hot” fast evaporating chemicals won’t let paint level out as well as slower evaporating “mild” thinners that’s allow more time for the paint to settle. I used to shot a lot of Dio-sol (~50% xylol & ~50% toluene) it was hot as hell and would bite plastic “hard” and dry fast. Masking with 3M painters tape not detacked never lifted paint after ~3 minutes in my experience. My typical Dio-sol 30 minute paint job from the mid 1990’s with Floquil in one session, masked on the fly between color changes…lol
If too hot or low humidity sometimes the finish would go grainy because Dio-sol was so hot and fast evaporating.
Floquil Military Color thinner, lighter fluid, naptha & mineral spirits were slower less “hot”, no grainy finish on in dry weather or hot days…basically no toluene, just xylol and probably another chemical with a slower evaporation rate.
Now using the even slower Mr Color Leveling Thinner gives best paint results with the same paints…but I wouldn’t dare try masking with masking tape 3 minutes after shooting with MCLT!
HTH
2 Likes
After flooding the surface with mineral spirits, every single bolt, crease, crevice, panel line, and screw on the Sturmpanzer was treated with a pin wash of Mig Light Mud, Mig Wash Brown, or Winsor and Newton … something. Most of it pulled away and left tide lines. On my Panzer 38(t), the very same paints worked just fine. It really is a mystery to me why these things happen. I watch videos and everything works perfectly for the person demonstrating the technique. I do the exact same things with the exact same products and disaster ensues.
It was a mistake to use Wash Brown on Dunkelgelb. I knew that. Resolved not to do it after finishing a Sturmgeschutz IV 6 months ago. Forgot. Did it again.
Would Vallejo acrylics work as a wash with enough Flow Improver and perhaps Thinner Medium? Would the surface tension fall low enough and the dry time extend long enough to work?
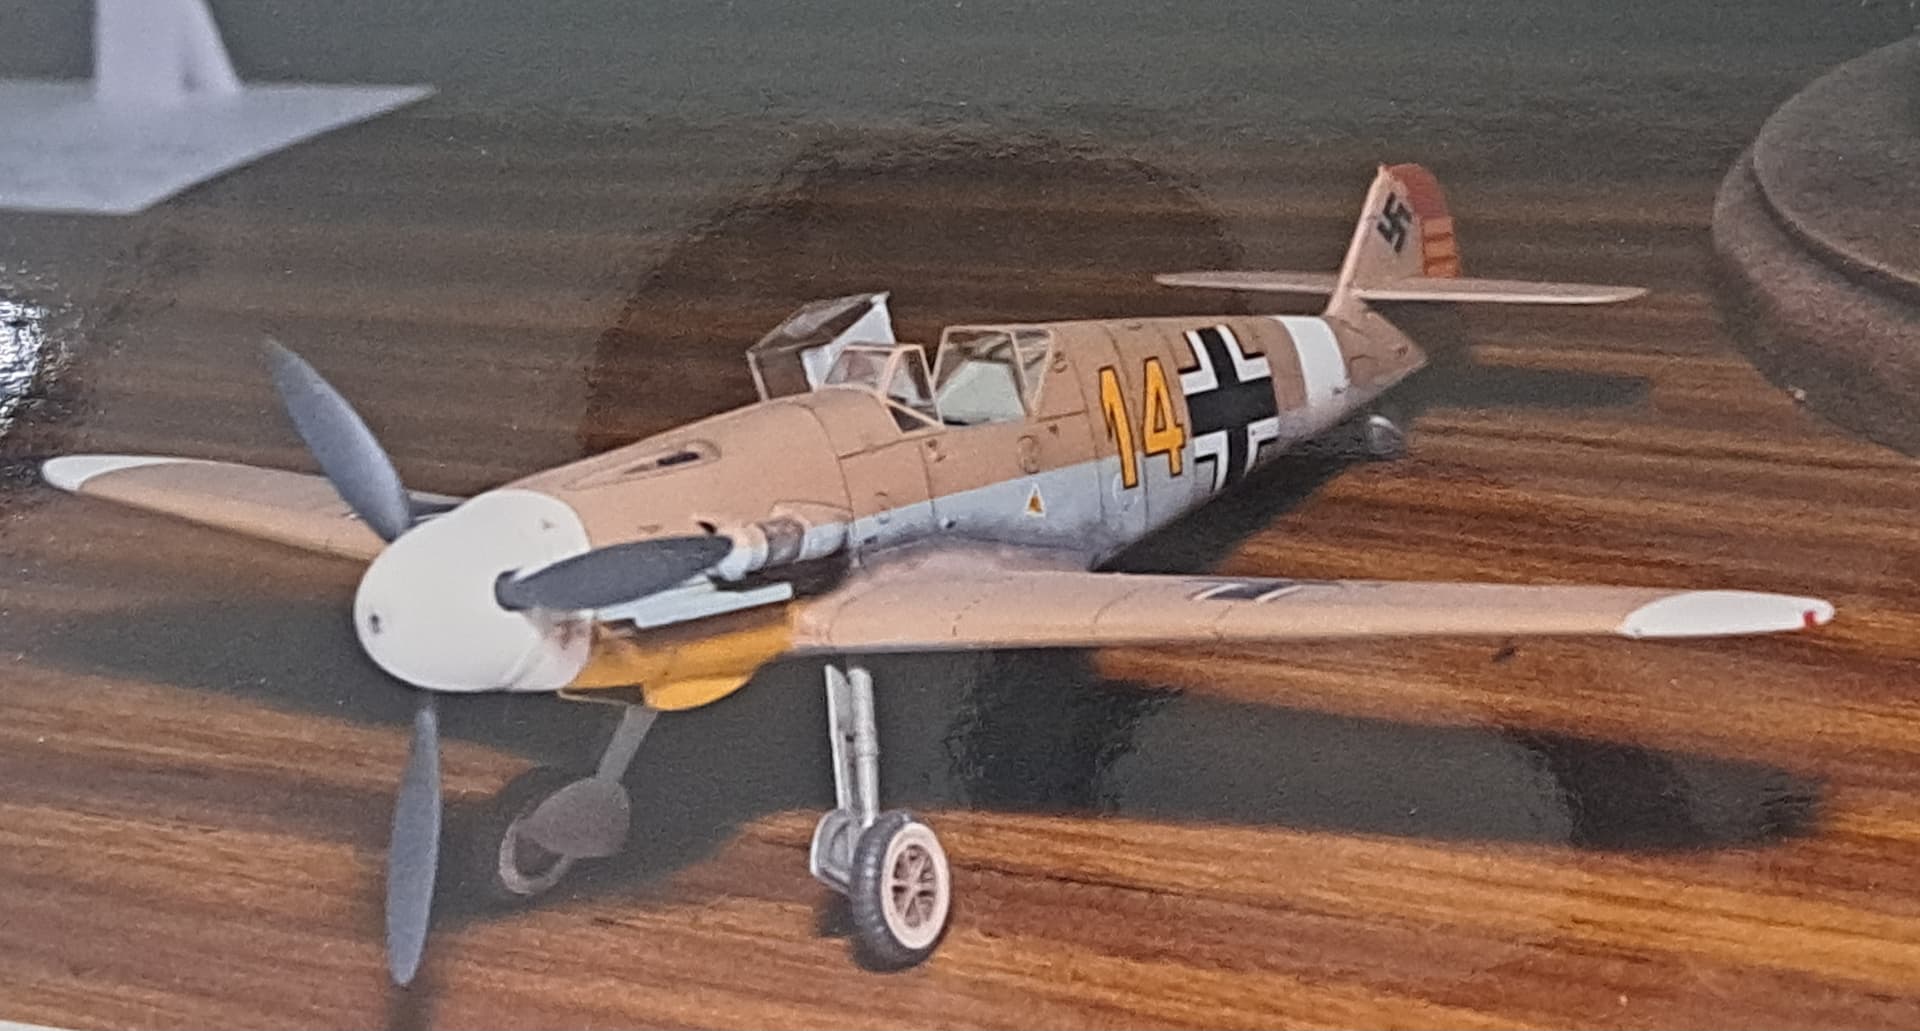
That is a lovely Bf 109.
2 Likes
Thank you, the 109 was a fun slam project one week.
Before applying an oil wash, applying a light brushing of thinner (whatever the wash is made with) to wet the area first helps reduce surface tension. I also helps with more even drying reducing tide marks. They are also a bit easier to work out with a damp brush.
Enamel washes are probably the easiest to work with in my experience. Maybe one of the Tamiya panel liners (brown or gray) might be worth try? Haven’t used the panel liners before but I sometimes use enamel paint (Floquil) & thinner washes.
I think the general consensus is apply a good gloss coat and do the wash over it. I think that is especially important with acrylics.
Being contrary, I’ve always weathered directly on unprotected paint for more modulation etc. Never been a fan of acrylic washes myself as they always dried too quick for me to work and apply suitably. I’m sure a gloss coat would help as the wash would flow better etc.
3 Likes
I did flood each panel with mineral spirits before applying the oil paint pin wash. I did apply small amounts with a fine brush to each feature. I did mix a very weak solution. (Well, I thought is was a very weak solution.) I worked directly on the acrylic paint–no gloss coat. This method worked on the Panzer IV E (take two) and Panzer 38(t). No idea what went wrong on the Sturmpanzer.
My past experiments with acrylic washes have never gone well. Enamels and lacquers are no go–they make me really sick. Oil paints are a compromise. Mineral spirits give me headaches but, for now, do not cause rashes or make me sick to the stomach.
Please pardon my latest round of painting failure, frustration, confusion, and questions. This is why I have dozens of built models and a handful of painted ones–no talent for painting.  The painting process makes no sense to me–it is alien to my nature. Like cooking.
2 Likes
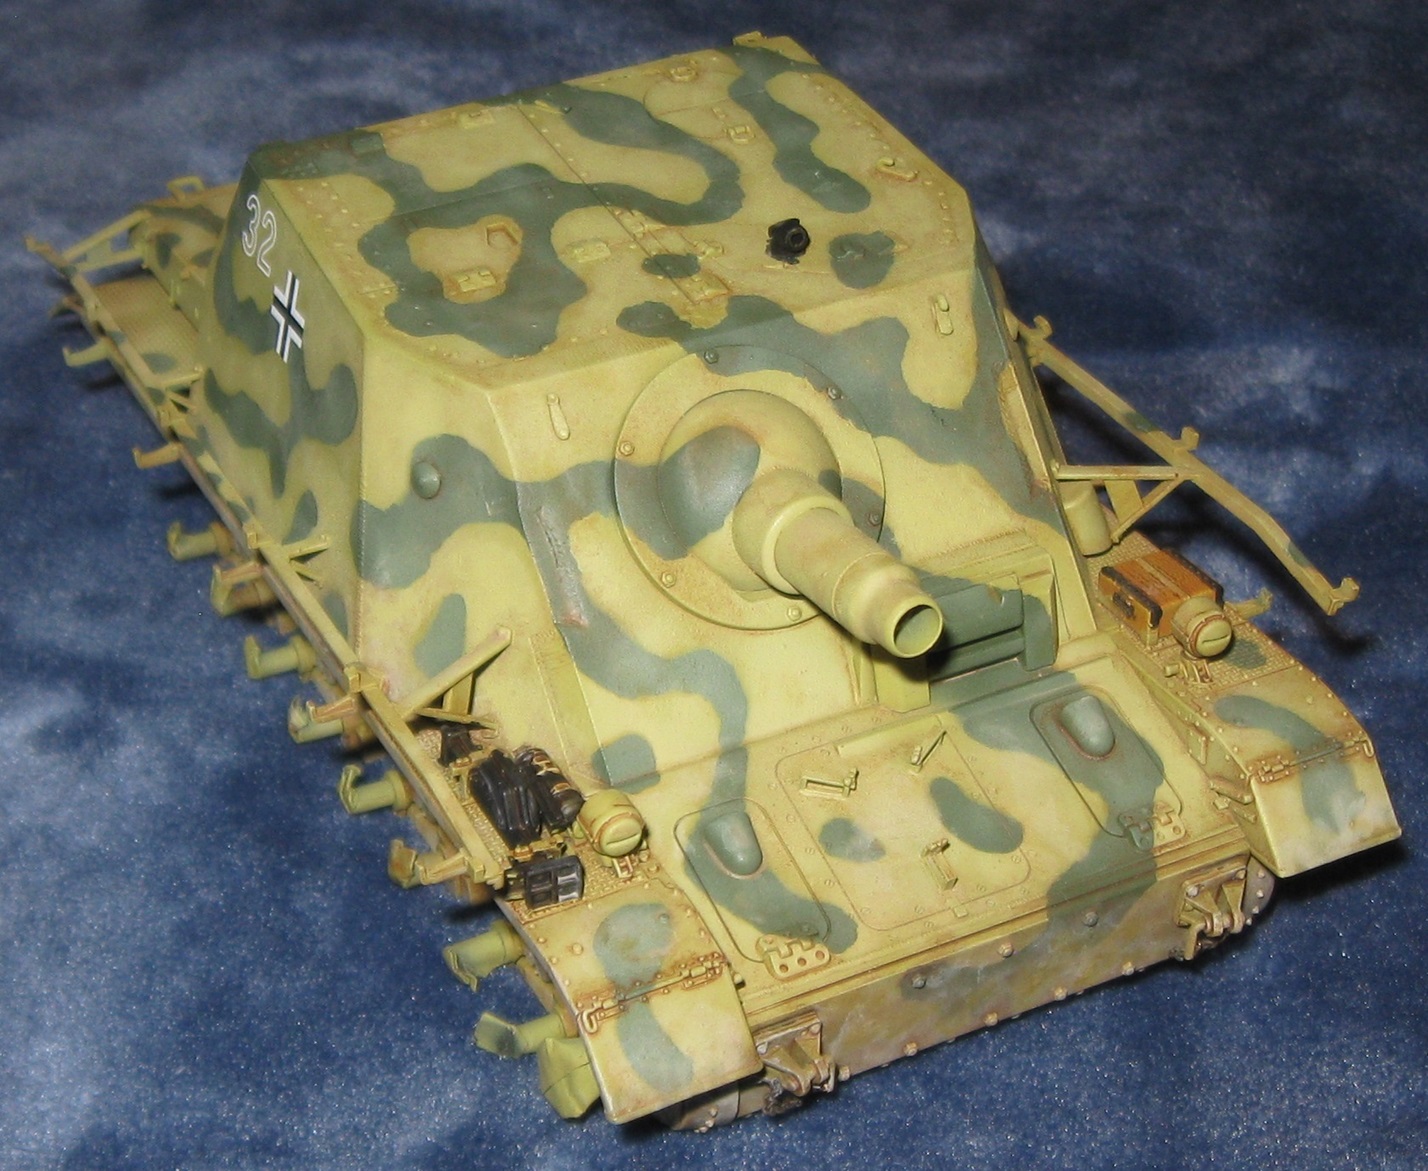
Cyber Hobby Sturmpanzer IV: More progress…
Since turpentine is not readily available, all upper surfaces were scrubbed with mineral spirits. This successfully lifted a significant portion of the previous mud brown oil paint wash.
After all mineral spirits evaporated, panzer dunkelgelb was lightly painted over the worst patches of mud brown tide marks. The underside of the vehicle was lightly dappled with armor sand and wood brown.
After the layers described above dried, the entire model was given a satin clear coat. My hope is that a second wash with umber oil paint will not fan out so easily on the uniform satin finish.
Since this model is kinda…mediocre, I’m gonna experiment with some things and see what happens.
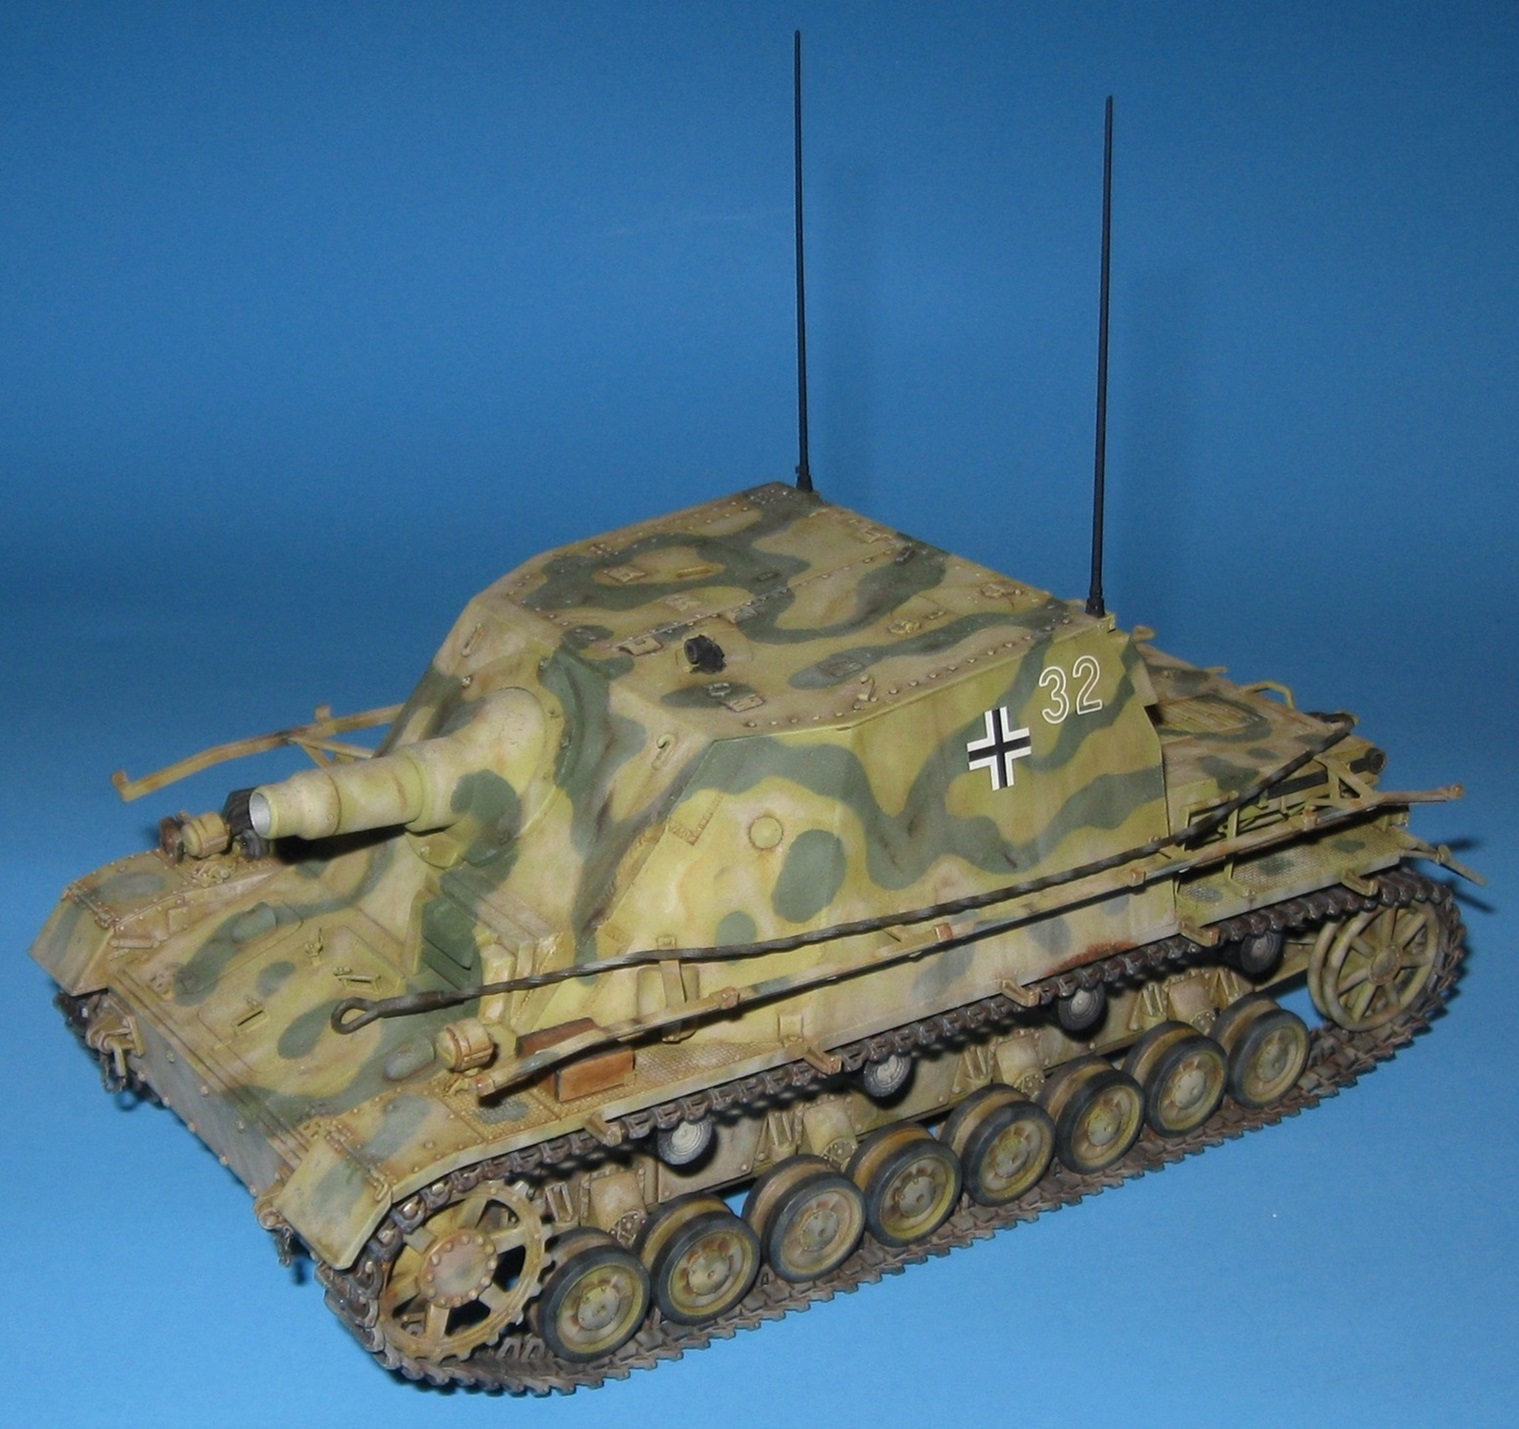
As a funny aside, over the last few days, I found the missing storage box, antennas, and apron plates for this model. That is fantastic. While test fitting an apron plate to the model, one of the plate hangers snapped off.  Yeah. No apron plates.
4 Likes
Cyber Hobby Sturmpanzer IV: Ten hours of painting later…
Some very interesting things happened. After applying a satin clear coat, I mixed up an acrylic wash (Vallejo Umber, Water, and Flow Improver) and very carefully applied it to the casement roof. This fanned very badly so I removed it.
Next, I mixed up a wash of Winsor & Newton Umber with mineral spirits. Once again, this was appled to the casement roof and fanned. I let the wash dry for a few minutes, then used a brush to push the paint where I wanted it. This is standard procedure for an oil wash but the result was not that great.
Working slowly, this was taking a lot of time for poor results. The wash was also thickening. At this point I flipped over the model and kept going. To my surprise, the wash stuck much better on the underside. The next morning, I was really surprised to see that the oil wash on the bottom of the model had worked. It was rather dark but well defined and tide lines were not really an issue.
More oil paint was now used to simulate environmental effects. You know the drill. Sturmpanzers are city fighters and those sorts of vehicles tend to get very dusty. Therefore, I used a lot of buff and light mud.
The far side of the vehicle still needs oil painting. Since I no longer care and need the practice, chipping, rusting, and dusting with pigments will follow. A few things ended up with too much buff so that needs dialing back.
I should also mention that the model is really reflective because mineral spirits leave behind a glossy sheen. A matte clear coat will remove that effect.
4 Likes
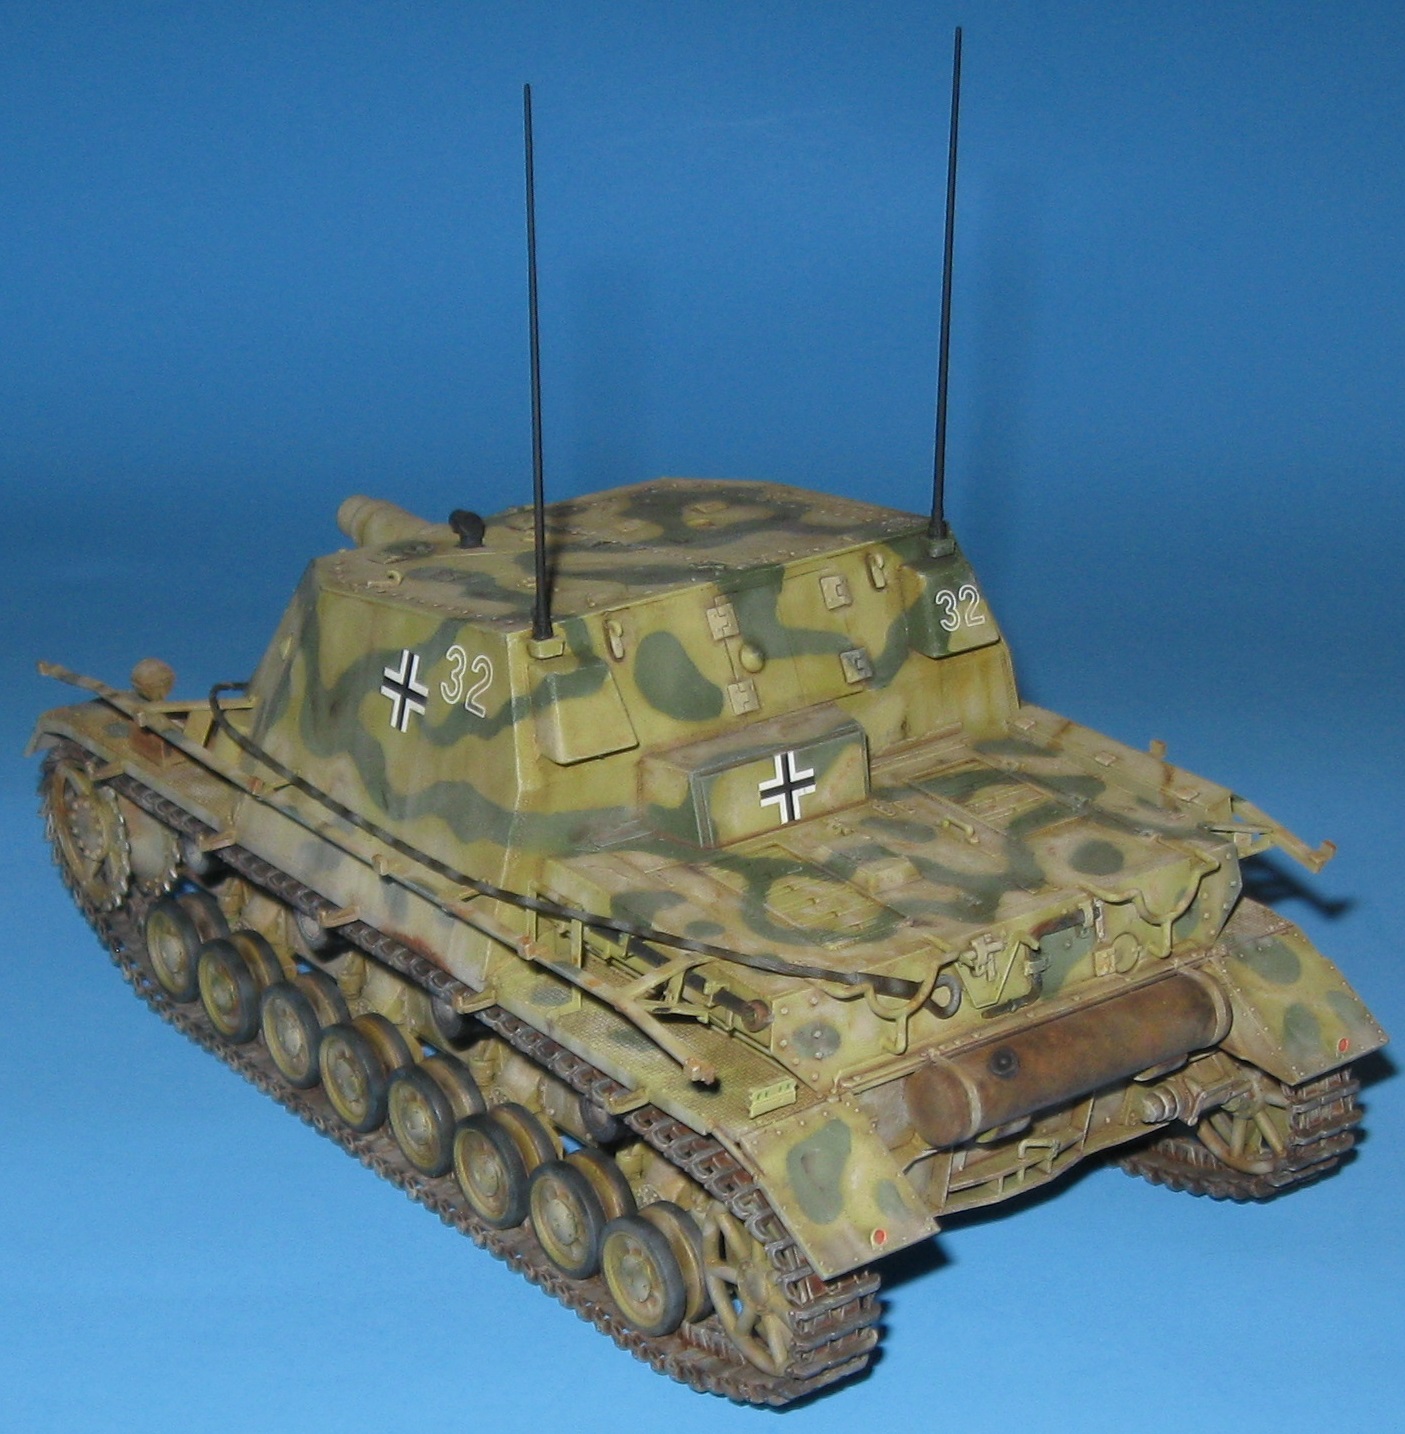
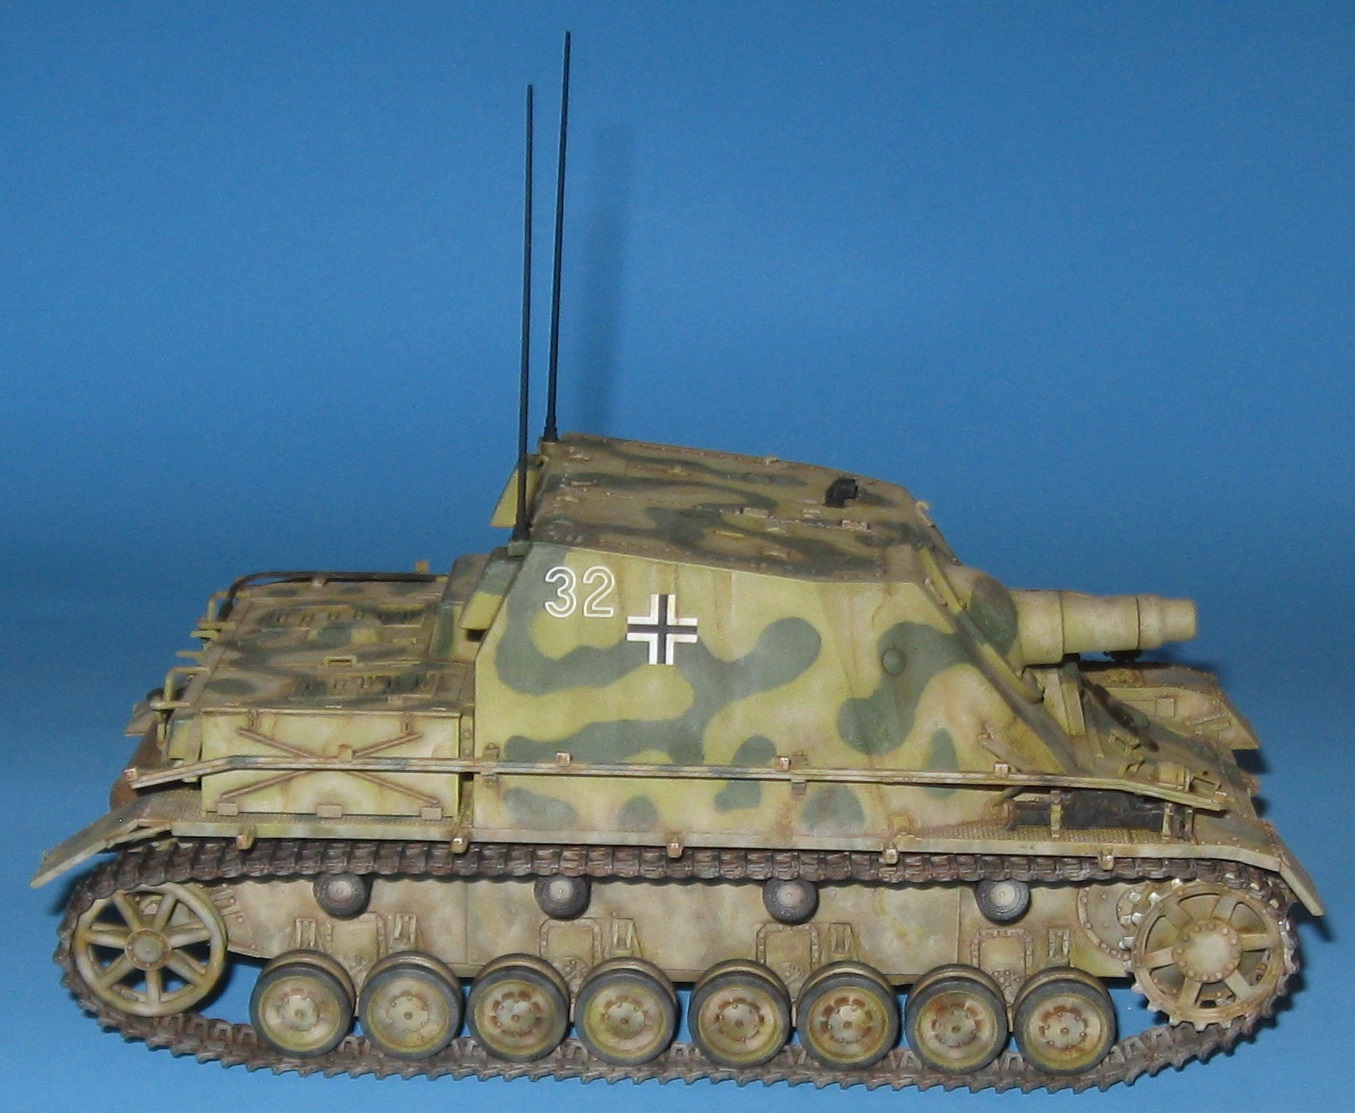
Finished: Cyber Hobby 6497 Sturmpanzer IV (with an assist from AFV Club)
While painting this model, I began to imagine the vehicle fighting in a small town or village. With each blast of the main gun, rubble explodes into the air, covering everything in a tenacious layer of fine gray dust. Passing showers cause the dust to set, slowly transforming the machine into a moving edifice of concrete and soot.
…
If you want to earn a campaign medal for finishing an old, stalled project, please consider joining this campaign. Unfinished models are excellent opportunities to try new techniques.
10 Likes
Very nicely turned out Doug. Great to see that you persevered and finished the beast.
2 Likes
Looking good Doug!
Very sharp!
Two of my shelf queens, from 2021 & 2023 are very slowly grinding forward towards the finish line.
Both need flat coat, pastels, ground work & bases.
9 Likes
Looking very nice indeed Wade
2 Likes
@petbat Thank you once again, Peter. In truth, I found the journey kinda funny because the project kept going wrong in such crazy and unexpected ways.
@Armor_Buff I look forward to whatever project you decide to enter here for the medal.  Your work is always excellent and inspiring.
…
As an aside, I hope to finish the medal for this campaign during the first week or April. I kinda went down a rabbit hole learning about real military medals while looking for inspiration.
3 Likes
Great build, Doug! Very nice faded lightly weathered look!
Looking forward to seeing the medal!
2 Likes
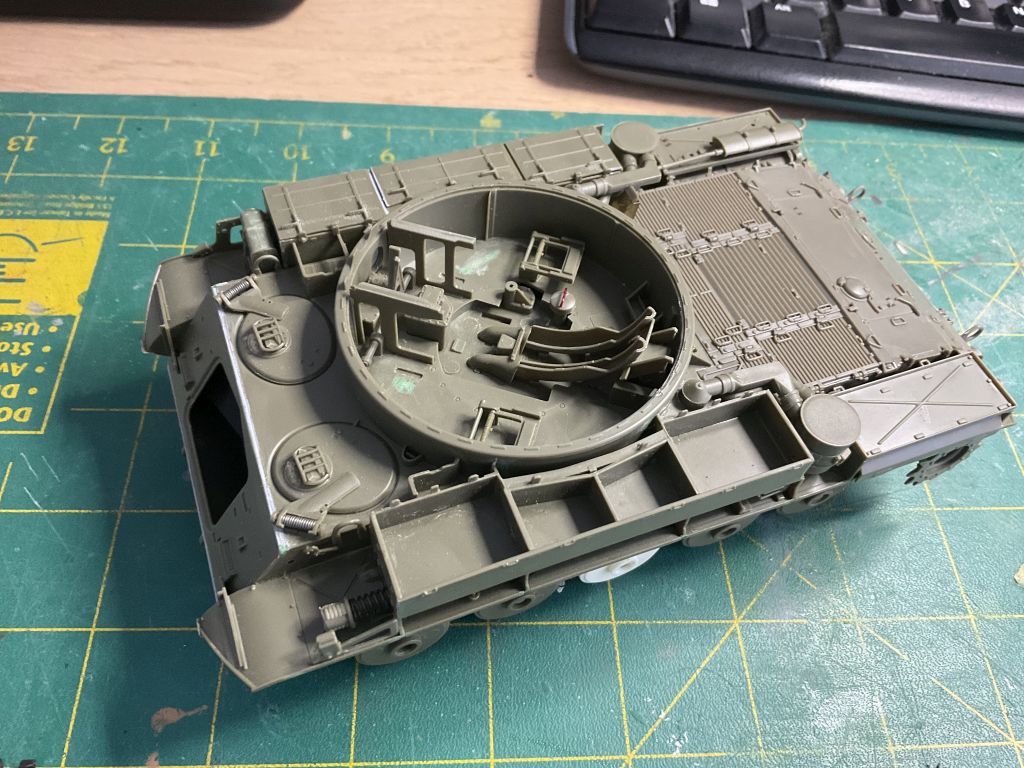
I recently moved into a new home. During the ceremonial unpacking, I came across my box of shelf queens. I pulled two out for finishing before I start something new and decided to post here.
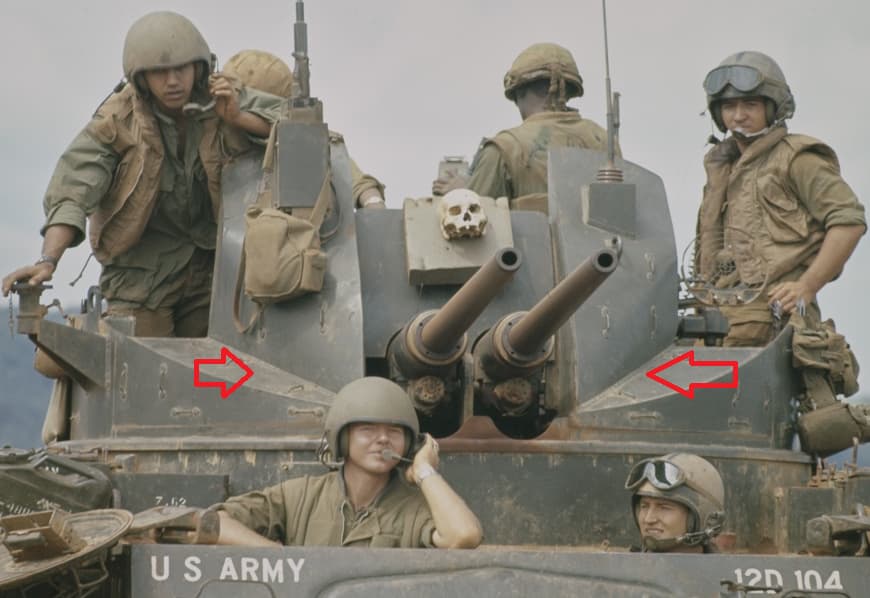
First is the AFV Club M42 Duster.
Where she was:
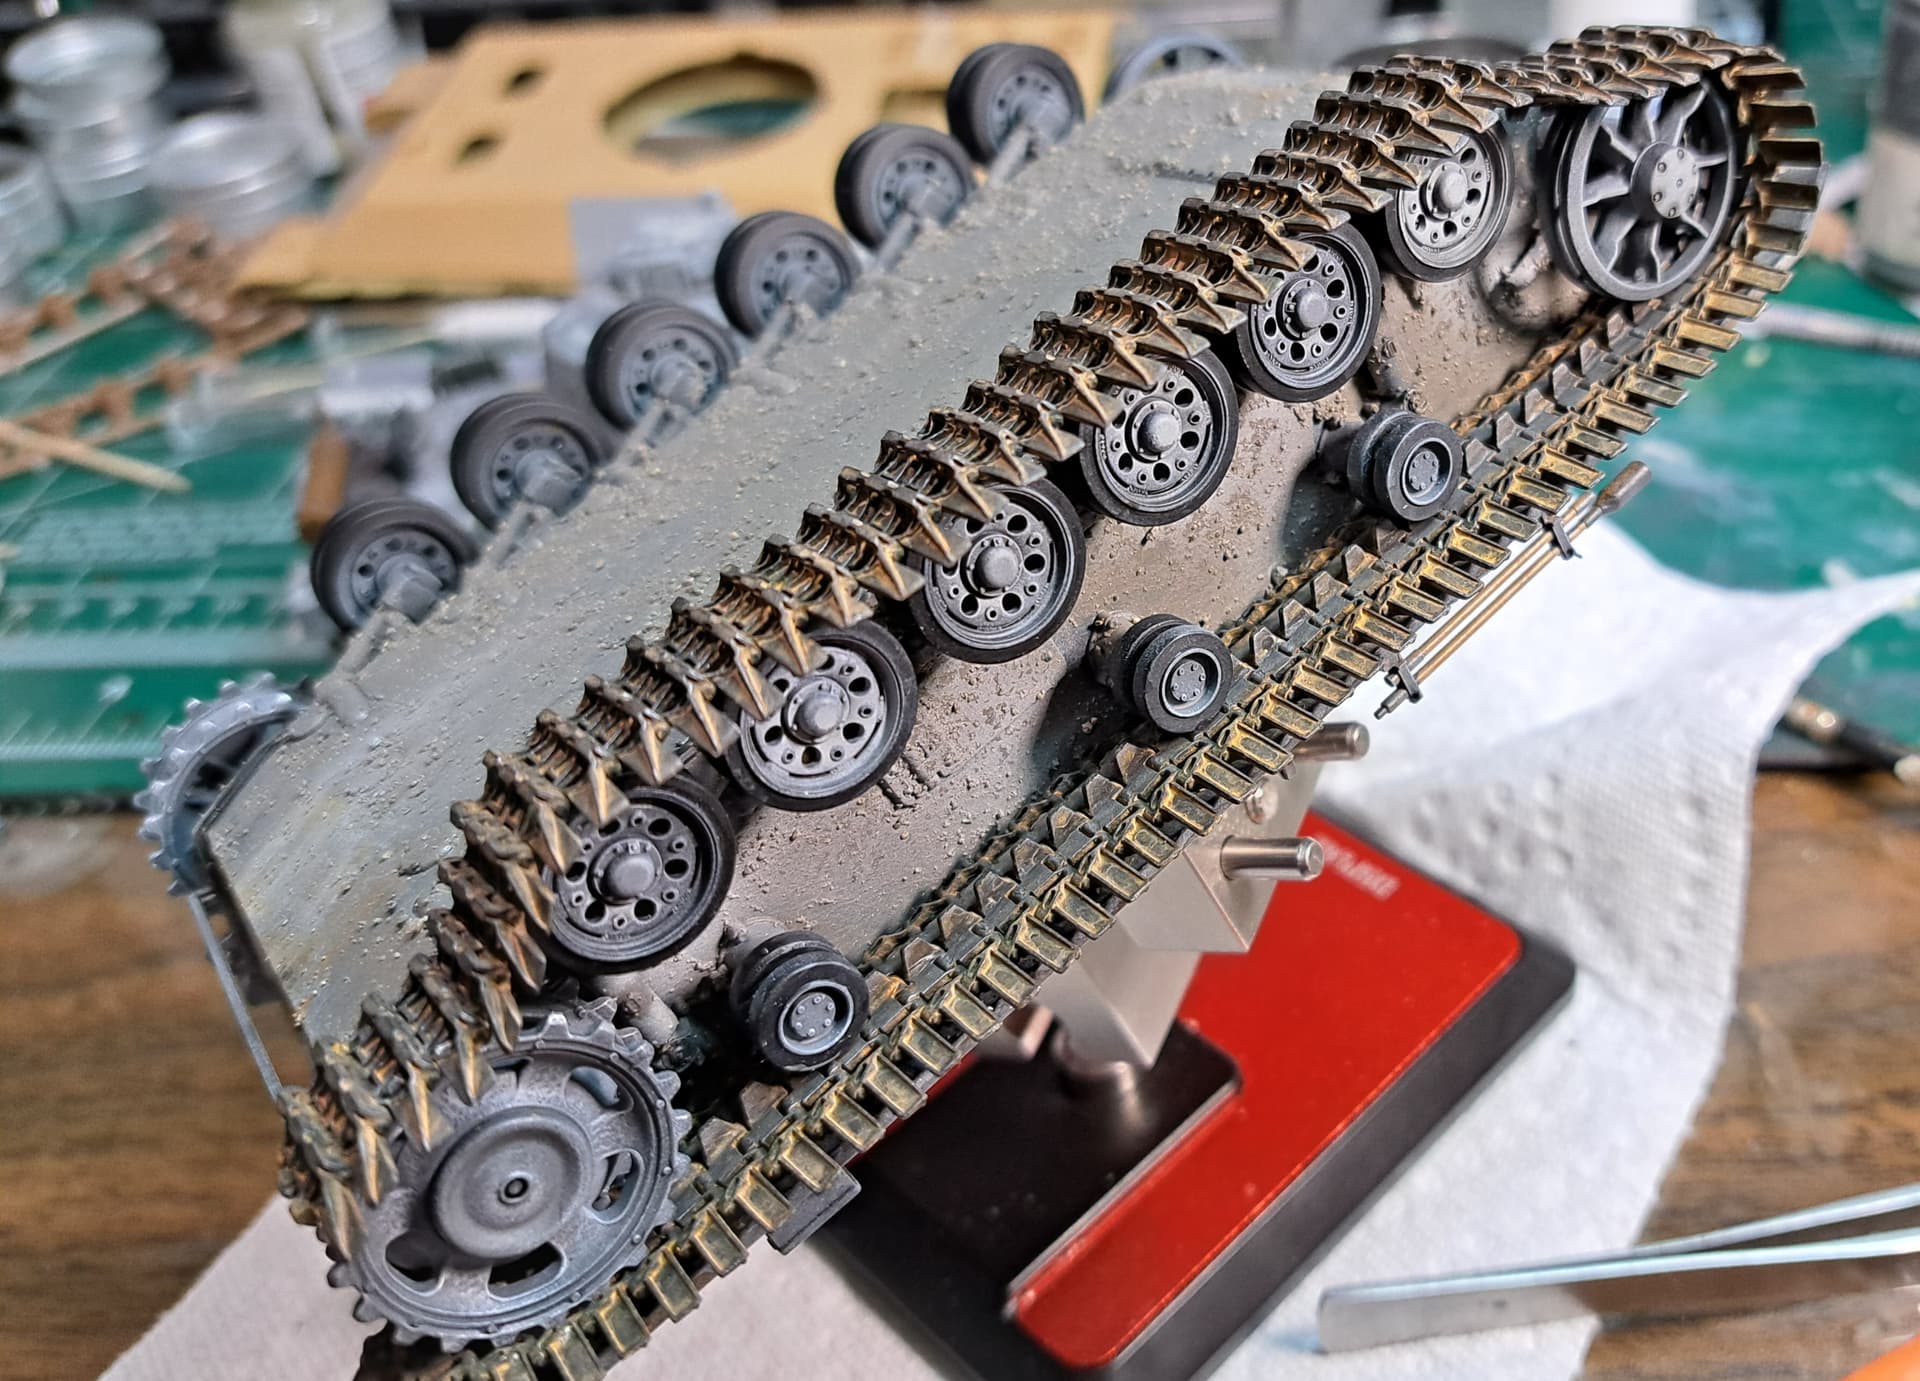
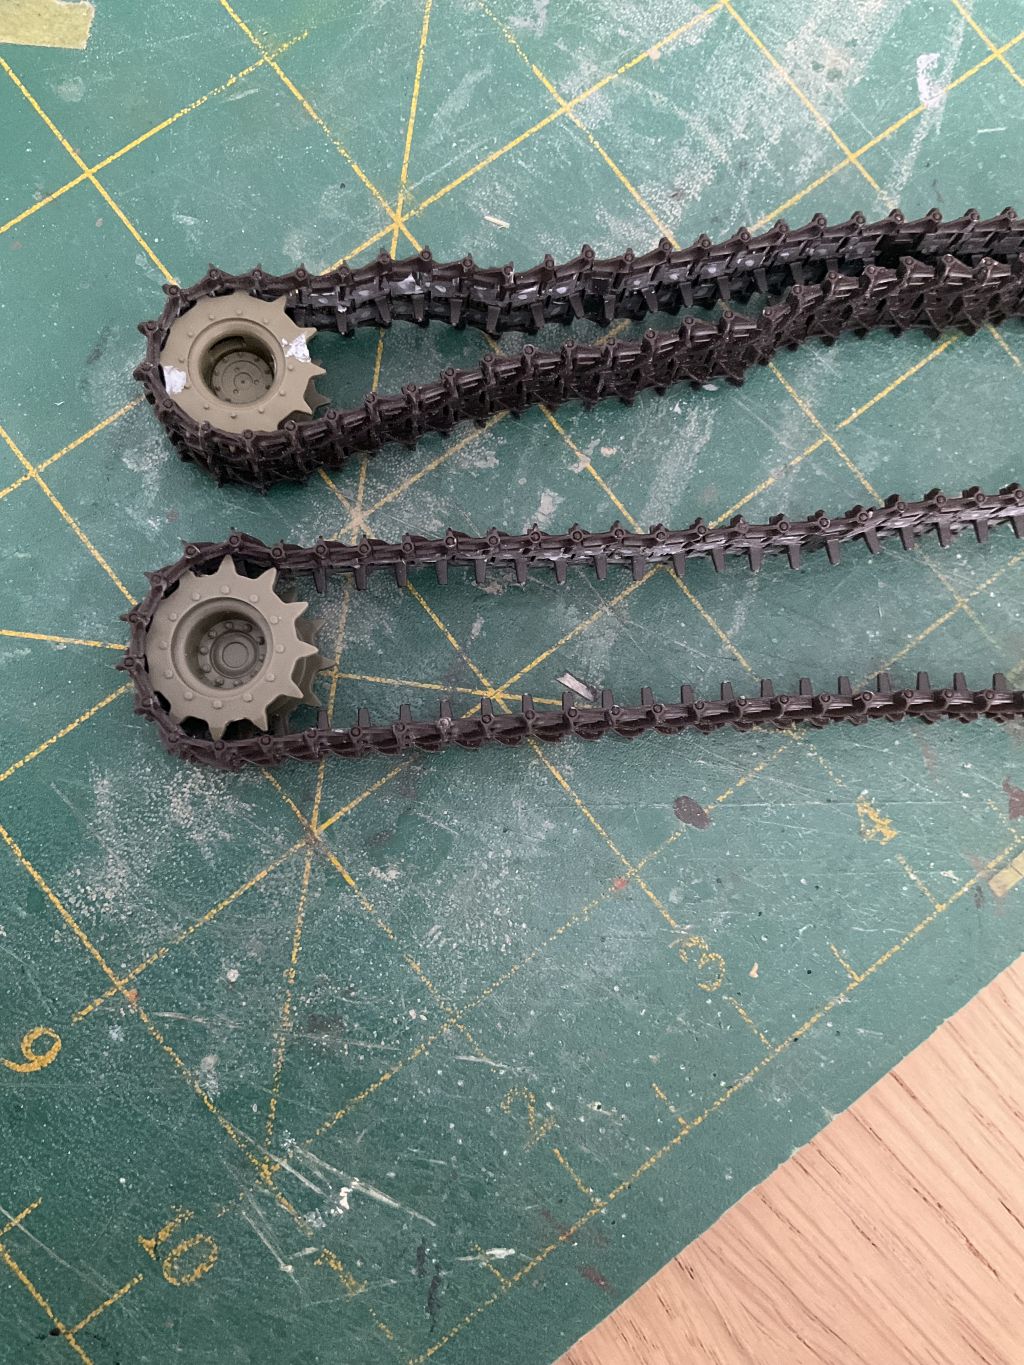
So, first up I decided to tackle the tracks. I think the poor moulding quality of the indy set was what made me put this aside in the first place. It would not be AFV Club if it did not have sink marks, flash and ejector pin issues:
An evening spent with the Tamiya putty tube:
Notice the flash on the bottom right link and the two broken links! I was not sure if I would have spare links, so these also went into the production line for treatment. As it turned out, I had a few left overs.
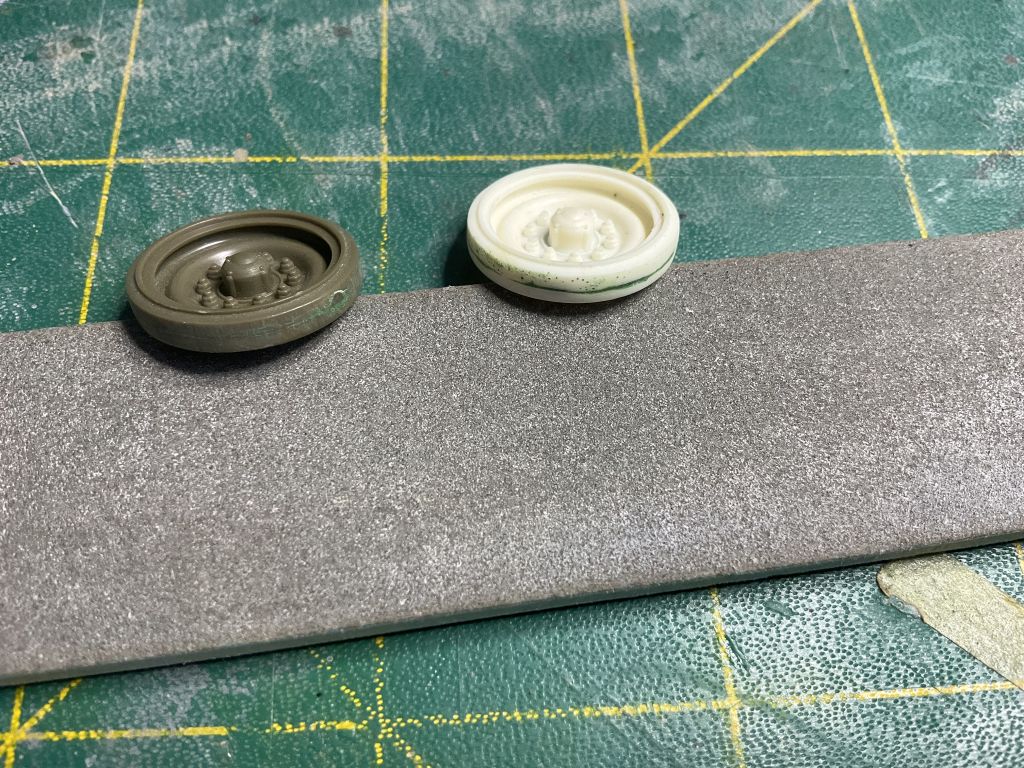
One of the things I did way back then, was acquire the old AFV Club wheel sets for the M41. These are the Skybow M41 wheel sprues that were marketed for people with the Tamiya Walker Bulldog. They are much better detailed and having a ‘face’ to add to the rim, have the raised lip of the real wheel that is impossible to create with a one piece wheel. The only issue with the set is that being for the M41, it only has 10 road wheels, where the M42 used a road wheel for the idler. No biggie, I just cast up two of the Skybow ones:
Because the hull of the Duster Kit is a ‘new tool’ the idler and Drive Sprocket mounts do not accommodate the Skybow set without some work, a few mods were made:
The reason for using the Skybow drive sprockets is in the detail, it has the cut outs in the shaft and detail in the centre hub the AFV Club set does not have…
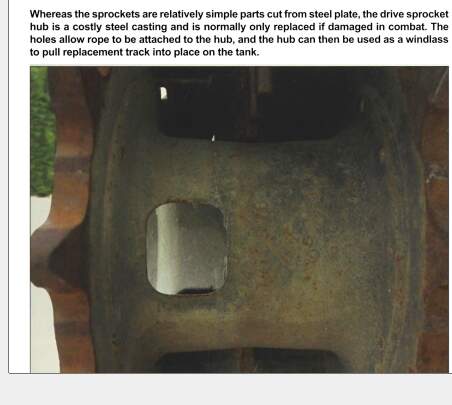
plus the AFV track set does not fit the Duster kit sprocket as the sprocket ring is too big!
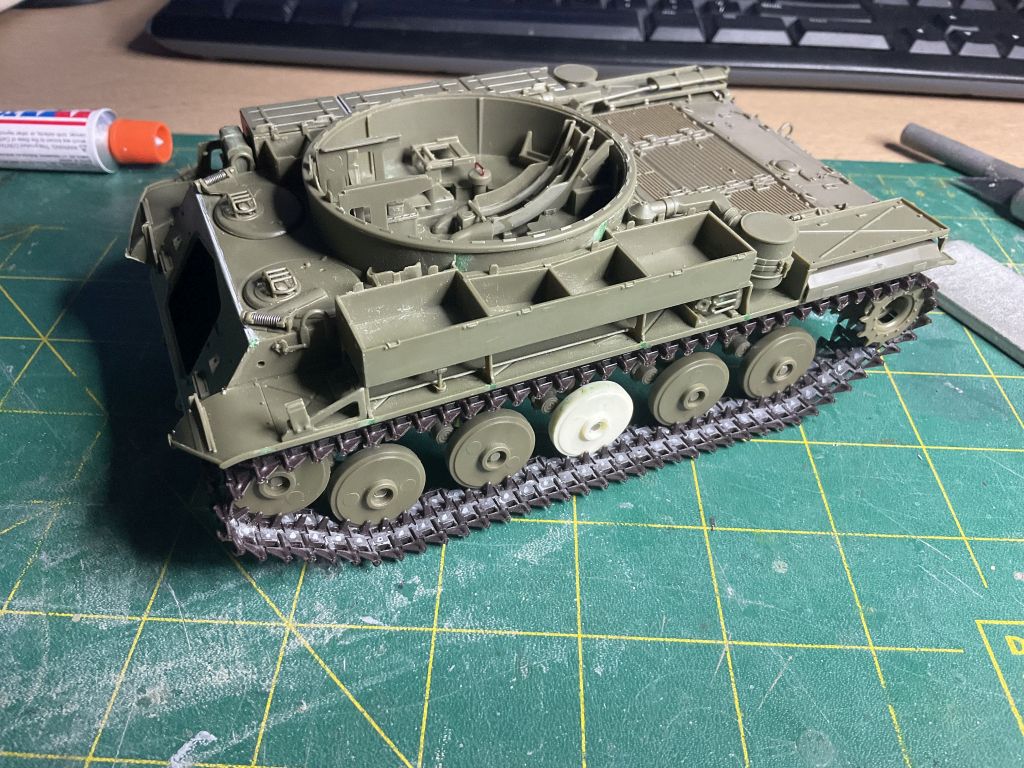
An evening with the sanding stick and scalpel, the wheel mods and then some click together fun, and the Duster now has some shoes:
9 Likes
Your M42 is giving me M41 flashbacks. They are both sitting next to my model table, waiting.
2 Likes
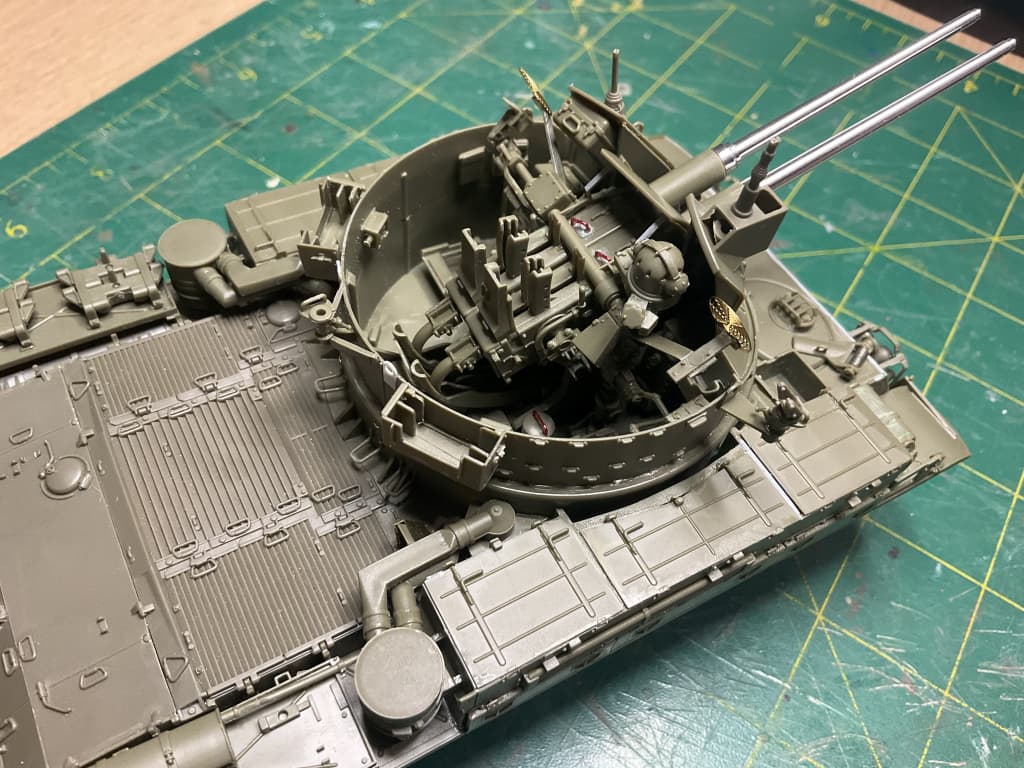
Okay, so pretty much all construction has been done and some more details added.
Added the weld bead to the turret rear. AFV Club does not supply it, nor did the separation between parts match the place it should be:
Note the two lifting lugs I had to scratch build. The originals from the kit did not survive the joint fill and sanding…
Weld bead on the joints - more beads still needed to be added in places.
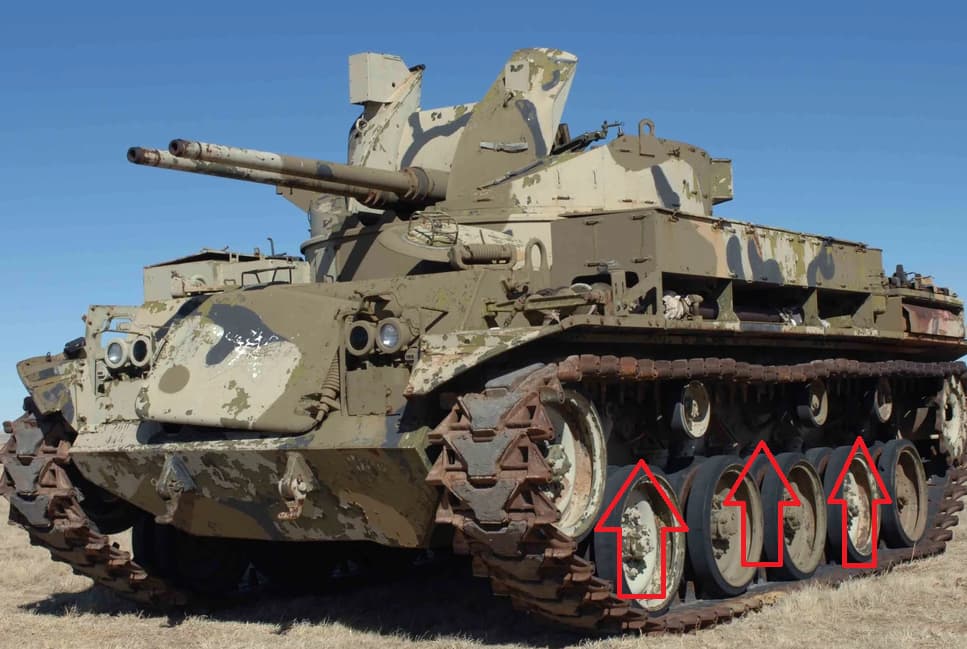
The first of 6 ‘strengtheners’ added to the return roller mounts. These were just trimmed off the AFV Club wheel set for the M41. (I have seen these incorrectly mounted on model kits with the strengthener vertical - there are bolts at 12 o’clock and 6 o’clock on the mount, so these could never be mounted with the bar at 6 o’clock - they are between bolt heads.
Some other WIP pics I took - Standard headlight drilled out, Hatch springs added - top two and front one, wiring for lamps, :
5 Likes
Oh, and yes the coil springs have the locking pins added in front of the spring ends:
5 Likes
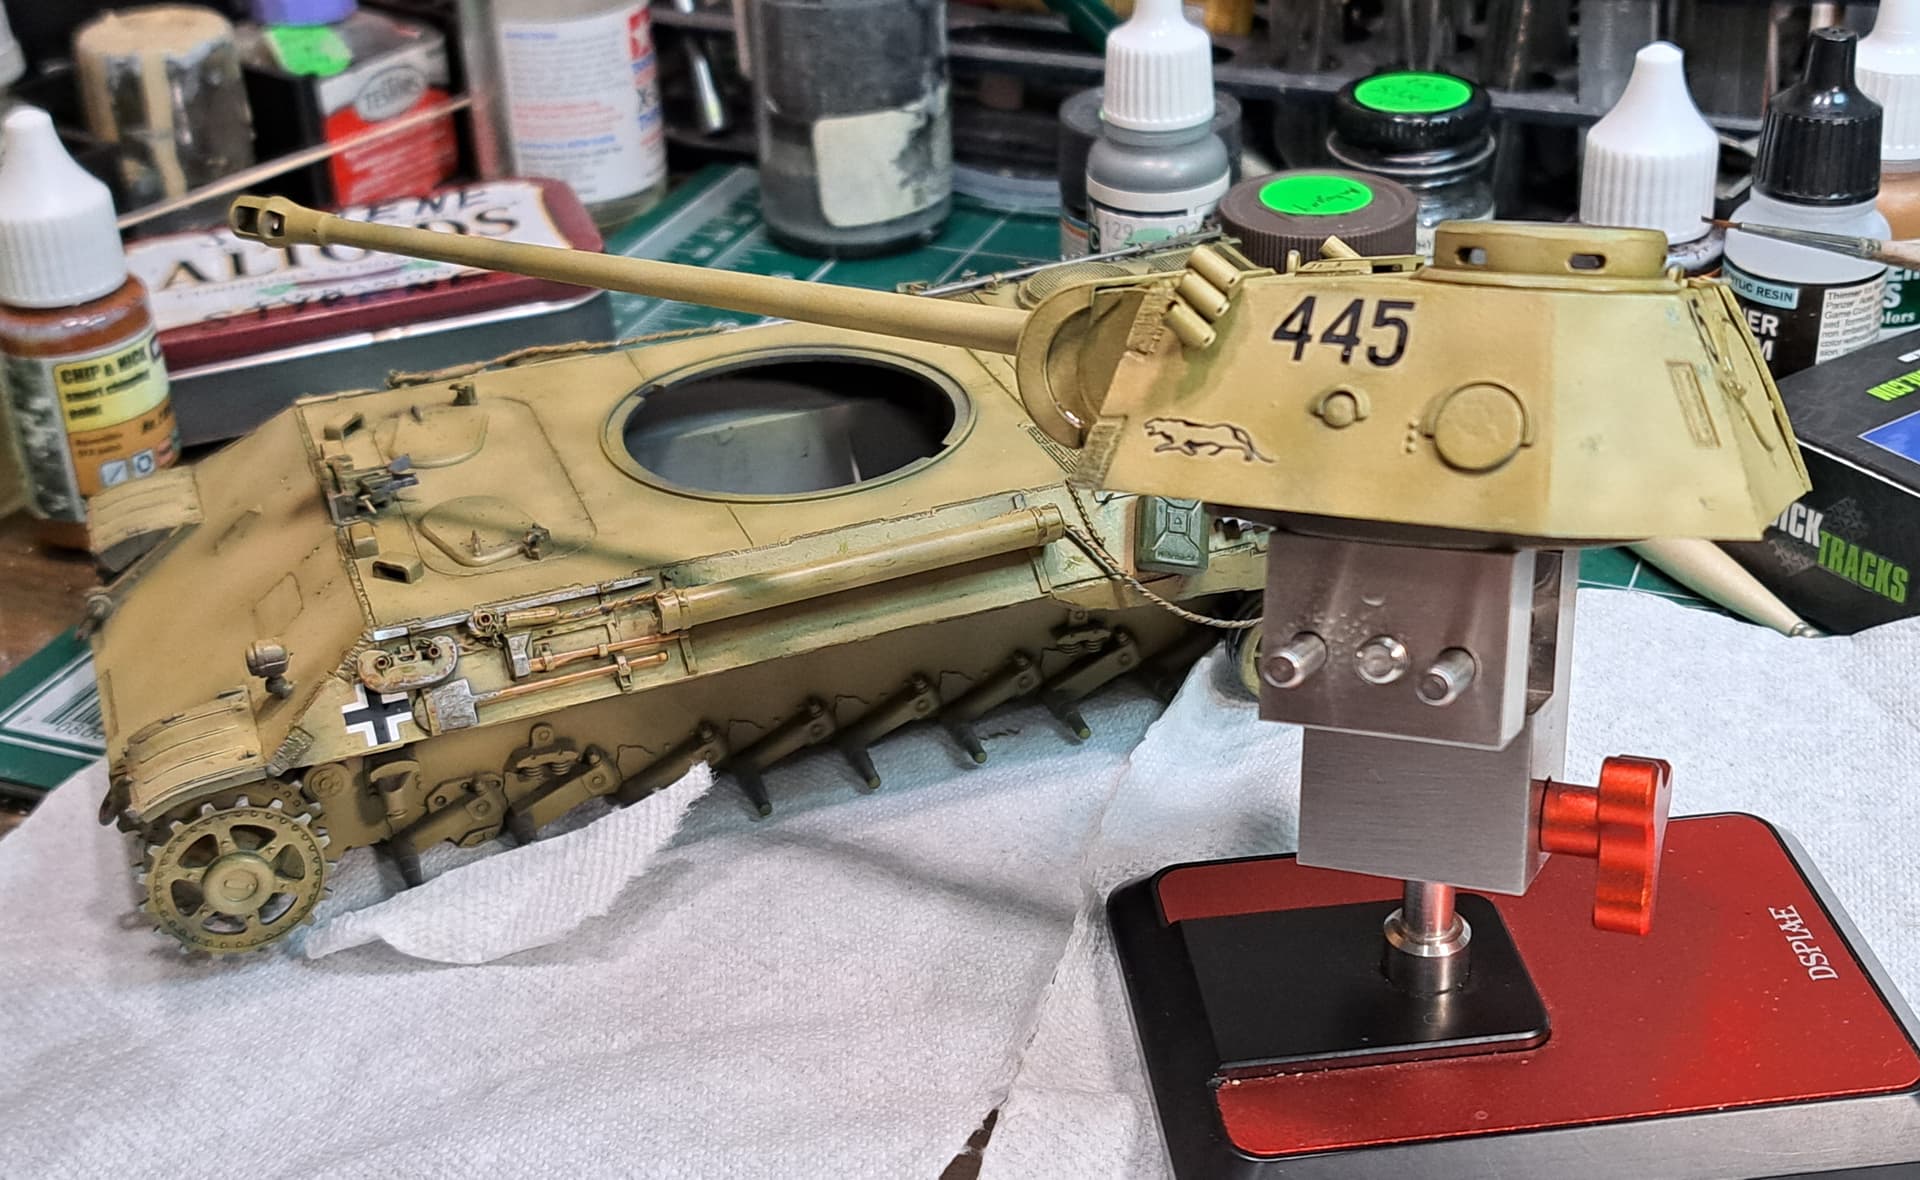
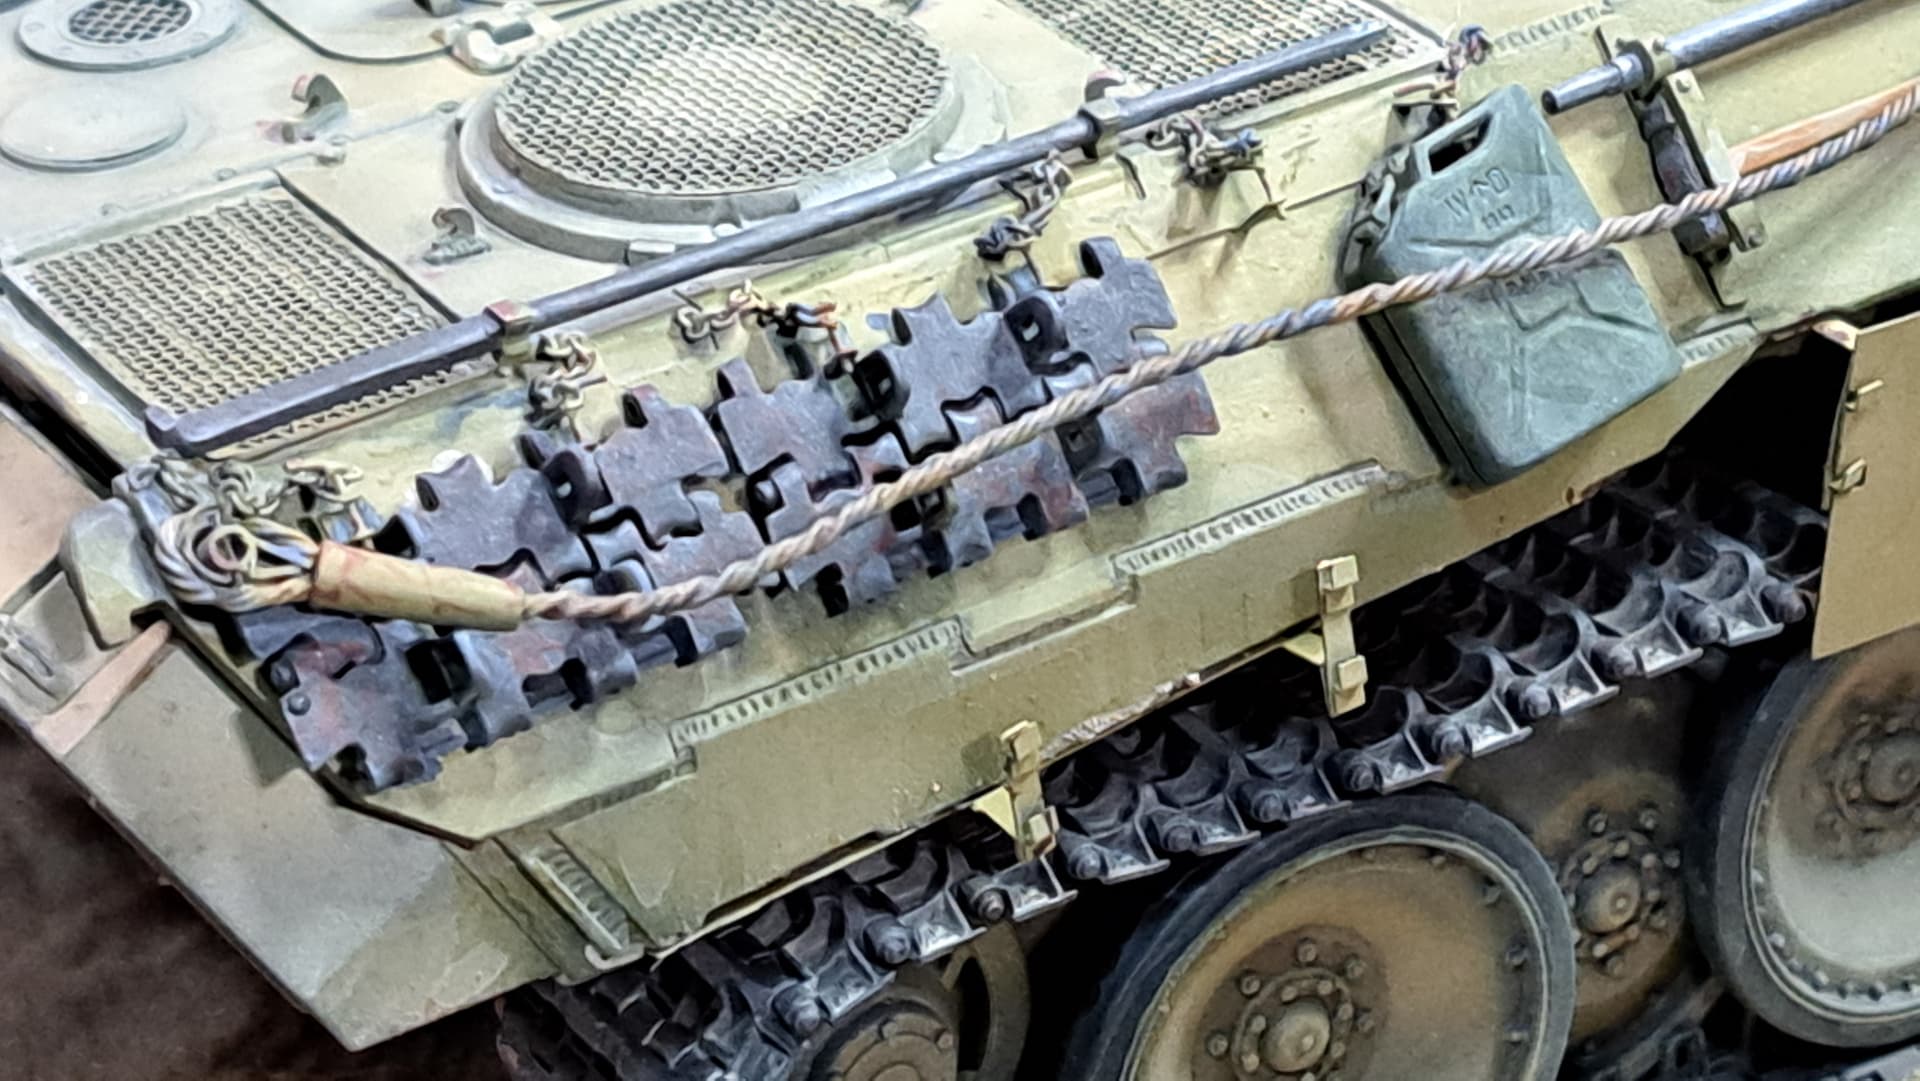
Dragon Panther D from Unfinished Business 2023, rolled into Unfinished Business 2024 is finally making progress again.
Start of 2023
Start of 2024
Last few weeks…
Today…
14 Likes
Beautiful work as always, Wade. Great to see your Panther with tracks on.
2 Likes
Thank you, Doug!
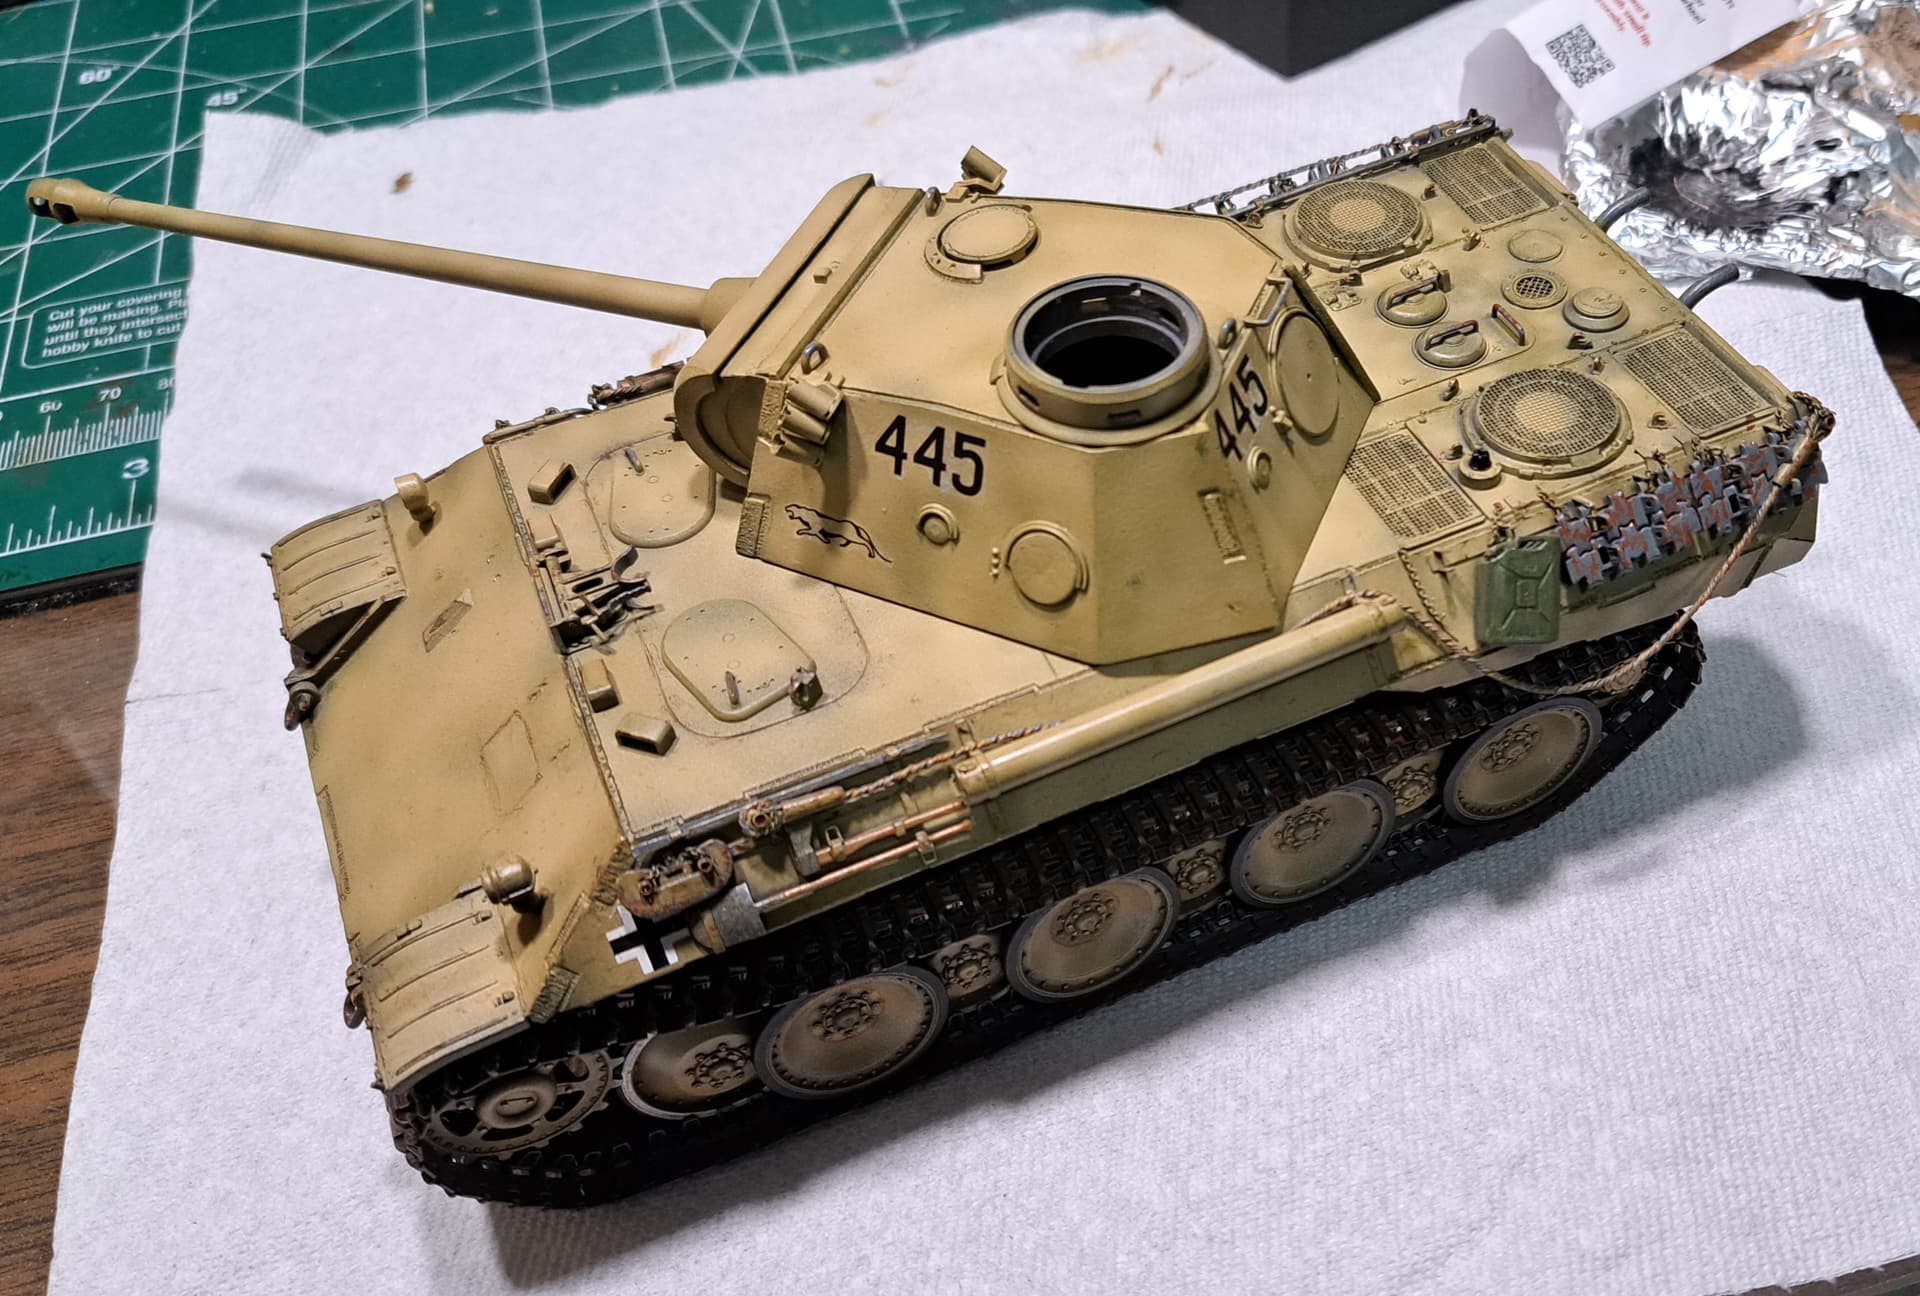
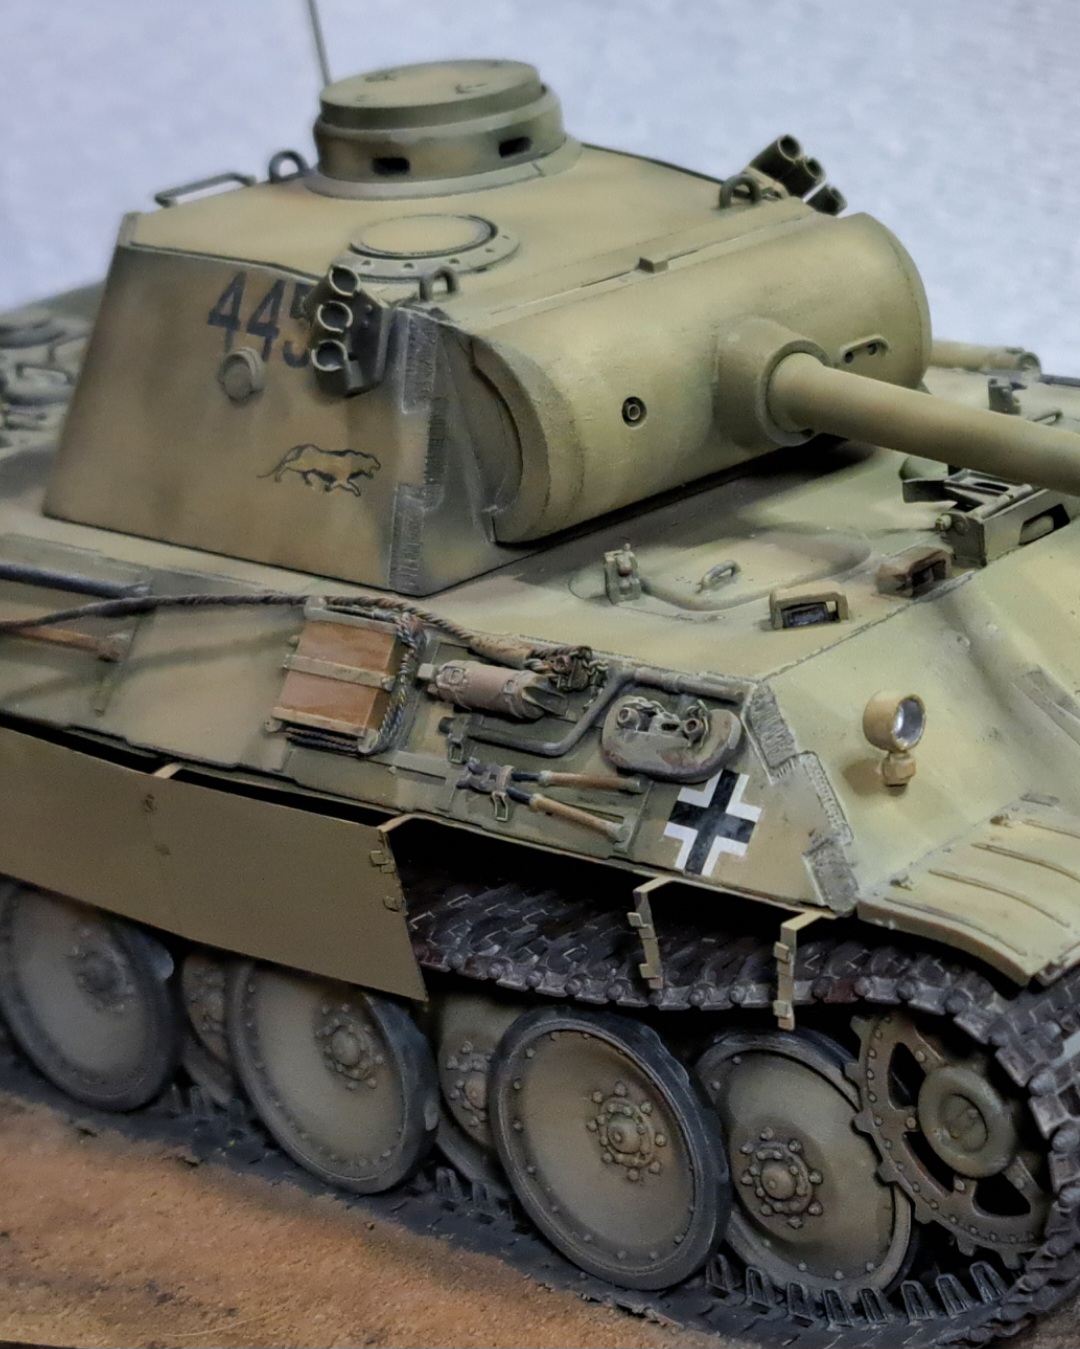
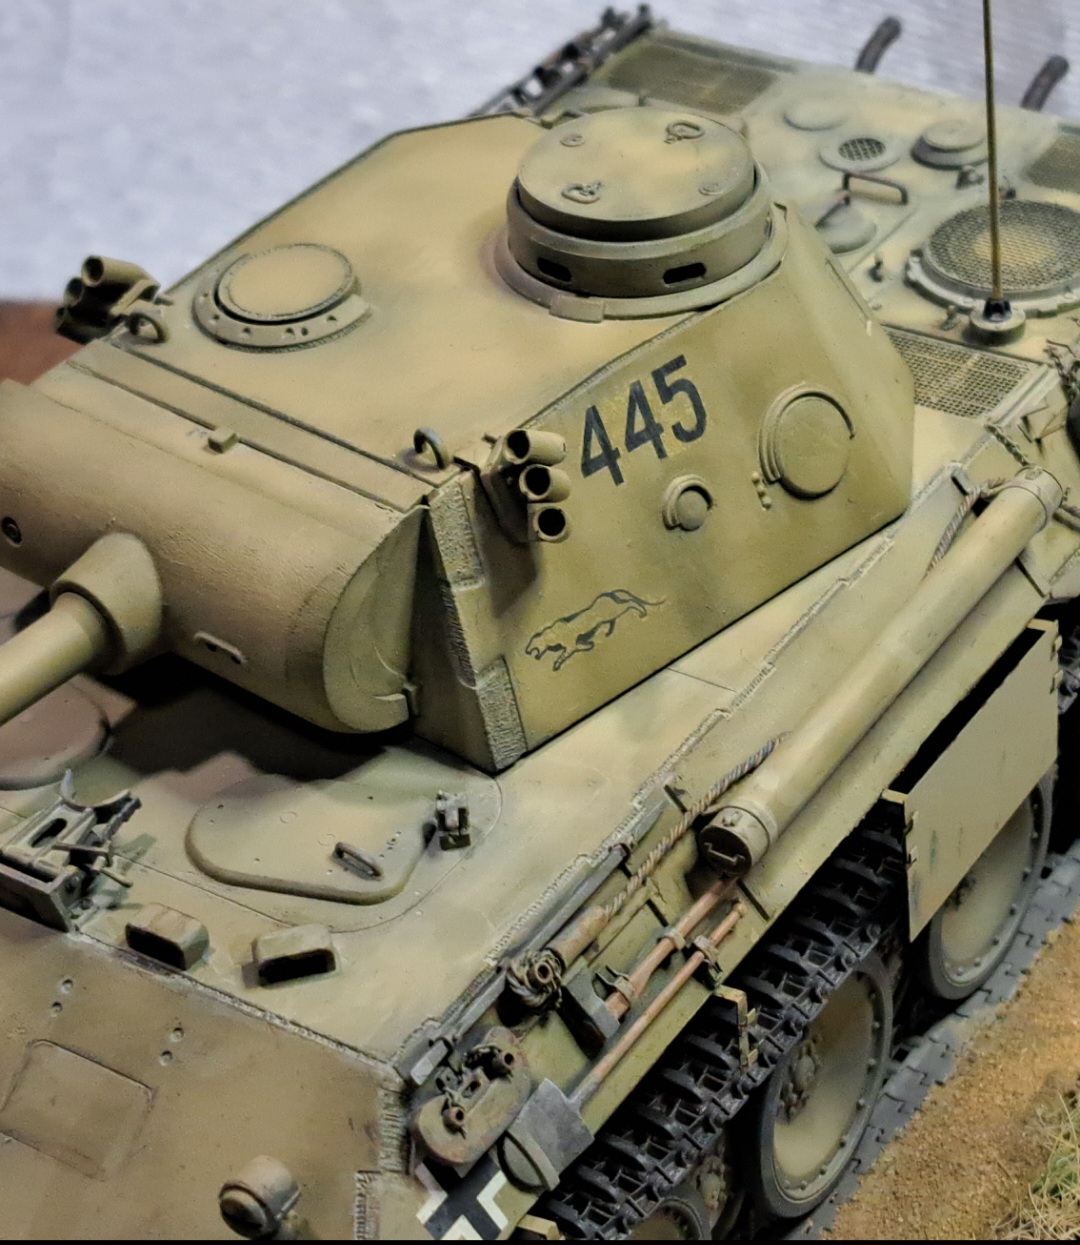
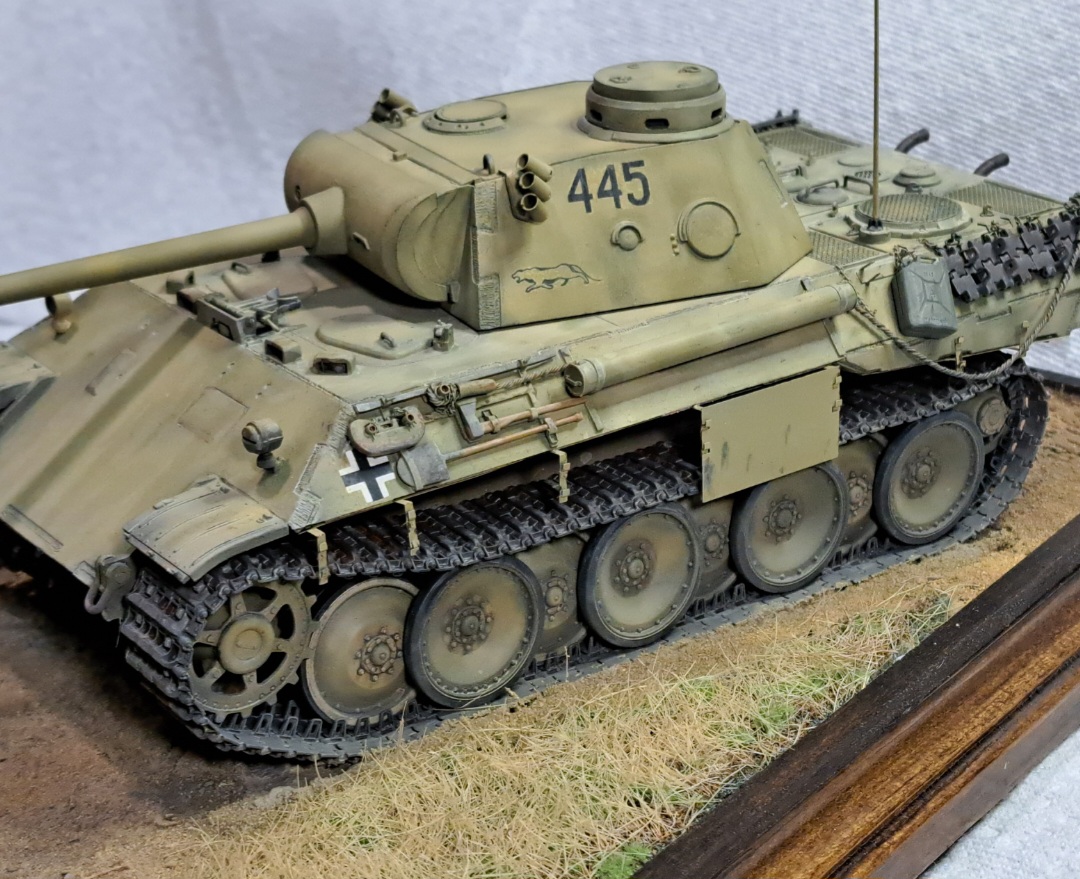
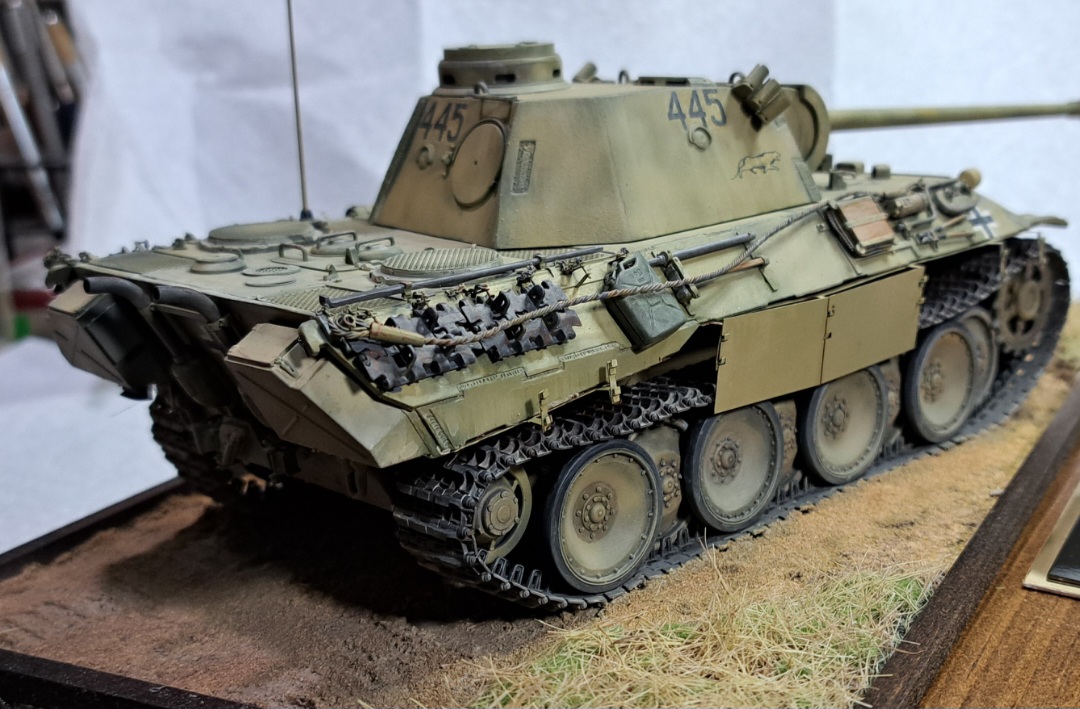
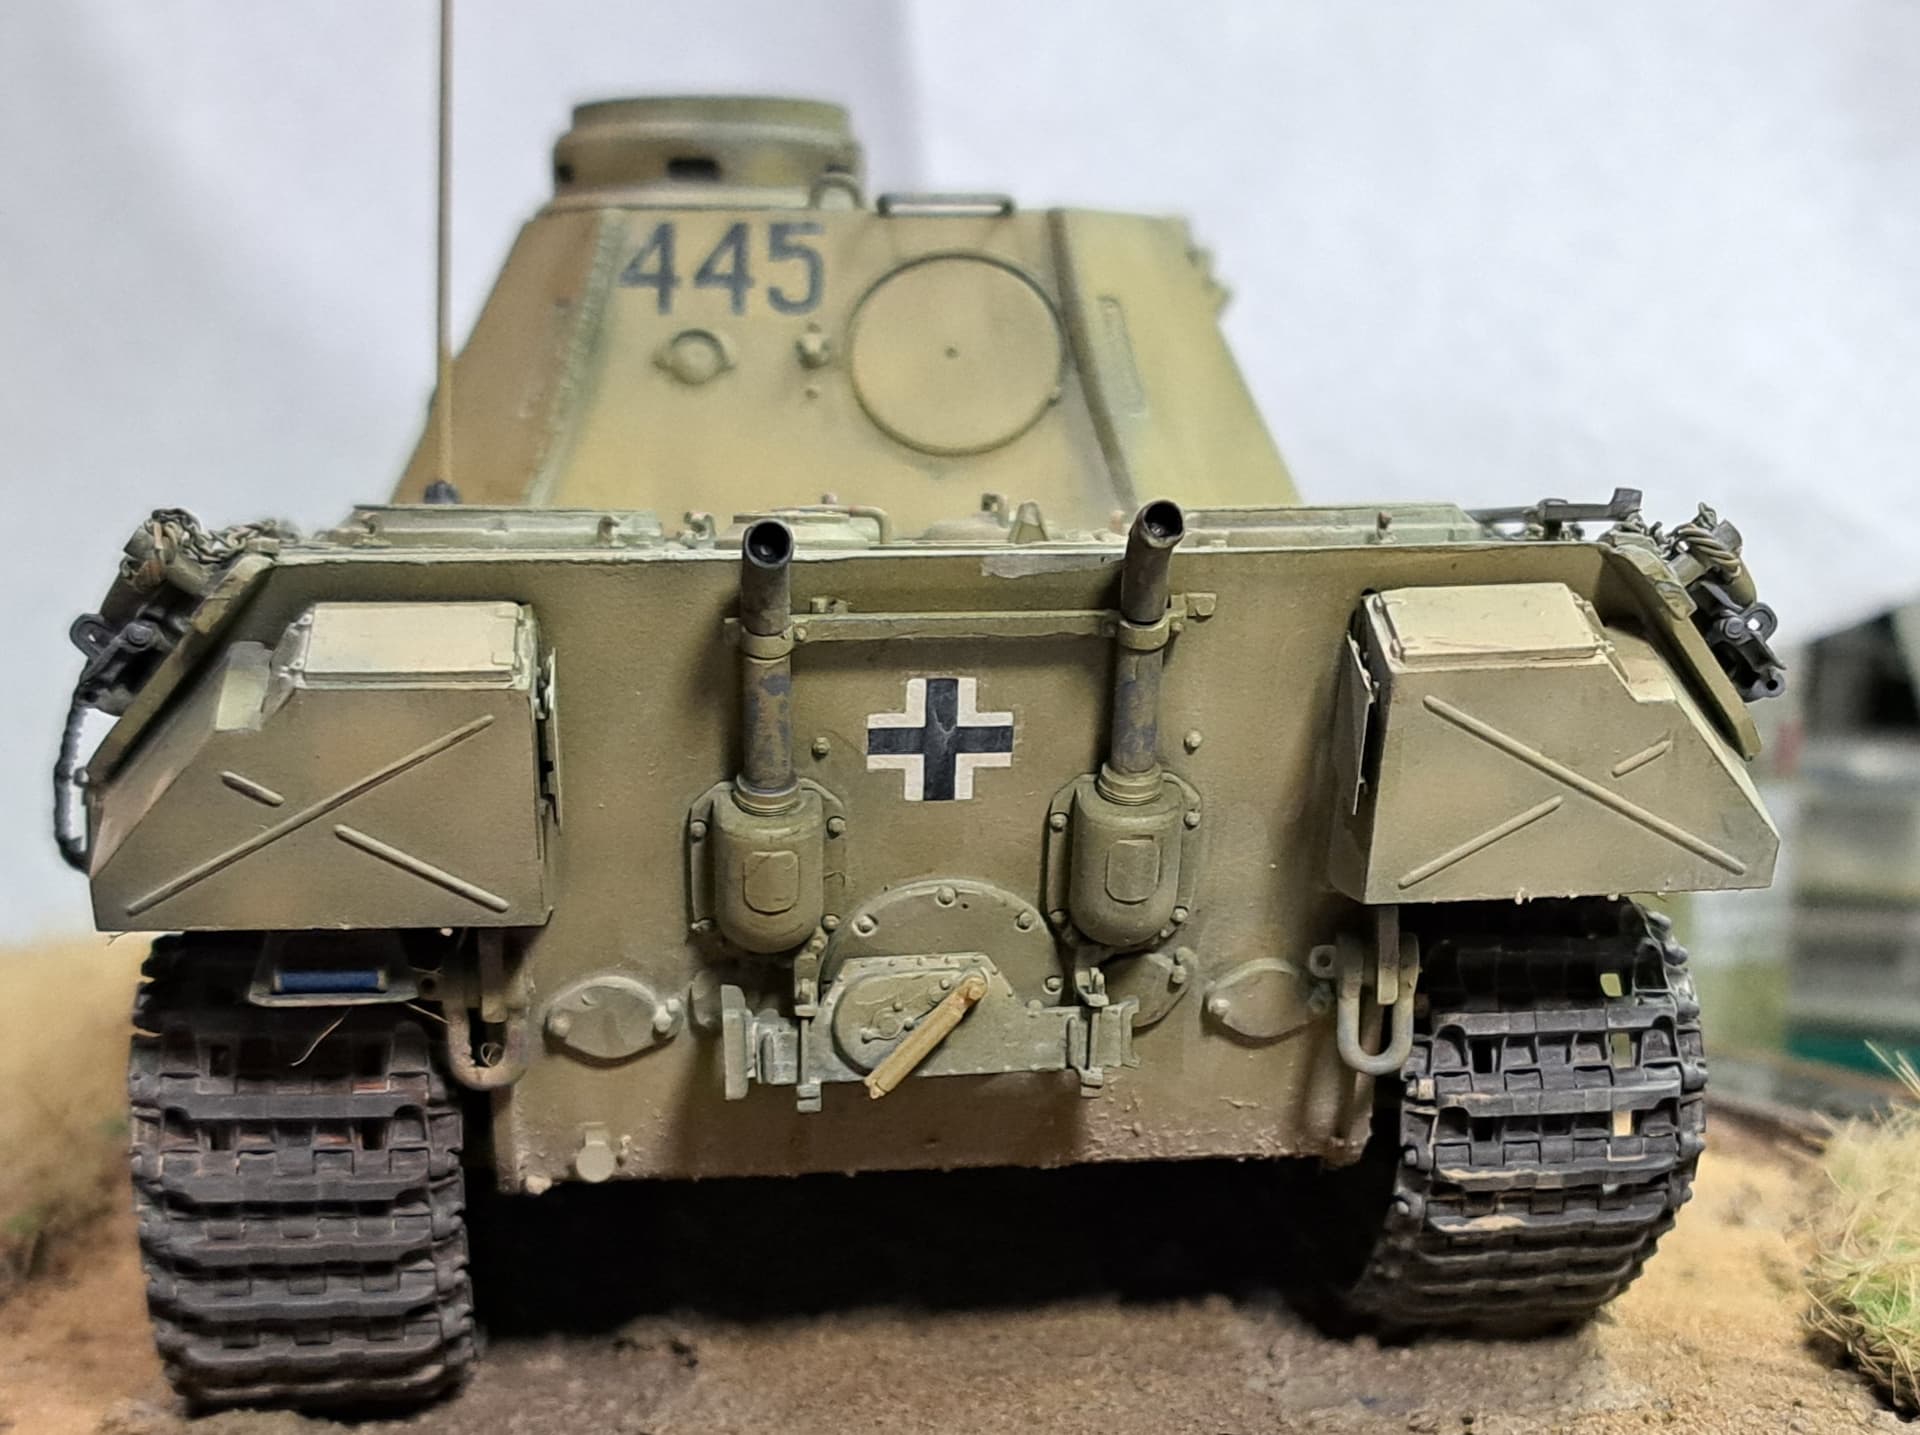
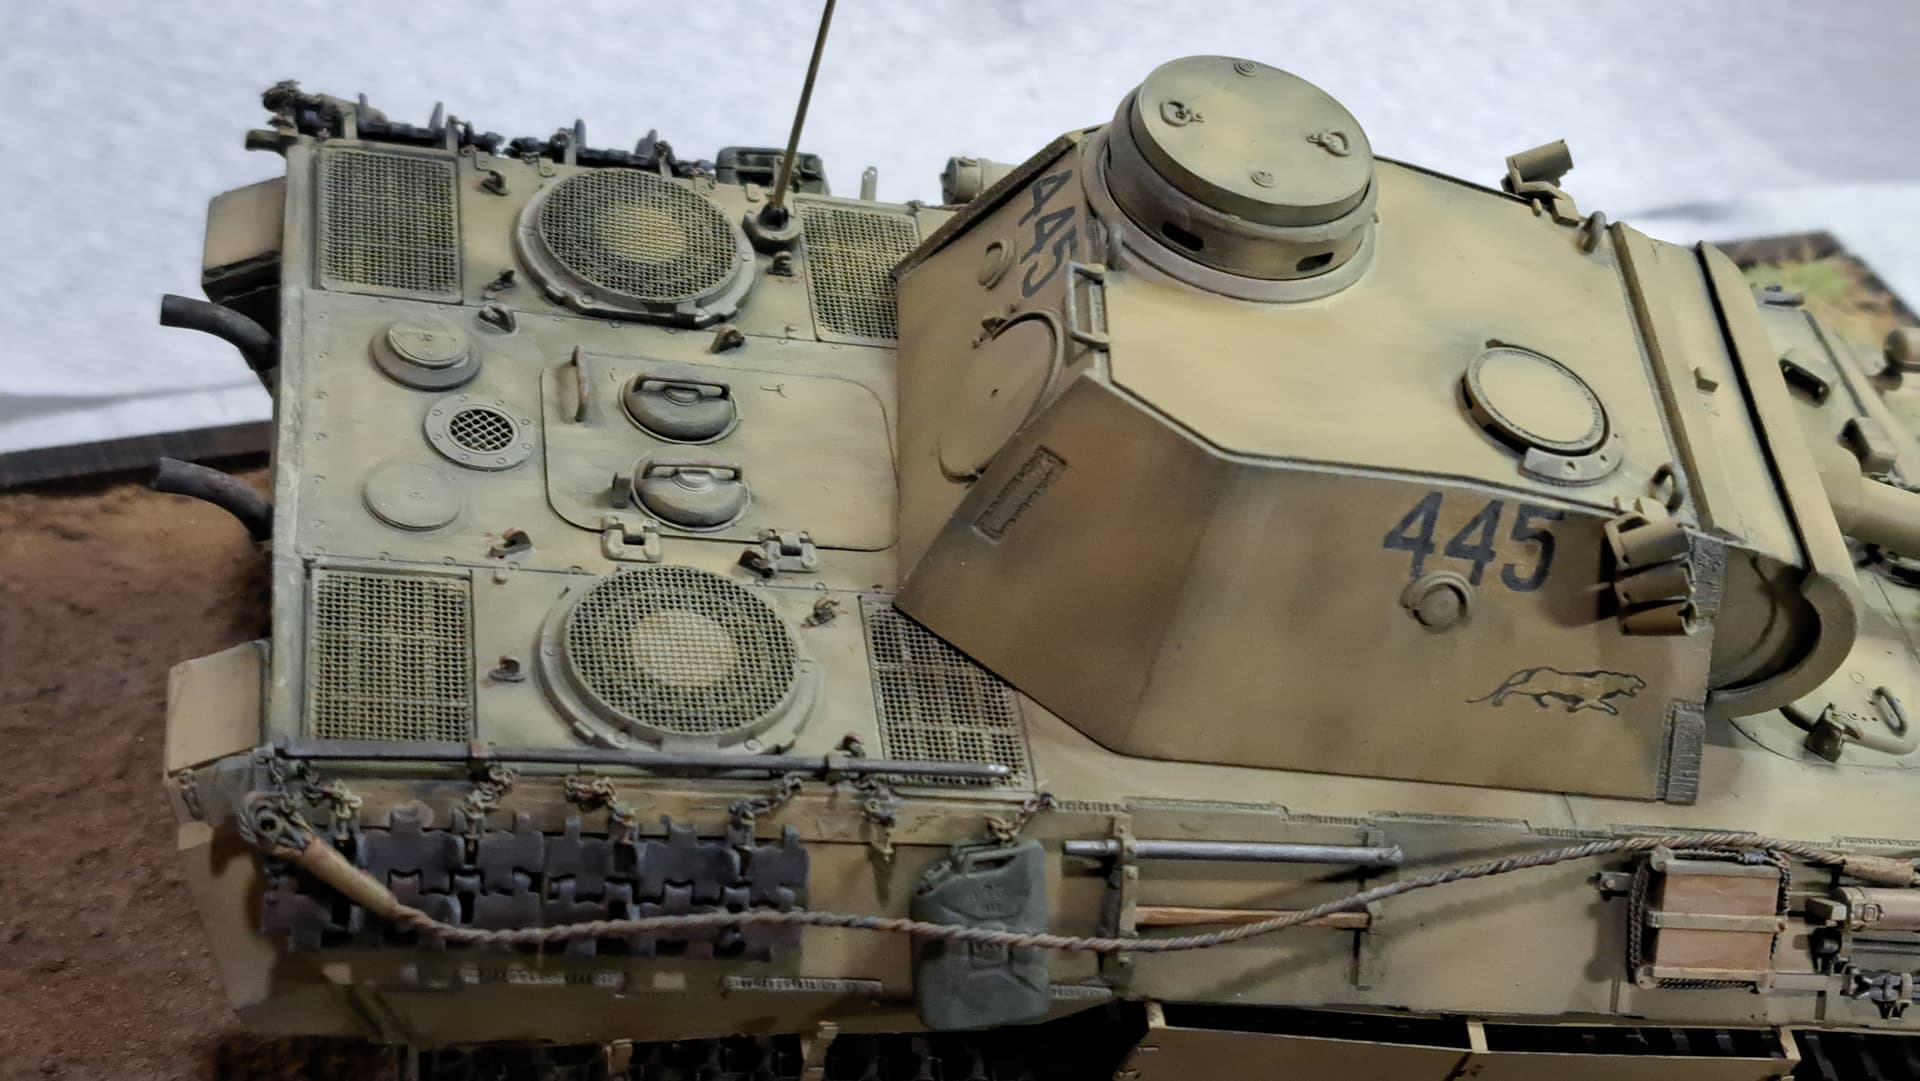
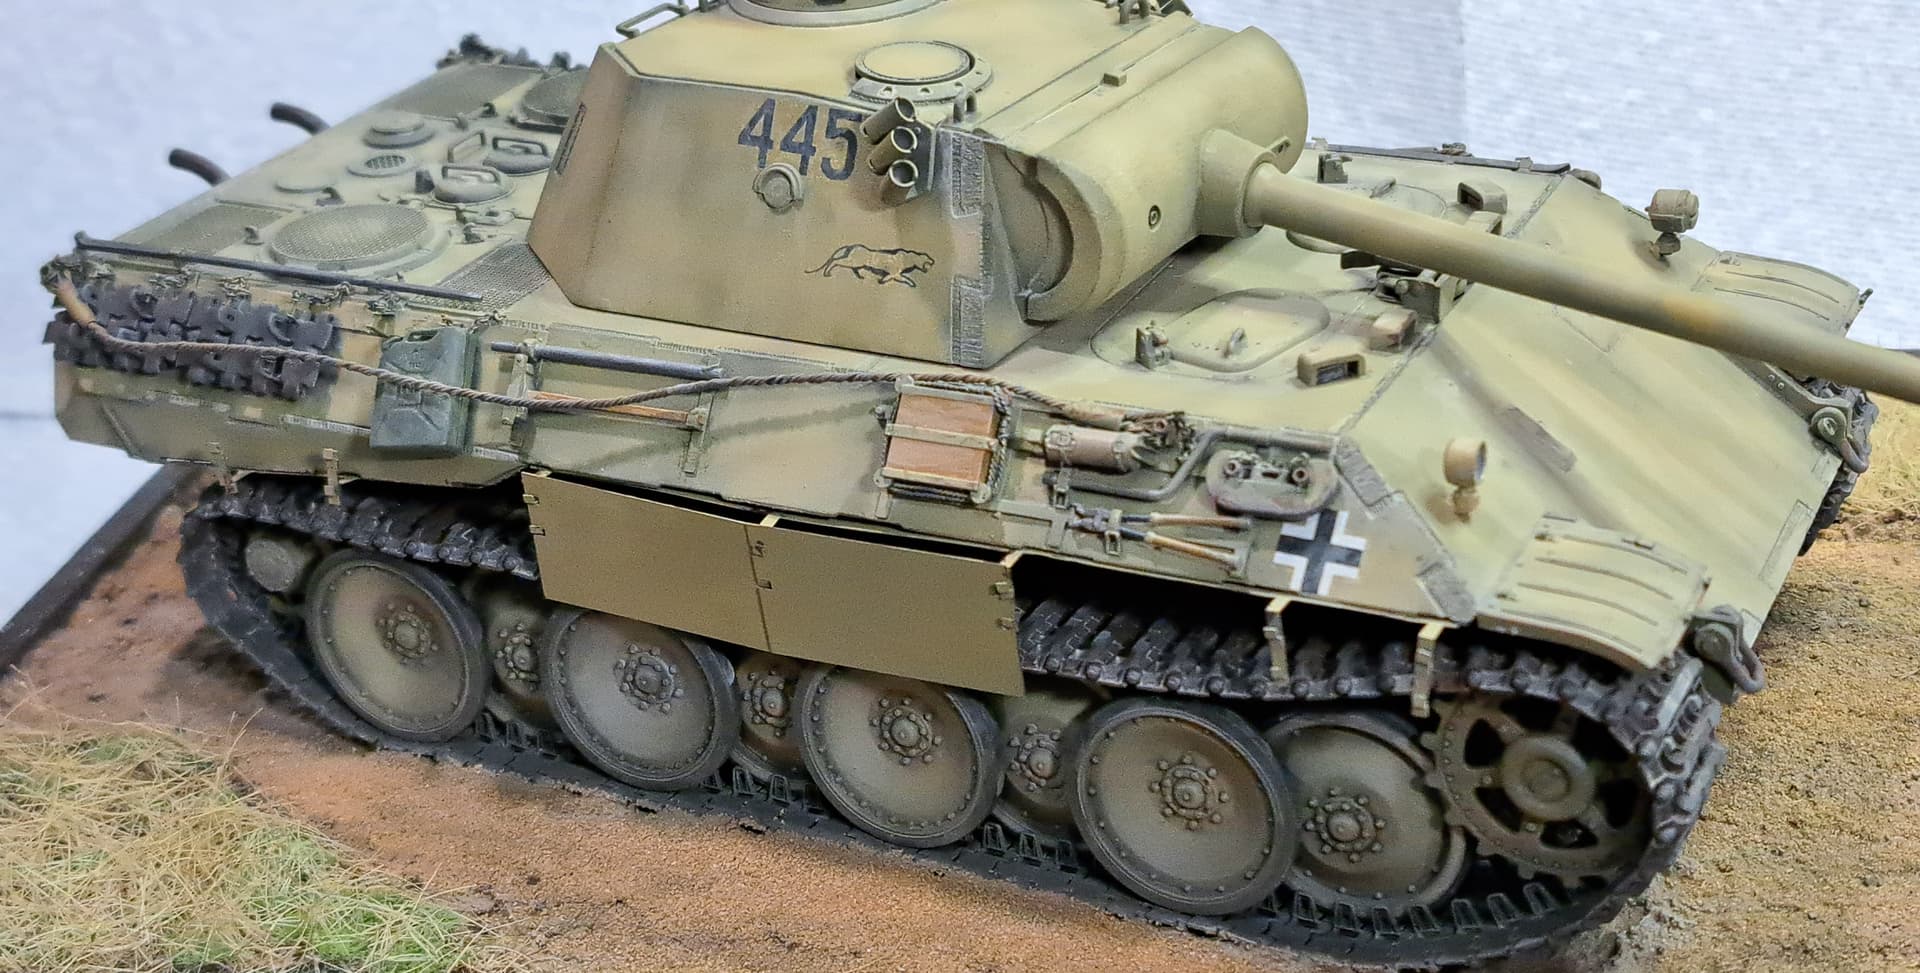
Finished some business today finally. Started in 2002, 1/35 Dragon #6164 Panther D was completed today in 2024.
Panther 445 of Panzergrenadier Division Gross Deutschland as I imagined it in approximately August 1943.
12 Likes