BLOG: Kitty Hawk 1/35 SH-60B Seahawk

I’m posting this thread on FSM’s Forum and there is a thread here showing a great completed version of this kit. I like to publish complete builds with all the details, warts and flubs and some of my fantastic recoveries. “It ain’t whether you screw up, it’s how you recover that determines the good guys.”

Since I already started the build, I’ll just get through this part quickly. Then I will simply copy and past the same thread from FSM to here. I believe there are different audiences, although I know that Heavy Arty (Gino) reads both (as do I).

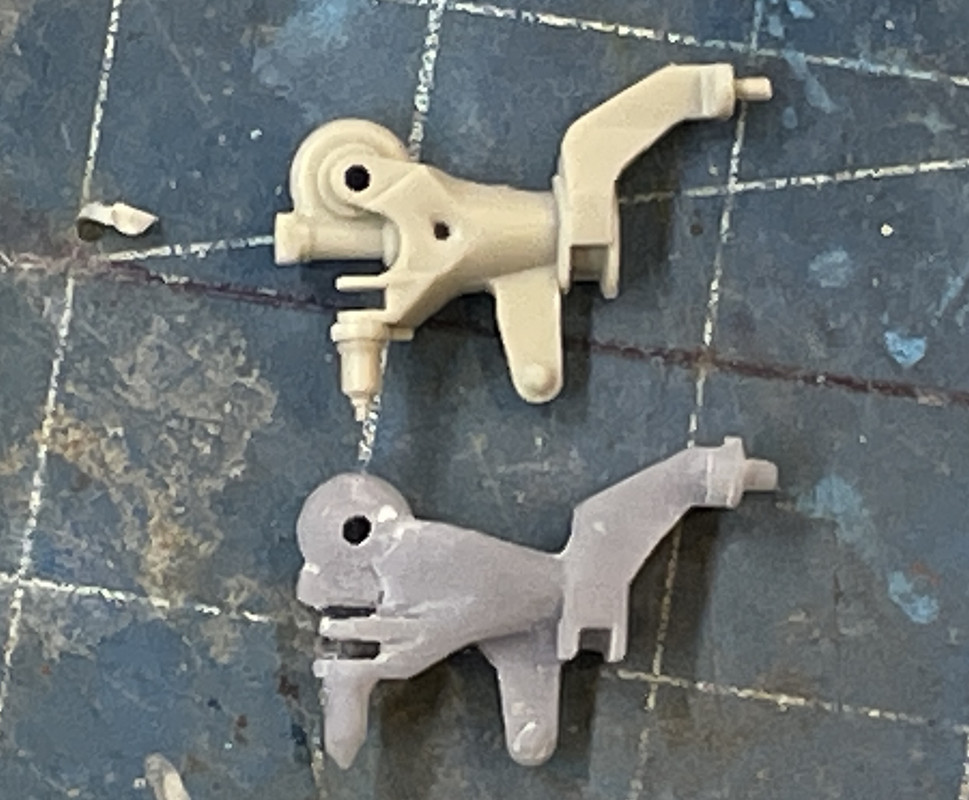
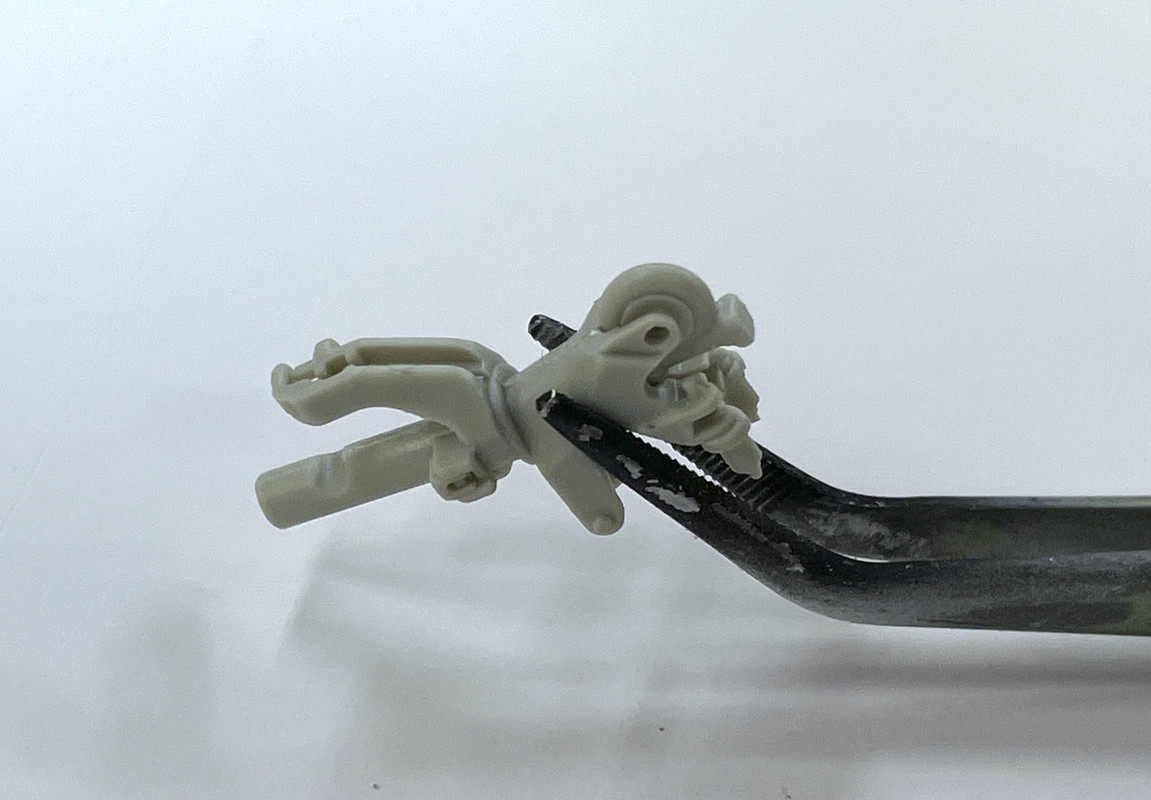
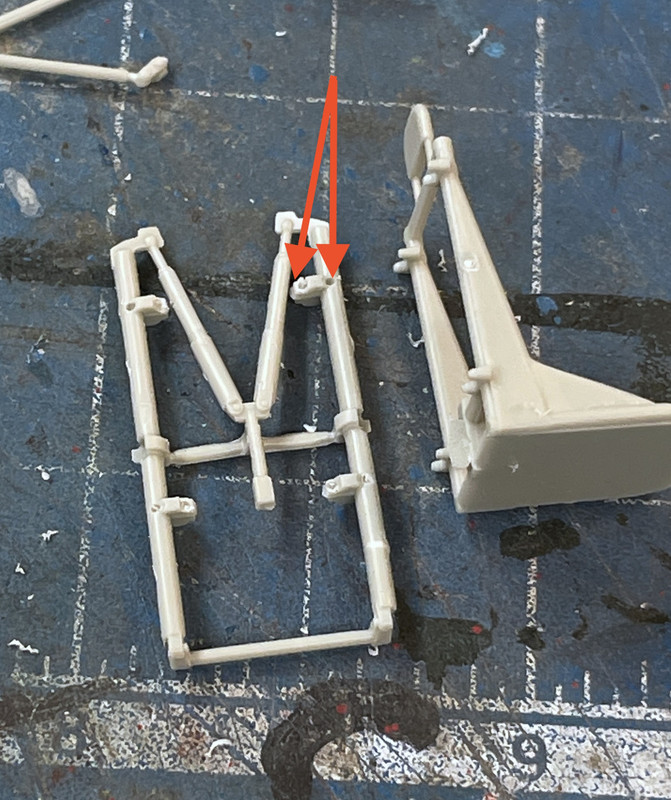
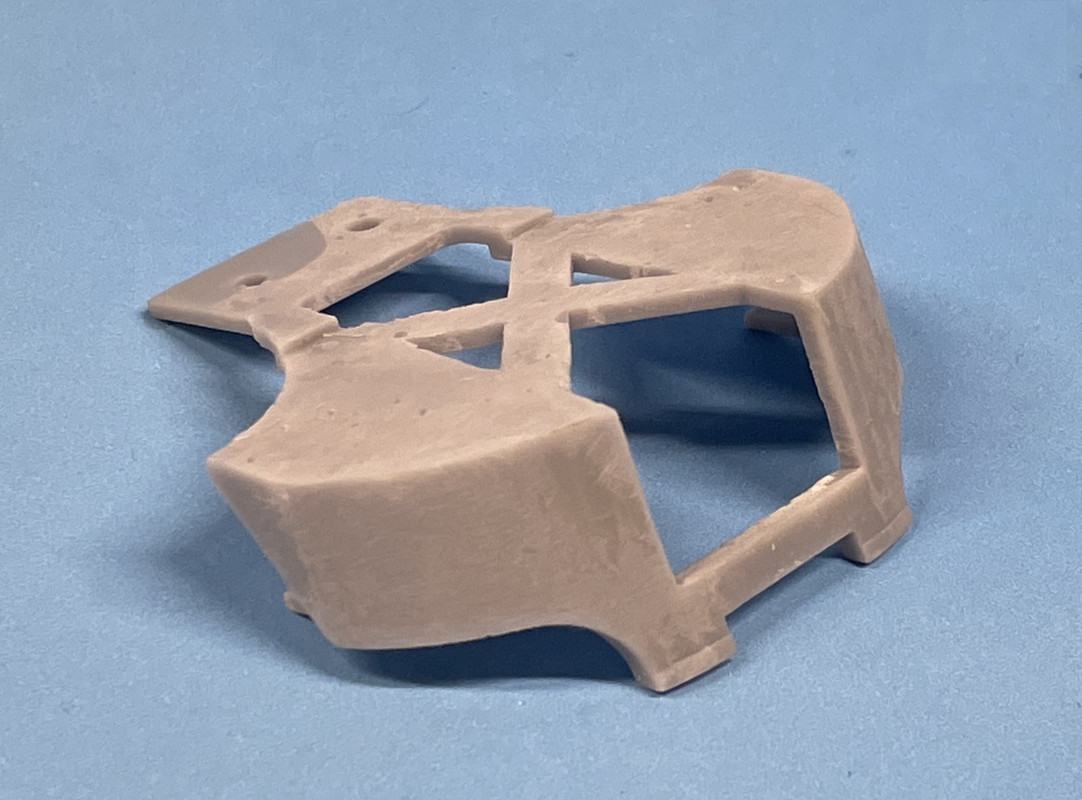
One of the first things I did was to create via 3D resin printing the wrongly molded part HD33. It’s a critical half of the rotor hub ends that provides the hinging and hydraulic locks that permit the blades to fold and be locked in the extended position. There should have been two facing in the same direction, but HD33 was printed as a mirror image… seemed intuitive, but wrong. I’ve printed multiple copies and will make them available for sale at a very reasonable price. Heavy Arty showed a way to cut and paste the wrong-way version to make a right way, but creating a correctly facing part from scratch will be more secure. Incidentally, the drawings of this part in the instruction are facing correctly.

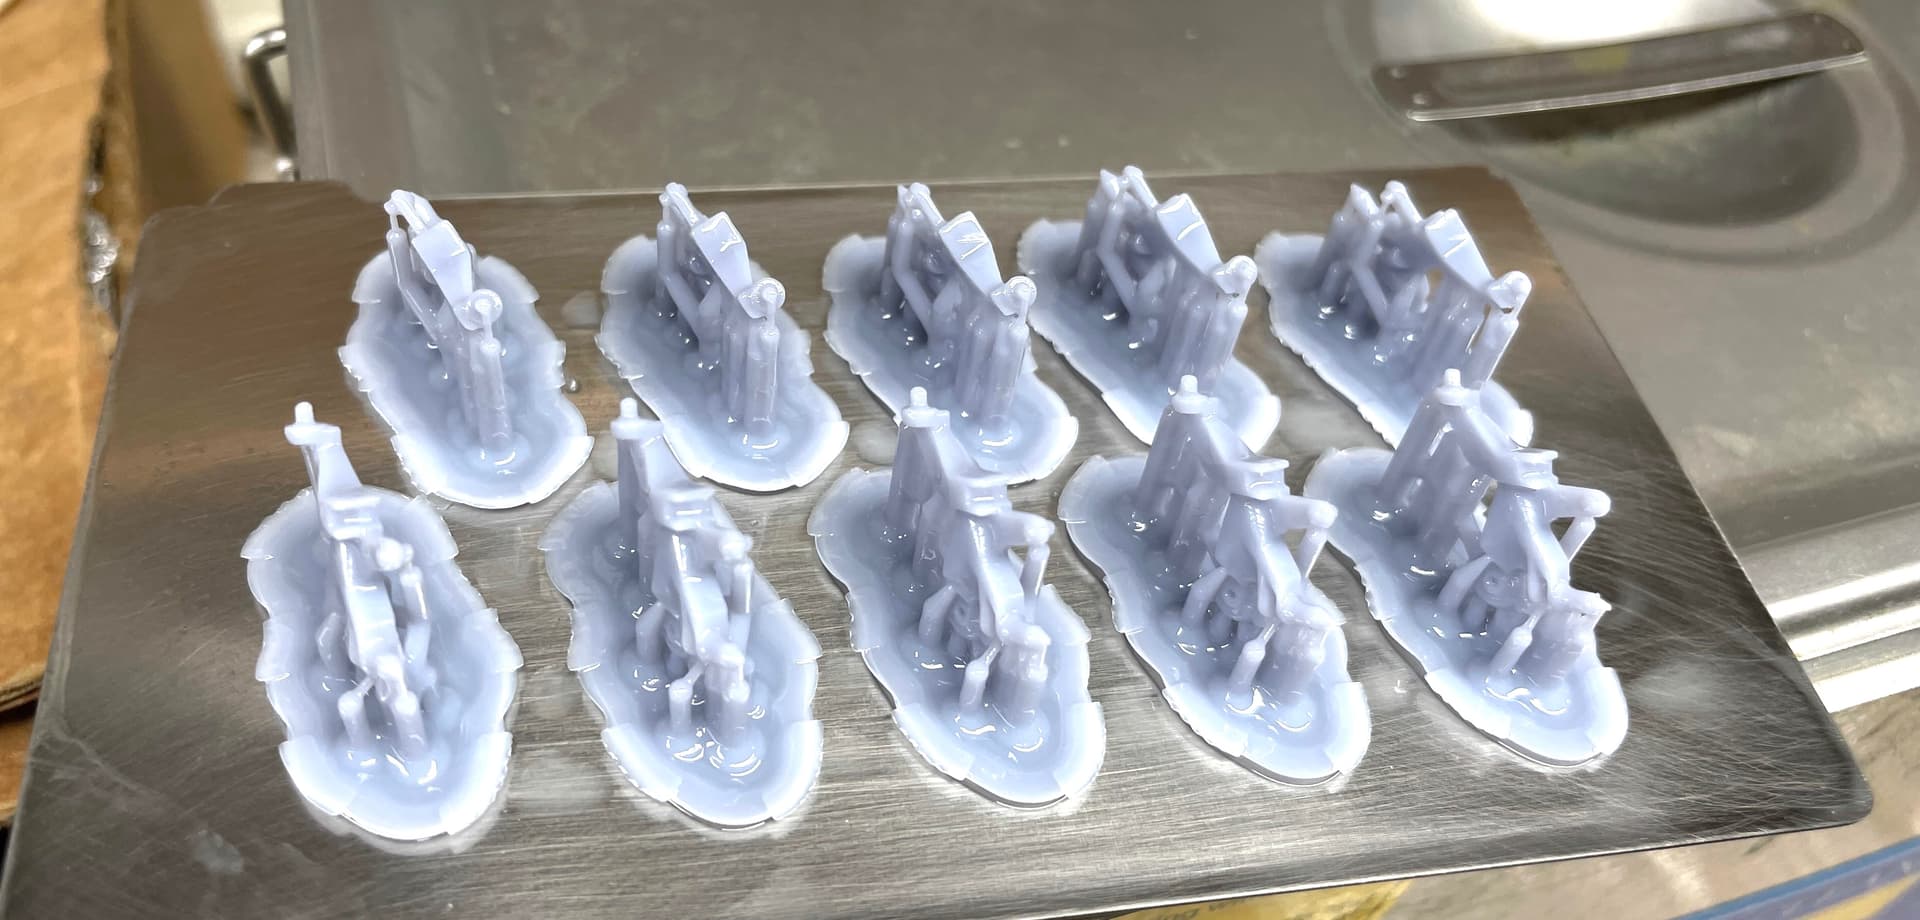
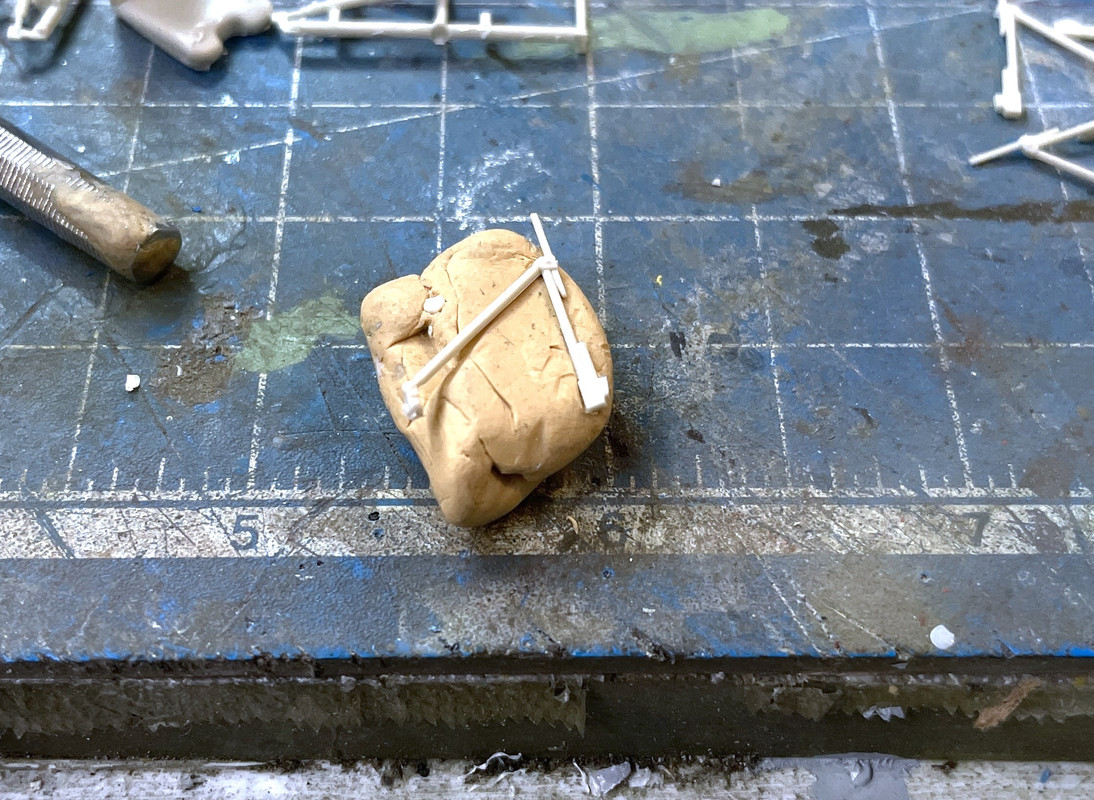
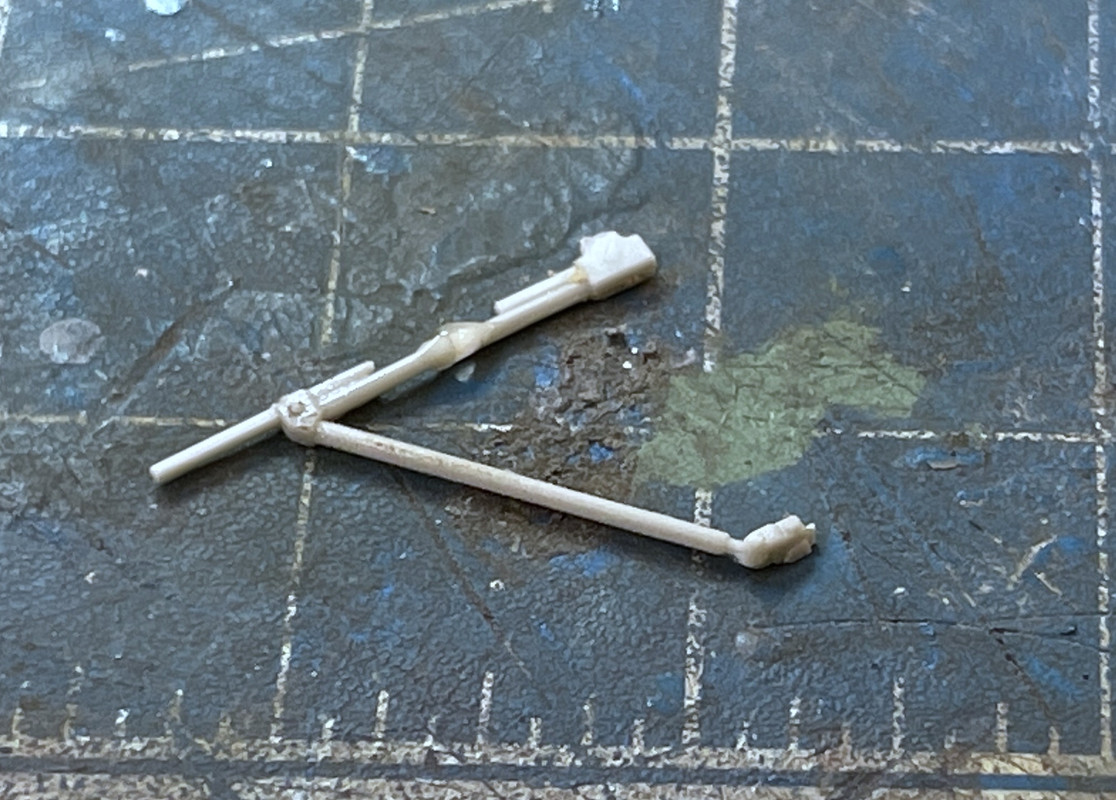
The picture shows the parts right off the printer still with their supports that are necessary to create the parts in this kind of machine.

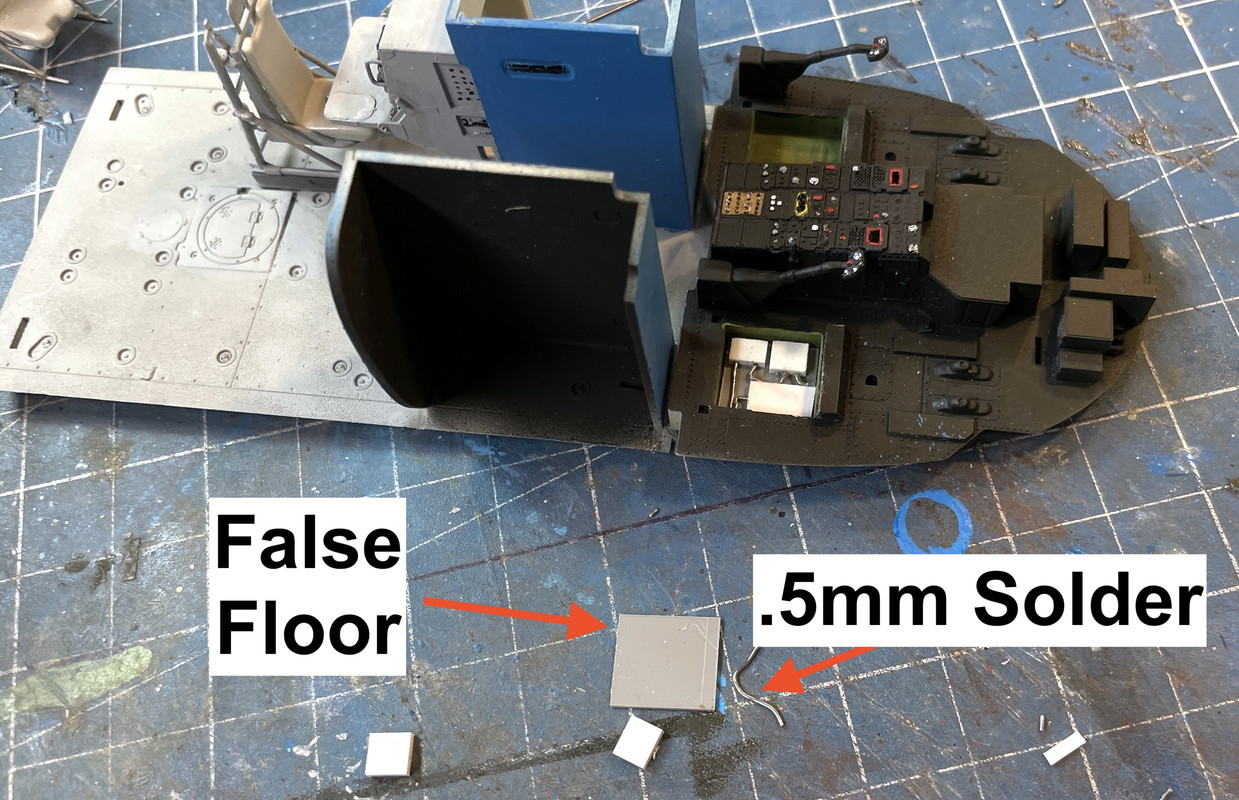
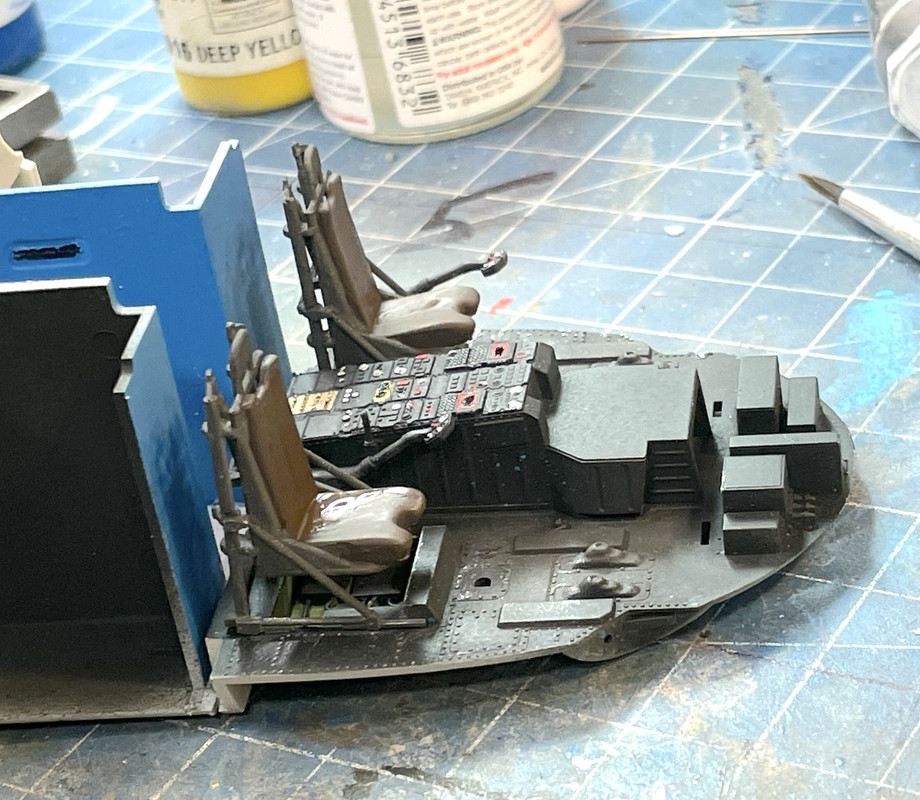
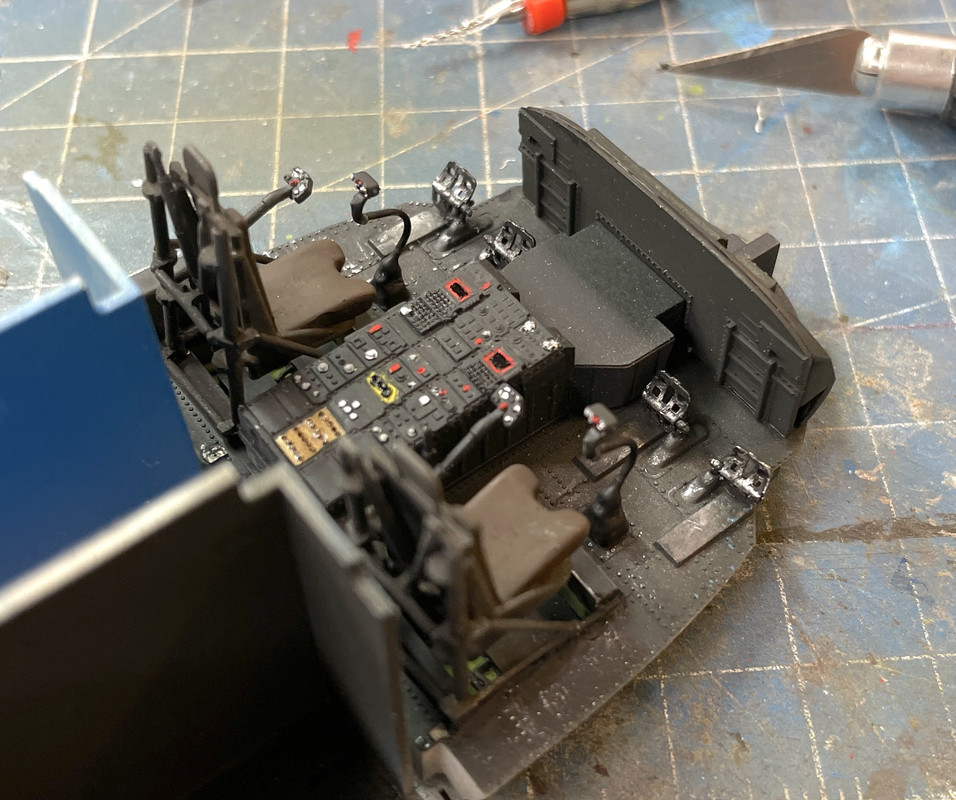
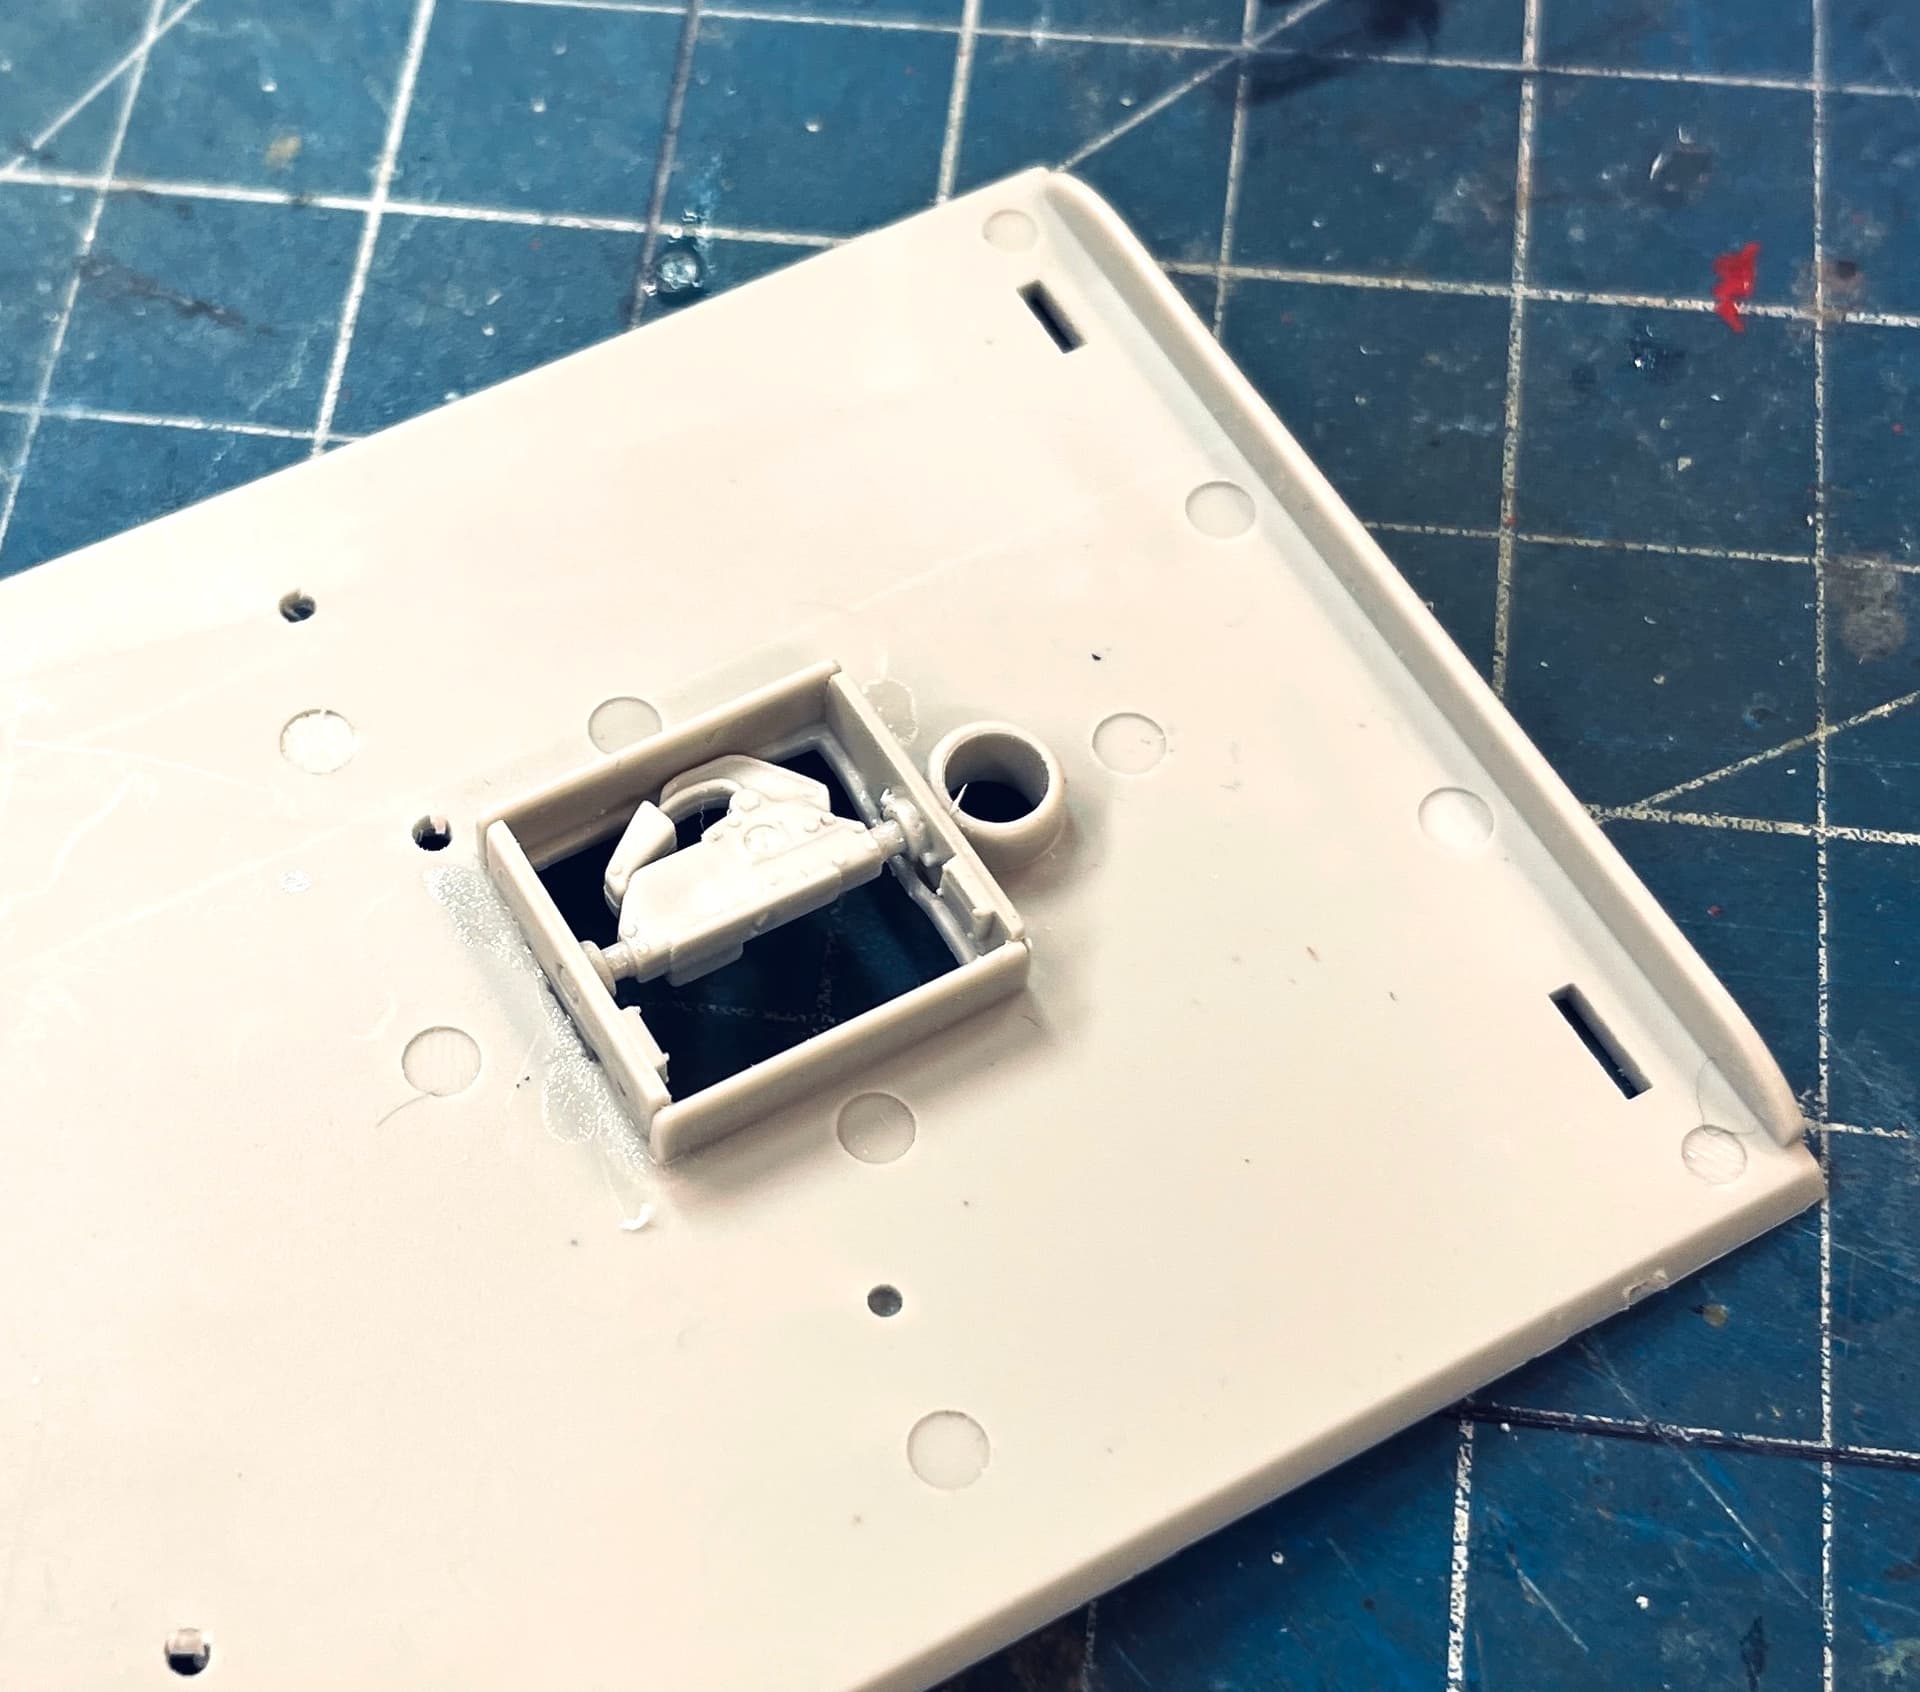
There’s a detail that goes below the floor. I think it might be a hoist mechanism. The side pieces were supposed to lock into slots. There was the barest hint of a slot so I made them. I could have cut the tabs off, but I wanted them to align. That tiny chisel was included in an ancient Hasegawa 1/8th scale Sopwith Camel that was a skeleton framed model. I got a $1,000 to build that kit in the early 1980s. The chisel was a tool needed in the creation of the model. I’ve found uses for it ever since.


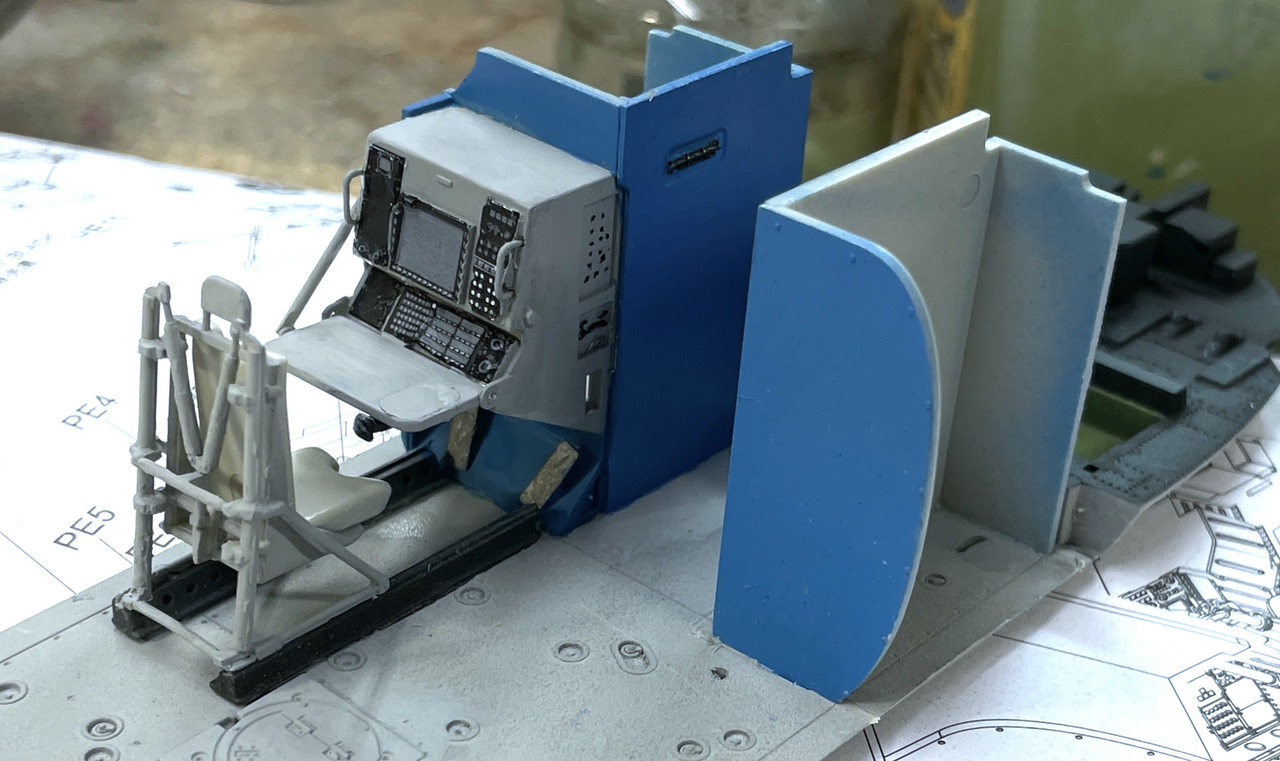
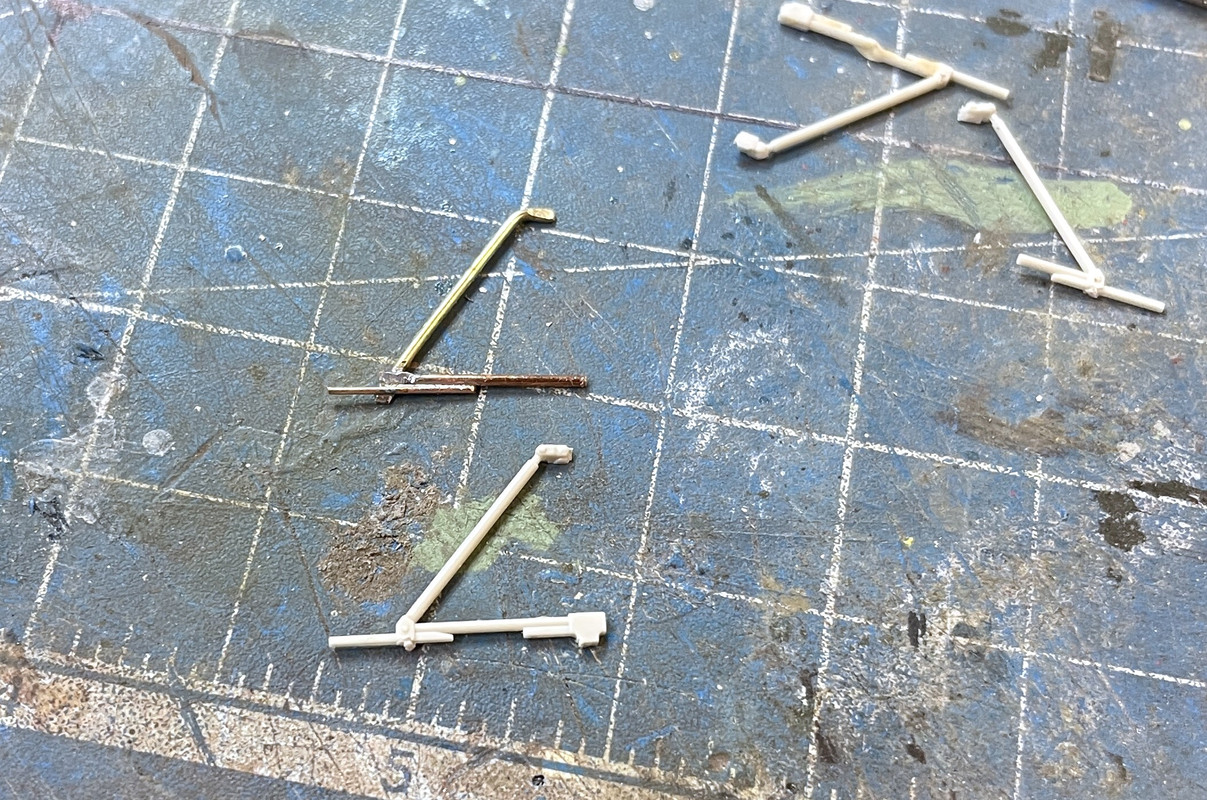
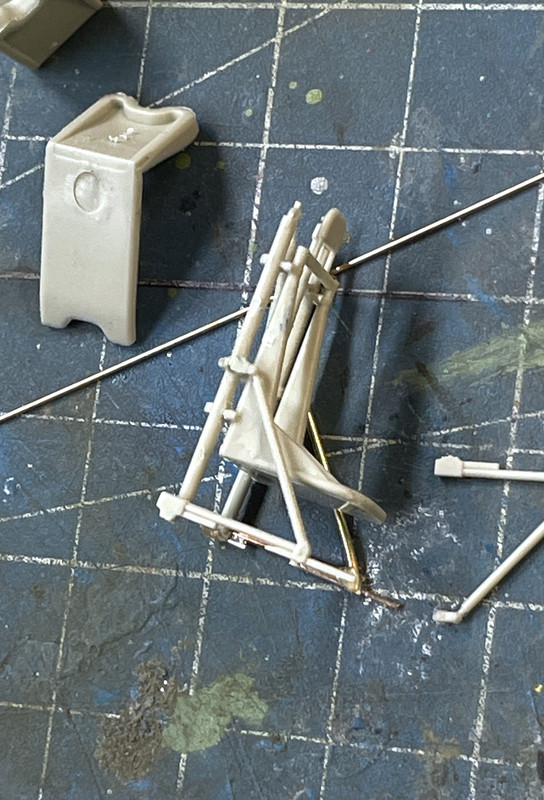
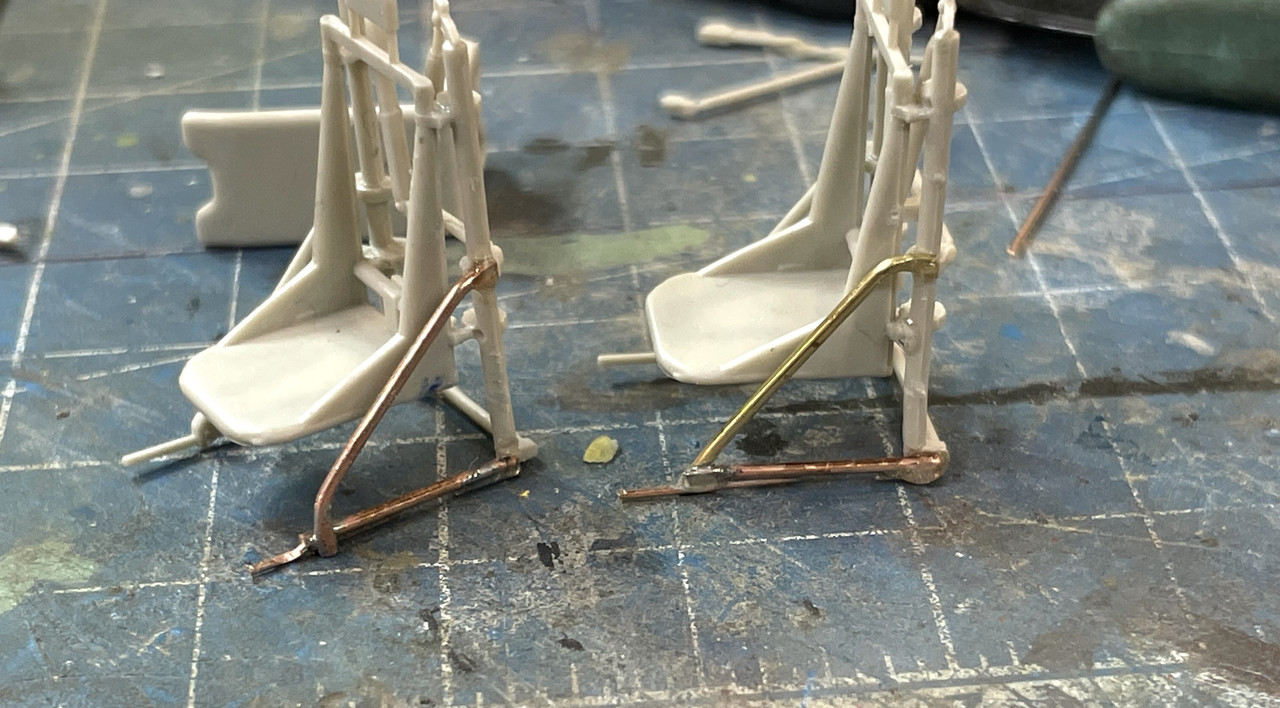
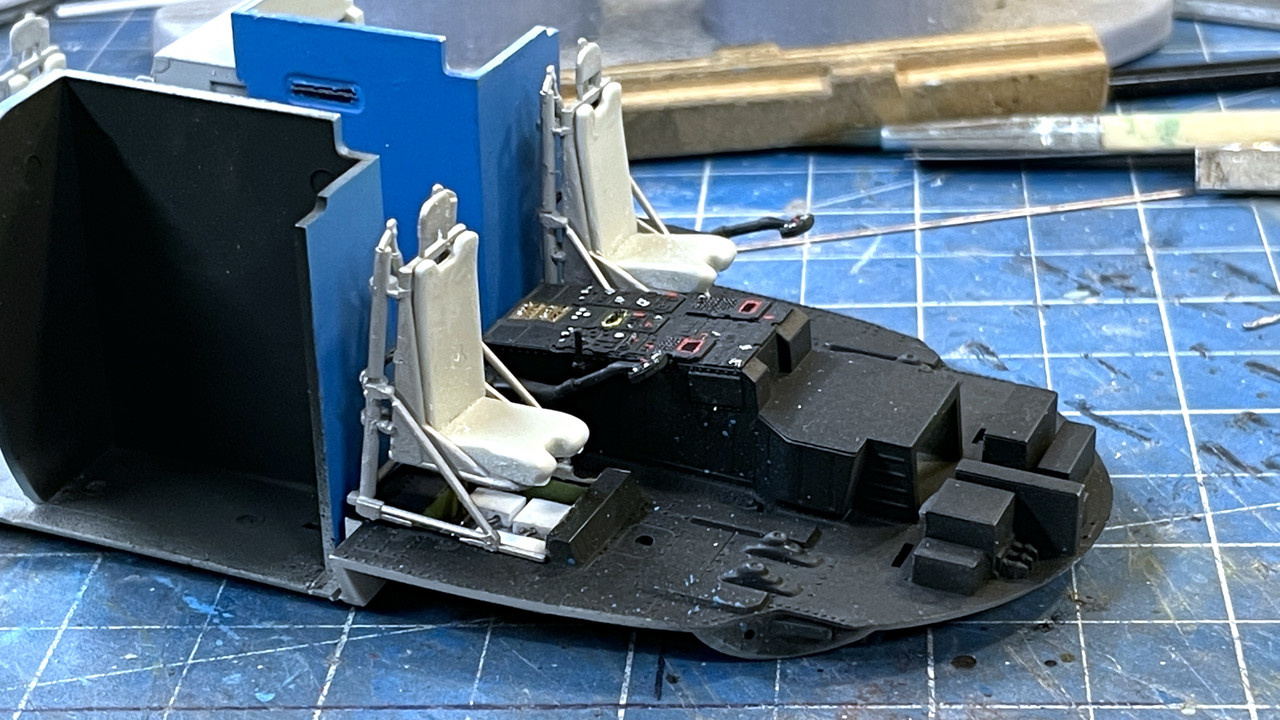
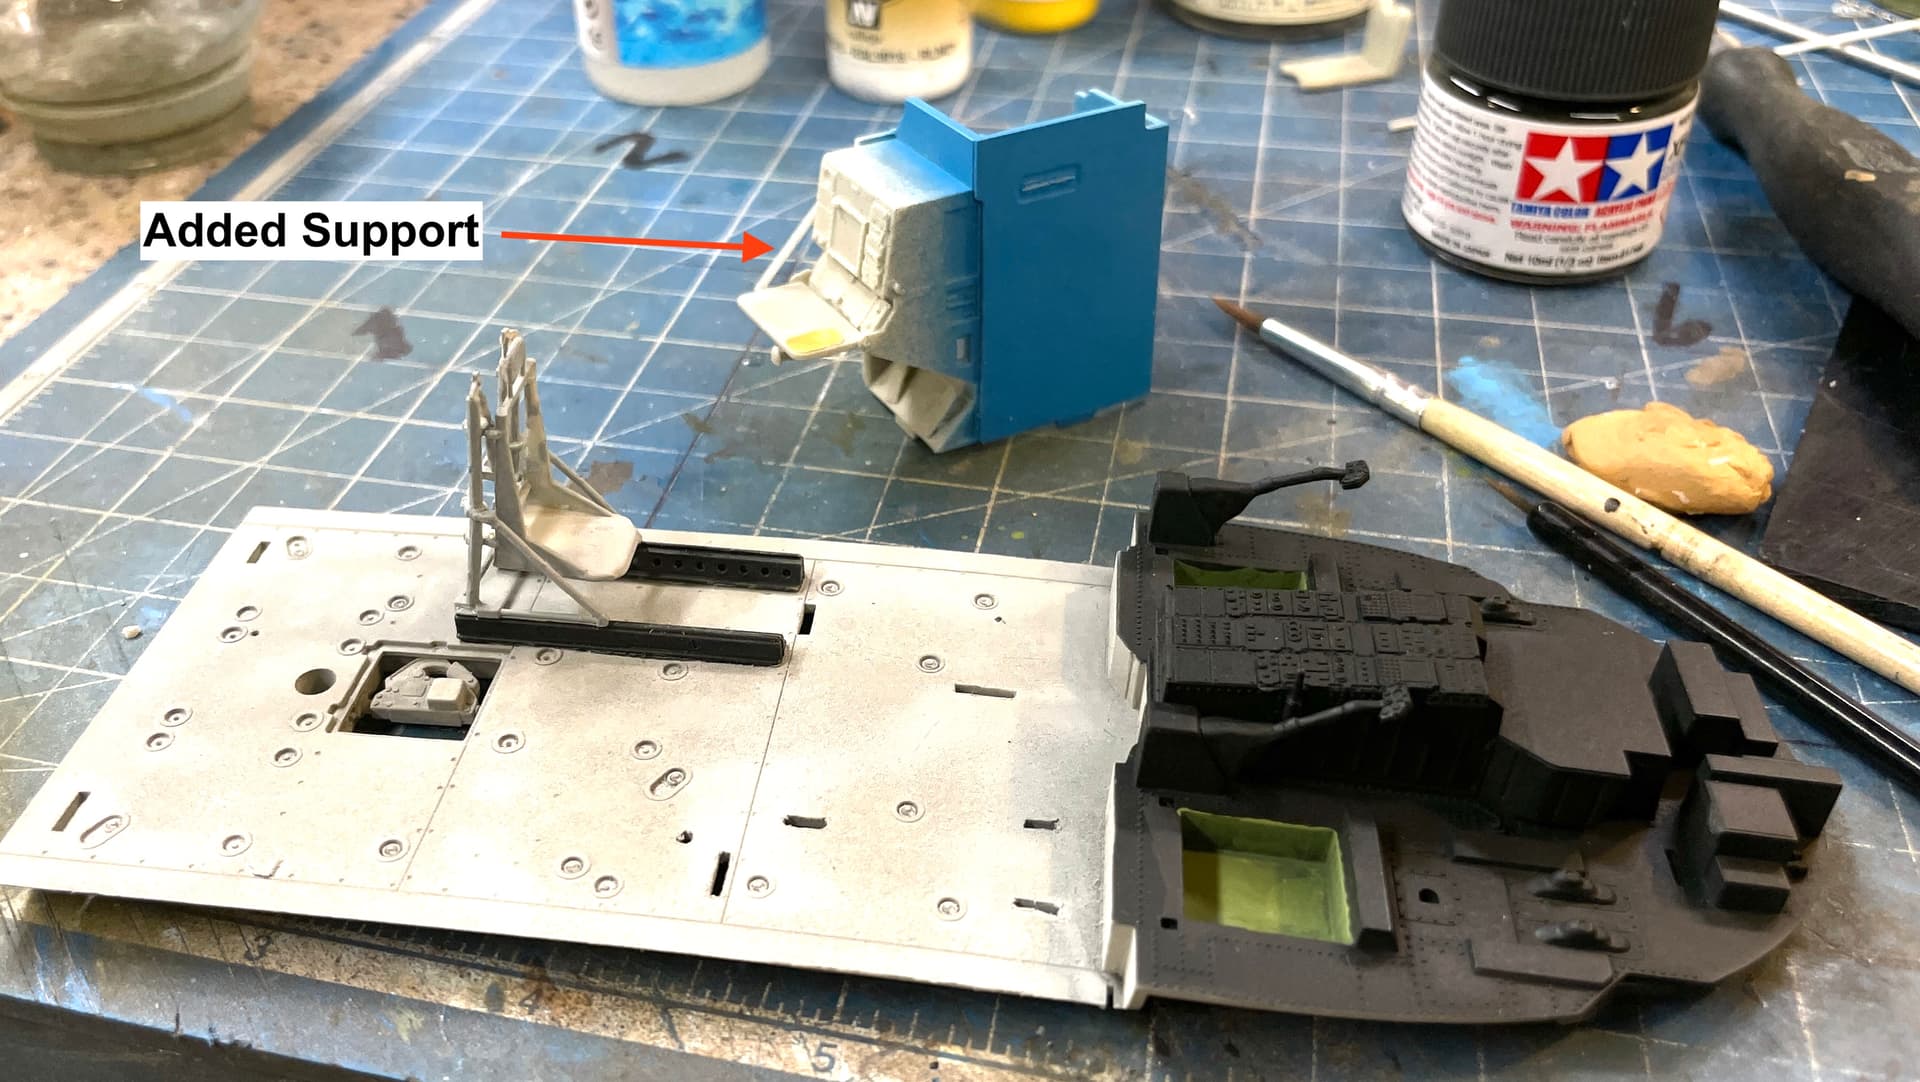
The seats were annoying to glue together mainly because I’m impatient and didn’t wait until the glue was cured before attempting to paint them. The joints failed and re-gluing is always harder than gluing in the first place. After screwing with it for way too long, I ended up using med CA and accelerator to finally get them together.

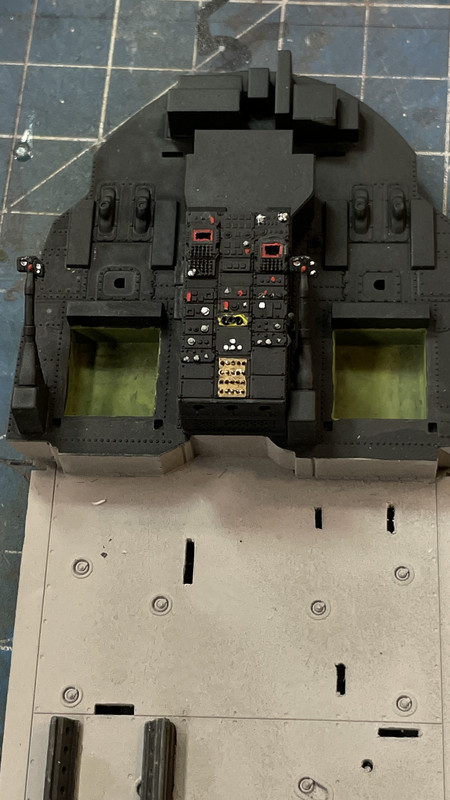
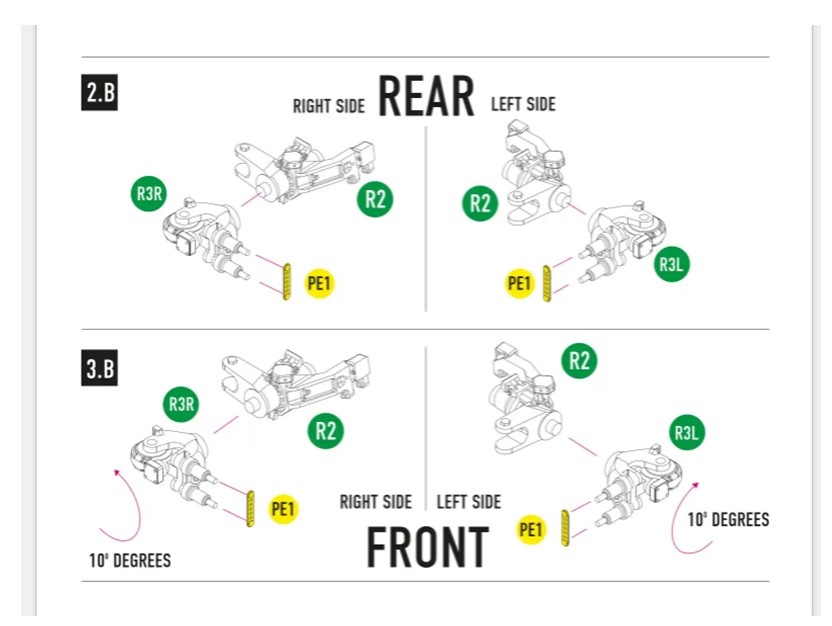
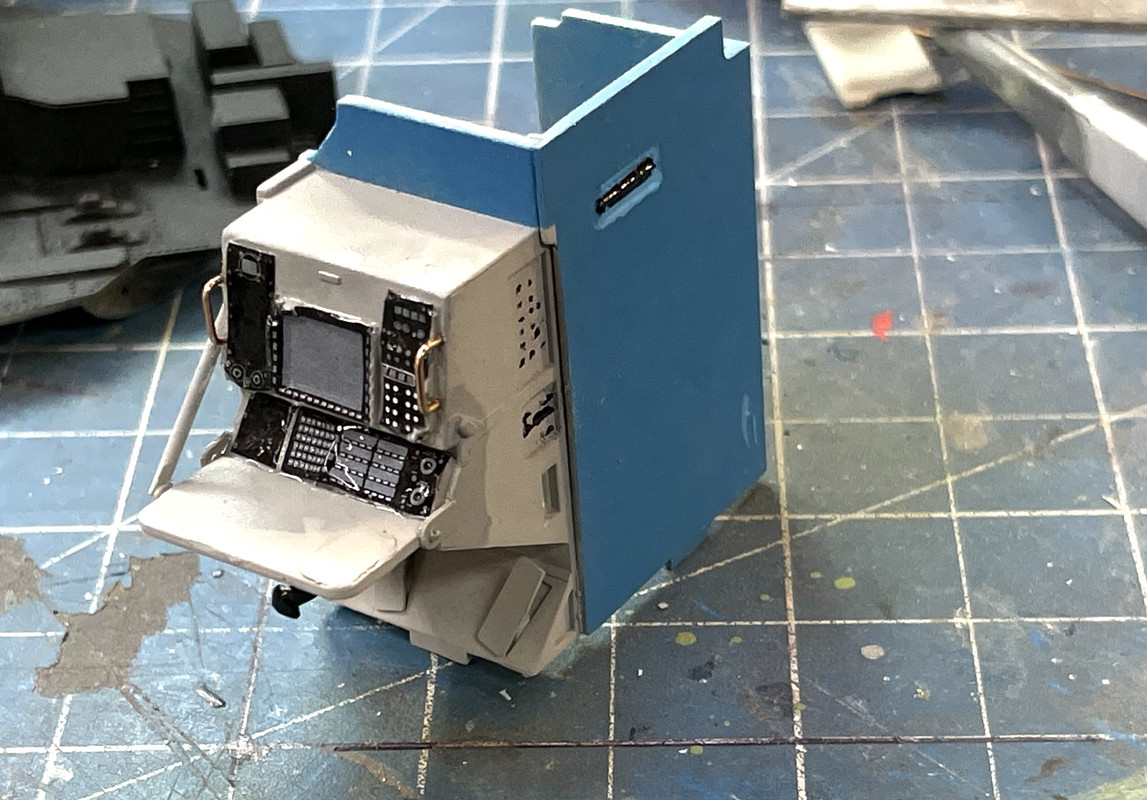
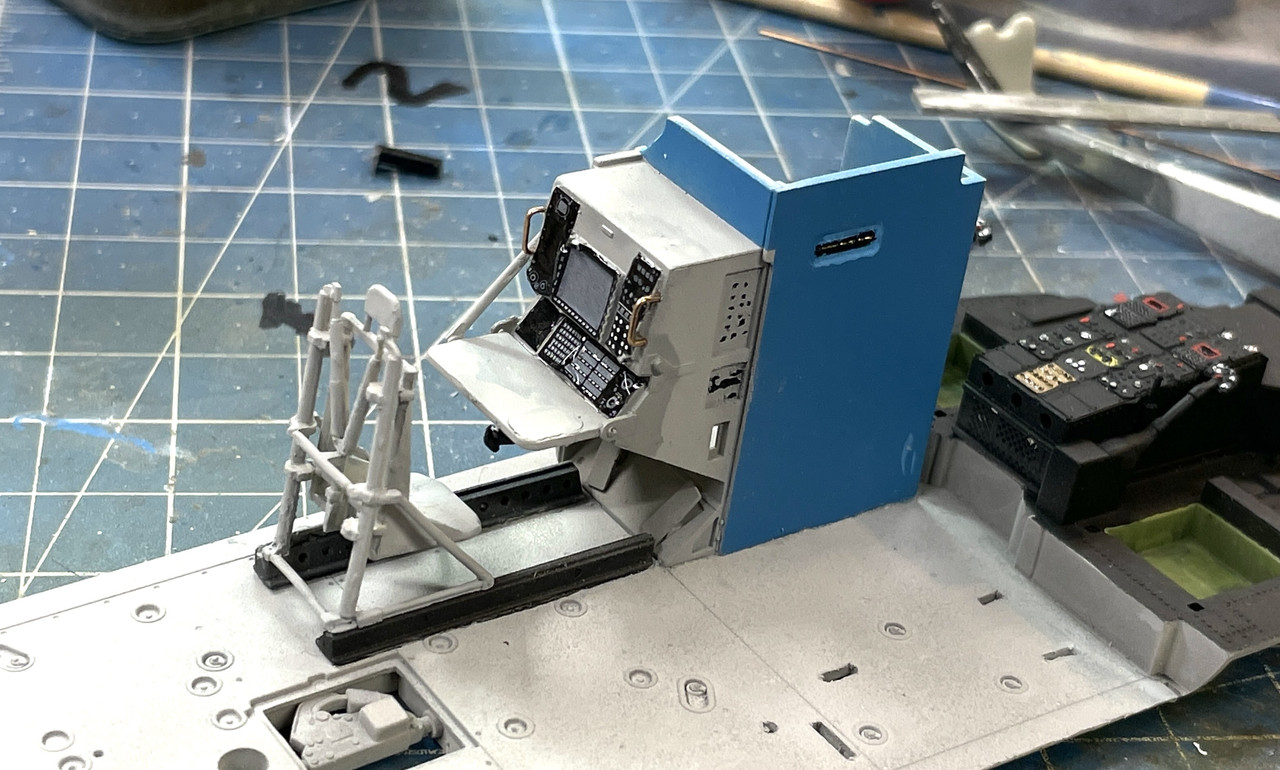
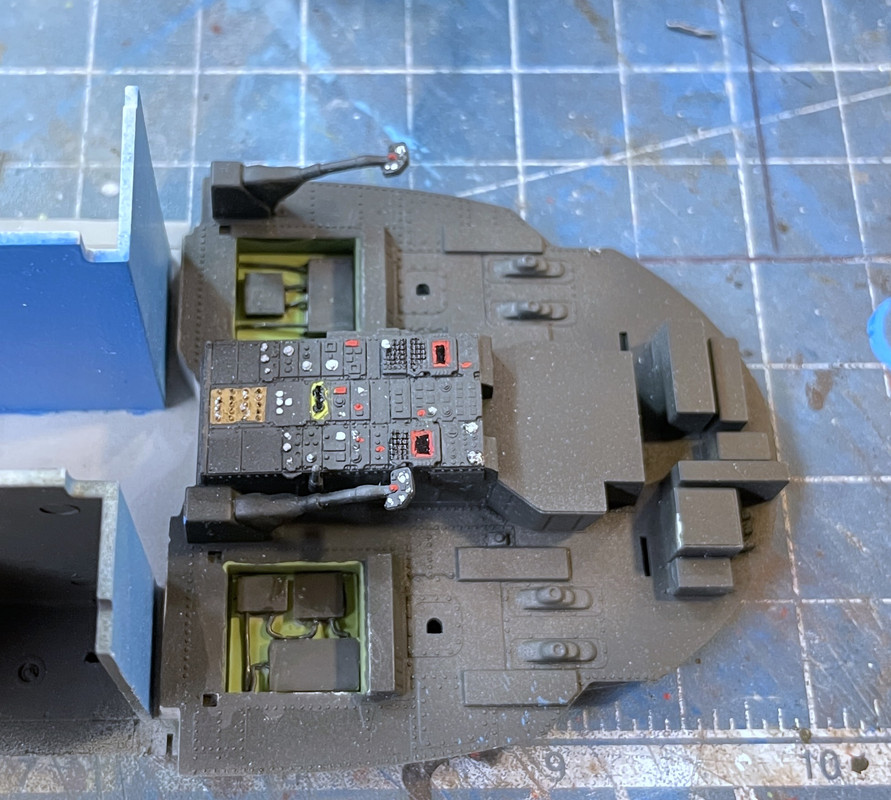
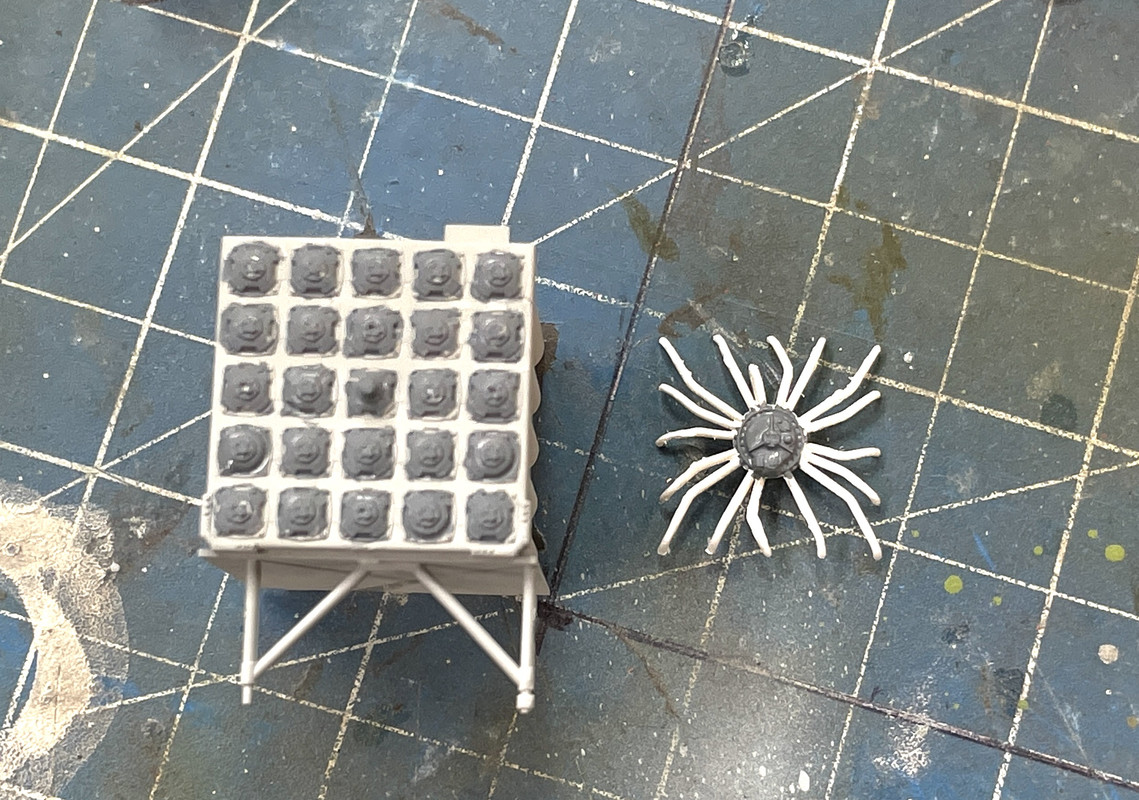
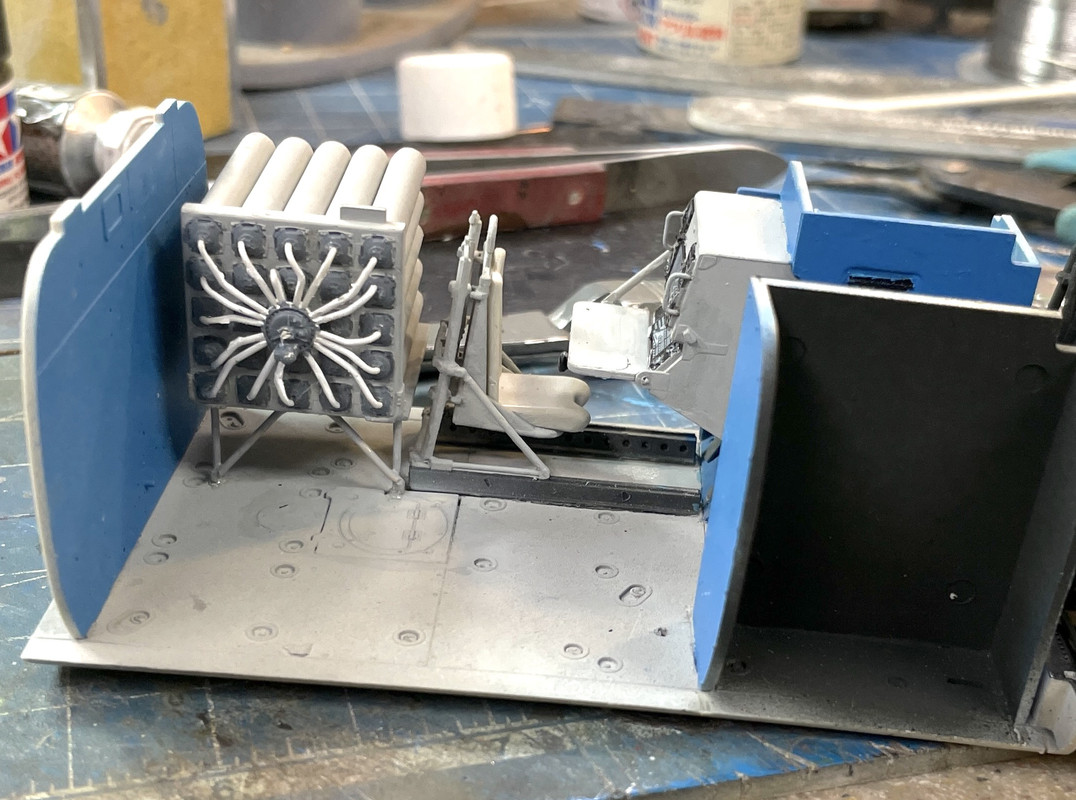
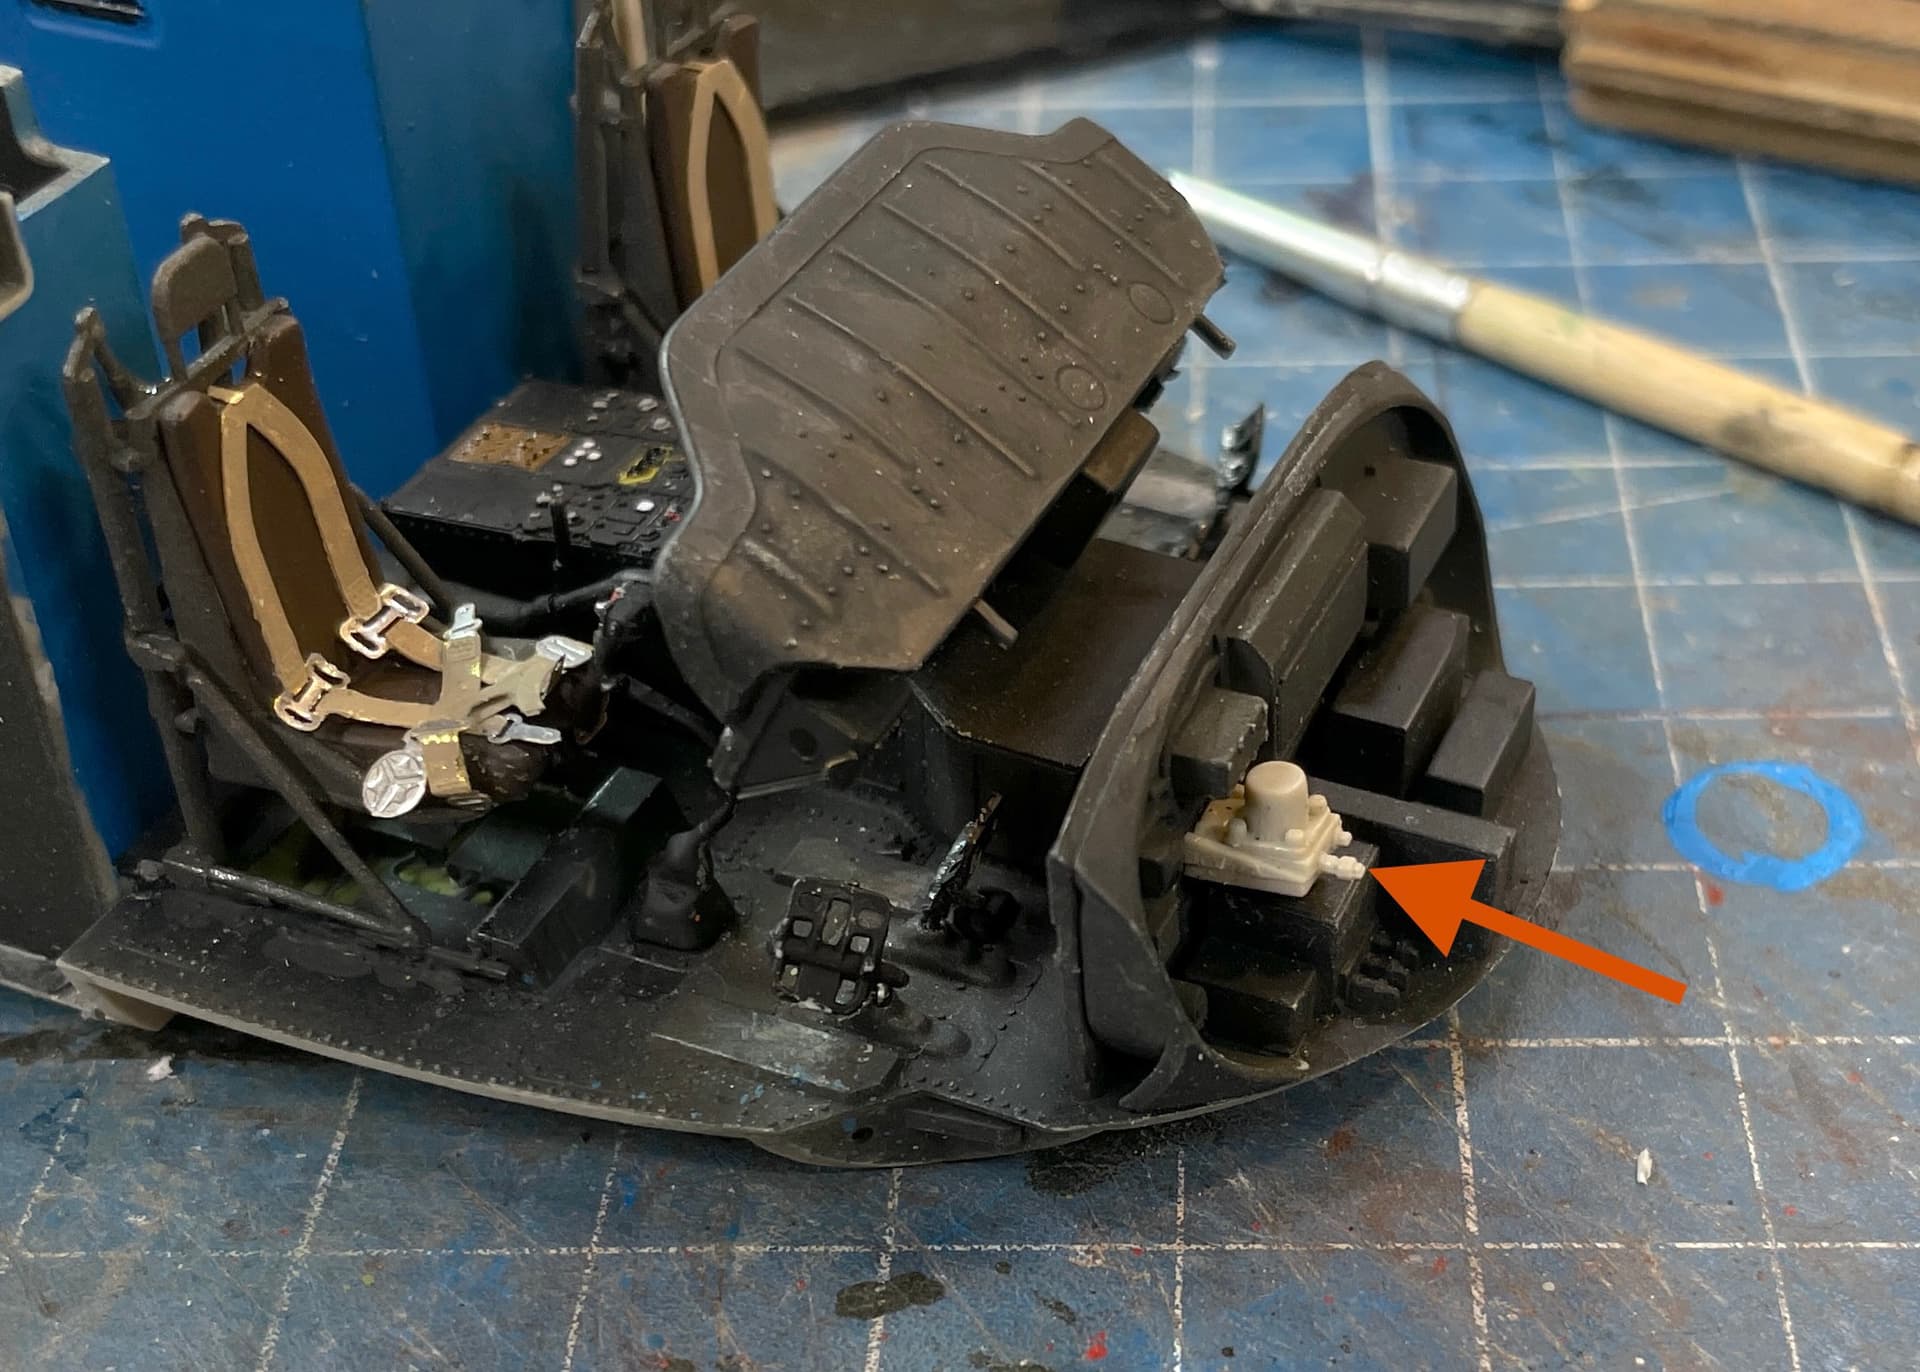
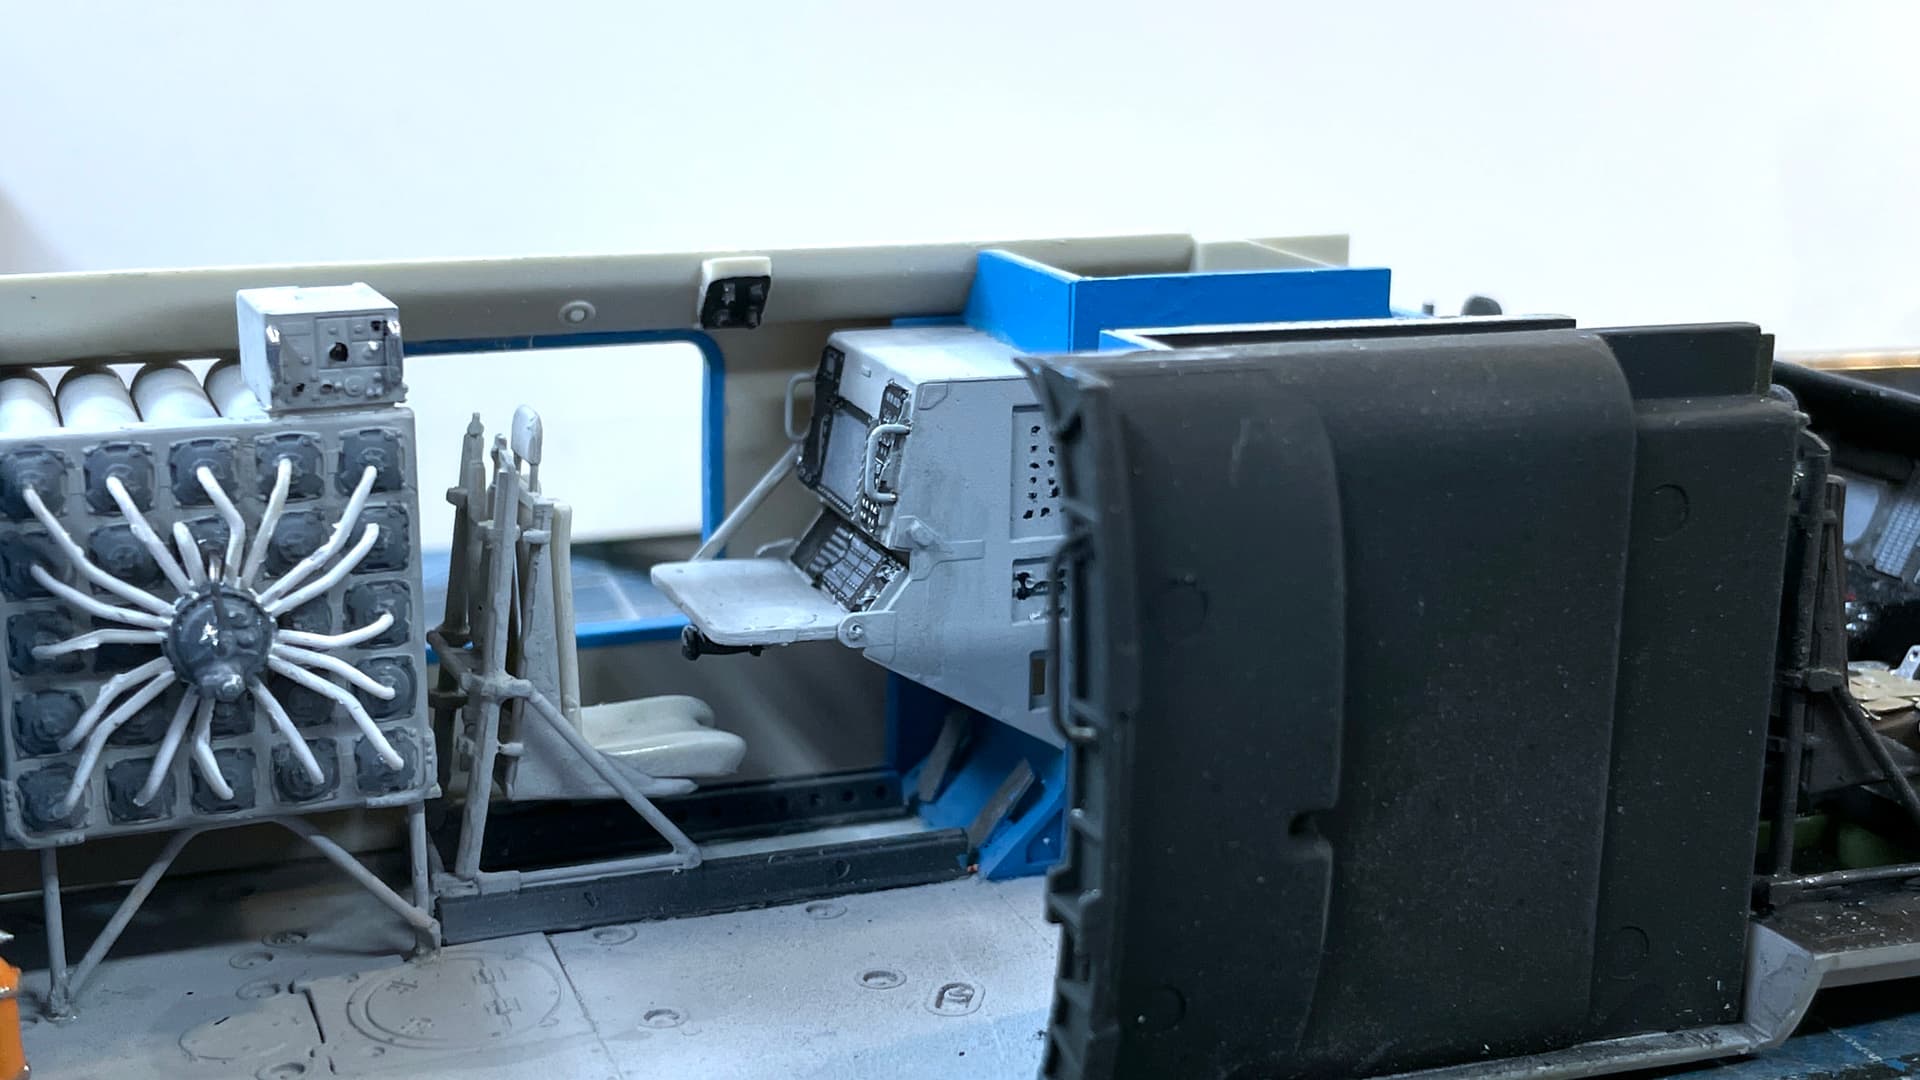
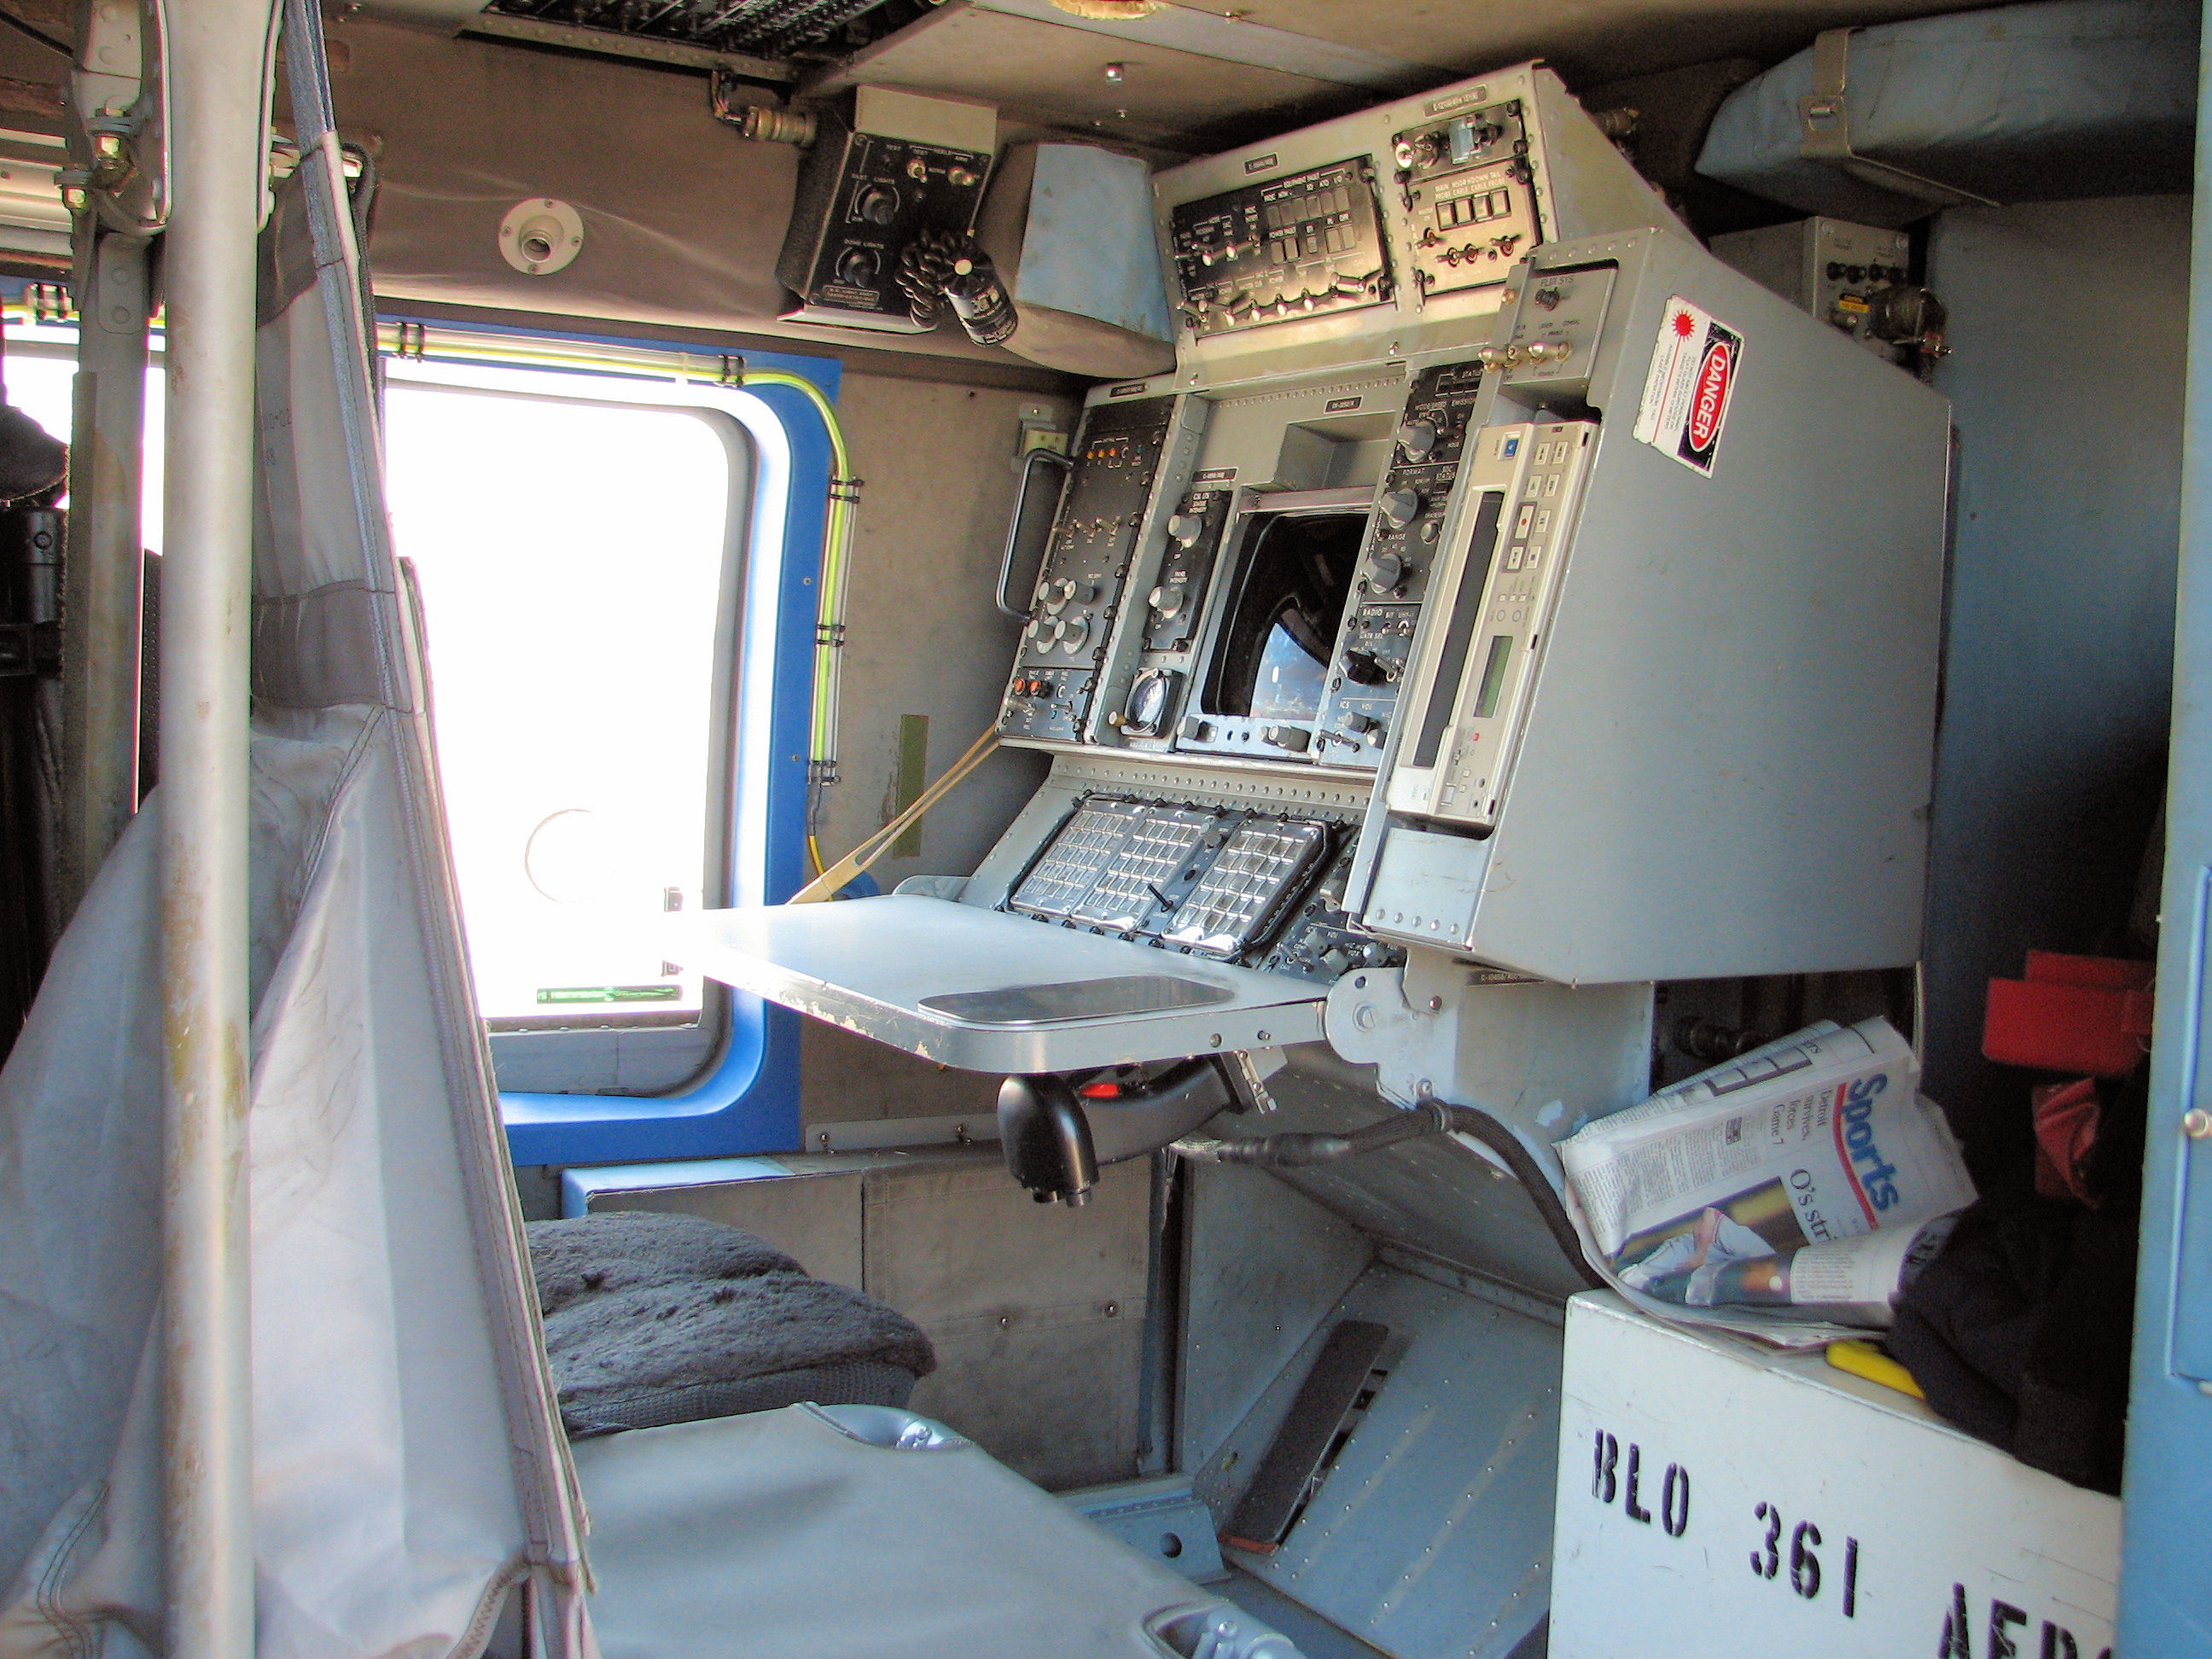
The interior wall panels are painted a light, slightly aqua blue. The weapons console is light gray in the images I’ve found. The Kitty Hawk kit is very detailed and finely molded. I did find that the PE part on the console work table is labeled PE1, but there is no PE1. The part is actually PE2.

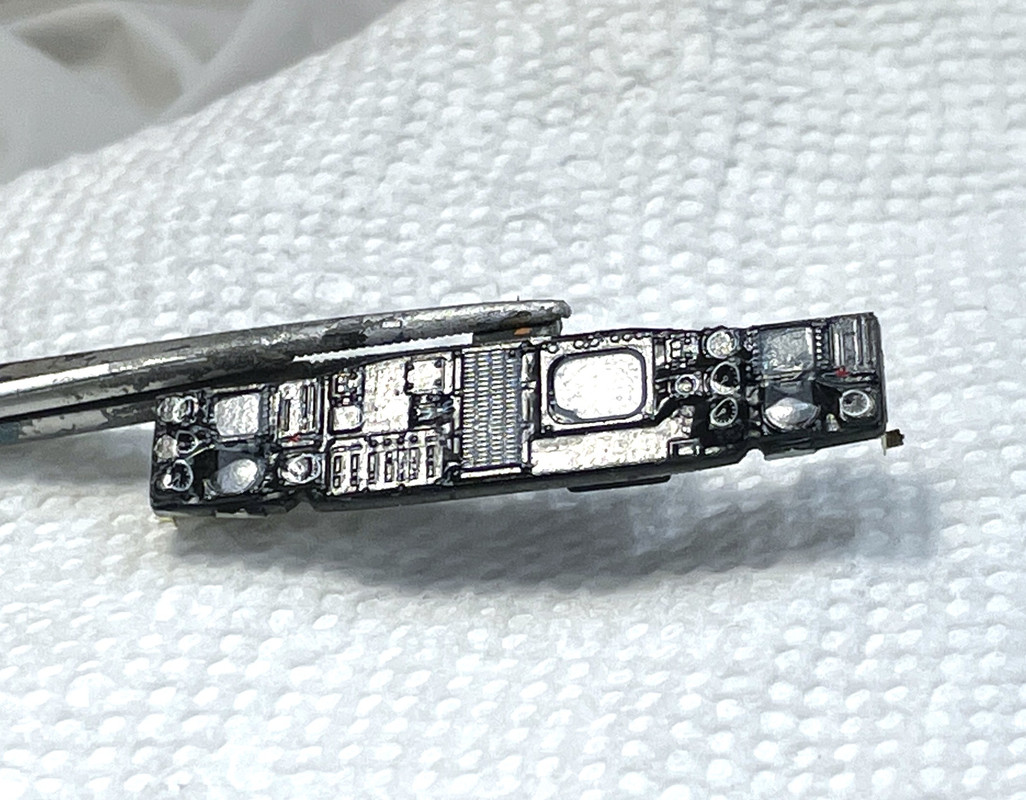
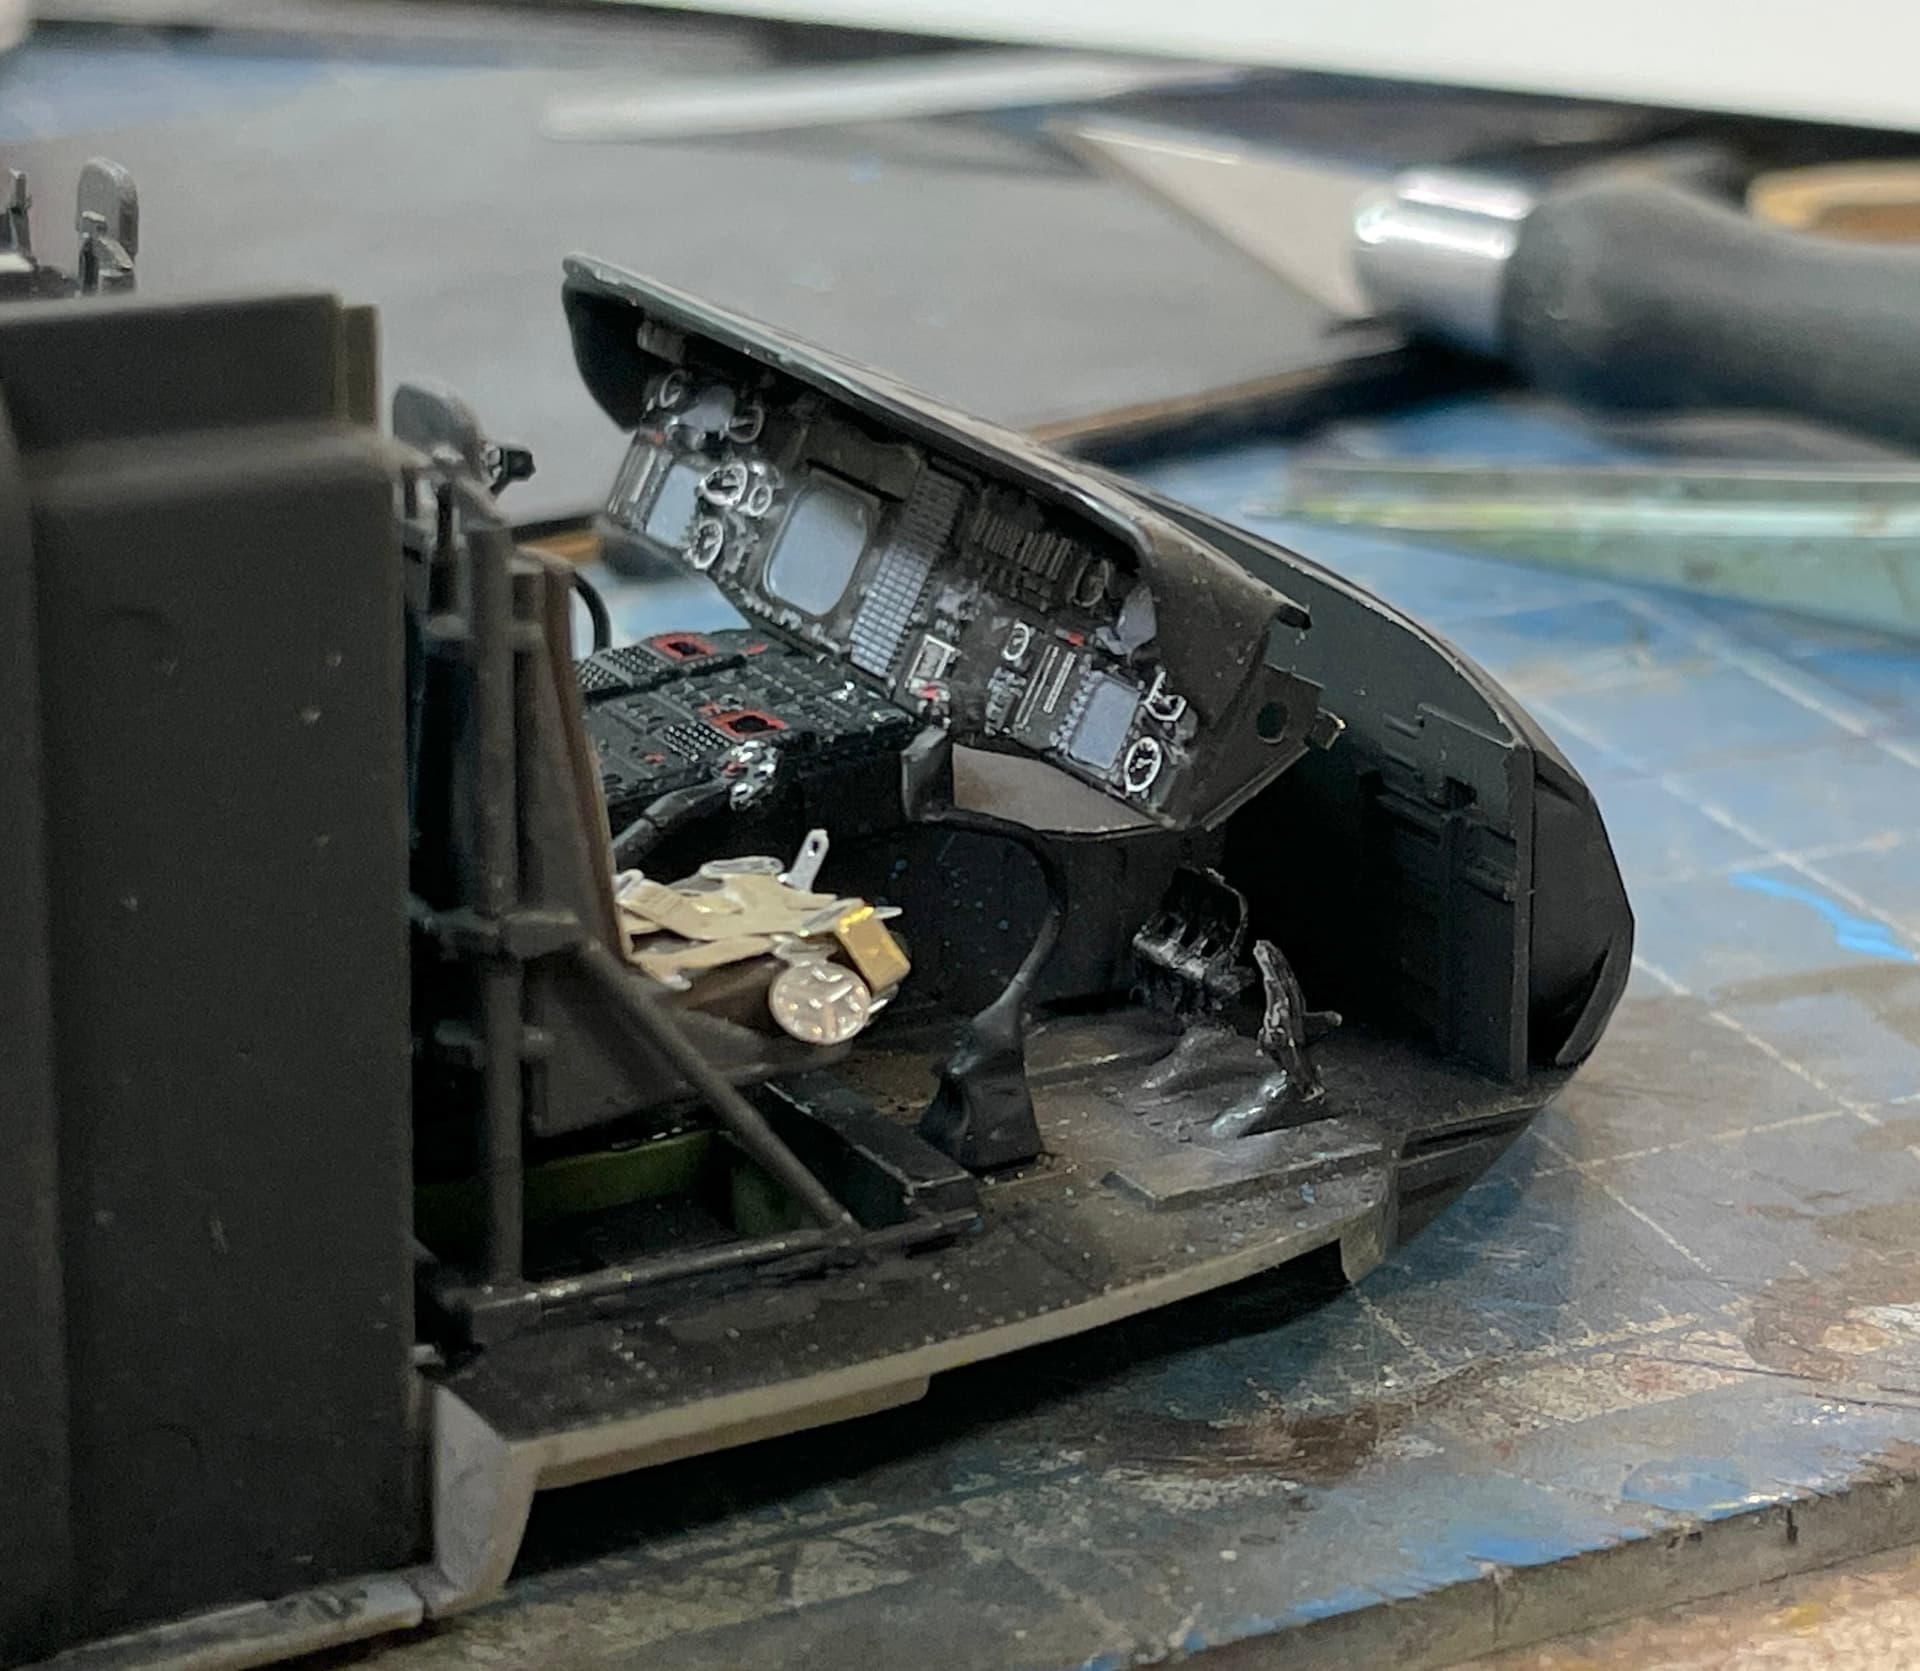
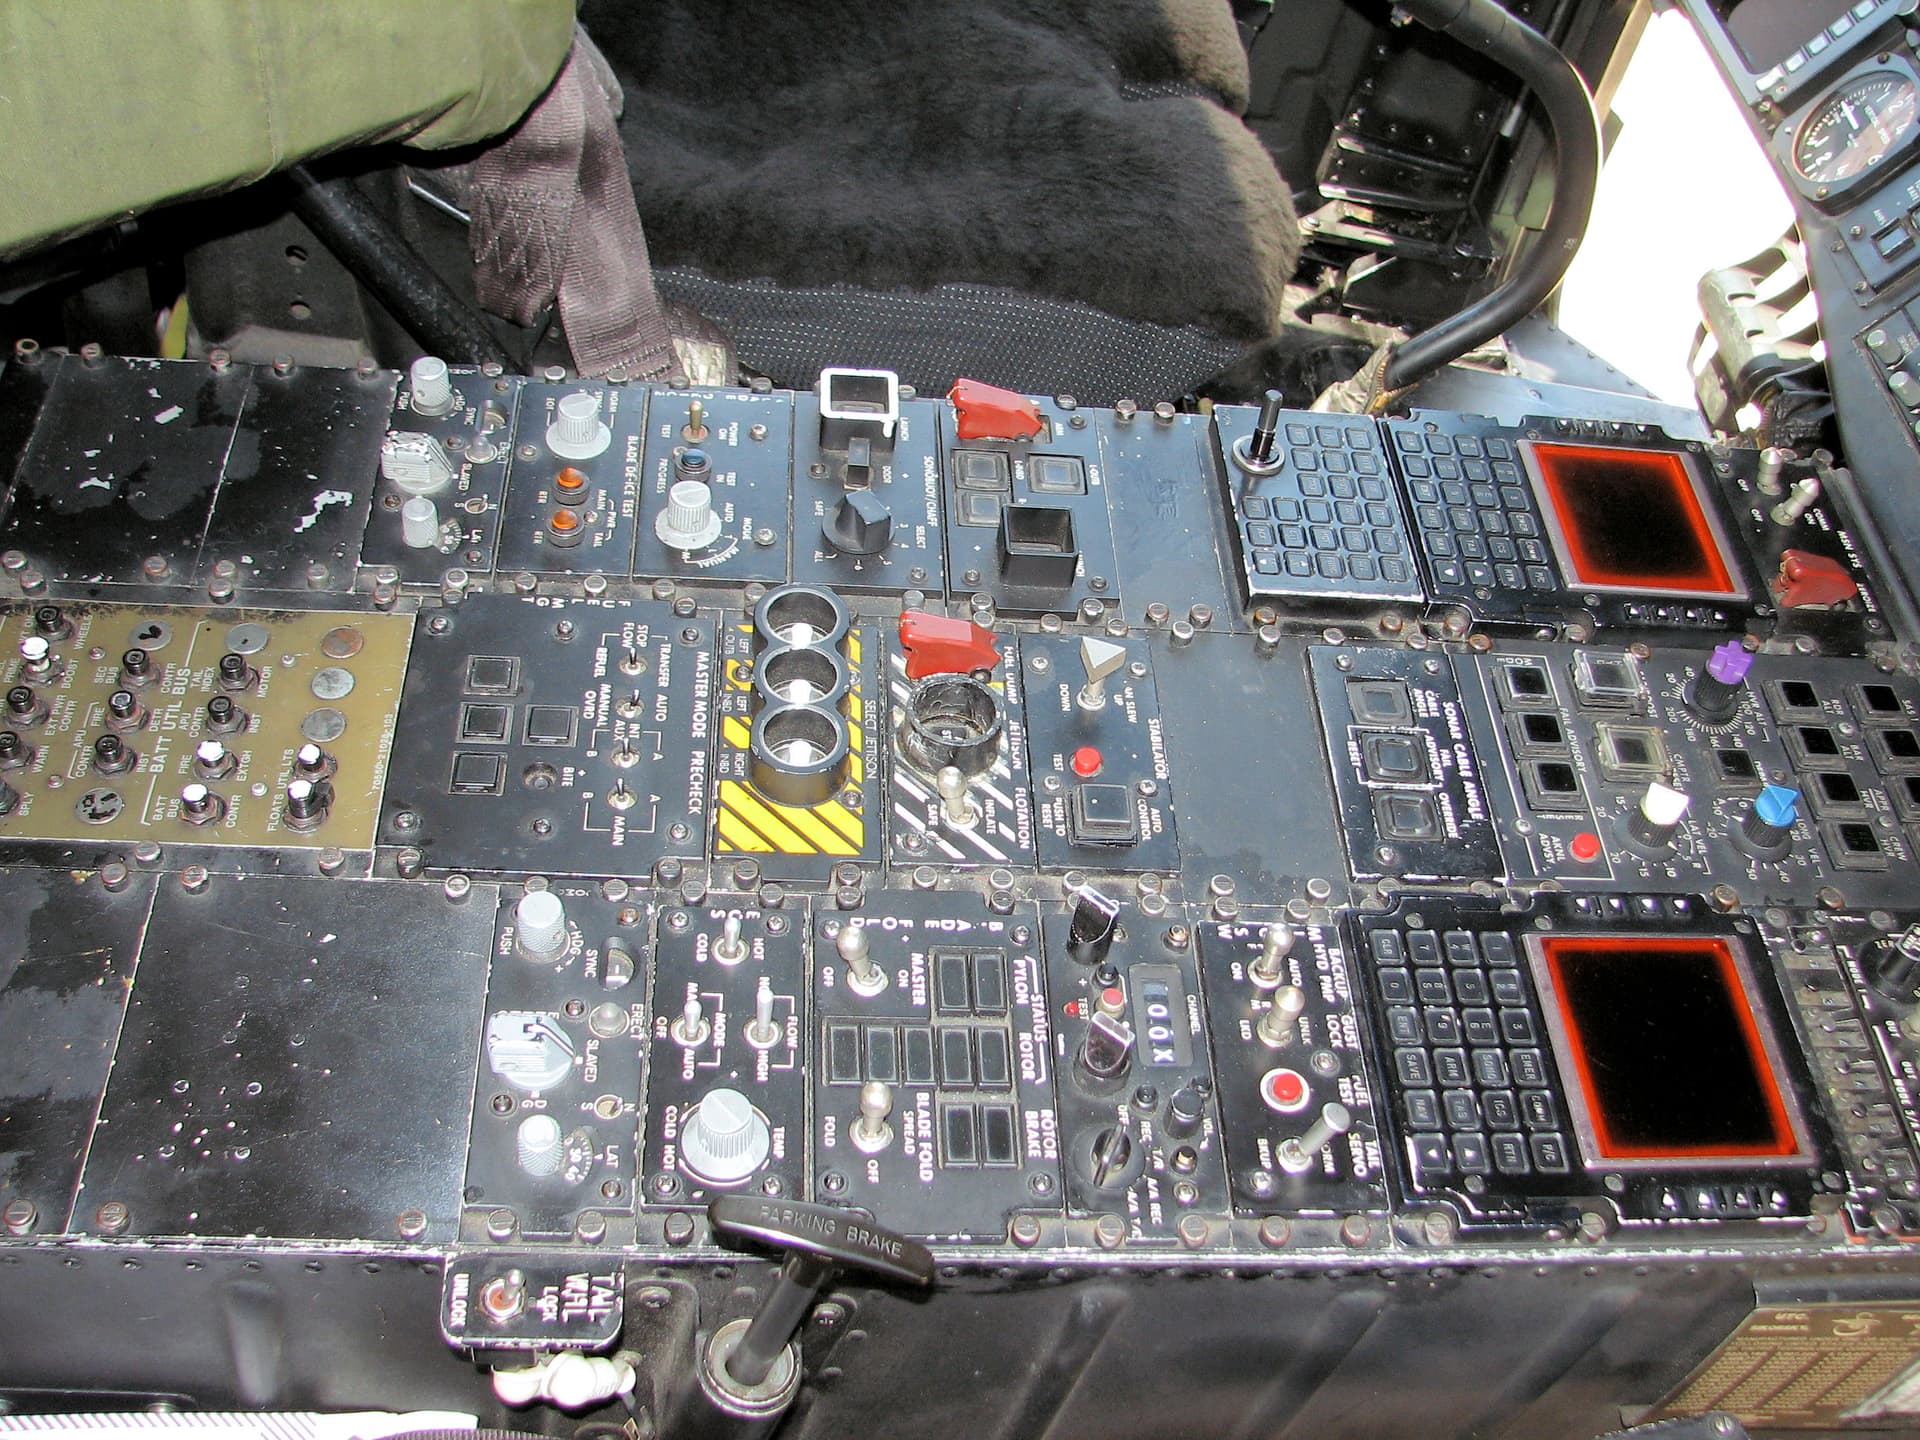
I chose to paint the control panels instead of trying to get the decals to settle in over all the knobs and switches. The picture shows WIP. I have more work to do on it.

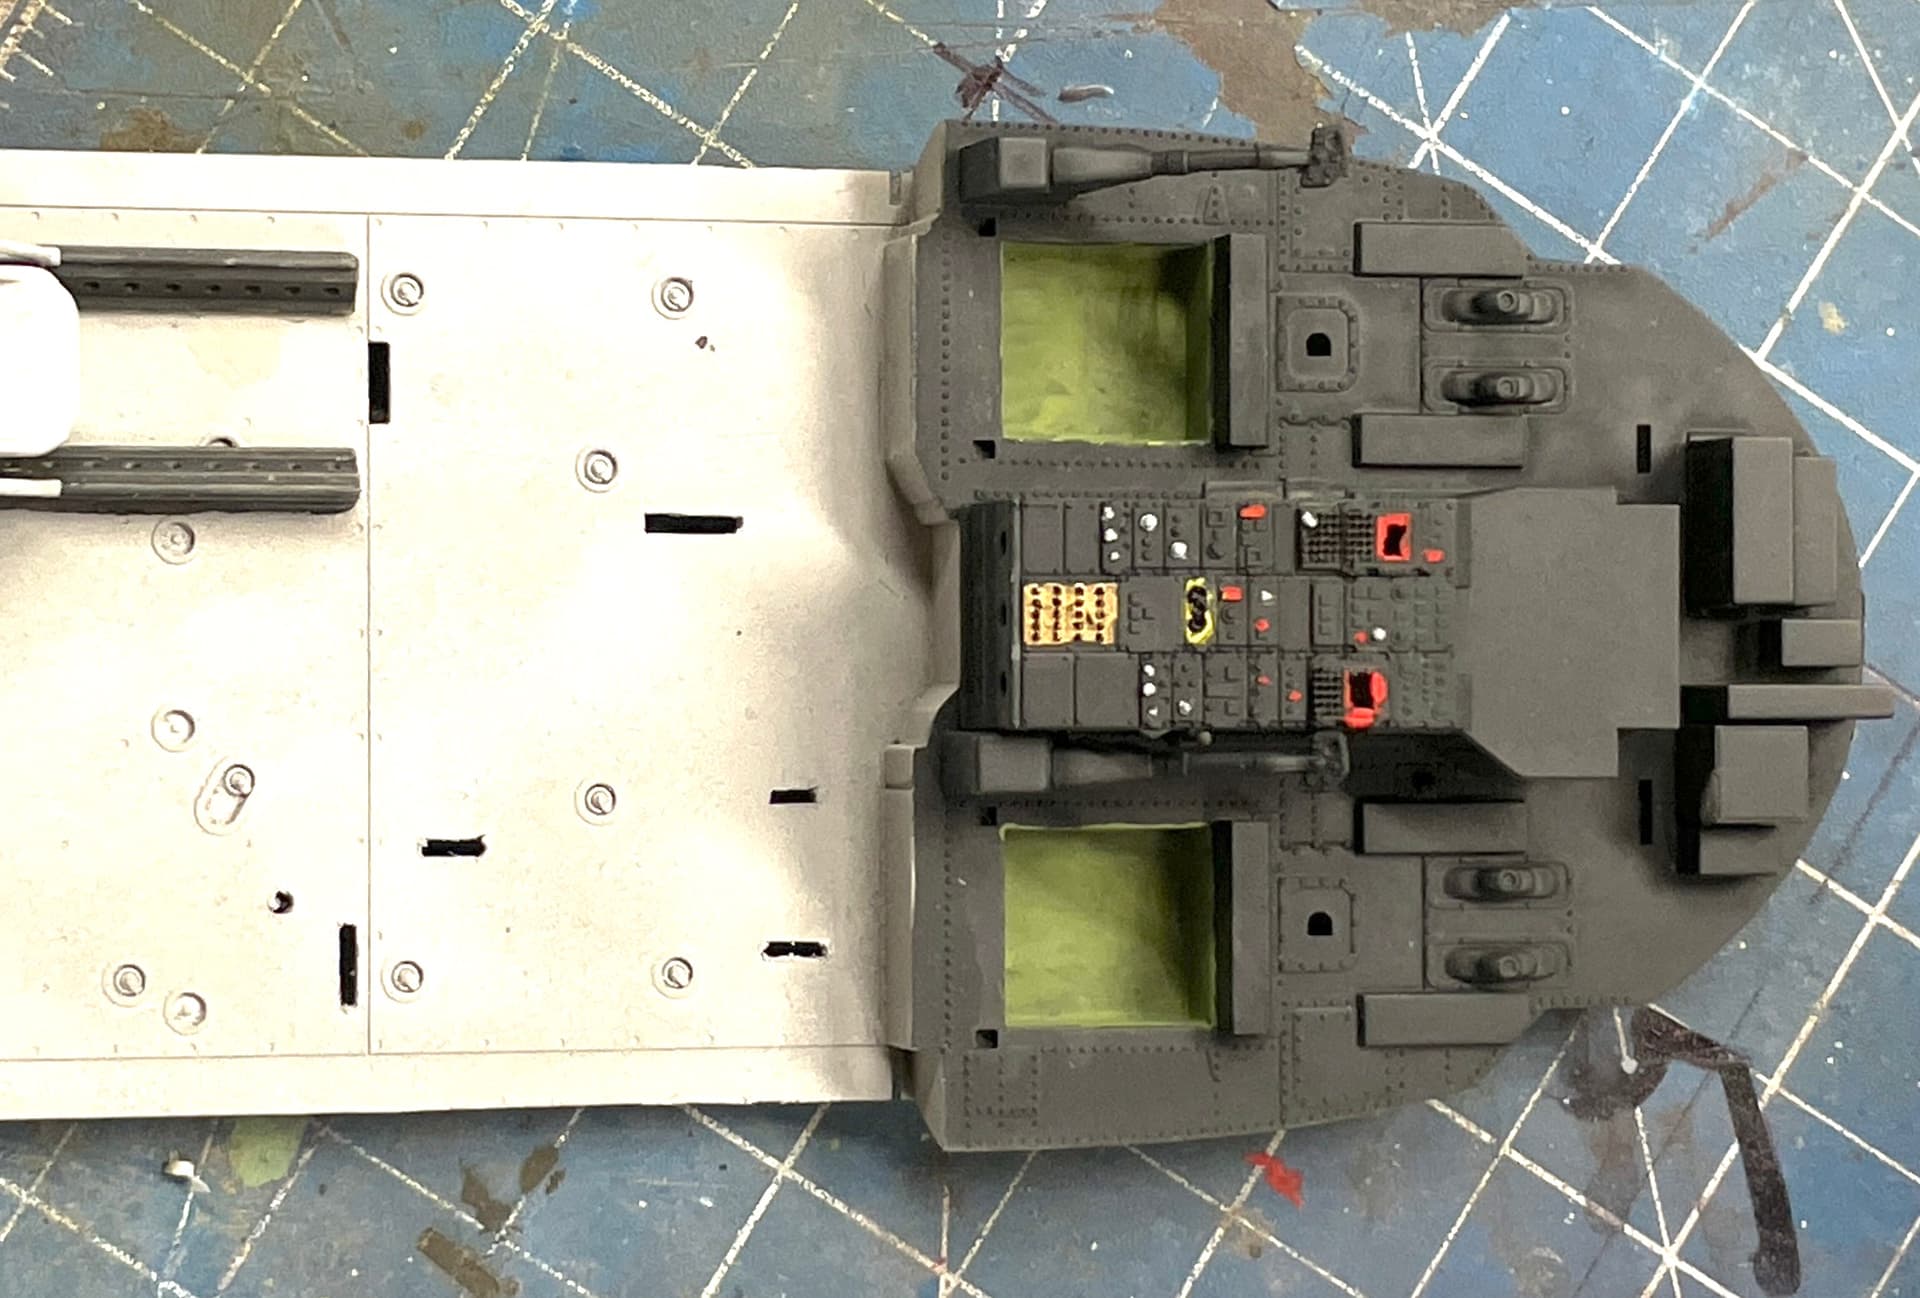
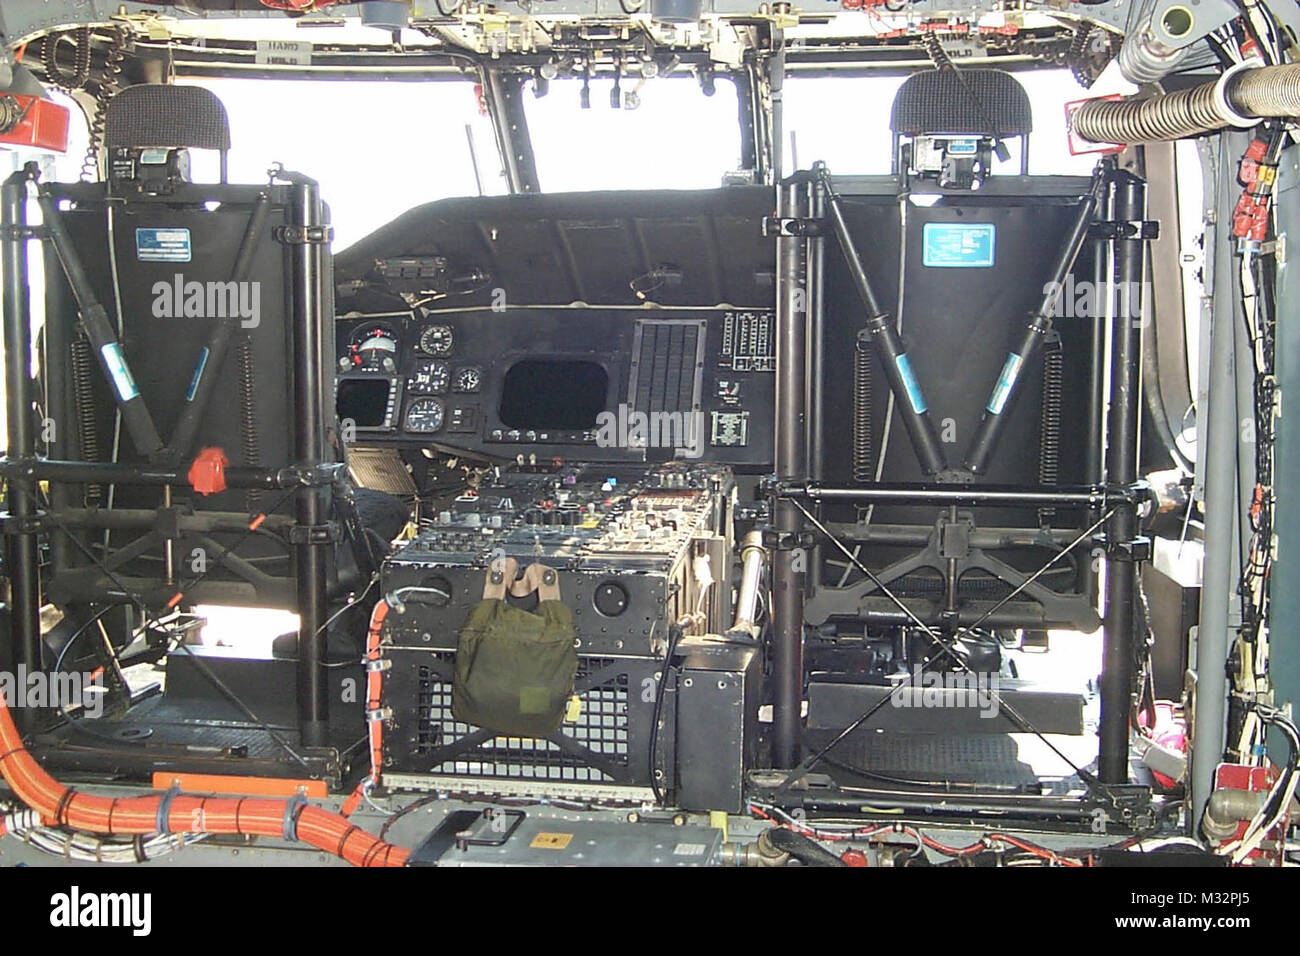
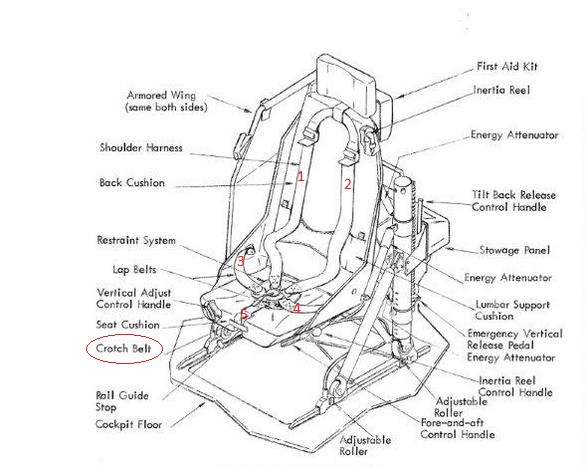
Here’s what I’m basing the coloration on. BTW: I use Nato Black instead of flat black.

Work will continue tomorrow. Being retired I get to work on stuff almost every day, although must stop work at 5:00 and no work on the weekends.

8 Likes

Its coming along great. Good to see it here as well.

Don’t know if I’ll add it… but I might not be able to help myself (AMS). Got a very little time in the shop, but did get the latest iteration of the HD33 rotor part cleaned up and checked. It’s still a tad off. The donut and its hole are a scosh to far out so the hole didn’t align with the kit piece. If I want to make this available to others it needs to be just about perfect, so I’m printing another modified bunch (Ver 3.0). Notice tht sink hole in the plastic part.

And I did some more fine detailing on the center console. I’m thinking I’ve gone as far as I can with this part. And now I have to decide to add some greeblies in those equipment boxes under the seats.

I’ve also been introduced to some terrific resin details by ResKit that I’m having my LHS order for me. Actually the proprietor showed them to me. I’m getting them. Since I’m gong nuts on this model I might as well go all-the-way nuts.

2 Likes

Good deal. Of note, if you get the Res/Kit SH-60 rotor head set, it replaces part HD33 with their own parts, so you may not need to continue on it.

Here is a link showing the Res/Kit Naval H-60 sets.

1 Like

I’m going for all four pieces. I’m only getting the right engine since I’ll only open that one side.

Res/Kit also does a Naval H-60 Wheel Set. You may want to get them too.

Res Kit SH-60 Wheels

Since I did order the rotor head, your point is correct, but, I still perfected the HD33 piece as best I could using the print method available to me, so I will have those parts and can make them available to folks who rather spend a couple of bucks (USD) than to shell out $35 for the complete assembly. If anyone is interested in getting this part, let me know via eMail, mmarcovitch@gmail.com

To that point, my latest mods to the part brought the holes in perfect alignment, got the size matched to the blade lock cylinders, and further refined the overall shape of the other end with the arm with the pin on it. Here is it in position with the mating kit’s part.

If I could only print without those pesky supports, the part would be essentially perfect.

Here’s the fit of the correct part included with the kit.

I’m going fully assemble the kit’s rotor just for fun and compare it to the ResKit parts.

I finished up work on the weapons console. I didn’t like how the plastic hand grabs were fitting so I made some out of 0.022" phosphor bronze.

I chose to add the decals using a lot of Micro Sol and Micro Set after applying some Tamiya clear to provide a better surface.

I then glued the completed console onto the deck after scraping off the paint in the glue area for a good connection.

That finishes up the work for the week. See y’all on Monday. And Happy Halloween!!!

3 Likes

The sonar panel is looking nice. Good job on it so far.

Thanks Gino!

Finished the console area with some flat clear, added color to the underneath area, a coupld of floor details and the right hand bulkheads. I needed to mix more of the blue wall color. It’s not an easy mix of blues and a bit of yellow. I adjusted lightness with white. I made enough so I could airbrush it. I reuse all my screw-top airbrush bottles. After cleaning any dried paint with MEK, I plop it in the ultrasonic cleaner for 10 minutes and the bottle is sparkling.

I started building the cockpit seating. Again, getting the little pins on the seat bucket to engage in the spots on the seat frame was a pain in the behind. I wised up and drilled some small 0.022" holes for the seat’s pins to find and it was much, much easier.

The angle braces for these seats presented another more tractable problem; two out of four of them broke in the same place. I first attempted to glue it together. First supporting it in some clay with solvent cement.

Didn’t work. Second attempt: glue it together with Bondic UV resin.

Didn’t really work either. Plan B: make my own out of various pieces of wire.

I have the tools to work with fine metal pieces. I solder all the PE together on my 1:350 ship model antenna towers, so this shouldn’t be too bad.

Measured, bent and cut using one of the two good ones as a guide. I have a ceramic soldering pad that lets you pin things in position.

To do this effectively requires one more tool, my resistance soldering unit (RSU). This is not a cheap tool (actually my most expensive), but what it does is irreplaceable. It applies high current and low voltage between the tweezer electrodes that heats only the joint area controlled by a foot pedal. When the solder melts you release the pedal, but keep pressure on the tweezers to hold the joint together until the solder solidifies. I use 63/37 eutectic solder which goes from liquid to solder instantly with no slushy stage. It’s great for electronic work since the slushy stage creates a crystal structure that can be resistive (cold solder joint), but it’s also good for metal work since it solidifies so fast.

Here was the first one I did, but before I added the last thin part on the bottom. The wire is 0.032" and 0.022".

I bulked out the joint areas with some Bondic, but am not going to attempt to add any more detail to this part. The metal frame is held to the seat with gel CA.

And here’s the first complete seat with a plastic one on one side and the metal frame on the other. I have to make another one of these, since I broke two. I flatten the metal at the joint areas with a pliers and some pressure to increase the contact area.

When the seat is painted, the differences will not be too obvious. I suppost I could add a few drops of Bondic to simulate the fasteners at the junctions. Tomorrow, I’ll build the other one.

Remember: IT’S NOT WHETHER YOU SCREW UP, IT’S HOW YOU RECOVER THAT DETERNINES TRUE SUCCESS!"

4 Likes

Good recovery on the seat frame. Color on the rear compartment walls looks good. Nice job.

1 Like

Thanks Gino! Got both seats fixed, painted and ready for final install. I painted more NATO black items that called out. The ResKit rotor head and tail rotor kits are now in my posession. The engine hasn’t arrived yet. I got more commission 3D printing jobs. The model club has dubbed me, “The Master Fabricator” and they’re taking advantage of it. Included in the batch of odd jobs are 1/72 handwheels for a 105mm cannon mounted in a M3 Priest, a set of 1/48 armored fuel caps, a 1/48 Pennsylvania RR station sign and a complete replacement pilot on both ends of a New Haven RR GE “Jet” electric passenger loco. The first pilot is coming off the machine in a couple of minutes. I’ll have to take it to the owner to see if it fits and if any corrections need to be made to the design. The orginals are Zamac white metal castings that have completely crystalized and crumbling. Taking measurements from them was very difficult.

Onto the SH-60: Soldered another seat support system together and built both of the seats. Initially painted them the light gray, but then over-coated them with a mix of Allclad base aluminum with a little Allclad yellow aluminum. The real color is metal of some form or another, not paint. It’s paint in the passenger compartment, but not the cockpit.

I bit the bullet and decided to add some greeblies to the empty under-seat boxes. To facilitate getting stuff into them, I made some false floors out of some ABS sheet scrap. This way I can build the entire deal out of the model and put it in as an assembly.

I’ll paint them off the model and glue them in complete. This image shows the seats with their new colored frames.

The inside of that chamber was supposed to be flat black, but there’s a skin over it that completely conceals it. Oh well…

3 Likes

Looking good. I do the compartments under the pilots’ seats the same way. As to the pilot seats, they too are black, seat pan, frame, and cushions.


1 Like

Thanks! I have a picture that shows a different frame color.

It’s really not black. Actually I’m not sure what color that is.

1 Like

It looks like anodized black to me that has a lot of wear and rubs. If you look at the bottom rear of the seat pan where no one touches, it still looks flat black to me.

1 Like

I corrected the seat color. Can’t have inaccuracies like that, can we?

I also finished the black boxes below the seats and dry-brushed some wear on the cockpit floor.

I painted the seat frames NATO black with a bit of flat aluminum. I then painted the seats Tamiya red brown with some NATO black. Seats are still not glued in since the seat paint was not dry.

I also finished two of the three 3d printing jobs. The loco pilot came out terrific and I’m hoping that it will fit. The other was a very quick and simple job to print PRR station signs.

2 Likes

Had a nice long work session today and worked on several items at once. I’m continuing to work on the cabin and cockpit area. I installed the seats, sticks and pedals. There was a huge mold ejection stub that needed to removed on each pedals front side. The mounting point for the pedal was sorely under-designed. It was just a tiny little dimple. I drilled the dimples with 0.032" carbide bit. This gave the pedal some purchase and I glue them in with gel CA.

The sticks are painted with three kinds of black. NATO black for the grip area. Semi-gloss for the tubular part and rubber black for the boot at the bottom. I then picked out the buttons with a tooth pick to match the colors on my prototype pick.

Next up was the instrument panel. Like Gino, I decided to give the decal a try. When first laid on it was rather scary.

Before applying I put down a coat of Allclad water-based gloss. I painted the panel NATO black for decaling and it’s flat so the gloss was needed. I really didn’t have to paint it at all. I also applied some Micro-Sol to the gloss. After application I coated it with Micro-set, and did this at least three times.

This image was an intermediate shot with about two applications of setting solution.

I went back and poked some holes and slices in areas that really needed some more help. And here’s what it looks like now. It’s snugged down pretty well, but I really don’t like how the dial gauges distorted.

I will go back and selectively apply matte finish to everything except the CRT and guage faces. I might have been better to scrape all the raised details off before applying the decal. Oh well…

Next up was the sonar module. I have a great picture of it so I was able to match the coloration closely. The piece glues into the model at this stage by just two legs of the stand. It’s a very dubious connection.

And then this happened!

While I could have drilled the broken halves with a 0.010" drill and pinned it with guitar string steel, but I chose, instead, to build another wire assmbly. Once I found out how quickly I could cobble these together with the RSU, I just got to work and did this.

After trimming to match the old stand, I CA’d the sonar assembly into some re-drilled holes in the floor.

Once again, dodged a bullet.

See y’all tomorrow…

3 Likes

Looking pretty good. I didn’t really have the issues you had with the decals. Mine settled down pretty well.

Have you seen my 1/32 UH-34D build/conversion yet?

1 Like

Just read the thread. I commented there, but will say that you’re putting undo pressure on me. It’s a great job, and you’re more deranged than I am with the ribbing and gussets on the interior wall. I’m well aware about how much “fun” it can be when fitting small pieces between big pieces. I use the digital calipers as a gauge to cut the intervening pieces.

1 Like

Moving ahead on the interior. I used some clear flat on the non-gauge areas of the instrument panel and built the assembly and installed it. I added two more interior/exterior walls after painting the blue trim around the window next to the sonar station. I added some more small details which sometimes cause more stress than they’re worth. I then went to the hobby shop to drop off the commission work I was doing including 3D printing some very small 1/72, 105mm Howitzer hand wheels. They were the smallest parts I ever printed.

Other than the “warped” “steam gauges”, I agree with Gino that the decal looks okay.

This was one of those small parts that should have been a breeze to put in, but it wasn’t going in. I then found that there was one of those ejection pin huge pieces sticking out on the bottom keeping it from settling in. Once i removed it, things went better.

Picked up the remaining ResKit parts at the hobby shop. I was very pleased with the engine kit where it calls out in detail all the piping that makes turbine engines so interesting. I now have four more complicated sub-kits: Main Rotor, Tail Rotor, Rt T700 Engine and the articulated tail joint.

3 Likes

Looking good. Of note, the seatbelts should be black too, including the circular buckle, with silver adjusters.

MH-60R, but the same belts.

Same for the sonar operator’s seat, all black w/black seat belts.

Actually, all the seat belts are all black. KH also left part of the pilots belts off, they should be 5-point harnesses.
h-60 pilot seat

The rest of them are 4-point.

Lastly, you may want to paint the screens on the MFDs. When off, they are a dark, glossy color. I paint them black, then put a couple coats of clear green, the a couple of gloss. I don’t know why KH went grey on them.

Sonar panel MFD as well.

2 Likes