What areas should be mindful for modification?
1 Like
Make sure you fit the correct exhausts…
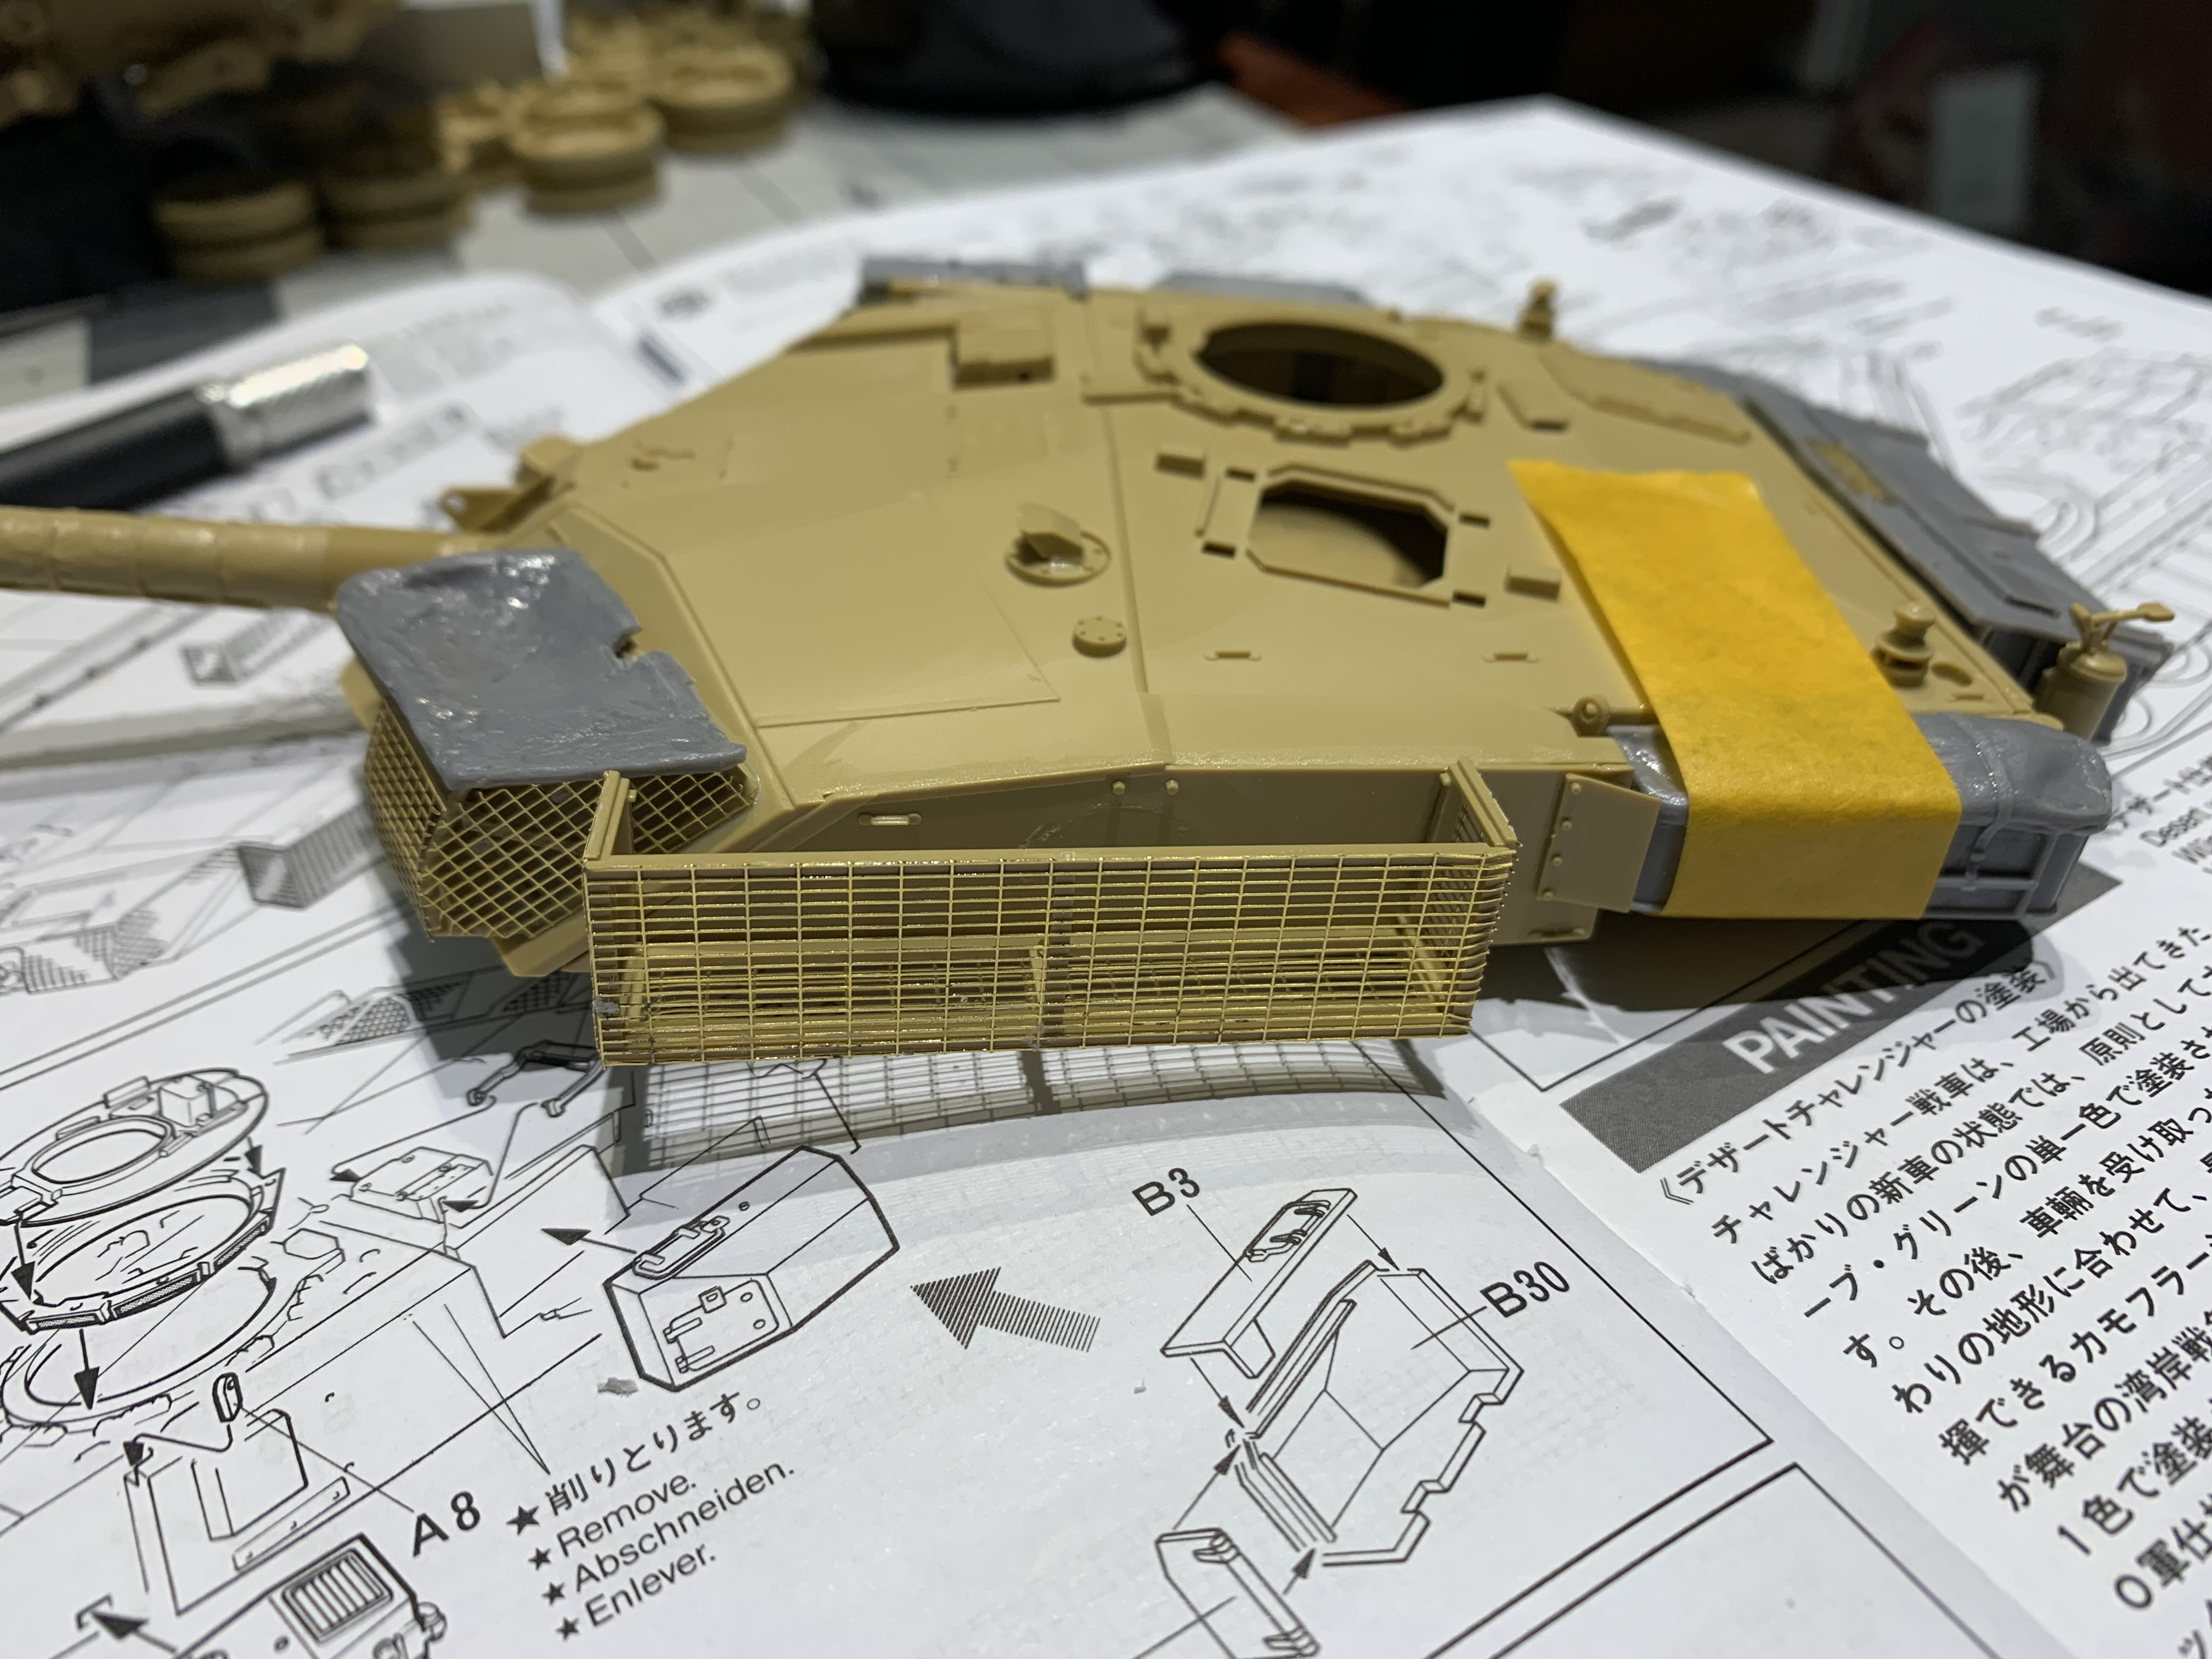
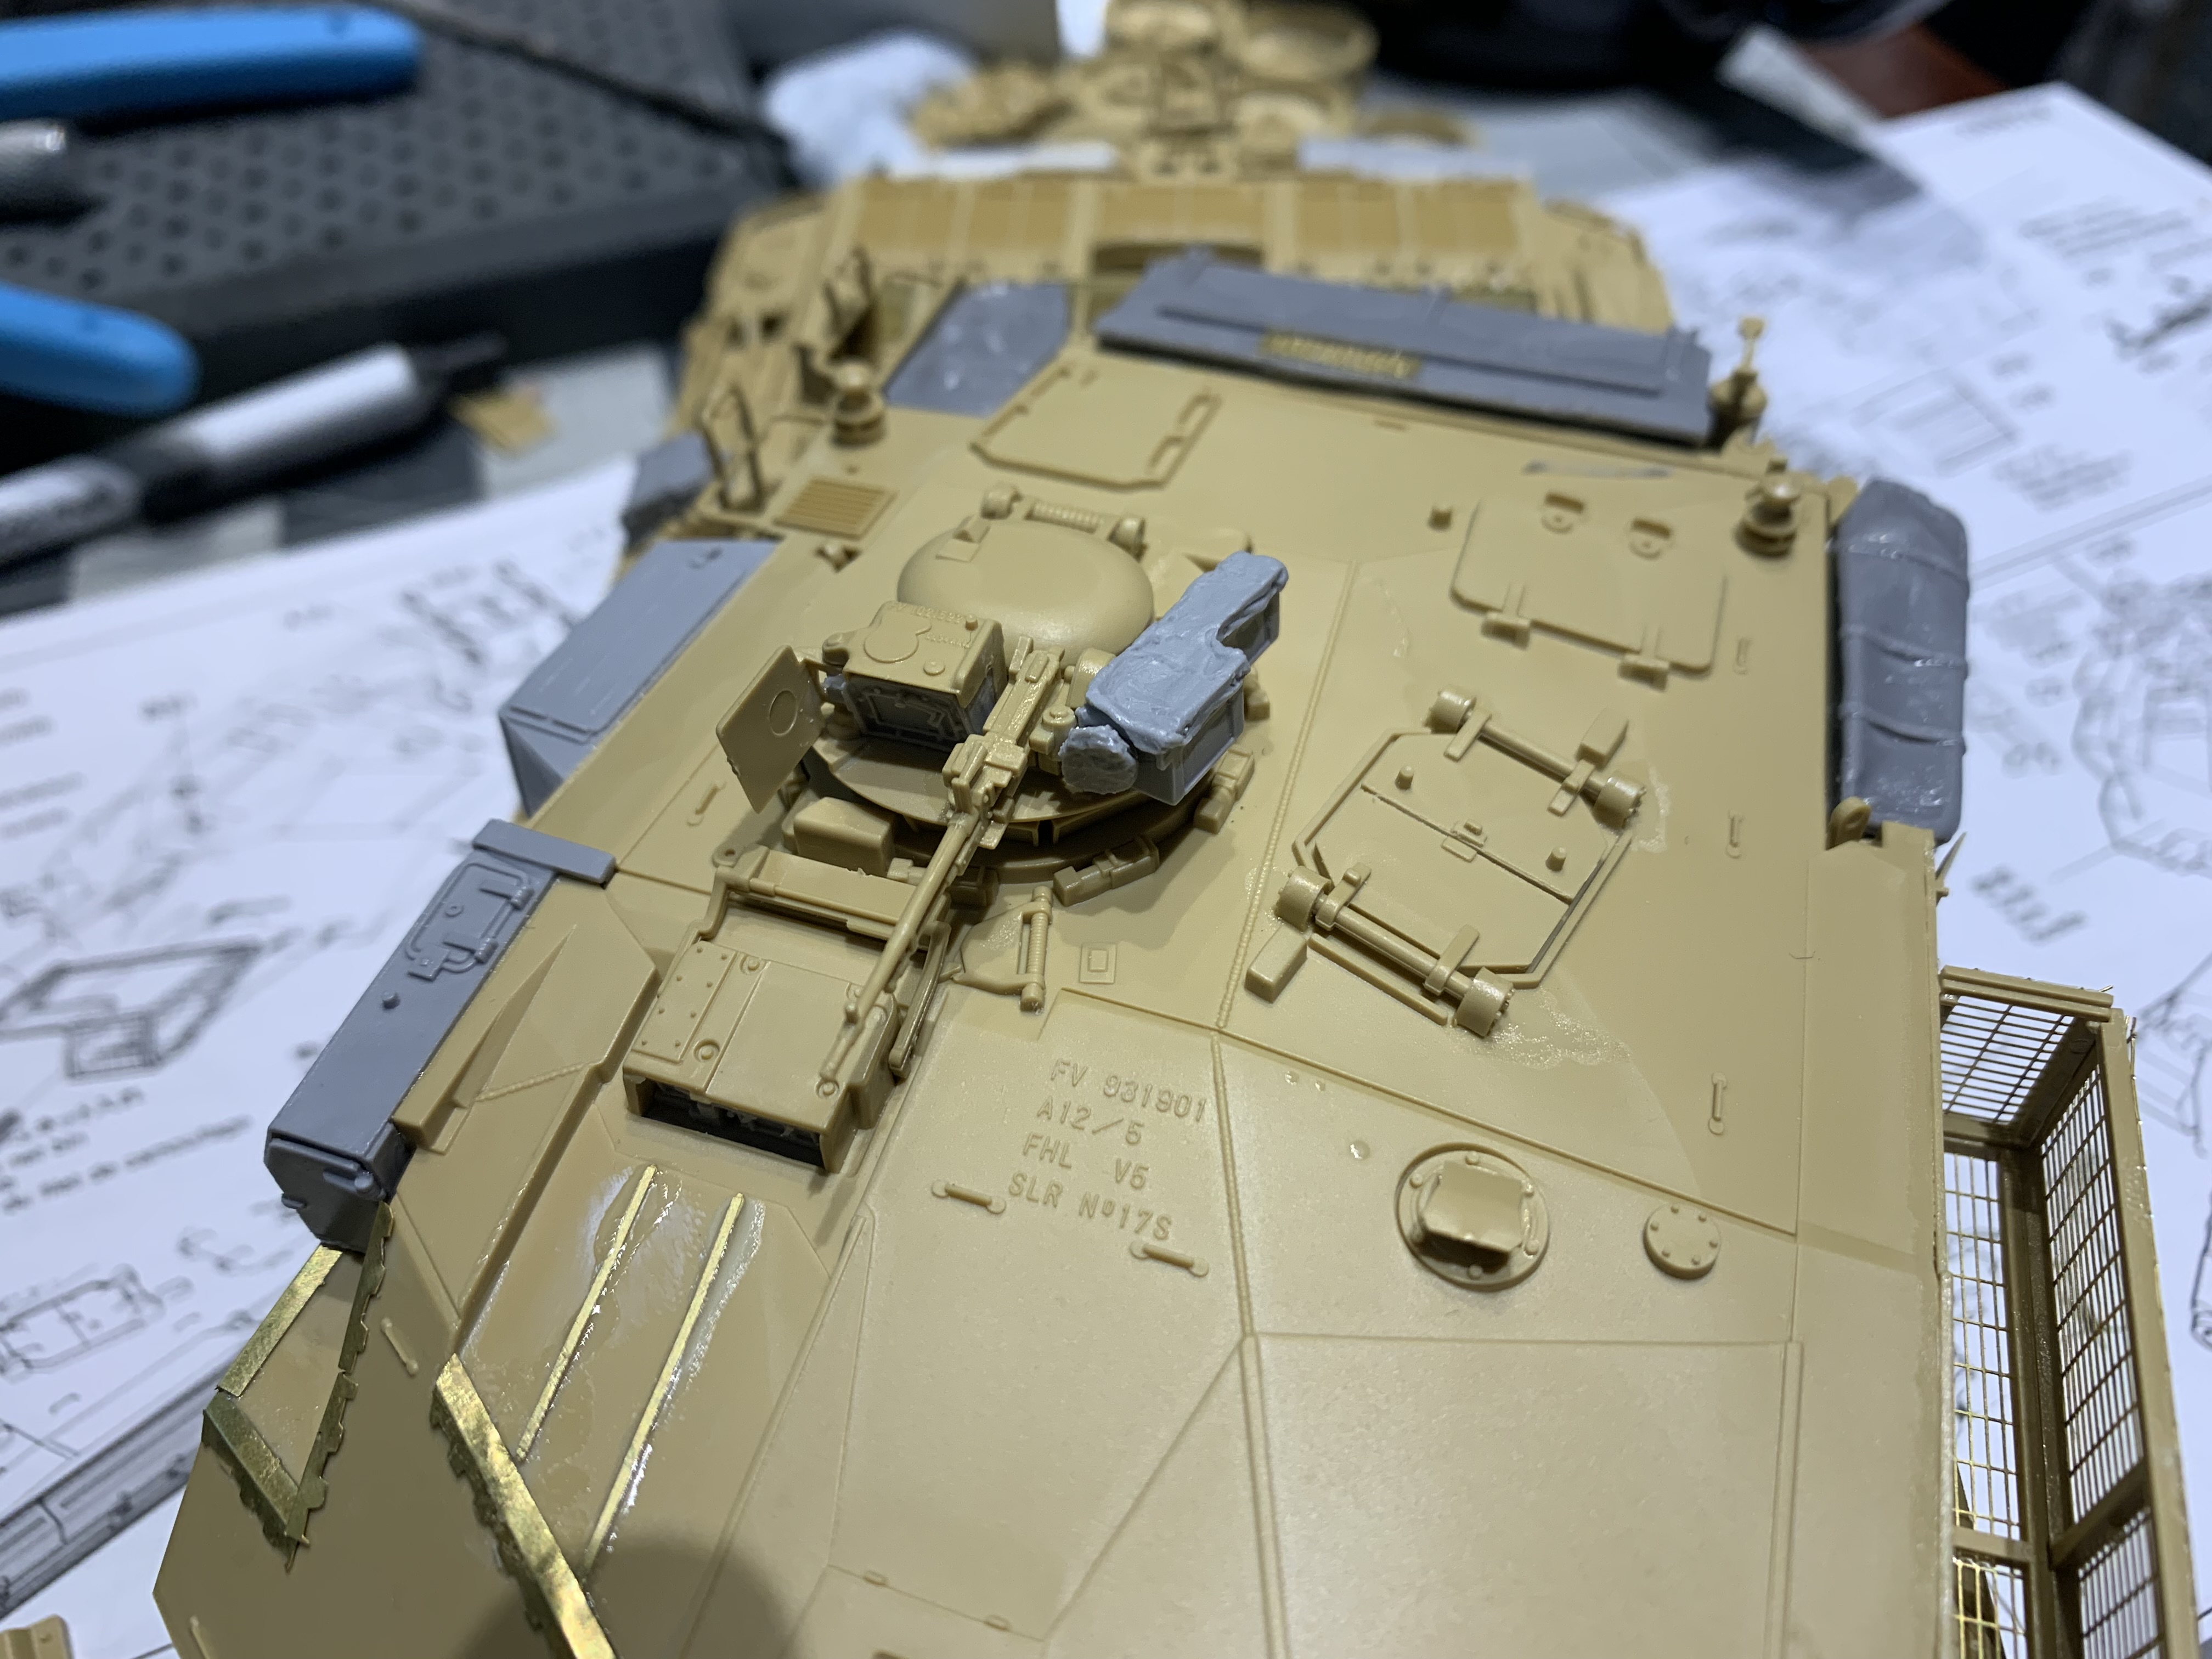
Turret rear bin is the wrong type ( it opens the wrong way).
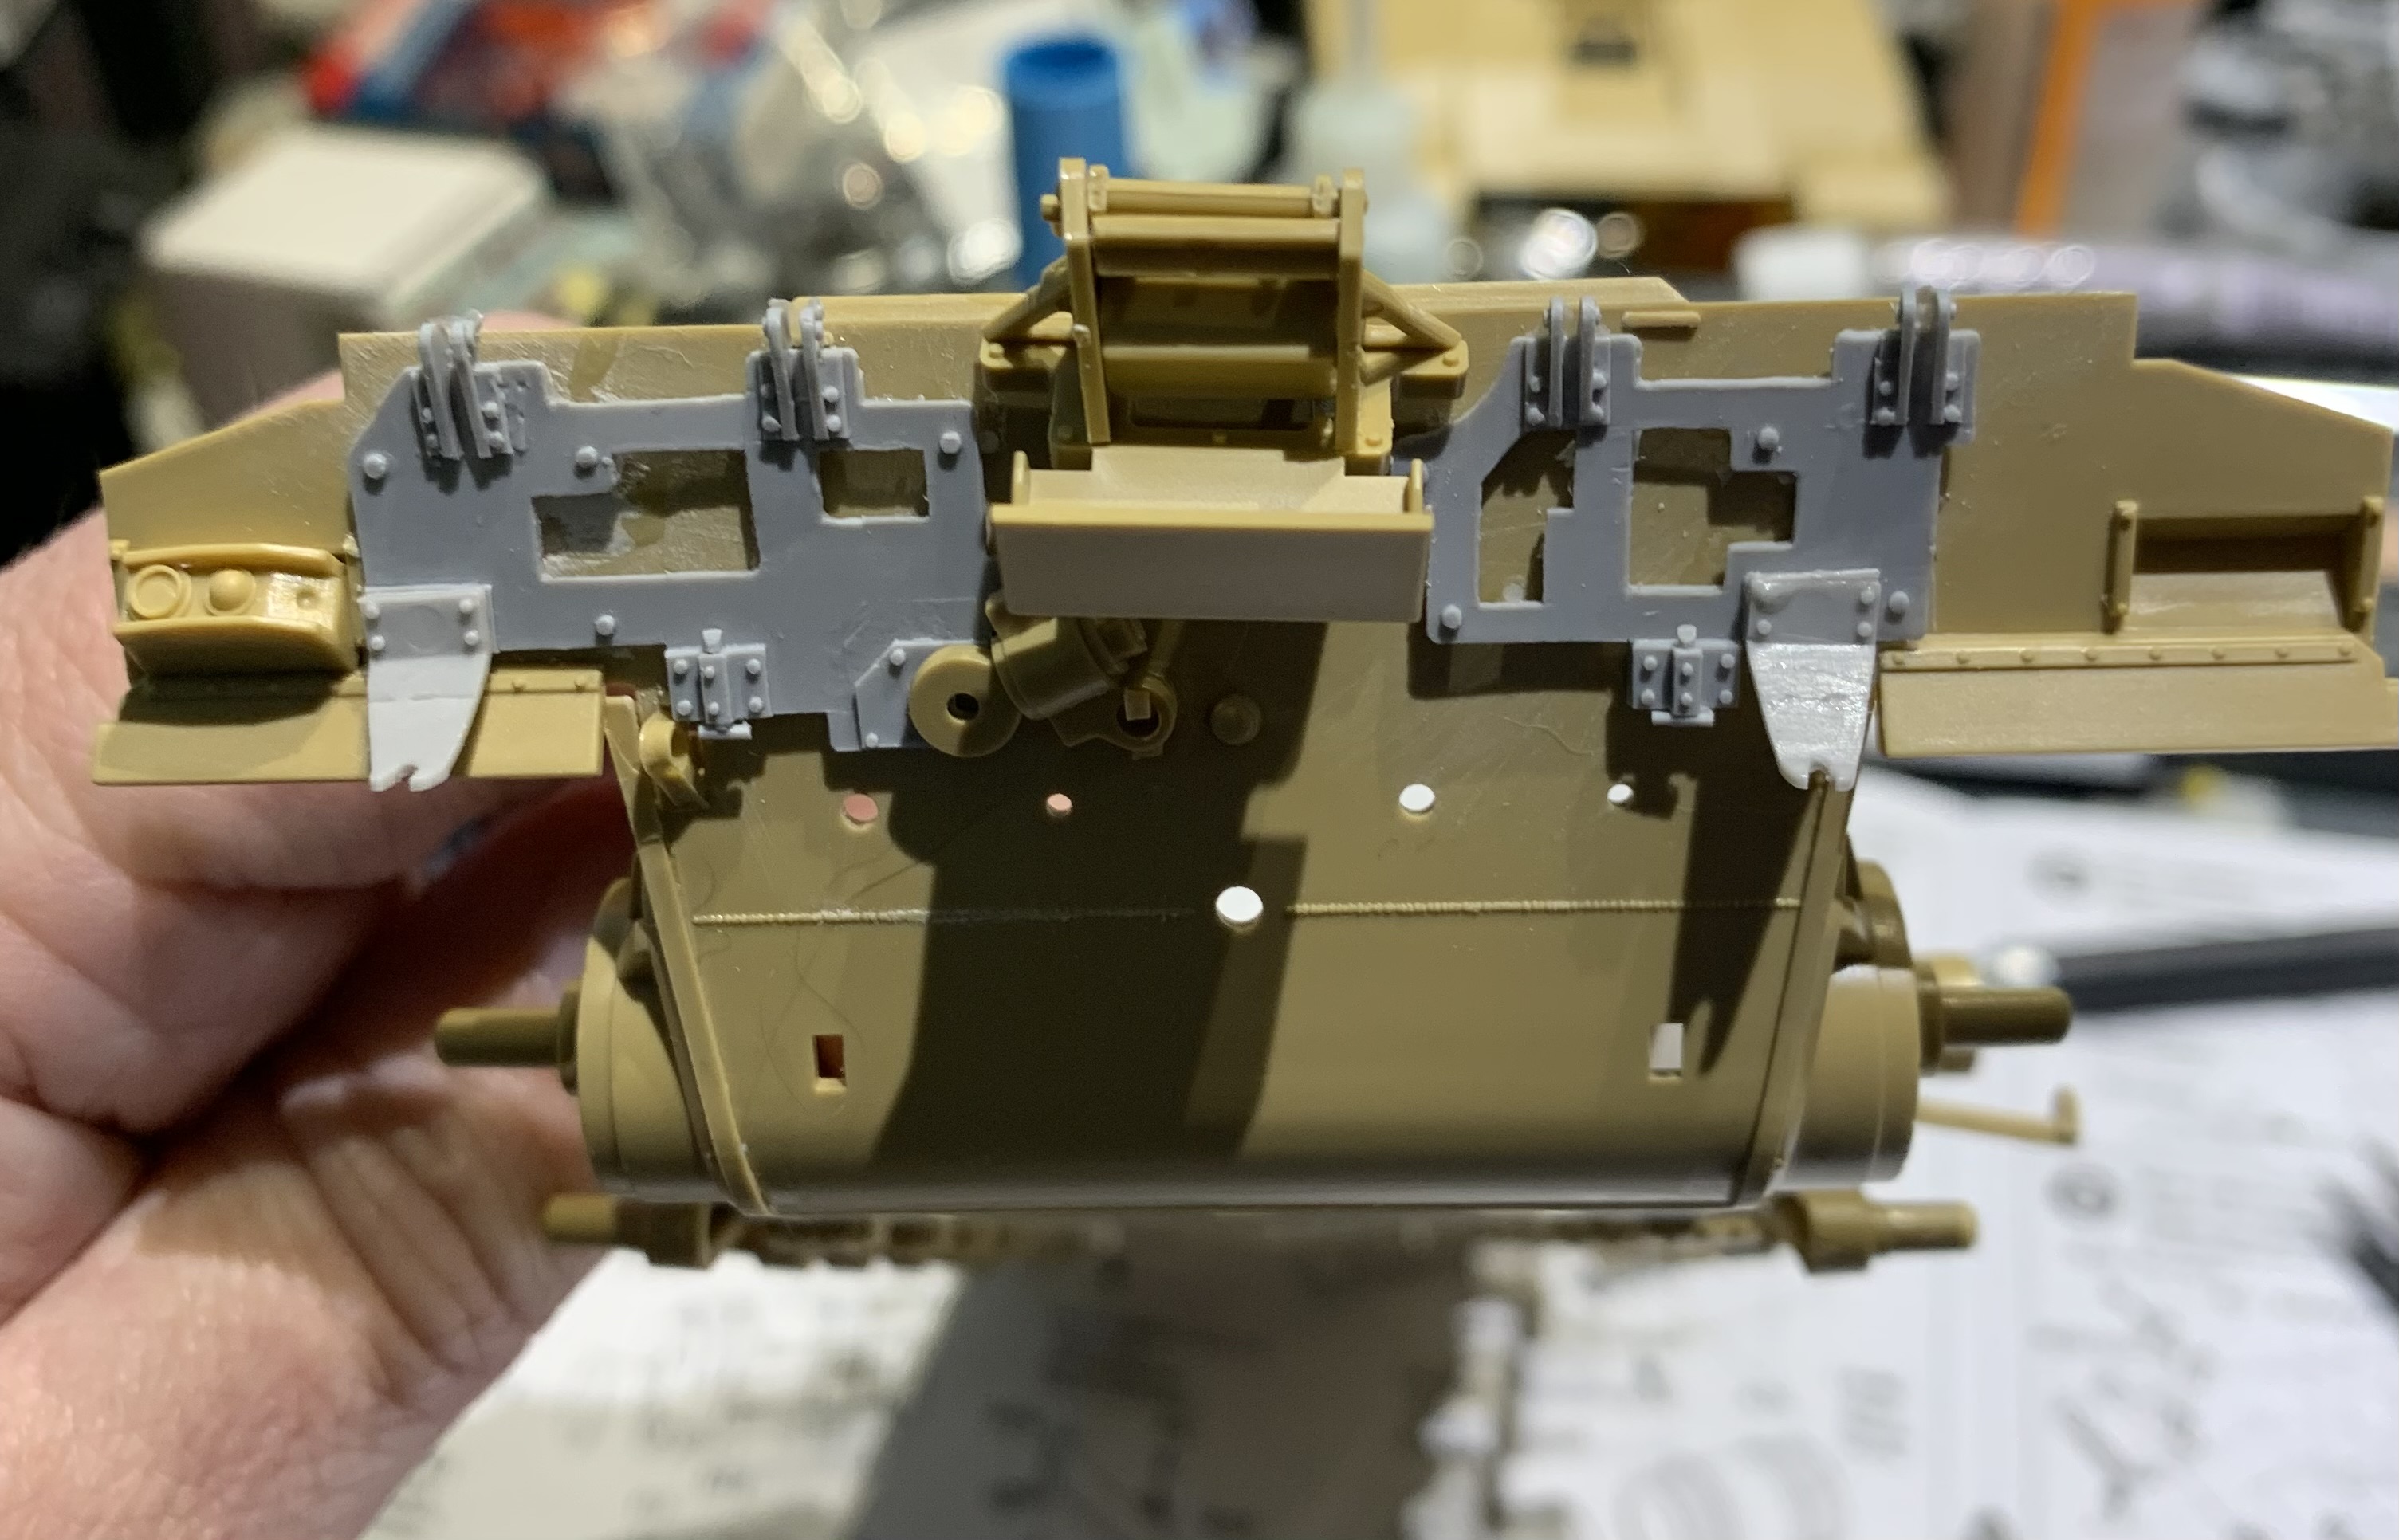
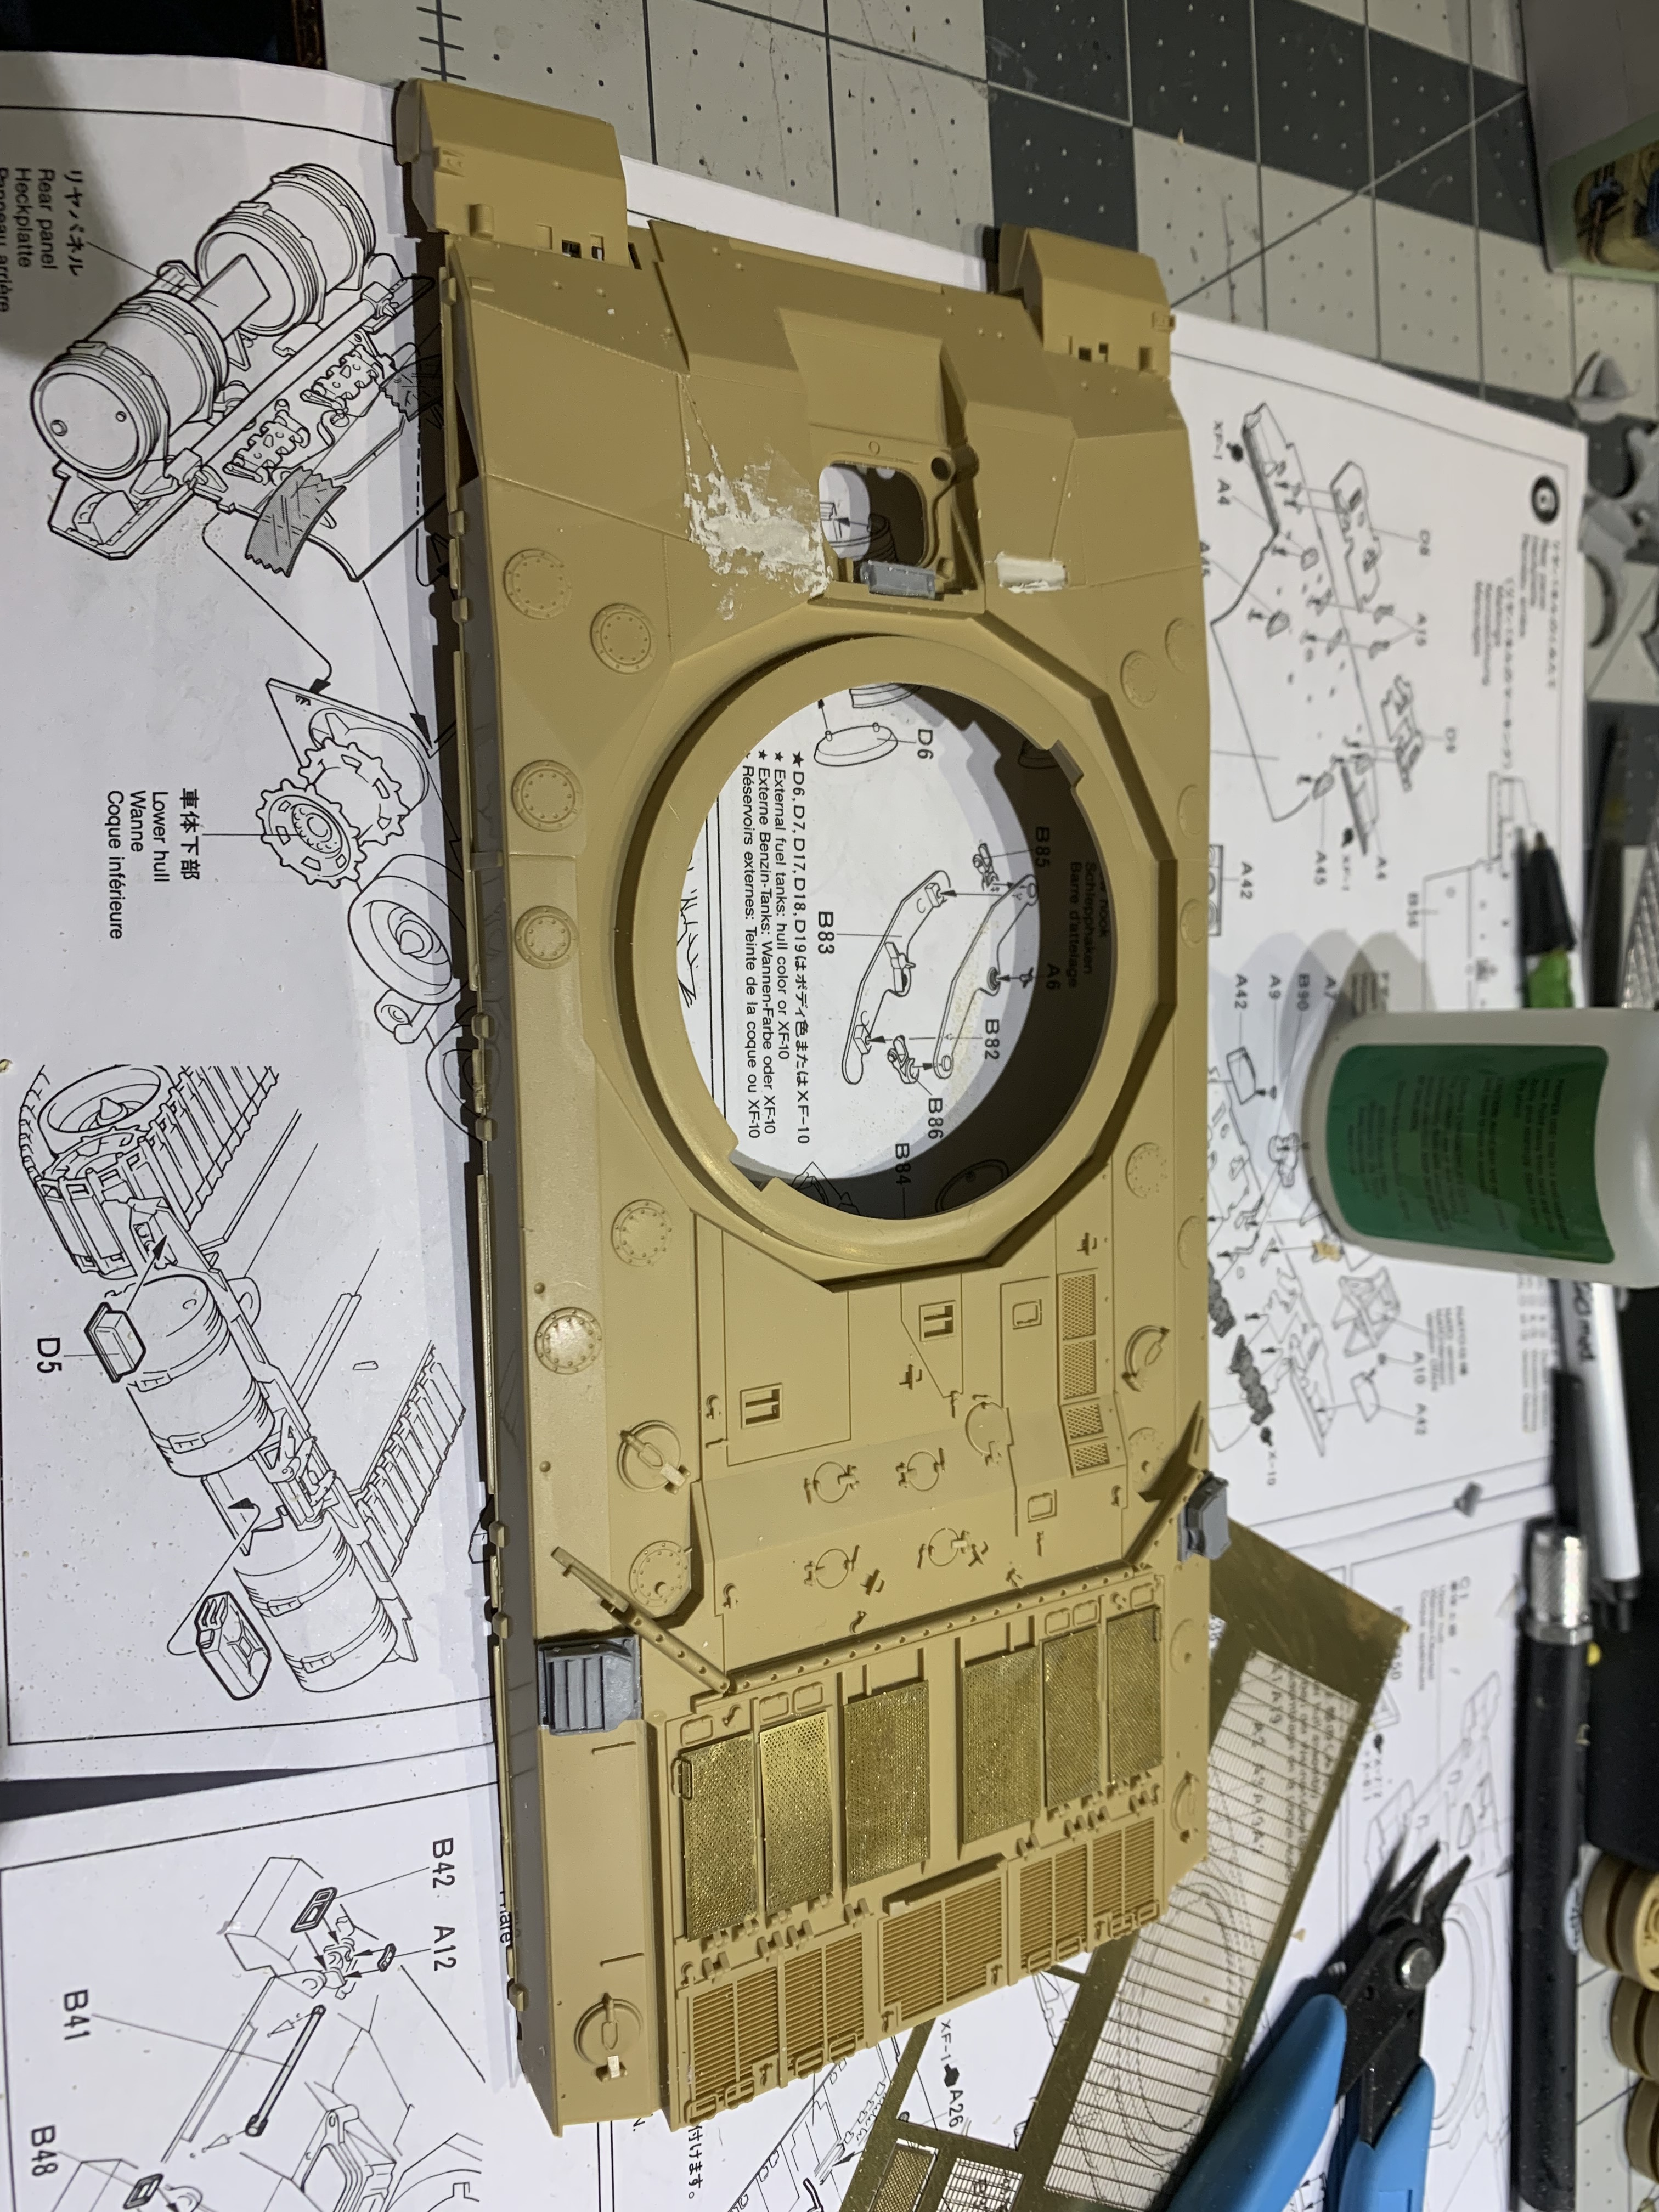
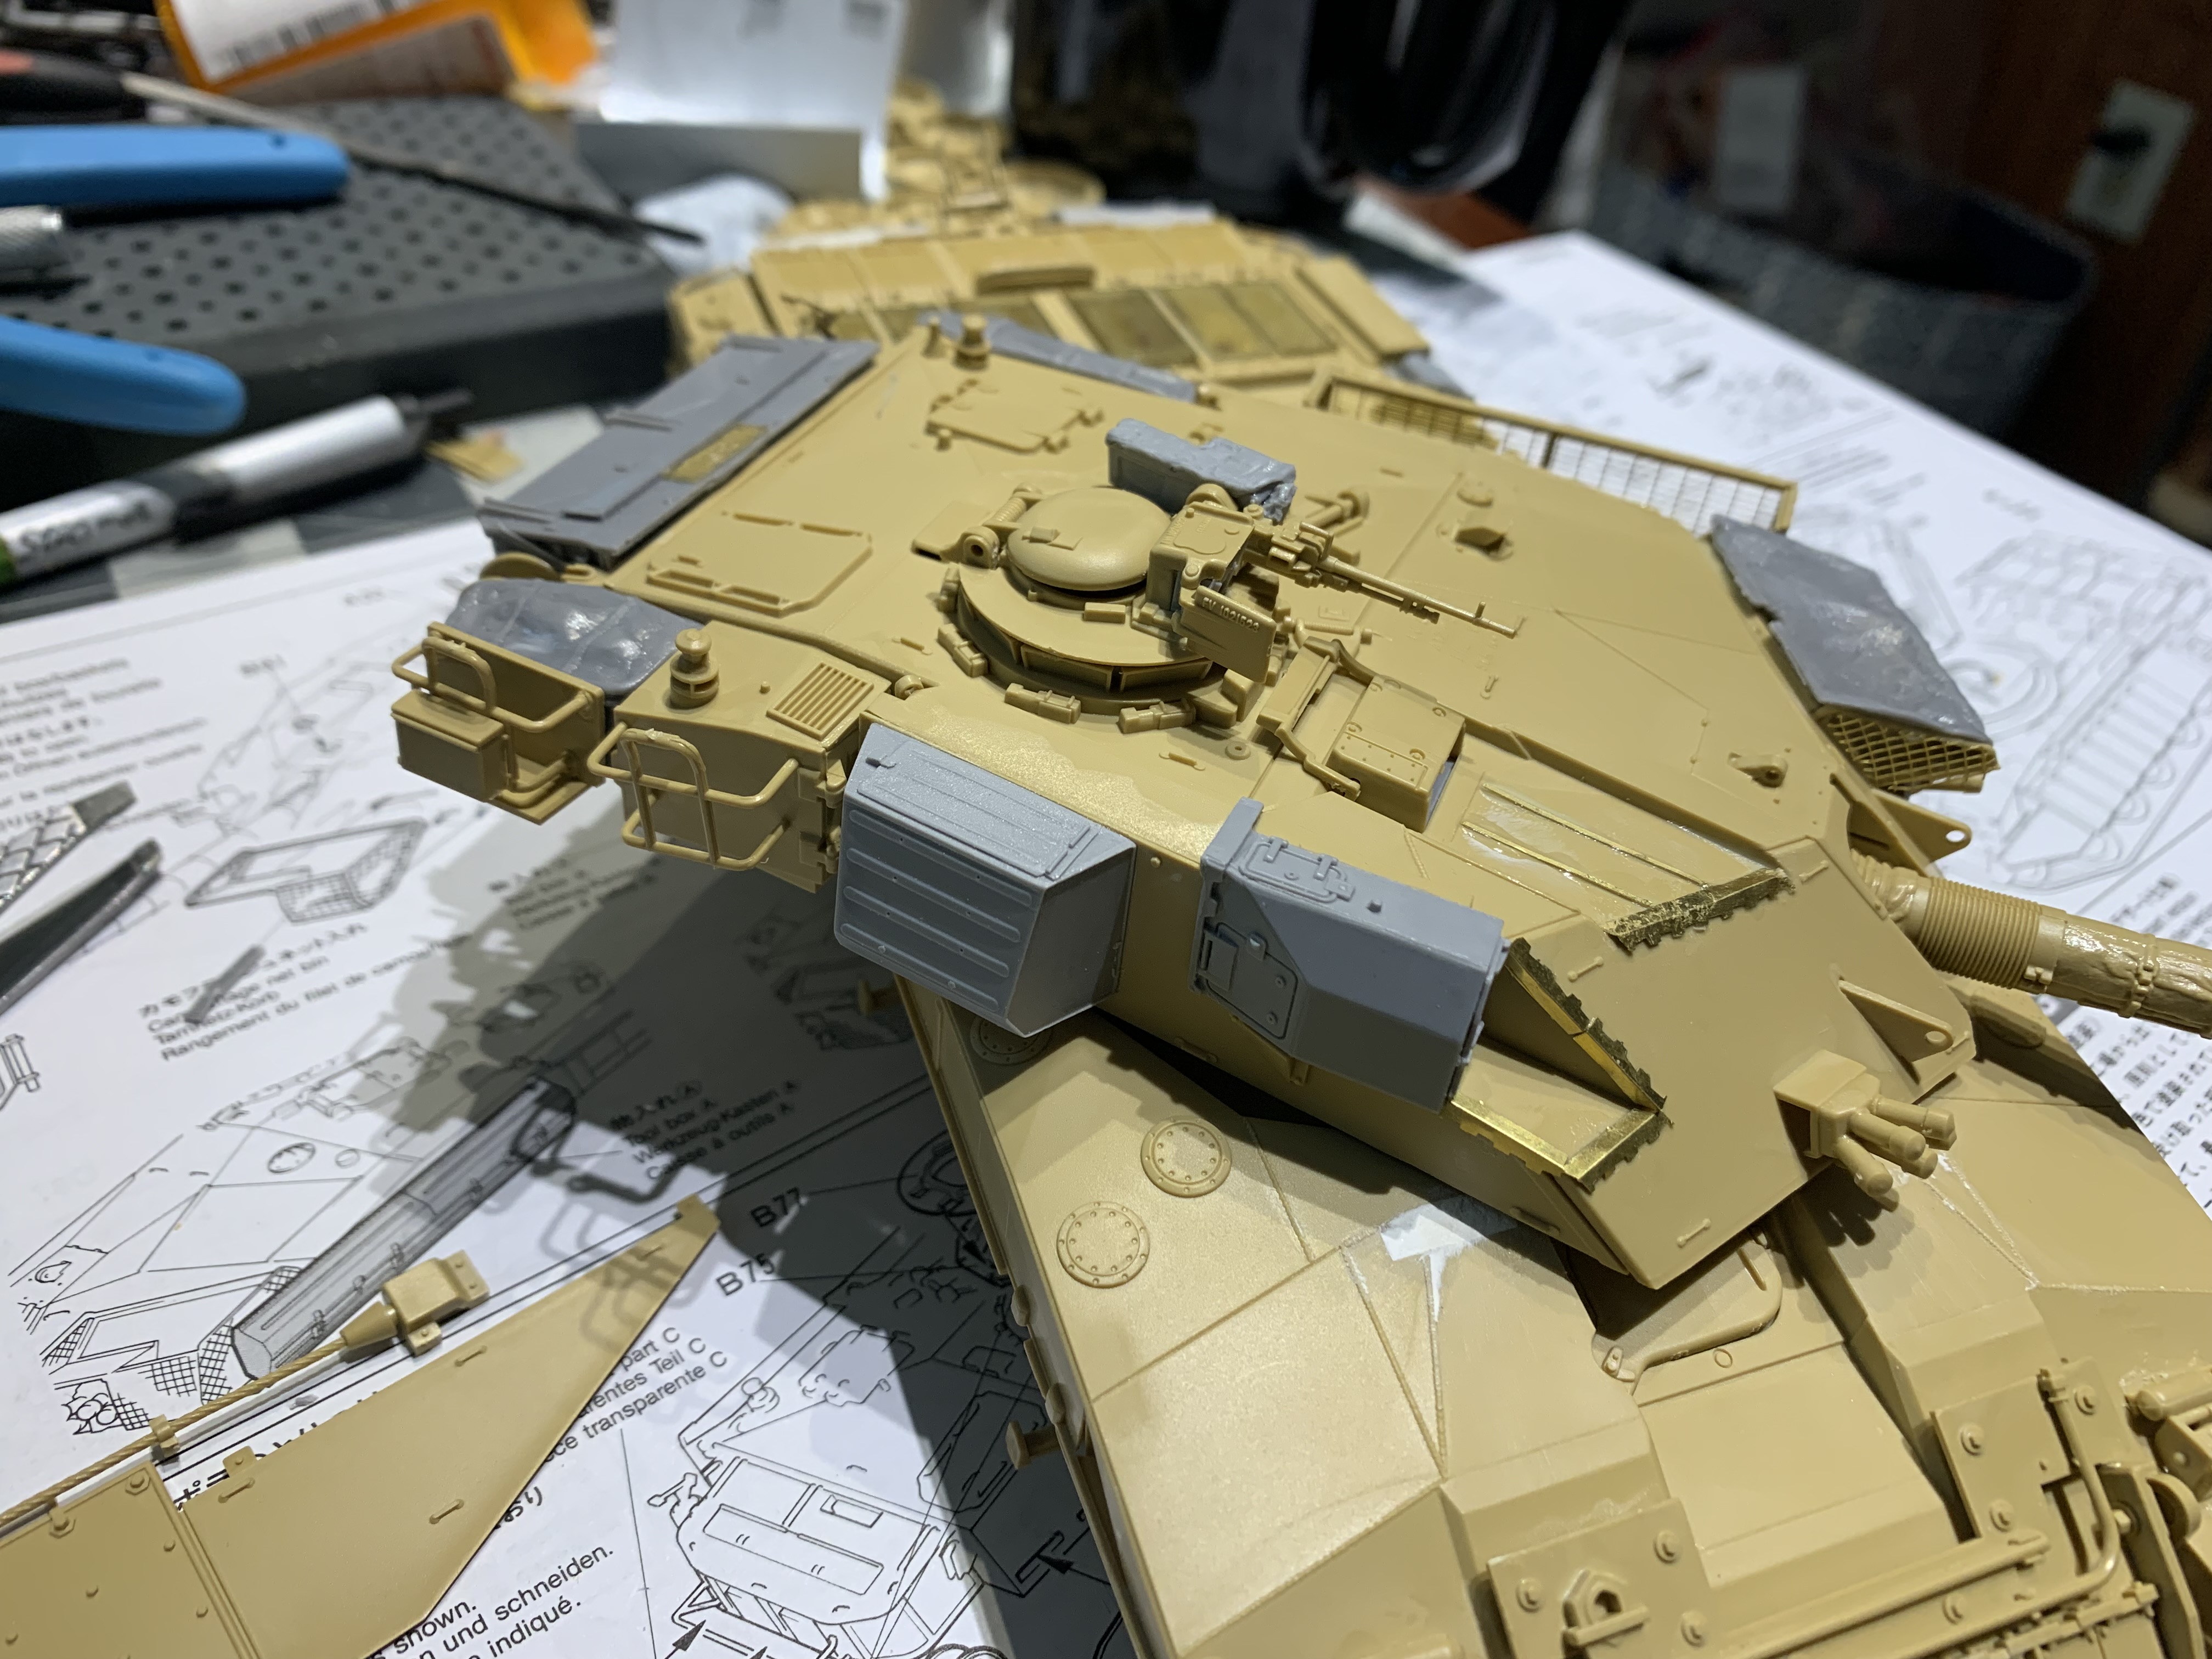
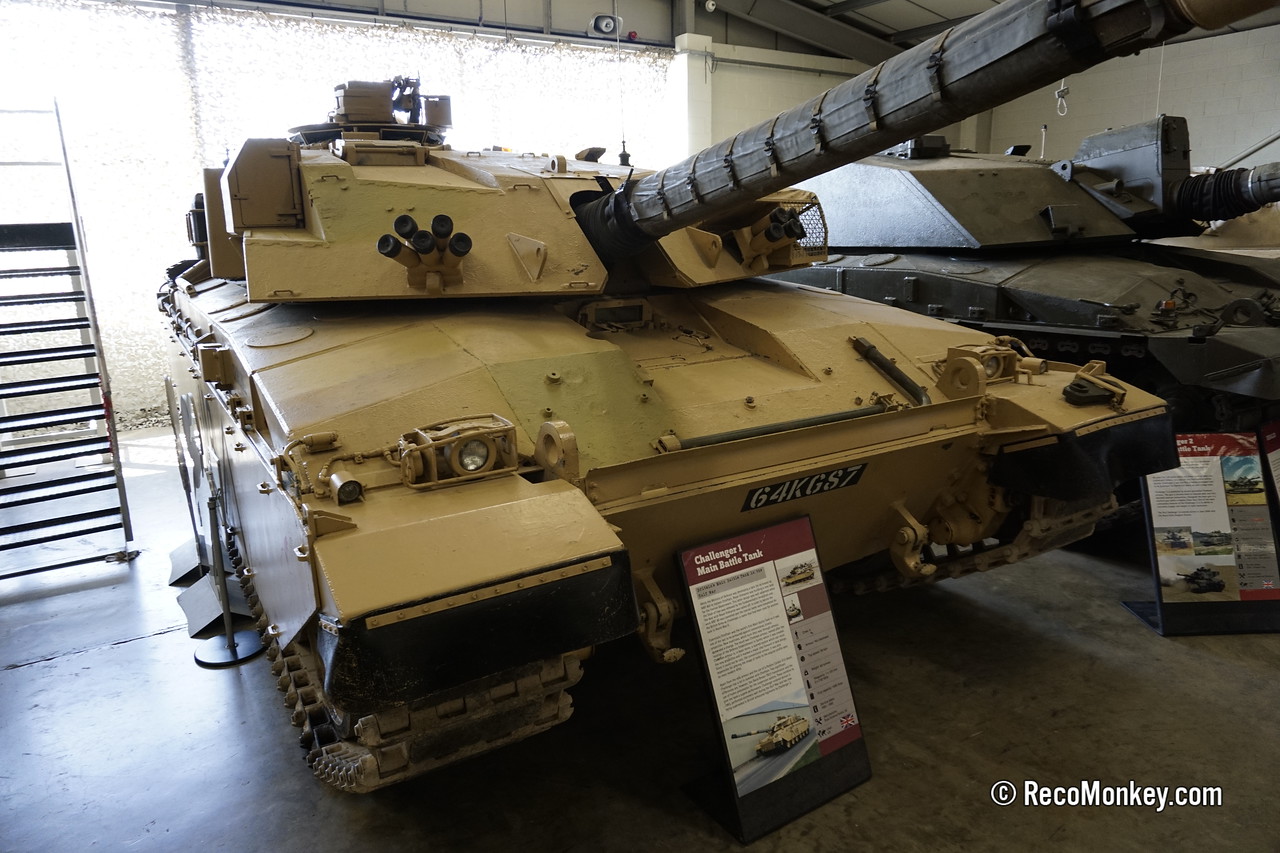
On the hull upper slope, on the left and right, there is what looks like a cutaway area, which then meets a raised area in front of the drivers cab. These 2 areas probably would not of been present on the GW1 Cr1s. Only the first (guestimate) 30 or maybe a few more had them…wagons after that had a flush upper hull front slope.
You can get small resin fill ins for those areas but the best and most realistic method is to cut out the raised area like Russ @rfbaer did in his Cr1 builds and what I did in my CTT build, and then make a new section with white plasticard. (It’s actually pretty straightforward)
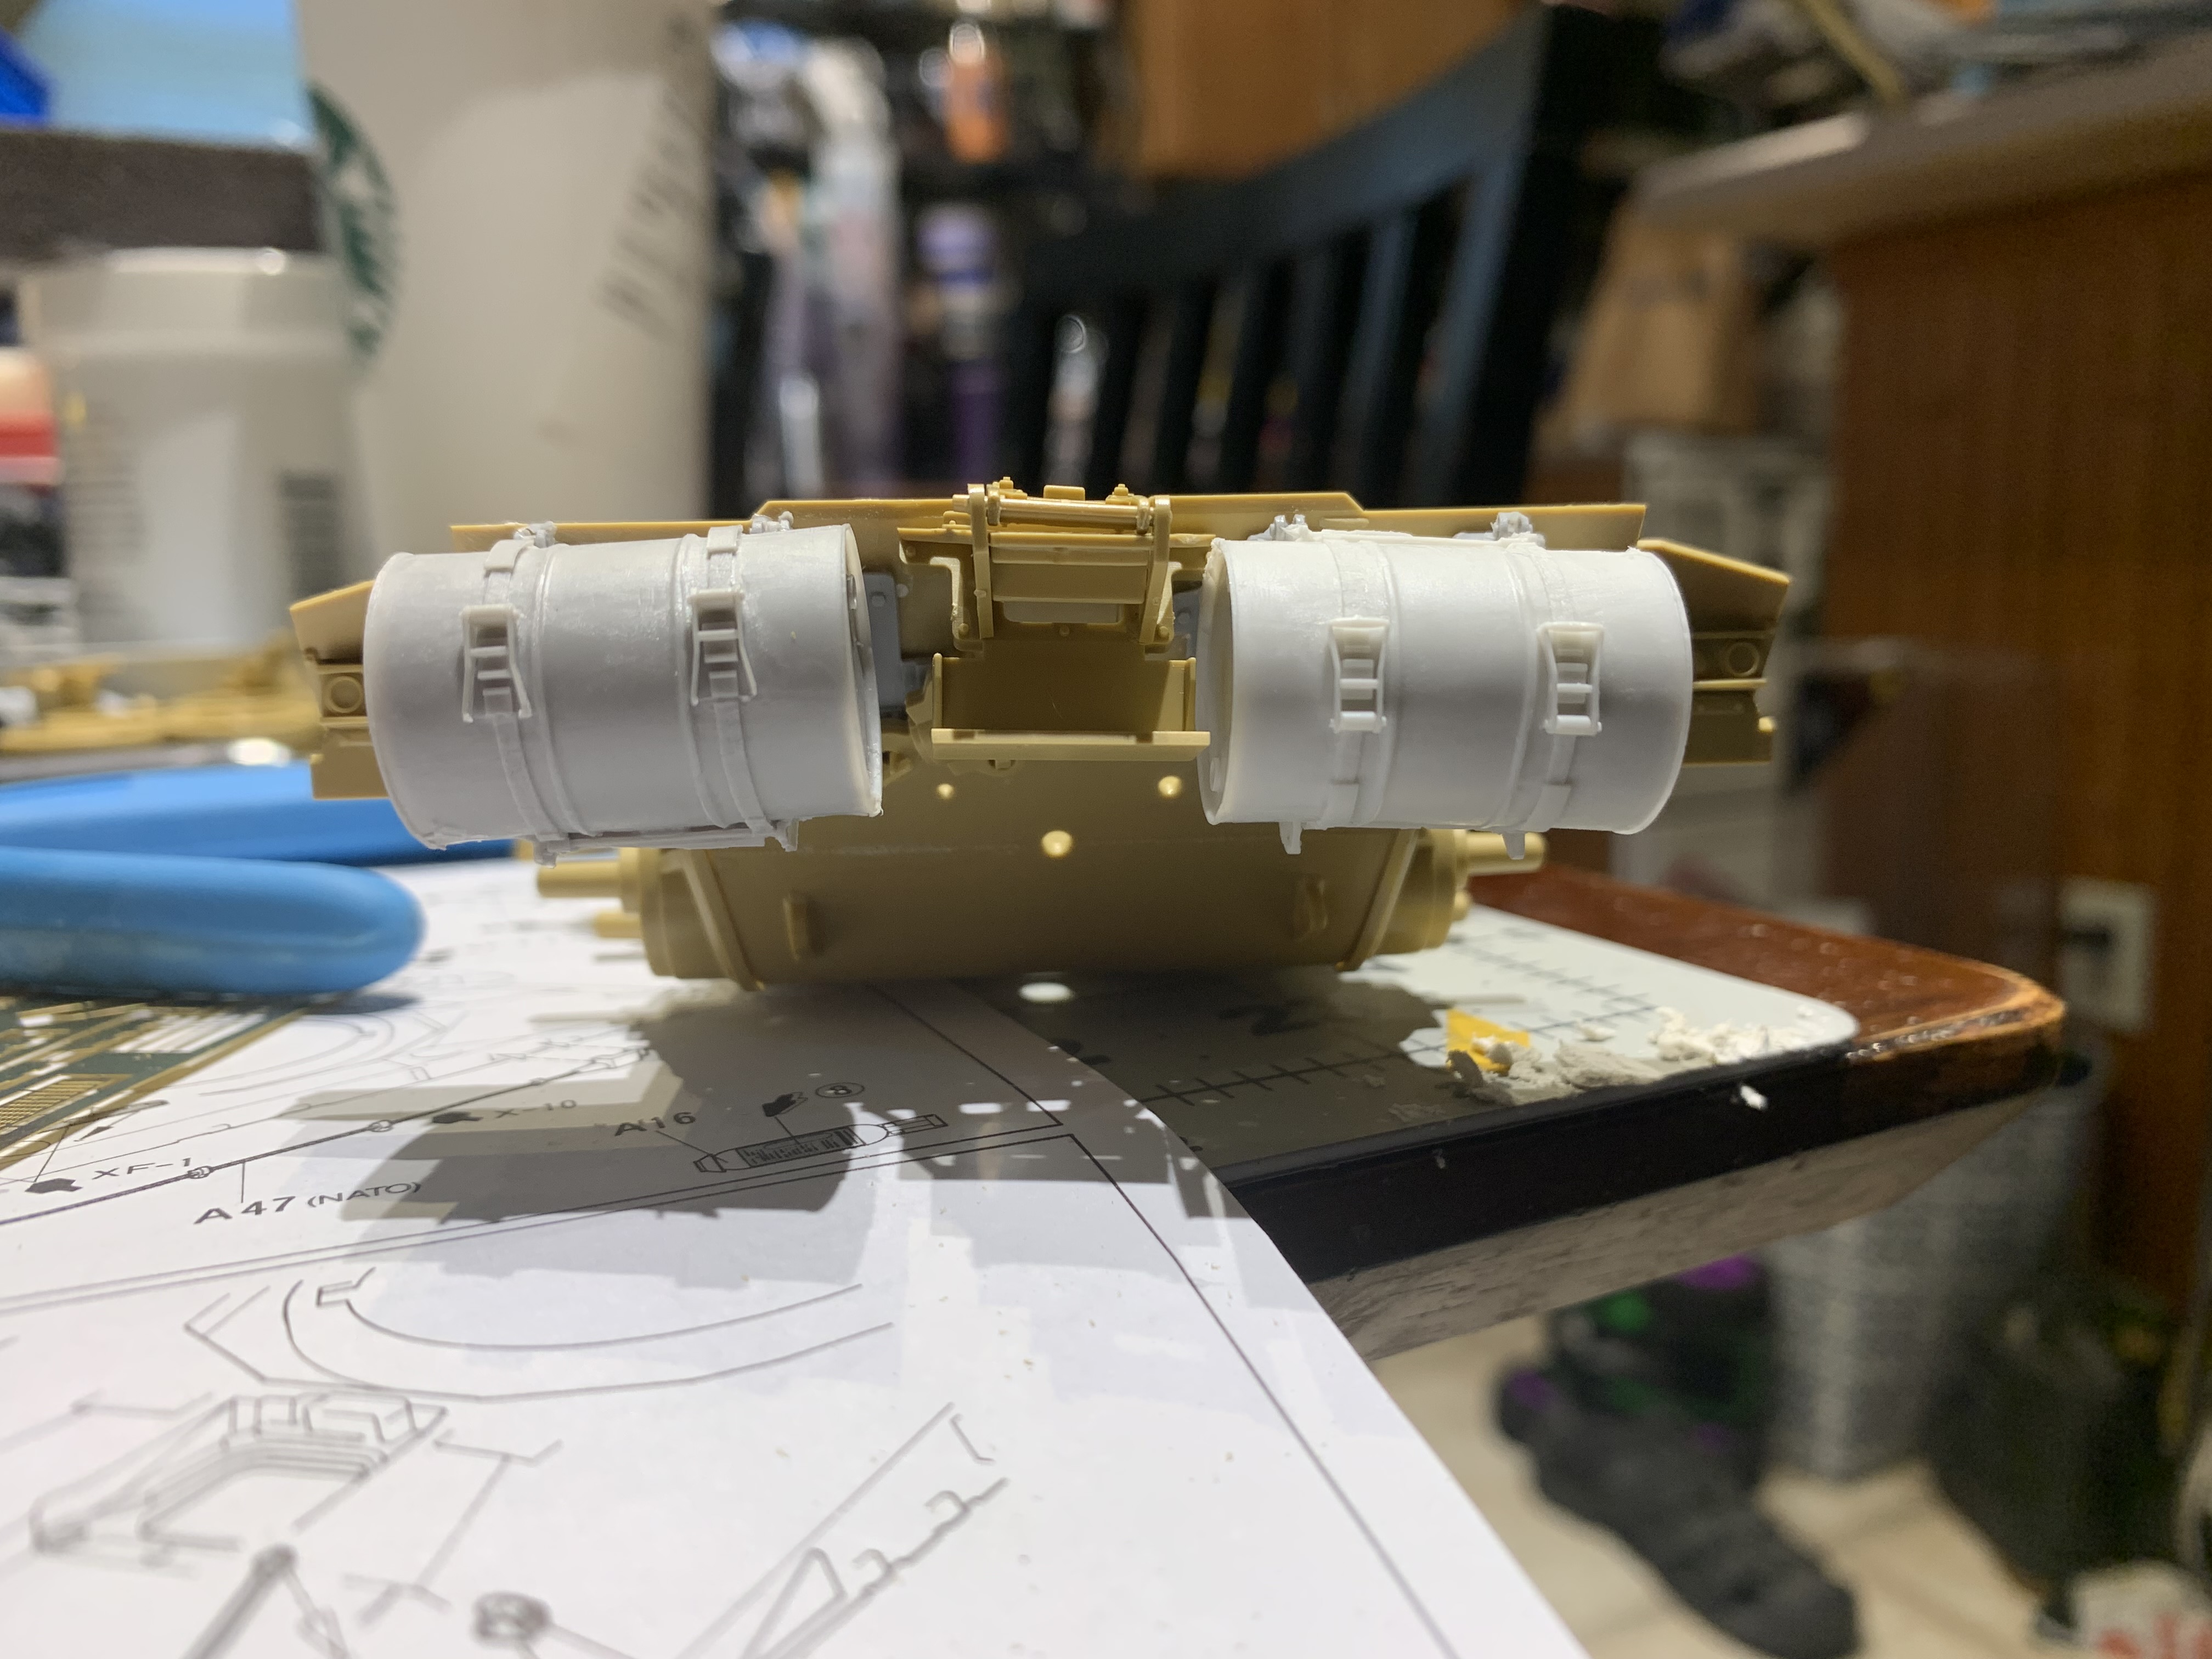
And the rear fuel drums were not fitted to all wagons in GW1.
Most of the alterations from Mk1 to Mk3 are internal so not massively noticeable…
3 Likes
Going to have to review your progress (if posted here)on your Mk3 build, when the time comes.
2 Likes
RB, I’ve also got a Braille Scale Challenger 2 built for an AMPS GB ![]()

5 Likes
I will build it a lot sooner than later, and do it in another separate thread.
Russ @rfbaer also did 2 excellent build threads sorting out the issues here
And
Highly recommended reads
3 Likes
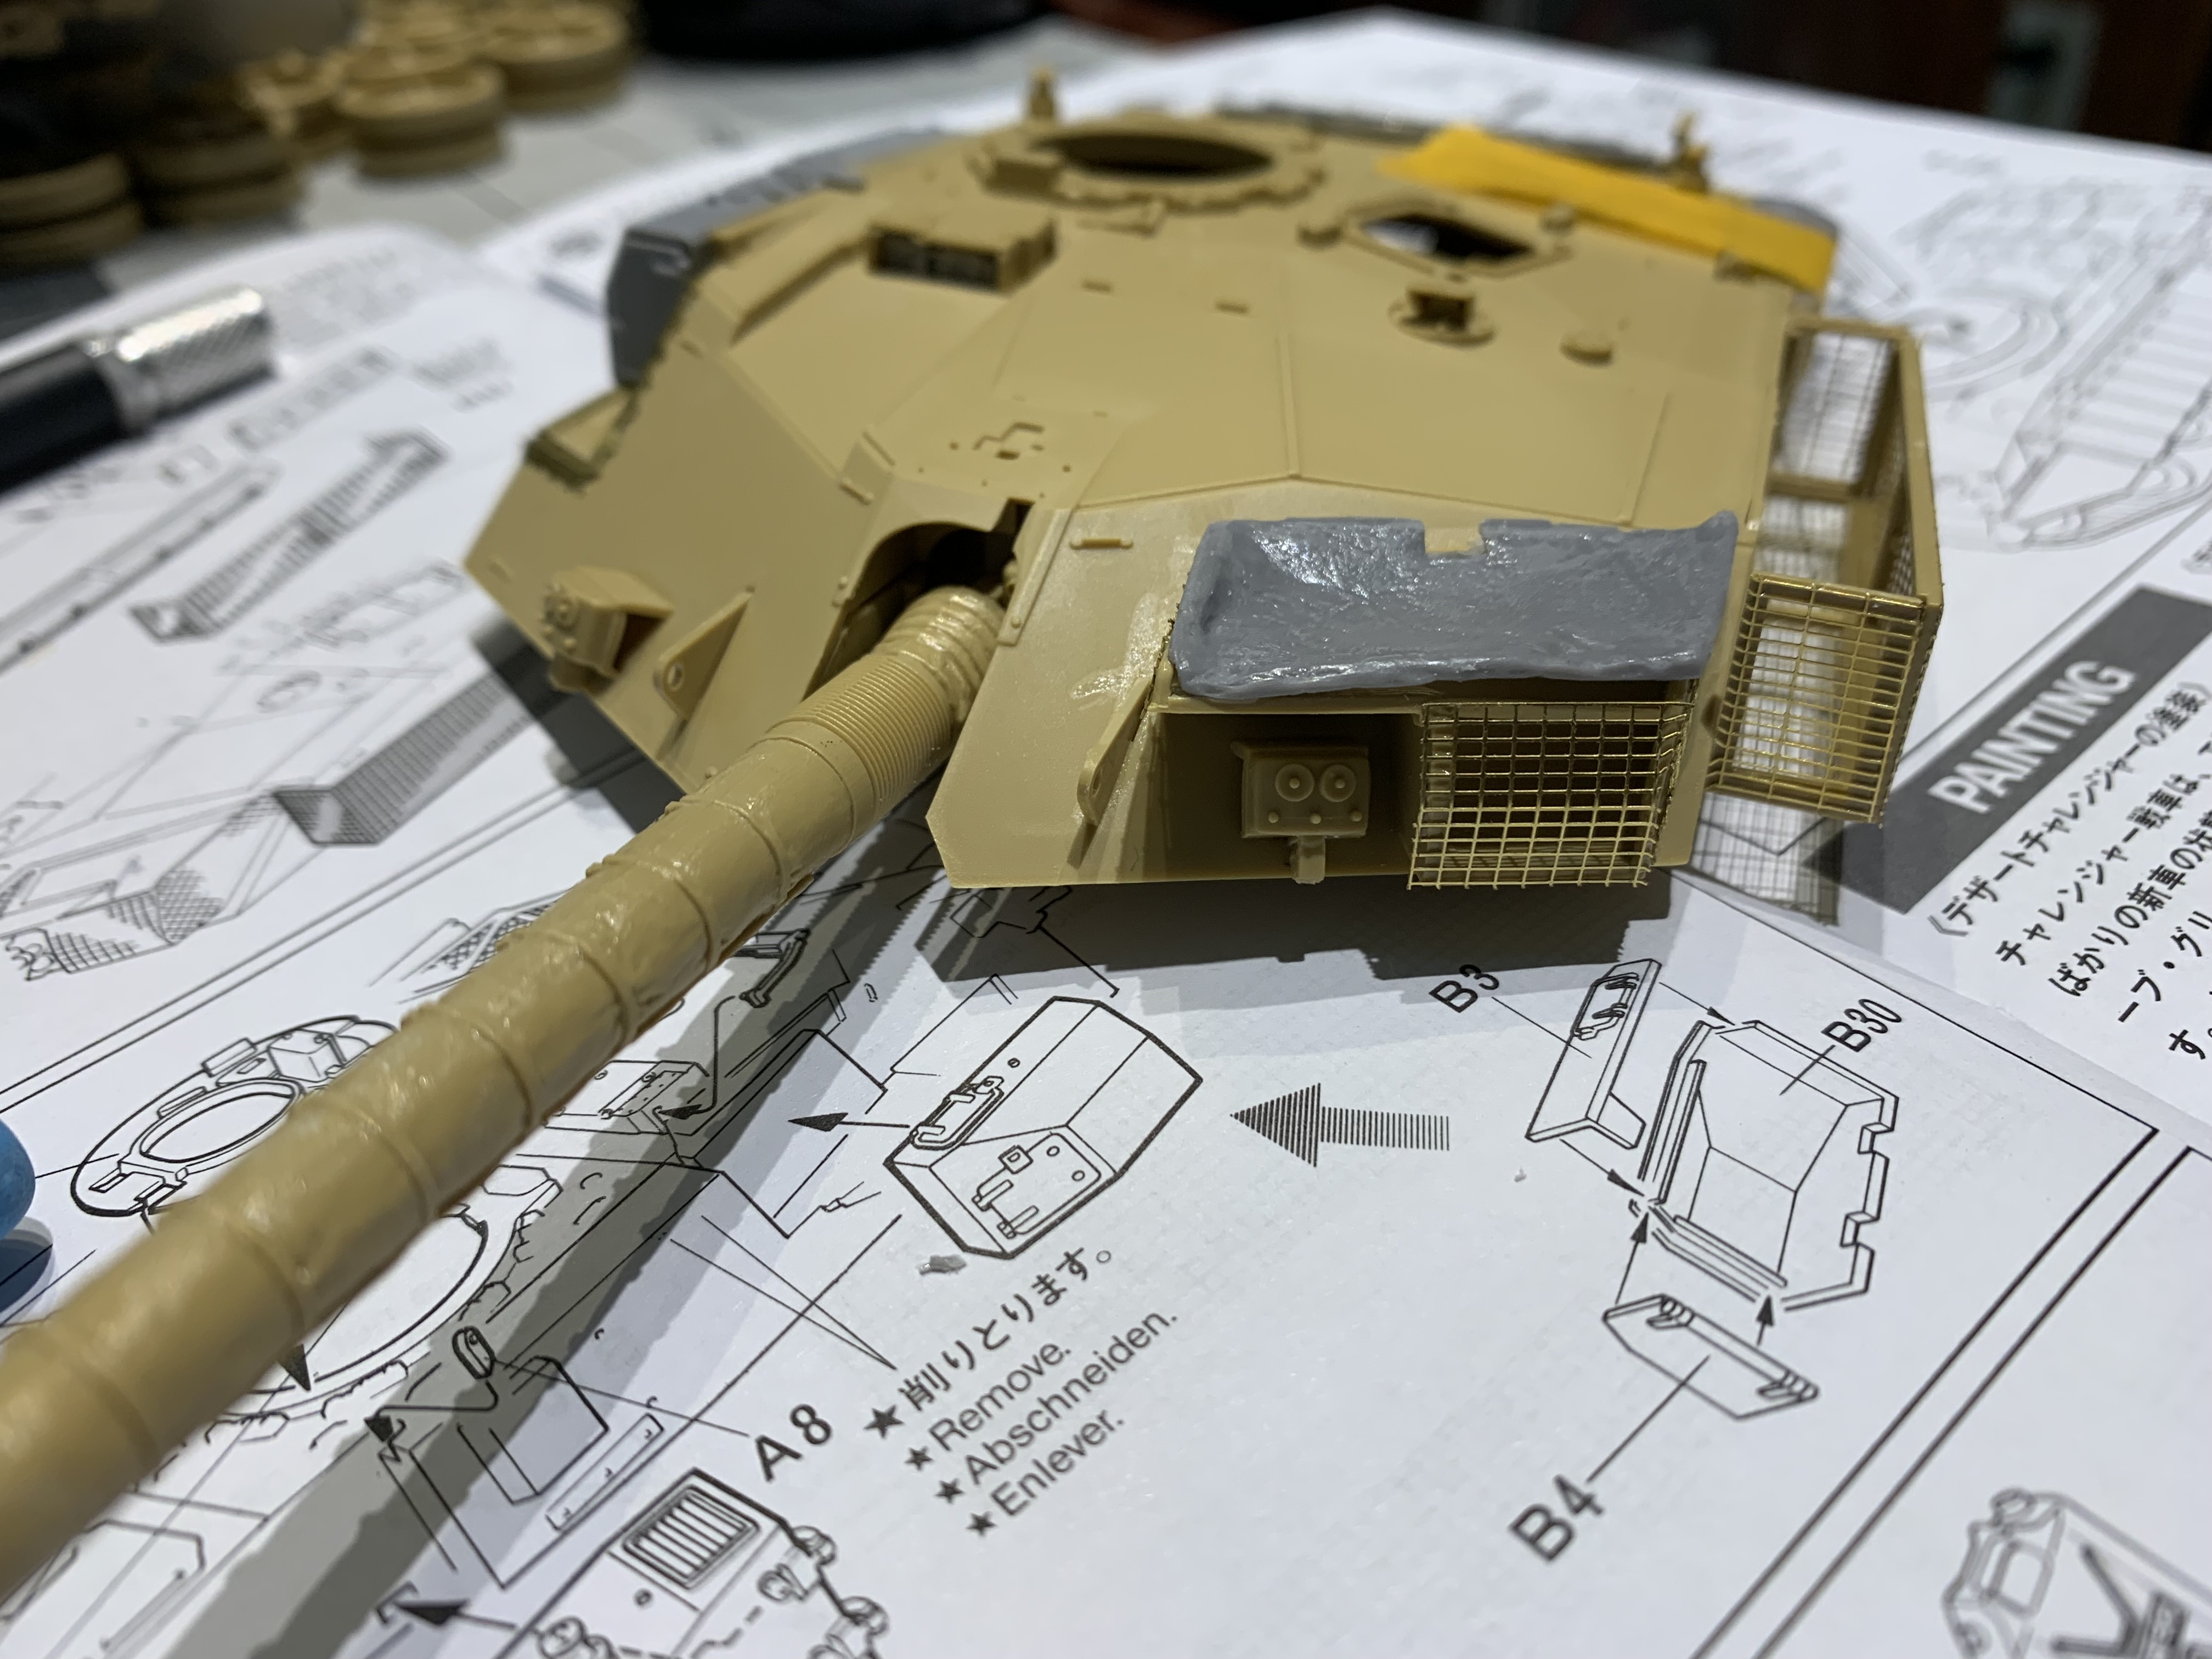
I’m going to hide the issue with the front armor sloping by hiding it with camo netting.
I have the Scorpion miniature models detail set large, turret baskets.
Can someone help me with the yellow hi vis panel and the Union Jack
1 Like

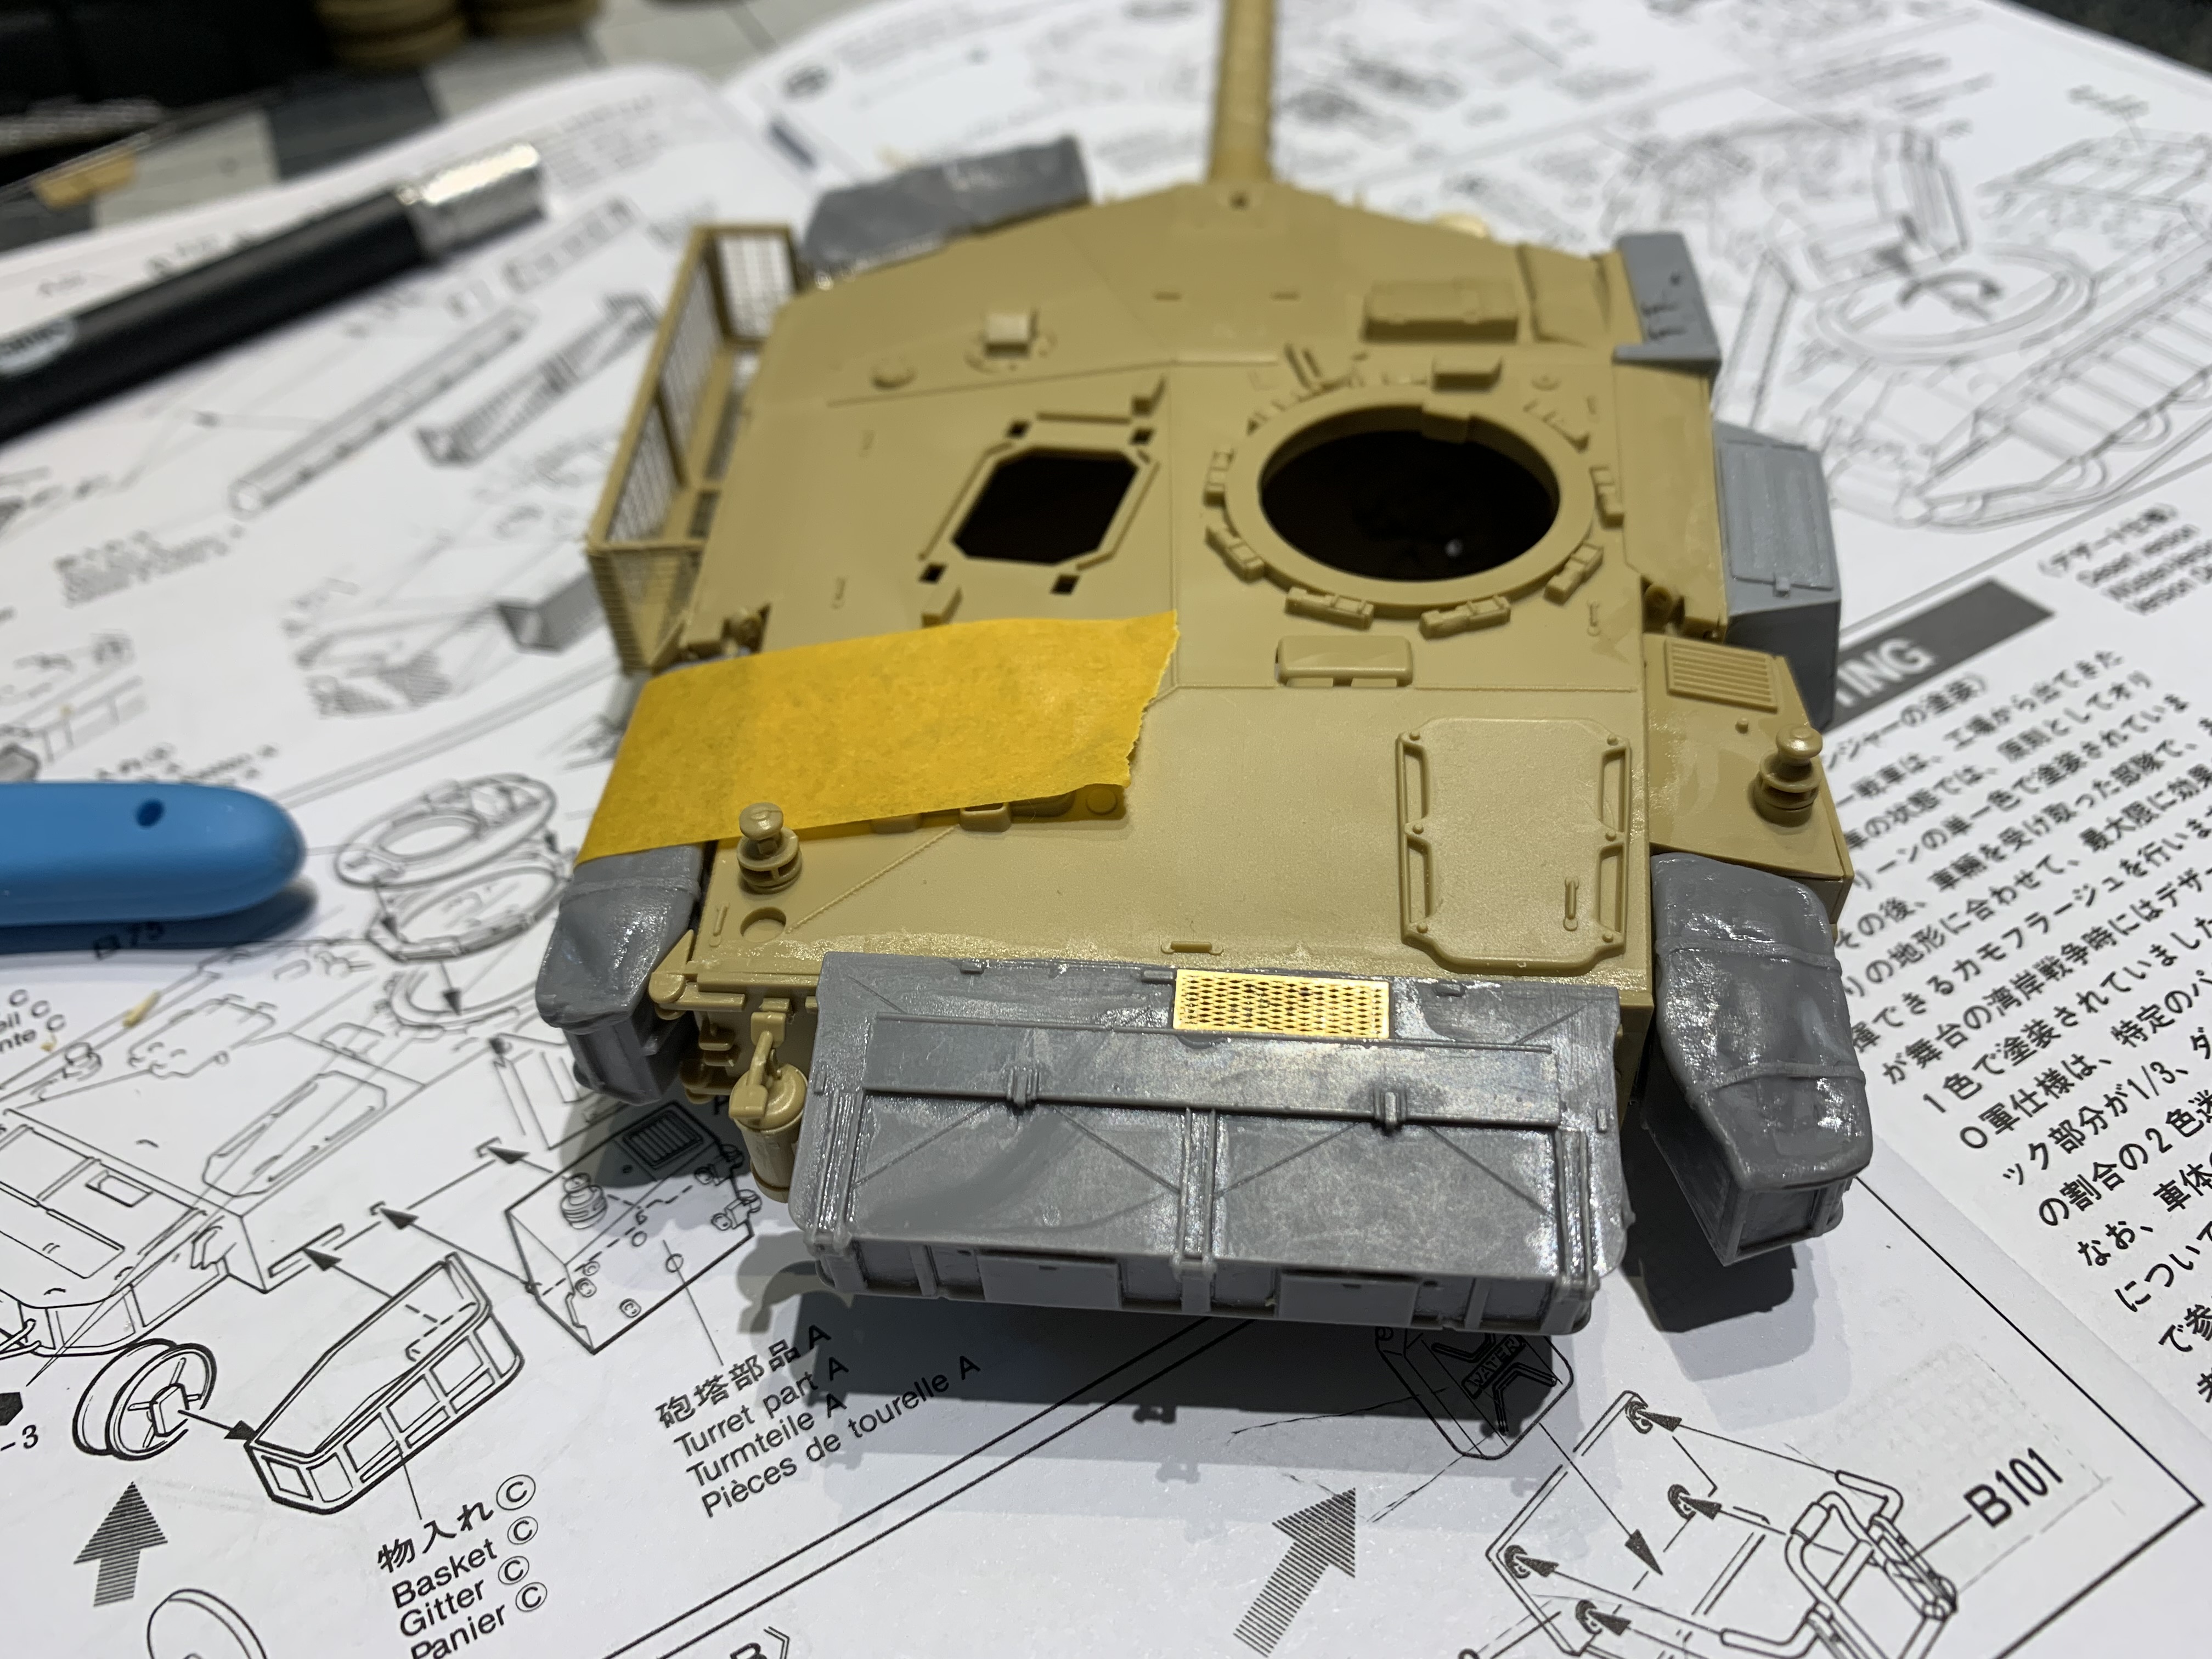
@Johnnych01 behind the one radio is a hole for the rotating amber light. Do I fill that hole in or just put the base in and leave off the light part?
4 Likes
Put the base in and leave the light off. The stalk on the base had a flip cover to protect the opening, so you could represent that with 1mm masking tape or similar if you wanted to. ![]()
3 Likes
So the step in the front plate shouldn’t be there for a mk3? Do you add to the sides or take away from the middle?
2 Likes
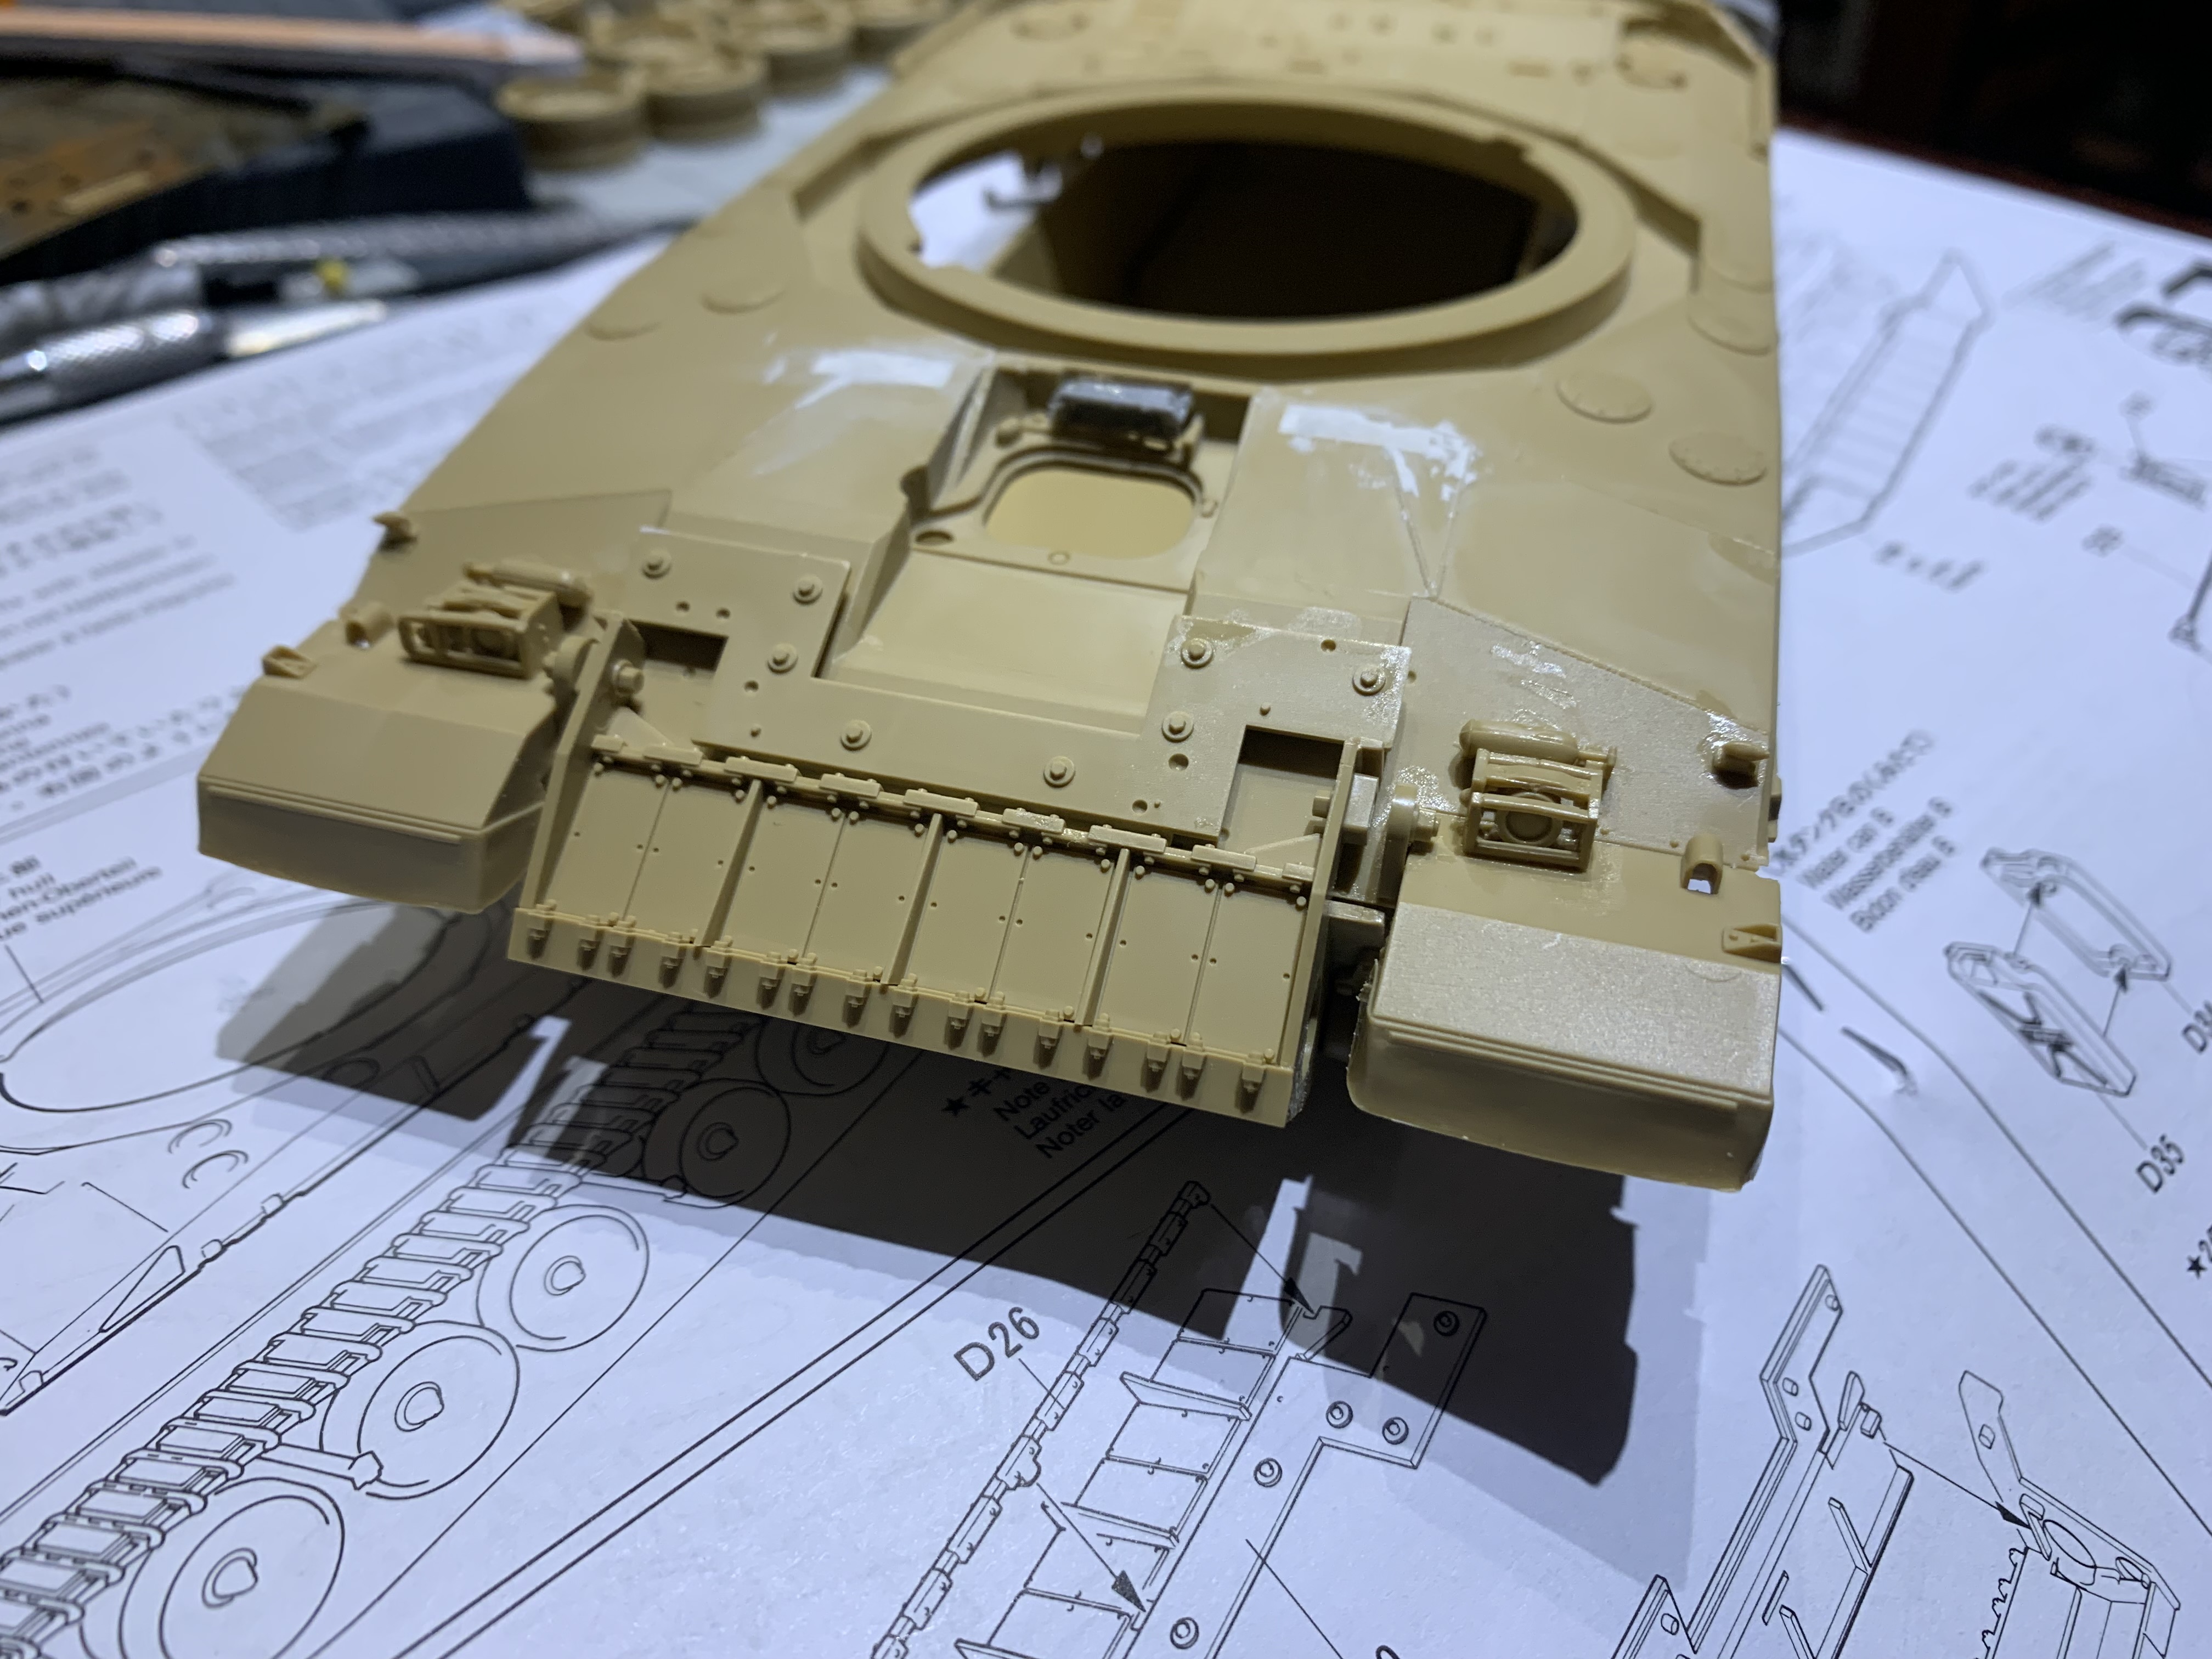
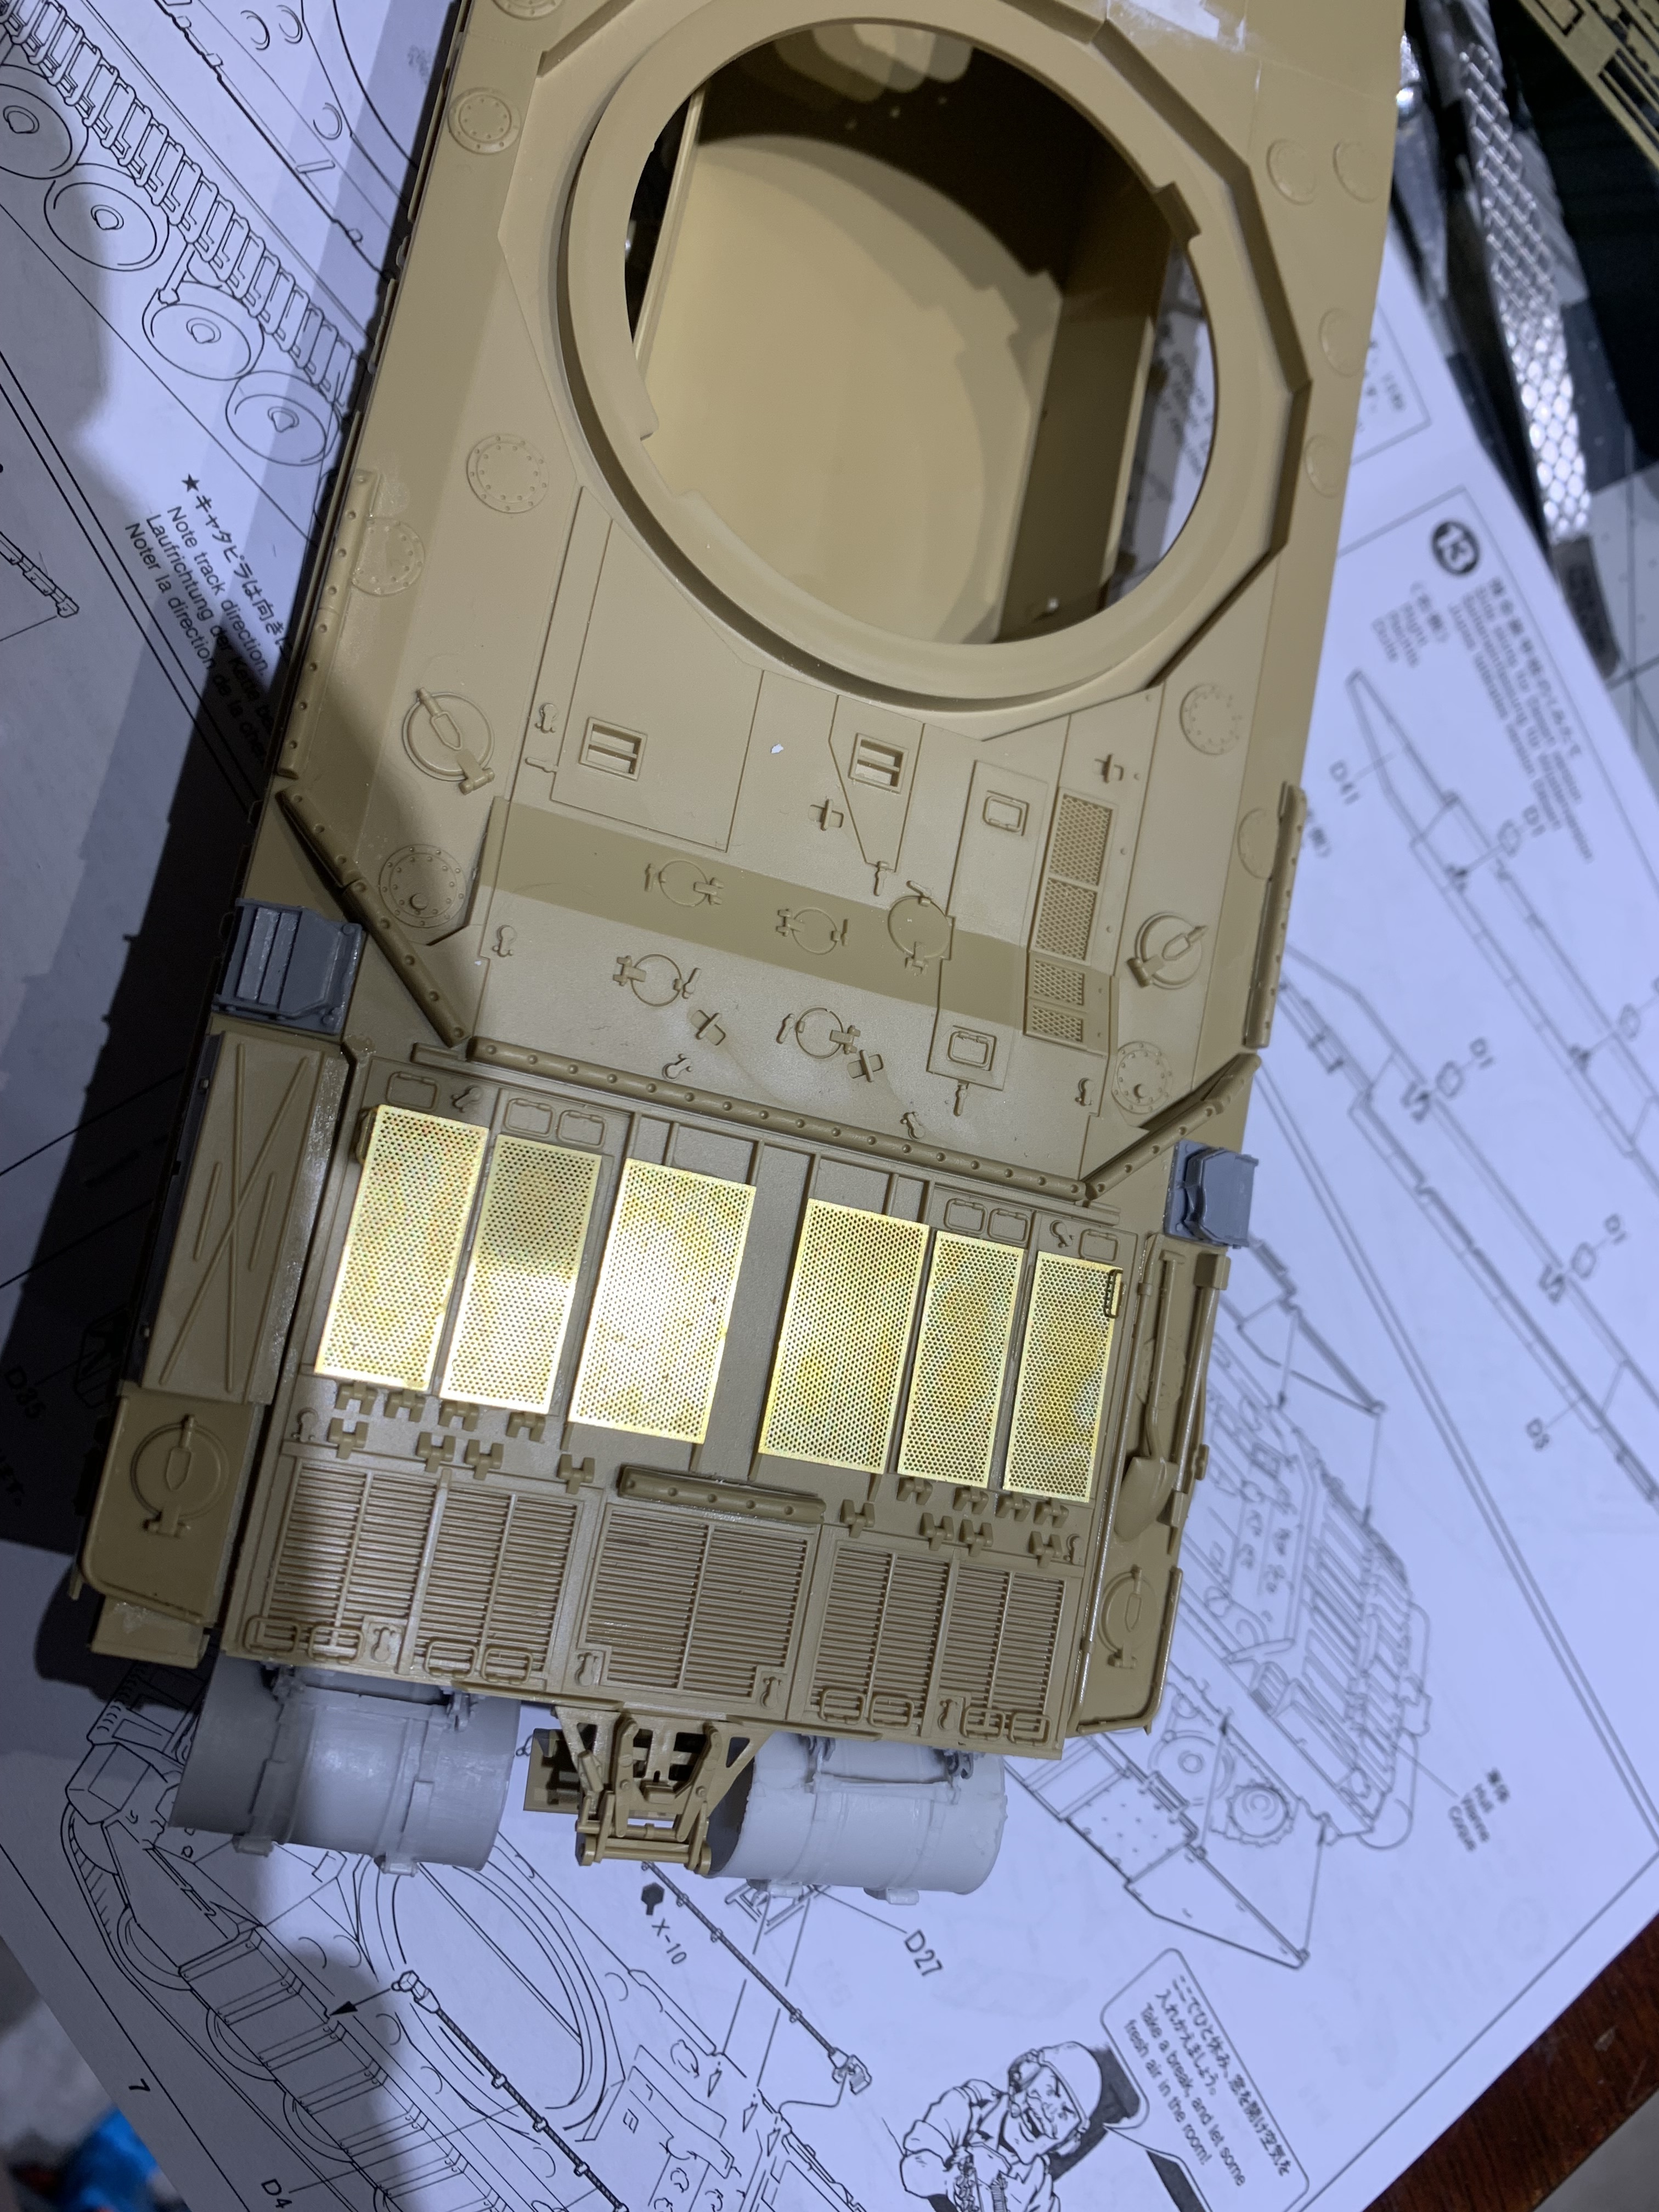
The front glacis all the way across should be flat. Over the tracks is modeled a step down which shouldn’t be there.
Scorpion miniatures makes an update for it but I didn’t buy it.
1 Like
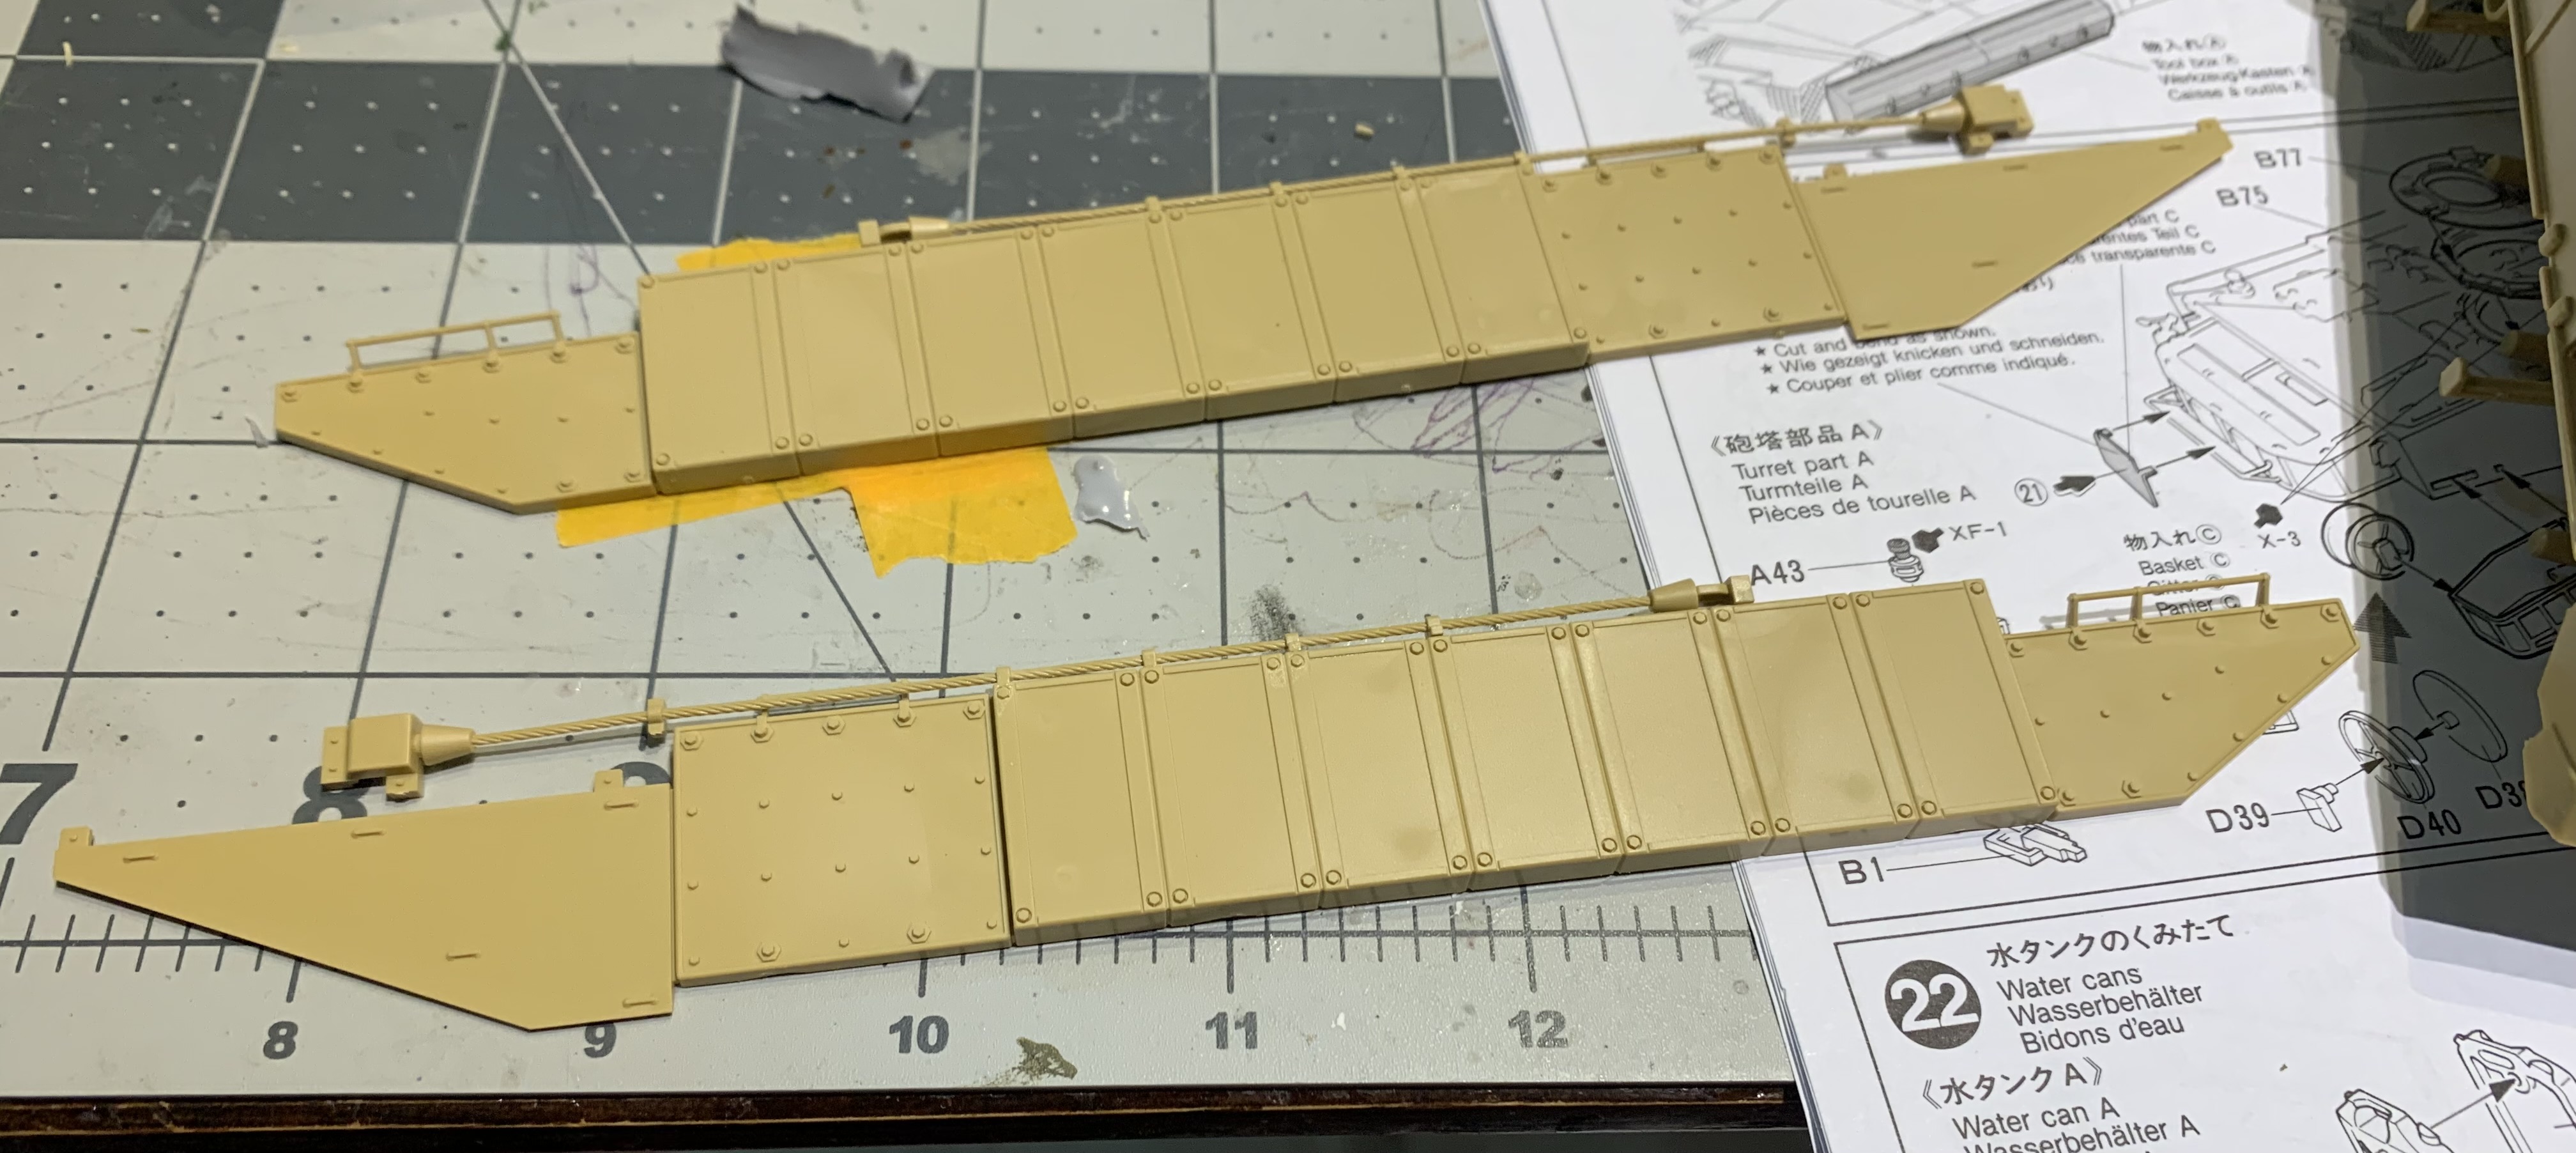

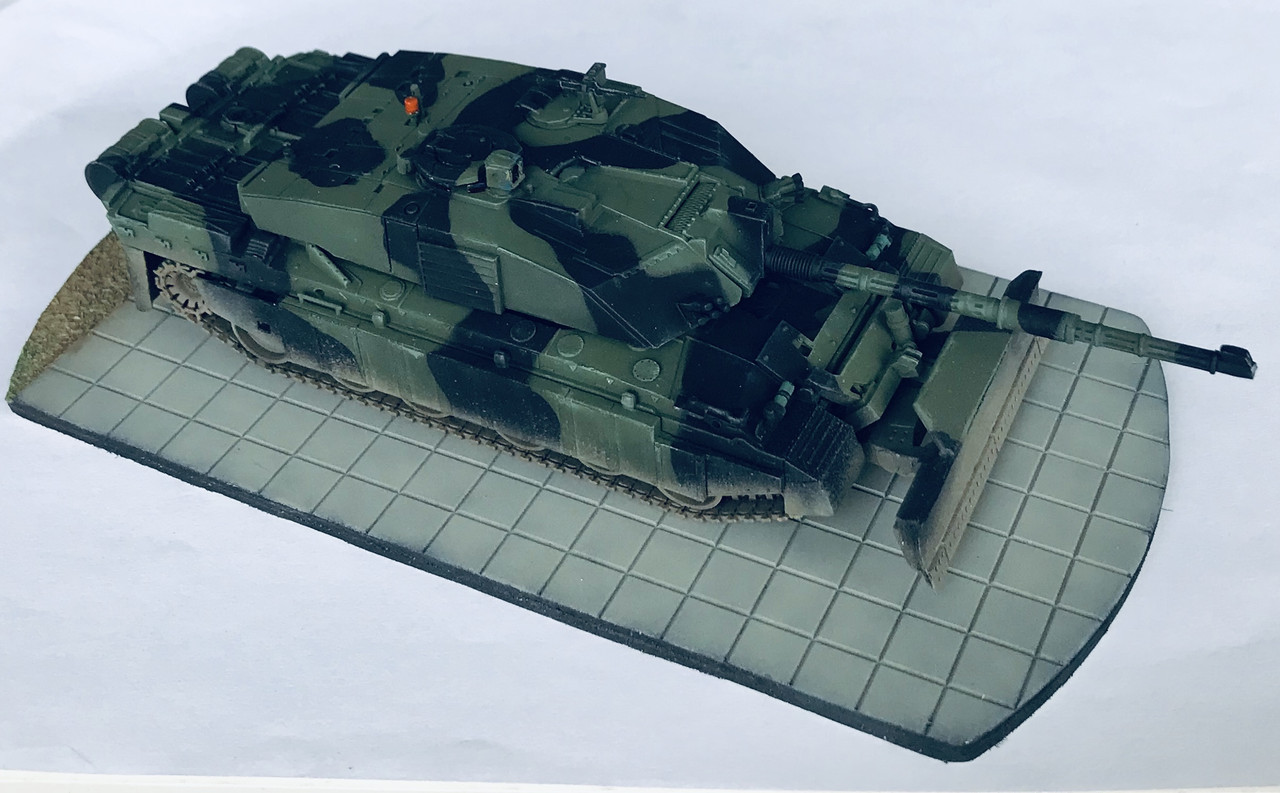
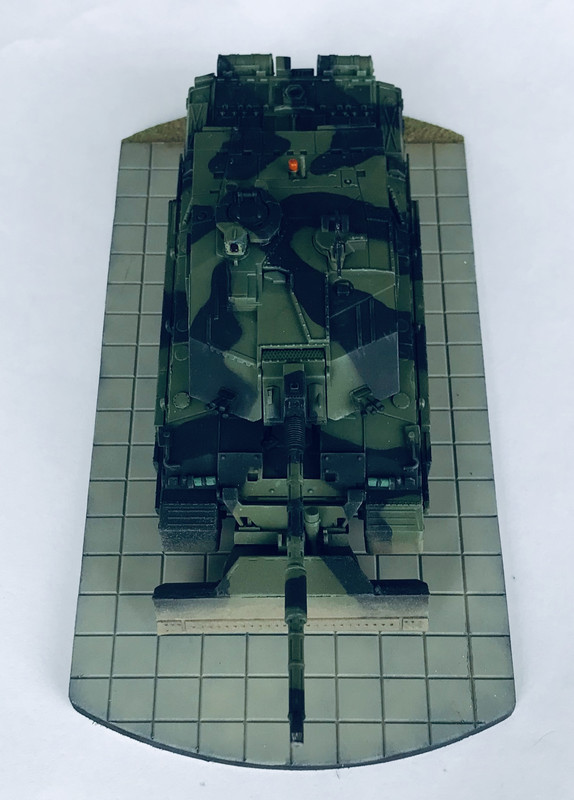
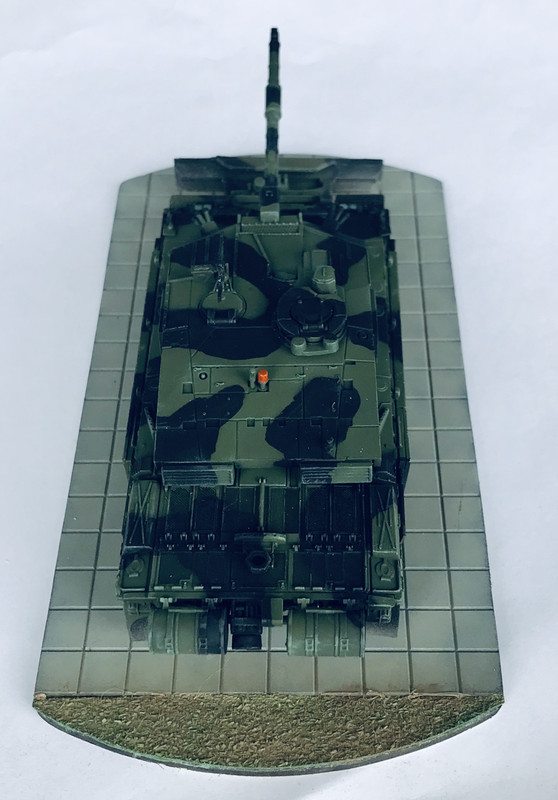
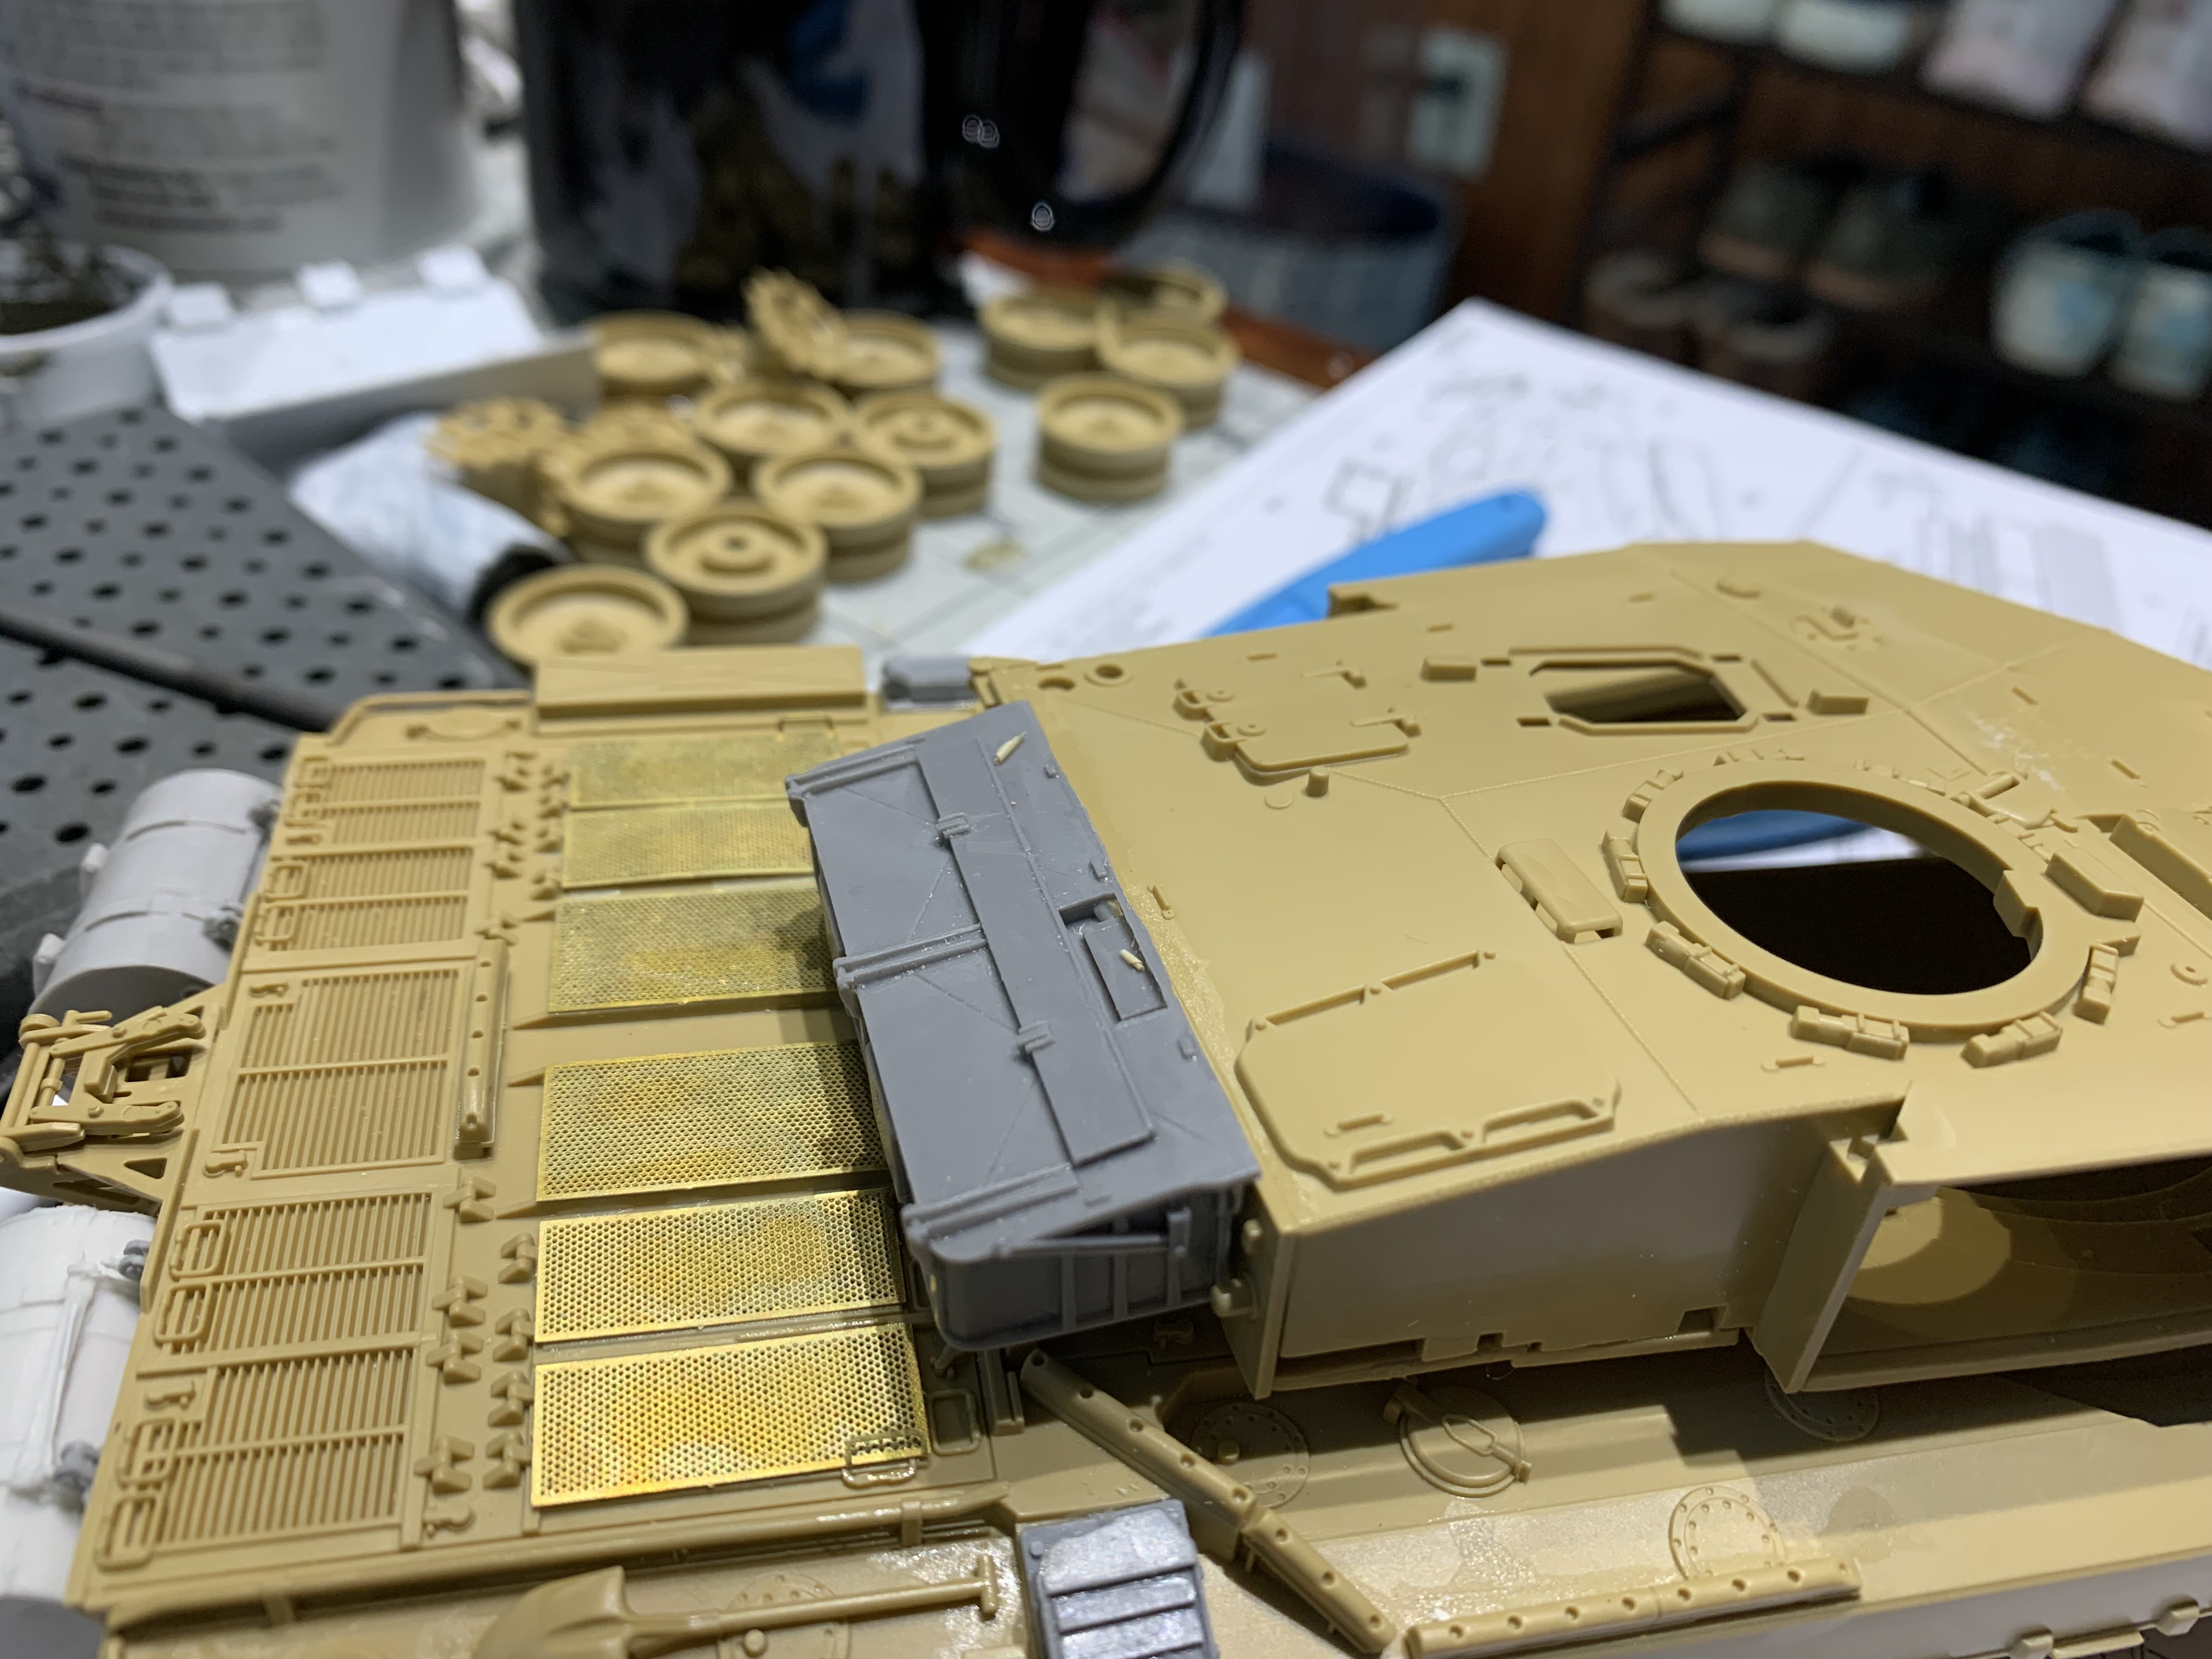
Ready for the paint booth.
Stowage will be added after the paint.
The particular tank I’m doing I don’t see the side water can racks. And I have no evidence it had the rear add on rack. I’m still researching.
4 Likes
So far I have seen two ways of doing it, is it a step down over the tracks or a step up in front of the driver, when compared to a Challenger 2 hull it seems to be a step up, unfortunately I am comparing models and not the real thing, I know early models did have the step, it is really hard to tell in photos, but to my mind the step is removed from the front of the driver, photos don’t seem to show the bevelled top to the armour plate as in the model?
I am modelling small scale so my only option is to do it myself, not a lot if an6 aftermarket available.
1 Like

@Simon_Barnes These are what we’re talking about
1 Like
Technically yes but it’s more about this bit in red

When looking at photos the bevel (yellow) is not present
Making me think it was removed more than added to at the sides
2 Likes
Ok, I was a bit perplexed by this topic for a long time as a lot of people were saying this is right or this is wrong, it should be like this and not like that and they shouldnt be there etc etc etc; so I looked into it … A LOT lol … many many many hours and from personal memories of my wagons I was on or played with while on courses etc.
And the correct term is a step up in front of the Dvrs position. This is the only logical explanation I could come to after thinking back to my wagon and looking at many hundreds of images of gaps, angle size variations and differences in certain points against having the side steps added to, or the slab in front of the driver removed, and it always comes back to the slab was removed in front of the driver.
There is no documentation on this, its just narrowing things down in a logical way and thinking of the number of Cr1 built against the various Mk’s etc.
The first batch of Cr1 - the Mk1, had no TOGs fitted as it hadnt been signed off yet as being workable. The barbettes were empty but fitted. I think it was just over a hundred or so that were made like that. Once TOGs had been signed off and cleared, all CR1’s from then were fitted with TOGs and designated as Cr1 Mk2. All the old Mk1’s were then retrofitted with TOGs to make them into Mk2’s.
Now, within that first initial production run, and (this is my guesstimation here !!) I think it could only have been about 50, maybe a few more, maybe a few less, that were made with the slab fitted in from of the Dvrs position. From then, the production changed and the slab was removed for whatever reason, that area then became totally flat across the front and I would imagine the 2 recesses left and right to the rear of the driver simply had plates welded over them at this time as well.
So, yes there some wagons that had the slab which raised the area in front of the driver, but they were a short run in production ( I am not sure if the slabs were retro removed at a base overhaul, so in theory, you could possibly even have a Mk 2 with the raised slab still, but that image is like hens teeth if it even exists !!!..)
Now, sorting the issue on the kits …
Russ @rfbaer has 2 great threads on his builds which I linked in a post above, and I did it for my Cr1 CTT which is a WIP (getting back to it soon I promise )
If you are happy with a razor saw, some white plasti-card/putty and attention to detail, then removing that slab is the correct way to do it and it will give you a visually correct appearance of the dimensions of that sloped frontal area.
This mine with the section removed.
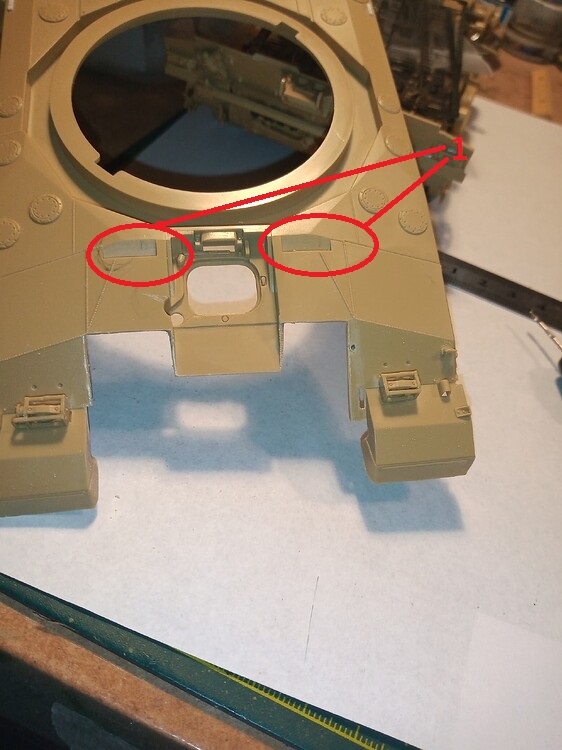
The areas ringed and marked 1 are the places that a plate was just welded over.
And with the white plastic card fitted.
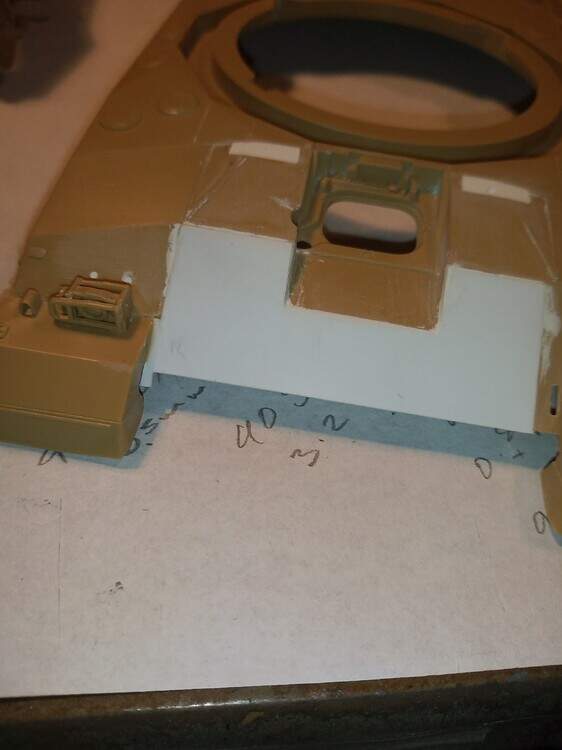
One thing I will say is that when I did mine, it was a bit trickier as my hull was gifted to me and was already built up, so it took a bit more work. One straight out the box will be easy.
If you are not overly confident doing surgery to that level, then as AJ says above, Scorpion MM do supply a pack with the 2 inserts for the left and right step down, but added those will give a higher sloped area than the real thing, so just be aware of that.
One more thing Simon, on your image above, disregard the yellow line. The slab goes all the way back to where the red line is behind the yellow one.
2 Likes
The turret is building up nicely AJ…one thing, the rear turret bin looks like the lid is sitting to high in your pictures ? It should be pretty much flush with the turret.
1 Like