OK, well, evidently I went about setting up the new thread incorrectly. It looks like someone already moved this thead to the main Campaigns section (thank you.) Guess I’ve still got some training to do.
Michael
OK, well, evidently I went about setting up the new thread incorrectly. It looks like someone already moved this thead to the main Campaigns section (thank you.) Guess I’ve still got some training to do.
Michael
I am to please lol…
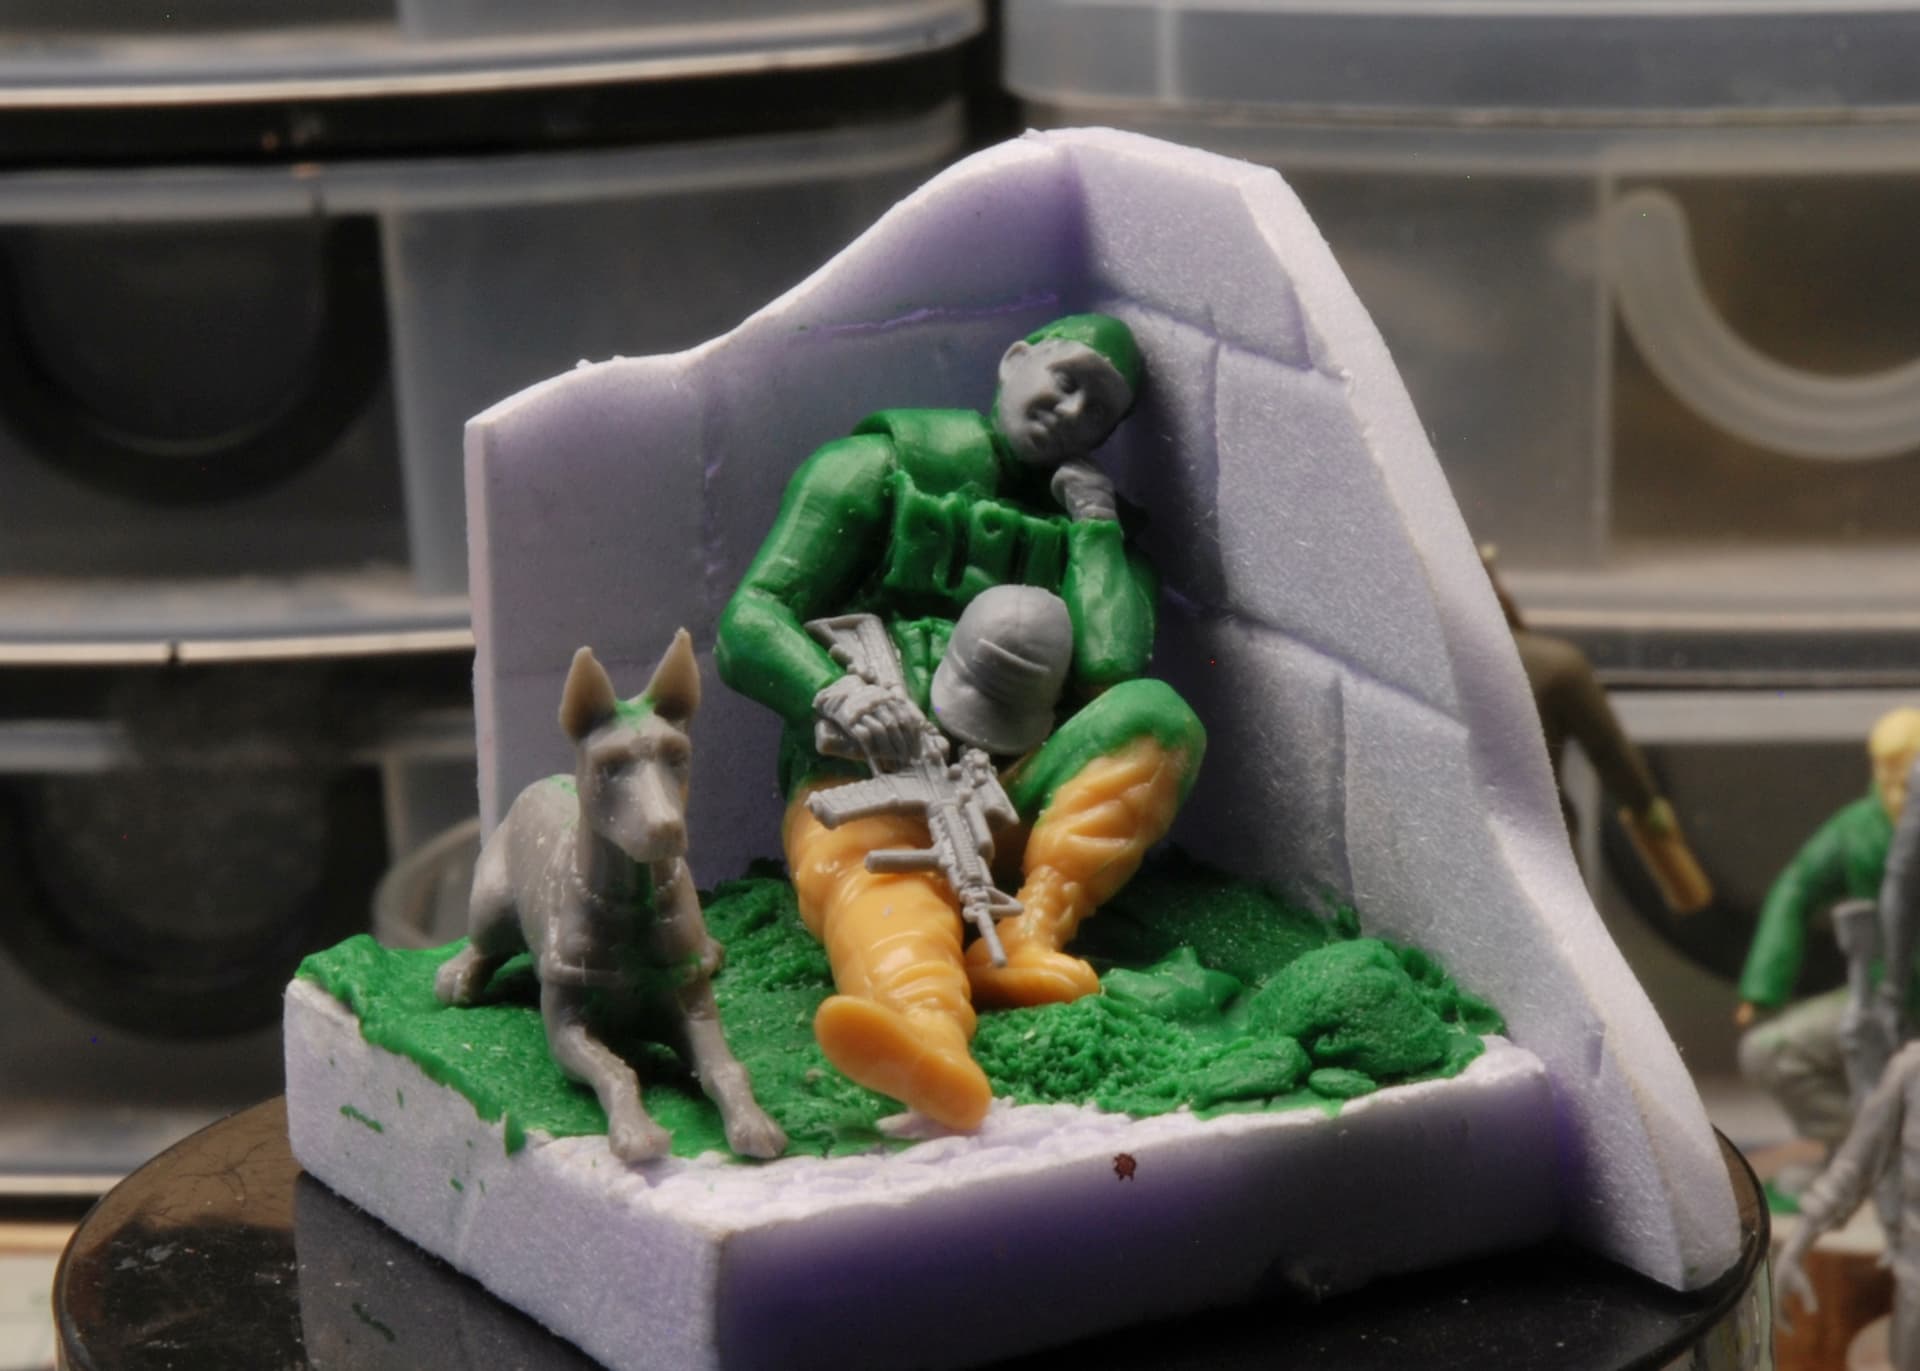
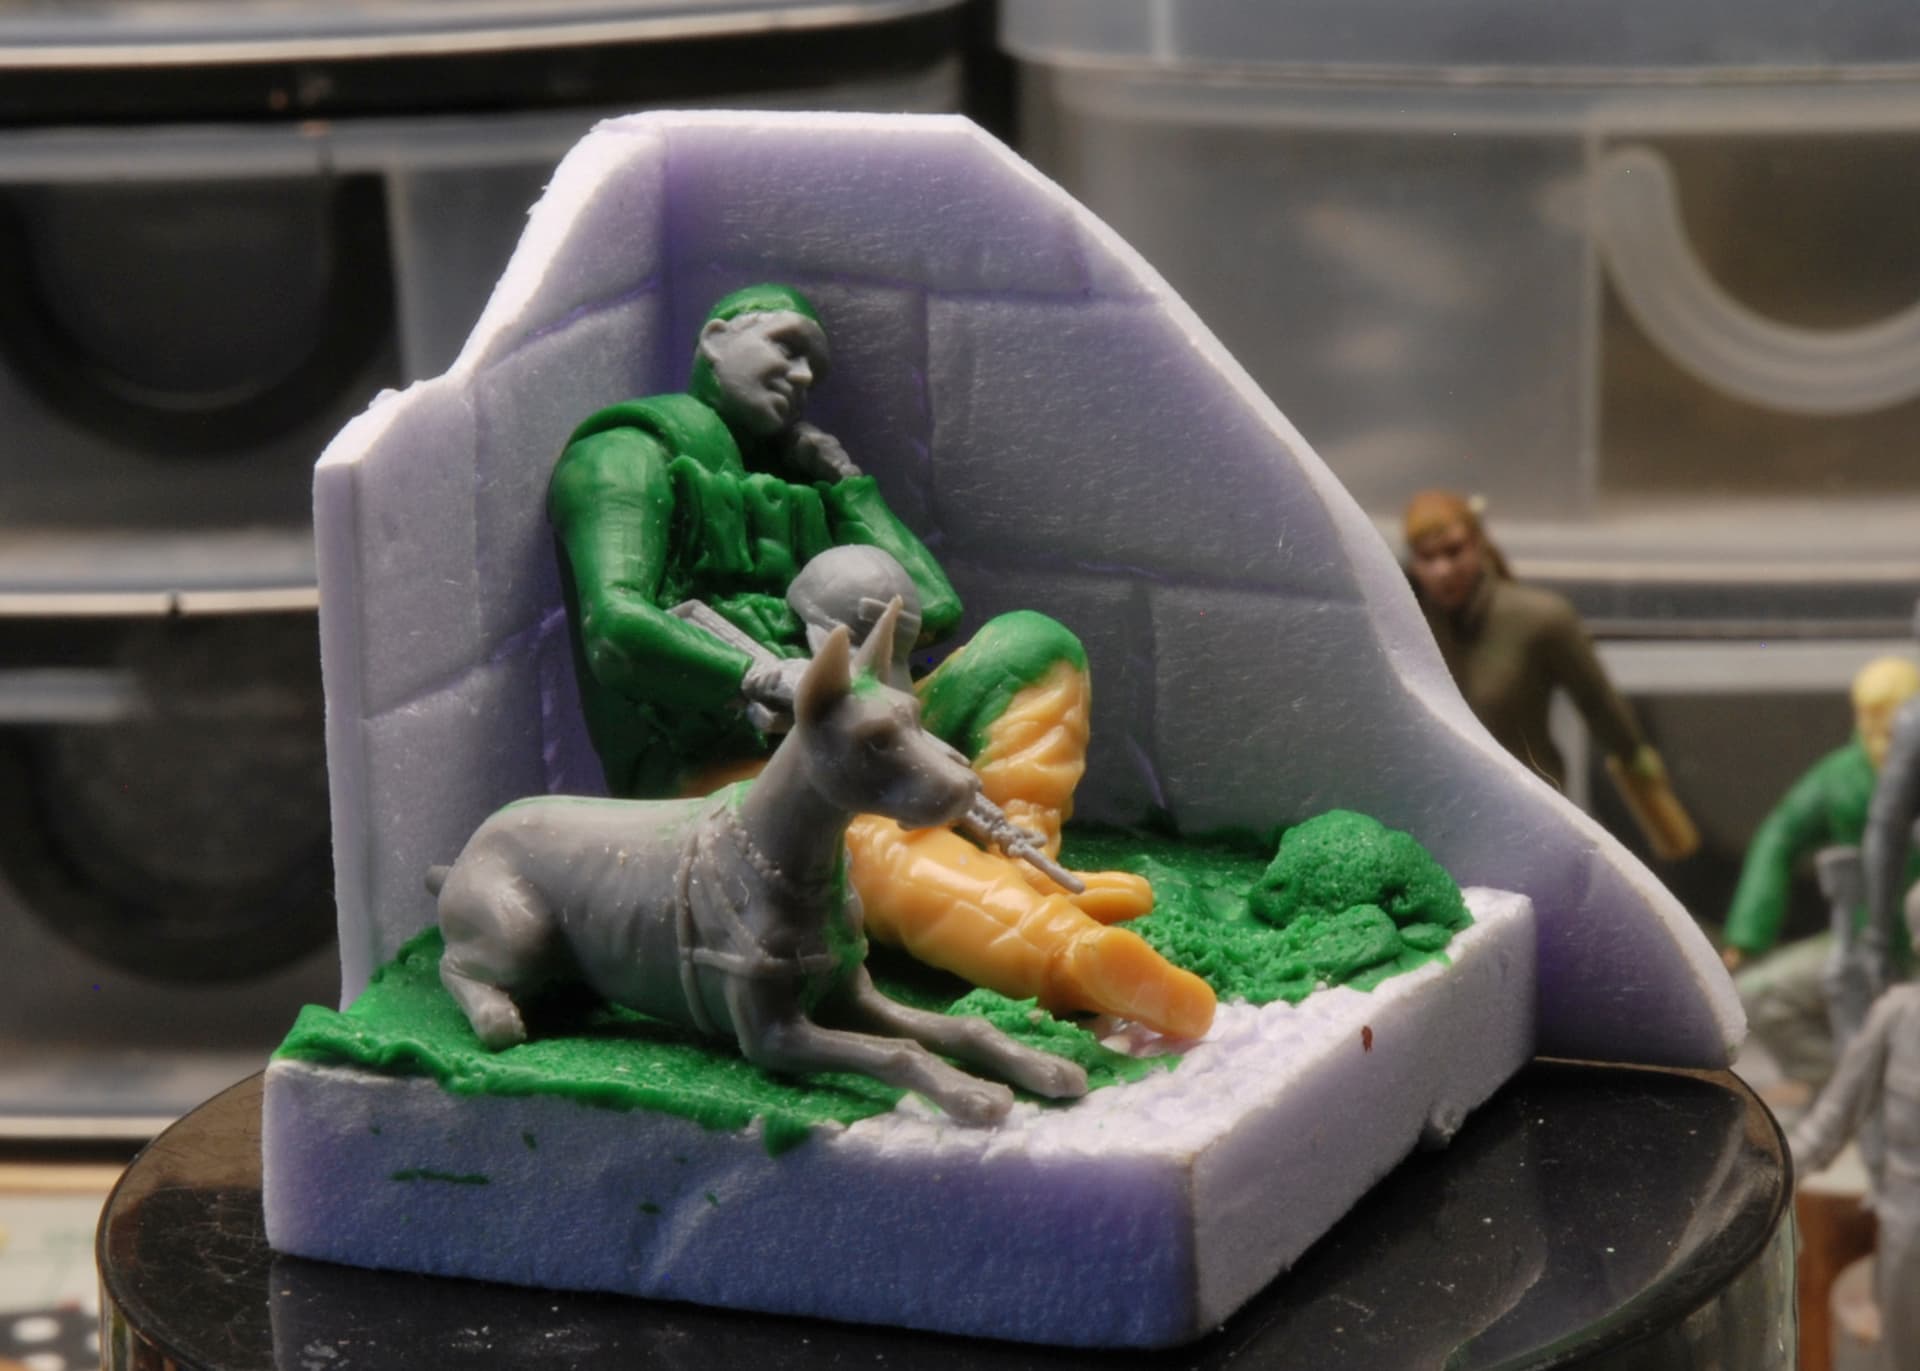
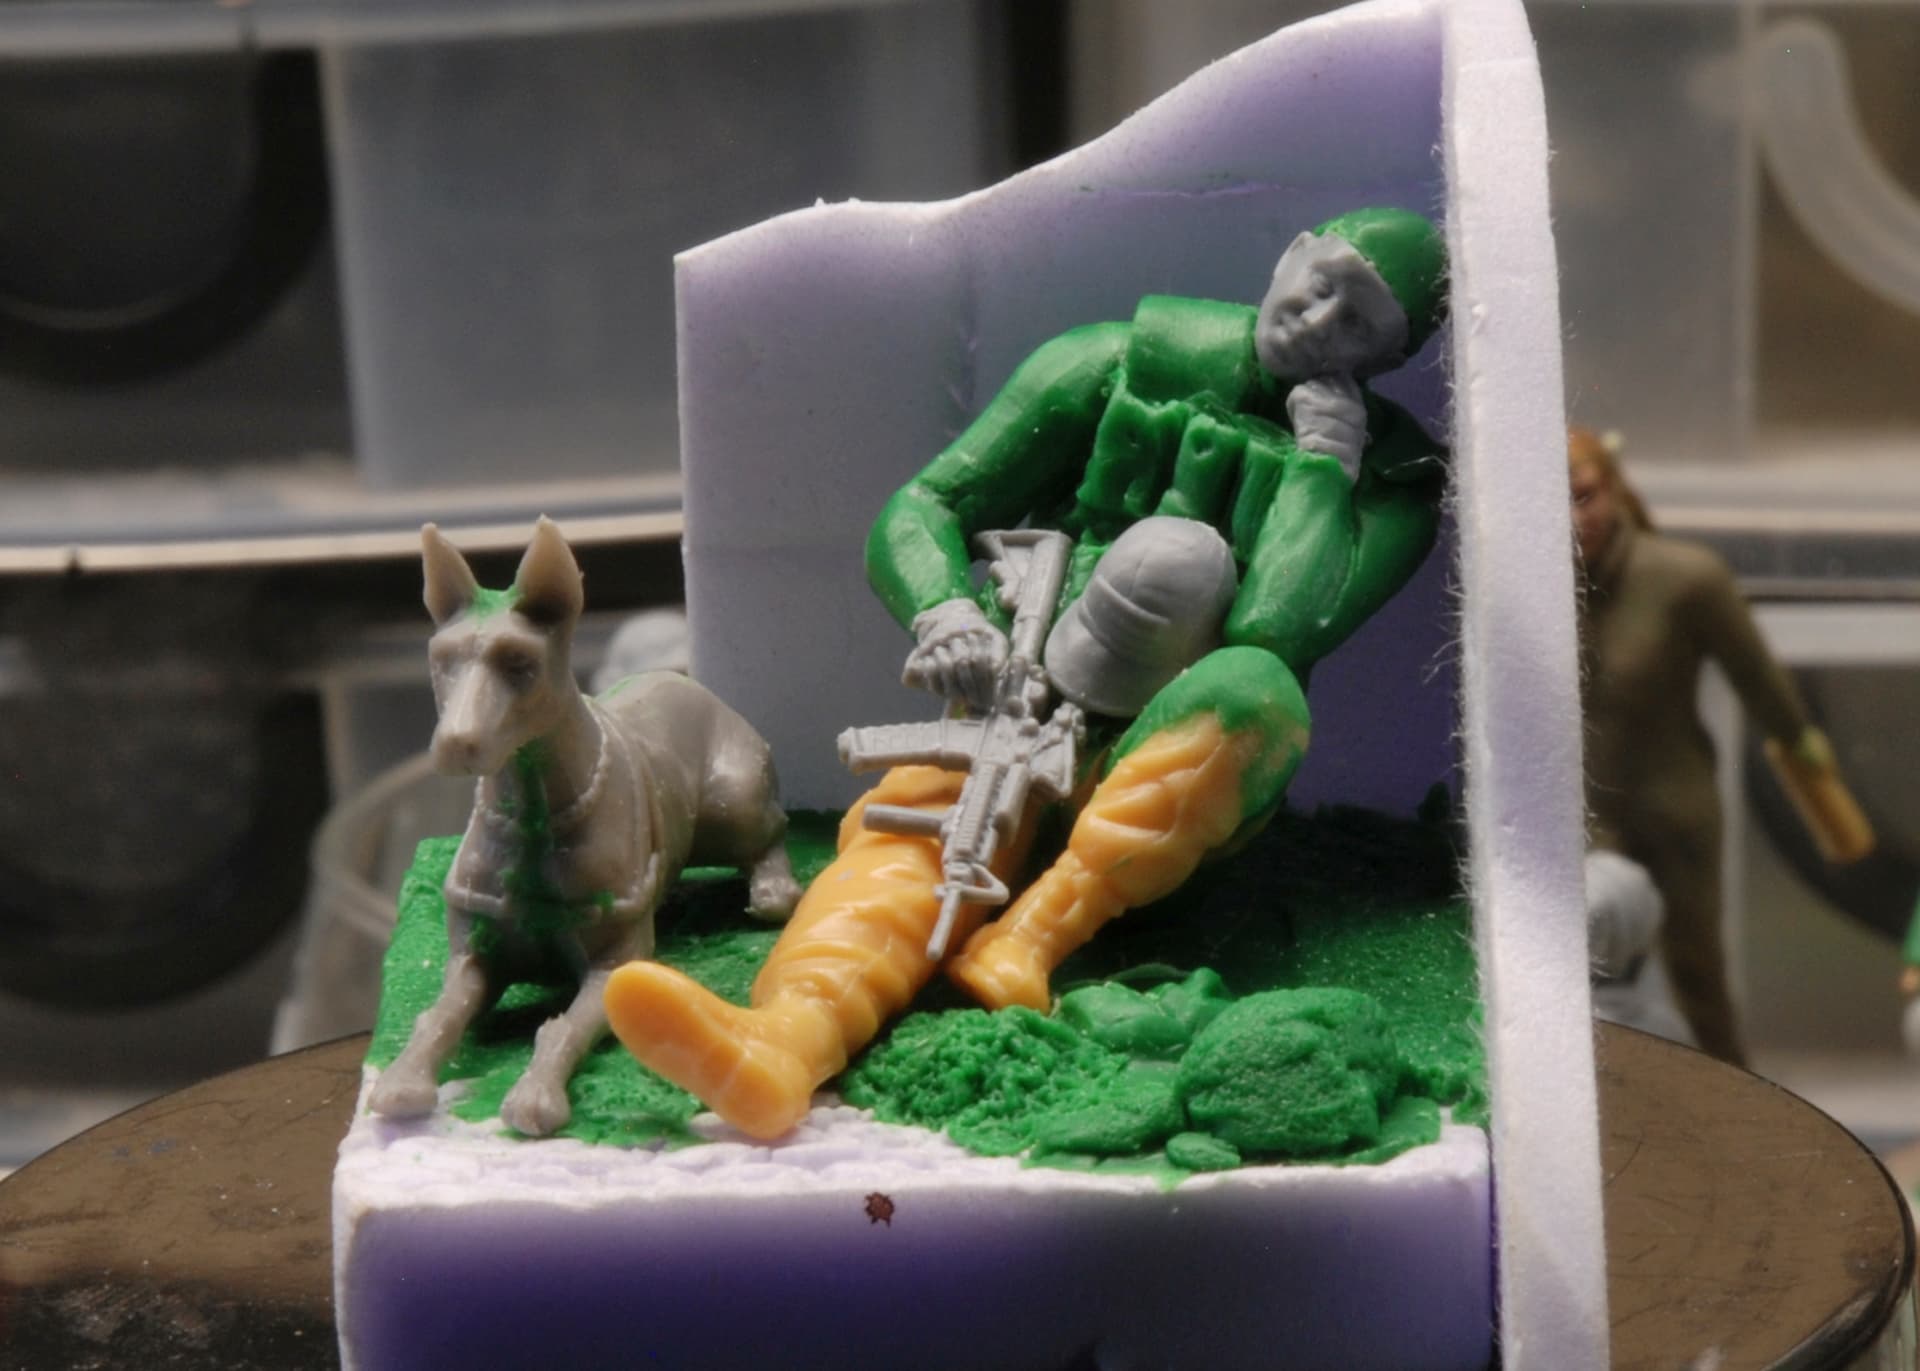
First cuts done, or rather snips followed by sanding.
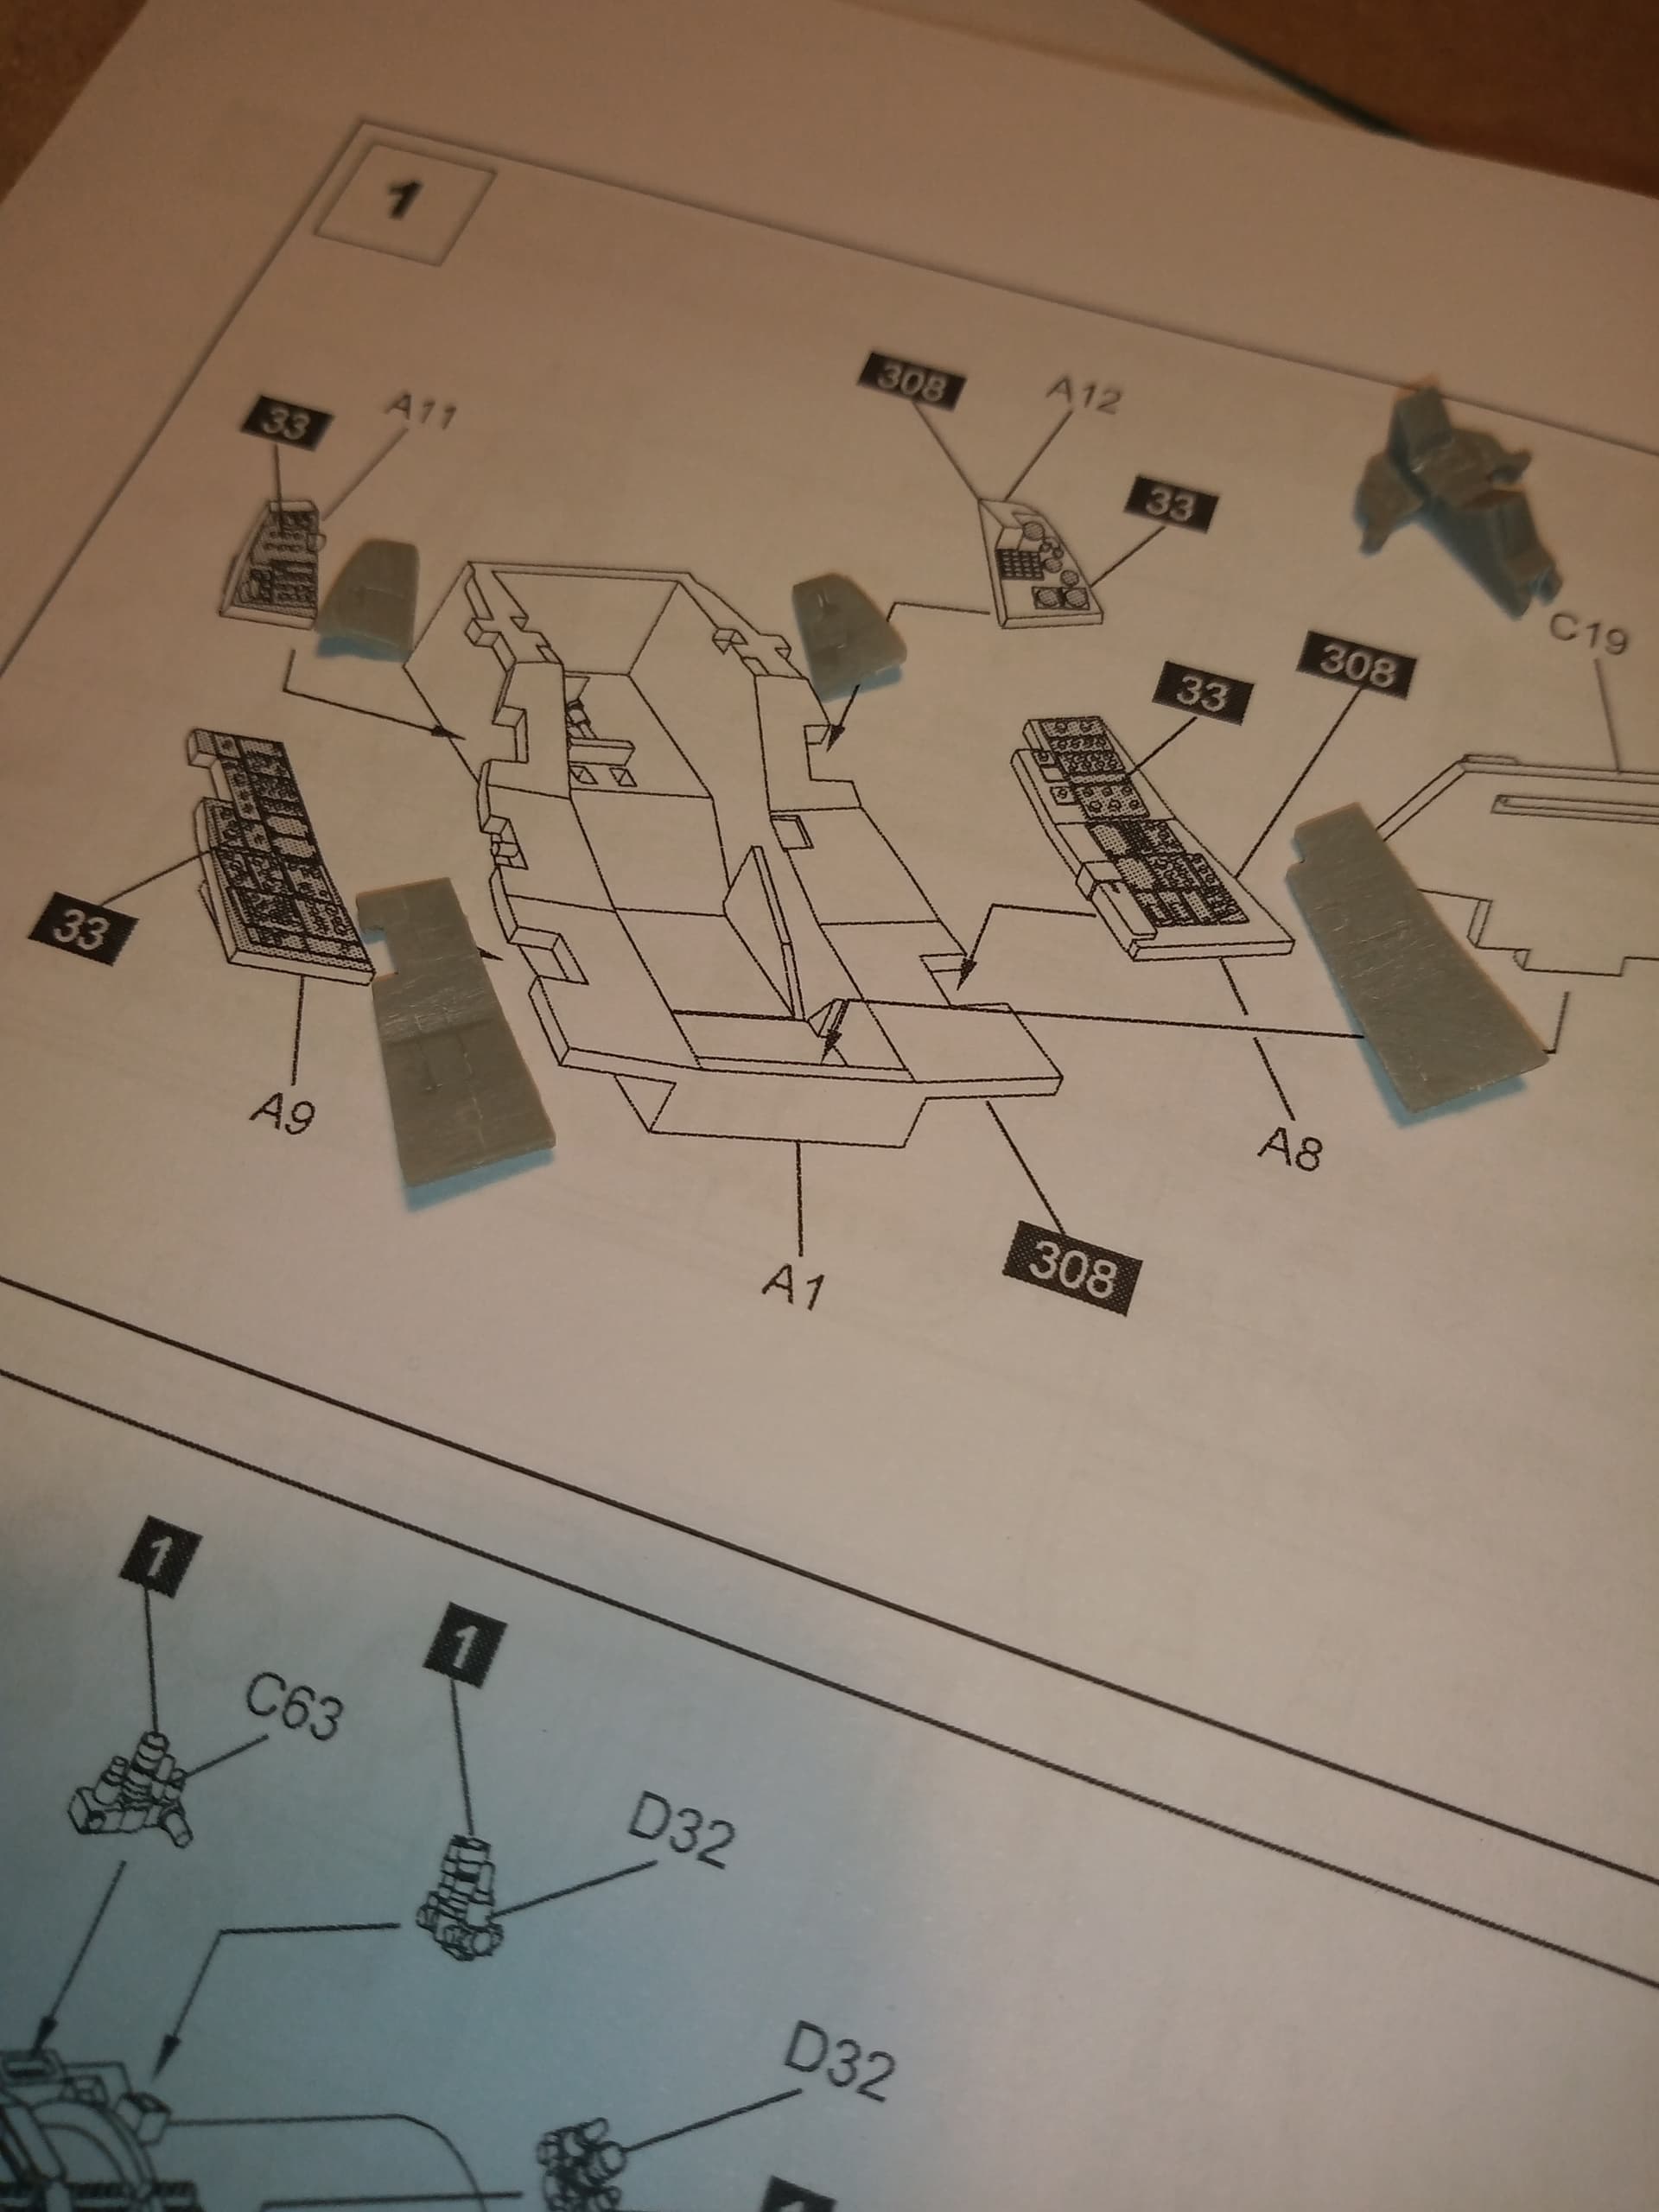
Sanded back all the kit detailing on the instrument panels, ready for painting then the first of the Quinta decals…
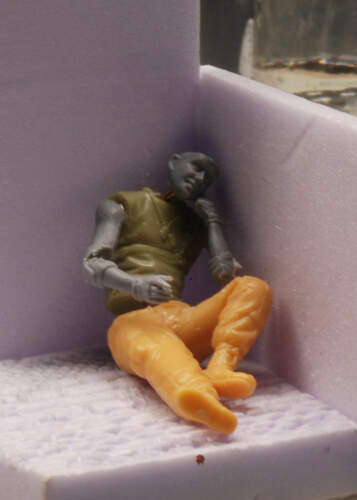
A the start I always feel like a butcher, cutting, carving using the resin saw.
Putting body parts together with wire.
Still a way to go.
Some start… That would take me 2 months Jan !!
It’s the experience of building years figures, but it always stay a challenge to bring it to life.
And find the right atmosphere.
Nice variety of builds… and great scratch work right away again by Jan…
As I still have some IDF stuff left, I will be joining as well, might be another M3 that I was still planning to do… might be something else… got enough IDF stuff in my stash…
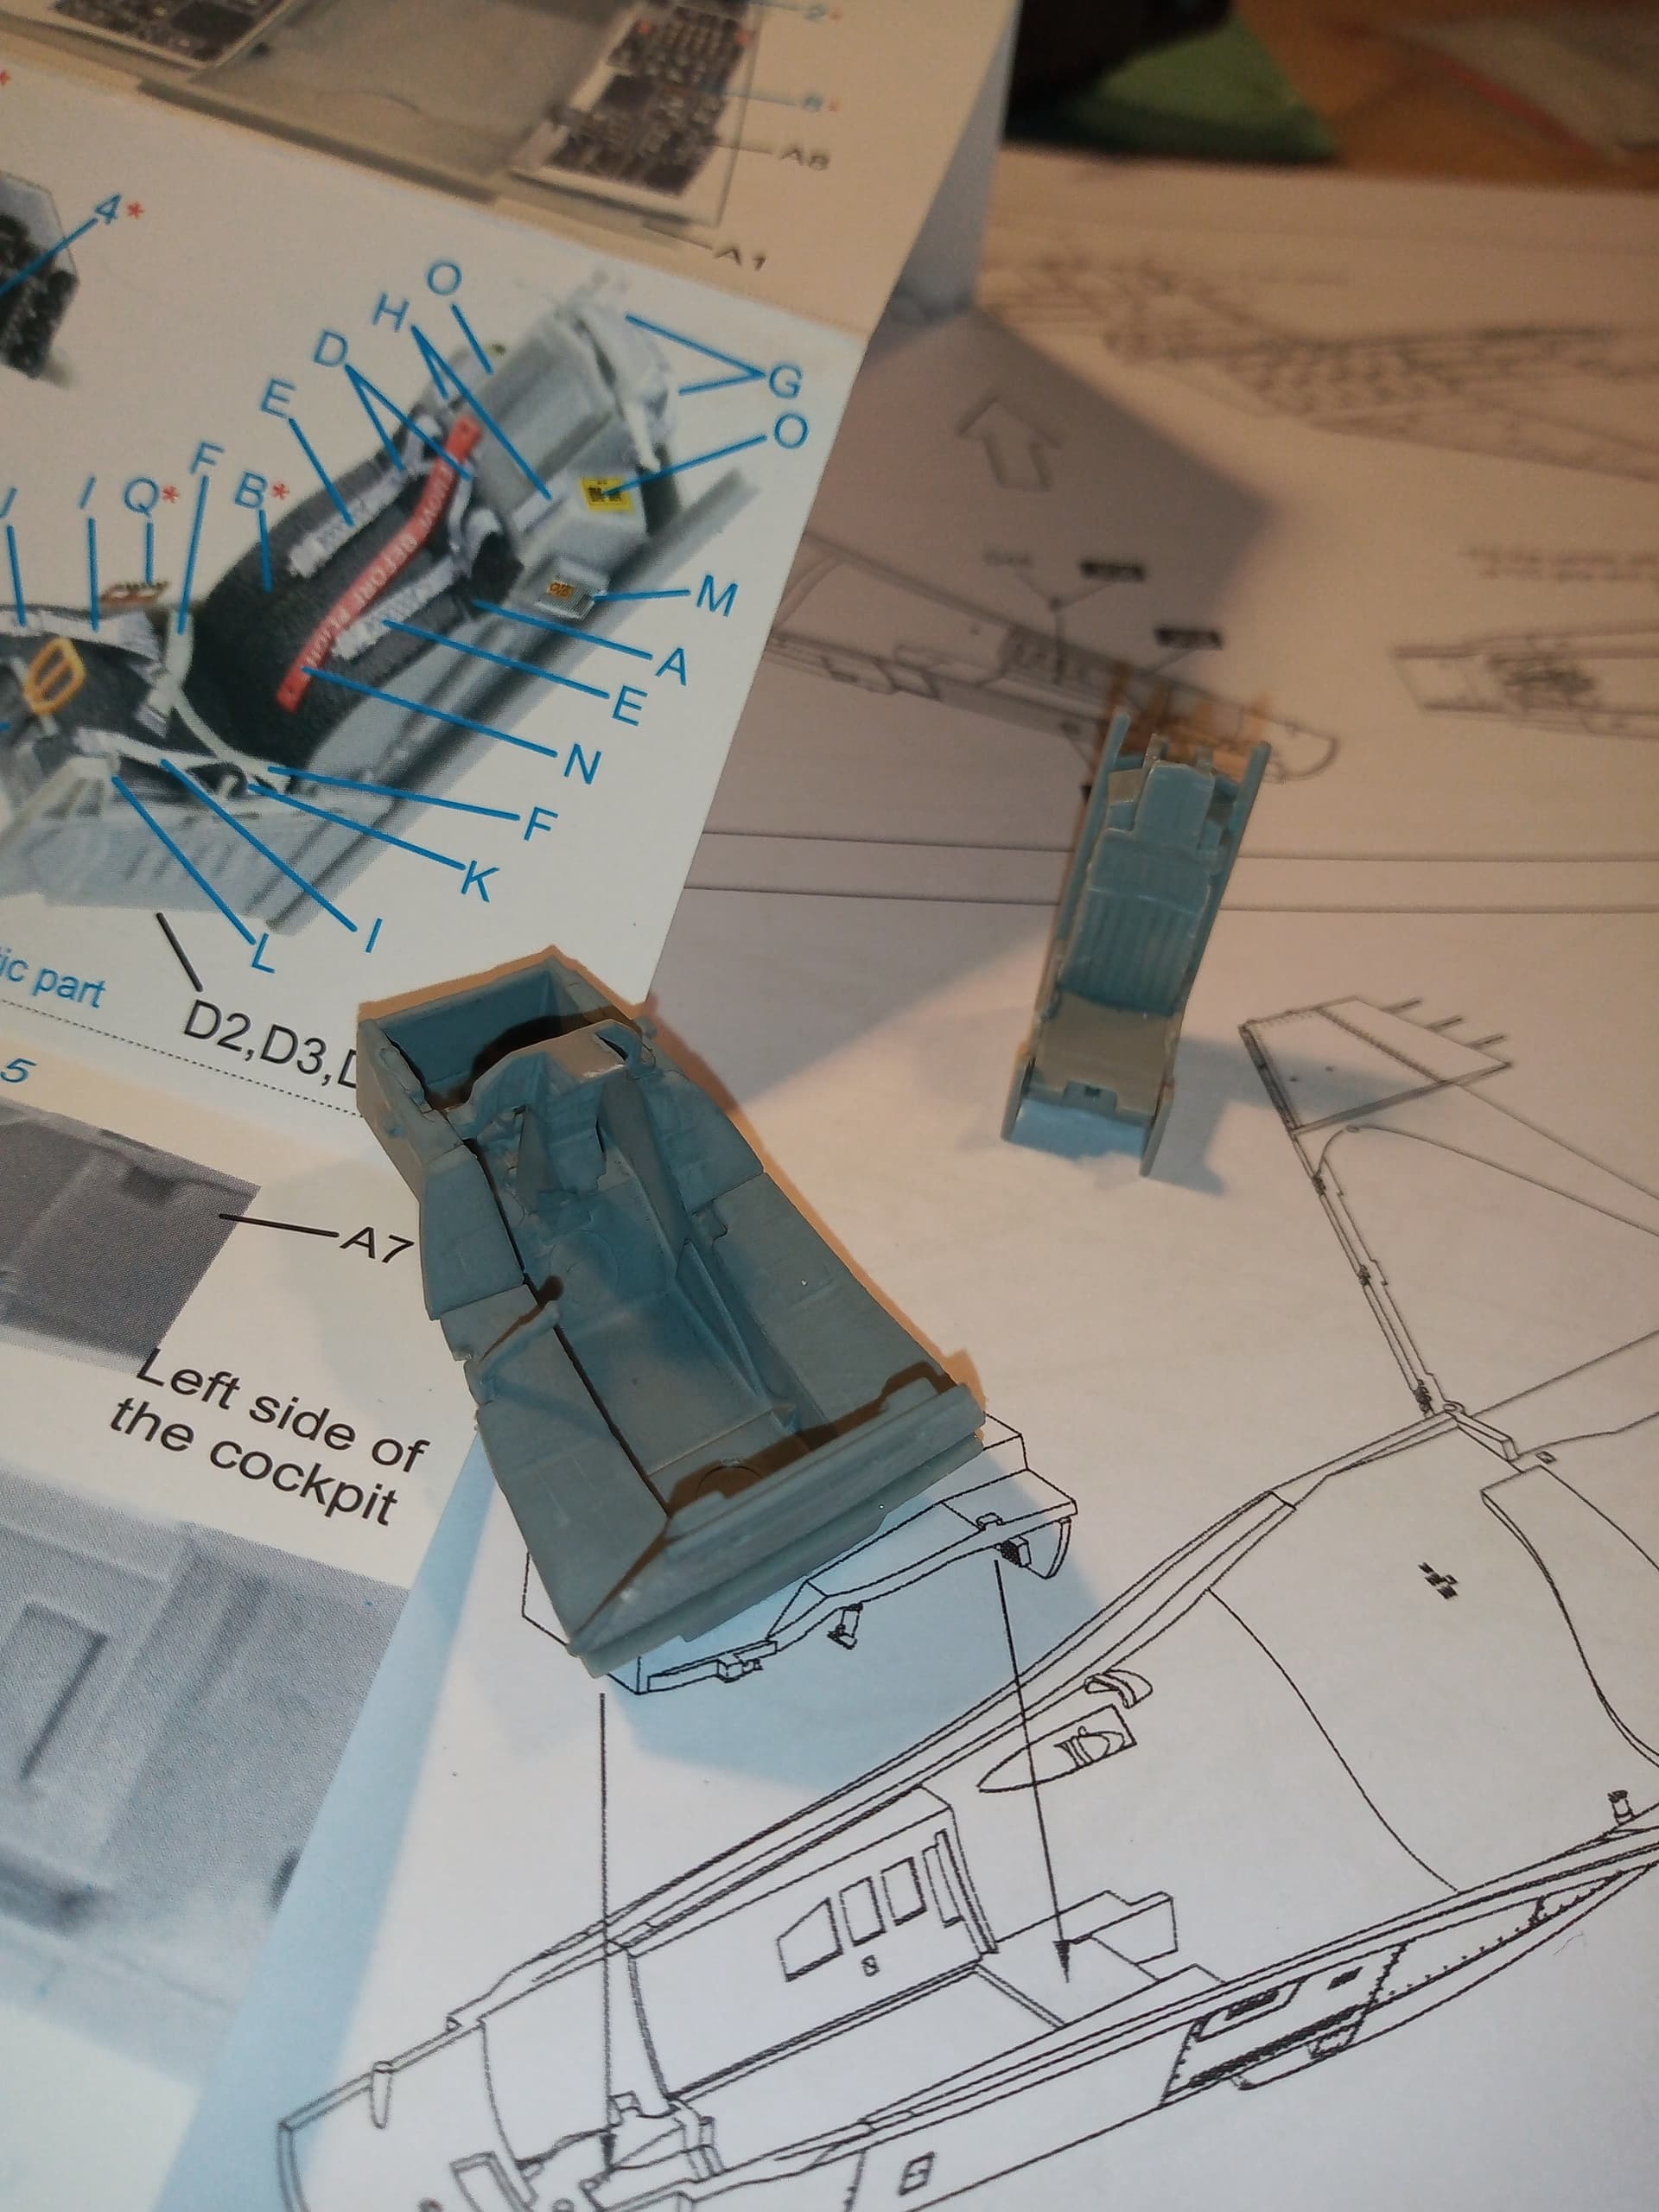
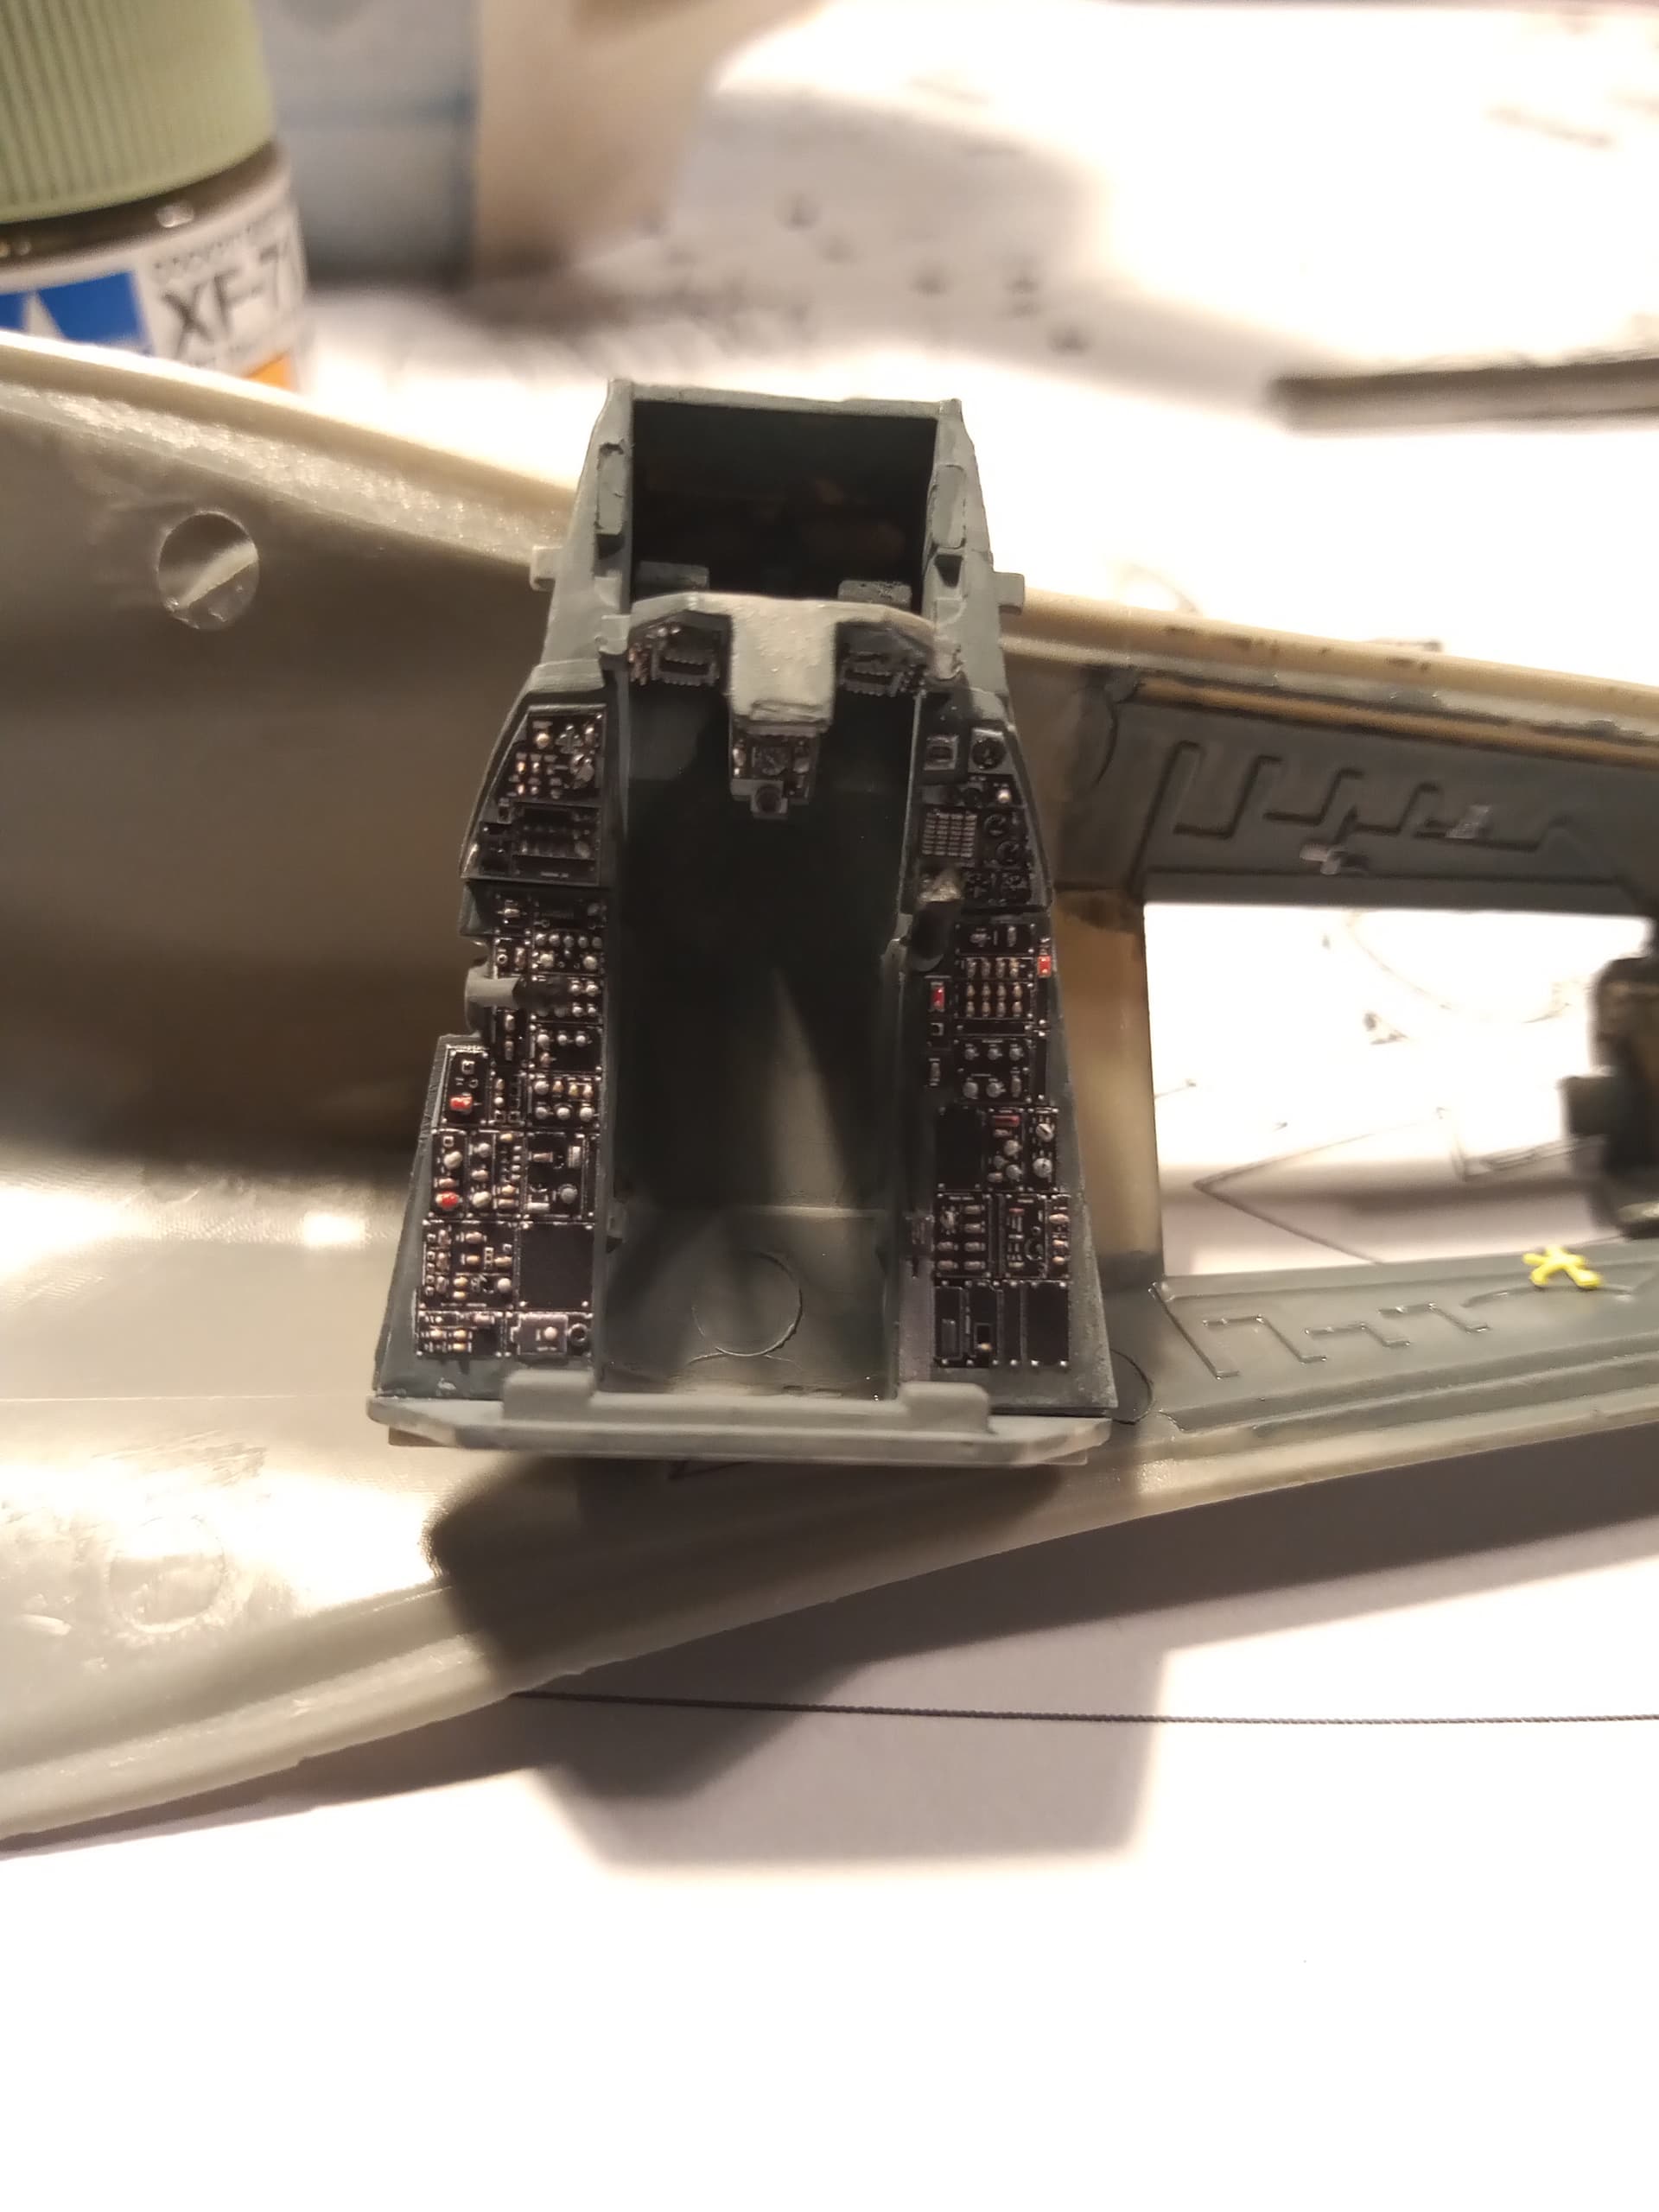
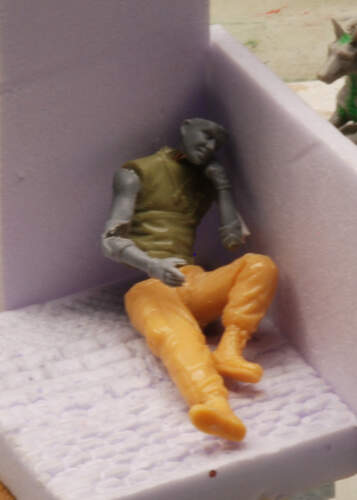
Got the basic cockpit tub and seat together, just have to paint the seat.
That link Israel @ReluctantRenegade gave me had some great images in of the ex IAF F16s which were a great help. Will definitely be using that link a bit more on this build. Luckily the Quinta details come with all the correct panel colours (grey)
One thing with the 48th scale, it’s great being able to have more visible detail, but there in lies the inherent problem… Any mistakes and goofs with the painting are also very more visible…
A bit more care will be needed for this one me thinks …
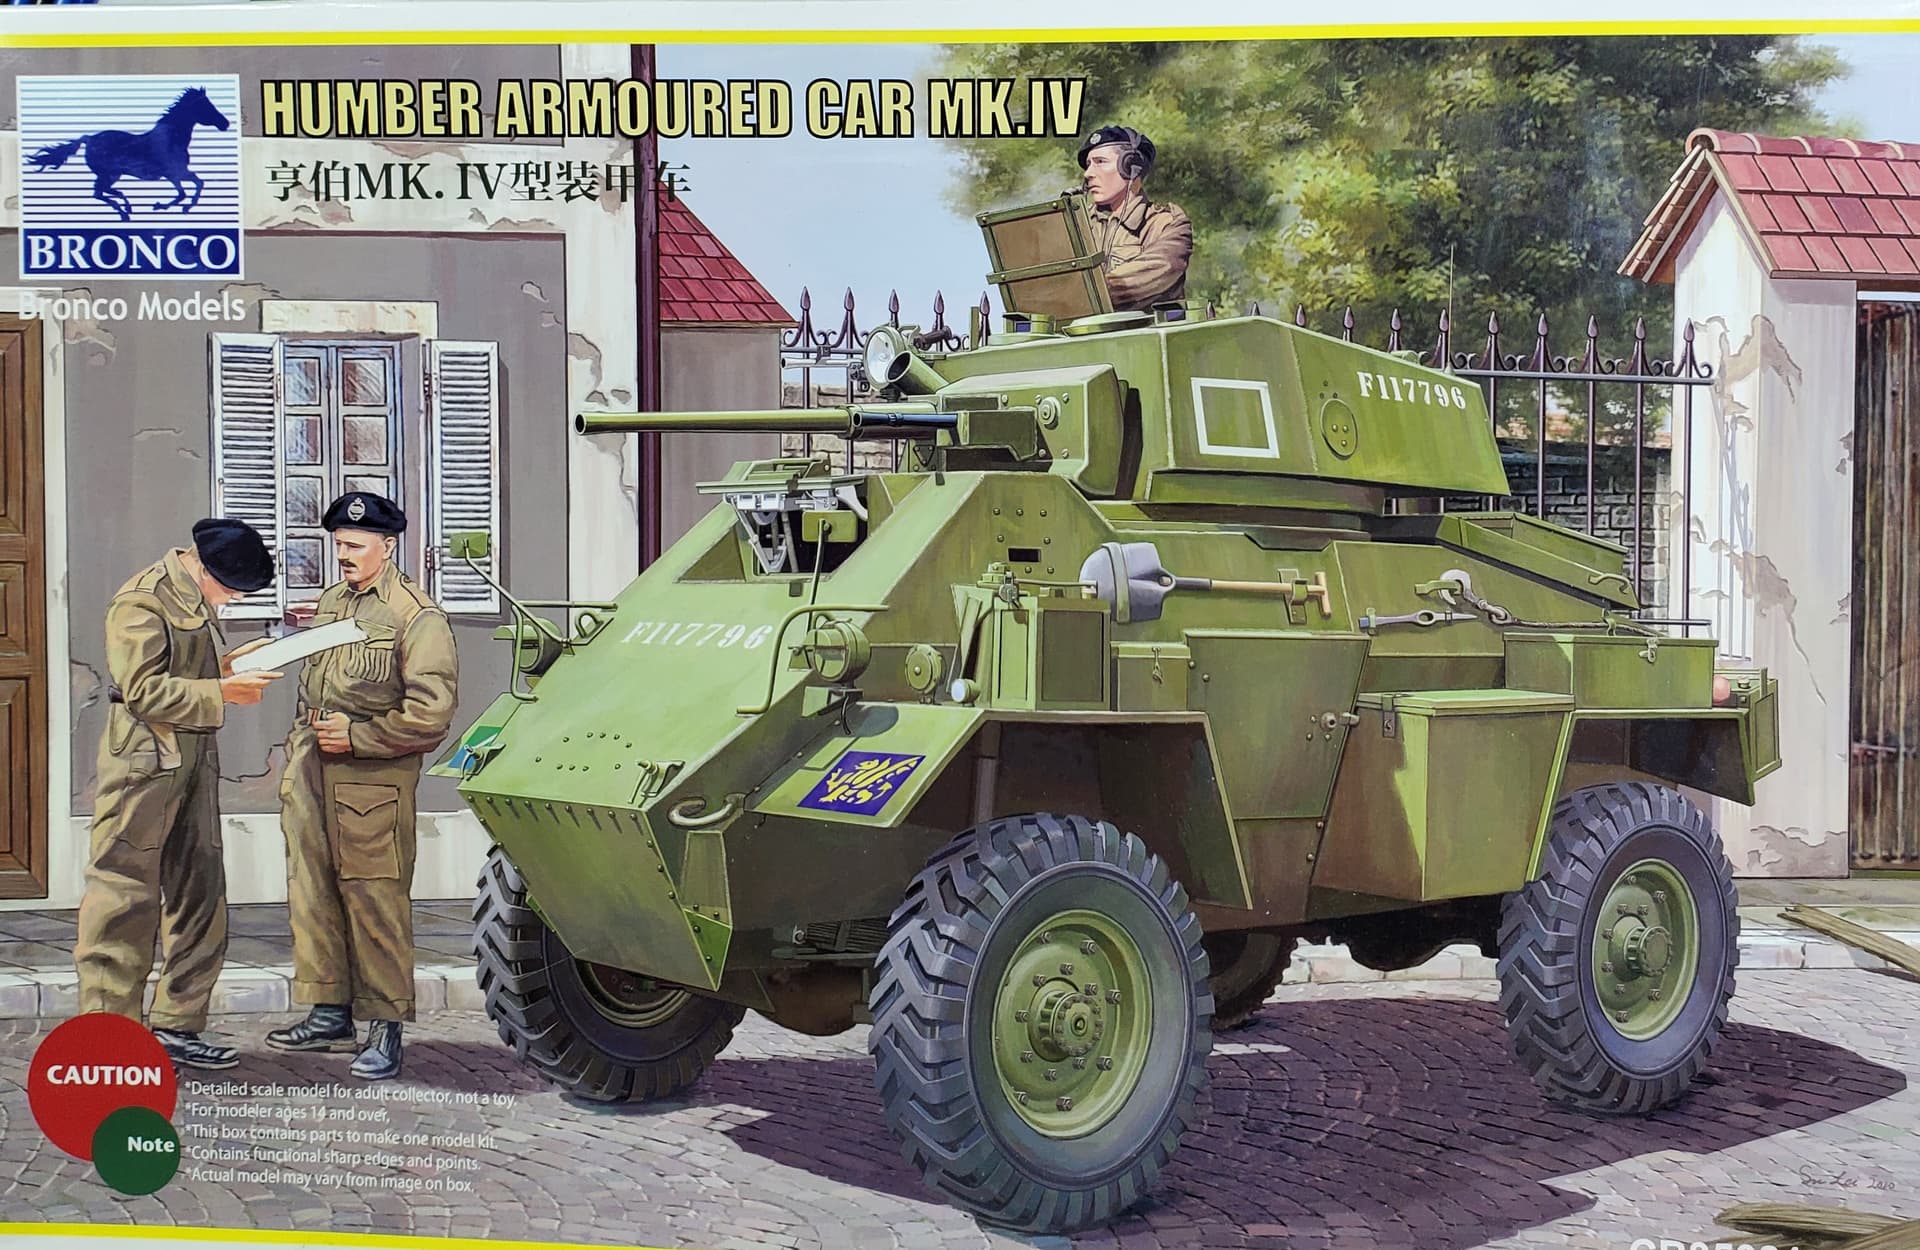
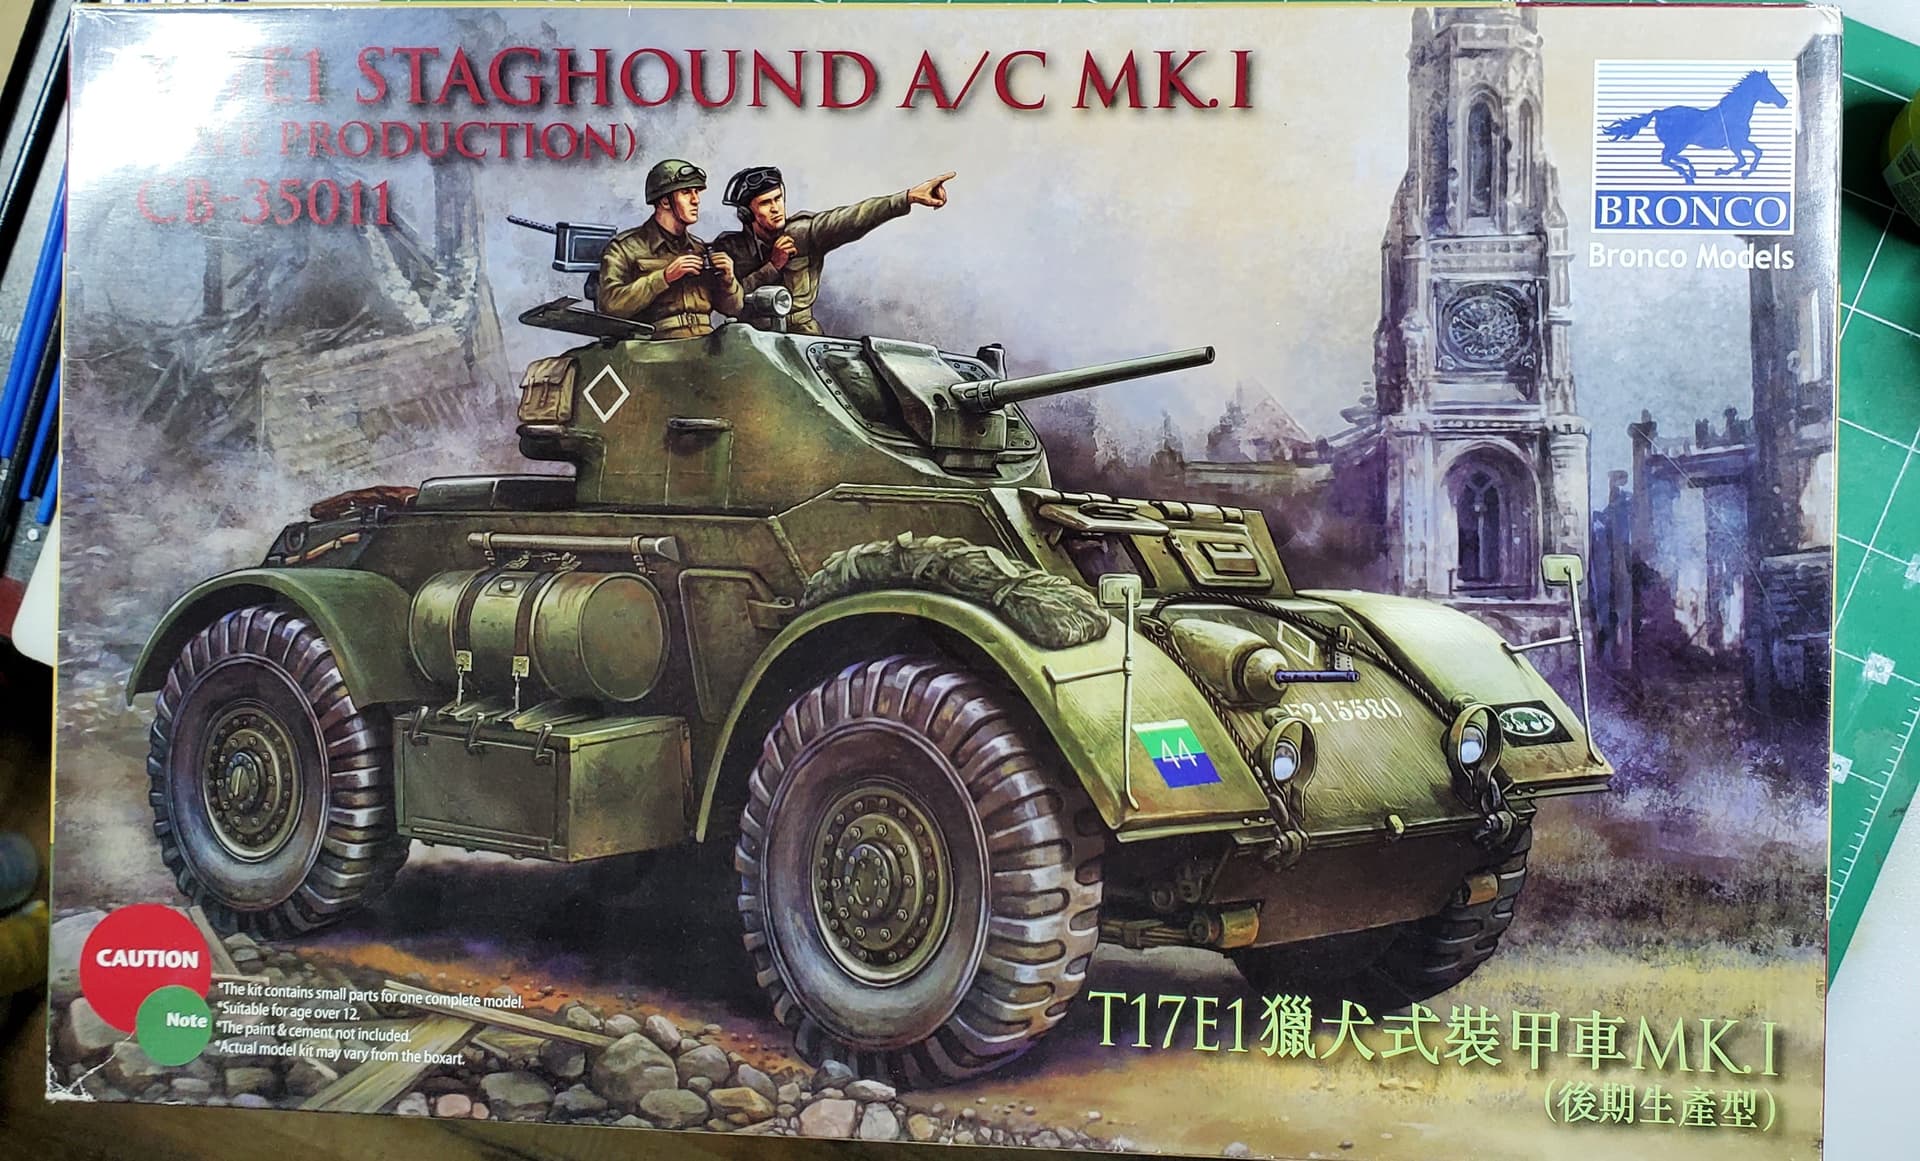
If I still have a house left after Hurricane Ian, I will pick one of these 2 little jewels from the '48-'49-time frame. We all know the IDF used any vehicle they could get their hands on, especially of WW2 vintage.
John, are you in Florida also? I am north of Tampa, as of right now the eye is coming straight at me…looks I will get a lot of building time this week, as I work outside.
Only the Humber participated in the War of Independence. The Stagehound entered service in 1952.
The decision was made … I must admit that I haven’t bought the M113 from the Dragon yet and that was also an argument to take it off the shelf …
Your usual rubbish… I mean… fantastic work!
For a Frankenstein build it cannot be faulted…amazing skill and attention to detail Jan. ![]()
![]()
Well, I’ll just pick an era for what either kit fits! ![]()
I lived in Odessa for a while, but just a couple of years. Been on the Space Coast since 2004…retired from NASA. We’re gonna feel it here as well. Generator, portable A/C unit, 3 days of gas, plenty of non-perishables, drain the pool every few hours, beer ![]() ,…we’re set! Maybe some model work. Be safe over there as well!
,…we’re set! Maybe some model work. Be safe over there as well!
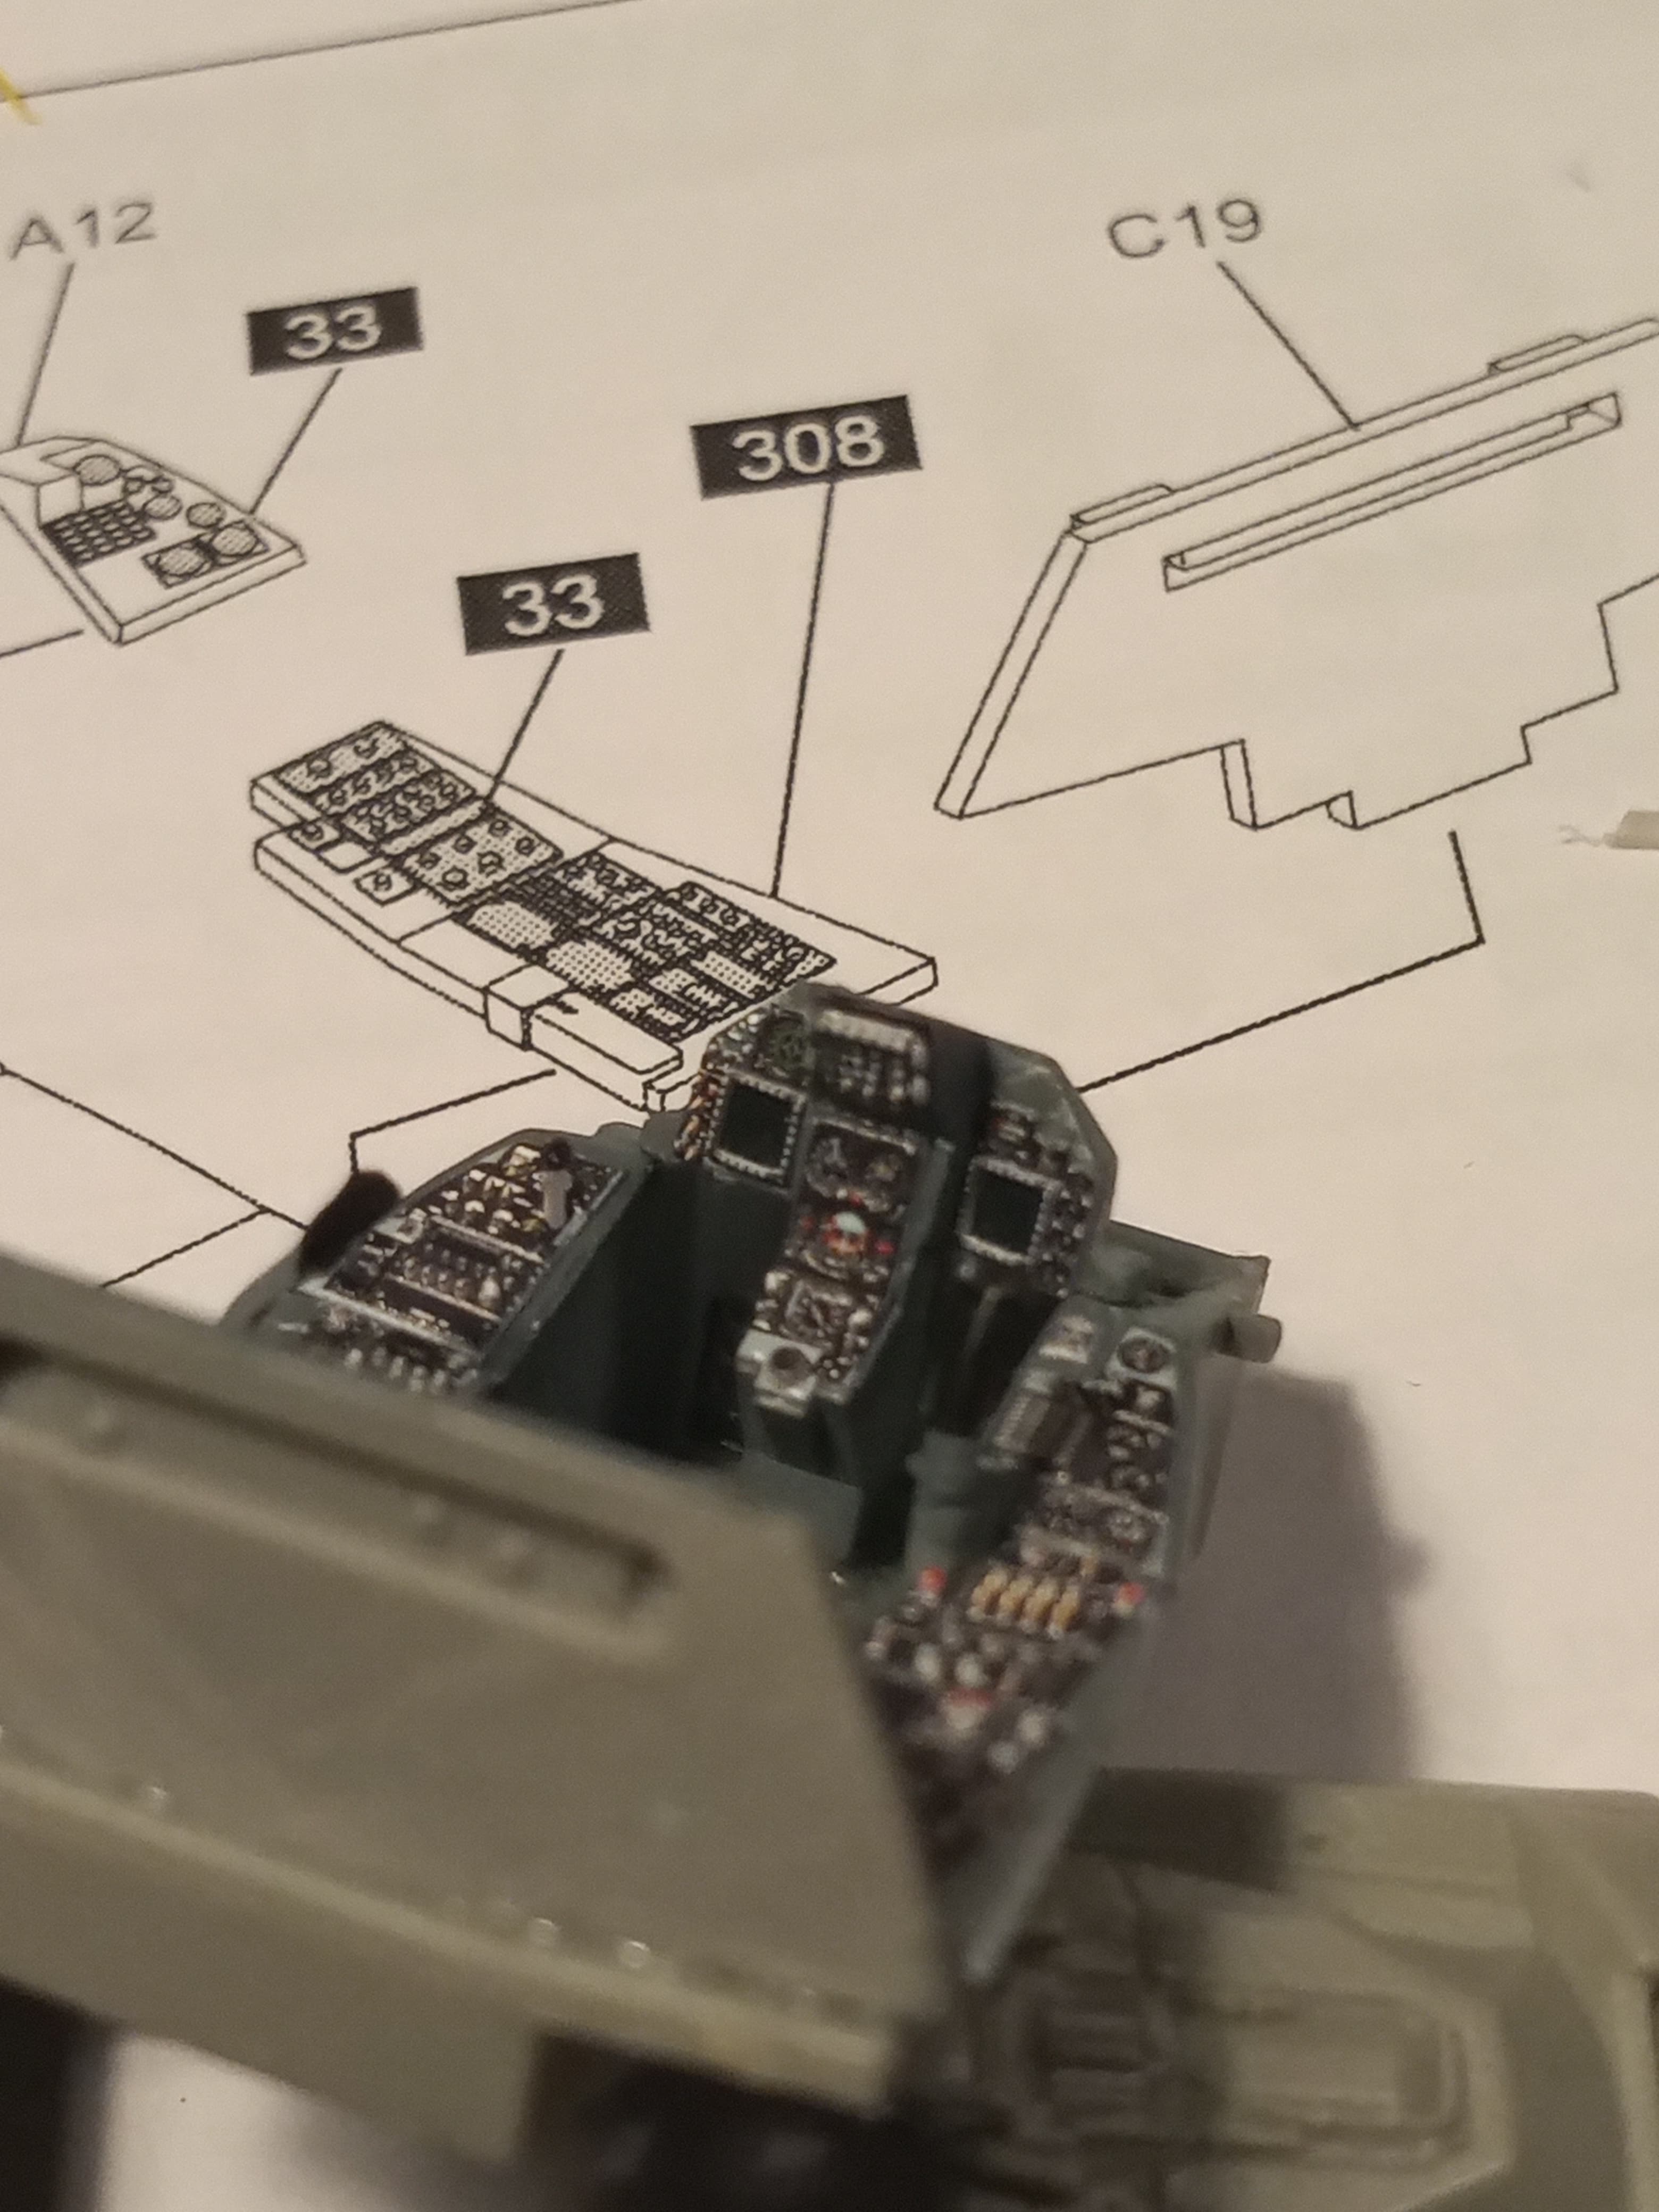
Started on the Quinta decals for the cockpit
Very easy to use, just same as normal decals (do not use micro sol or set or similar) warm water and then they recommend using a bit of PVA to help secure it or a micro dab of super glue… I used PVA.
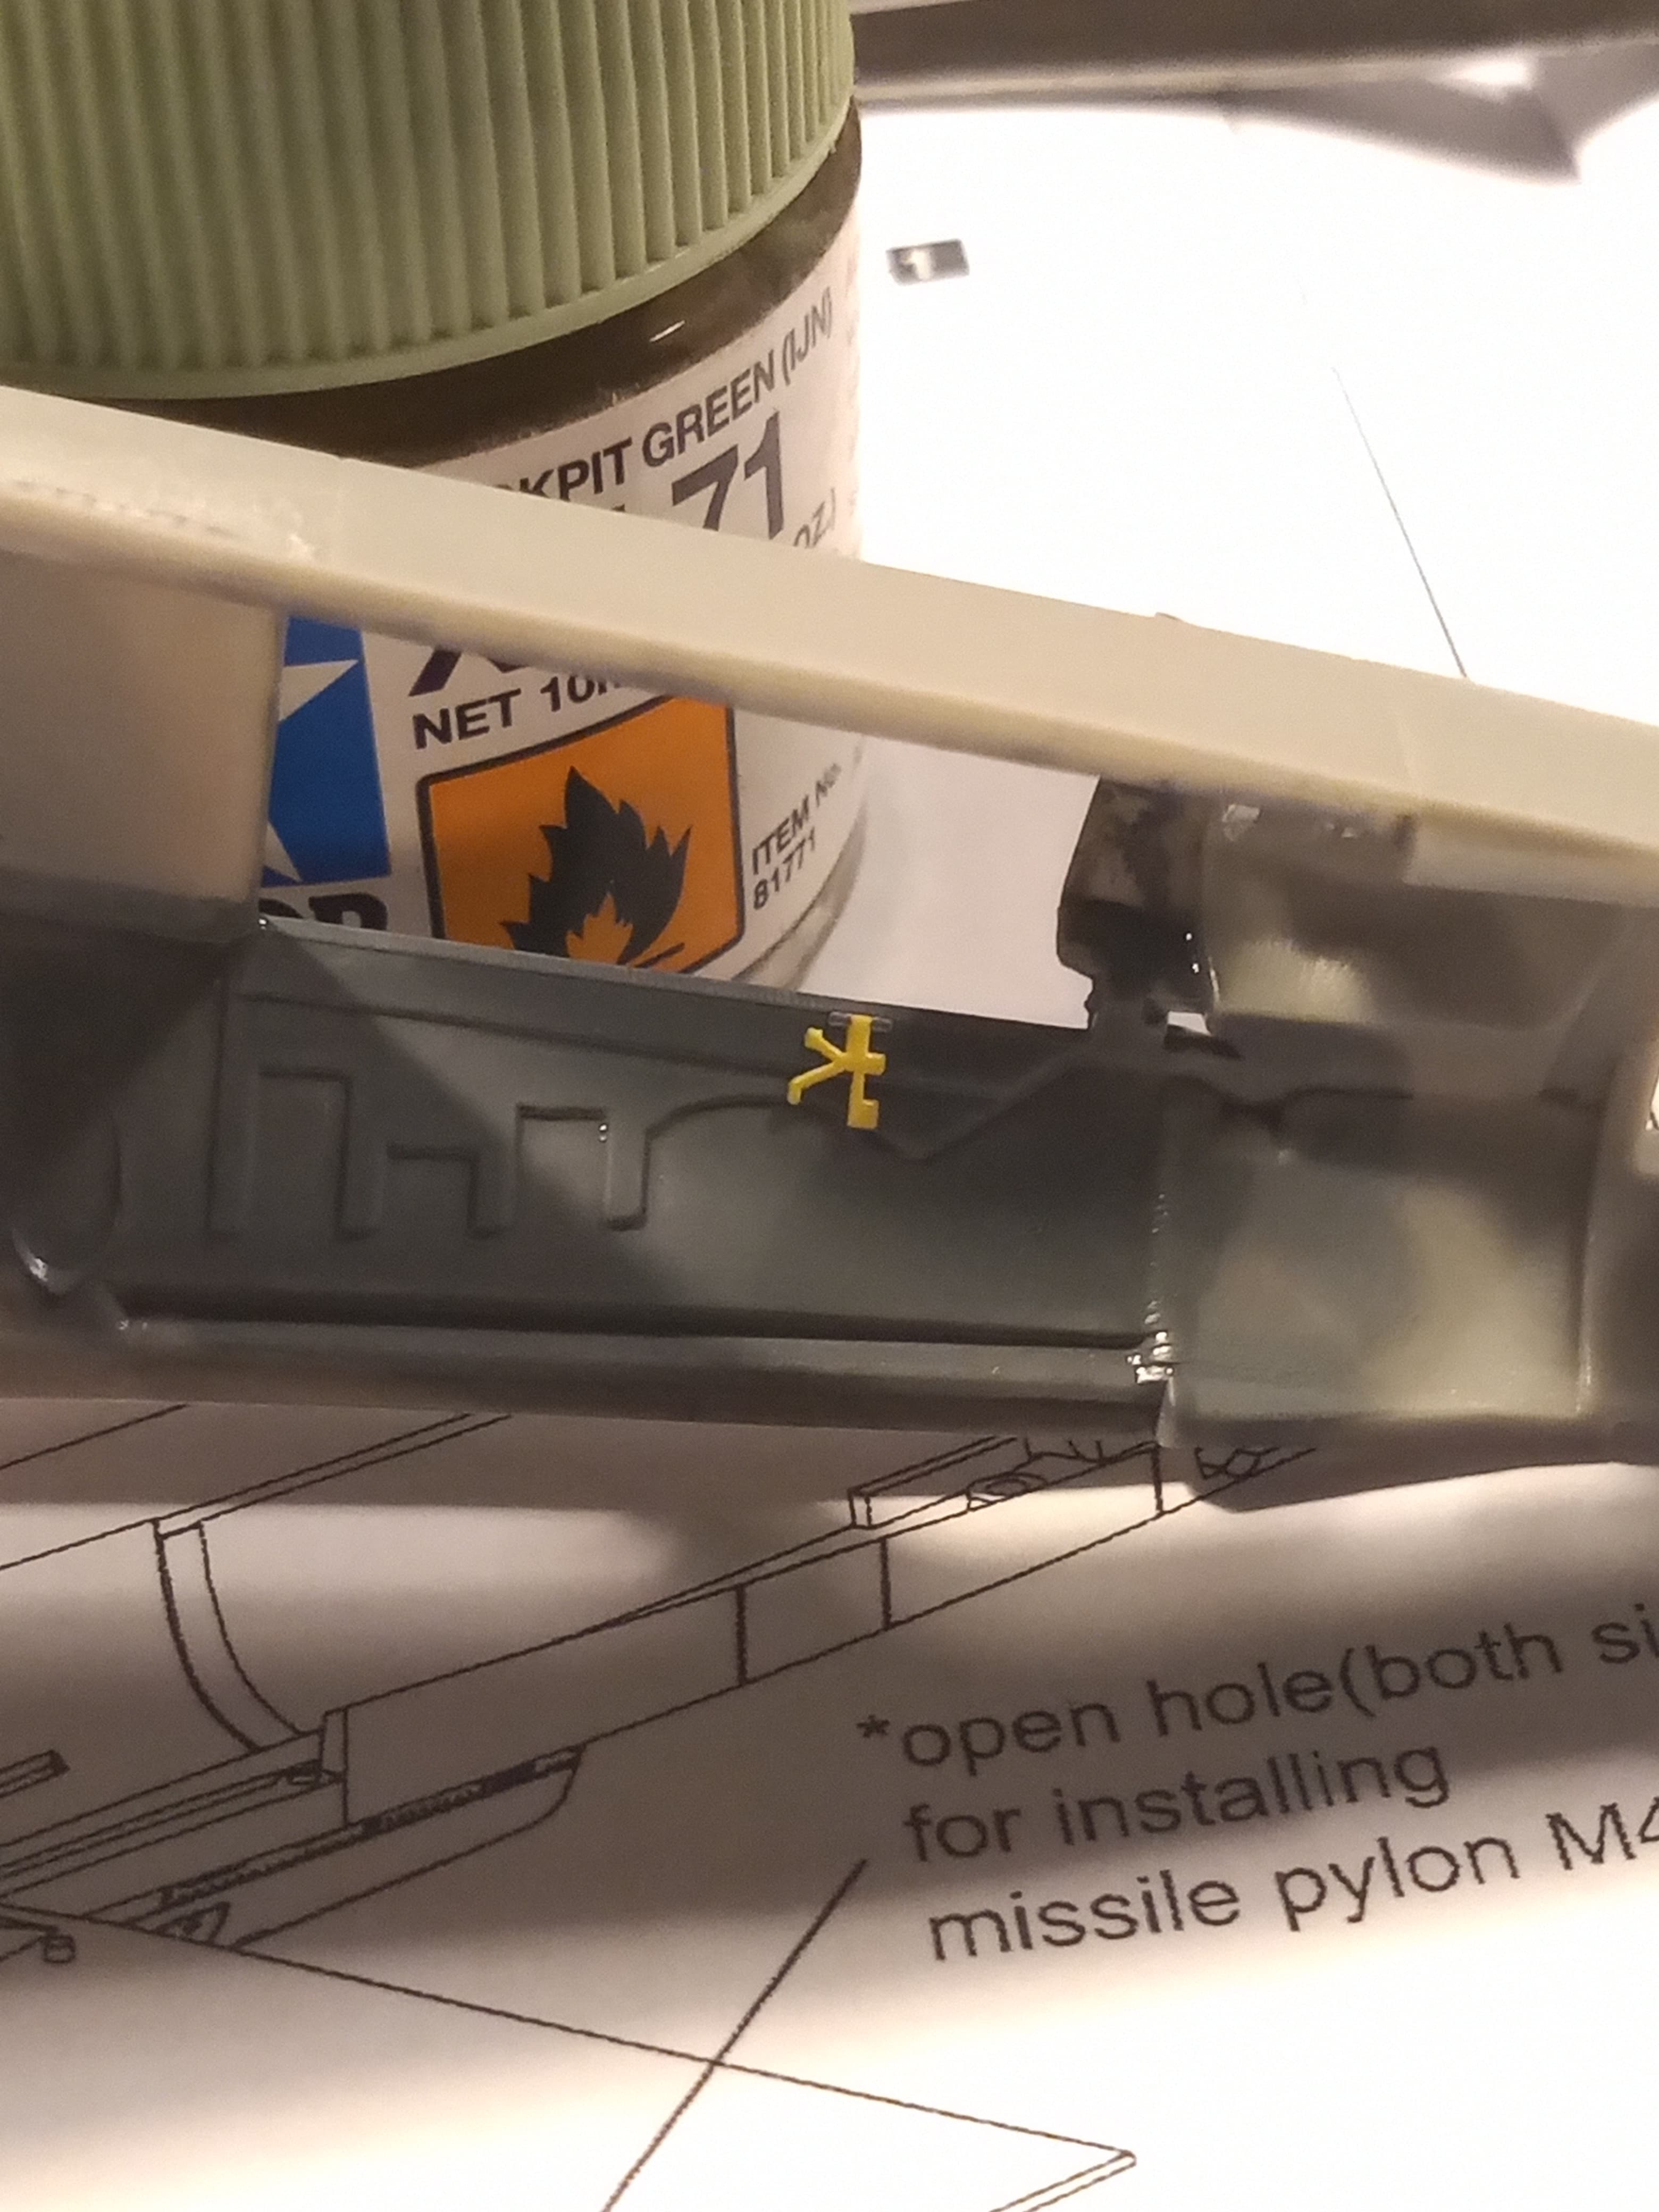
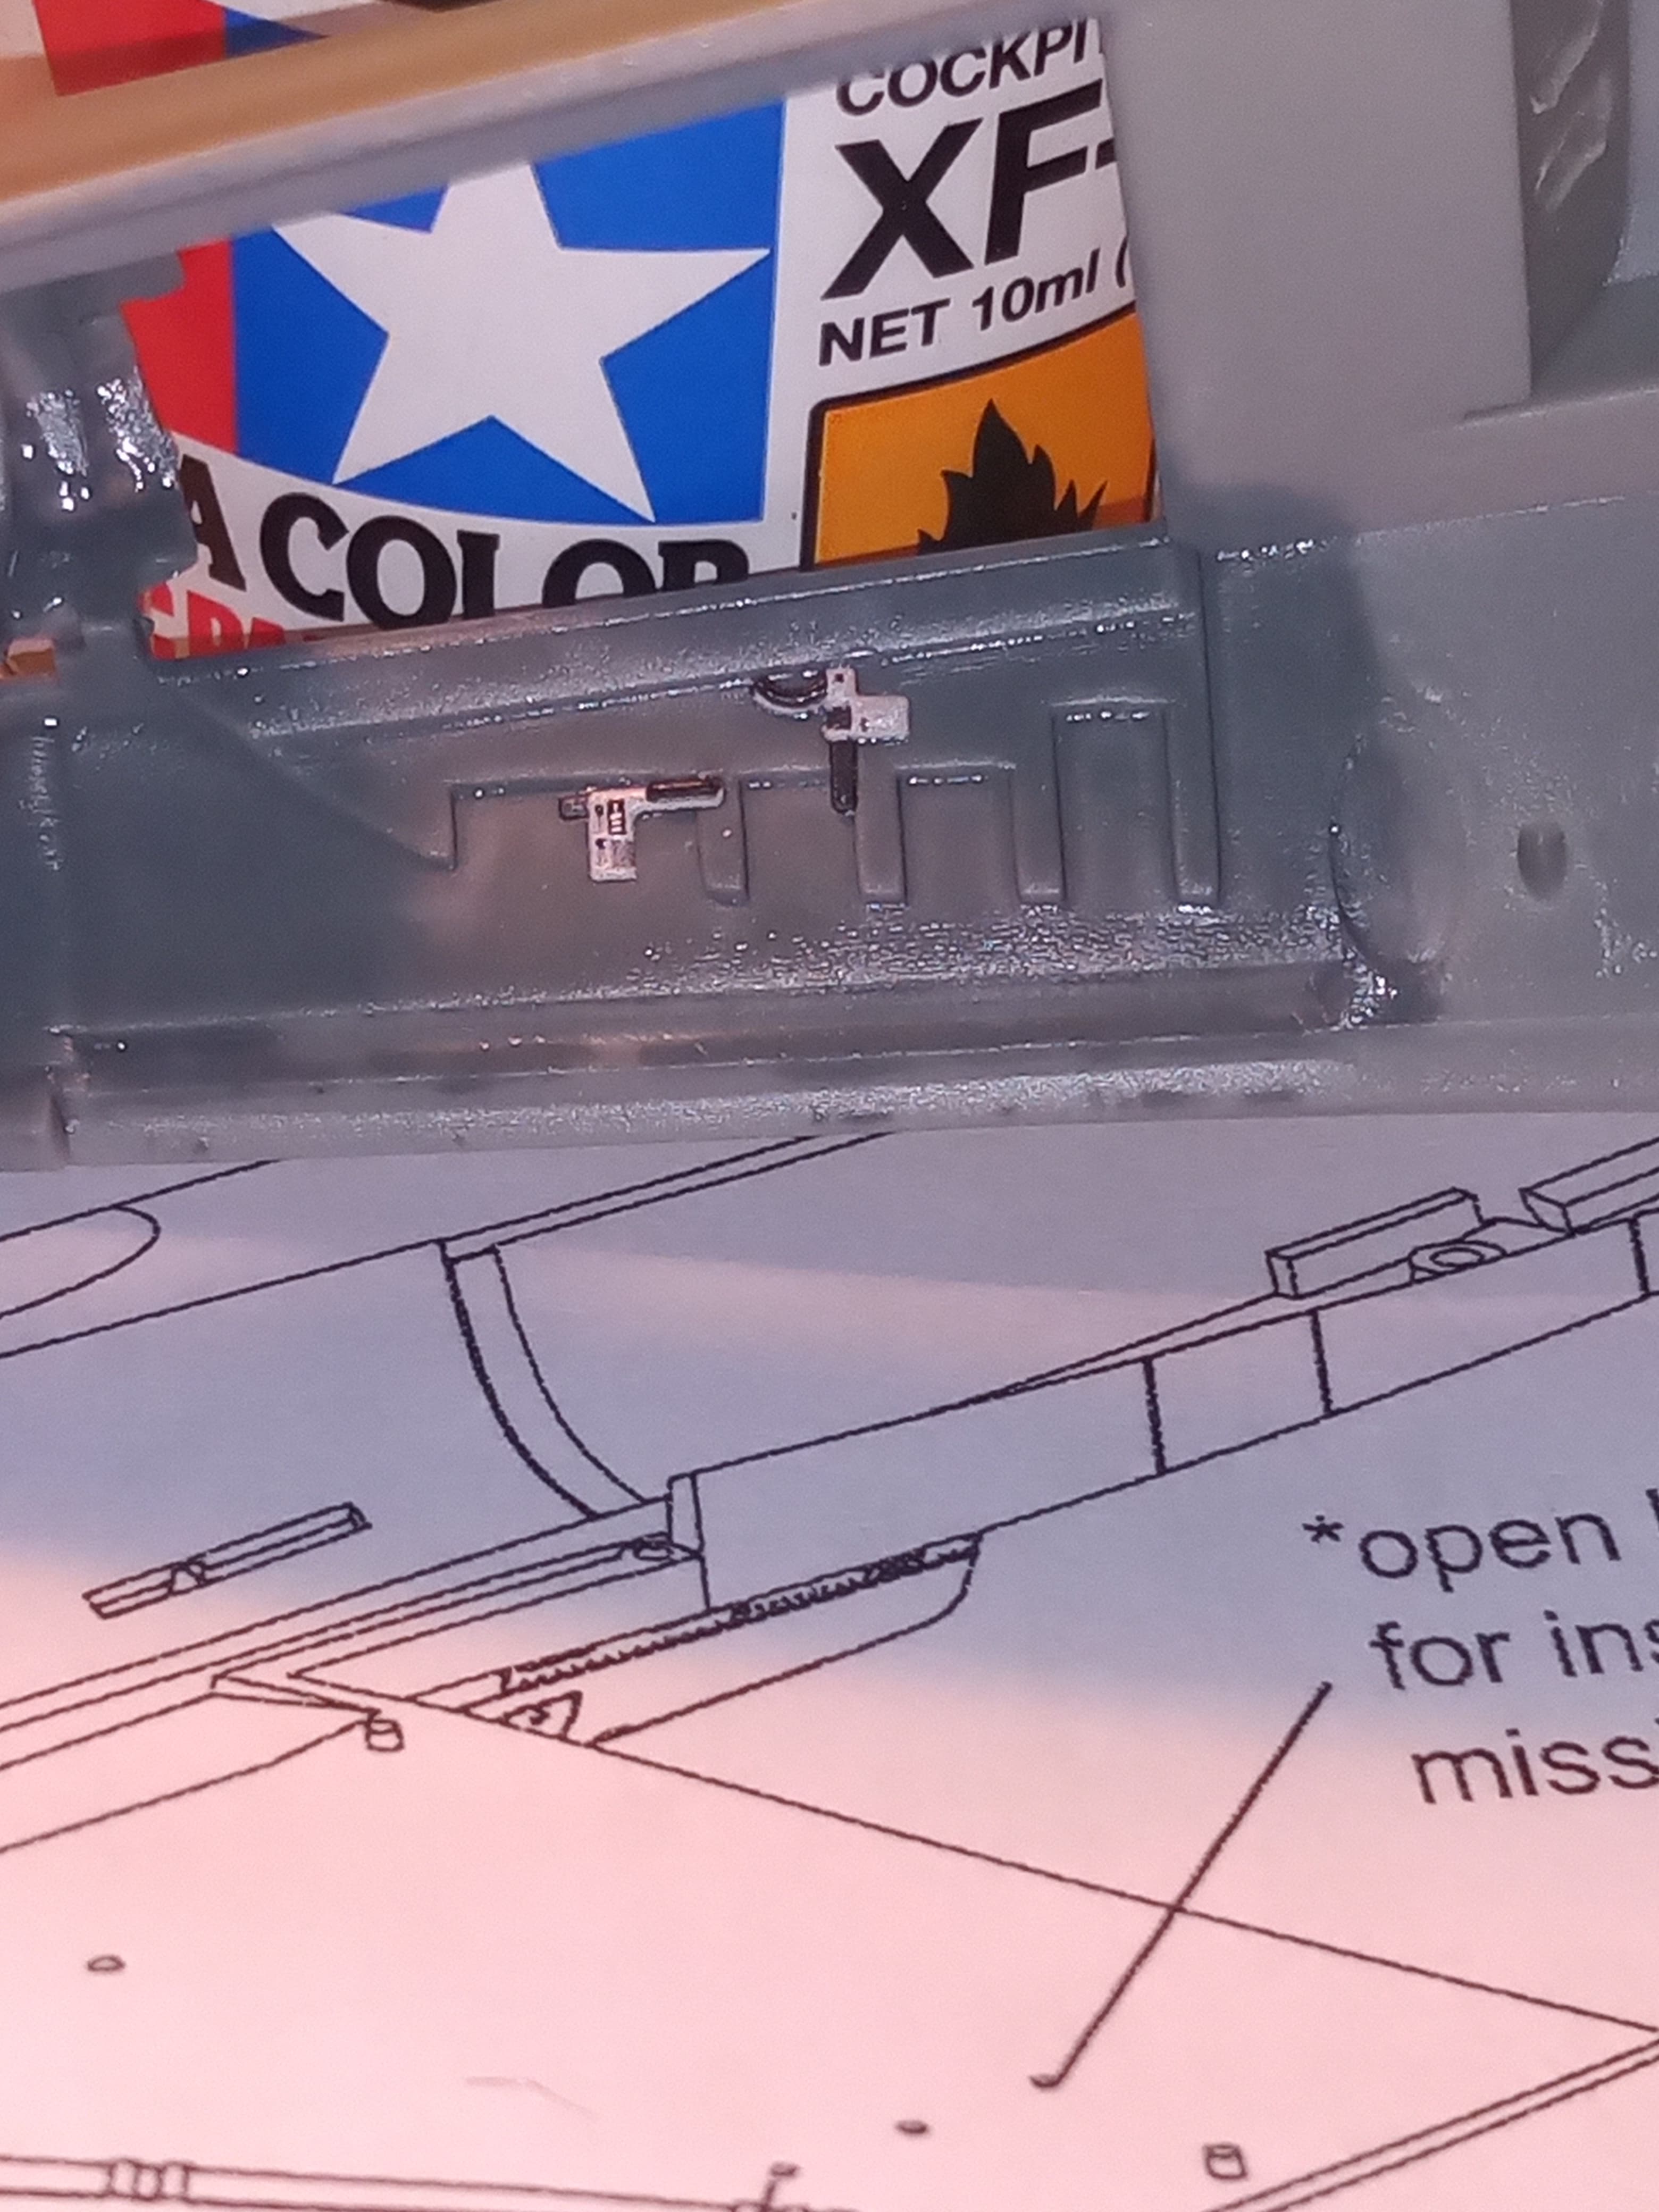
And some bits for either side of the inner cockpit walls.
Started on the seat. Will need to mix a more striking green for the oxygen bottle. There is still one piece of kit seat to add at the top but is very fragile…will wait till the decals are on before I do that though.
Sorry Bert for mistakenly posted this in yours ![]()
Nice work John. The cockpit is looking nice Roth those Quinta decals. I have yet to purchase any of their items but very very tempting in getting few cockpit sets in near future.
Bert @bwilt I am going to link your IDF Dio thread here as there is a lot of good info in there regarding colours and paints and history about certain vehicles, hope that’s ok…
And people can bookmark if needed
No problem at all, John, people might have to search that topic for the info they are looking for though… its a long lasting topic ![]()