I haven’t posted here since about 2007 (unable to recover my old account unfortunately), and am close to a place where I feel like beginning a build thread. Not so much because I am an expert (I’m not), but would love to take advantage of everyone’s expertise as I embark on a new build for the first time since 2019.
Going to start working soon on Tamiya’s P-38 as the G variant. Aftermarket bits include model master gun barrels and Quinta Studios 3D decals.
Then welcome back Steve… A lot of people have talked about this kit and sung it’s praises, so will follow along and see what its like… I’m sure you will get lots of help/tips/advice… Good luck
Excellent! I’m going to be building that kit soon myself. We have a twin-engine fighters group build that has just started if you’d like to pile in there.
So I have less than one month until Grad School is officially over for me, so it may be more prep work and small chunks until I suddenly have a bit more time leading into 2022.
Doing my Homework marking what needs to be sanded away to make a flat surface for the Quinta Studios Decals.
Hi Steve and welcome back - I’ll be watching for sure . I’ve built this kit recently and it is without doubt the best assembly experience I’ve ever had.
I’m sure you will enjoy it . I’m looking forward to see how the 3D decals work out .
Cheers- RT
This kit is categorically awful and you shouldn’t go anywhere near it. I hereby volunteer, out of the goodness of my heart, to take it off your hands. You don’t have to thank me.
Seriously, this it one of (if not the) best kits I’ve ever built. The only real issue I had with it is the main gear retraction struts that are quite fragile and have to be installed with the gear bays and thus are in the way for the rest of the build. Might be best just to cut the things off and reinstall later. Also, I knocked the gun sight loose at one point, so be careful with that, it’s hard to install once the windscreen is glued on. All that aside, though, a truly great kit.
What Michael said - he beat me to it before I could post these .
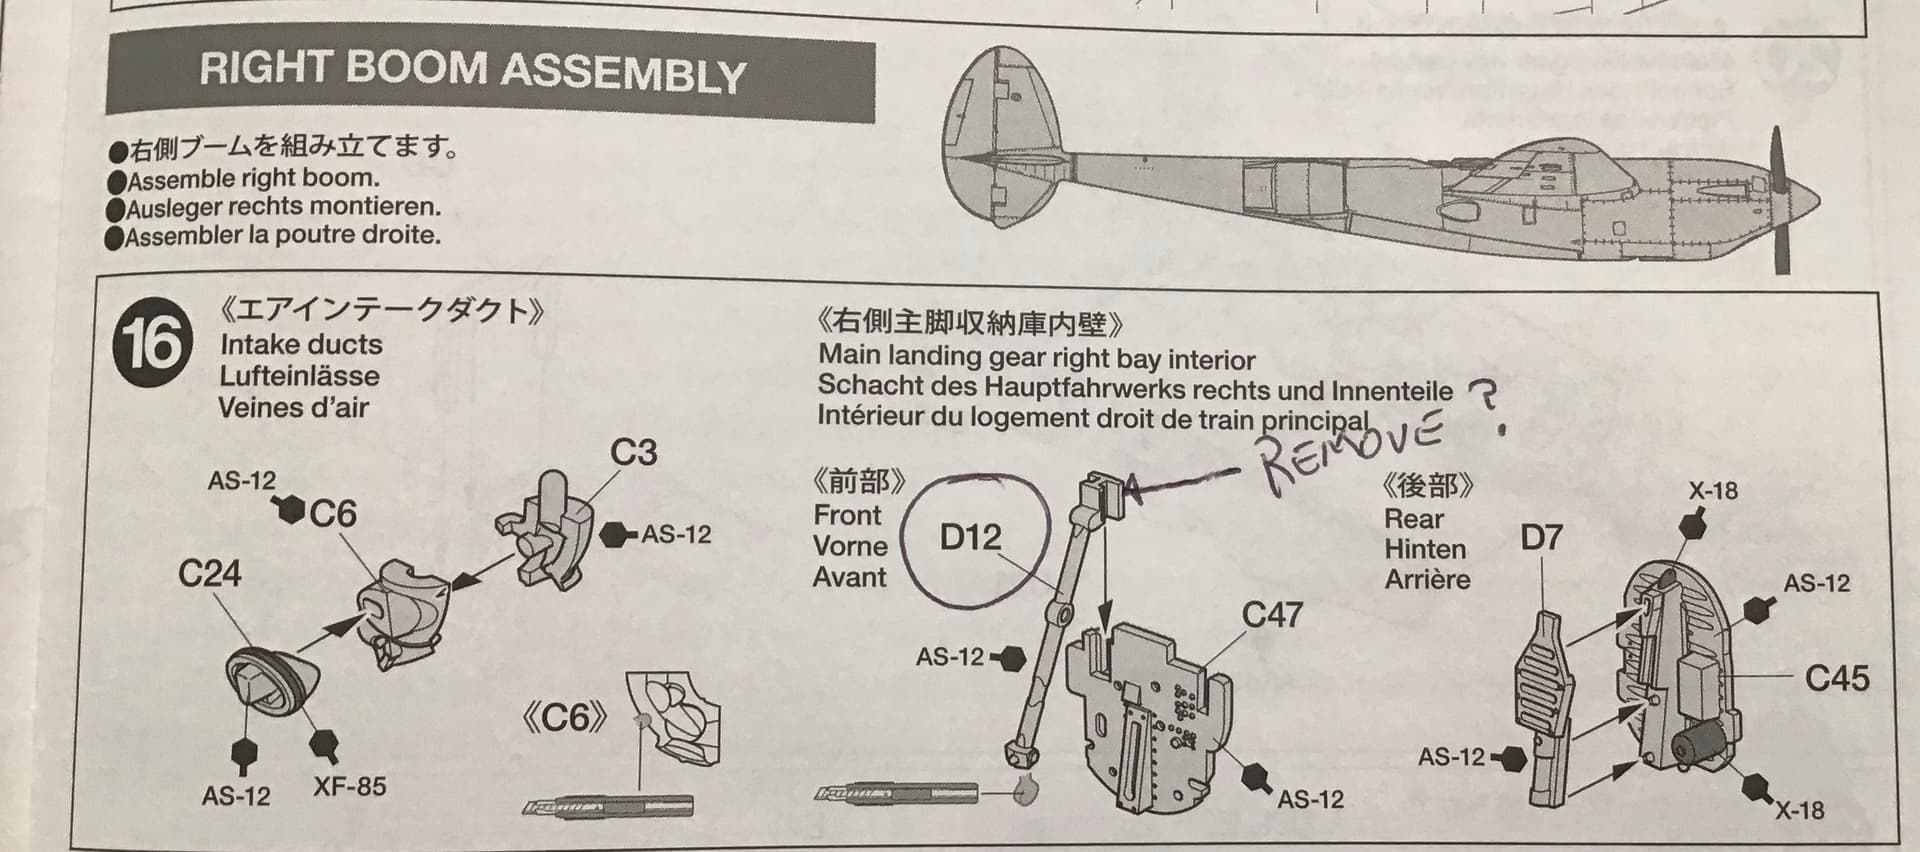
If you can find a way to not install these fragile main landing gear parts until nearly the end , so much the better as they will be sticking out and at risk of breaking throughout the build. I have illustrated the right boom but the procedure will be the same for the corresponding parts in the left boom . The one obstacle is the “T” section tab on part D 12 that is trapped behind the bulkhead once the bulkhead is installed. Cutting this off while still leaving it’s perpendicular part to slot into the bulkhead should do the trick.
Haha perfect! It’s in the mail. Thank you for the insight on the main gear bay. I’m one that is not skilled at fixing issues with bad kits so at this point I am being snobby towards only kits that are engineered to fit together with minimal sanding/seam filling etc. Previous kit was the Tamiya F-14A so I think the pattern has been established!
Richard quick question for you; do you mind explaining how you attached your antenna line rigging to the back of the canopy? That part stymies me and pictures are often not close up on that spot for me to tell what’s going on. Thanks in advance for any advice!
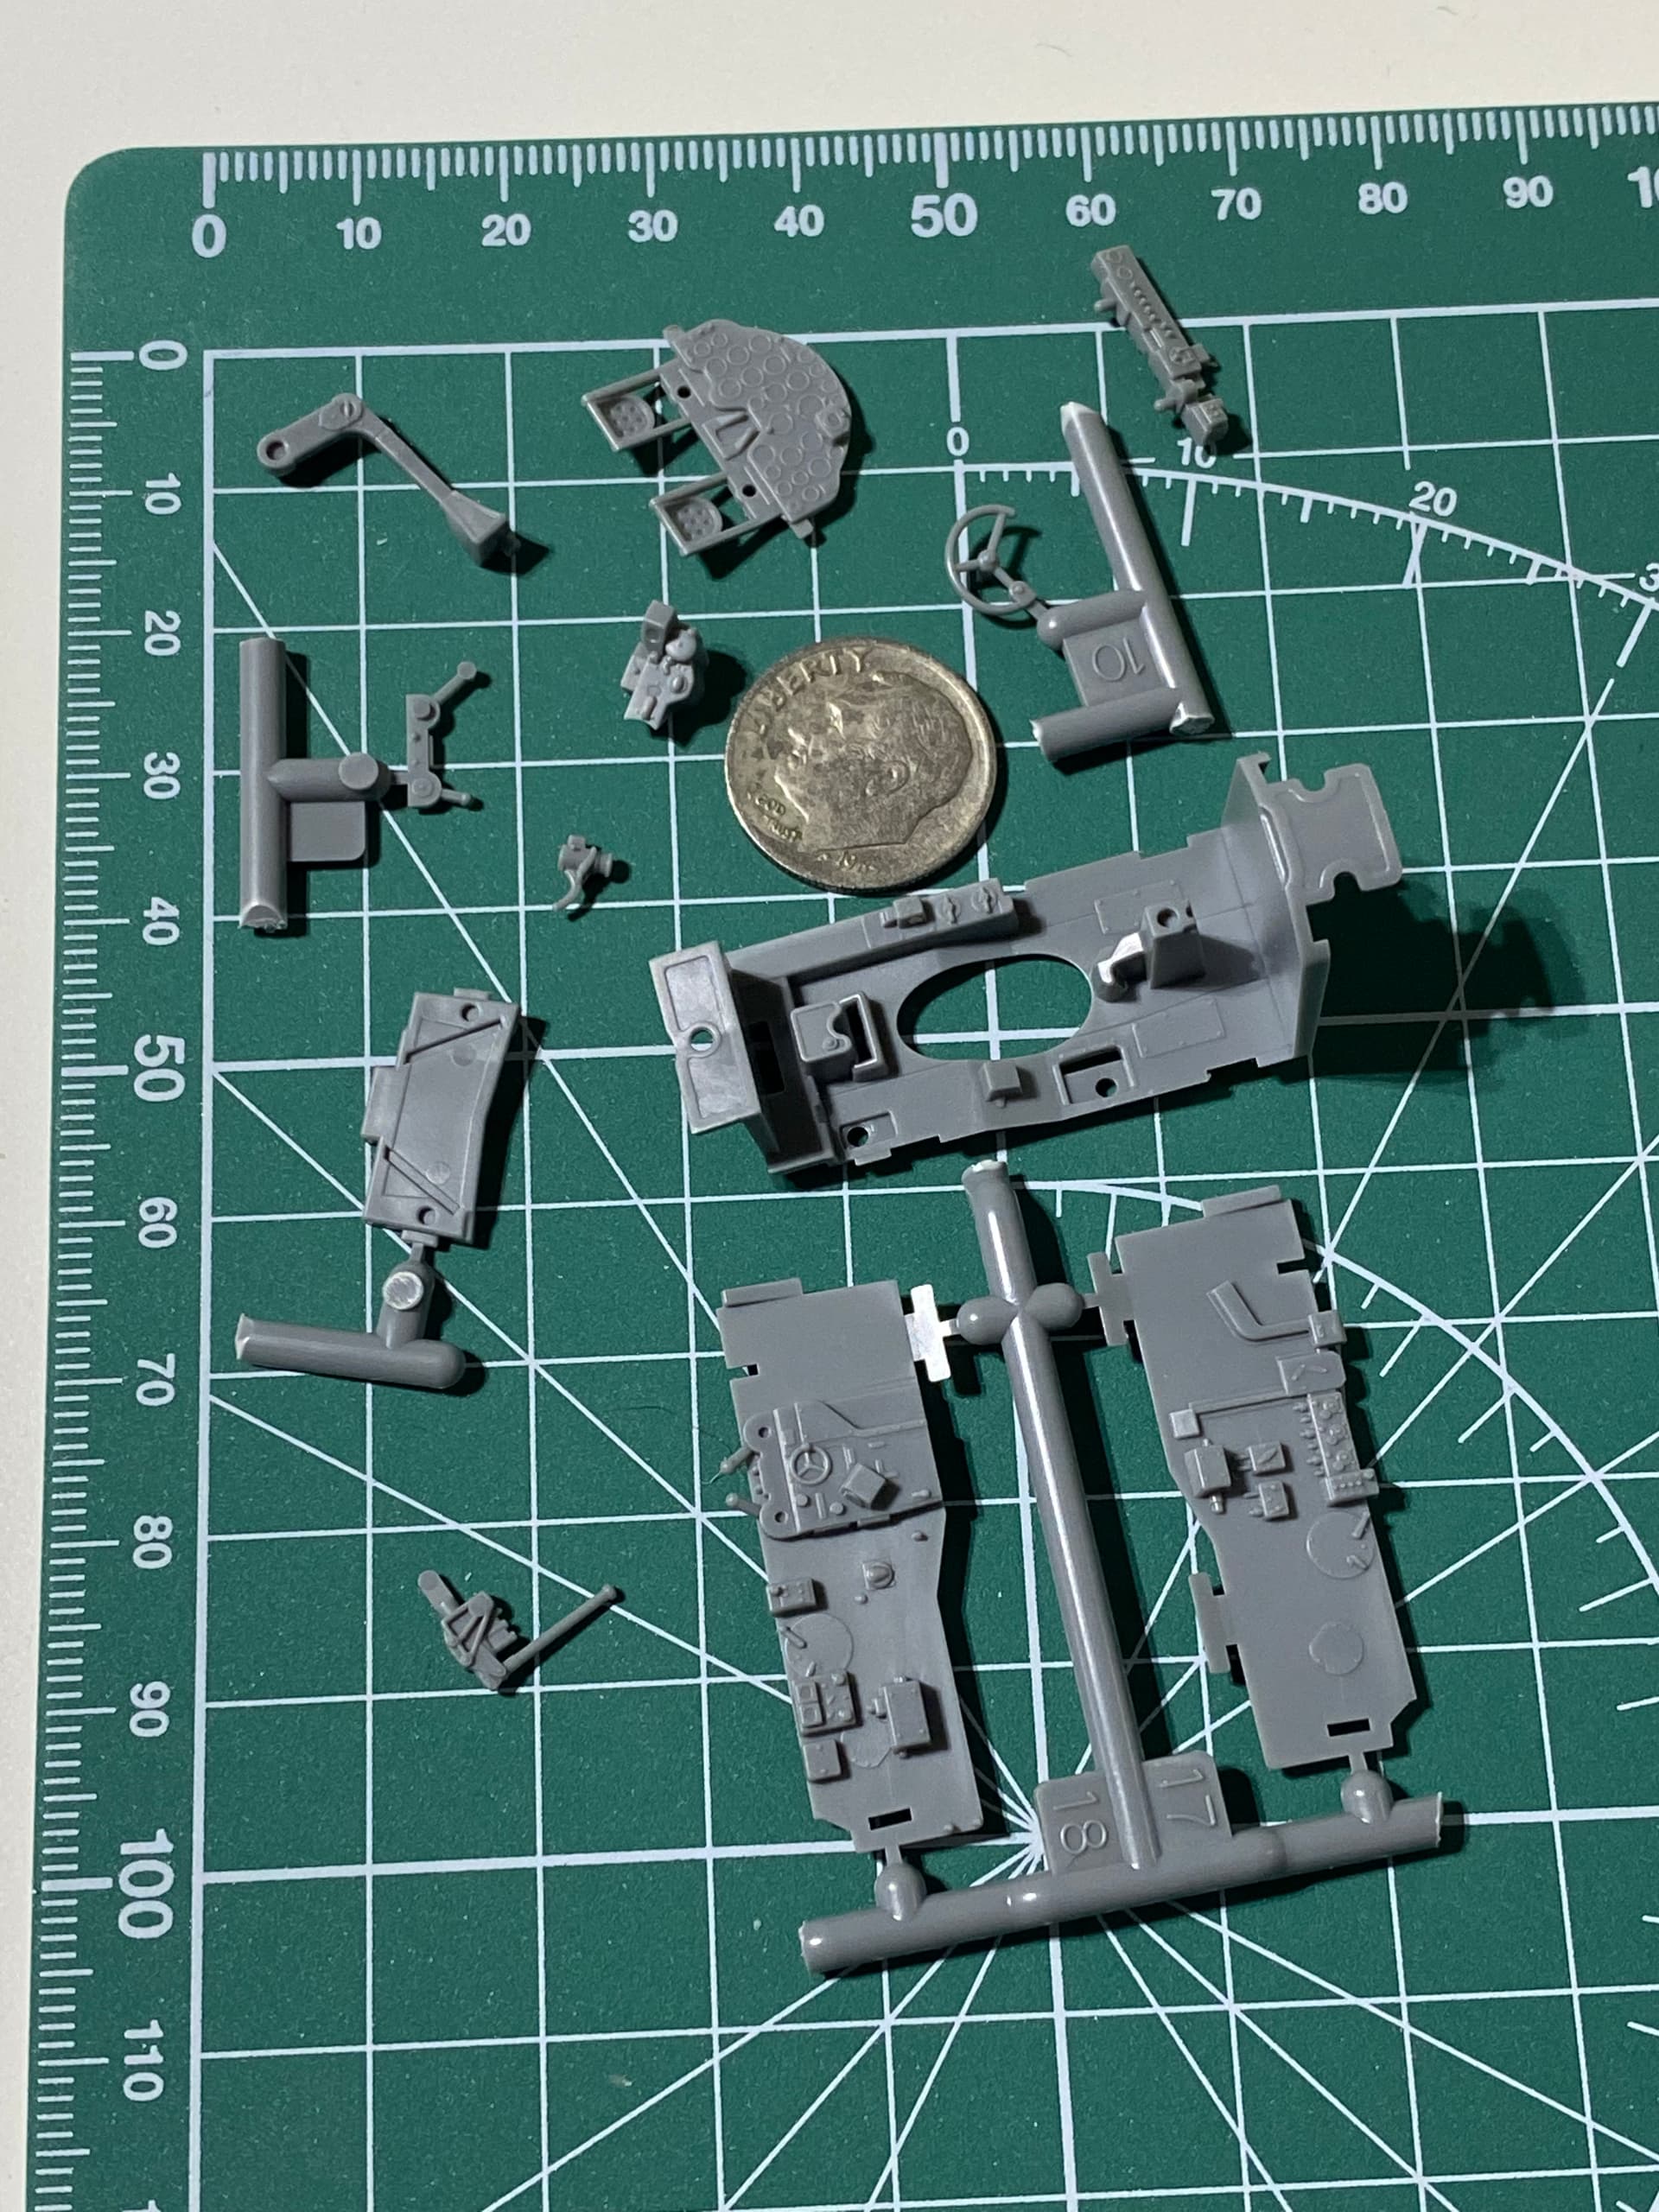
Super small update: have all cockpit pieces removed from sprue or cut in a way for ease of painting. Was going to start sanding away details on pieces receiving 3D decal treatment but actually think I should remove the decals from backing first to ensure all pieces are in decent shape and the correct size before I sand off detail on kit parts. My understanding is the backing paper is simply for transporting purposes and once off the paper they are good to use for an indefinite amount of time and don’t need to be rushed on.
Knowing my luck I’ll sand off detail and then ruin the decal meant to go on somehow. Better safe than sorry!
Alright hoping to prime cockpit with Mr. Surfacer this week when kids are not sick and I can count on a block of time when they are sleeping soundly at night.
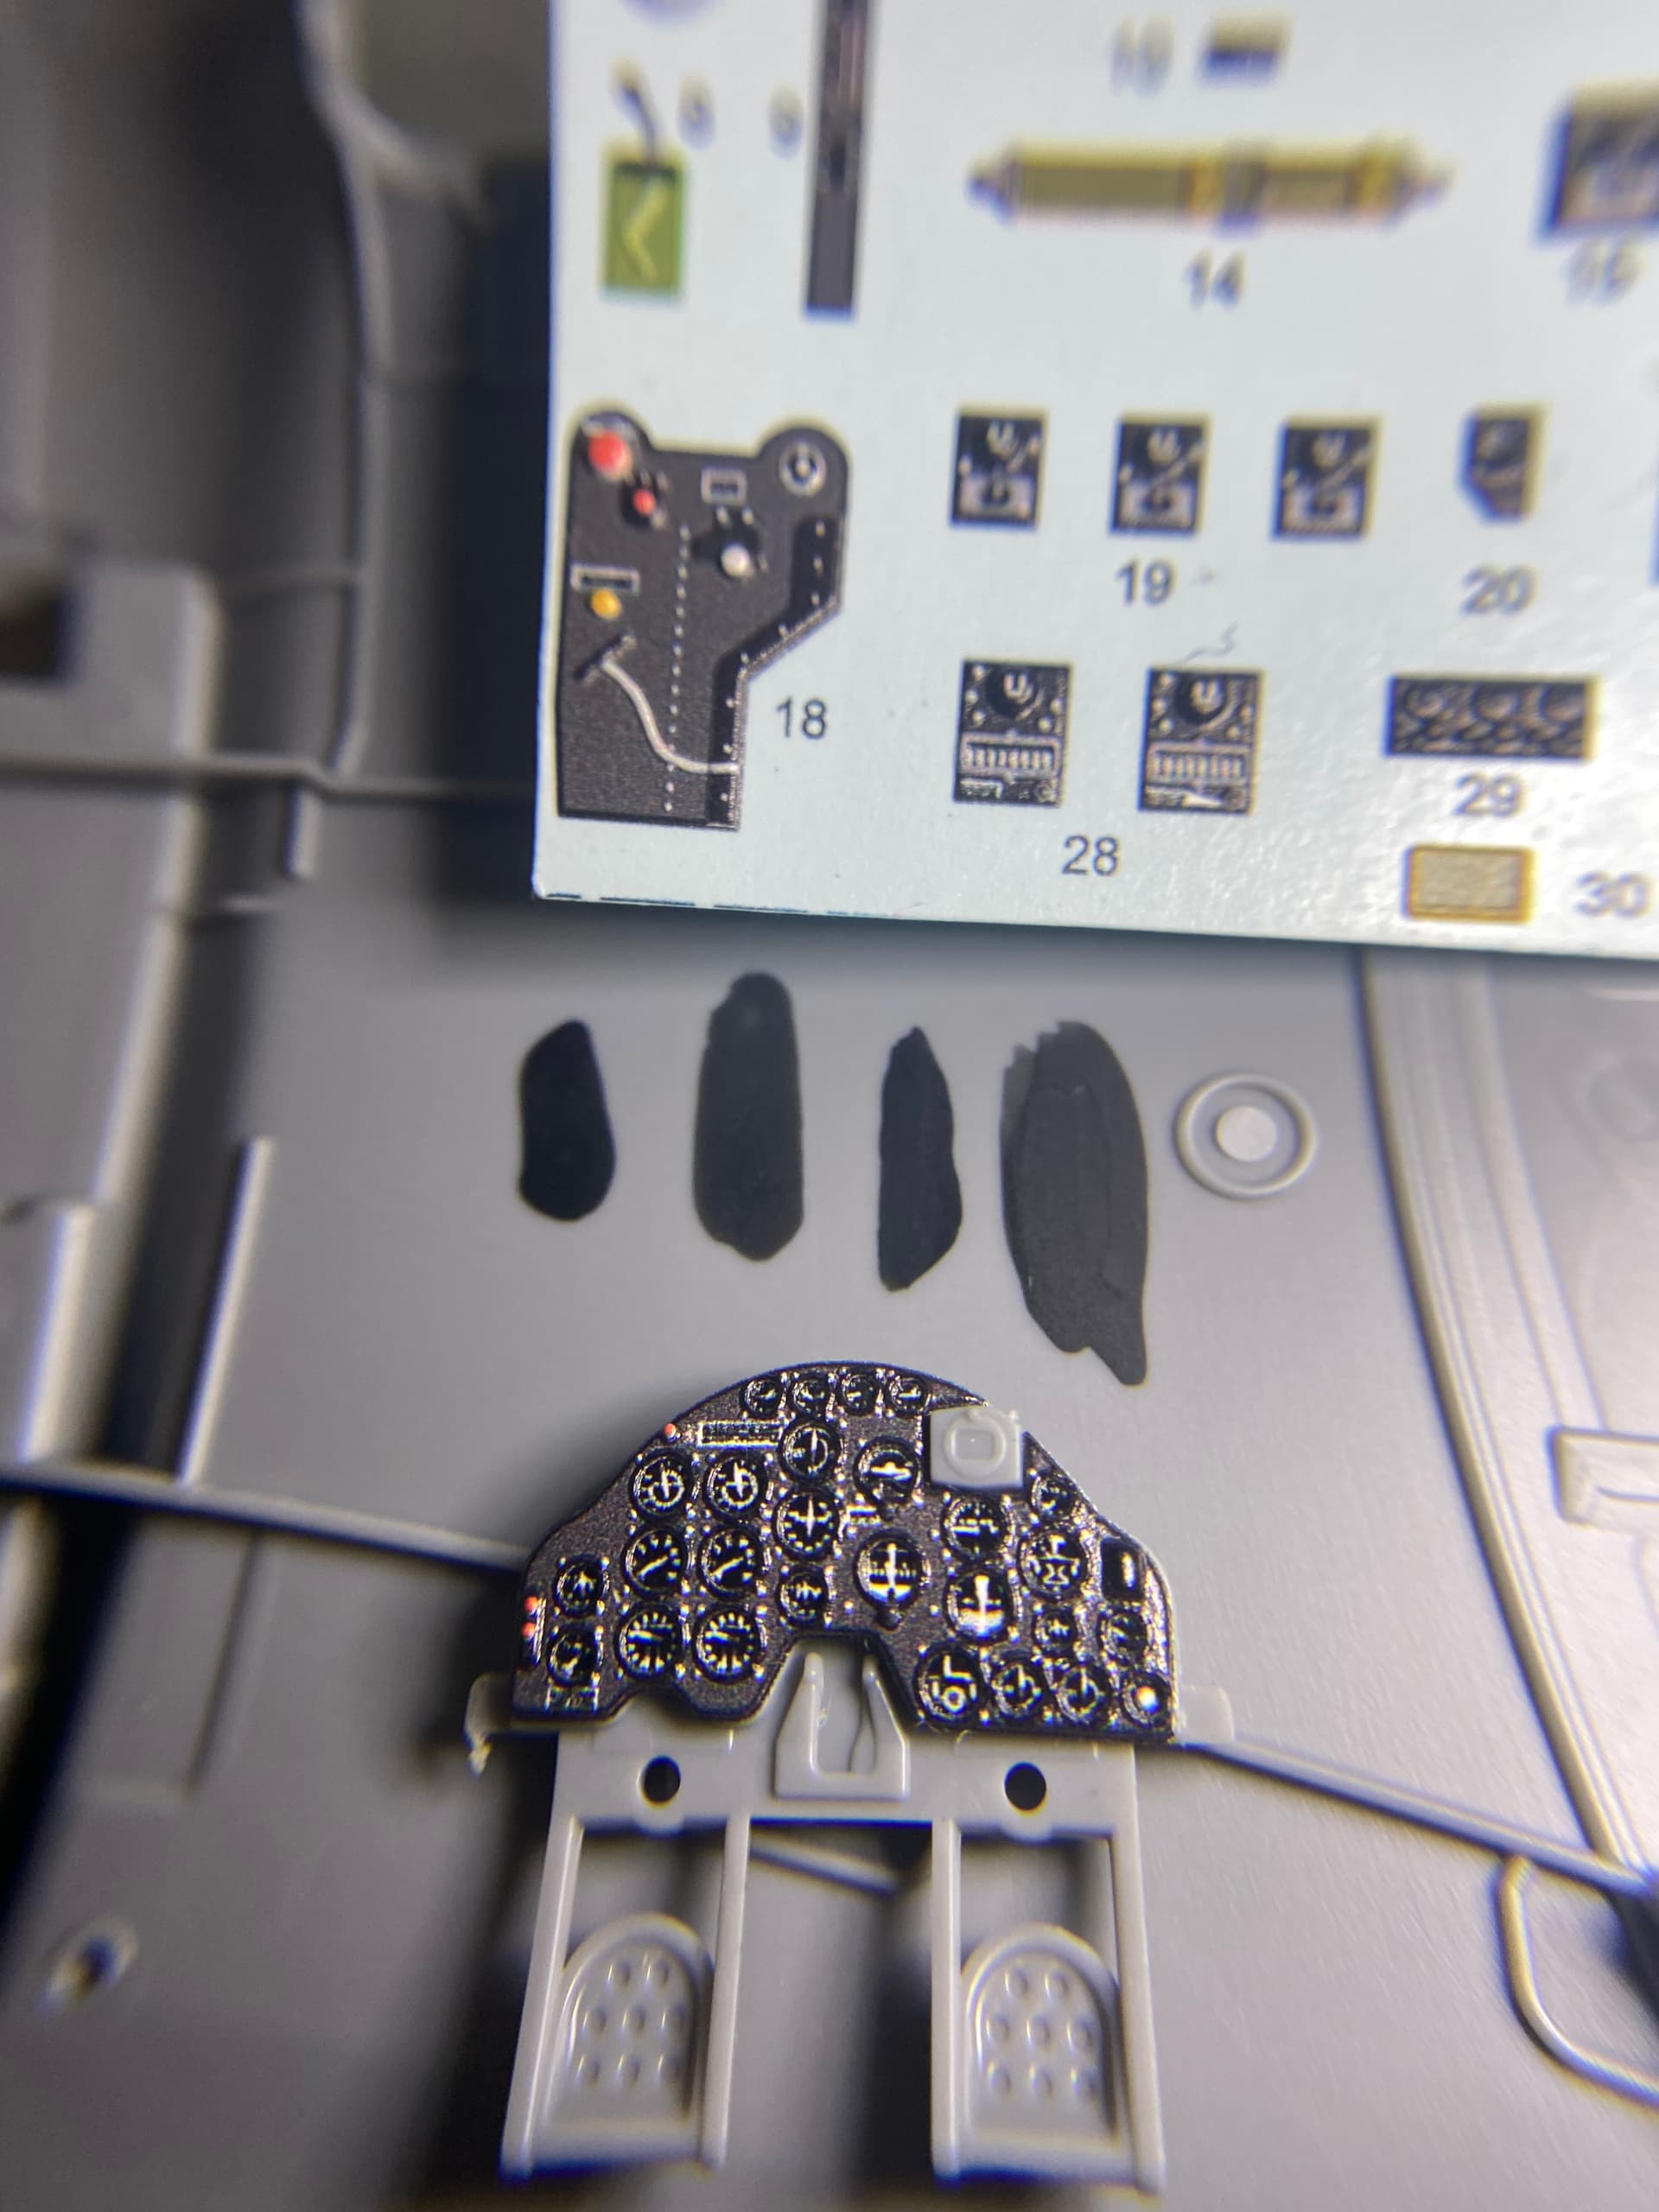
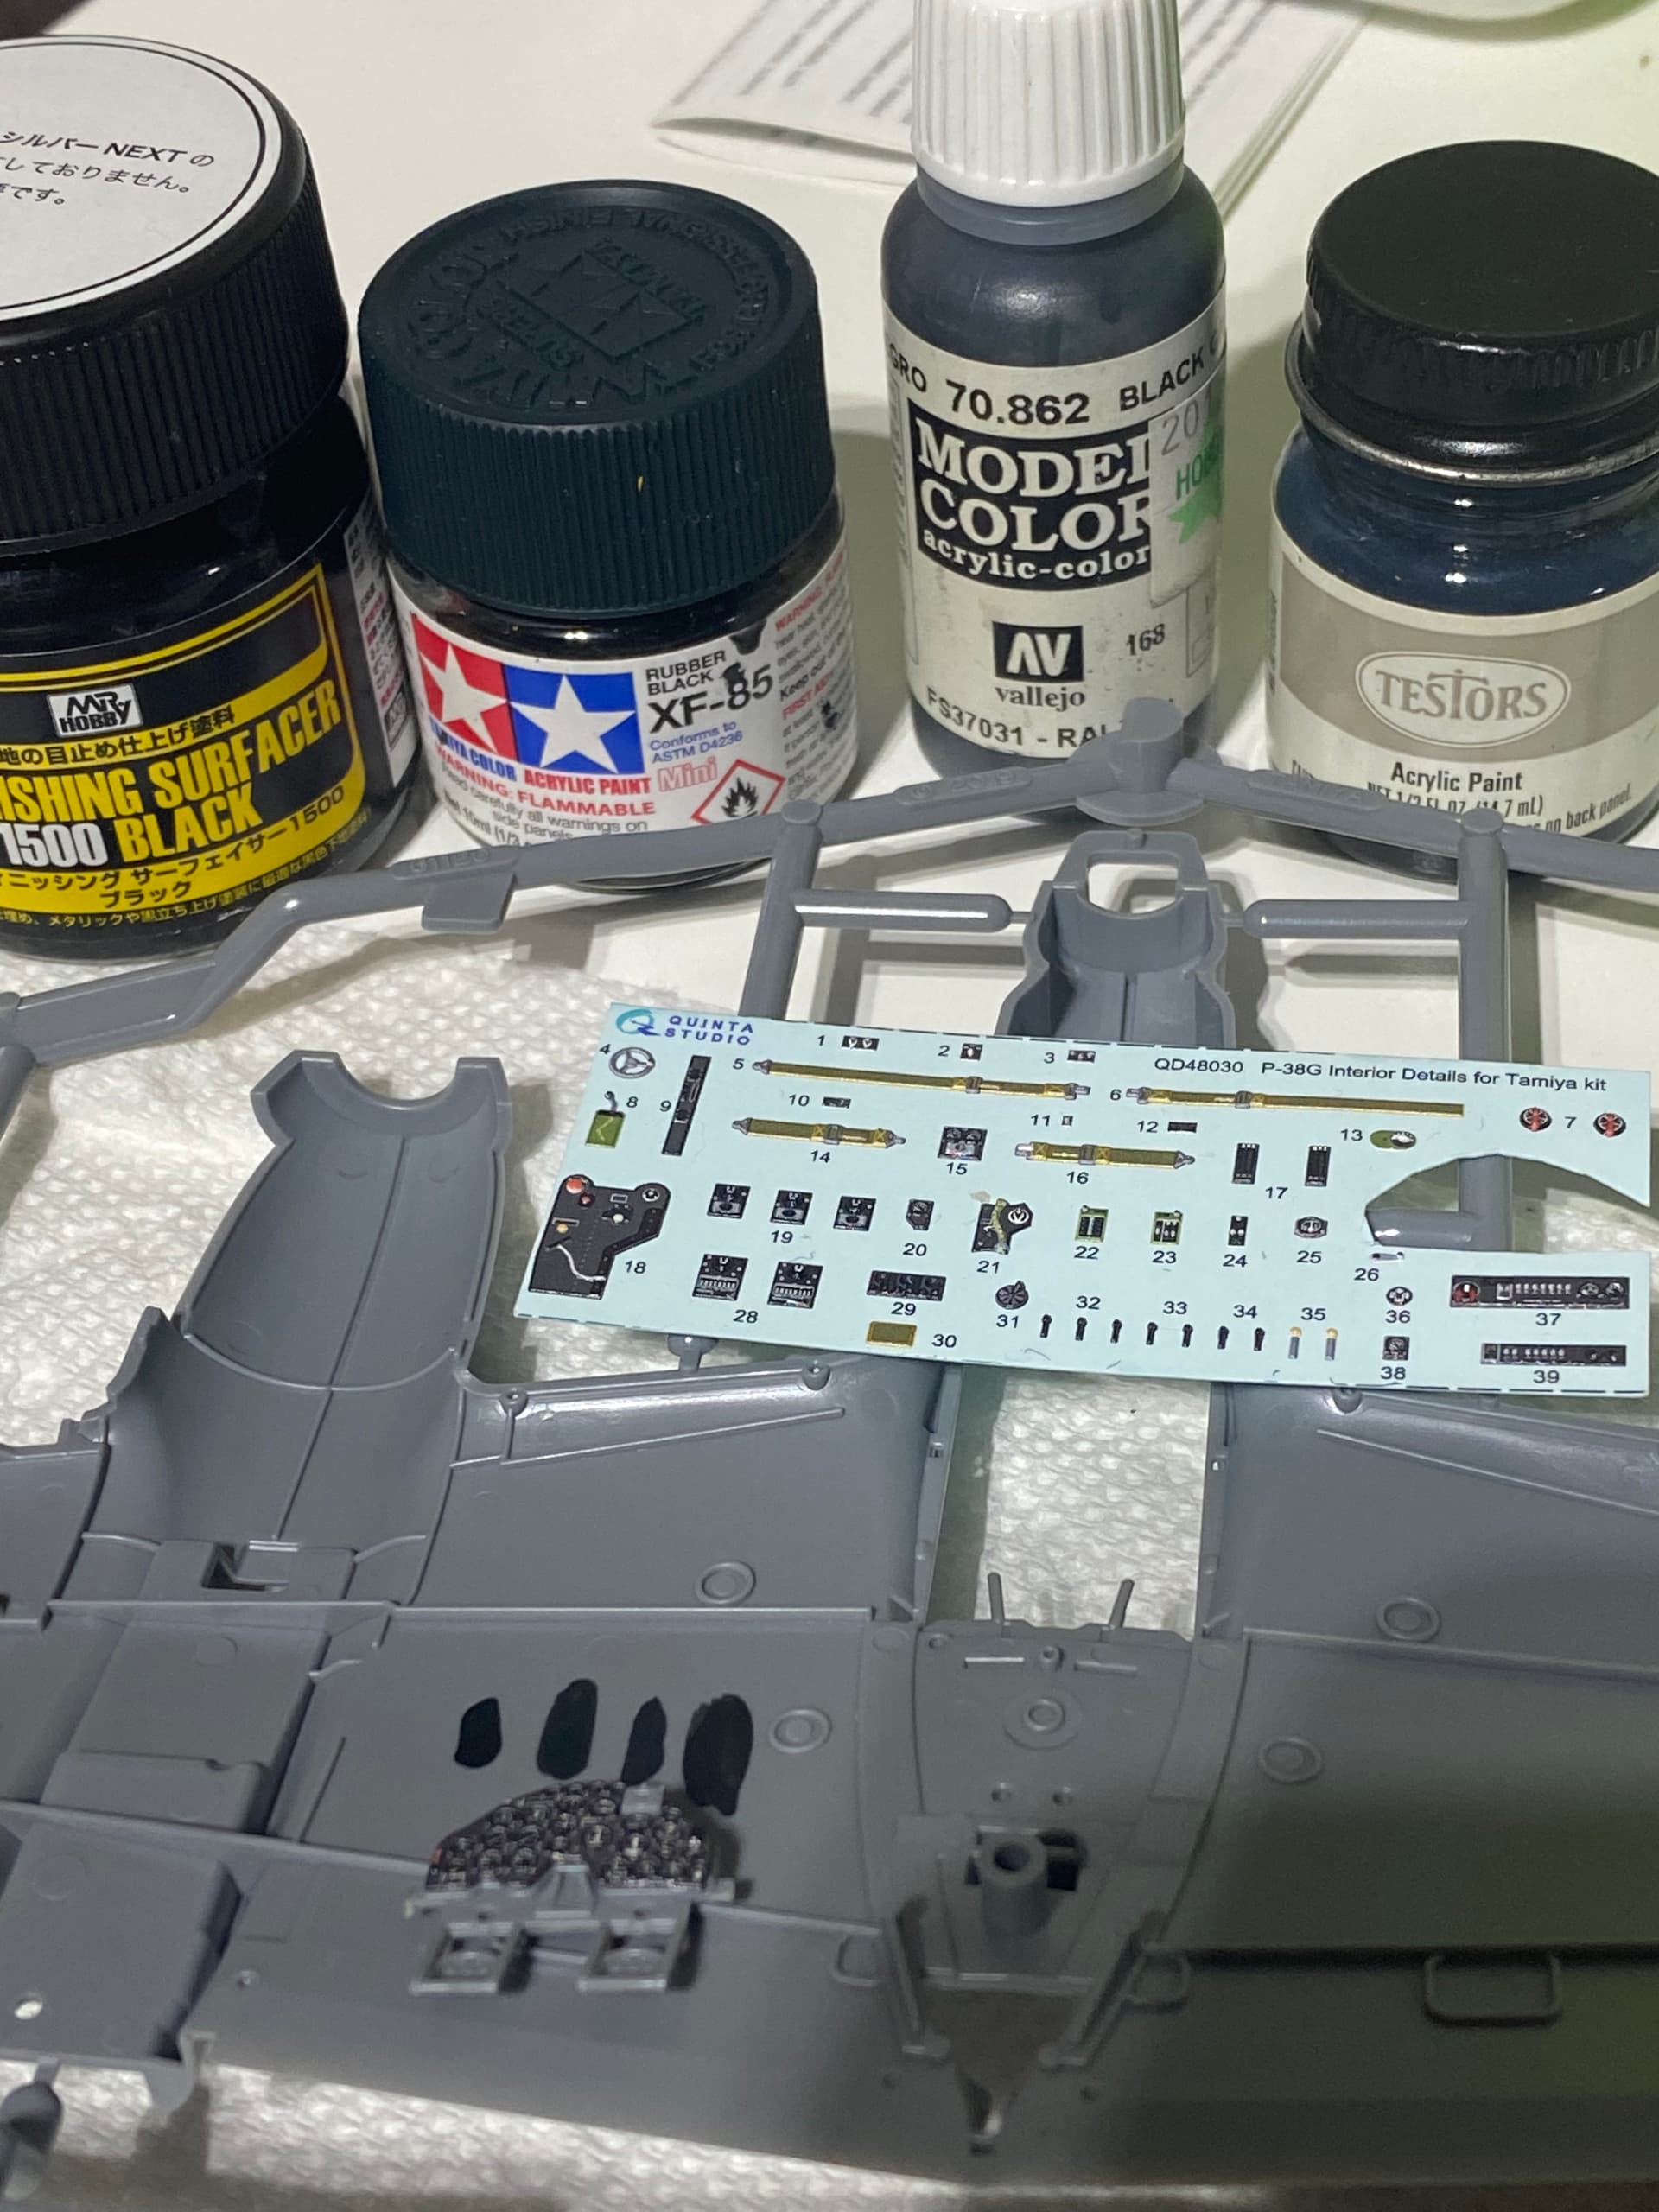
In the meantime, trying to figure out best black to use on panels alongside the Quinta decals to match. What do you think? Left to right swatches and jars match.
One more question with regards to painting order in cockpit. I’ve always been a drybrusher and never used chipping fluid. Is this the correct order and number of layers?
1: Mr. surfacer 1500 black
2: Tamiya LP-11 aluminum
3: chipping fluid
4: interior green
5: paint black sections and details.
Or do I skip steps 2 and 3 and just dry brush with aluminum?
This will be my first go with lacquers so I’m a little apprehensive.